



Long thick hair has opinions. Left alone, it can fall like a curtain, eat up your face, and turn a curl into a heavy wave before you’ve even left the house.
That’s the strange part about down styles for long thick hair. The hair already has presence. It does not need help looking full. What it needs is shape, movement, and a little discipline around the roots and ends so the whole thing doesn’t turn into one big block.
The styles that work best usually do one of three things: they lift at the crown, carve out space around the face, or break up the length so the weight doesn’t sit in one blunt line. A good down style on thick hair should feel lived-in, not stiff. It should move when you turn your head. It should still look intentional when the wind hits it.
And yes, product matters. Too much cream near the roots can make thick hair slump fast, while too little hold leaves curls puffing out in all the wrong places. The sweet spot is usually lighter than people think. The first style below is the kind of starting point that makes long thick hair look styled instead of simply managed.
1. Soft U-Shaped Blowout Waves for Long Thick Hair
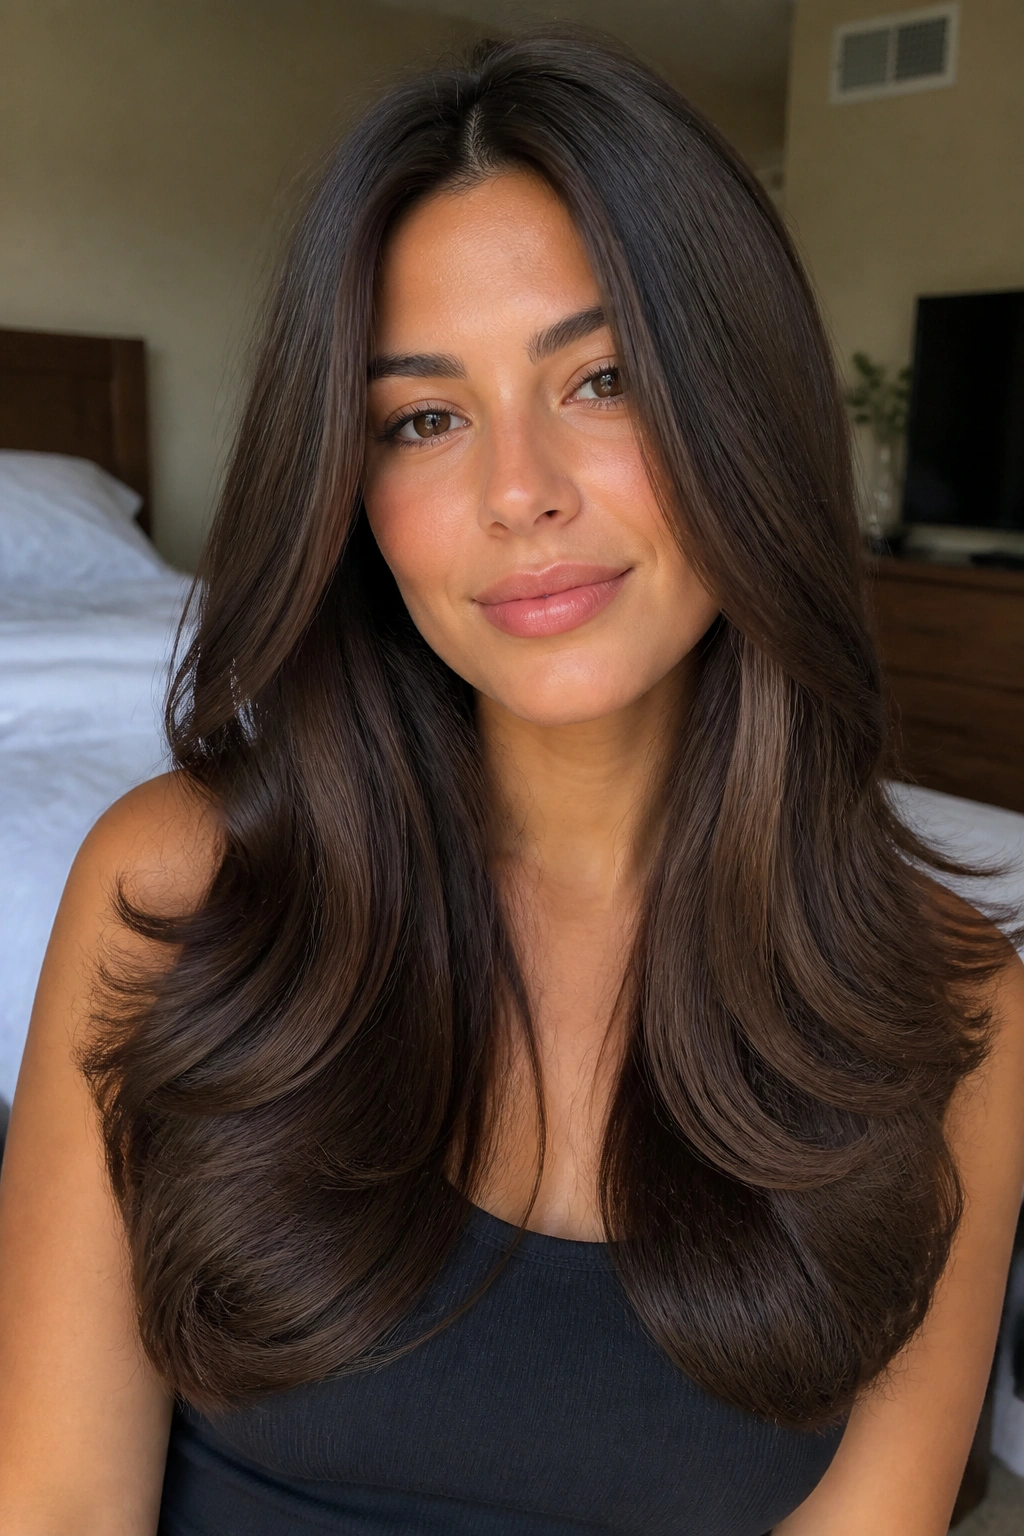
A soft U-shaped blowout is one of the easiest ways to make long thick hair look expensive without making it look stiff. The shape matters here. Instead of cutting the length into a hard straight line, the ends curve gently inward and the sides stay a little longer, so the whole silhouette feels softer and less heavy.
Why It Works on Thick Hair
The U-shape takes some of the visual weight out of the bottom edge. Thick hair can look boxy when every strand lands at the same point, and this cut-and-style combo avoids that. It also gives your waves somewhere to fall, which keeps them from puffing out into one giant cloud.
A medium or large round brush does most of the work. A 1.5-inch curling iron can help too, but only on the mid-lengths and ends. You do not need to curl the whole head into tight loops. That would be overkill. The goal is movement, not a parade of identical curls.
- Keep the front pieces a touch shorter so they skim the cheekbones.
- Finish with a light brush-through once the curls cool.
- Aim for ends that curve, not ends that flip like a cartoon.
Best tip: curl the top half away from the face first, then brush everything out with your fingers once it’s fully cool.
2. Sleek Center-Part Glass Hair
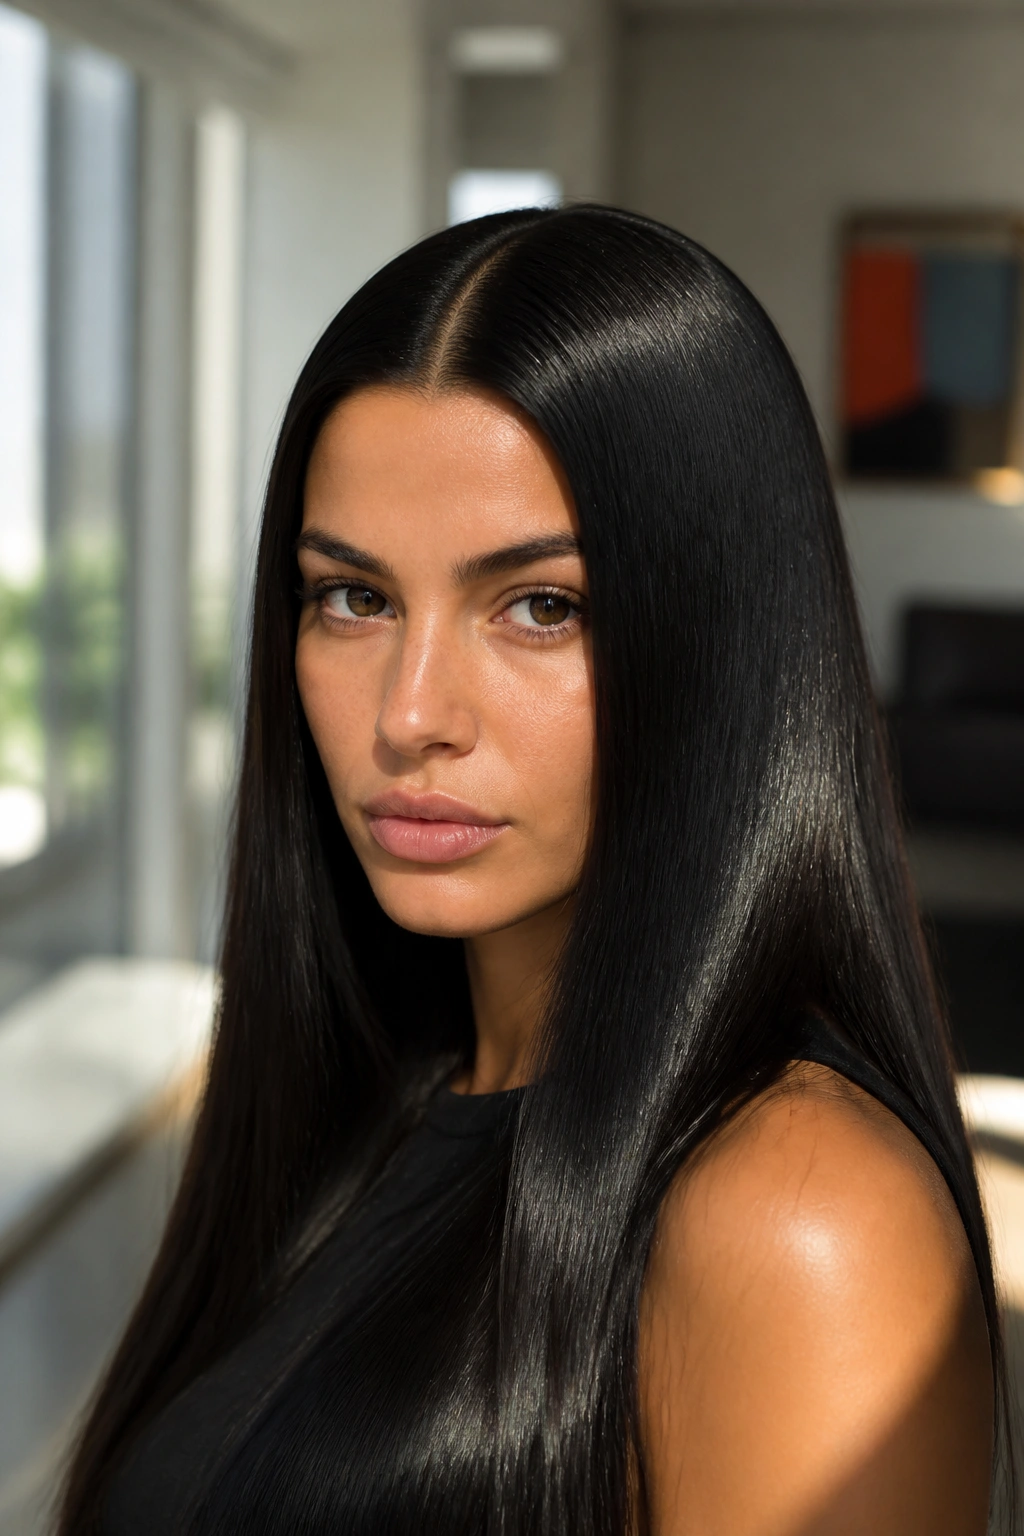
A sharp center part on long thick hair can look downright luxurious when the finish is smooth and reflective. Dense hair naturally gives you that heavy, polished fall, so this style leans into the weight instead of fighting it. It’s one of the few looks where “flat” is actually the point, but not limp-flat. Controlled-flat.
The trick is in the prep. Blow-dry the hair in the direction you want it to live, then use a flat iron in clean 1-inch sections so the surface stays smooth from root to end. A tiny amount of serum through the mid-lengths helps, but keep it off the roots unless you like your part looking greasy by lunch. No thanks.
If the ends puff out, that’s where people usually go wrong. Don’t keep ironing the same pieces over and over. One careful pass is enough on healthy thick hair. Too many passes can make the finish look harsh, and thick hair tends to show damage fast when the surface gets too dry.
No fluff. That’s the point.
3. Brushed-Out Barrel Curls
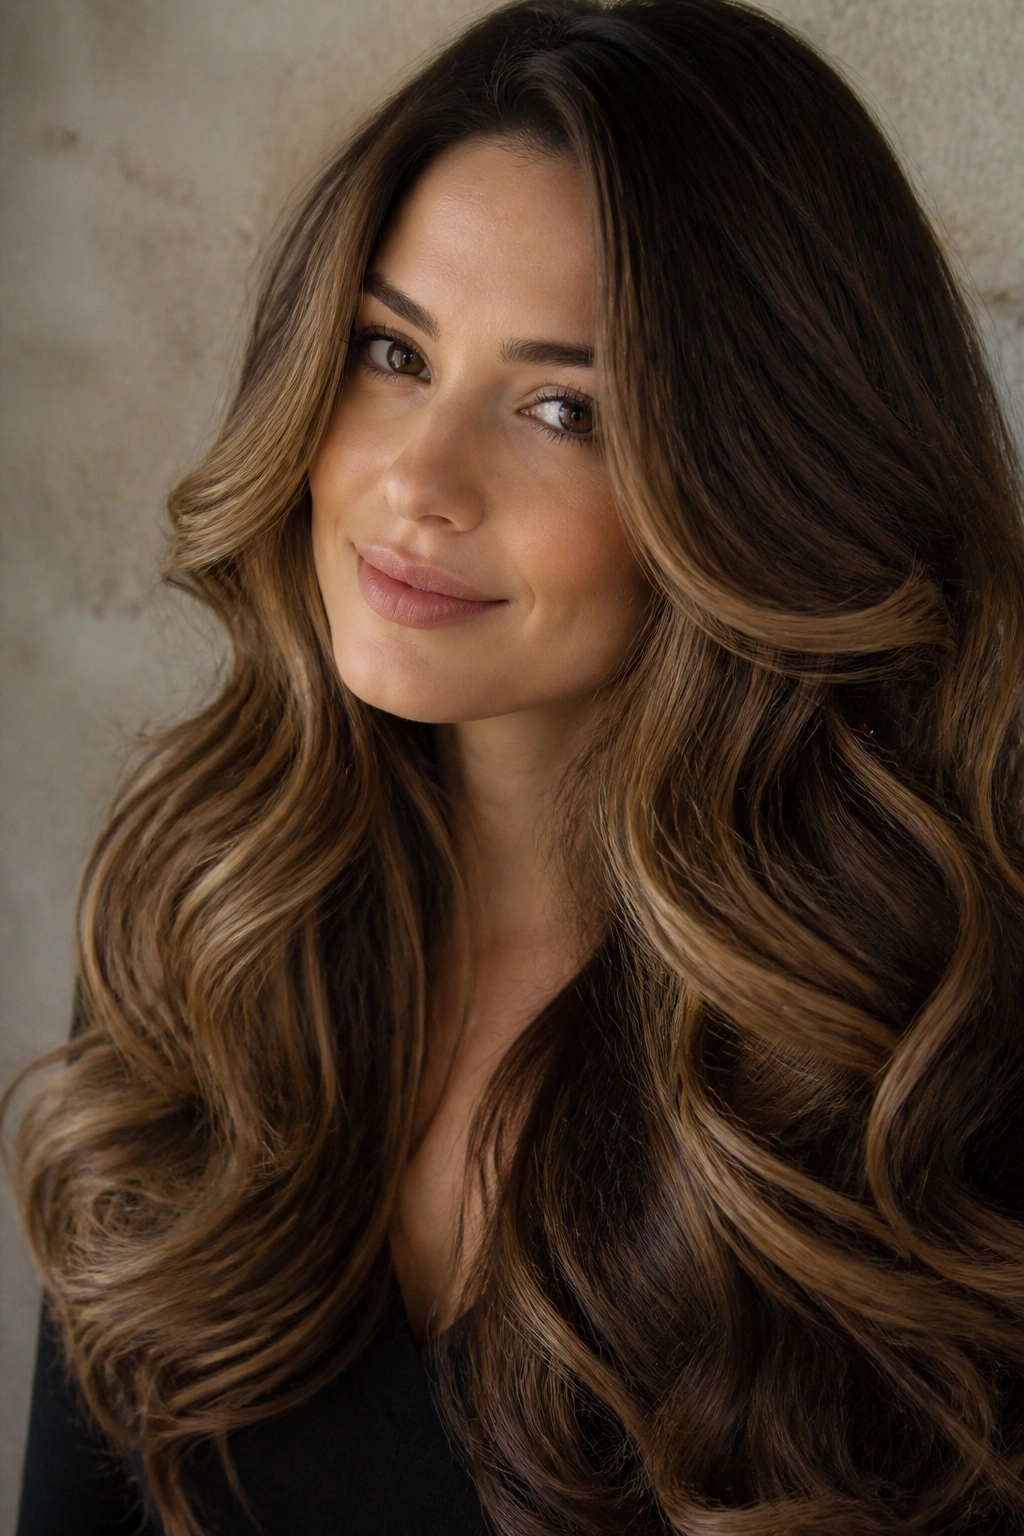
Why do brushed-out barrel curls work so well on long thick hair? Because they use the hair’s own weight to their advantage. Tight curls can fight thick length and lose shape, but bigger curls that are brushed into soft waves settle into something richer and more relaxed.
The Science Behind the Shape
Start with 1.25-inch sections and curl them away from the face. Let each curl cool completely before you touch it. That cooling step is not optional. If you brush too early, the curl collapses and the whole style can go fuzzy by the time you’re halfway through dinner.
A paddle brush softens the curve without flattening it. A boar-bristle brush gives a more polished finish, though I’d skip it if your hair frizzes easily. Thick hair often needs a little more hold at the ends than fine hair does, so a light mist of flexible hairspray from about 10 inches away helps the shape last.
How to Wear It
- Curl in vertical sections for a longer wave.
- Alternate the direction of some sections so the style doesn’t look too uniform.
- Brush only once the hair feels completely cool to the touch.
Pro tip: leave the very last inch a little straighter. It keeps the waves from looking too bouncy and helps long hair fall with more swing.
4. Deep Side-Swept Hollywood Waves
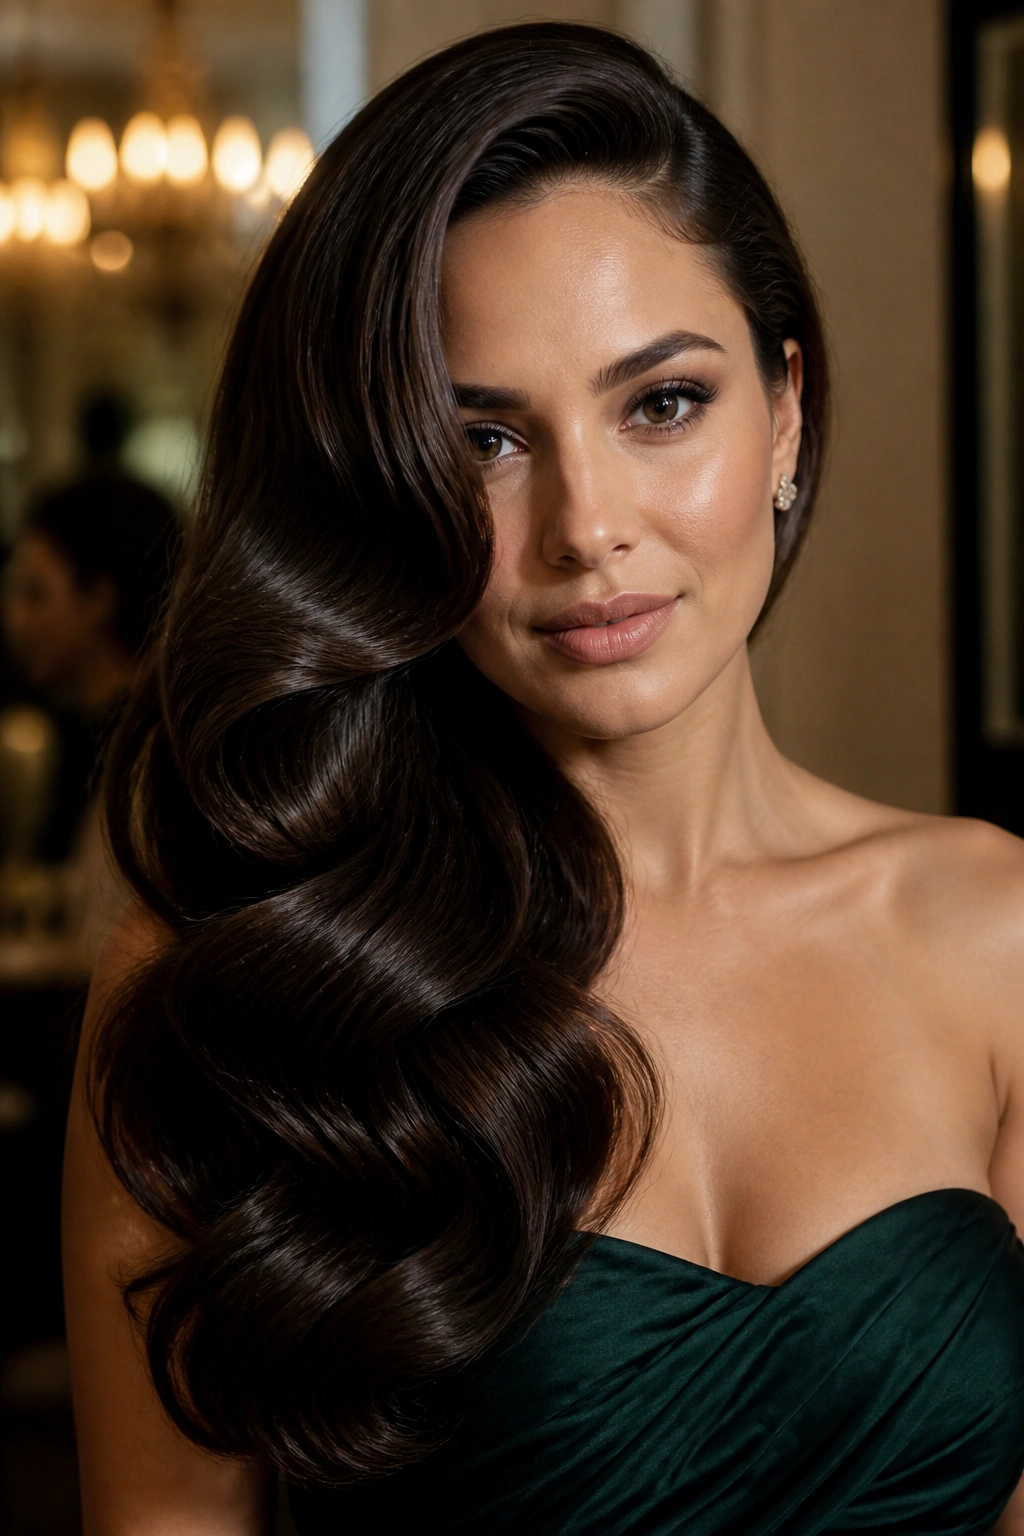
A deep side part changes the whole mood of thick hair. Suddenly the weight is pushed to one side, the cheekbone gets a frame, and the length looks more dramatic without needing any extra volume tricks. It’s a good move when your hair feels too even or too symmetrical, which can happen fast with dense lengths.
Picture a dinner, a party, a wedding, or any event where you want your hair to look dressed up but still down. A side-swept wave does that cleanly. It also keeps the front from falling into your eyes every five minutes, which is a small mercy that becomes huge after an hour.
- Use a 1.25-inch iron for the wave pattern.
- Clip the heavier side behind one ear if you want more face showing.
- Mist the top lightly, not the ends, so the wave stays soft.
- Choose earrings that can handle a bit of hair movement around them.
The real strength of this style is balance. It gives thick hair shape on purpose, not by accident. That difference shows.
5. Air-Dried Natural Texture with Curl Cream
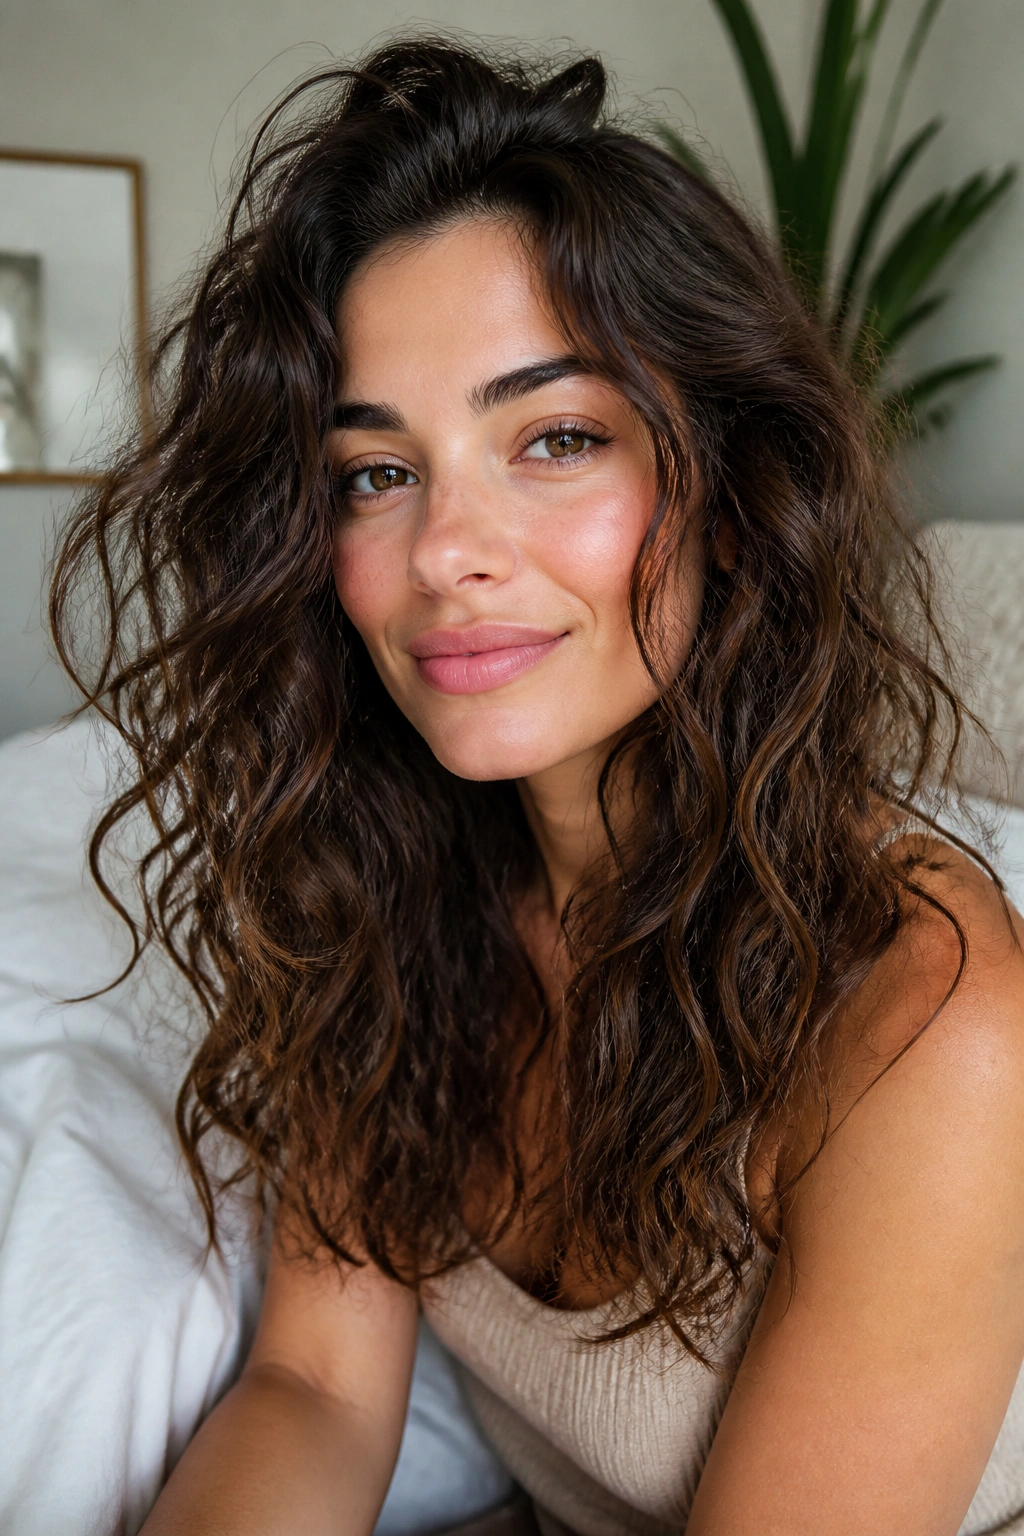
Some of the best down hairstyles for long thick hair happen when you stop fighting the texture you already have. If your hair has wave or curl in it, air-dried texture can look richer than any hot-tool style, especially when the layers are cut well and the product is light enough to let the strands move.
The key is to work in sections while the hair is damp. Thick hair hides mistakes, which sounds nice until you realize it also hides uneven product distribution. A leave-in conditioner first, then a small amount of curl cream, then a gel or mousse where the ends need more shape. That order matters. Go too heavy at the roots and the style sinks before it dries.
Less touching. More drying.
A microfiber towel or an old T-shirt helps keep the cuticle calm while the hair sets. If your roots dry too flat, flip your part once while it’s still damp. That single move can make the crown lift instead of lying there like a blanket.
I like this style because it doesn’t pretend thick hair should behave like something else. It doesn’t.
6. Half-Up Twist with Loose Length
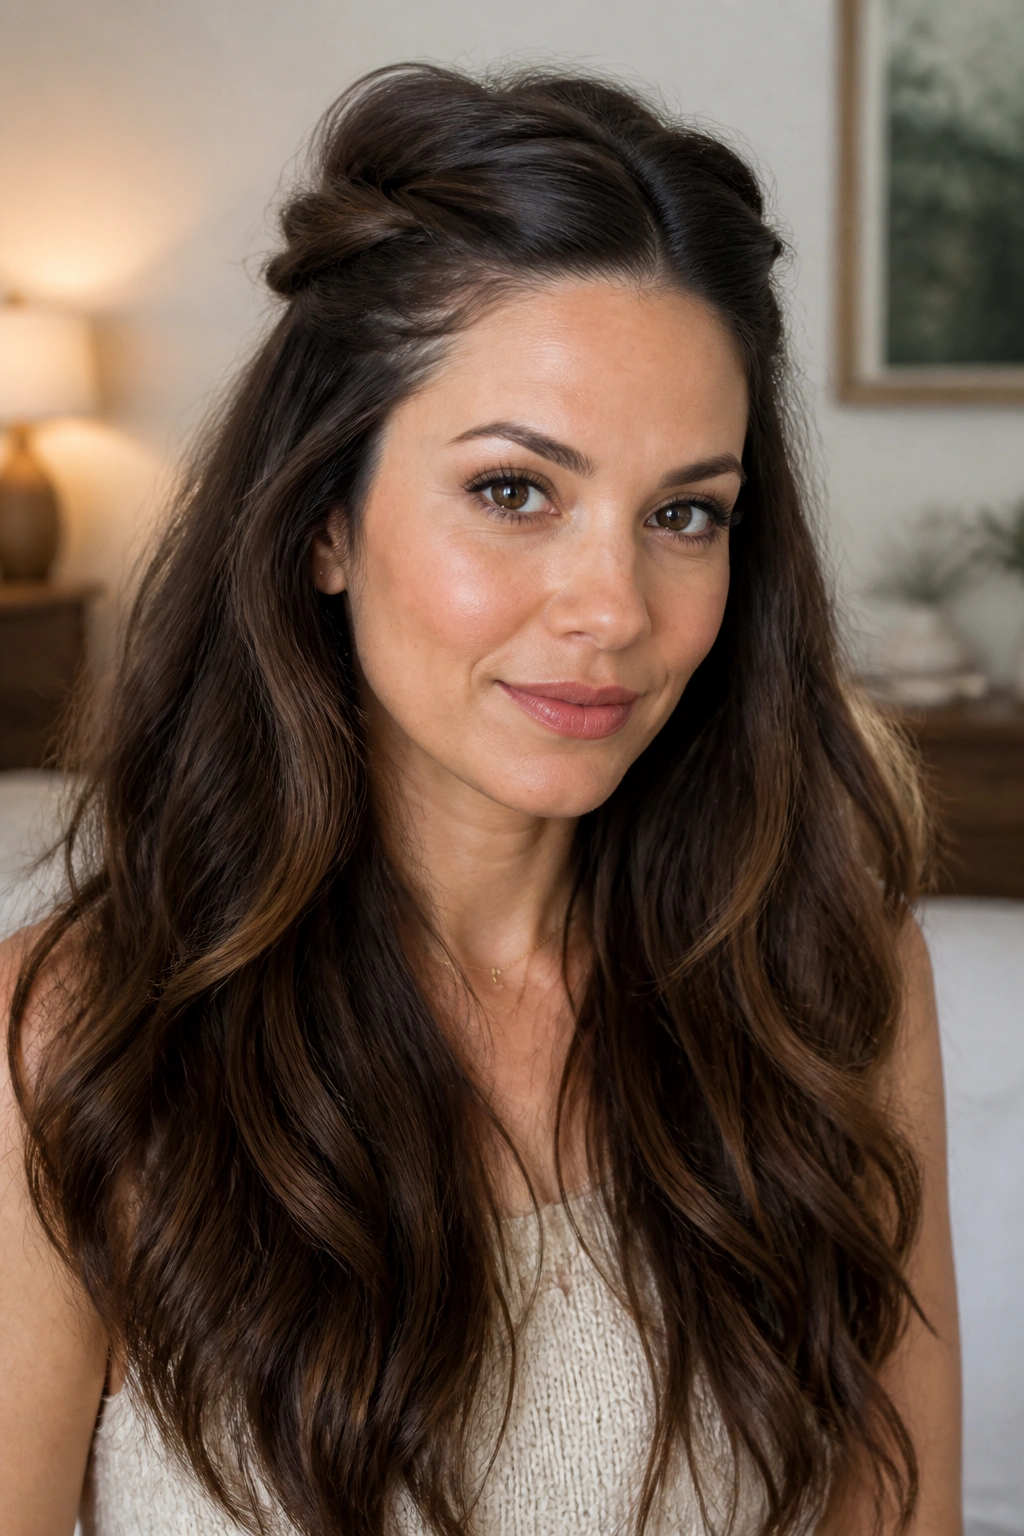
A half-up twist is the cleanest way to open up the face without giving up the drama of long hair. Unlike a full half-up style, this one borrows only a little from the top, so the length stays visible and the back still feels like the main event. That matters when the hair is thick enough to feel heavy at the temples.
Two small twists from the front sections are usually enough. Start near the hairline, twist back toward the crown, and pin them where they meet. Crossed bobby pins hold better than one big pin, and they disappear under the hair more easily. Keep the twist loose. If you pull it too tight, it carves a hard line across the head and the whole look turns fussy.
This is a smart choice for long thick hair that gets in your eyes but still looks good down. It’s also one of the few styles that works for workdays and dinner plans without needing a full redo.
The best version looks casual, not crowded.
7. Waterfall Braid with Flowing Ends
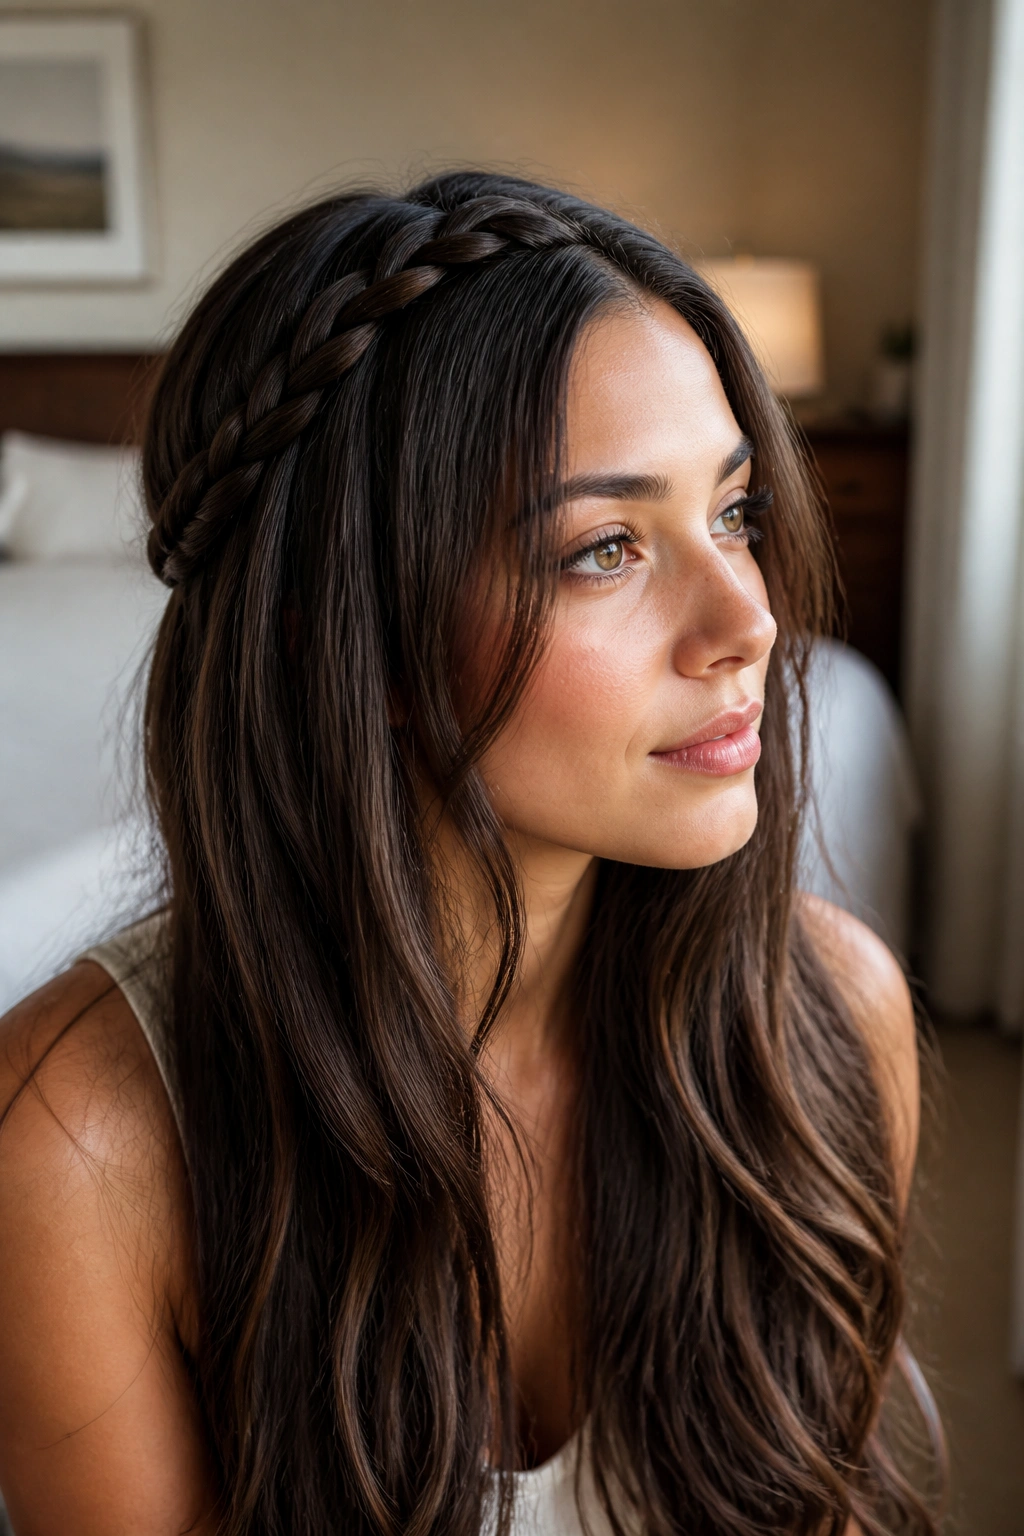
A waterfall braid is one of those styles that looks complicated from across the room and totally manageable once you get the hand position right. On long thick hair, it works because the braid sits on top like a frame, while the rest of the length continues to fall loose underneath. You get detail without losing the impact of the hair itself.
Where to Place It
The braid looks nicest when it starts just above the temple and follows the curve of the head toward the back. Keep the drops small, around 1 inch at most, so the braid doesn’t turn chunky. Thick hair can make the braid look bulky fast, which is great if you want a bold shape, not great if you want delicacy.
A little texturizing spray helps the strands stay in place. Freshly washed hair can be too slippery for this one, so day-two hair often behaves better. If the braid starts looking wide in a bad way, gently tug the outer edge with your fingertips to loosen it without unraveling the whole thing.
- Best on straight or softly waved hair.
- Works for special occasions and dressy daytime events.
- Looks strongest when the loose lengths are curled or softly bent.
Quick note: if you’ve got layers, leave the shortest face pieces out on purpose. They soften the line and keep the braid from looking too strict.
8. Crimped Texture with a Shine Finish
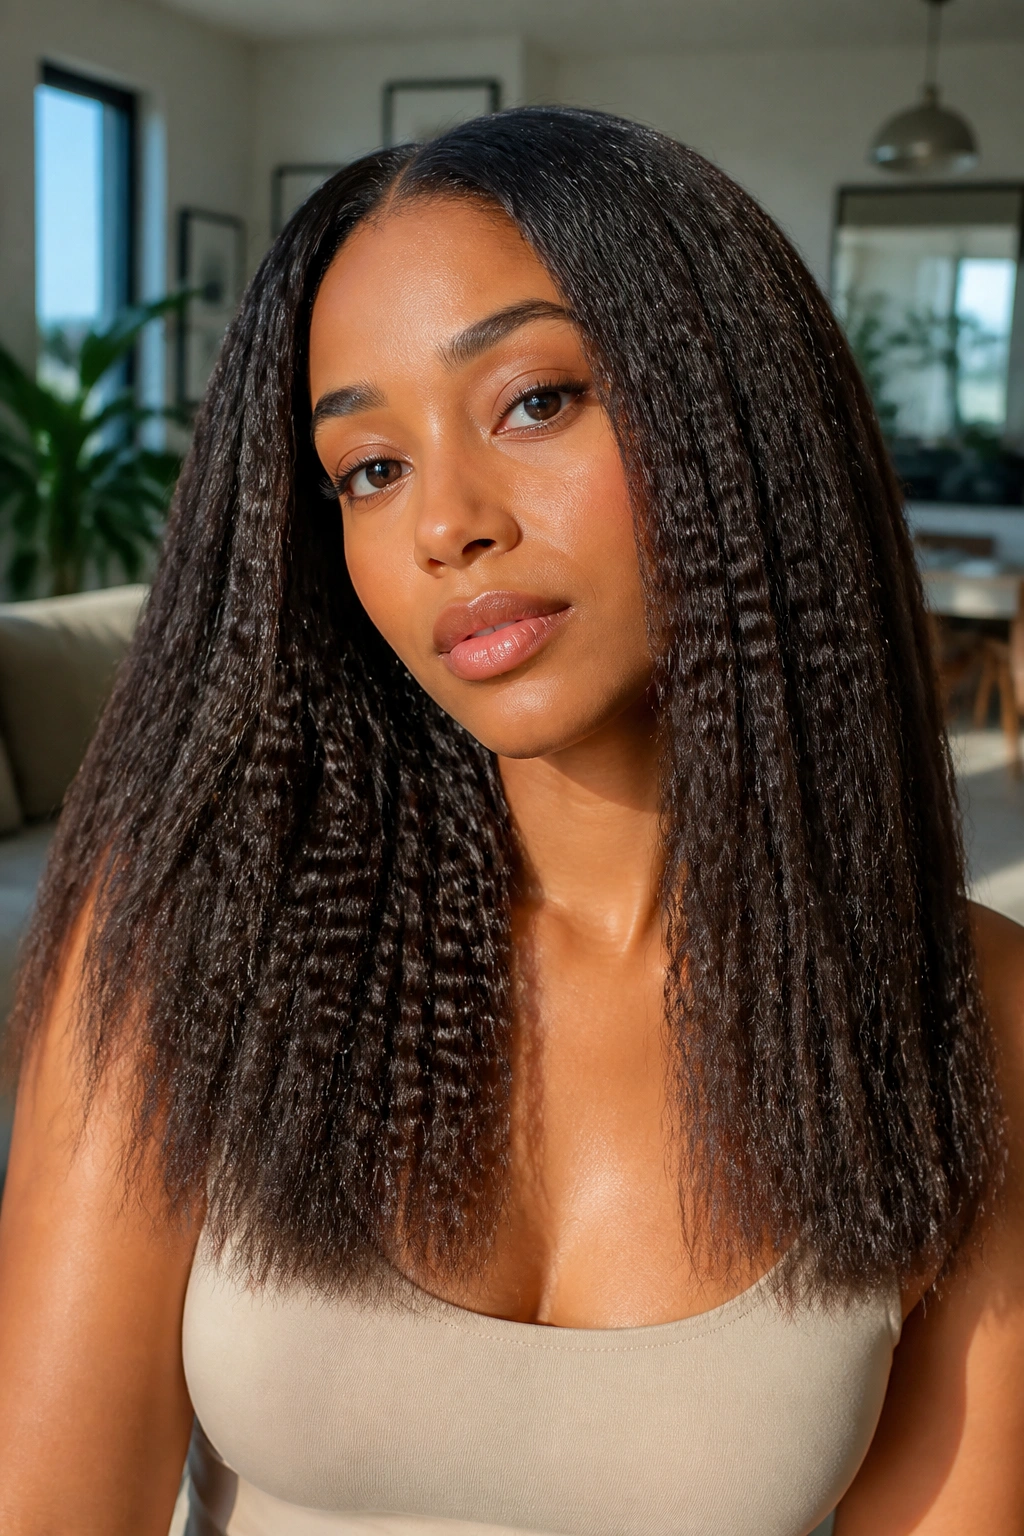
Crimping made a comeback because thick hair can carry it. Fine hair often needs crimping for body, but long thick hair uses crimping for shape, which is a different thing entirely. The texture breaks up the density and gives the whole length a bit of rhythm, almost like fabric with a weave you can see from across the room.
The modern version is better when the crimping is placed through the mid-lengths instead of from scalp to tip. Leave the roots smoother and keep the ends slightly softer. That contrast is what stops the style from looking costume-y. A wide-plate crimper gives a looser pattern, which usually looks more current on long hair than the tiny old-school zigzag.
You can also crimp just a few face-framing pieces and leave the rest straight. That works well if you want texture without a full commitment. Thick hair holds the pattern better than fine hair, so you don’t need to overdo it.
This style is not subtle. That’s the point. If you want the hair to feel playful and a little edgy, crimping does the job fast.
9. Rope-Braid Crown with Loose Waves
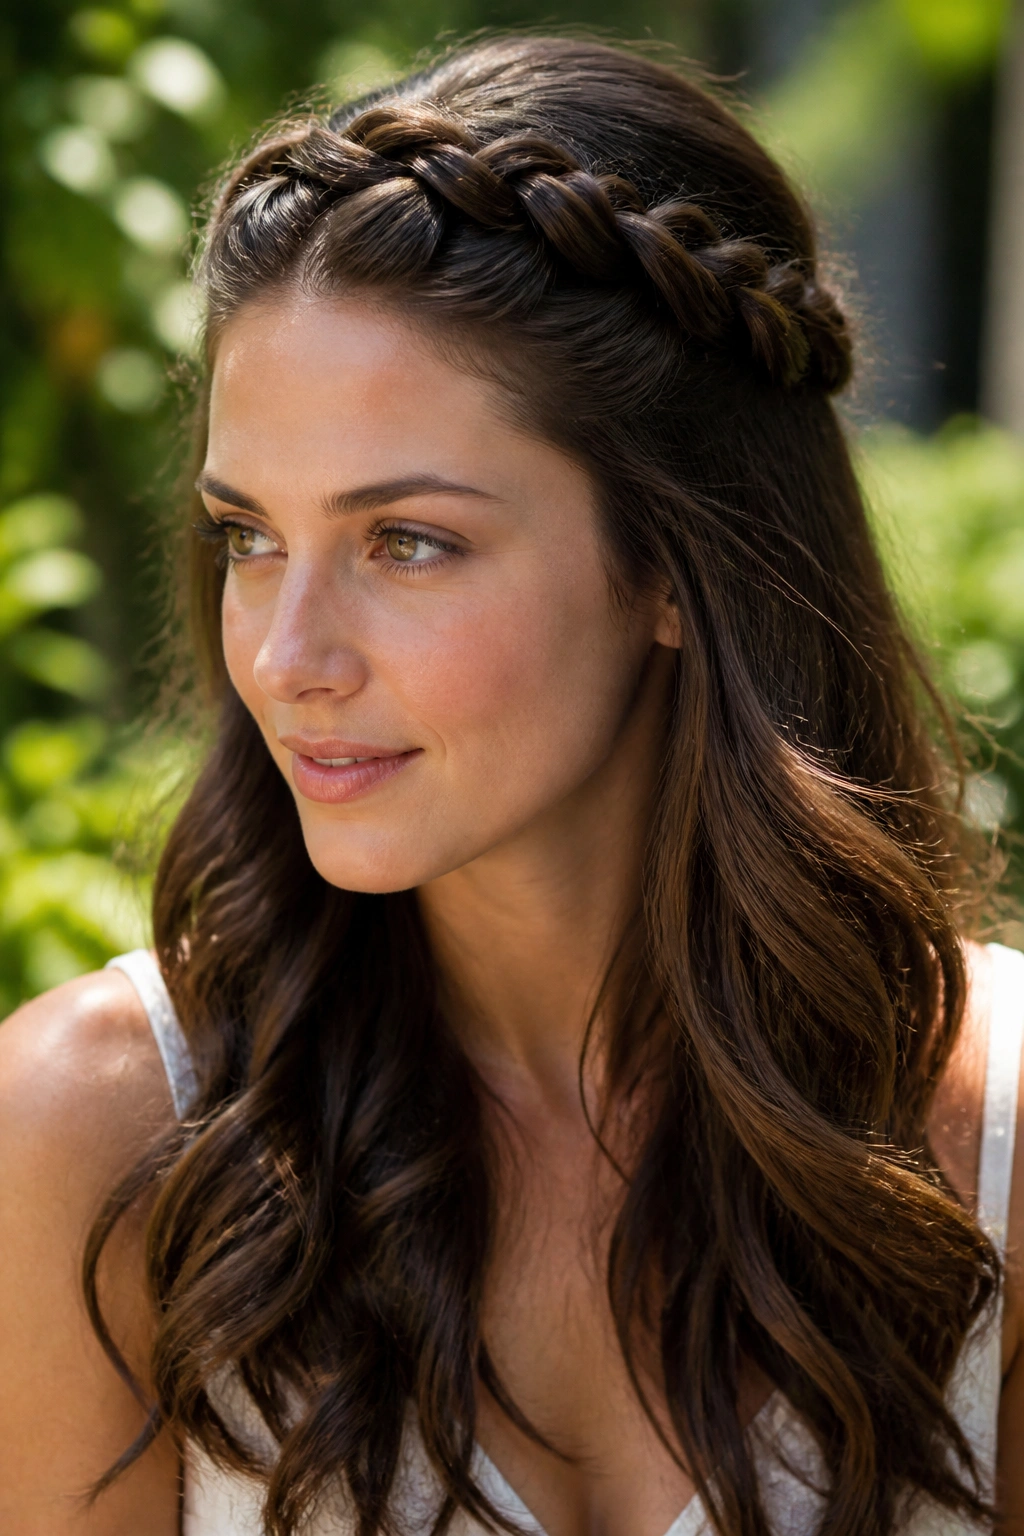
Why does a rope-braid crown flatter thick hair so much? Because it controls the front without stealing the length. The braid wraps the hairline in a neat little loop, then the rest of the hair falls away underneath, still full and visible. That gives the eye a clear place to land.
How to Wear It
Take a front section from one side, split it into two pieces, twist each piece in the same direction, then wrap them around each other in the opposite direction. That’s the whole trick. It’s cleaner than a standard braid and sits flatter against the head, which matters when the hair underneath is already dense.
This style looks best when the twist is loose enough to feel soft. You can gently pancake the braid with your fingers after it’s secured, making it appear wider and more relaxed. If your hair is especially slippery, a touch of dry shampoo at the roots will give the braid something to grip.
It suits long thick hair that needs a little structure near the temples. A heavy side part and loose rope braid can also tame a stubborn fringe without pinning everything back.
Quiet control. That’s what it gives you.
10. Big Round-Brush Blowout Volume
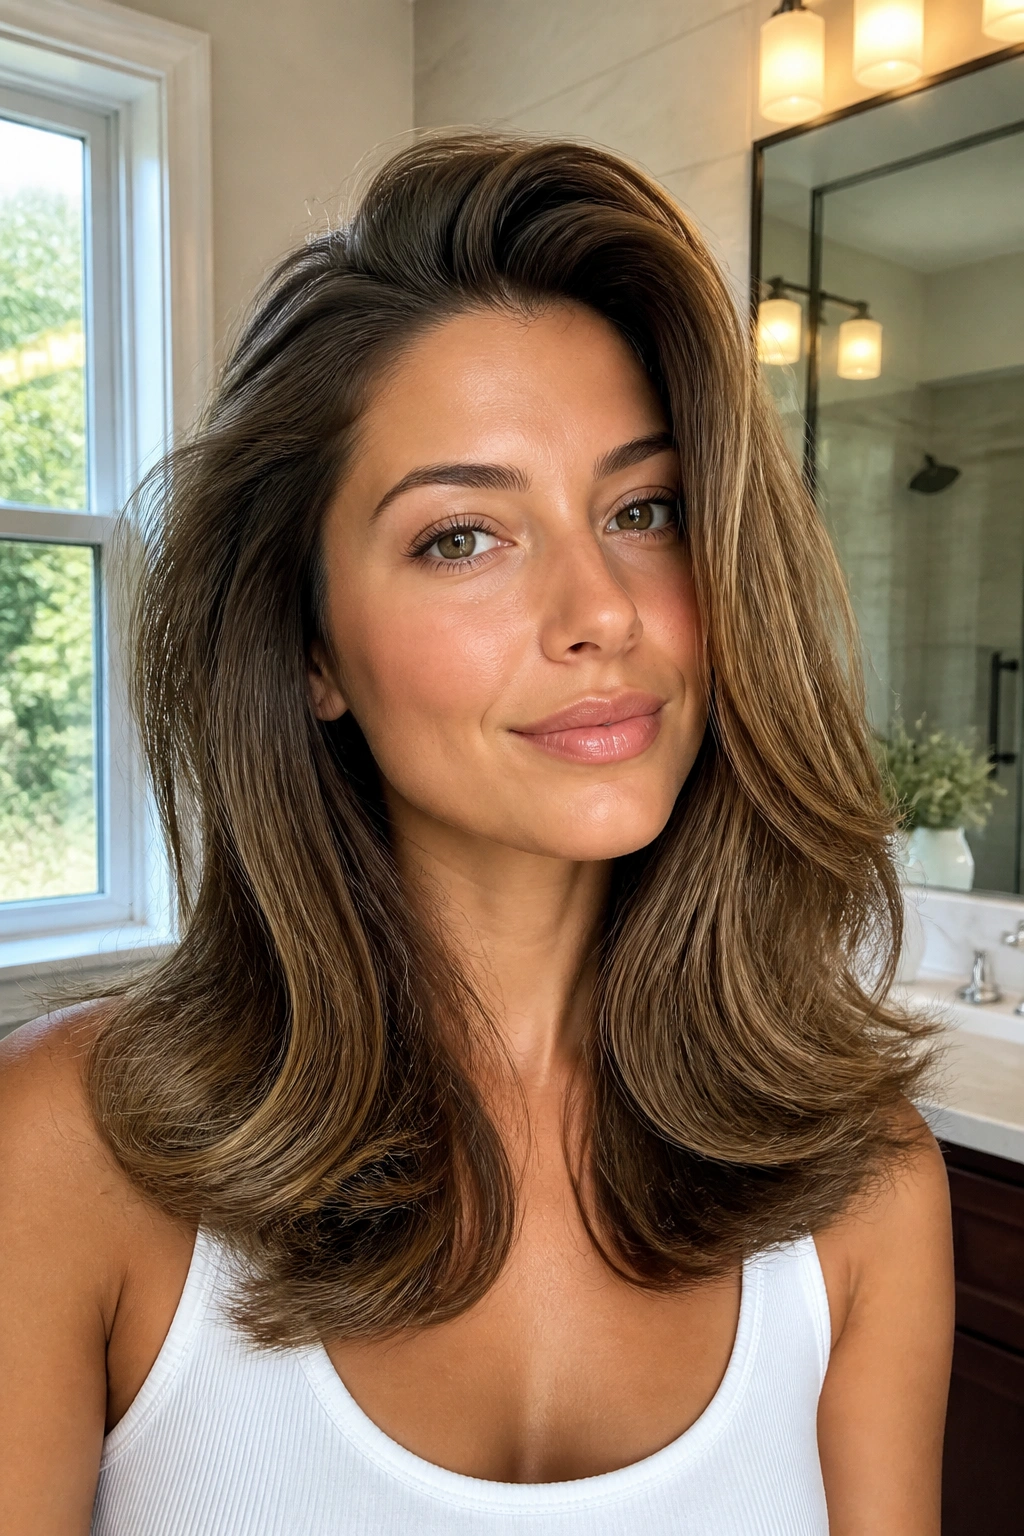
A round-brush blowout is the old reliable when long thick hair needs body instead of curl. It lifts the roots, smooths the surface, and gives the ends a soft bend that keeps the length from looking dead straight. Thick hair can hold this shape for hours if you set it properly.
Use a nozzle on the blow-dryer and work in 3-inch sections. A round brush with a ceramic barrel usually speeds things up, though any brush that gives you grip will do. Pull the hair up at the crown, roll the ends under, and let the heat hit the section until it feels warm all the way through. Then give it a cool shot before moving on. That cooling bit helps the bend stay.
- Clip the top layers out of the way first.
- Finish the crown with Velcro rollers for 10 minutes if you want more lift.
- Keep the ends soft, not curled tight.
If your hair tends to collapse at the roots, this style buys you shape without needing a lot of product. It’s especially good when you want movement but not waves. Clean, full, and easy to wear.
11. Long Shag with Curtain Bangs
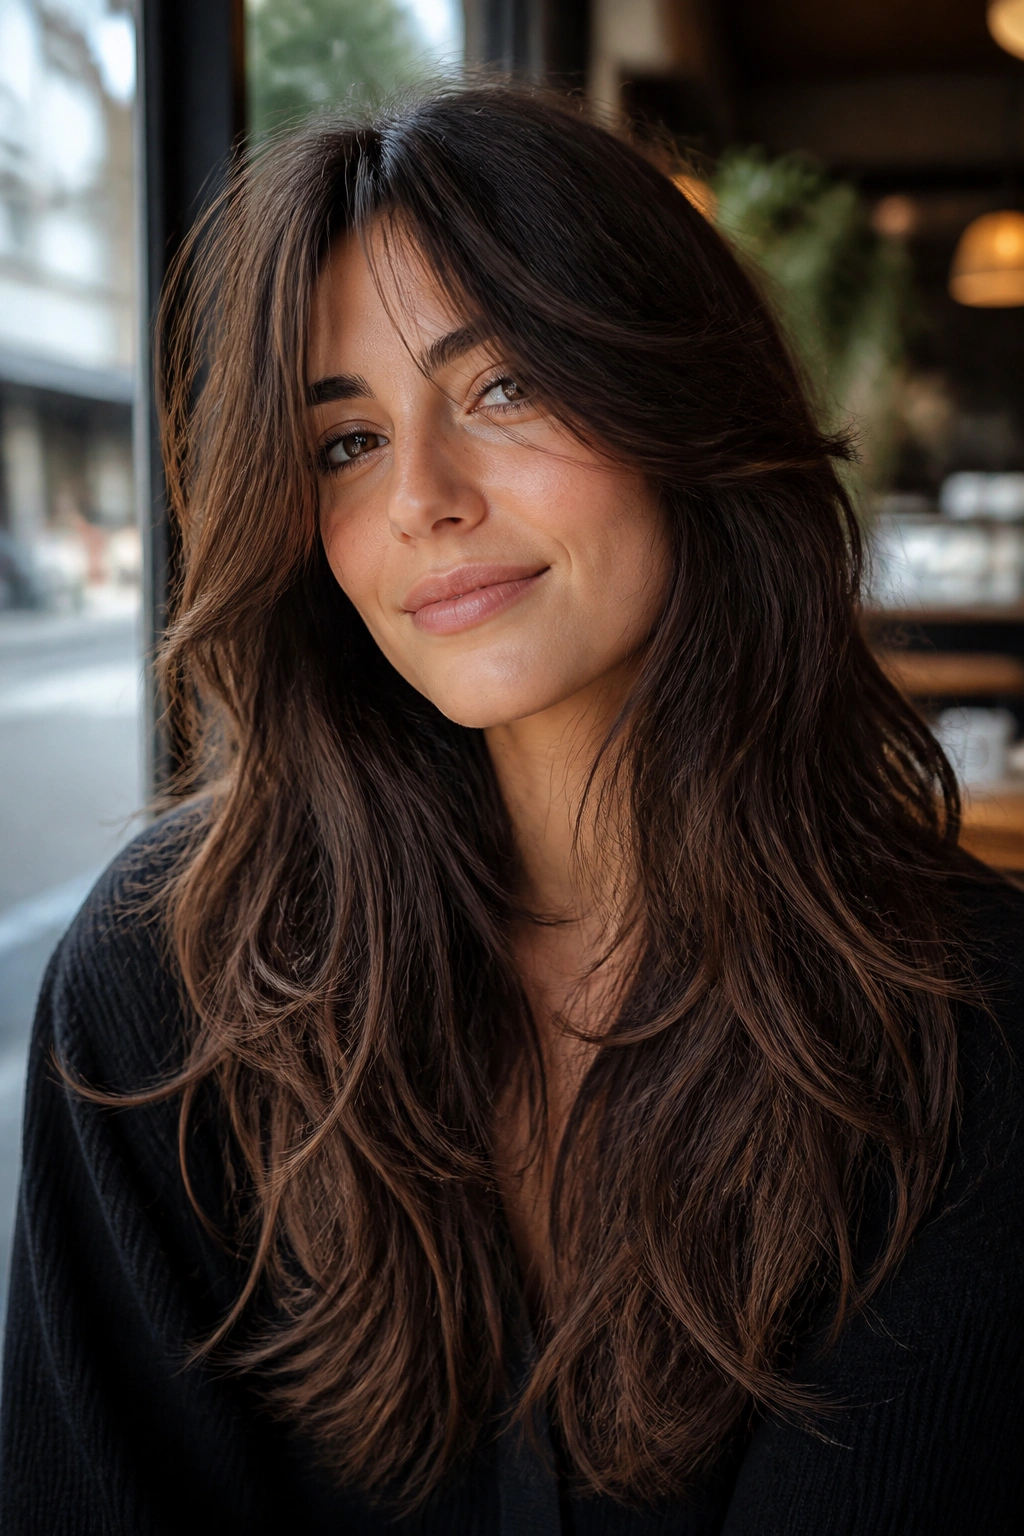
A long shag changes everything for thick hair. Suddenly the weight isn’t sitting in one blunt block at the bottom, and the face gets a frame that feels built in rather than added on. Curtain bangs help even more, because they split the front without making the hair look crowded.
This cut works when long hair starts feeling too heavy to wear down. The layers give the lower half space to move, and they stop the dreaded triangle shape that thick hair can fall into when it’s all one length. Curtain bangs usually look best when they start somewhere around the nose or cheekbone, depending on how much opening you want around the face. Too short, and they can feel choppy. Too long, and they disappear into the rest of the hair.
Weight, gone.
You do need upkeep on the front pieces, because bangs grow fast and the shape can sag if they’re left alone for too long. But the payoff is big. The style has movement even when the hair is freshly washed, and it behaves well with a rough dry or a quick bend from a round brush.
I’m a fan. Thick hair and a long shag get along.
12. Straight Hair with Bent Ends
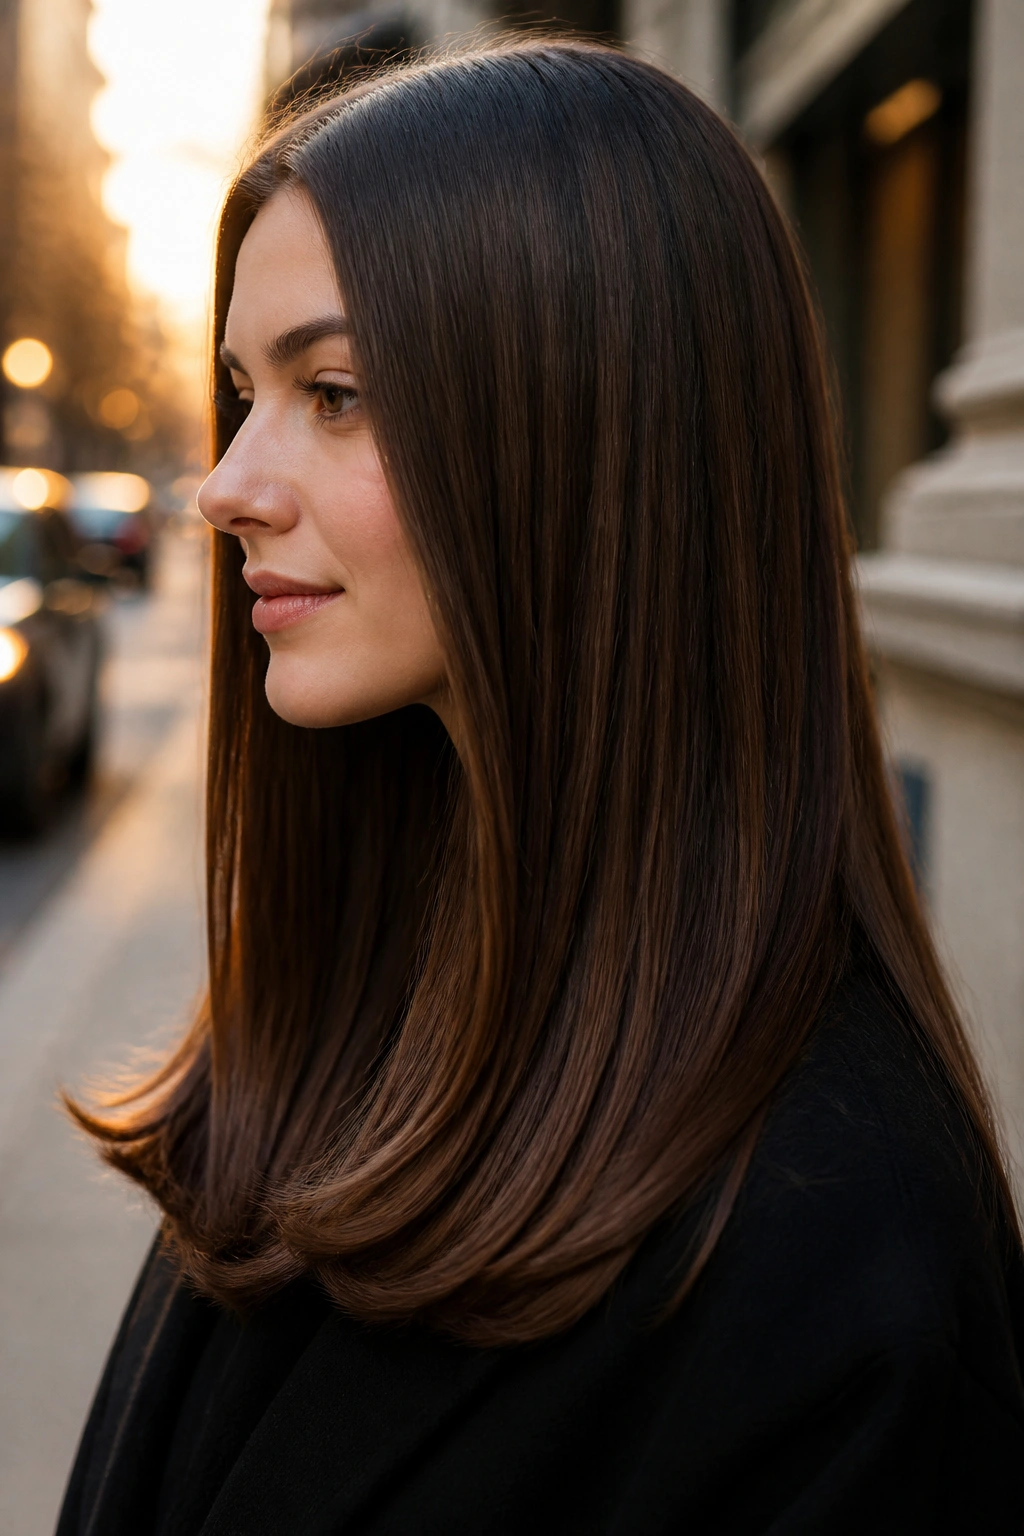
Straight hair with bent ends is the style I reach for when long thick hair needs polish but not rigidity. Unlike pin-straight lengths, which can look severe on dense hair, a soft bend at the ends keeps the whole shape from feeling like a ruler. It’s cleaner, less fussy, and easier to live with.
The bend can turn inward or outward depending on the mood. Inward reads softer. Outward feels a little more playful. Either way, you only need to curve the last 1 to 1.5 inches. Anything more starts to look like a full flip, which is a different style altogether.
A flat iron or blow-dryer brush both work. If the hair is very thick, split it into four clean sections and move slowly, because trying to rush through heavy lengths usually leaves random puffs behind the ears. Those little puffs are what make straight styles look unfinished.
This one is good for work, travel, or any day when you want the hair to look neat without looking stiff. The finish should glide, not stick.
13. Polished Side Part with Tucked Front Pieces
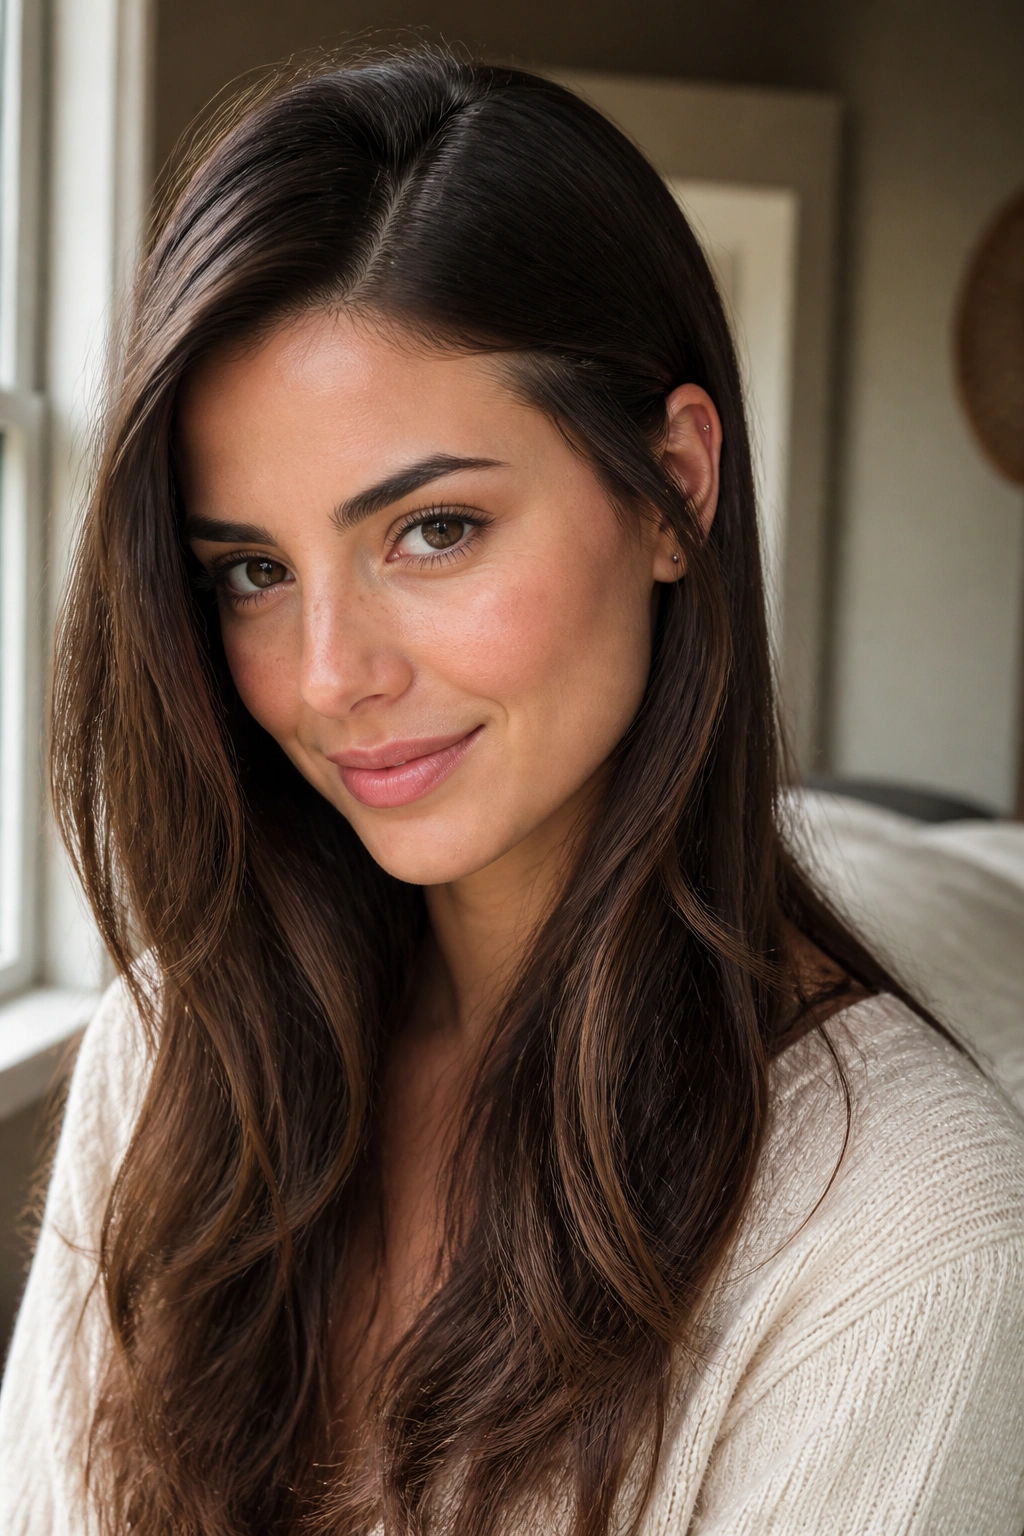
A side part can do a lot of quiet work on long thick hair. It shifts the bulk, softens a wide forehead, and gives the length a little asymmetry so it doesn’t just hang there in one straight curtain. Tucking the front pieces behind one ear adds shape without pinning the whole style back.
What Makes It Different
The magic is in the placement. Move the part just 1 to 2 inches off center, then tuck a thin front section behind the ear on the heavier side. Leave the rest loose. That tiny change can make the hair feel less heavy around the cheeks and jaw. It also works well when you want earrings to show without doing a full updo.
A narrow pin hidden under the top layer keeps the tucked section in place. If the hair slips, dust the underside with a touch of texture spray first. Don’t go wild with it. Thick hair can take weight, but it doesn’t need more matte product than necessary.
Who It Suits Best
This style is nice for straight hair, soft waves, or a smooth blowout. It’s not trying to impress anyone with tricks. It just makes the hair sit better.
That restraint is exactly why it works.
14. Velvet Ribbon Half-Pullback
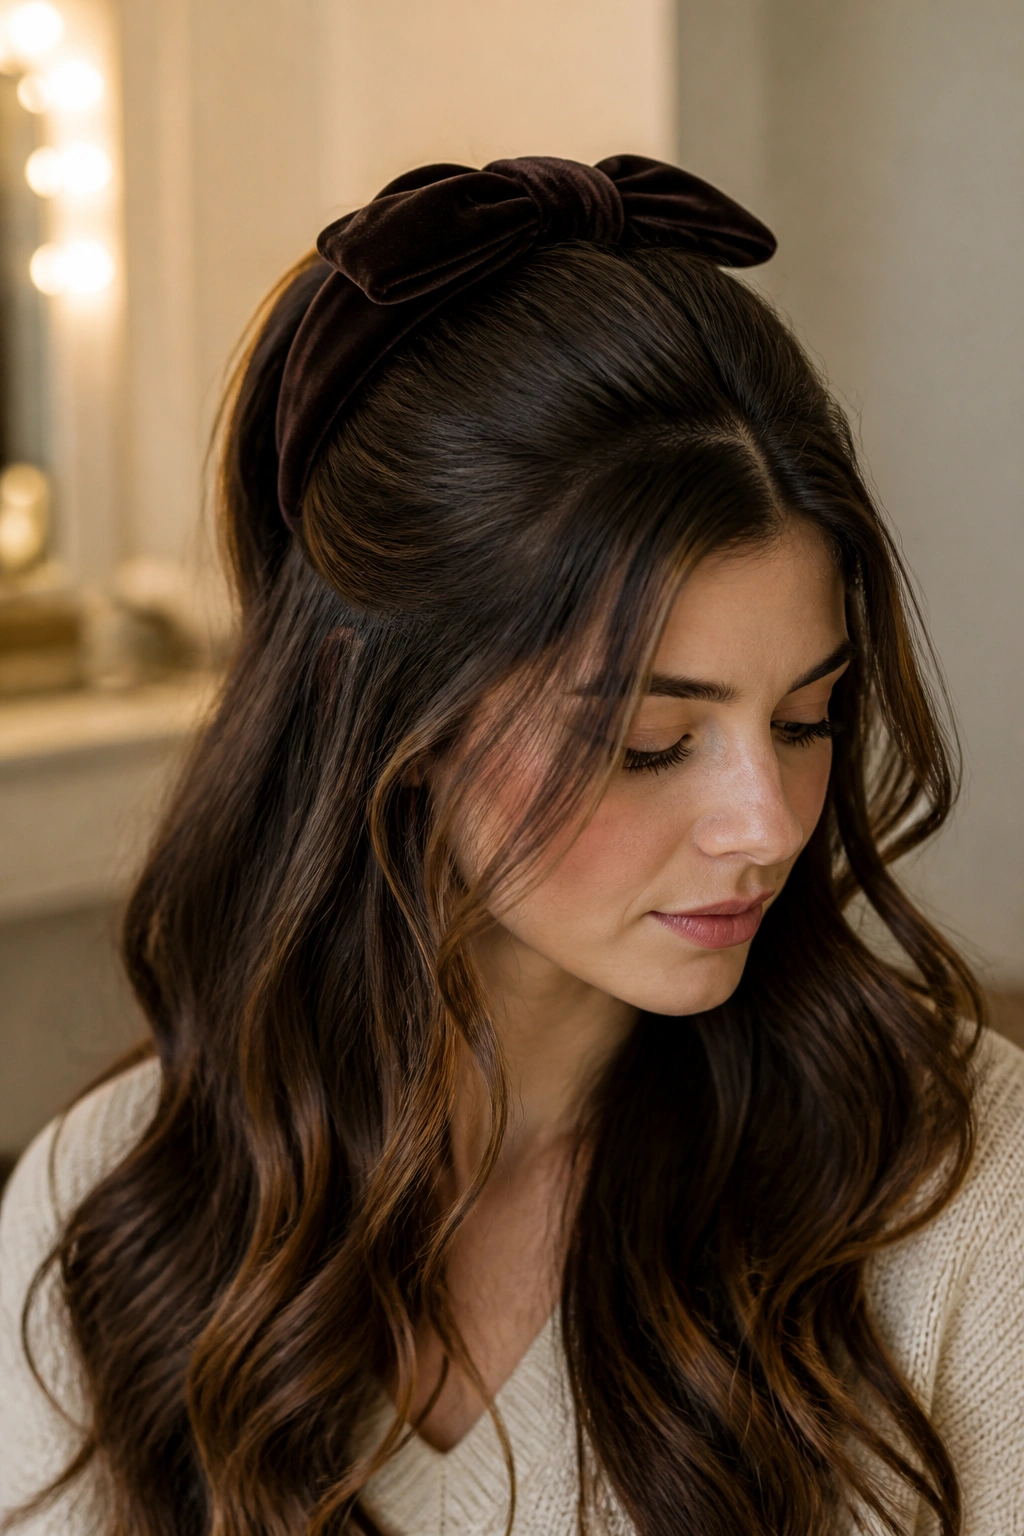
A velvet ribbon can do more for thick hair than a dozen tiny clips ever will. It creates a shape right at the crown, adds a little softness, and keeps the front from sliding into your face without pretending to be a full-up style. The length stays down, which is the whole point here.
The ribbon should be wide enough to show up against all that hair. A narrow strip tends to disappear, especially if the hair is dark or extra dense. Something around 1 to 1.5 inches wide usually looks right. Tie it loosely at the back of the crown, not too high, or the style starts to feel like a school recital. Let the tail ends hang down with the rest of the hair.
This works especially well when the hair has a wave or a soft bend. The ribbon gives the top a little shape while the lower half keeps moving. If the hair is slippery, secure the half-pullback with a clear elastic first, then cover it with the ribbon.
It’s simple. That’s why it lands.
15. Loose Dutch Braid Accent into Waves
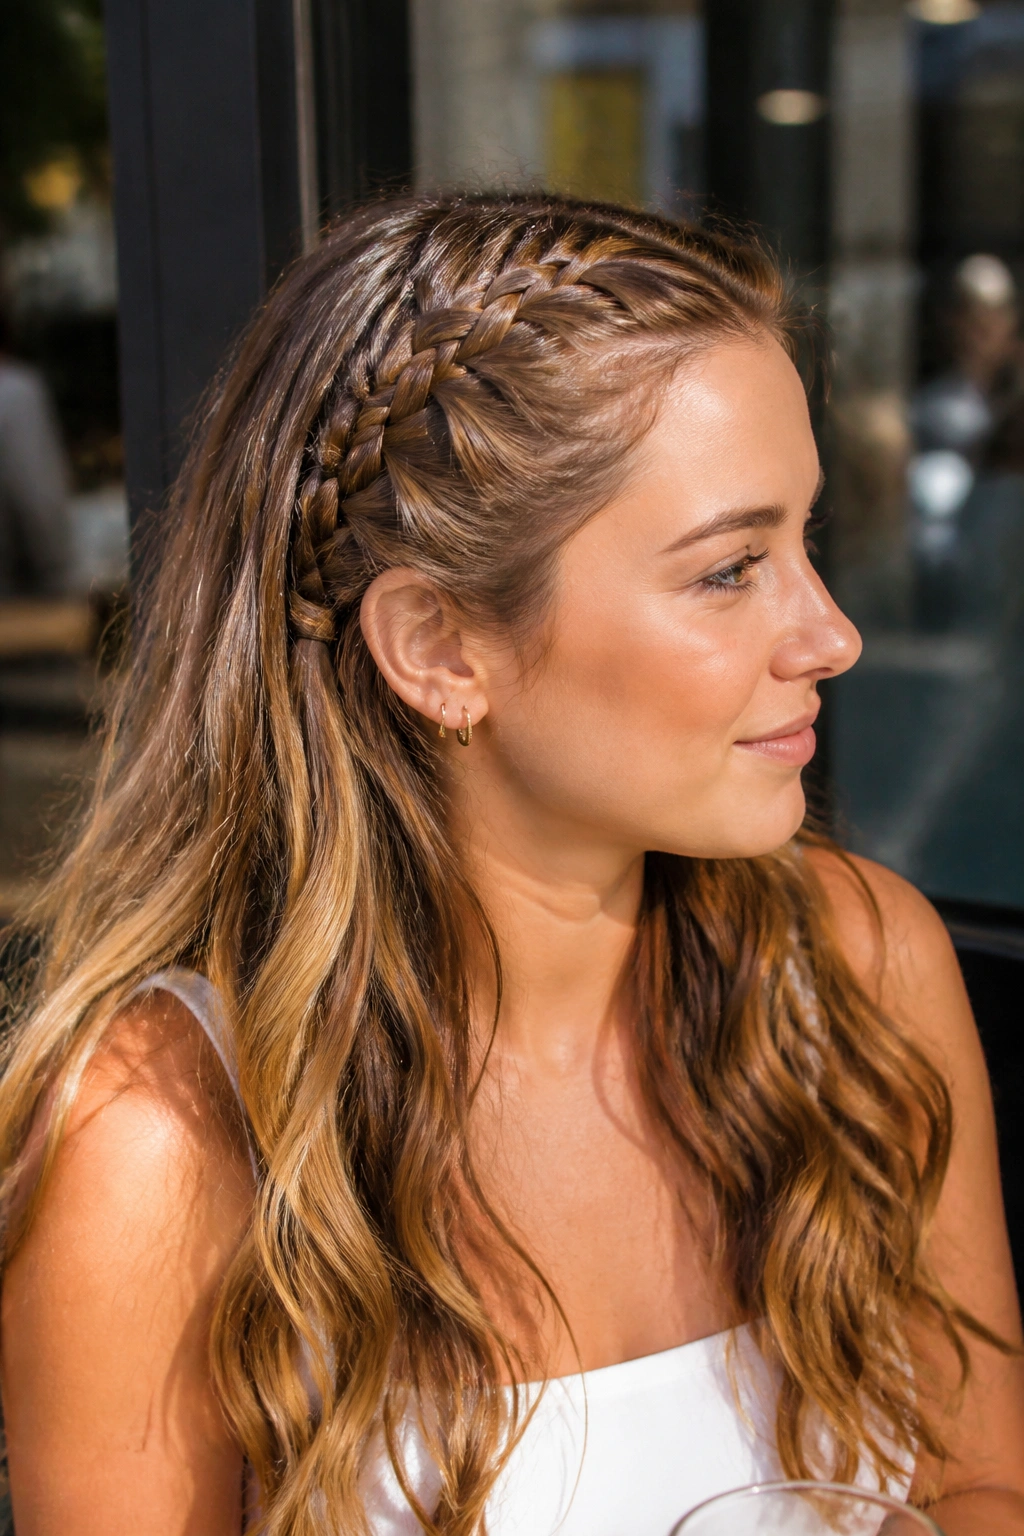
Why do a Dutch braid accent instead of a full braid? Because sometimes you want the texture of a braid without swallowing up the length. On long thick hair, a braid that runs from the temple toward the ear gives enough detail to matter, and the rest of the hair can stay loose and full.
How to Use It
Start with a side section about 2 inches wide. Cross the strands under, not over, which creates the raised Dutch look. Stop after four or five passes and secure it just above the ear. Then gently tug the braid edges wider with your fingers. That keeps the braid visible without making it look tight or tiny.
The rest of the hair can be waved, straight, or left in its natural pattern. I like this style best when the loose length has a bit of bend in it, because the contrast between the braid and the flowing hair feels deliberate. It also hides the fact that the braid itself is small. Smart trick.
- Good for second-day hair.
- Works with casual outfits or dressier ones.
- Uses very little time compared with a full braided style.
A little braid can go a long way on thick hair. This is proof.
16. Heatless Robe Waves
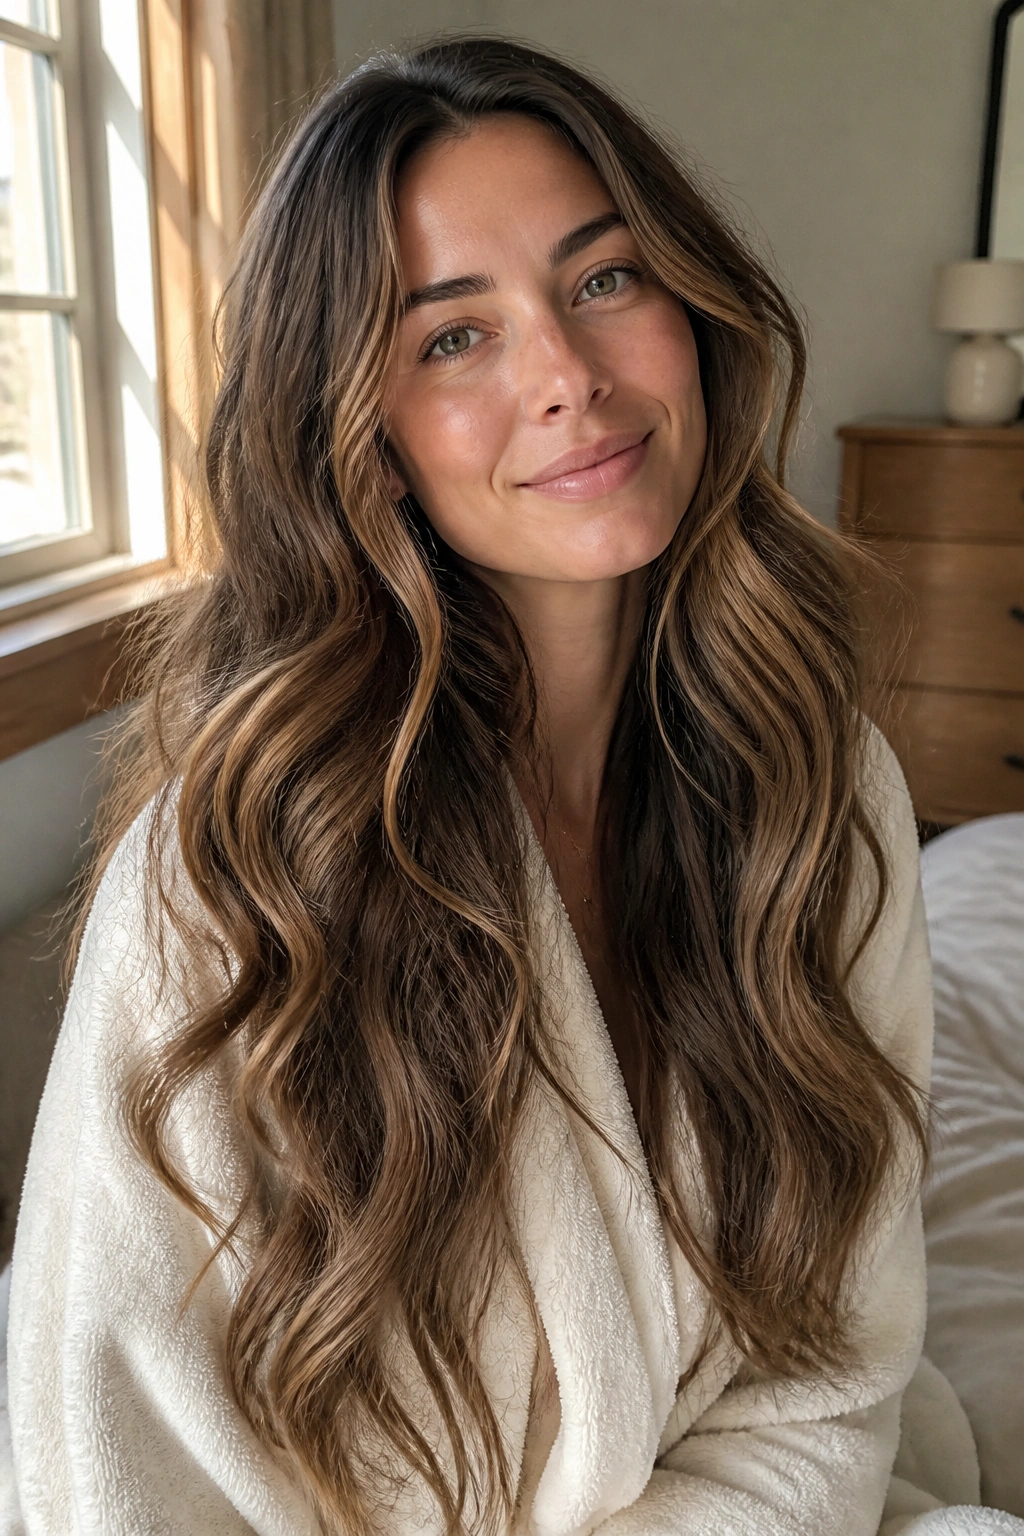
Heatless robe waves are worth knowing if you like soft movement but hate the feel of hot tools on long hair. Thick hair holds shape well once it dries in place, which makes this method more useful here than people expect. The catch is timing. The hair has to be damp enough to mold, but not so wet that it stays soggy for hours.
Wrap the hair around the robe belt or a similar soft tie, then secure it low and let it sit overnight. In the morning, release it gently and separate the waves with your fingers. If you brush them, you’ll lose some of the shape and create frizz around the crown. A light mist of finishing spray helps the pattern last, but keep it airy.
- Start with hair that’s about 70% dry.
- Keep the wrap flat against the head.
- Leave the ends smooth for a more relaxed wave.
This is the style for people who want softness without heat damage. It can look a little uneven at first, and that’s fine. Thick hair usually settles into the wave by the time you’ve had coffee and moved around for an hour.
17. Bubble Braid Accent with Loose Length
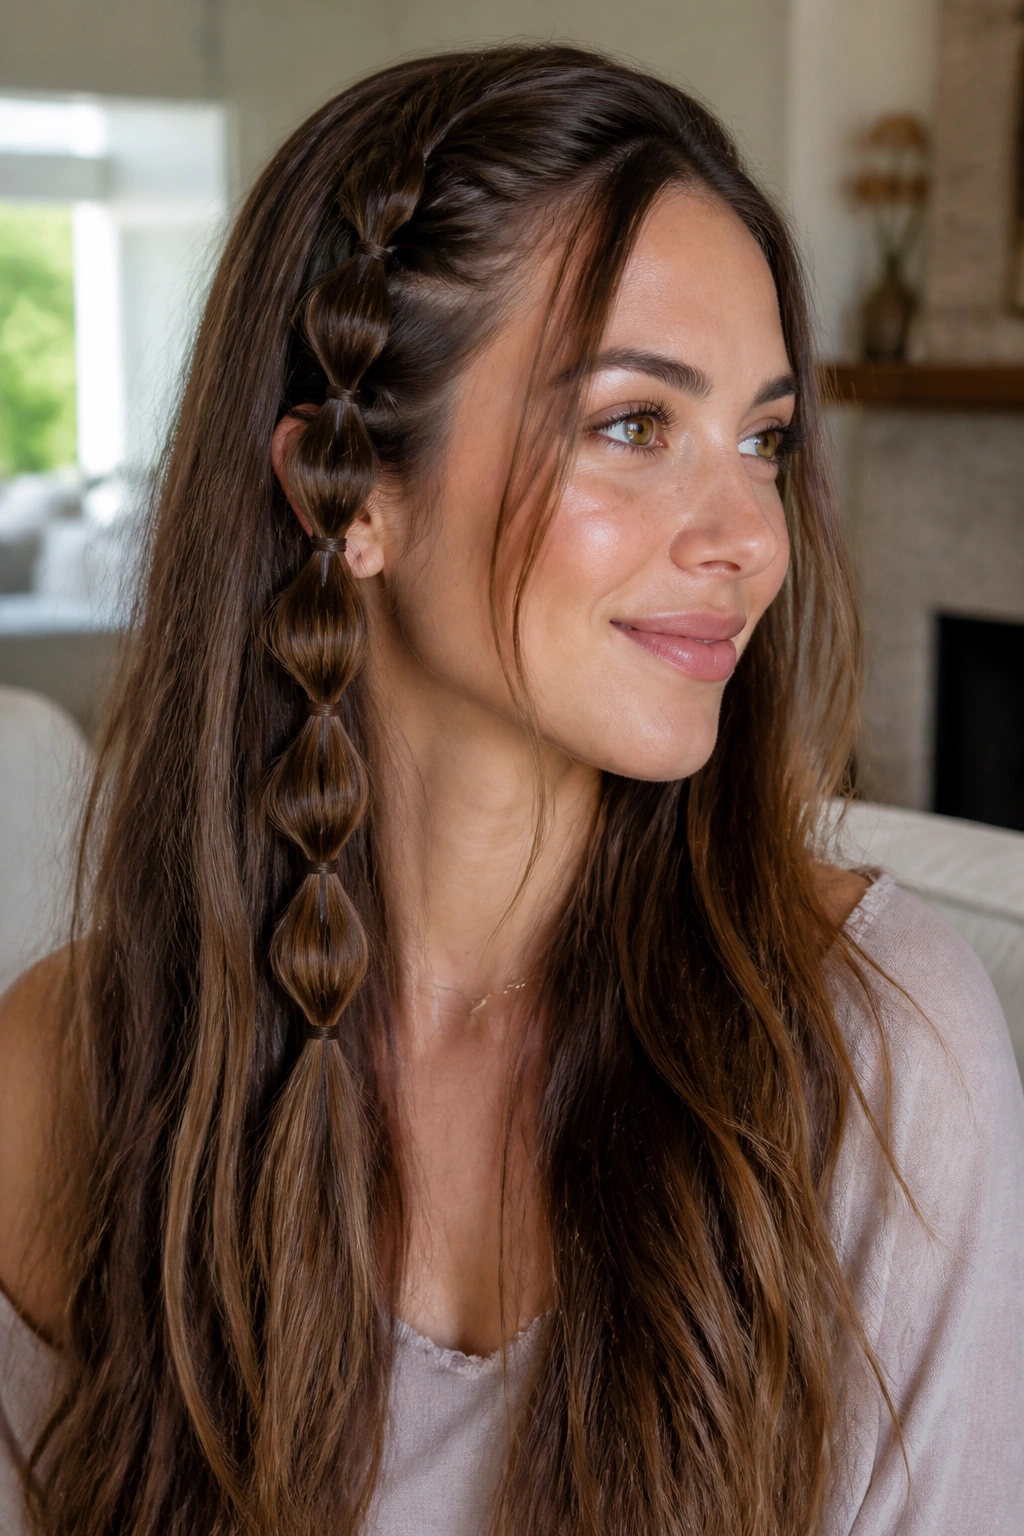
Bubble braid accents work shockingly well on long thick hair because the hair already has enough body to make the bubbles look round and full. You’re not fighting for volume here. You’re using what’s already there and giving it a little structure along one side of the head or down a front section.
The braid starts as a simple ponytail-like section, then clear elastics are added every 2 to 3 inches. After each elastic, gently pull the hair between the ties to make the bubble shape. Don’t yank. A small stretch is enough. The result should feel playful, but not messy in a careless way.
What I like most is how little of the length it takes away. The accent stays narrow, so most of the hair still falls free down the back. That makes it a nice choice when you want one detail that people notice without turning the whole head into a braid project.
It also works with straight hair, curls, or waves. The bubble shape stays visible either way. Simple idea. Strong effect.
18. Statement Barrette Side Clip
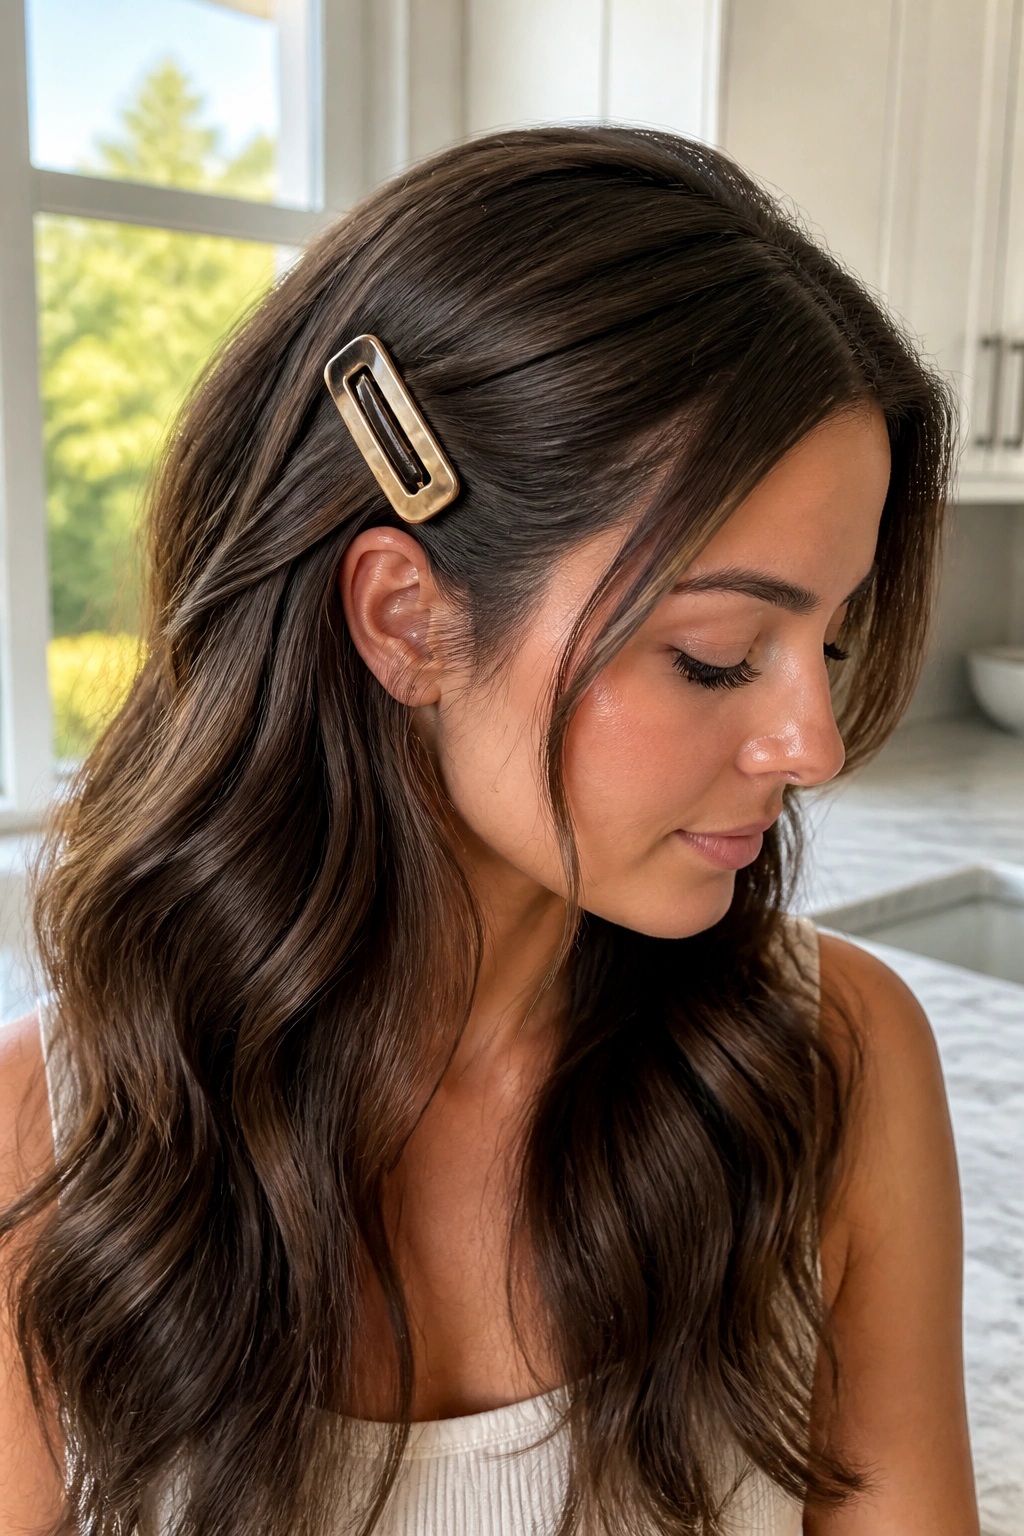
A statement barrette can change long thick hair faster than almost anything else. Unlike a full half-up style, which asks you to section and secure a lot of hair, a side clip only gathers a small piece and lets the rest stay loose. That tiny shift changes the line of the face without flattening the length.
Pick a clip that’s at least 3 inches long and has a real spring to it. Cheap clips can’t hold the weight of thick hair for long, especially if the strand is silky. Place it just above the ear, where the side section naturally wants to sit, and keep the gathered piece narrow. If you grab too much hair, the clip starts sliding and the whole thing gets annoying fast.
This style is useful on smooth blowouts, soft waves, or even air-dried texture. It’s the fastest option in the list, which is part of its charm. A good barrette looks intentional because the shape is clean and the rest of the hair can still move.
A small fix. A big difference.
19. Defined Natural Curls with Layered Ends
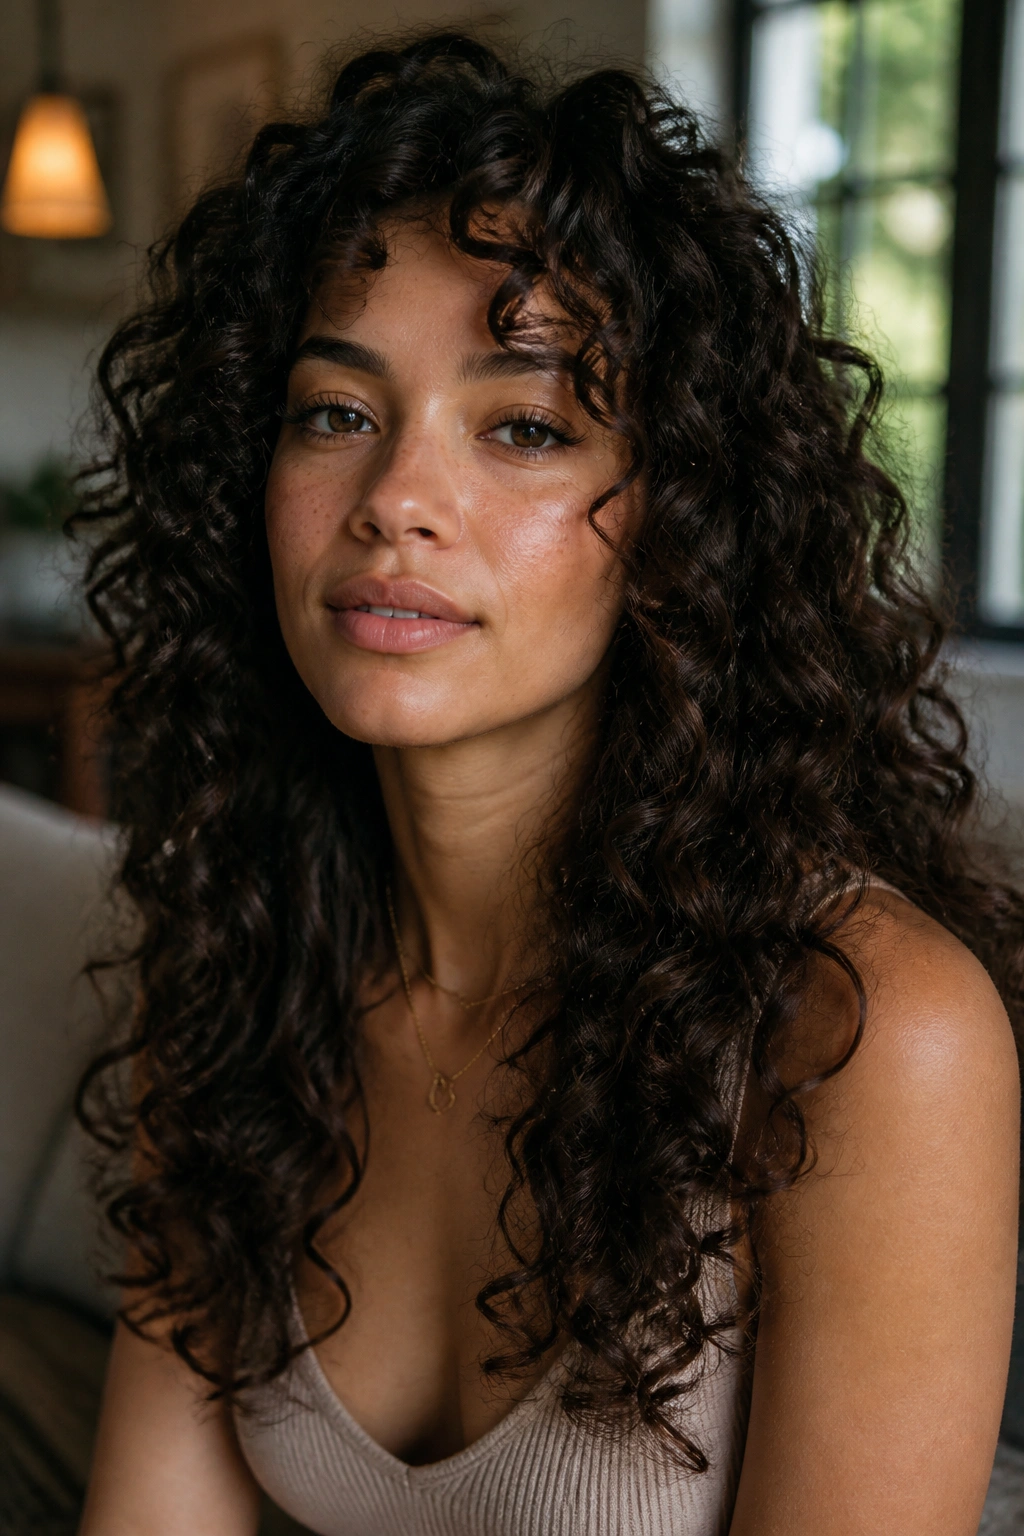
Defined curls on long thick hair can be glorious when the shape is cut and styled with the curl pattern in mind. Layers matter here. Without them, heavy curls tend to stack on themselves and create a wide bottom edge. With them, the curl falls in rings and clumps that have room to spring.
Why the Layers Matter
A layered cut lets each curl sit where it wants instead of being dragged down by the weight above it. That is especially helpful if your curl pattern is mixed or if the ends tend to stretch out while the crown stays tighter. The result is a cleaner outline and less bulk at the shoulders.
Use leave-in conditioner, then a gel or foam that gives hold without making the hair crunchy. Diffuse on low heat if you want more lift, or let it air-dry if you prefer a softer finish. Once it’s dry, break the cast with oiled hands. Not a brush. Brushes can blow the curl apart and make the shape frizzy in ten seconds flat.
- Do not touch it while it’s drying.
- Scrunch only after the hair is fully set.
- Refresh the next day with a little water and a small dab of conditioner.
Curly thick hair doesn’t need to be flattened. It needs shape.
20. S-Shape Mermaid Waves with Face-Framing Pieces
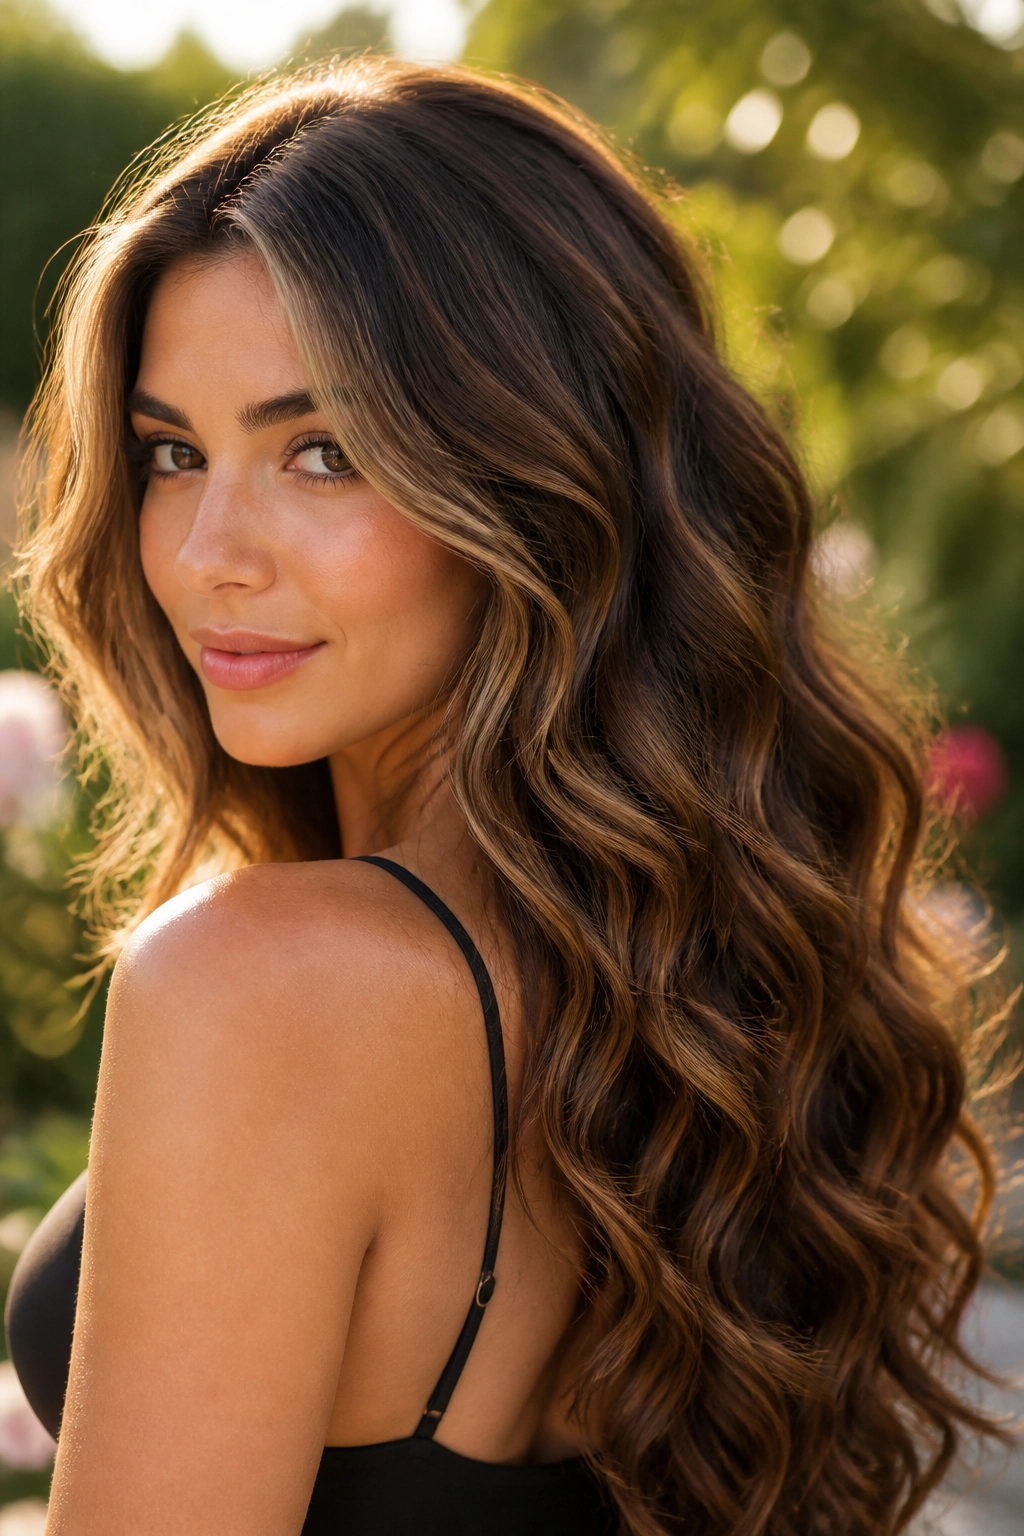
S-shape mermaid waves work because they keep the length looking long. That sounds obvious, but a lot of wave styles cut the hair into too much bounce and the length starts disappearing into itself. Here, the curve is softer, longer, and a little more ribbon-like, which is exactly what thick hair can carry without looking puffy.
The trick is to wrap alternating sections in opposite directions, then brush them very lightly so the wave opens into a long S pattern instead of a tight curl. Leave the last inch or so a little straighter. That small detail keeps the shape flowing down instead of stacking up at the bottom. Face-framing pieces can be bent a touch more than the rest, which gives the front a visible shape without turning it into a full glam wave.
This style suits thick hair that holds a bend well but doesn’t love tight curls. It also photographs in a clean way because the lines are visible from a distance. You see the motion without losing the length.
If your goal is long hair that still looks long, this is a strong pick.
Final Thoughts
Long thick hair looks best when the style gives the weight somewhere to go. That can mean a blunt finish with a sharp part, but more often it means layers, bends, or one small detail that breaks up the bulk. The hair already has presence. It just needs a shape that respects it.
The biggest mistake is trying to force thick hair into a style built for fine hair. Too much product, too many tight curls, too much control at the roots — all of it can make the length feel heavier instead of lighter. A cleaner cut, a smarter part, or a softer wave usually does more.
Pick the version that matches your day, not the one that asks for the most work. Thick hair has enough character on its own.
