



A low ponytail can look lazy in five seconds or polished in fifteen. The difference is smaller than people think. Low ponytail hairstyles work because they sit close to the nape, where the shape reads calm and deliberate instead of hurried.
The ones that miss usually fail at the same point: too much puff at the crown, a visible elastic, or ends that look like they were abandoned halfway through styling. Clean hair helps, sure, but the real trick is restraint. Flat roots. A neat part. One finish detail that makes the whole thing feel intentional.
I reach for low ponytails when I want hair out of the way without losing the line of the style. They suit sharp collars, bare necks, and simple earrings better than a high ponytail ever will. They also behave better on second-day hair, which is one reason people keep coming back to them.
Some of these styles are nearly bare bones. Others add a braid, a scarf, a fold, or a little lift at the crown. Start with the plainest version first, because once the base looks clean, the fancier ones make sense fast.
1. Glass-Hair Center-Part Low Ponytail
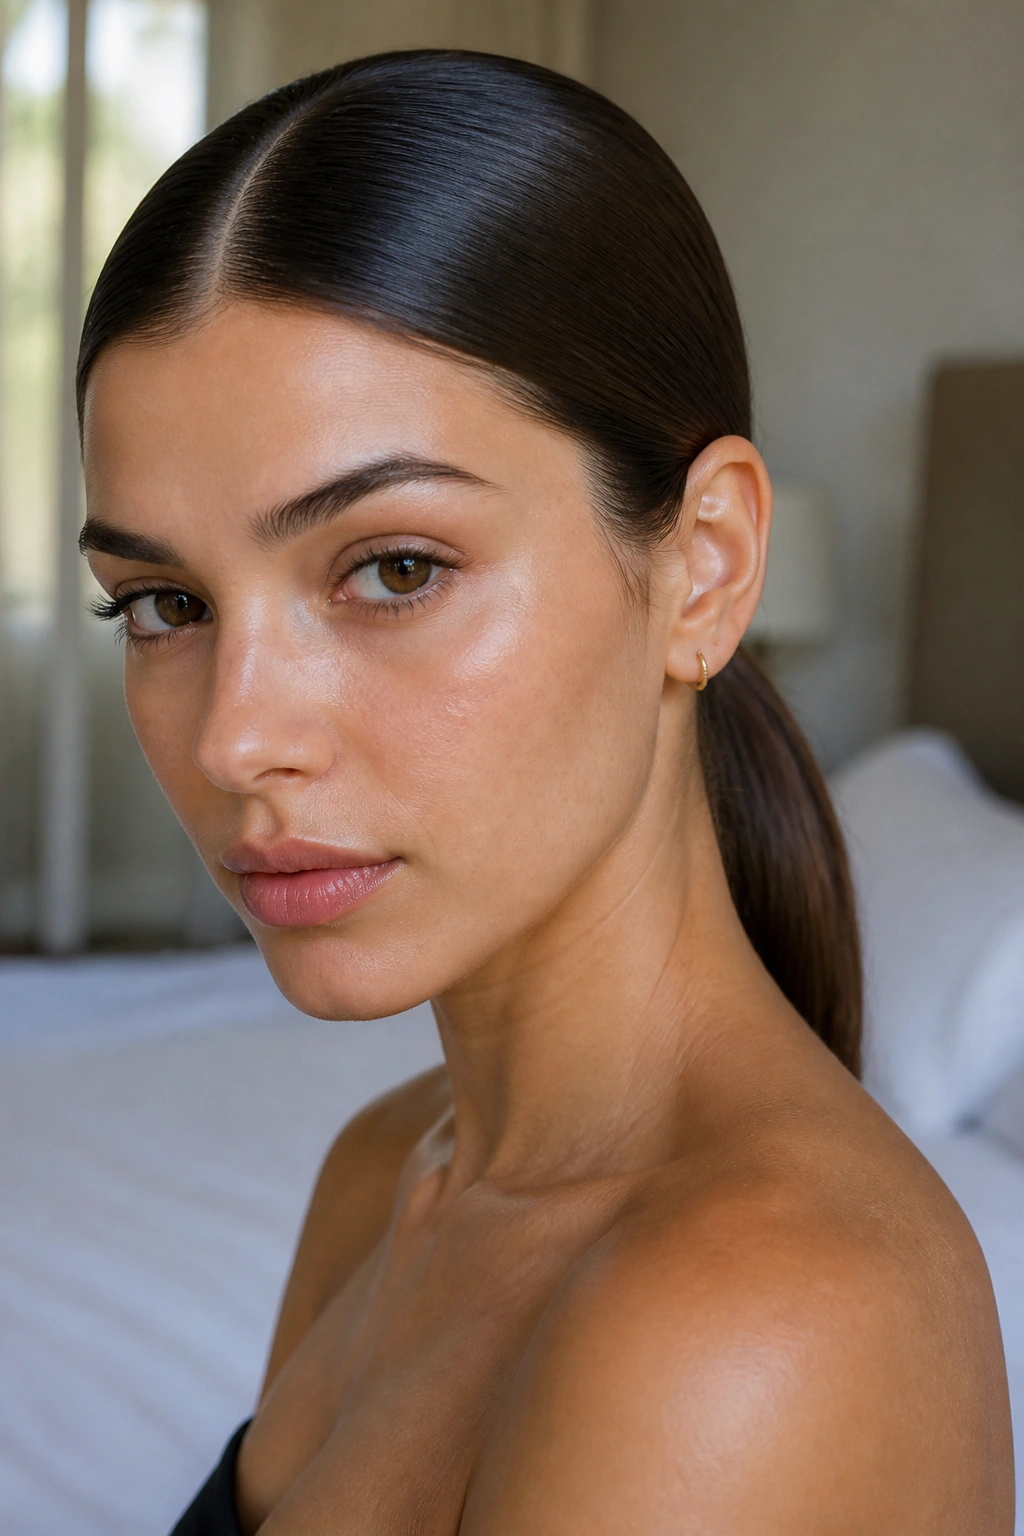
This is the version that looks the most deliberate. A sharp middle part, smooth roots, and a tail that sits right at the nape can make even simple clothes look more finished. The trick is not drowning the hair in product. It is getting the front half flat enough that the eye stops noticing texture.
A pea-size dab of gel at the hairline and a light pass of a boar-bristle brush usually do more than a whole palmful of cream. If your hair bends or frizzes easily, blow-dry the front sections with a nozzle first, then pin the ponytail low before the ends get away from you. One quick pass with a flat iron on the tail keeps the line clean.
The whole point is a clean edge.
- Best on straight, relaxed, or blown-out hair.
- Strong-hold gel beats heavy oil at the roots.
- Keep the elastic snug, not tight enough to dent the hair.
- Finish with a fine mist of shine spray.
Tiny tip: smooth the part with the tip of a tail comb, not your fingers.
2. Deep Side-Part Sleek Low Ponytail
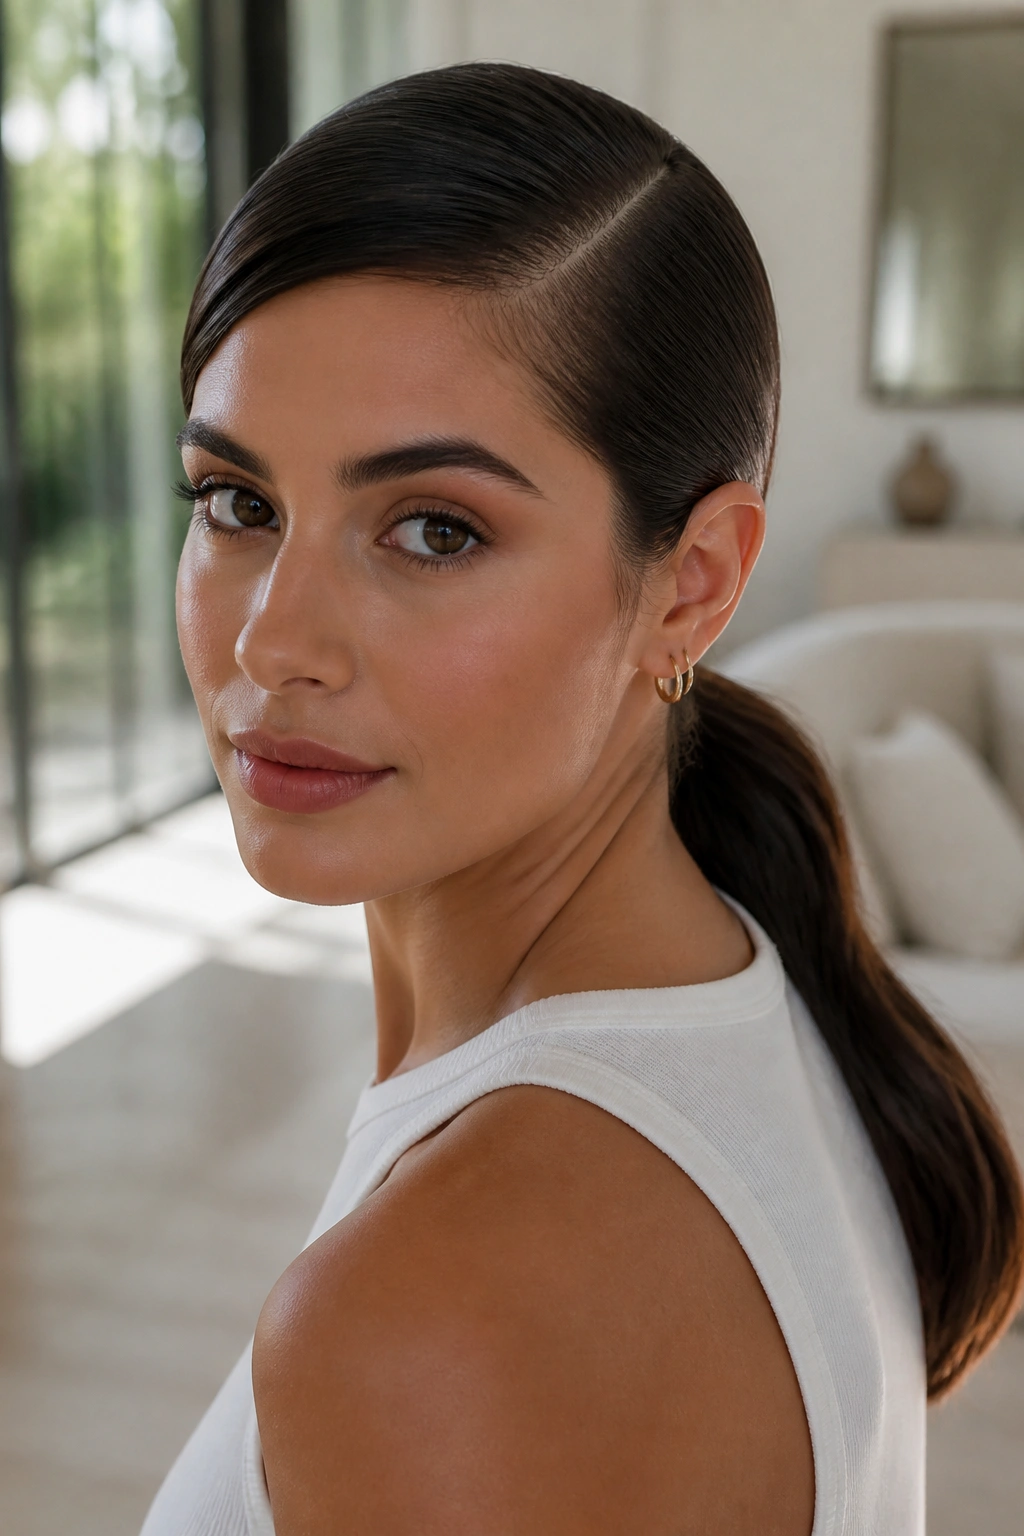
Want the ponytail to look softer without losing the sleek finish? Move the part a few inches off center and the whole style changes. A deep side part throws a little volume into the front and gives the ponytail a more sculpted shape, especially when you tuck the lighter side behind the ear.
Why the side part matters
The side part breaks up the severity of a straight-back ponytail. It gives the face a diagonal line, which feels less rigid and a little more graceful. That matters if your hair tends to sit flat on top, because the asymmetry creates shape where there might not be much natural lift.
Where to place the ponytail
Keep the ponytail low and slightly off the center line, sitting just behind the heavier side of the part. That small shift makes the style feel balanced instead of lopsided. If you like a stronger finish, wrap a narrow strand around the elastic so the back looks as clean as the front.
It’s a small shift. Big payoff.
3. Wrapped-Elastic Low Ponytail
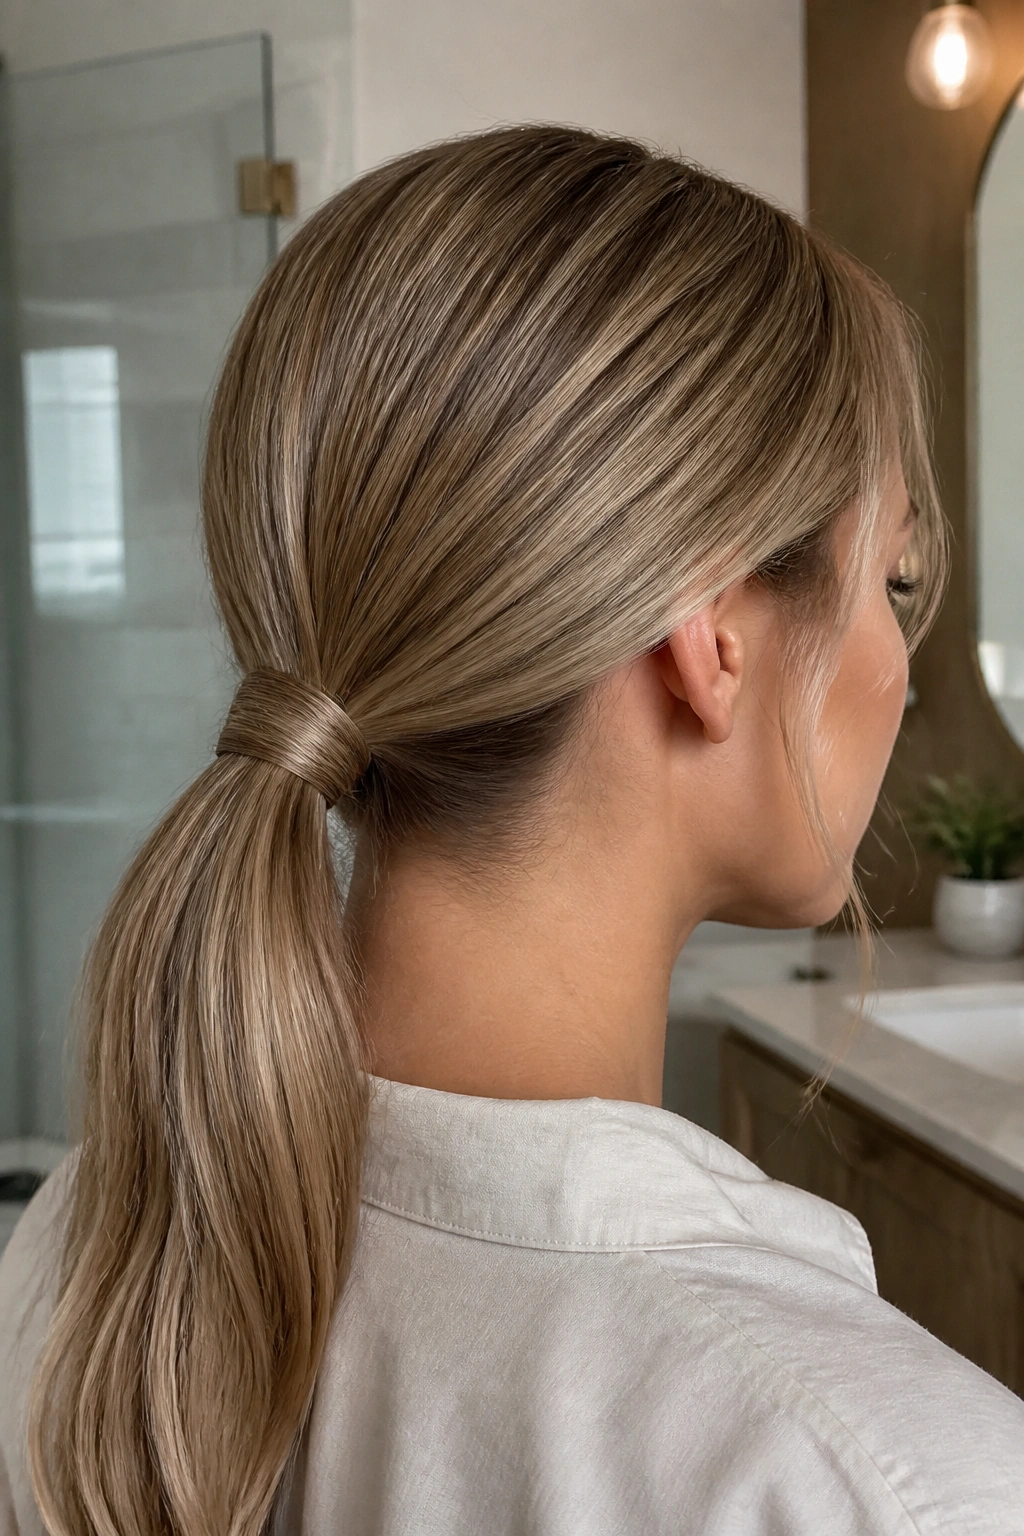
If you hate seeing the hair tie, this is the fix. Wrapping a strand around the base turns a plain ponytail into something cleaner without adding much time, and it works with every hair color because the wrap disappears into the tail itself.
Take a 1-inch slice from the underside of the ponytail, smooth it flat, and wind it once or twice around the elastic. Secure the end with a bobby pin pushed upward under the base, not sideways where it can poke. The wrap should look like part of the ponytail, not a separate ribbon strapped on top.
Less hardware. More polish.
- Use a pin that matches your hair color.
- Pick a wrap strand from the underside so the top layer stays neat.
- Mist the strand lightly before wrapping if it slips.
- Keep the ponytail base low and close to the nape.
My preference: this is the easiest way to make a basic ponytail look more expensive.
4. Braided Crown into Low Ponytail
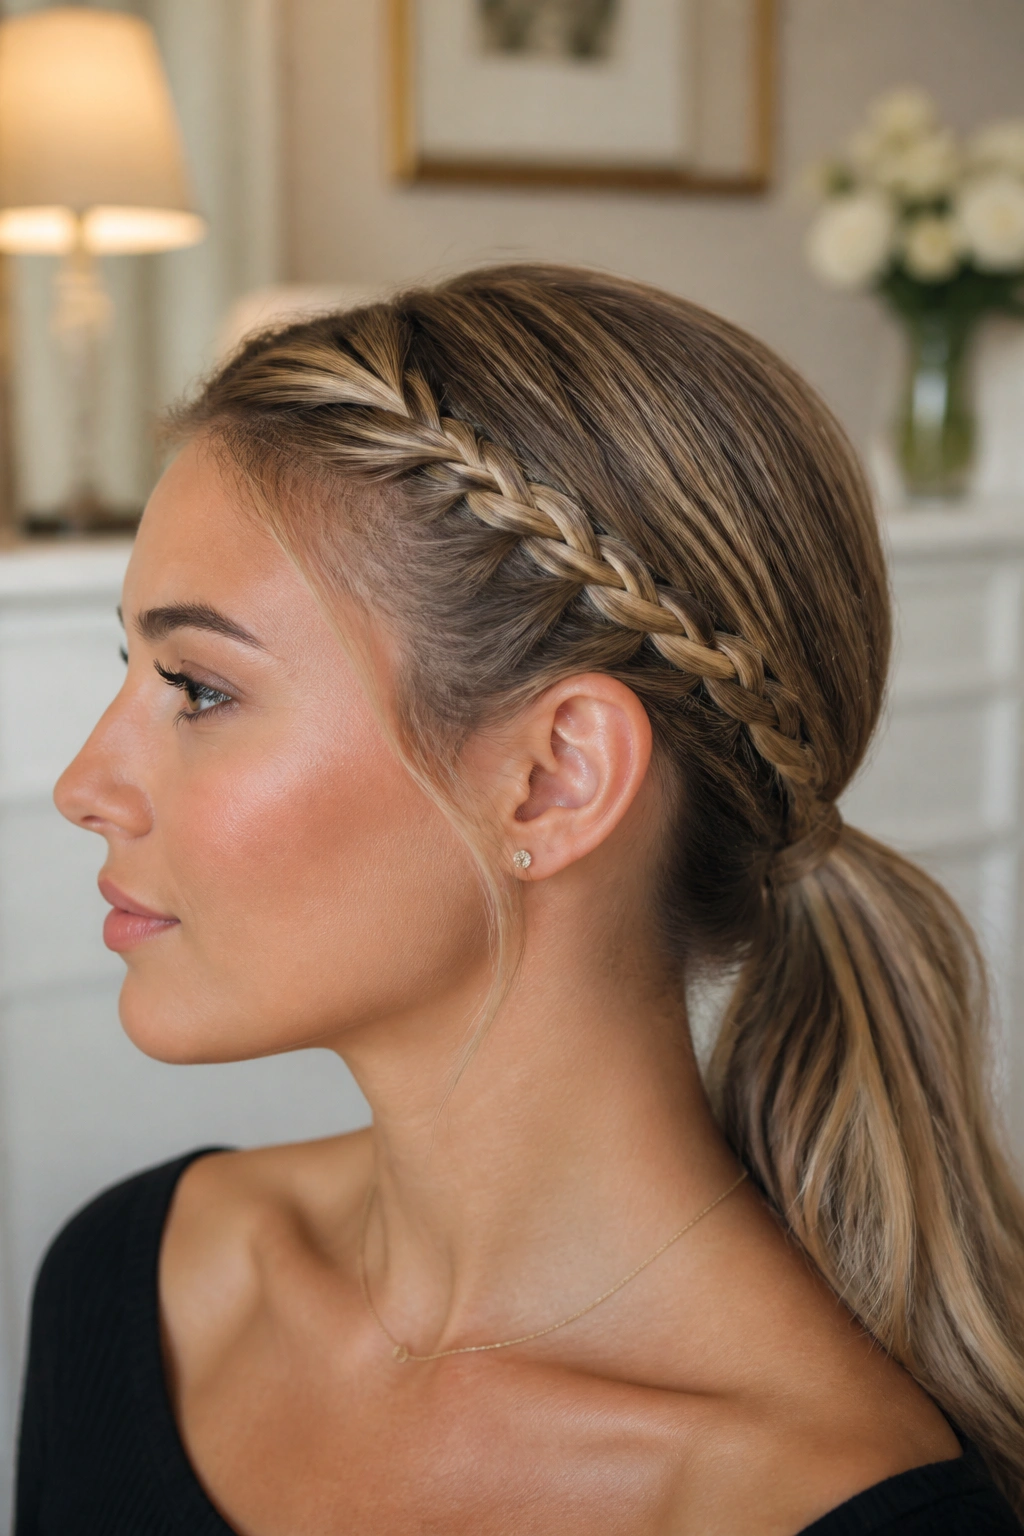
A tiny braid near the hairline changes the whole read. It takes the ponytail out of “office default” territory and gives it a little structure, especially when the rest of the hair is smooth and flat.
Keep the braid small
Use a slim braid from one temple or both temples, then feed it into the base instead of letting it wander down the head. Three or four crosses are enough; a big, chunky braid starts to fight the sleek finish. If your hair is layered, a light mist of texture spray at the front helps the braid hold its line.
Where it works best
This version is a good choice for grown-out bangs and face-framing layers that never quite behave. The braid keeps those shorter pieces from escaping, which is half the battle on slick days. And yes, the tail can stay straight. It does not need to become a whole bohemian situation.
The braid is the headline.
5. Bubble Low Ponytail
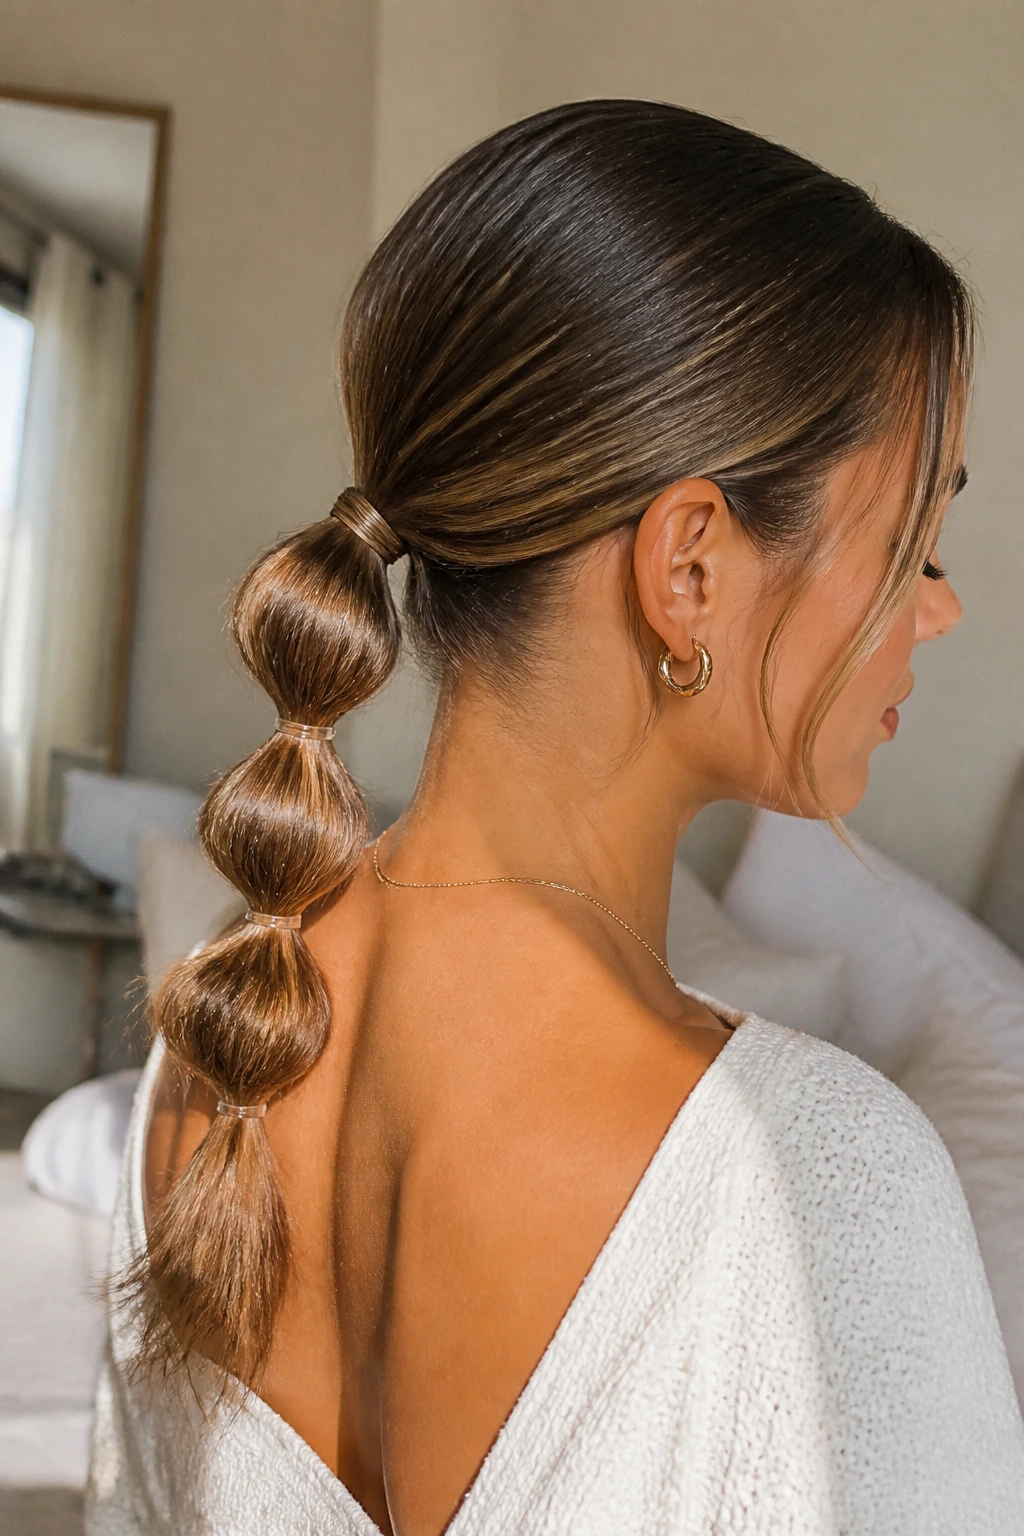
Bubble ponytails usually look playful, but at a low placement they feel cleaner and more grown-up. The shape is still easy to read: a smooth base, then little rounded sections held in place with clear elastics. The result has movement without turning into a mess.
Use clear bands every 1.5 to 2 inches down the tail, then gently pull each section outward with your fingertips until it puffs into a soft bubble. If your hair is fine, tug from both sides at once so the shape stays even. Thick hair needs a little more spacing between elastics, or the bubbles get crowded fast.
Use clear elastics. That’s it.
- Best on hair that reaches past the shoulders.
- Space the bands evenly, not by eye alone.
- Loosen each bubble a little after securing.
- Keep the crown flat so the ponytail reads sleek first, playful second.
This one looks best when the bubbles are soft, not giant. Tiny rounded sections do the job just fine.
6. Twisted Sides Low Ponytail
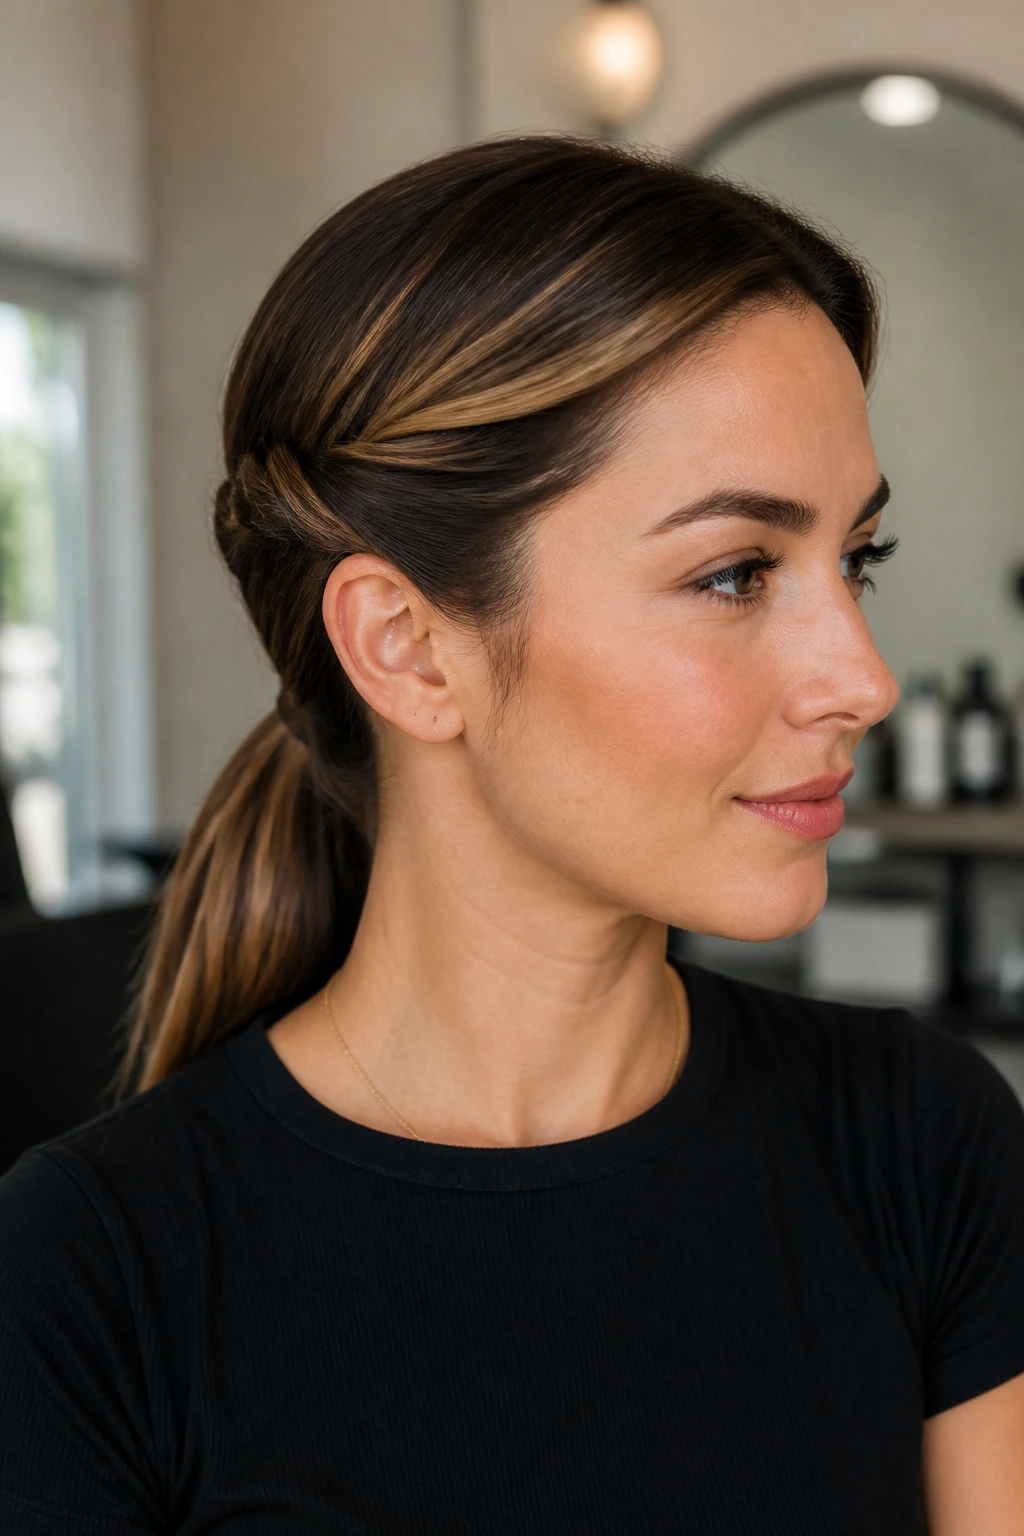
Twists at the sides are the quiet answer to flyaways near the temples. They tuck short layers back, keep the front neat, and make a low ponytail feel a little more styled without asking for a braid or a lot of pins.
Keep the twist flat
Take a 2-inch section from each temple, twist it back toward the nape, and pin it low before gathering the rest into the ponytail. The twist should sit close to the head. If it sticks out, it starts to look bulky, and that ruins the whole sleek effect. A little hairspray on the fingers helps flatten the twist without making it crunchy.
Who it flatters
This style is useful when your hairline has wispy pieces or your layers keep falling forward. It also works when you want the front to stay neat but not severe. The twist gives enough detail that the ponytail does not feel bare, which is a nice middle ground.
Simple. Clean. Not fussy.
7. Sleek Low Ponytail with Blunt Ends
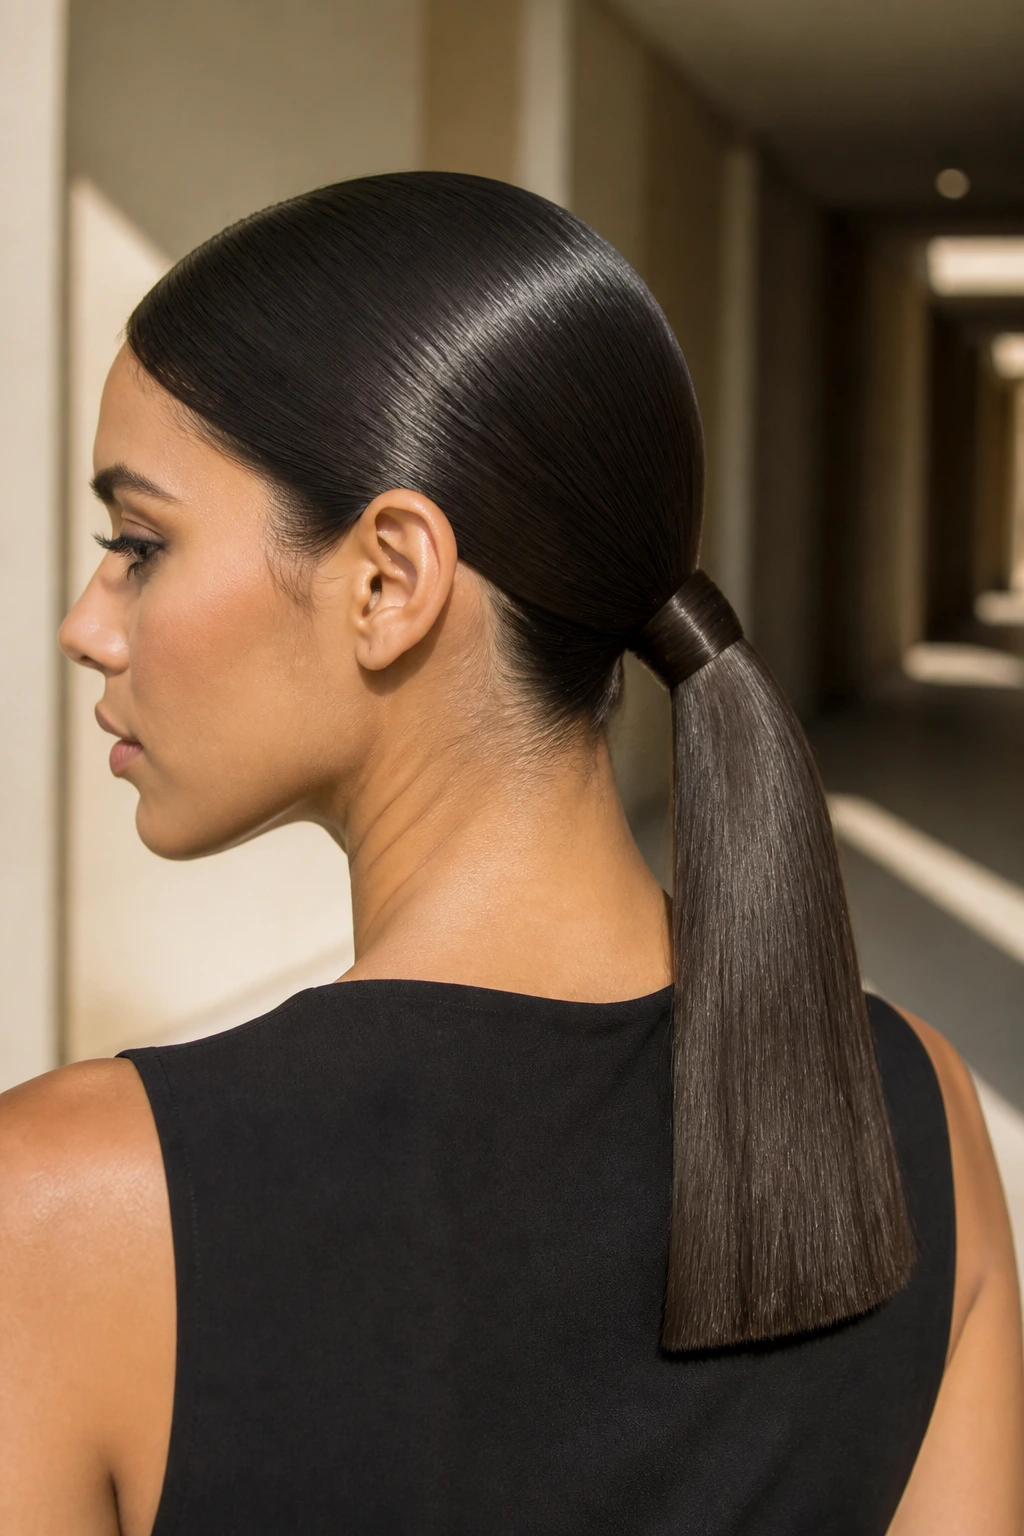
Straight ends make a low ponytail feel sharper. Compared with curled or bent ends, blunt tails read more tailored and a little more editorial. I reach for this look when the clothes are simple and the hair needs to do less talking, not more.
If your ends already fall straight, a light serum is usually enough. If they flip or puff, a flat iron on the last 2 inches will calm them down fast. The point is not to make every strand perfect. It is to keep the tail looking like a clean line instead of a bundle of separate hairs.
A blunt finish also makes a thin ponytail look fuller. The eye reads the edge first, not the density. That is the part people miss. They chase volume when what they actually need is shape.
Sharp collar. Sharp hair.
8. Low Ponytail with Face-Framing Tendrils
A few loose pieces can soften a severe ponytail fast. The trick is to keep the tendrils thin and placed with care. Thick face-framing strands can make the style look unfinished, while narrow pieces near the cheekbone or jawline keep it polished.
How to place them
Pull out two small sections, one on each side, before you secure the ponytail. Keep each piece about the width of a pencil. If you want a lifted look, cut the length at cheekbone level. For something softer, let it fall closer to the jaw. A 1-inch curling iron or flat iron bend adds movement without turning the front into curls.
What to skip
Skip the temptation to release half your front layers. That usually turns into frizz by lunch. A few controlled strands do the job better, especially when the rest of the ponytail is tight and smooth.
Thin pieces. That’s the rule.
9. Chignon-Inspired Folded Low Ponytail
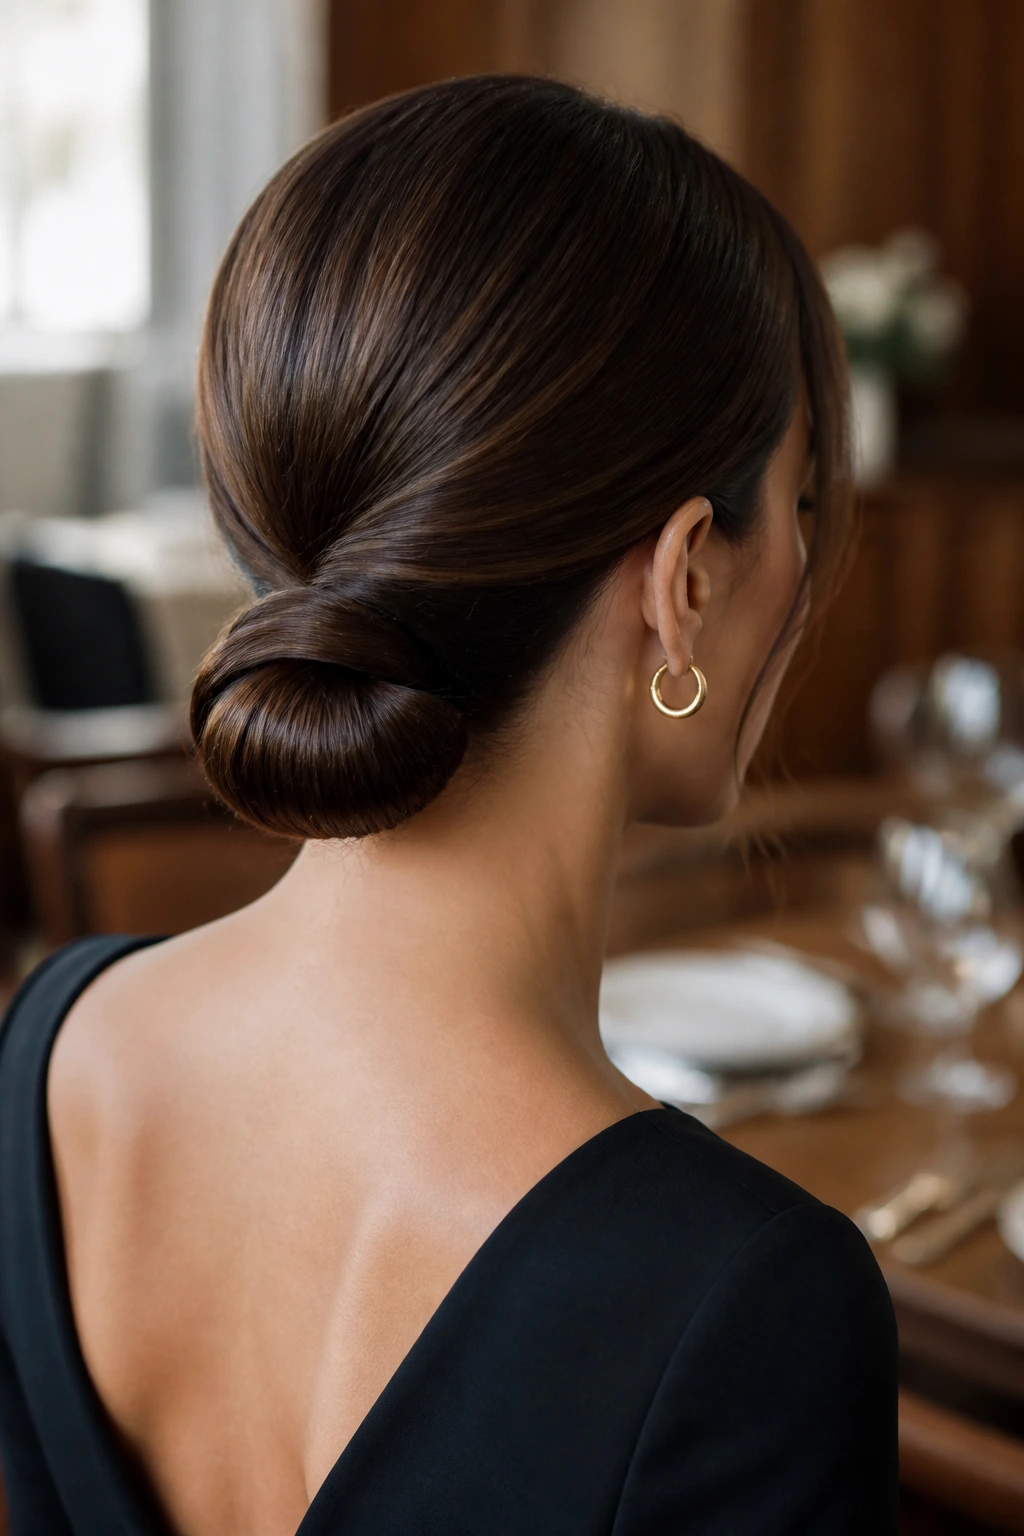
This one sits between a ponytail and a bun, which is why I like it so much. The tail gets folded back under itself, then pinned so the ends disappear into the base. You still have the shape of a ponytail, but the finish is neater and a little more formal.
How to keep the fold neat
Secure the ponytail low, then loop the tail upward once and tuck the ends under. Use 2 or 3 bobby pins hidden inside the fold, not poking out from the sides. If the hair is long, fold the tail twice so the end disappears cleanly. The shape should sit flat at the nape, with only a soft curve showing.
Where it shines
This is a smart pick for dinners, meetings, or any day when you want the neck area to stay open but the hair to look controlled. It also works nicely on medium-length hair that’s too short for a full bun but long enough to fold.
No loose ends. That’s the charm.
10. Low Ponytail with Scarf Tie
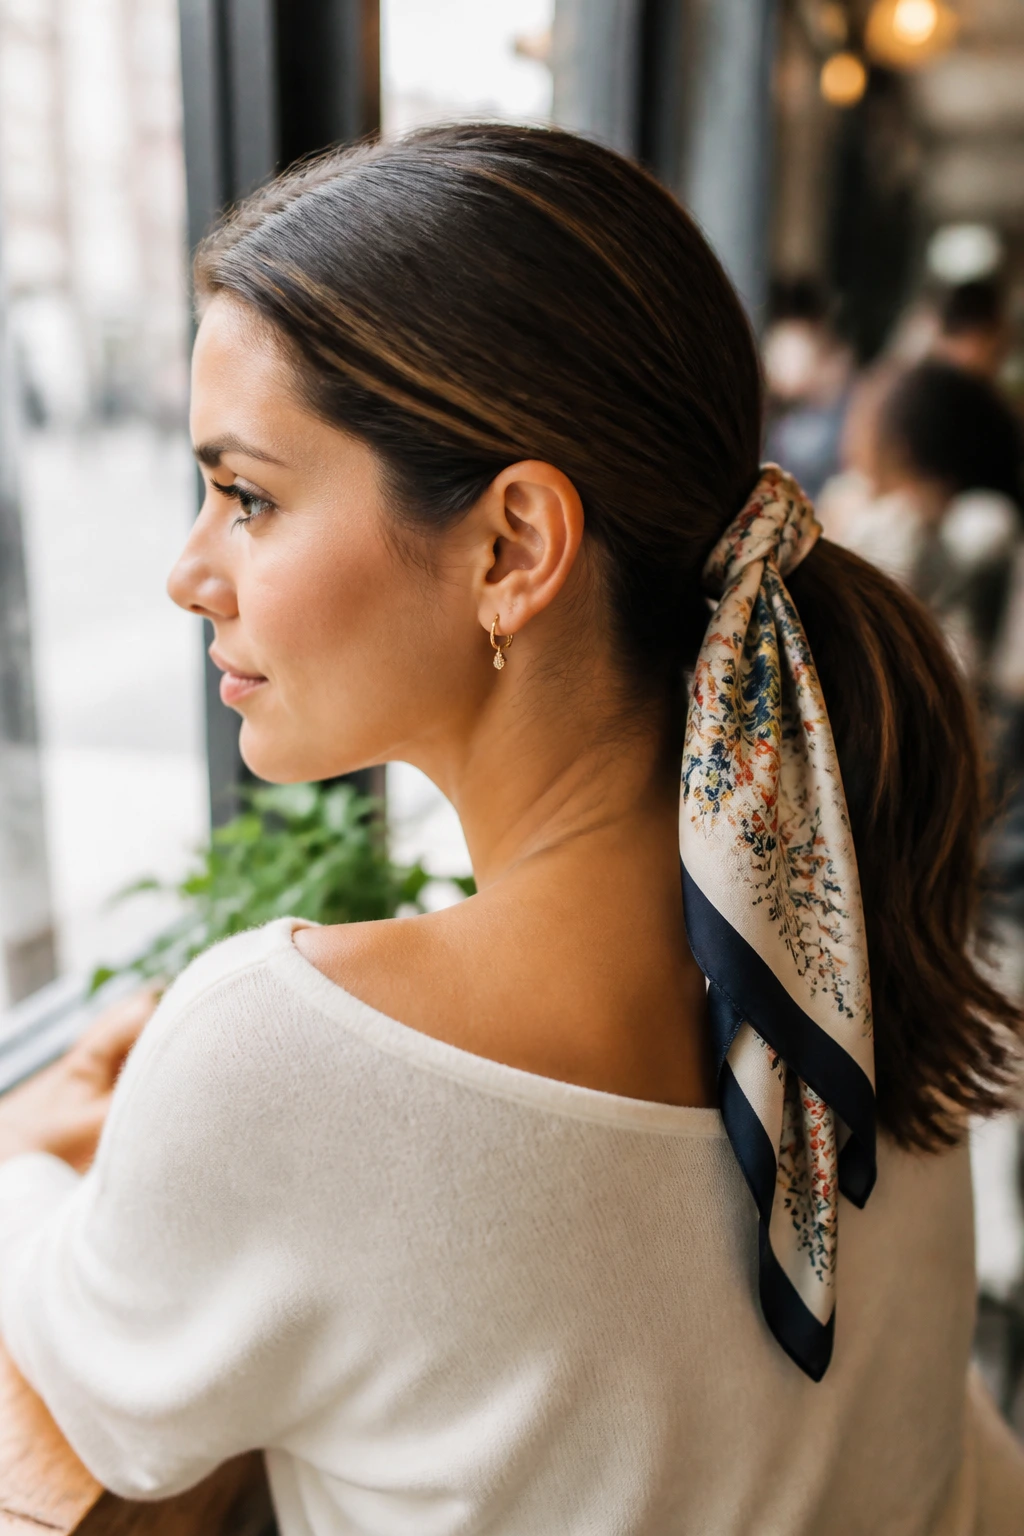
A silk scarf changes the mood of a low ponytail in one move. The hair can stay simple and smooth, and the scarf does the talking. I like this best when the rest of the outfit is plain, because the fabric brings in color and movement without making the style heavy.
Choosing the scarf
A square scarf folded into a 1 to 1.5-inch strip is easier to control than a wide piece of fabric. Tie it over the elastic, then knot it once or twice so the ends hang where you want them. A lighter scarf works best on fine hair. Thick hair can carry something a little broader without the knot sliding.
What to watch for
Keep the ponytail itself clean before adding the scarf. If the base is puffy, the fabric only draws attention to the mess. Also, avoid slippery knots that loosen after an hour. A double knot solves that problem fast.
One scarf. Whole different attitude.
11. Wet-Look Low Ponytail
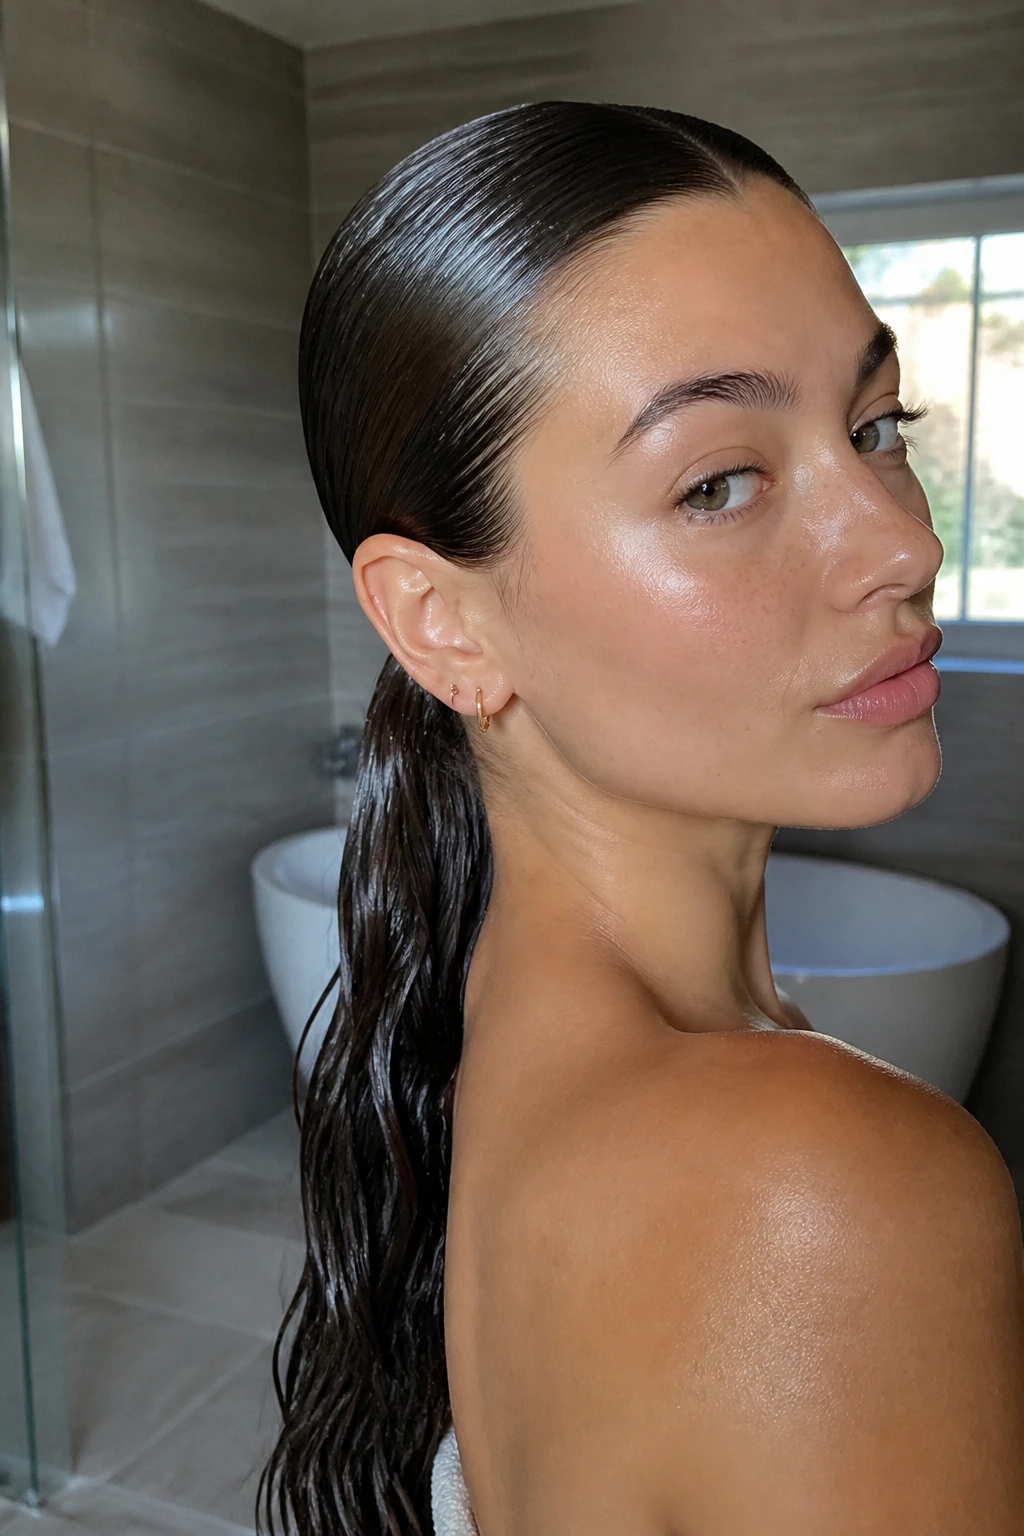
This is the sleekest version on the list, and also the riskiest. Wet-look hair exposes everything: product buildup, uneven parting, frizz at the edges, and any little patch that refuses to lie flat. When it works, though, it looks sharp in a way that dry hair can’t quite match.
Start with damp hair and work a firm gel through the roots and midlengths. Comb everything back with a tail comb until the surface lies smooth, then secure the ponytail low before the hair dries in the wrong shape. Do not keep touching it. That’s where the finish starts to break apart.
Not forgiving.
A little extra shine spray at the end helps the style read glossy instead of sticky, but don’t overdo it. If the hair gets too slick, it can start to separate into pieces. That’s not the look. The clean line is.
12. Rope-Braid Low Ponytail
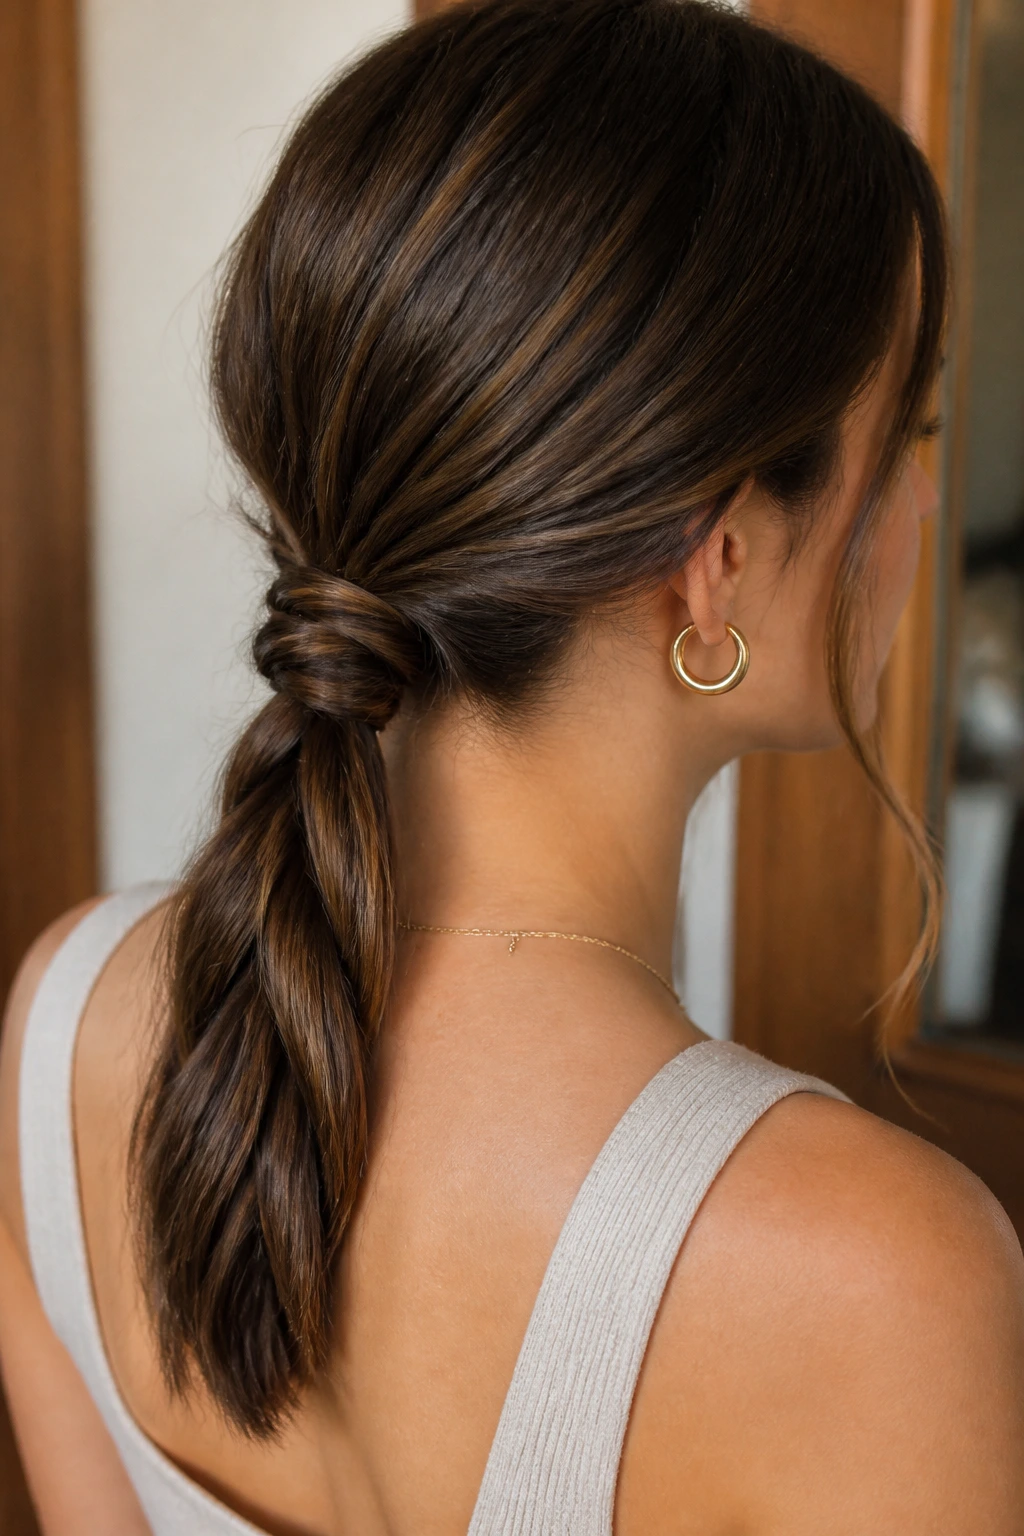
Compared with a regular three-strand braid, a rope braid looks smoother and tighter. It uses two sections twisted around each other, which keeps the surface glossy and the shape compact. On a low ponytail, that feels neat instead of fussy.
Why it stays neat longer
Because the twist pattern is simple, the braid holds its shape well through the day. It is a good choice for medium to long hair that tends to puff up in humidity or lose definition by lunchtime. The ends still need a small elastic, but the body of the braid stays tidy.
How to get a clean finish
Keep both sections the same size, twist in the same direction, then wrap them in the opposite direction. That sounds fussy, but after one or two tries it becomes muscle memory. A light smoothing cream on the lengths helps the twist look glossy, not dry.
Tighter than a braid. Cleaner than a twist.
13. Low Ponytail with Barrette Stack
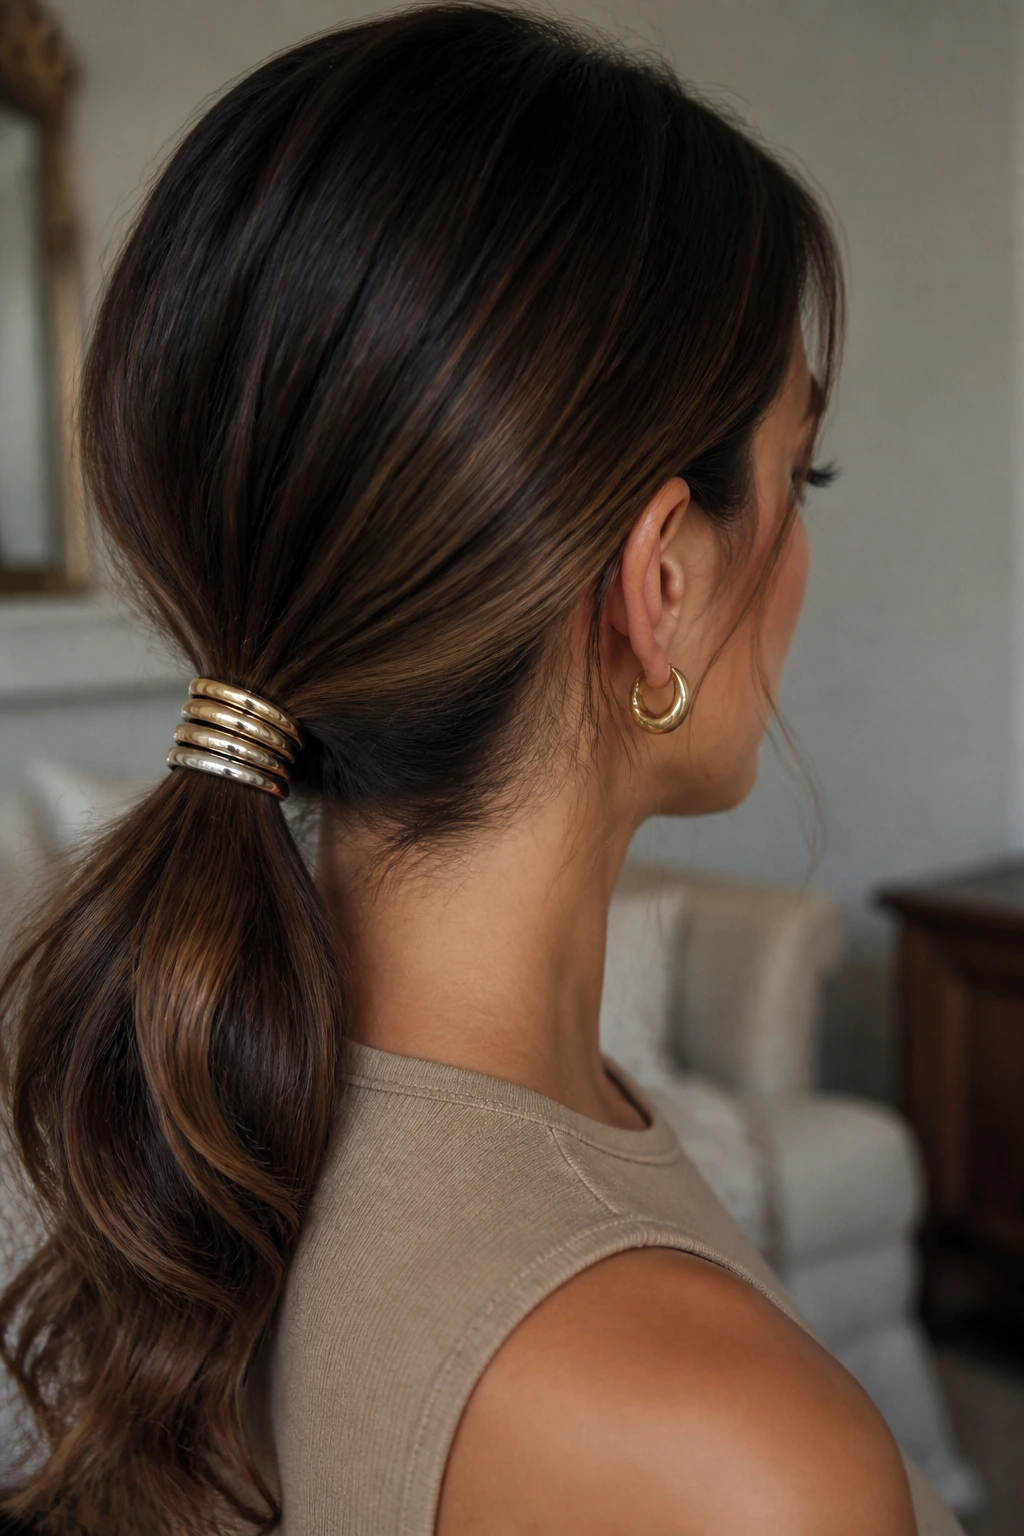
One barrette is polite. Three can look sharp. A stacked set of barrettes gives a low ponytail some personality without changing the shape of the hair itself, which is useful when you want decoration but not extra volume.
Place the first clip just above the elastic, then step the others up the side in a small line or cluster. Keep the spacing tight — about an inch apart — so the stack reads as a single detail instead of random pins. Mixing metals works if the pieces are small. If the barrettes are large, stick to one finish so the style doesn’t get noisy.
What works best
This style likes a very smooth base. The cleaner the ponytail, the better the clips look. A matte clip can soften a glossy ponytail, while a polished metal barrette makes the whole thing feel sharper.
Small hardware. Big effect.
14. Low Ponytail with Hidden Mini Braids
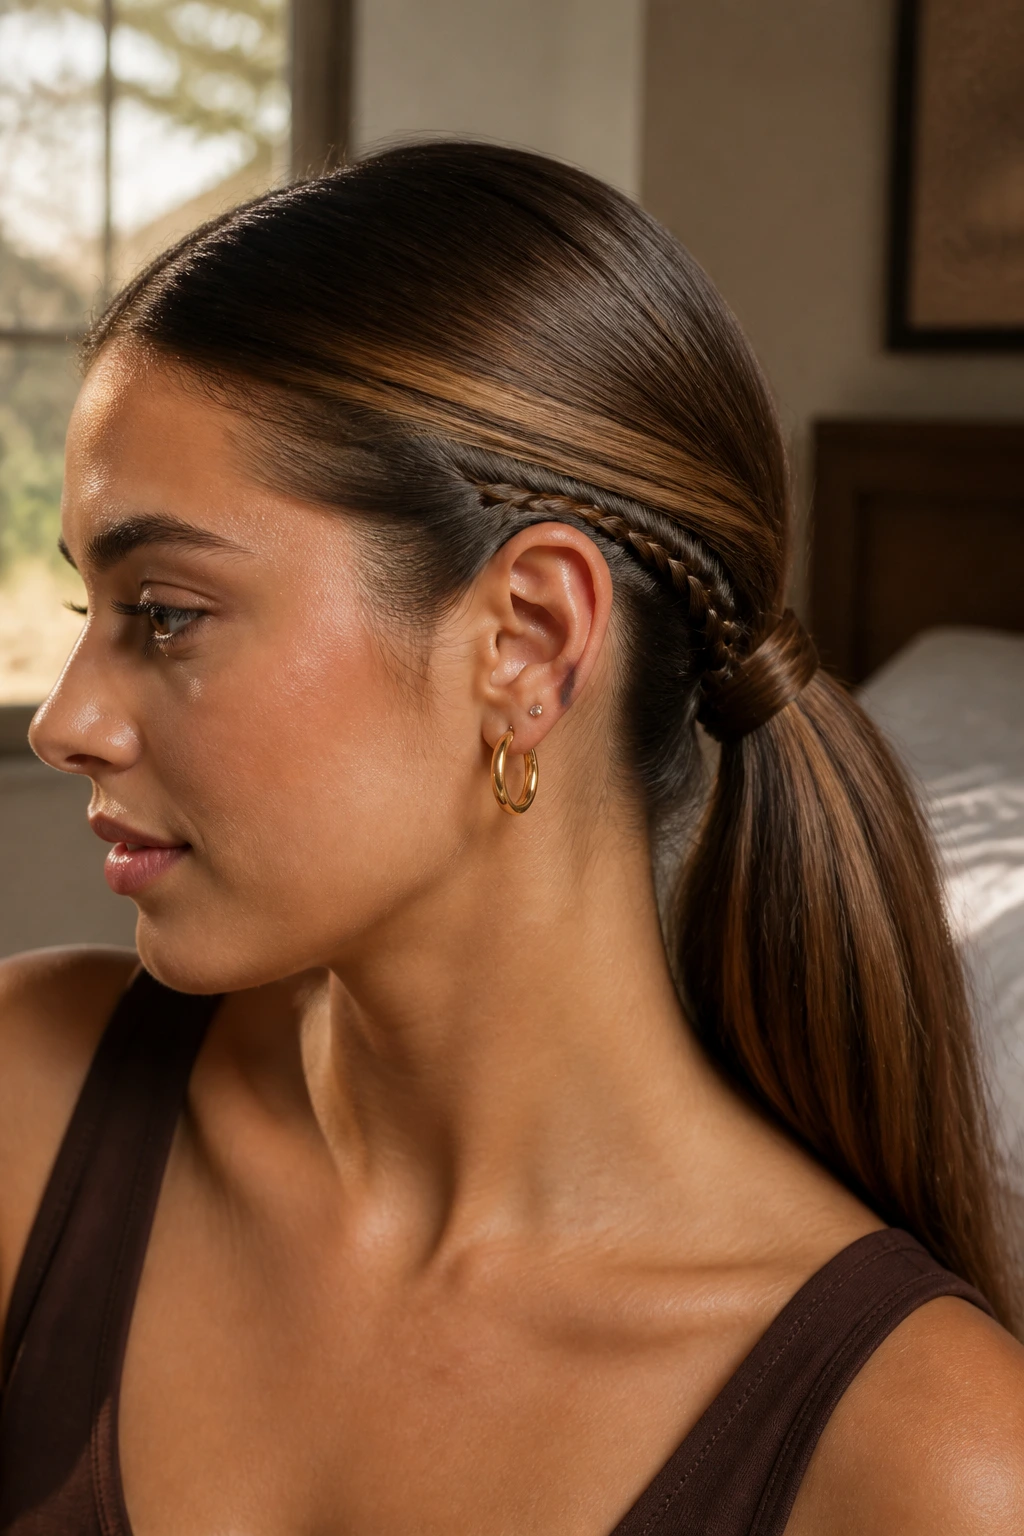
Some styles work because they reveal themselves slowly. Hidden mini braids do exactly that. They sit under the top layer of hair, so you only catch them when the ponytail moves or when the light hits from the side.
Take two tiny sections from behind each ear, braid them tightly, and blend them into the ponytail before securing the elastic. Keep the braids slim enough that they don’t change the shape of the base. They should feel like a secret detail, not the main event. On textured hair, the braids also help with grip, which is a nice side benefit.
I like this look when the ponytail needs a little texture but I still want the crown smooth. It gives the style depth without breaking the sleek line. Tiny braids. Hidden in plain sight.
15. Curved Nape Low Ponytail
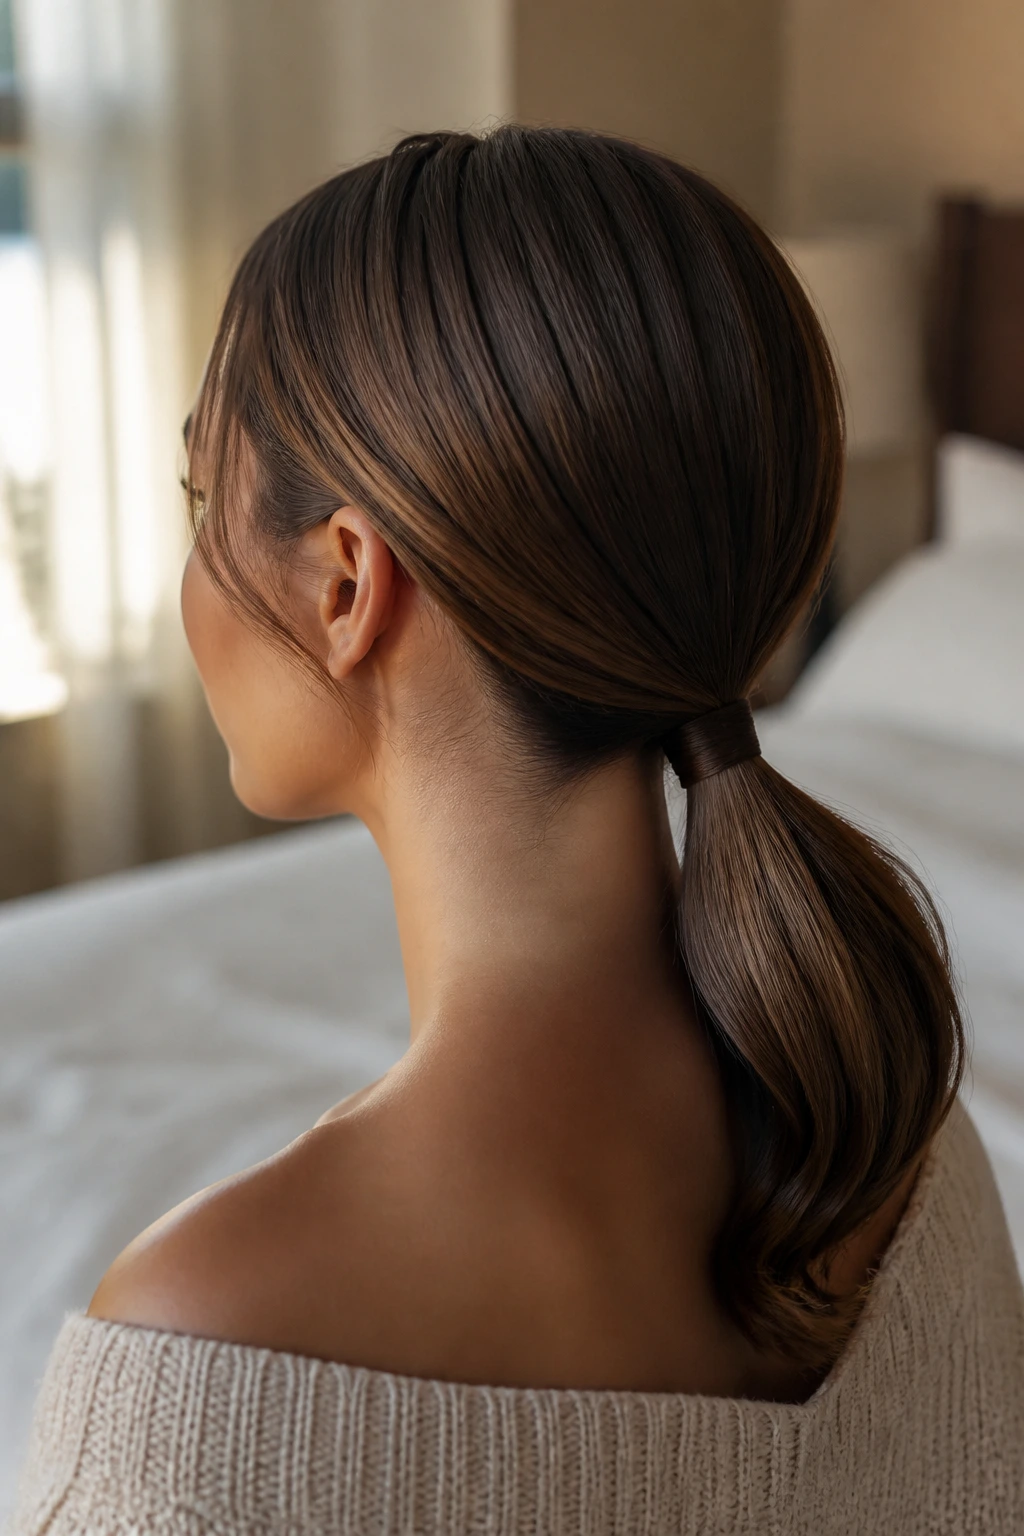
Why does this style look softer than a straight-back ponytail? Because the line follows the natural curve of the neck instead of fighting it. That small adjustment changes the whole silhouette and makes the ponytail feel more relaxed while staying neat.
Mapping the curve
Instead of gathering the hair dead center, sweep it slightly along the shape of the head and let the base sit where the nape starts to narrow. The ponytail should lie close to the curve, not pulled straight back like an arrow. That matters most in profile, where the shape reads immediately.
Who should try it
This is a good pick if a straight-back ponytail feels too severe or if your jawline already has a strong shape and you want something softer. It also works well with side-swept front pieces. The curve gives the style a gentle line without making it casual.
Small shift. Softer finish.
16. Low Ponytail with Volume at Crown

A little lift at the crown stops a low ponytail from looking flat. Not a lot. Just enough to keep the top from sitting like a helmet. Too much teasing makes the style feel dated fast, so this one is about restraint.
Backcomb a 2-inch strip at the crown, then smooth the top layer over it with a brush. A little dry shampoo at the roots gives the hair grip if it slips. After that, gather the ponytail low and keep the tension even all the way around the head. If the crown is smooth and the tail is clean, the slight lift looks intentional rather than puffy.
Best use case
This version is useful when the face needs a little height or when the hair has gone flat from being tucked behind the ears all day. It also pairs well with sharp parts and simple earrings. The lift gives the style shape. That’s the whole job.
17. Double Elastic Power Ponytail
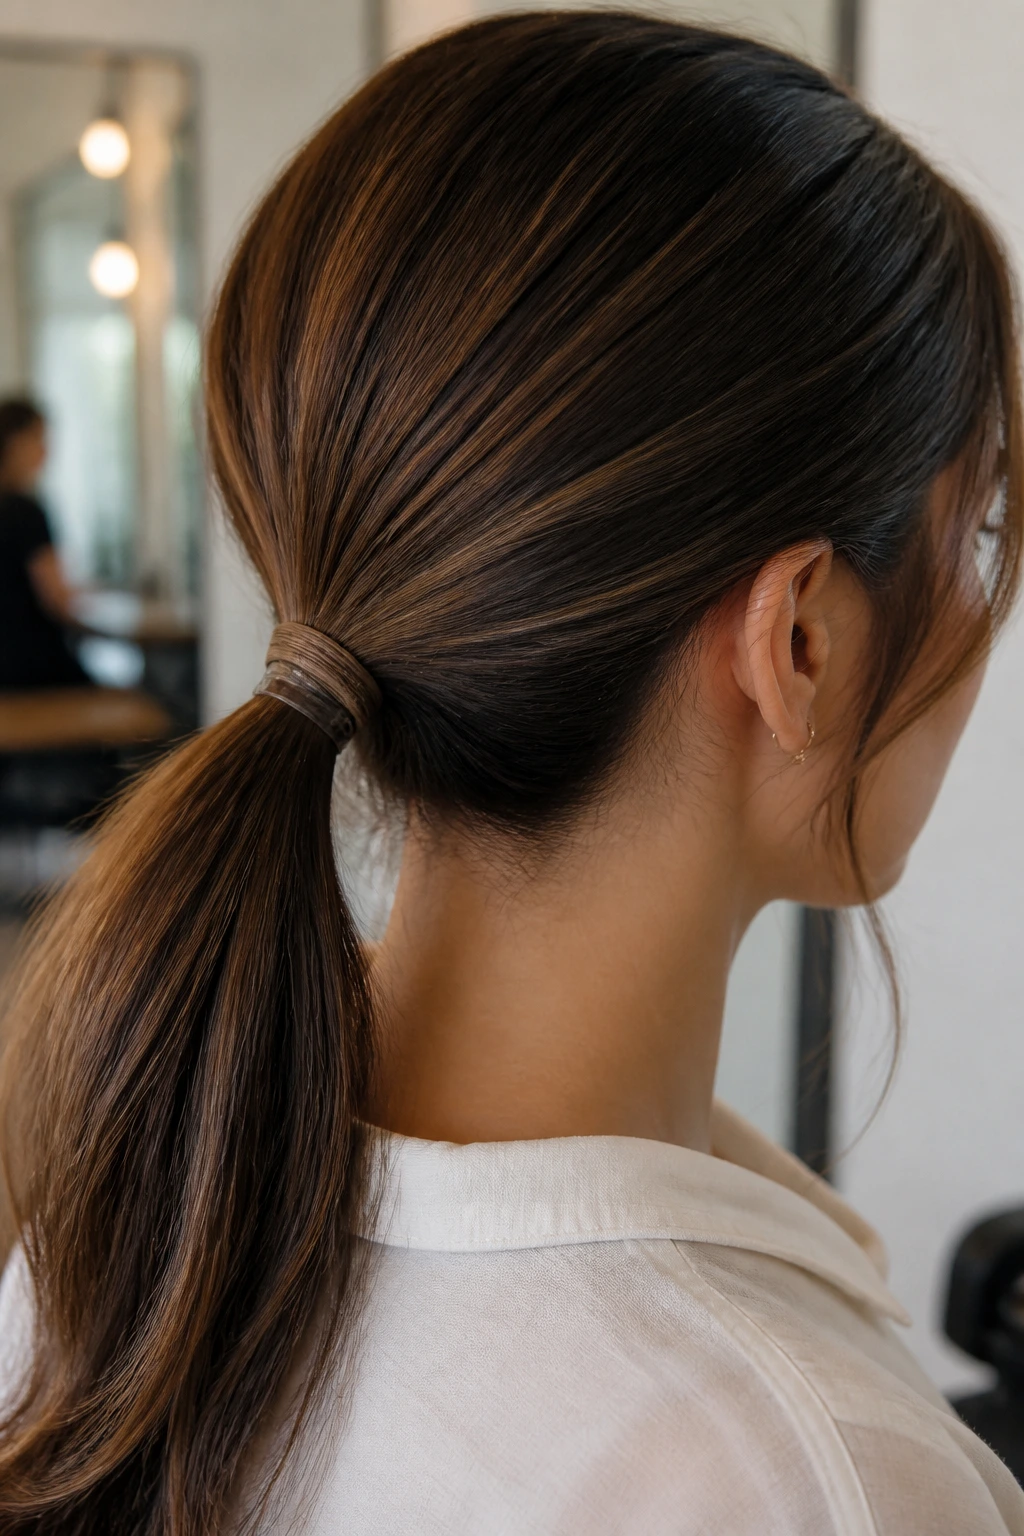
Two elastics handle weight better than one. If your hair is thick, long, or heavy with product, a single tie can sag by the end of the day. A second elastic placed just below the first helps support the tail and keeps the base from slipping.
Why two beats one
The first elastic sets the position of the ponytail. The second one carries some of the weight so the shape doesn’t drop. I like to use a clear elastic underneath and a hair-colored one on top if I want the base to disappear a little more.
How to place them
Secure the first elastic low and snug. Then place the second band about 1 inch below it, or right where the tail starts to pull downward. Keep both ties firm but not painfully tight. If the scalp feels sore, the ponytail is too tense and will probably loosen in odd places later.
A practical fix. Nothing fancy.
18. Knotted Low Ponytail
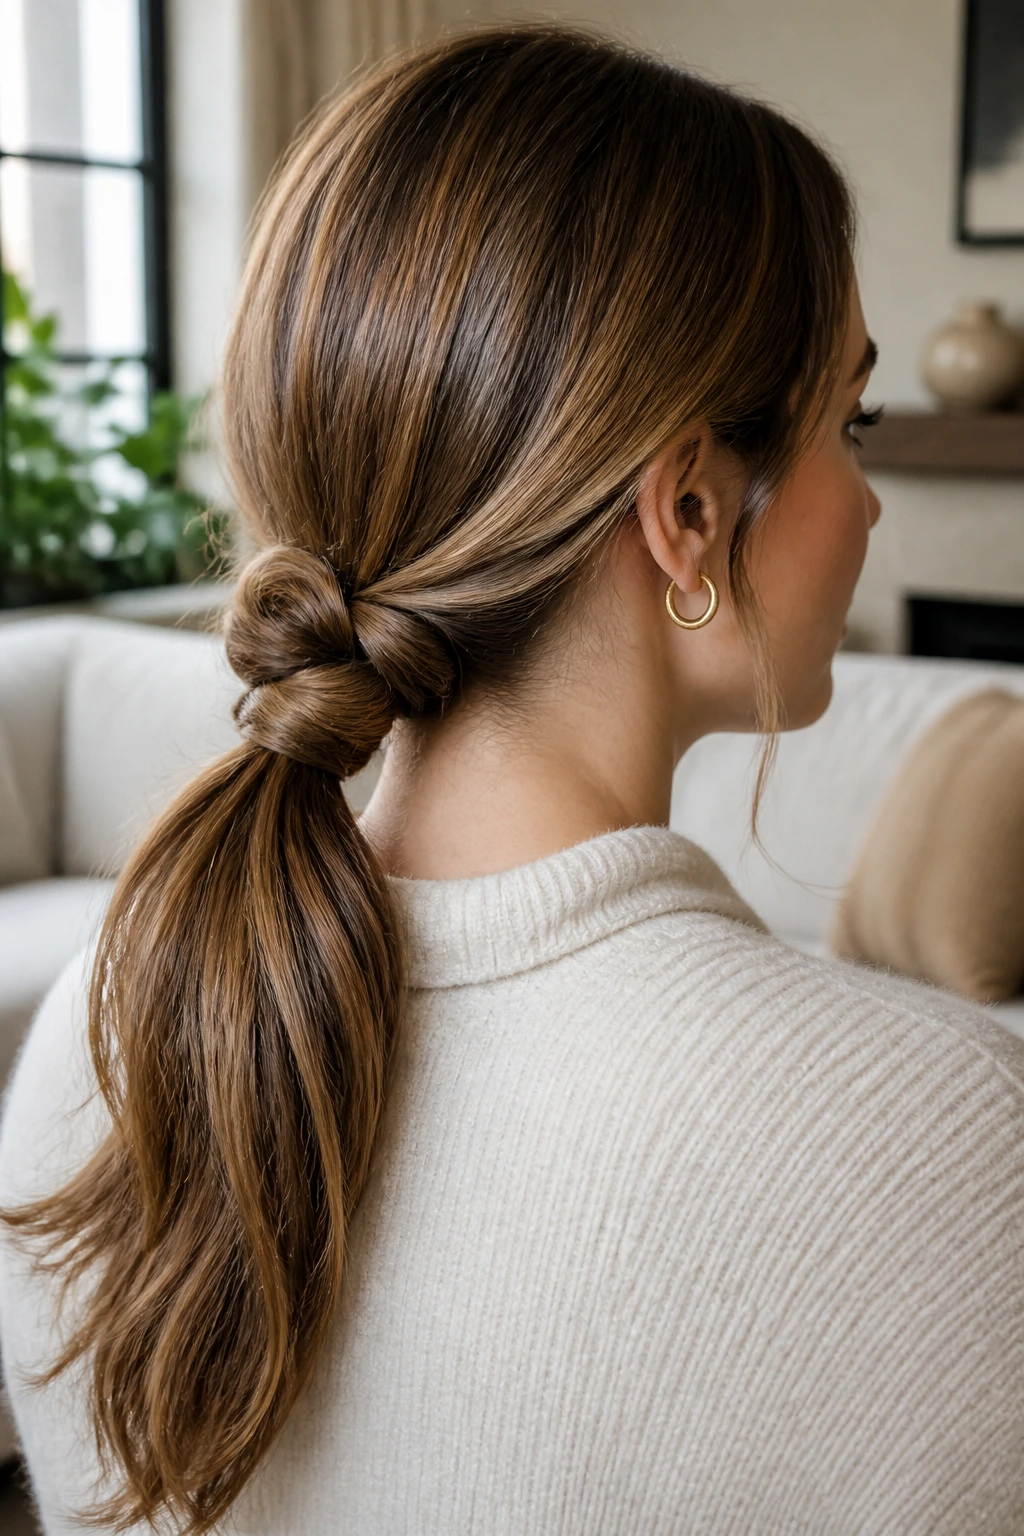
This one looks more complicated than it is. A knotted low ponytail uses the hair itself to create a soft knot over the base, which gives the style some shape without needing extra accessories. The finish feels a little unexpected, but still clean.
Take two side sections, bring them behind the ponytail, and tie a loose knot right above the elastic. Secure the knot with pins underneath so it sits flat. If the hair is very silky, mist the sections with texture spray first. Otherwise the knot can slide apart faster than you’d like.
The part people miss
The knot should look soft, not tight. If you yank it too hard, the whole thing starts to bulge and the shape gets awkward. Keep the tension even and the knot low. That way it feels like part of the ponytail instead of a separate ornament.
Soft knot. Clean base.
19. Low Ponytail with Soft Wave Ends
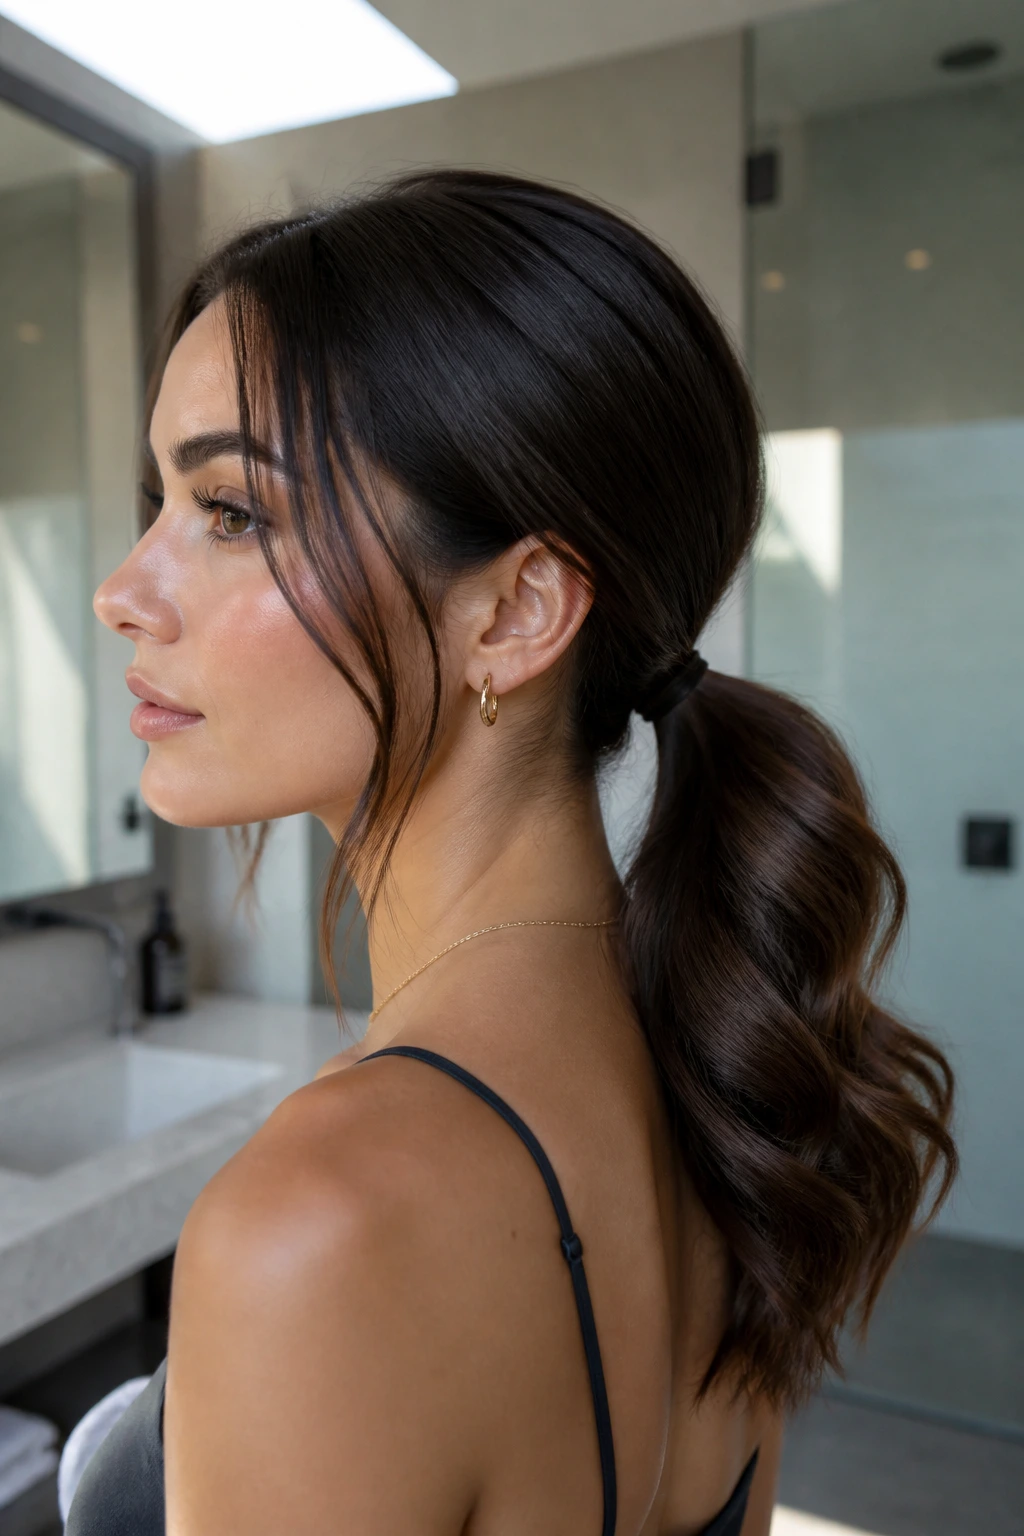
Sleek roots and soft wave ends can live in the same ponytail. In fact, that contrast is what makes the style work. The top stays smooth and controlled, while the tail has enough bend to feel lived-in instead of severe.
Use a flat iron or 1.25-inch curling iron on the bottom half of the ponytail, turning only the last few inches into a loose curve. You’re not building curls here. You’re just giving the ends a small S-shape or bend so they don’t hang like a rope. If your hair is naturally straight, that little move changes everything.
This version is a nice compromise for people who like sleek hair but don’t love a sharp finish. It also softens blunt cuts and long layers. Tiny bend. Much better balance.
20. Accessorized Pearl Ponytail
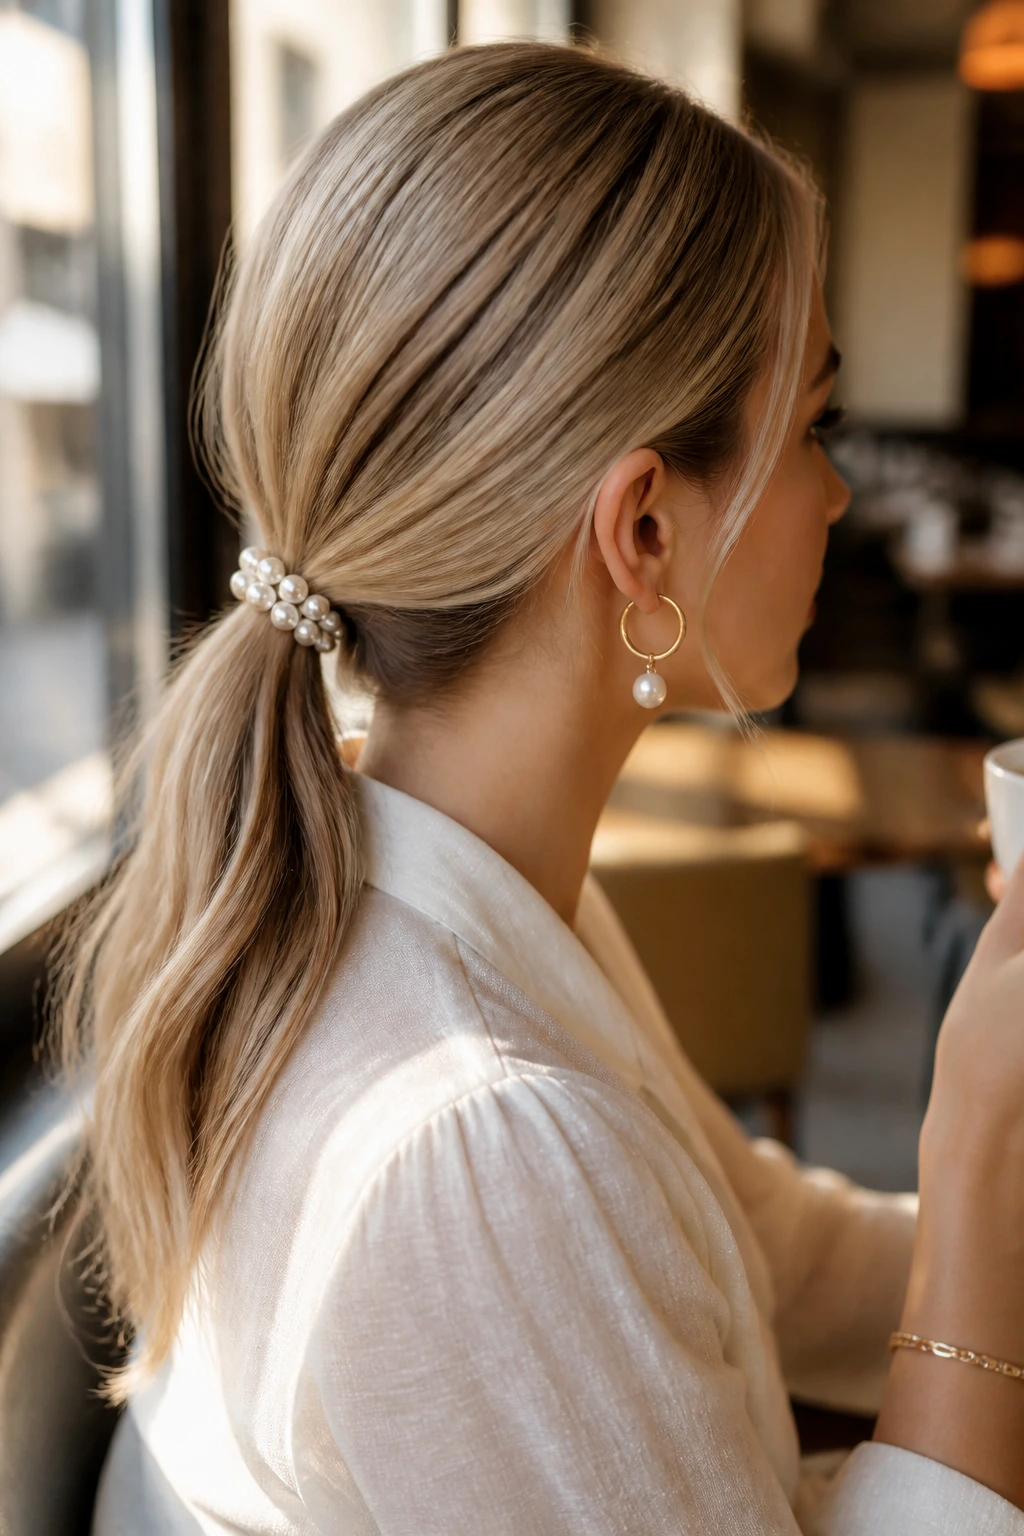
Pearl accents can go wrong fast if there are too many of them. One cluster, though, can make a low ponytail look refined instead of plain. The key is to keep the base smooth and let the accessory do its work without crowding the shape.
Where to place the pearls
A small pearl comb at one side of the base, or a line of tiny pearl pins above the elastic, usually looks cleaner than a heavy cluster. Keep the pearls close together so they read as one detail. If the ponytail already has a wrapped base, the pearls should sit slightly above it, not buried under the wrap.
What to skip
Skip oversized beads unless the rest of the style is minimal. Big ornaments can overwhelm a low ponytail fast. Smaller pieces are easier to wear and less likely to tilt during the day.
One accent. That’s enough.
21. Low Ponytail with Side Sweep
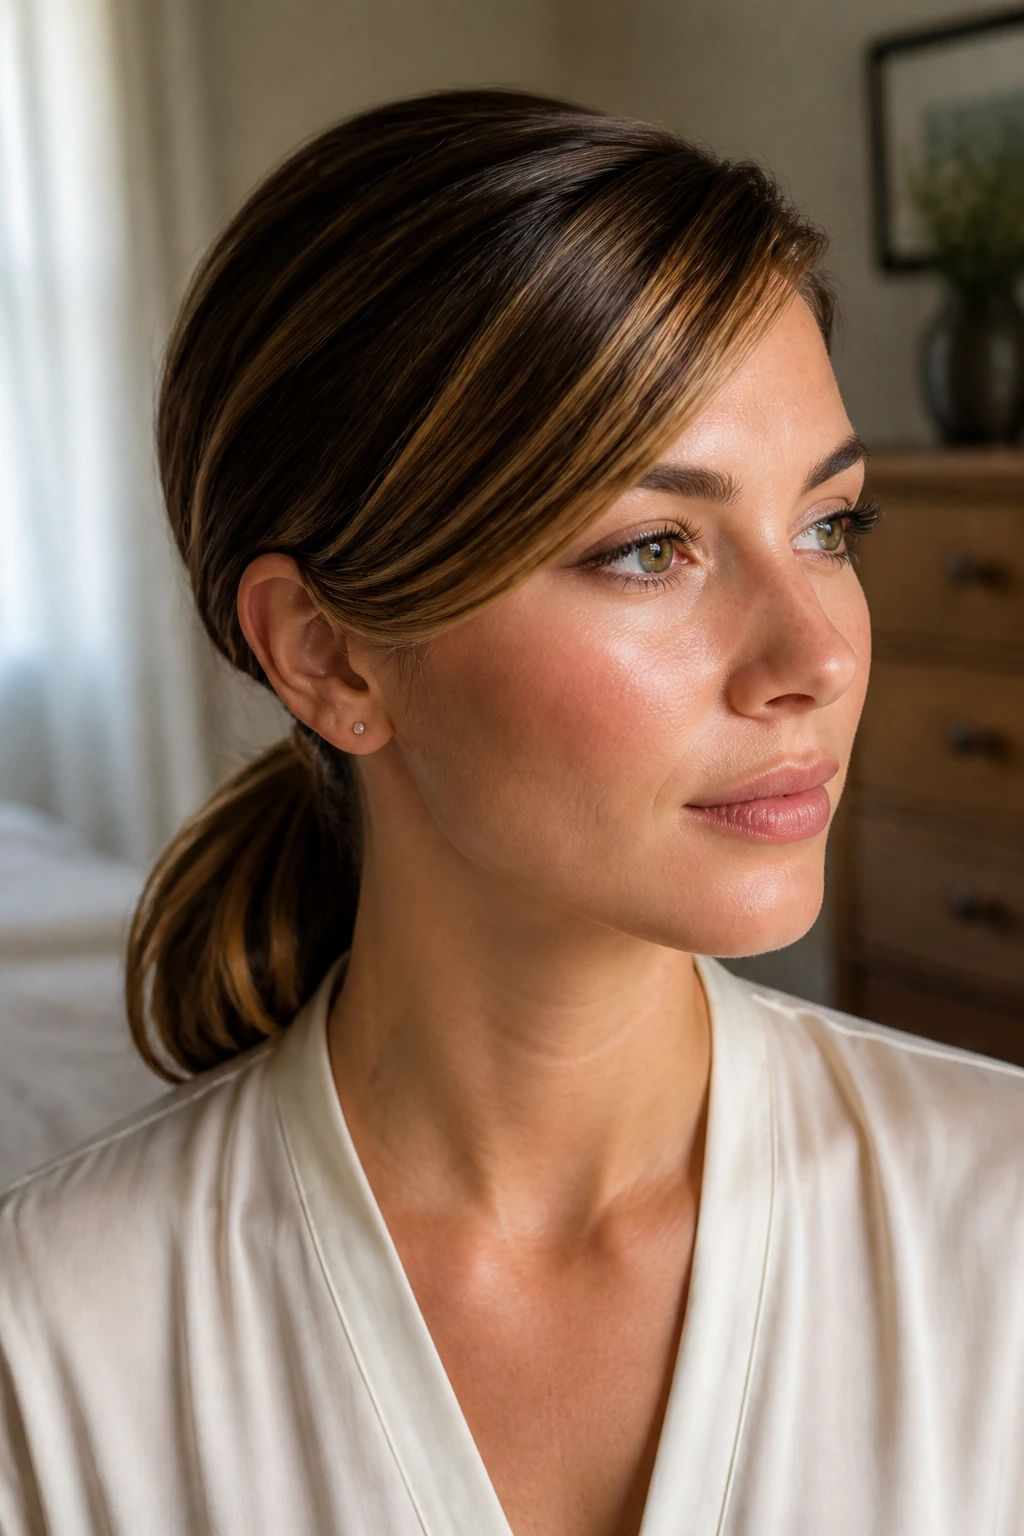
A side sweep solves a lot of hairline problems. It softens a strong part, hides uneven growth at the front, and gives a low ponytail a graceful diagonal shape that feels less strict than a center part.
Sweep a broad front section across the forehead, then tuck it behind the opposite ear or feed it into the base of the ponytail. Keep the sweep smooth and wide; skinny pieces tend to separate and look accidental. If the hairline has cowlicks, a light mist of styling spray on the brush helps the sweep stay in place without getting stiff.
This is one of those styles that looks best from the side. The front still matters, but the angle is what makes it work. It’s a nice choice when you want sleek hair with a little movement around the face.
22. Tucked-In Low Ponytail
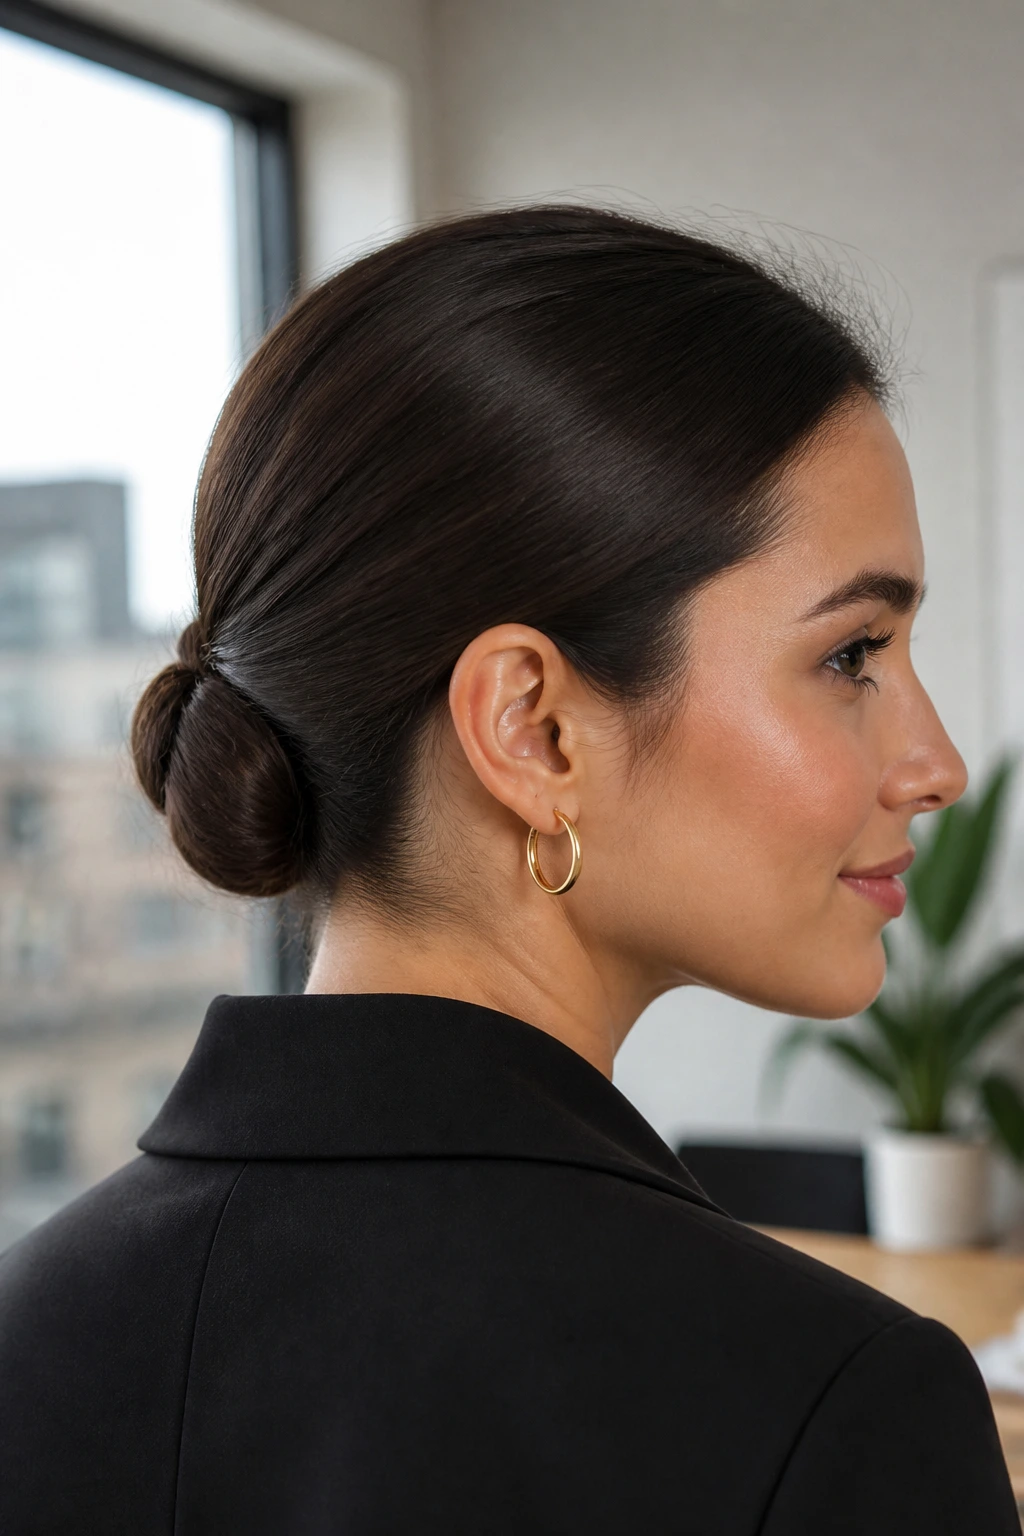
When you want the ponytail to disappear a little, tuck the ends under and pin them in place. The result sits somewhere between a ponytail and a low roll, with none of the loose tail hanging down. It’s neat, compact, and very good at making hair look controlled.
How to keep it from springing open
Secure the ponytail low, fold the length upward or inward, and pin the ends underneath with 2 or 3 bobby pins. If the hair is long, fold it twice so the tail stays hidden. A light spray of flexible hold before pinning helps the shape stay put without making it hard or crunchy.
When to wear it
This version works well with tailored jackets, simple dresses, or any outfit that already has a strong line. It keeps the neck area open and the silhouette tidy. If you want the cleanest possible finish, this is one of the strongest options on the list.
No tail showing. Very neat.
Final Thoughts
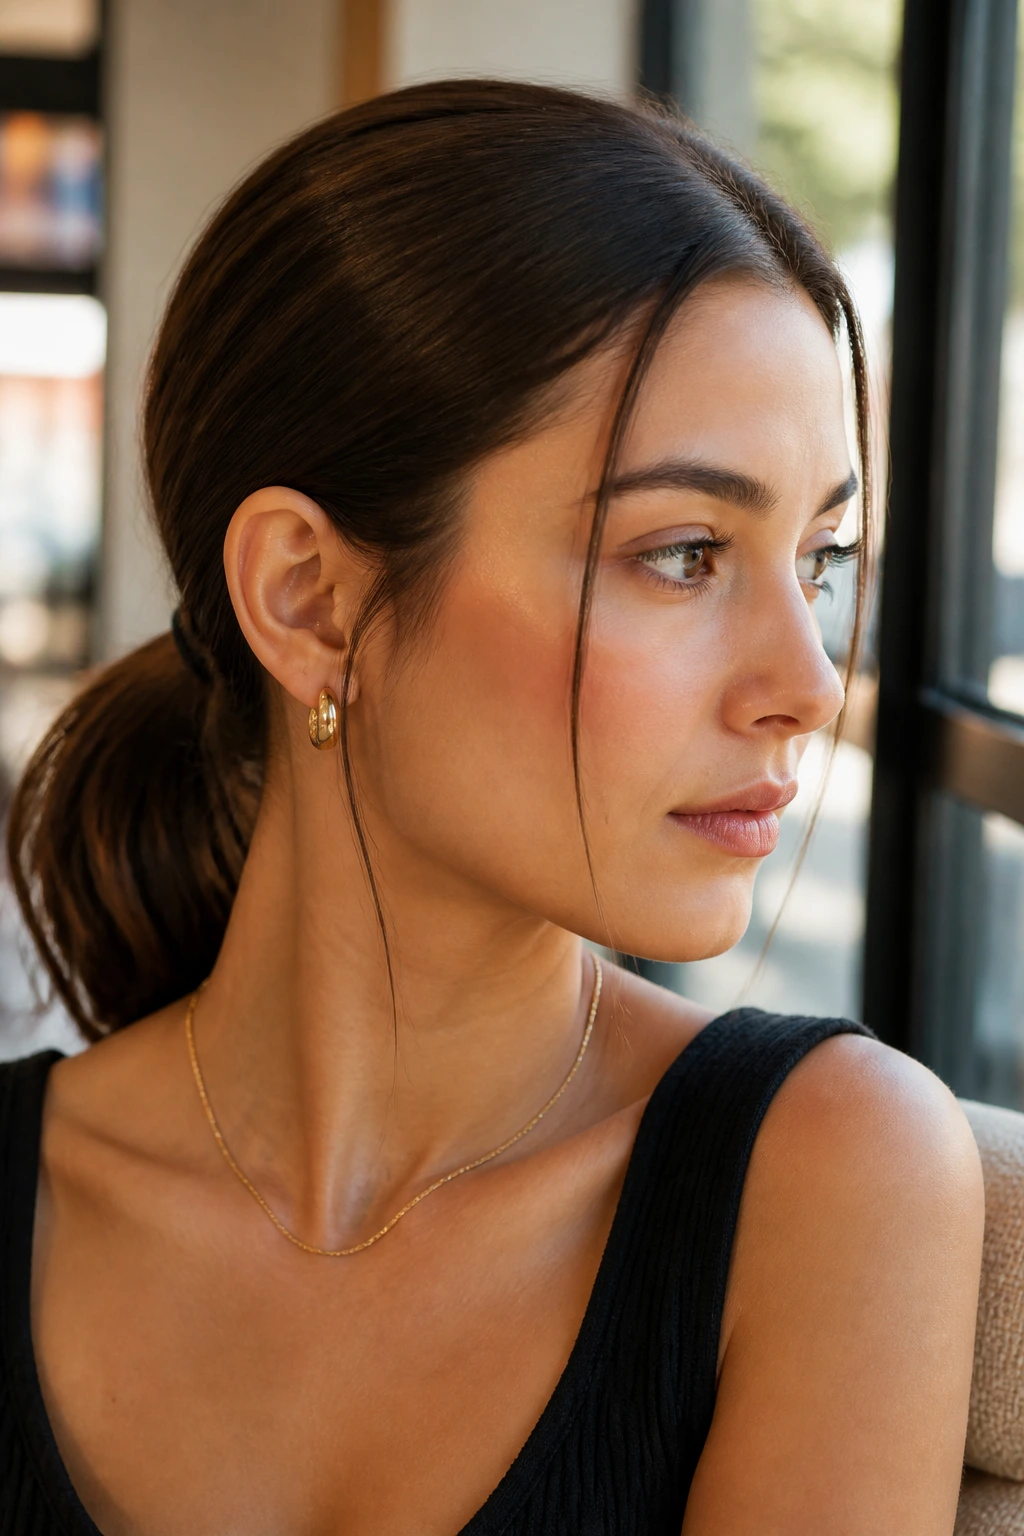
A low ponytail does not need much to look good. It needs a clean base, a shape that matches the way your hair naturally falls, and one finishing move that gives it purpose — a wrap, a braid, a fold, a scarf, something.
If your hair is fine, the wrapped-elastic and double-elastic versions hold up well. If it’s thick, the curved nape and tucked-in styles keep the shape from getting bulky. And if you want the sharpest read possible, the glass-hair center part still does the heavy lifting.
The nicest thing about these low ponytail hairstyles is how flexible they are once you know the shape. Smooth the top. Decide what the tail should do. Stop before the hair starts to look handled. That last bit matters more than people admit.
