



Long hair is where bohemian braid hairstyles for long hair look most at home. The length gives you room for loose ends, skinny accents, face-framing pieces, and the little bits that fall out on purpose instead of by accident. That looseness matters. A braid on long hair can go from soft and relaxed to stiff and overworked in about thirty seconds, and the difference usually comes down to how tightly you start at the roots.
Freshly washed hair can be slippery. Day-old hair, a light mist of texturizing spray, or even a little dry shampoo at the crown gives the braid something to hold onto without turning it crunchy. That is the sweet spot for boho hair: structure at the base, movement everywhere else.
The styles that age best are the ones that keep their shape while still looking a little undone. A good bohemian braid does not fight your hair’s natural texture; it uses it. Waves, bends, flyaways, and layered ends all help, as long as you keep the anchor points tidy and the rest soft.
Some of these looks are fast. Some need a tail comb, a mirror, and a few spare bobby pins. Start with the one that fits your texture and the time you’ve got, then work your way toward the fancier ones once your hands know what they’re doing. The first one is a good place to begin.
1. Loose Fishtail Half-Up Braid
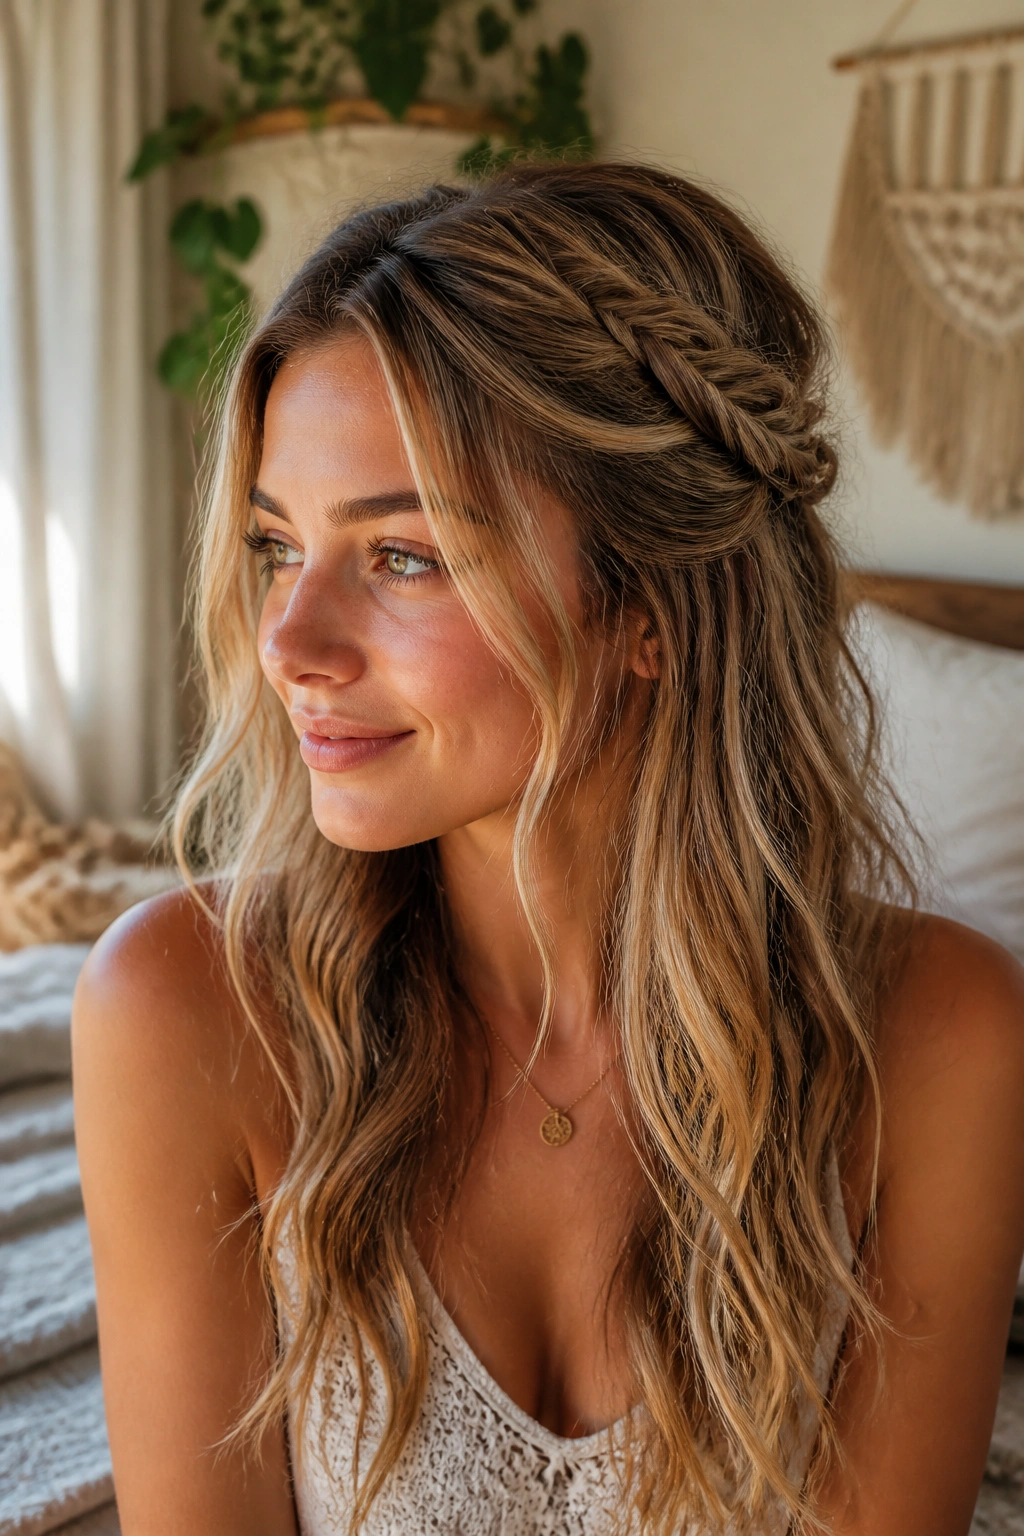
A loose fishtail half-up braid is one of those styles that looks far more intricate than it is. The fishtail pattern gives long hair a slim, woven look, and the half-up shape keeps the length visible instead of burying it under a full crown of braid. It has that easy, lived-in feel people want from boho hair.
Why It Flatters Long Hair
Long hair shows off the fishtail pattern better than shoulder-length hair does. The strands have enough length to make the weave visible, and the ends can fall over the back in soft waves instead of sticking out like a stubby tail. That’s the difference between cute and clunky.
For the cleanest finish, start the braid just above the ears and keep the crown a little loose. Do not pull the top too tight unless you want a flat, severe look. If the braid feels too skinny, gently pancake it by tugging the outer edges after you finish.
- Works well on wavy or slightly bent hair
- Looks good with a small center part or a soft off-center part
- Needs only 1 clear elastic and 2 to 4 pins
- Pairs well with loose curls at the bottom half
Pro tip: Wrap a tiny strand of hair around the elastic at the back. It hides the tie and makes the whole thing look more finished.
2. Crown Braid with Loose Waves
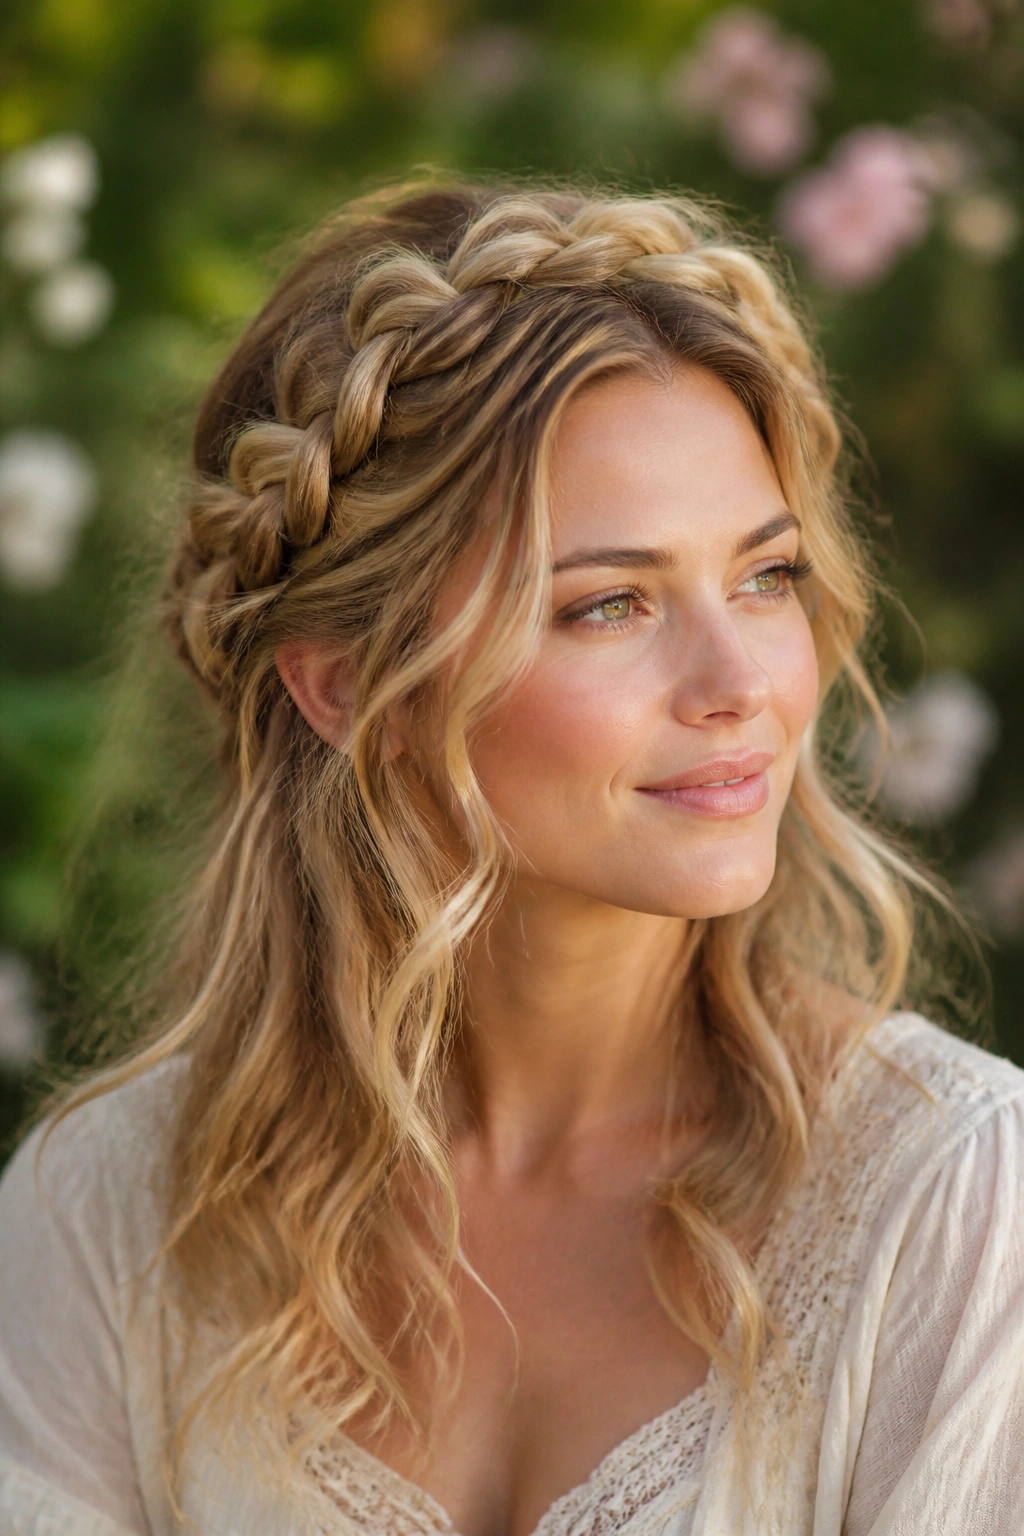
A crown braid can go formal fast, but the bohemian version stays soft because the braid is never treated like a helmet. It sits around the head with a little lift, and the rest of the hair is left in loose waves that move when you walk. That contrast is the whole trick.
You want the braid to trace the hairline, then tuck or pin it behind the ears with a few hidden bobby pins. Keep the braid slightly wider than you think you should. A narrow crown braid can look neat, but it often loses the relaxed feel that makes this style work in the first place.
Leave a few wisps near the temples. Let them do their job.
If your hair is very layered, curl the loose ends with a 1-inch iron first, then brush them out once they cool. That gives the braid something to sit against. On thick hair, a bit of texturizing spray at the roots helps the braid stay put without needing a pile of pins.
3. Waterfall Braid
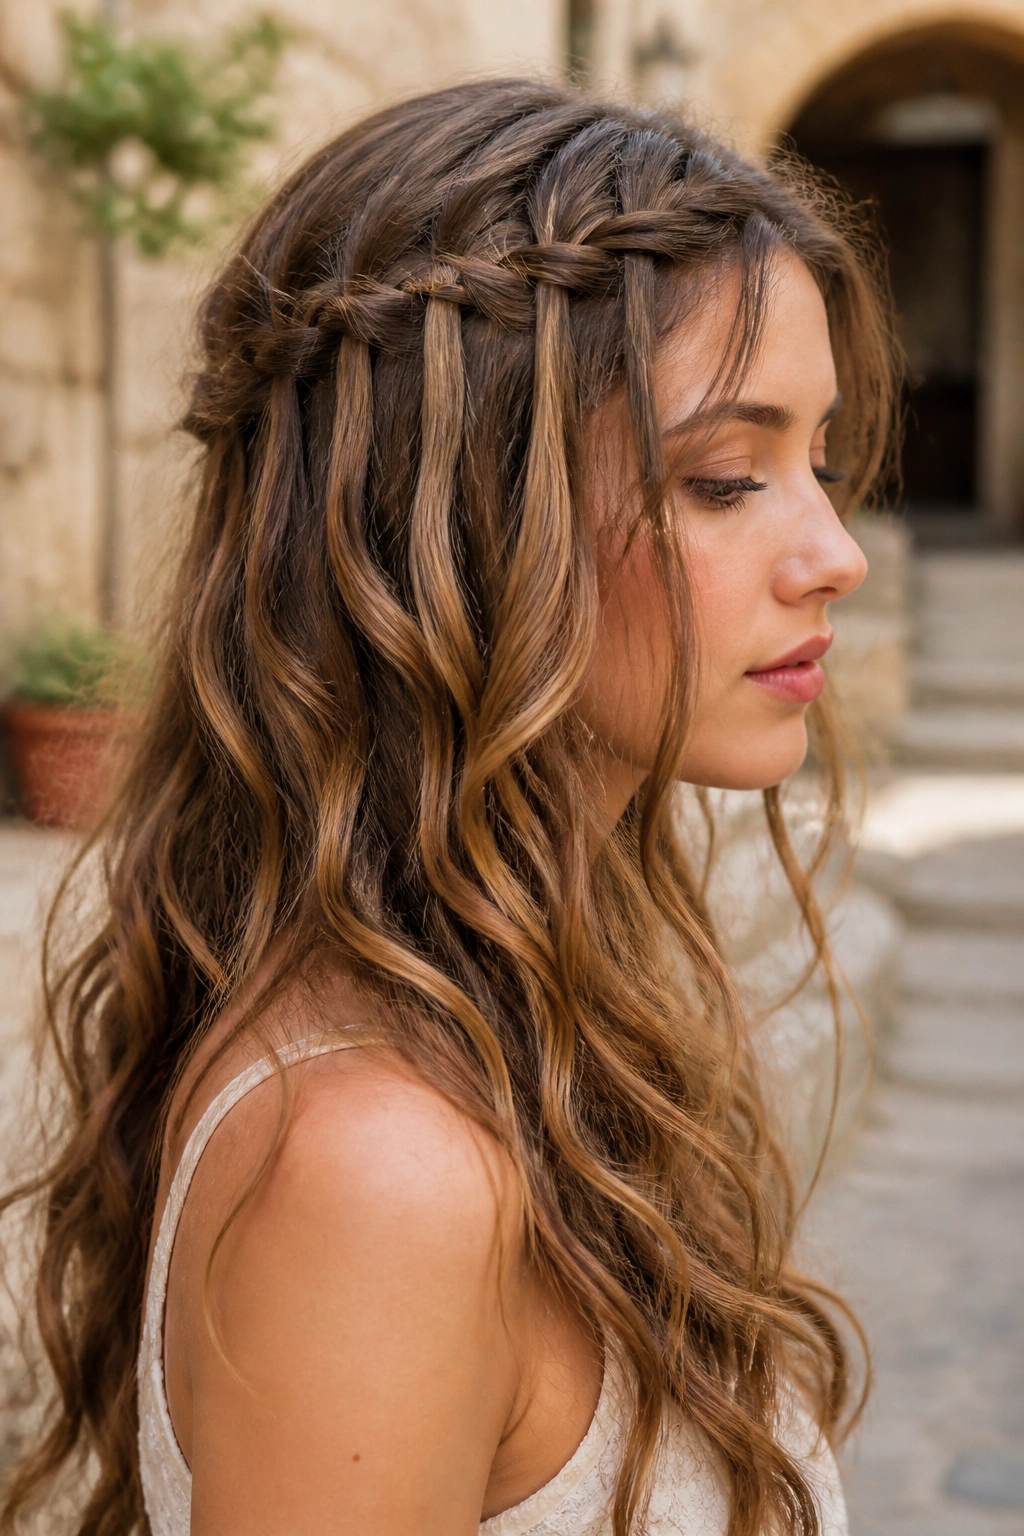
Why does the waterfall braid keep showing up in romantic hair photos? Because it leaves part of the hair free. That little drop of strands running through the braid gives the style movement, which is exactly what bohemian braid hairstyles are supposed to have.
The braid works best when the hair is smooth enough for the sections to separate cleanly, but not so silky that everything slips out. If your hair is freshly washed, a light mist of texture spray helps. If it has a natural wave, even better. The braid will look softer, and the hanging pieces will blend into the rest of the hair instead of feeling like an afterthought.
How to Keep the Drops Even
Take your time with the first few passes. Once the spacing gets sloppy, the whole line looks messy in a bad way. Keep each dropped piece about the same size, and always pick up a fresh section from the top when you cross over. That rhythm matters more than speed.
A waterfall braid looks especially nice with loose curls underneath, since the dropped strands blend into the curl pattern. If you’re doing it for a wedding, add one small pearl pin near the end. If you’re doing it for a weekend, skip the extras and let the braid speak for itself.
4. Side-Swept Boho Braid
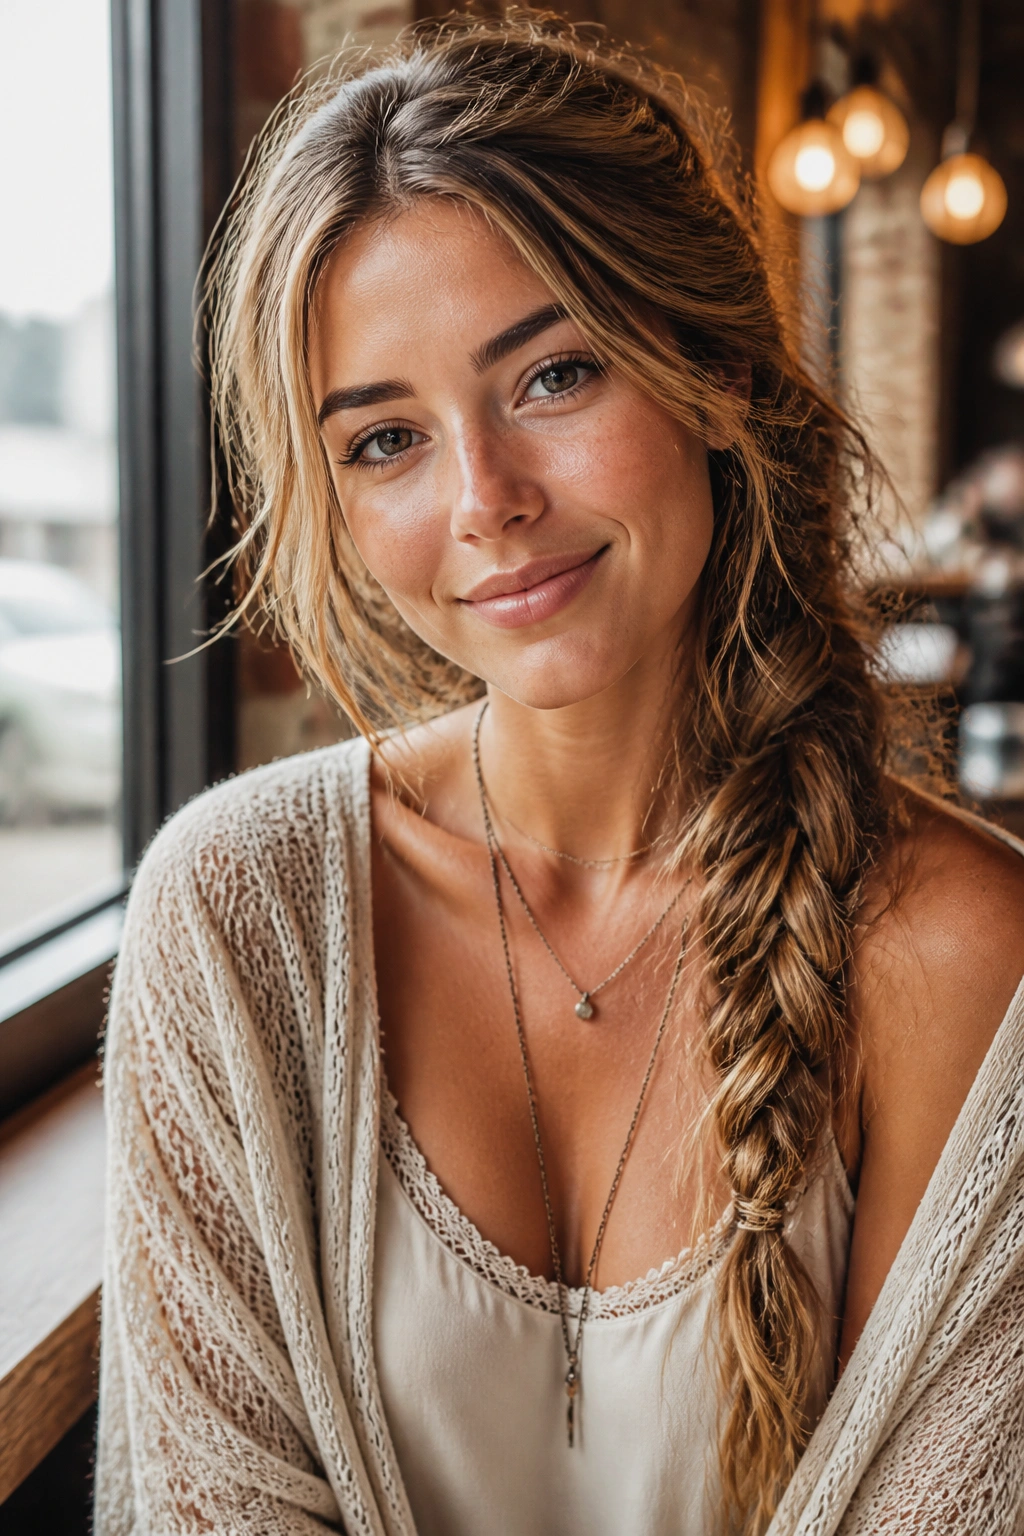
If your hair keeps falling into your lip gloss or your bag strap, this is the one. A side-swept boho braid pulls everything over one shoulder, which makes it feel casual and a little dramatic at the same time. It also gives long hair a clear shape without asking you to sacrifice length.
Start the braid low and a bit off-center. Bring it across the back or sweep it straight from behind one ear, depending on how much volume you want at the crown. The style looks best when the braid isn’t pulled too tight against the scalp. You want it to sit there like it belongs there, not like it was strapped on.
A side braid is especially good when your ends are layered. A few shorter pieces will escape, and that’s not a flaw here. It’s part of the look.
- Best with soft waves or a bend in the ends
- Easy to dress up with a ribbon or hair cuff
- Needs 1 to 2 elastics and a couple of pins
- Works well when you want hair off one shoulder but not fully tied back
One small detail changes everything: pinch the braid wider once it’s secured. That extra width gives the style its boho feel.
5. Milkmaid Braid
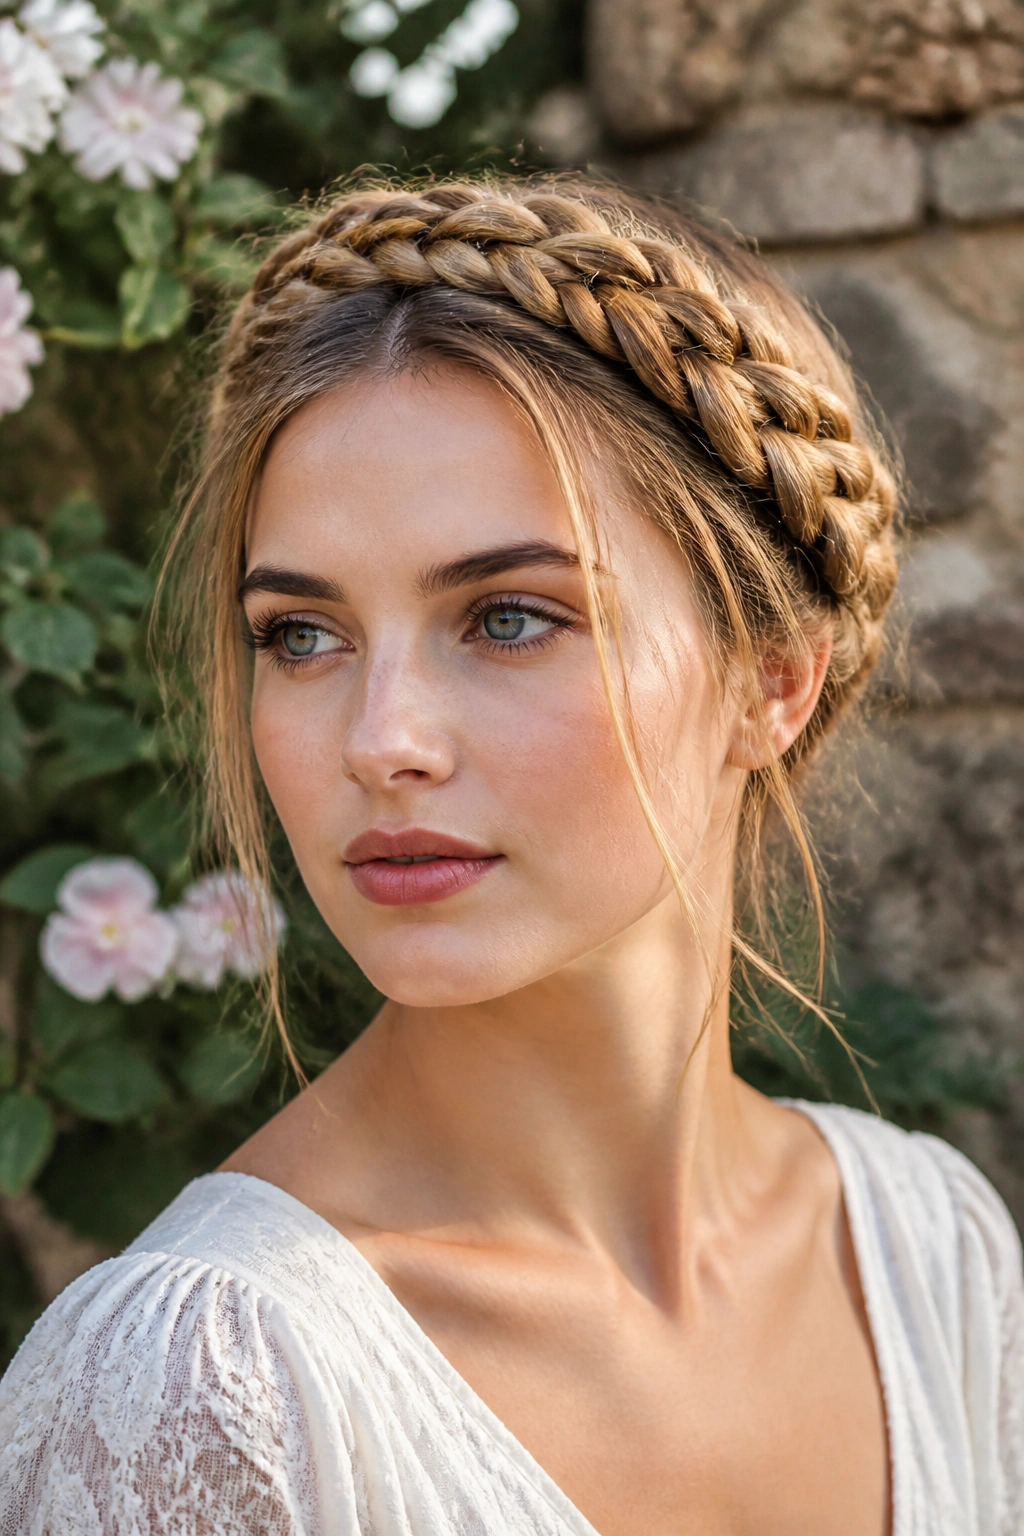
A milkmaid braid has a very specific kind of charm. It wraps the hair around the head like a soft band, which gives long hair shape while keeping the neck clear. The version that works best for boho styling is the one that looks a little looser than tradition would like.
Braid the hair into two plaits, then bring them up and over the crown so they meet near the opposite side. Pin the ends underneath each other. If your hair is thick, flatten the braid slightly before pinning so it does not sit like a heavy ridge. That one tweak keeps the style from feeling stiff.
The best part is how easy it is to soften. Pull a few tiny sections out near the temples. Gently loosen the top edge of each braid. Stop before it starts falling apart.
This style loves long hair because the length gives the braids enough material to look full. On very fine hair, you may want to add a little dry shampoo or mousse first. On thick hair, use fewer pins and let the braid carry the shape. Either way, it has that relaxed, vintage feel without leaning costume-y.
6. Rope Braid Ponytail
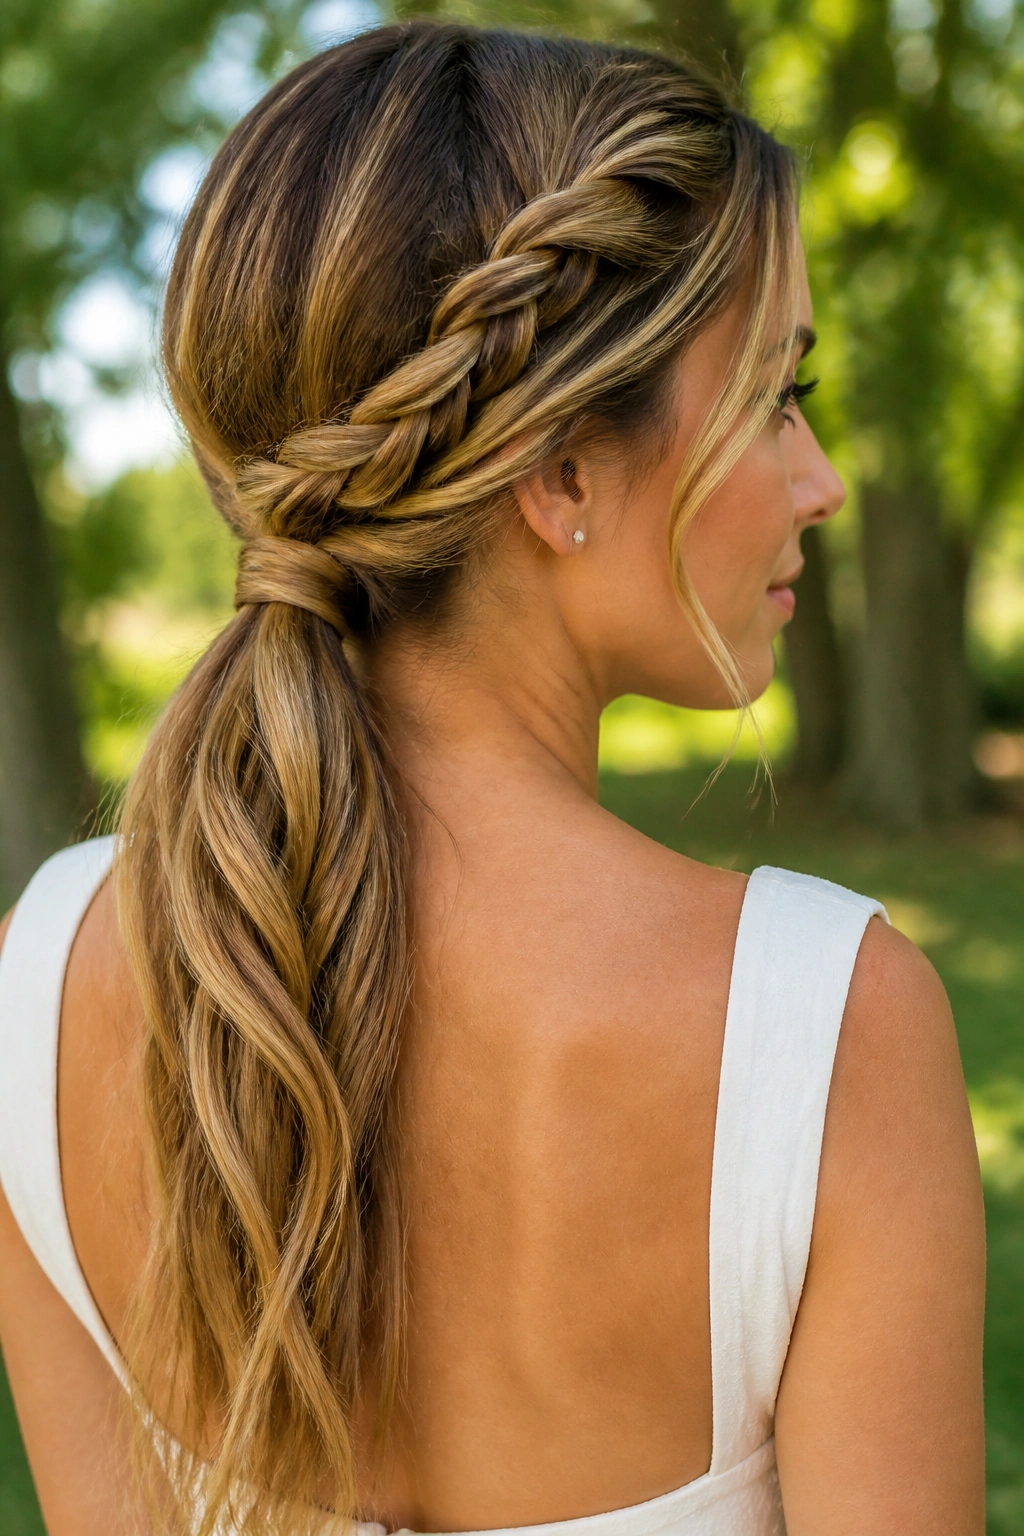
Unlike a three-strand braid, a rope braid is built from two twisted sections. That gives it a sleeker, more spun look, which is a nice change if your hair keeps hiding the pattern in a regular braid. On long hair, the twists show off shine and movement in a way that feels a bit lighter than a standard plait.
It also takes less hand coordination than some people expect. Split the ponytail into two sections, twist each one in the same direction, then wrap them around each other in the opposite direction. That opposite twist is what helps the braid stay together. If you twist both sections the same way the whole time, the braid will unravel. Fast.
This style is especially good for silky hair, which can slip out of more complicated braids. A small amount of styling cream or pomade on the mid-lengths gives the twists grip without making the ponytail greasy. Secure the end with a clear elastic and tug the twists gently to open them up.
It reads polished, but not fussy.
7. Braided Headband
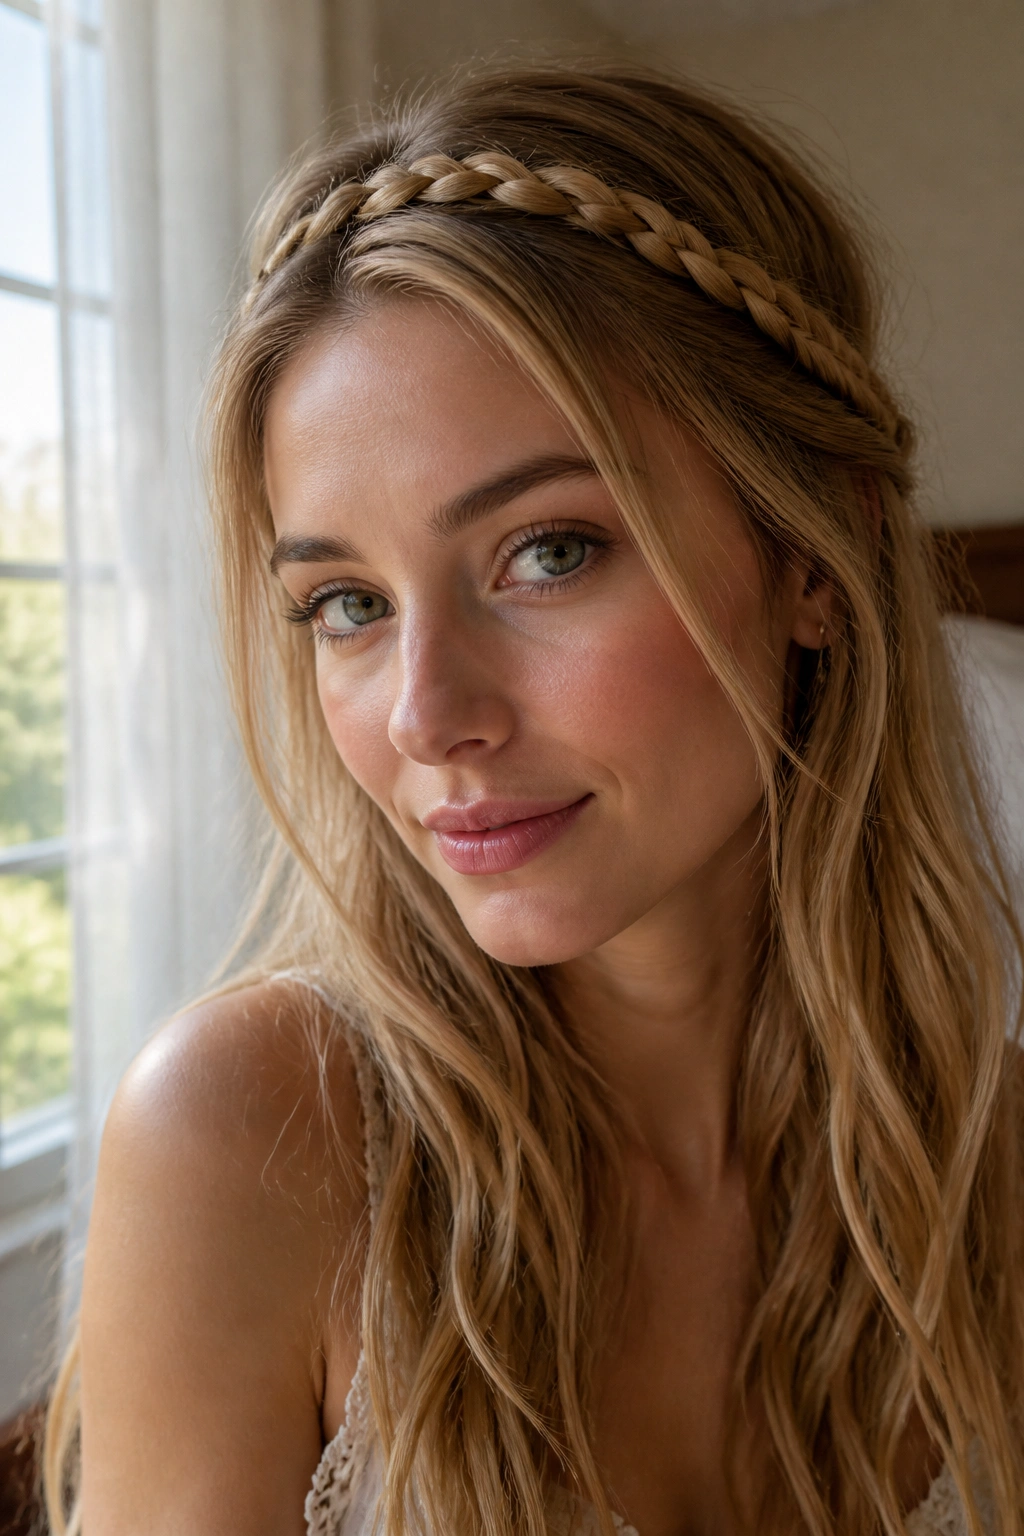
A braided headband is a good answer when you want your hair down but still want something holding the front in place. The braid starts near one temple and runs across the top of the head like a soft band, usually blending into the loose lengths behind it. It’s simple, but not boring.
Where to Place It
Set the braid about an inch back from the hairline if you want it to sit like a true headband. Closer than that and it can look awkward, almost like an athletic band made of hair. Slightly farther back gives the braid room to breathe and keeps the style softer.
A little teasing at the crown helps, especially if your hair is very flat. You only need enough lift to keep the braid from disappearing into the rest of the style. After that, pin the ends under a layer of hair so the join stays hidden.
The look is good with waves, but it also works on straight hair if you want a cleaner finish. Add a small metal cuff or a tiny flower pin if the outfit needs a nudge toward dressy. Otherwise, leave it plain. The shape does the work.
8. Pull-Through Braid
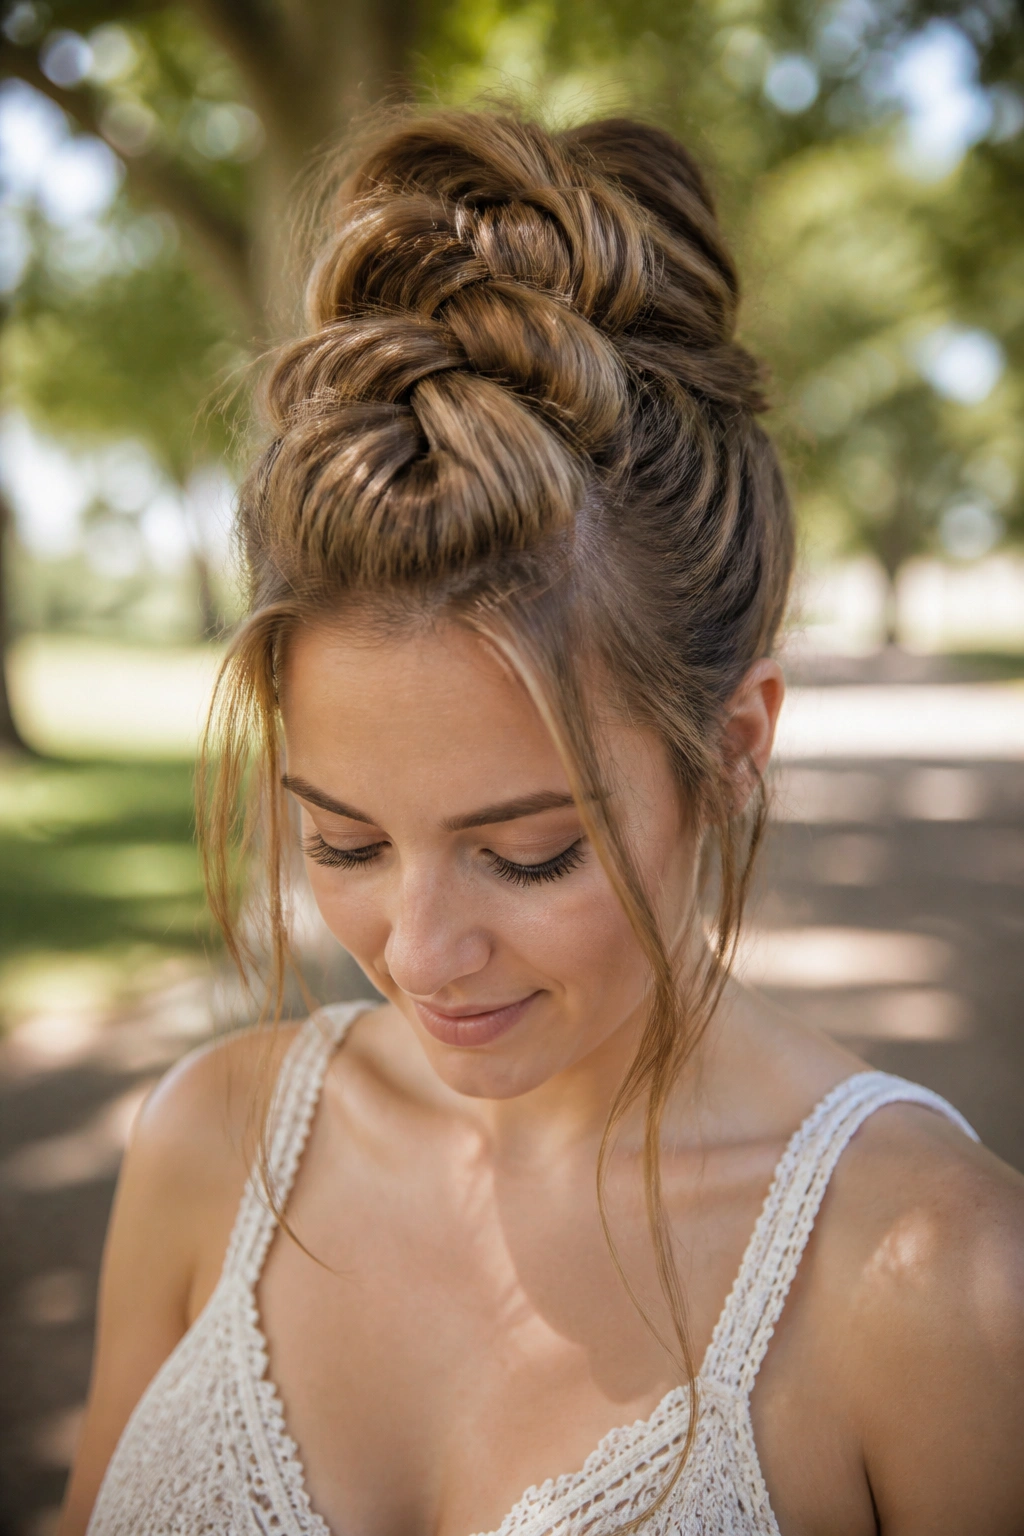
The pull-through braid is the cheat code for full-looking long hair. It is not a braid in the strict sense, which is part of why it works so well. You build it from small ponytail sections, then flip and loop them so the whole thing stacks into a thick, soft column that looks a lot denser than your hair actually is.
It’s especially useful if your hair is fine or falls flat by midday. A traditional braid can shrink into the back of the head. A pull-through braid keeps its shape. That’s why it photographs so well, and why it also survives a long day better than people expect.
You will need several small clear elastics. Place each one 2 to 3 inches apart, then tug the outer loops gently once the braid is finished. That loosens the sections and gives the style its full, boho look. If you skip that step, it can look a little stiff and segmented.
One warning. Don’t rush the stacking. Uneven loops show more than they do in a regular braid. Take the extra minute and it pays off.
9. Bubble Braid with Tiny Accent Plaits
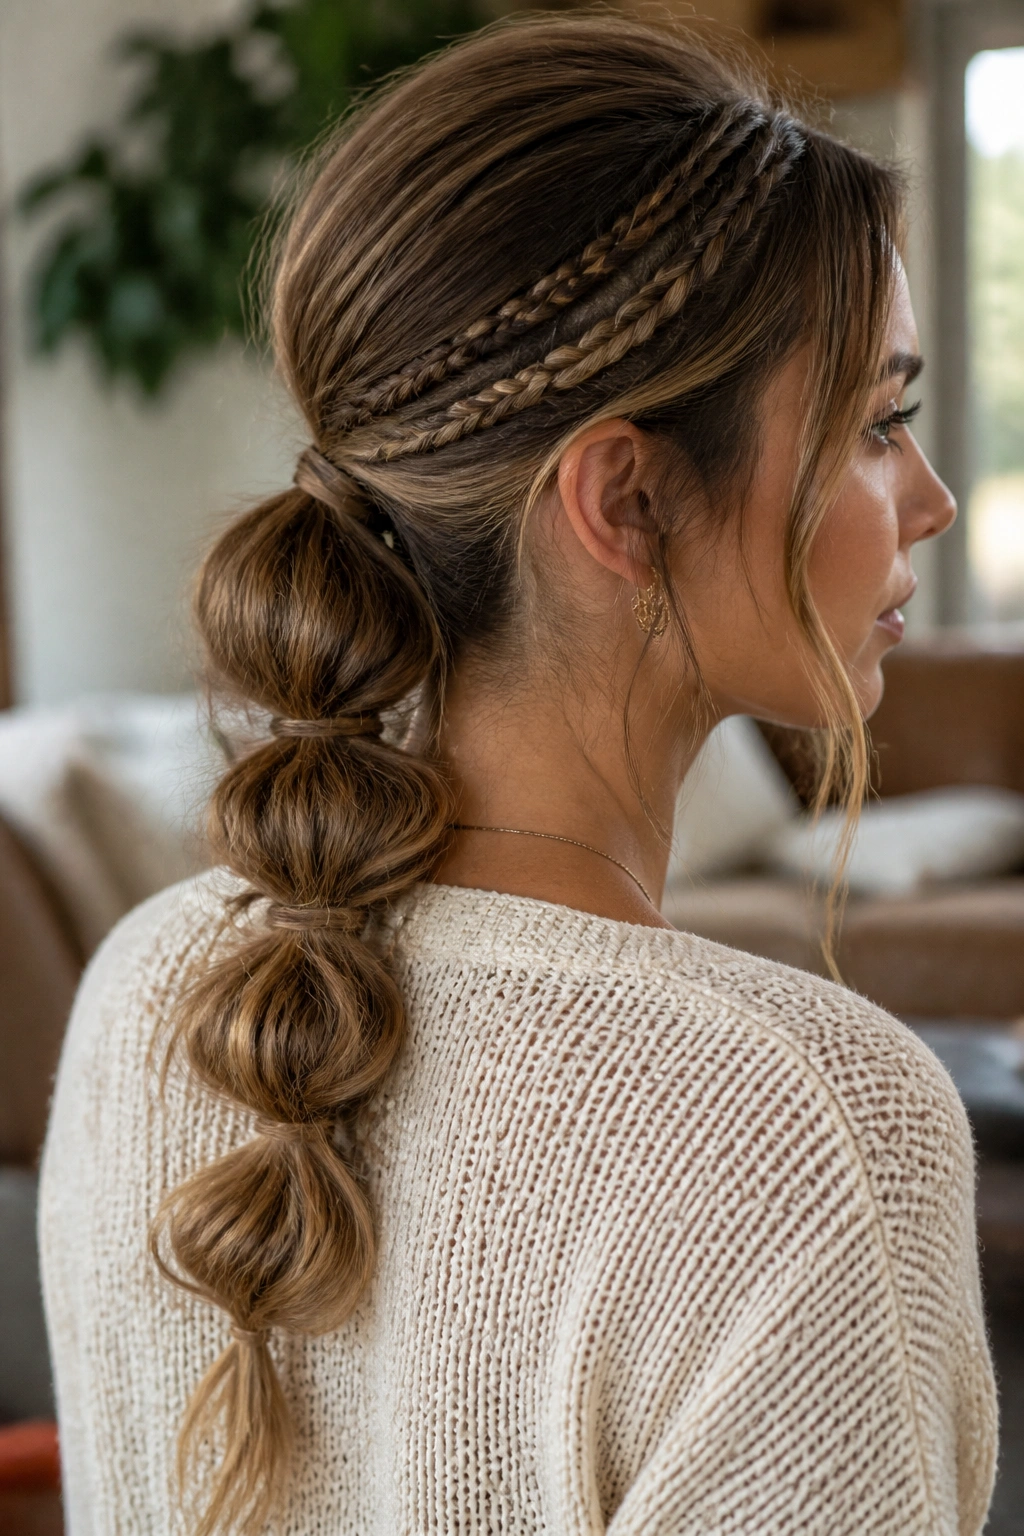
How do you make a ponytail feel boho instead of sporty? You add bubbles, then break up the clean line with a few tiny accent braids. The result has shape, but it also has texture, which is the piece most people miss.
Start with a low or mid ponytail, then add clear elastics every few inches. Gently tug each section between the elastics to create round bubbles. If you want a softer look, pinch the sides of the bubbles outward a little more at the top and less near the bottom. That keeps the shape from looking identical all the way down.
Tiny braids at the temples or tucked into one side of the ponytail add just enough detail. You do not need a dozen of them. Three small accent braids are plenty. More than that and the style can start to feel busy.
How to Keep the Bubbles Even
Use your fingers, not a brush, to shape them. Brushes flatten the roundness. Fingers let you see the size in real time, which is much easier when the hair is long and heavy. A light mist of hairspray on the finished bubbles helps them hold without making them hard.
10. Double Dutch Braids into Loose Ends
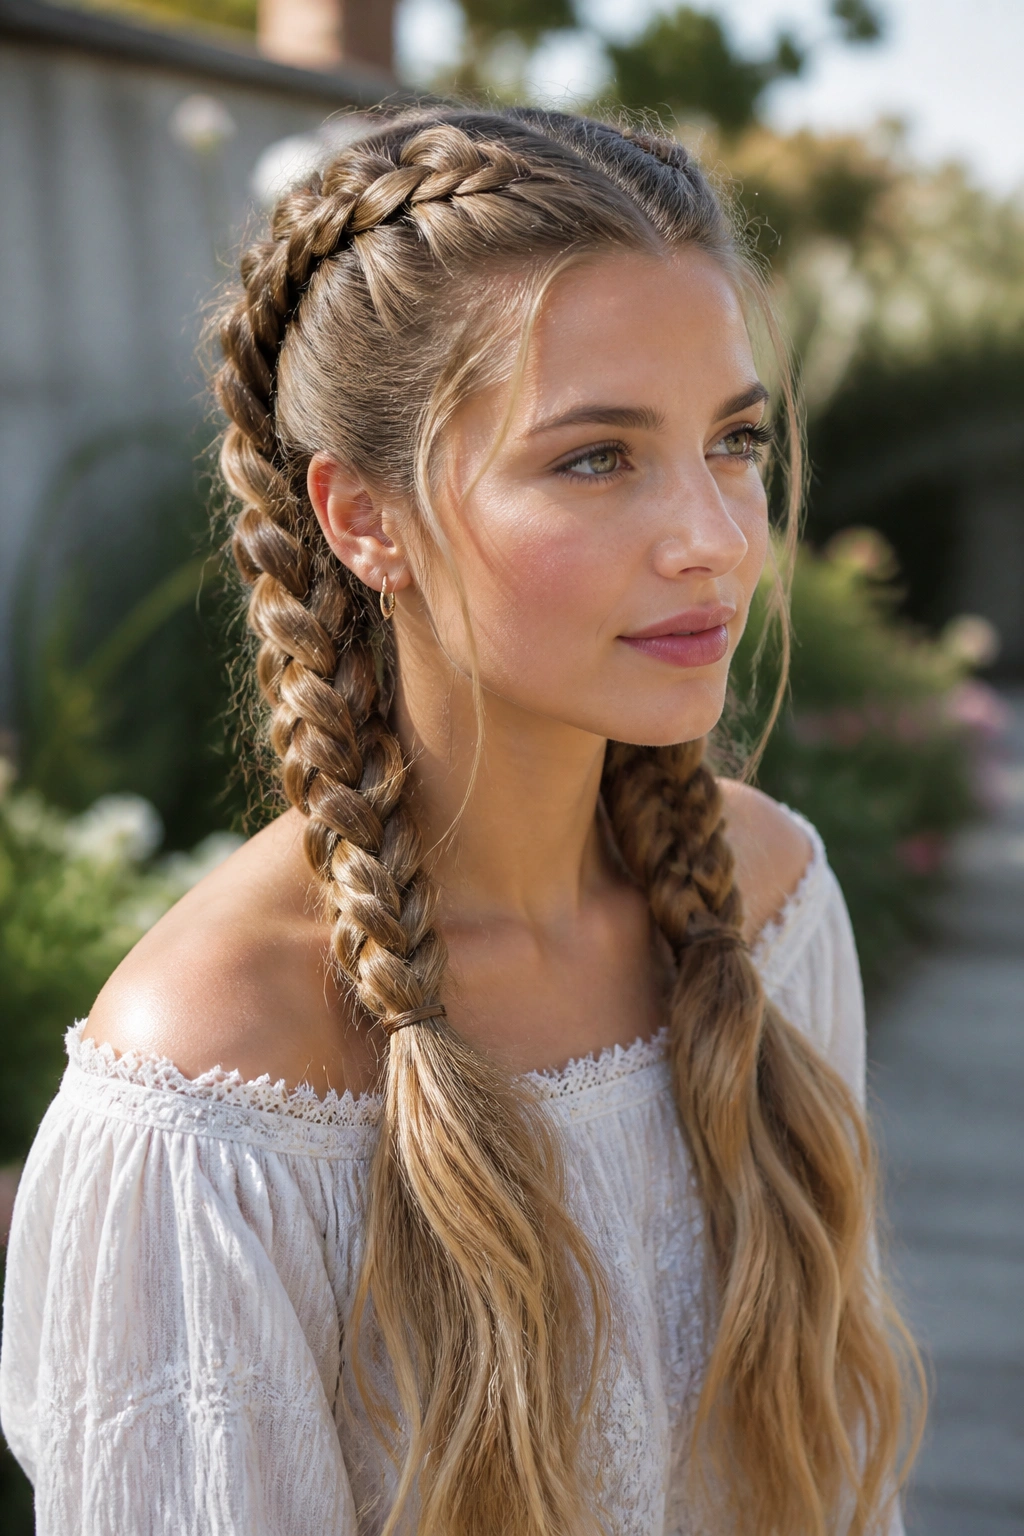
Think of this as the braid style that can handle rain, dancing, and a denim jacket all at once. Double Dutch braids keep the top section controlled, but leaving the ends loose turns the style into something softer and less athletic. That balance is why it works so well on long hair.
Start each braid at the hairline and braid under, not over, so the plaits sit raised off the scalp. Keep the sections a touch loose at the crown. If you pull them tight from the first stitch, the braids will look severe, and the boho part disappears. Let the braids run down to the nape, then stop and secure each one with a small elastic so the lower lengths can fall free.
A little texture spray at the roots helps the sections grip, especially if your hair is freshly washed. If you want more softness, pull a few strands loose around the face and near the ears. Not too many. Just enough to keep the style from looking boxed in.
This one is practical, but it doesn’t have to look practical. That’s the fun part.
11. Mermaid Braid
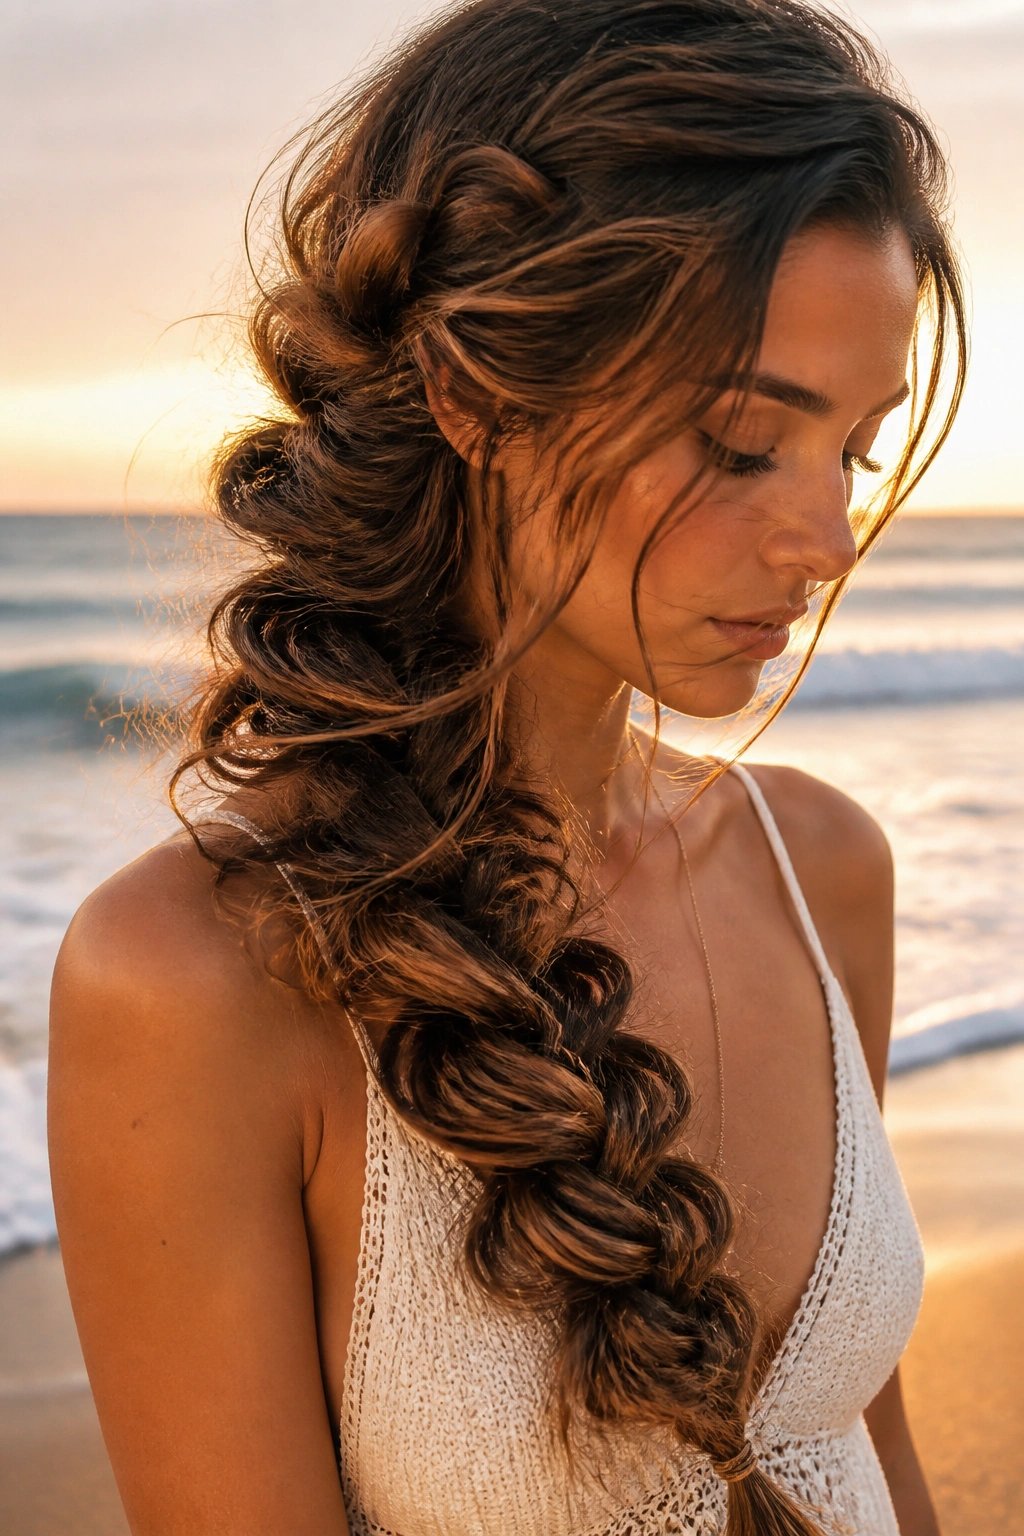
A mermaid braid has a wide, airy look that feels softer than a tight plait. It usually starts low and works down the back or over one shoulder, with the outer edges gently pulled out so the braid looks almost scaled. On long hair, that width is what makes it special.
The style depends on spacing. If the braid is too tight, it turns into a narrow rope and loses the effect. If it’s too loose, it falls apart. The sweet spot is a braid that feels secure at the center but has softened edges. After securing the end, go back and pull the outside loops wider with your fingertips.
Layered hair makes this one tricky, because shorter pieces can escape before the braid is finished. A little styling cream on the mid-lengths helps. So does starting the braid lower down, where the hair is a bit denser. If your hair is very straight, a loose wave in the lengths gives the braid more shape.
This is one of those styles that looks expensive without needing expensive effort. The width does the heavy lifting.
12. Half-Up Halo Braid
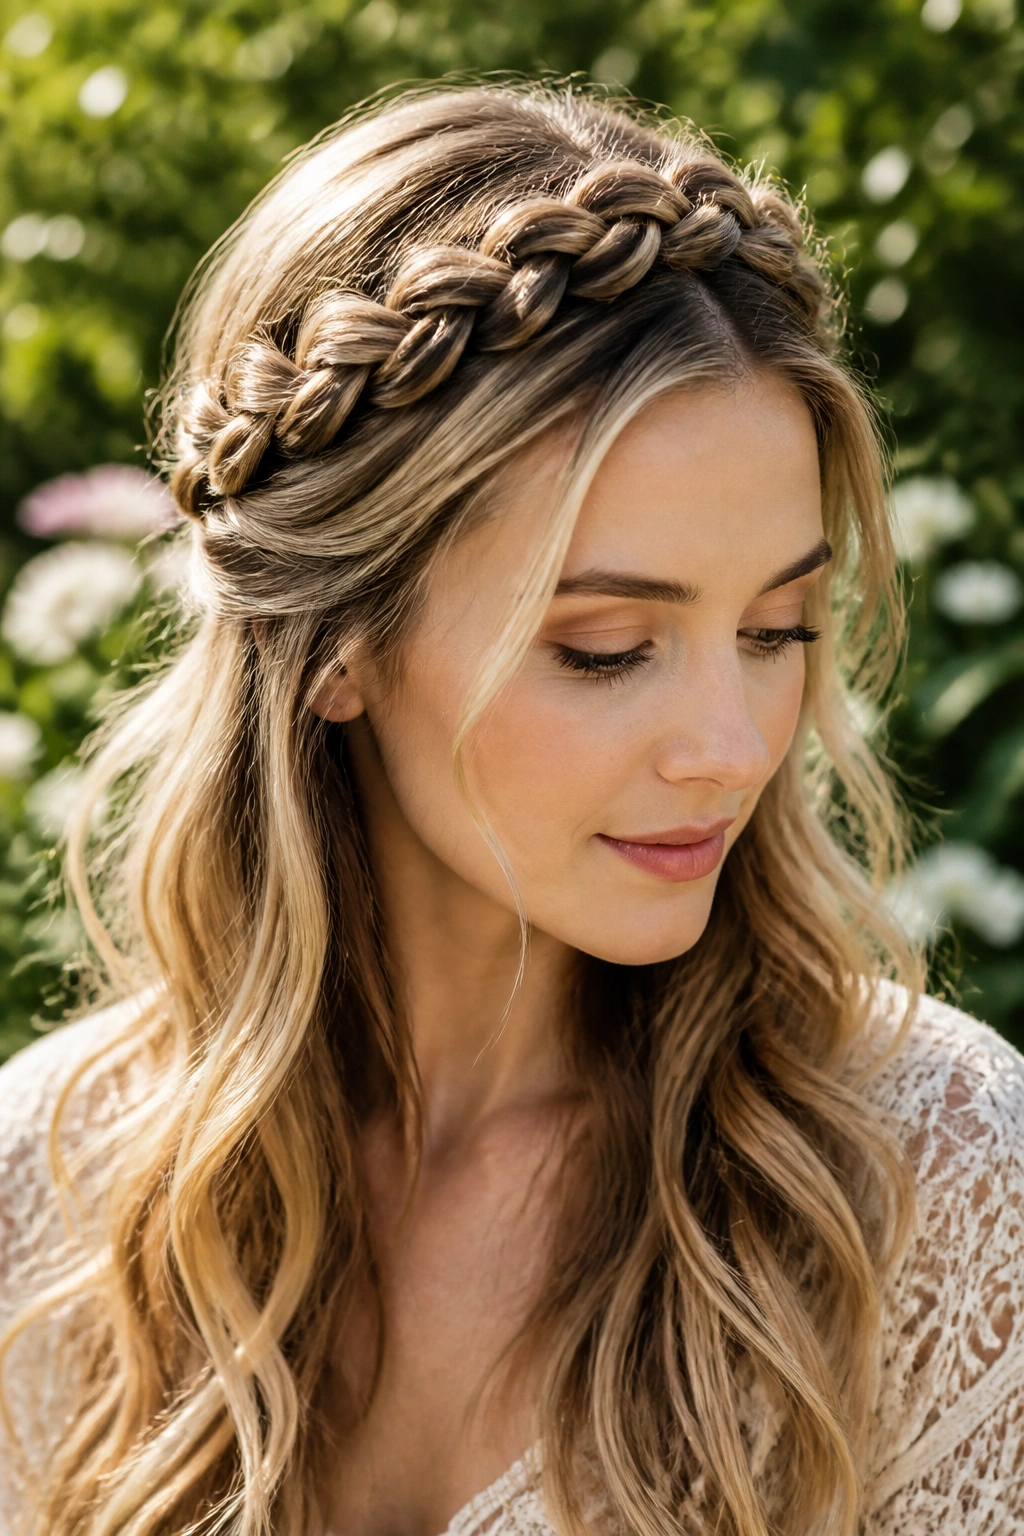
A half-up halo braid gives you the frame of a full crown braid without taking over the whole head. That’s the main reason I like it. It keeps the hair off the face, but the lower length stays free, which matters when you want long hair to still feel long.
Unlike a full halo, this version starts at the temples and joins at the back, leaving the rest down. The look is lighter and faster, and it usually sits better on thick hair because it doesn’t require wrapping a full circle around the head. If your hair is dense, that alone can save your scalp.
It’s also forgiving. Small bumps along the braid disappear into the style, and the transition into the loose hair is meant to feel soft. Curling the bottom half helps, but a smooth blowout works too if you want more contrast.
This is a good choice for weddings, brunch, or any day when you want your hair to look done without feeling pinned into place. The braid says “planned.” The loose ends say “I still like movement.”
13. Accent Braids with Beads
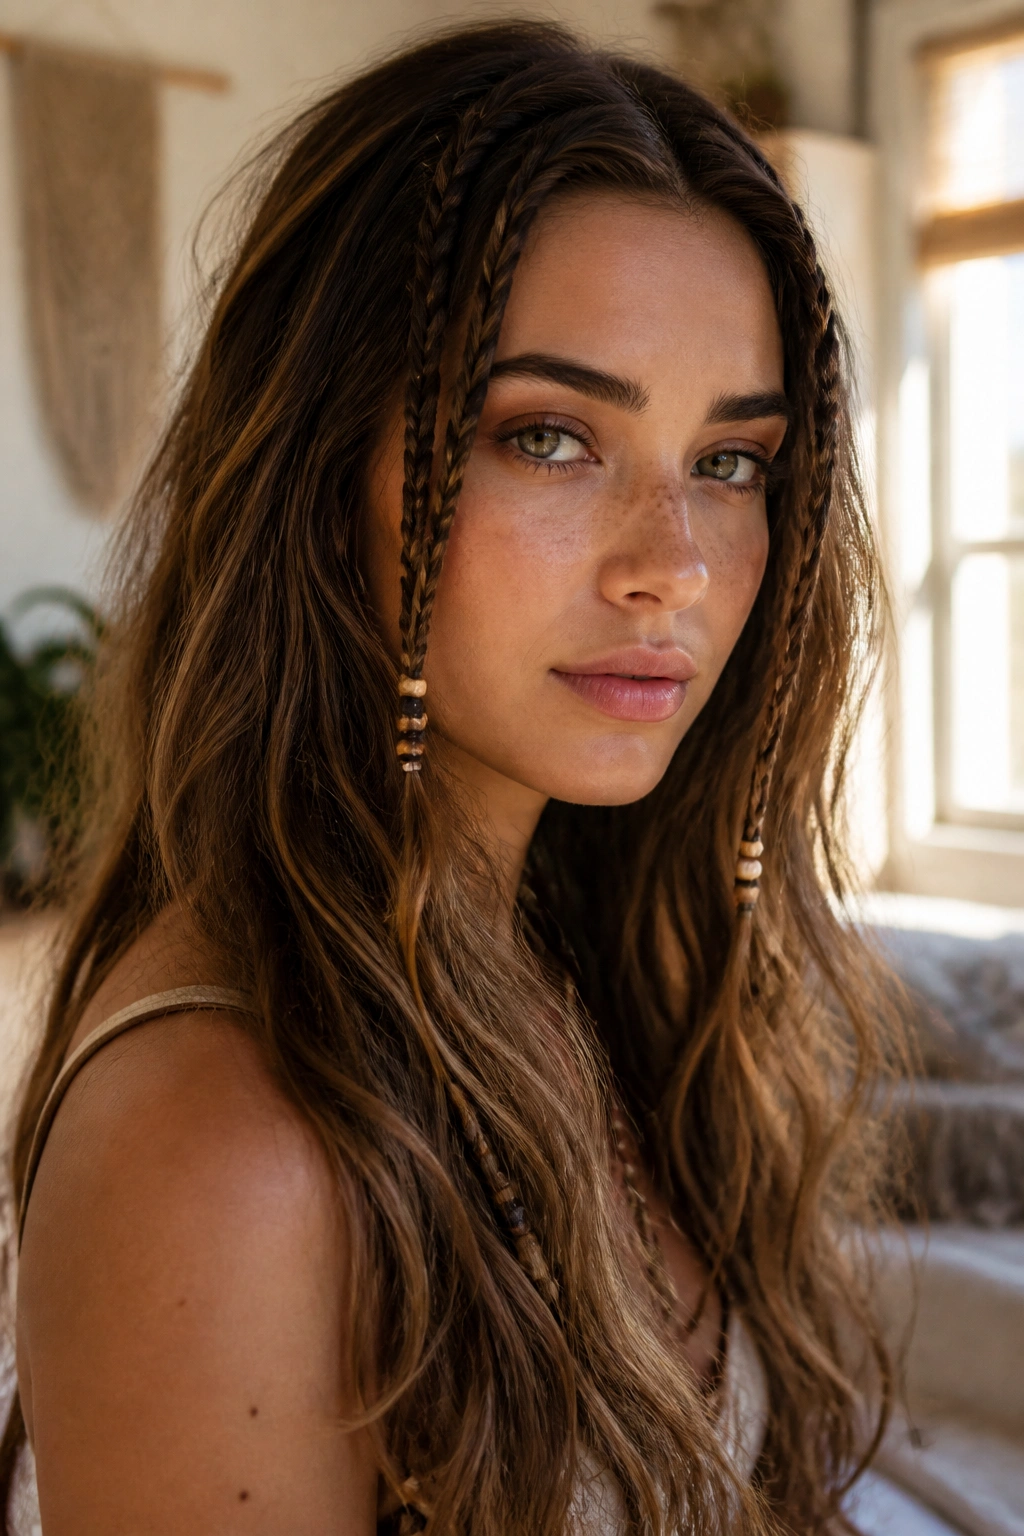
A few tiny accent braids can change a whole hairstyle faster than any curling iron. Put them near the temples, along a middle part, or tucked into one side of loose waves, and they give the hair that slightly collected, festival-ready feeling without taking over the head.
Placement Matters
The best place for accent braids is where the eye already goes: near the face, near the part, or just above the ear. That way the detail reads as intentional instead of random. If you scatter them everywhere, the style starts to look cluttered.
Beads and cuffs can be fun, but use them with restraint. Two or three tiny beads at the end of a braid can look lovely. Ten of them can drag the hair down and make the braid hang oddly. Light pieces work better because long hair already has enough weight.
- Keep the rest of the hair wavy and loose
- Use 3 to 5 micro braids at most
- Choose beads with small holes so they slide on cleanly
- Secure tiny braids with clear elastics first, then add the accessories
My rule: if the accent takes longer than the main style, it’s too much.
14. Low Side Fishtail
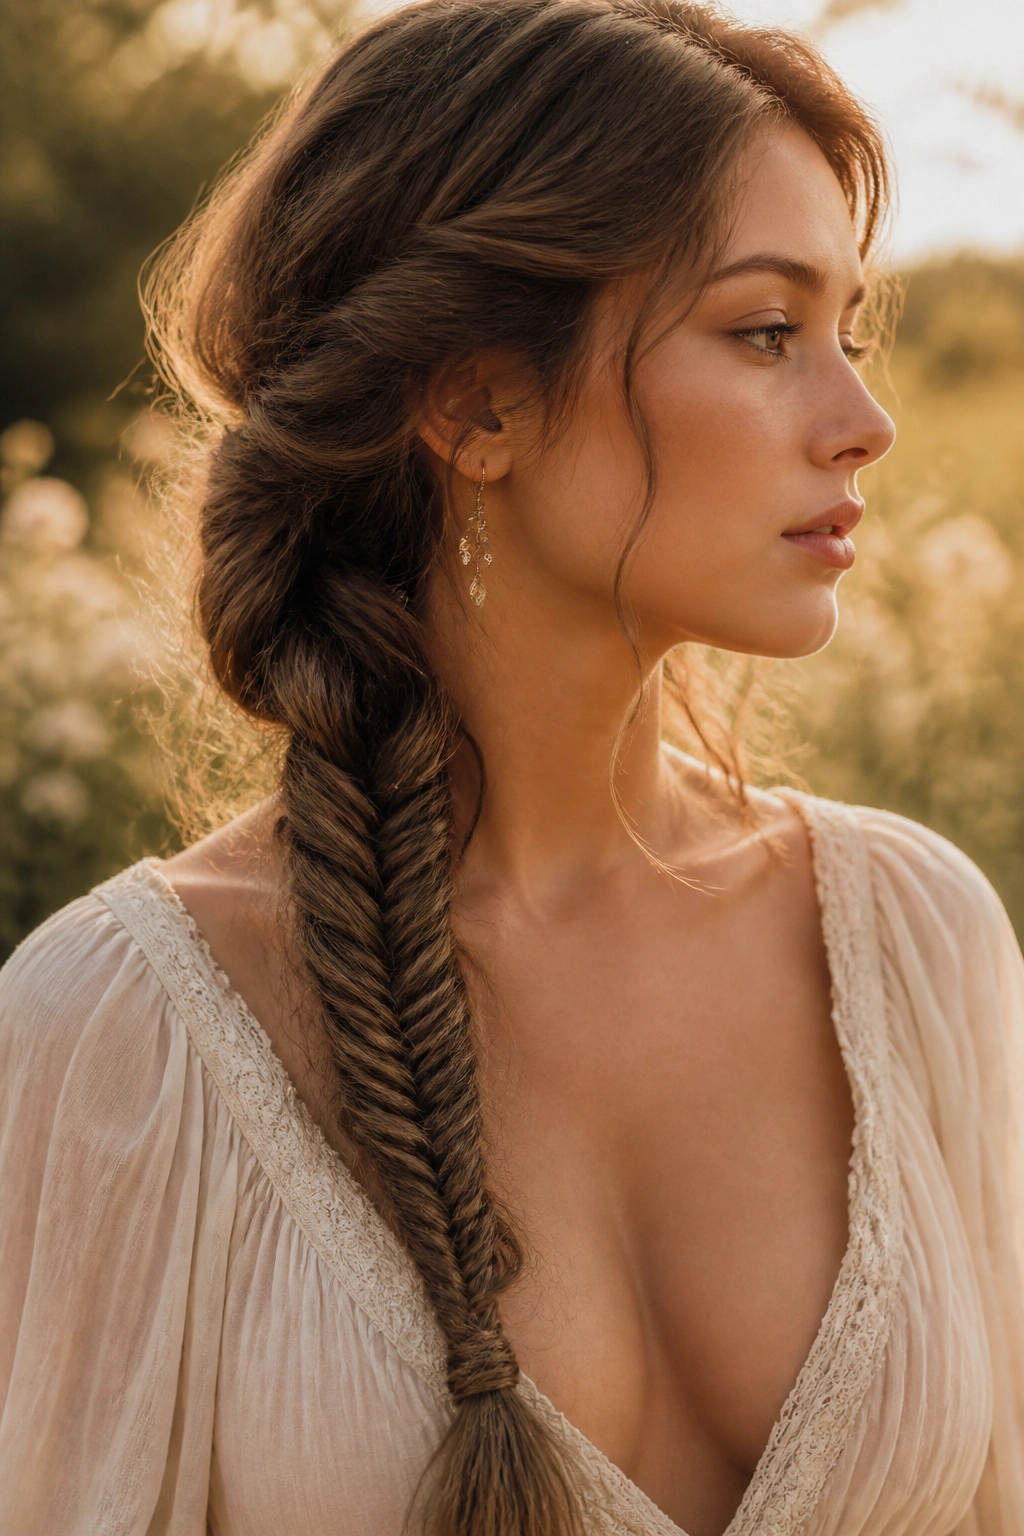
A low side fishtail looks more dressed up than a standard side braid, and it takes less effort than a formal updo. That’s a nice place to land. It rests over one shoulder, so the long length stays visible, and the fishtail texture gives the whole style a bit of movement even when the braid is pulled low.
Start with a deep side part if you want more drama. Sweep the hair to one side, braid down near the collarbone, and keep the first few stitches a little loose so the top doesn’t go flat. Once the braid is secure, widen the outer edges with your fingers. That softens the pattern and keeps it from looking too exact.
A thin ribbon tucked into the elastic works well here. So does a small wrapped strand of hair if you want the finish cleaner. Either way, the braid should feel like it belongs with soft fabric and open necklines, not stiff tailoring.
The style is long hair’s friend because the length gives the braid more room to drape. Shorter ends can’t really do this one the same way.
15. Braided Bun with Face-Framing Pieces
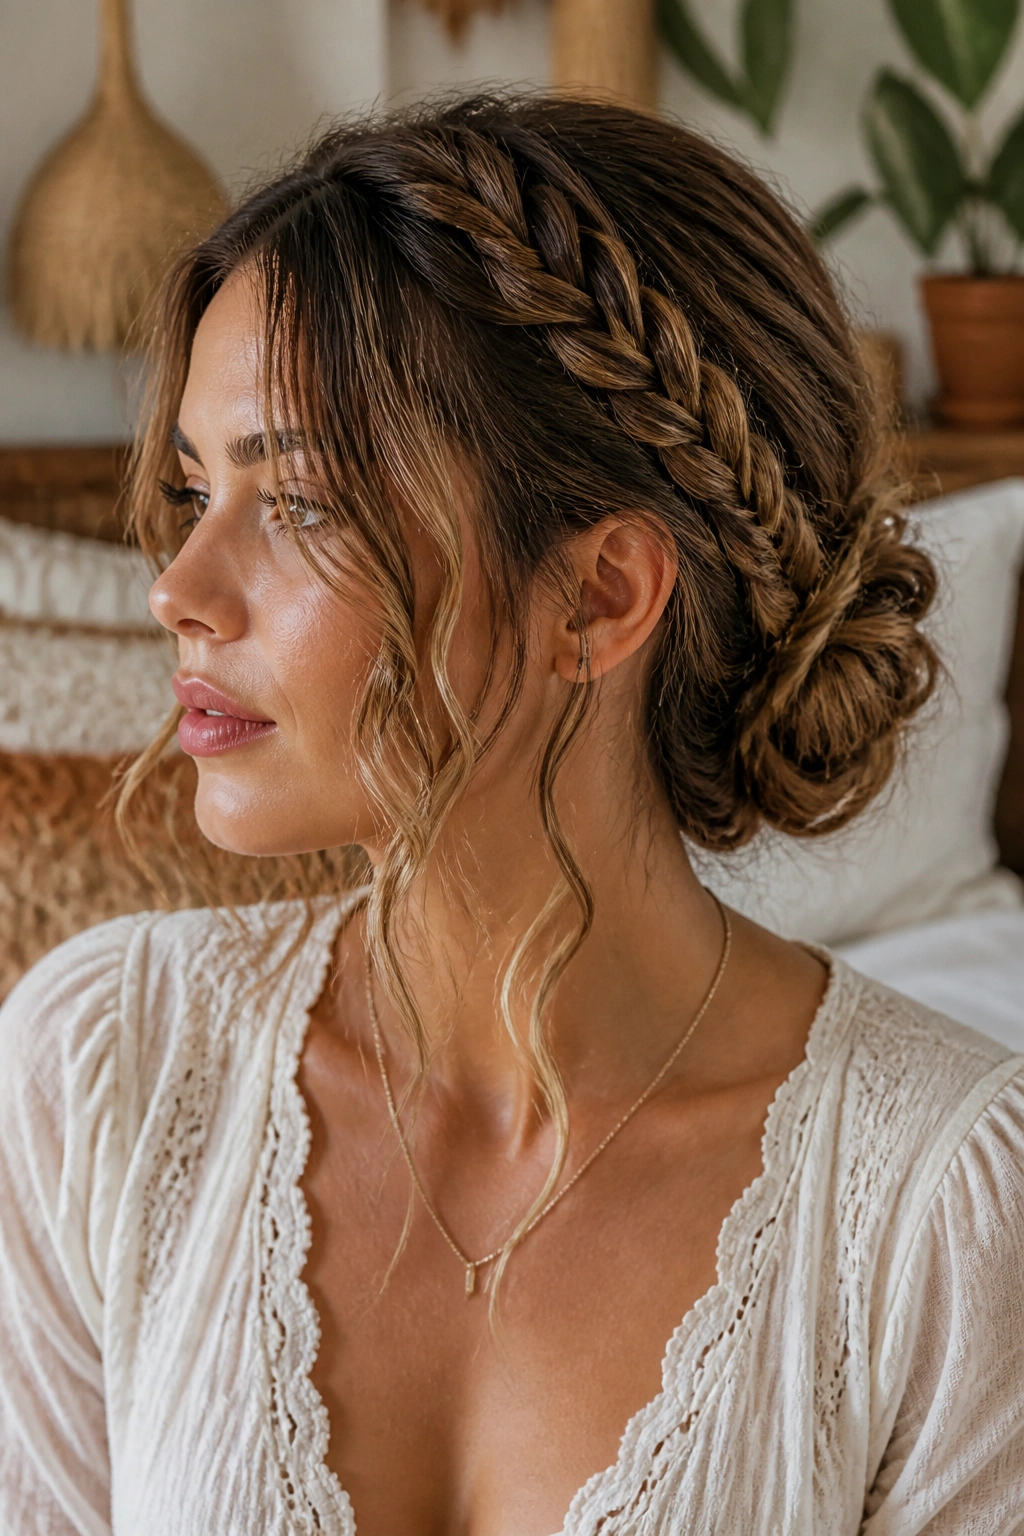
Can a bun still feel boho if it is pinned up? Yes, if the bun stays soft and the front pieces are left loose. A braided bun with face-framing pieces gives you the clean neck line of an updo without losing the relaxed feel that makes bohemian styling work.
The braid usually feeds into the bun or wraps around its base. That braided detail keeps the updo from looking like a plain knot at the back of the head. Let the bun sit low, not high and tight. A low placement feels calmer, and it gives the loose tendrils at the front a chance to soften the face.
How to Keep It Soft
Curl the front pieces away from the face with a 1-inch iron, then let them cool before touching them. That shape holds better and falls in a gentler curve. Pin the bun with 4 to 6 bobby pins, crossing them in different directions so it does not slide down over the course of the day.
Do not smooth every flyaway. A few wisps near the crown make the style look lived in instead of sealed up.
16. Criss-Cross Half-Up Braid
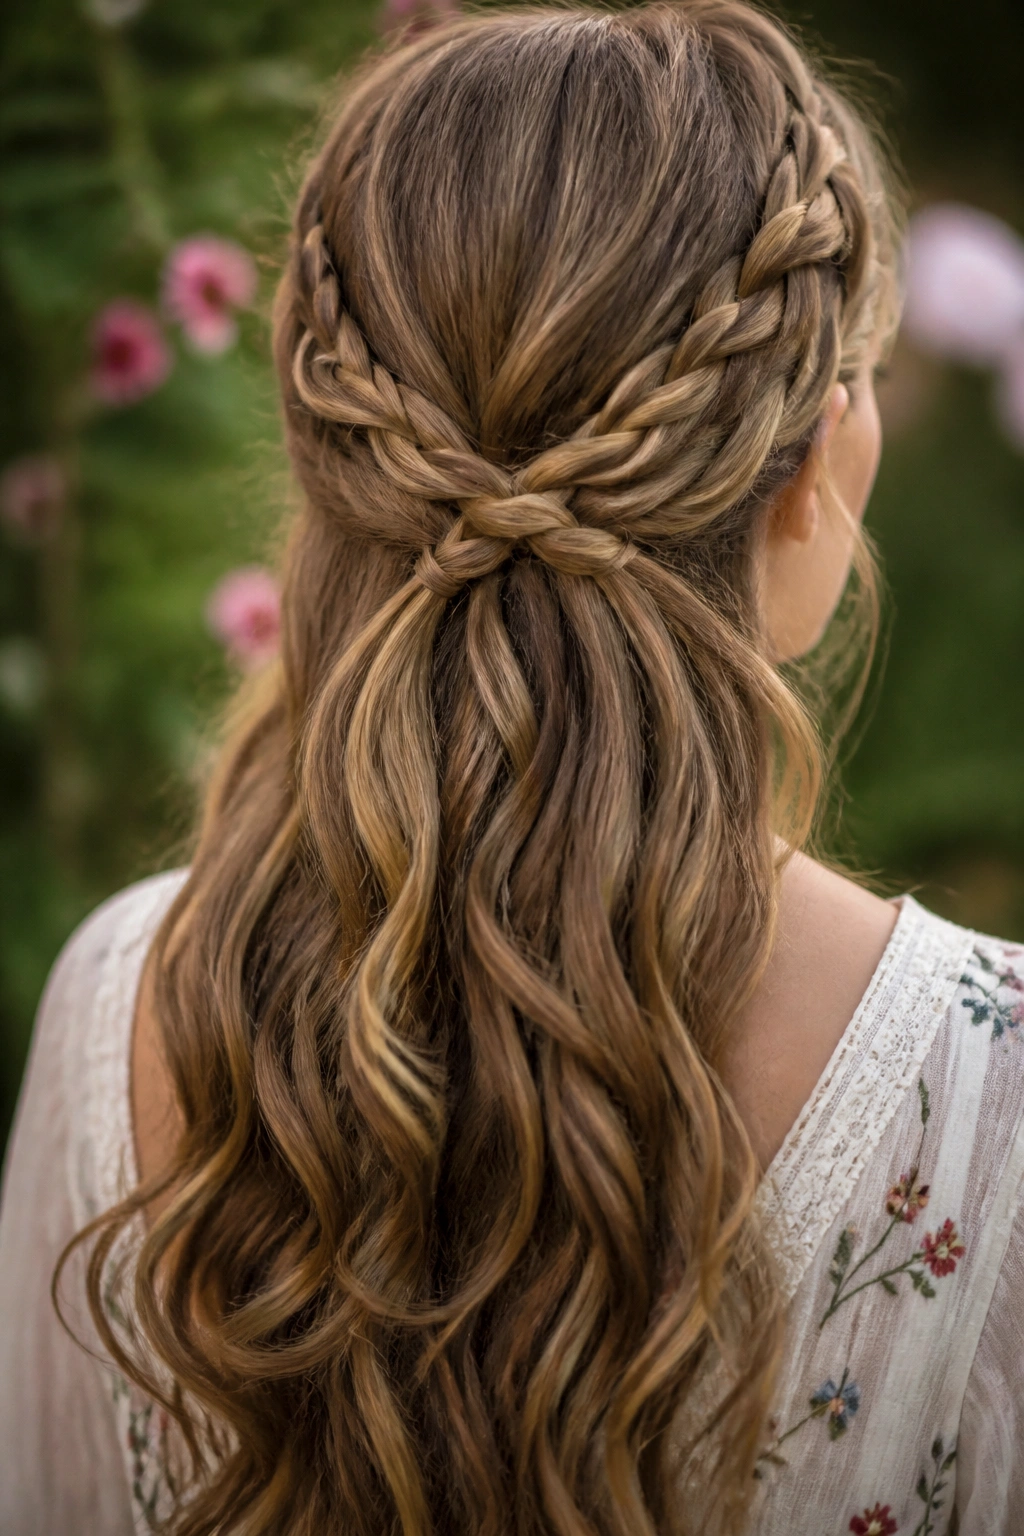
This is the half-up style I pull out when I want something a little less ordinary. Two sections are braided or twisted from each side, then crossed over the back of the head and pinned in place. The result is tidy enough to stay put, but loose enough to keep the boho feel.
It works well on long hair because there is enough length to create a visible cross without making the ends look stubby. The lower half stays down, so you still get movement through the ends. If you curl that lower section, the cross sits on top of a soft wave pattern and looks even better.
A middle part gives the style a calmer feel. A slight side part makes it more relaxed. Either one works. What matters is keeping the crossing point clean so the pins do not show through.
- Use matching elastics or tiny clear ones
- Hide the pins under the cross
- Keep the back section loose, not flattened
- Add a small clip at the crossing point if you want extra decoration
This style is quiet, which is part of its appeal. It doesn’t shout.
17. Ladder Braid
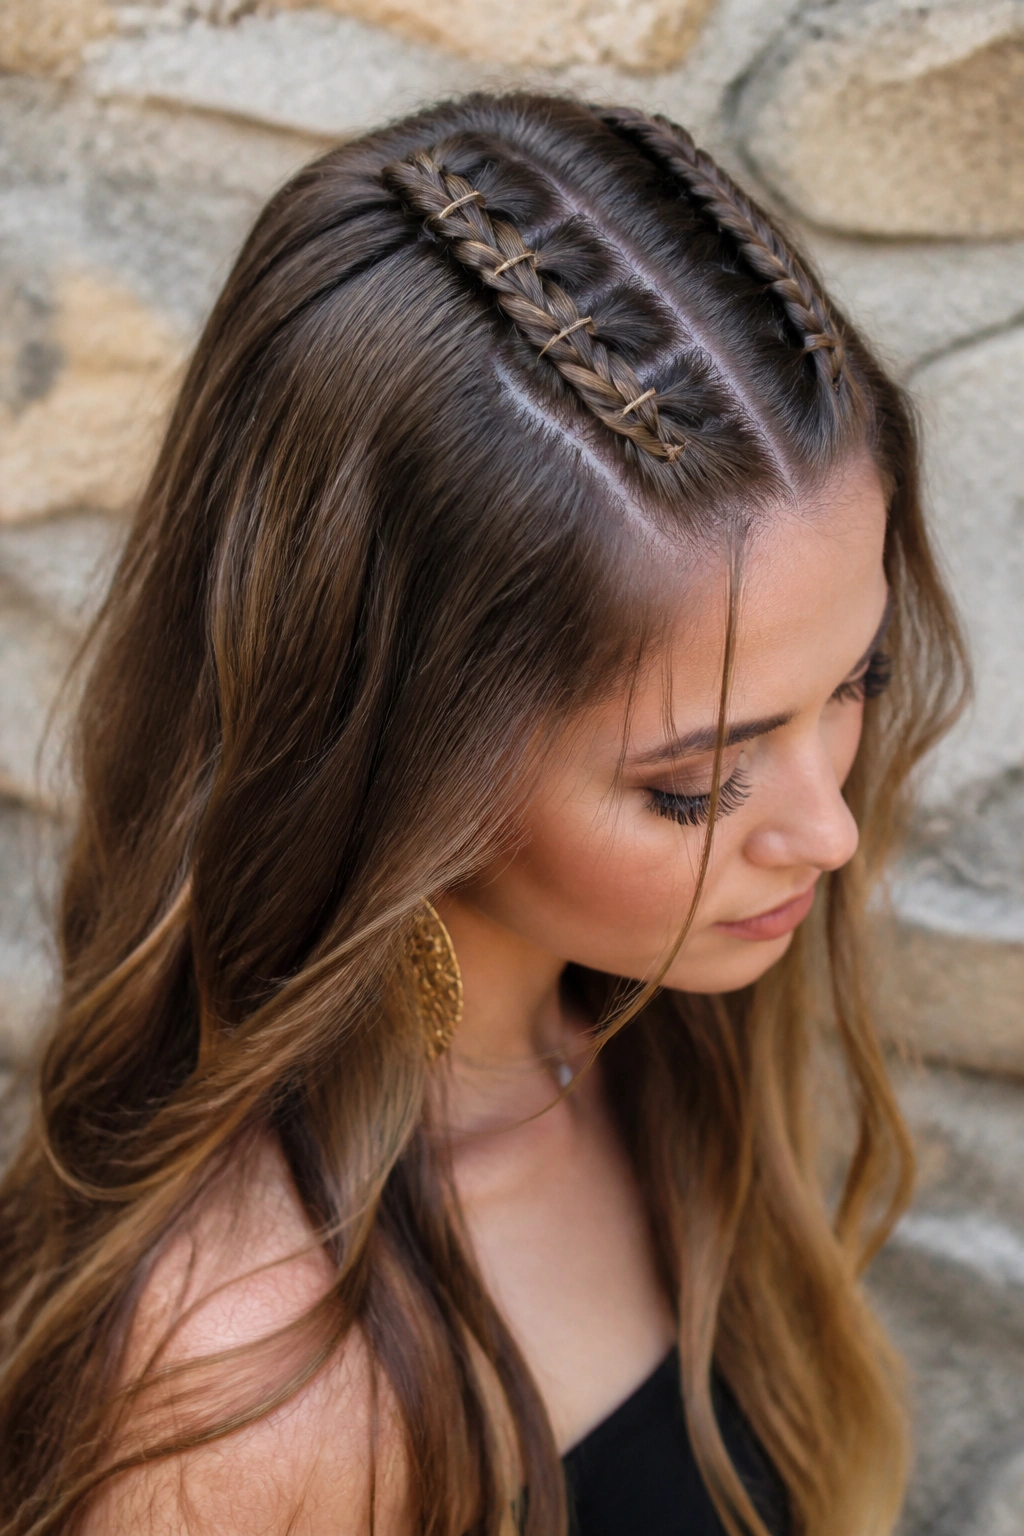
A ladder braid has a more detailed look than most boho styles, and that detail is what makes it special. Two braid lines run alongside each other, with cross pieces linking them in a pattern that looks a little like a ladder. On long hair, the structure stands out beautifully because there is enough length for the links to show.
It is not the fastest style on this list. Fine. Some looks need patience. The sections have to stay neat, and the hands need a little coordination to keep the cross pieces even. A tail comb helps here, as do a couple of clips to hold sections out of the way while you work.
This style works best on smooth hair or hair that has been lightly blown out. If the texture is too fuzzy, the pattern gets lost. A small amount of shine spray on the finished braid helps the links read clearly without making the hair slick.
I like this one for days when the outfit is simple and the hair is doing the talking. It has that handcrafted feel people notice up close.
18. Four-Strand Loose Braid
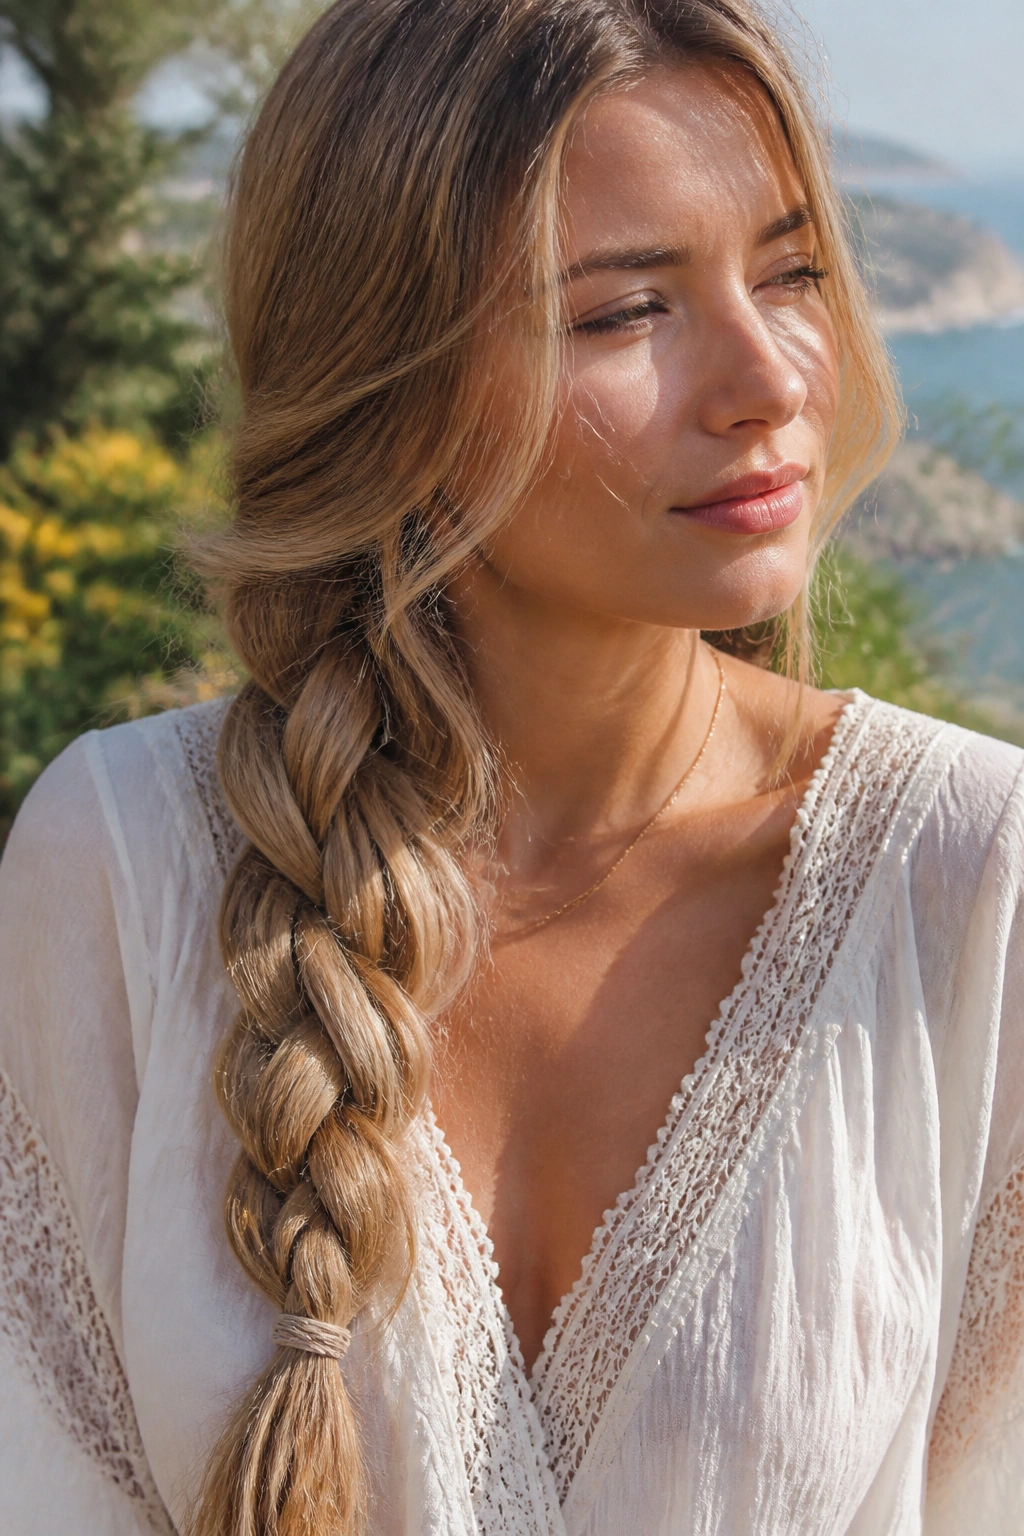
A four-strand braid has a denser, more woven look than a three-strand braid, and that extra pattern makes it a good fit for bohemian styling. On long hair, the braid stretches enough to show off each section, which gives the finished style a richer texture. It is one of those details that looks subtle from across the room and more interesting the closer you get.
The main difference is control. A four-strand braid holds its shape better than a loose three-strand braid, but it still feels soft if you keep the tension relaxed. That makes it a nice middle ground when you want something different without adding clips, beads, or flowers.
Use it at the back, over one shoulder, or as a low side braid. The side placement shows the weave best. If your hair is layered, braid a little lower so the shorter pieces have time to join the pattern before they slip out.
It takes a bit more practice than people expect. After a few tries, your hands settle into the rhythm. Then it becomes oddly satisfying.
19. Twisted Braid Ponytail
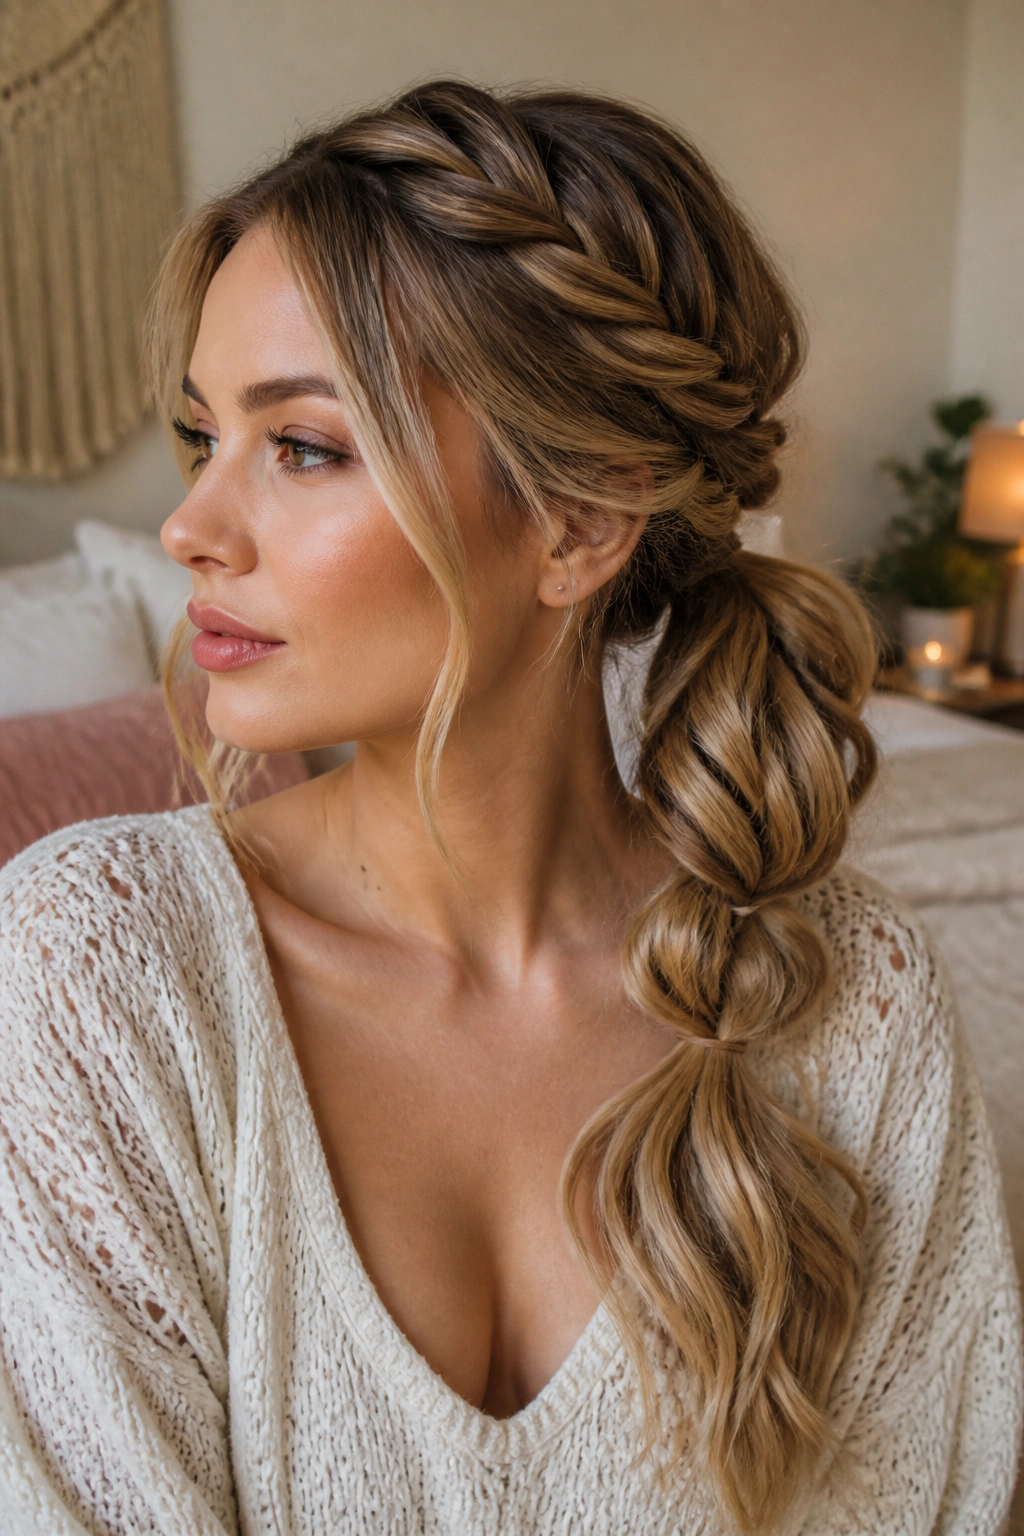
A twisted braid ponytail is a smart choice when you want the ease of a ponytail and the texture of a braid. Start with two twisted sections from the front, feed them into a low or mid ponytail, then braid the remaining length loosely. The style looks layered and intentional without needing a lot of extra work.
Best Placement for Long Hair
A low ponytail gives the style a more relaxed mood. A mid-height ponytail feels livelier and works if you want the braid to sit higher on the back of the head. Either way, the front twists help soften the hairline, which is usually the part that needs the most help in boho styles.
Keep the twists loose enough that they have shape, but not so loose that they fall apart before they reach the ponytail. A small amount of mousse at the front can help hold the sections while you work. If the ends are very straight, curl them a little before braiding so the tail does not look too sharp.
- Good for second-day hair
- Easy to finish with a wrapped strand around the elastic
- Looks nicer with a light wave in the ends
- Uses 1 elastic for the ponytail and 1 for the braid
It’s straightforward. That’s part of its charm.
20. Scarf-Woven Low Braid
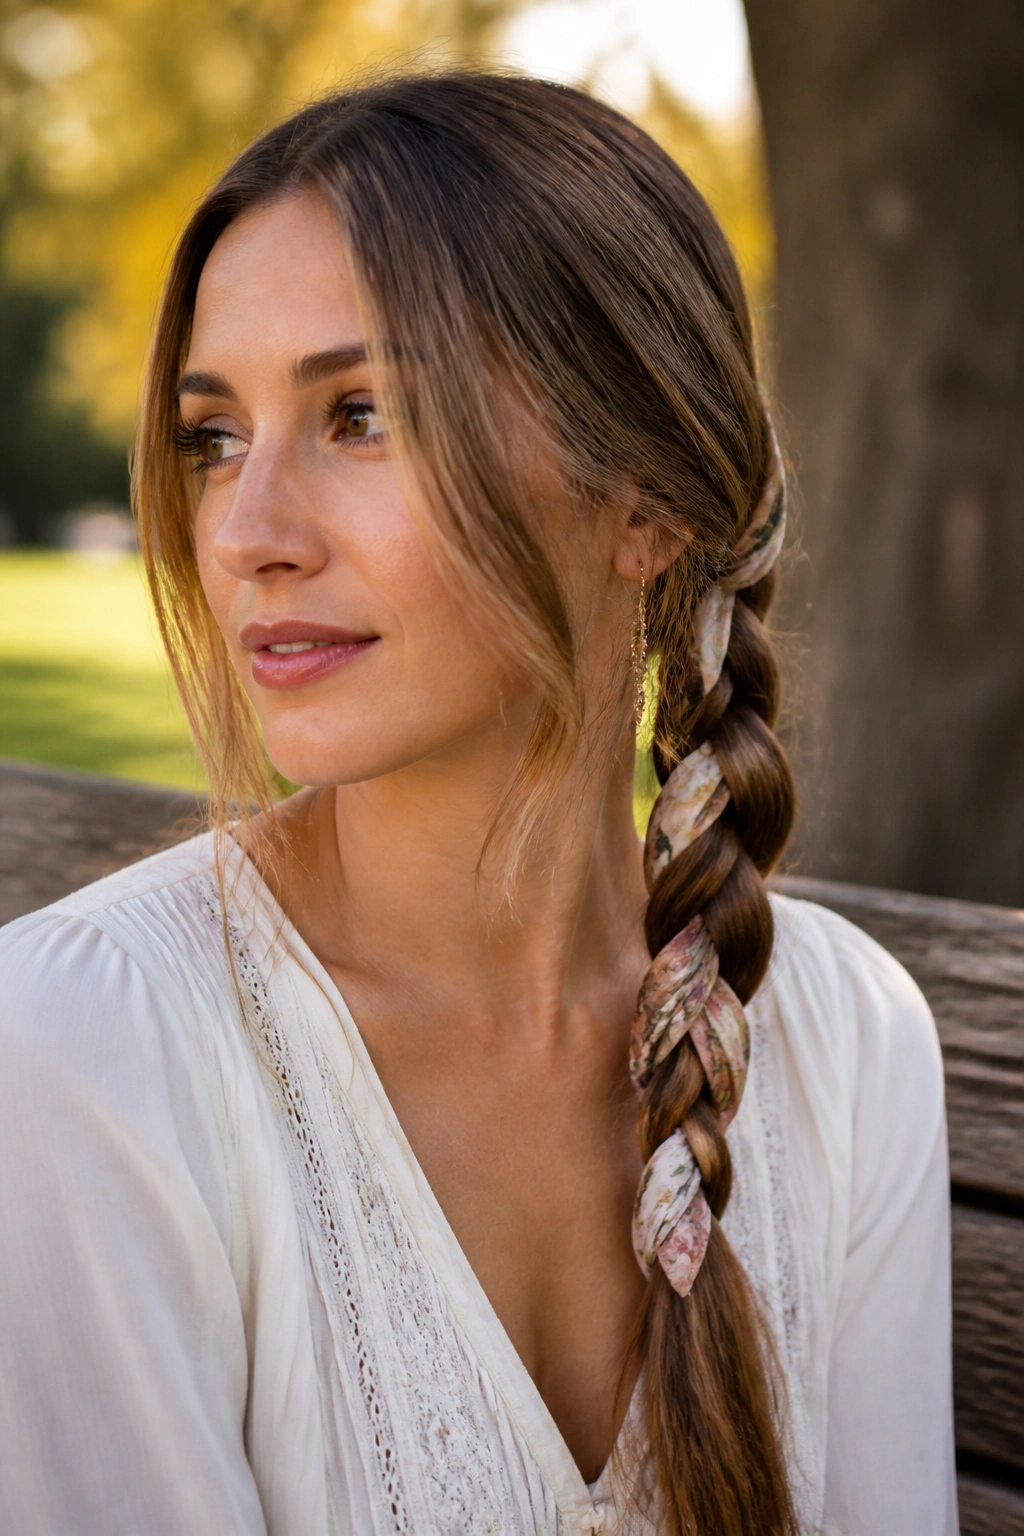
A scarf-woven low braid changes the mood of the whole look in a few seconds. Put a silk scarf or a narrow ribbon into the braid, and the hair stops feeling like it is trying to blend in. It becomes the point. That little hit of color or print is often all a boho braid needs.
Start with a low braid at the nape, then weave the scarf through one of the strands as you braid, or tie it around the base and let it trail through the length. A scarf about 1.5 to 2 inches wide is easy to handle without bulking up the braid too much. Thicker fabric can make long hair look weighed down.
The scarf should feel like part of the outfit, not an apology for the outfit. A neutral linen scarf gives a soft, earthy look. A patterned silk one works better when the clothes are simple. If the fabric slips, hide two bobby pins under the braid to anchor it.
This is one of my favorite ways to make a standard braid feel special without adding more pins, more texture, or more time. Clean braid. Good fabric. Done.
Final Notes
The best bohemian braid hairstyles for long hair usually do three things at once: they keep the hair from feeling heavy, they leave room for texture, and they don’t over-polish the finish. That last part matters more than people think. If every strand is frozen in place, the style loses its easy charm.
A small detail often makes the difference. A loose temple piece. A ribbon. A slightly wider braid edge. You do not need to load on every accessory at once. Pick one thing and let the braid breathe around it.
If you are choosing between two styles, go with the one that works with your hair’s natural bend instead of fighting it. That is where boho hair stops looking copied and starts looking good on you.
