



Pin curl hairstyles for vintage looks have a wider range than most people give them credit for. People hear “pin curls” and picture a tight, doll-like set that belongs in a museum case, not on a real head with a real life. That’s a narrow reading, and it misses the best part.
A pin curl is not one look. It’s a method. Wrap the hair, flatten the loop, pin it down, let it cool, and the result can land anywhere from glossy old Hollywood to a soft brushed wave that barely whispers “retro” until the light hits it from the side.
That flexibility is why pin curls keep showing up in vintage-inspired styling. A set built for a bob behaves differently from one made for long hair tucked into a faux shape. Direction matters. Section size matters. Even the way the hair cools matters, which is one reason a rushed set often looks off no matter how neat the parting was.
A clean side part is the easiest place to start.
1. Classic Side-Part Pin Curls with a Glossy Brush-Out
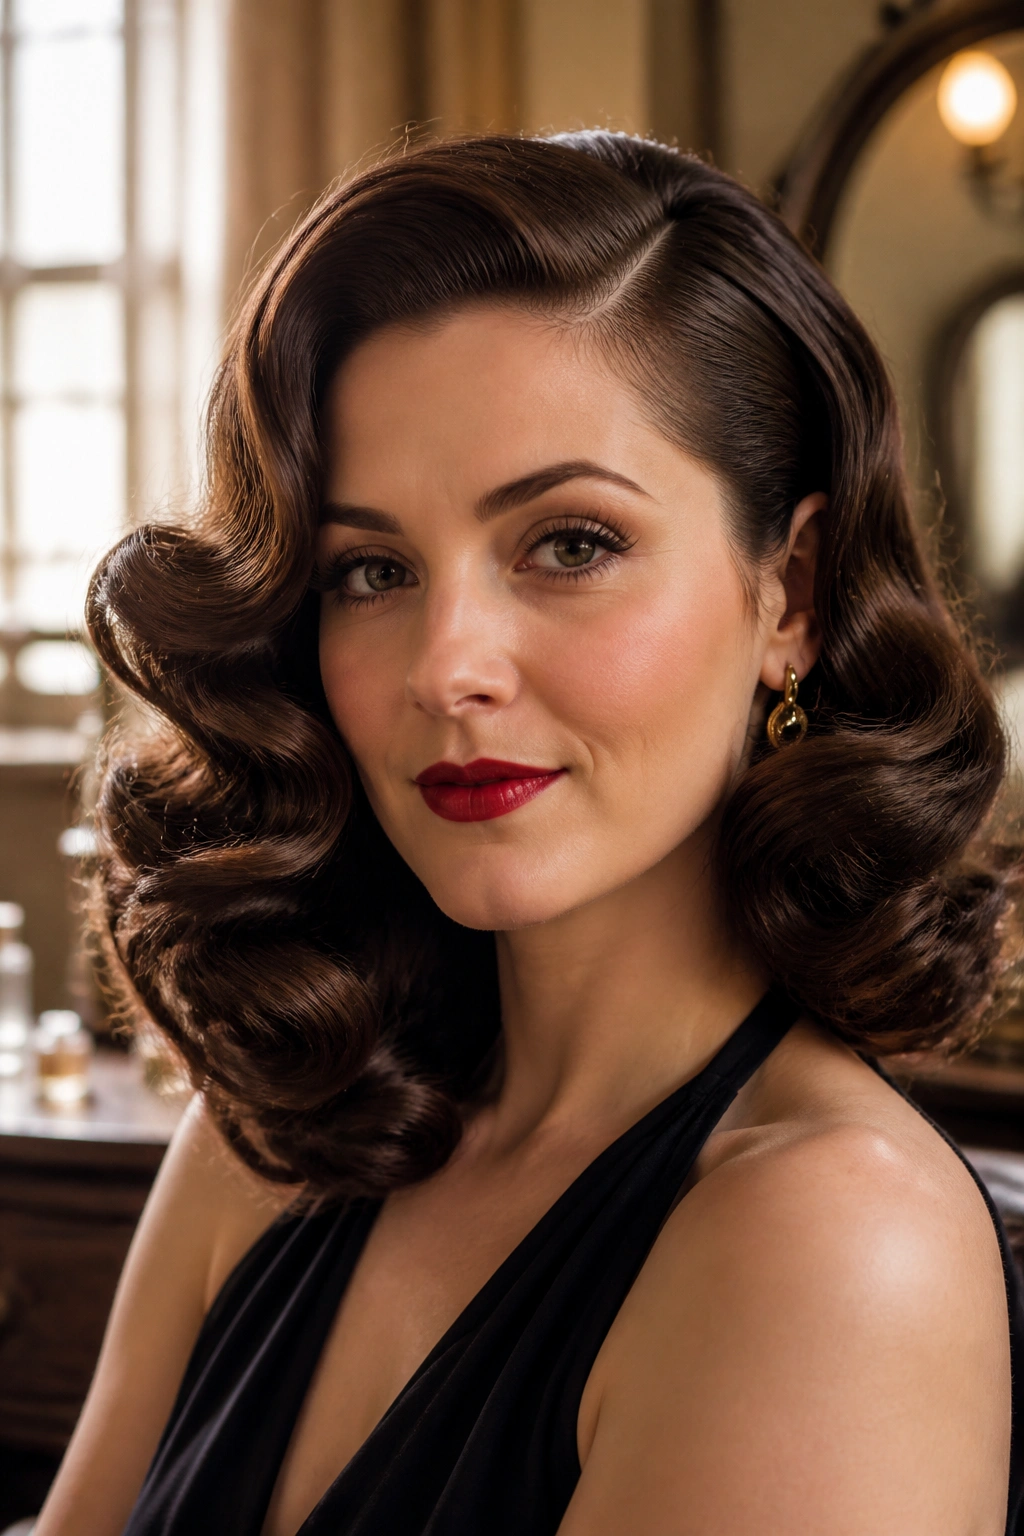
A side part changes the whole mood of a pin curl set. Center parts can feel sweet and symmetrical, but a deep side part gives the style a little tension, which is exactly what makes it read vintage instead of costume-y. The finish can be sleek, brushed out, or softly broken up; all three land in the same family.
Why the Side Part Does the Heavy Lifting
When the part sits low and deep, the front curls have somewhere to fall, and that creates shape without much effort. The face gets framed on one side, the crown lifts a little, and the whole style looks more deliberate. I like this version on shoulder-length hair because it keeps the top from puffing out too much.
A 1/4-inch rat-tail comb is worth using here. Make the part clean, set the curls flat, and direct the front sections away from the face on the heavier side. The curl pattern does not need to be tight. It needs to be tidy.
- Use small, even sections so the brush-out stays smooth.
- Pin each curl flat against the head, not stacked up.
- Let the set cool completely before you take one clip out.
- Finish with a boar-bristle brush if you want a softer, polished wave.
Tip: If the crown looks puffy, the sections were too large. Smaller parts solve more problems than hairspray ever will.
2. Victory Rolls Framed by Tight Pin Curls
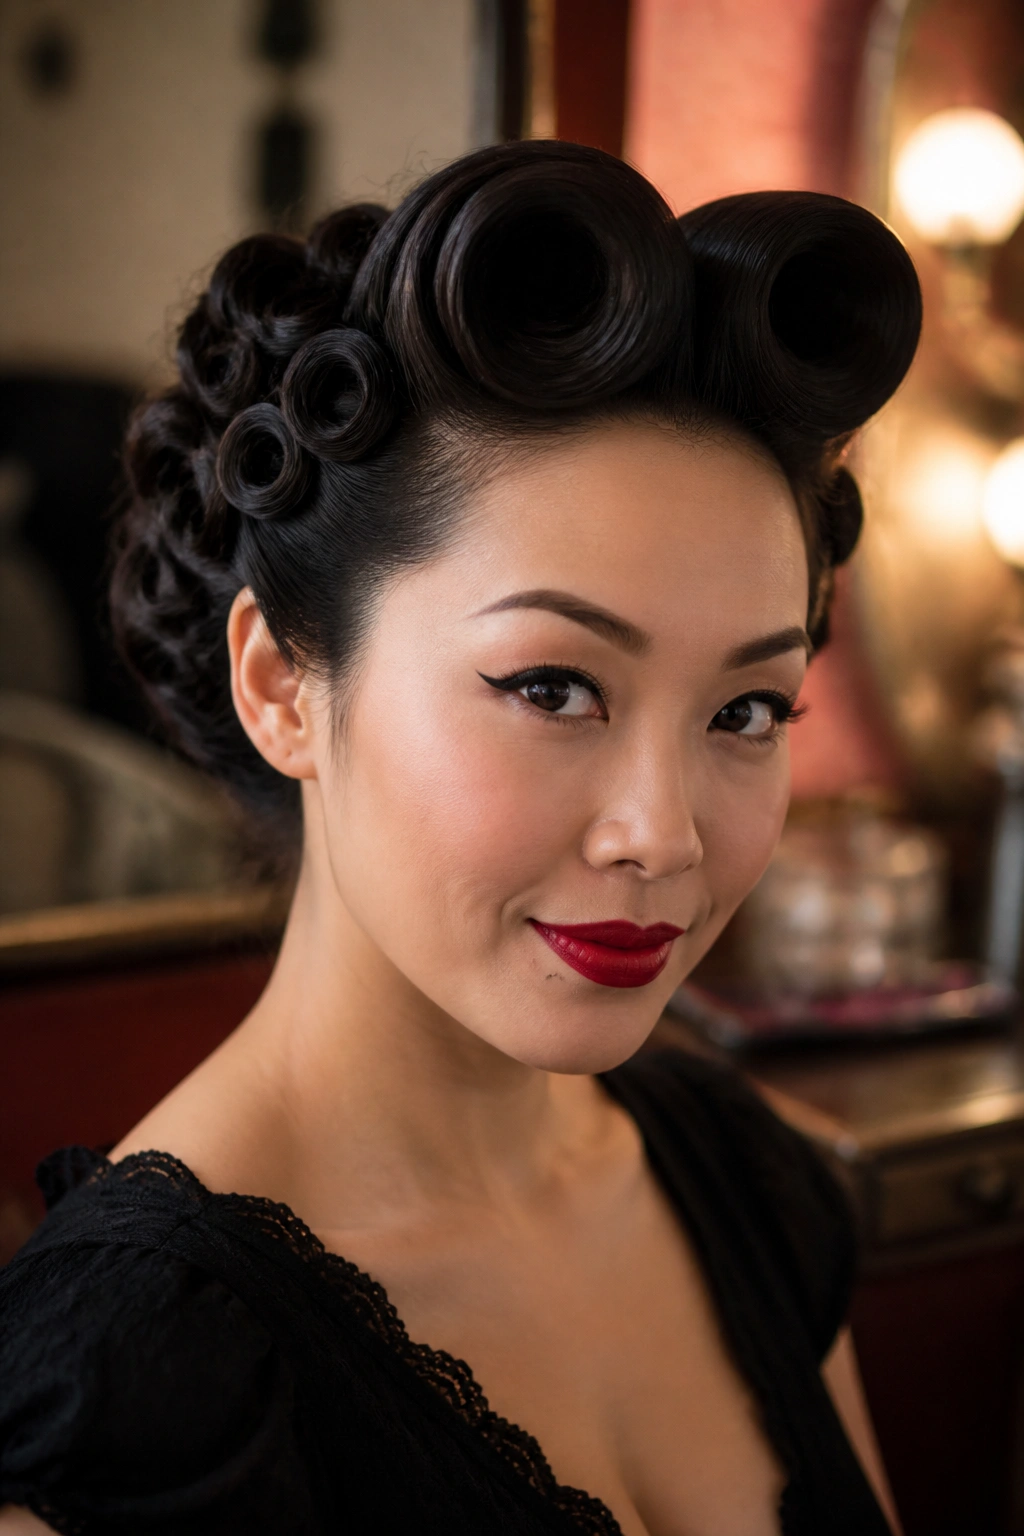
Victory rolls look richer when the base is pin-curled first. That’s the part many people skip, and then the rolls collapse into a shape that feels flat and fussy. Tight pin curls give the front enough structure to stand up, curve back, and stay there without a battle.
The trick is to treat the rolls and the curls as one design, not two separate ideas. Set the front sections away from the face, let them cool, then roll them into place with your fingers. The cool-down matters more than the roll itself. Warm hair will not hold the shape for long, no matter how many pins you jam in.
A good setting lotion helps here because it gives the hair a little grip before styling. Use it lightly. Soaked hair takes forever to dry and can leave the front stiff in a way that looks less vintage and more helmet.
Once the rolls are secured, keep the remaining curls tucked closer to the head. That balance is what makes the style elegant instead of crowded. The top should look sculpted, not stacked. And honestly, that restraint is what gives victory rolls their best version of glamour.
3. Short Bob Pin Curls with Tucked Ends
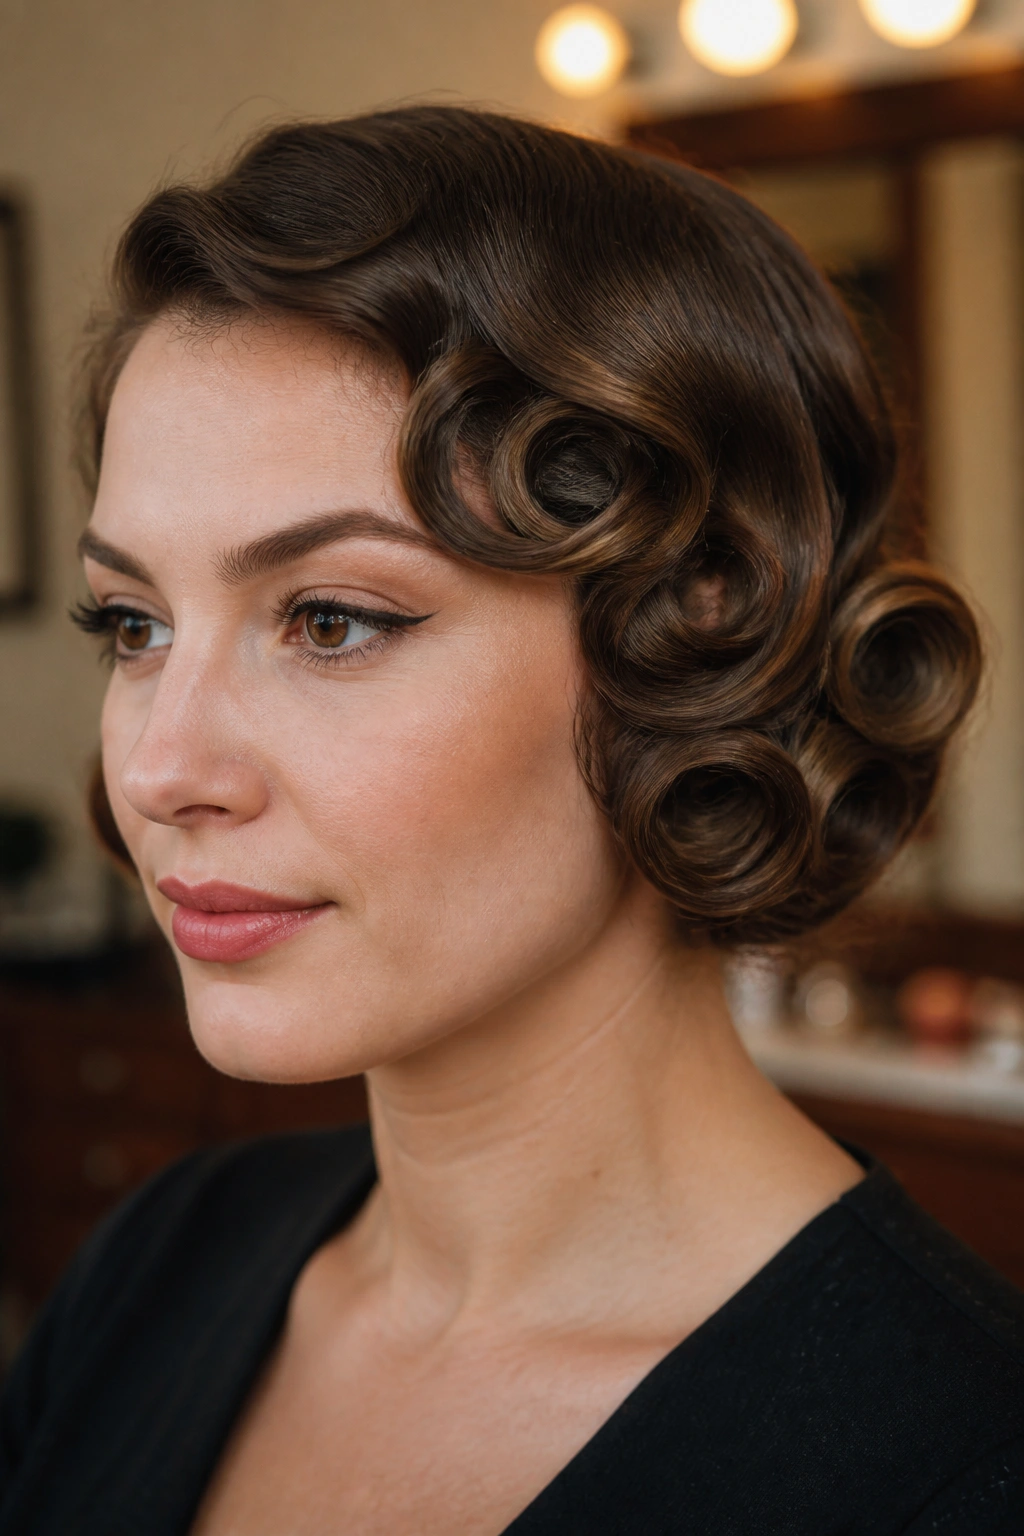
A short bob can look almost shockingly different with pin curls. One day it’s a neat haircut; the next it has that 1940s bend that makes the ends flip under and the crown sit a little fuller. If your hair hits the chin or skims the jaw, this is one of the easiest vintage looks to wear.
Set the curls in 1-inch sections and keep the direction alternating. One curl can go under, the next away from the face. That small change stops the finish from becoming too uniform, which is where short sets sometimes start to look stiff. Short hair shows every decision you make, so the sectioning has to be clean.
The ends matter a lot. Tuck them in with purpose. Loose, pokey ends ruin the line of a bob faster than almost anything else. When the set comes down, use your fingers first and the brush second. A hard brush-out can undo the shape you worked for.
- Best on chin-length to collarbone-length hair.
- Works well with a light mousse before setting.
- Keep pins flat so the curl dries smooth.
- Use a low-heat hood dryer if the hair is thick.
Tiny sections matter. Really. On short hair, they are the difference between sculpted and messy.
4. Half-Up Crown Pin Curl Set for Medium Hair
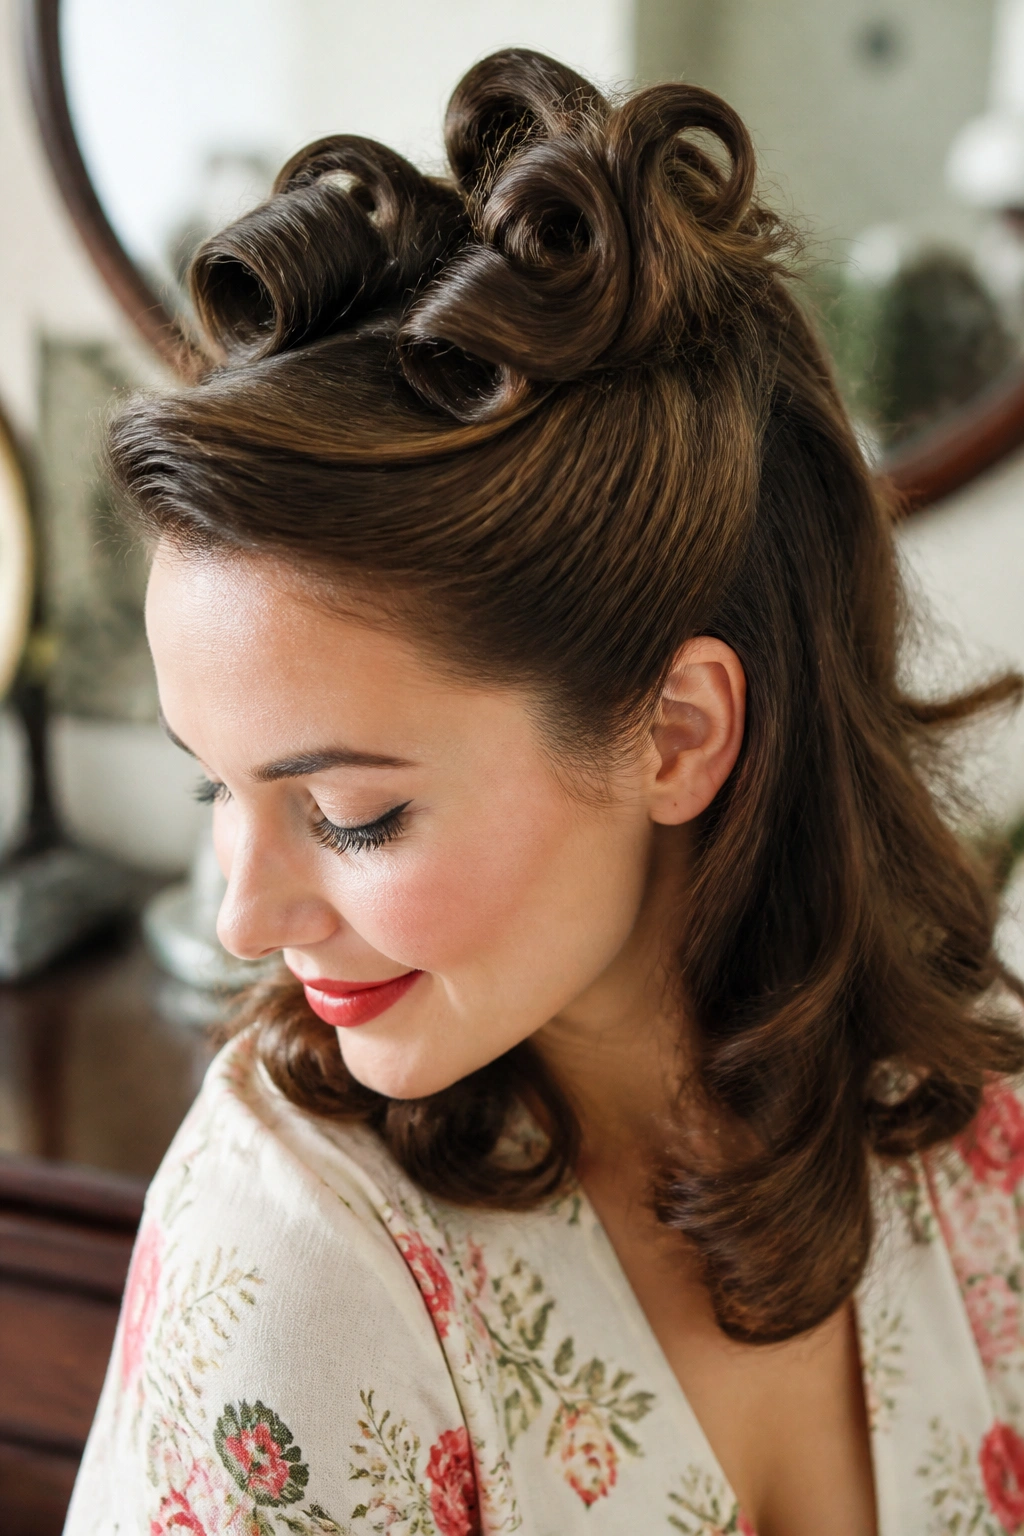
What makes a half-up style feel vintage instead of bridal? The answer is usually the crown. Leave the top too loose and it goes soft in a generic way. Shape it with pin curls and the whole style gets a cleaner outline, especially on hair that falls between the shoulders and the collarbone.
The top section should be handled like its own little haircut. Set the crown in narrow rows, clip the curls flat, and keep the lift centered where you want the eye to go. The back can stay looser. That contrast gives the style some breathing room, which is useful when the hair is medium thick and tends to swell as it dries.
How to Place the Pins
Start at the front and work back in a shallow arc. That keeps the crown from splitting awkwardly at the seam between the top and the sides. If you pin too high, the style can look lumpy. If you pin too low, the lift disappears.
A soft side sweep in front helps a lot here. It turns the look from “set hair” into a proper style. And no, it does not need a dozen pins. Three or four carefully hidden bobby pins usually do the job better than a crowded nest of hardware.
5. Soft Marilyn Waves Made from Large Pin Curls
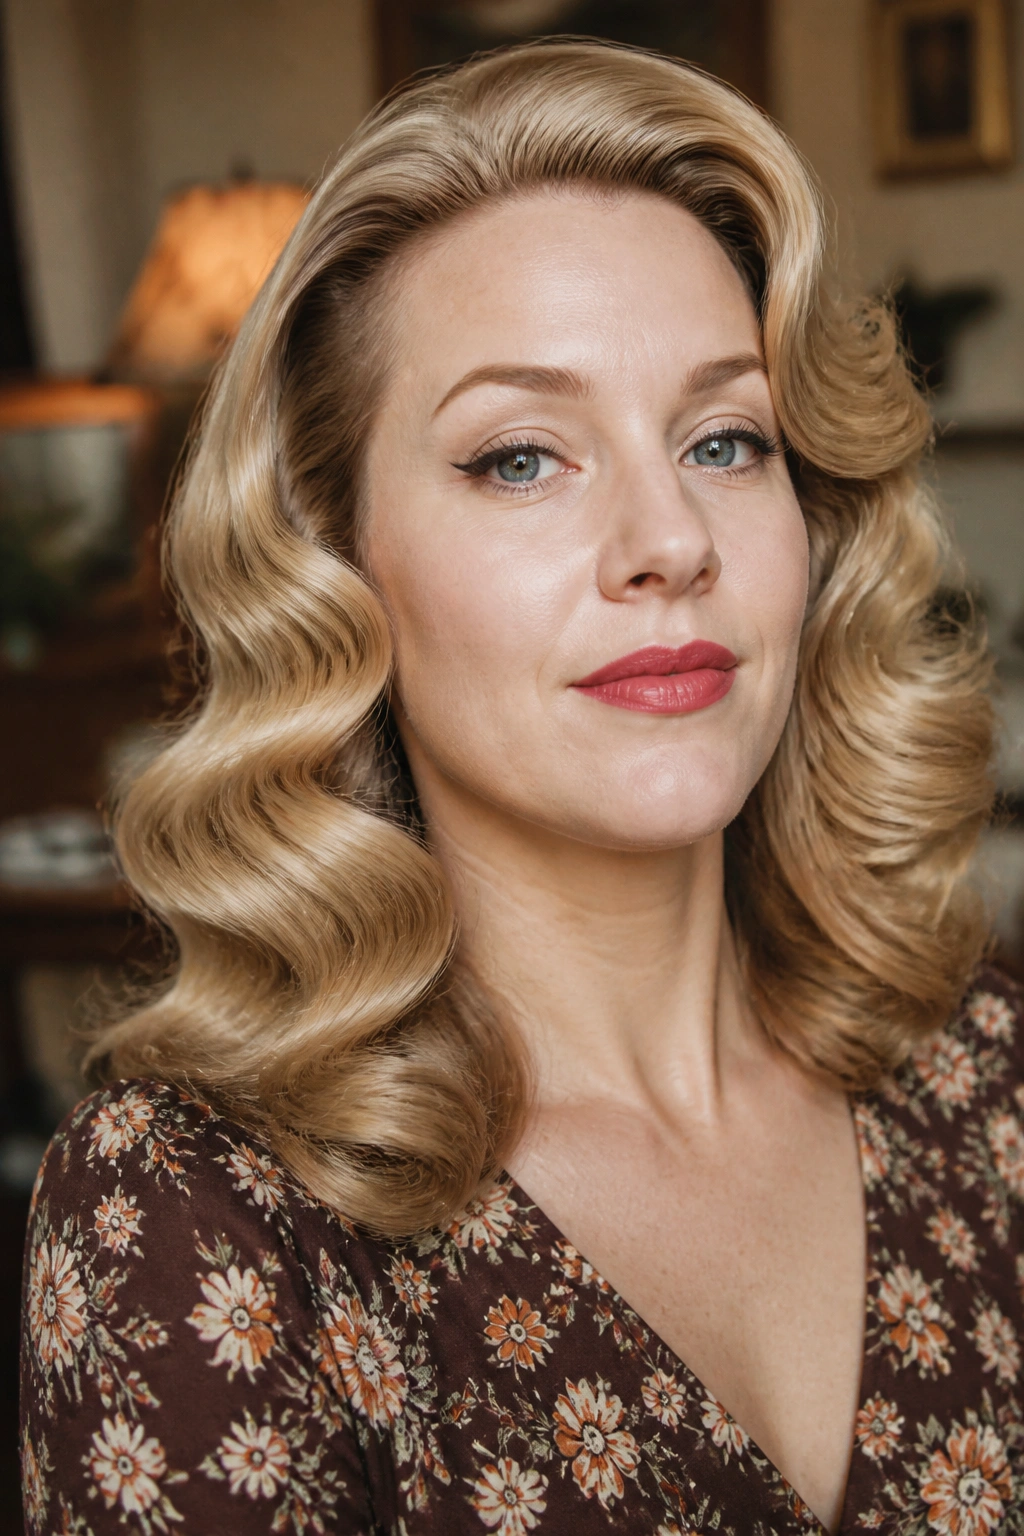
Large pin curls are the reason this look feels plush instead of tight. Marilyn-style waves need room to bend, and that means bigger sections, slower drying, and a brush-out that stops before the hair gets frizzy. The result should move. If it sits there like a shell, the curls were too small or the brush-out went too far.
I prefer this version on hair with some length below the shoulders. The weight helps the wave lie down in a smooth curve. Shorter hair can still work, but the finish gets bumpier, and you have to be more careful about where each curl starts. At the cheekbone, not the ear, is usually the sweet spot.
The product matters less than the shape, but a light setting foam or lotion helps the ends stay smooth. Skip anything sticky. Sticky hair is hard to brush into a soft wave, and the whole point here is movement that feels clean at the surface.
The nicest part of this style is how forgiving it can be once you know the pattern. Large pin curls do not need perfect symmetry. They need a good line, enough drying time, and a brush that knows when to stop.
6. Hidden Pin Curls Under a Low Chignon
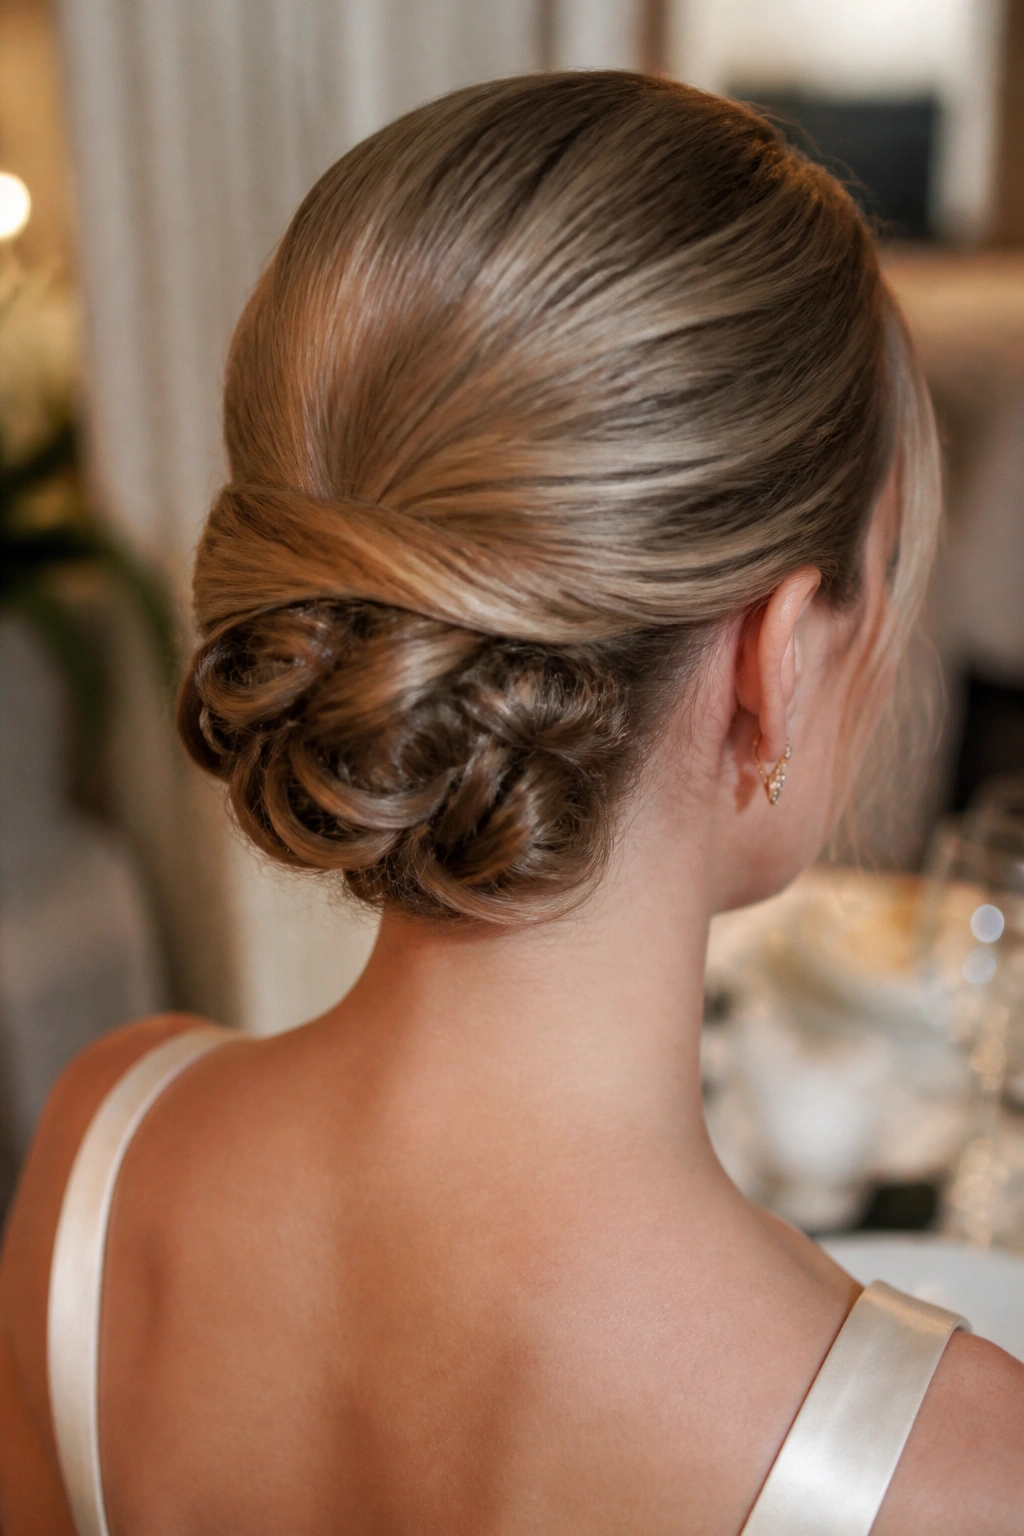
A plain low bun can look fine. A low chignon with hidden pin curls looks finished. The difference is the texture tucked inside the shape, which gives the style depth even when most of the hair is gathered and pinned away from sight. It feels formal without looking stiff.
This is one of those styles where people assume the curl work is decorative. It is not. The hidden pin curls help the bun hold its curve and stop the front from collapsing by the end of the night. That matters if your hair is silky or very fine, because loose gathered styles tend to slip on smooth hair.
Unlike a simple wrap bun, this version is built in layers. The front is set, the mid-lengths are curled, and only then is the hair gathered low at the nape. The chignon sits better because the base has texture underneath it. That means fewer pins, which is always welcome.
Best for formal dinners, weddings, or any event where you want the shape to feel controlled. If you want a look that says polished without shouting, this is one of the smartest pin curl hairstyles to reach for.
7. Faux Bob Pin Curls for Long Hair
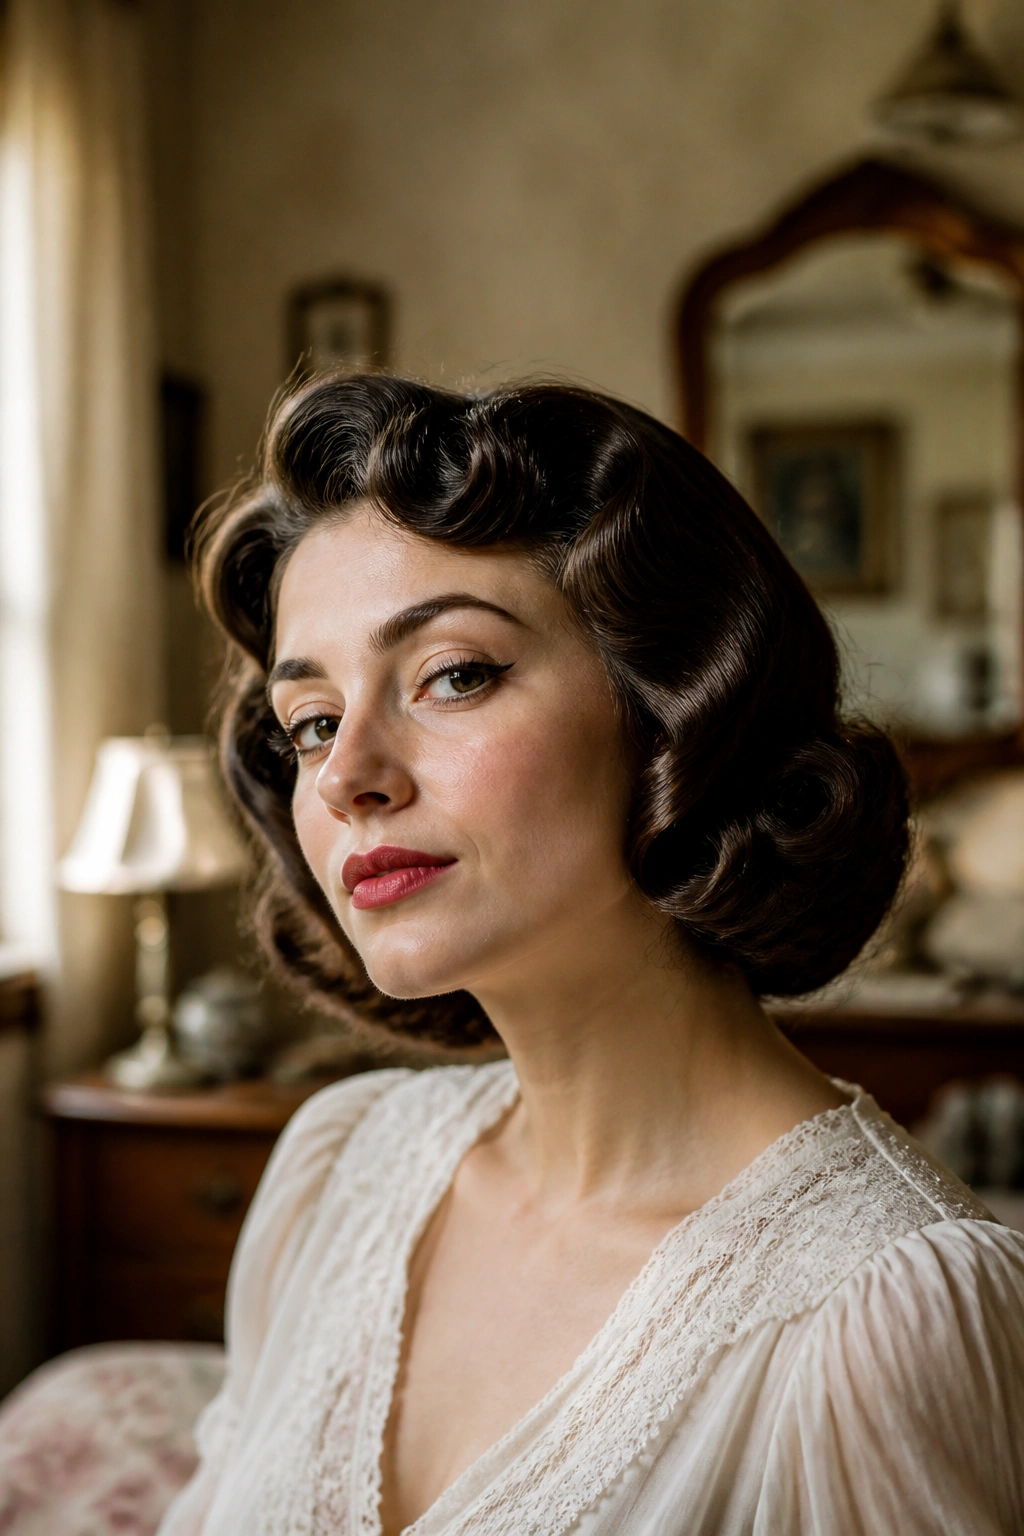
Long hair can wear a bob illusion better than most people expect. The trick is folding the length inward and pinning it so the ends disappear under the outer layer. Once the pin curls are brushed out, the shape reads as a bob from the front and a tucked set from the back.
I like this style when someone wants the vintage silhouette without cutting a single inch. It has a little theater in it, but not in a bad way. The line at the jaw matters most, so the front sections should be set with care and clipped close to the cheekbones rather than left to sag.
A few details make the difference:
- Use strong bobby pins or small flat clips for the hidden length.
- Smooth the ends inward before the pins go in.
- Keep the crown slightly lifted so the back does not look flat.
- Finish with a light mist of flexible-hold spray.
The back can be a little messy because nobody sees it once the style is finished. I actually think that makes the whole thing better. It gives the illusion room to work.
8. Pin Curl Bangs with a Clean Front Roll
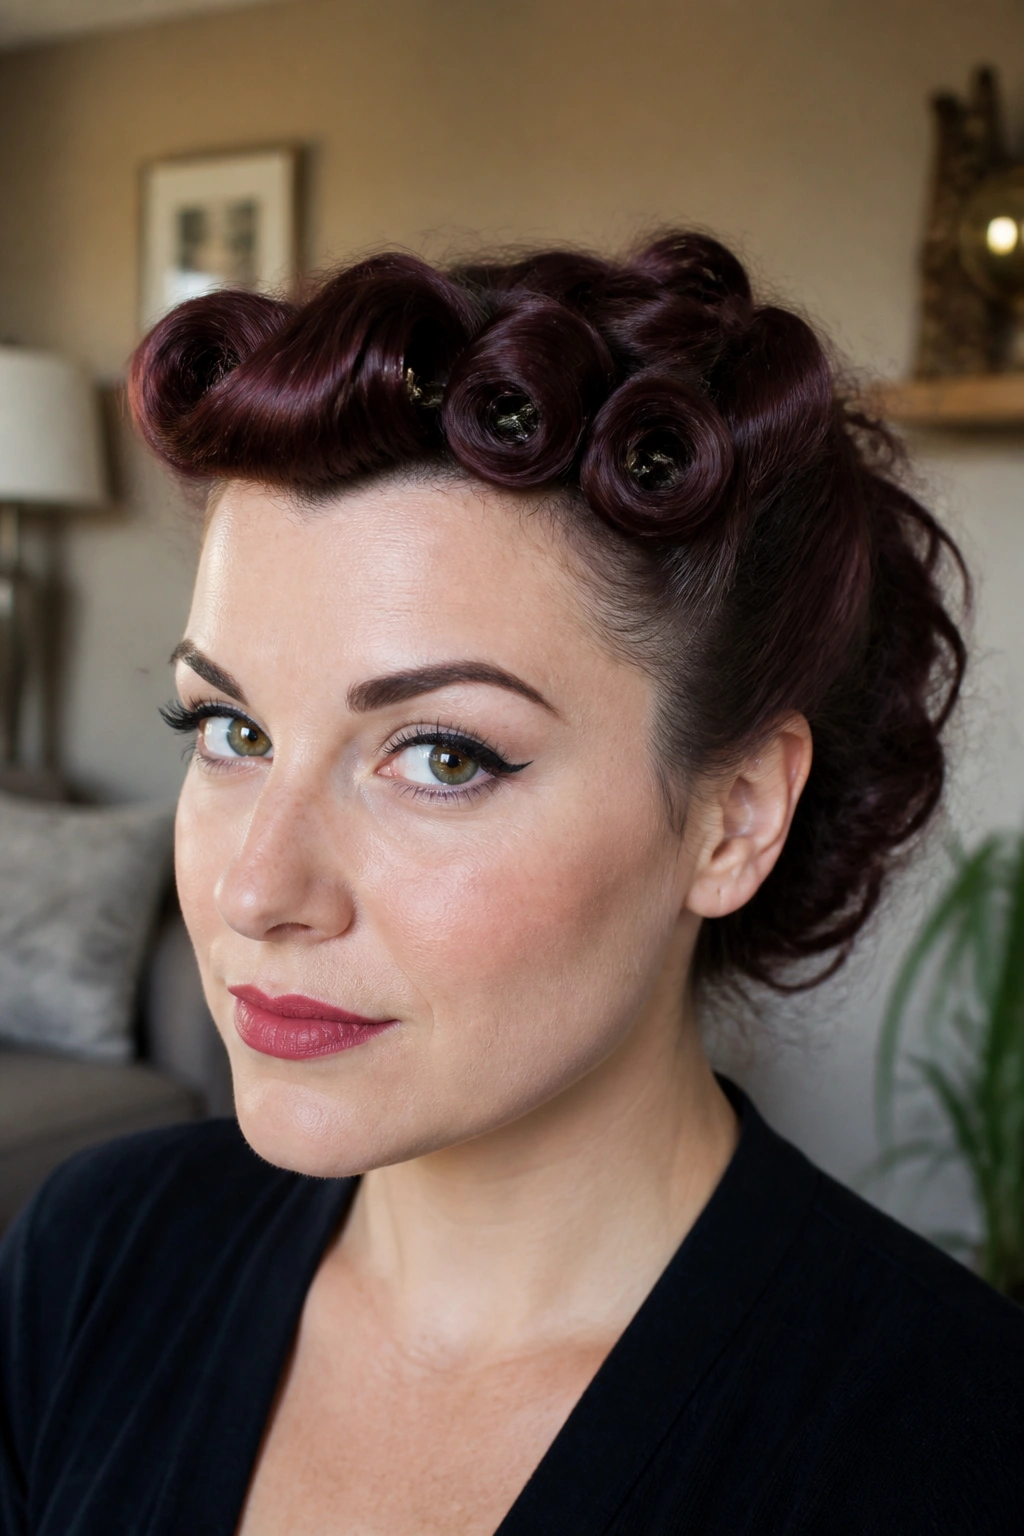
Can bangs carry a vintage look by themselves? Yes, and they do more work than people realize. A front roll or pin-curled fringe gives a hairstyle a clear point of focus, which is useful when the rest of the hair stays simple. It is a small move with a big payoff.
The fringe area should be handled with care because bangs show every crease. Roll them once, pin them flat, and let them cool in that position before you touch anything else. If the bangs are short, use a small setting rod shape with the pins and avoid over-direction. Too much pulling at the roots can leave the front standing up in a way that feels awkward.
What to Watch For
The front should soften the face, not fight it. If the roll is too high, it steals attention from the eyes. If it is too wide, the shape gets cartoony. A narrow, smooth roll usually looks best on oval and heart-shaped faces, though blunt bangs can make it work on square faces too.
From there, the rest of the hair can stay as plain or as dressed up as you like. That is the nice part. The bangs do the vintage talking for you.
9. Finger Waves Blended into Pin Curls
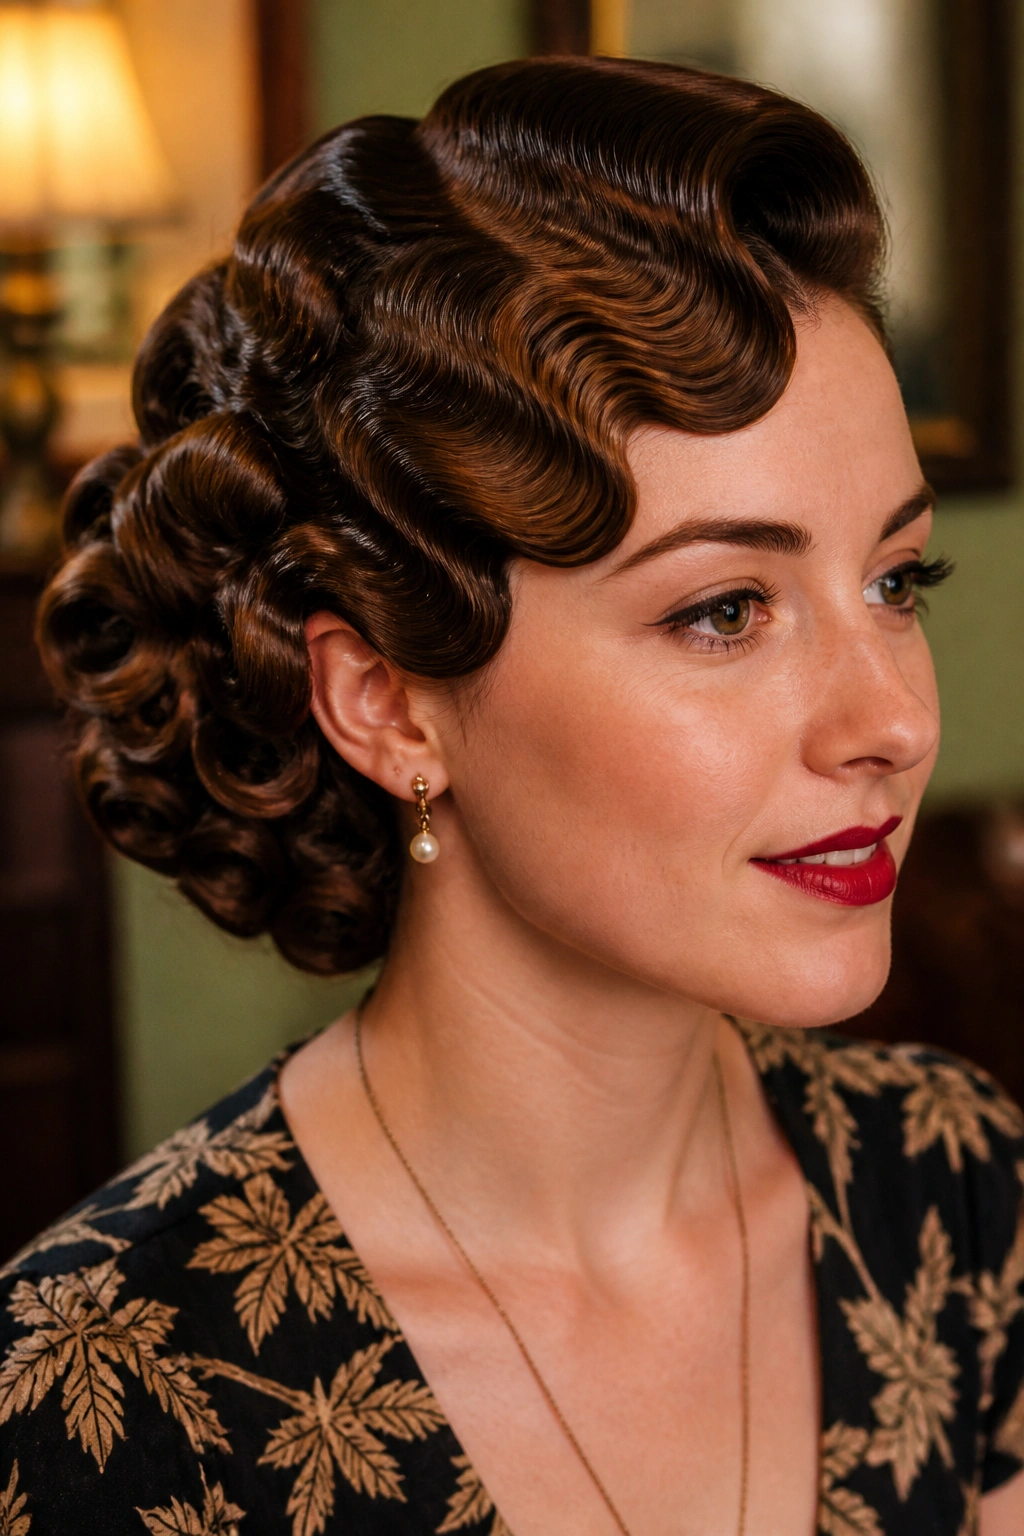
Finger waves get the spotlight, but pin curls are often what keep the whole style from falling apart. That blend works because the wave sets the front line and the curls build the body behind it. You get a face-framing shape at the top and movement through the lengths, which is more useful than people admit.
The front needs a little patience. Use a comb and setting lotion to carve the wave, then pin the sections that sit just behind it. The back can stay tighter or softer depending on the mood you want. If the goal is a true 1930s feel, keep the waves neat and the curls compact. If you want something looser, let the pin curls brush out a bit.
One sentence is enough here: Don’t brush the waves out too soon.
That mistake is common. The front loses its line, the whole style goes fuzzy, and you end up with hair that is halfway between two eras. Give the set time, then release it carefully with your fingers first and a brush only where needed. The result should look shaped, not flattened.
10. Bandana-Ready Pin Curl Set
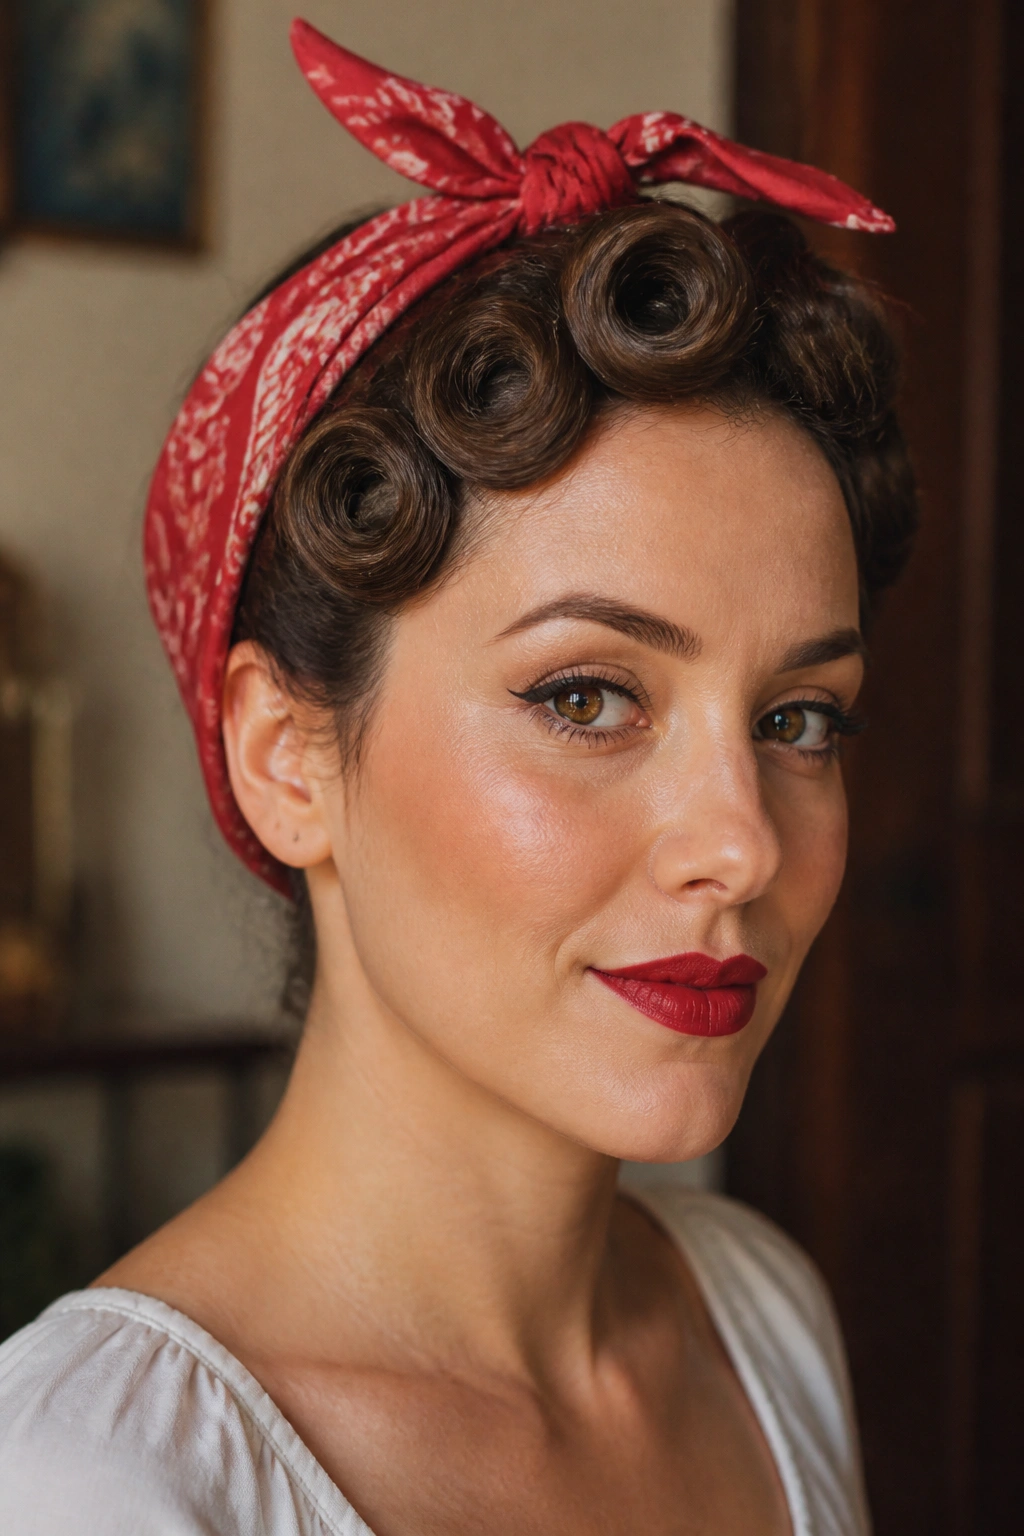
A bandana changes the whole game. Once fabric sits across the hairline, the style underneath has to do a lot of quiet work. Pin curls are ideal here because they create a molded base that stays put under a knot, tie, or folded scarf without fighting the accessory.
This look is practical and a little playful. The curls can sit low around the ears, or the front can be rolled back so the scarf frames the face instead of hiding it. Either way, the set should be dry and secure before the bandana goes on. Damp hair under fabric is a bad idea. It flattens, frizzes, and takes on every crease the cloth wants to give it.
- Keep the crown smooth so the scarf lies flat.
- Place the side curls low enough to peek out below the tie.
- Use pins that sit flush if the bandana crosses the top.
- A satin scarf underneath helps the set last longer.
The best part is how forgiving this style can be. It looks intentional even when it is modest. That is a rare quality, and I never get tired of it.
11. Pageboy Pin Curls Curving Under the Jaw
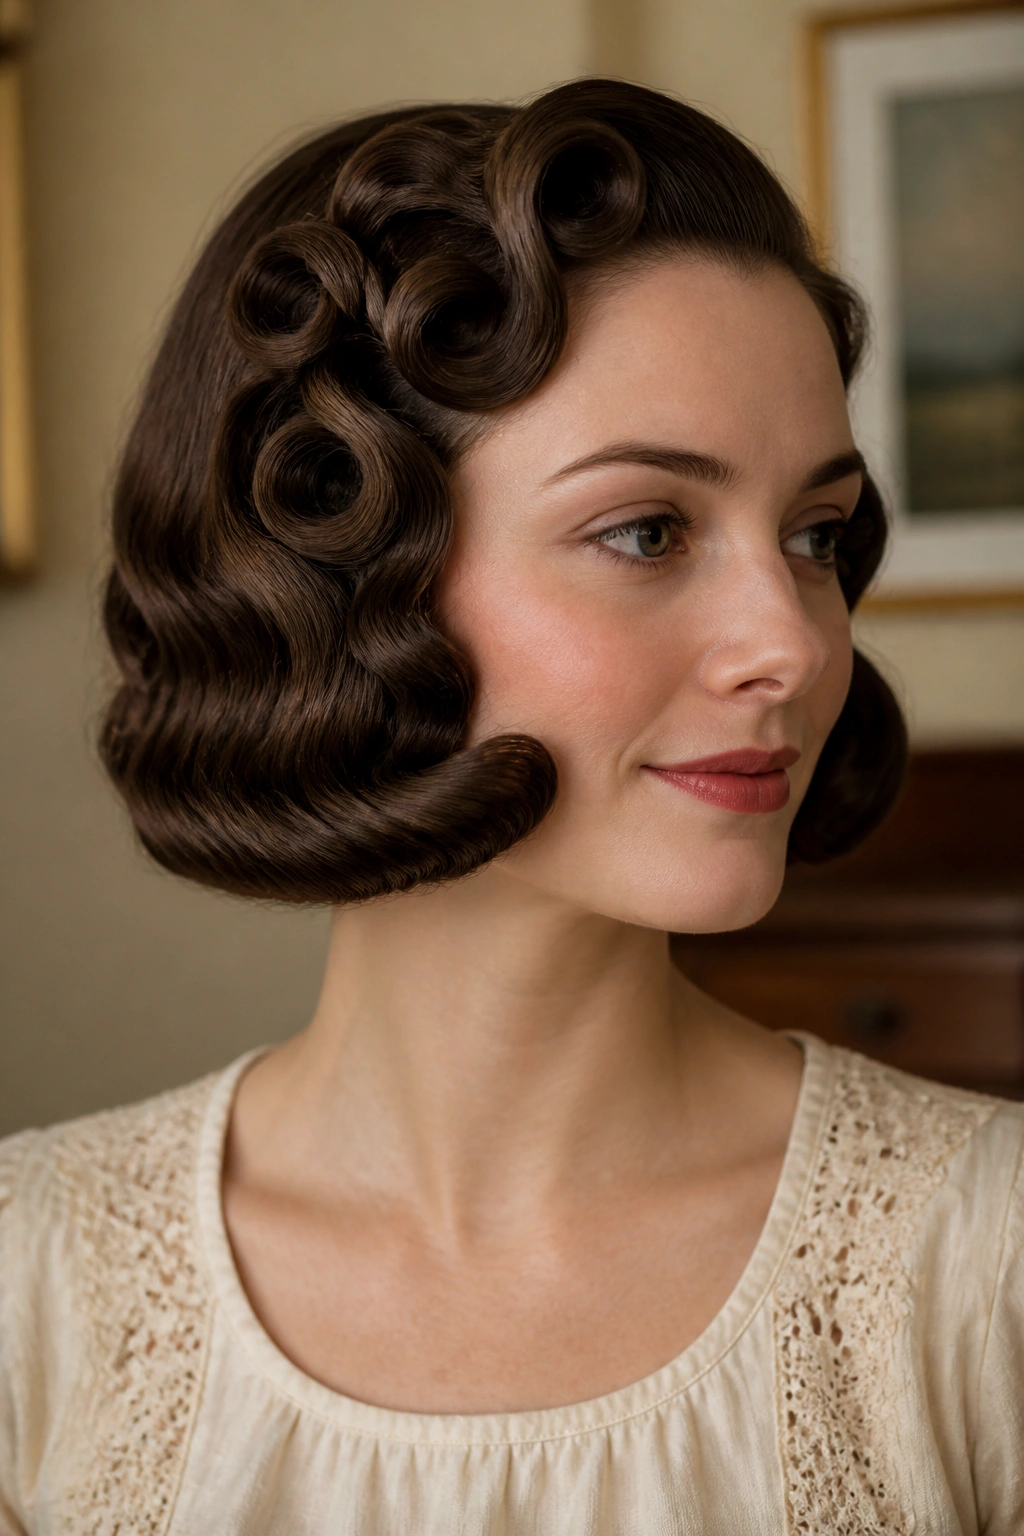
Pageboy shapes are more precise than people think. The hair curves under, the line hugs the jaw, and the finish feels neat without becoming severe. Pin curls make that under-bend much easier to hold because they train the ends in the right direction before the brush-out starts.
Compared with a bob set, the pageboy leans smoother and a little more rounded. The silhouette is what matters. The hair should skim the face and tuck under at the bottom, not kick out at the ends. That undercurve is the whole look.
This style suits straight to softly wavy hair best, especially if the hair has enough length to sit just under the chin. Very thick hair can wear it too, but the sections need to be smaller or the bottom edge will puff out. A little smoothing cream at the ends helps the curve stay tidy.
If you want a vintage cut without the actual haircut, this is the one I’d point to first. It has that old salon feel, but it still wears easily with a sweater, a collar, or a sharp pair of earrings.
12. Pompadour Pin Curls with Strong Crown Lift
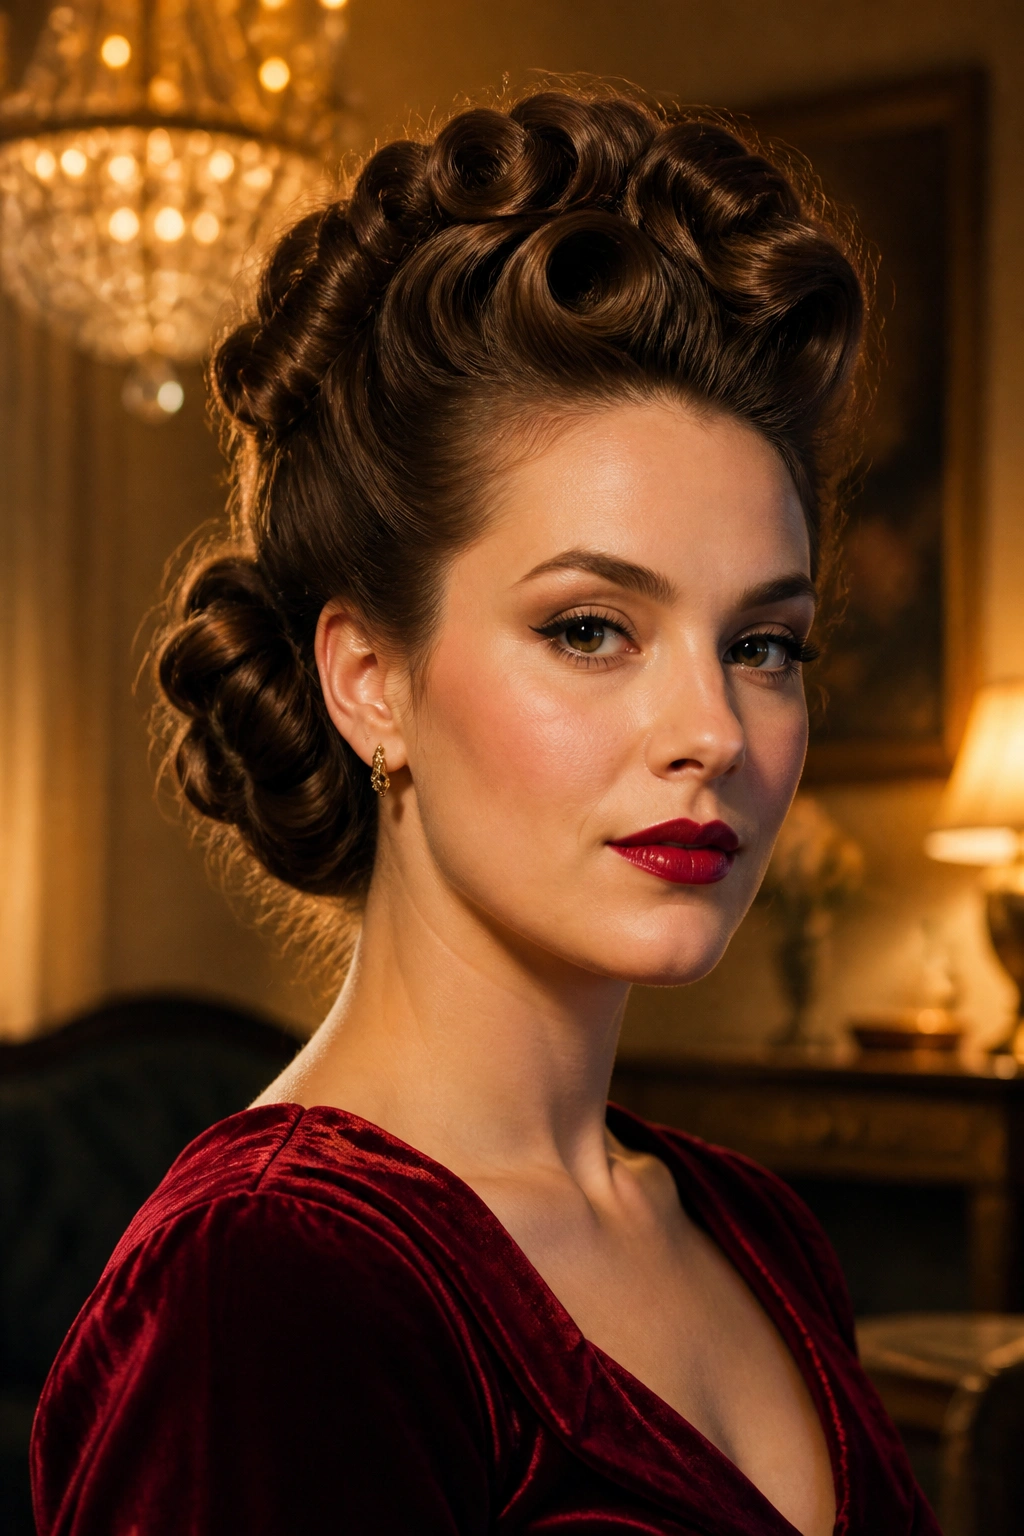
A good pompadour is all about lift at the roots, and pin curls are a sneaky way to get it without backcombing the life out of your hair. Set the crown forward, pin it in a rounded shape, and let the roots cool high before you brush the front into place. The shape holds better because it was trained there instead of teased there.
The front should rise, then sweep back. Not straight up. Not flat. That little curve is what keeps the style from turning into a rockabilly caricature. The sides can stay closer to the head so the crown looks even taller by contrast.
How to Keep the Front from Collapsing
Use a bit more support at the base than you think you need. A few crossed bobby pins hidden under the lifted section do more work than a heavy spray coat ever will. If the hair is fine, a root mousse before setting helps. If it is coarse, the set itself usually provides enough hold.
This look has attitude. I like it for evening outfits, sharp collars, and anything that could use a bit of height without a full updo. It’s bold, but not messy.
13. Halo Pin Curls for Natural Curls and Coils
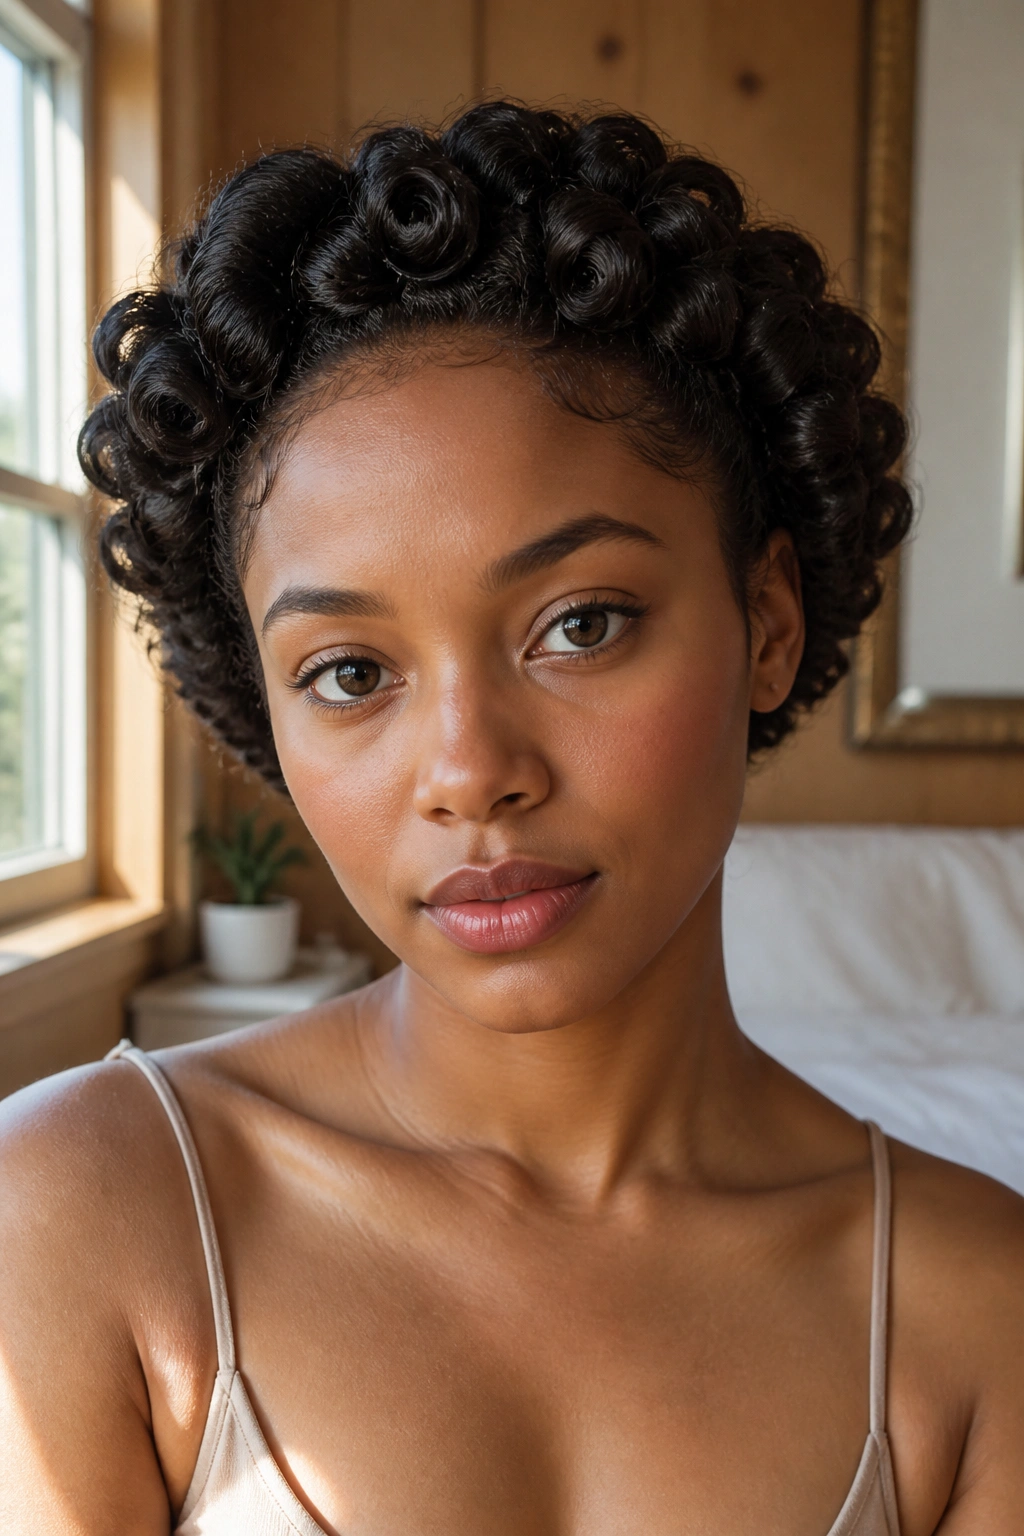
Halo pin curls work beautifully on natural textures because they let the hair keep some of its own shape instead of forcing everything into one perfect spiral. The style sits around the head like a soft ring, which feels vintage without flattening the texture that makes the hair interesting in the first place.
The set should start on damp, well-conditioned hair, but not dripping wet. Section size is the thing to watch. Too large, and the curls dry unevenly. Too tiny, and the style can look overworked. A medium-small section is usually the sweet spot, especially around the hairline and crown where shape matters most.
Use pins or clips that hold securely without denting the curl. Satin or silk at night helps more than almost any styling product. The hair keeps its curve, the line stays smooth, and you do not wake up to a puffed halo that has lost its edges.
- Set the front in a gentle arc.
- Keep the crown directional, not random.
- Let the curls dry fully before removing pins.
- Finish with a light oil on the ends, not the roots.
There is a quiet elegance to this version. More important, it respects the hair instead of fighting it.
14. Retro Ponytail with a Pin Curl Crown
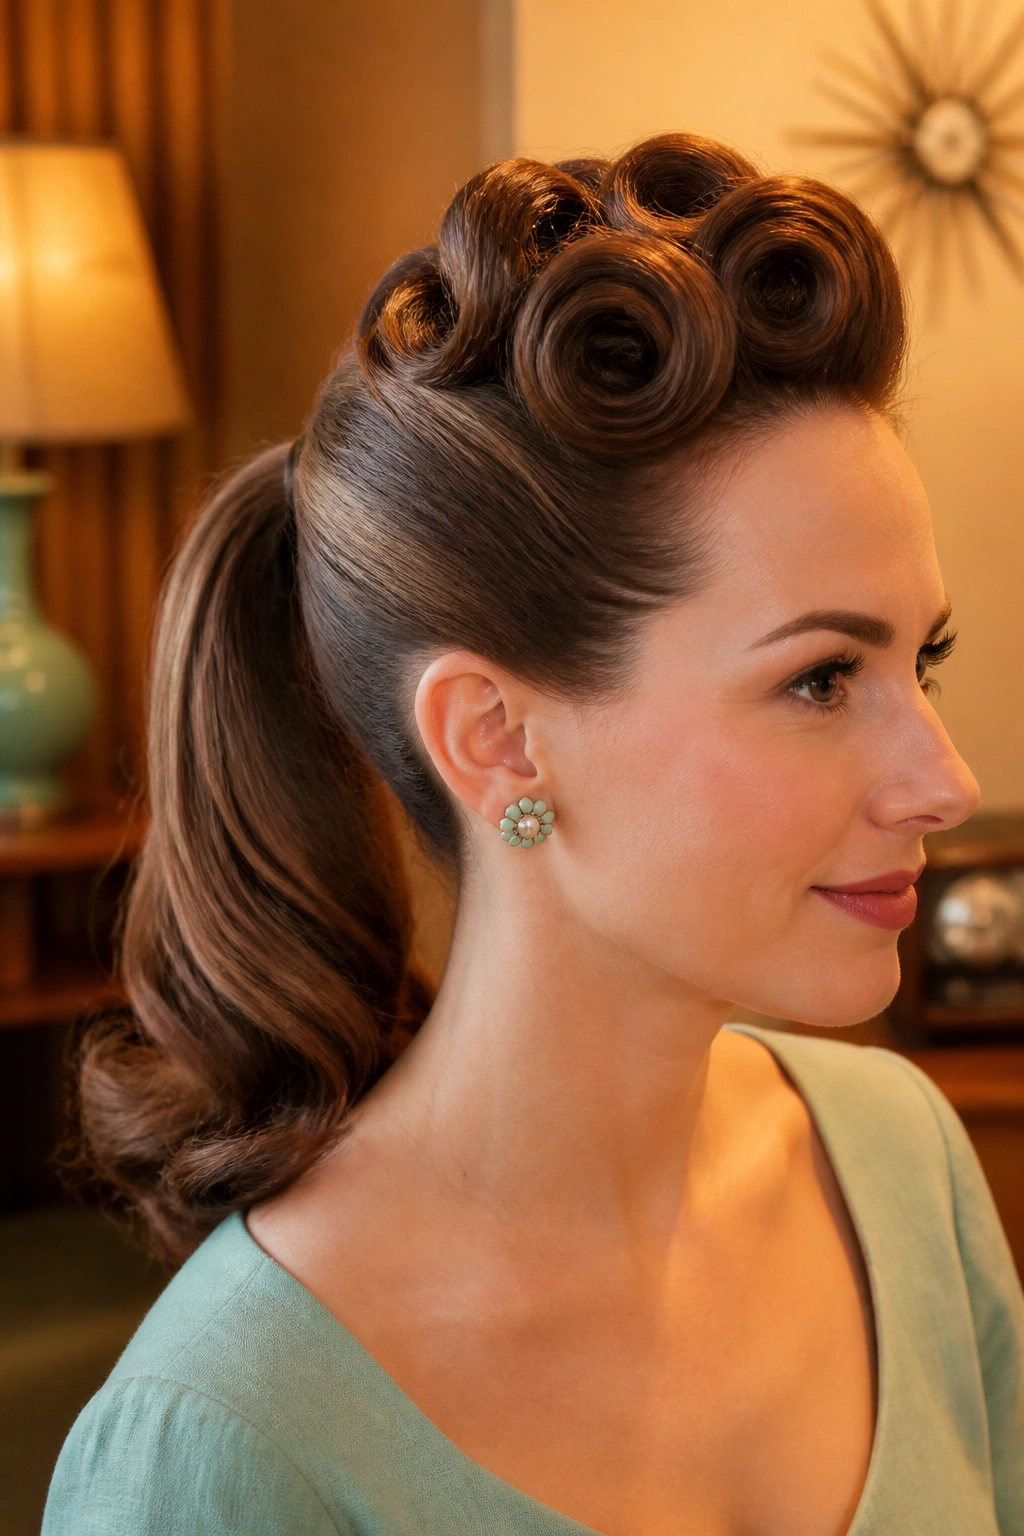
A ponytail can look vintage if the crown has enough shape. That is the piece most people miss. Pull the hair back too plainly and you just get a ponytail with a nostalgic outfit. Set the top in pin curls first, and suddenly the ponytail feels planned.
The crown should sit with a little lift before the elastic goes in. After that, smooth the sides into the tail and wrap a strand around the base to hide the band. If the hair is layered, a few hidden pins at the back of the crown keep the lift from sagging. Simple, but it works.
This style is a good choice when you want your hair off your neck but still want some vintage flavor. It plays well with wide collars, earrings, and makeup that leans a little dramatic. The ponytail itself can stay low and loose, or it can be brushed into a soft wave depending on how formal you want it.
One small thing: do not make the crown too tall. The style should hint at retro, not shout at the room.
15. Loose Brush-Out Pin Curls for Everyday Wear
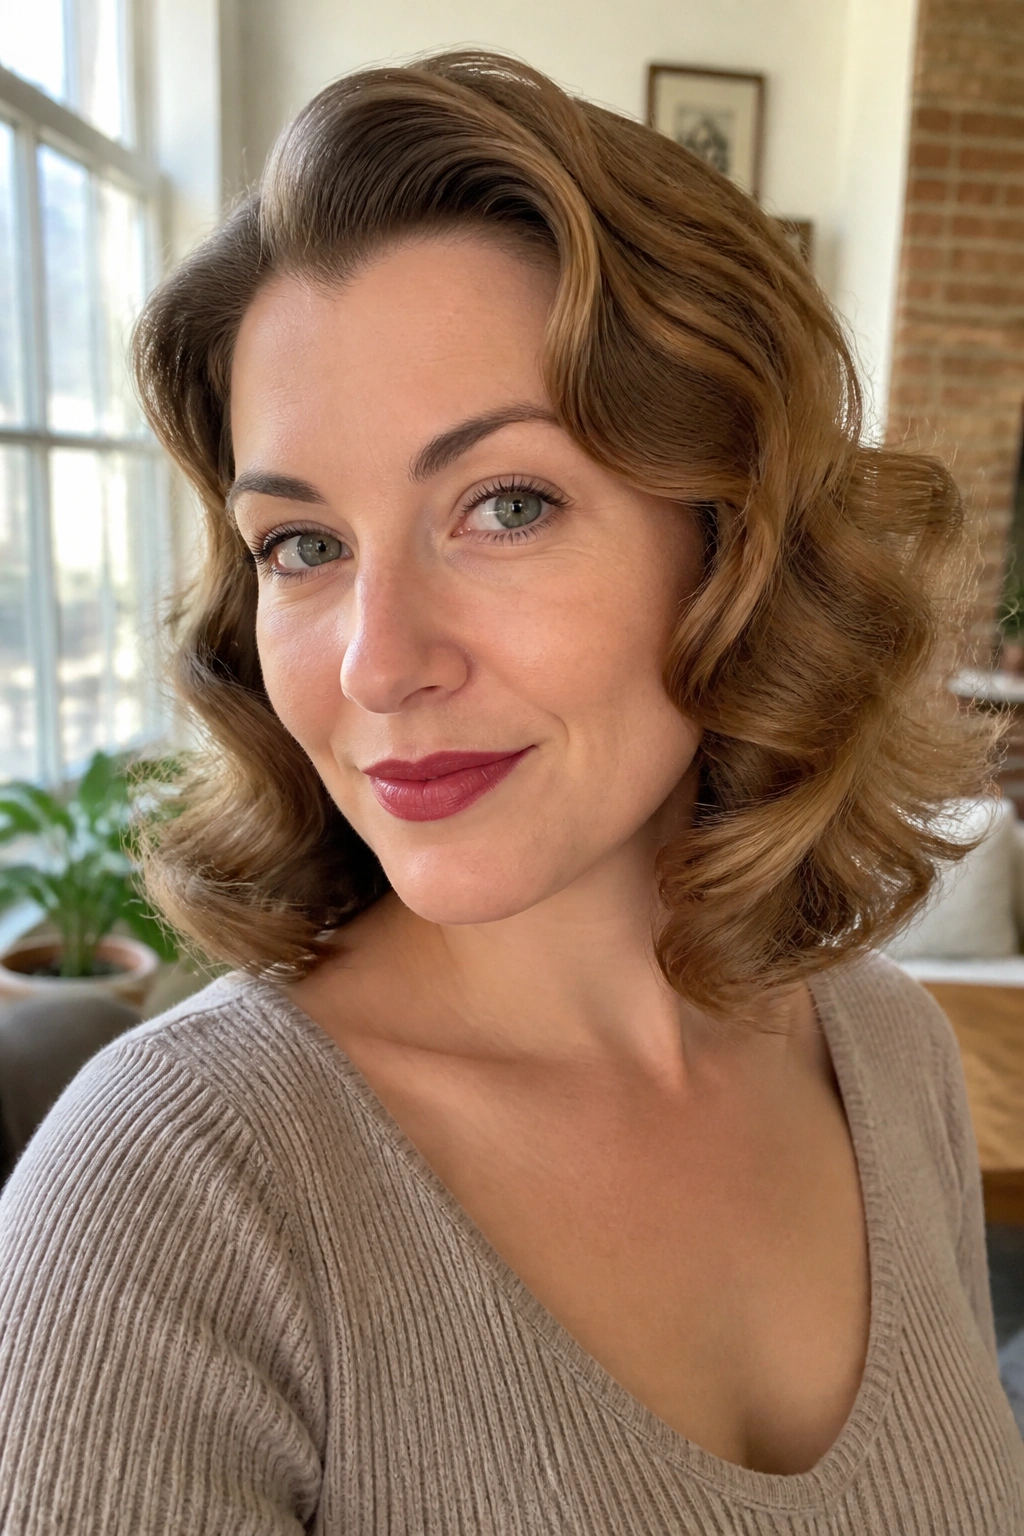
Not every vintage look has to feel like a costume change. Loose brush-out pin curls are the version I reach for when I want soft shape, movement, and a little polish without a lot of fuss. The curls are set as usual, but the brush-out stays gentler, so the waves remain visible and the hair keeps some bounce.
This works especially well on day-two hair. A little texture helps the set hold, and the finished style often looks better after the hair has had time to settle. Use a wide-tooth comb at the roots if needed, then switch to a soft brush only through the mid-lengths and ends. That keeps the curve without turning everything frizzy.
A few habits make this version last:
- Set the curls in moderate sections, not huge ones.
- Let the hair cool all the way through before releasing it.
- Stop brushing when the waves look smooth, not when the hair feels flat.
- Mist the finished style with light-hold spray from at least 8 inches away.
This is probably the most wearable of all the pin curl hairstyles on the list. It gives you the vintage line, the softness, and the ease. And if a style can do all three, I’m paying attention.
