



Long hair was made for vintage braid hairstyles. The extra length gives you room to build shape instead of just tying things back, and that matters more than people think. A braid that sits flat on a collarbone-length cut can turn into a real style once there’s enough hair to wrap, tuck, and pin.
What makes these looks useful is that they solve a practical problem without looking practical. A milkmaid braid keeps hair off the neck. A side Dutch braid keeps the front controlled. A pinned Gibson roll gives you that old-fashioned silhouette without needing a full set of hot rollers or a complicated updo. Clean parting, a little tension, and the right pins do most of the work.
The details matter. A 1-inch section at the hairline, a braid pulled outward just a touch, a crossed pair of bobby pins at the nape — those are the small moves that separate a plain braid from something with shape. You do not need salon hands for most of these. You do need a comb, a mirror that shows the back of your head, and enough patience to redo a section that slips.
Some of these styles read romantic. Some look neat and severe in a good way. A few sit right in the middle, which is usually where the most wearable hair lives. Start with the style that matches your texture, not the one that looks prettiest in a still photo, and the whole thing gets easier fast.
1. Milkmaid Crown Braid for Long Hair
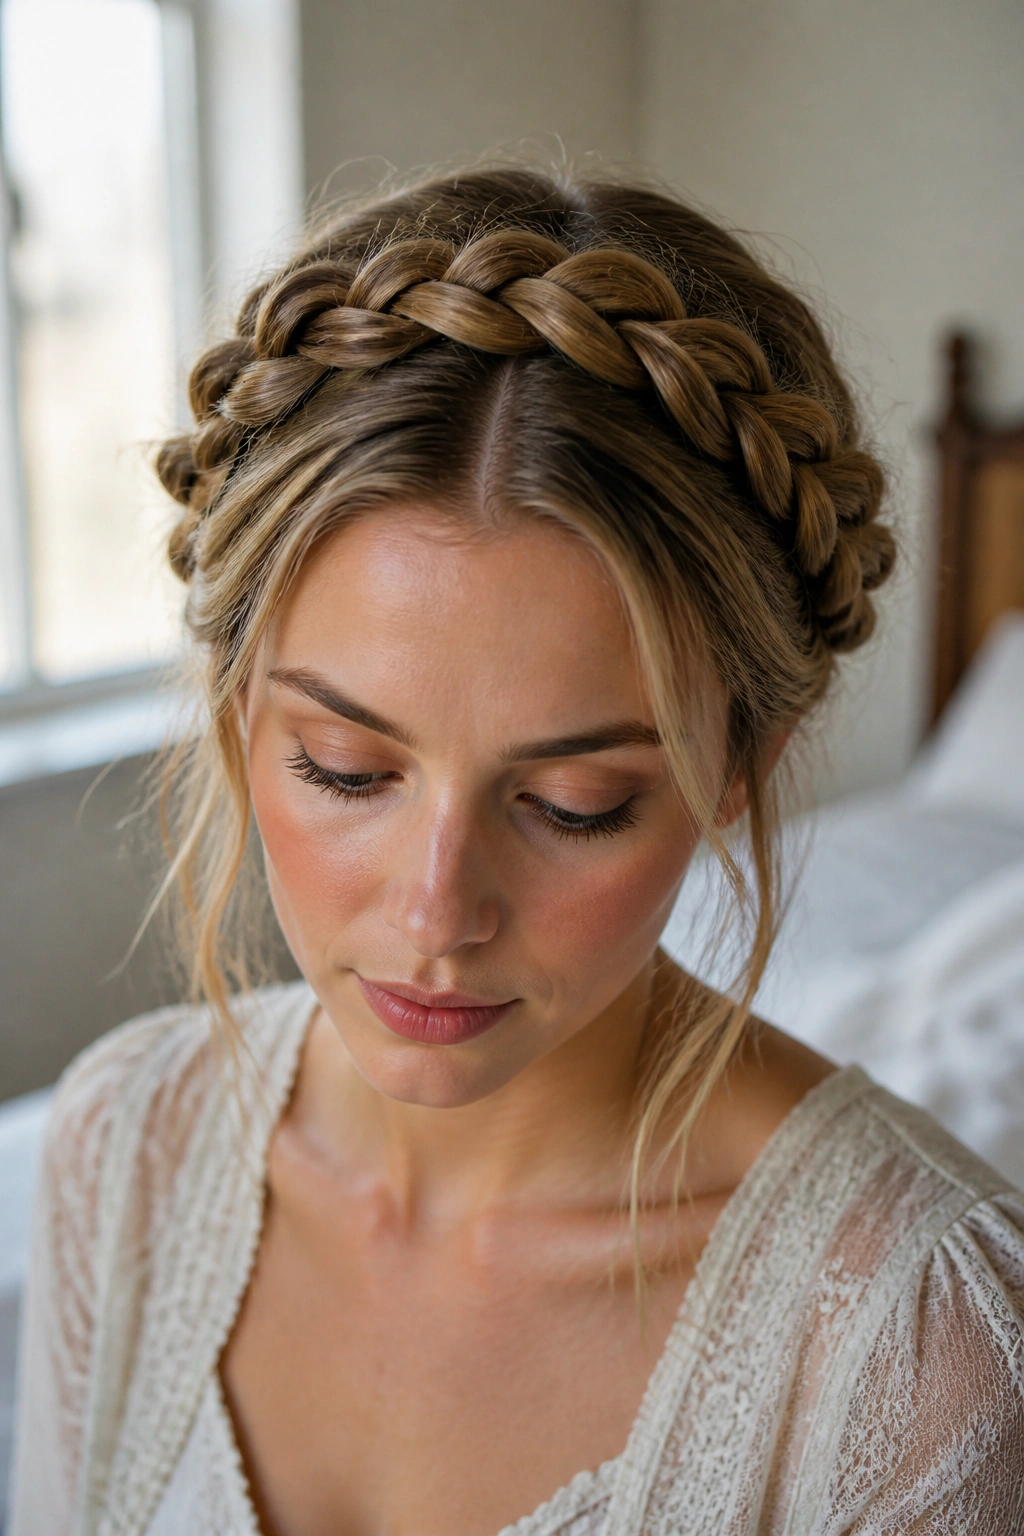
A milkmaid crown braid is one of those styles that looks more difficult than it is. That’s part of the appeal. The braid wraps across the head like a built-in headband, which gives long hair shape at the top and keeps the ends tucked away instead of hanging loose and getting in the way.
Why it works on long hair
Long lengths give you enough braid to cross the crown without making the style look thin. If your hair is layered, braid each side a little tighter at the start so the shorter pieces stay inside the plait. The shape should sit snugly against the head, not float above it like a loose loop.
Small details that make it hold
- Start with a center part and braid each side all the way to the ends.
- Pull the braid edges outward just a little so the crown looks fuller.
- Cross the braids over the top of the head and pin them behind each ear.
- Tuck the tails under the crossed section so they do not poke out.
- Use two crossed bobby pins at each anchor point instead of one.
A tiny bit of texture spray near the roots helps. So does second-day hair. Clean hair can work, but it slips faster and makes you chase flyaways with your fingers all afternoon.
Best tip: leave the braid a shade looser at the back of the head and tighter near the face; that keeps the crown from collapsing.
2. Side-Swept Dutch Braid
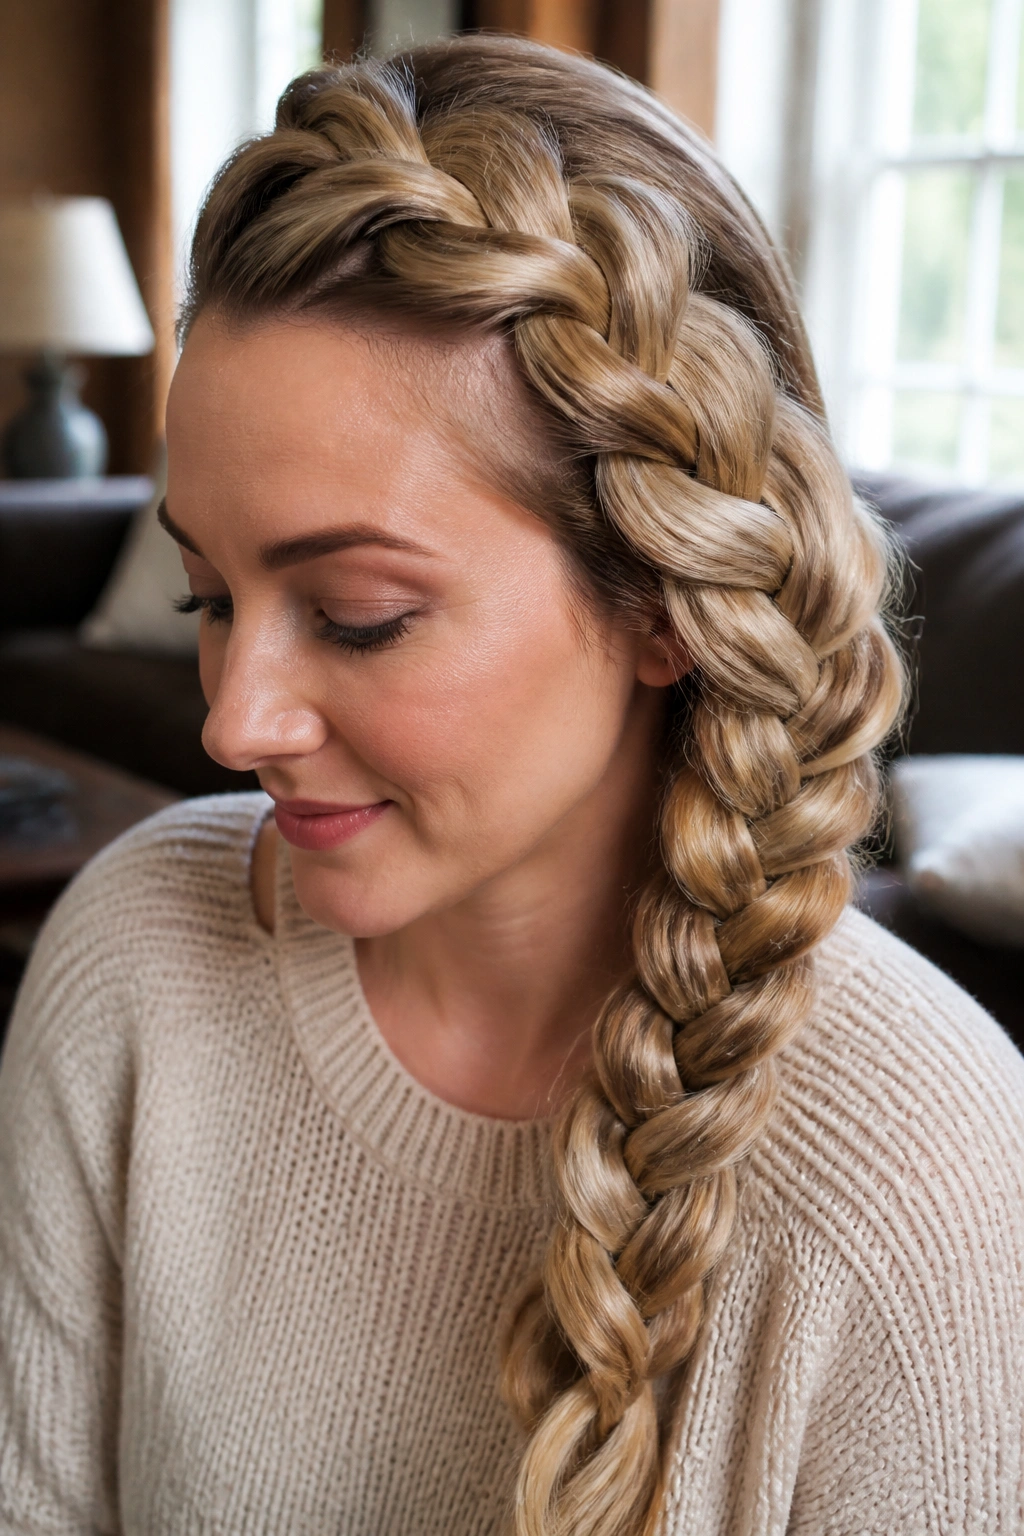
Want a braid that feels polished but not stiff? A side-swept Dutch braid is the one I reach for first. Because the braid sits raised from the scalp, it has more shape than a flat plait, and that makes it read as deliberate instead of casual.
The parting is doing half the work here. A deep side part gives the style that old portrait look, the kind with a strong line at the front and a soft fall over one shoulder. From there, braid close to the hairline, then keep feeding in sections until the braid reaches the nape and drops over the shoulder.
The trick is to keep the crown smooth and the braid slightly wide. Pull on the outer edges after you finish, but only enough to soften the shape. If you tug too hard, the braid loses its line and starts looking fuzzy. That’s not the goal.
This style works especially well on long hair with a little wave. Straight hair can look sharp and sleek; waved hair makes the braid feel fuller. Either way, the braid should feel anchored near the scalp and relaxed through the tail.
3. Gibson Roll with Braided Base
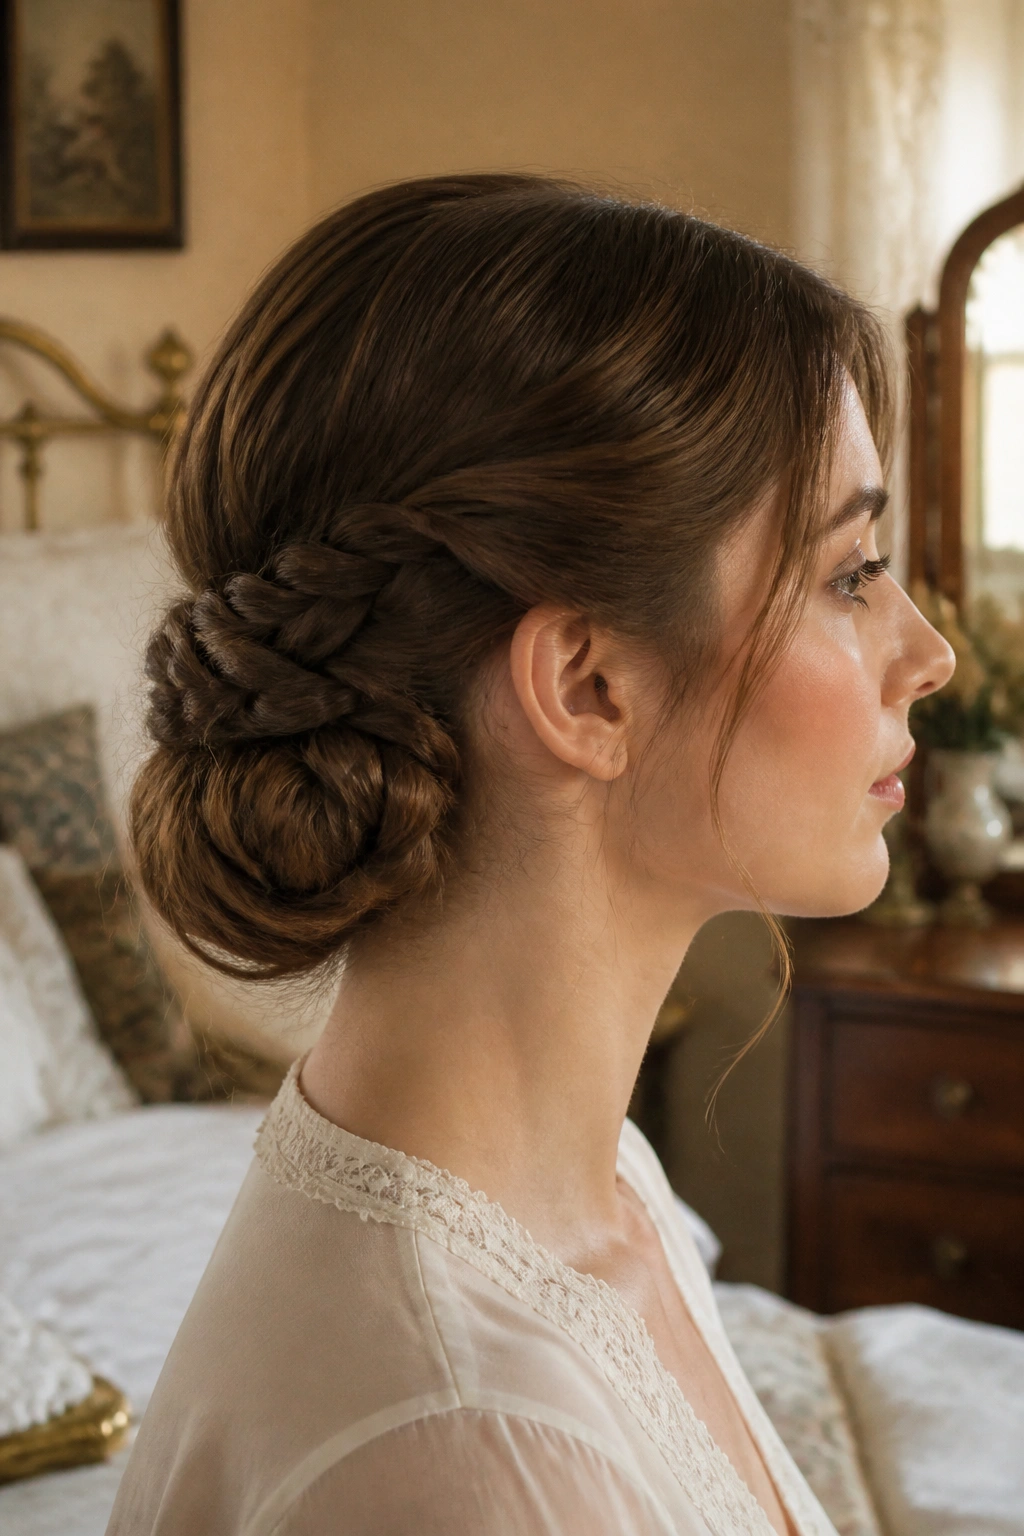
The Gibson roll looks fussy until you build it from a braid. Once the braid is there, the whole style makes more sense. You get a tidy nape, a soft roll, and that lifted shape that feels pulled from an old studio portrait without looking costume-y.
A good version starts with a low braid or a small braid running along the back of the head. After that, the braid is rolled upward and tucked inward so the ends disappear into the fold. The roll should sit flat against the head, not puff out like a cushion. That flatness is what keeps it elegant.
How to wear it without fighting the pins
- Make a low ponytail first, then braid the tail.
- Roll the braid upward toward the nape.
- Pin the roll into the base with at least four pins, crossed in pairs.
- Smooth the top with a comb, not your fingers.
- Leave the front slightly soft so it does not look severe.
A little shine serum on the surface helps if your hair tends to frizz at the nape. Do not use too much. One drop is enough, and more than that can make the style look greasy by the end of the day.
4. Fishtail Shoulder Braid
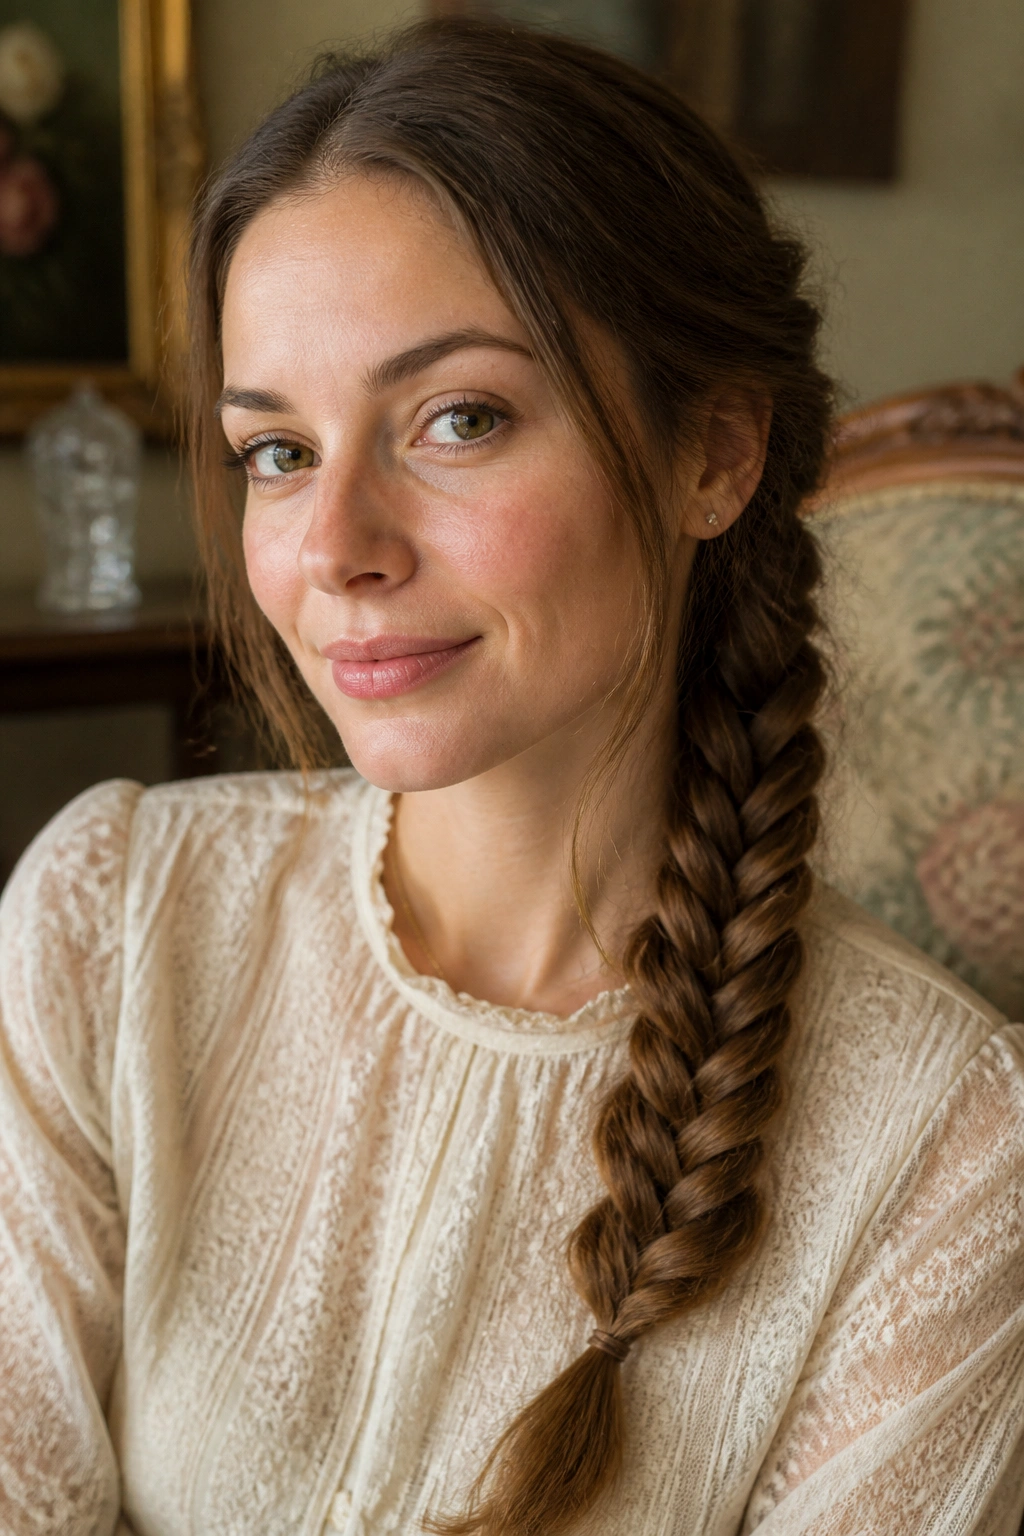
A fishtail braid feels denser in the hand than a three-strand braid, and long hair shows off that texture better than short hair ever could. The pattern reads small and precise, almost like woven fabric, which is why it works so well for a vintage look when you wear it low and to one side.
Start the braid near the nape or just behind one ear, then let it fall over the opposite shoulder. Keep the first few passes snug so the top stays controlled. After that, you can loosen the braid a little by pulling at the outer edges. That gives you fullness without losing the narrow, detailed pattern.
If the hair is layered, secure the braid with a clear elastic every few inches and smooth the ends after the final tie. It sounds fussy. It isn’t. Long layered hair tends to escape a fishtail faster than people expect, and that little extra security keeps the braid from unraveling into a frizzy tail.
A ribbon at the end can push the style deeper into vintage territory. Velvet works well in colder months, satin looks dressier, and a narrow grosgrain strip keeps the whole thing from getting too sweet.
5. Halo Braid
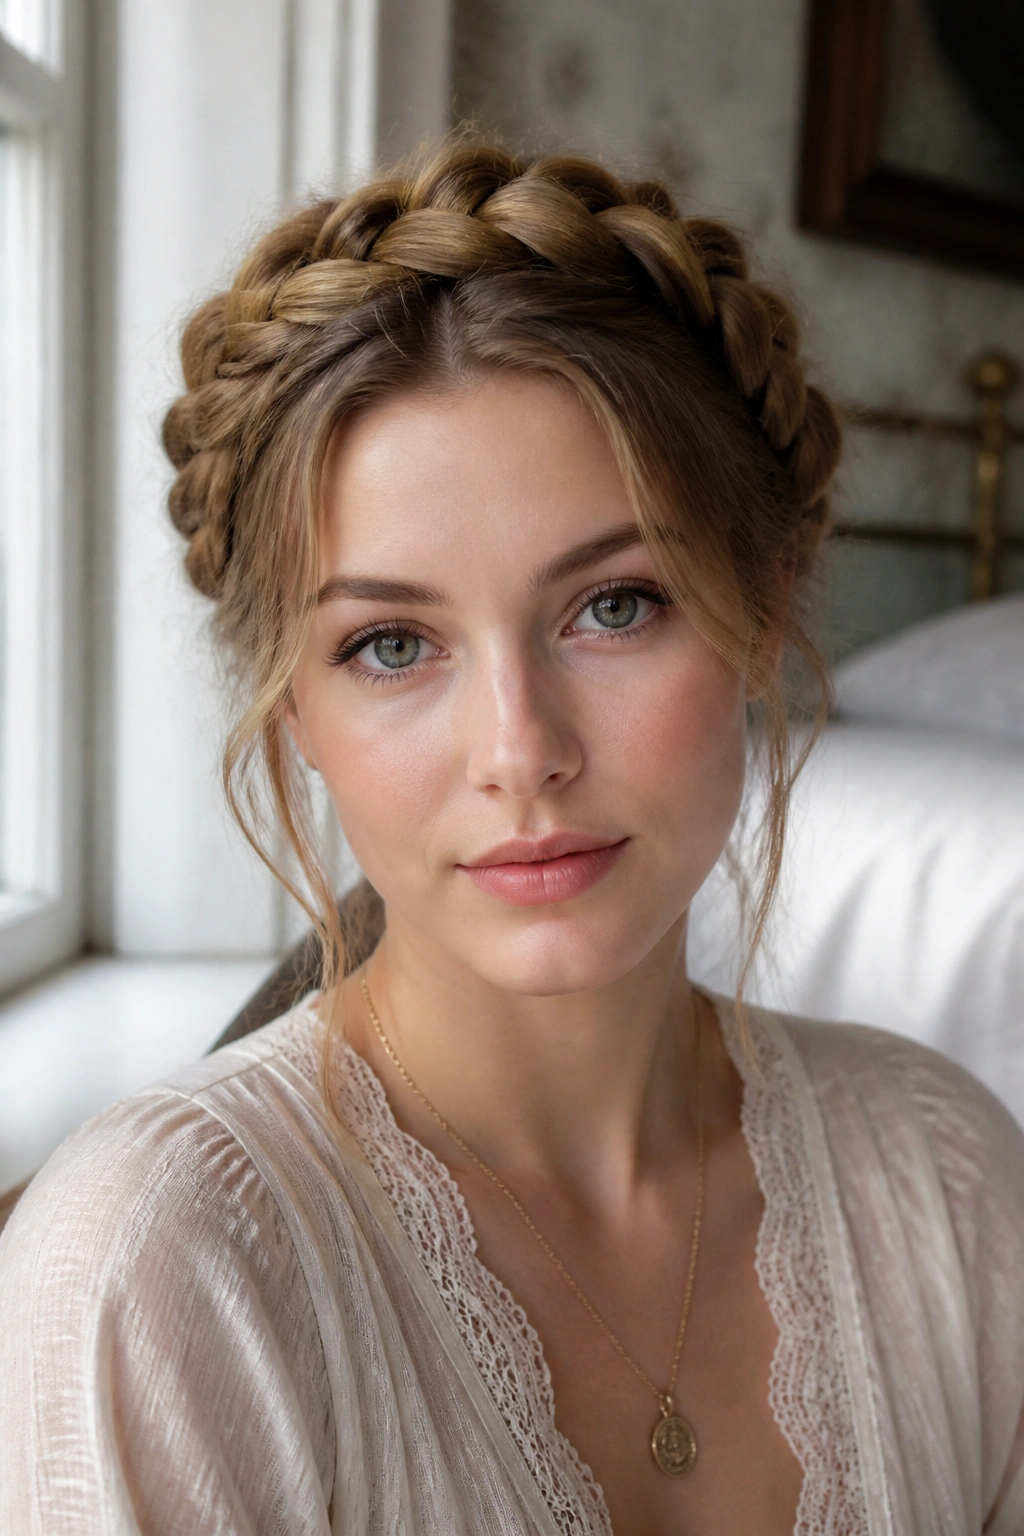
A halo braid is the kind of style that makes long hair feel controlled from every angle. The braid travels around the head instead of down the back, so it frames the face and clears the neck at the same time. That shape has a very old-fashioned charm, but it also solves the very modern problem of hair that gets in your way.
The best part is how stable it feels once it is pinned. Because the braid sits around the perimeter of the head, the weight is spread out instead of pulling from one spot. You notice that after an hour or two. There is less tugging, less headache, and far less temptation to keep adjusting the back.
Second-day hair helps here. Freshly washed hair can slide out of the braid, especially if it is fine. A bit of texture at the roots gives your fingers something to hold while you wrap the braid around the hairline and tuck the tail out of sight.
This one likes neatness at the front and softness at the edges. A few narrow flyaways are fine. A full halo that looks too perfect can feel stiff, and that is not the mood. You want a braid that looks like it belongs on a real head, not a display stand.
6. Lace Braid Half-Up for Long Hair
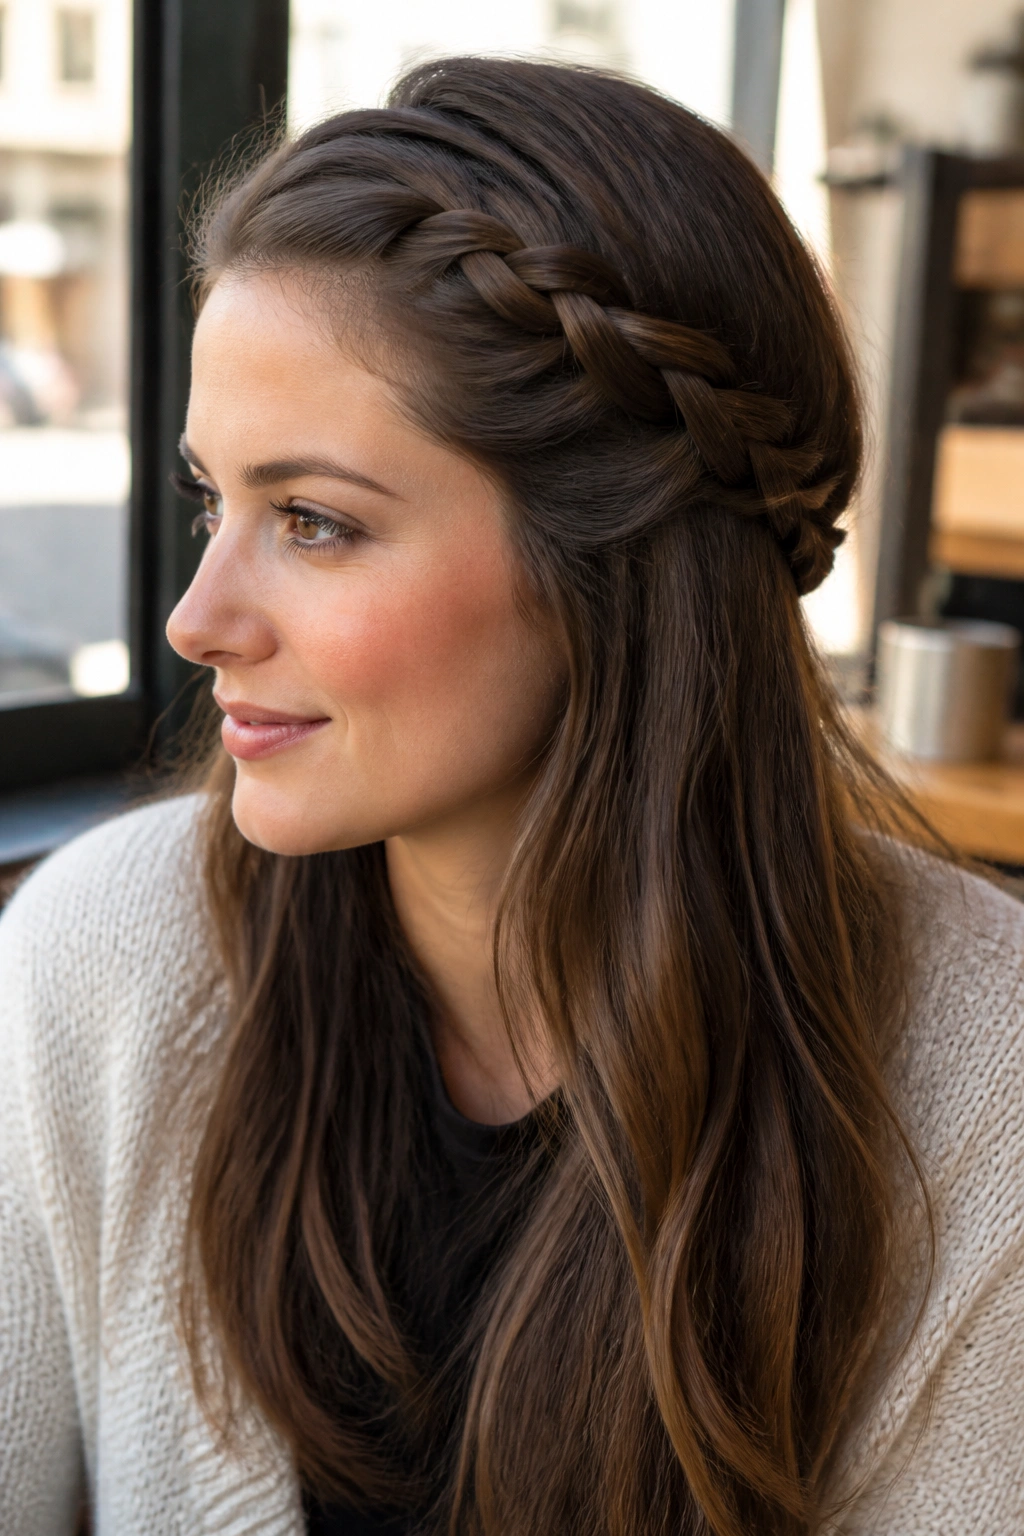
This is the cleanest way to wear vintage braid hairstyles for long hair when you want the length left down. A lace braid gives you control through the crown and temples, but it lets the rest of the hair stay loose, wavy, and soft. That balance is why it keeps showing up in bridal looks and old-fashioned half-up styles.
Unlike a standard braid, a lace braid only pulls in hair from one side. That means it can hug the head without swallowing the loose lengths underneath. On long hair, that matters. You keep the visual line of the braid, but you still get movement through the back.
What makes it feel old-fashioned
- Start above one temple and braid diagonally across the head.
- Feed in only the top-side sections, not both sides.
- Stop around the back of the head and pin the end under loose hair.
- Curl the loose length into a soft bend, not a tight ringlet.
- Use a pearl pin or small comb if you want a dressier finish.
The style looks best when the braid is tidy and the down hair is not over-styled. A soft brush-through after curling usually beats a crunchy wave. That combination gives the braid room to stand out without making the whole thing feel stiff.
7. Ribbon-Woven Braid for Long Hair
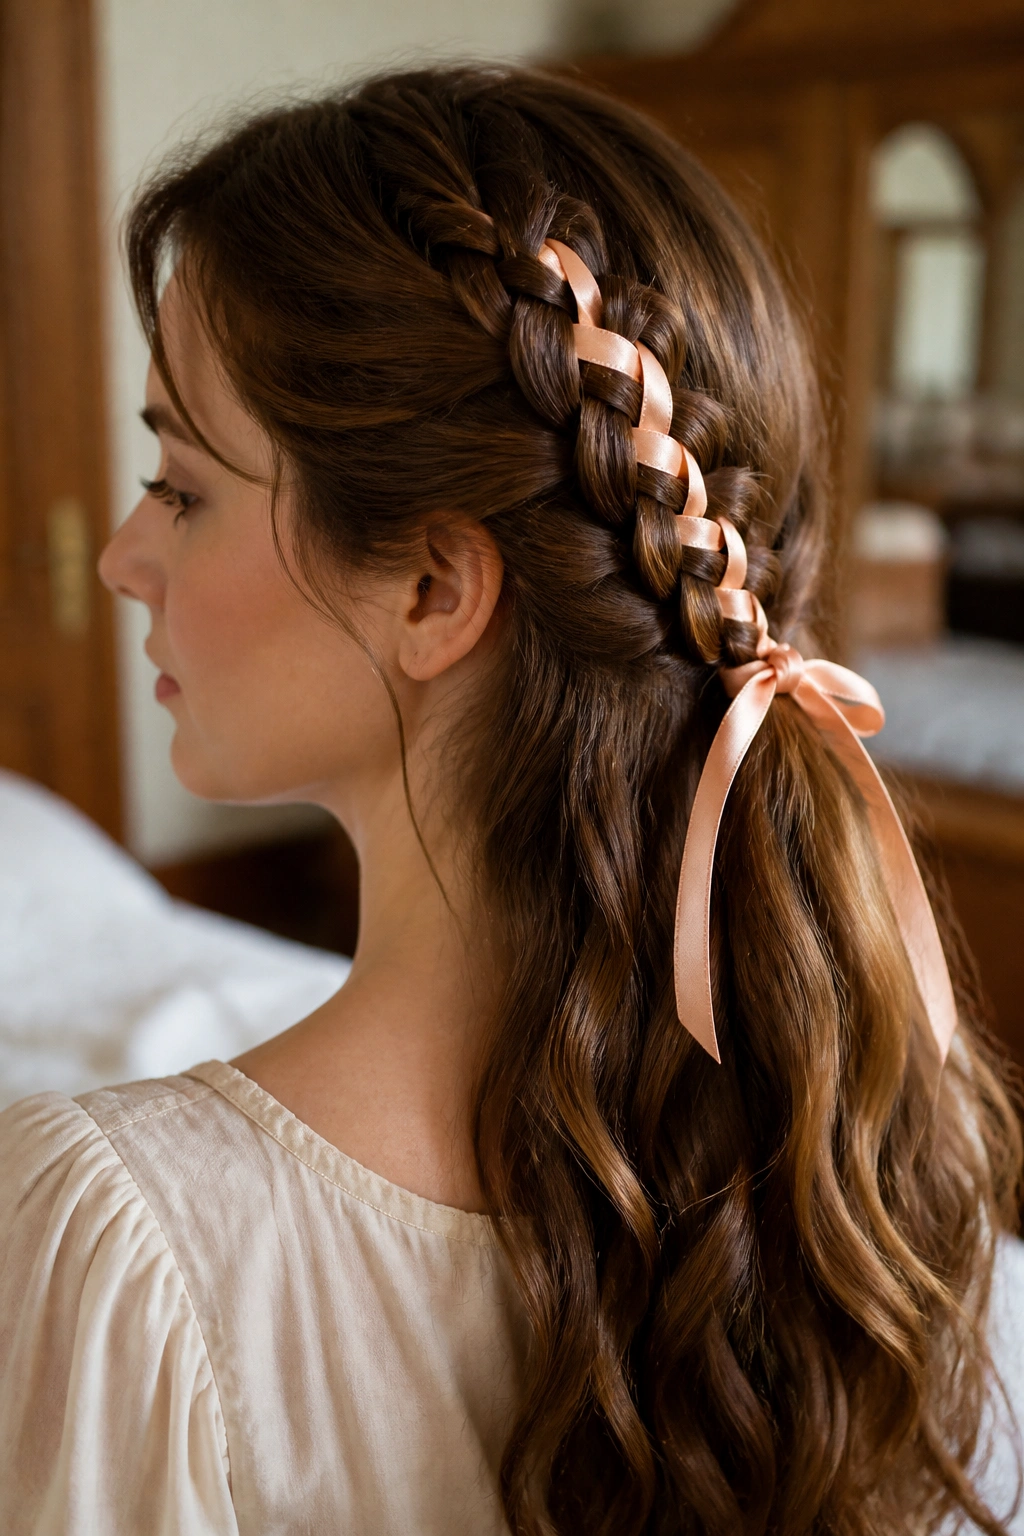
Why does a ribbon-woven braid feel so much more dressed up than a plain braid? The answer is simple. The ribbon adds a second line of color and movement, so the braid reads like an accessory instead of just a way to tie hair back.
A narrow ribbon works best. I like something around half an inch wide because it sits neatly inside the braid without bulking up the shape. Satin gives you a smooth, glossy finish, while grosgrain holds its shape better if your hair is thick or slippery. Either way, tie the ribbon to the top of the braid or anchor it under the first elastic so it does not slide around.
How to get the ribbon to behave
- Keep the ribbon flat before you start braiding.
- Match the tension on both sides so one strand does not twist.
- Use a clear elastic at the end, then wrap ribbon over it.
- Let the ribbon show more near the bottom if you want contrast.
- Trim the tails at an angle so they do not fray fast.
This style sits nicely with center parts and side parts alike. The braid itself can be simple, but the ribbon adds enough finish that you do not need much else. A low braid with a black ribbon looks sharp. A cream ribbon reads softer. Both feel old-fashioned in the best way.
8. Braided Low Chignon
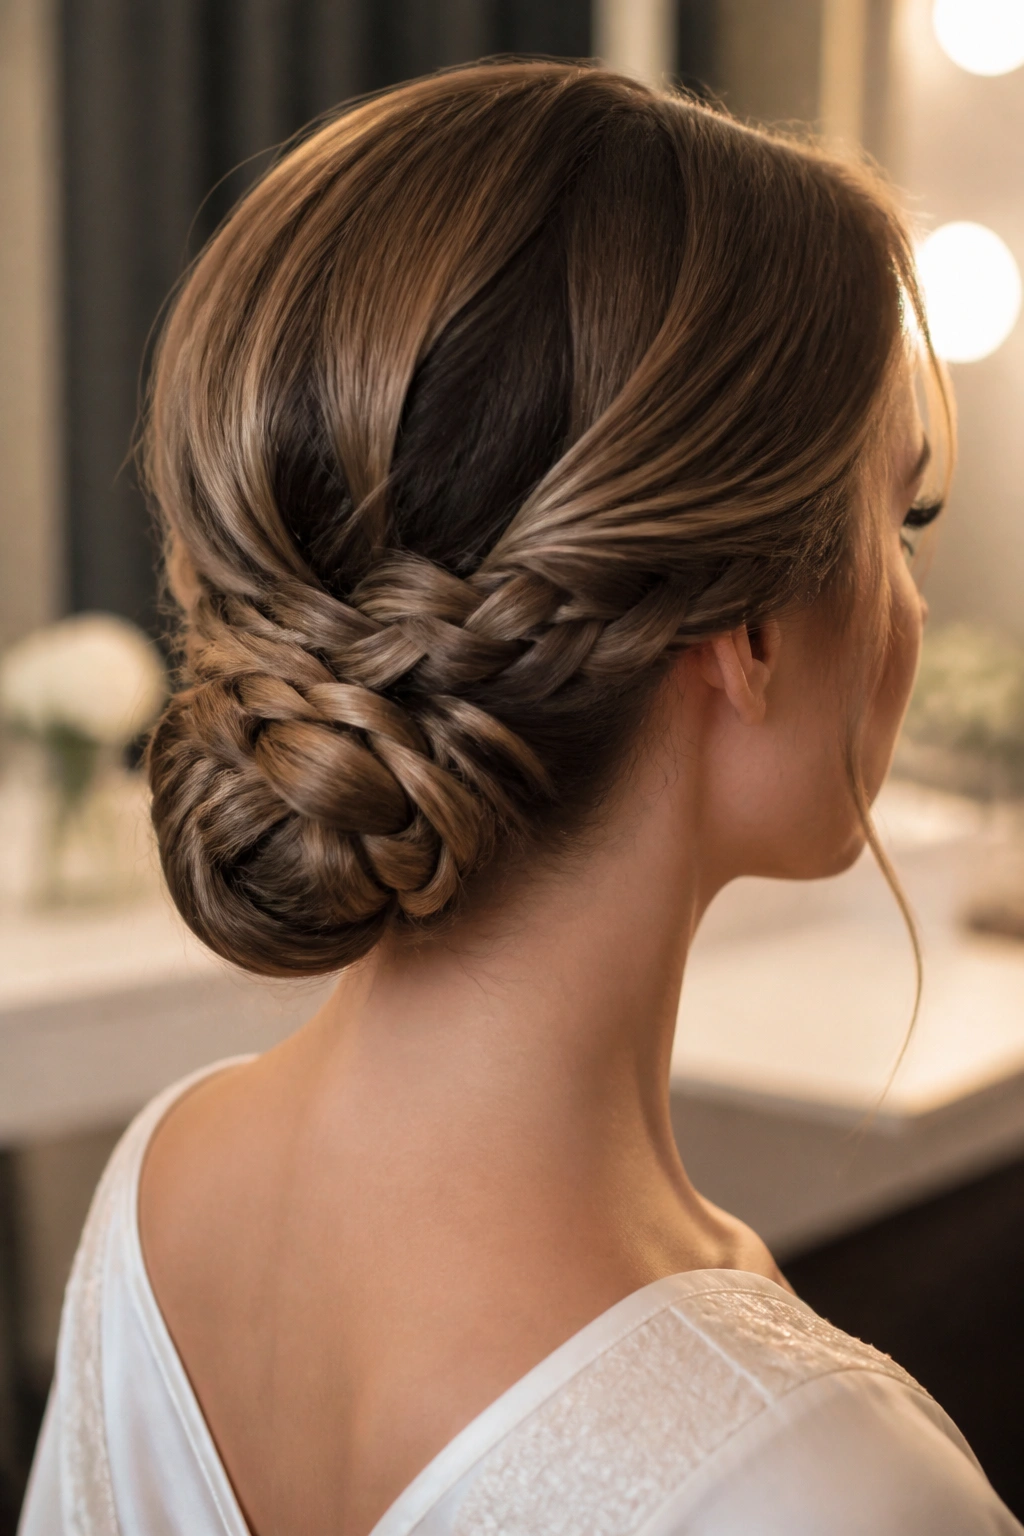
A low chignon with a braid base works when you want something tidy, not precious. The braid gives the bun a bit of structure at the back, and the low placement keeps the silhouette soft. Long hair is useful here because it gives you enough length to wrap the chignon without stuffing the shape into itself.
Start with smooth roots and a low ponytail at the nape. Braid the tail all the way down, then coil it into a bun and pin it flat against the head. The braid should still be visible in the coil, at least a little. That texture is what keeps the style from looking like a plain bun with extra steps.
A useful trick: leave the top section slightly flatter than you think you need. If the crown is too bulky, the chignon starts to sit high and the whole thing loses its quiet shape. A flat crown with a rounded nape looks much more refined.
A hair comb or a slim barrette can sit above the bun if you want more of a vintage finish. Pearl pins work too, but I prefer using them sparingly. Too many decorative pieces can make the braid compete with itself.
9. Double Braids into a Nape Bun
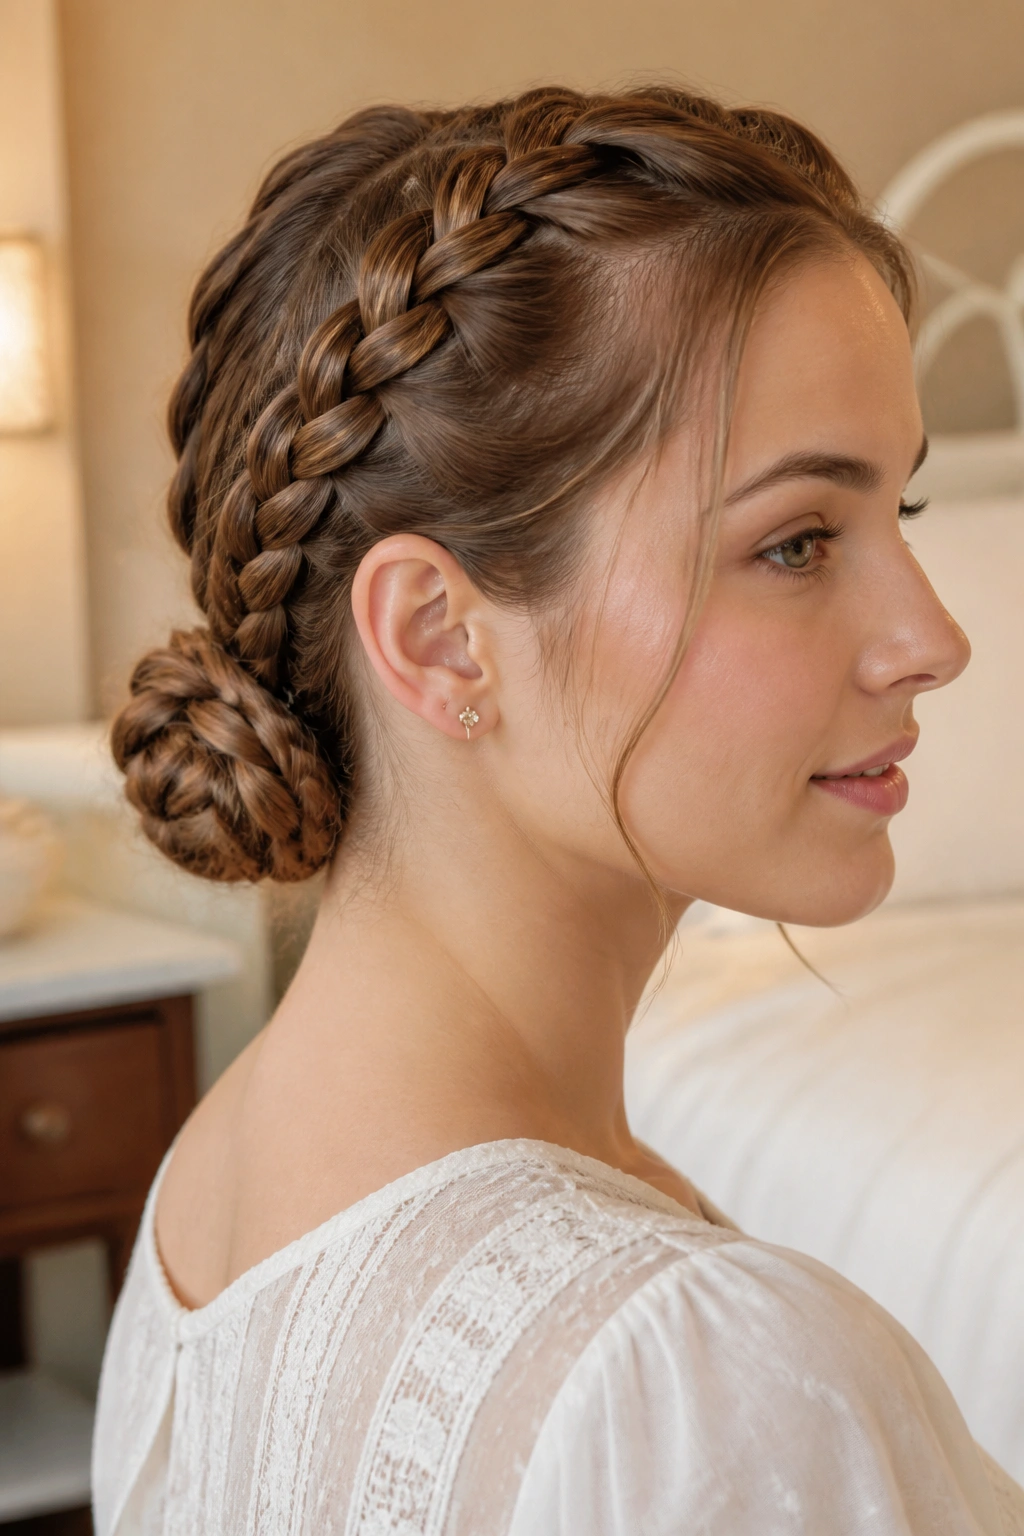
Two braids do not have to look childish. The difference is in the finish. Keep the part sharp, smooth the crown, and pin the braid ends into a low bun rather than letting them hang loose. That changes the whole mood.
This style works especially well when the hair is long enough to make two braids with a bit of heft. A middle part gives a formal line, while two slightly off-center braids feel softer. Either way, the braids should be even in thickness so the bun sits balanced at the nape.
A lot of people make this style too tight at the top. Bad move. If the scalp is pulled flat and shiny, the braids can start to look severe. Leave a little give at the crown and then tighten the braid sections as you go down. That creates a cleaner shape and makes the bun easier to pin.
Best for:
- Straight hair that needs structure
- Wavy hair that holds braids well
- Days when you want the neck clear
- Hair that is long enough to wrap twice around itself
The bun itself can be round or tucked into a slightly elongated shape. Both work. I lean toward a flatter bun because it feels more vintage and less gym-class. A few crossed pins at the base keep the shape from sagging.
10. Waterfall Braid with Waves for Long Hair
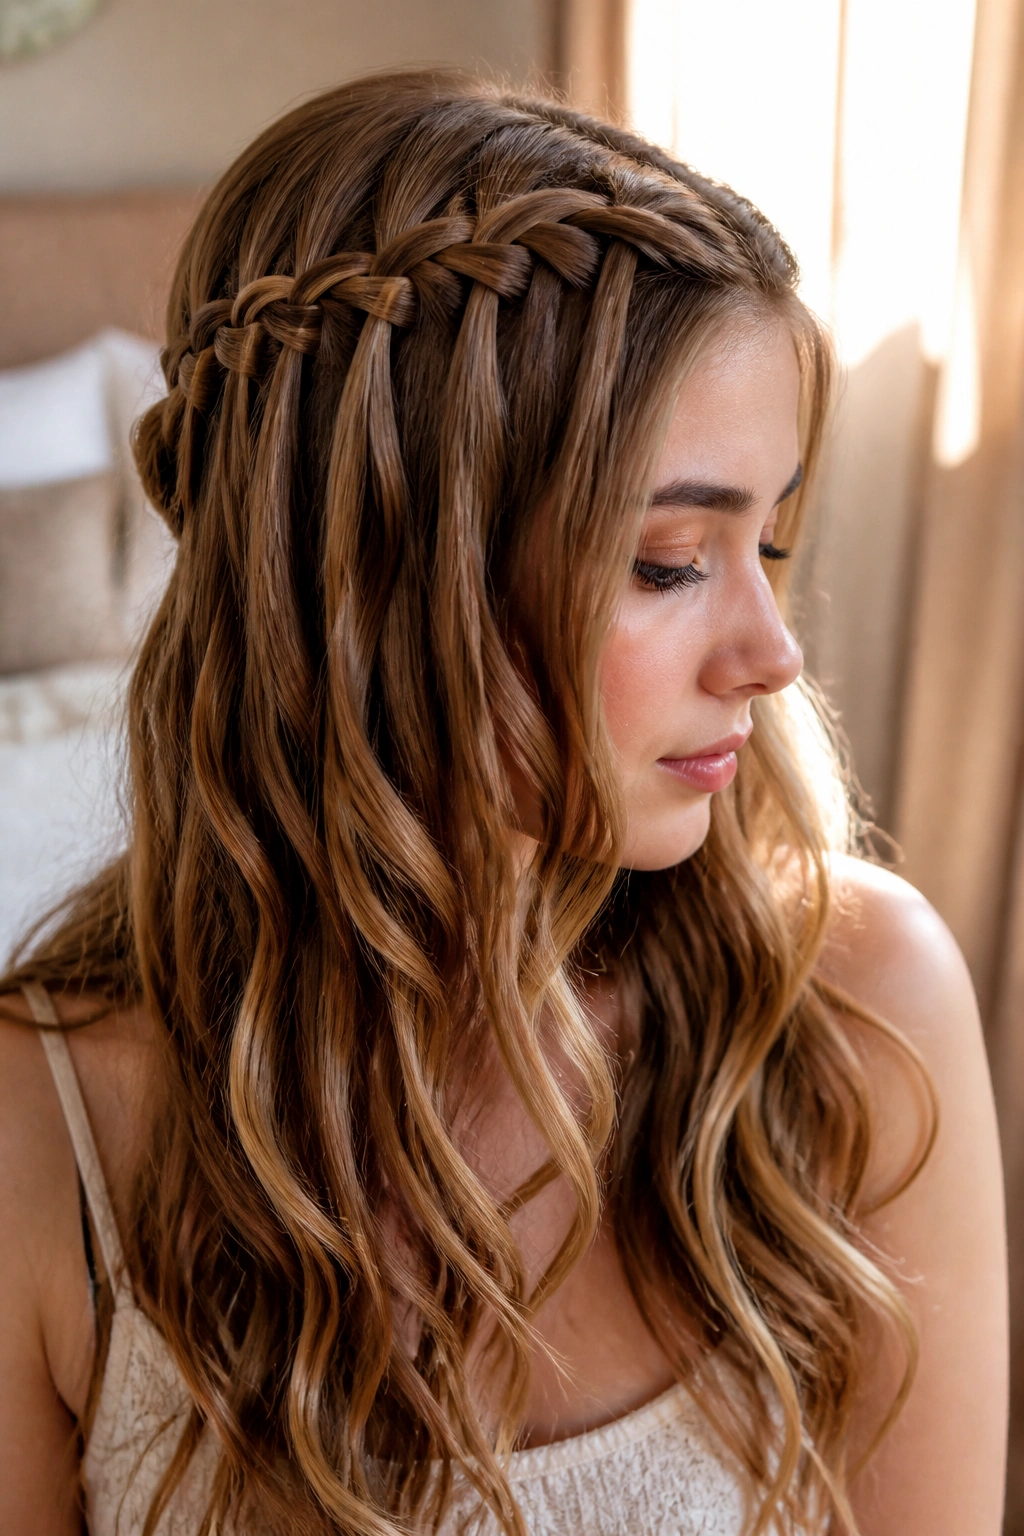
The softest-looking style in the bunch is probably the waterfall braid. It lets sections of hair drop through the braid like small pauses, which creates movement without losing the frame around the face. On long hair, the effect is more visible because the loose pieces have room to fall.
A waterfall braid works best when the loose hair is already waved or lightly bent. If the length is stick-straight, the dropped strands can look a little harsh. A soft wave gives them a better shape and keeps the braid from feeling too crisp. That softer texture is part of the vintage appeal.
The shape to aim for
- Braid across the head from one temple toward the other.
- Drop one section each time you cross over.
- Let the released pieces fall into the rest of the hair.
- Stop near the back of the head and secure the braid discreetly.
- Brush the loose lengths so they blend together.
A brushed-out wave works better here than a tight curl. You want the braid and the fall of hair to flow together, not fight each other. One of those airy, overdone beach textures can make the braid look less polished than it should.
The style is a good choice if you like to wear your hair down but still want something with shape near the front. It gives you the feeling of a half-up look without actually pinning half your hair away.
11. Basket Weave Crown
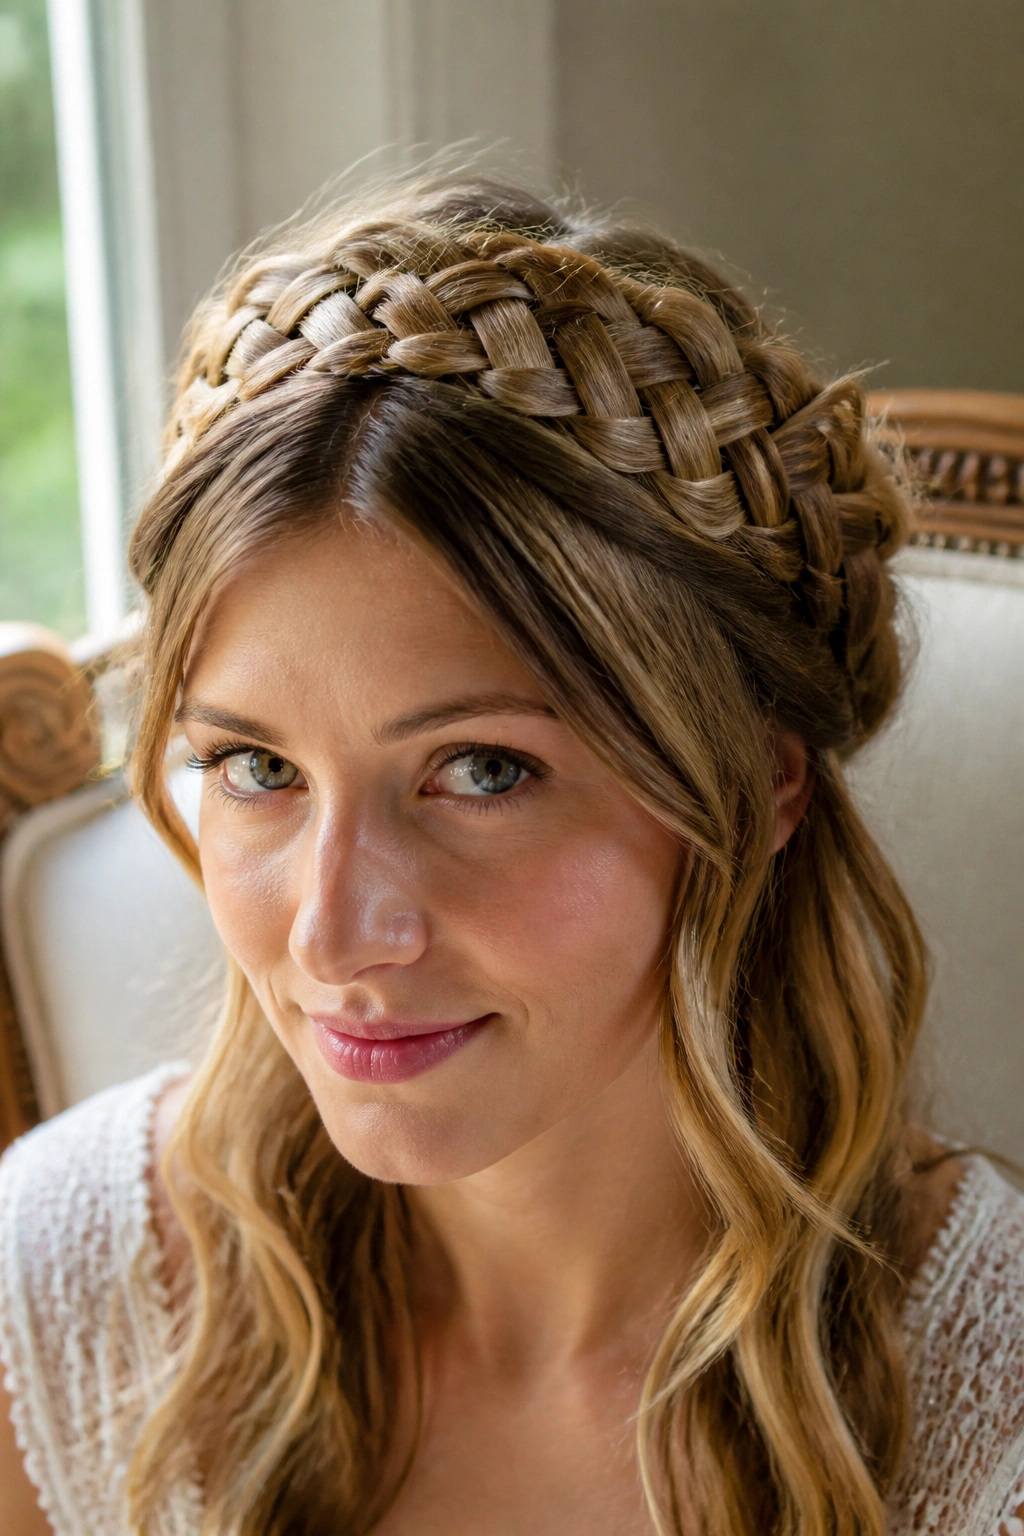
Why does this style look like it took forever, even when it did not? Because the crossing pattern does the visual work for you. A basket weave crown uses overlapping braid sections to create that woven, old-world texture around the head, and long hair gives it enough length to stay readable.
The neatness matters. You want clean partings and tidy crossings, not loose bends that blur the pattern. If your hair is slippery, start on second-day hair or add a dusting of texture powder at the roots. That little bit of grip makes each crossover easier to control.
The parting pattern matters
- Divide the hair into two side sections first.
- Braid each side close to the head.
- Cross the braids over the crown in an interlaced pattern.
- Pin each crossing point as you go instead of waiting until the end.
- Hide the tails under the opposite braid or under a wrapped section of hair.
This style reads strongest when the hair is smoothed at the top and slightly softer through the lengths. Too much frizz at the crown breaks the woven look. A comb and a little patience solve most of that.
It is a good pick for long hair that needs to stay contained, because the braid path creates its own architecture. You do not have to invent the shape with pins. The braid already gives you the shape.
12. Rolled Braid Ponytail
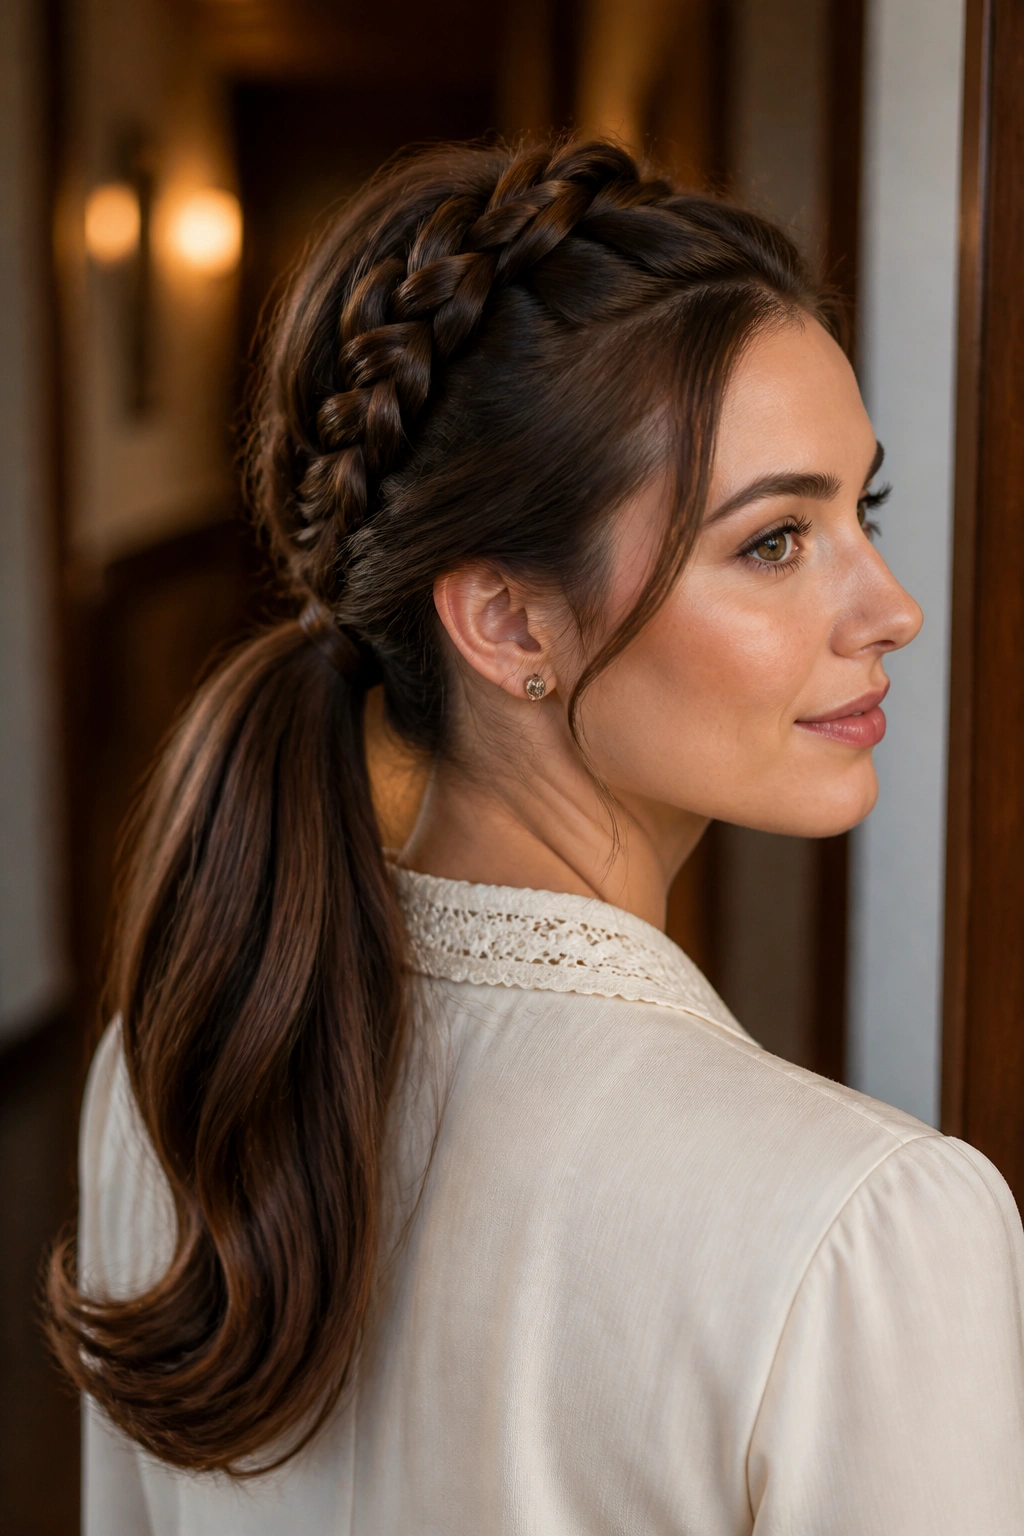
The rolled braid ponytail feels neat at the scalp and soft at the ends. That combination is what makes it useful. You get the polish of a vintage updo near the head, but the tail stays long enough to keep some movement.
Usually, I start with a side or center braid across the crown and then gather the rest into a low ponytail. From there, the ends can be rolled under, wrapped around the elastic, or tucked inward against the back of the head. The elastic should disappear under a wrap of hair or a small braid tail so the style looks finished.
A low ponytail sits better than a mid-height one for this look. Higher placement makes the style drift toward sporty instead of vintage. Keep it low and close to the nape, and the whole thing settles into a more old-fashioned shape.
The braid detail at the top gives the style enough interest that you do not need curls everywhere. A smooth tail with a slight bend at the end is enough. If the hair is thick, secure the base with two elastics spaced about half an inch apart so the ponytail does not sag.
13. Center-Part Twin Braids into a Low Knot
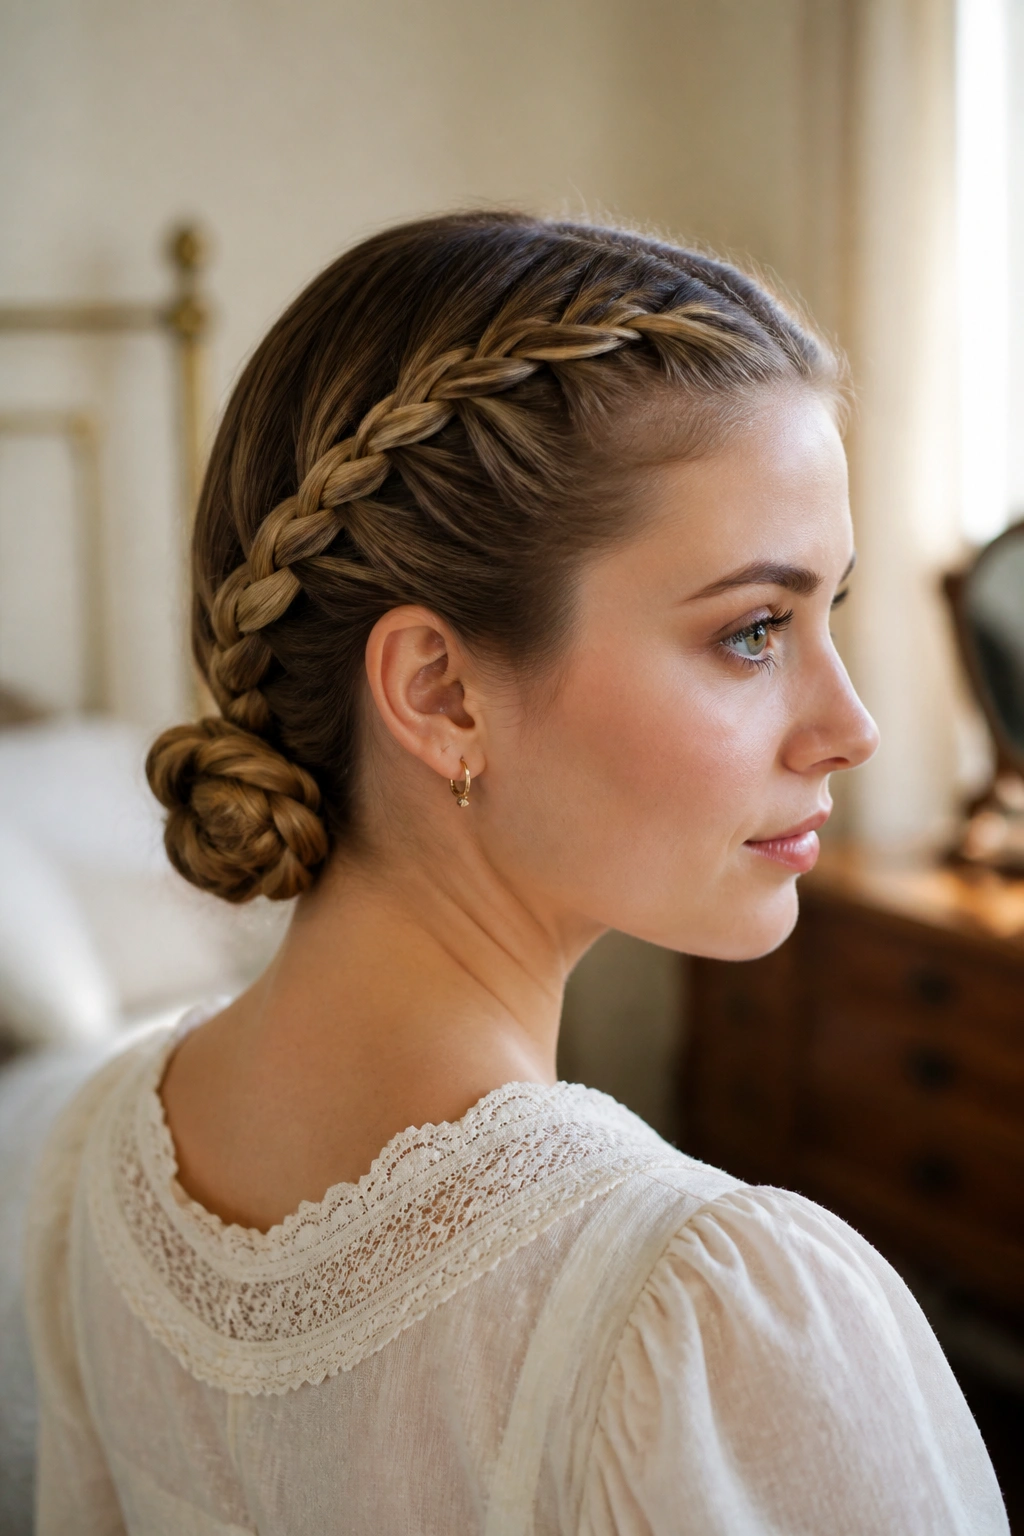
Picture two long braids starting at the hairline, then meeting at the nape and disappearing into a knot. That is the shape here. It looks neat, almost severe at first glance, but the low knot softens it and keeps the style from feeling too school uniform.
The center part is the anchor. Keep it straight and clean, then braid each side evenly. The braids should start flat against the scalp and stay close to the head until they reach the back. Once they are there, twist or knot them into a low shape and pin the ends under the fold.
How to keep it grown-up
- Smooth the roots before braiding.
- Keep both braids the same size.
- Tuck the ends inward instead of letting them fan out.
- Use matte pins if you want the braid detail to stand out.
- Add a small barrette at the nape only if the knot feels too plain.
Long hair is useful here because it gives you enough length to make the knot without stuffing the ends in awkwardly. If your hair is very layered, braid a little tighter through the lower third so the shorter pieces stay inside the pattern.
I like this one for days when you want the face open and the back controlled. It has a crisp line, but the knot keeps it from feeling harsh.
14. Braided Headband with Lifted Crown
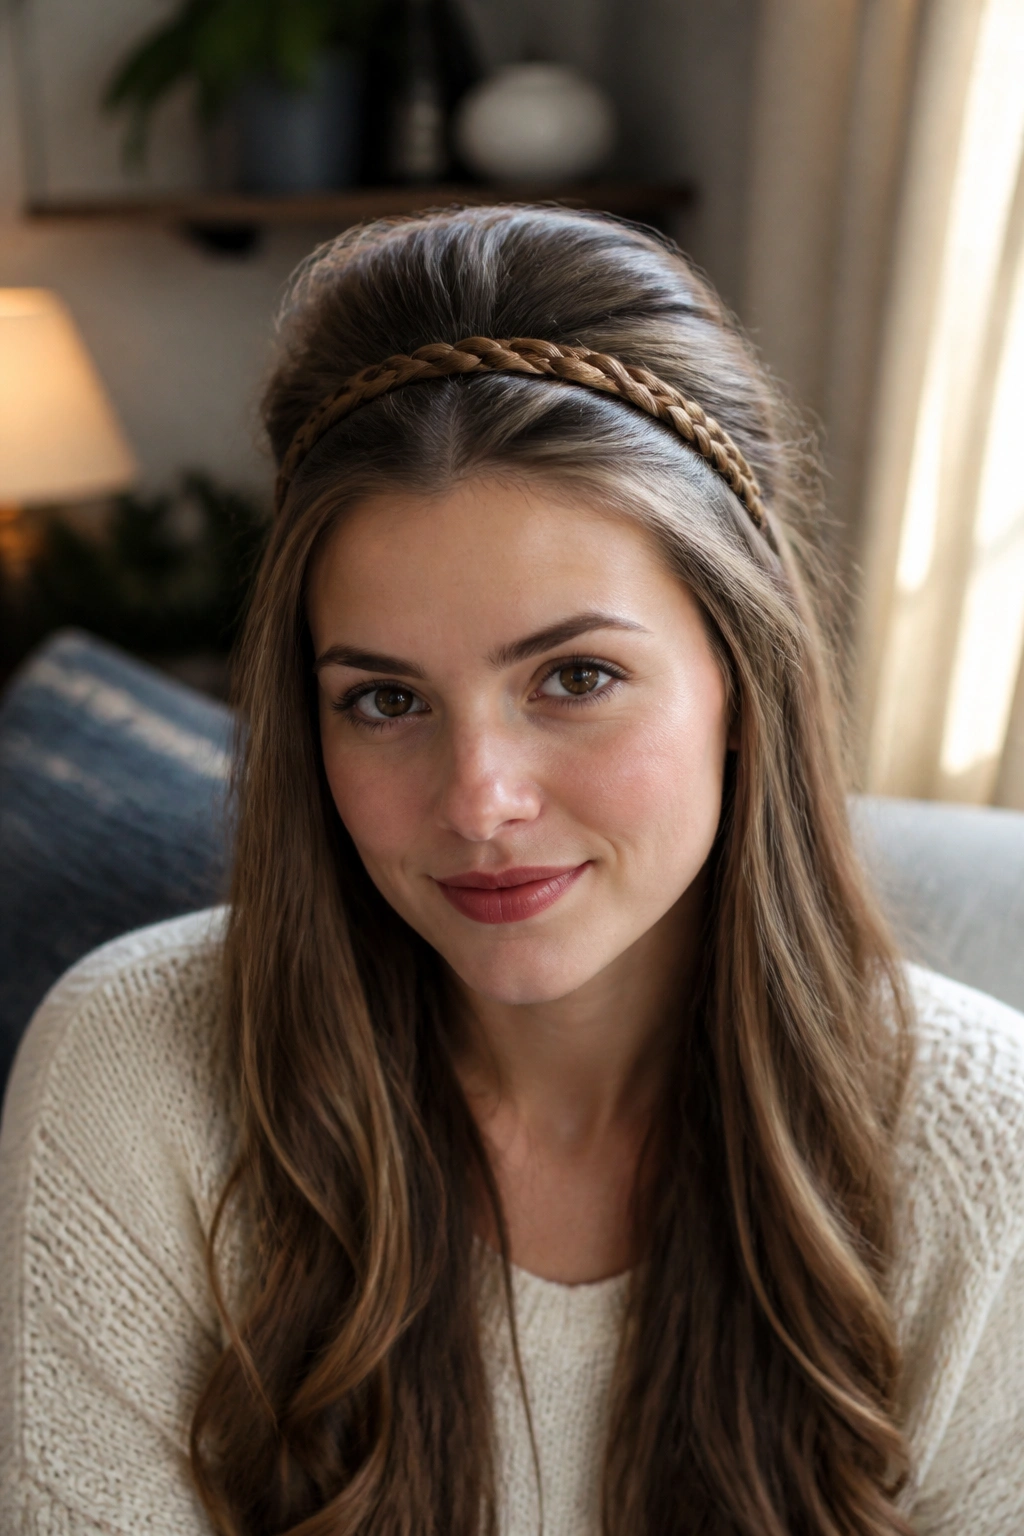
Unlike a loose braid, this one starts with a bit of lift at the front. That lift is the whole reason it feels vintage. A small bump or softly teased crown changes the silhouette right away, especially on long hair, where the weight can flatten the head if you do nothing.
The braid acts like a headband, either crossing the front hairline or sitting just behind it. The rest of the hair can stay down, waved, or tucked into a low roll. I prefer a smooth front with a gentle lift because it keeps the style from looking too flat under the braid.
A narrow braid works better than a thick one here. If the braid gets too bulky, it can swallow the face instead of framing it. The point is to create a line across the head, not build a heavy band that fights the rest of the hair.
This is one of those styles that looks good with a slightly imperfect finish. A few loose pieces around the temple make the lift look softer. The braid should still sit securely, though. If the headband section shifts, the whole shape loses its balance, and you spend the day fixing it.
15. Rope Braid Bun
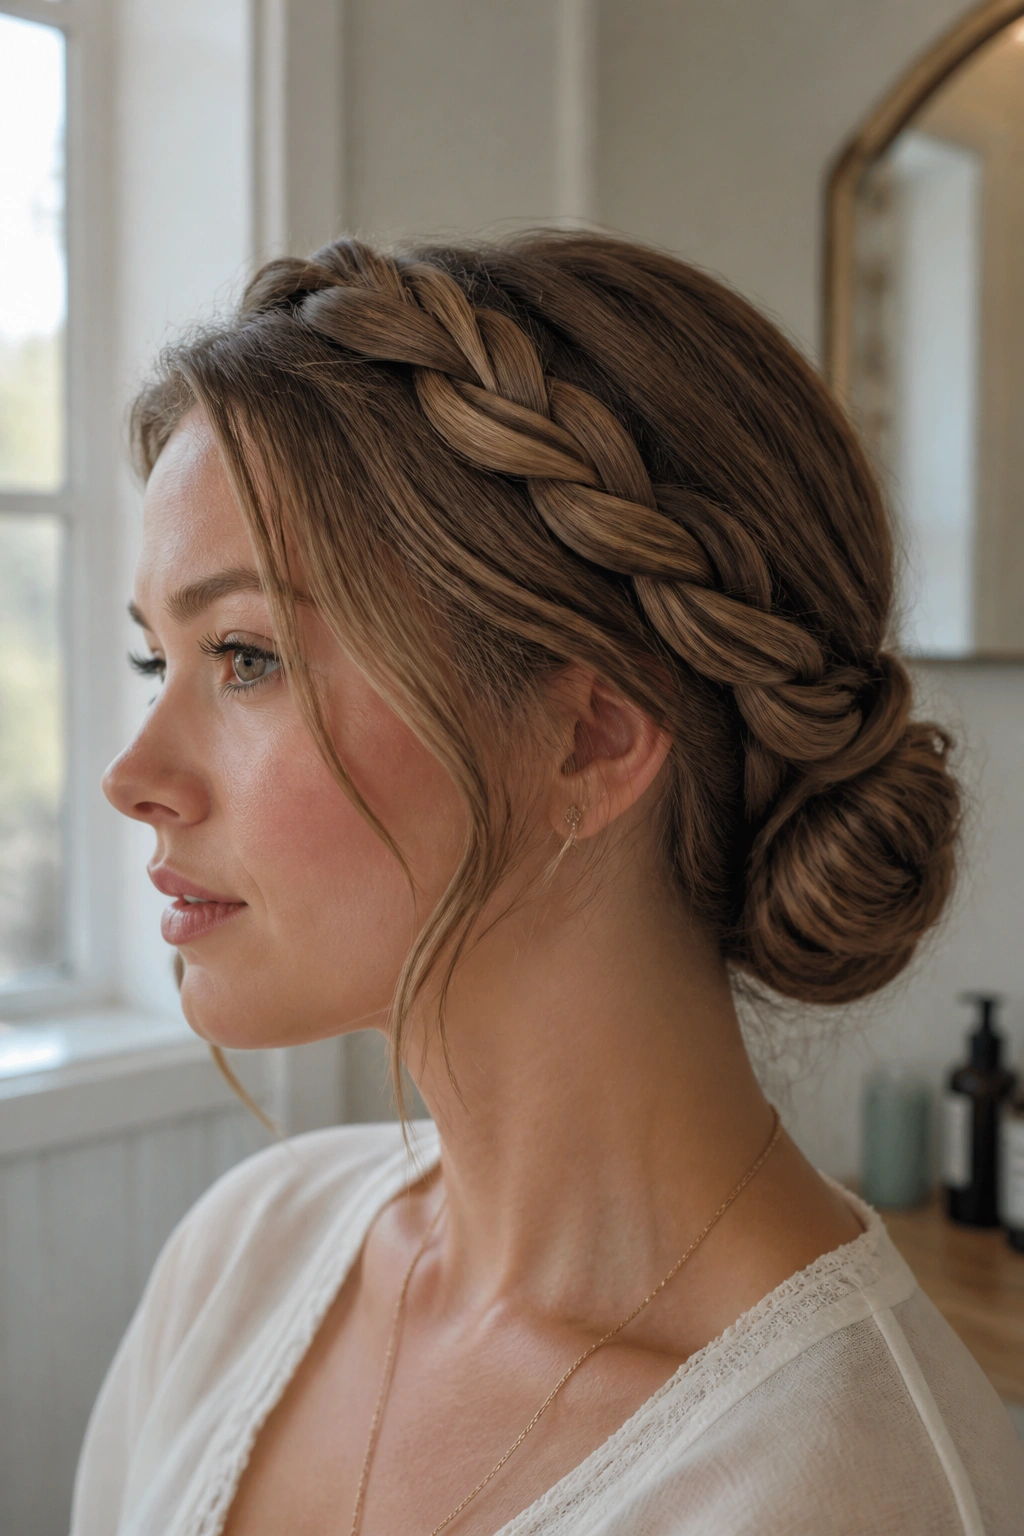
Rope braids are underused, and I do not know why. They are fast, they hold well, and they give long hair a clean twist that feels more refined than a standard three-strand braid. Once the hair is twisted, it practically builds its own sculpted line.
The setup is simple. Split the hair into two sections, twist each one in the same direction, then wrap them around each other in the opposite direction. That opposite motion is what creates the rope shape. Pull it into a low bun, and you get a knot that looks polished but not overworked.
What makes it different
- It needs only two sections, not three.
- The twist holds well on thick hair.
- A little smoothing cream helps frizz at the nape.
- The bun can sit flat or slightly off-center.
- A pair of crossed pins keeps the coil from slipping.
This is a good option when you want the hair off your neck without the visual busyness of a full braid. The rope texture reads neatly from a distance and still has detail up close. I also like it on hair that tends to puff out, because the twist often behaves better than a loose braid in humid air.
The finish should feel taut, not tight. There is a difference. Taut means controlled. Tight means your scalp will hate you by lunch.
16. Side Braid with Rolled Front
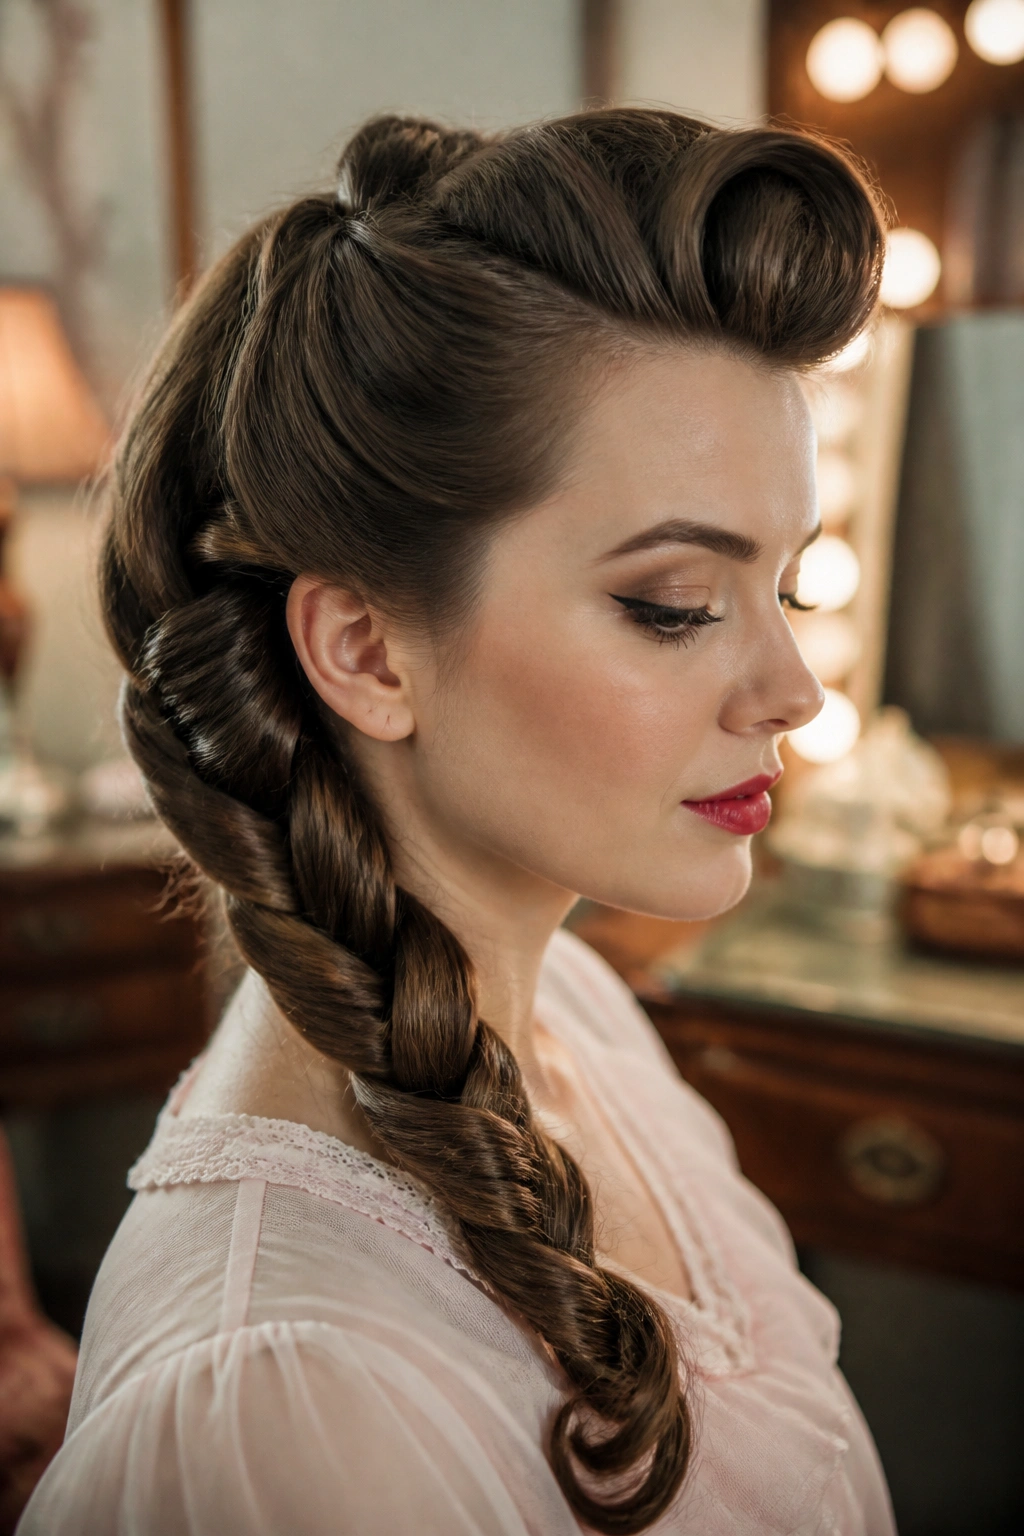
Want something that looks like it came from an old dressing table mirror? A side braid with a rolled front gives you that shape fast. The rolled front adds a little lift at the forehead and temples, while the braid drops to one side and keeps the rest of the hair calm.
This style works best when the front section is smoothed over a brush or a round brush first. That little roll does not need to be dramatic. Even a modest bend is enough to change the outline of the face. From there, gather the hair to one side and braid it loosely so the tail stays soft and visible.
The vintage note comes from contrast. The front is controlled. The braid is relaxed. The two pieces together create a shape that feels old-fashioned without looking stiff. Long hair helps because the braid can drape cleanly over the shoulder instead of ending too high on the chest.
A small pin hidden behind the ear keeps the rolled front in place. If you skip that, the roll tends to fall flat after a few hours. I would also keep the braid slightly wider than usual. A skinny side braid can look accidental; a wider one reads as deliberate.
17. Looped Braided Updo
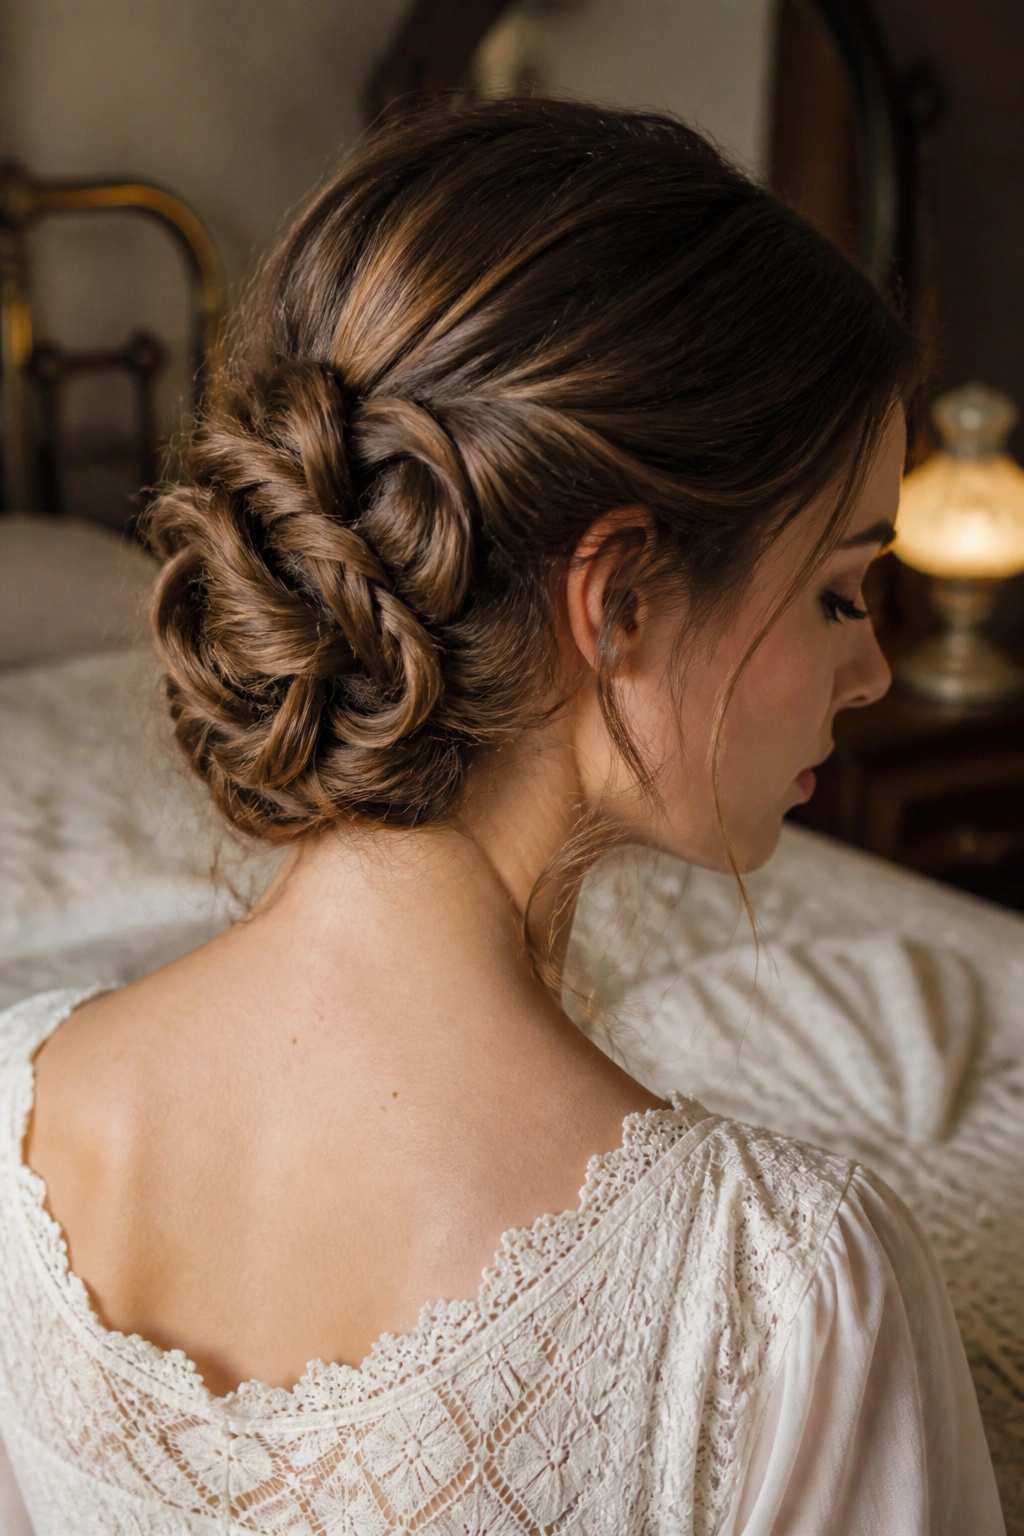
I keep coming back to looped braids for long hair because they hide a messy day. The style gathers the length, folds it back on itself, and turns all that hair into a shape that looks intentional. That is a useful trick when you do not want a plain bun but still need everything off your neck.
Start with a low braid or two smaller braids, then pin each section into loops at the nape. The loops should overlap a little, like soft folded ribbons. You do not want them standing straight up. Flat loops hold better and give the style that calm, tucked-in look.
A few loose pieces around the ears can help. Too much neatness makes the updo feel severe, and looped styles already have enough structure. Let one or two narrow tendrils soften the temples if your face likes a little framing.
The best part is how forgiving it is. If a loop looks uneven, pin it a little lower and call it texture. This is not a style that needs perfection. It needs balance, a few good pins, and enough hair to shape into folds without exposing the seam.
18. Tucked Side Sweep Braid
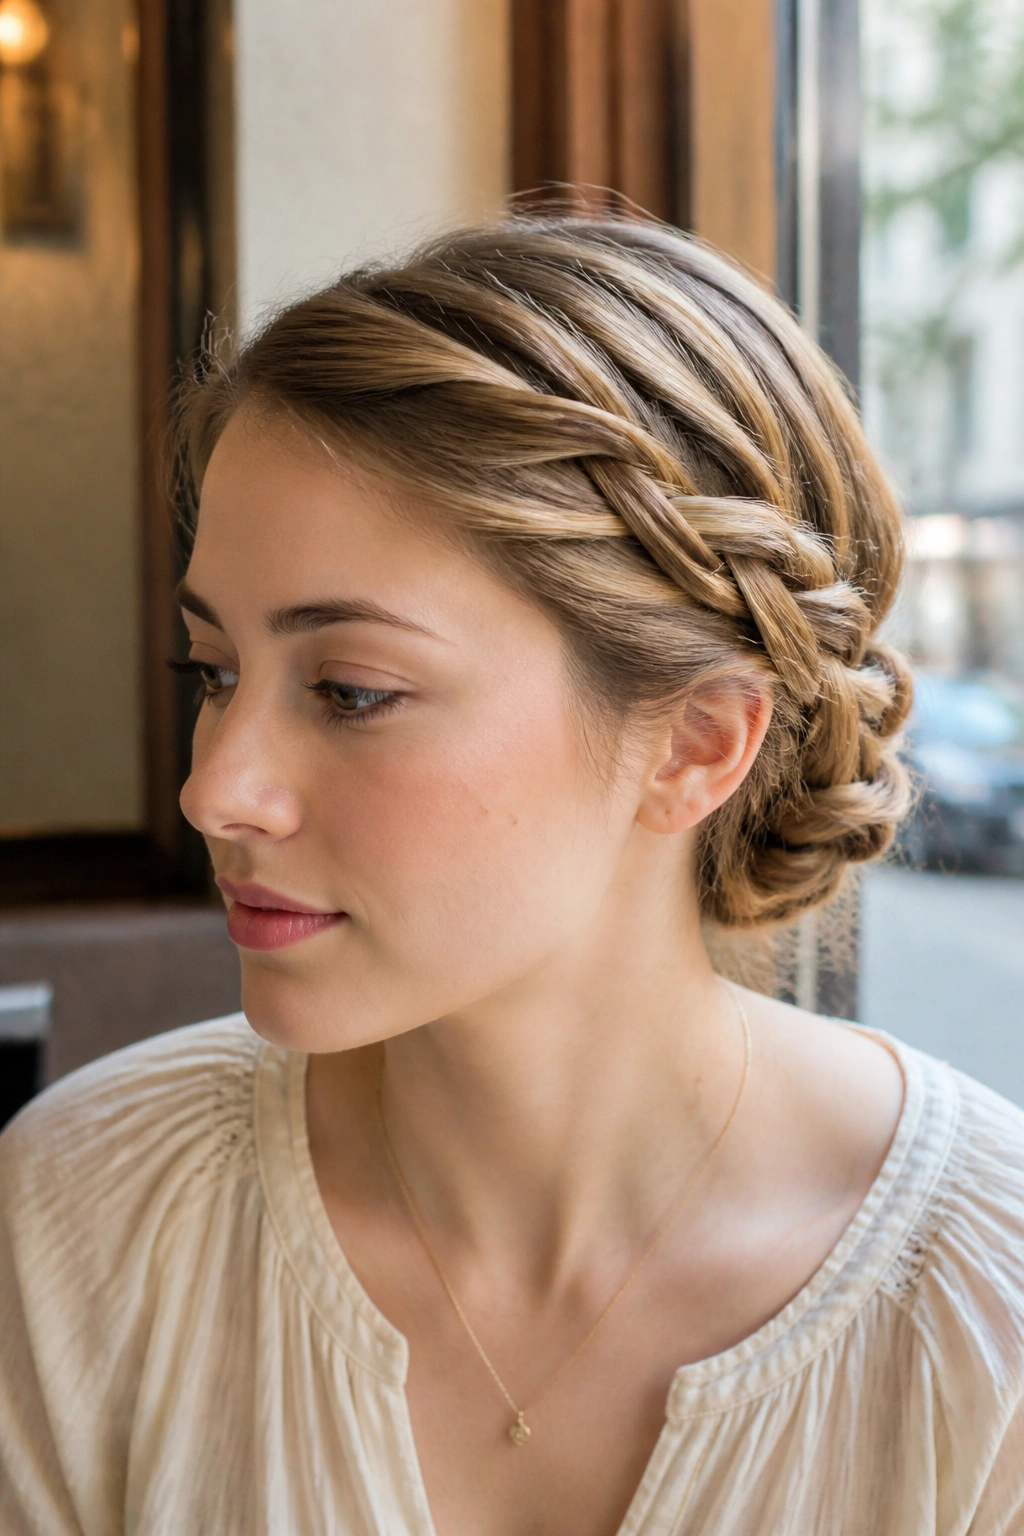
If you want one vintage braid hairstyle for long hair that feels dressed up without turning stiff, this is the one. A side sweep braid starts with a deep part, slides across the head, and then tucks back under itself or behind the ear so the shape stays low and soft.
The line of the braid matters more than the size. Keep it close to the scalp at the front, then let it widen a little as it moves toward the nape. That creates a graceful slope instead of a chunky rope. Long hair gives you enough length to tuck the end away cleanly, which is why this style works so well on fuller lengths.
A few bobby pins hidden under the hair will keep the sweep from slipping. If you want extra polish, smooth the crown before braiding and leave the tail slightly curved rather than pin-straight. That small bend keeps the style from feeling too severe.
There is a reason this kind of braid stays in rotation. It clears the face, handles long length without drama, and still looks like you meant to spend time on it. No need to overthink the finish. A clean part, a controlled braid, and one neat tuck usually say enough.
