



Slicked back hairstyles for long hair can look sharp, calm, and expensive with very little visual noise. They can also go wrong in about ninety seconds. One crooked part, one fuzzy crown, one heavy blob of gel at the hairline, and the whole thing starts to feel dated instead of clean.
The trick is not drowning the whole head in product. It’s about putting hold where the hair meets the scalp, then letting the lengths do something useful—fall, braid, coil, or wrap. Long hair is actually a gift here because the weight helps flatten flyaways, but that same weight can drag a ponytail down or pull a bun apart if the base isn’t anchored well.
My rule is simple: the cleaner the surface, the less complicated the shape needs to be. A tail comb, a boar bristle brush, a medium-hold gel, and a few good bobby pins will take you farther than a dozen styling products that all promise the same thing. And if your hair is thick, curly, layered, or very slippery, the order matters more than the product itself.
Some of these looks are polished enough for a wedding. Some are the kind of style you throw on when you want your hair off your face but still want it to look thought through. The first one is the baseline—the style every other version borrows from.
1. Classic Wet-Look Slick Back
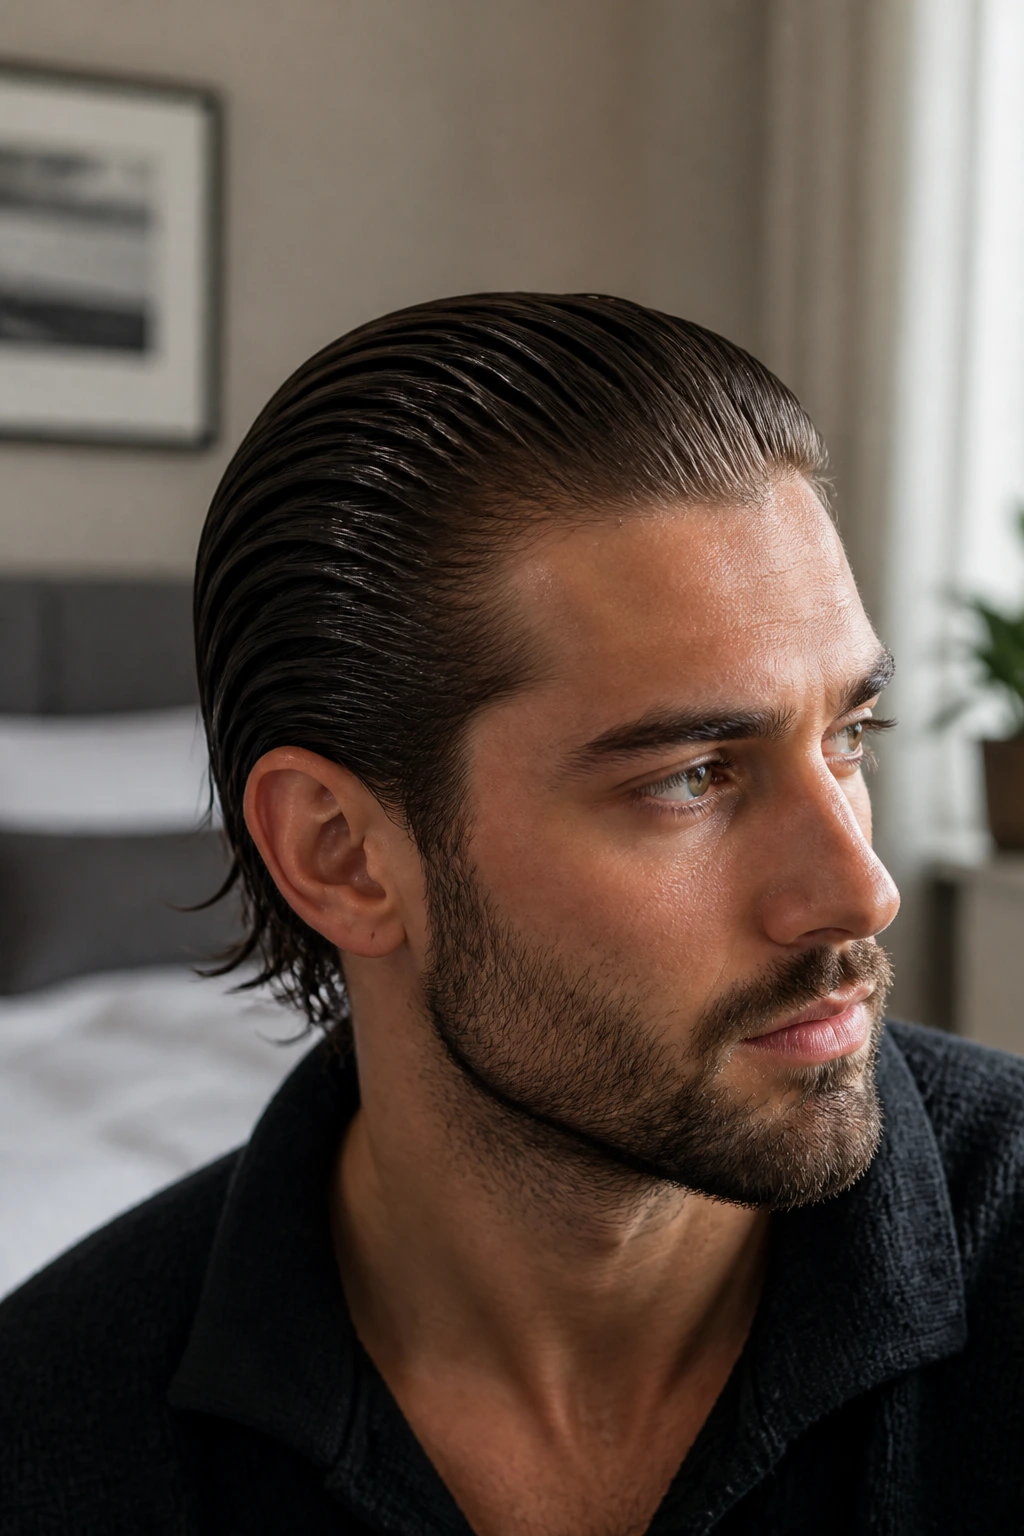
The classic wet-look slick back is the purest version of the style, and honestly, it still holds up because it does one job well. Hair is combed straight back from the forehead and temples, the roots are sealed flat, and the shine sits on the surface instead of turning the whole head into a helmet.
Why It Works
The look depends on control at the root and restraint everywhere else. If you load product through the mid-lengths and ends, the style gets heavy fast, especially on long hair that already has weight. A better move is to smooth a thin layer of gel or styling cream only through the front third of the head, then brush the rest back with firm, even strokes.
A lot of people skip the second pass with the comb, and that’s where the mess starts. The first pass lays the hair down. The second pass lines up the strands so the finish reads sleek instead of smeared. On hair that puffs up at the crown, I like to press the brush flat against the head, pause for a beat, then move back another inch. Slow. Annoying. Necessary.
- Best for straight, wavy, or stretched curly hair
- Looks strongest on one-length or low-layered cuts
- Works with a middle part, side part, or no part at all
- Needs a fine-tooth comb and a brush with firm bristles
Pro tip: Use a small amount of gel near the temples first, then add more only if the hair still lifts. Too much product at once creates slick spots that never dry evenly.
2. Low Sleek Ponytail
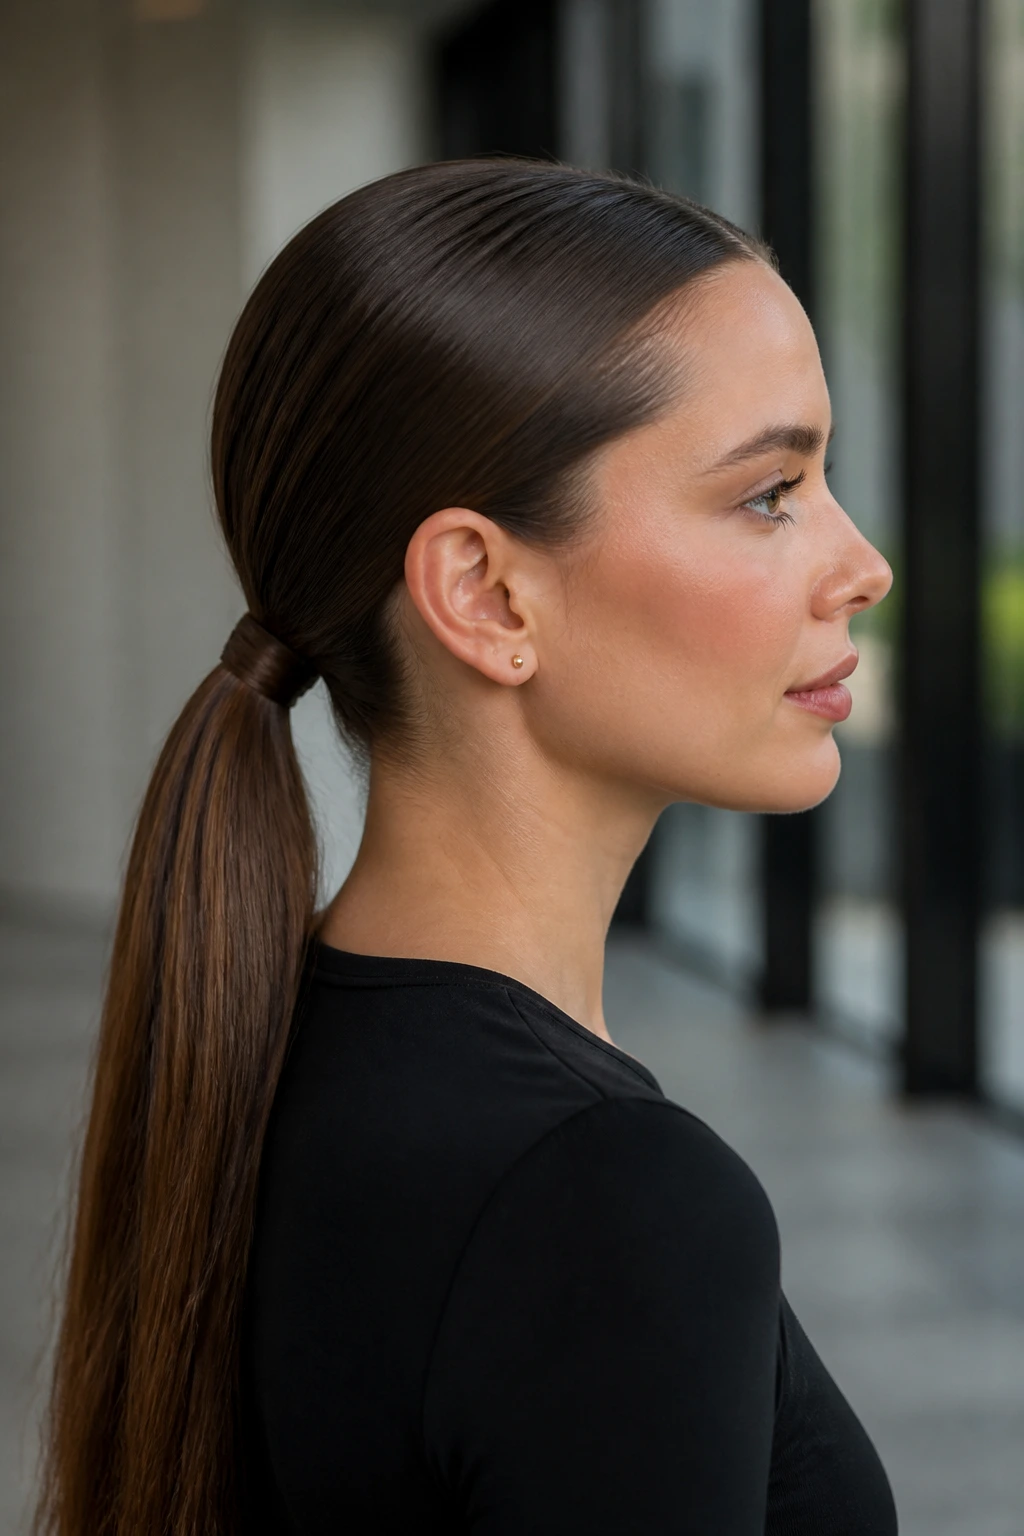
A low sleek ponytail is the style I reach for when I want the hair to look deliberate without turning it into a full editorial moment. The base sits near the nape, the crown stays smooth, and the length falls in one long line that looks neat even when the ends have a little natural bend.
The placement matters more than people think. A ponytail tied too low can feel flat and sleepy. Too high, and it starts behaving like a different hairstyle entirely. I like the sweet spot about an inch or two above the hairline at the nape, where the head still looks lifted and the length hangs with a bit of swing.
Long hair gives this style a nice payoff because the ponytail has presence. You don’t need a ton of volume at the base. In fact, too much puff at the crown can make the whole thing feel less sleek. Brush the front back first, then smooth the sides, then gather the length once everything is lying the same way.
Wrap a small strand of hair around the elastic if you want the finish to look cleaner. Pin the wrapped piece underneath with a bobby pin and tuck the pin toward the nape so it disappears. That little move makes a plain ponytail look finished.
3. High Glass Ponytail
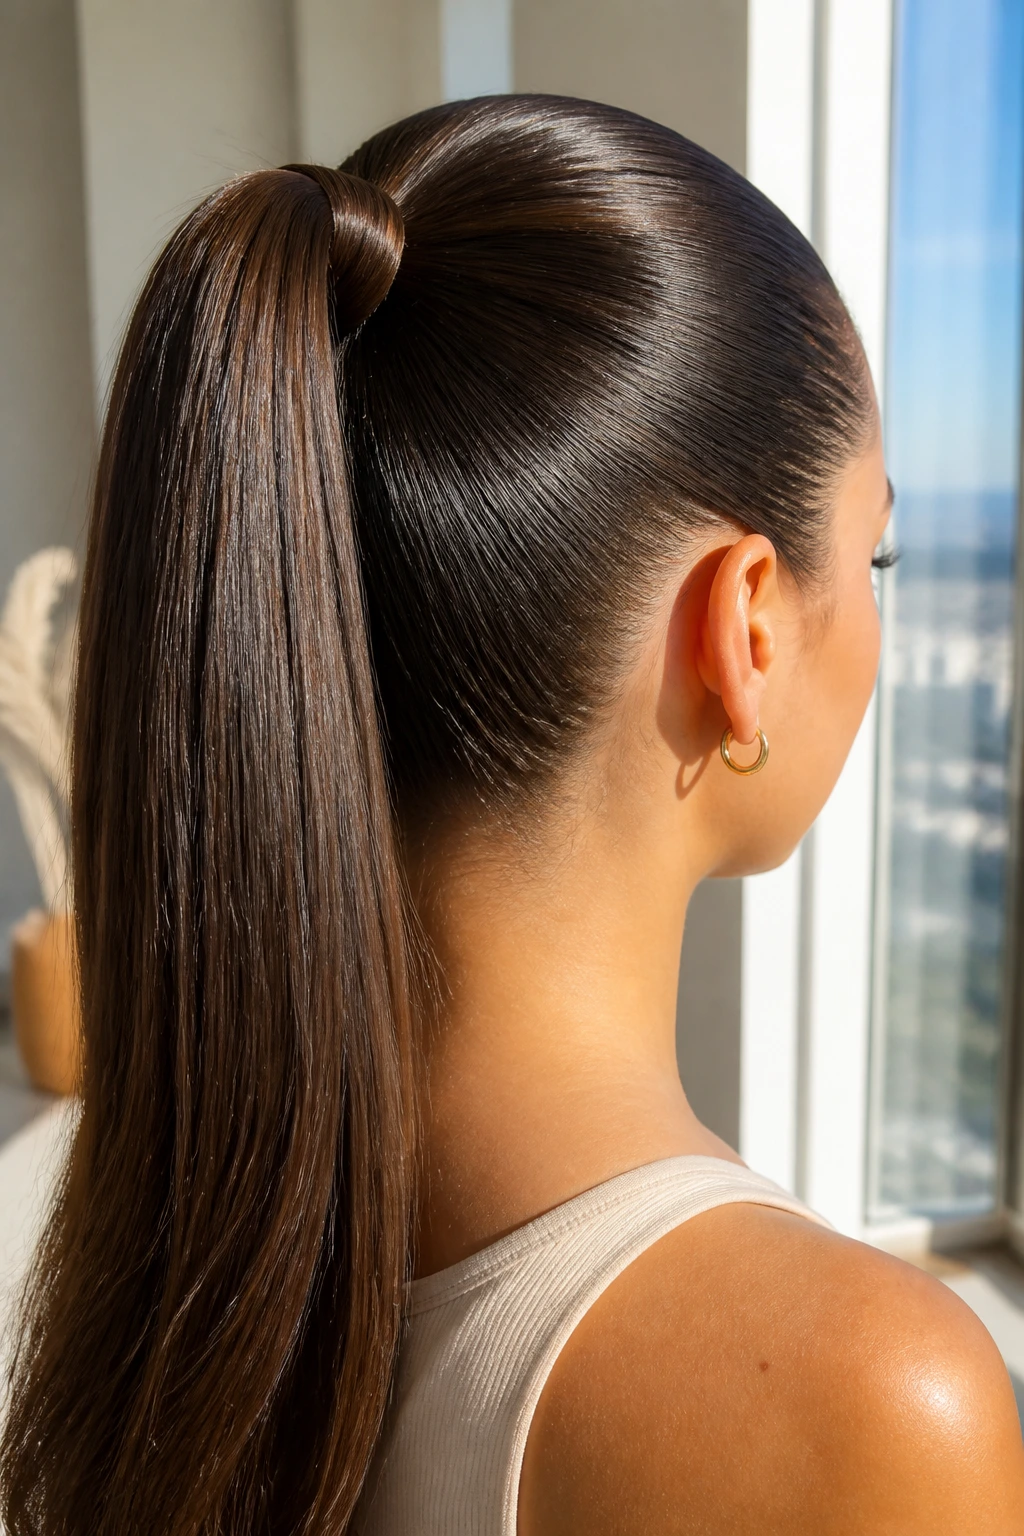
Why do some high ponytails look lifted and clean while others look like they’re fighting the scalp? Usually it comes down to tension and placement. A high glass ponytail needs the crown smoothed first, then the tail anchored hard enough to stay up without pulling the front too tight.
How to Keep the Crown Flat
Start by brushing the hair upward from the sides, not straight back from the front. That small angle helps the hair flow toward the ponytail instead of creating a bump where your part used to be. Once the base is tied, run a fine-tooth comb over the crown and the front hairline again to catch any little lift.
For long hair, I like a double-elastic setup. The first elastic holds the hair. The second one goes right on top to reinforce the base and keep the ponytail from sagging after a few hours. It sounds fussy. It isn’t. Long, heavy hair will pull itself down if you give it any slack.
Quick Shape Notes
- Best when the ponytail starts at the top third of the head
- Works well with a sharp middle part or a smooth no-part finish
- Needs strong hold near the roots, not through the whole tail
- Looks cleaner if the tail is wrapped with a straightener or blow-dried smooth first
If your hairline is sensitive, loosen the first tie slightly before tightening the second. Painful hair does not read as polished.
4. Sculpted Low Bun
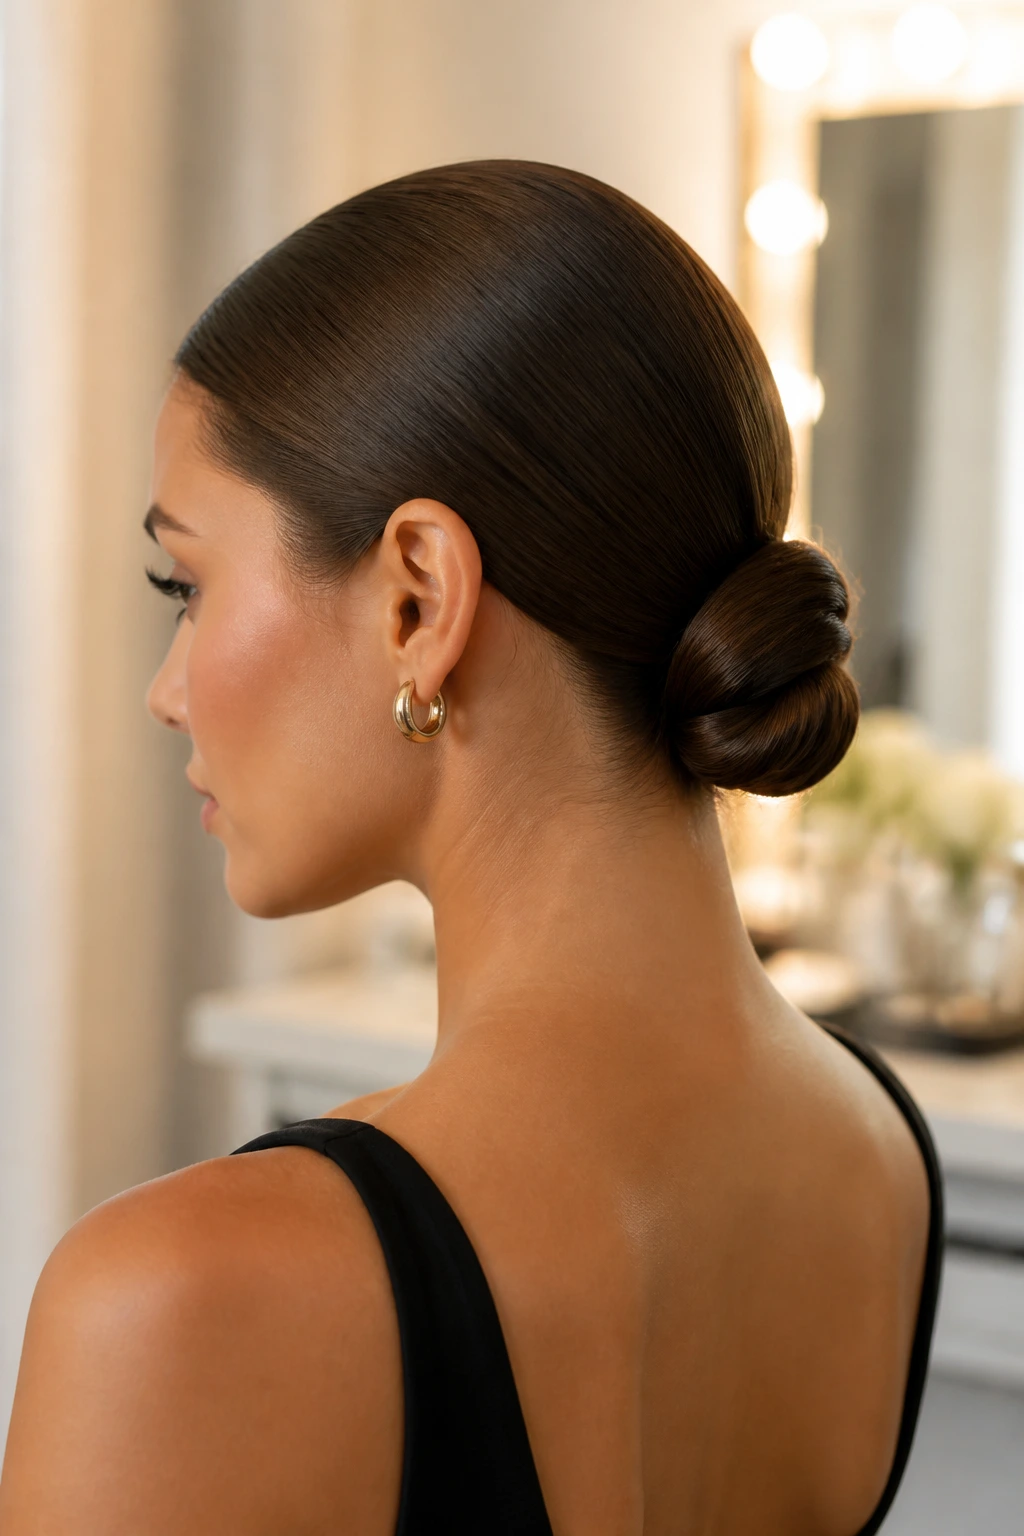
A sculpted low bun can look strict or soft depending on where the tension sits, and that’s why I keep coming back to it. The crown stays smooth, the bun sits low at the nape, and the overall shape feels controlled without being stiff.
This version works best when the hair is gathered in a low ponytail first, then twisted once or twice before being wrapped into the bun. On long hair, that twist matters because it keeps the bun compact. If you skip it, the ends can poke out in odd directions and the shape gets bulky fast.
Pins are the whole story here. Use them in crossed pairs so the bun holds from both directions instead of sliding downward. A few well-placed pins beat a dozen random ones every time. I also like to press the bun flat with one hand while pinning with the other, because that keeps the top smooth and stops the style from puffing out.
The nicest thing about this look is that it suits everything from a plain T-shirt to a dress with an open back. Quiet. Clean. A little severe, in a good way.
5. Deep Side-Part Sleek Back
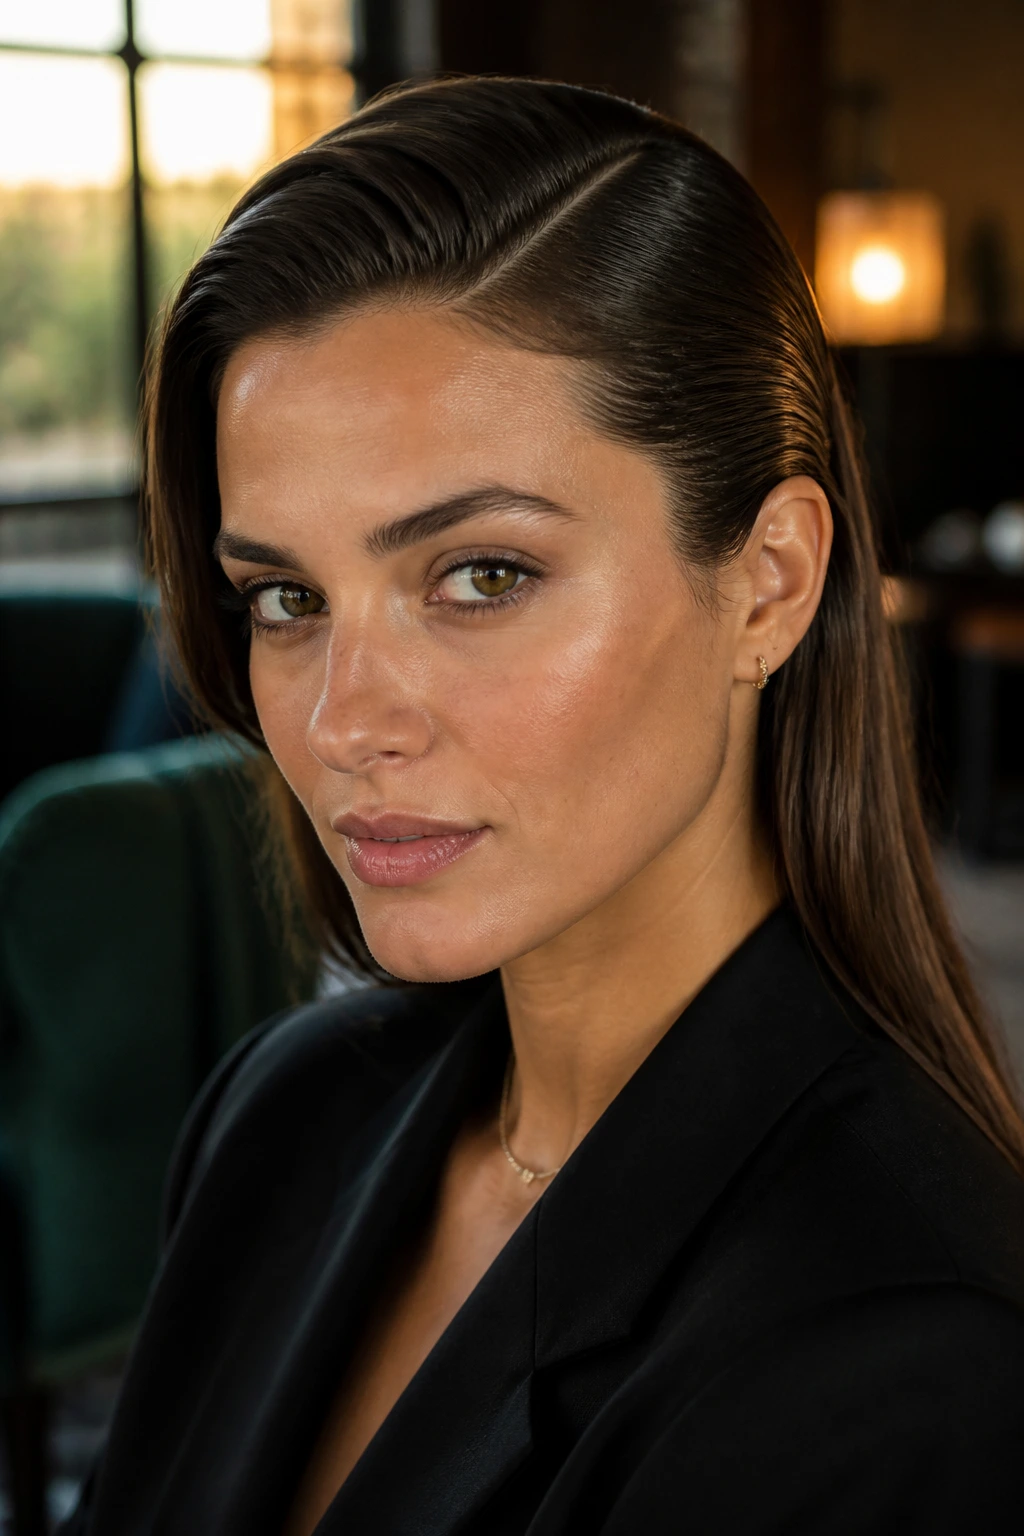
A deep side part changes the mood immediately. Same long hair, same slicked-back base, completely different feel. The asymmetry makes the style look a little more dressed up, and it also gives you a better way to frame one side of the face without letting the whole front collapse into softness.
Where the Part Should Sit
Set the part farther over than feels normal, usually above the arch of one eyebrow. That leaves one side with more hair and one side with a narrower sweep, which gives the style shape from the front. If the part is too subtle, the whole look turns generic. If it’s too deep, the front can start looking lopsided in a bad way.
The thicker side should get brushed back first, then the smaller side laid over it. That helps the part stay visible instead of getting swallowed by the gel and brush work. For long hair with layers, use a little more product on the shorter front pieces so they don’t spring loose around the temple.
This is the version I’d pick with statement earrings, a strong neckline, or a blazer that needs a clean frame around the face. It’s polished without trying too hard, which is rare. And useful.
6. Center-Part Glass Hair
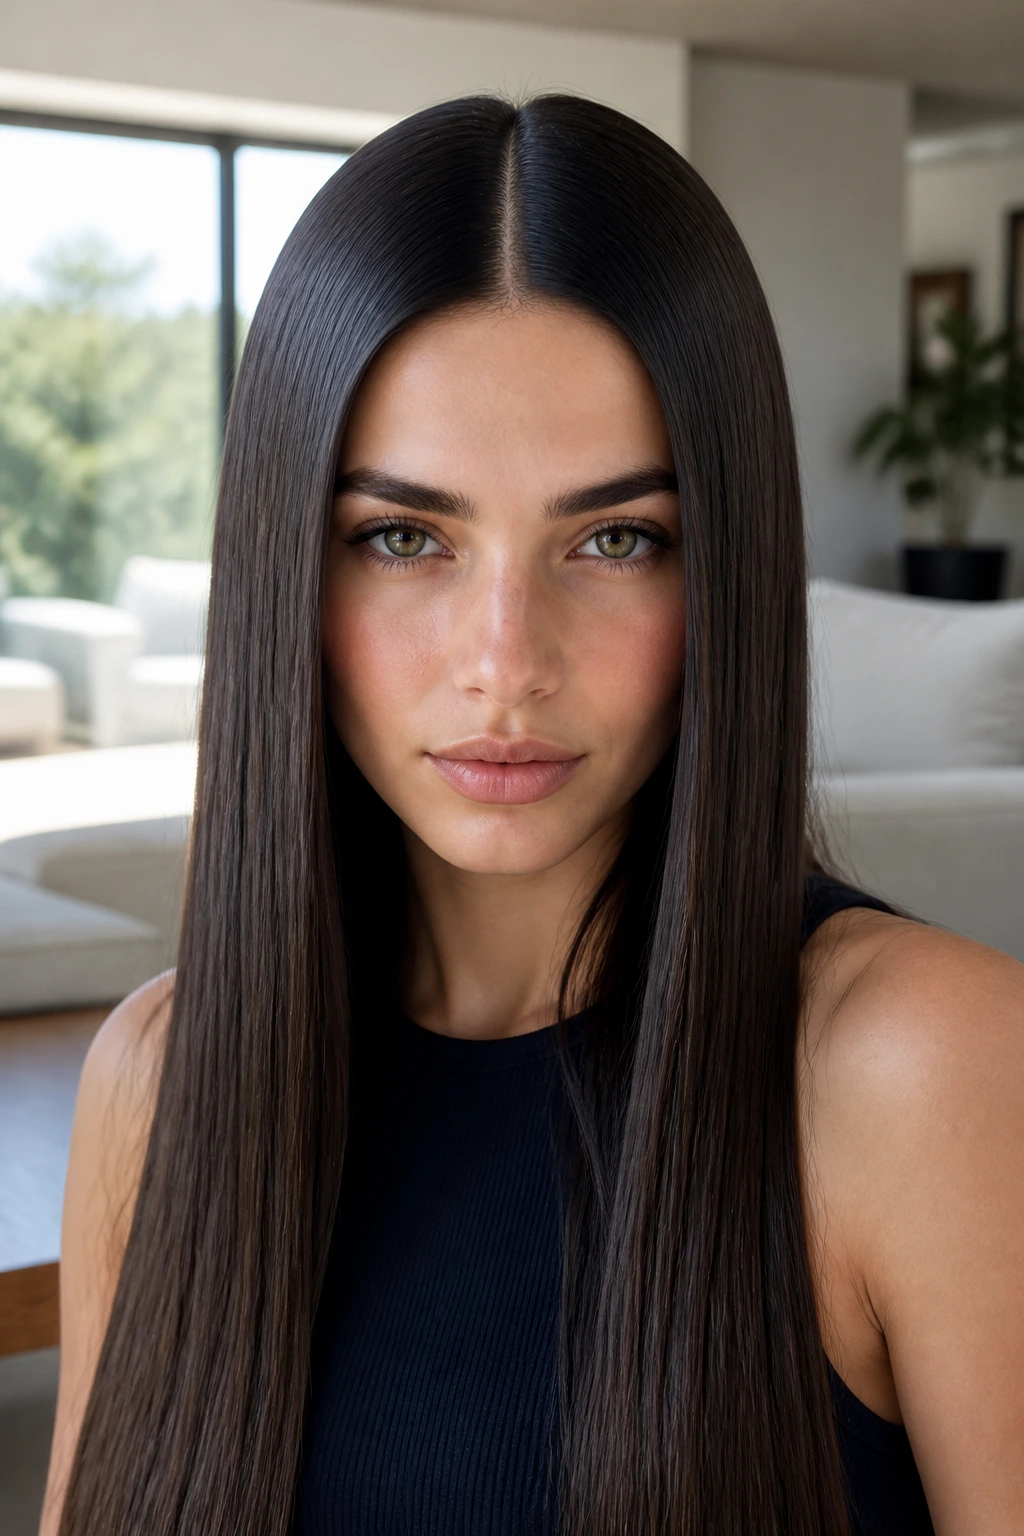
A center part is unforgiving, which is exactly why it looks so clean when it works. With long hair, the symmetry draws the eye straight down the head, and the sleek finish makes the lengths look almost reflective if the cuticle is lying flat.
The part itself needs to be exact. Don’t eyeball it in a bathroom mirror from three feet away and hope for the best. Use the tail end of a comb, start at the center of the forehead, and pull the line straight back to the crown before brushing either side down separately. If one side has more hair, fix that before you reach for the product.
What Makes It Stay Crisp
- A light cream under the gel keeps the hair from feeling crunchy
- Downward brushing helps the top layer stay close to the scalp
- A cool shot from the dryer can set the front once it’s laid down
- A dab of serum on the ends keeps the tail from looking frayed
This style is a good one for long hair that’s naturally straight or only mildly wavy. Very textured hair can do it too, but it usually needs more prep. If you want a sharper finish, tuck the lengths behind the ears for a minute while the front sets, then release them once the roots have cooled.
7. Slicked-Back Braided Ponytail
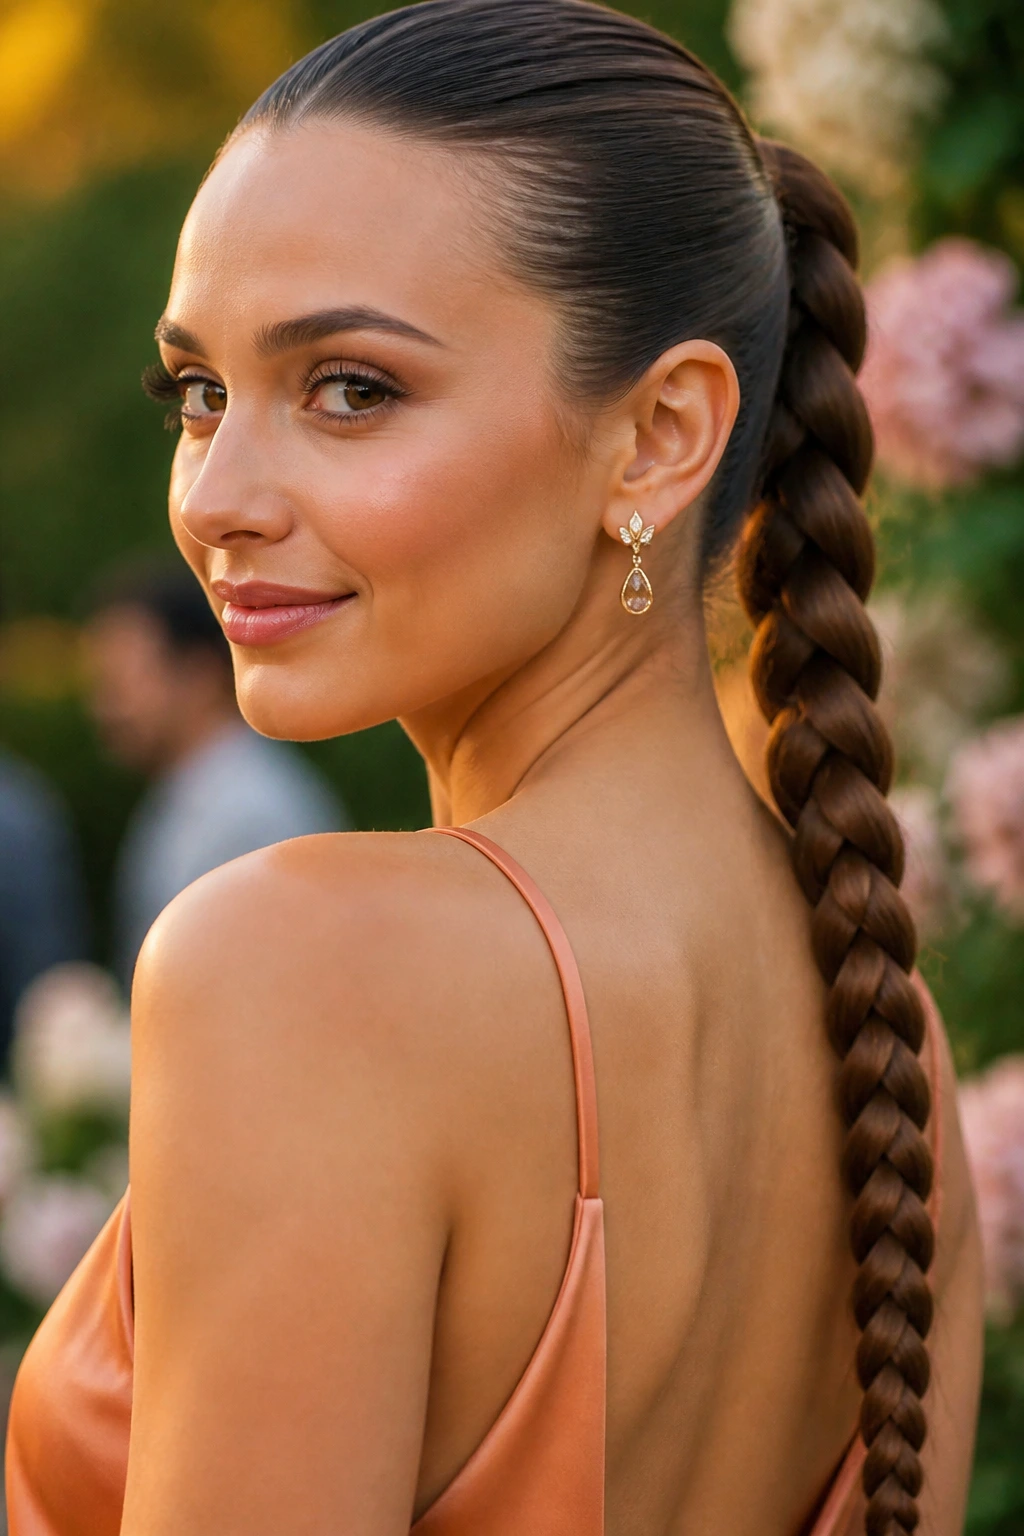
If your ponytail tends to fray by lunchtime, braid the tail. That’s the whole idea here. The front stays smooth and controlled, then the length gets turned into a single braid that keeps the style together instead of letting it spread out and tangle.
The braid can be tight or a little fuller, but the base should stay neat. That means smoothing the crown first, tying the ponytail securely, and only then braiding the lengths. A braid added before the base is stable usually ends up pulling the front loose, which defeats the point.
Braid Tension Matters
A three-strand braid works best when each section gets the same pull. If one side is looser, the braid starts twisting instead of lying flat. On long hair, I like to keep the tension even for the first 4 or 5 passes, then relax it just slightly toward the end so the braid doesn’t taper into a stringy tail.
This is one of those styles that reads practical but still clean enough for an event. It also handles wind better than a loose ponytail, which is no small thing. Hair that stays where you put it has a certain charm.
8. Bubble Ponytail
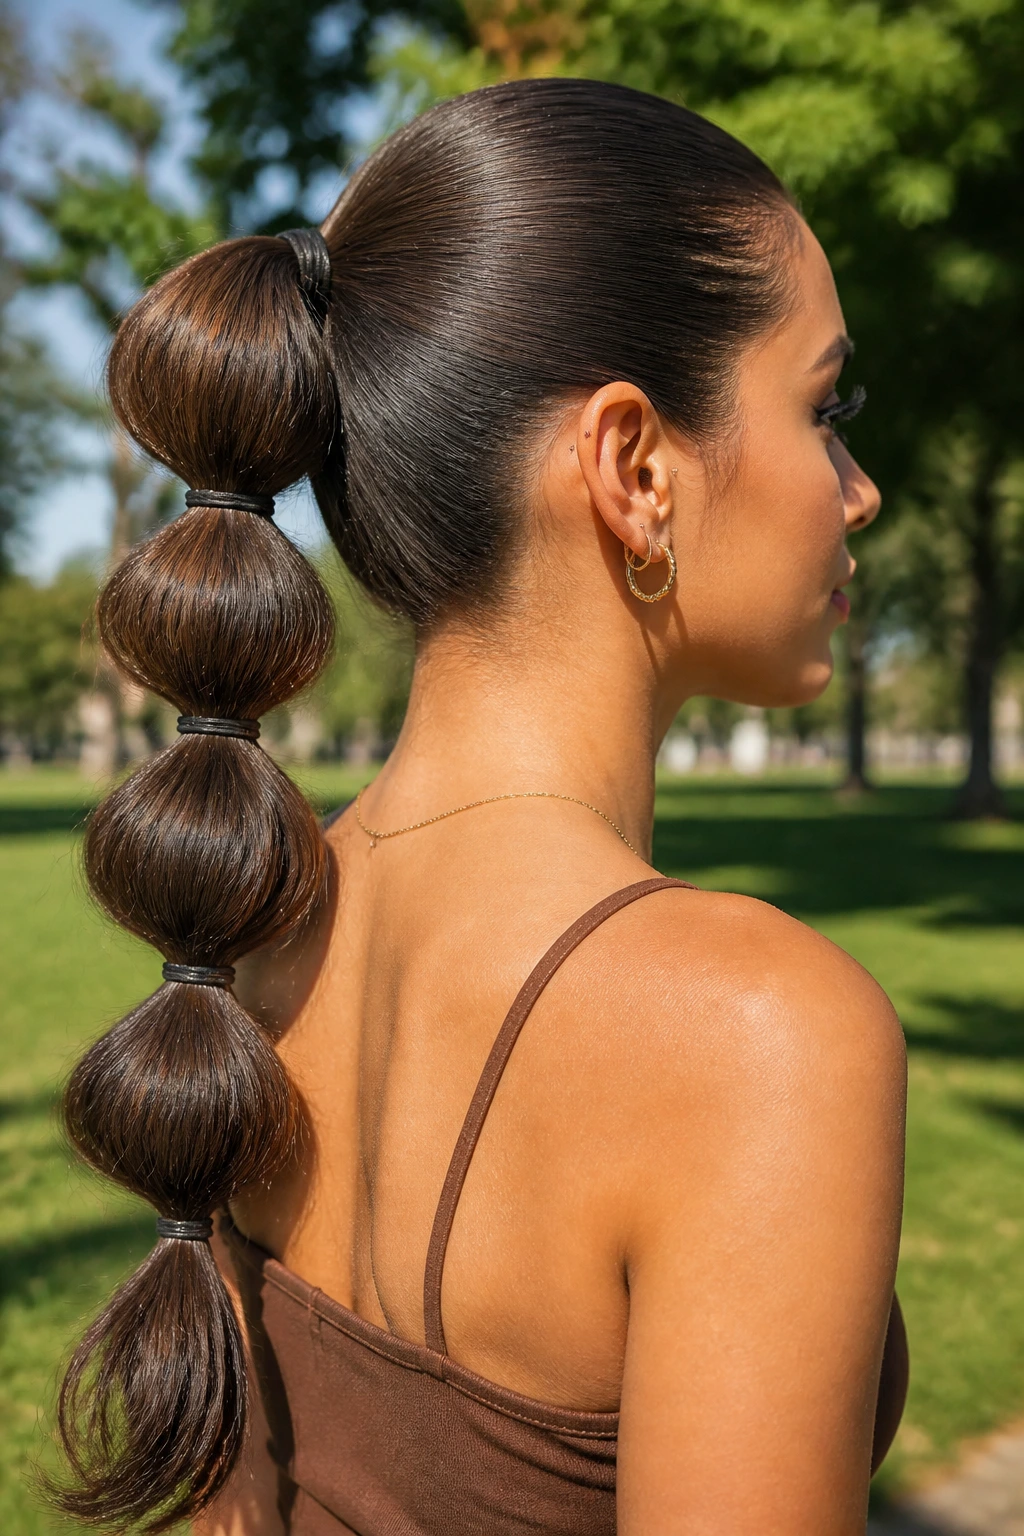
Clean roots. Big shape. That’s the appeal of a bubble ponytail, especially on long hair where each section has enough length to puff out between elastics without disappearing into the next one.
Start with a sleek ponytail, then place clear elastics every 2 to 3 inches down the tail. After each elastic, tug the hair gently outward until the section rounds out into a bubble. Don’t yank. You want shape, not collapse. The bubbles should look even from top to bottom, but they do not need to be identical. Slight irregularity looks better than a row of stiff balloons.
This style works beautifully when the hair is long enough to show three or four clear sections. On shoulder-length hair, the effect can feel small. On waist-length hair, it gets more dramatic because the line keeps going.
- Use snag-free elastics so the tail stays smooth
- Wrap a tiny strand of hair around each elastic if you want a cleaner finish
- Keep the crown glossy and tight, or the style loses its punch
- Leave the bubbles soft; over-pulling makes them collapse later
It’s playful, sure, but not childish if the root area stays sharp.
9. Sleek Half-Up Half-Down
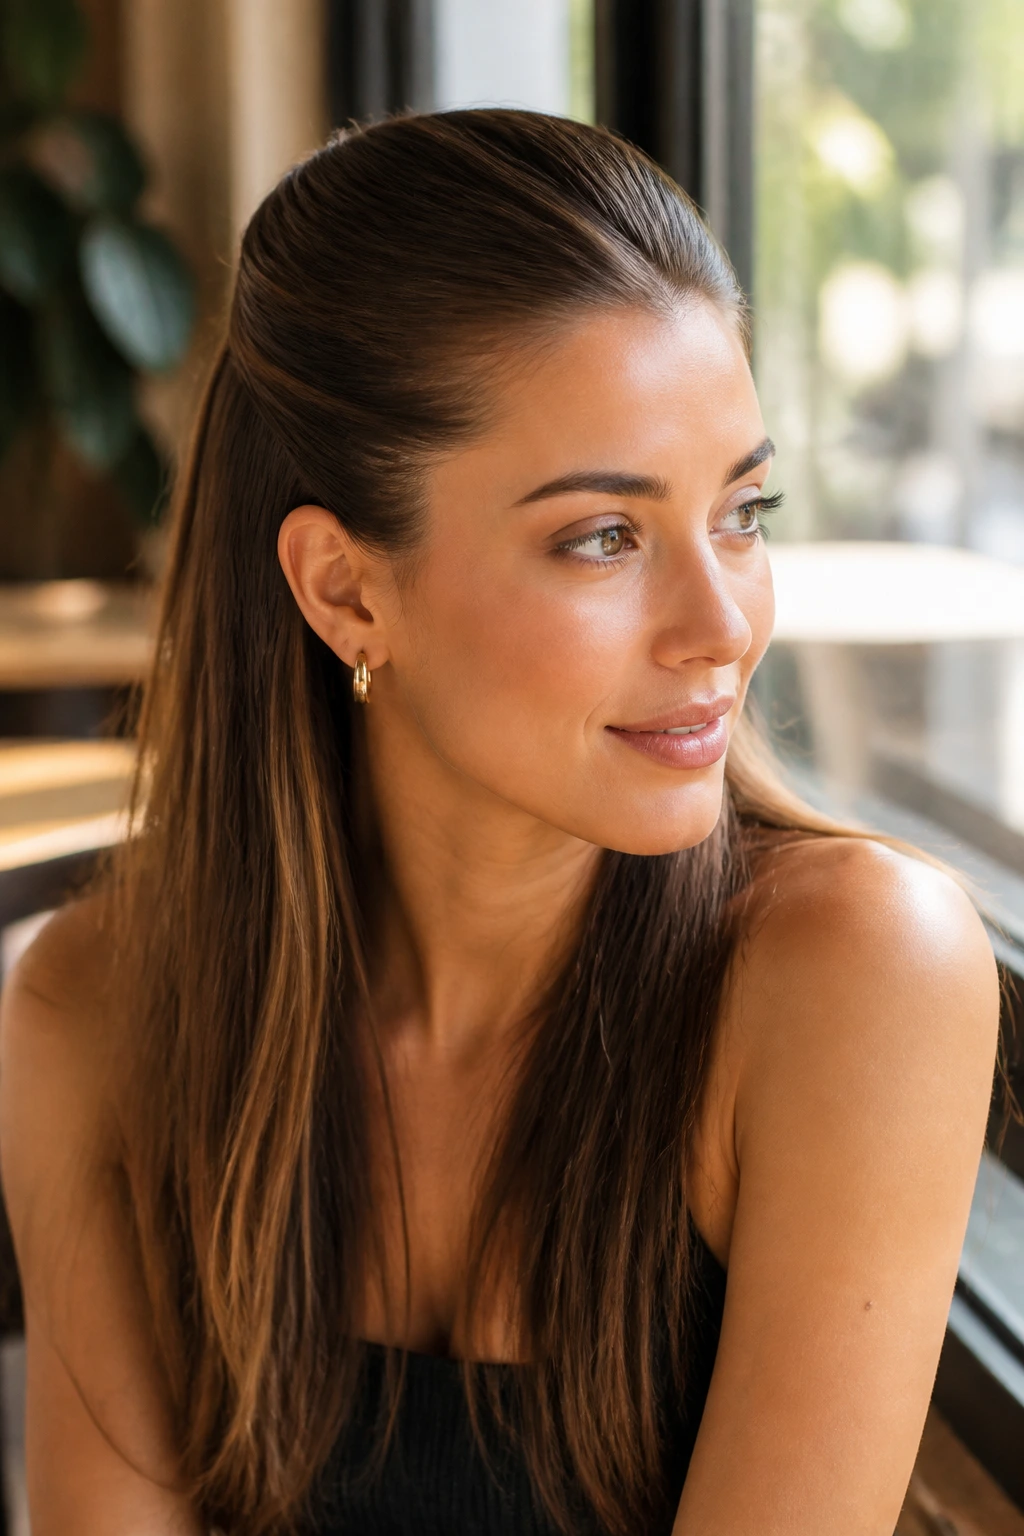
Who says the whole head has to be pulled back? The sleek half-up half-down style gives you the control of a slicked front while leaving the length visible, which is often the better deal when your hair is long and you want some movement left in it.
The top section should be brushed back from temple to temple and secured at the crown or just below it. From there, the bottom lengths can fall loose, straight, bent, or softly waved. I like this look when the top half needs to stay in place but I still want the hair to move around the shoulders instead of sitting in one rigid line.
The key is not overloading the top section. A thin layer of smoothing cream plus a little gel at the hairline is enough. If the top gets too slick, the contrast between the controlled crown and the loose ends starts looking disconnected.
This one is forgiving in a way some sleeker styles are not. It works for day events, dinner, even workouts if you keep the lower half tucked out of the way. And when the ends are healthy and shiny, the style does half the work for you.
10. Wrapped-Base Ponytail
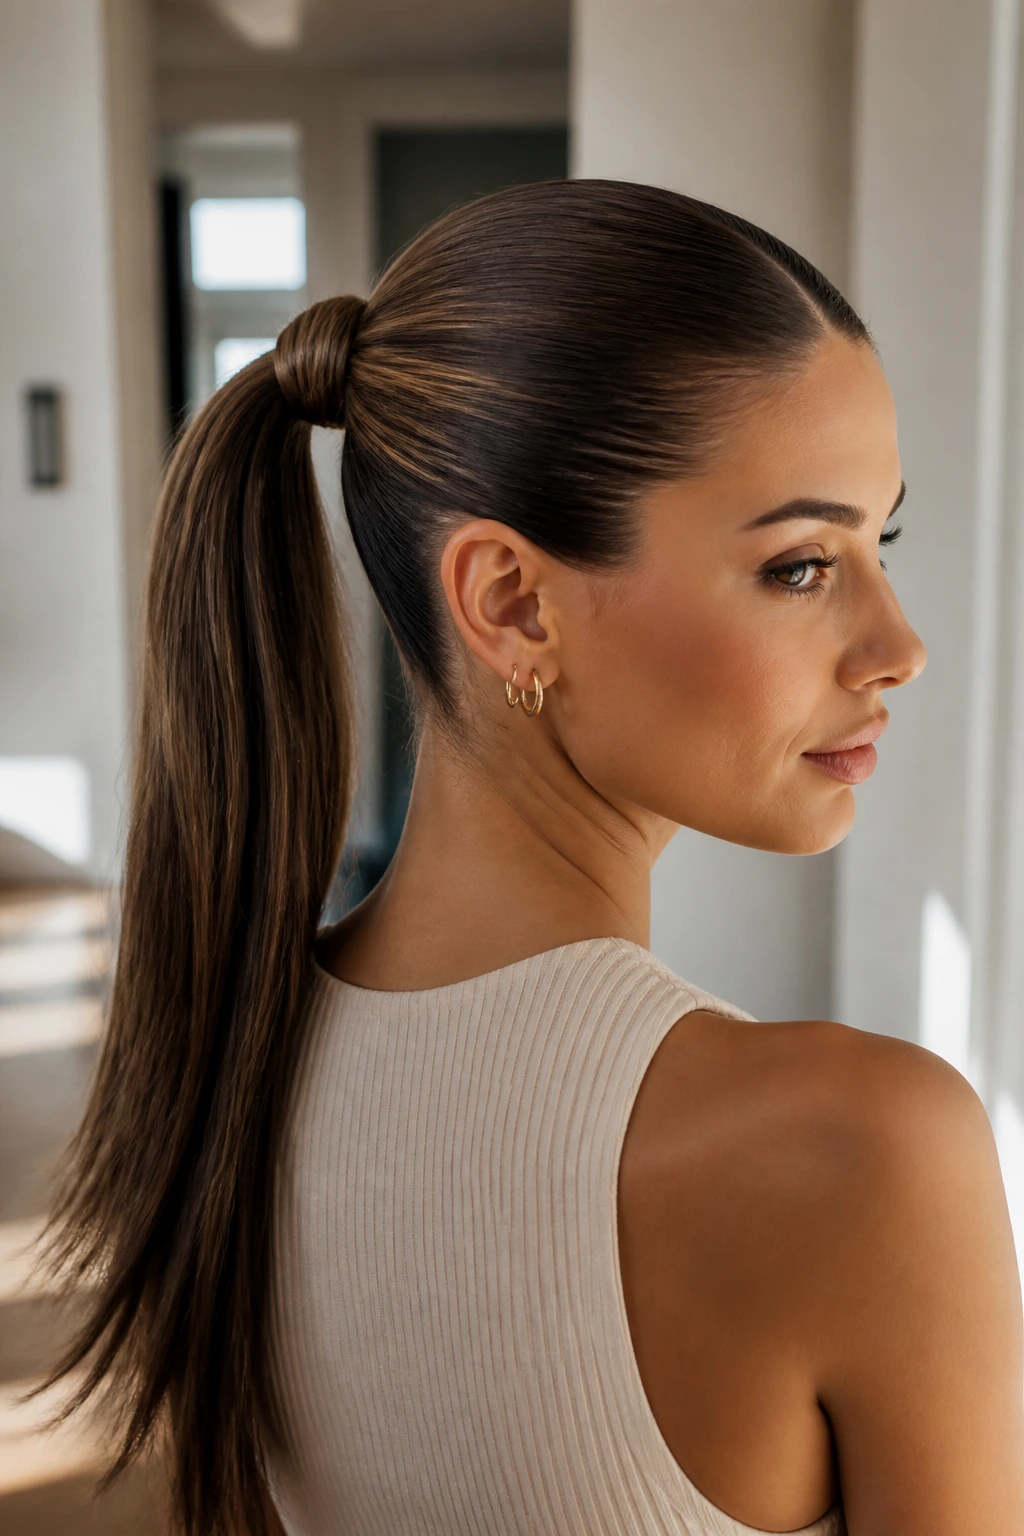
A wrapped base is the fastest way to make a basic ponytail feel finished. The style itself is simple: tie the ponytail, then take a small section of hair from underneath, wrap it around the elastic, and pin it out of sight. That tiny move changes the whole read of the look.
Long hair makes this easier because you always have enough strand to wrap neatly around the base. The wrap should cover the elastic in one clean coil, or two at most. If the strand is too thick, the finish gets bulky. If it’s too thin, the elastic shows through.
Where People Go Wrong
They wrap too loosely. The strand slips, the pin shows, and the whole thing slides out in a few hours. Pull the wrap snug, then pin it underneath the ponytail so the pin disappears into the shadow under the base. A flat bobby pin works better than a heavy one here.
I also like this style because it gives you a place to hide a tiny snag or uneven section. The wrapped piece acts like a visual reset. It is a small thing. It matters anyway.
11. Rope-Braid Ponytail
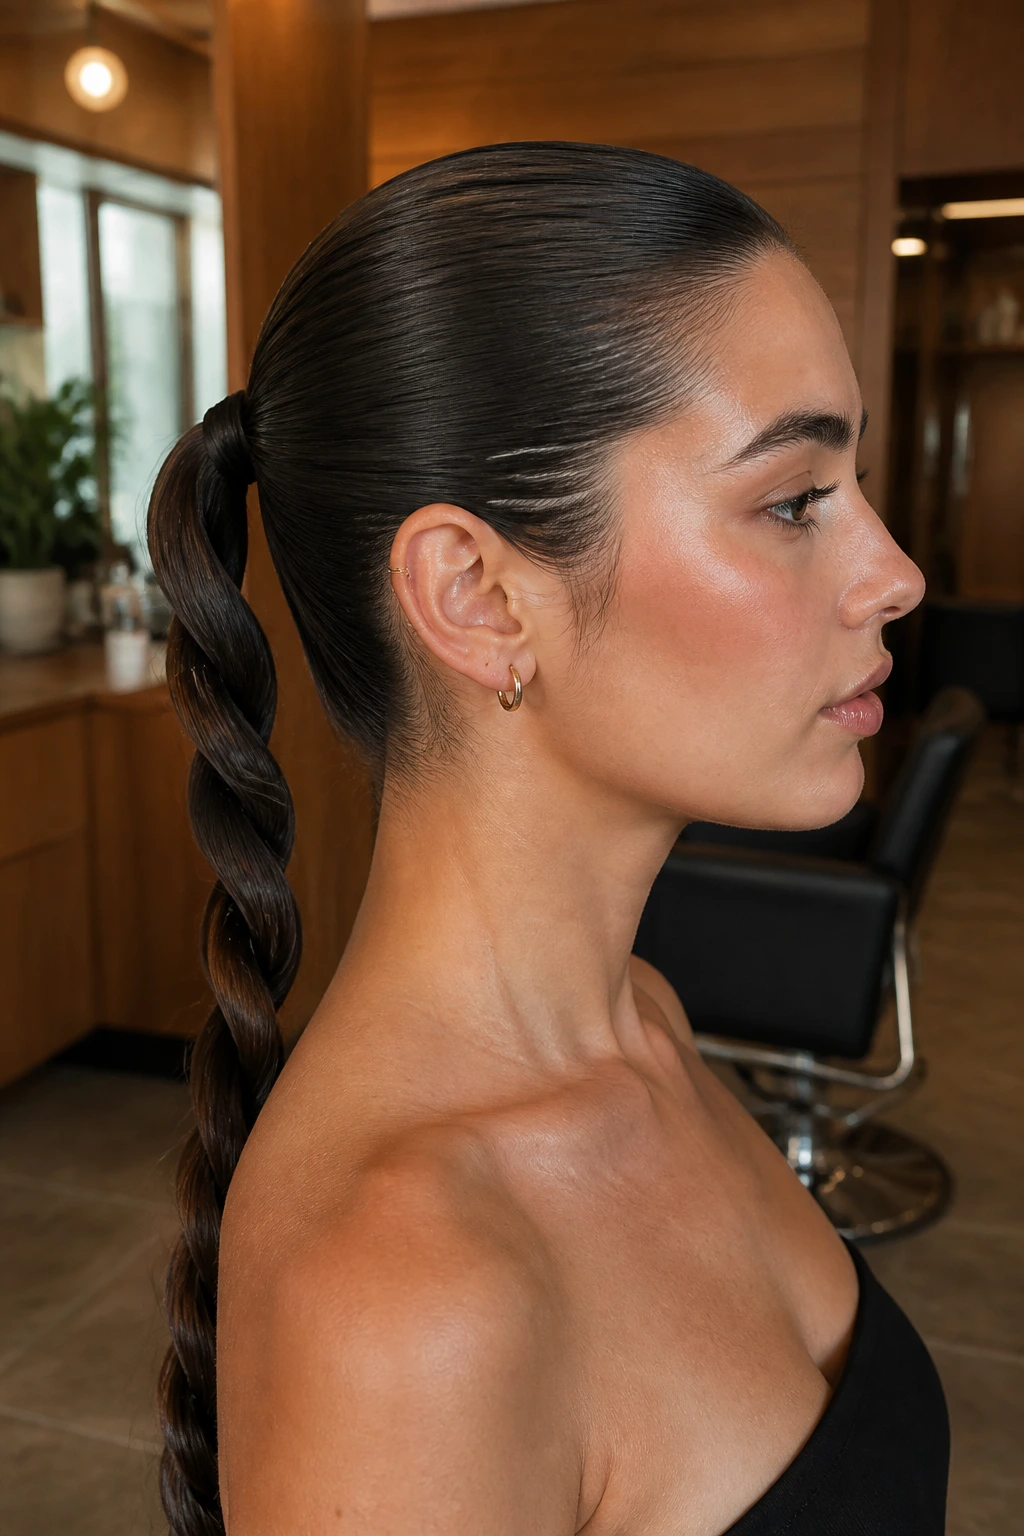
If you hate how three-strand braids sometimes flatten out, a rope braid gives you a shinier, tighter line. It twists instead of weaving, which makes the finish look a little more sculpted and a little less familiar.
Gather the hair into a sleek ponytail first. Split the tail into two equal sections, twist each section in the same direction, then wrap them around each other in the opposite direction. That opposite-motion part is what makes the braid hold. If you twist both sections and wrap them the same way, the braid loosens and falls apart.
This style is especially good on thick long hair because the length helps the rope pattern stay visible from top to bottom. It’s also a smart choice if your ends are a little dry, since the braid keeps them bundled rather than splaying out.
How to Get the Most From It
- Use smoothing cream or a light serum before twisting
- Keep the base tight so the braid starts clean
- Secure the end with a small elastic that matches your hair color
- Gently pull the braid wider if you want a softer finish
The rope braid has a nice practical edge. It looks polished, but it doesn’t feel precious.
12. Crown Braid with Slicked Sides
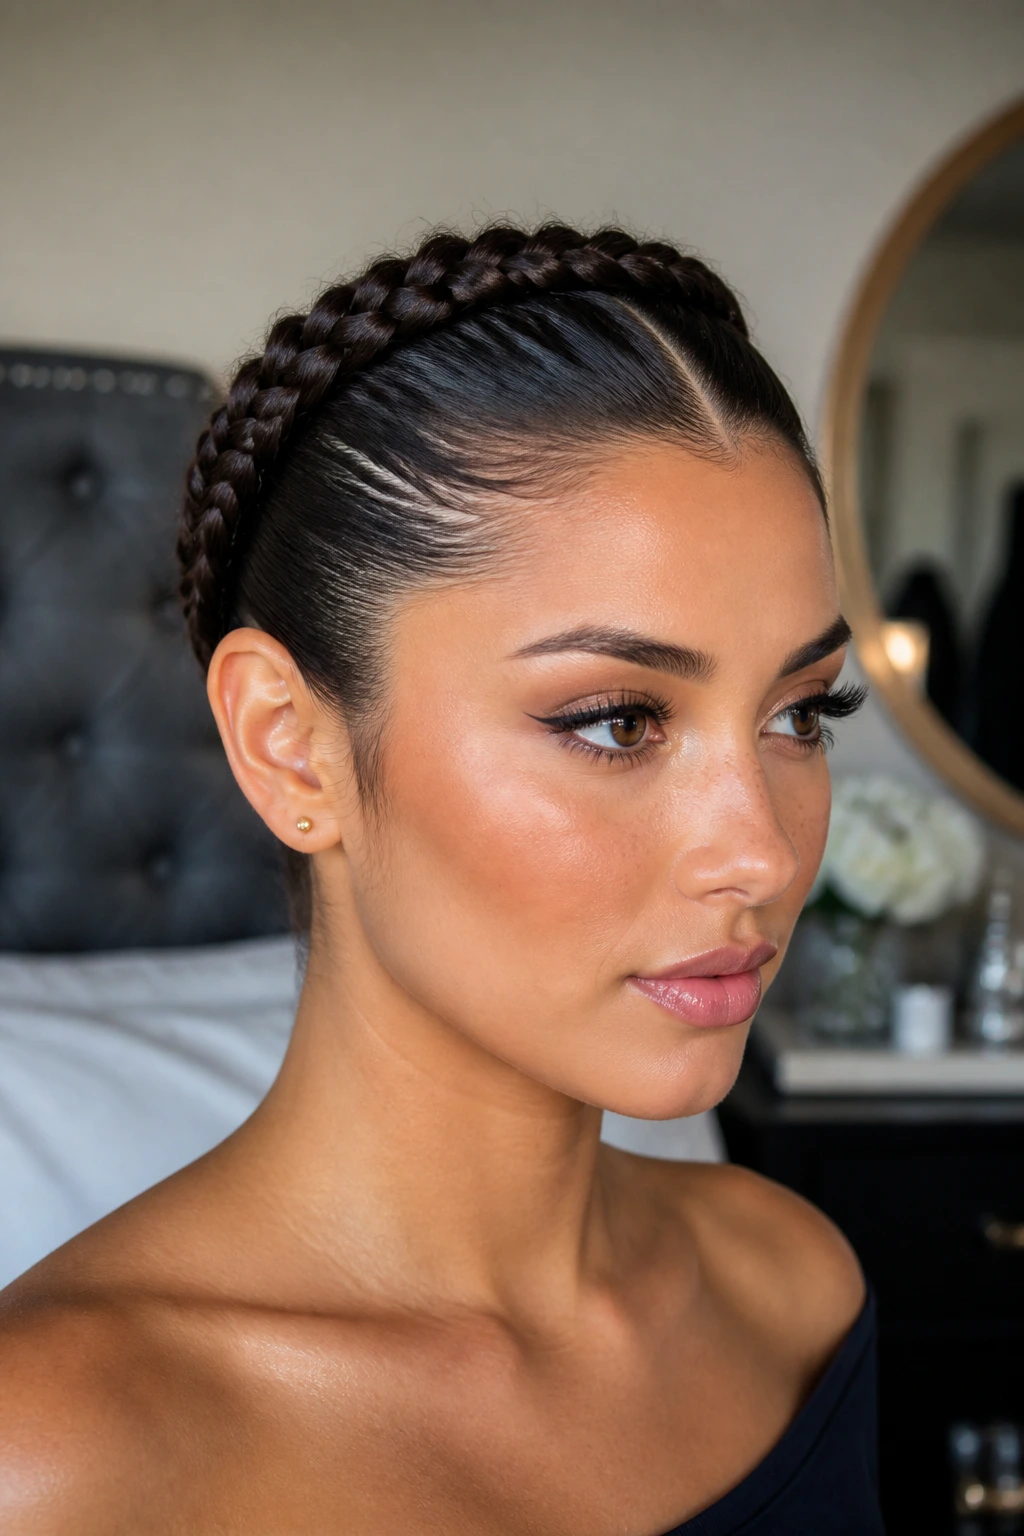
Some styles live at the hairline, and this is one of them. A crown braid frames the head like a band, while the sides stay slicked back so the braid has a clean stage to sit on. On long hair, the back can drop into a low ponytail, a bun, or even tucked lengths, depending on how formal you want it.
The braid itself can run along the hairline from one ear to the other, or it can start at the temple and travel across the crown. Either way, the sides need to be smooth first. If the front starts puffing, the braid stops looking intentional and starts looking like a rescue mission.
What to Watch For
The braid should sit close enough to the scalp that it does not float. Floating braids look pretty in photos and annoying in real life. Pin every few inches, especially behind the ears where hair likes to spring out.
A crown braid is one of the few slicked-back styles that brings in texture without losing the clean feel. That’s why I keep recommending it for long hair that needs a bit more interest than a plain tail.
13. Low Chignon
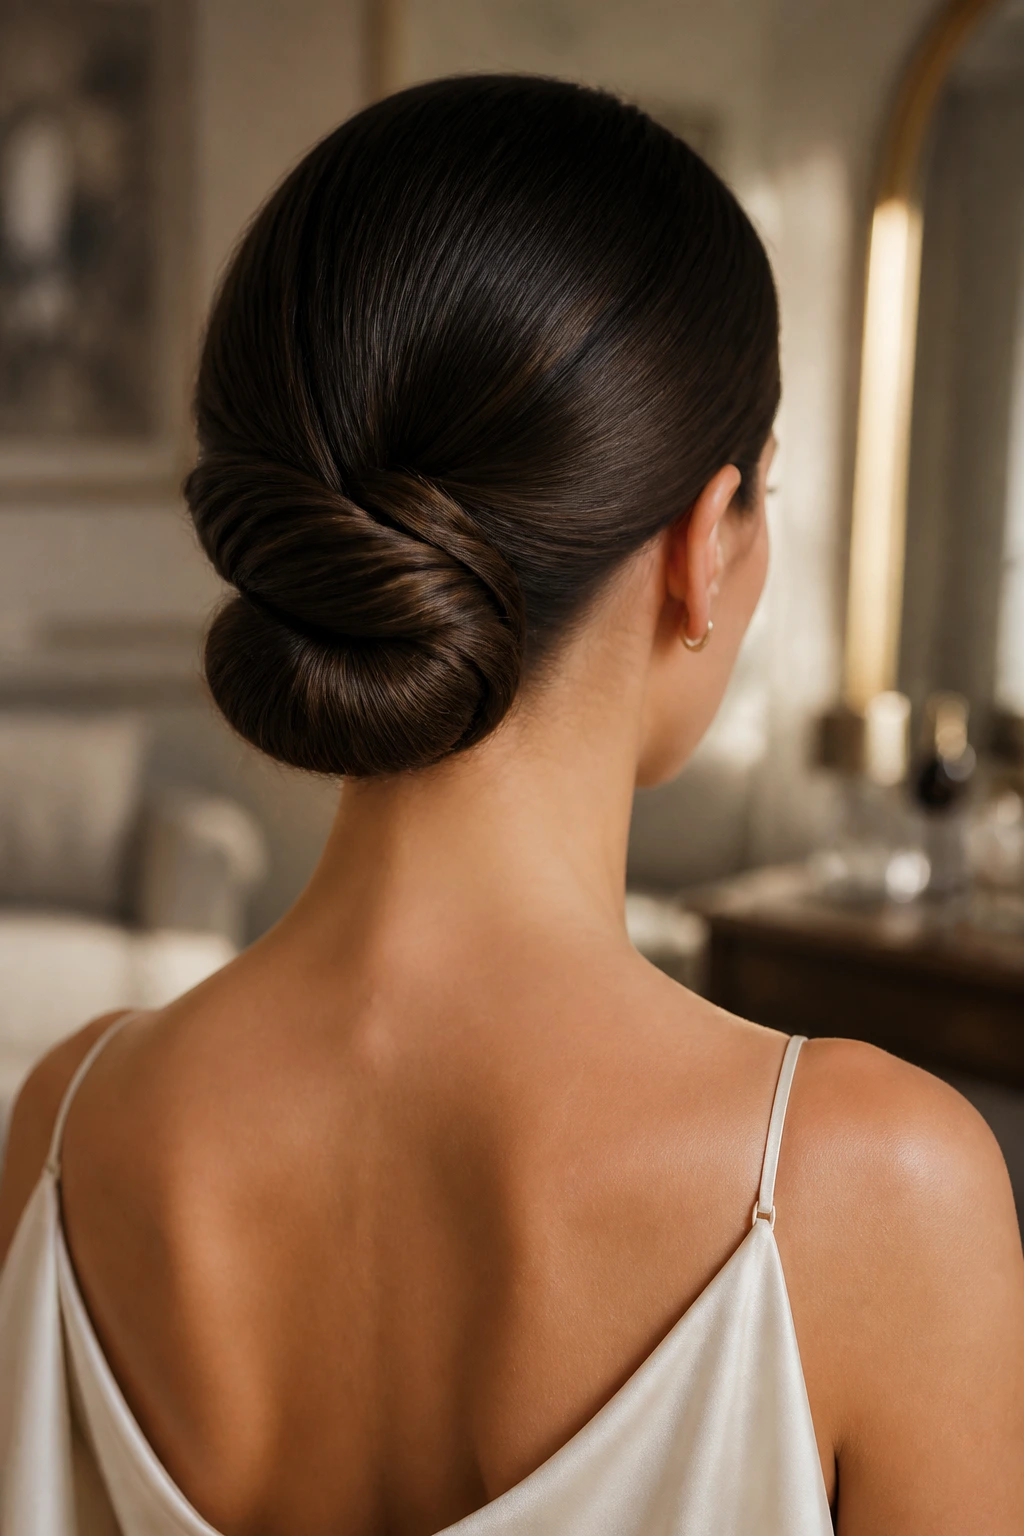
A chignon is not just a bun with a French accent. The shape is more folded than rolled, and it usually sits right at the nape with the ends tucked inward so the finish feels compact and elegant rather than round and bulky.
Long hair makes a chignon easier to sculpt because there’s enough length to fold back on itself without the ends sticking out. I prefer starting with a low ponytail, twisting it, then bending the tail under and around the base. The trick is to keep the twist snug while you pin it, so the shape stays narrow.
This style is better than a plain bun when you want something a little more formal. A bun can feel casual if it’s too soft. A chignon has a cleaner line and usually looks better with a dress collar, a blazer, or any neckline that wants some space.
If your hair is layered, pin the shorter pieces first. They are the ones most likely to escape once the style settles.
14. Cornrow Ponytail
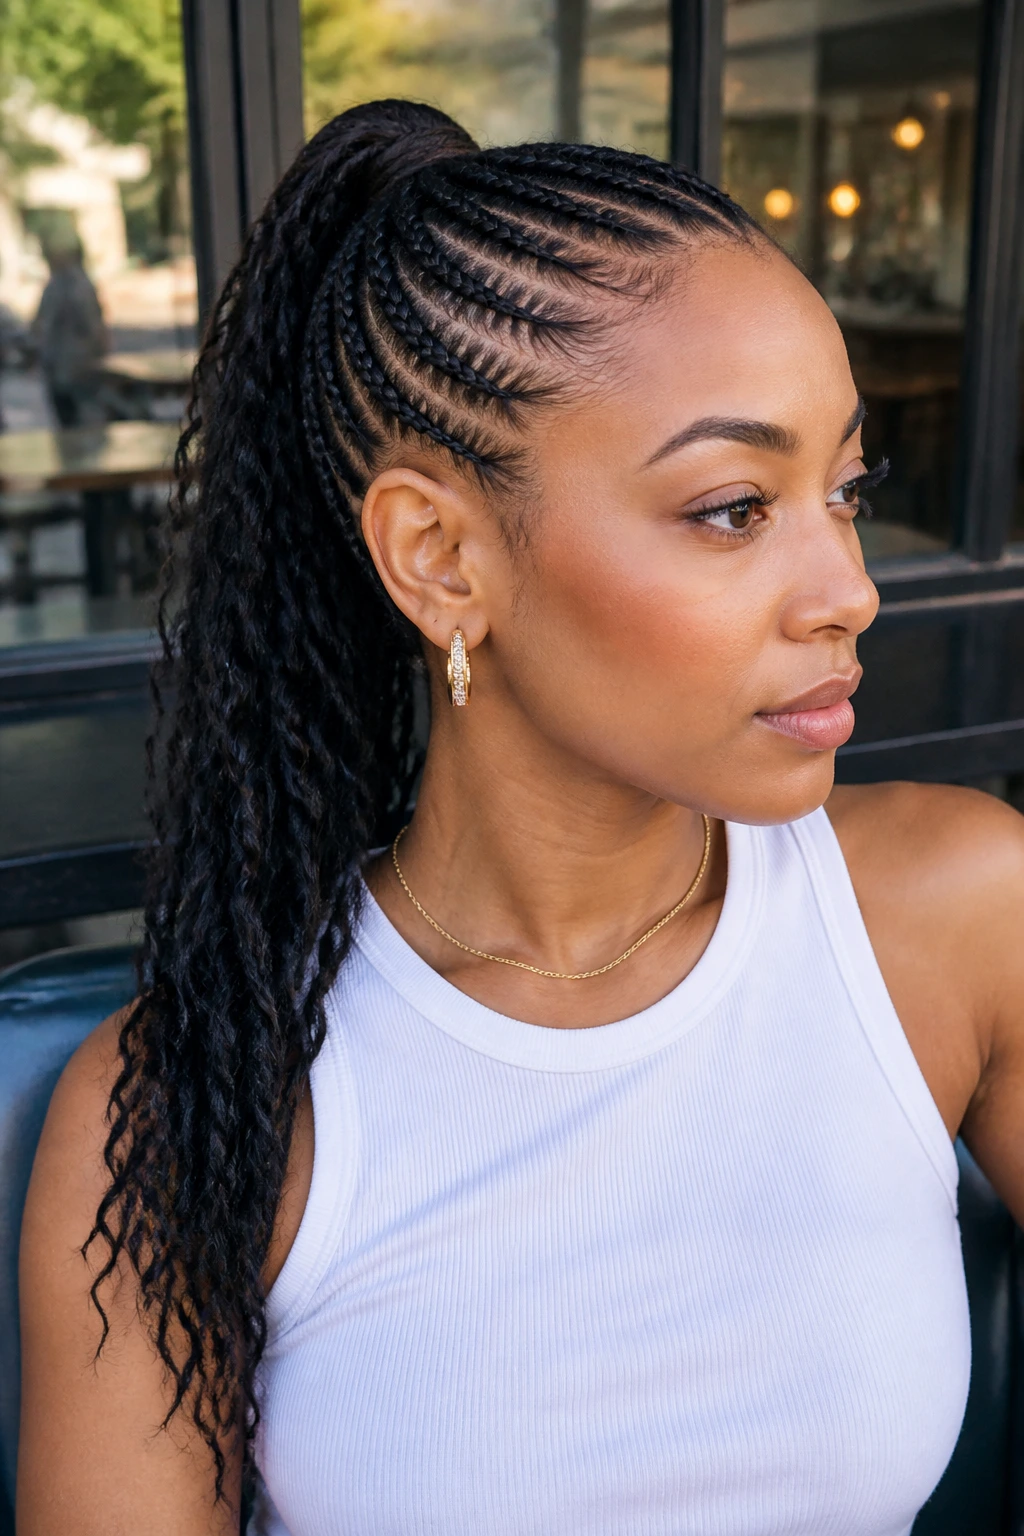
Long, dense hair takes this style better than most people think. A few neat cornrows along the front or crown can feed into a ponytail and keep the roots flat for days, which is a very different kind of slicked-back look than the glossy one-day styles above.
This is the version that leans protective as much as polished. The scalp stays tidy, the front stays off the face, and the ponytail can be worn high or low depending on the braid pattern. If your hair is coarse or very thick, the style can hold beautifully because the braids do the job that gel alone would struggle to do.
Prep and Wear
- Start on stretched or detangled hair to reduce pulling
- Use edge control only where the hairline needs smoothing
- Keep the braids even in width so the pattern looks balanced
- Finish with a ponytail band that will not snag the ends
I would not rush this style if you’re new to braiding. The braid tension has to be even, or the whole thing feels off at the scalp. But when it’s done well, it’s one of the cleanest long-hair looks in the bunch.
15. Dutch Braid Pigtails
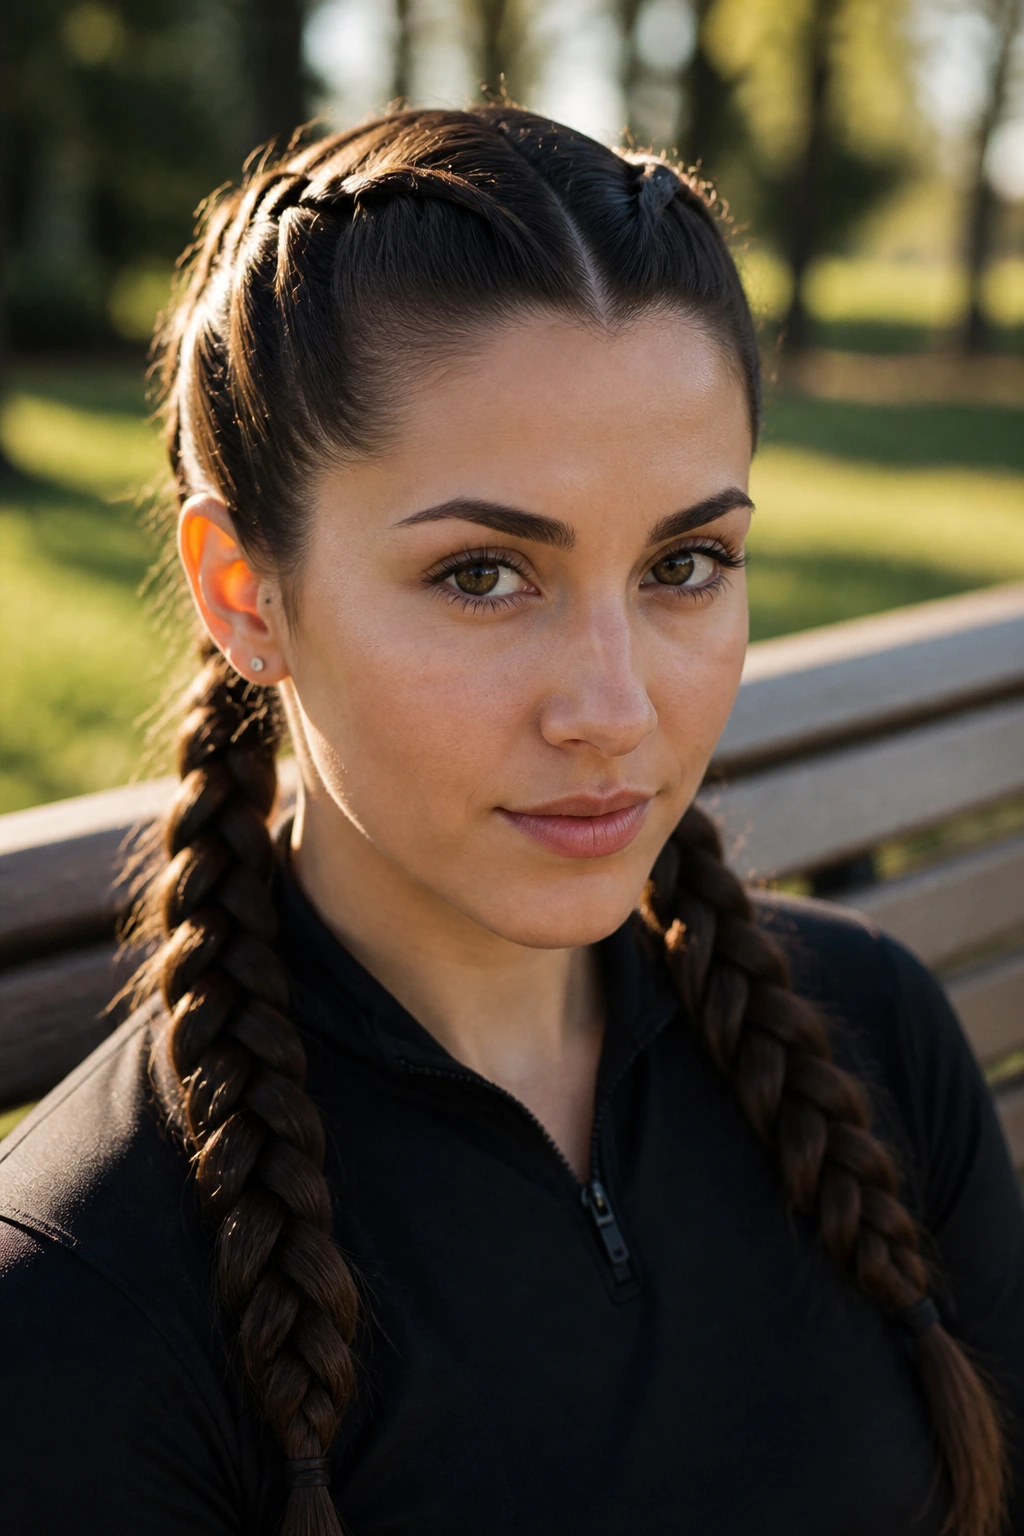
Two thick Dutch braids pressed close to the scalp look sporty, but not sloppy, when the part is clean and the roots are smoothed first. On long hair, the braids have enough length to hang past the shoulders, which keeps the look from reading too childlike.
Dutch braids sit on top of the hair rather than sinking into it, so they show more texture than French braids. That raised pattern gives long hair a nice profile from the side. If you want the style to feel sharper, keep the part line straight and use a touch of gel only along the front edge.
A lot of people overstuff the braid on the first passes and make it lumpy. Better to keep the first 2 inches tight and even, then gently widen the braid as it moves down. The structure will still hold, but the finish looks cleaner.
This is a good style for active days, travel, or any situation where you want the hair contained without flattening it into a ponytail. It also wears well under a coat or scarf, which matters more than people admit.
16. Folded Ponytail
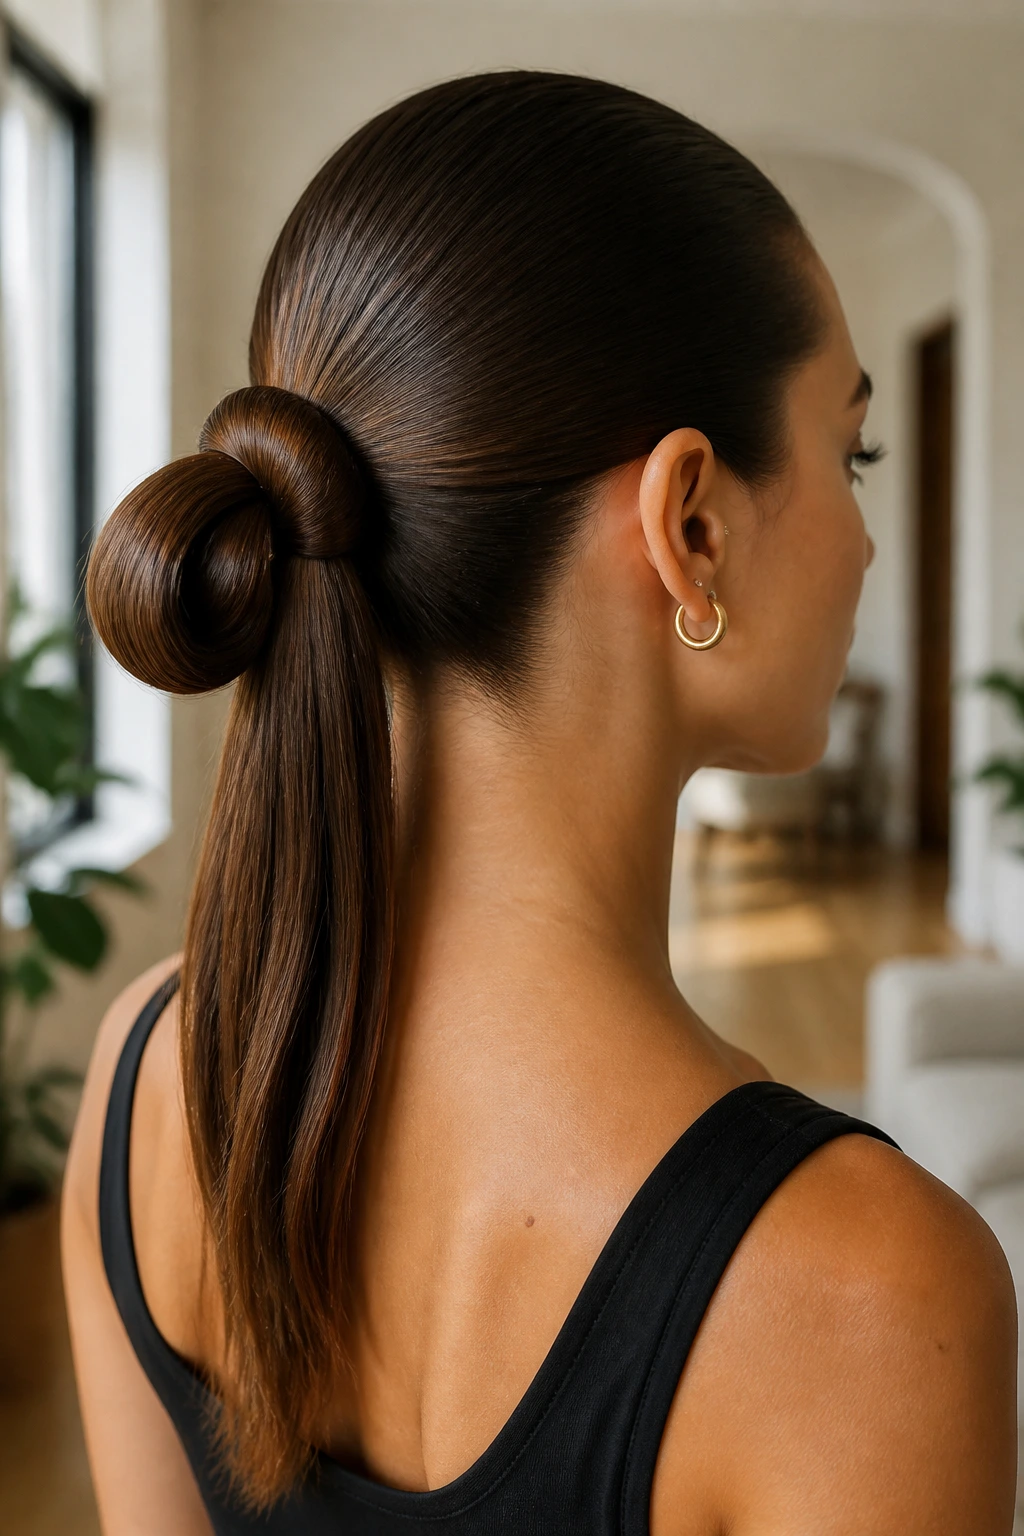
If your hair hangs past your waist, folding the tail can look smarter than letting every inch hang free. The style starts like a low ponytail, then the length is folded upward or inward and pinned so the ends create a neat loop or stacked shape.
That fold is what gives the style its personality. Long hair can sometimes look heavy in a plain ponytail, almost too easy. Folding the length back into itself changes the shape and lifts the visual weight closer to the head, which is flattering when you want the style to feel intentional.
Best When the Hair Is Heavy
A folded ponytail makes a lot of sense if the tail feels too long or too bulky when left down. The fold takes pressure off the ends and keeps them from brushing against your clothes all day. Use two or three strong bobby pins, tucked in where the fold overlaps the base, so the shape does not drift apart.
This one sits between a ponytail and a bun. Not too casual. Not too formal. That middle ground is useful, even if it sounds boring on paper.
17. Slicked-Back Claw-Clip Twist
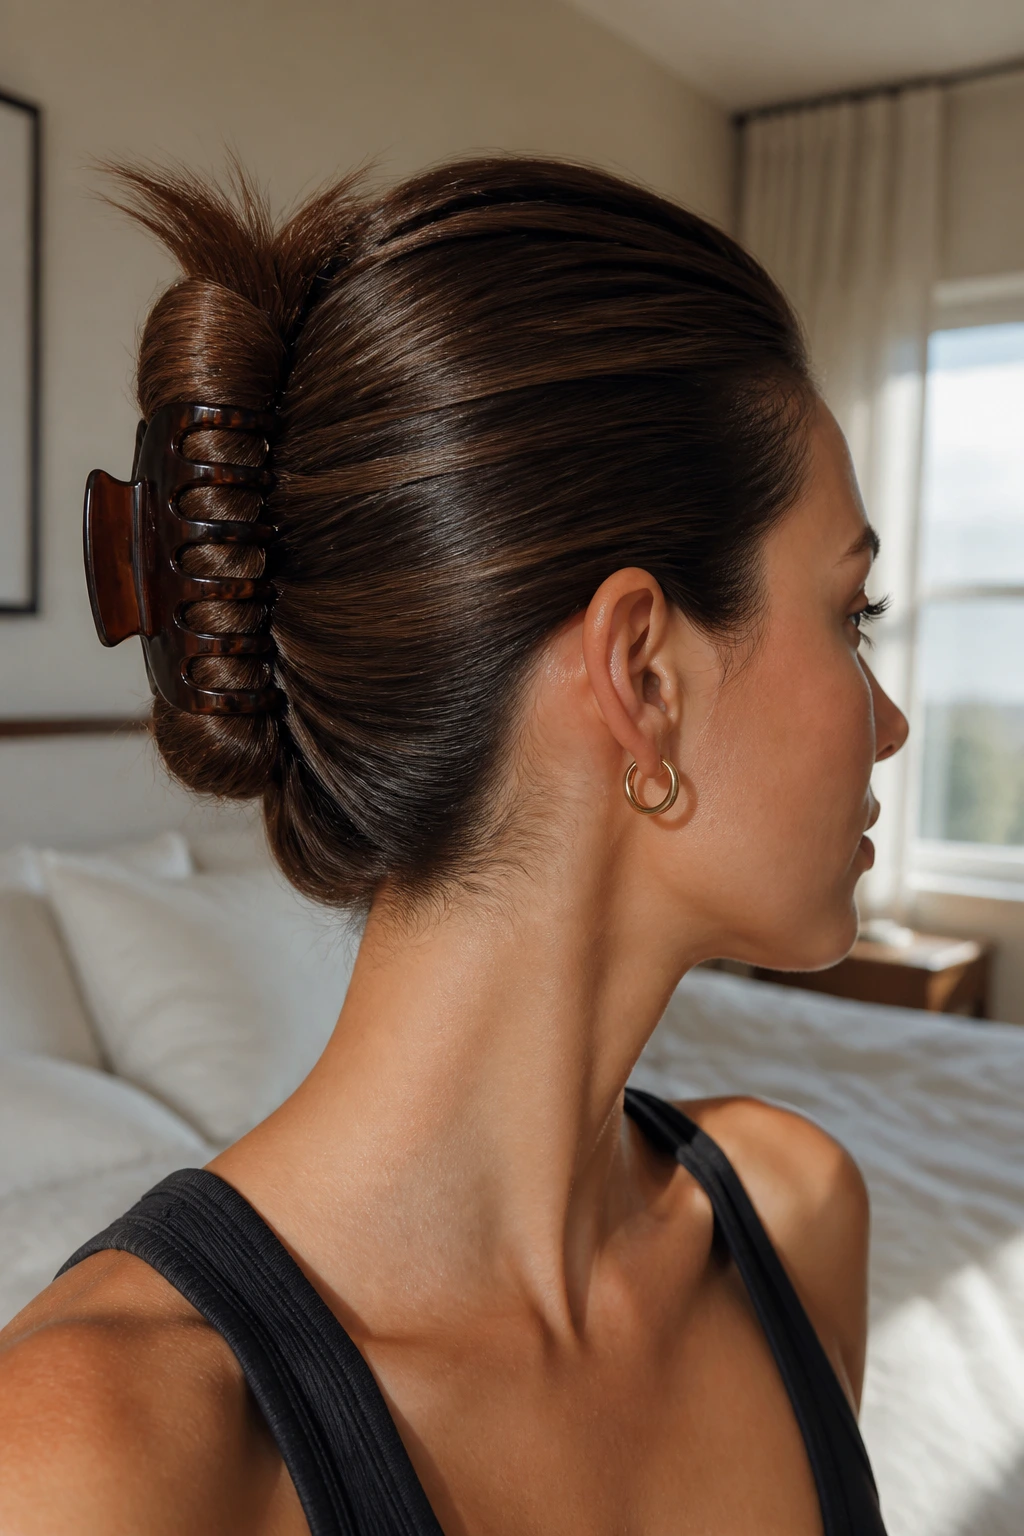
A claw clip is not lazy when the prep is clean. Smooth roots, a tight twist, and a clip that actually fits the amount of hair you have can turn a quick updo into a sleek, usable style.
Long hair needs a large clip with deep teeth. Small clips pinch the top layer and let the rest spill out. Brush the hair back first, twist it upward or inward, fold the length, then secure the twist with the clip so it grips both the base and the folded tail. If the hair is slippery, a little texturizing spray at the mid-lengths helps the clip hold without roughing up the front.
This style works well when you want something between a bun and a ponytail. It gives the illusion of effort, but the actual shape is fast. I also like that you can adjust it through the day without tearing the whole style apart.
One warning: if the clip sits too low, the twist droops. Too high, and it can poke the scalp. There’s a small sweet spot, and once you find it, you’ll use it constantly.
18. French Twist for Long Hair
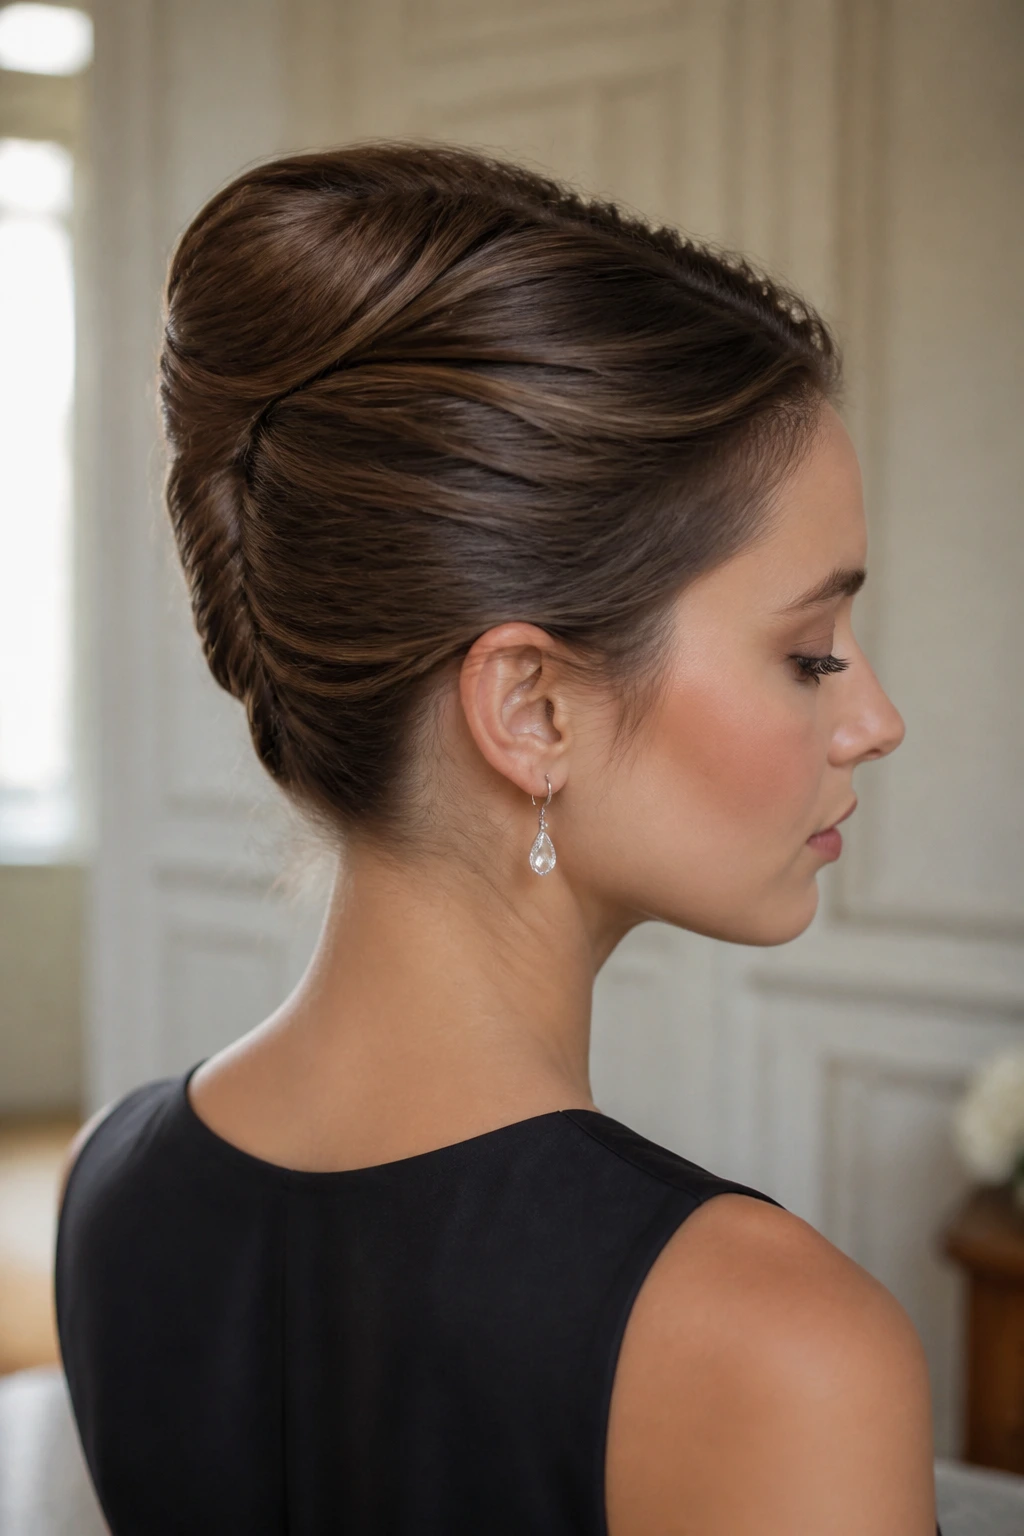
There is something satisfying about folding long hair straight up the back of the head. A French twist does exactly that. The sides are brushed smooth, the length is gathered vertically, and the ends are tucked into the roll so the finished shape looks narrow and formal without turning into a stiff shell.
This style is more forgiving on long hair than people expect. Extra length gives you more material to tuck and secure, which helps the twist stay put. The most common mistake is leaving the base too loose, then wondering why the whole thing starts sliding by dinner. Tighten the twist at the scalp first, then pin along the seam in a staggered line so the hold is spread out.
How It Should Feel
The twist should feel secure, but not painful. If the scalp is being pulled hard, the shape is too tight and the twist will likely loosen as your head relaxes. A few hidden pins can do more than one aggressive tug.
This is the style I’d choose for something formal, old-school, and clean. It has enough structure for long hair, and enough polish to make the hair look deliberately arranged instead of merely controlled.
