



Long hair has a way of looking luxurious and unruly in the same five minutes. A sleek bun fixes the argument fast. It pulls the length into one clean shape, keeps the neckline open, and makes even a plain outfit look finished instead of accidental.
Sleek bun hairstyles for long hair work because they respect the hair’s weight instead of fighting it. That matters more than people think. Long hair has more slip, more bulk, and more chance of puffing up at the crown if you rush the prep, so the style has to be built with a little intention from the start.
The good ones are not stiff little knots that look like they were pinned in a hurry. They’re smooth at the scalp, secure at the base, and shaped enough to look deliberate from every angle. A few lean sharp and polished. Some soften the face. A couple are sturdy enough to survive wind, commuting, and a long evening without falling apart.
Start with the cleanest version first, because once you get the feel for how long hair behaves in a bun, the rest gets easier.
1. Classic Center-Part Low Bun
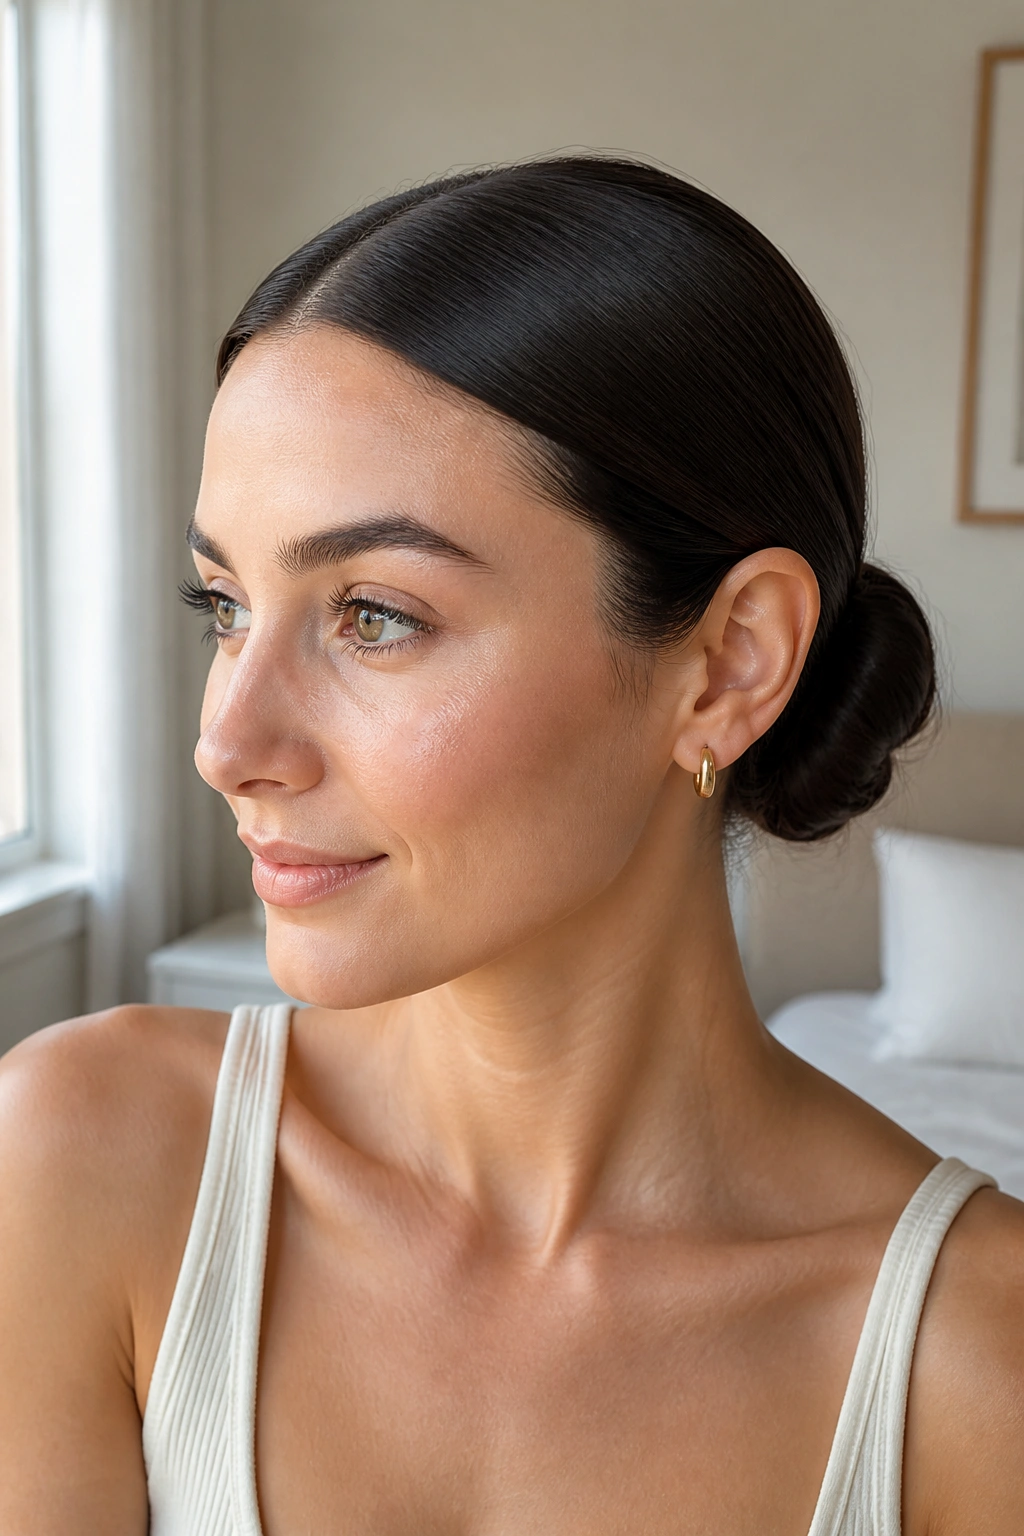
The center-part low bun is the one I trust when the rest of the day feels too busy to negotiate with my hair. It’s calm, even, and clean at the front, which makes long hair look controlled without making it look severe.
Why It Works
A straight center part gives you two balanced panels at the scalp, and that symmetry does a lot of the visual work before the bun even starts. The bun sits low at the nape, where long hair can rest without dragging the whole style downward.
It also gives you a clean base for shine. A small amount of smoothing cream on damp or dry hair — about a pea-sized amount for fine hair, a little more if your hair is dense — keeps the top flat without turning it greasy.
- Best with straight, lightly wavy, or blow-dried hair.
- Looks sharp with a middle part that ends exactly at the crown, not off to one side.
- Holds well with a snag-free elastic and 4 to 6 bobby pins.
- Finishes nicely with a light mist of flexible hairspray, not a heavy lacquer.
Pro tip: brush the hair upward from the nape before you wrap the bun. That tiny move helps the base sit snug instead of sagging after an hour.
2. Deep Side-Part Sculpted Bun
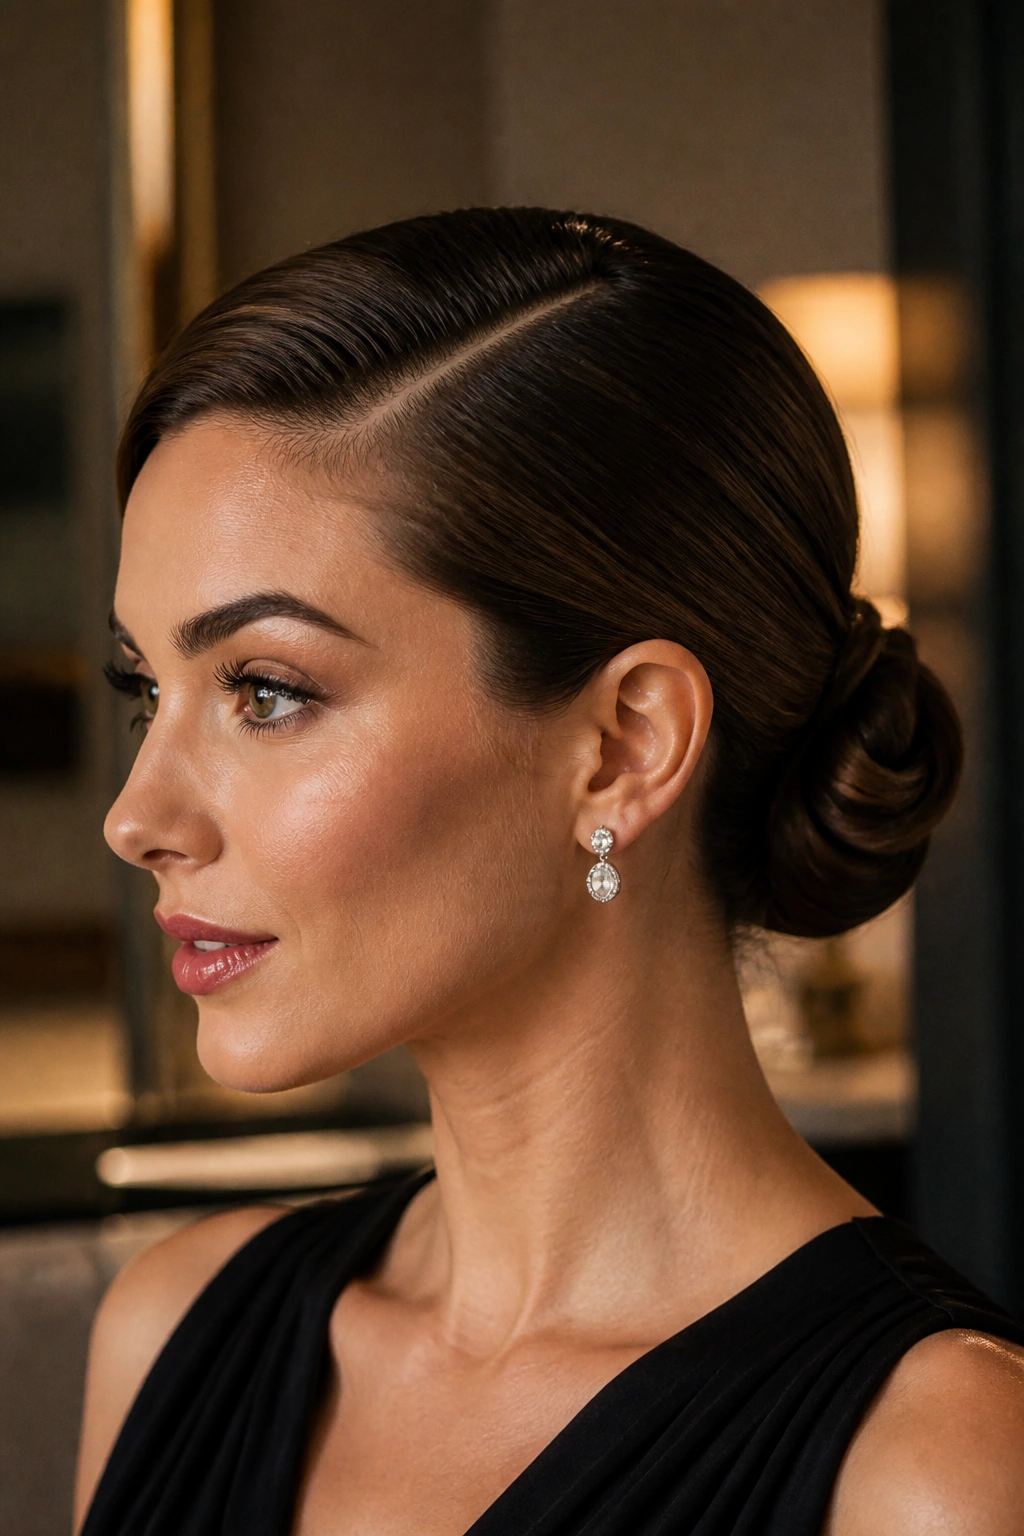
A deep side part changes the mood immediately. The bun still looks sleek, but it feels less formal and a little more interesting, which is useful when a center part feels too exact.
Long hair can sometimes make a low bun look flat at the front. A deep side part fixes that by lifting one side of the face and giving the whole style a soft diagonal line. It’s especially nice if your hair naturally falls to one side anyway, because forcing it into a middle part usually shows.
The trick is to keep the part crisp and the rest of the hair smooth. Use a rat-tail comb to carve the part, then press the hair down with a light gel or edge control near the front only. If you coat the whole head, the style can look heavy.
This bun works well for dinners, events, or any outfit with strong shoulders. It likes earrings too. Big hoops, slim drops, even a single bar earring on the deeper-part side — all of it looks cleaner when the bun stays low and sculpted.
3. Wrapped Ponytail Bun
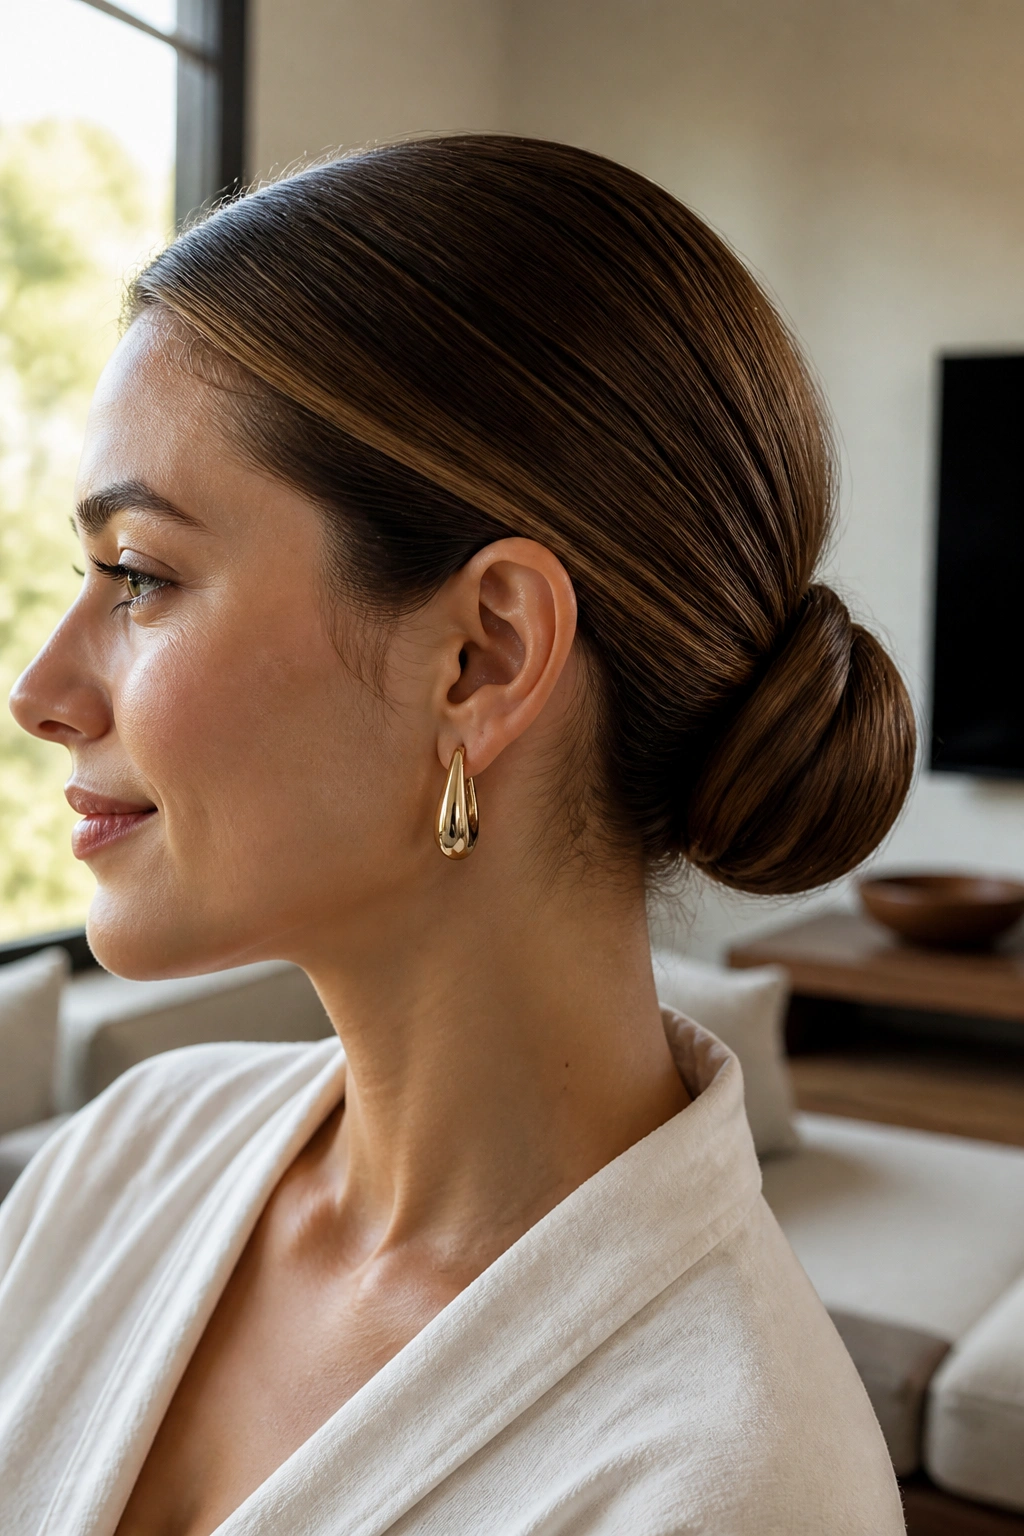
Why does a bun look more finished when it starts as a ponytail? Because the base is already anchored before you ask the length to cooperate.
That’s the big advantage here. Long hair has enough weight to pull a loose bun sideways, but a low ponytail gives you a firm center point. From there, you can twist the length, wrap it around the elastic, and pin the ends beneath the coil.
How to Wear It
Start with the hair brushed straight back and secured low at the nape. Then twist the ponytail tightly enough that it holds its shape, but not so tightly that it frays at the ends. Wrap it around the base in one smooth circle, then cross two bobby pins over the seam in an X.
If your hair is silky, add a second elastic before you wrap the bun. That extra anchor helps a lot.
- Use a strong, no-slip elastic.
- Pin the bun from underneath so the pins stay hidden.
- Finish with a fine mist of hairspray from about 10 inches away.
- Add a hairnet if the ends keep peeking out.
Watch for this: if the ponytail is too high, the whole style loses its sleek line and starts looking like a topknot in disguise.
4. Wet-Look Ballet Bun
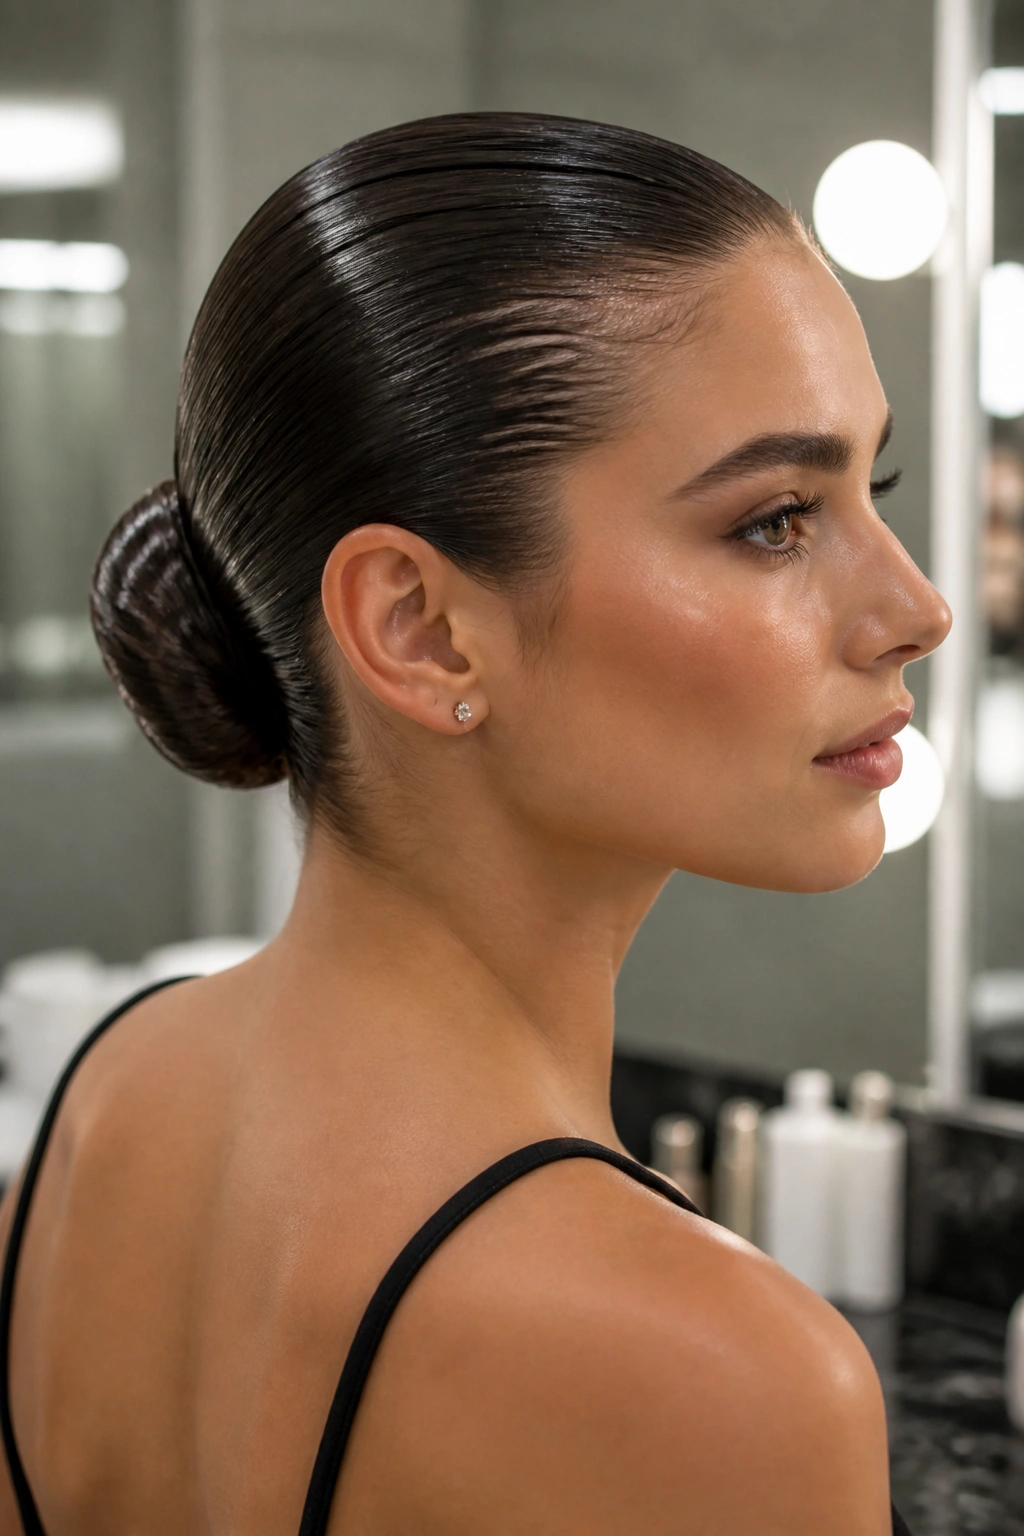
There are days when hair needs to stay put through humidity, heat, and a coat collar rubbing at the back of the neck. A wet-look ballet bun handles that kind of day without pretending to be delicate.
The shine is what makes it work. You want the front and sides to look smooth and a little glossy, not crunchy. That means applying gel to damp hair, brushing it flat with a firm bristle brush, and stopping before the product turns cloudy or flaky.
A clean middle part gives this bun its shape, but a side part can work if you want a softer finish. Either way, the bun itself should sit tight at the nape and stay compact. Long hair can make the coil bulky, so twist the length firmly and pin the ends close to the center.
For this one, I like a strong-hold gel at the roots, a tiny bit of shine serum on the ends, and a final mist of hairspray once the bun is in place. Too much of any one product can make the whole thing look slick in the wrong way.
It’s a blunt style. That’s the point.
5. Knotted Low Chignon
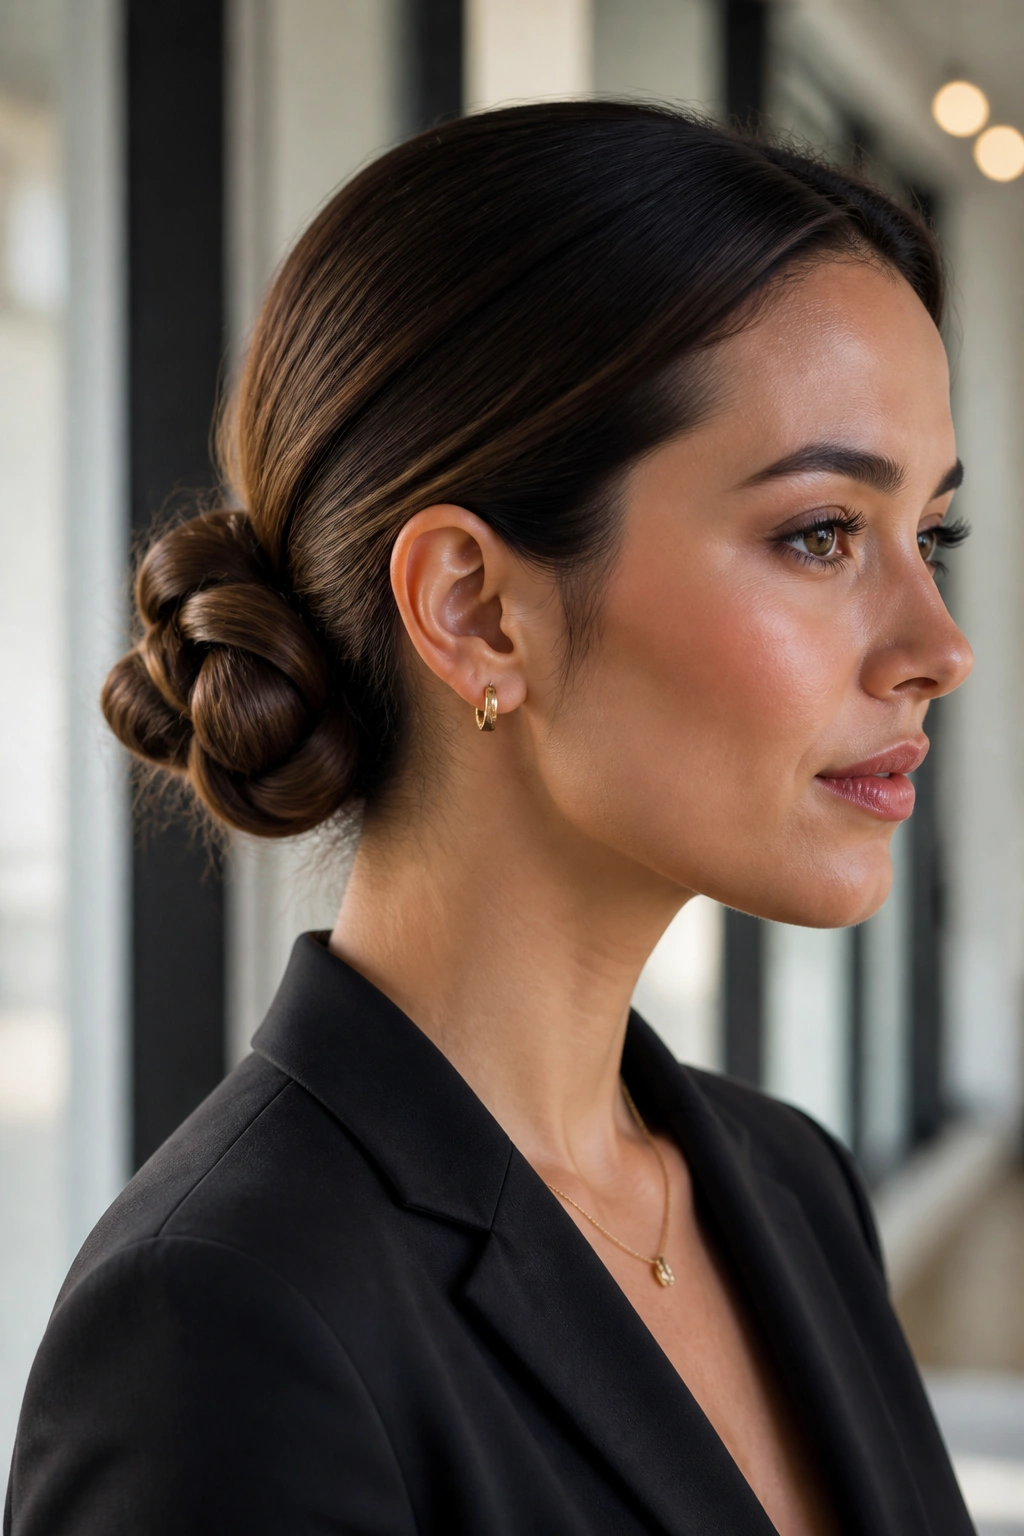
The knotted chignon is what happens when a low bun gets a little more shape and a little more attitude. It still reads sleek, but the knot gives it a softer, more tailored look than a plain coil.
This is one of my favorite options for long hair because it hides a lot of bulk. If your hair is thick or layered, a regular bun can start to balloon out at the sides. A chignon solves that by folding the length into itself instead of wrapping it in one obvious circle.
The finish should feel smooth at the crown and almost tucked under at the back. I like to keep the twist low and slightly off-center, then pin the knot so it lies flat rather than sitting up like a little dome. That small adjustment matters more than people expect.
It works with clean necklines, satin dresses, sharp blazers, even plain knit tops. The style has enough structure to look polished, but not so much structure that it steals attention from the rest of the outfit. That’s usually where a good chignon wins.
6. Braided Base Bun
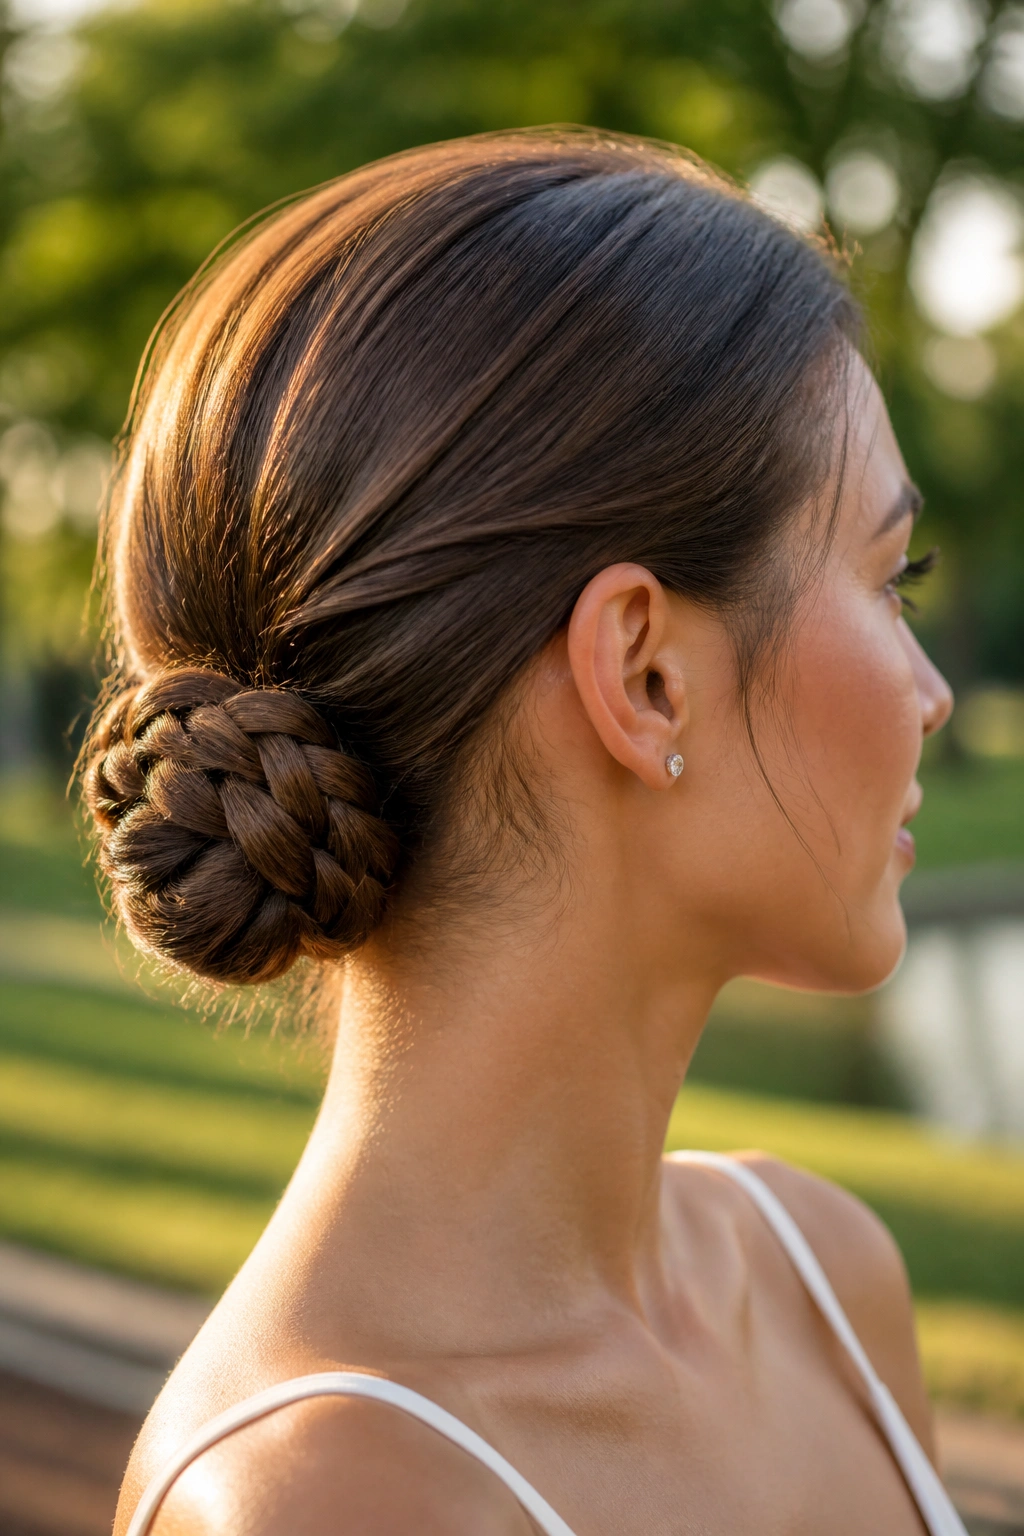
A braid changes the whole base of a bun. It gives long hair grip, which means the style holds better and the finished shape usually looks tighter around the edges.
Unlike a plain coil, the braided base gives the bun a bit of texture at the back while still keeping the front sleek. That matters if your hair is slippery, freshly washed, or fine at the crown but heavy through the ends. A simple three-strand braid from the nape to the tips gives you enough structure without making the style feel overbuilt.
The braid does not need to be fancy. In fact, a clean, standard braid is often better because it stays flat. Once it’s secured, wrap it around its base and pin it in two or three places so the braid pattern peeks through only a little.
This one suits long hair that likes to unravel. It also suits windy days, which is a polite way of saying the style stays useful when other buns give up. If you want extra hold, smooth the top with a light gel before you braid. The difference shows right away.
7. Rope-Twist Low Bun
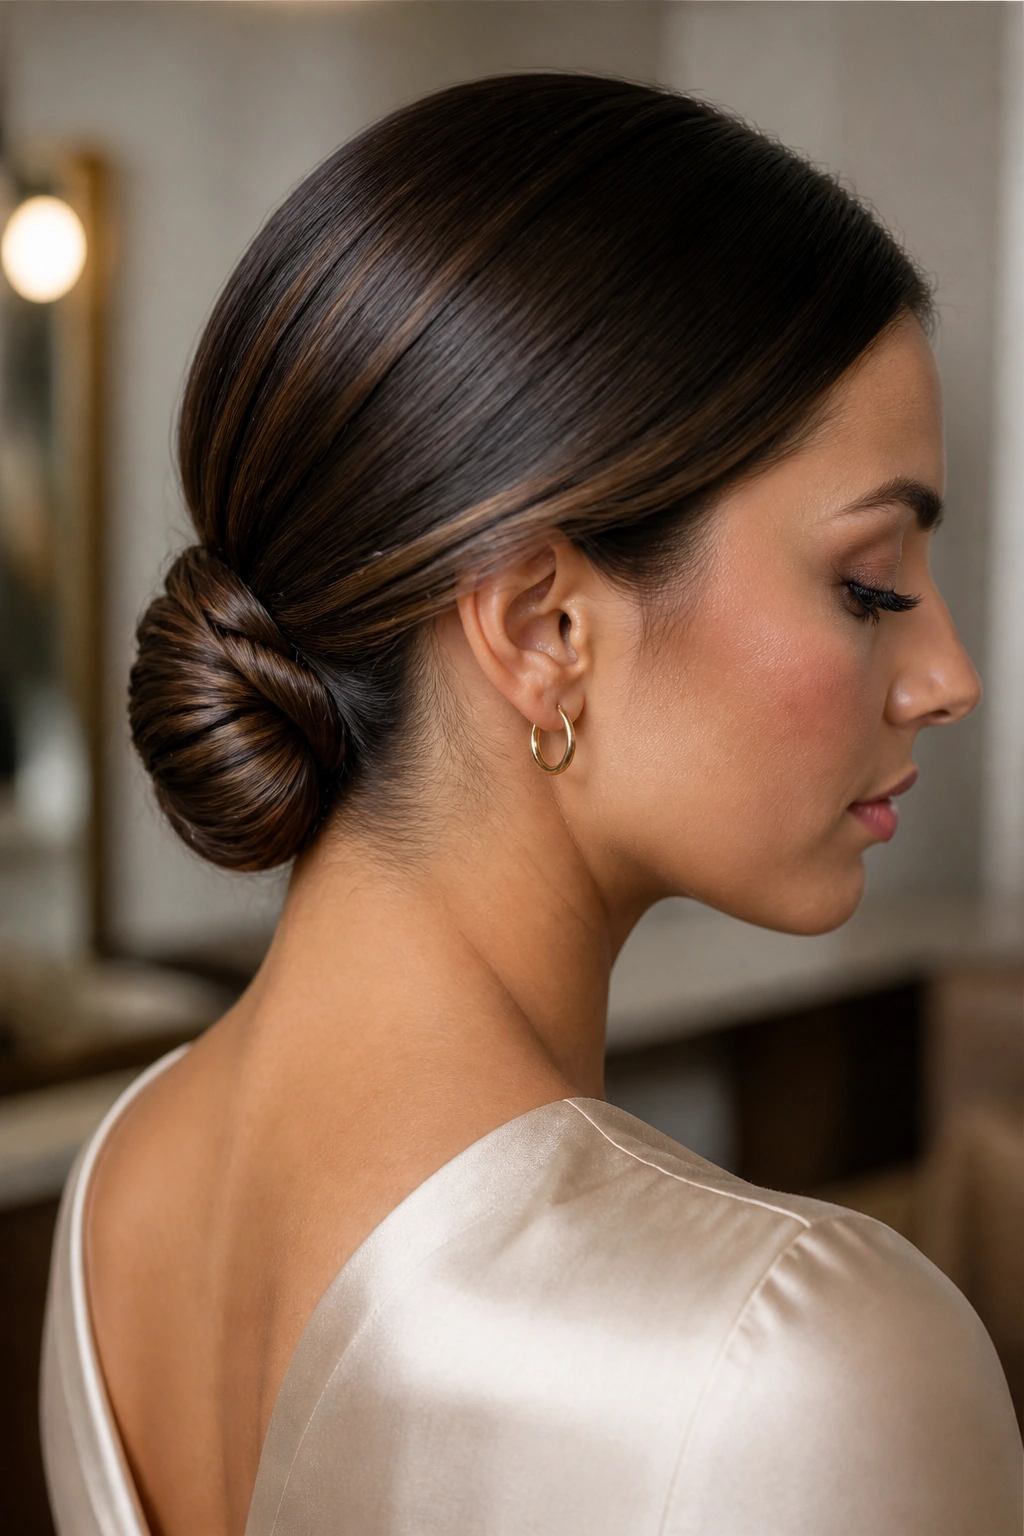
A rope-twist low bun has a cleaner, slimmer look than a braid. The hair is divided into two sections, twisted in the same direction, then wrapped together so the whole style feels smooth and almost architectural.
What Makes It Different
The twist sits flatter against the head than a traditional braid, which is useful if your hair is thick and you don’t want the base to swell out. It also gives you a neater line at the nape, especially when the hair has layers that tend to poke loose.
How to Get the Most From It
- Start with brushed hair and a small amount of smoothing cream.
- Split the ponytail into two even sections.
- Twist both sections in the same direction before crossing them around each other.
- Pin the bun from underneath so the twist shape stays visible.
The rope twist is a good middle ground. It looks more detailed than a plain bun, but it takes less time than a braided one. If you want something tidy for work and still a little different from the usual low knot, this is a smart choice.
8. High Sleek Bun
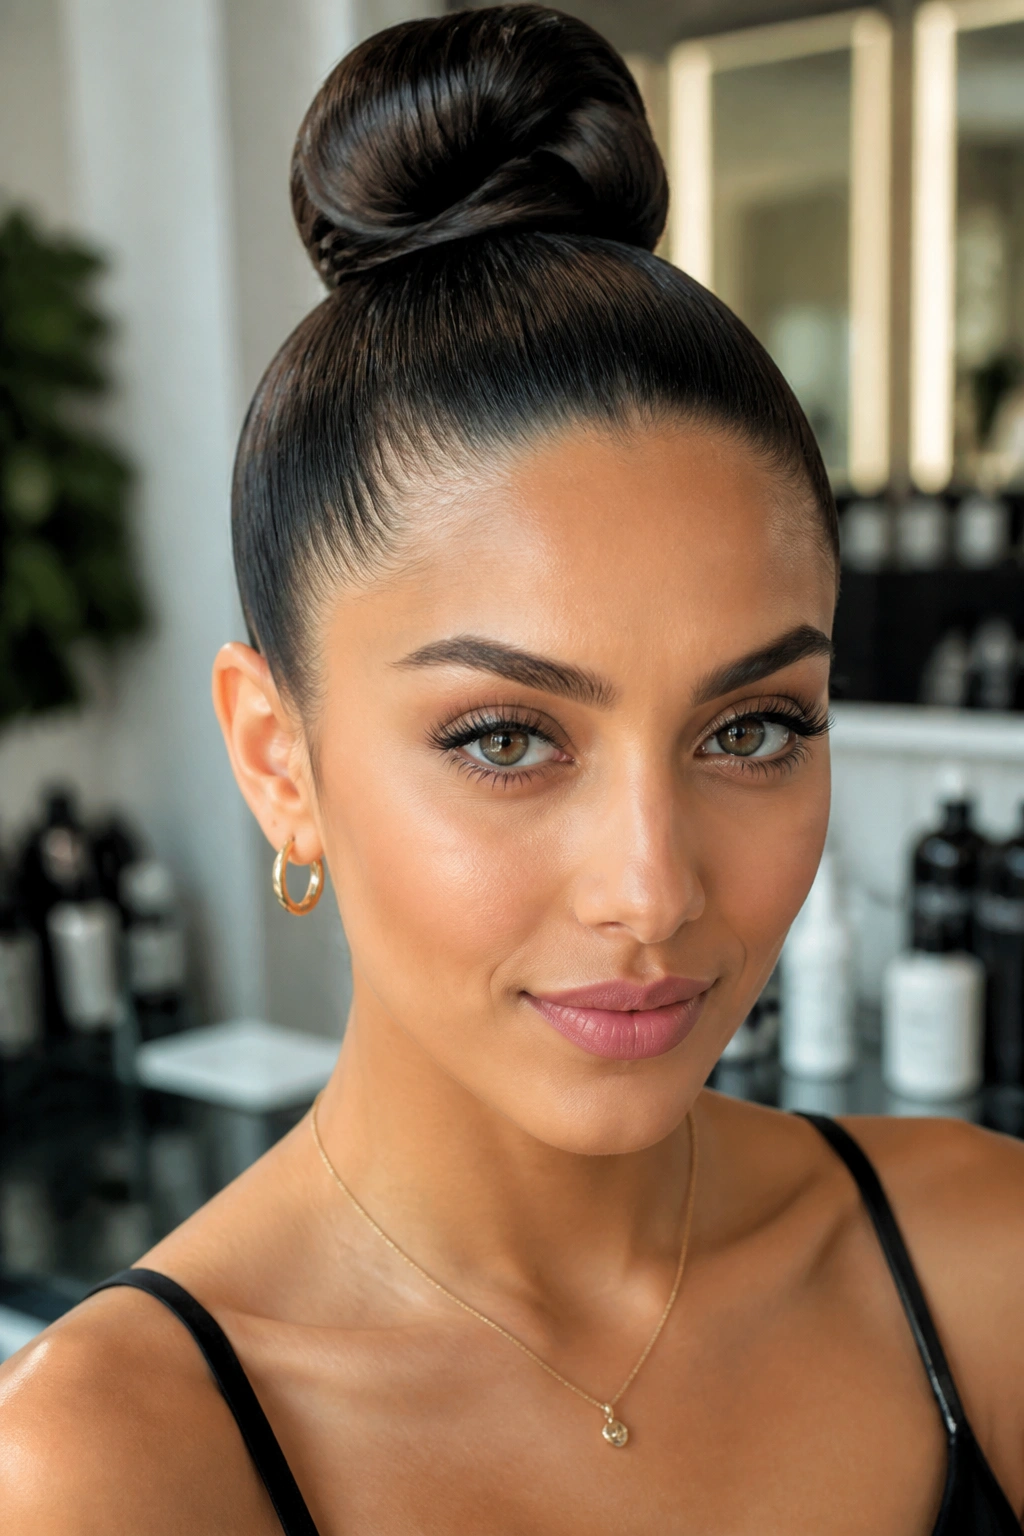
When the bun sits high enough, the neck feels open and the whole face looks lifted. That’s the big appeal of a high sleek bun. It gives long hair a sharper shape and makes heavy length feel light for a while.
This version needs a firm brush hand. Pull the hair up from the temples and nape so the base stays smooth, then secure it at the crown with a strong elastic. If your hair is very long, use two elastics stacked close together. One elastic often slips under the weight.
The bun itself should stay compact. Do not spread it too wide across the crown, or the style starts to lose that crisp line. A small, tight coil looks cleaner than a loose knot that sags at the edges. A fine-tooth comb helps here, and so does a little gel at the roots before you brush everything upward.
High sleek buns are good when you want your features to show more. They also pair well with jackets, bare shoulders, and plain necklines because the style gives the whole outfit a bit of height. It’s practical, but it doesn’t feel plain.
9. Side-Swept Tucked Bun
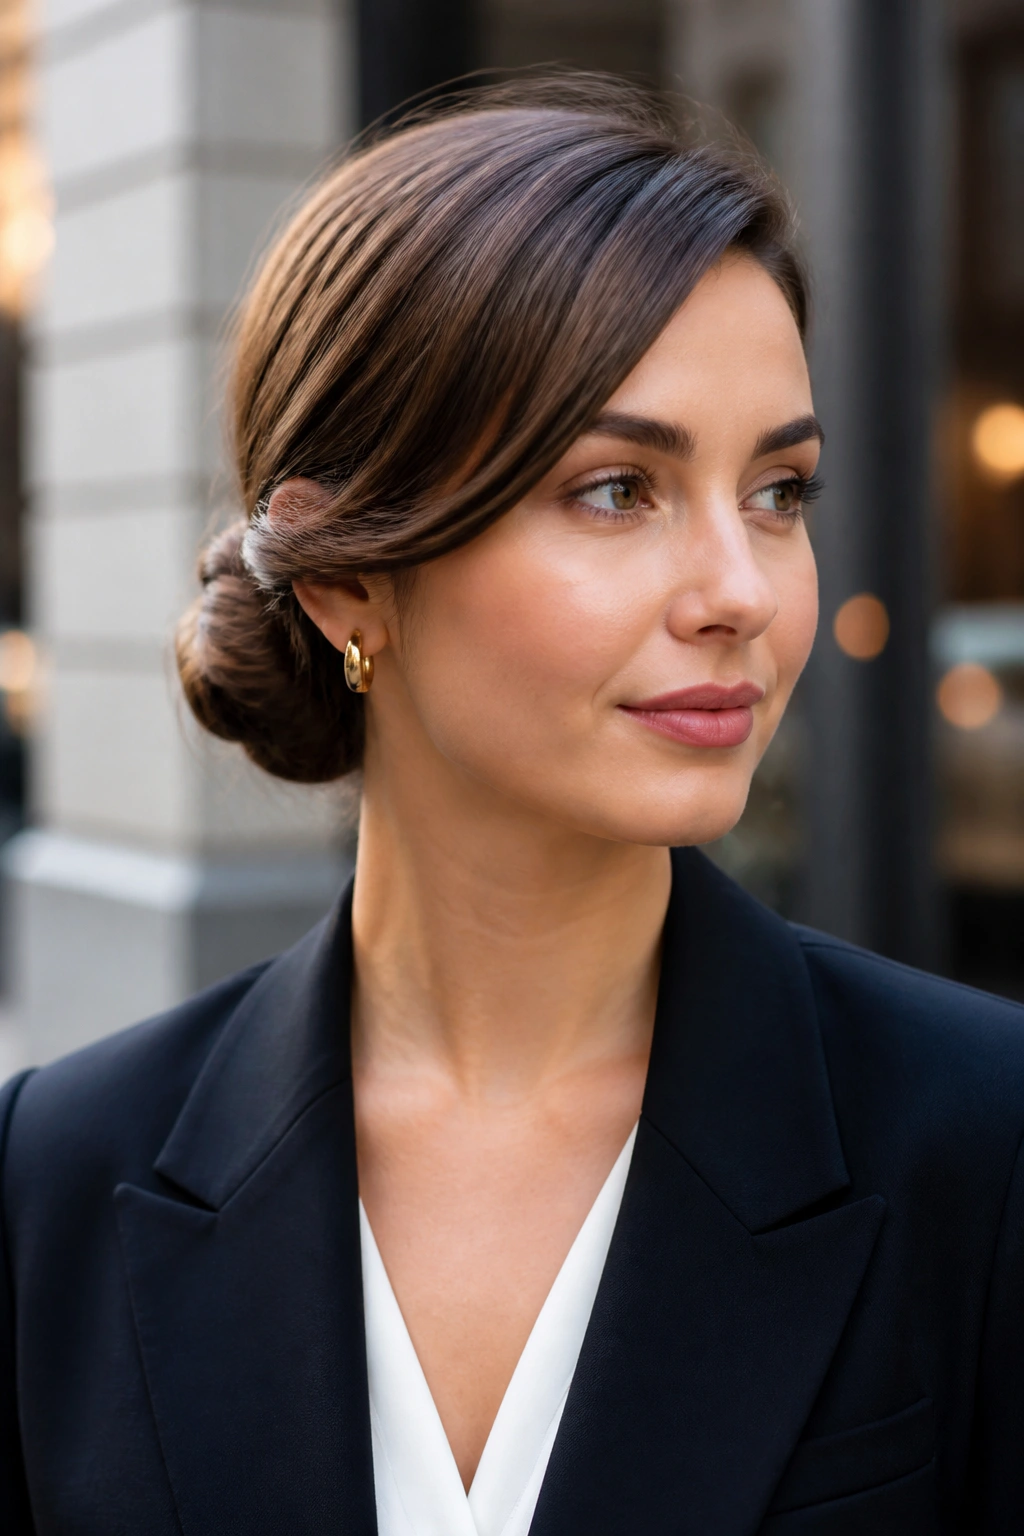
Sleek does not have to mean severe. A side-swept tucked bun keeps the hair smooth, but the side part and tucked shape soften the whole look a little.
This is the one I like when a center part feels too strict or when I want the bun to sit quietly to one side instead of dead center. The hair sweeps across the forehead, then folds into the bun at the nape or just behind one ear. That off-balance placement gives long hair a nicer line from the front.
The trick is to keep the sweep clean, not loose. You want the hair to glide across the head in one smooth arc. A few flyaways at the crown can be handled with a brush and a touch of edge control, but leave the shape itself neat. The style works best when the tucked side is pinned flat and the bun stays close to the head.
This bun is especially good if you wear a lot of tailored clothes but do not want your hair to look severe with them. It softens a blazer. It also works with a simple dress, which is where it gets quietly useful.
10. French Twist Bun
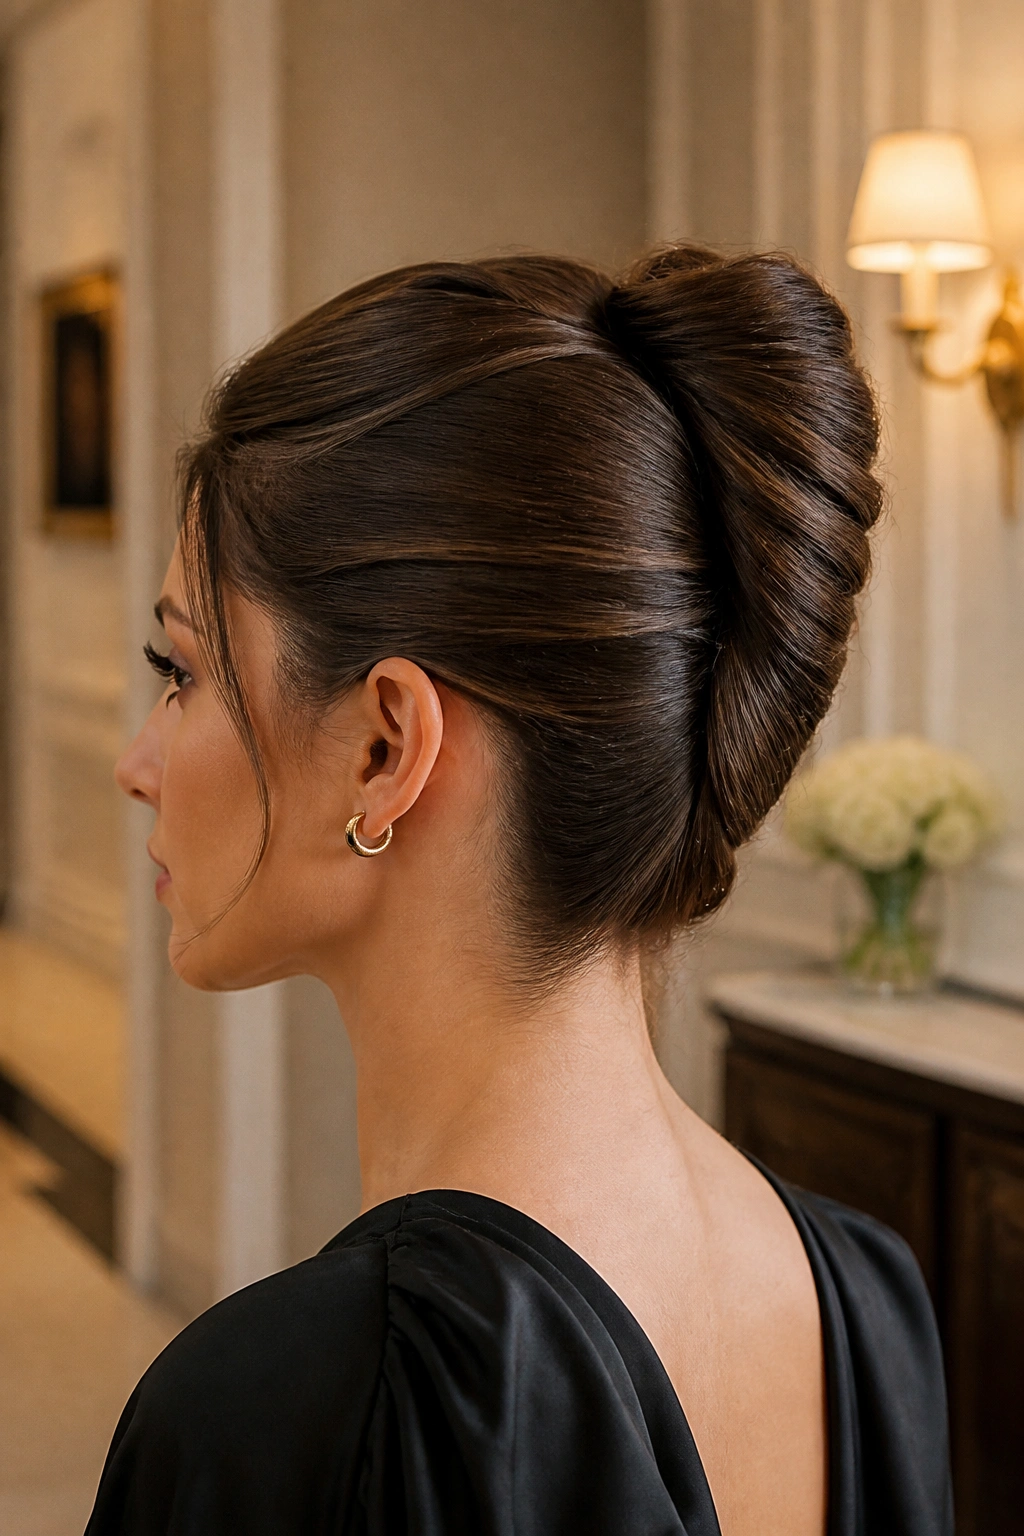
A French twist bun looks more vertical than most other sleek buns, and that tall line makes long hair feel controlled without turning it into a giant knot. It’s the style that says you paid attention, even if the rest of the outfit is almost too easy.
The twist runs upward rather than around in a full circle, which is why it looks so clean from the side. Long hair tucks into itself along the back seam, and that hidden fold keeps the shape neat. A handful of long bobby pins or a few U-pins usually do the job.
I like this bun best when the hair is brushed smooth first, then gathered low and twisted upward into one narrow roll. If the hair is very layered, pin the shorter pieces first, then tuck the rest. That order saves a lot of fiddling later.
It’s not the quickest style on this list. Fine. Some styles earn their place by being fast, and some earn it by looking sharp from every angle. This one falls into the second camp.
11. Gibson Tuck Bun
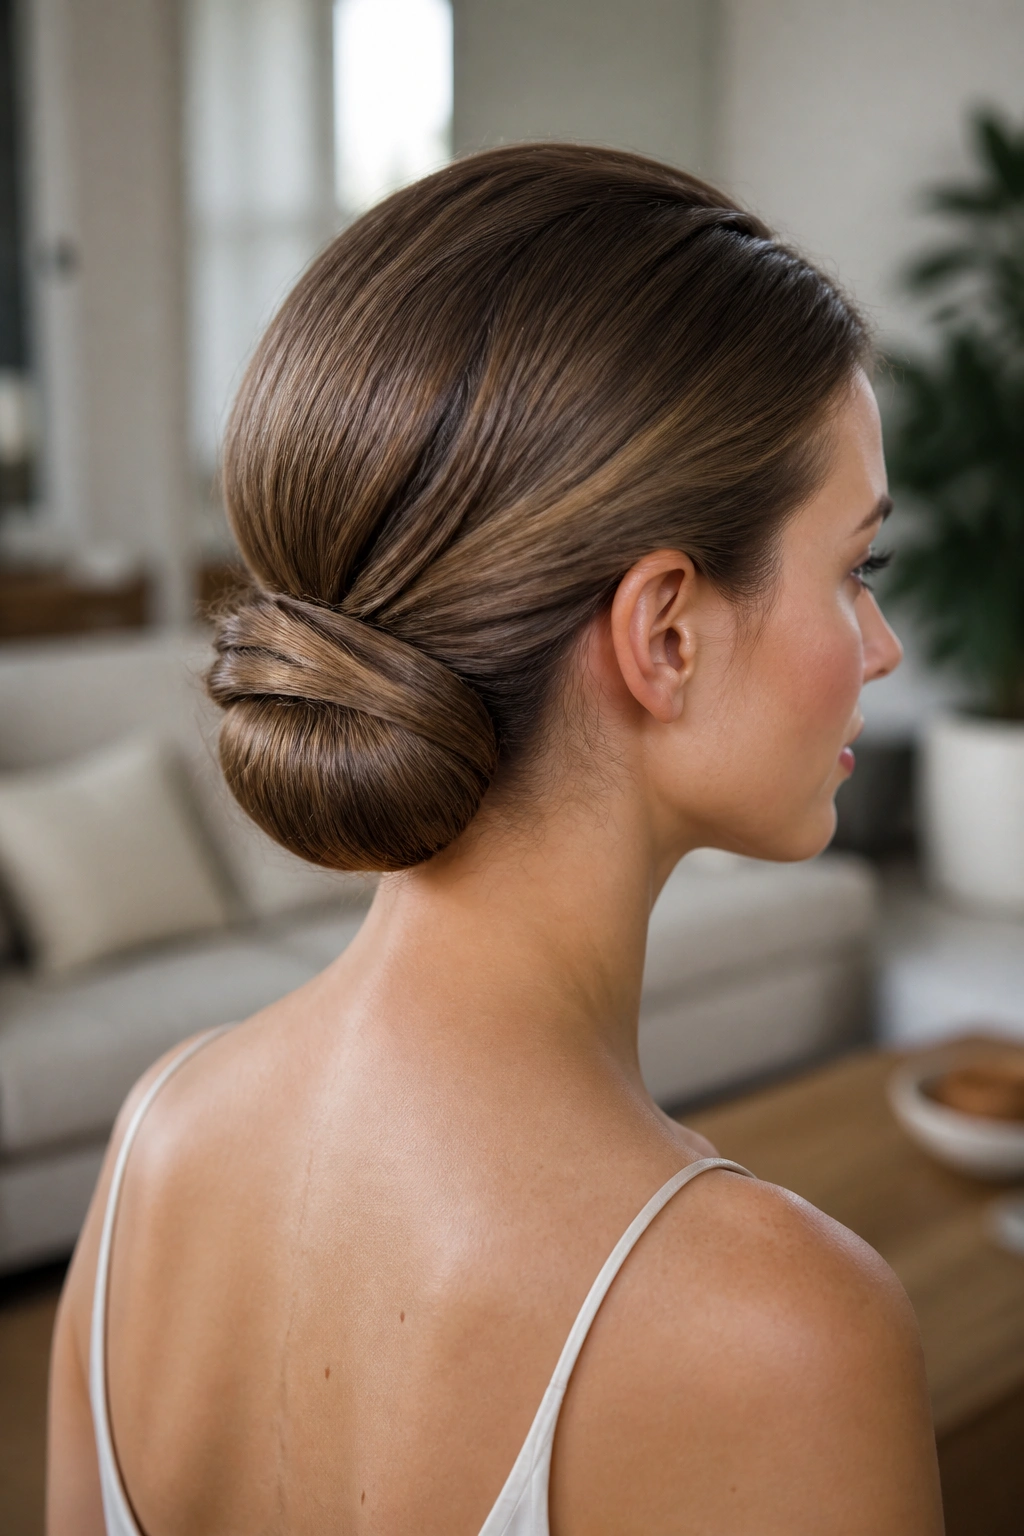
The Gibson tuck is one of those styles that makes long hair behave in a way it normally refuses to. Instead of wrapping the length into a tight knot, you fold it inward and let the tuck carry the shape.
That gives the style a softer finish than a French twist, and it’s a little easier on very long hair because the ends disappear into the roll instead of stacking up in one bulky knot. It’s also kind to layers, which can be a pain in more rigid buns.
The cleanest version starts with a low ponytail. Split the hair just above the elastic, flip the length upward, and tuck it through the gap. Then flatten the roll and pin the sides until it sits snug against the head. The result is polished, but not fussy.
This is a good choice for days when you want a bun that feels finished but not formal. It works with knit dresses, button-downs, and even simple T-shirts if the rest of the look is plain. There’s a quiet neatness to it, and that’s really the point.
12. Scarf-Wrapped Sleek Bun
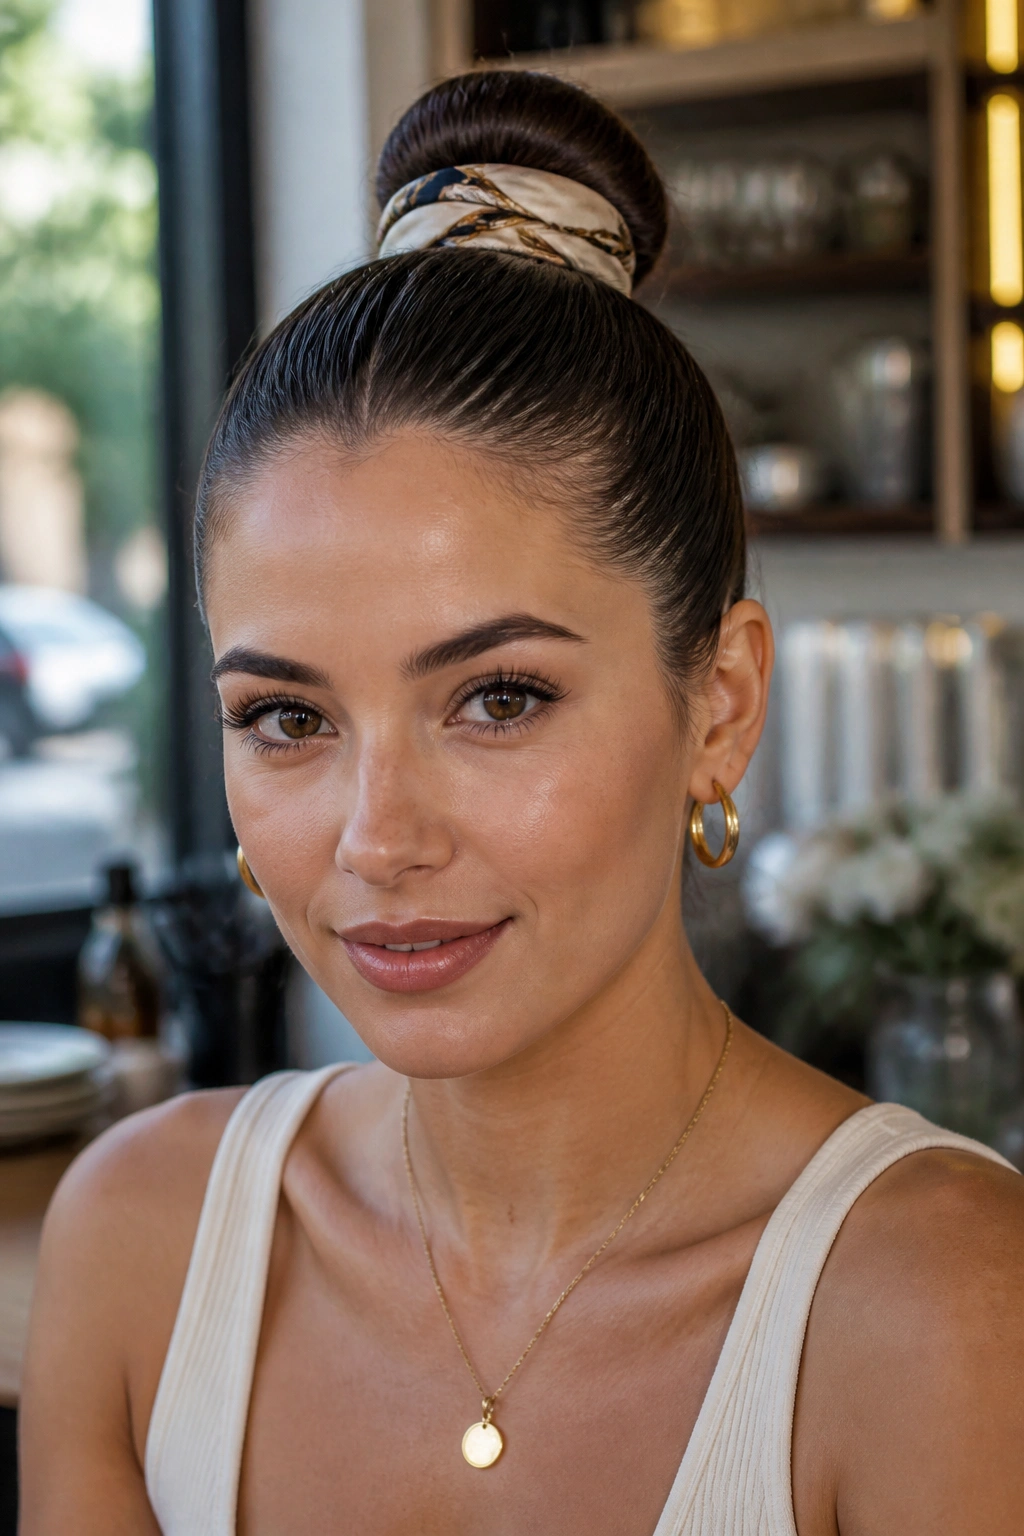
A scarf can do more than decorate a bun. When it’s narrow and well placed, it hides the elastic, adds a clean line around the base, and keeps the style from feeling too bare.
The best scarves for this look are slim silk or satin strips, usually around 1 to 2 inches wide. Thick cotton tends to puff out and fight the sleek shape. Tie the scarf around the base after the bun is pinned, then let the tails trail a little or tuck them under the bun if you want a tidier finish.
A Few Things That Matter
- Keep the scarf smooth, not bunched.
- Match the scarf color to one tone in your outfit if you want the style to feel intentional.
- Use the scarf as a wrap, not a pillow. Bulk ruins the line fast.
- Spray the hair first, then add the scarf, so the fabric does not get sticky.
This style is useful when you want the bun to look finished without more pins, more shape, or more hair fuss. It also solves the problem of an elastic showing at the nape, which bothers me more than it should.
13. Double-Loop Bun
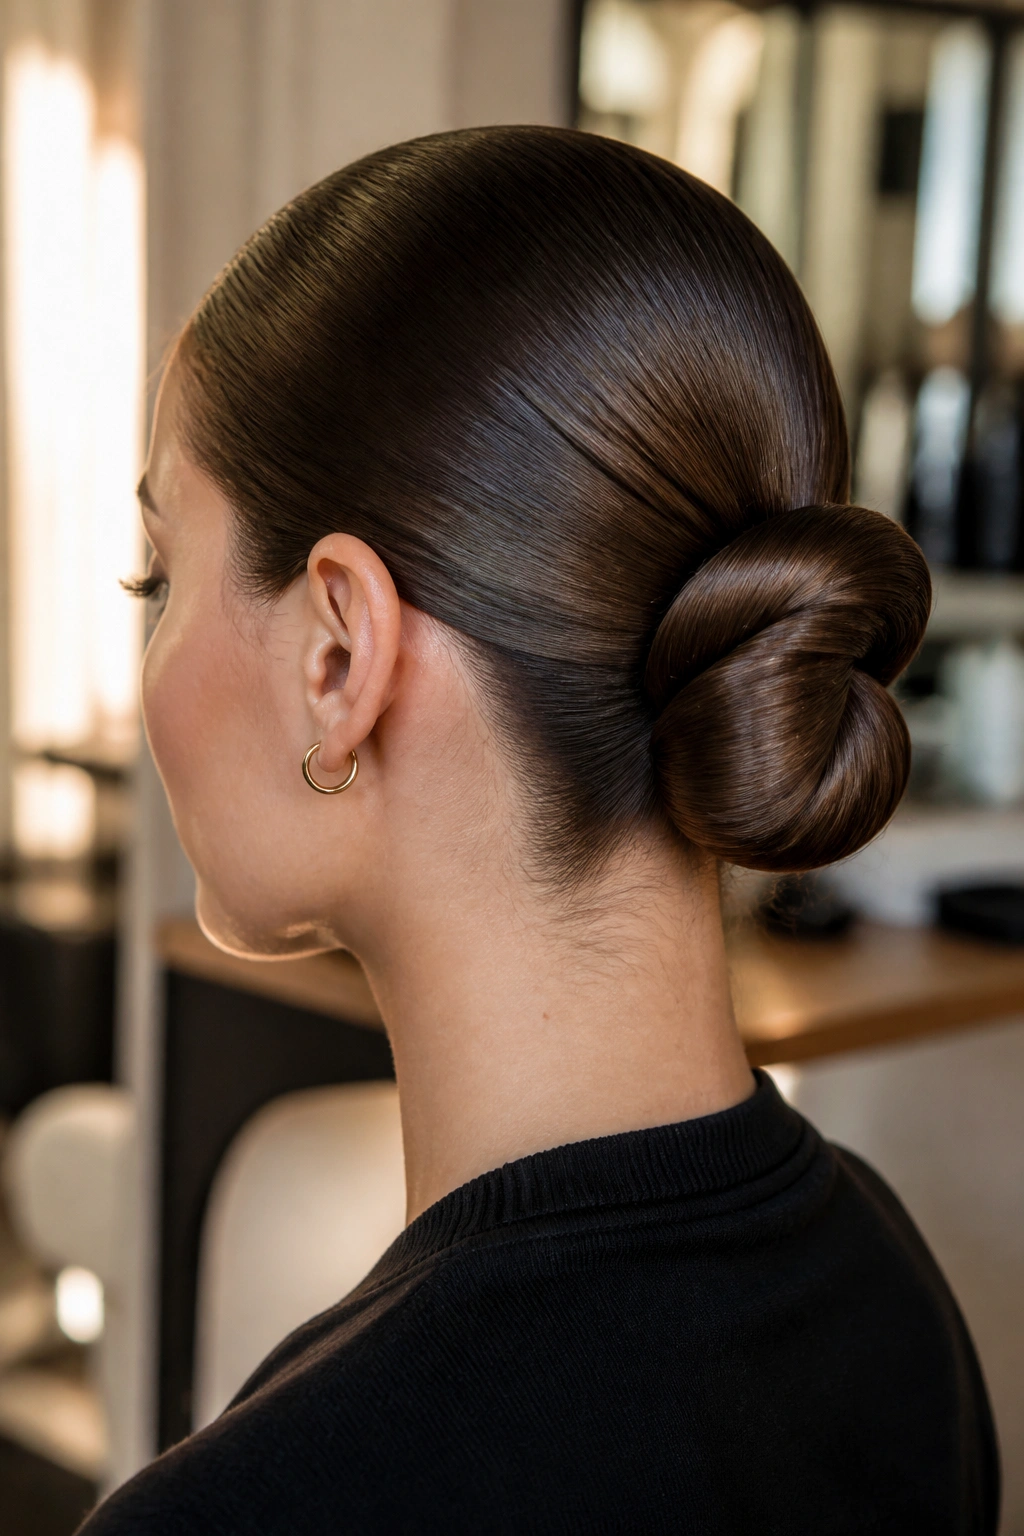
The double-loop bun is a neat answer to very long hair that refuses to stay compact in a single wrap. You split the length into two loops around the base, and that gives the bun a cleaner, flatter profile.
It’s a good style for hair that feels too heavy for a tight chignon. One wrap can leave a thick lump at the back, especially if the ends are blunt. Two loops spread that weight out and make the bun sit closer to the head.
I like this one when I want the bun to look smooth from the side and still have a little fullness at the center. It has a tidy shape, but it does not look tiny. That balance can be hard to get with long hair unless you build the bun in sections instead of trying to force one giant coil.
If your hair is slippery, use a small clip or two hidden under the loops before the final pinning. That extra grip is worth it. Otherwise the bun can loosen at the edges and stop looking sleek by lunch.
14. Figure-Eight Bun
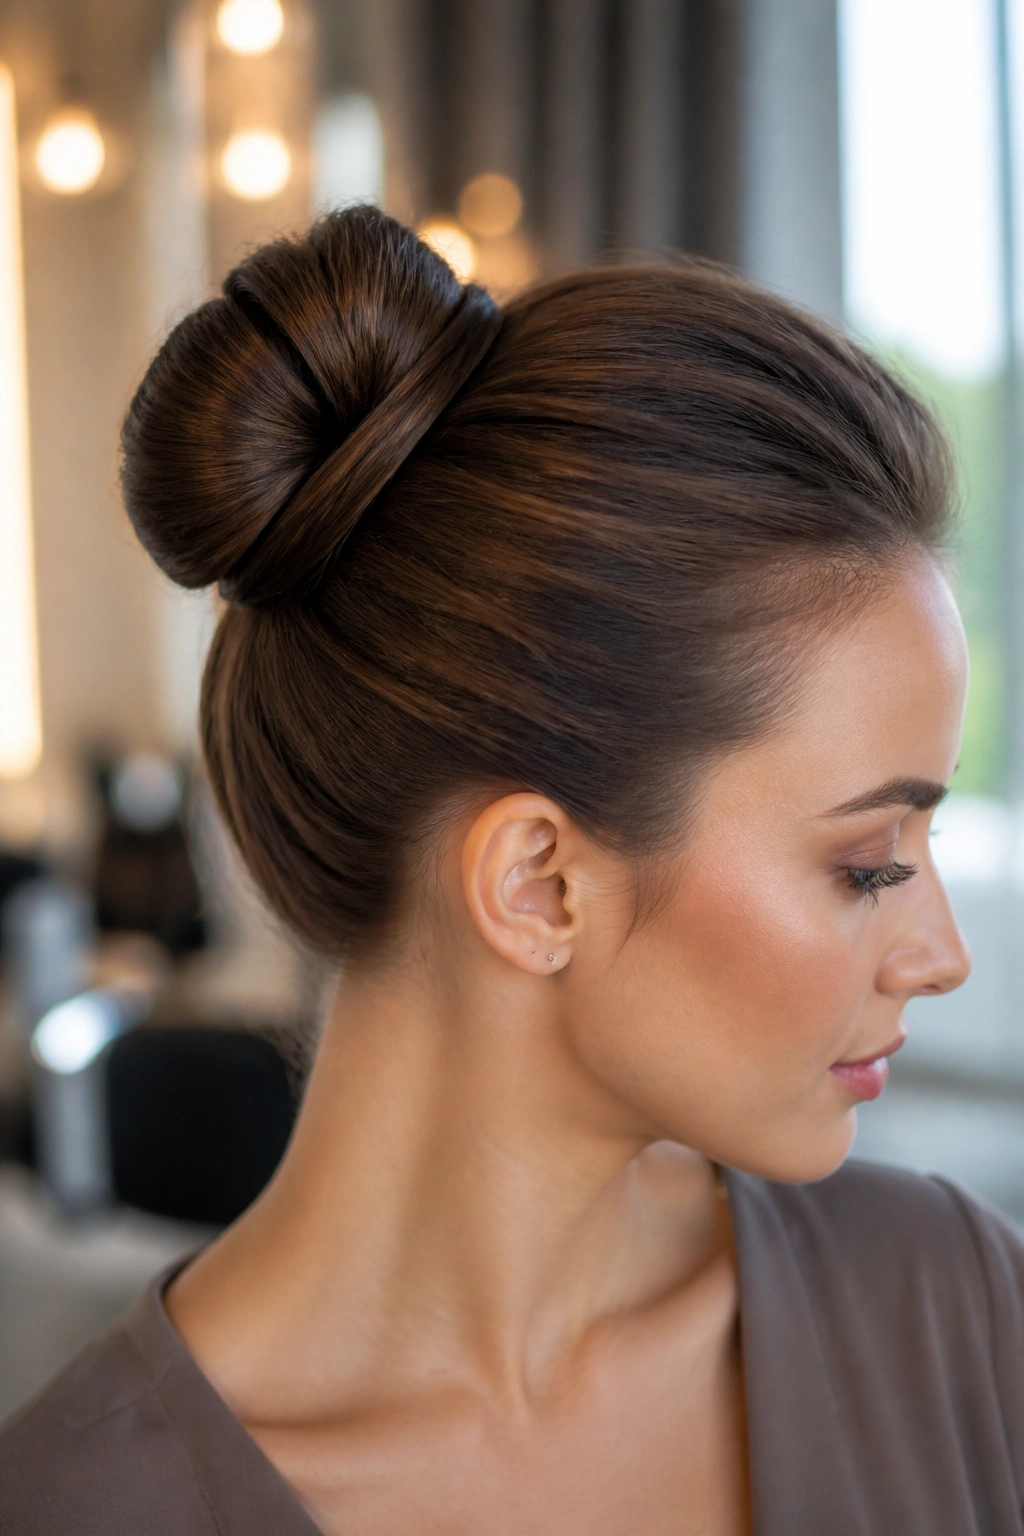
When hair is past mid-back, a single wrap can feel lopsided. The figure-eight bun fixes that by folding the length into two crossed loops, which keeps the shape flatter and more balanced.
This style works because it distributes the bulk instead of stacking all of it in one spot. Long hair often needs that. The first loop becomes the base, and the second loop crosses over it so the bun reads as one clean shape rather than a thick nest.
Why It Works on Very Long Hair
- It keeps the bun close to the head.
- It reduces the “one heavy lump” problem.
- It gives layered hair a place to tuck without sticking out.
- It usually needs 6 to 8 pins, not 12.
The figure-eight bun looks especially good when the hair is smooth at the front and the loops are pinned with care. If the crossings show too much, the style can start to look messy in a way that is not flattering. Pin underneath the loops, keep the seam hidden, and finish with a light spray once the shape feels firm.
15. Accessorized Sleek Bun with a Metal Cuff
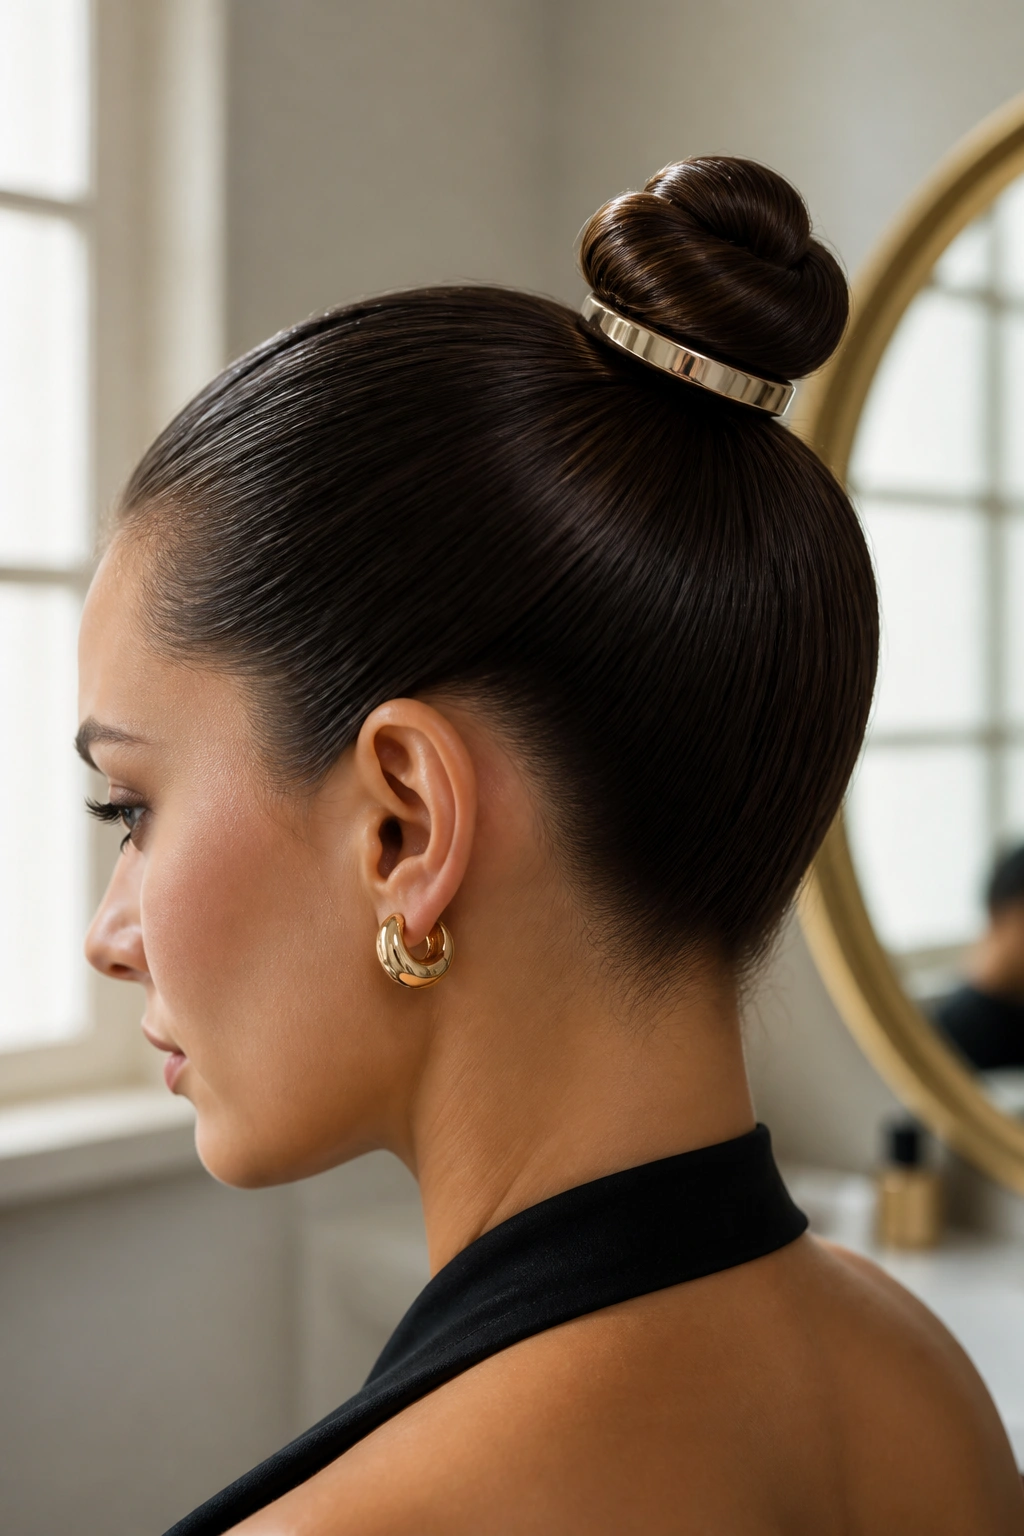
A sleek bun gets stronger when the accessory is small and deliberate. A metal cuff, a narrow bar, or a few pearl pins can finish the style without making it feel dressed up in the wrong way.
The accessory belongs where the eye naturally lands: at the seam, the base, or one side of the bun. Put it there after the bun is pinned and smooth, not before. If you add the ornament too early, you end up rearranging the whole shape around it, and that usually makes the bun less clean.
I prefer this style when the outfit is simple and needs one precise detail. Black blouse, white shirt, slip dress, even a plain sweater — all of them benefit from one small piece of shine at the back of the head. Keep the accessory slim if your hair is fine. Use something a bit firmer if the bun is thick and heavy.
The best part is that this style does not need more drama than that. One clean cuff, one tight bun, and the whole look feels done. That’s often enough.
