



Bubble ponytail hairstyles have a useful trick up their sleeve: they make hair look styled even when the actual effort is low. One elastic gets the shape started, a few more elastics carve out the bubbles, and suddenly the whole thing looks intentional instead of rushed.
That’s why people keep coming back to them. A bubble ponytail can look polished, sporty, sweet, edgy, or a little theatrical depending on how tight you pull each section, how far apart you place the ties, and whether you leave the crown sleek or keep some texture up top. Tiny change. Huge payoff.
They also solve a very real problem. Plain ponytails can collapse into one flat rope, especially if your hair is fine, layered, or a little slippery. Bubble ponytails give the shape back. They build volume where you want it, and they do it without requiring a complicated braid or a dozen pins hiding in your bathroom sink.
And yes, the details matter. A slick brush, snag-free elastics, and a light mist of texturizing spray can turn a so-so pony into something that holds for hours without looking crunchy. The styles below cover the fun range — from neat and glossy to loose and playful — so you can pick the version that fits your hair, your schedule, and your mood.
1. Sleek High Bubble Ponytail
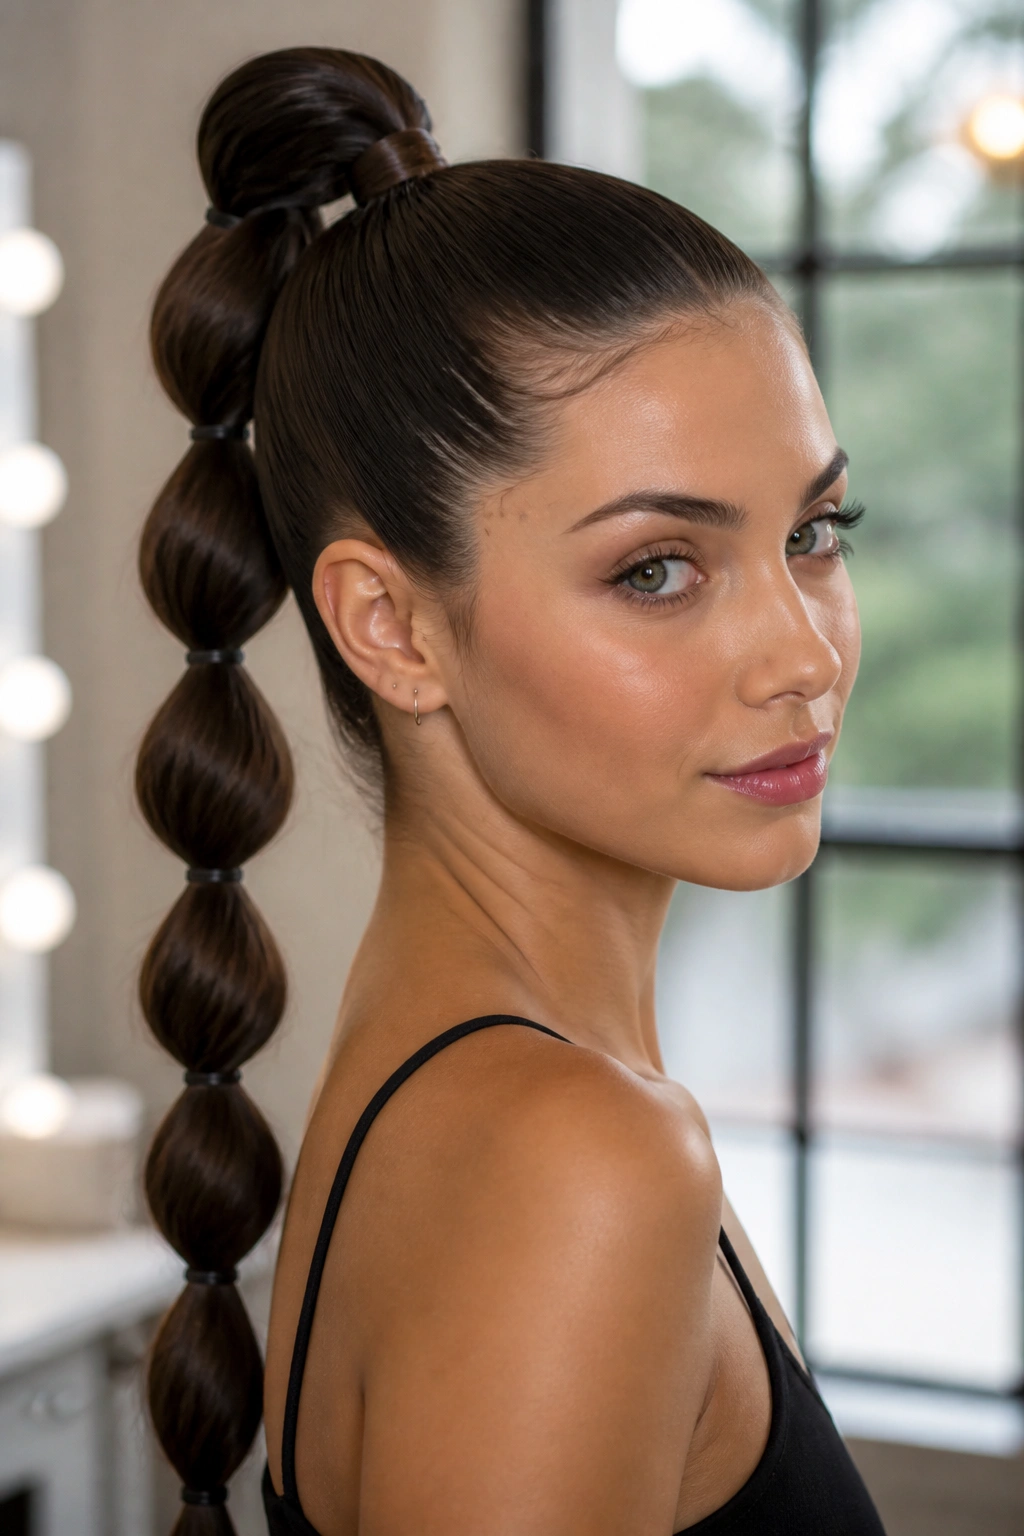
A sleek high bubble ponytail is the version that makes the whole style feel sharp instead of cute. It sits high on the crown, with the hair brushed tight at the scalp and the bubbles puffing out cleanly down the length. That contrast is the point.
Why It Works
The high placement gives instant lift at the face, which is why this version is so good when your roots look flat. It also shows off the spacing between each elastic, so the bubbles read as deliberate shapes instead of random lumps.
Best for: straight hair, blowouts, and anyone who wants a more polished finish.
- Use 3 to 5 clear elastics depending on hair length.
- Keep each bubble about 2 to 2½ inches apart.
- Smooth the crown with a boar-bristle brush and a pea-sized amount of styling cream.
- Tug each bubble gently from the sides, not the middle, so it stays round.
My favorite move: leave the first bubble slightly bigger than the rest. It gives the style a stronger shape from the top down.
2. Half-Up Bubble Ponytail on Loose Waves
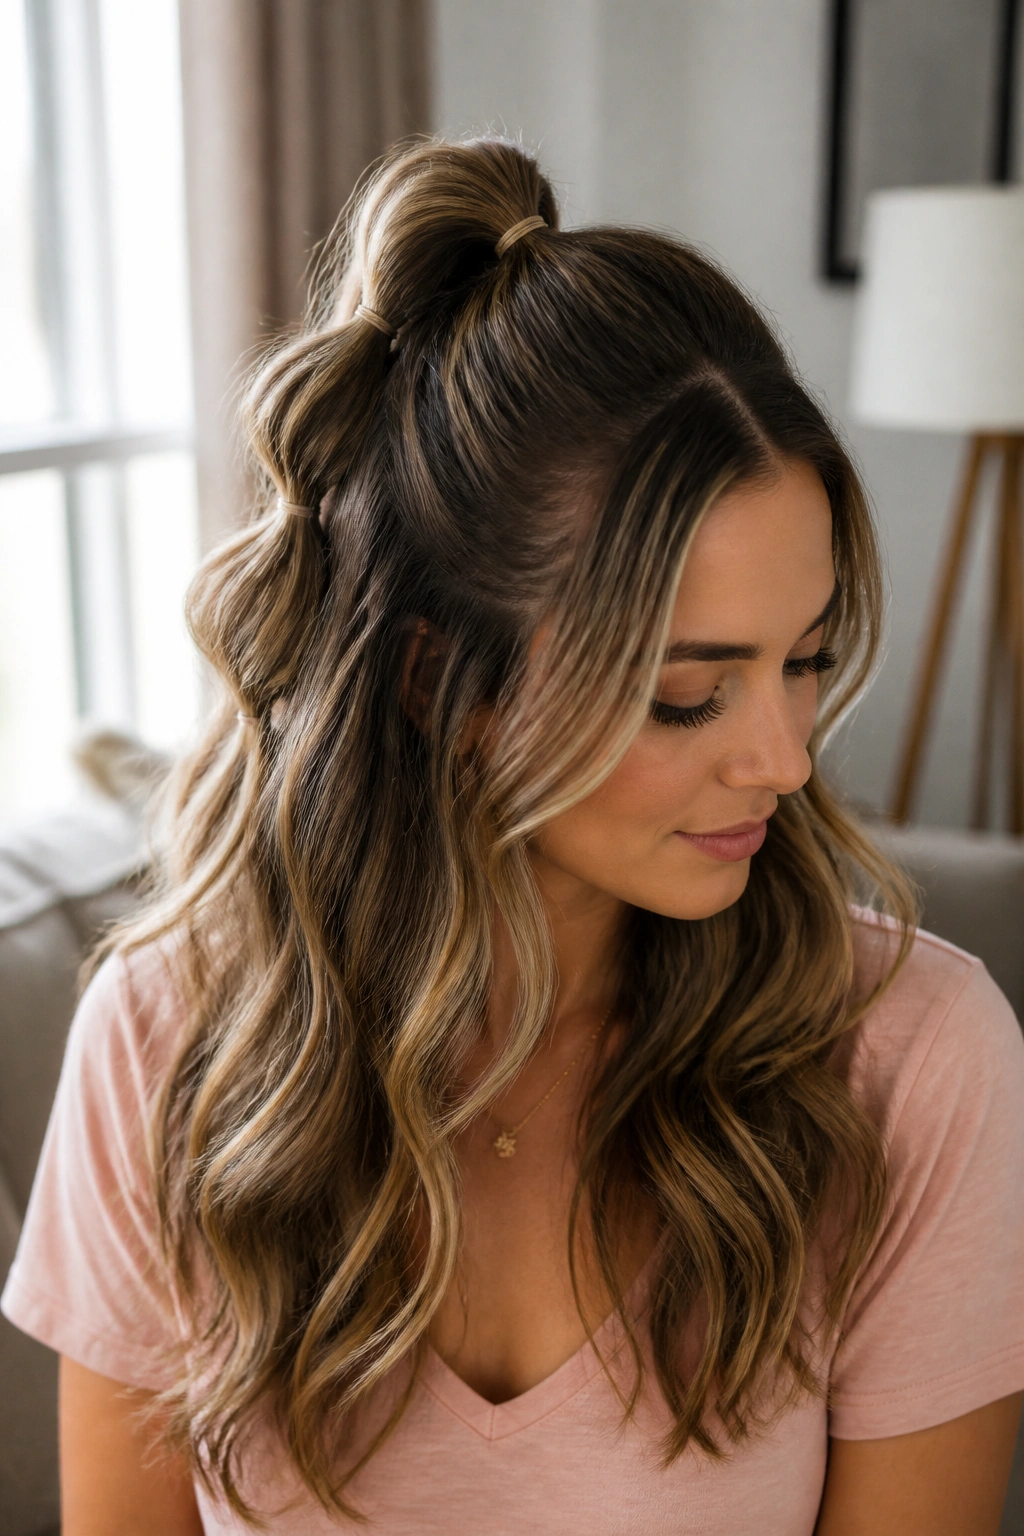
Half-up bubble ponytail hairstyles are what I reach for when I want the hair to feel playful, not strict. The top section gets gathered and bubbled, while the rest stays loose and wavy underneath. It’s an easy way to keep hair off the face without losing movement.
The style works especially well on second-day waves. The texture underneath gives the whole thing a softer edge, and the half-up section keeps the crown from falling flat. If your hair is layered, this is one of the kinder ways to wear it; the loose ends help balance everything out.
A quick prep note: don’t pull the top section too tight at the temples. Leave a little softness around the hairline, then create two or three bubbles through the top half. That small choice makes the style look more relaxed and less school-pageant.
The nicest part is how low-stress it is. You can dress it up with a ribbon at the first elastic or leave it plain and let the texture do the work. Either way, it still looks finished.
3. Low Bubble Ponytail With Ribbon Ties
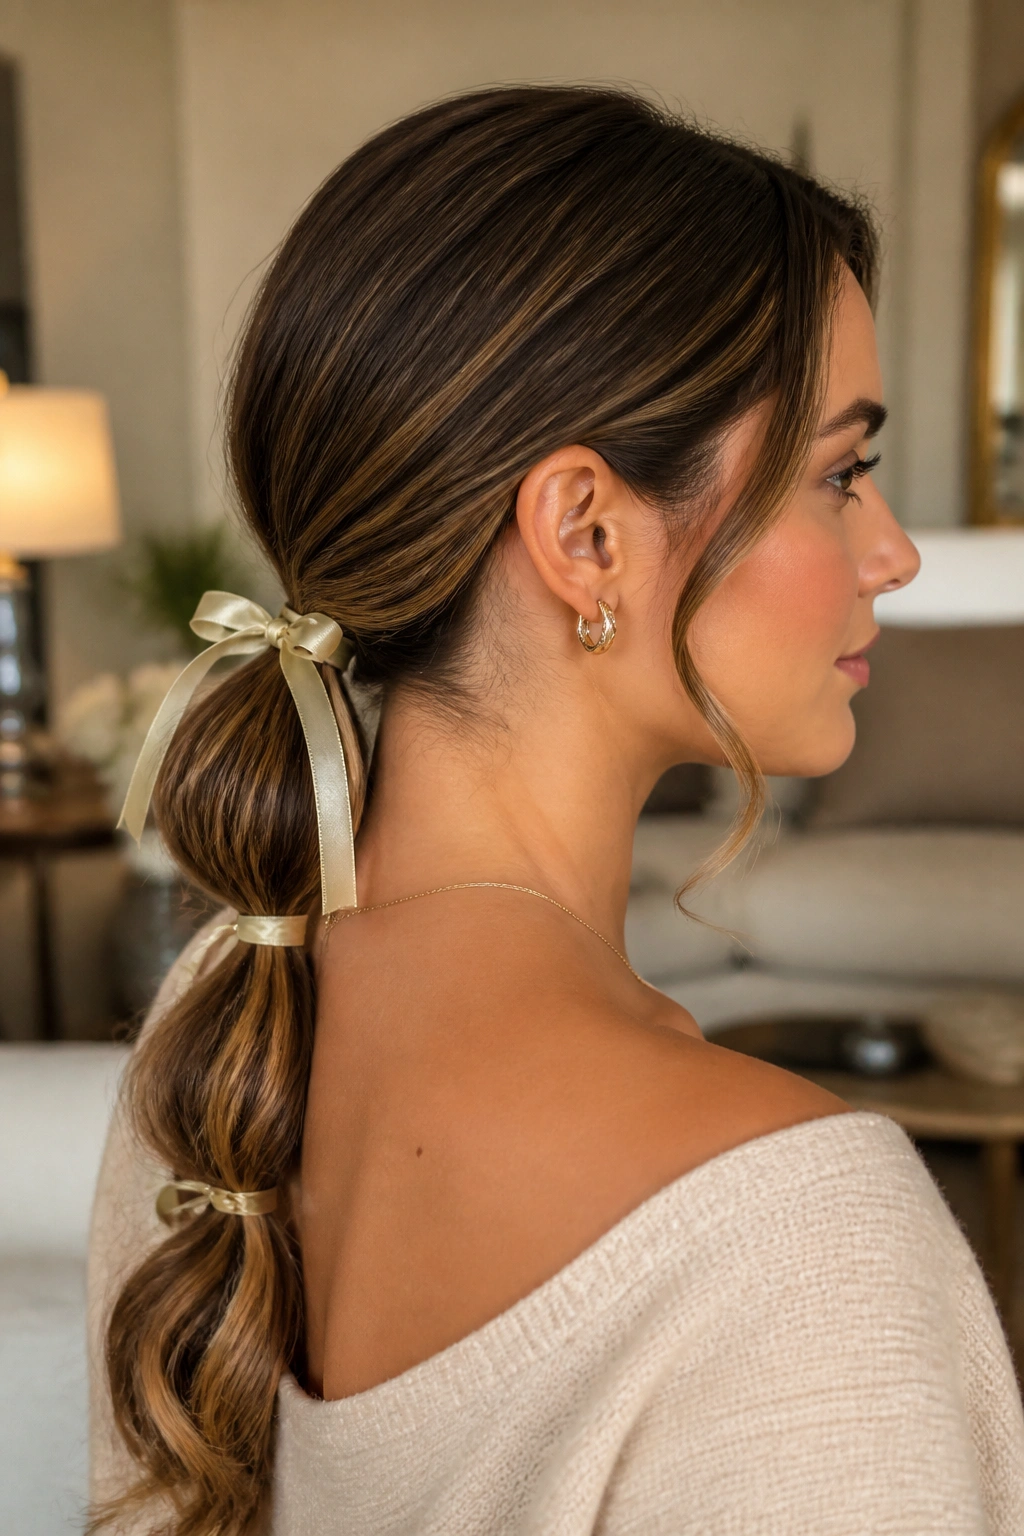
Why does a low bubble ponytail look so polished with almost no effort? Because the shape sits near the nape, where the neck and shoulders frame it nicely. Add ribbon ties between the bubbles, and the whole style starts feeling a little more intentional, a little more dressed up.
How to Wear It
Start with a low ponytail at the base of the neck, then add elastics every 2 inches or so. Slip a narrow satin ribbon through one or two of the sections, or tie it around the base elastic and let the tails hang down. Keep the ribbon slim; wide ribbon can swallow the shape.
This version is especially good for soft fabrics and open necklines. It sits well with a knit dress, a button-down shirt, or anything with a collar that would fight a high style. The lower placement also means you do not need a ton of product to keep flyaways down.
A small detail I like: choose a ribbon that repeats one color from your outfit rather than matching it exactly. It feels less fussy and more pulled together.
4. Braided Bubble Ponytail Hybrid
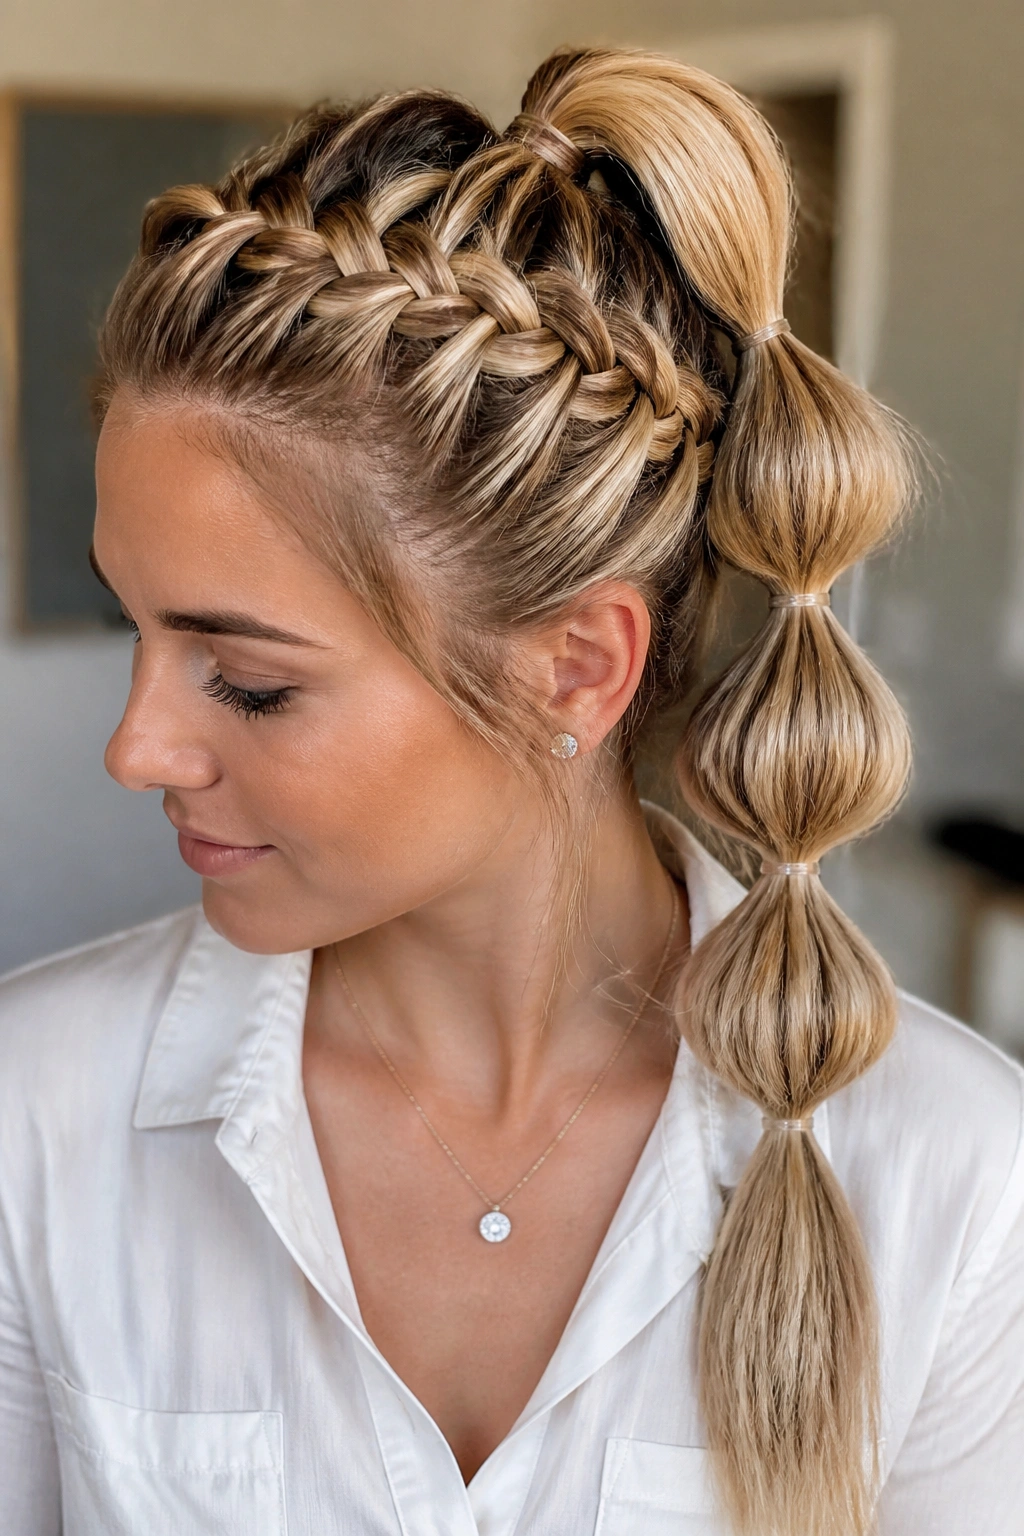
If a plain braid feels too expected, this is the smarter version. A braided bubble ponytail hybrid gives you the clean structure of a braid at the top and the round, spaced-out shape of bubbles through the tail. It has more texture than a straight pony and less bulk than a full braid from root to end.
Begin with a small Dutch braid or regular braid at the crown, then stop once you reach the point where the ponytail starts to fall naturally. Tie it off, then add elastics down the length and tug each section into a bubble. That braid-to-bubble transition is what makes the style feel fresh.
Key Details
- A braid that is 3 to 4 inches long is enough for most hair lengths.
- Use small snag-free elastics so the switch from braid to bubble stays neat.
- Pull on the braid edges before tying off if you want a fuller top.
- Keep the bubbles looser than the braid so the style doesn’t look overworked.
Best part: it holds texture well on hair that slips out of regular styles by lunchtime.
5. Curly Bubble Ponytail With Soft Volume
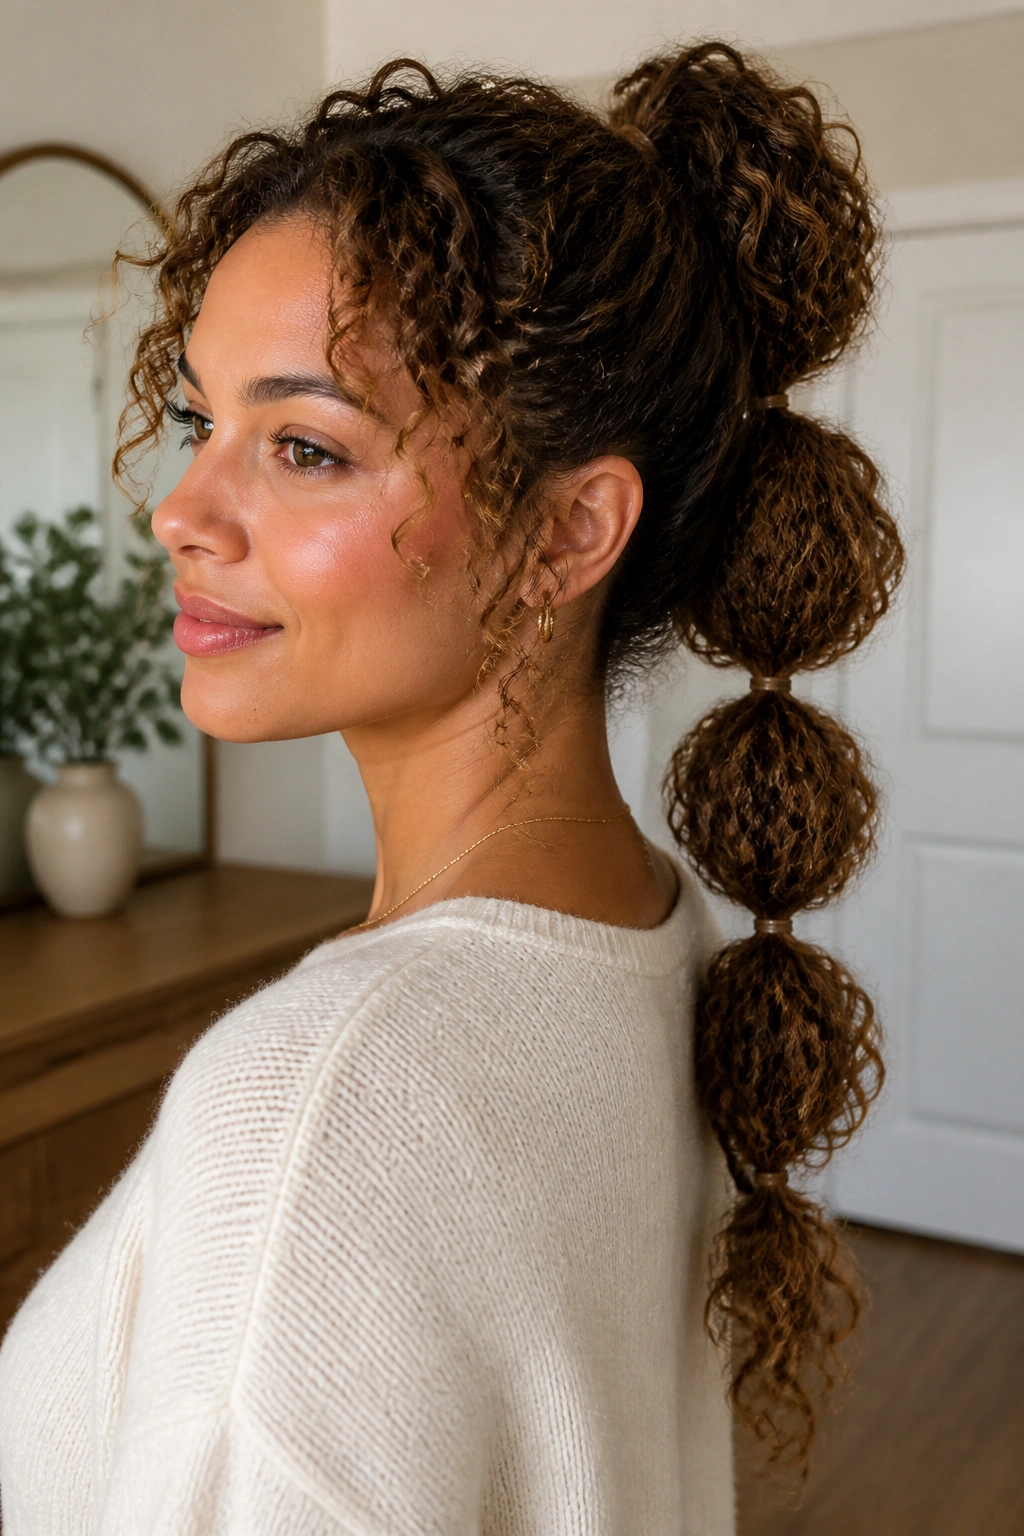
Curly hair and bubble ponytails get along better than people think. The trick is not to flatten the curls into submission at the base. Leave some of the curl pattern alive, and the bubbles will look airy instead of stiff.
The style works best when you gather the ponytail with your fingers first, then use a brush only on the crown if you need a cleaner finish. From there, place elastics at generous intervals and let the curls fill the spaces between them. If the hair is stretched too tightly, the bubbles lose that springy, dimensional feel.
I like this version with a little curl cream scrunched into the lengths before you start. Not a lot. Just enough to keep the curls defined and stop the ends from frizzing out of the bubbles. A satin scrunchie at the base helps too, especially if your hair is dry or fragile.
The result is softer than a sleek ponytail and more controlled than wearing curls loose all day. It looks like you meant to style the texture, which is half the battle.
6. Side-Swept Bubble Ponytail
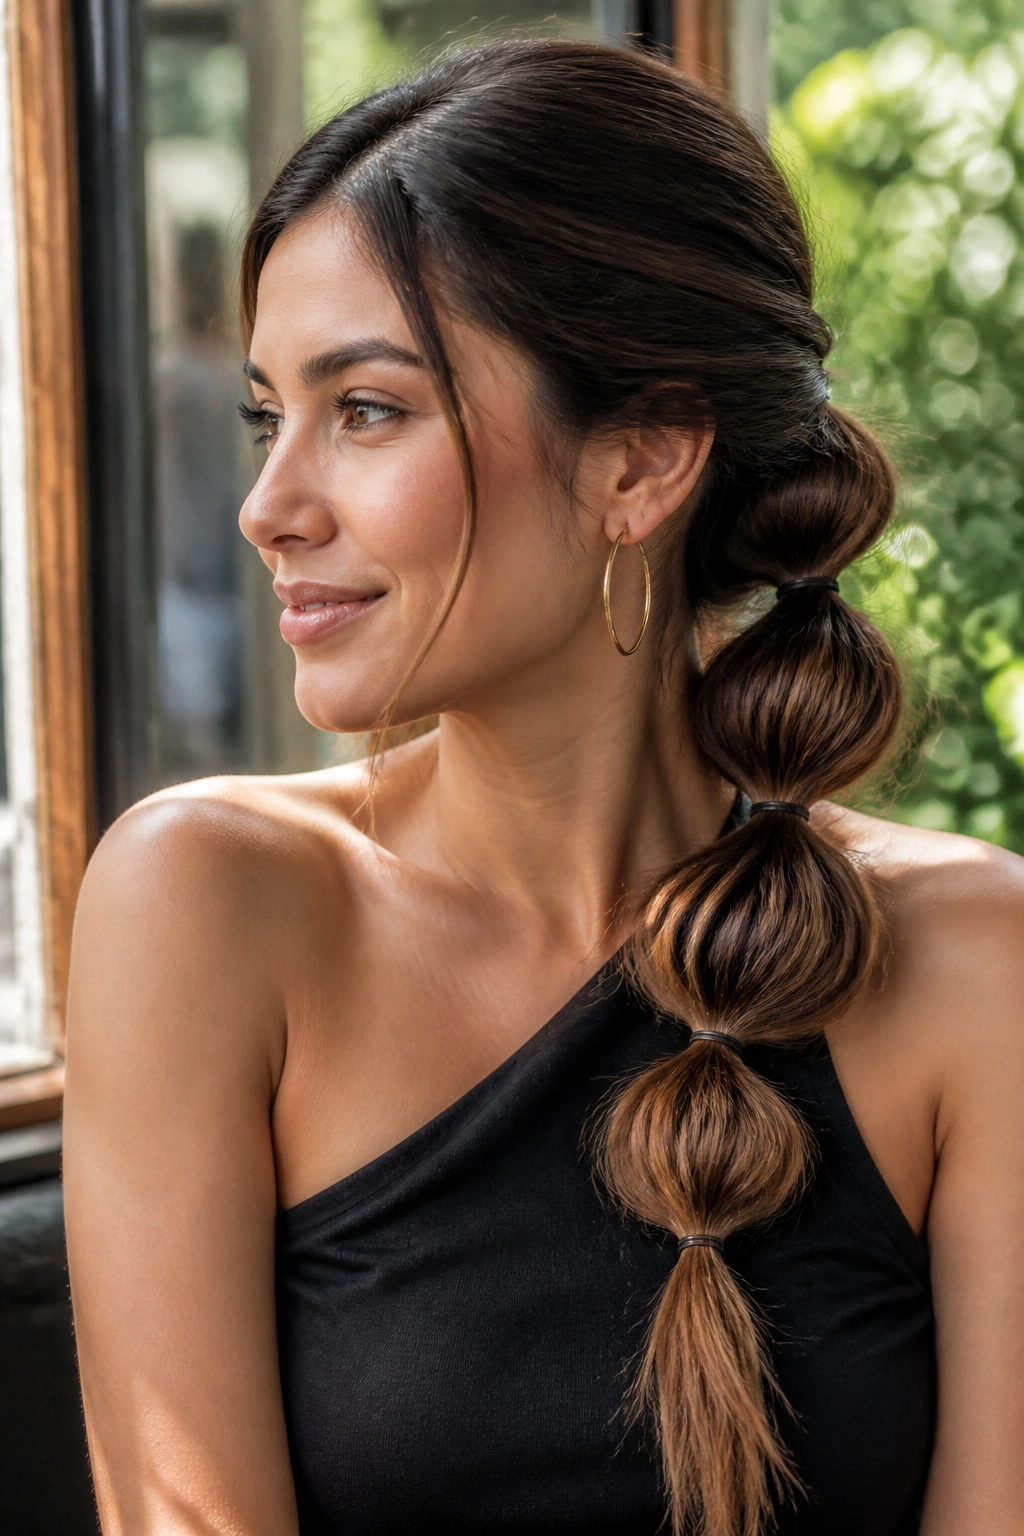
A side-swept bubble ponytail changes the whole mood just by moving the weight off the center line. Instead of hanging straight down the back, the ponytail rests over one shoulder and gives the face a slightly softer frame. It feels less sporty, more evening-ready.
What makes this version different is the line it creates. A deep side part pulls the eye across the forehead, and the bubbles trail diagonally instead of vertically. That diagonal shape is flattering on a lot of face shapes because it breaks up the symmetry in a gentle way.
This style is also a smart pick when you want earrings to show. A long drop earring or a small hoop gets more room to breathe when the pony sits to one side. If your hair is naturally thick, the side sweep helps keep the weight from feeling like a helmet.
For a cleaner finish, secure the ponytail at the side of the nape rather than high behind the ear. It keeps the bubbles from sliding forward too much. Small change. Better shape.
7. Double Bubble Ponytails for Sporty Energy
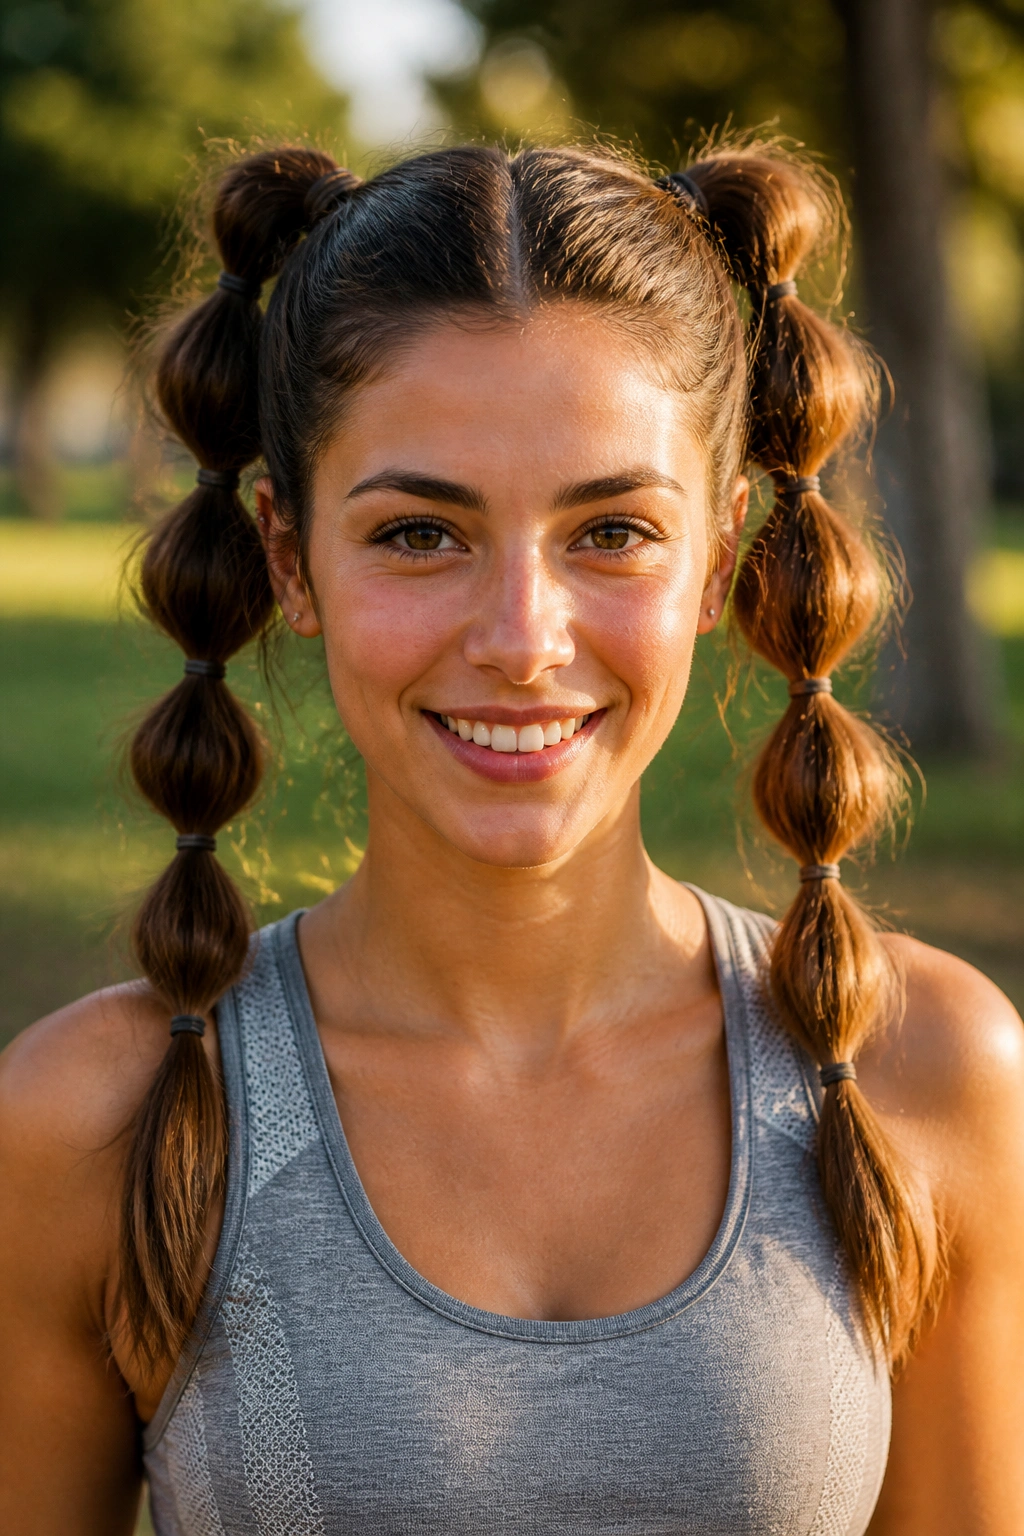
Two bubble ponytails can be just as fun as one, and honestly, they’re easier to keep balanced than people expect. The look splits the hair into pigtails, then adds bubbles down each side. It has that playful, active feel without looking childish if you keep the part neat.
Why It Works
The symmetry is what gives this style its energy. Each side mirrors the other, so the eye reads the shape quickly, even from a distance. On medium-length hair, double bubbles can actually look cleaner than one long pony because the sections stay more controlled.
Quick Facts
- Part the hair down the middle for the neatest balance.
- Use 4 to 6 elastics per side, depending on length.
- Space the ties about 1½ to 2 inches apart.
- Tug the sides of each bubble equally so both pigtails match.
Tip: mist the hair with texturizing spray before parting. It gives the sections more grip and keeps the style from slipping apart halfway through the day.
This is the one I’d pick for travel days, workouts, or any morning when you want something practical but not boring.
8. Bubble Ponytail With Face-Framing Pieces and Bangs
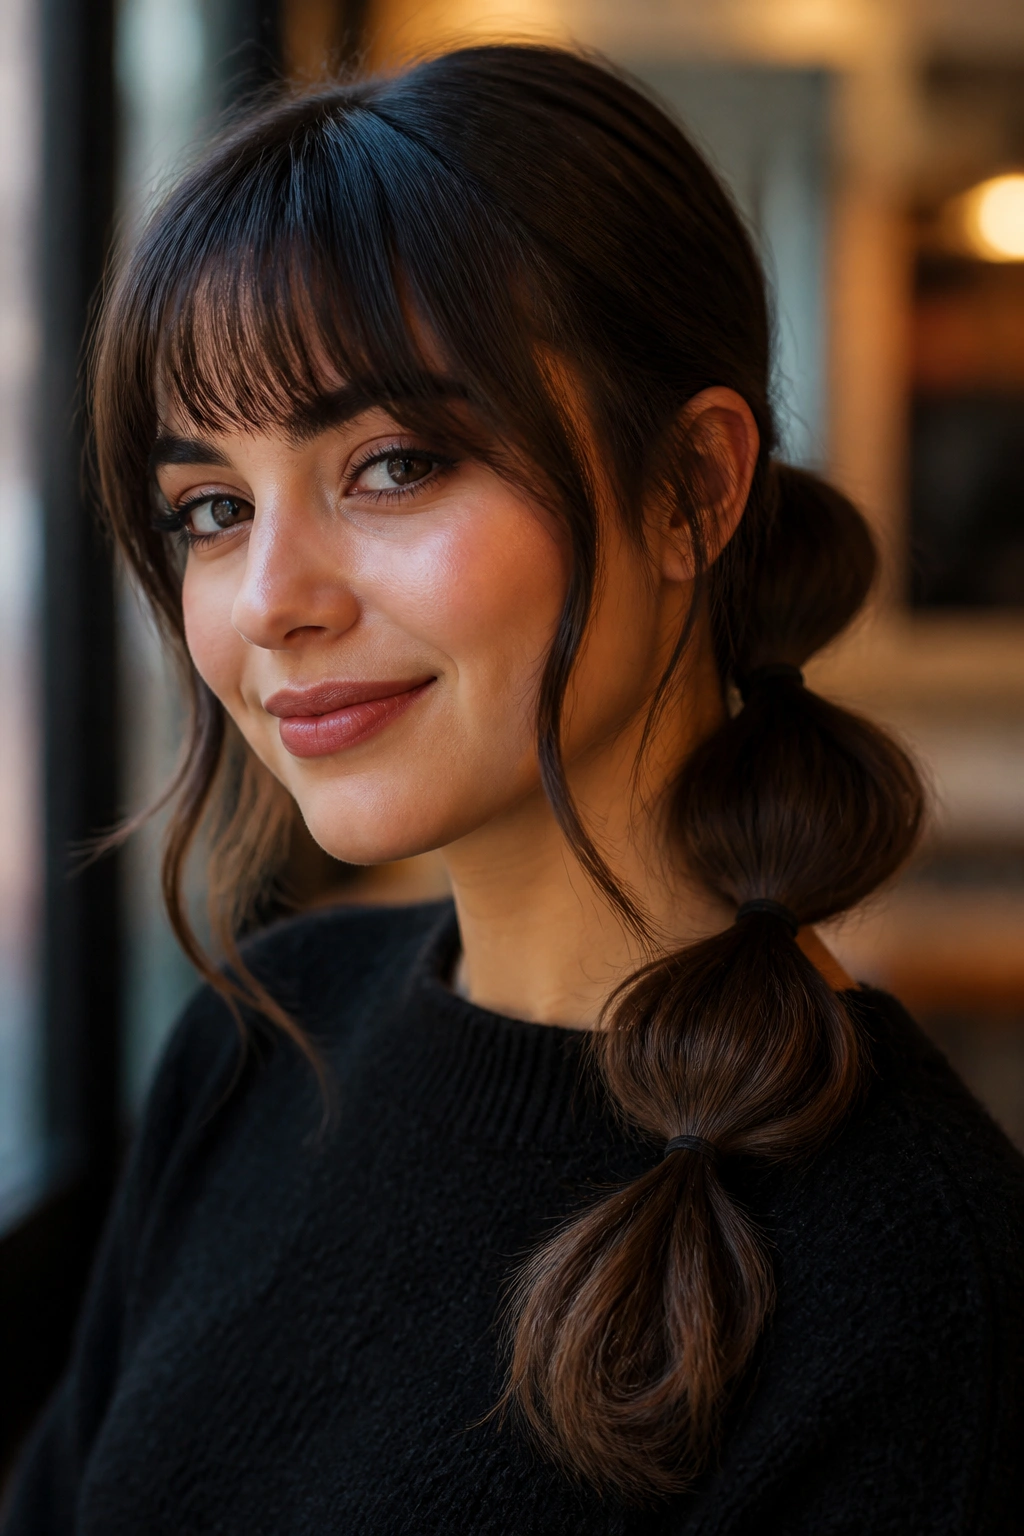
Bangs and bubble ponytails are friends, not rivals. A lot of people assume the style needs a clean forehead to work, but that’s not true at all. Leaving out face-framing pieces or curtain bangs can make the whole look softer and more wearable.
The key is restraint. Pull the ponytail itself back neatly, then let the front pieces fall where they want to. If you’ve got curtain bangs, bend them slightly with a round brush or a flat iron so they sit around the cheekbones instead of sticking straight out. For blunt bangs, keep the ponytail low enough that the fringe doesn’t compete with the top section.
This version is especially nice when your hairline has a few shorter layers that never stay tucked in anyway. Instead of fighting them, work with them. A little smoothing cream on the roots and a light spray on the front pieces is usually enough.
I like this look because it never feels overdone. The bangs keep it casual, and the bubbles add enough shape to make the style look thought through.
9. Wrapped-Elastic Bubble Ponytail
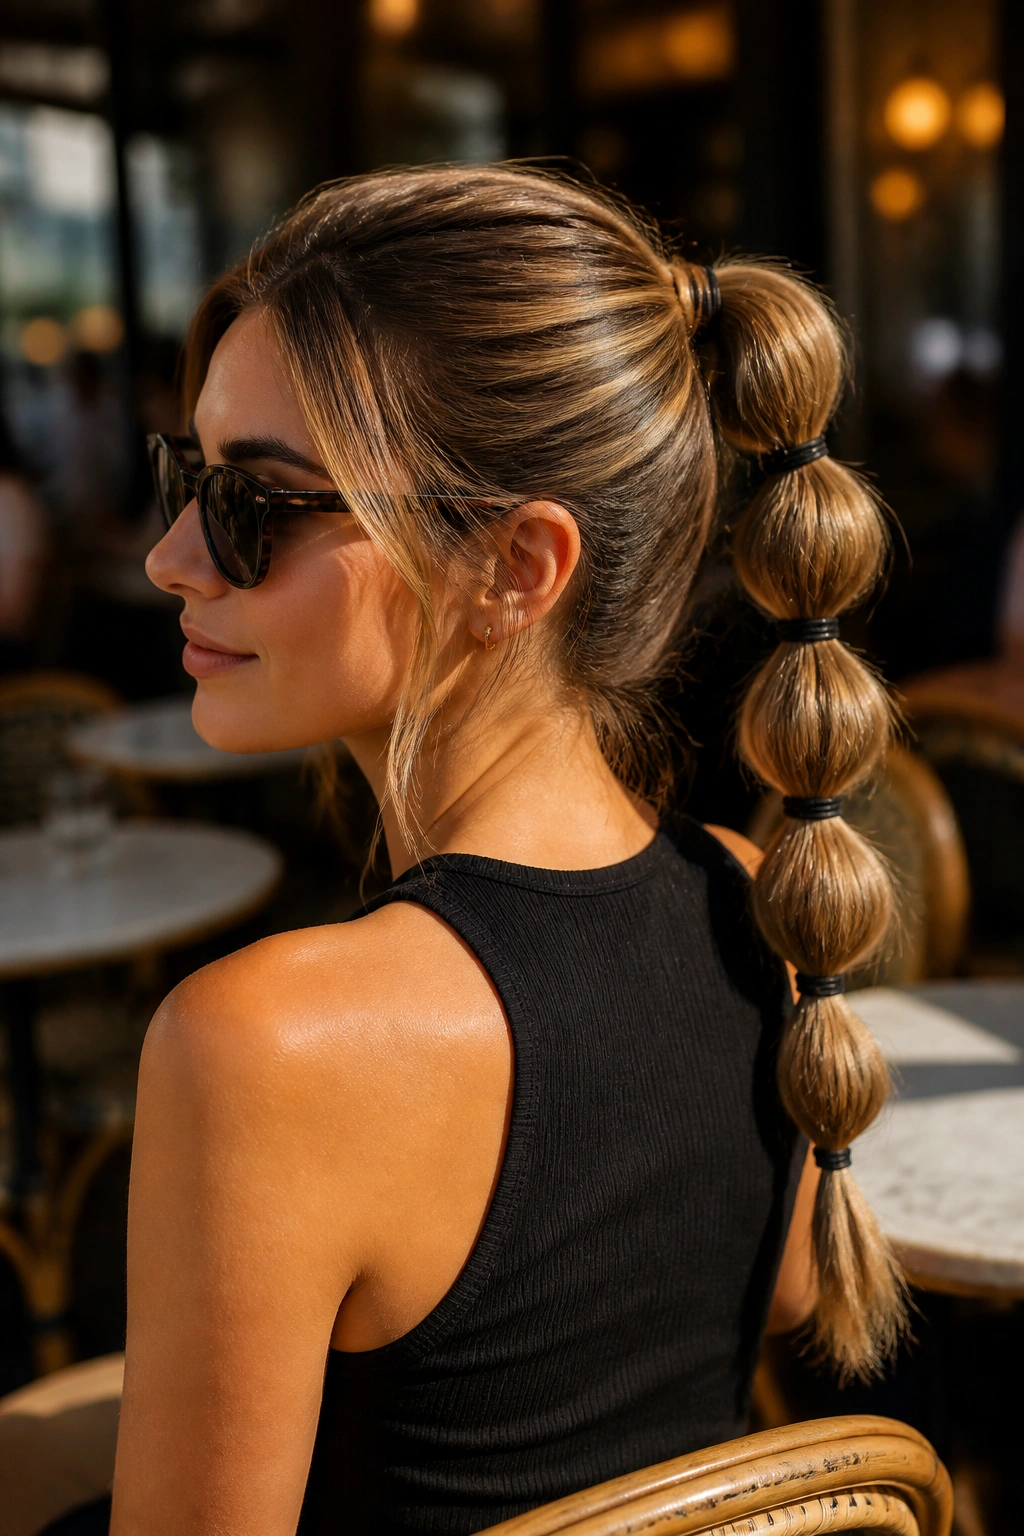
What if the elastics are the whole point? That’s really the charm of a wrapped-elastic bubble ponytail. Instead of hiding the ties, you choose them on purpose — black, white, gold, neon, whatever fits the outfit — and let them become part of the design.
How to Wear It
Start with a regular ponytail, then add visible elastics every couple of inches. The trick is consistency. If the spacing jumps around, the style starts looking messy instead of graphic. Keep the bubbles roughly the same size, especially if you’re using colored bands that stand out against the hair.
This version works well for school events, themed outfits, or any day when you want the hair to read a little more playful. Bright elastics can look especially sharp on dark hair, while clear or soft-toned bands blend better on lighter shades.
One thing to avoid: too many colors at once. Pick one palette and stay there. A row of red, pink, and blue bands can be fun, but if every tie is different, the eye stops seeing the shape.
10. Tiny Bubble Ponytail for Shorter Lengths
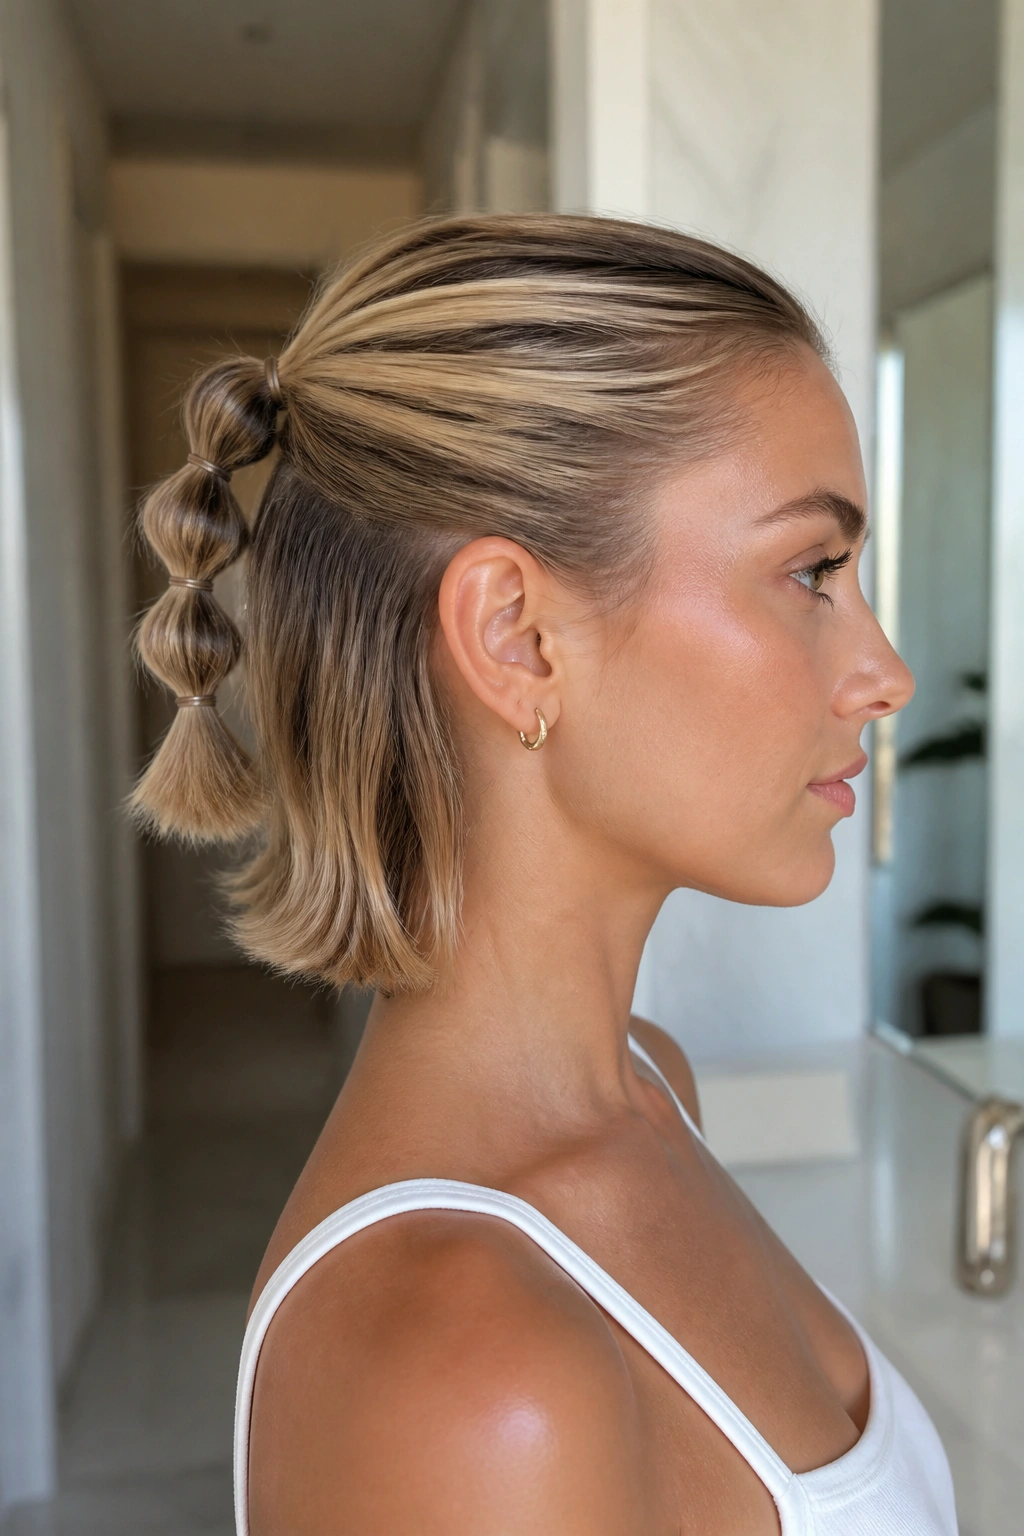
If your hair barely clears your shoulders, stop waiting for the big version. Tiny bubble ponytails are made for shorter lengths, and they can look crisp, cute, and surprisingly full when the sections are kept small.
I’ve seen this style work better on collarbone-length hair than people expect. The bubbles are shorter, sure, but that also means the shape stays compact and neat. You do not need dramatic spacing to make it read as a bubble ponytail. In fact, too much space can make short hair look sparse.
Key Details
- Use 1 to 1½ inch spacing between elastics.
- Keep the ponytail base low or mid-height so the length doesn’t get swallowed.
- Choose thin elastics instead of thick ones.
- Pull the hair outward gently, not aggressively, so the bubbles don’t collapse.
The real win here is proportion. Tiny bubbles match shorter hair better than oversized ones ever could. They look deliberate, not like you tried to stretch the style beyond what your hair can do.
11. Festival Bubble Ponytail With Metallic Elastics
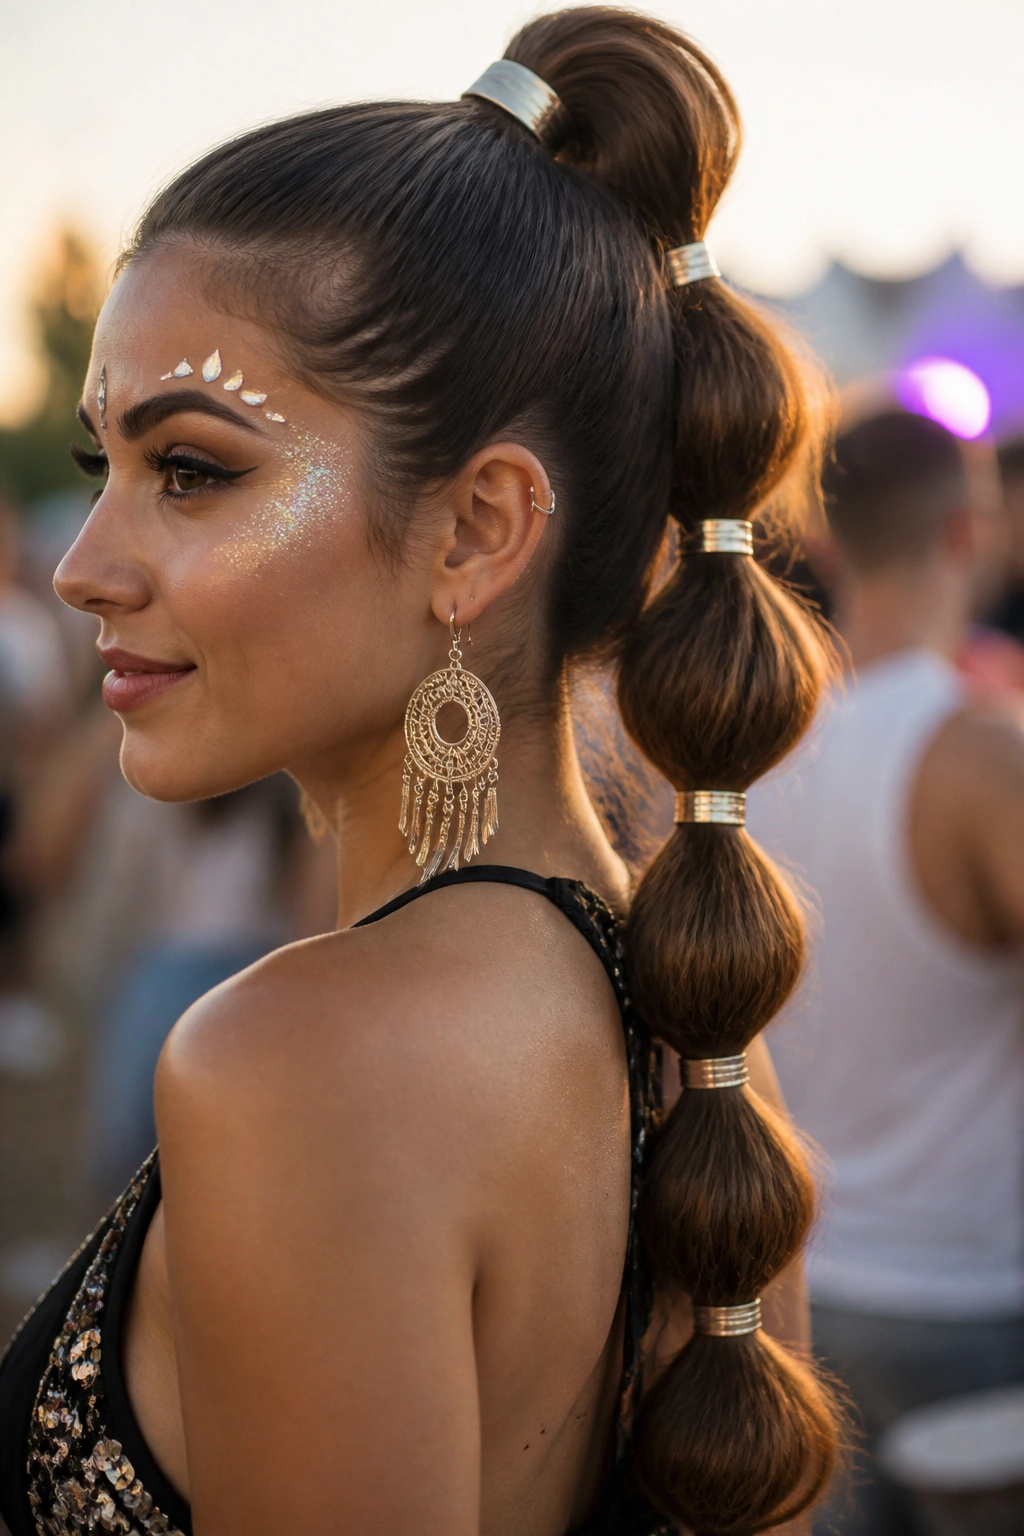
Metallic elastics change the tone of a bubble ponytail fast. A few silver or gold ties can make the style feel sharper, almost jewelry-like, especially when the hair is pulled high and the bubbles are spaced evenly down the back. Add a bit of shimmer, and the ponytail becomes part of the outfit instead of an afterthought.
The best version of this look usually starts with smooth roots and a little texture through the tail. That mix keeps the shine from feeling flat. A light mist of gloss spray at the crown helps, but you do not want the hair to look soaked. Just enough to catch the light when you turn your head.
Small braids tucked between two bubbles can help too. So can thin cords, colored thread, or a tiny clip at the base. The point is not to pile on every accessory you own. It is to pick one or two details that echo the rest of the outfit and let the ponytail do the rest.
This style has a bolder feel than the everyday versions. It’s also forgiving, which matters when you’re wearing it for hours and don’t want to keep checking a mirror.
12. Bubble Ponytail With Claw Clip Base
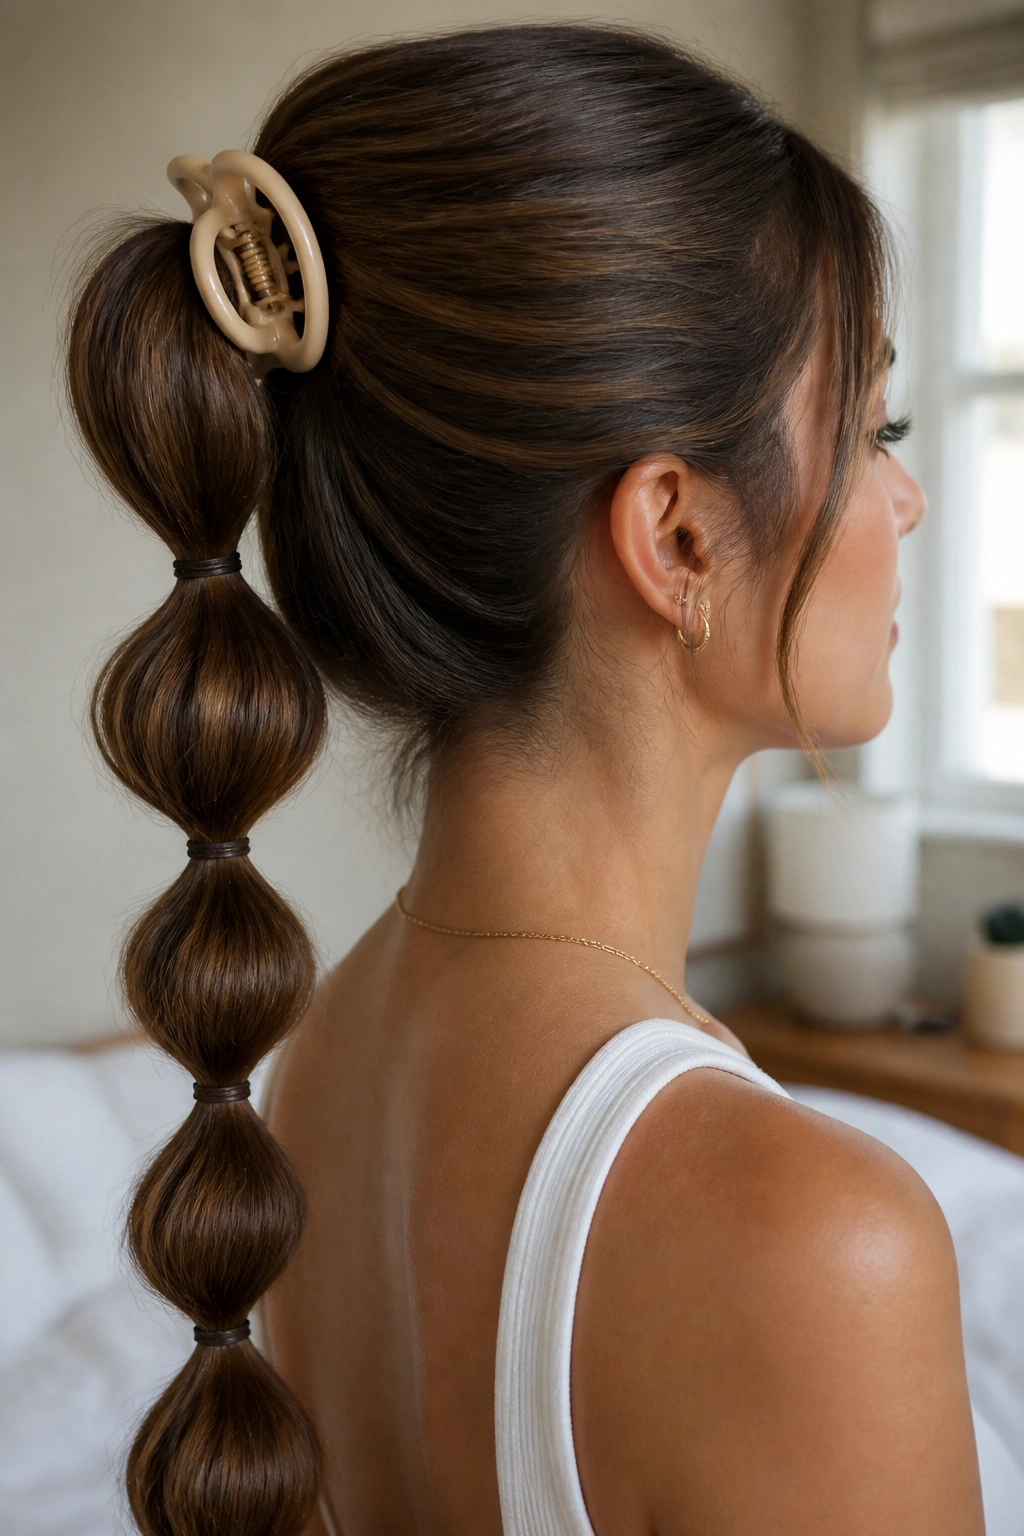
A claw clip base changes the whole game because it gives the ponytail lift without forcing the roots tight. Unlike a standard elastic-only setup, a claw clip lets the hair sit a little looser at the crown, which can be a relief if you hate the pulled-back feeling.
This version works best when the clip is sturdy and wide enough to hold the base without sliding. A clip that’s about 3 to 4 inches long usually does the job for medium to thick hair. Once the base is secure, you can add the bubbles down the tail just like normal.
Who is this for? Mostly people with hair that gets sore from tight ponytails, or anyone who likes the look of an updo but wants a softer finish around the scalp. It’s also handy when your hair has a little bit of natural bend and doesn’t want to lie flat all day.
I’d keep the bubbles a touch looser here. The clip already gives the style some shape, so you don’t need to force every section into a perfect circle.
13. Bubble Mohawk Ponytail
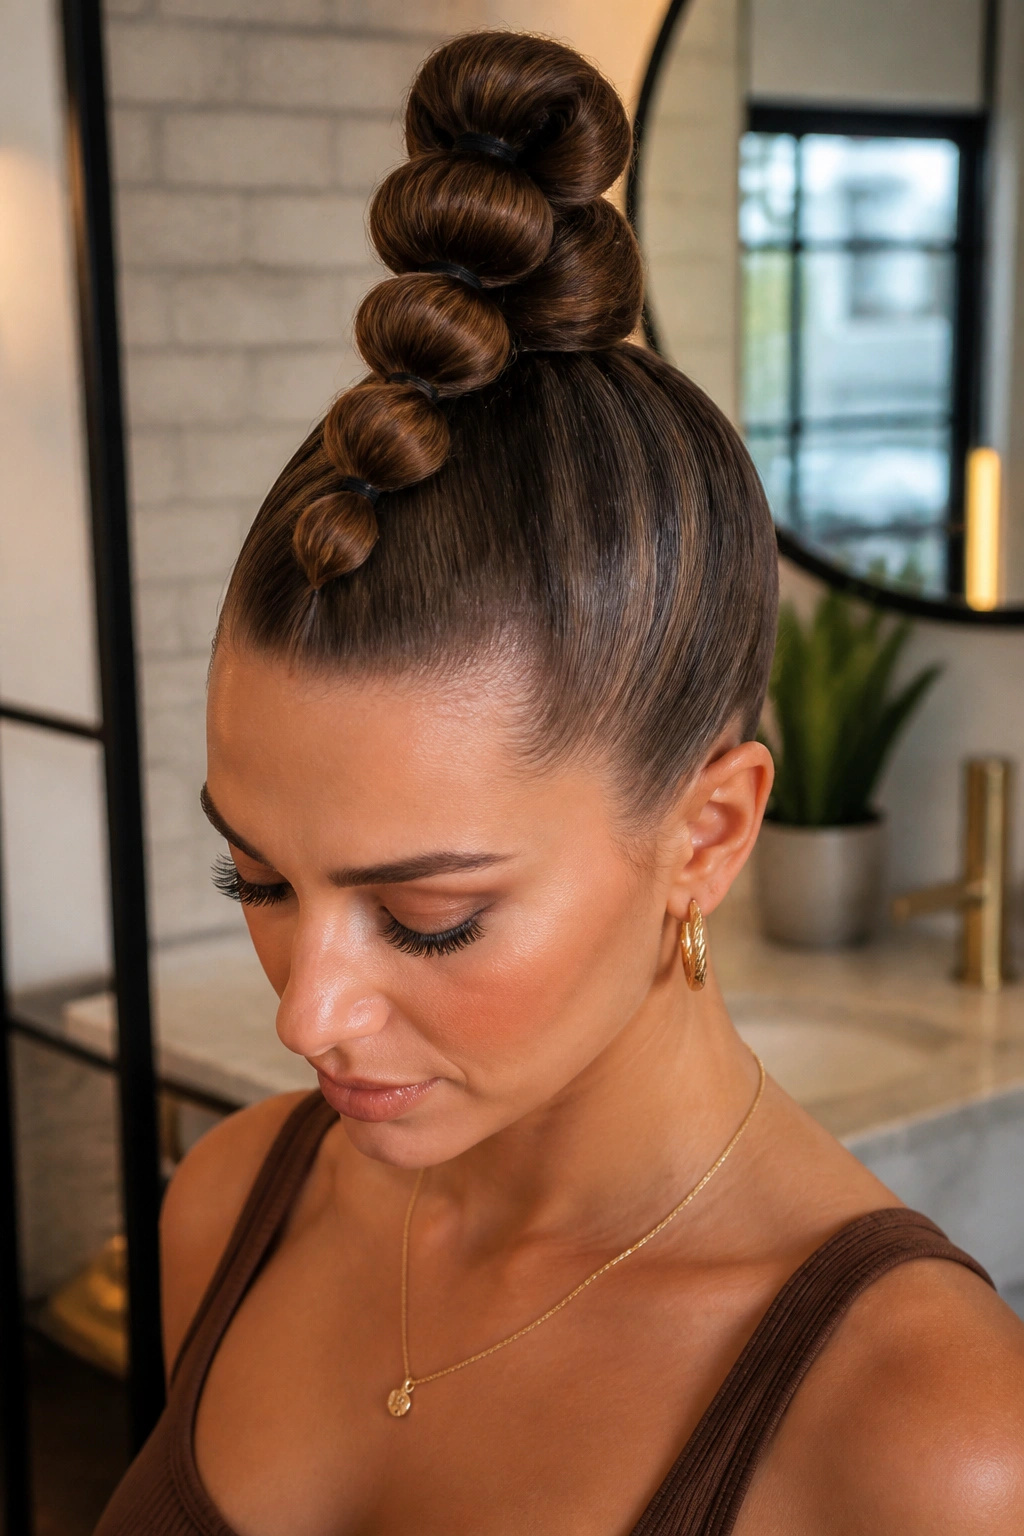
A bubble mohawk ponytail has more attitude than the softer versions, and that’s the whole appeal. The hair on the sides gets smoothed back tight, while the center section stands up in a line of bubbles that run from the forehead toward the nape. It’s bold without needing a complicated braid pattern.
Why It Works
The center strip creates a strong vertical line, which makes the bubbles look stacked and sculpted. That shape is especially useful if you want the top of the head to look taller. It also keeps the style from spreading too wide, which can happen with thick hair.
Quick Facts
- Use a fine-tooth comb for the sides.
- Keep the center section about 2 to 3 inches wide.
- Place each elastic evenly so the bubbles stay centered.
- Finish with a light-hold spray; heavy spray can make the top feel stiff.
Best tip: if your hair is layered, pin the side pieces first and smooth the center last. It keeps the mohawk line cleaner and saves you from chasing flyaways forever.
14. Bubble Ponytail With Scarf or Bandana
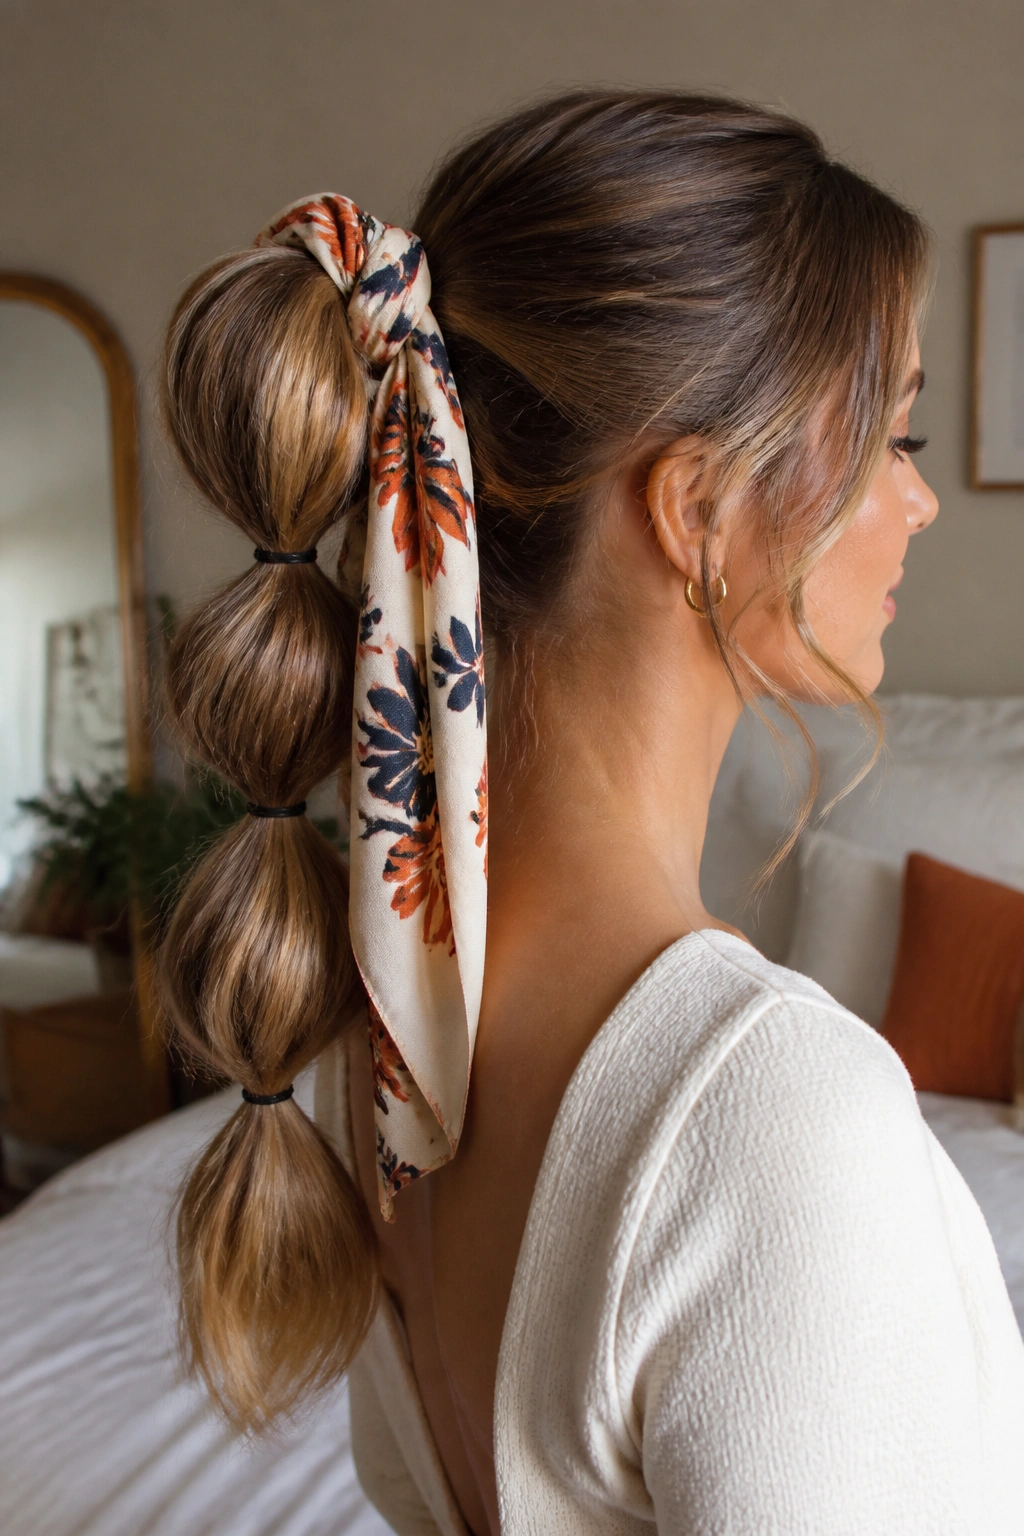
The scarf does half the styling here. Wrap a silk scarf or a soft bandana around the base of the ponytail, and the look instantly feels more relaxed and a little more styled than plain elastic alone. It’s an easy fix for a flat root or a day when the hair just needs a visual lift.
What makes this version different is the texture contrast. The scarf brings in softness, while the bubbles add shape underneath it. You can tie the scarf in a knot at the base and leave the tails hanging, or fold it into a narrow band and tuck the ends away. Both work.
A practical note: don’t wrap the scarf around every elastic. That gets bulky fast and can make the ponytail feel crowded. Keep the scarf at the base and let the bubbles stay clean. A small print works better than an oversized one, too, because it doesn’t fight the shape.
This is one of those styles that looks easy in the best way. Not plain. Just calm.
15. Bubble Ponytail for Thick Hair
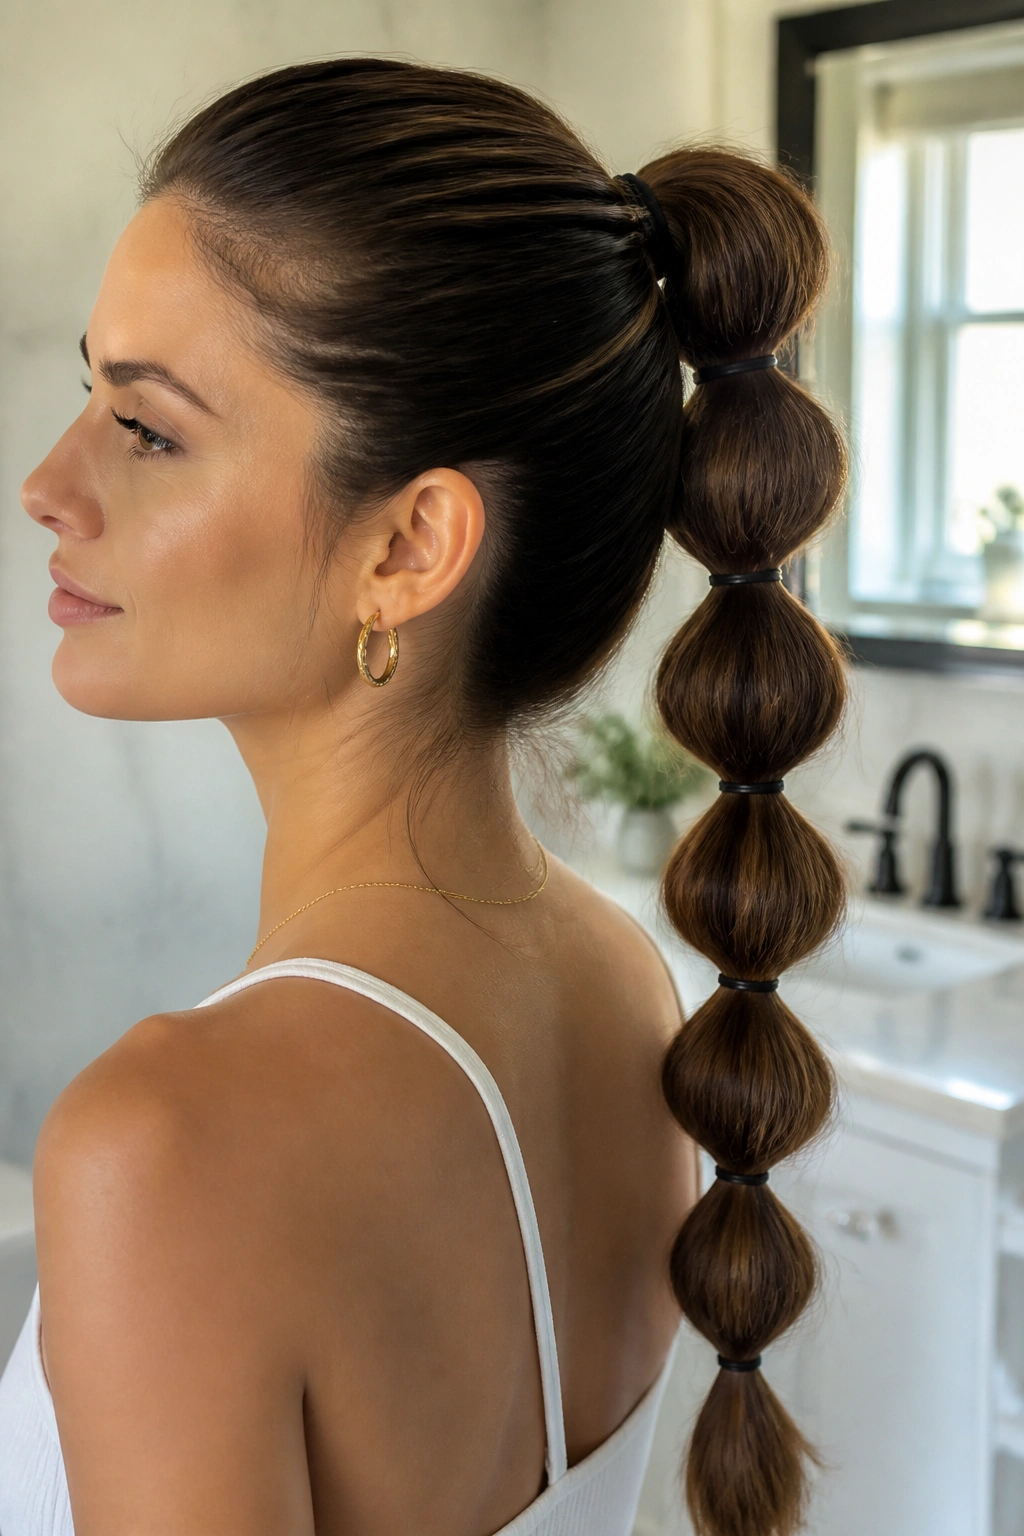
Why do thick-haired bubble ponytails sometimes fall into chunky, uneven lumps? Because the hair carries more weight than most sections want to hold. The fix is not more force. It’s better sectioning and stronger anchors.
How to Wear It
Use stronger elastics and keep the sections a bit smaller than you think you need. Thick hair often looks best with bubbles spaced about 1½ inches apart, especially if the ponytail is long. If the sections are too wide, they sag before the day is over.
You may also want to divide the hair with clips before you start. That makes it easier to keep the bubbles even. If the crown is wide and heavy, smooth it with a little cream first, then tighten the first elastic firmly. The first anchor carries most of the weight, so don’t rush it.
A lot of people try to make thick hair look airy by tugging the bubbles too hard. That backfires. You want fullness, not distortion. Pull just enough to round the shape, then stop. The style looks richer that way anyway.
16. Bubble Ponytail for Fine Hair
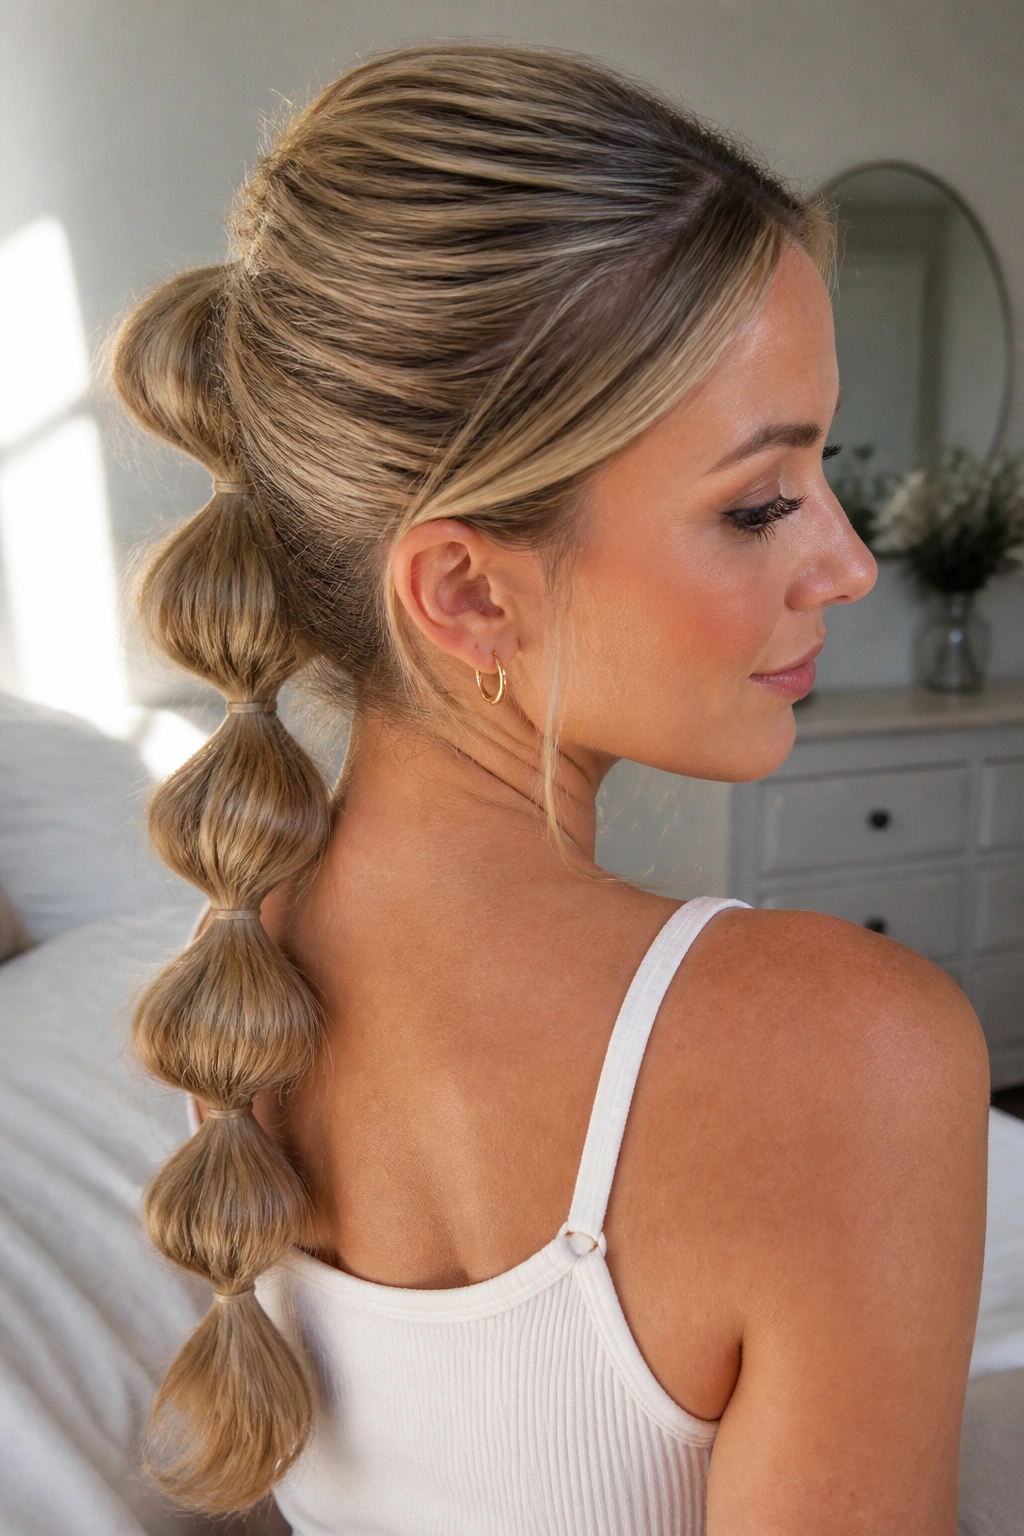
Fine hair can make bubble ponytails feel a little sad if you rush them. The bubbles may collapse, the elastics may show too much, and the whole style can end up looking thinner than it did before you started. That’s frustrating. Also fixable.
The trick is to create body before you gather the ponytail. A little dry shampoo at the roots, a quick backcomb at the crown, and a spritz of lightweight texturizing spray can make a real difference. You do not need a lot. Fine hair gets sticky fast, and sticky hair is not the goal.
Key Details
- Use smaller bubbles so the sections stay lifted.
- Hide the elastics by wrapping a tiny strand of hair around them.
- Hold each bubble in place with a light mist of flexible spray.
- Avoid heavy creams that flatten the roots.
The nicest thing about this version is that it can look fuller than a regular ponytail. The bubbles create shape where the hair might otherwise lie flat. That alone makes it worth the extra minute.
17. Bubble Ponytail With Mixed Textures and Curls
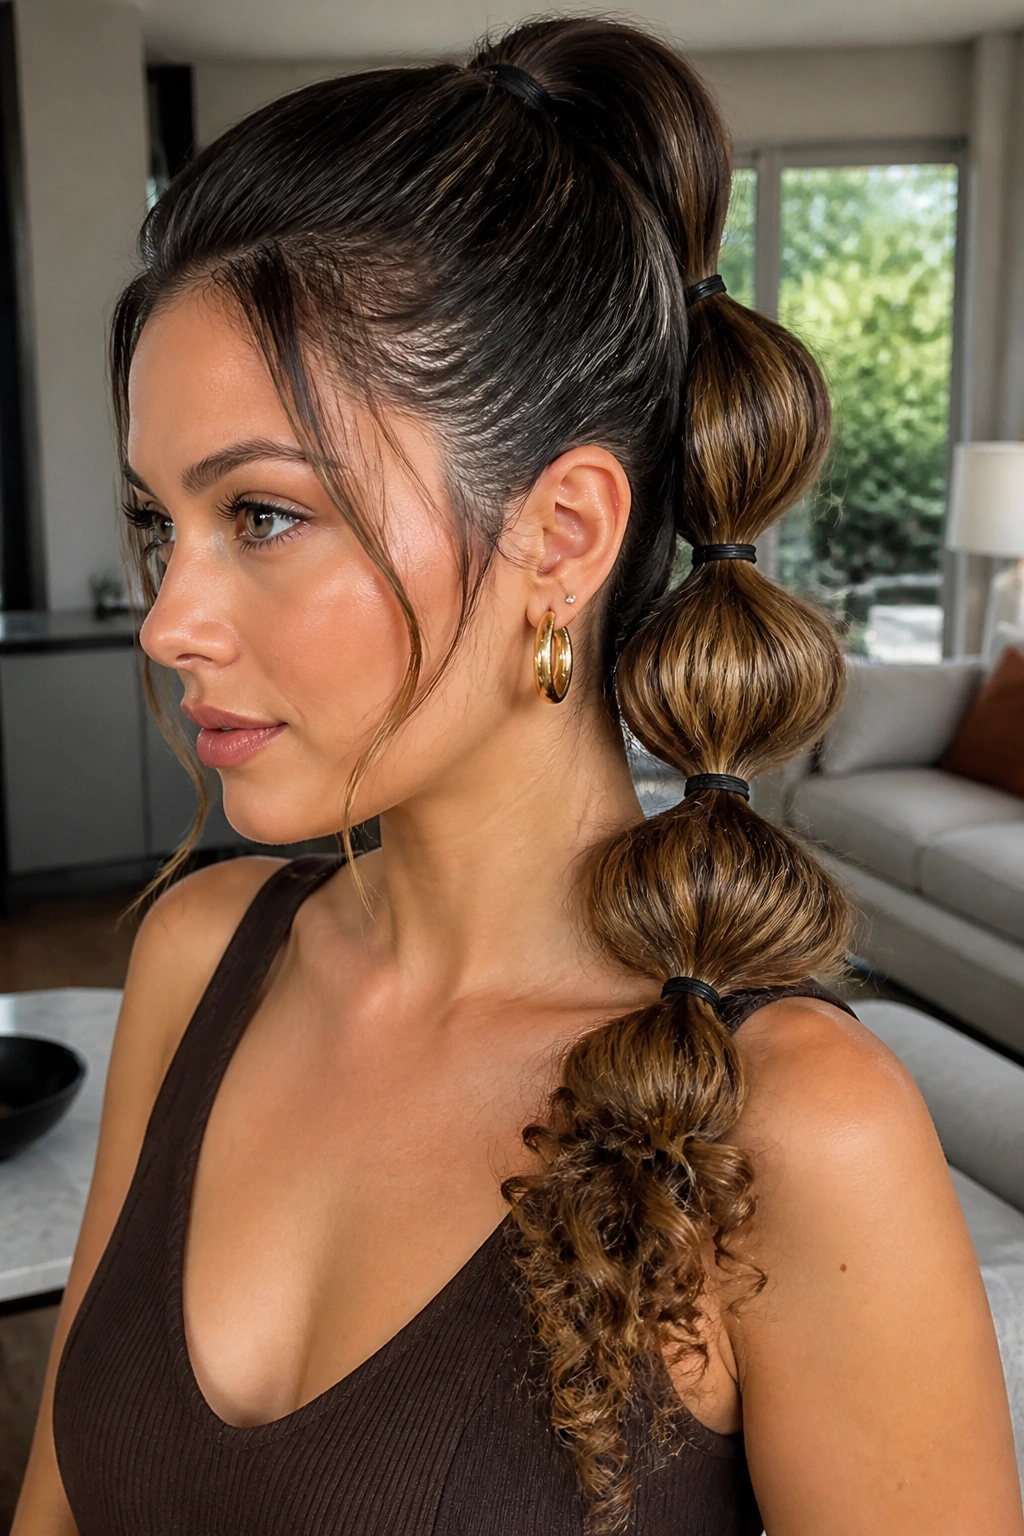
Mixed textures can make a bubble ponytail look richer, not messier, if you let each section do its own thing. Straight roots, wavy mids, curls at the ends — all of that can work together inside the same style. The bubbles act like little frames, giving each texture a place to sit.
I like this approach because it stops the hair from looking overcontrolled. A sleek crown with loose, bendy lengths feels modern in the practical sense, not the trendy sense. It looks like real hair, which is often better anyway. You are not trying to erase every difference in the strands.
A small amount of smoothing cream at the top helps the base stay neat. After that, leave the middle and ends alone unless they need a tiny touch of curl cream or oil on the frizzy bits. If you over-style the whole ponytail, the mixed texture disappears and the look turns flat.
This is the version that makes the most sense for people who like their natural pattern but still want the hair pulled back and out of the face.
18. Low, Loose Bubble Ponytail for Everyday Wear
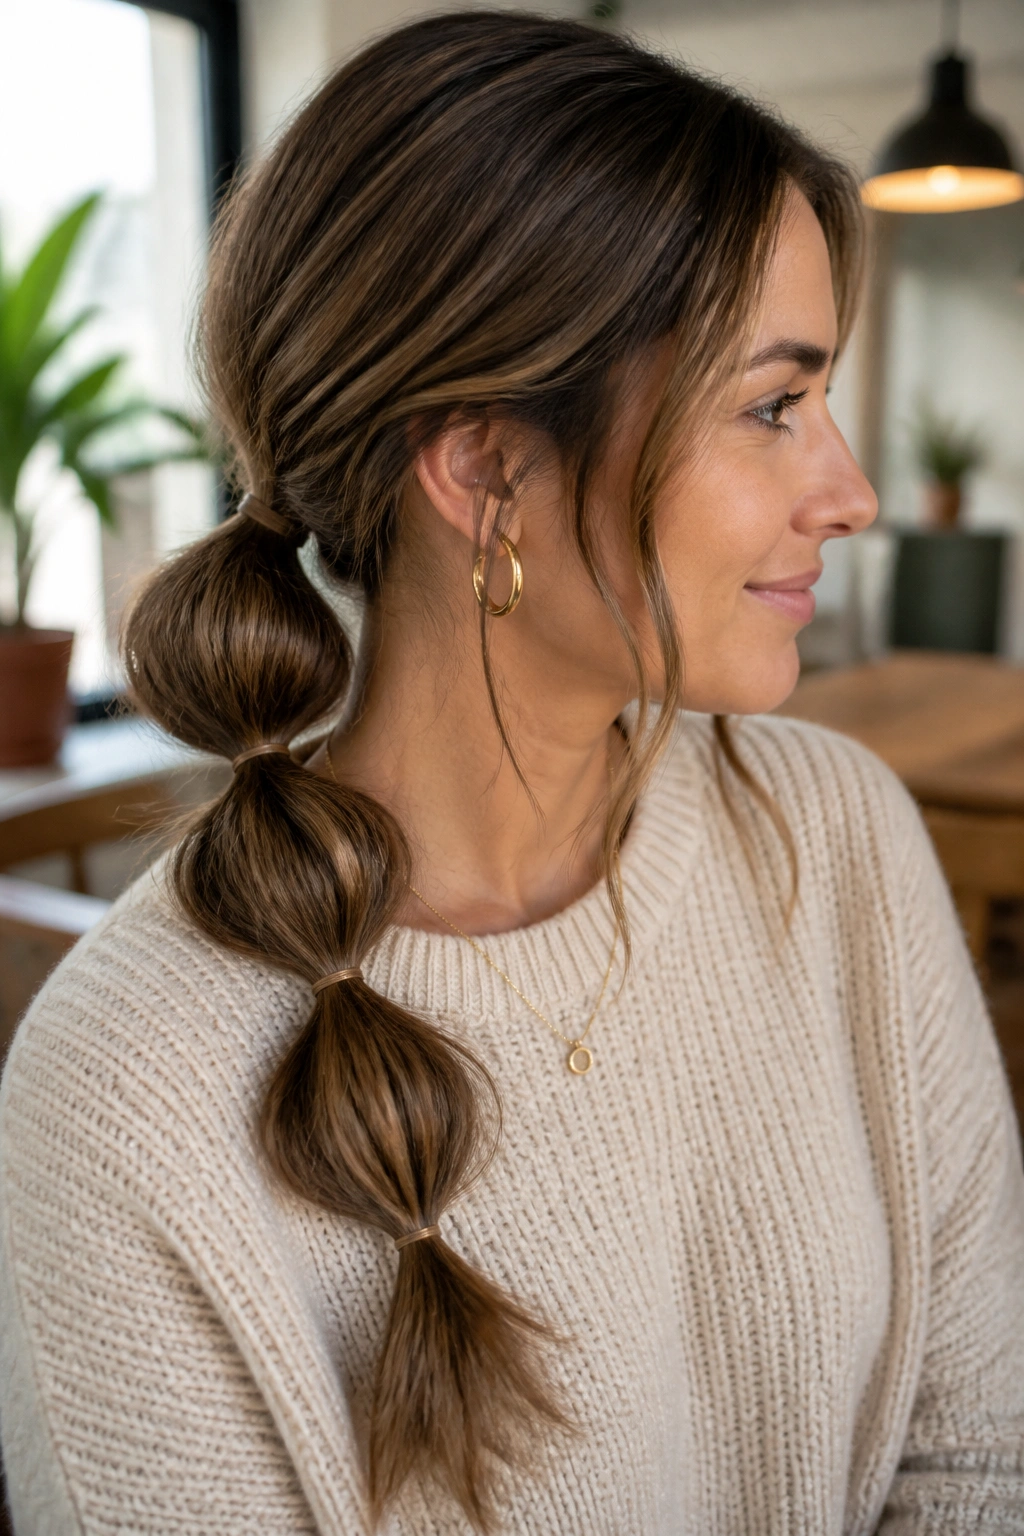
Unlike the tighter, dressier versions, this low, loose bubble ponytail is the one that slips easily into real life. It works with a hoodie, a blazer, a workout set, or a soft sweater you’ve worn three times this week and still like. The bubbles sit lower, the spacing is relaxed, and the finish feels casual without looking unfinished.
What makes it different is the attitude. You are not chasing perfect symmetry here. You’re keeping the crown smooth enough to look intentional, then letting the bubbles soften a little as they fall. Three bubbles is often enough. Four if the hair is long. Any more and it starts to feel fussy for everyday wear.
I’d keep the elastics about 3 inches apart and leave a few face-framing strands out if the hair wants them. If the base slips, a couple of hidden bobby pins under the first elastic will save the day. That’s the kind of fix people skip, then wonder why the ponytail keeps sliding down their neck.
This is the version I’d tell a friend to try first. It’s easy, it holds up, and it still has enough shape to make plain hair feel styled.
