



A date night hairstyle has a funny job. It needs to look deliberate at 7 p.m., still look decent after dinner, and survive the little real-life things nobody includes in photos — a coat collar, a restaurant breeze, someone leaning in close. The best romantic hairstyles for date nights do not try to look frozen. They look touchable. Soft. A little lived-in.
That is where a lot of people go wrong. They pull everything back too tight, drown the hair in spray, and end up with something that feels more event staff than date-night charm. Worse, the style can fight your outfit. A high neckline wants one thing, bare shoulders want another, and your hair should help the whole look feel finished instead of overworked.
The good versions all share the same basic idea: movement near the face, a shape that holds, and enough polish to feel intentional. A 1-inch or 1.25-inch curling iron, a few bobby pins, a flexible-hold spray, and a little patience go a long way. So do small choices that most people skip — like where the part sits, how much hair you leave loose, and whether you let the curls cool before touching them.
1. Soft Waves with a Deep Side Part for Date Nights
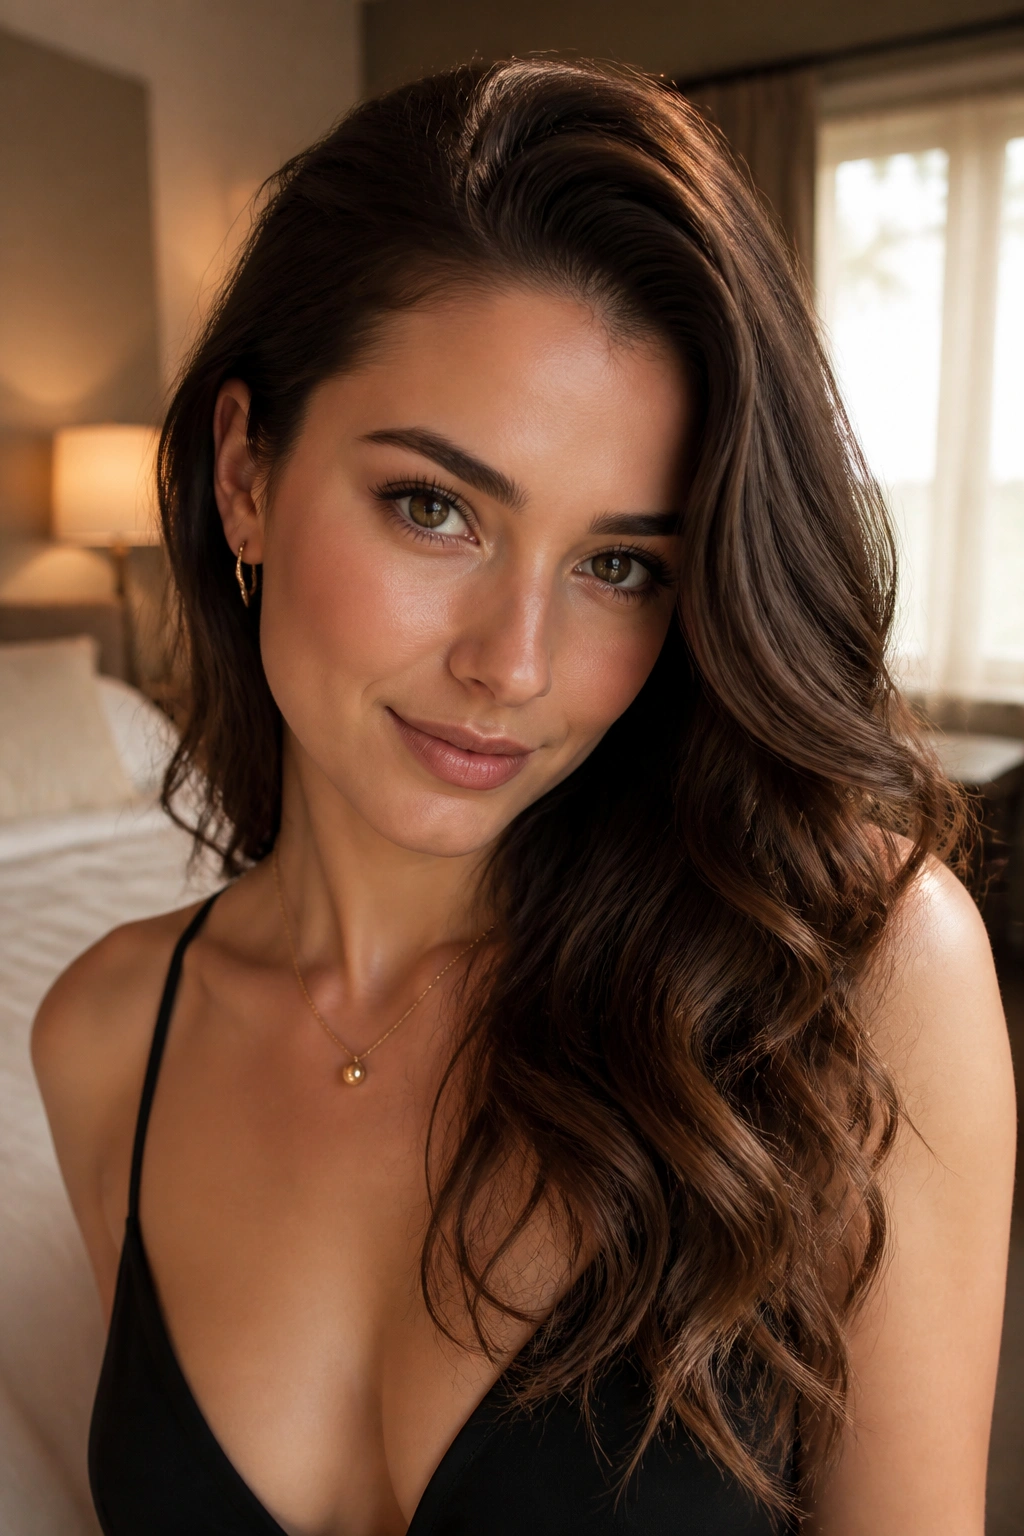
If you only learn one style, make it this one. Soft waves with a deep side part have that easy, flattering shape that works on straight, wavy, or layered hair without looking fussy.
The side part does more than people think. It shifts the whole balance of the face, adds a bit of drama, and gives the waves somewhere to fall. A 1.25-inch curling iron is usually the sweet spot for shoulder-length or longer hair, though a 1-inch iron works better if your hair is shorter or holds curl badly.
How to make it feel romantic
Curl sections away from the face, let each section cool fully, then brush through with a boar-bristle brush or your fingers. That last part matters. If you skip it, the waves can look hard and separate. If you go too far and brush them into nothing, you lose the shape.
- Start the part above the arch of one eyebrow.
- Curl 1-inch sections in the same direction on each side.
- Pin the curls up for 5 to 10 minutes while they cool.
- Finish with a light mist of flexible-hold spray, not a stiff shell.
Tiny tip: put one drop of hair oil on your palms and smooth only the ends. Roots need lift; ends need shine.
2. Half-Up Twisted Crown

Want your hair off your face without losing the softness around it? A half-up twisted crown does exactly that, and it feels a little more graceful than a plain clip.
This style works especially well if your hair has a slight wave or some natural bend. You take two sections from each temple, twist them back, and pin them where they meet. The lower half stays loose, which keeps the whole thing from getting too stiff or too bridal. That balance is the charm.
What makes it hold
A dry texture spray at the crown gives the twists something to grip. If your hair is fine, tease the roots very lightly before you twist. Not a nest. Just enough lift to keep the pins from sliding.
- Use two bobby pins per side if your hair is thick.
- Cross the pins in an X for better grip.
- Leave a few face-framing pieces out before you pin.
- If the twists look too neat, tug them gently with your fingertips.
Short hair can do this too, as long as the top layers reach behind the ears. And if you wear earrings, this style does a nice job of letting them show without turning the whole look severe.
3. Low Chignon with Face-Framing Pieces
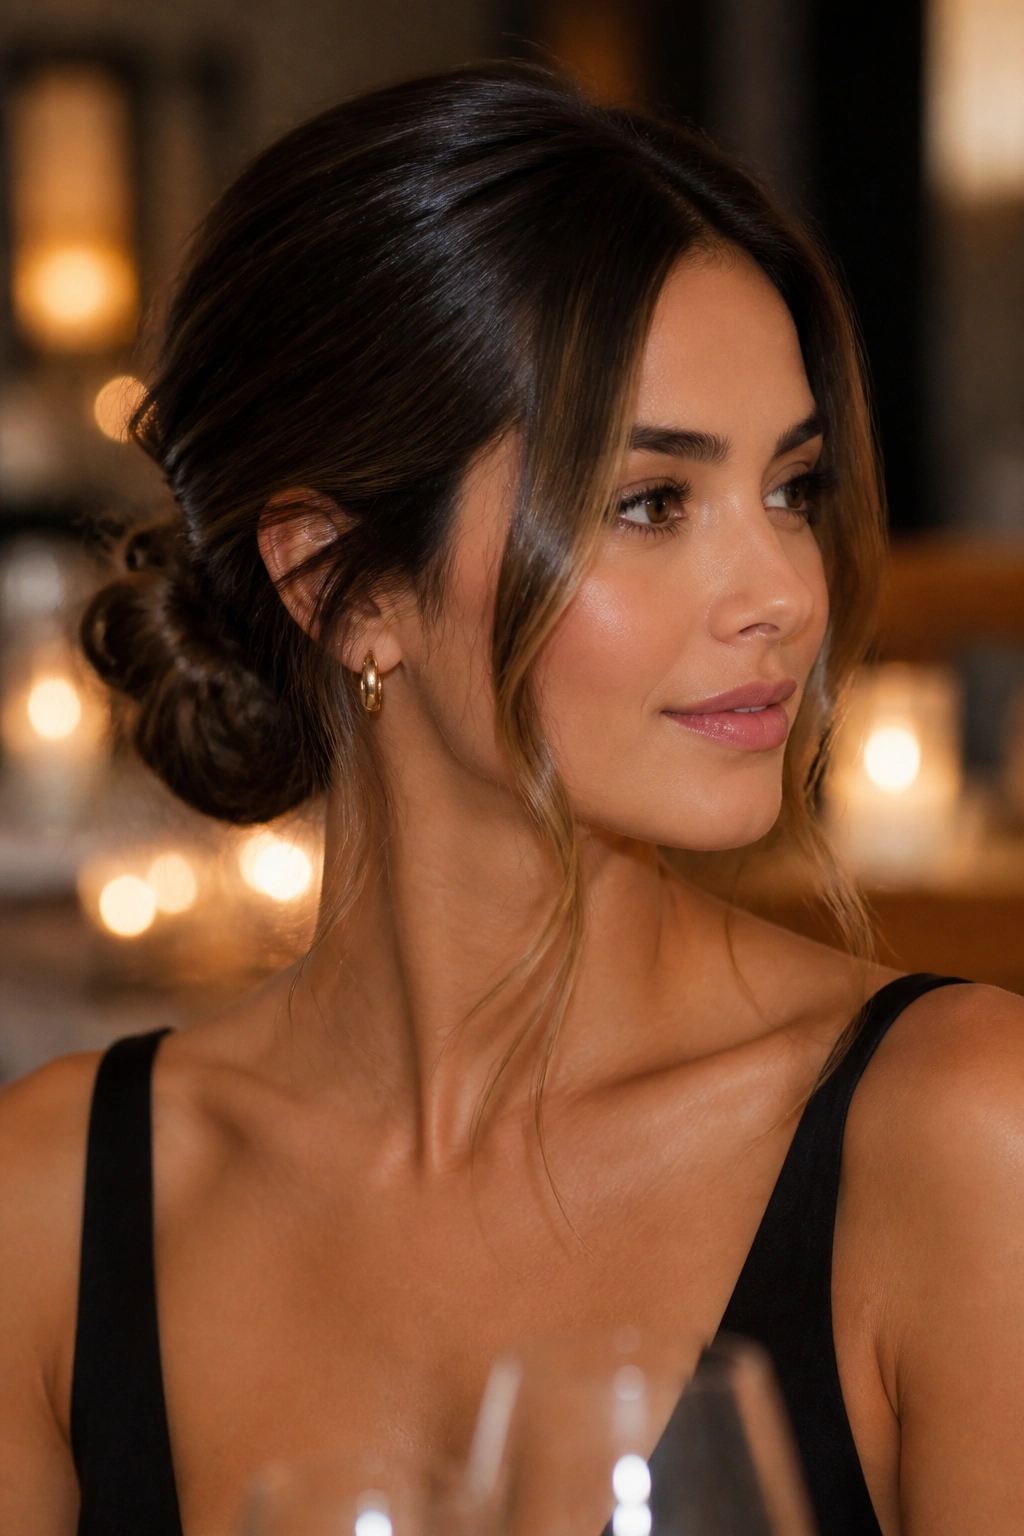
Picture a tucked nape, a soft jawline, and two loose pieces skimming the cheeks. That’s the sweet spot for a low chignon. It feels grown-up, but not cold.
The trick is to keep the bun low and slightly imperfect. A chignon pulled too tight can look formal in the wrong way. A looser one, built at the base of the neck, reads softer and more romantic. I like this style when the outfit already has structure — a sharp collar, a fitted dress, or anything with a clean neckline.
The part people often miss
Leave two thin sections out before you gather the rest of the hair. Curl those pieces away from the face with a 1-inch iron, then pin the bun underneath them so they fall naturally over the sides. That tiny move changes the whole shape.
If your hair slips, mist the roots with texture spray first. If it’s very silky, braid the tail once before wrapping it into the bun. It gives the pins something to catch.
Watch out for this: a chignon needs tension at the base, but not at the temples. If the sides feel tight, start over.
4. Polished Blowout with Bouncy Ends
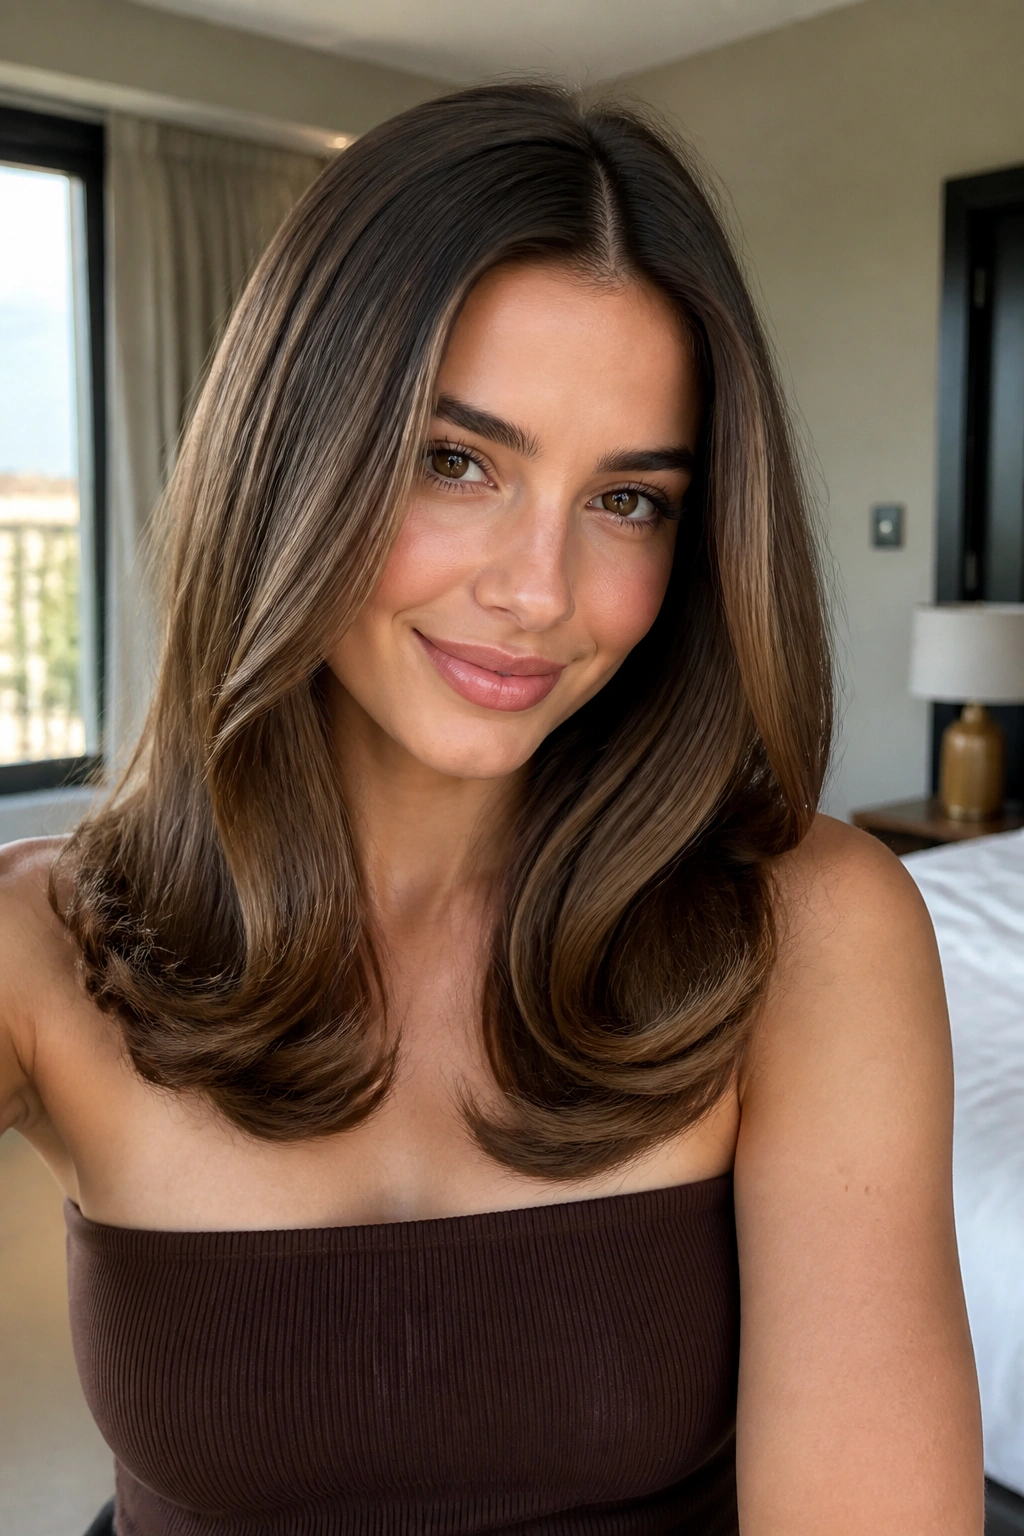
Not every romantic hairstyle needs pins or braids. A polished blowout can look just as date-ready, especially when the ends turn under or flick out with a little bounce.
This style is one of my favorites for medium-length hair because it feels clean without being flat. The shine does a lot of the work. So does the movement. Hair that swings a little as you walk always looks alive, and that matters more than people think.
Use a round brush while blow-drying, working in sections no wider than the brush itself. If you have a blow-dryer nozzle, use it. It keeps the air directed and cuts down on frizz. For extra lift at the crown, roll the top section into a Velcro roller while your makeup or outfit is finishing up.
The ends can curve in for a softer look, or away from the face for more shape. Both work. What you want to avoid is a stiff, over-brushed finish that looks overdone. A few fingers through the roots after cooling is usually enough.
5. Braided Halo
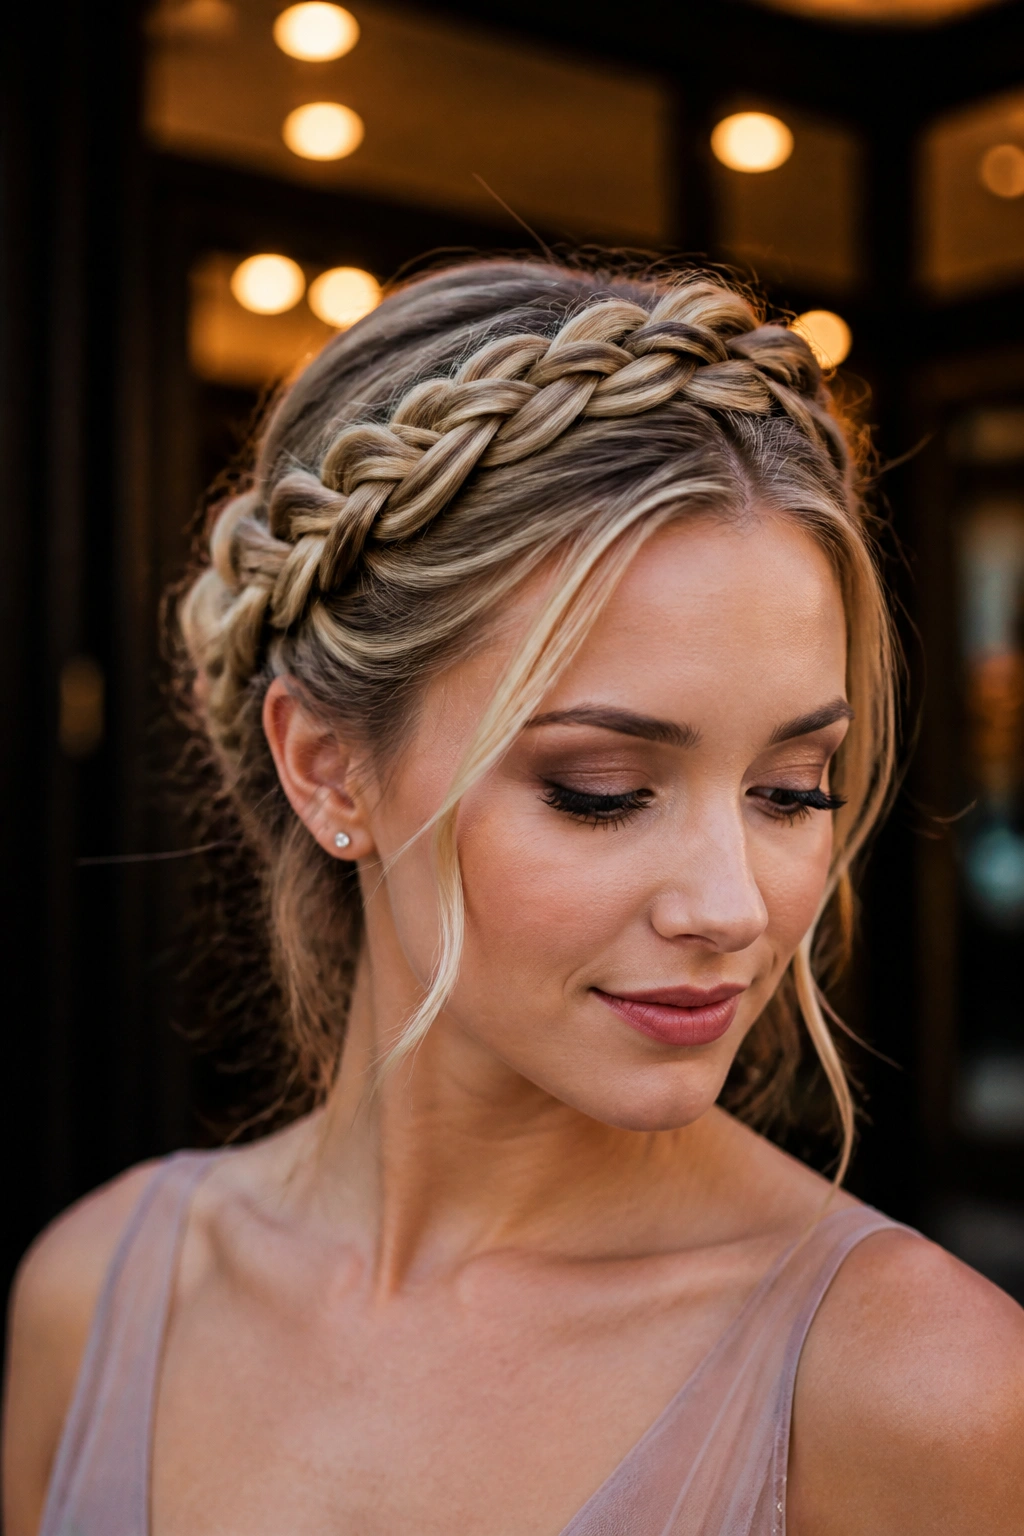
Braids can look soft when they sit low and a little loose. A braided halo proves it.
This style wraps a braid around the head like a crown, but it should never feel severe. The braid itself can be a regular three-strand braid, a Dutch braid, or even two braids pinned into a circle if your hair is shorter. I like it most on second-day hair because the extra grip makes the braid easier to shape.
How to keep it from going stiff
Once the braid is in place, tug the outer edges gently. That little pull fattens the braid and softens the line. Don’t yank. You want texture, not pancake-flat strands.
- Work with dry or lightly textured hair.
- Keep the braid low around the hairline.
- Pin every few inches, not just at the end.
- Leave one or two tiny pieces near the ears if you want a less strict finish.
A braided halo pairs well with simple jewelry and a neckline that doesn’t compete with the hair. It’s the kind of style that looks like you planned ahead without looking like you tried too hard. Which is rare. And useful.
6. Sleek Low Ponytail for a Romantic Date Night

Can a ponytail feel romantic? Absolutely — if the lines are clean and the base is wrapped well.
The polished low ponytail is one of those styles people underestimate because it is so familiar. Put it at the nape of the neck, smooth the top with a little cream or serum, and curl the tail into a soft bend. That last step matters. A straight tail can feel plain. A waved or curled tail feels intentional.
Make the base look finished
Take a 1-inch strand from underneath the ponytail, wrap it around the elastic, and pin the end underneath. It hides the band and gives the style a cleaner look. If your hair is layered, use a tiny amount of pomade on the top layer so the shorter pieces stay put.
- Center parts look modern and clean.
- Deep side parts feel softer.
- A satin ribbon can replace the wrap if you want a dressier finish.
- Thick hair may need two elastics stacked for support.
This is the style I’d pick when the outfit already has drama. Let the hair stay calm. That contrast is part of the appeal.
7. Loose French Twist
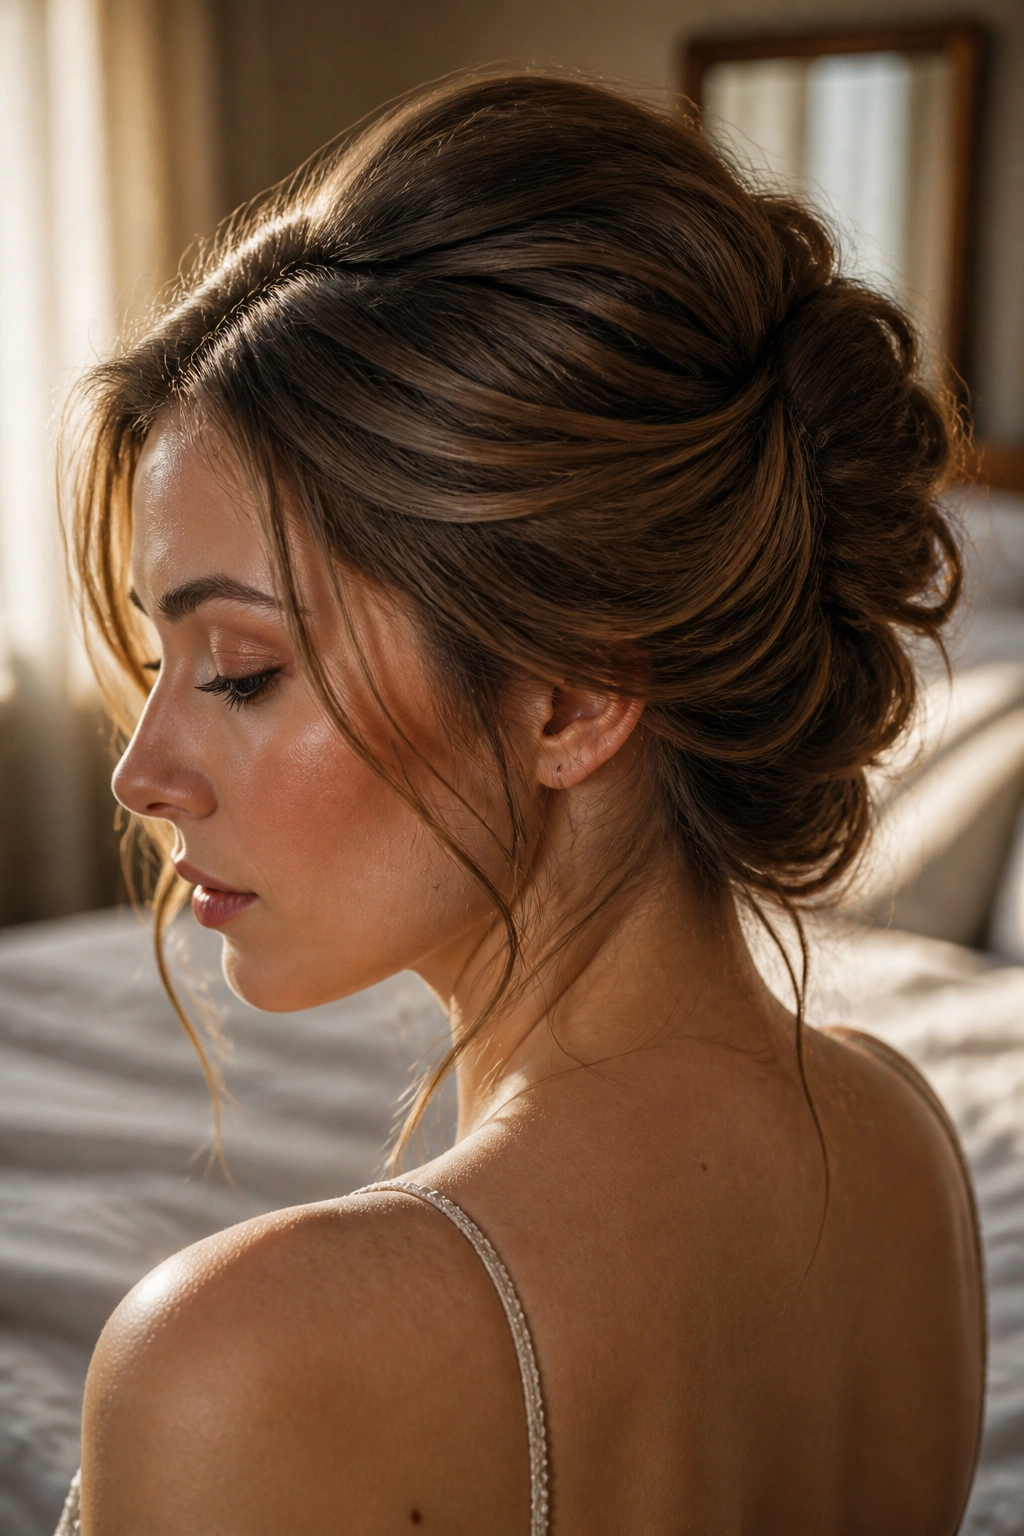
If you want your earrings to do some of the talking, this is the one.
A loose French twist has a built-in elegance, but it should not be pressed into place like a helmet. The best versions have a little volume at the crown and a soft fold through the back, with a few pieces escaping near the temples. That looseness is what keeps it date-night friendly.
Where most people overdo it
They pin the twist too tight and smooth away every trace of movement. Don’t. Leave a bit of air at the top, twist the hair upward from the nape, and secure it with long pins placed vertically. The shape should feel held, not nailed down.
For finer hair, backcomb the crown lightly before twisting. For thicker hair, split the hair into two sections and twist each one toward the center before pinning. It sounds fussy. It isn’t, once you’ve done it once or twice.
A French twist looks especially good with a dress that opens at the neck or shoulders. It clears the face, shows off the profile, and gives the whole look a slightly sharper edge without losing softness.
8. Waterfall Braid on Loose Hair
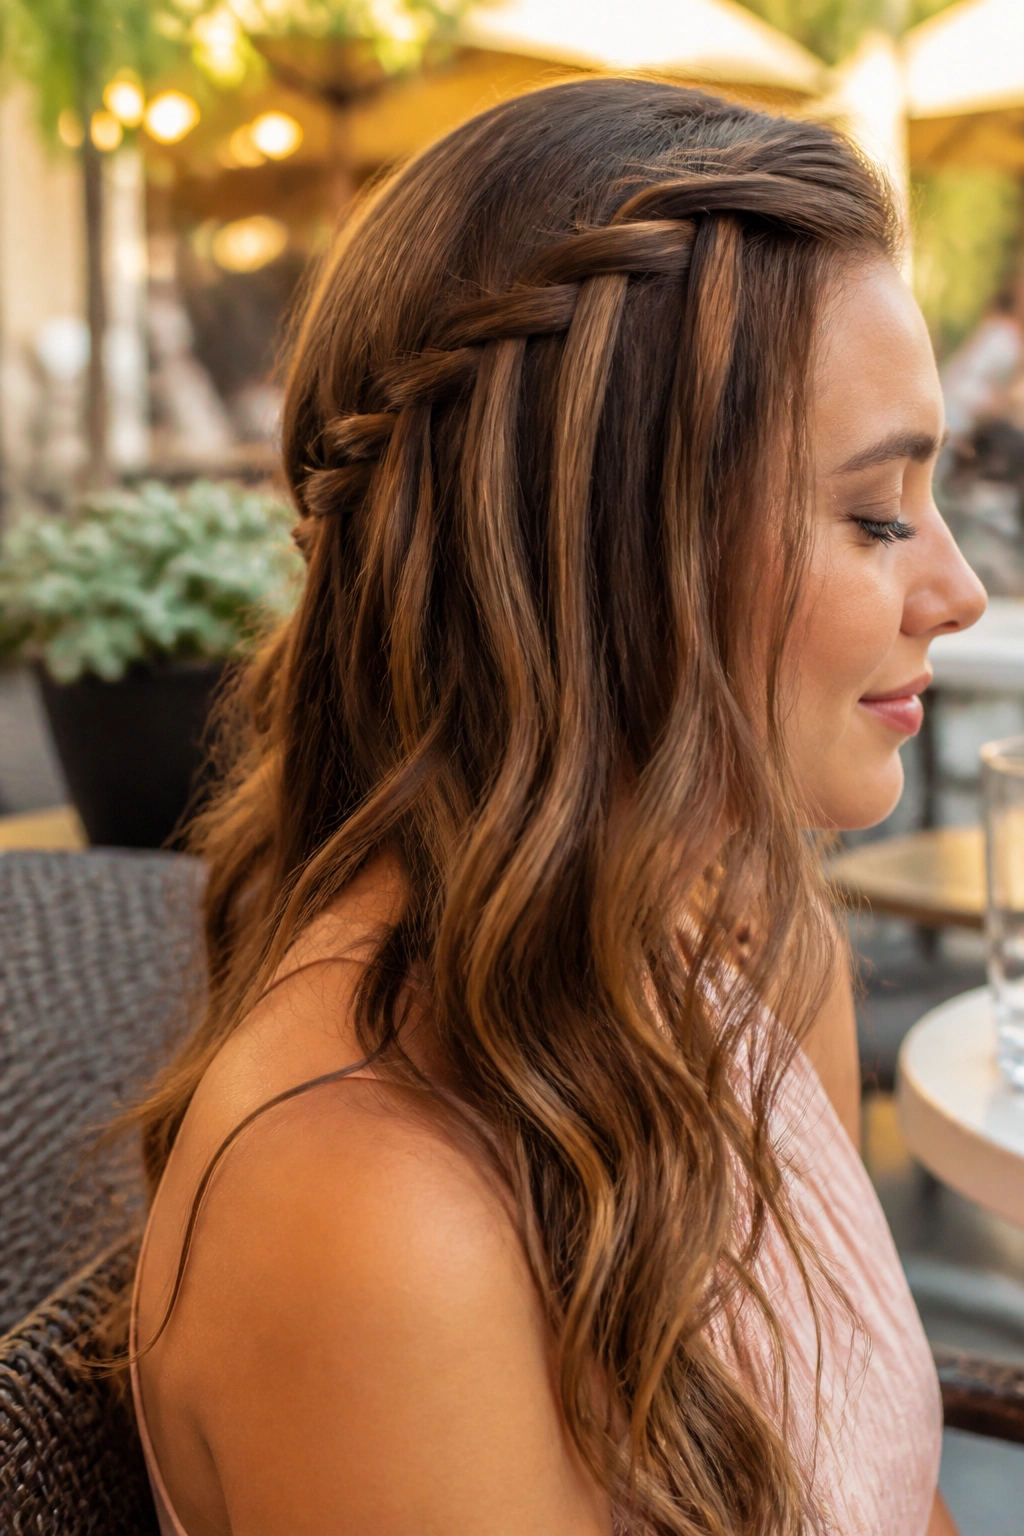
Waterfall braids look intricate, but the rhythm is simple once your hands catch on.
Start near one temple and braid along the hairline, but let the top strand drop each time you cross it through. Pick up a new section from above to replace it. That creates the “waterfall” effect — little pieces falling through the braid while the rest of the hair stays loose.
This style works best on wavy hair or hair that has already been lightly curled. Straight hair can look a little flat under it unless you add a few bends first. I’d keep the braid on one side rather than wrapping it all the way around unless you have a lot of time and patience.
How to get the most from it
Use small, even sections. If the pieces are too thick, the braid gets clumsy fast. If your hair layers are short, set the loose lengths with a light spray first so the style doesn’t unravel by dinner.
- Braid on the heavier side of your part.
- Secure the end behind the ear with two pins.
- Curl the hanging hair in the same direction for a softer finish.
- Pull one or two strands free around the face.
It’s a fiddly style. Still worth it.
9. Ribbon-Tied Ponytail

A narrow satin ribbon changes the mood fast. That’s the whole trick.
Tie it around a low ponytail, a half pony, or even the base of a braid, and the hair starts to feel softer and less casual. I like ribbons that are about 3/8 inch to 1 inch wide. Wider ribbons can look costume-like unless the outfit is very minimal. Narrow ones feel cleaner.
The ribbon works because it interrupts the hard line of an elastic. It also adds movement. Every little tail of the ribbon shifts when you turn your head, and that detail is more interesting than a plain band.
If your hair is straight, leave the ponytail sleek and let the ribbon do the softening. If your hair is wavy, tie the ribbon after the hair has been lightly curled so the texture and the fabric play off each other. Both versions work. The key is to keep the rest of the styling simple.
One useful habit: tie the ribbon under the ponytail first, then bring the ends up and knot them over the top. It sits flatter and stays put longer.
10. Messy Bun with Tendrils

Messy does not mean random. It means the looseness is planned.
A good romantic messy bun sits low or slightly mid-height, with a few tendrils left around the face and ears. The bun itself should look soft and a little airy, not like you twisted the hair up in a hurry and hoped for the best. That difference is huge.
This is one of those styles that works better when the hair has a little grit. If your hair is freshly washed and slippery, use dry shampoo or texture spray first. Gather the hair loosely, twist it once or twice, and pin it in place. Then pull out two thin pieces near the front and curl them away from the face.
The part that keeps it romantic
Leave the bun slightly imperfect. A few loose loops are good. A lot of loose loops can make it look unfinished. You want shape at the nape and softness around the edges.
- Pin through the base, not just the outer loop.
- Use 3 to 5 bobby pins, depending on thickness.
- Curl the tendrils after the bun is secured.
- Let the crown stay a little lifted.
This style is forgiving, which is part of why people keep returning to it. It can look casual or dressed up depending on the earrings, the neckline, and how neat you make the front.
11. Side-Swept Hollywood Waves
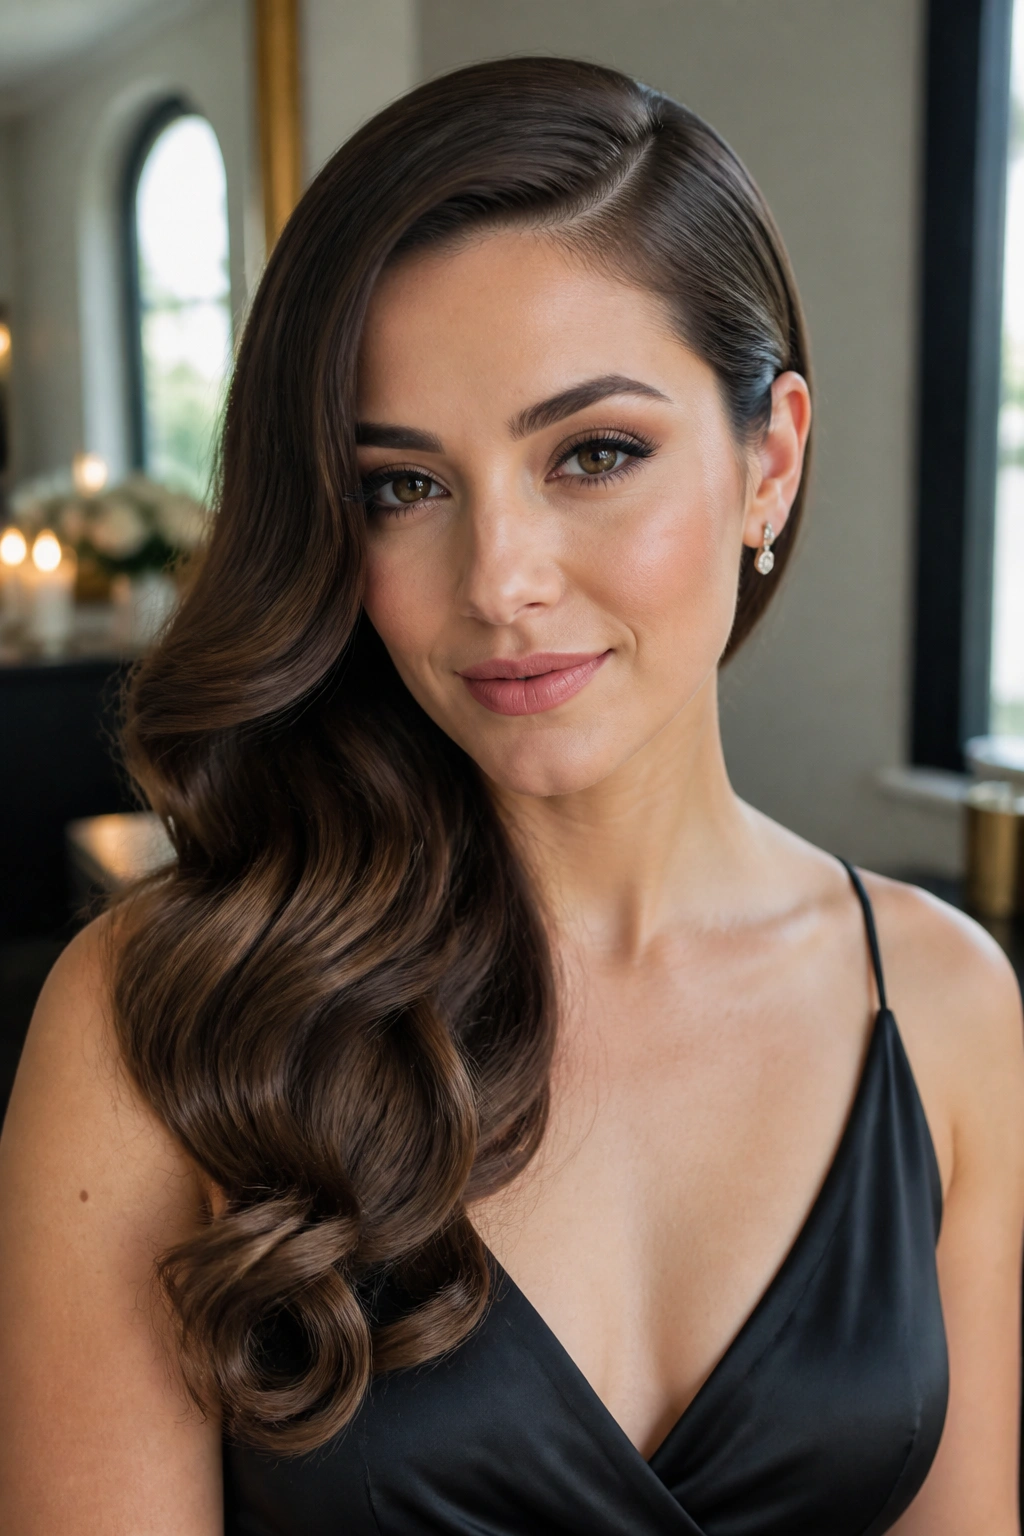
Want something that feels more dressed up without going full red-carpet? Side-swept Hollywood waves hit that middle ground nicely.
The style starts with a deep side part and large, even waves shaped in the same direction. A 1.5-inch curling iron or hot roller gives the smoothest bend, especially if your hair is long. After the curls cool, brush them out until they form one long, glossy wave line. Then sweep one side behind the ear and secure it with a hidden pin.
What makes the shape hold
The curl direction matters. If you alternate too much, the wave loses that long, clean sweep. Keep the curls consistent, then brush them only after they’ve cooled fully. That cooling time is not optional if you want the style to last through dinner.
- Use a heat protectant before every section.
- Curl away from the face on both sides.
- Clip the front section while it sets.
- Finish with a light mist of shine spray, not a wet-looking gloss.
This style loves shoulder-baring necklines. It also loves earrings, which is convenient. There’s a little drama in it, but the kind that still feels polished when you catch yourself in a mirror.
12. Bubble Ponytail

If your hair is long and you want drama with less fuss than a braid, the bubble ponytail earns its place.
Start with a low or mid ponytail, then add clear elastics every 2 to 3 inches down the length. Gently pull each section outward to create the bubble shape. If your hair is thick, the bubbles can stay round on their own. If it’s fine, a little backcombing inside each section helps.
This style reads playful, but it can look quite chic when the top is smooth and the bubbles are even. A wrap of hair around the first elastic makes the whole thing look more finished. You can also thread a ribbon through the base if you want a softer touch.
The ponytail itself should not be too tight. That’s the mistake that makes the style feel young in the wrong way. Keep the crown smooth, leave a little softness near the ears, and let the bubbles do the work.
It’s a good choice for straight hair, but curly hair can wear it too. The texture gives the bubbles more body.
13. Knotted Half-Up Style
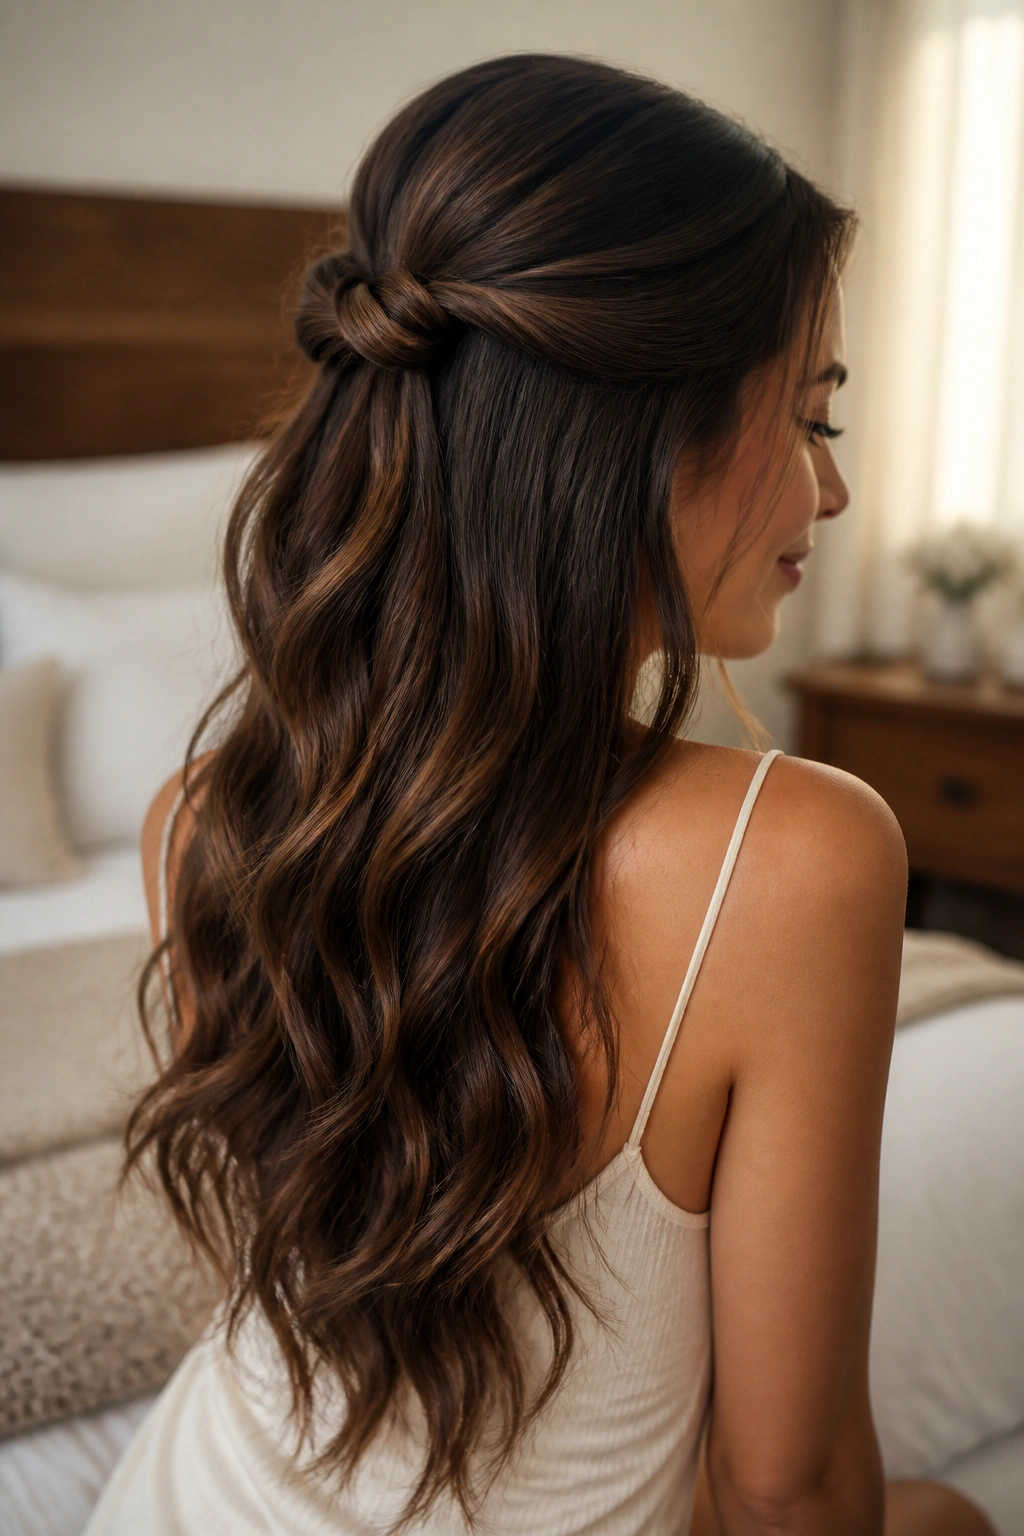
A knot can look prettier than a braid when the hair has shine. That surprises people.
Take two front sections from just above the temples, tie them once or twice at the back of the crown, and pin the knot underneath. Leave the rest of the hair down in waves or loose bends. The shape feels simple, but it has enough detail to read as special.
This style is especially useful if your hair is layered and braids fall apart too fast. A knot gives you a clear focal point without relying on perfect sectioning. It also works well on medium-length hair where a full updo would feel too much.
A small trick helps here: spray the two sections lightly before you tie them. Not drenched. Just enough grip so they hold shape while you work.
If the knot feels too flat, slide the end of a tail comb under it and lift the center slightly. That tiny puff keeps it from looking pressed down. And if you want a softer feel, leave one slim piece of hair out on each side of the face.
14. Dutch Braid into Low Bun

Need a style that can handle dinner, dessert, and a long walk after? A Dutch braid into a low bun stays put without looking stiff.
The braid starts at the hairline and runs down the center or slightly off-center of the head. Because a Dutch braid sits on top of the hair instead of sinking into it, the texture shows clearly. Once you reach the nape, twist the rest into a bun and pin it low.
Where to start the braid
Begin with hair that has a little texture, not hair that’s slippery and freshly conditioned. If your strands are smooth, a dry shampoo or texture spray gives the braid something to hold. That first inch matters most; if it slips, the whole style loosens faster than you want.
- Keep the braid snug near the scalp.
- Loosen the bun slightly after pinning.
- Pull the braid edges apart a little for softness.
- Use U-pins for thick hair if bobby pins keep popping out.
This is one of the more secure styles on the list, which is nice when you do not want to think about your hair after you leave the house. It’s practical. Still romantic. Those two things can absolutely live together.
15. Clipped-Back Curls

Sometimes the right answer is one good clip.
Clipped-back curls are ideal when you want a style that looks planned but still takes almost no time. Curl the hair loosely, then sweep one side back and secure it with a jeweled clip, a pearl barrette, or even two smaller clips stacked near the temple. The rest of the curls stay down and loose.
The placement matters more than the clip itself. Sit the clip about 1 to 2 inches above the ear, where it can hold the hair away from the face without pulling the whole style backward. If you place it too high, it starts to feel awkward. Too low, and it disappears into the hair.
This is a good move for bobs, lobs, and shorter layers that won’t stay in a full updo. It also works on day-two curls that have already lost a little bounce. A single clip can redirect the whole shape and make the haircut feel intentional again.
Keep the rest of the look simple. One strong accessory beats three fighting for attention.
16. Vintage Pin Curls

This style looks complicated because the finish is neat. The setup is not as wild as it seems.
Section the hair into 1-inch pieces, curl each one, then roll the curl flat against your head and pin it in place while it cools. Once the whole head has set, unpin and brush lightly into soft, uniform waves. The result feels vintage without reading as costume if you keep the makeup and outfit modern.
The cool-down matters
If you take the pins out too soon, the shape falls before it settles. Give the curls time to cool fully. That is the part people rush, and it’s why the style collapses halfway through the night.
- Use setting lotion or mousse on damp hair.
- Curl in the same direction for a cleaner wave.
- Pin each curl flat, not piled on top.
- Brush gently with a soft brush, not a paddle brush.
Pin curls do best on hair that can hold shape, but they work on most lengths if the sections are small enough. This is a more advanced style, sure. It also has one of the nicest finishes on the whole list when you want something with a little old-fashioned glow.
17. Textured Lob with Tucked Ends
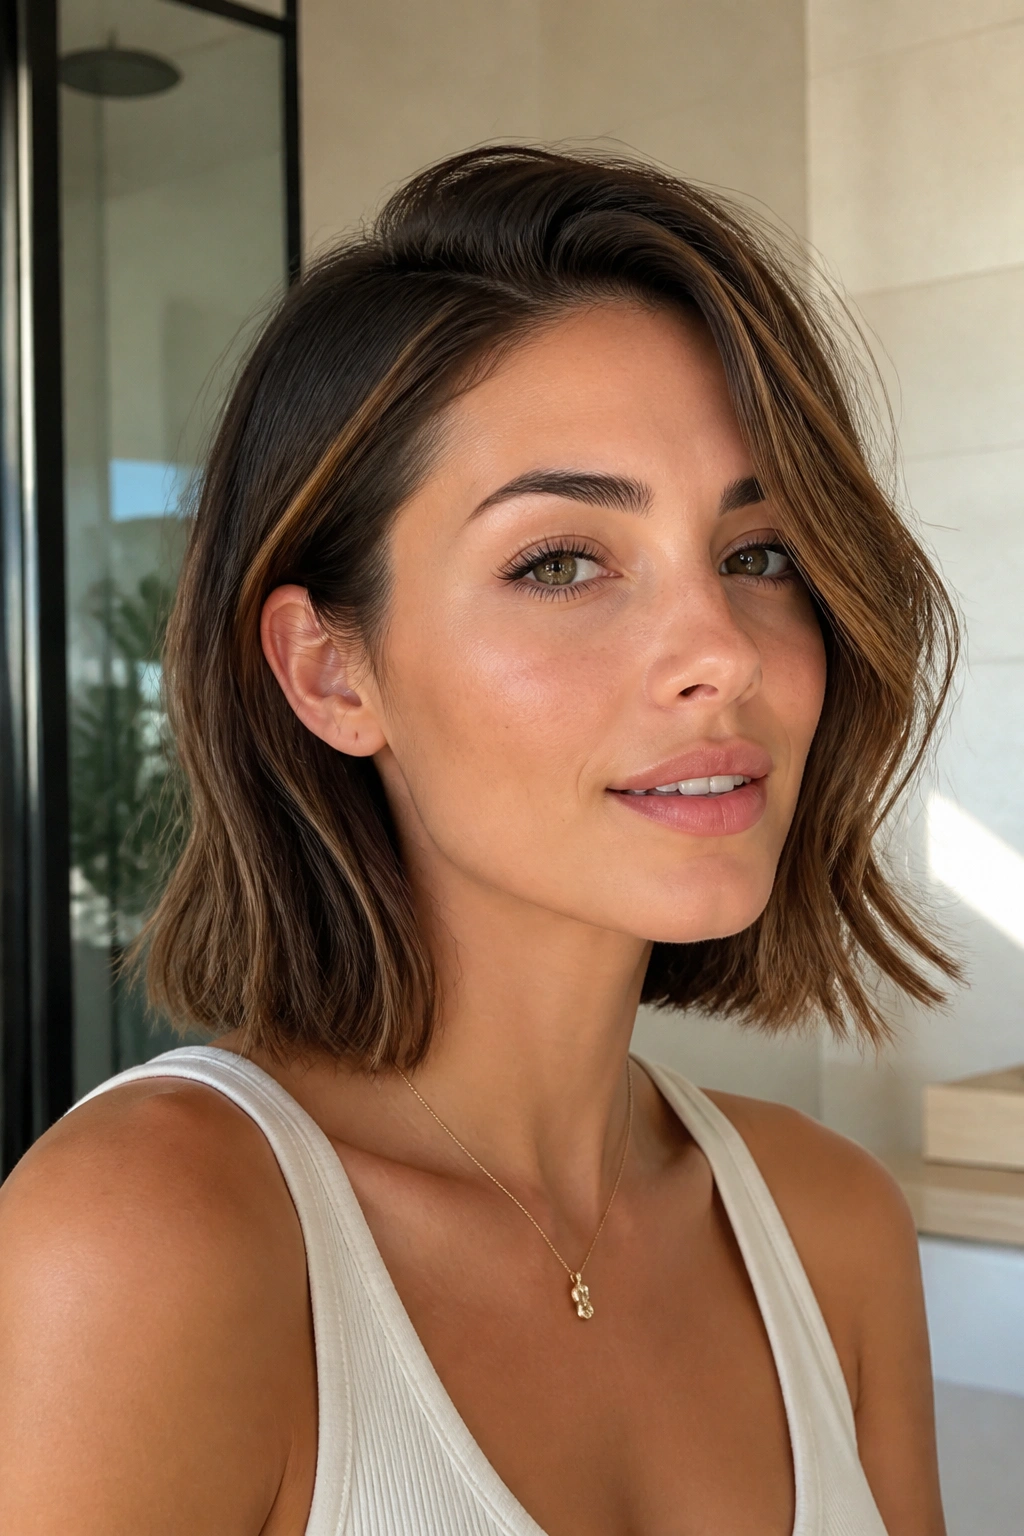
Short hair can be just as romantic as long hair — it just needs shape.
A textured lob with tucked ends keeps the cut looking soft instead of blunt. Use a flat iron or curling wand to make a few loose bends through the mid-lengths, then tuck one side behind the ear. A tiny bit of paste on the ends keeps them from flipping every which way.
This style is useful because it works with the haircut you already have. You do not need length to make it feel special. You need direction. A few bends toward the face, one tucked side, and some lift at the crown can do more than a complicated updo on the wrong cut.
If your lob is layered, alternate the direction of a few pieces so the texture looks natural. Not all of them. A little variation keeps it from looking too styled. Finish by rubbing a pea-sized amount of cream between your hands and touching only the ends.
It’s a calm style. Clean. And it lets the rest of your look breathe.
18. Soft Low Knot for Date Nights
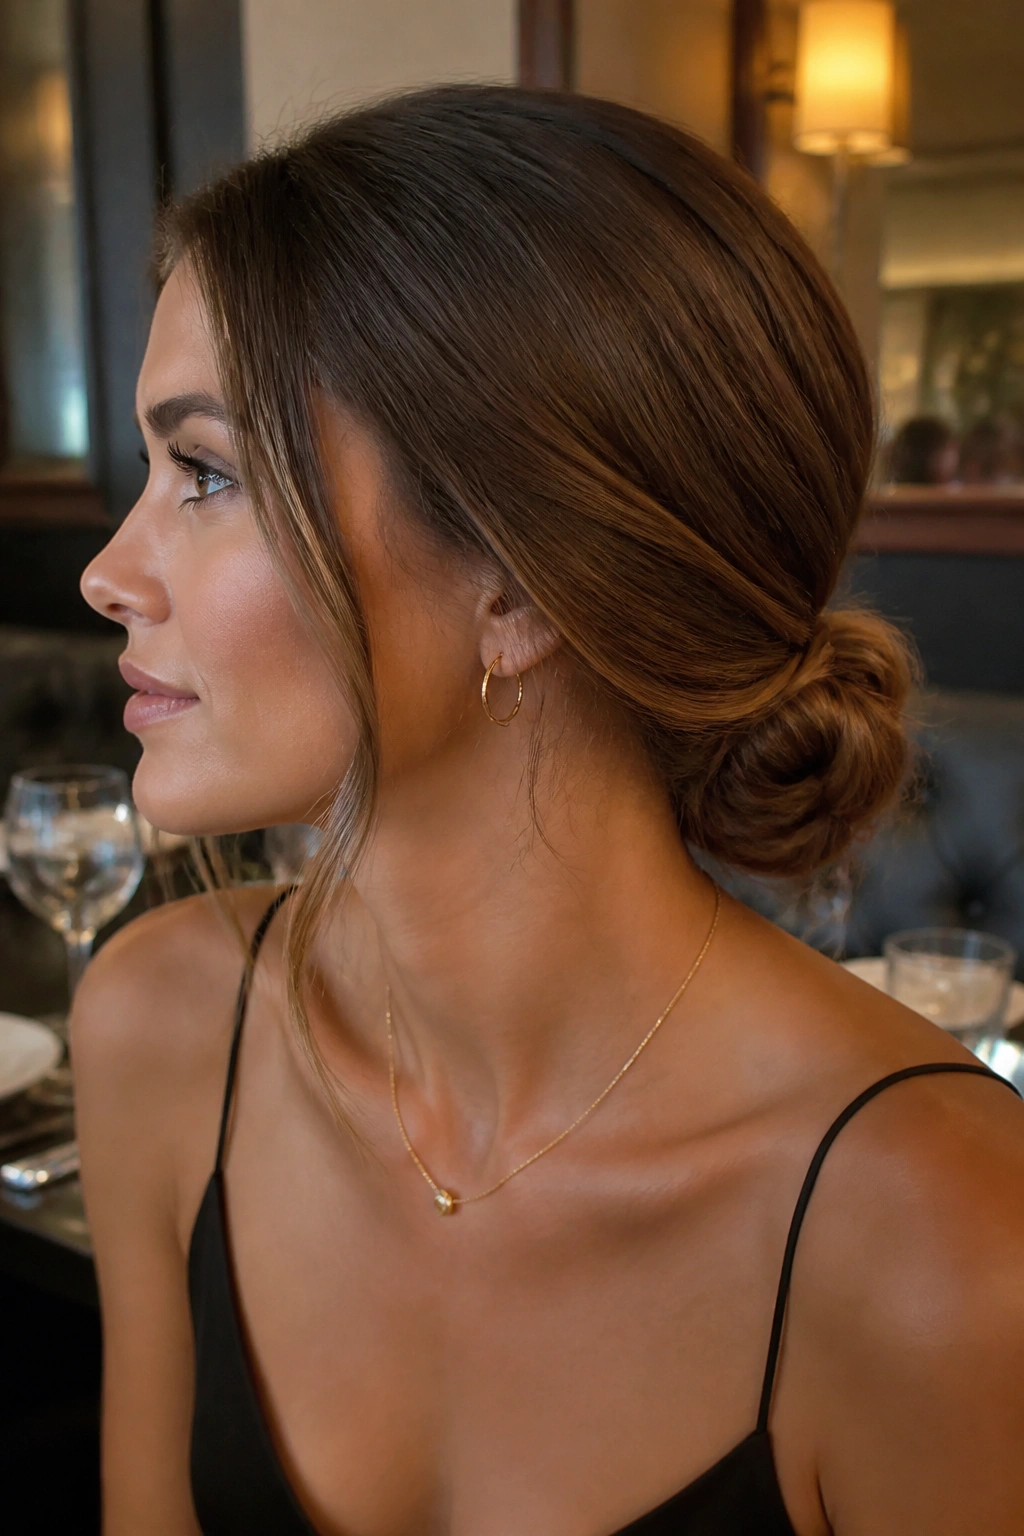
The styles people reach for again and again have one thing in common: they move a little.
A soft low knot sits right in that sweet spot. It gives you the neatness of an updo and the looseness of a ponytail, without leaning too hard in either direction. Twist the hair at the nape, fold it into a knot, and pin it so the shape stays soft. Leave one thin face-framing piece out if your outfit can handle it. If not, keep the front clean and let the knot do the talking.
This is the style I’d choose when I want the least amount of fuss and the most reliable payoff. It works with earrings, bare shoulders, high necklines, and even a more casual dinner outfit that needs a little lift. It also survives better than a loose bun on hair that tends to fall flat.
The final trick is restraint. Use enough pins to hold the knot, then stop. If you keep fussing, you erase the softness that makes it romantic in the first place. Bring a small comb and two spare pins in your bag. That tiny backup plan is worth it, especially if your night stretches longer than you expected.
