



Long hair can look polished in five minutes and messy by lunch. The right plait hairstyles for long hair keep the length visible, calm the bulk, and stop the whole thing from sliding into a limp rope by the time you leave the house.
Plaits also do something a plain ponytail never quite manages: they give long hair shape. A good braid shows off shine, handles layers better than people expect, and keeps the ends from tangling into coat zippers, chair backs, and scarf knots. The catch is grip. Very soft, freshly washed hair can be slippery, so a little mousse, dry shampoo, or texture spray at the roots often helps more than another pass with the brush.
I keep coming back to one boring truth. A braid that hurts is a bad braid. The American Academy of Dermatology has long warned that styles pulling too tightly at the hairline can stress the scalp over time, and that matters here because long hair already brings weight with it. Secure should not mean painful.
Some plaits are neat and clean. Some are loose and romantic. Some are the kind you throw together before work, school, a dinner reservation, or a day when your hair is acting expensive for no reason. Start with the style that fits your hair texture and your patience level, and the rest falls into place fast enough.
1. The Classic Low Three-Strand Plait for Long Hair
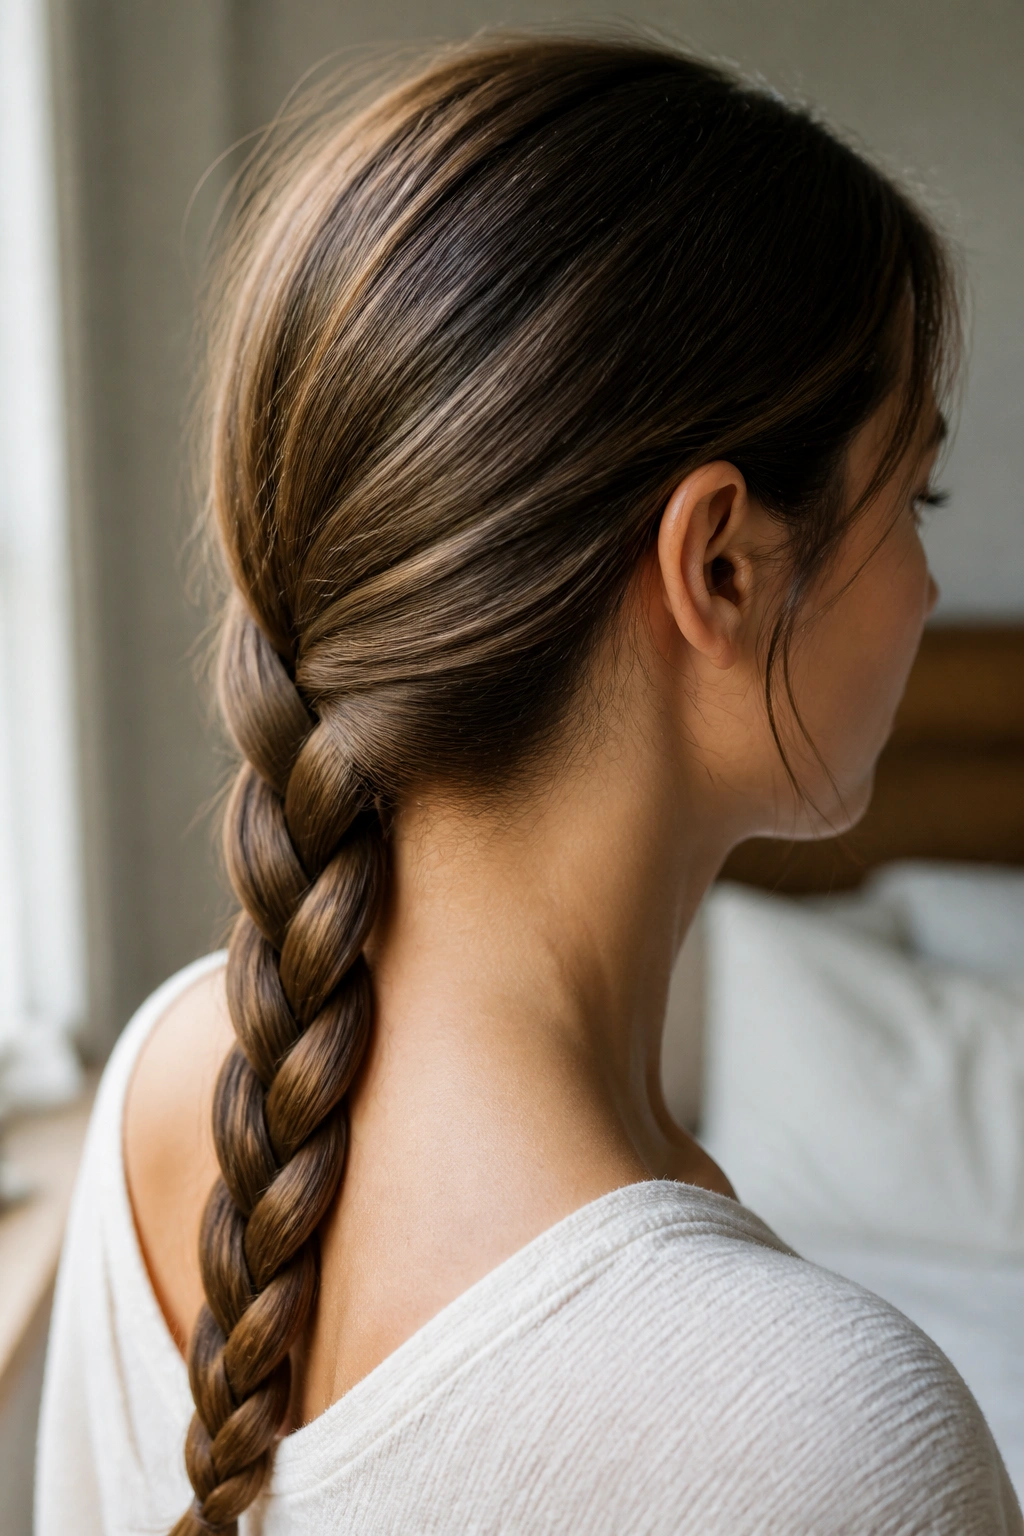
If you want one style that never looks like you tried too hard, this is it.
A classic low plait sits at the nape, keeps long hair under control, and looks tidy even when the rest of your day is not. I like it on hair that’s been brushed smooth but still has a little grip — freshly washed hair can work, but a touch of dry shampoo at the roots makes the braid hold better and look fuller.
Why It Works on Long Hair
The length does most of the work here. Long strands give the braid enough weight to hang neatly instead of puffing out at the crown, and the low placement keeps the style from feeling severe. If your hair has layers, keep the first few crosses snug, then relax your hands a little once the braid is past the shoulders.
A tiny detail matters here: cross each section evenly. If one side gets pulled tighter than the other, the braid twists instead of laying flat, and you can see it the second you turn your head.
- Brush the hair well before you start.
- Tie it at the nape with one snag-free elastic.
- Pull the outer edges slightly wider if you want a thicker look.
- Smooth flyaways with a pea-sized drop of serum on the ends.
Best tip: leave the braid a little looser near the bottom. That keeps it soft instead of stiff.
2. The Side-Swept Plait
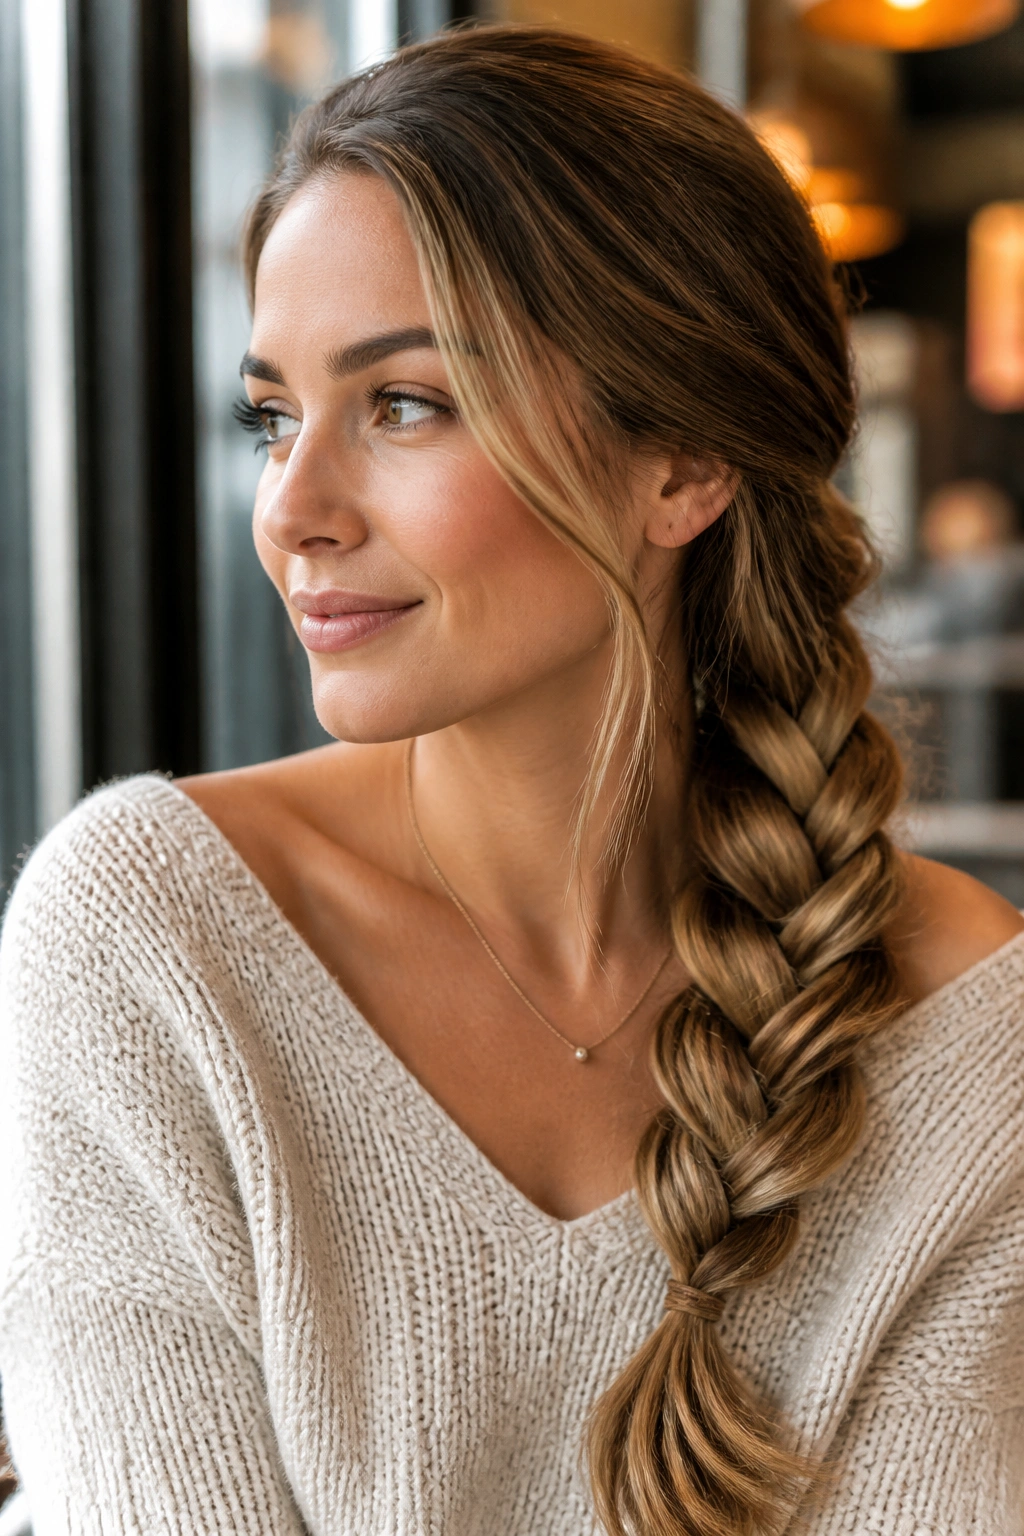
Why does a side-swept plait make long hair look softer right away?
Because it shifts the weight off the center line. Long hair has a lot of visual bulk, and moving the braid over one shoulder breaks that straight-down curtain effect. It also works beautifully with earrings, open necklines, and collars that would otherwise fight with a braid sitting dead center.
Start with a deep side part if you want the finished plait to feel deliberate. Gather the hair just behind the opposite ear, then braid down toward the shoulder you chose. Keep the top section smooth, but do not pin every little bump flat. A tiny bit of shape at the crown gives the style life.
The part that gets overlooked is the finish. Pull the braid gently so the outer edges widen, then tuck the end under if you want a neat finish. If you like a softer look, leave the last 2 to 3 inches loose and let the end swing free.
It is a simple style. That is the point.
3. The French Plait
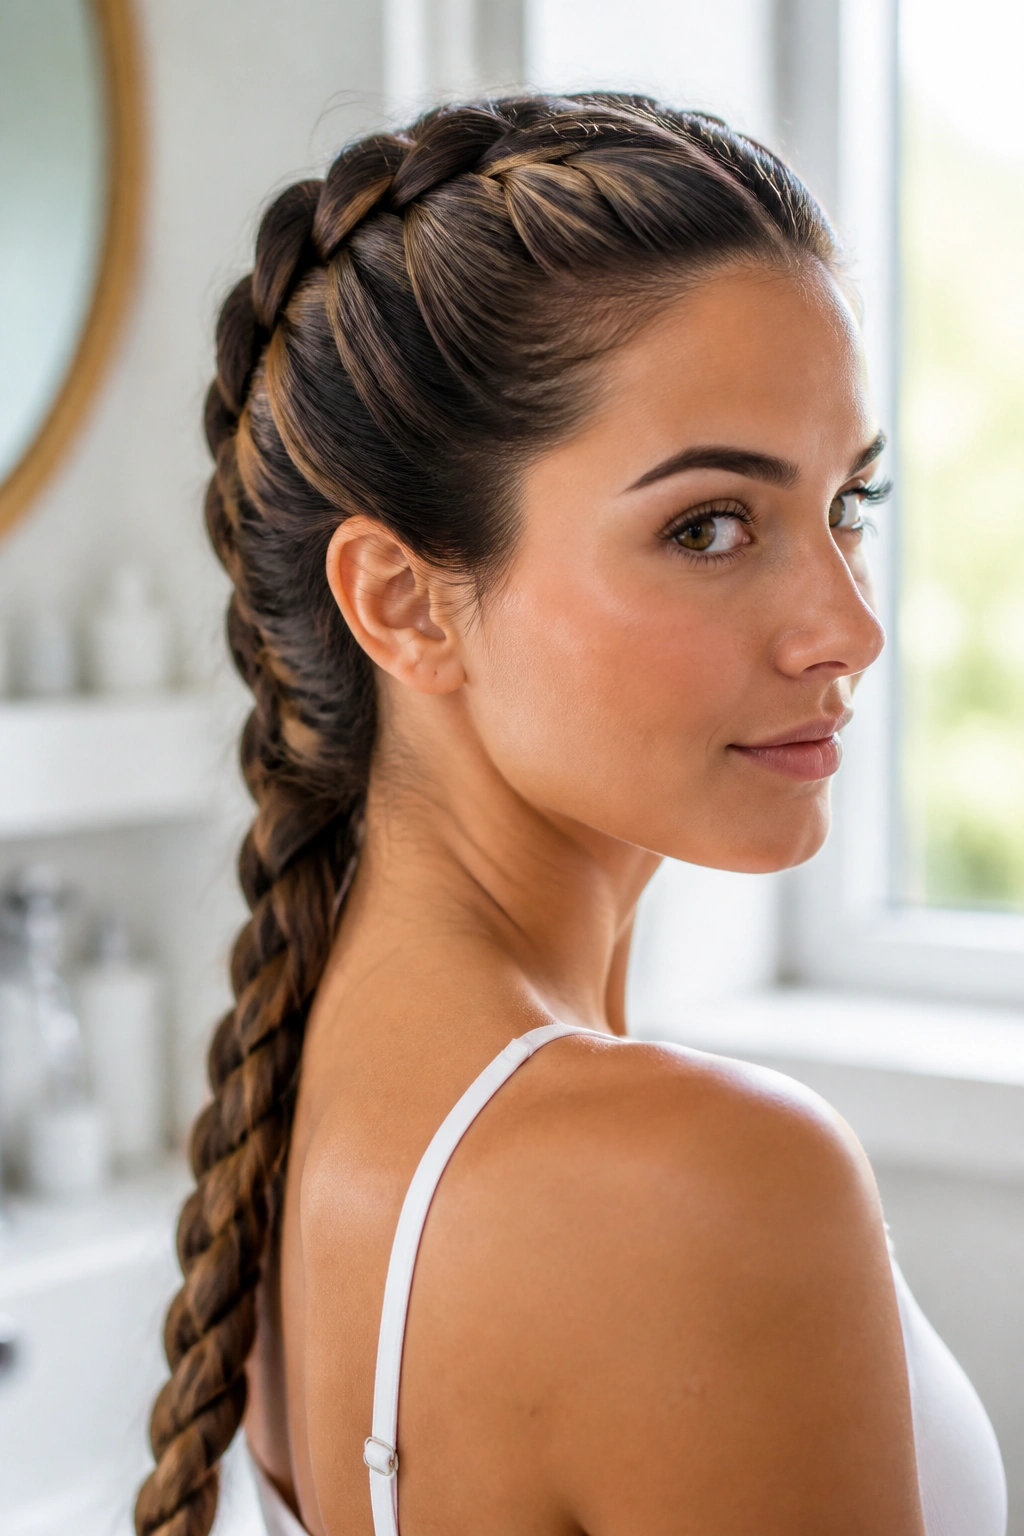
A French plait is the style I reach for when the hairline needs to stay calm and the rest can move.
It starts at the top, feeds in hair as you go, and keeps long strands anchored from the roots down. That makes it much more secure than a plain braid when you know you’ll be bending, walking, or lifting your hair off your neck a dozen times. For long hair, the neat part is not the braid itself — it is the way it controls all that extra length without making the style feel bulky.
How to Wear It
- Begin with dry or slightly damp hair that has a little grip.
- Take three clean sections from the front hairline.
- Add small pieces as you braid backward.
- Keep the first inch snug, but do not yank the scalp.
- Finish the last section as a regular three-strand plait at the nape.
If your hair is very slippery, mist the roots with water and a little mousse before you start. The braid will look cleaner, and your fingers will stop chasing the strands across the head.
I like French plaits because they look more finished than they are. A little practice, and they become almost automatic.
4. The Dutch Plait
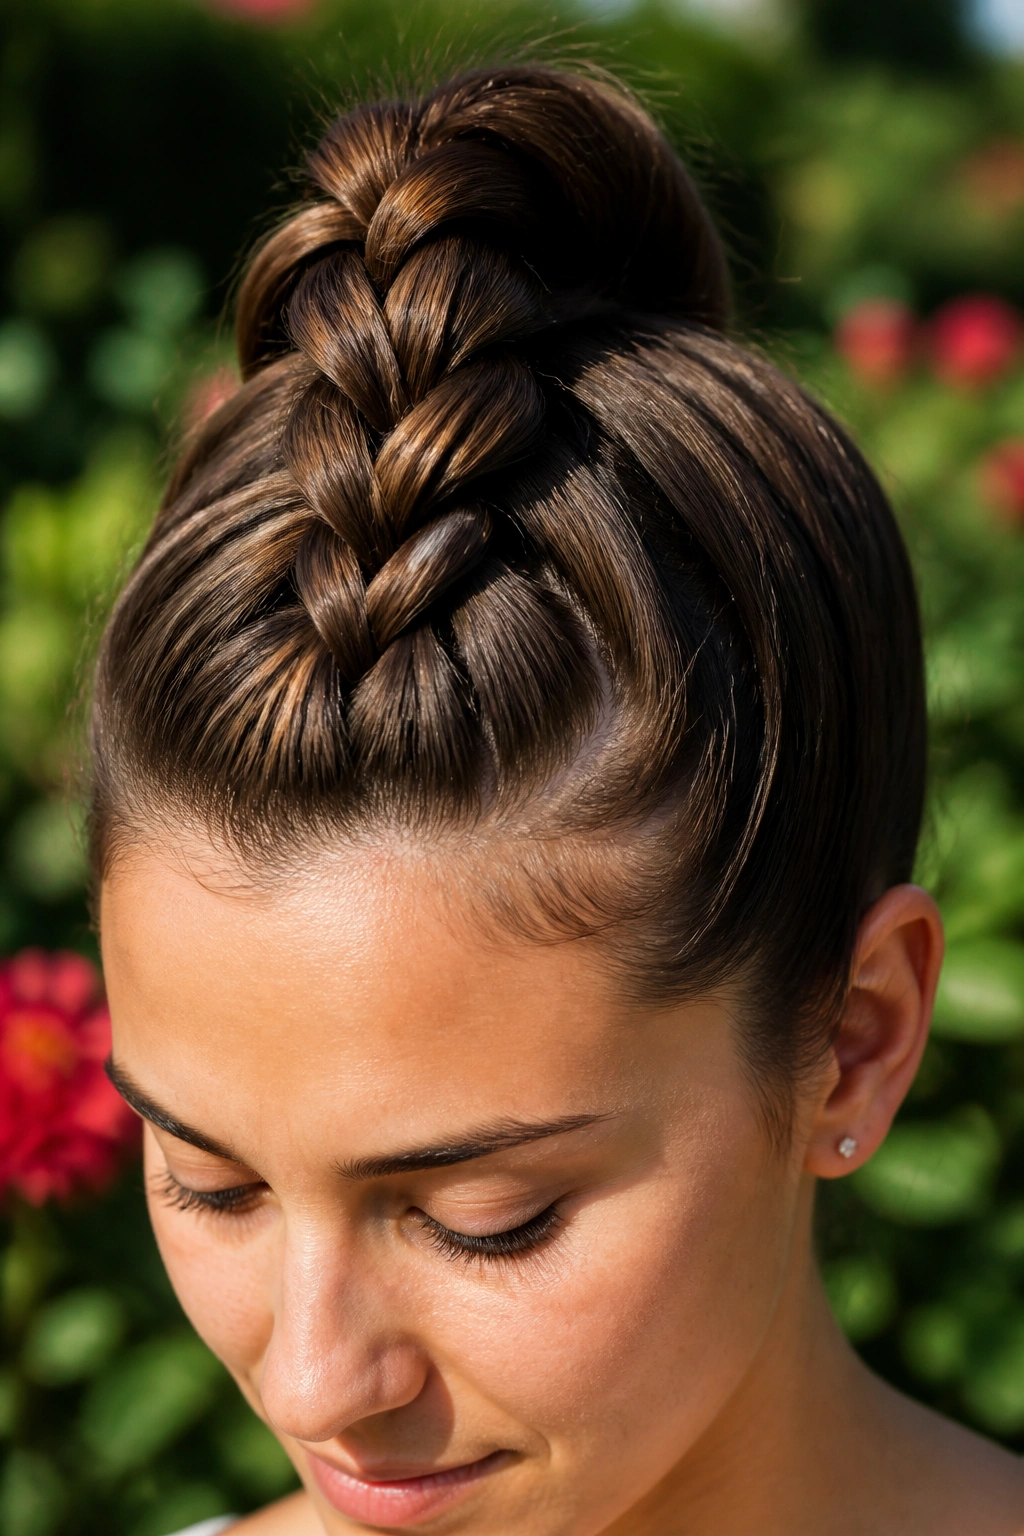
The braid that sits on top of the hair usually looks more polished than the one tucked inside it.
That’s the whole appeal of a Dutch plait. Instead of crossing the strands over one another, you cross them under, which pushes the braid outward and gives it that raised, rope-like shape. On long hair, the effect is strong in a good way. The braid shows clearly from the crown all the way down the back, and the texture is easy to see even from a distance.
What Makes It Different
- The braid stands up from the scalp instead of lying flat.
- The pattern reads well on thick hair and highlighted hair.
- A gentle pull at the edges makes the loops look fuller.
- It works well as a single braid or as part of two braids.
The one mistake people make is over-tightening the first few passes. That kills the shape and can leave the scalp sore. Keep the base controlled, then loosen only the outer edges once the braid is done.
If French braids feel a little too soft for your taste, Dutch is the cleaner, sharper option. It has more visual punch.
5. The Fishtail Plait
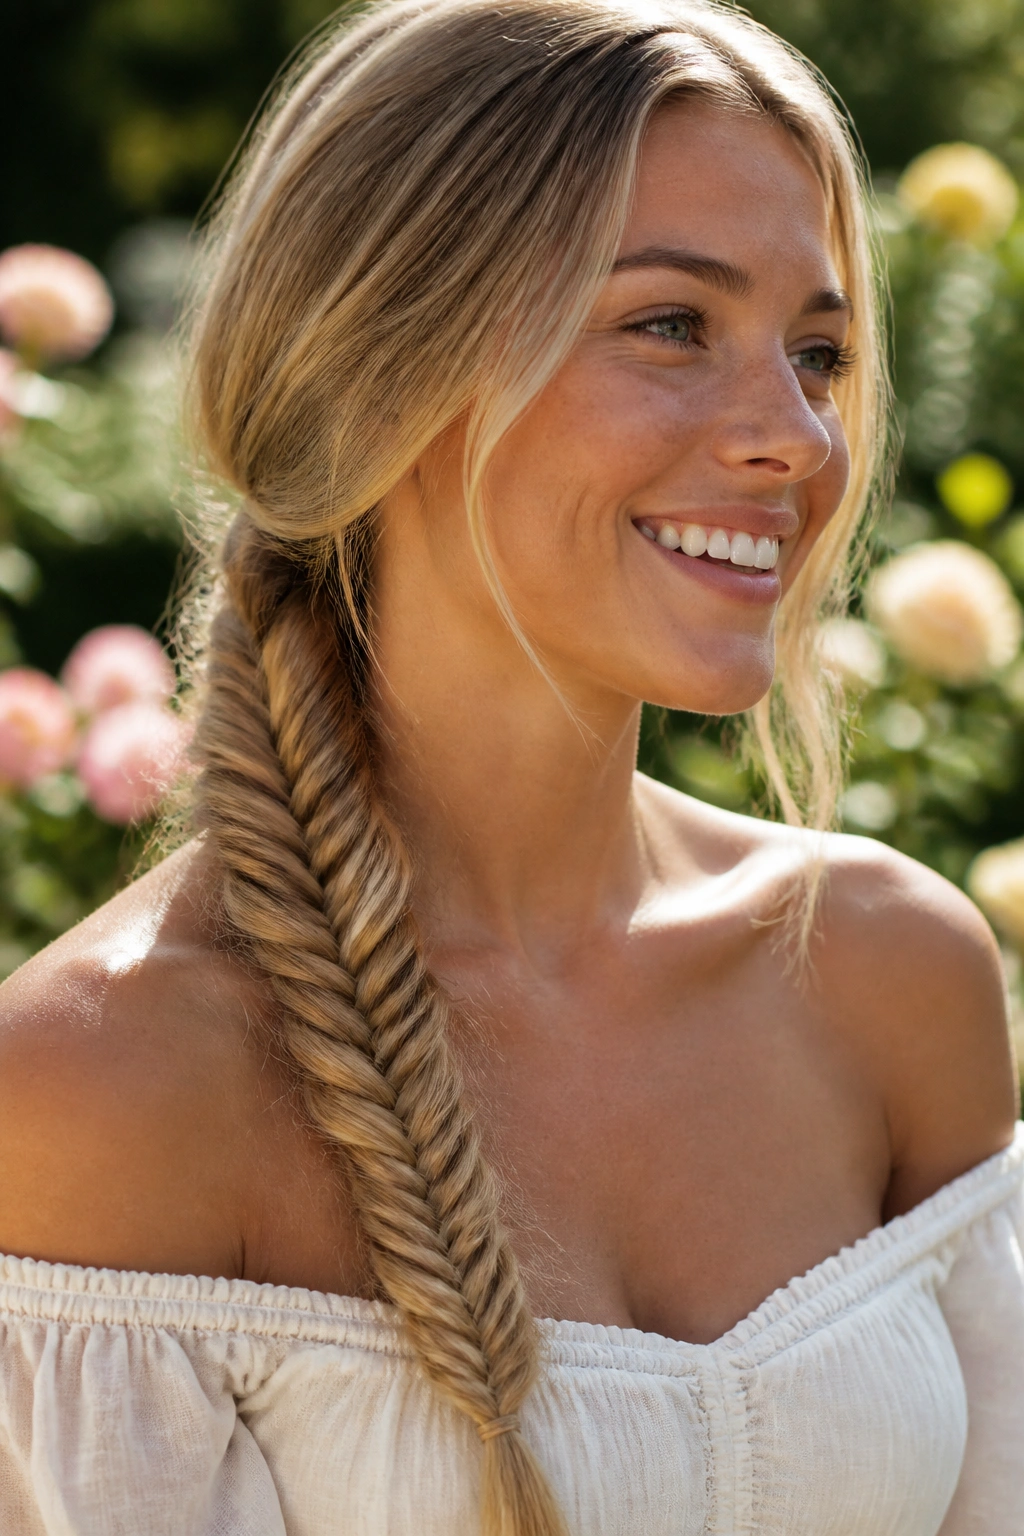
A fishtail plait feels like tiny fishbones laid across the back of the neck.
That’s why it looks so intricate, even though the technique itself is not that complicated. You work with two main sections, then keep taking small pieces from the outside and crossing them into the opposite side. On long hair, the pattern shows up beautifully because there is enough length for the weave to read all the way down. Shorter hair can do it, but long hair gives the braid room to breathe.
Patience helps. A lot.
If your hair is layered or freshly blown out, smooth it first with a light cream or a drop of serum so the smaller pieces do not slip away. I also like a fishtail worn over one shoulder, because the braid has more room to show off instead of disappearing into your back.
The nicest thing about this style is that it looks good a little imperfect. In fact, the faintly uneven version usually feels better than the overly precise one.
6. The Rope Plait
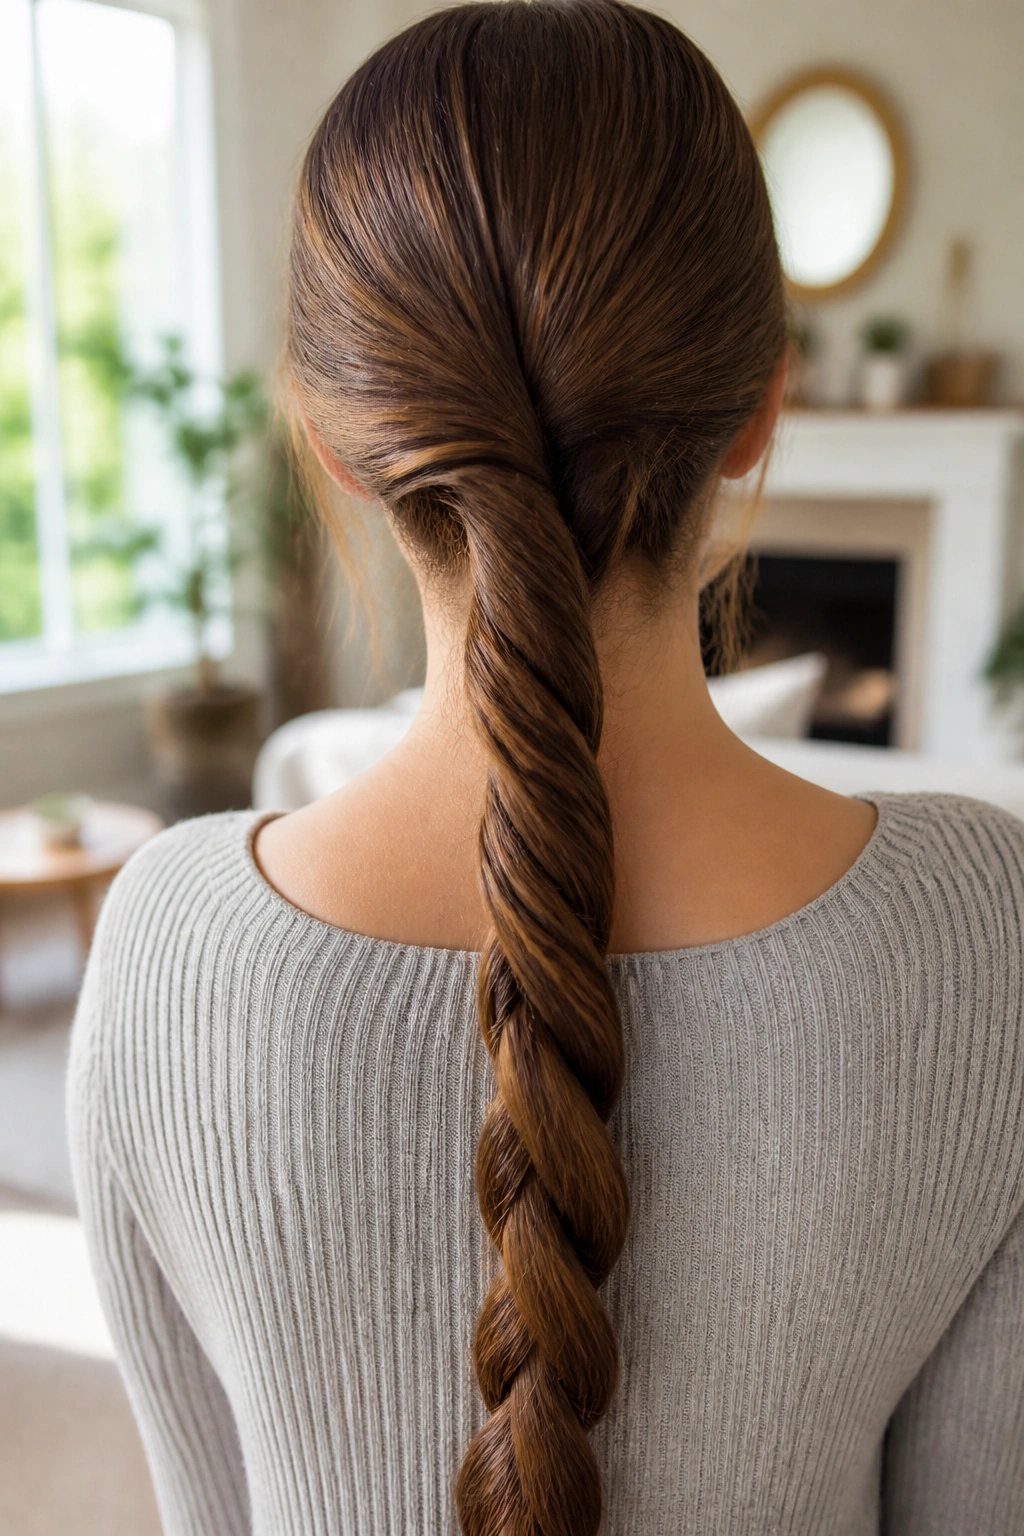
Unlike a three-strand braid, a rope plait only needs two sections, which is why it suits tired hands and slick hair.
You twist each section in the same direction, then wrap them around each other in the opposite direction. That sounds fussy on paper, but in practice it is fast. Long hair makes the rope plait better because the extra length exaggerates the twist, and the finished style has a glossy, coiled look that regular braids cannot quite match.
It is especially good when you want something neat without a lot of finger work. Thick hair, long blunt ends, and hair that has been straightened all play nicely here. I would use a light gel or smoothing cream if the hair slips apart easily.
The catch is consistency. Twist both sides evenly or the braid starts to corkscrew in a lopsided way. Once that happens, the whole shape feels off.
This is the style I choose when I want polish without wrestling three sections like a small animal.
7. The Crown Plait
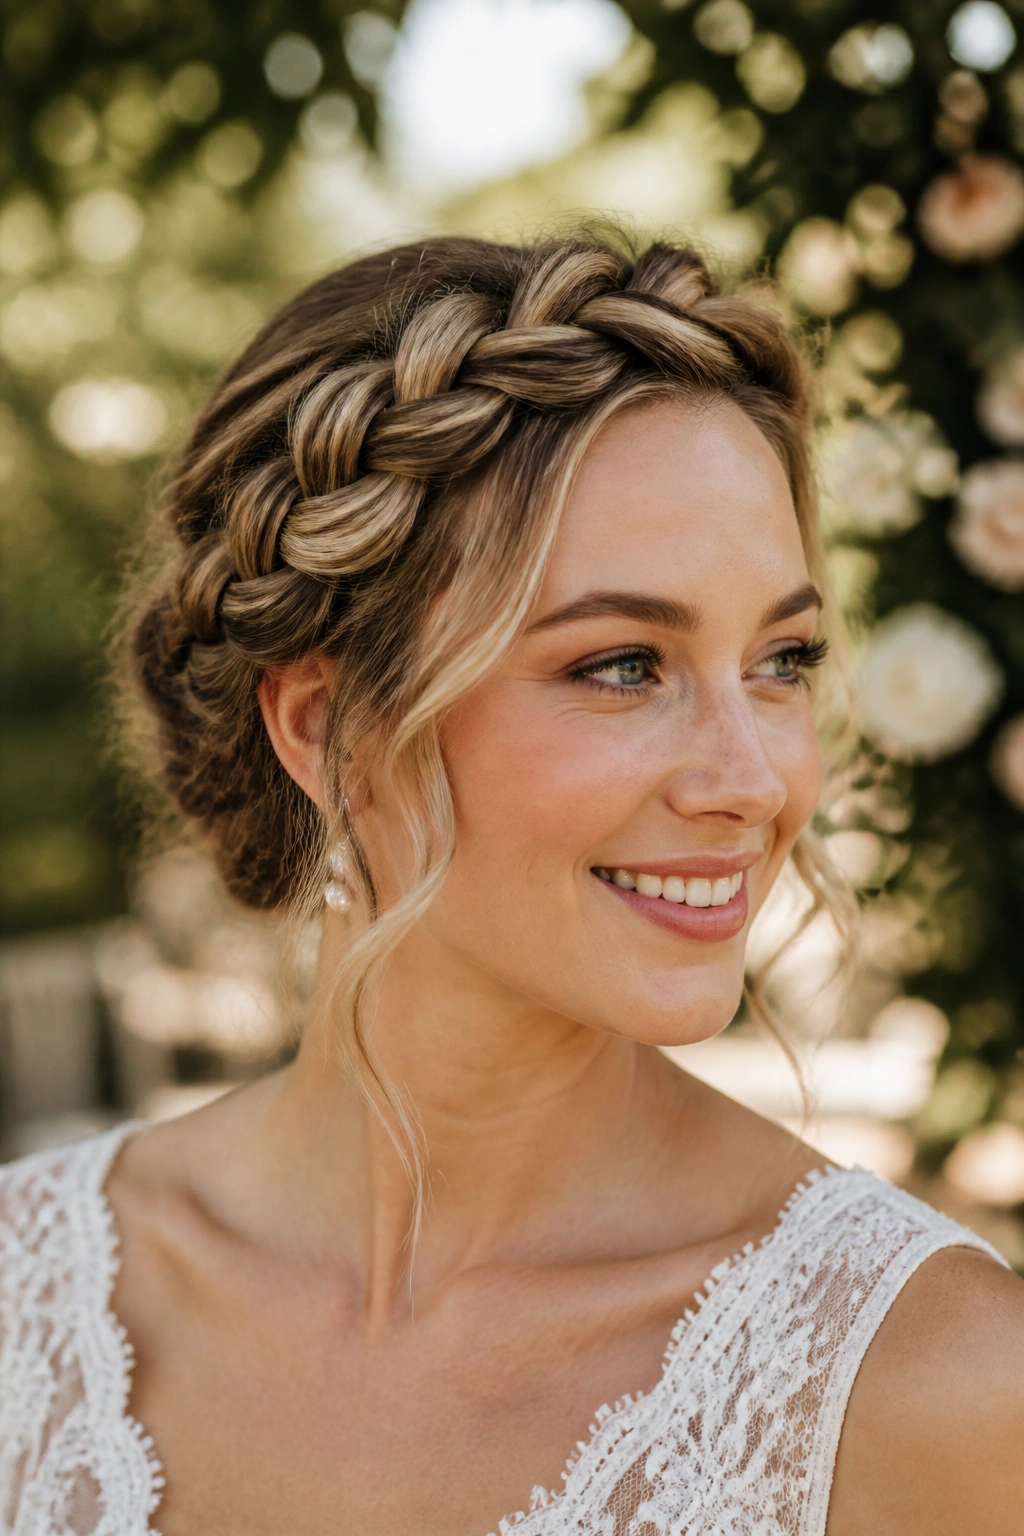
At weddings, festivals, and humid afternoons, a crown plait earns its keep.
It wraps around the head like a halo, which means long hair gets lifted off the shoulders and the whole face opens up. There is something about the shape that feels finished even before you add pins or a decorative clip. If your hair is very long, the weight can be a bit annoying, so the trick is to anchor the braid as you go instead of waiting until the end and hoping for the best.
How to Keep It Anchored
- Start with one or two braids depending on thickness.
- Pin every 2 inches as the braid curves around the head.
- Use bobby pins that match your hair color if you want them to hide.
- Tuck the ends under the braid so nothing pokes out.
- Press the braid gently against the scalp, then secure again with cross pins.
I like this style best when it is a touch loose at the temples. Too tight, and it starts looking severe. Too loose, and it slips. Somewhere in the middle is the sweet spot.
8. The Half-Up Plait
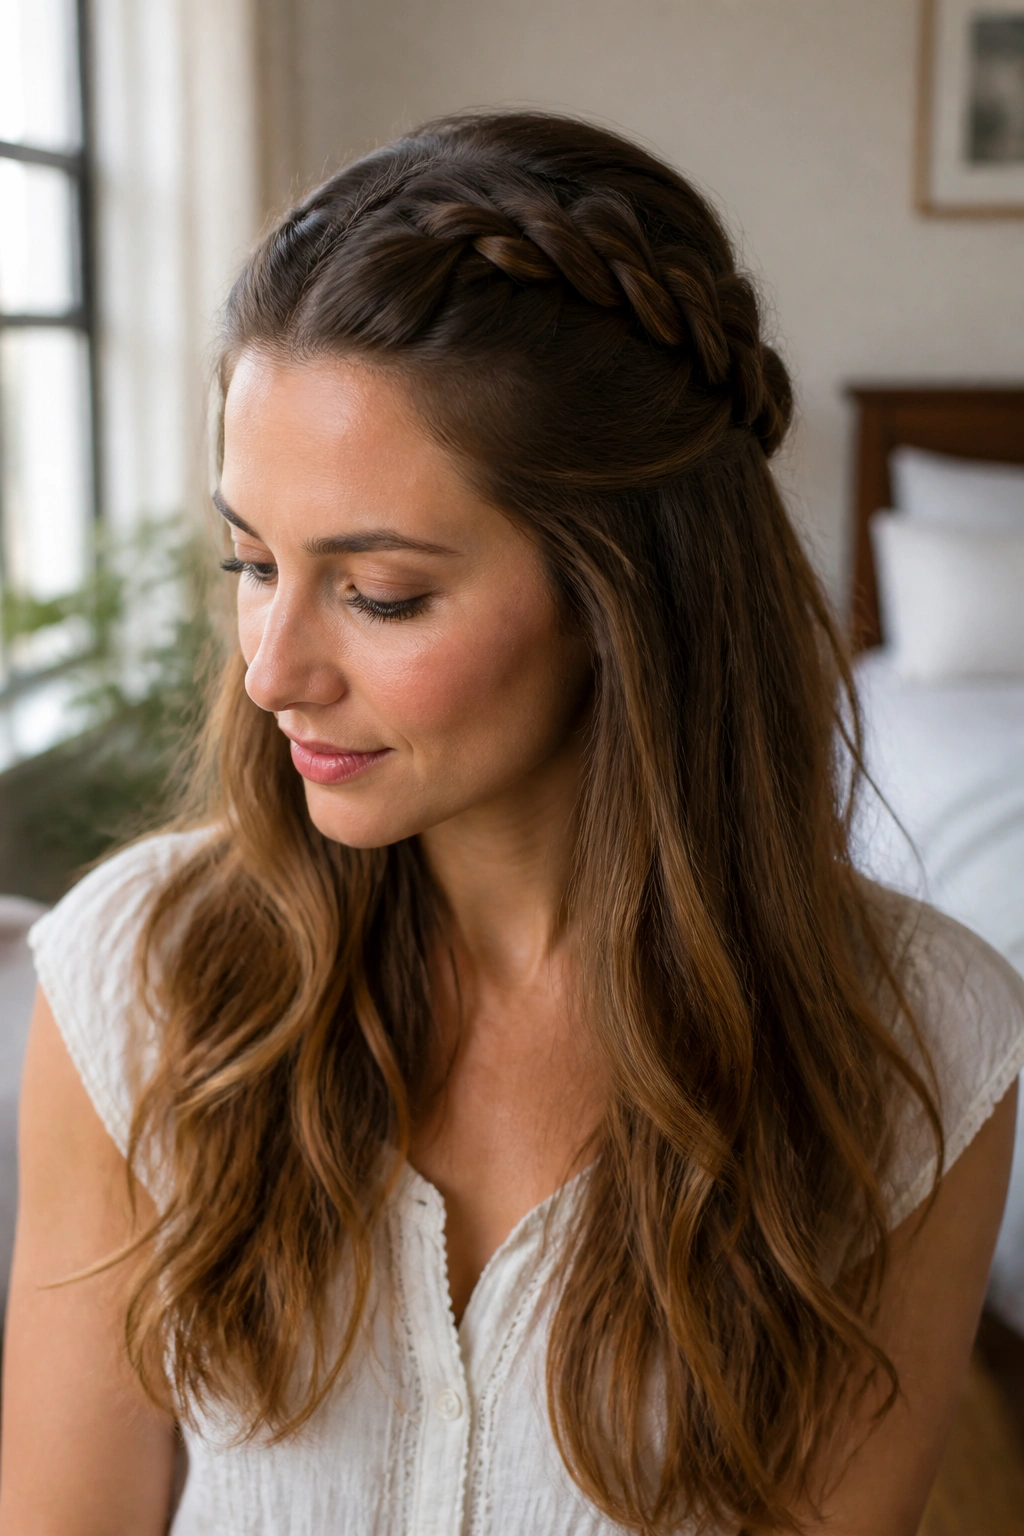
Half-up styles are underrated.
They keep the front of the hair out of your eyes, but they let the length stay visible and move around. On long hair, that matters more than people admit. Pulling every strand away can make the head feel smaller and the style feel heavier; a half-up plait gives you control without hiding the length you spent years growing.
This one works well with straight hair, waves, and even loose curls. Take the top section from temple to temple, braid it back, and secure it where the crown begins to round down. You can leave the braid tight for a cleaner look, or pull it apart a little for softness. Both work.
It is also forgiving. If the braid is slightly uneven, nobody cares. The rest of the hair acts like a cushion.
I use this style when I want the front to stay tidy but I am not in the mood for a full updo. It is low effort. That is why it stays in rotation.
9. Twin Plaits Down the Back
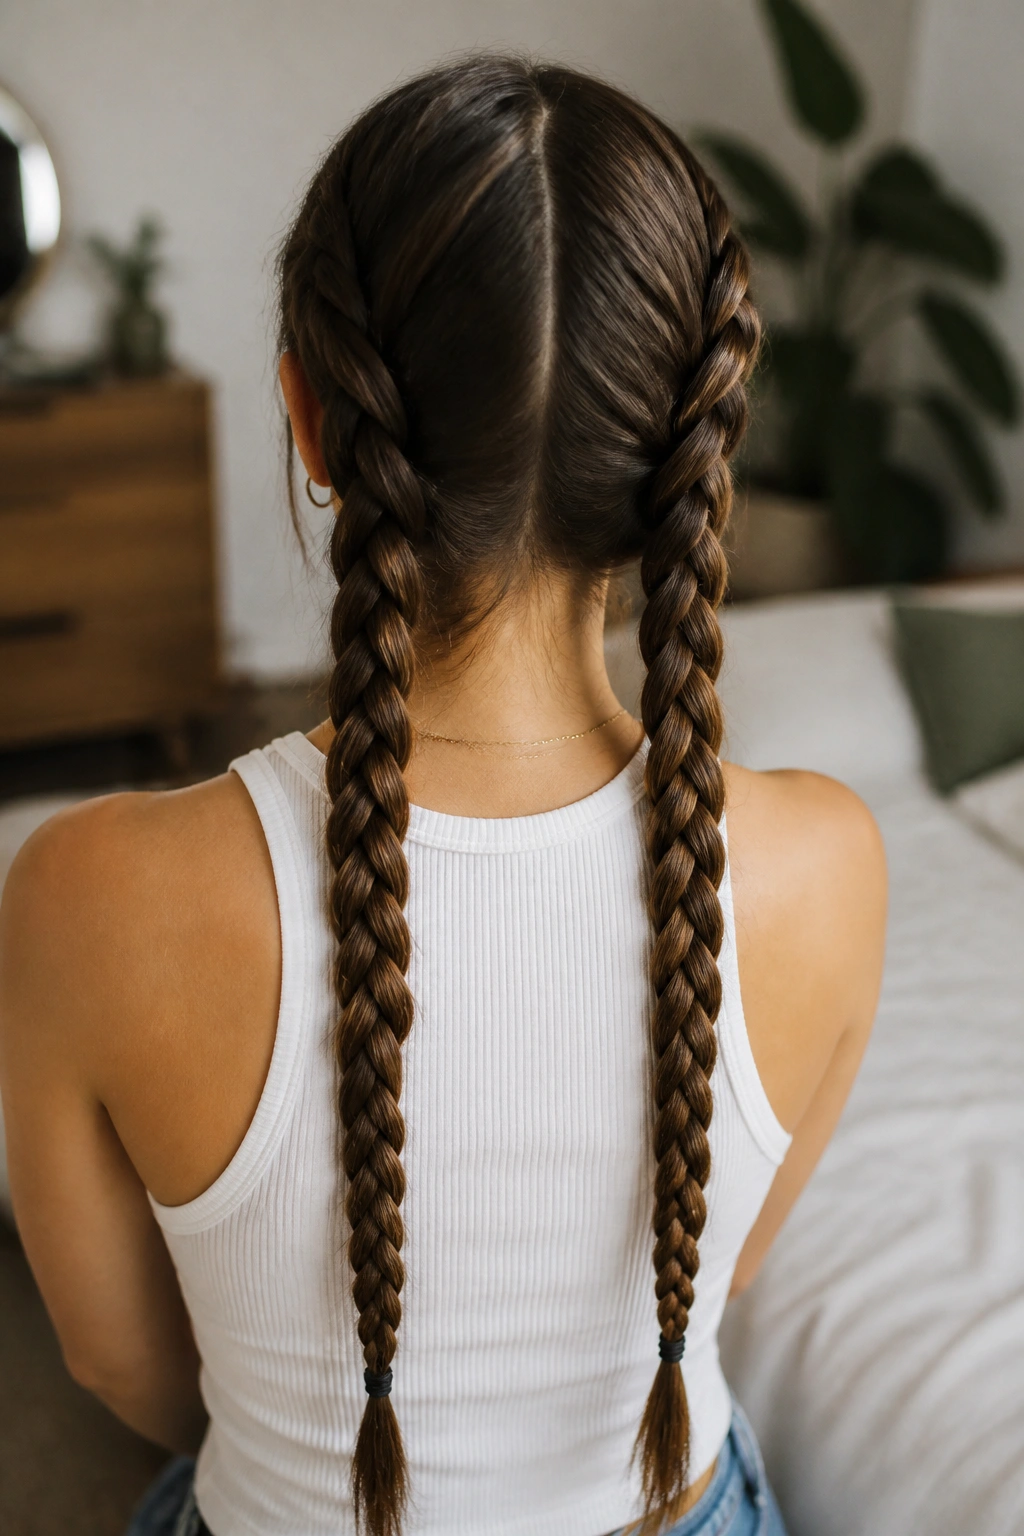
Two plaits can look calmer than one.
That sounds odd until you see how the symmetry changes the shape of very long hair. A center part and two even braids split the weight, keep the length controlled, and stop the ends from fighting each other all day. They also sit nicely under hats, scarves, and hoodies without turning the back of the head into a knot.
Where They Shine
- Long school or work days.
- Sleep protection on loose, dry hair.
- Travel, because the braid stays flatter against the head.
- Workouts, if you want the hair fully contained.
The secret is not making them too tight. Long hair can get puffy fast when the plaits are over-pulled at the base, especially if the ends are thick. A slightly softer braid often looks better and feels much better by hour six.
If you want a cleaner line, start each braid just behind the ears. If you want more lift, start higher at the temples. Small change. Big difference.
10. The Waterfall Plait
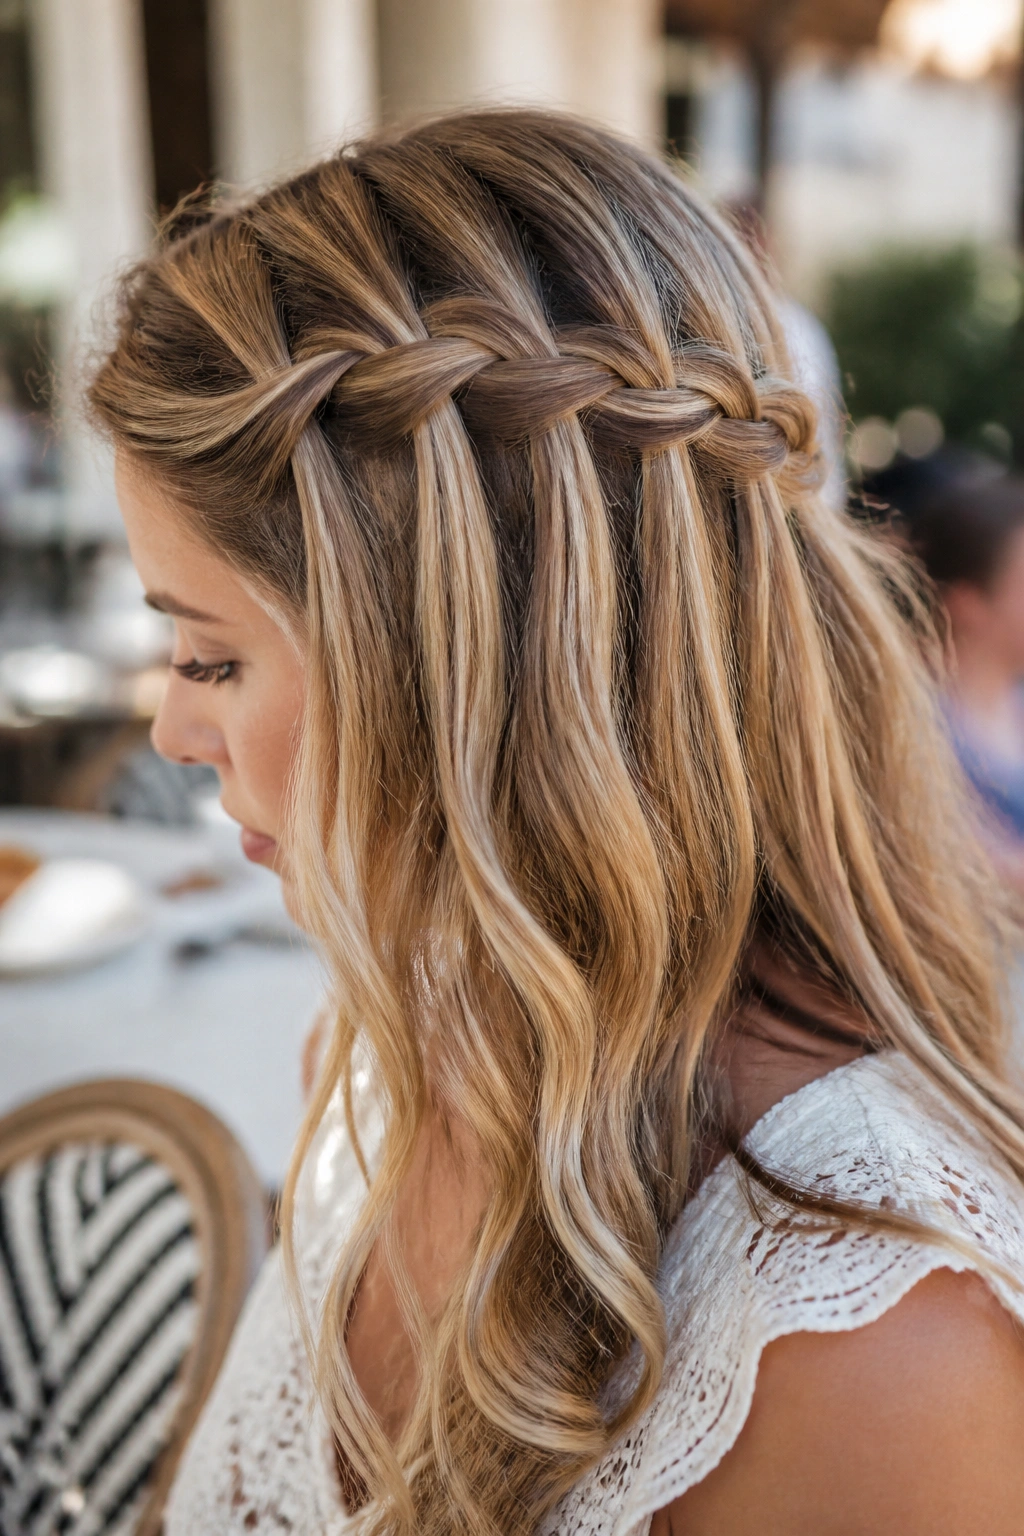
Why does a waterfall plait feel so airy on long hair?
Because it lets pieces drop through instead of trapping every strand inside the braid. That creates the little cascading effect people love, especially on long layered hair or soft waves. It is more decorative than protective, and I would not choose it for a day full of wind, workouts, or coat zippers that behave like tiny traps.
The technique works best when the hair has a little slip but not so much that the strands slide out immediately. A light texturizing spray helps, and curled ends make the dropped pieces sit more neatly. If your hair is pin-straight, you may want to add a bend with a flat iron first so the shape shows.
A waterfall plait is one of those styles that looks like more effort than it is. That is half the charm.
I like it for dinners, photos, or any time you want the length to stay visible while the front gets a little structure.
11. The Milkmaid Plait
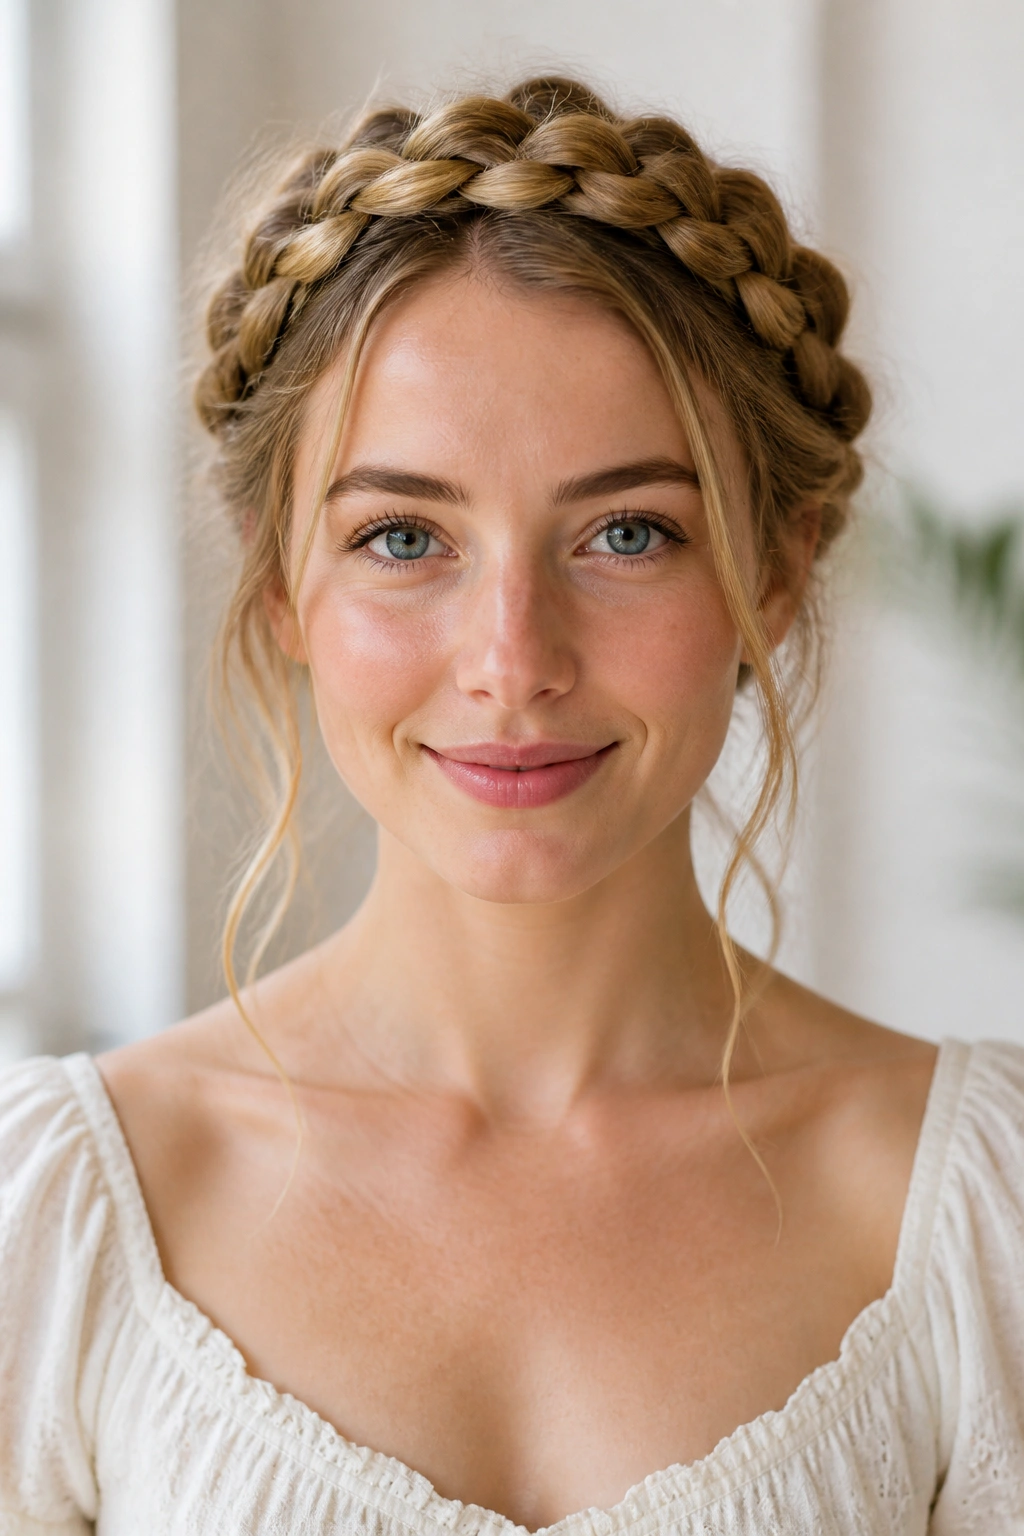
Milkmaid plaits sit where crowns usually sit, and that changes the face fast.
The style frames the hairline, lifts the eyes, and makes long hair look deliberate instead of just long. You usually braid two sections, one on each side, then cross them over the top of the head and pin them in place. With really long hair, the extra length can either help or annoy you. It helps because you have more material to work with. It annoys you because the weight can tug if the pins are flimsy.
Use more pins than you think. Not a pile of them — just enough to spread the pressure around the head. Cross each pin in an X if the braid keeps sliding.
I also like leaving the ends tucked in rather than hanging down. It keeps the silhouette clean and stops the style from turning into a half-finished crown. If you want a softer look, let a few fine pieces slip around the temples.
It is a romantic style, yes, but it works best when it is built solidly underneath.
12. The Bubble-Section Plait
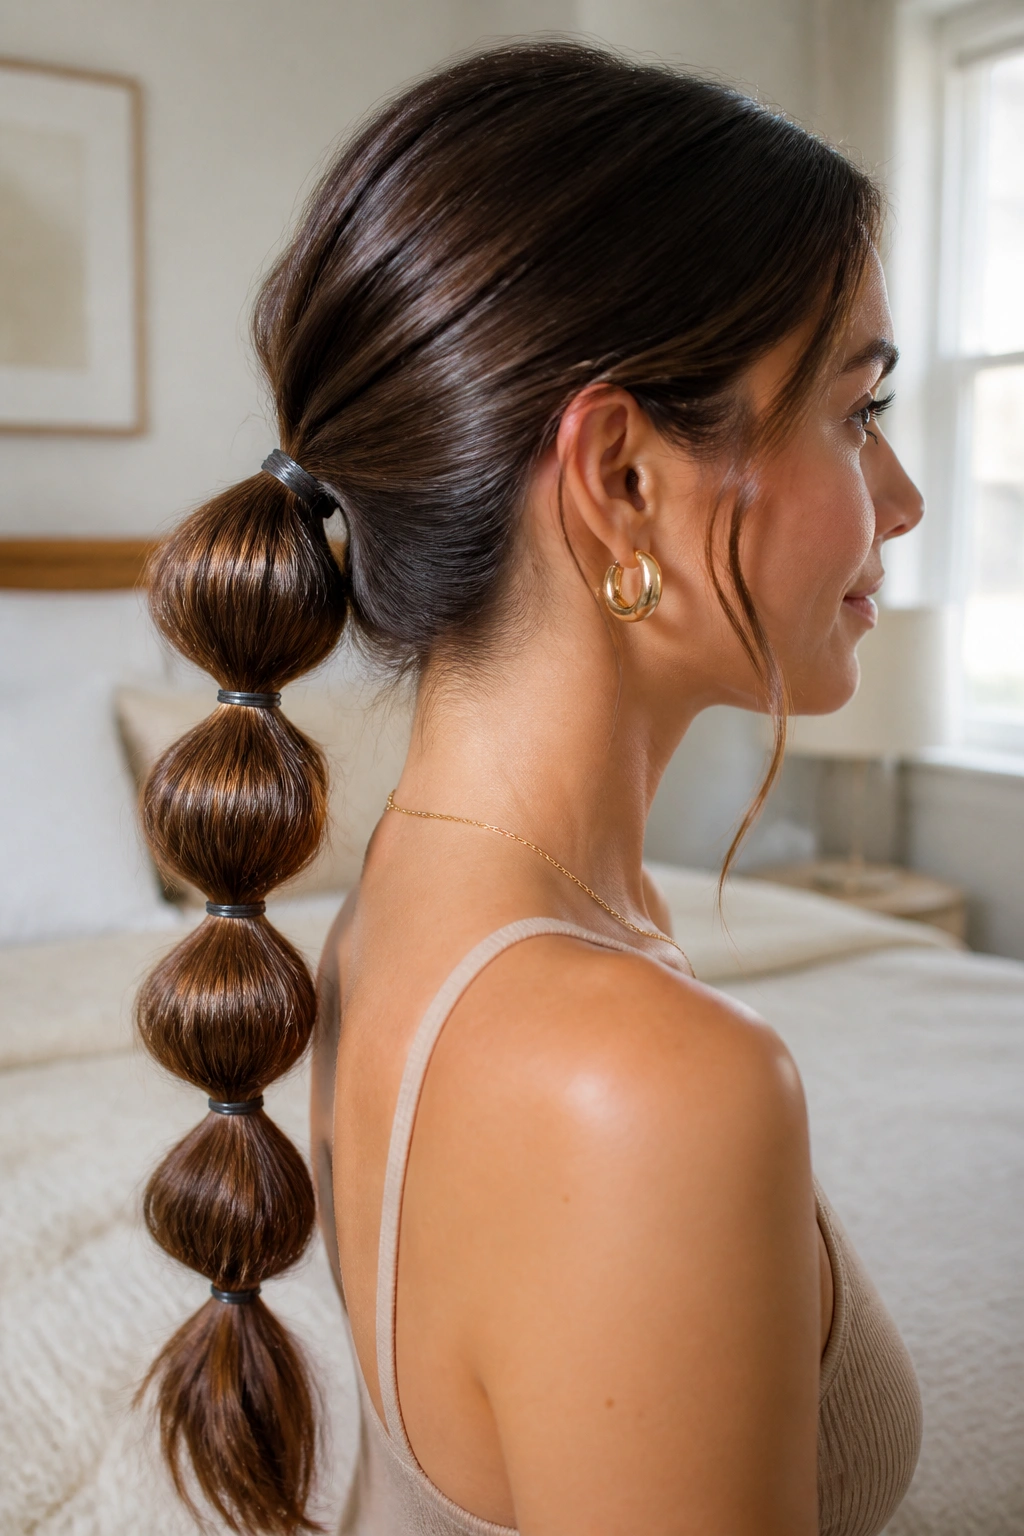
This is the easiest style here if your fingers get tired halfway through a braid.
A bubble-section plait is not a classic plait in the strictest sense, but for long hair it does the same job: it gathers length, keeps it controlled, and looks intentional. You tie a ponytail, add clear elastics every 2 to 3 inches, then gently tug each section to create the rounded bubble shape. The longer the hair, the better the visual payoff.
Fine hair sometimes needs a little help. Tease each section lightly before you puff it out, or mist the tail with texture spray so the bubbles hold their shape. Thick hair usually does the opposite problem — too much bulk. In that case, keep the bubbles a little tighter and smoother.
I like this one when I want something playful that does not require precise weaving. It is also good on days when your arms are not up for a full braid session.
Simple. Fast. Surprisingly pretty.
13. The High Ponytail Plait for Long Hair
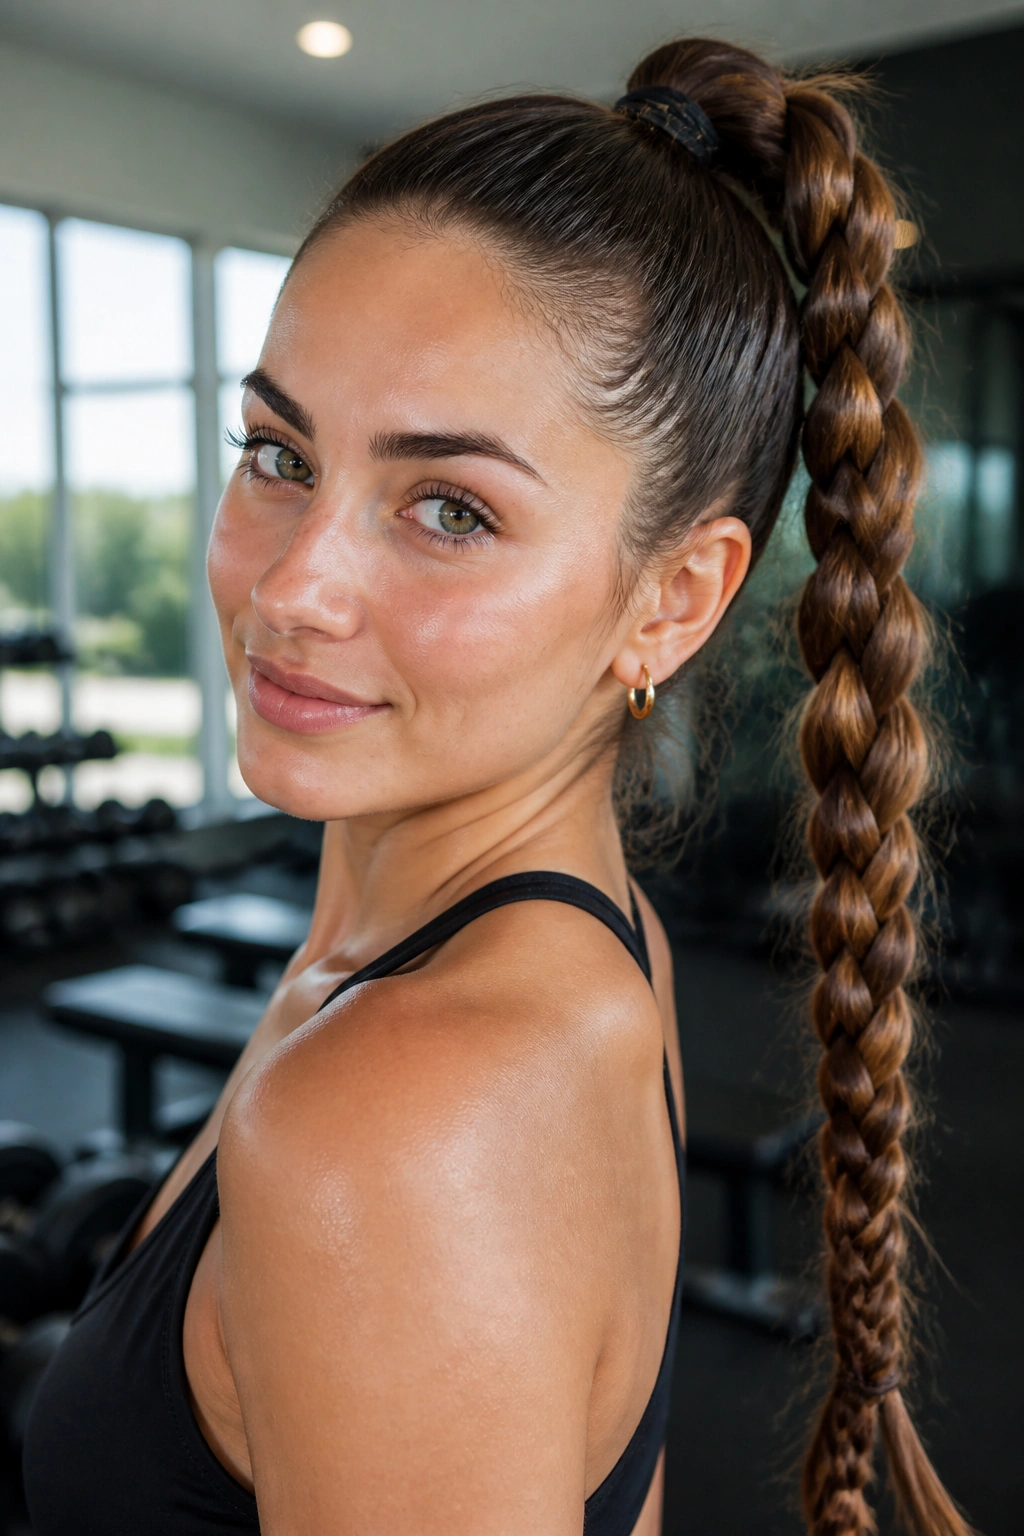
A high plait does one thing beautifully: it gets the weight off your neck.
That alone makes it worth keeping in the rotation. Set the ponytail high on the crown, smooth the sides back, then braid the tail all the way down. Long hair makes this style dramatic in a way shorter hair cannot quite match, because the braid swings and moves instead of stopping at the shoulder blades.
The base matters most. If the ponytail sits too low, the style loses the lift. If it sits too high and too tight, the scalp complains. I keep the front firm and the edges soft enough that the head still feels like a head.
This is a good style for workouts, errands, and any day you want your face fully clear. It also looks cleaner if you use two elastics: one to hold the ponytail in place, and one at the very end of the braid.
Short version? It is practical, but it does not look plain.
14. The Mermaid Plait
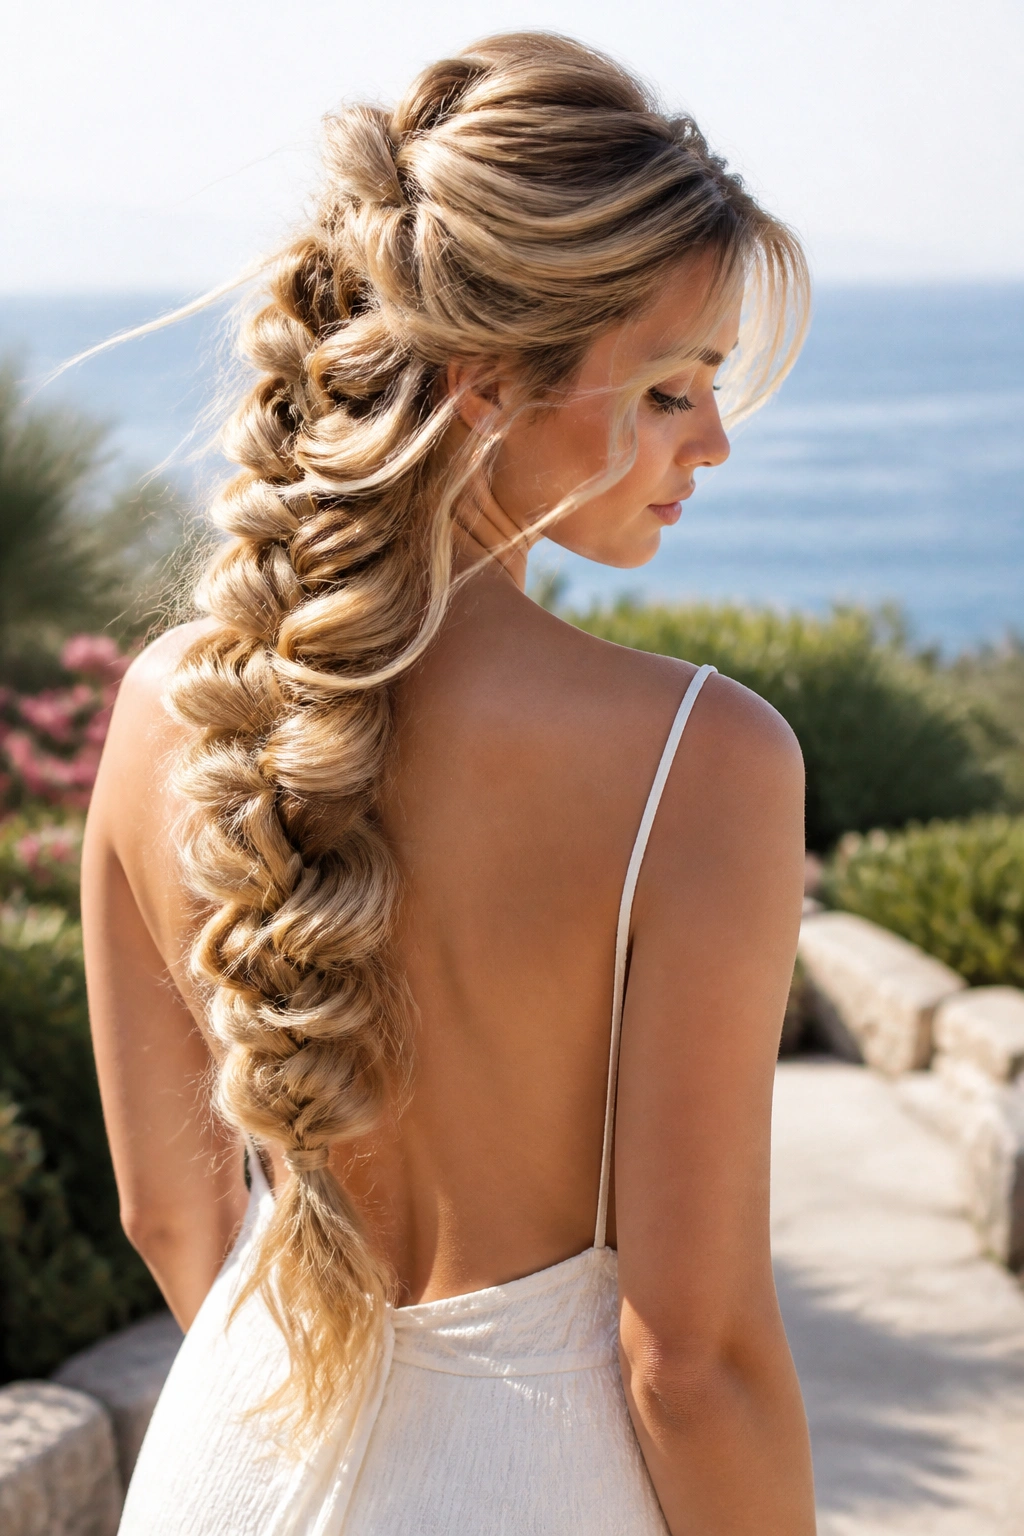
A mermaid plait is really a loose, fat braid with better manners.
It uses the length of long hair to make something soft, wide, and a little dramatic. The sections are usually broader than a fishtail braid, and the braid is often pulled apart after styling so it has that textured, spread-out shape. On very long hair, the effect is gorgeous because the braid has enough length to look full from crown to tail instead of collapsing into a stubby knot.
How to Get the Shape
- Start with hair that has some texture.
- Braid loosely rather than tugging every section tight.
- Pull the sides outward after securing the end.
- Use a light mist of texture spray so the pieces do not slide back in.
- Leave a few face-framing strands if you want a softer line.
It is not the neatest option. That is fine. This style works because it looks soft and full, not because it is perfectly symmetrical.
I prefer it on layered long hair, where the different lengths add to the shape instead of fighting it.
15. The Pull-Through Plait
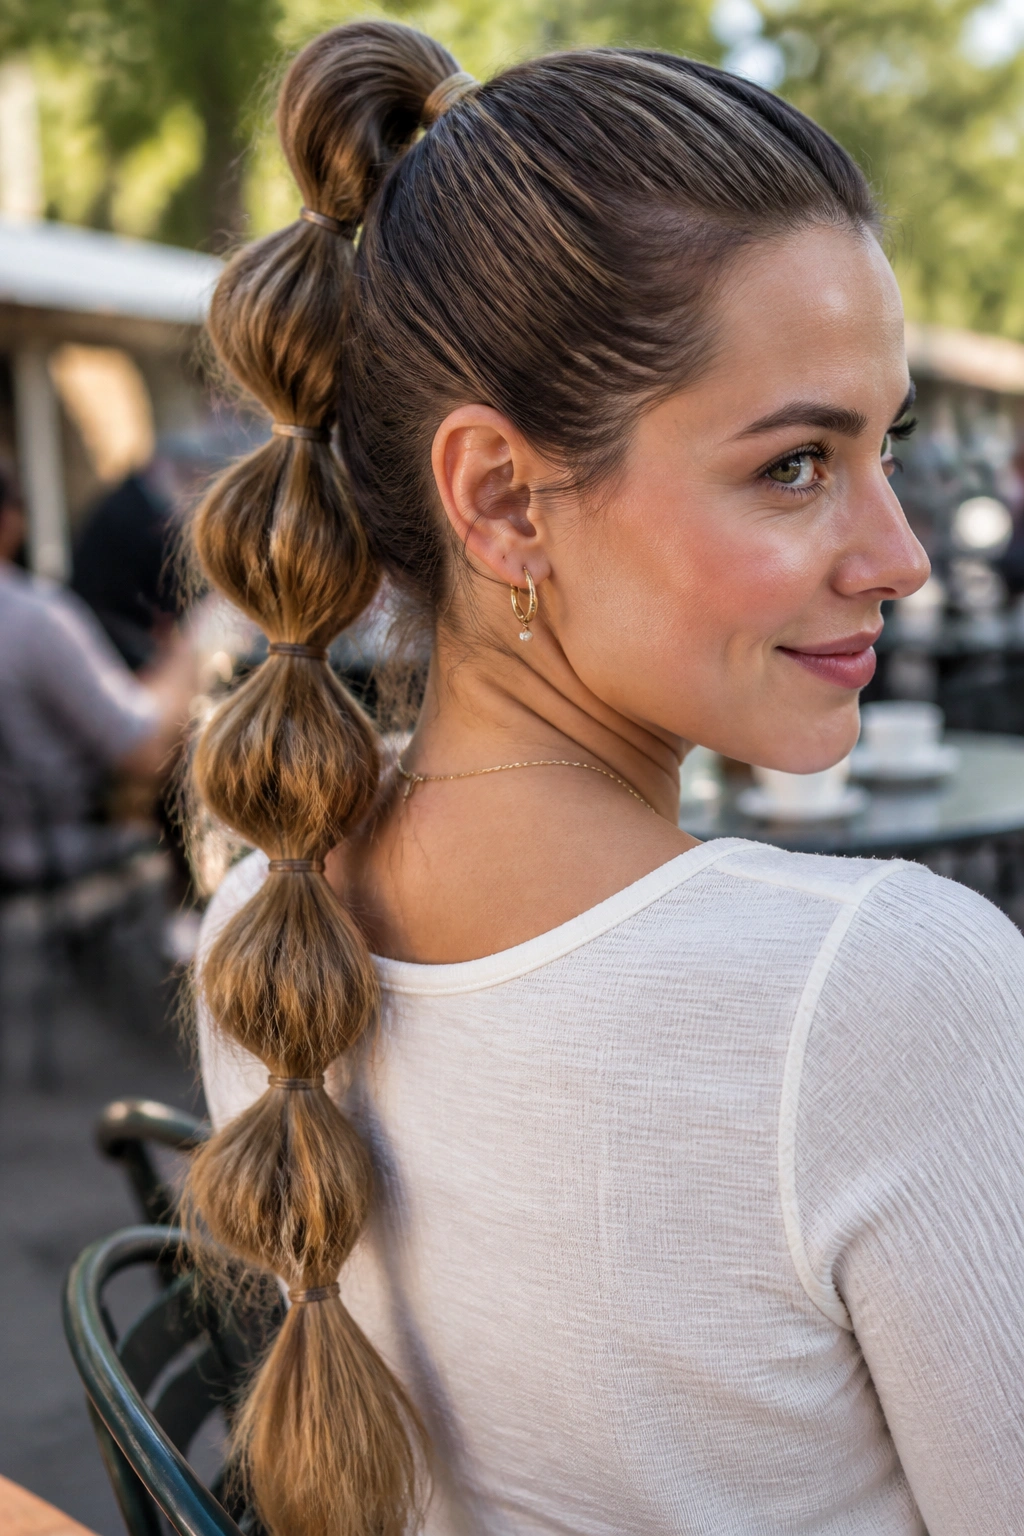
If your hair is long but slippery, the pull-through plait may save the day.
Unlike a traditional braid, this one is built from ponytail sections stacked on top of one another, which makes it easier for people who can never keep three strands in their hands at the same time. You start with a small top ponytail, split it, pull the next ponytail through the opening, then repeat every 1.5 to 2 inches down the length of the hair.
Yes, it uses more elastics. Worth it.
The payoff is volume. Long hair gets this thick, rounded braid effect that looks fuller than a standard plait, especially if the hair is fine or straight. I also like that it stays surprisingly stable once it is set, because each section helps lock the one below it in place.
If your hair is very heavy, keep the elastics snug but not strangling. Too tight, and the crown feels sore. Too loose, and the shape falls apart.
It is one of the best cheats in the whole set.
16. The Four-Strand Plait
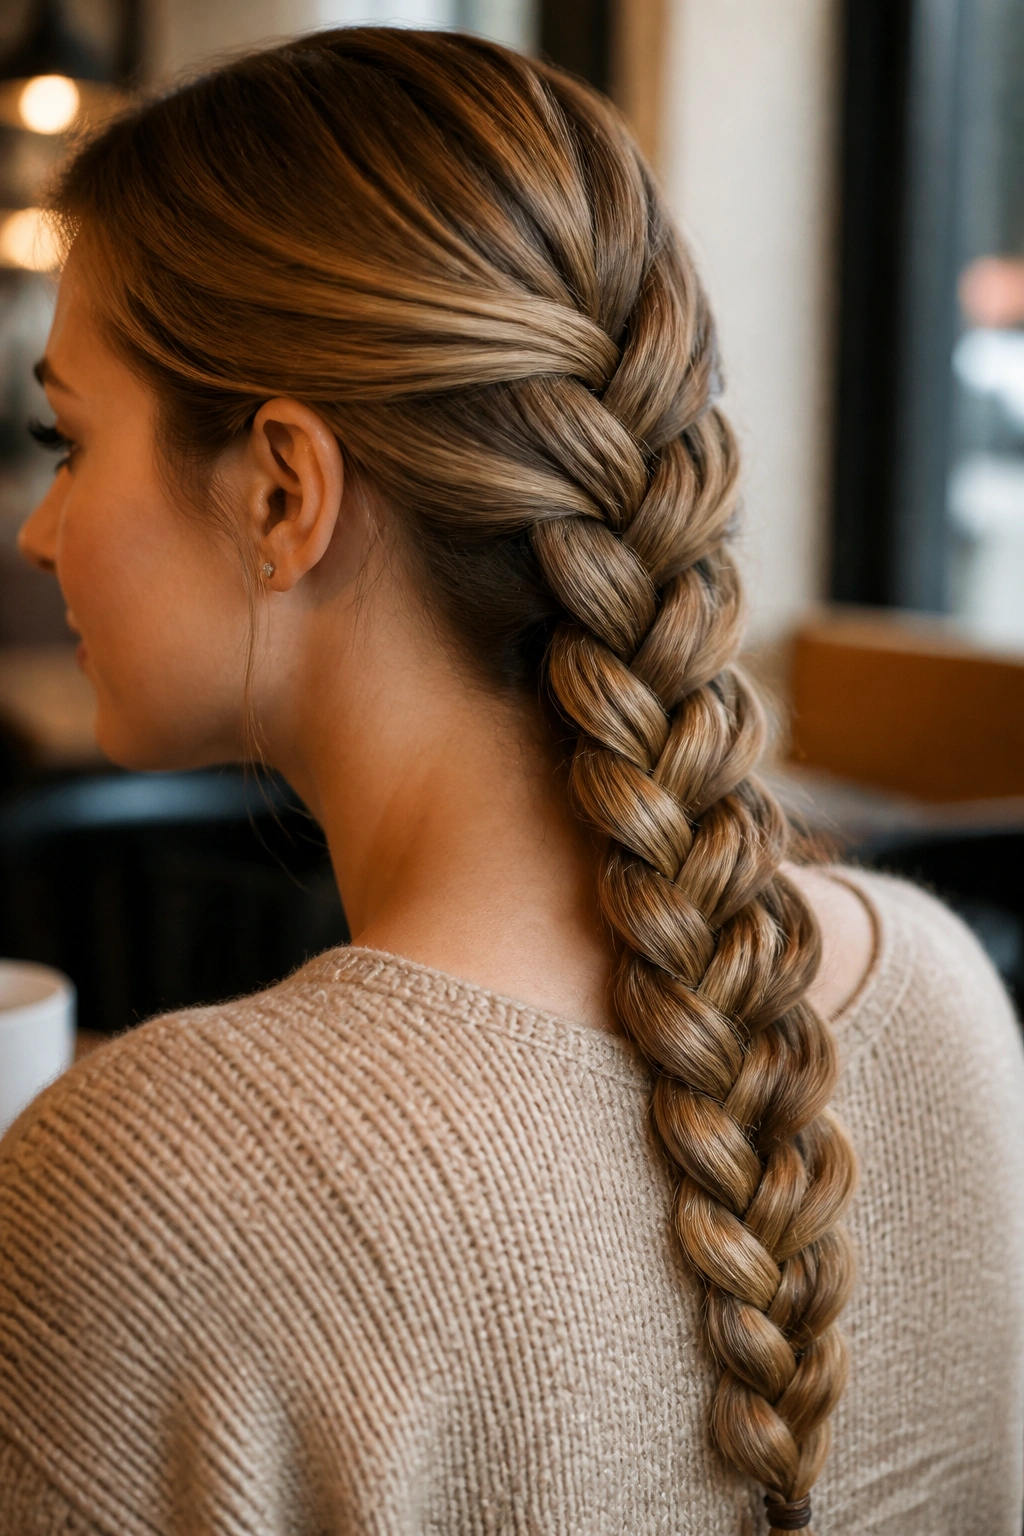
Want a braid that looks complicated without being impossible?
A four-strand plait gives you that extra bit of detail without needing a salon chair. The weave looks denser than a three-strand braid, and long hair shows it well because the pattern has room to repeat down the length. It does take concentration the first few times, so this is the style I suggest when you have a little more patience than usual.
What to Watch For
- Keep the four sections even from the start.
- Hold the two center strands steady.
- Cross the outer strand over the nearest middle strand each time.
- Start low on the head so the pattern is easy to see.
- Use a clip or a second hand mirror if you need to check your tension.
The biggest problem is losing track of which strand is which. That happens to almost everyone at first. If it does, stop, reset, and start again rather than forcing the pattern and ending up with a strange knot halfway down the back.
Once the motion clicks, it feels smooth. A little nerdy. A little satisfying.
17. The Ribbon-Woven Plait
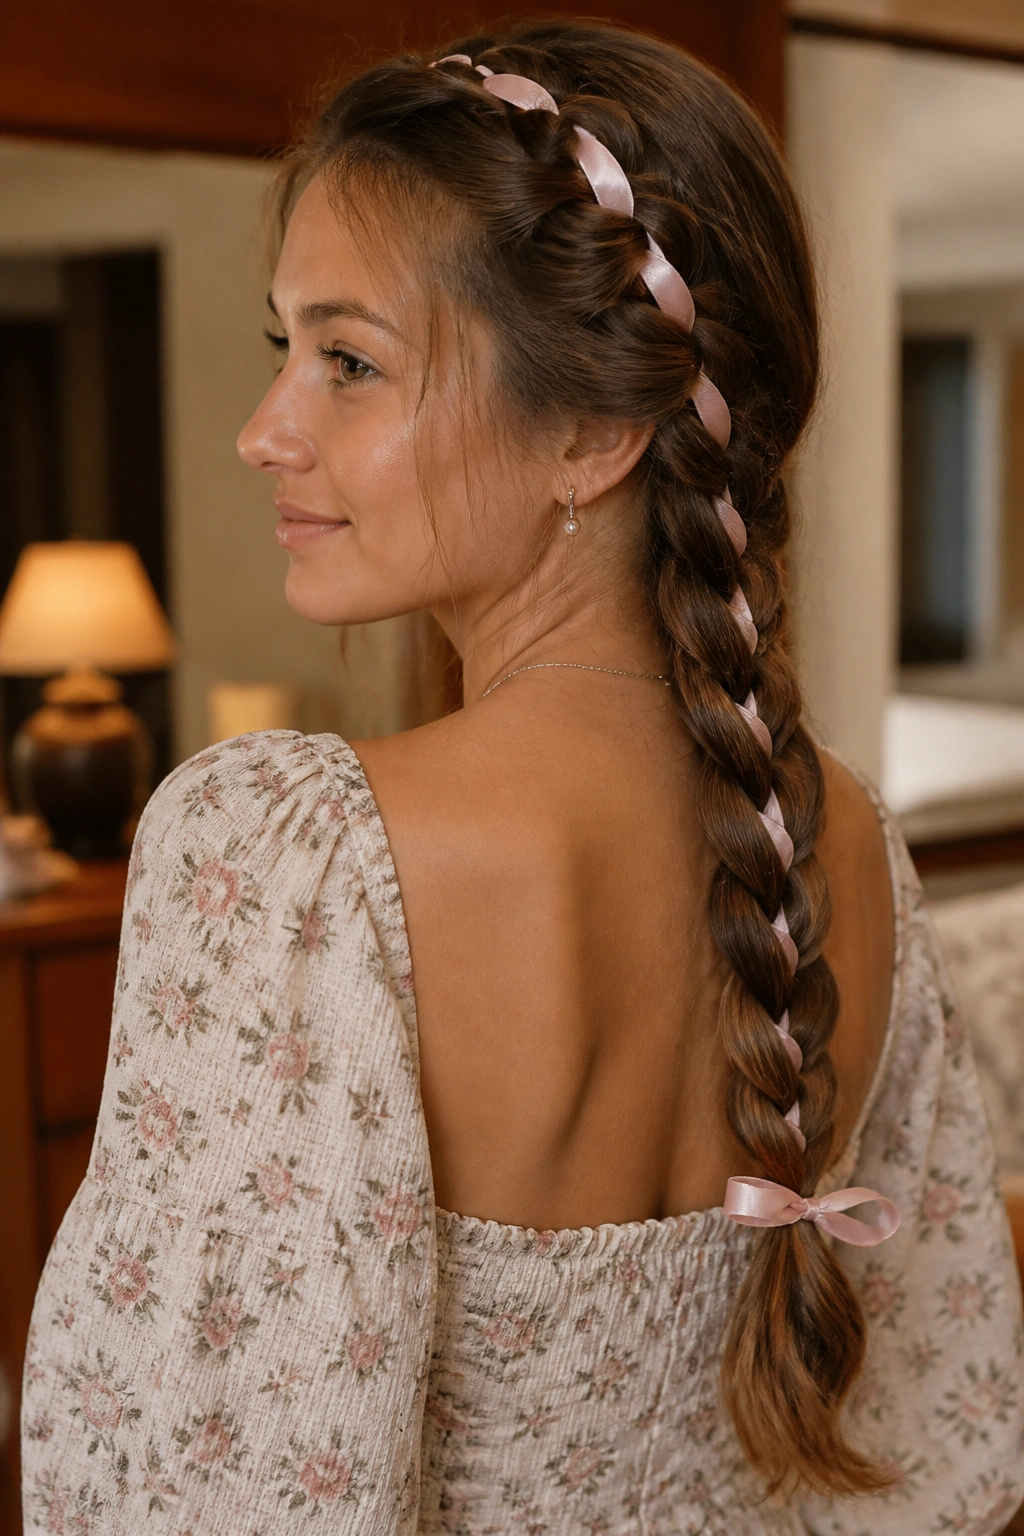
Put a ribbon through long hair and the whole plait changes mood.
A ribbon-woven plait is still a braid, but the ribbon turns it into something softer and more dressed up. Use a narrow silk ribbon, a satin tie, or even a matte grosgrain strip if you want more grip. On long hair, the ribbon can run the full length of the plait, which means the color shows from top to bottom instead of just sitting as a bow at the end.
Choose a ribbon that does not fight the hair texture. Very slippery ribbon can slide, so a slightly textured finish usually behaves better. Tie it in at the crown, then braid it with the hair as one of the strands. If you want the ribbon to show more clearly, keep the braid slightly looser and let the fabric peek through the gaps.
This is the one I reach for when I want the style to feel intentional without adding a lot of pins or product. It is also a neat way to make a simple braid feel special without changing the base technique much.
18. The Braided Bun Plait for Long Hair
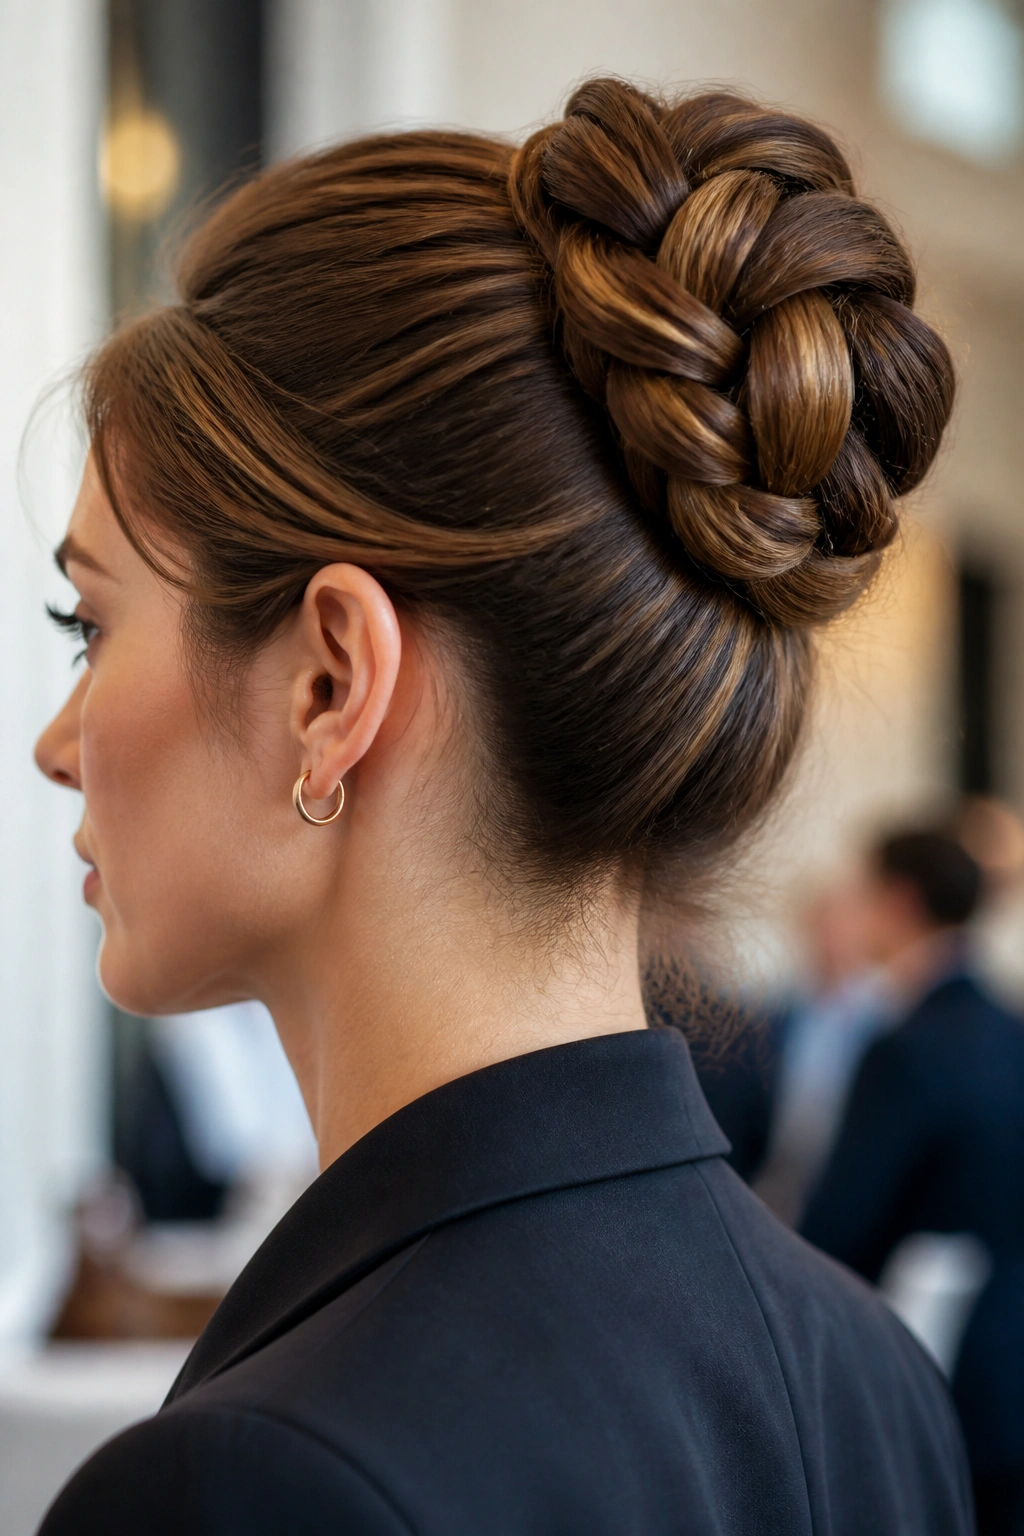
When the day calls for everything to stay contained, this is the style I trust.
A braided bun starts with a full plait, then coils that length into a bun at the nape or the crown. Long hair is a gift here because it gives you enough material to create a substantial bun instead of a tiny knot that disappears against the head. The trick is to distribute the bulk. If your hair is waist-length, fold the braid once before coiling so the bun does not feel like a brick.
I like a low braided bun for work and formal events because it sits close to the neck and stays neat for hours. A higher version feels sharper and more dressed up, but it needs stronger pins. Use several bobby pins around the outside of the coil, not just one in the middle, so the weight spreads out.
This is the style I reach for when I need the hair completely off my face, off my shoulders, and not bouncing around every time I move. It is the practical answer, and sometimes that is the best one.
