



A hair donut bun for a sleek look can be the easiest way to fake a salon finish in a hurry — or the fastest way to expose every frizz halo you forgot to tame. The difference lives in the prep, not the donut itself.
A foam ring is only a tool. If the ponytail sits too high, the part is crooked, or the crown stays fluffy, the bun reads bulky instead of polished. A good donut bun should look like the hair grew that way: smooth at the roots, firm at the base, and tidy from every angle.
Tiny details do the heavy lifting. A small donut disappears better on fine hair, a medium one gives average density enough shape, and thick hair usually needs stronger pins plus a tighter first elastic so the ring does not sag by lunch.
Pick the version that matches the hair you actually have, not the hair you wish would show up that morning. Start with the classic low shape, and the rest of the ideas get easier fast.
1. The Classic Low Donut Bun for a Sleek Look
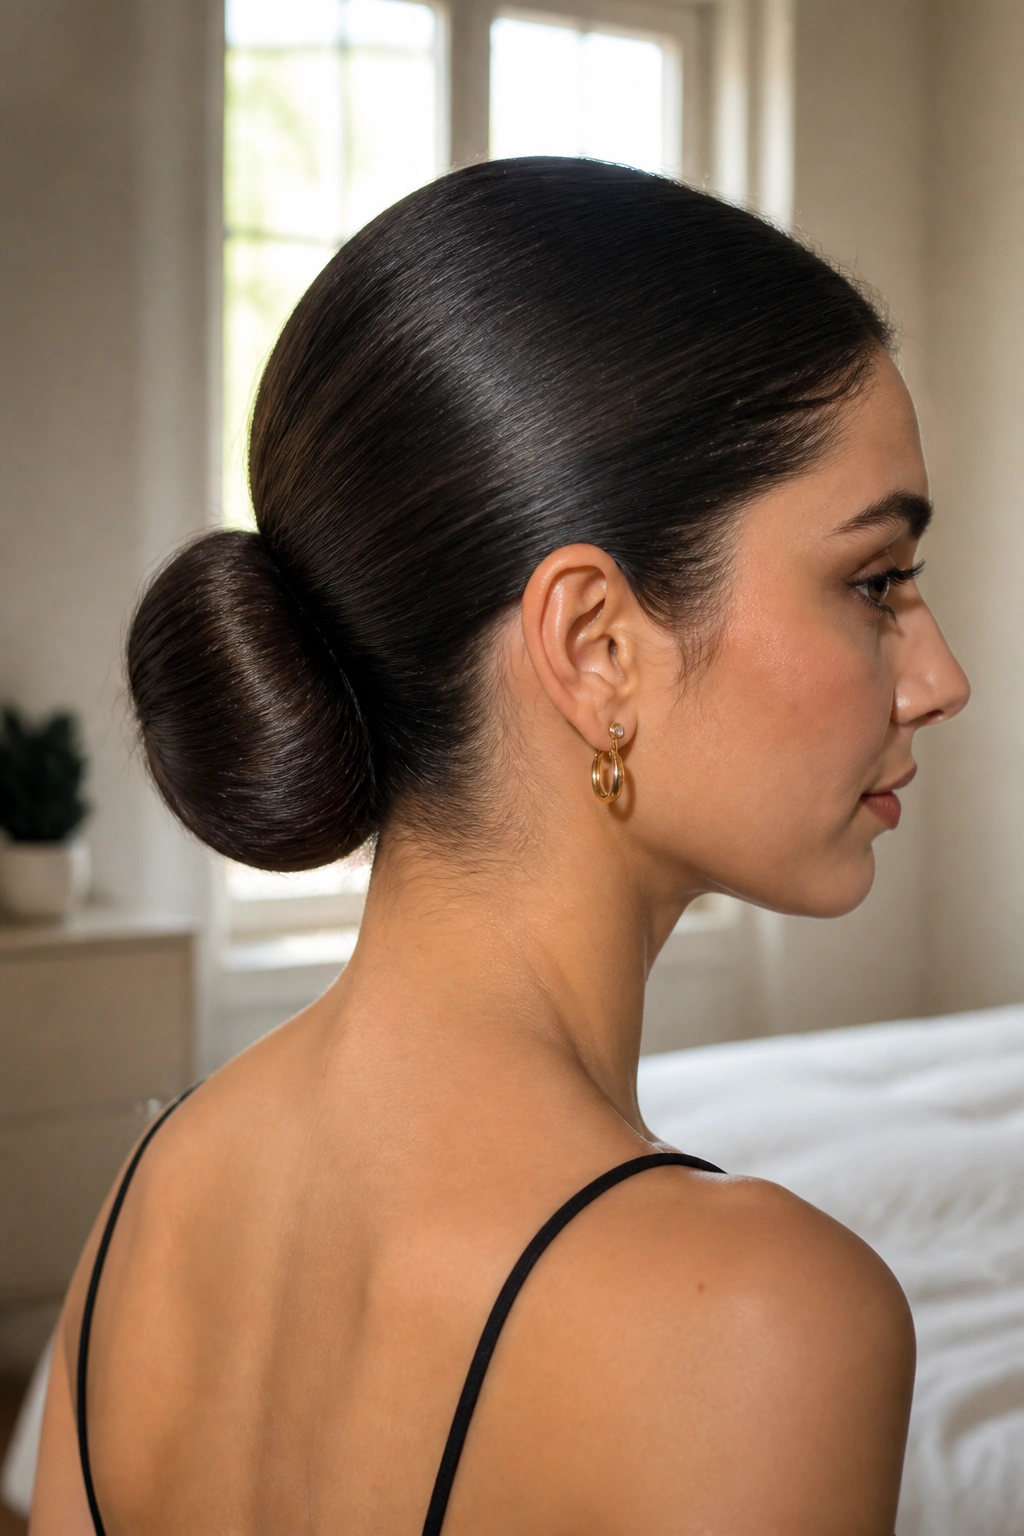
This is the one I trust when the bun has to stay calm under pressure. A low donut bun keeps the weight near the nape, which makes it easier to smooth the crown and hide the ring under a single clean wrap.
Why It Works
The low placement gives you more control over the silhouette. Hair does not fight gravity as much, so the shape stays compact instead of puffing out at the sides. It also sits neatly under collars, scarves, and jackets, which matters more than people admit.
If your hair is fine, go with a smaller donut ring so the bun does not look oversized. If your hair is thick, tie the ponytail tight first and use crossed bobby pins at the base so the bun does not start sliding after an hour.
- Brush the hair flat with a boar-bristle brush before you gather it.
- Use a 2-inch donut for shorter or finer hair.
- Use a 3-inch donut when the ponytail has enough length to cover the foam cleanly.
- Finish with a light mist of firm-hold spray only at the surface.
A sleek low bun is boring in the best way. If you need the style to stay put for hours, boring wins.
2. The High Crown Donut Bun
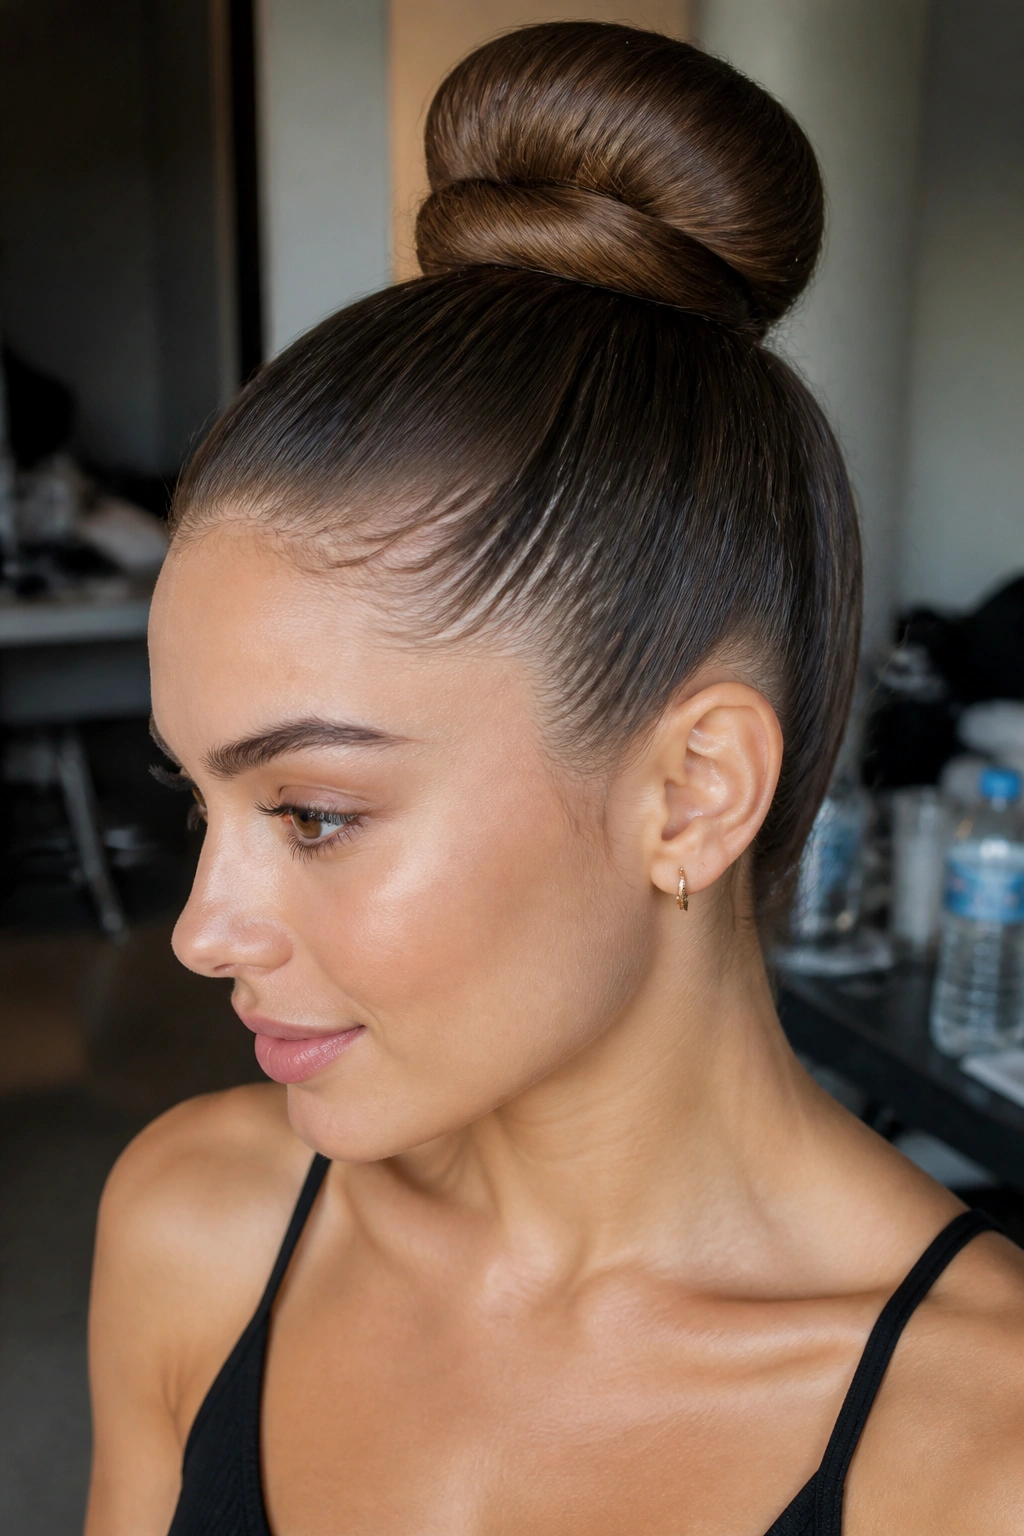
Picture a bun sitting high enough to open the face, but still tight enough to avoid that puffy, rolled-up look. A high crown donut bun gives instant lift at the top, which is handy if your hair tends to collapse flat by midday.
The trick is to smooth the hair upward before the ponytail is secured. If you pull the ponytail after the donut is on, you usually get little bumps at the crown. Do the reverse: brush, smooth, tie, then slide the donut into place and wrap the ends with even tension.
This shape is especially nice when you want a sharper side profile. It can make the neck look longer and the jawline look cleaner, which is why it shows up so often in polished event styling. But it needs discipline. If the top starts frizzing, the whole look goes from crisp to sloppy fast.
Use a touch of gel or styling cream at the roots, then smooth with the palm of your hand before the final spray. Not much. Enough to tame the flyaways, not enough to make the hair look wet all the way through.
3. The Deep Side-Part Donut Bun
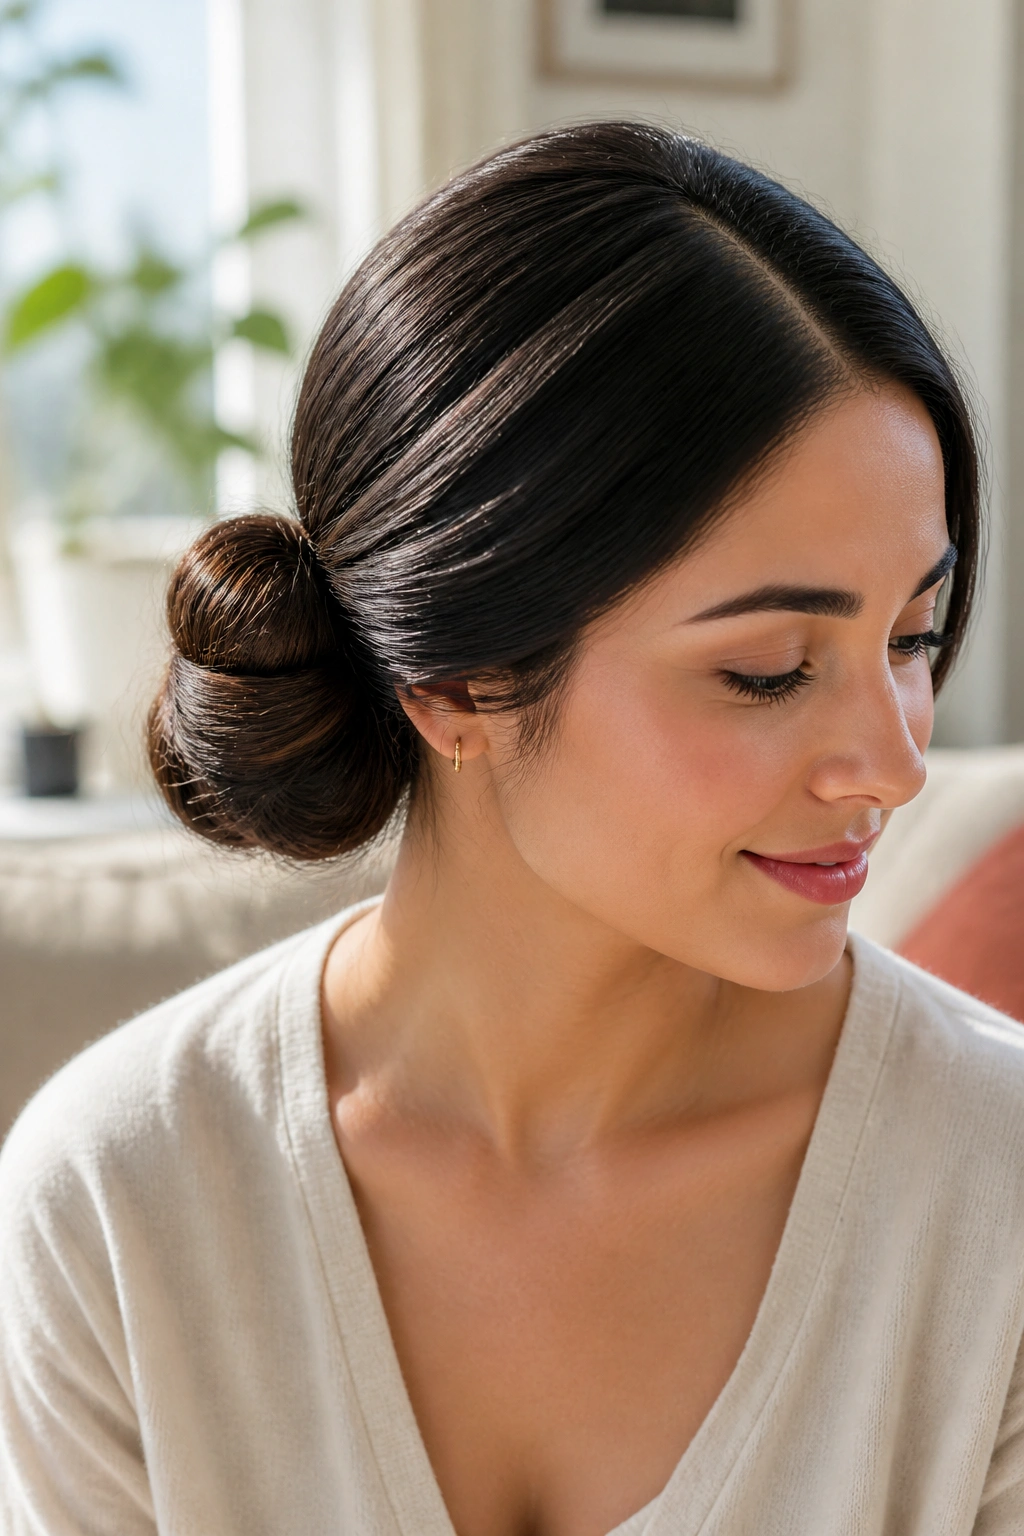
If your hair keeps falling into a side part on its own, work with it. A deep side-part donut bun looks deliberate, not accidental, and that tiny shift changes the whole mood of the style.
The asymmetry gives the bun a little movement while the donut keeps the shape neat. That is the whole trick. One side of the hair gets more visual weight, so the bun feels softer without losing the clean line around the head.
Small Details That Matter
- Make the part 2 to 3 inches deep if you want the effect to read clearly.
- Smooth the heavier side with a small amount of gel or cream.
- Keep the bun slightly off-center instead of dead center at the nape.
- Tuck the thinner side tightly behind the ear for a cleaner finish.
This is a smart option if your face looks better with a little asymmetry. It also helps when one side of your hair has more texture than the other — which happens more often than people admit. The off-balance part makes that unevenness look intentional.
I like this version for days when a center part feels too severe. It has polish, but it does not feel stiff.
4. The Wet-Look Donut Bun for a Sleek Look
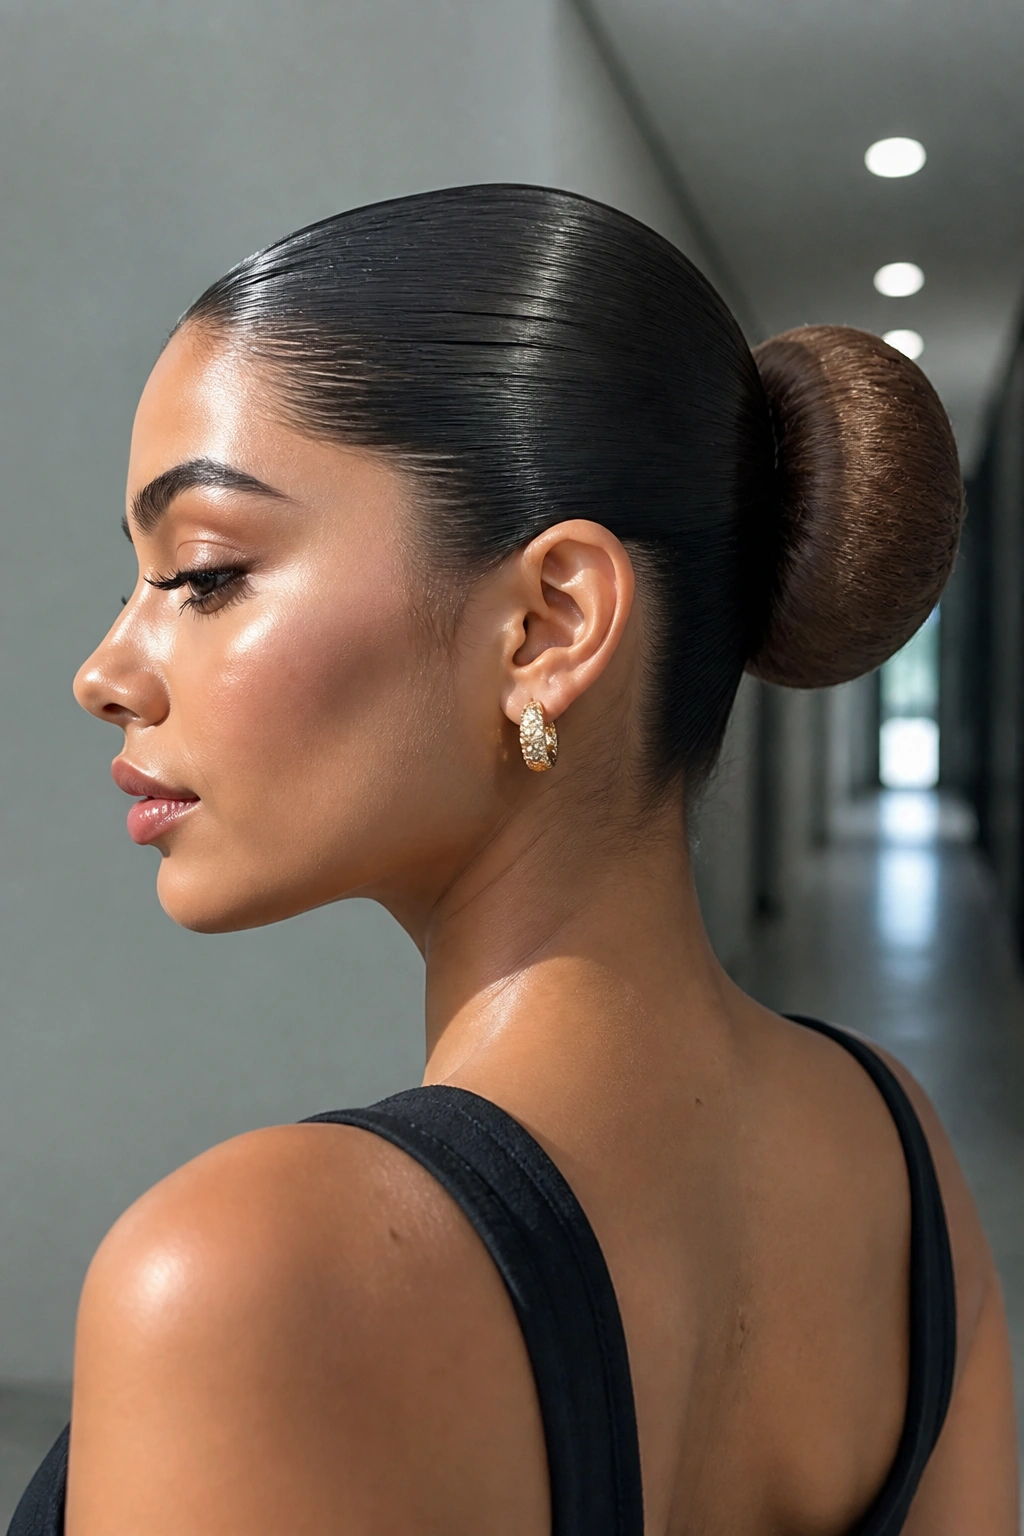
A wet-look donut bun does not need to look greasy. It needs to look controlled. There is a difference, and it is a big one.
Use a strong gel at the roots and through the surface of the hair before you gather it. Then comb everything back with a fine-tooth comb until the shine looks even, not stringy. The donut bun itself should stay matte enough to read as hair, not product.
The danger here is overdoing the gloss. Too much gel around the bun can make the style look crunchy, and crunchy is not sleek. It is tired. If the hair is fine, a lighter cream or a hybrid gel-cream usually works better than a heavy gel. Thick hair can take more hold, but even then, the hair should still move a little when you turn your head.
One small move changes the finish: smooth the outer layer with the backs of your fingers after the ponytail is tied, not before. That keeps the surface flat without breaking the part line. The effect is sharp, clean, and slightly dramatic — the kind of bun that looks good against a blazer or a simple neckline.
5. The Braided Base Donut Bun
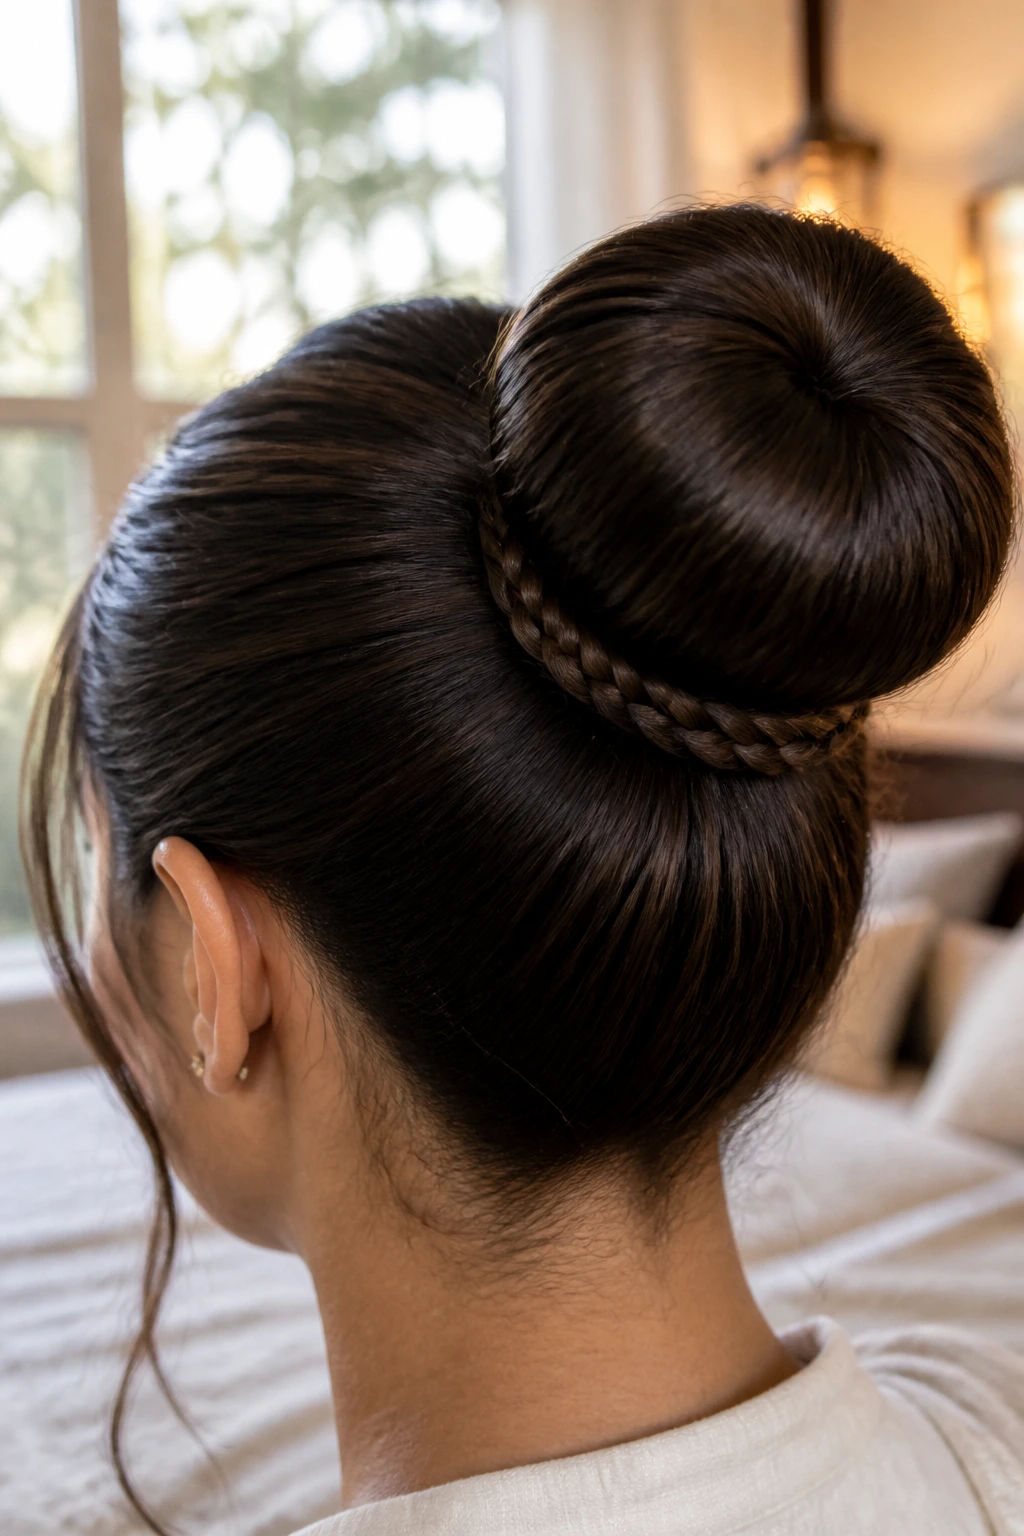
Why do some donut buns look cleaner than others even when the ring is the same size? Because the base is doing more work than people think.
A thin braid wrapped around the ponytail base hides the elastic and keeps shorter layers from poking out around the knot. It also gives the bun a little grip, which helps if your hair slips out of plain ponytails all the time. That is one of those unglamorous fixes that actually matters.
How to Build It
First, tie a tight ponytail where you want the bun to sit. Braid the ponytail end until you reach the point where the donut will start wrapping. Then wind the braid around the ring and pin each crossing point so the braid stays flat.
- Keep the braid tight and slim, not chunky.
- Use a clear elastic at the end of the braid.
- Pin through the braid and into the donut, not just into the hair.
- Smooth the hairline after the braid is set so the detail does not fight the sleek finish.
This style is useful for layered hair, and especially for anyone growing out bangs or face-framing pieces. The braid does the quiet repair work the donut bun needs.
6. The Twisted Donut Bun
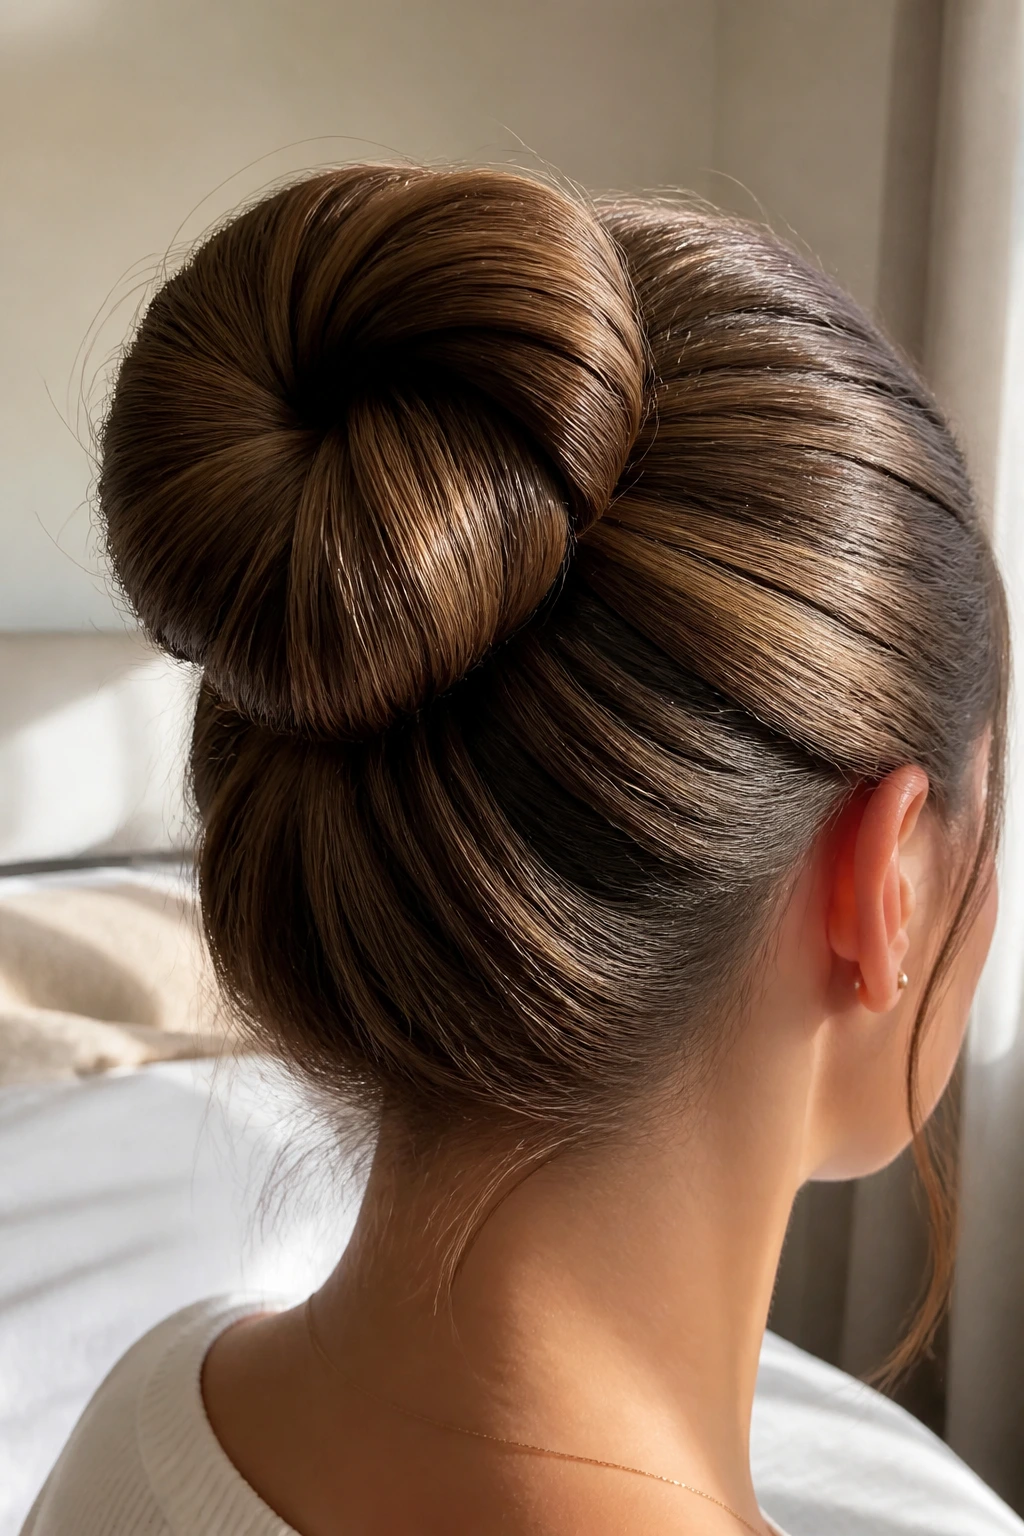
Unlike a braid, a twist sits flatter and feels a little softer. That makes the twisted donut bun a good pick when you want a sleek look that still has some movement.
Twists are also faster than braids, which matters on mornings when your patience is thin. Divide the ponytail into two sections, twist each side in the same direction, then wrap them around the donut in opposite arcs so the finished bun looks balanced. The twist lines catch the light a bit differently, which adds shape without needing extra accessories.
This version is especially nice for medium- to long-length hair because the ends tuck in cleanly. Very short layers can pop loose, though. If your hair barely reaches the ring, a twist can unravel faster than a braid.
Use this one when you want the bun to feel a touch less formal than a classic ballet shape. It is neat, but not severe. That middle ground is useful more often than people think.
7. The Wrapped Ponytail Donut Bun
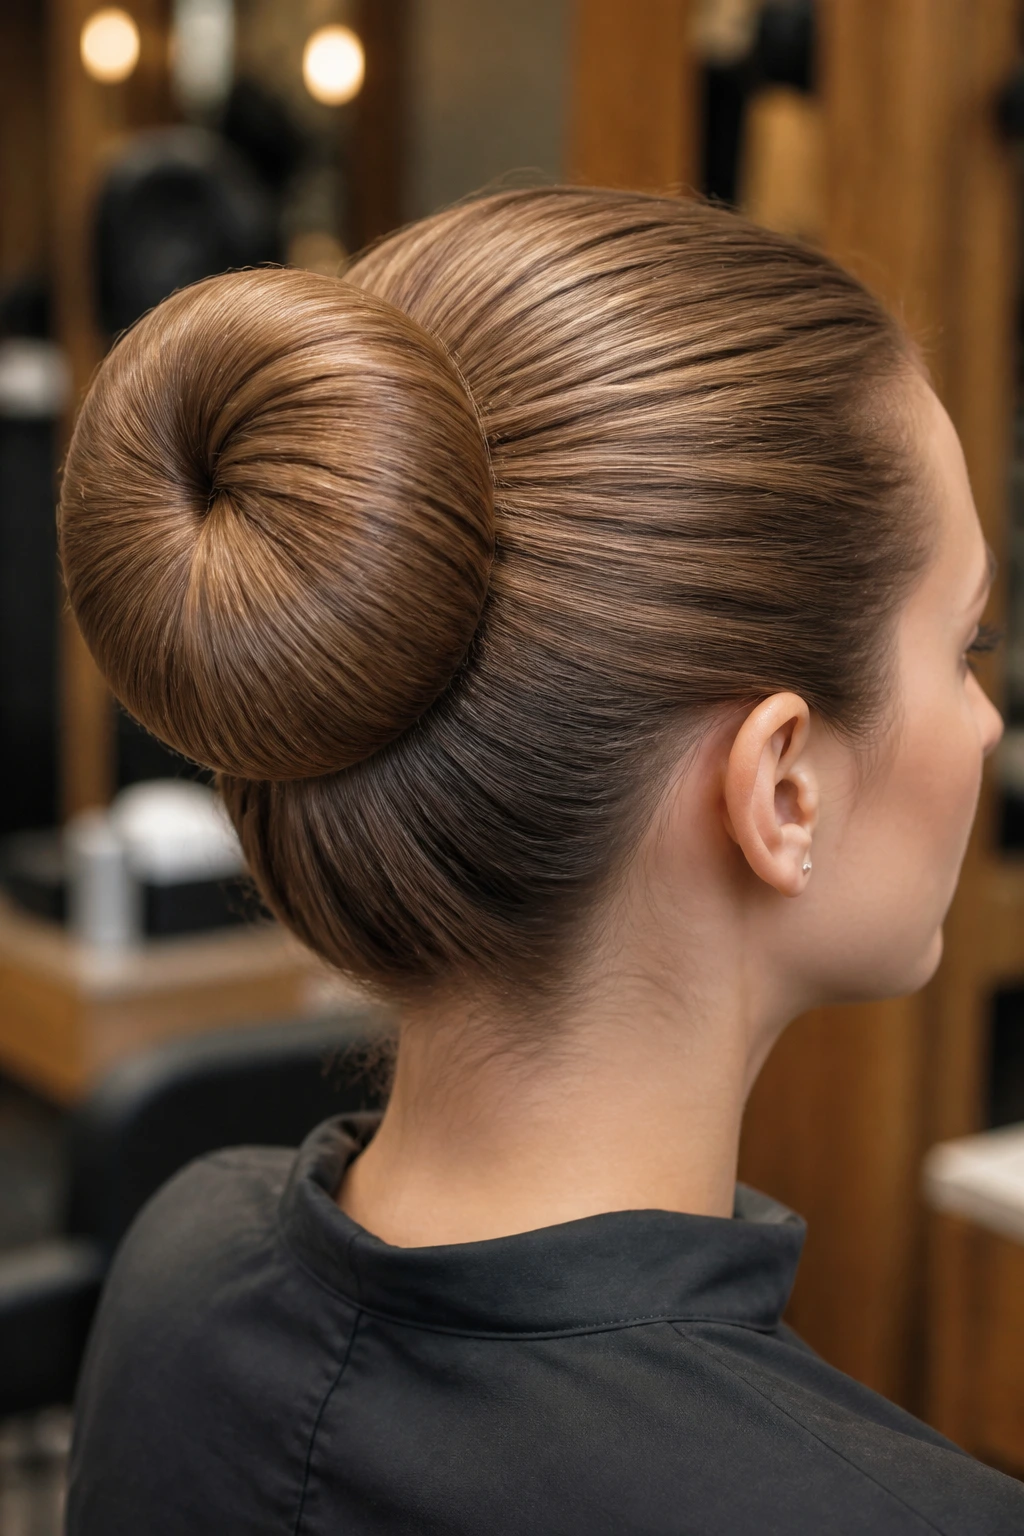
Imagine you have twelve minutes, a coat half on, and hair that is a little damp at the roots. The wrapped ponytail donut bun is the style that saves the day.
It starts like a plain ponytail, which is part of the appeal. You secure the base first, then wrap the hair around the donut with steady tension, tucking the ends underneath as you go. No extra steps. No elaborate sectioning. Just a clean spiral that hides the foam and keeps the finish smooth.
What Helps Most
- Use a strong elastic for the first ponytail, not a soft one.
- Angle each bobby pin inward toward the base so the bun anchors itself.
- Keep the wrap even from top to bottom so one side does not puff out.
- Brush the surface once more before the final pin goes in.
This bun works well when you need a clean look without a lot of fuss. It is probably the most practical choice on the list, and that is not a small thing. Pretty styles are nice. Styles you can actually do twice a week are better.
8. The Center-Part Ballet Bun
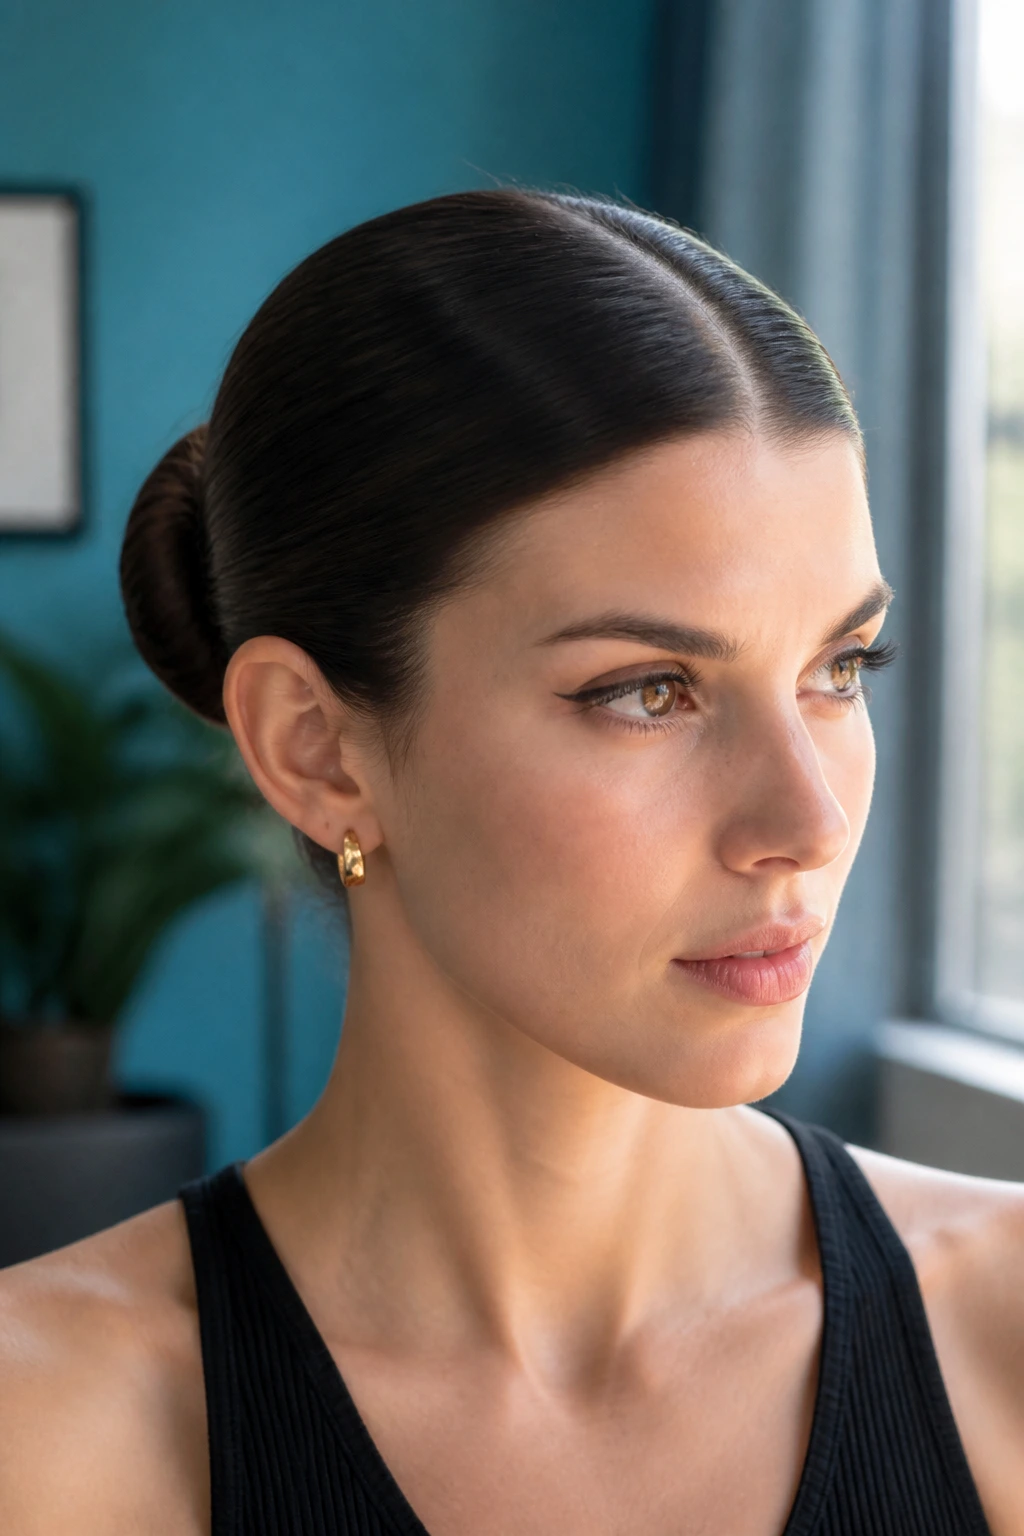
The center part should look like a thin line, not a trench. The bun should look like a tidy circle resting at the back of the head. When both pieces are done well, the whole style feels sharp immediately.
A center-part ballet bun gives you symmetry, which can be very flattering if your features already have strong balance. It tends to elongate the face and keep the focus on the eyes and cheekbones. That is why it reads so clean in photos and in person, even when the lighting is not kind.
Getting the Part Right
Use the tip of a tail comb to draw the part straight back to the crown. If the line wobbles, the whole bun can look a little off. Then smooth each side back separately before joining them at the ponytail. That small pause helps the part stay visible.
The rest is restraint. Do not overload the roots with product, and do not tug the bun so tight that the sides ripple. The goal is polished, not strained. A little shine at the surface is enough; a shellacked look is too much.
This one is a good pick when you want elegance without decorations.
9. The Side-Swept Nape Donut Bun
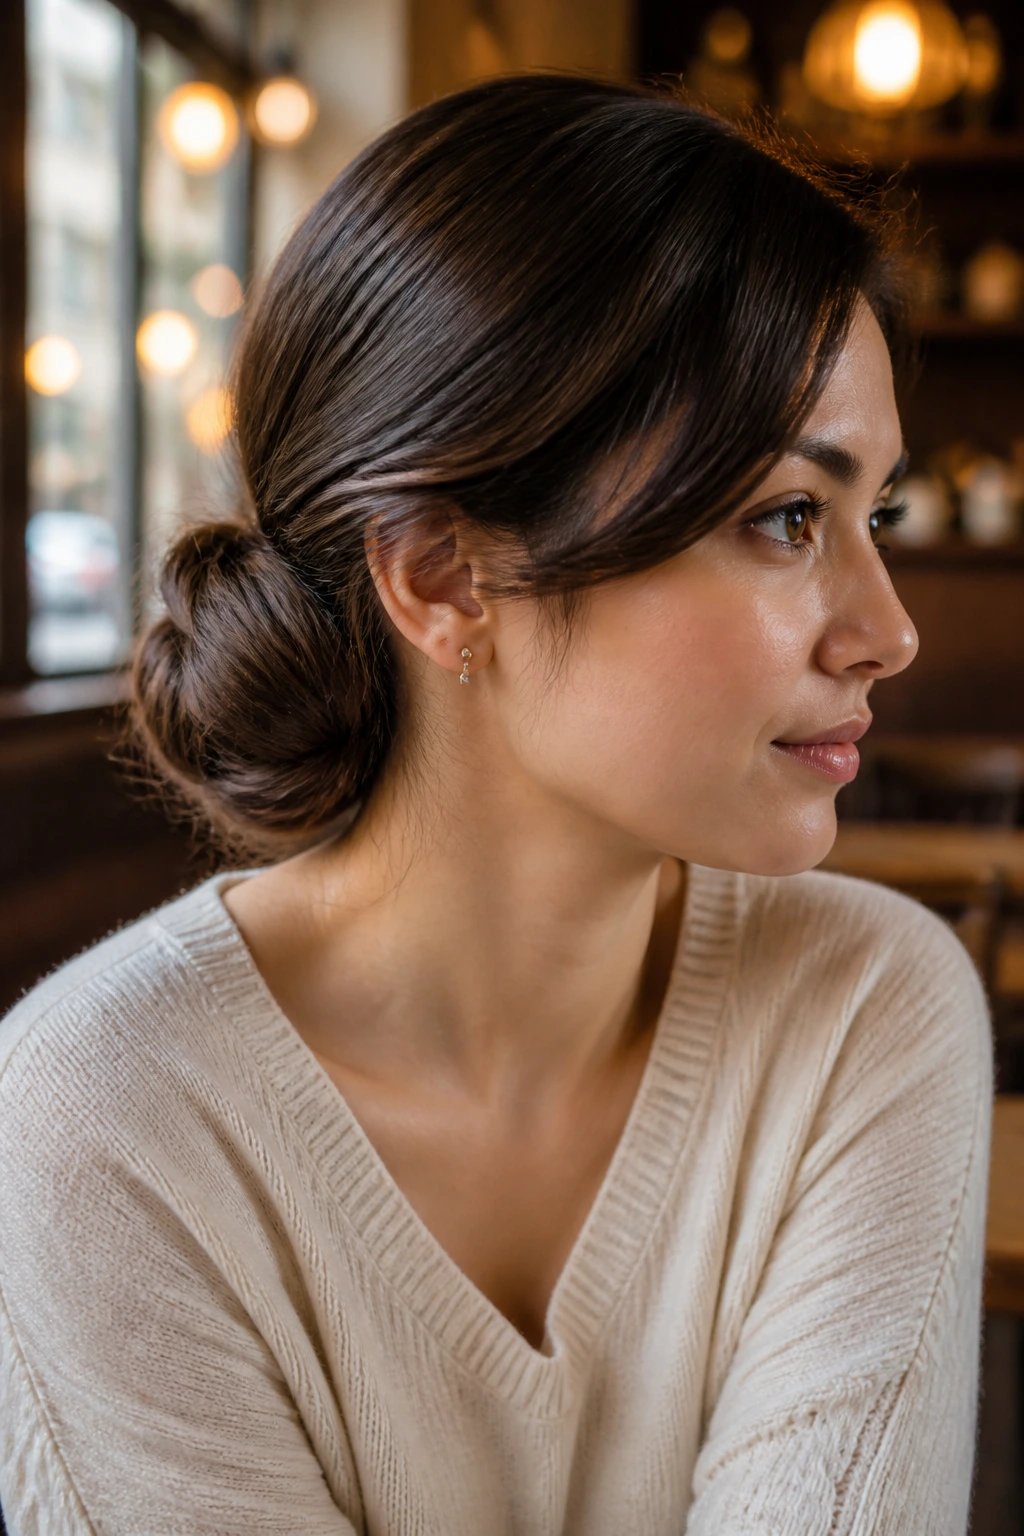
Can a sleek bun still feel soft? Absolutely. A side-swept nape donut bun proves it.
The front section sweeps gently to one side, then the bun sits low and neat at the nape. That little diagonal line changes the energy of the whole style. It feels less rigid than a straight-back bun, but it still looks controlled. If you want something polished that does not feel severe, this is a strong place to start.
Use a flat iron or a brush blow-dry on the front pieces if they are stubborn. The sweep should lie close to the head, not float away from it. Then pin the curve just behind the ear so the side stays smooth all day. One hidden pin usually does more than three loose ones.
This style is especially flattering if you like a softer frame around the face. It works with long earrings, sharp collars, and dresses that already have a lot going on near the neckline. The bun stays quiet while the sweep gives the style a little personality.
10. The Micro-Braided Accent Donut Bun
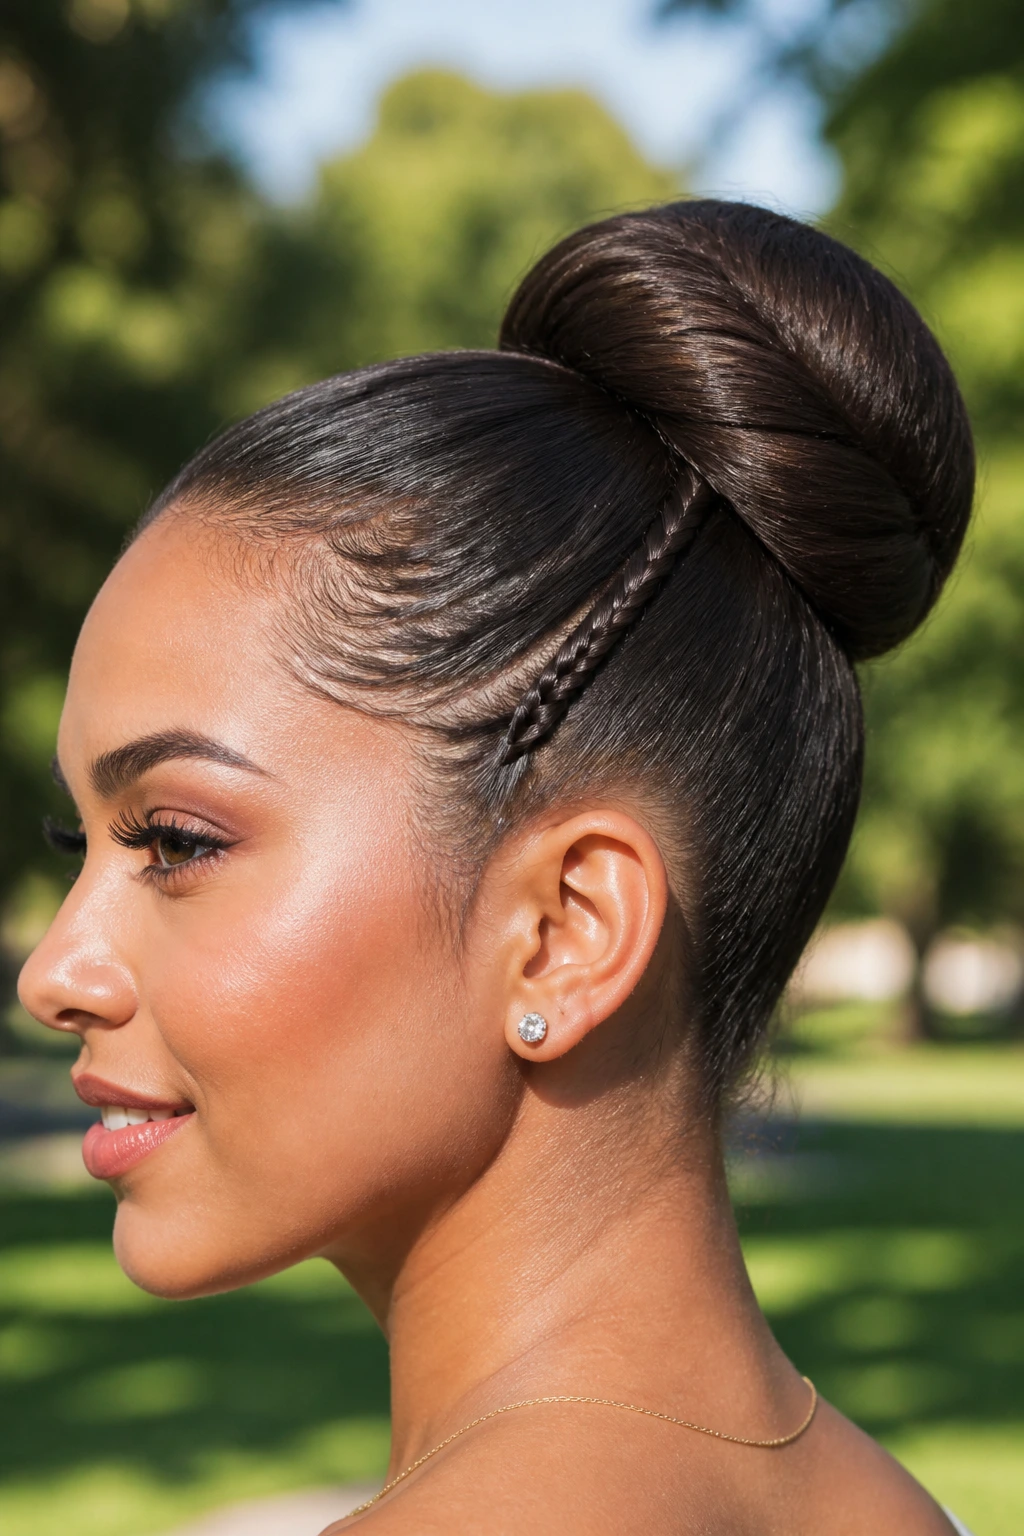
A tiny braid near the temple can make the whole bun look more finished without breaking the sleek line. That is the charm of the micro-braided accent donut bun.
This is not about making the bun busy. It is about adding one small detail in a place that does not interfere with the smooth shape. A braid that is only a quarter inch wide can tuck behind the bun or run along the hairline before disappearing into the base. The result feels intentional, not fussy.
Where the Detail Works Best
- Place the braid on one side only if you want the bun to stay clean.
- Keep the braid flat against the head so it does not puff up.
- Stop braiding once you reach the bun base; do not drag it through the whole style.
- Use a pin that matches your hair color so the braid stays the focus.
This is a good choice when you want texture but do not want curls, waves, or loose face pieces. It gives the style a little edge while keeping the silhouette neat. I like it most on hair that is all one color, because the braid pattern stands out just enough to matter.
11. The Hair-Net Finish Donut Bun
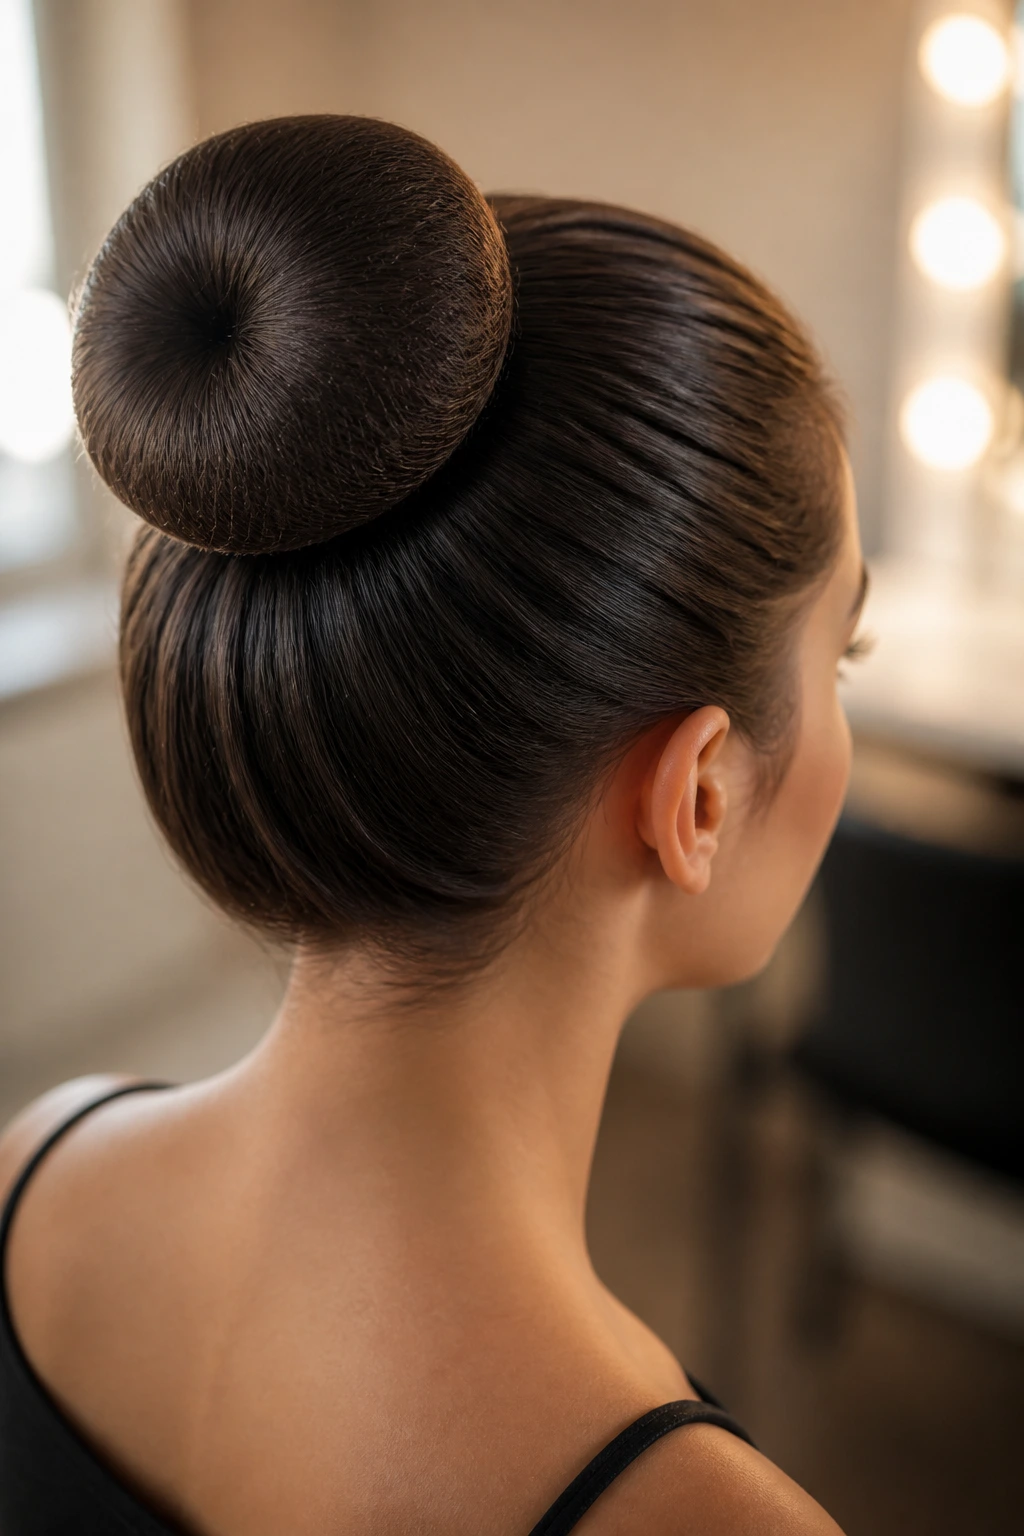
If you hate loose strands, the hair-net finish is the cleanest version on this list. It is a little old-school, and that is exactly why it works.
A hair net stretched over the bun keeps every wrap in place and stops the little ends from escaping. Use a net that matches your hair color as closely as possible, then tuck it under the donut wrap so it disappears into the shape. The bun ends up looking smooth from every angle, even when the hair is fine or slippery.
This version is smart for humid days, long shifts, performances, and any time you know you will be moving around a lot. It is not the flashiest option, but it is one of the best for pure hold. The bun stays tidy without constant checking.
The one catch? The net has to be placed carefully. If it sits too loosely, it wrinkles. Too tight, and it can flatten the bun into an odd oval. A light, even stretch is the sweet spot. Once it is pinned correctly, the finish looks cleaner than most sprayed styles.
12. The Double-Loop Donut Bun
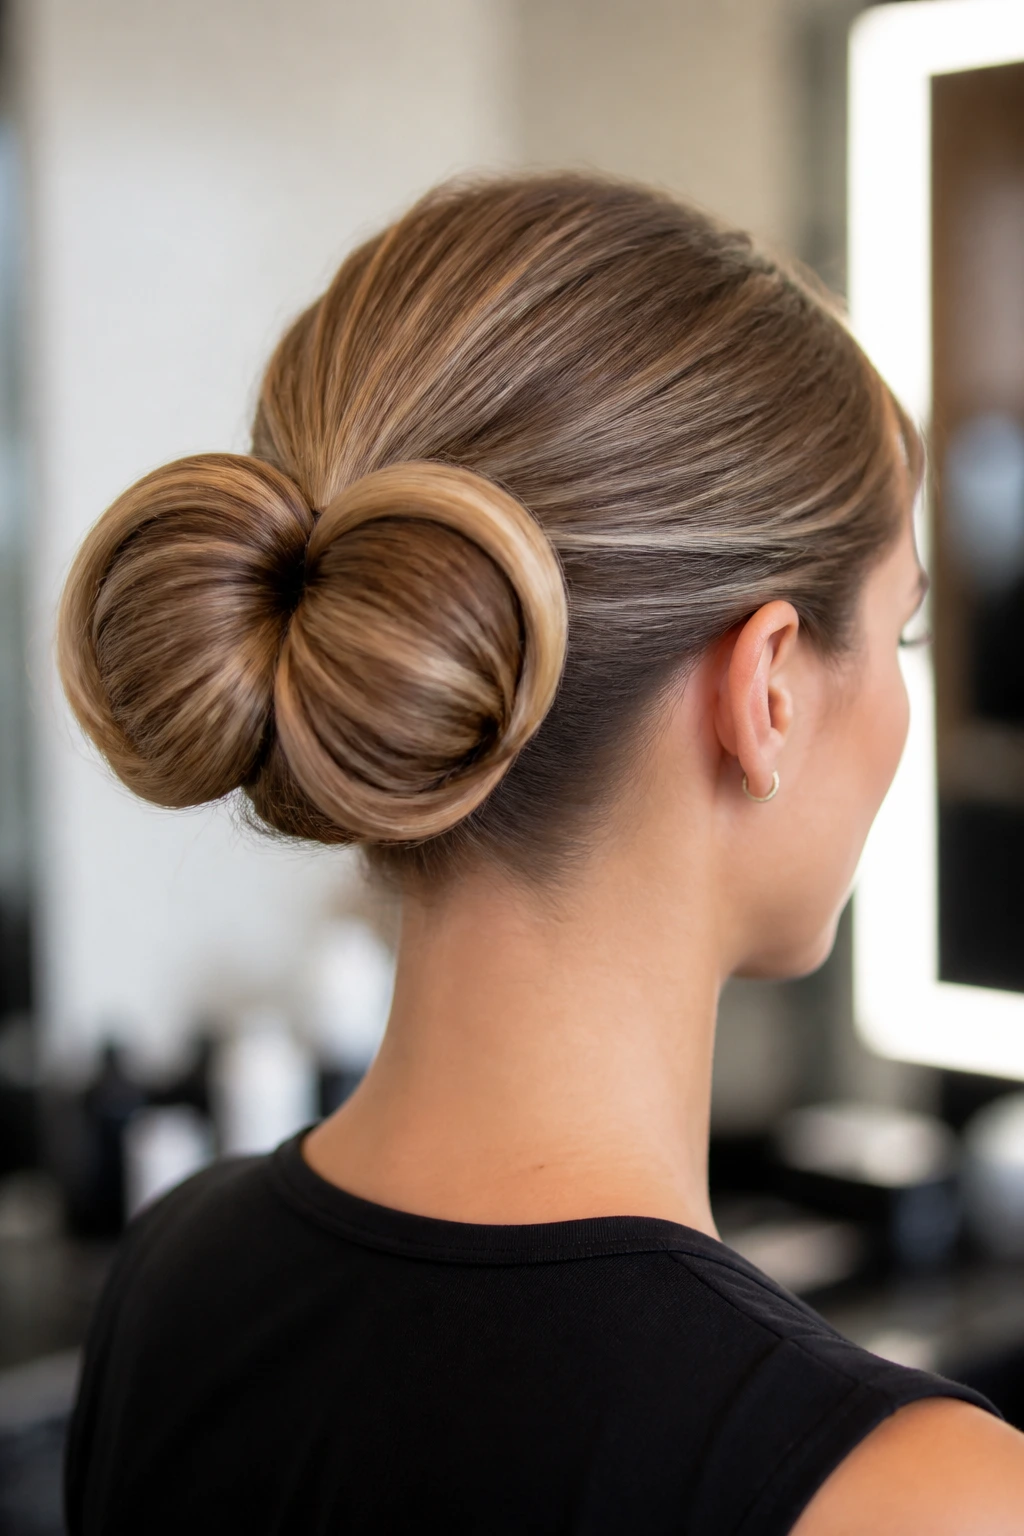
The double-loop donut bun looks architectural, not fussy, when the loops are sized evenly. That is the part most people miss.
Instead of wrapping all the hair in one uninterrupted circle, divide the ponytail into two sections and send each section around the donut in a mirrored loop. The shape reads a little more sculpted, which gives the bun interest without needing curls or extra texture. It is neat, but it is not plain.
Balance matters. If one loop is fatter than the other, the whole bun starts to look accidental. Keep both sides snug, and pin the meeting points where the hair overlaps so the structure stays flat. A U-pin works well here because it can hold a wider section without creating a bump.
This style suits thicker hair in particular. Thick hair sometimes turns into a heavy blob when wrapped once, and the double-loop method spreads the weight better. It also gives you a little more room to hide layers at the back, which is always a relief.
13. The Tucked-In Chignon Donut Bun
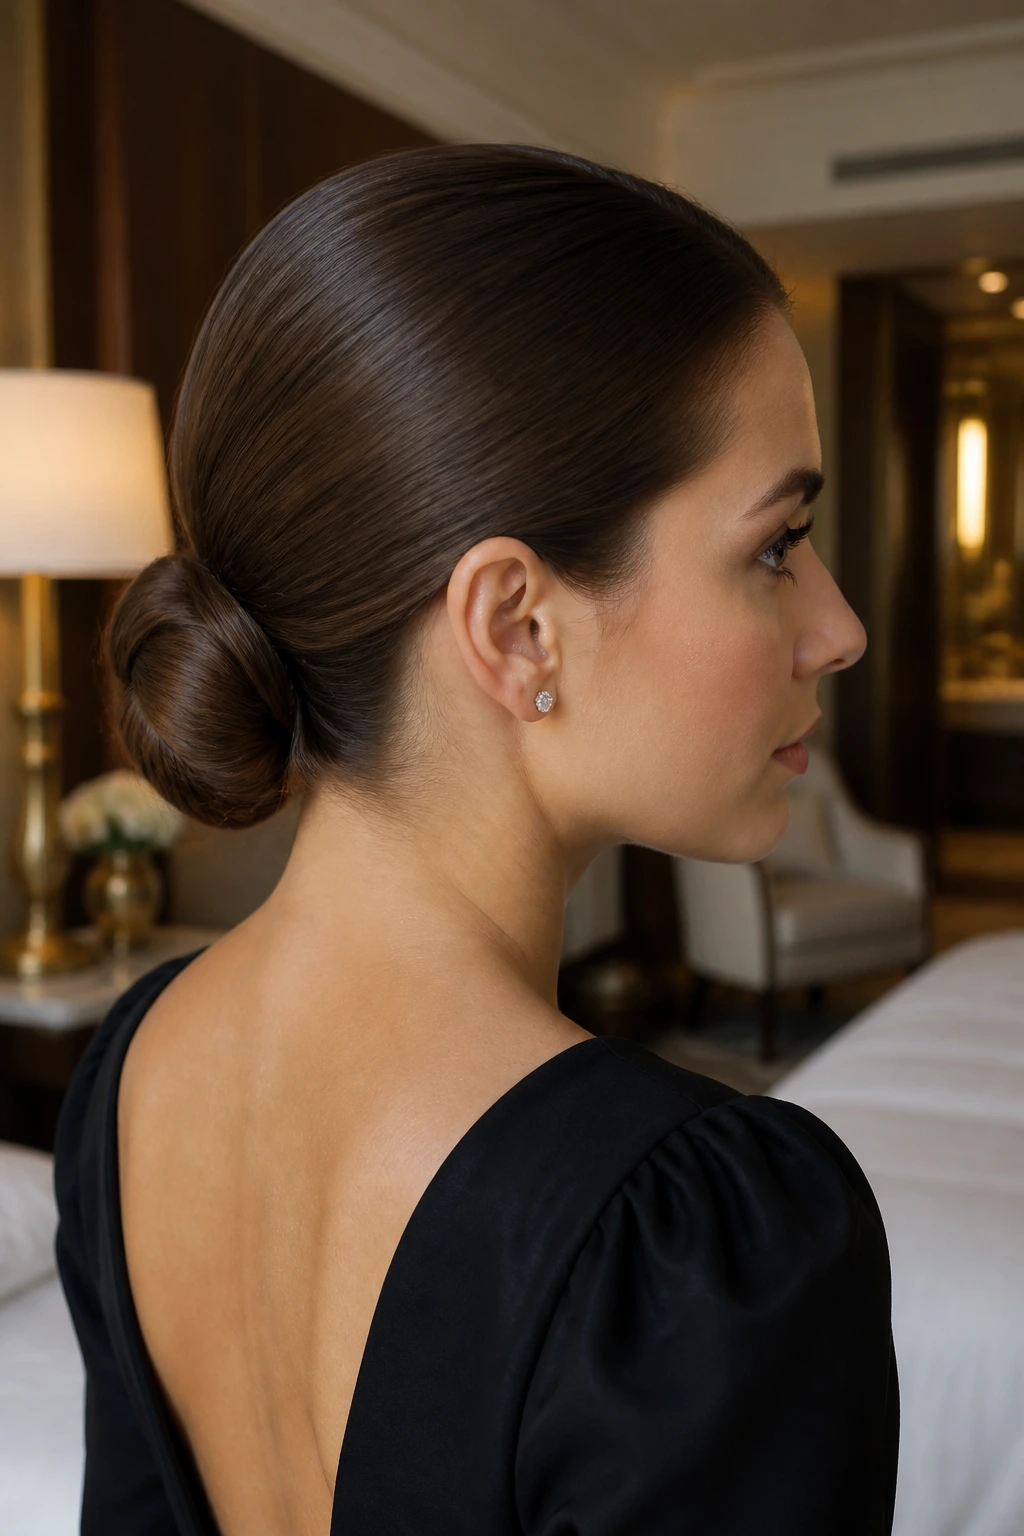
This is the most formal version on the list. The tucked-in chignon donut bun sits low, stays small, and keeps the ends hidden so the shape looks finished from the first glance.
The donut ring is still doing the job, but the final effect leans chignon rather than obvious bun. That means the hair is folded in closer, the outline is tighter, and the whole style works well with a sharp collar or a dress that already has a lot of shape. It is the bun I would choose when the neckline matters as much as the hair.
A smaller donut is usually enough here. If the ring is too large, the style loses that tucked-in feel and starts reading like a standard bun again. Pin the ends under the base rather than letting them fan out around the outside. That one choice changes the whole mood.
This is also a smart option for fine hair, since the compact size helps the bun look intentional instead of sparse. It is quiet. It is tidy. It gets the job done.
14. The Pearl-Pin Donut Bun
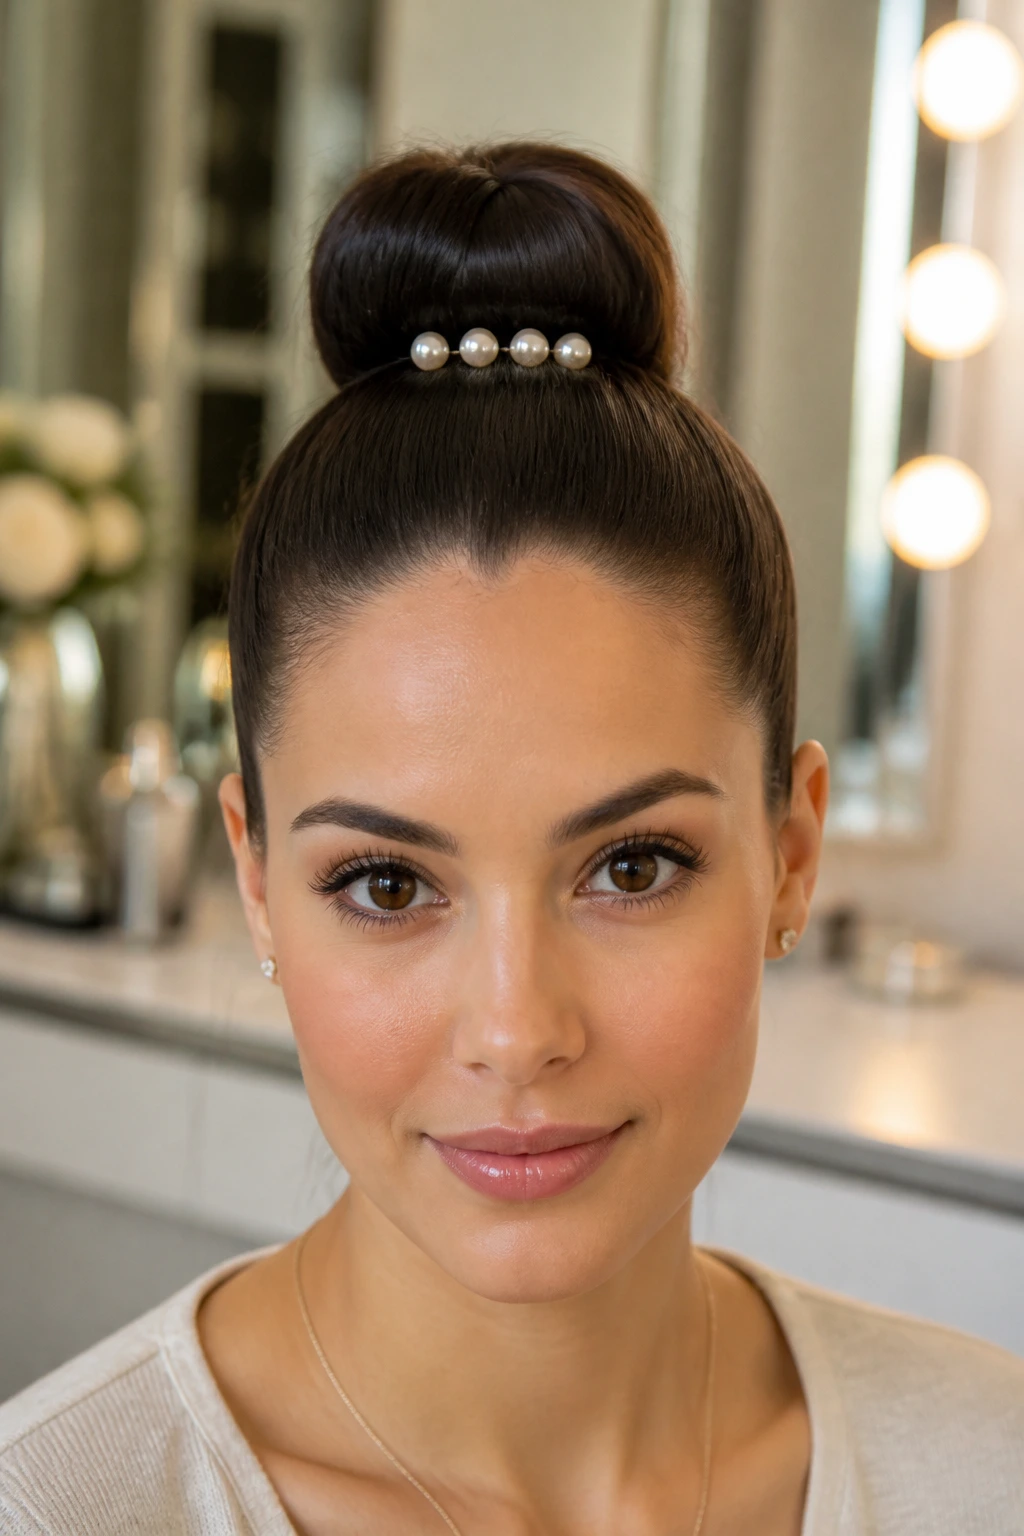
Can accessories stay sleek instead of sweet? Yes — if you keep them sparse and placed on purpose.
Pearl pins or simple metallic pins can turn a donut bun into something cleaner and sharper, not busier. The trick is restraint. Three or five pins are enough for most buns, and they should sit in a line or a small cluster rather than being scattered around like confetti. Too many pins make the style lose its shape.
Where the Pins Belong
- Place the pins close to the bun base, not far out on the sides.
- Keep the spacing even, about 1 to 2 inches apart if you use more than one.
- Match the metal tone to your jewelry so the look feels connected.
- Use pearls on one side only if you want the bun to stay elegant instead of decorative.
This version works well when the outfit is plain and needs a small lift, or when the bun itself is simple and needs one detail to feel finished. I like it for events where you want polish without turning the hairstyle into the main character. The bun stays sleek. The pins do the talking.
15. The Day-Into-Night Donut Bun for a Sleek Look
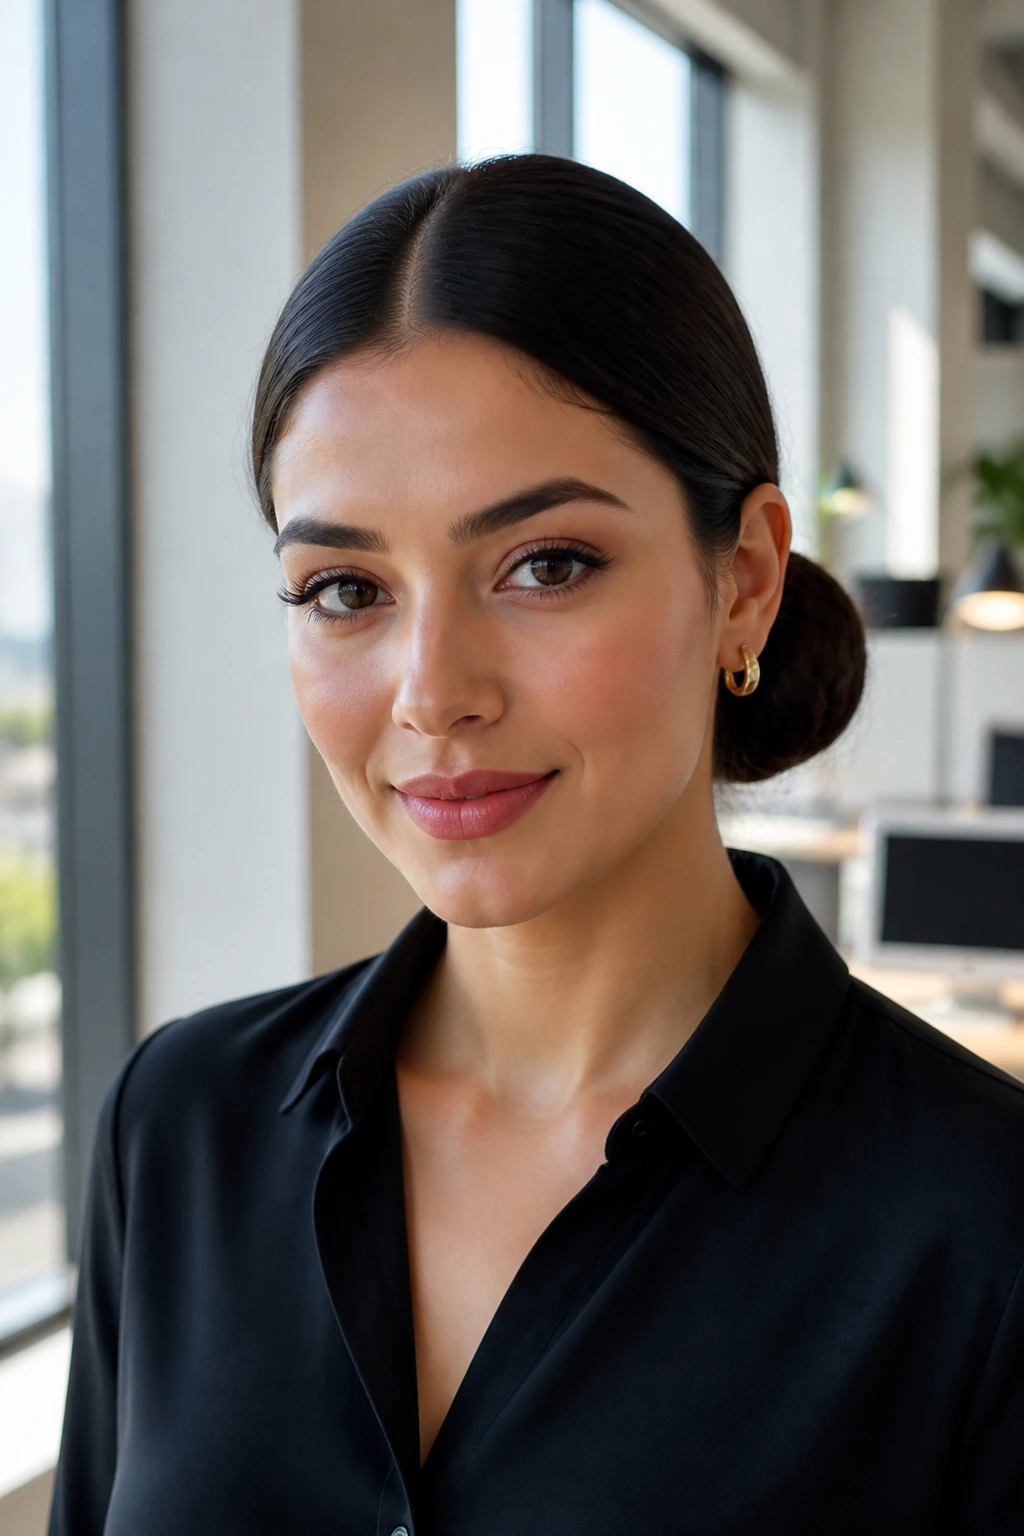
Say you need one bun that can survive a desk day, a dinner reservation, and a coat collar. This is the one to keep in your pocket.
Start with the classic low donut bun, but make the surface a little cleaner than usual. Use a center part if your hairline suits it, or a soft side part if that feels better. Keep the wrap tight and the base hidden, then stop before the style becomes overworked. That leaves you room to change one thing later without rebuilding the whole bun.
The best part is the flexibility. During the day, keep the bun plain and close to the head. At night, slide in one slim accessory, or loosen one thin face-framing piece if the style needs a softer edge. You do not have to start over. You just adjust the finish.
This is the version I would pick if I could only choose one. It is polished, fast, and easy to dress up or down without losing the sleek line that makes donut buns worth doing in the first place.
A good donut bun should look neat from the front, the side, and the back. If it does that, the style has already done most of the work for you.
