



The best loose hairstyles for wavy long hair are the ones that work with the bend you already have, not the ones that iron it into obedience. Wavy hair has movement built in. Use that, and the whole style looks richer; fight it, and you get flat roots, fuzzy ends, and that odd halfway-polished look that never quite lands.
Long waves can be slippery, though. They fall out of pins, stretch heavy at the crown, and get a little too friendly with humidity. So the styles that hold tend to do two things at once: they give the hair a shape, and they leave enough loose length for the wave pattern to stay visible.
A small amount of texture makes a big difference. A puff of dry shampoo at the roots, a little texture spray through the mids, or even one day of natural oil at the scalp can change how a twist or ponytail behaves in your hands. Clean, silky hair looks nice, but it often refuses to stay where you put it.
Some of the looks below are barely more than a twist and a pin. Others take a few extra minutes and pay you back by staying neat longer. That mix matters. Nobody wants to spend ten minutes on hair that collapses before lunch.
1. Soft Half-Up Twist
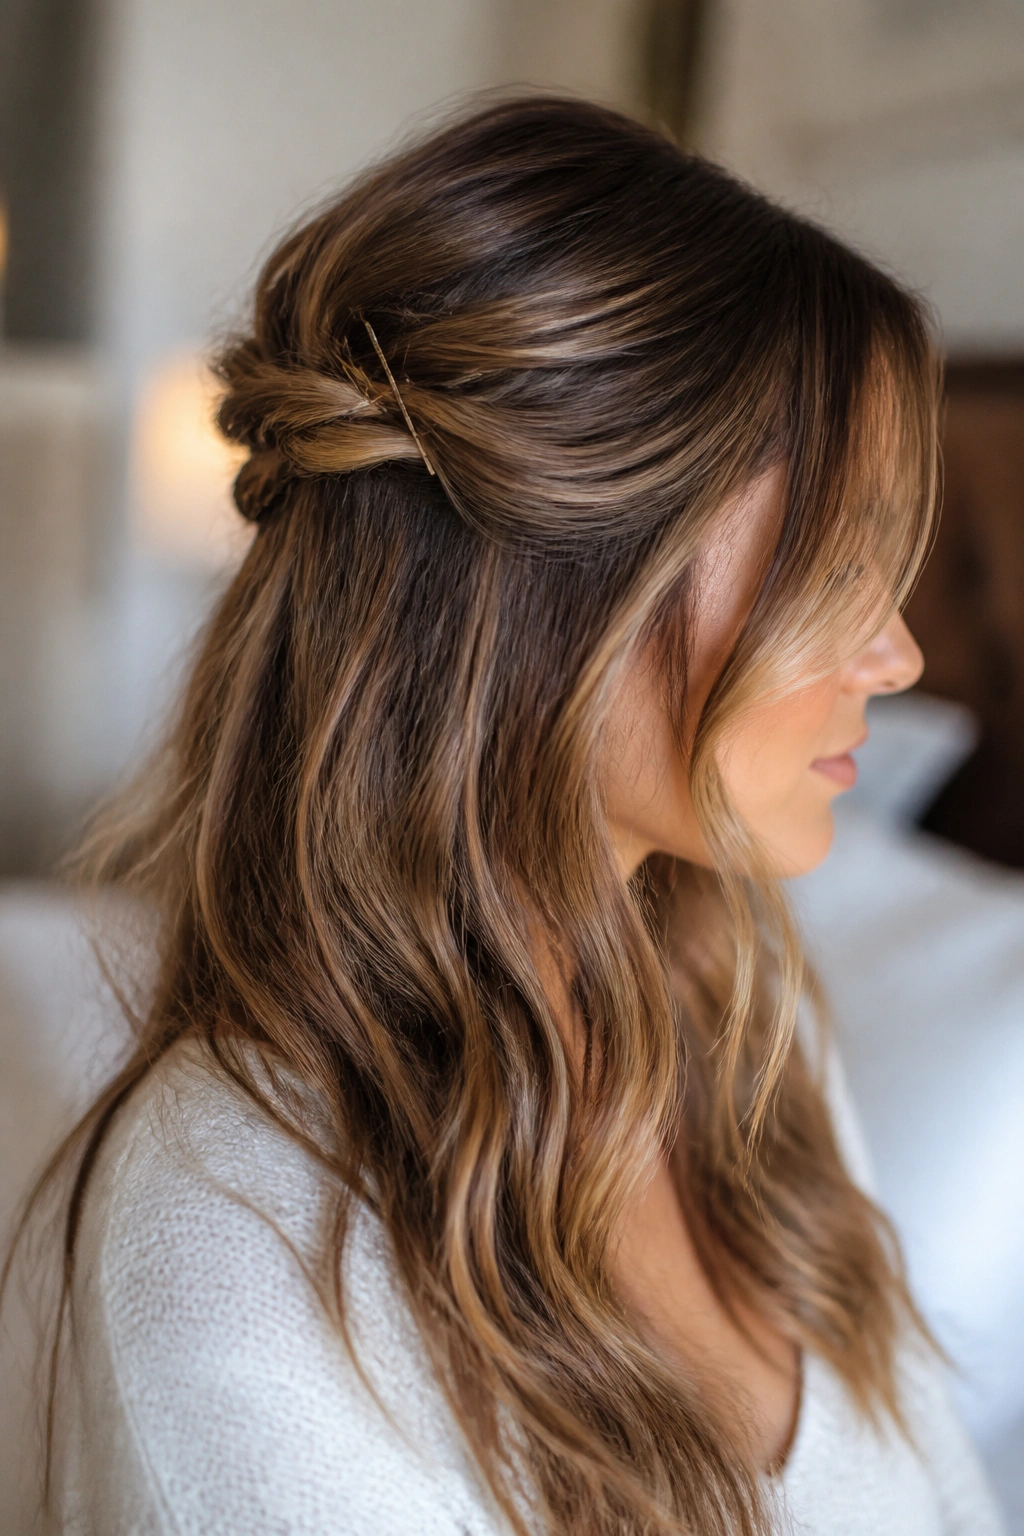
A soft half-up twist is the style I reach for when I want long waves to look intentional without looking arranged within an inch of their life. It keeps hair off the face, shows off the length, and still lets the ends move. That balance is the whole point.
Why the Twist Works
Take a section from each temple, twist them back toward the crown, and pin them together with two crossed bobby pins. The crossed pins grip better than one pin shoved in at an angle, especially if your hair is thick or a little slippery.
Leave the top loose. That sounds obvious, but people over-tighten this style all the time and then wonder why it looks stiff. A soft twist should sit a little above the occipital bone, not yanked flat against the head.
- Use 1-inch sections from each side for a subtle look.
- Pin the twist slightly off-center if your part is side-swept.
- Keep 1 to 2 face-framing pieces out near the cheekbones.
- Mist the twist with a light-hold spray before pinning if your hair is extra smooth.
Best trick: twist the hair backward, not inward. It gives a cleaner fold and stops the ends from poking out.
2. Claw Clip Half-Up
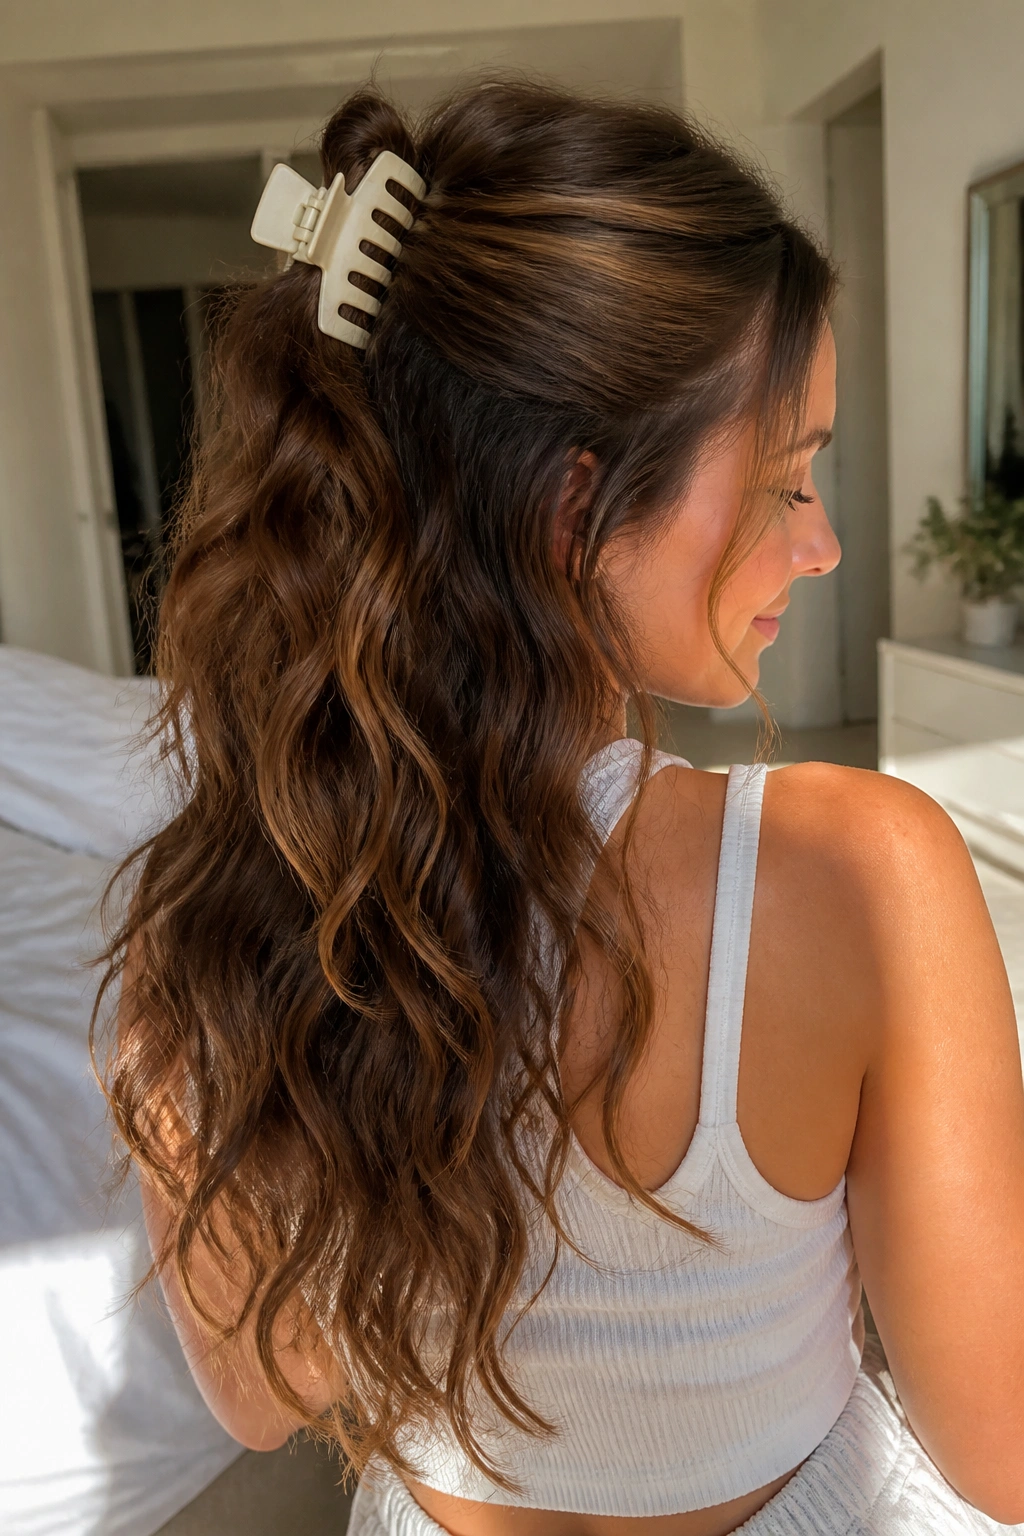
A claw clip half-up style can look lazy in the best way, if the clip is the right size. Tiny clips are a joke on long hair. They slip, they pinch, and they make the back of your head look crowded.
Pick a medium or large clip with long teeth, gather the top half of your hair at the back of the crown, and twist once before clipping. Let the ends spill out a little. That unfinished shape is what makes it feel relaxed instead of office-polished.
I like this one on second-day waves because the clip gives tired roots a break. It also works when you want volume on top but do not want to lose the texture through the lengths. The key is to keep the twist loose enough that the wave pattern stays visible.
If your hair is very thick, leave a little more hair out at the nape and clip only the top 60 percent. That reduces bulk, and the clip sits more securely. Small change. Huge difference.
3. Low Ponytail for Wavy Long Hair
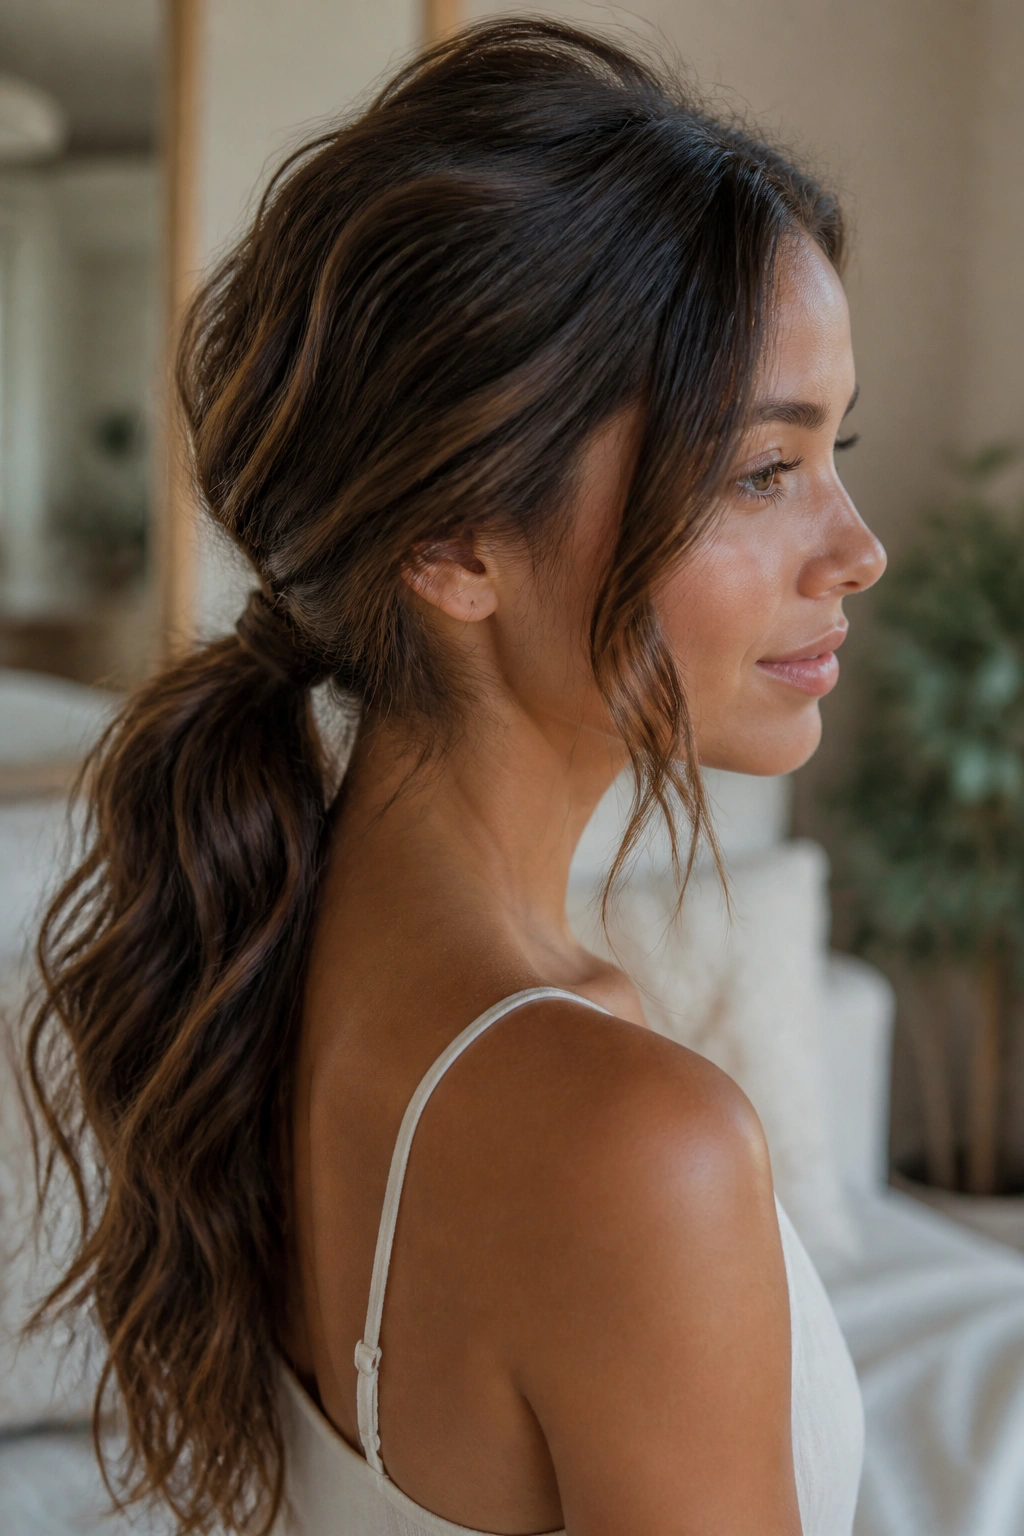
Why does a low ponytail look softer than a high one on wavy hair? Because it follows the natural fall of the head instead of pulling against it. The shape stays relaxed, and the length still shows off the bend.
How to Keep It Soft
Start with a loose center or side part. Brush only the top layer smooth, then gather the hair at the nape with one hand while keeping the crown slightly lifted with the other. That little lift matters; otherwise the style can sit too flat and drag the face down.
Wrap a small section of hair around the elastic if you want it to look finished, but don’t overdo the smoothing. You want the base neat and the rest flexible. A low ponytail should sway when you walk.
This is one of the easiest loose hairstyles for wavy long hair when you need something that works with a blazer, a knit dress, or a plain T-shirt. It’s plain in a good way.
4. Satin Ribbon Ponytail
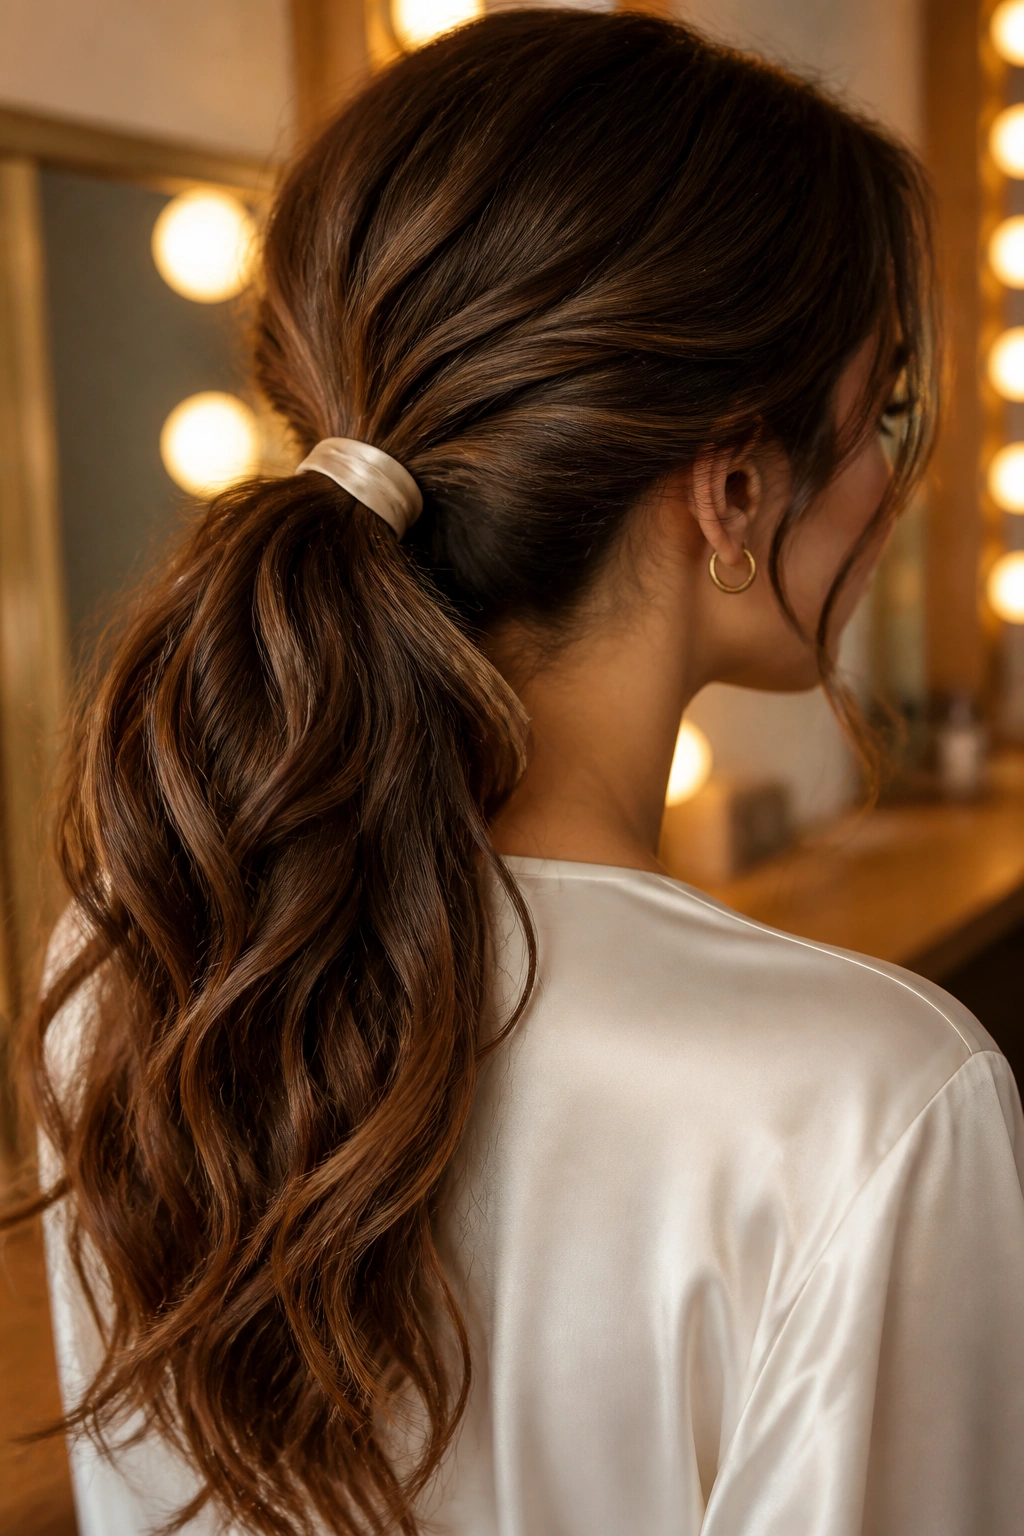
A ribbon changes the whole mood of a ponytail. Without it, the style can feel practical. With it, the ponytail looks a little more dressed up, even if you spent less than five minutes on it.
Tie the ponytail with a thin elastic first, then cover it with a satin or grosgrain ribbon. Satin is softer and a touch dressier; grosgrain has a bit more grip and stays put better. I prefer a ribbon about 1 inch wide for long hair, because anything thinner can disappear into the waves.
- Place the ribbon at the base, not halfway down the tail.
- Keep the ponytail low and loose for the softest finish.
- Leave the ends untouched so the wave pattern stays visible.
- Choose a ribbon that is long enough to tie in a neat knot plus a short tail.
This one is especially good if your hair has a little frizz. The ribbon distracts from the base, where the frizz usually gathers first, and the rest of the style can stay loose and airy.
5. Bubble Ponytail with Loose Sections
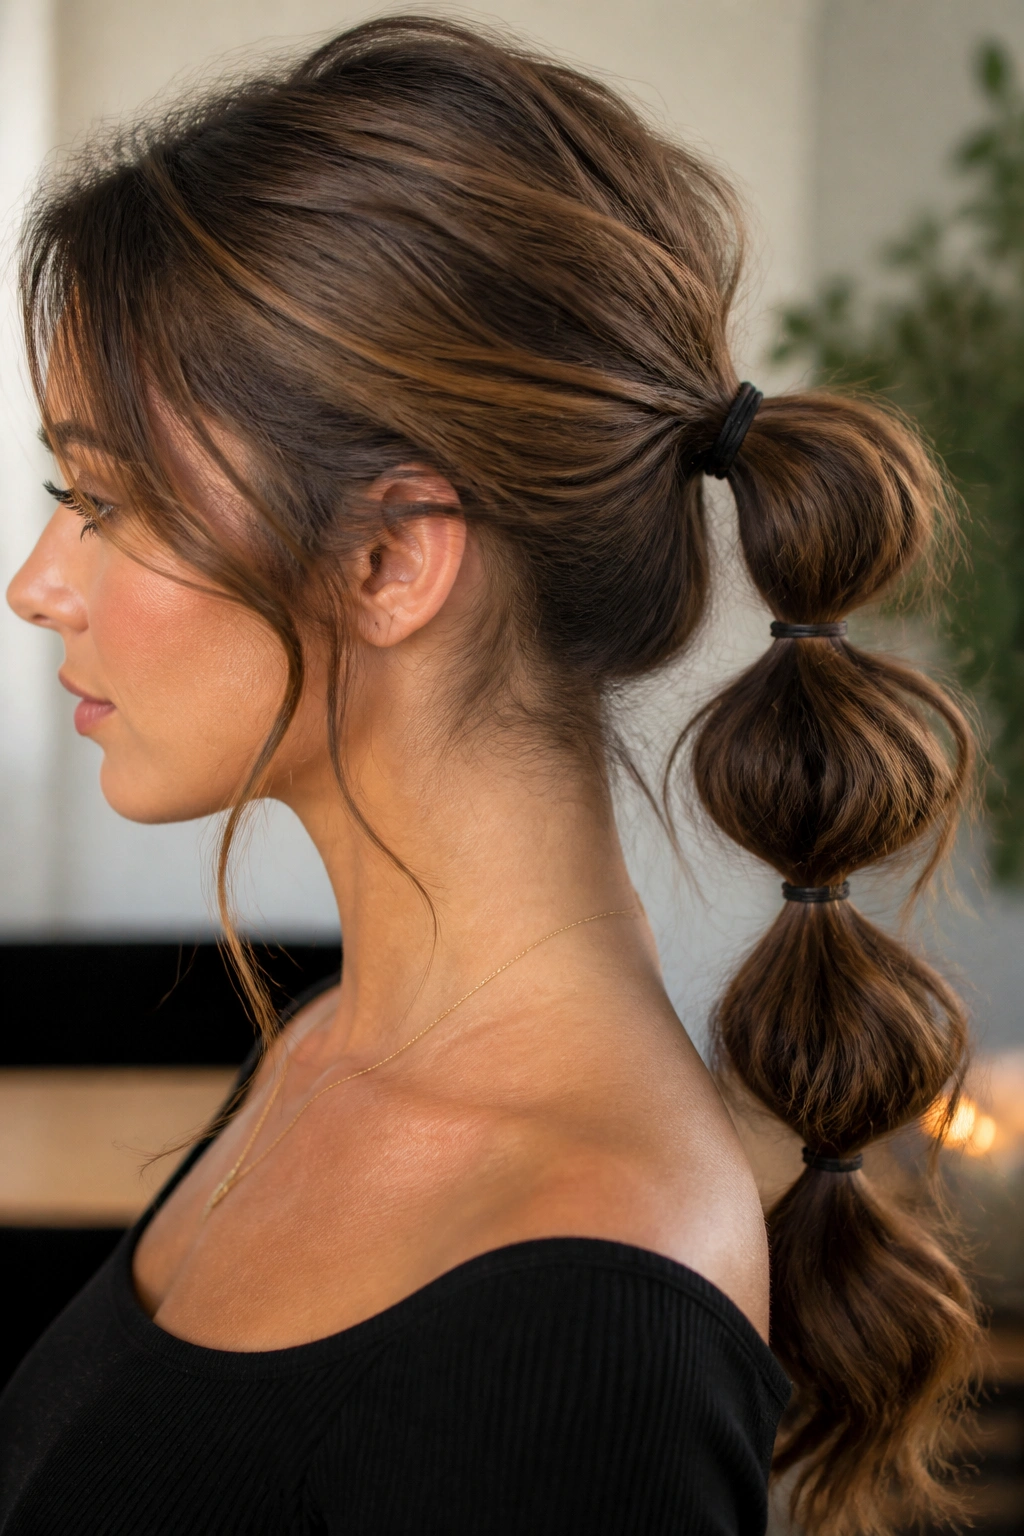
A bubble ponytail sounds playful because it is, but it also solves a practical problem: long wavy hair gets heavy fast, and regular ponytails can sag under that weight. The bubbles break the length into sections, which keeps the shape from looking limp.
Start with a low or mid ponytail. Add small elastics every 2 to 3 inches down the tail, then gently tug each section outward until it rounds into a bubble. Don’t yank. Pull just enough to create shape without exposing the elastics.
This works best when the waves are left a little imperfect. If every bubble is puffed to the same size, the style looks stiff and a bit costume-y. Uneven bubbles look more natural, which is the whole appeal here.
One thing people miss: the crown still matters. If the top is smashed flat, the ponytail never looks right. Keep the roots a little lifted with texture spray or a quick backcomb at the crown, then smooth only the surface.
6. Deep Side Part with Tucked Waves
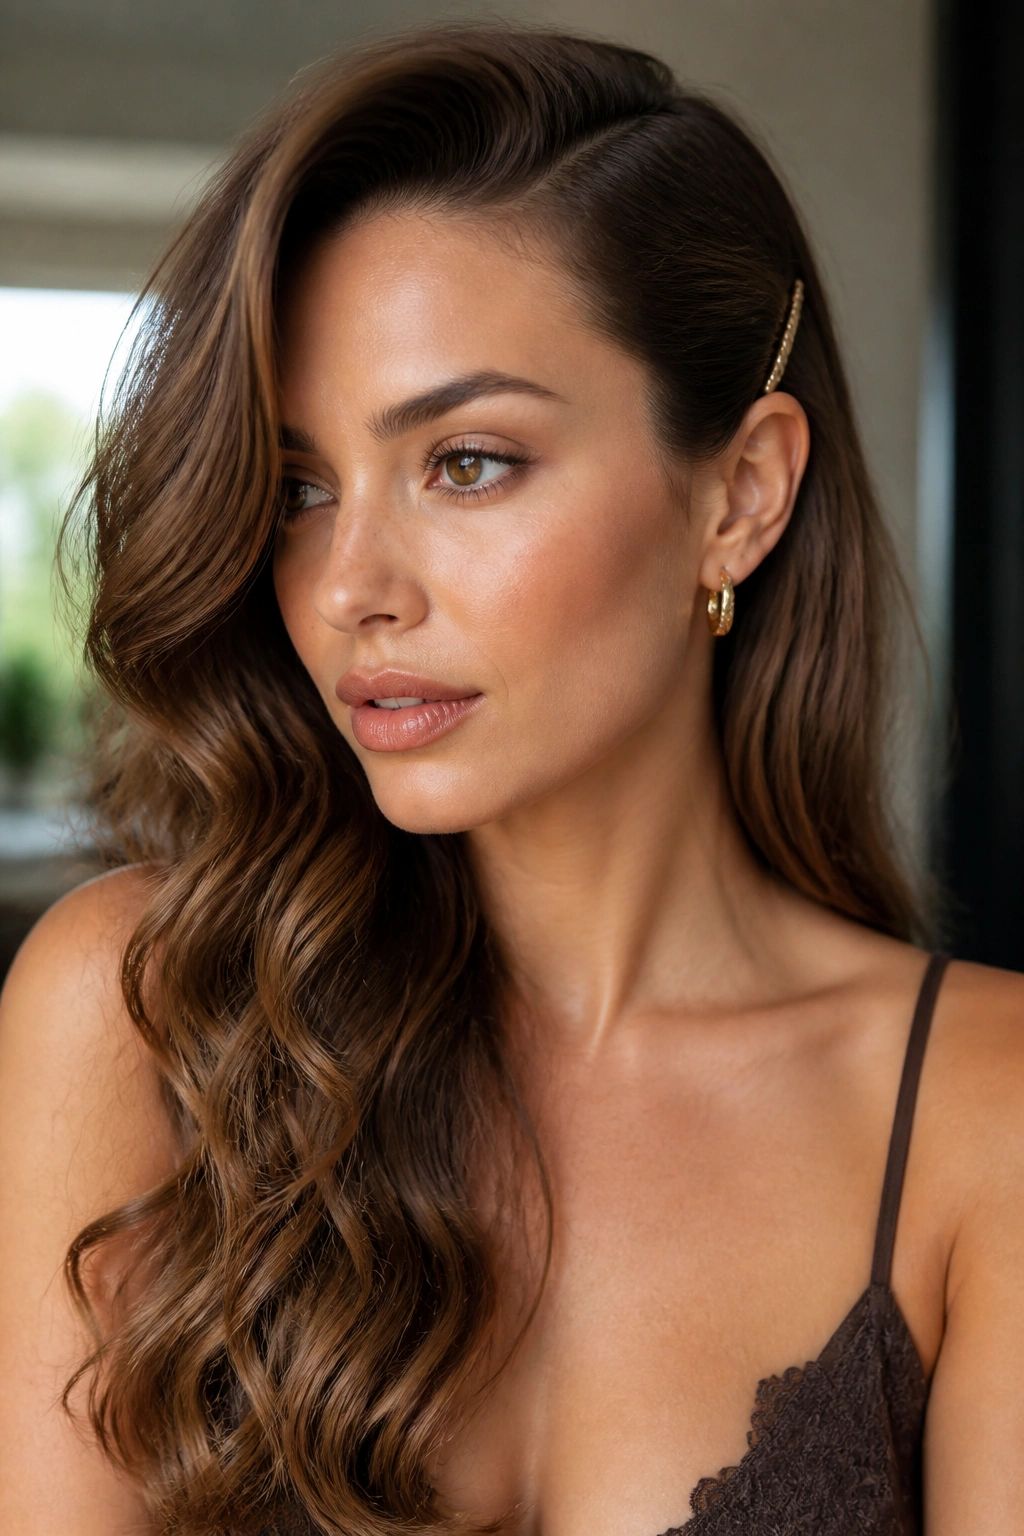
Unlike a center part, a deep side part changes the weight of the whole style in one move. It creates instant drama without needing curls, clips, or a ton of product. On long waves, that’s a gift.
Sweep the heavier side across the forehead and pin the smaller side behind one ear, or tuck it with a slim barrette. The waves should fall over one shoulder like they were meant to be there. That asymmetry keeps the look loose, and it frames the face in a way that feels a little more deliberate than leaving everything down.
What Makes It Softer Than a Straight Part
A side part gives the crown some lift, especially if your roots tend to lie flat. It also lets the front layers bend around the cheekbones instead of hanging straight down. That makes the style feel lighter, even when the hair itself is long and dense.
If your waves separate too much at the ends, run a pea-sized amount of cream through just the bottom 4 inches. Not the top. The top wants movement, not grease.
7. Waterfall Braid for Wavy Long Hair
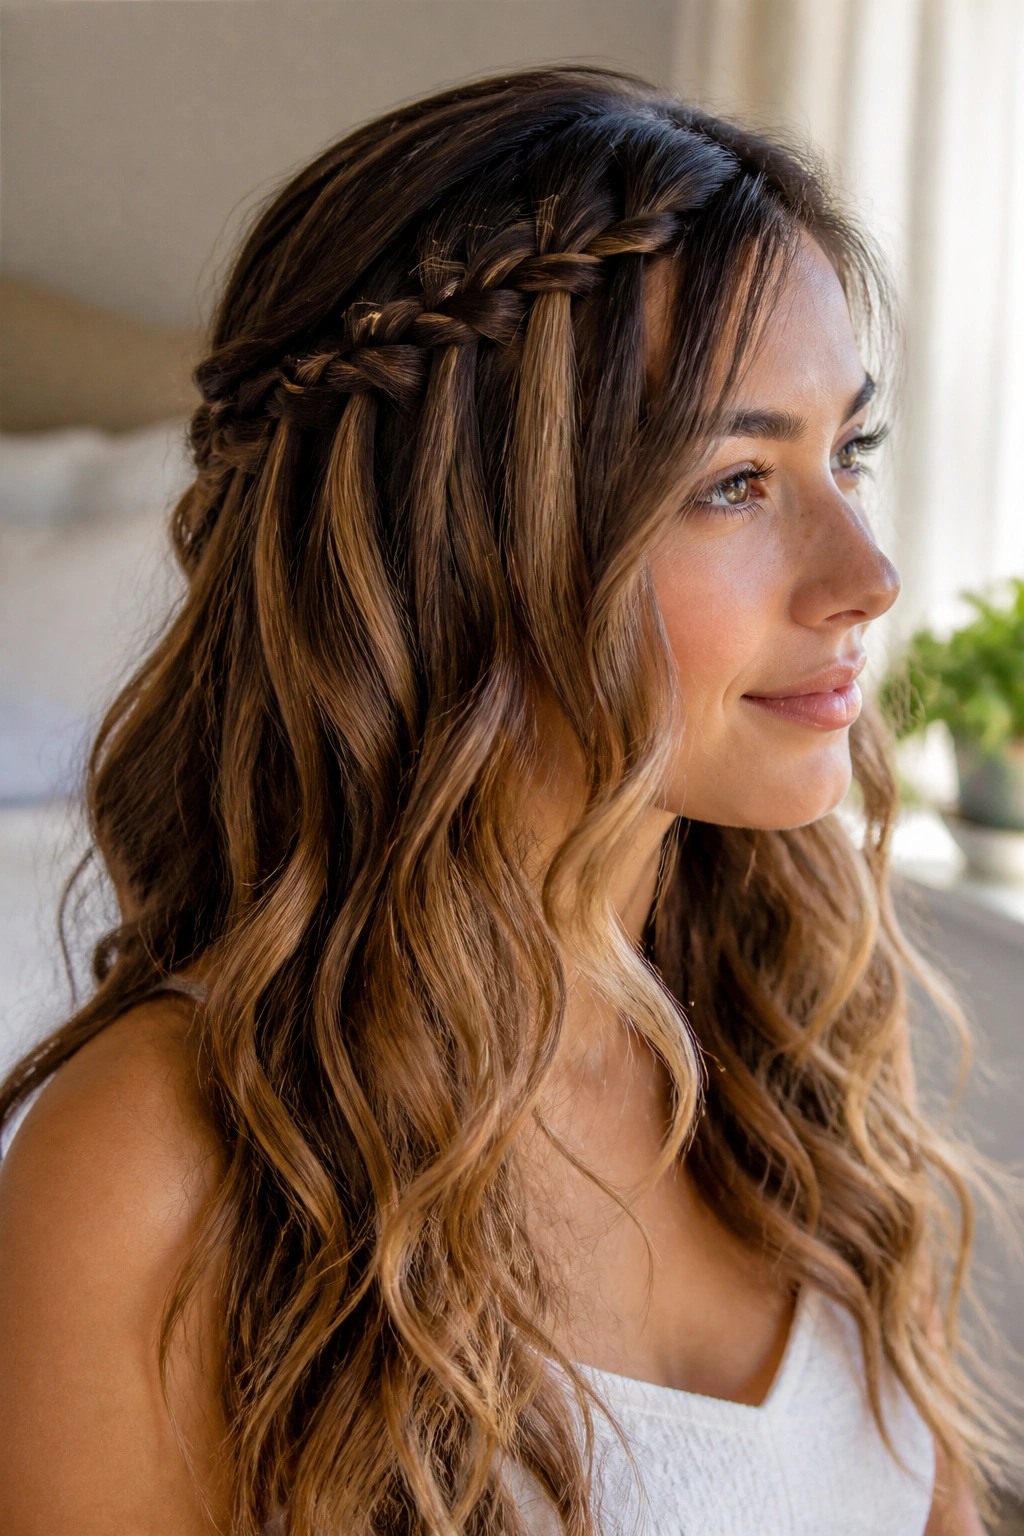
A waterfall braid is one of those styles that looks more complicated than it is, which is nice when you want people to think you spent more time on your hair than you did. The braid runs across the head and drops one section each time, so the loose waves keep spilling through.
Start on one side with a three-strand braid at the hairline. Each time you cross a section through, let the bottom piece fall and pick up a fresh section from above. Stop once you reach the other side and pin the end behind the ear or at the nape.
How to Keep It from Getting Stiff
Keep the braid wide and shallow. If you braid too tightly, the whole thing loses the soft, cascading look that makes it work. A 1-inch braid is enough for most people; a thinner braid can disappear in heavy waves.
This style is a good match for hair that has some texture but not a ton of root volume. The braid gives structure, and the lengths stay loose. It is one of the more romantic options on this list, though I’d skip it if your hair is freshly washed and slippery.
8. Half-Up Braided Crown
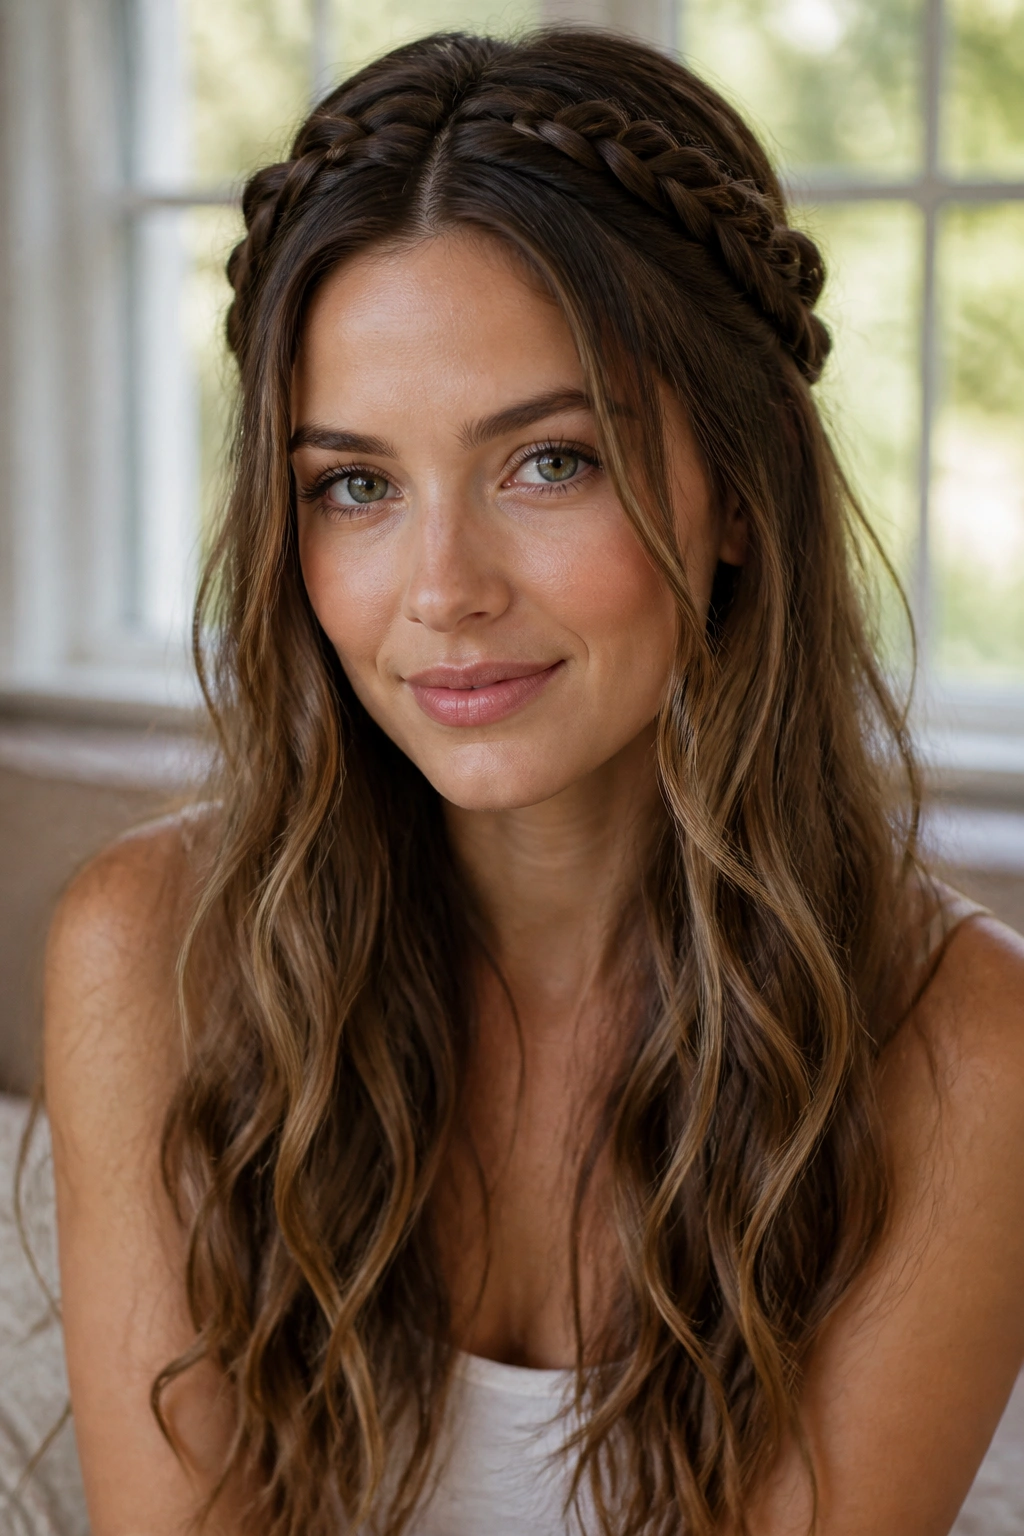
A half-up braided crown gives long waves a little shape around the face while leaving the rest of the hair free. It is more polished than a twist and less fussy than a full braid wrapped across the head.
Braid two sections from each temple, or make one braid that runs from ear to ear, then pin the braid across the back of the head like a slim headband. Keep the braid flat, not bulky. A braid that stands too high can make the crown look heavy, and nobody wants that.
The trick here is restraint. Let the braid be the detail, not the whole haircut. The waves below should still move and separate naturally, which is what keeps the style from feeling too dressed up.
I like this when the hair has a little grit from day-old texture. Freshly washed waves can be too smooth for the braid to hold its shape. If that’s what you’re working with, rough the roots a bit with dry shampoo first.
9. Messy Low Bun with Tendrils
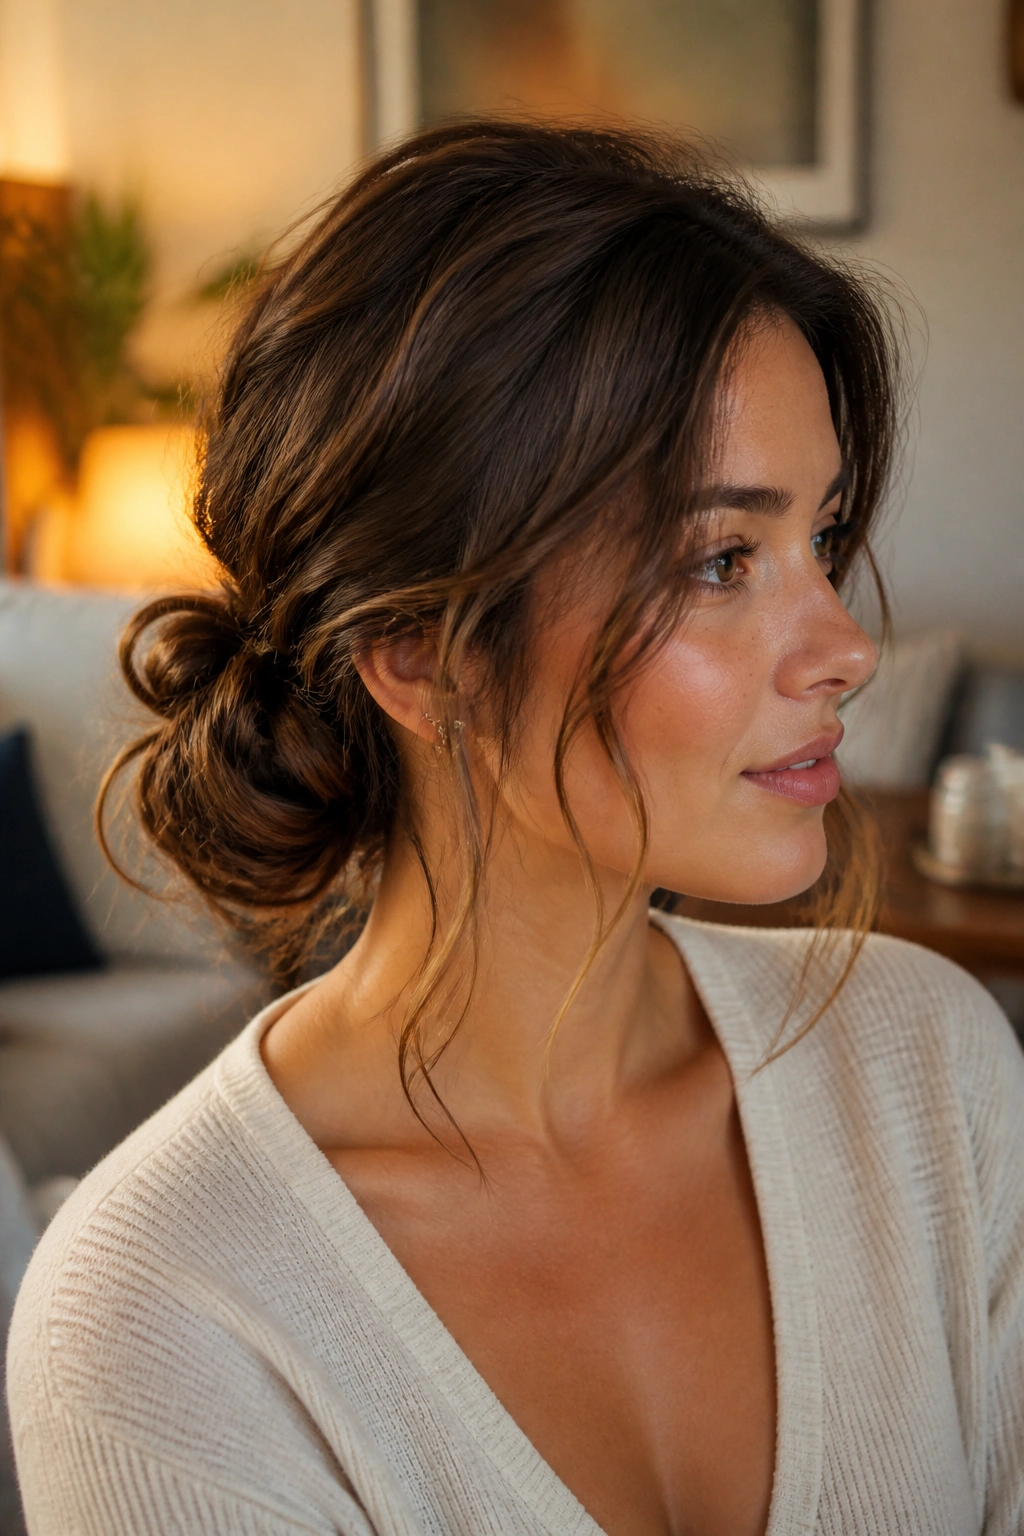
A messy low bun is the kind of style that saves you when your hair is doing the most and you are not in the mood to negotiate with it. Long wavy hair bunches beautifully at the nape, so you do not need a perfect twist to make it look right.
Gather the hair low, twist it loosely, and pin the bun in place with U-pins or regular bobby pins crossed through the center. Leave a few tendrils out around the ears and the jaw. Those pieces soften the bun instantly.
- Pull out 2 to 4 tendrils, depending on how face-framing you want it.
- Let one side sit a little fuller if you prefer an asymmetrical look.
- Mist the bun lightly before pinning if the hair is silky.
- Stop before it gets too neat; a tight bun loses the charm.
The bun should sit at the nape, not at the center of the head. Lower placement looks more relaxed and uses the natural fall of long waves better. Higher placement can feel more severe, which is the opposite of what this style is about.
10. Twisted Low Chignon
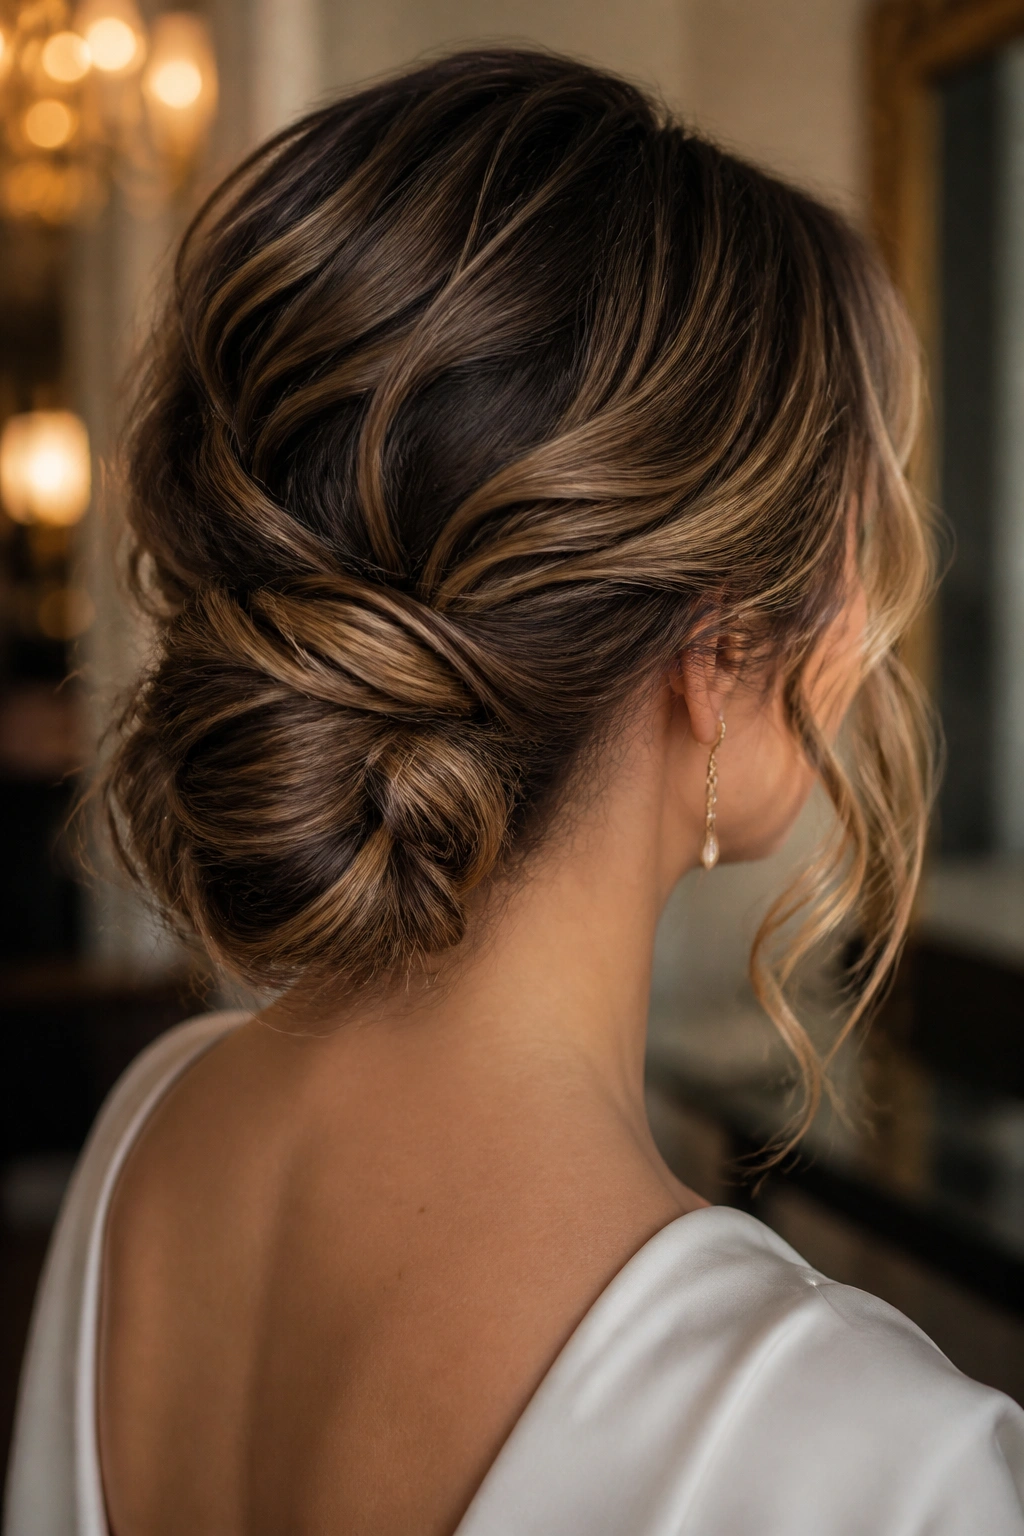
A twisted low chignon is the neater cousin of the messy bun. It still keeps the hair off the neck, but it has a cleaner shape and a more deliberate finish. If the messy bun is a Saturday style, this one can walk into a dinner without blinking.
Twist the hair into a flat coil at the nape, then tuck the ends under and pin them so they disappear. Leave the top slightly lifted and the front soft. The chignon should feel controlled at the base and loose around the edges.
A few waves peeking out at the temples make the difference between elegant and severe. That little bit of softness keeps the style from looking like it’s trying too hard. And honestly, long wavy hair looks better when you let some of it misbehave.
If your hair is thick, split it into two sections before twisting. One giant twist can be hard to pin and tends to slide. Two smaller twists stacked together hold more securely and lie flatter against the head.
11. Pinned-Back Temple Waves
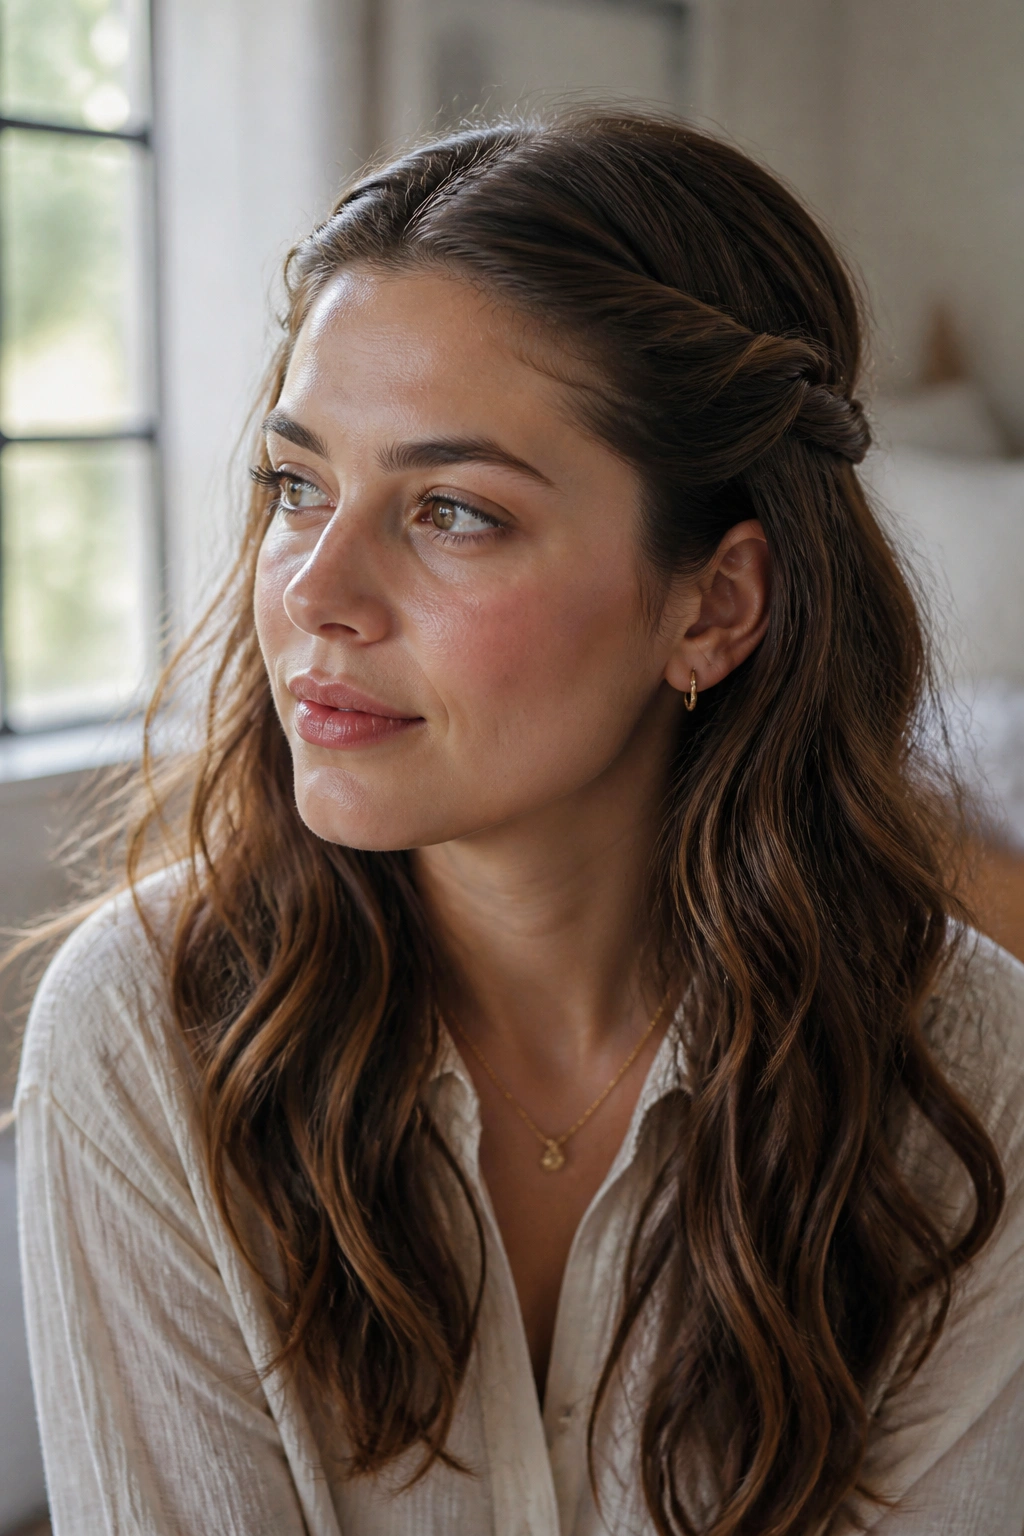
Why do pinned-back temple waves work so well? Because they solve the annoying part of long hair — the pieces that fall into your face — without taking away the length or the texture. It is one of the simplest loose styles you can do.
Take a small section above each temple, twist or smooth it back, and pin it behind the ears with decorative clips or small bobby pins. Leave the rest down. That is it. The style lives or dies on restraint, so keep the pinned sections narrow.
Best Pins to Use
Flat barrettes work well on finer hair. For thicker waves, use two bobby pins in an X shape so they do not slide apart. Gold or matte black pins usually look cleaner than shiny plastic ones, though the point is function first.
This style is useful when the ends are behaving but the front pieces are not. It keeps your hair out of your eyes during work, travel, or a long dinner, and it does not flatten the waves that are already doing the heavy lifting.
12. Rope-Braid Ponytail
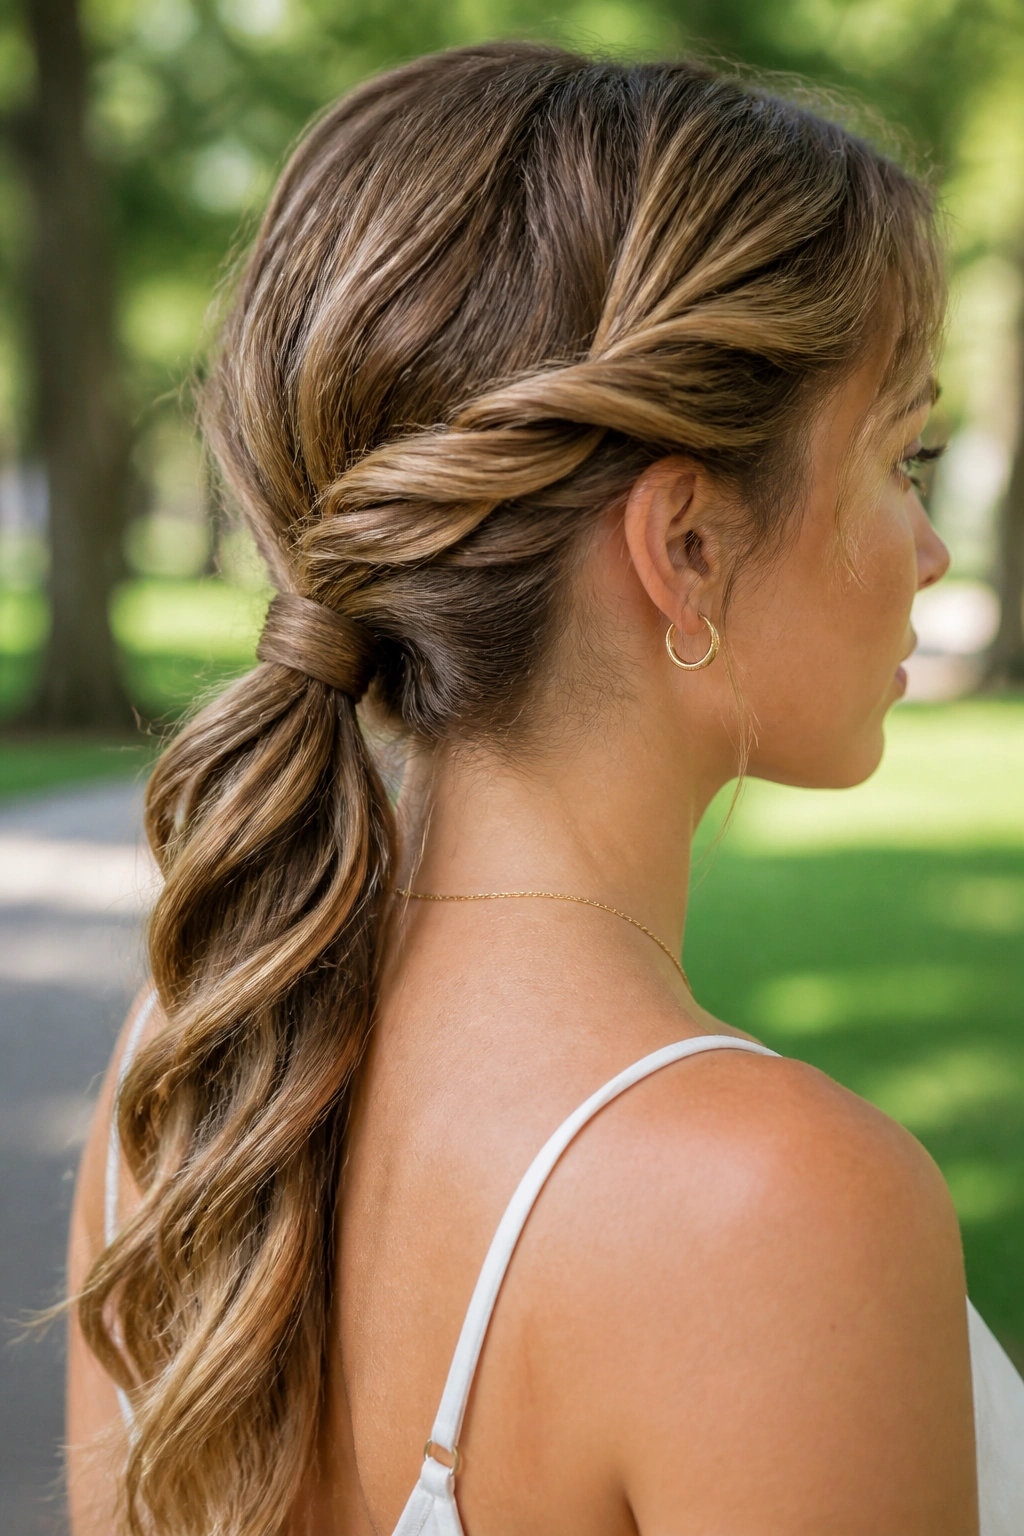
A rope-braid ponytail is one of my favorites for wavy long hair because it gives the lengths some order without killing their movement. It also tends to frizz less than a regular braid, which is nice if your hair swells in humidity.
Split the ponytail into two equal sections, twist each section in the same direction, then wrap them around each other in the opposite direction. Secure the end with a small elastic. If the twists are even, the rope braid forms a tight spiral that looks polished but still soft.
- Work with a ponytail that sits at the nape or just below it.
- Keep the twists snug, but not so tight that the hair shrinks up.
- Gently tug the braid after securing it if you want a fuller look.
- Use a clear elastic at the end if you want the spiral to stand out.
This one is best when your waves are already defined. The rope braid shows off the texture in a cleaner line than a loose braid does, and it stays neat without looking overworked.
13. Scarf-Wrapped Ponytail
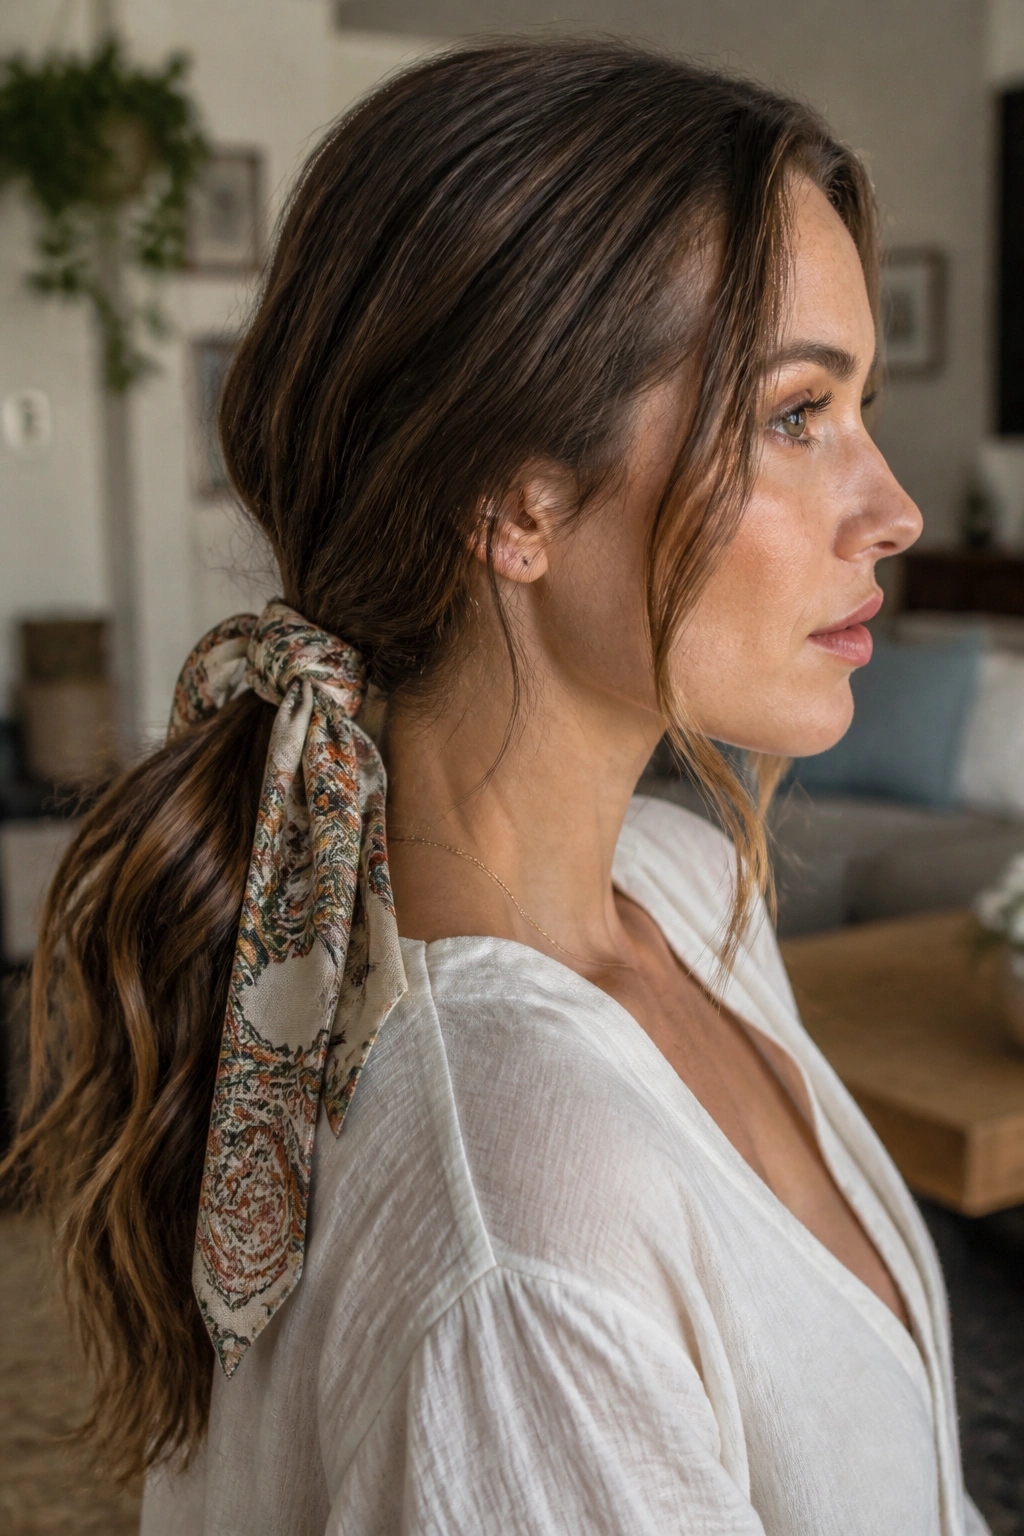
A scarf-wrapped ponytail can make second- or third-day waves look intentional fast. The scarf adds color and hides the base, which is usually the least flattering part of a ponytail once the hair has been worn down for a while.
Tie the ponytail low or mid-height, then wrap a silk or cotton scarf around the elastic once or twice before knotting it. Let the ends of the scarf hang down a little, or tuck them in for a cleaner finish. A scarf that is about 2 inches wide gives you enough presence without swallowing the ponytail.
Where the Scarf Sits
Place it right at the elastic, not high on the ponytail. That keeps the hair’s length visible and avoids bunching at the crown. If you have a lot of wave pattern, the scarf should frame the ponytail, not compete with it.
This is a good move when the hair looks flat at the roots but still has decent texture through the mids. A scarf makes that difference less obvious. It is practical, and I like styles that solve two problems at once.
14. Soft High Ponytail for Wavy Long Hair
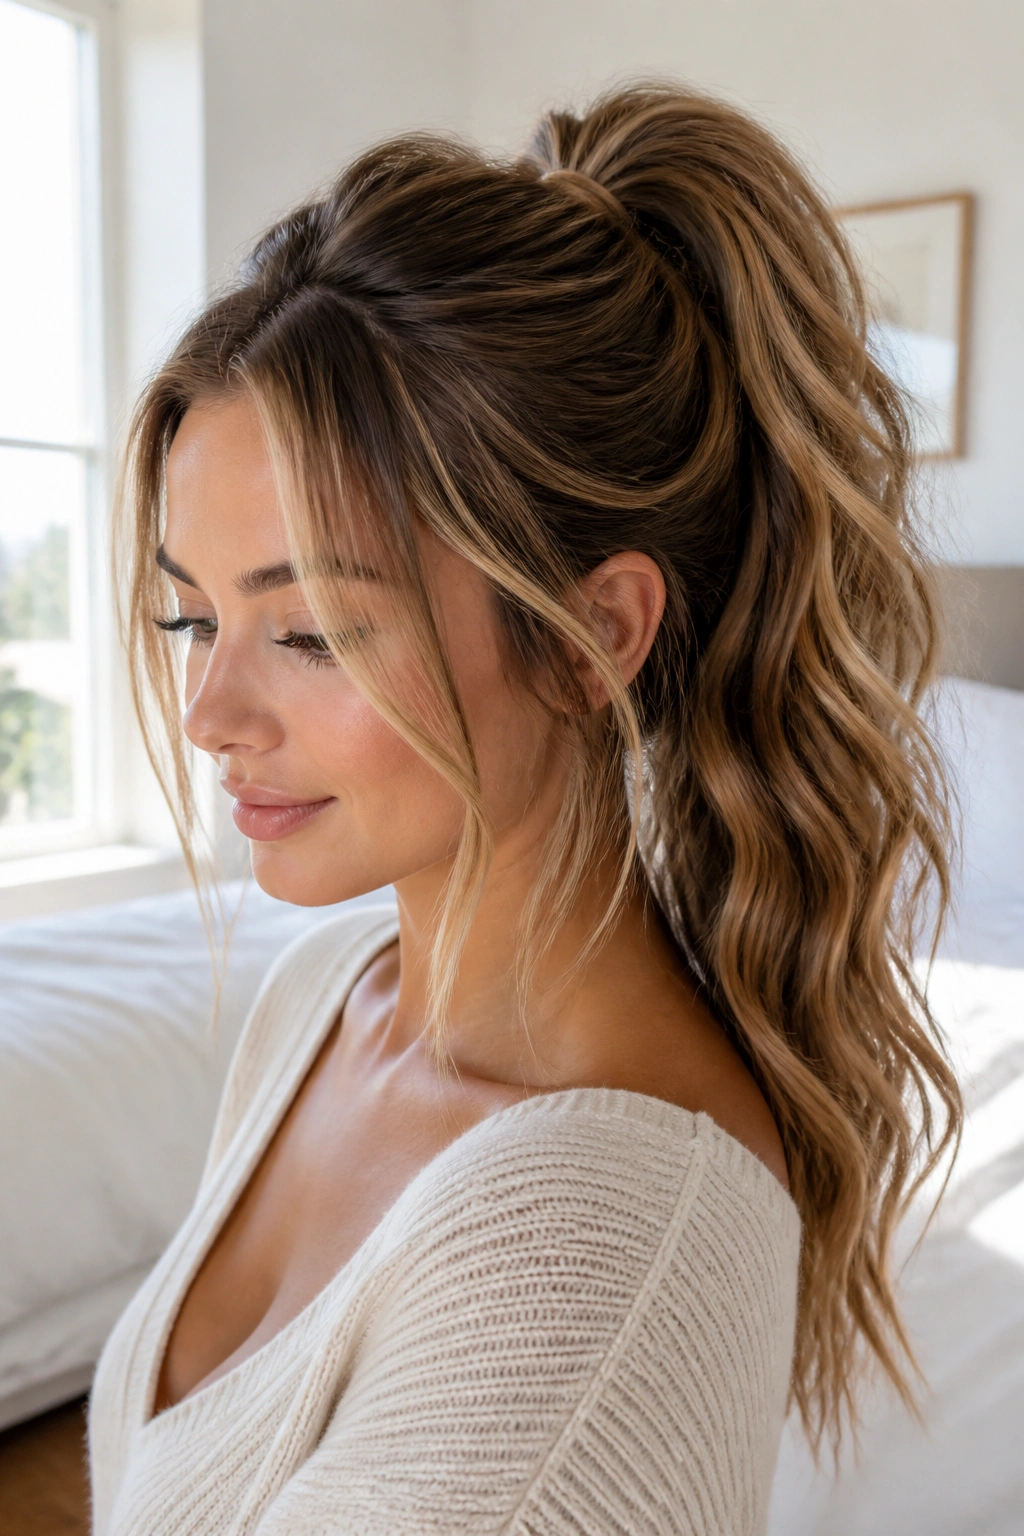
A high ponytail does not have to look severe. On wavy hair, it can feel airy and lifted if you leave enough softness at the crown. The mistake is pulling it too tight and turning the whole thing into a gym look.
Start by lifting the hair at the temples and crown before securing the ponytail high on the head. Use a soft brush to smooth the surface, but leave the texture underneath alone. The ponytail itself can stay wavy and loose, which is what keeps the style from looking rigid.
You can wrap a small section of hair around the elastic if you want it to feel more finished. I usually do when the ponytail is the main look, not just a quick tie-back. It takes thirty extra seconds and changes the shape of the base.
If your hair is heavy, split the ponytail into two sections before tightening the elastic. That keeps the base from sagging. Little trick, big payoff.
15. Loose Side Braid
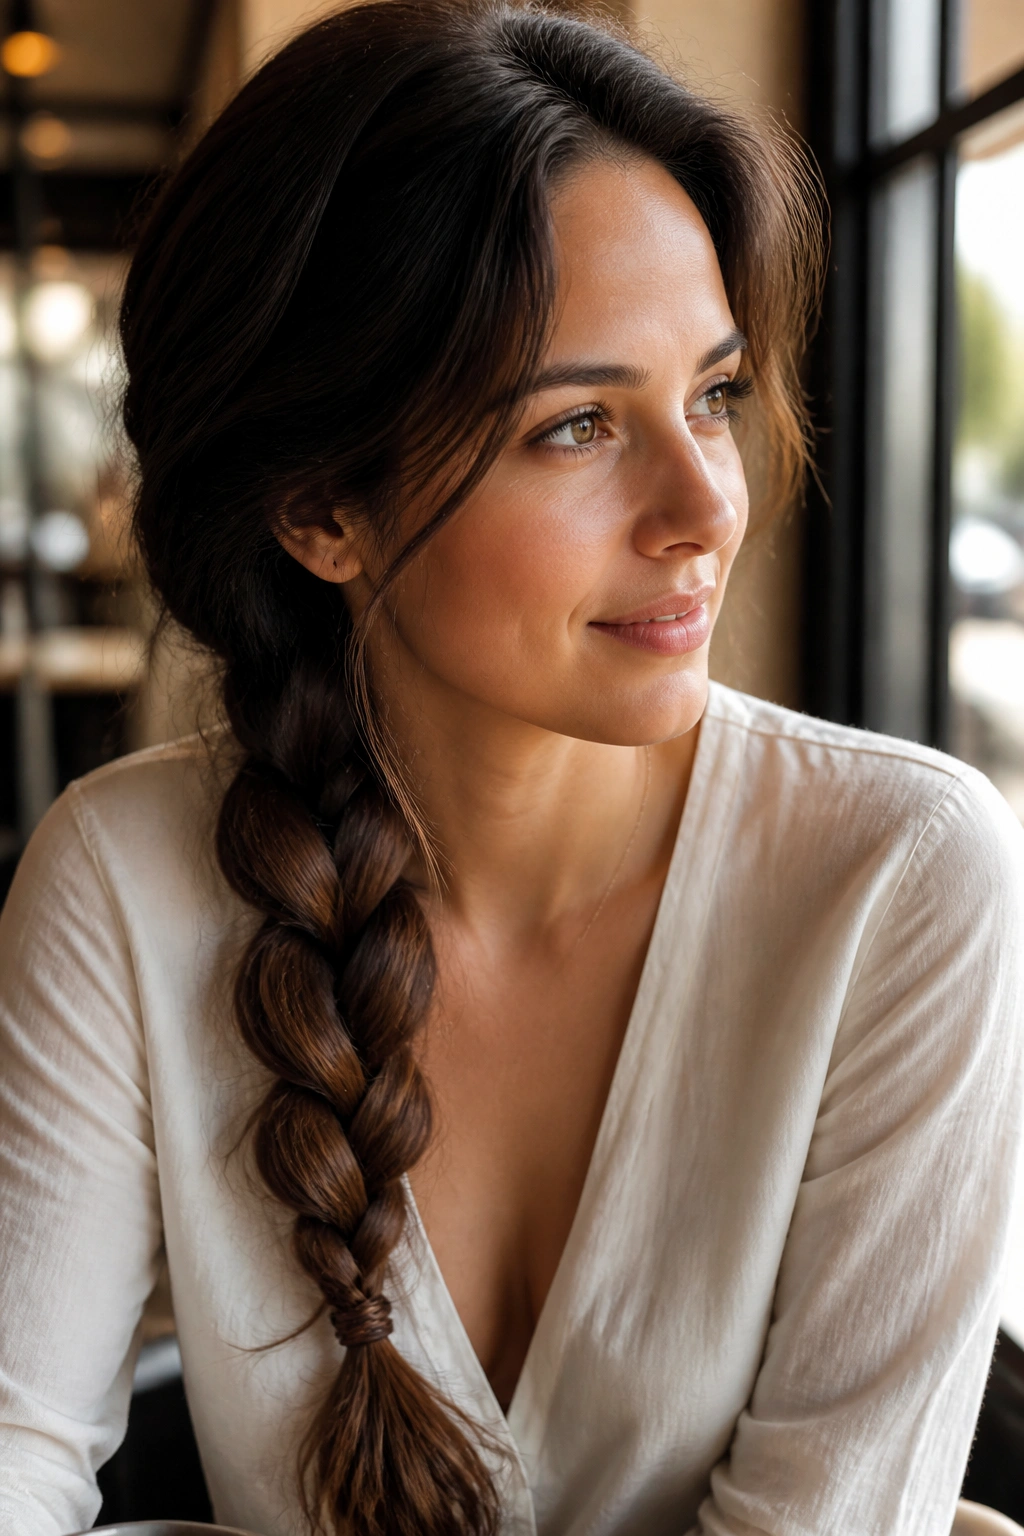
A loose side braid is the kind of style that looks better when it’s not trying too hard. The braid sits over one shoulder, the waves stay visible, and the whole thing feels relaxed without becoming messy.
Unlike a tight braid, this one needs room. Braid it loosely, then gently pull apart the outer loops with your fingers so the braid widens. That widening step — people call it pancaking, though I never love that word — makes the braid feel fuller and softer.
How to Pancake the Braid
Hold the braid from the end and tug only the outer edges. Don’t pull the center apart or you’ll end up with gaps that show the elastic underneath. Stop when the braid looks rounded and a little wider than your palm.
This is a good choice for hair that feels too bulky to wear down all the way but too nice to hide in a bun. The side braid keeps the length visible and lets the texture do the talking.
16. Mini Accent Braids in the Front
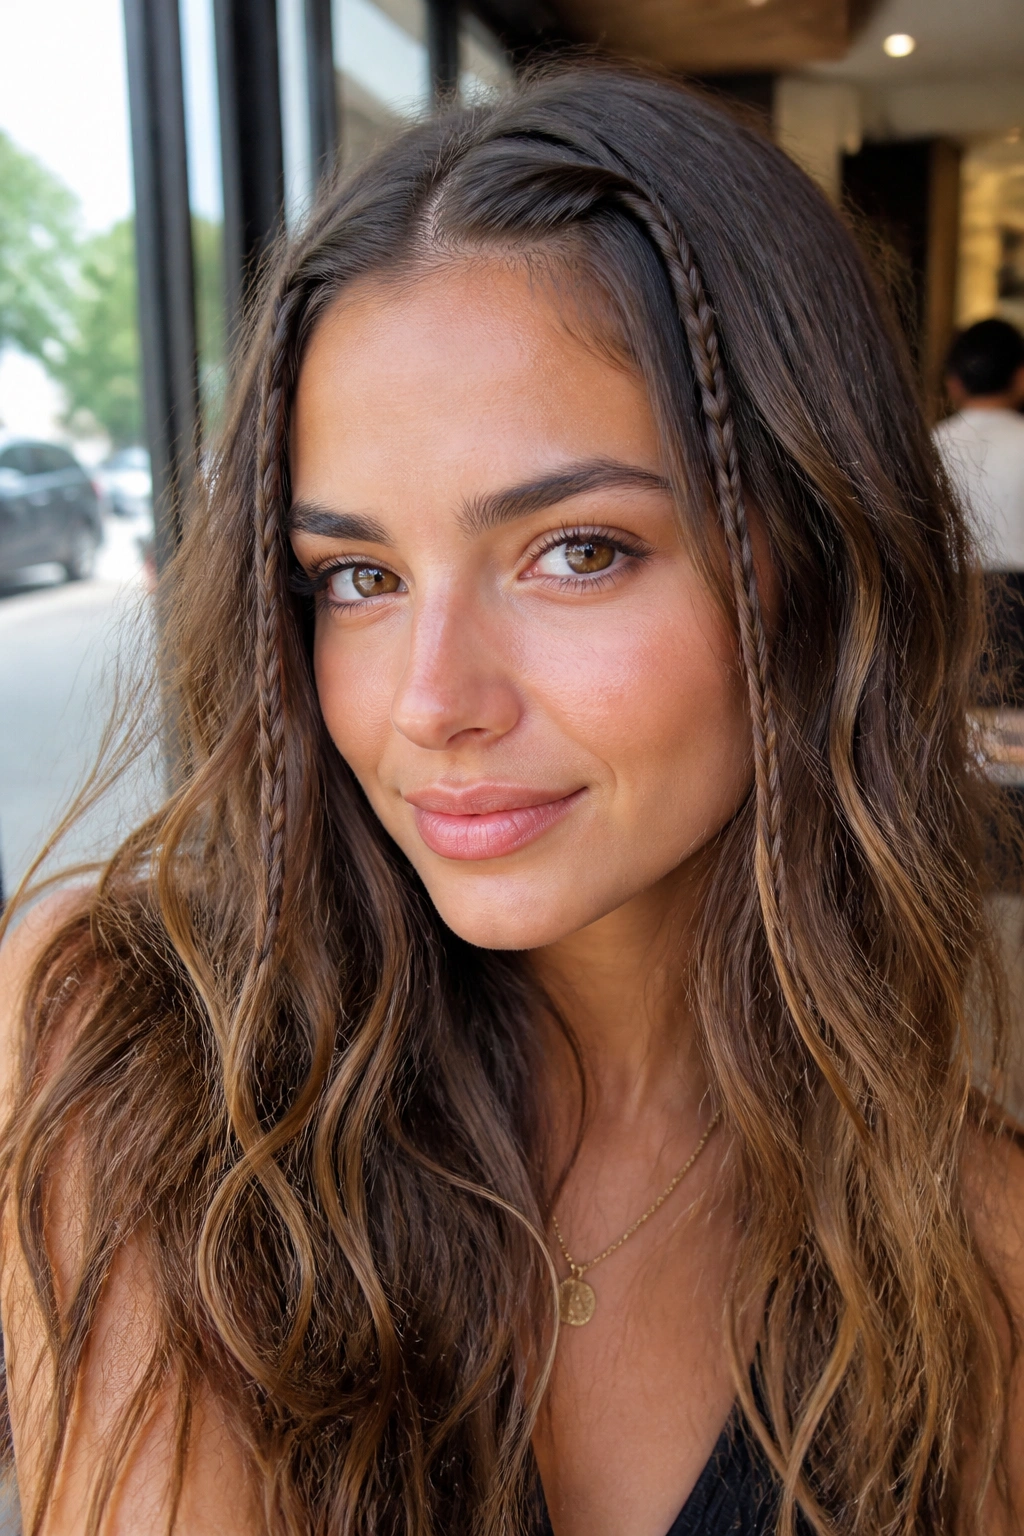
Mini accent braids are the easiest way to add detail without changing the whole hairstyle. Two tiny braids near the temples can make loose waves look styled even when the rest of the hair is left alone.
Braid one or two very small sections, each about the width of a pencil or slightly thicker, then tuck the ends under the top layer or secure them with tiny elastics. You can leave them plain or thread in a thin cord if you want a little edge. Three accent braids is plenty; more than that starts to look crowded.
- Place them near the hairline or just behind the ears.
- Keep the braids narrow so they do not fight the wave pattern.
- Let the rest of the hair fall freely.
- Skip heavy styling cream on the front pieces, or the braids can slip.
This style works when you want a bit of personality but not a full braided look. It is especially good on thick wavy hair, which can take the detail without seeming overloaded.
17. Half-Up Top Knot
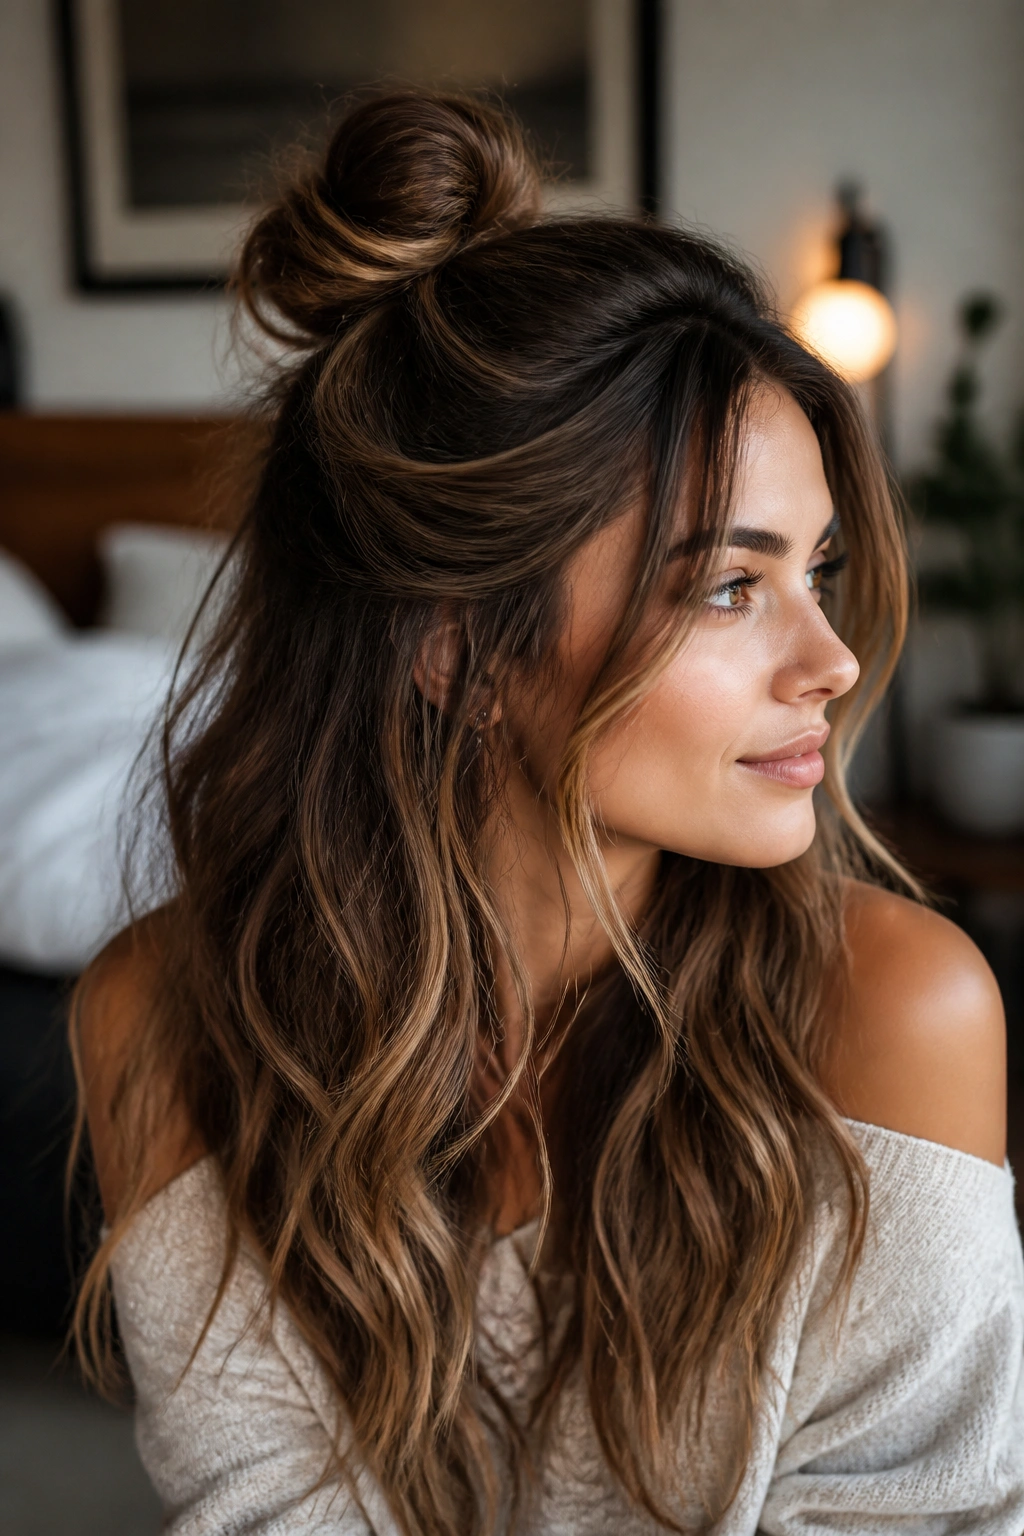
A half-up top knot is the fast answer to hair that looks good halfway down and gets in your way the other half. You keep the volume on top, leave the length down, and get that nice balance of lifted and loose.
Pull the top third of the hair into a small knot at the crown. Keep the knot soft and a little messy, not tight and smooth like a ballerina bun. The rest of the waves should hang freely underneath.
How to Keep the Knot Loose
Twist the section once, then wrap it around itself only once or twice before pinning or tying. If you over-wrap it, the knot gets bulky and eats up the shape of the crown. A small knot looks cleaner and sits better on long hair.
This is one of the easiest loose hairstyles for wavy long hair when you need your face clear but do not want a full updo. It also plays nicely with day-old waves, which can make the knot hold better than freshly washed hair.
18. Faux Bob with Tucked Ends
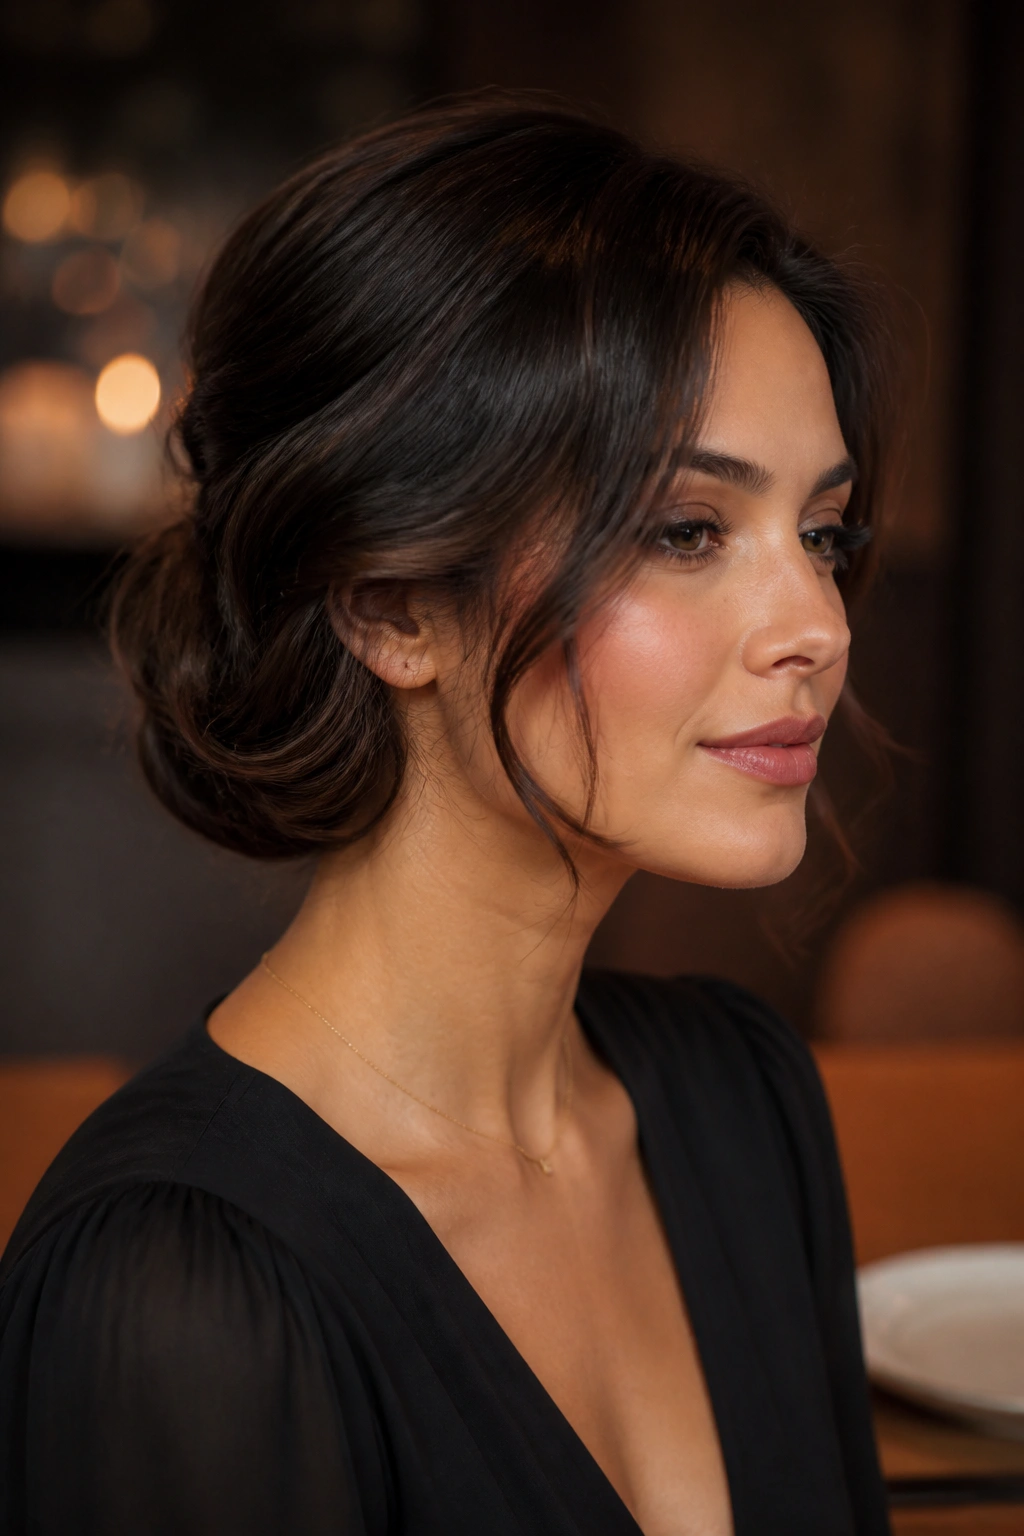
A faux bob is a clever trick for long wavy hair because it changes the silhouette without actually cutting anything. The length gets tucked under at the nape, and the waves at the top stay loose enough to look soft rather than pinned down.
Create a low loose tuck by folding the ends upward and pinning them under the lower layers. Leave a few face-framing pieces out, and deepen the side part if you want the look to feel a little more vintage. The visible hair should skim the shoulders, even though the full length is still there underneath.
This style needs more pins than people expect. Use several small pins instead of one big one, and place them in different directions so the tuck stays put. If the hair is very thick, divide the ends into two tucked sections instead of one large fold.
It is not an everyday look for most people, and that is fine. Some styles are meant for dinners, photos, or a night when you want long hair to look a little different without doing anything dramatic to the cut itself.
Final Thoughts
Loose styles work best on wavy long hair when they respect the wave pattern instead of flattening it. A soft twist, a low ponytail, or a pinned-back front section can look polished with almost no effort, as long as the base stays a little relaxed.
The styles that usually fail are the ones that pull too hard at the crown or bury the texture under too much product. Keep the roots light, leave the ends visible, and use pins or elastics that match the thickness of your hair. Thin hair needs lighter pressure; heavy hair needs better grip.
A small stash of tools helps: two or three bobby pins, one large claw clip, a few clear elastics, and one ribbon or scarf. That is enough to get through most days without overthinking it.
