



Wet hair looks for summer days are easier to wear than people think, and they’re not really about looking drenched. The best versions look controlled: shine at the roots, a smooth part, and enough hold to survive heat, sweat, and a bit of wind without turning into a puffed-out mess.
The mistake is assuming you need to soak your hair or pile on thick oil. You don’t. A good wet finish usually starts with damp hair, a water-based styler, and a brush or comb that can flatten the top without making the ends look stiff.
That’s why this style family works across so many hair types. Straight hair gets a sharper, cleaner line. Waves get more definition. Curls get clumpier, glossier shape. Even short hair can pull it off if you keep the product light and the part intentional.
And because summer has a way of making loose hair feel like a small punishment, these looks are practical as much as they are pretty. Some take two minutes. Some ask for a little patience. Start with the one that matches your length, texture, and tolerance for hair in your face, because those things matter more than fashion language ever admits.
1. Sleek Center-Part Low Bun
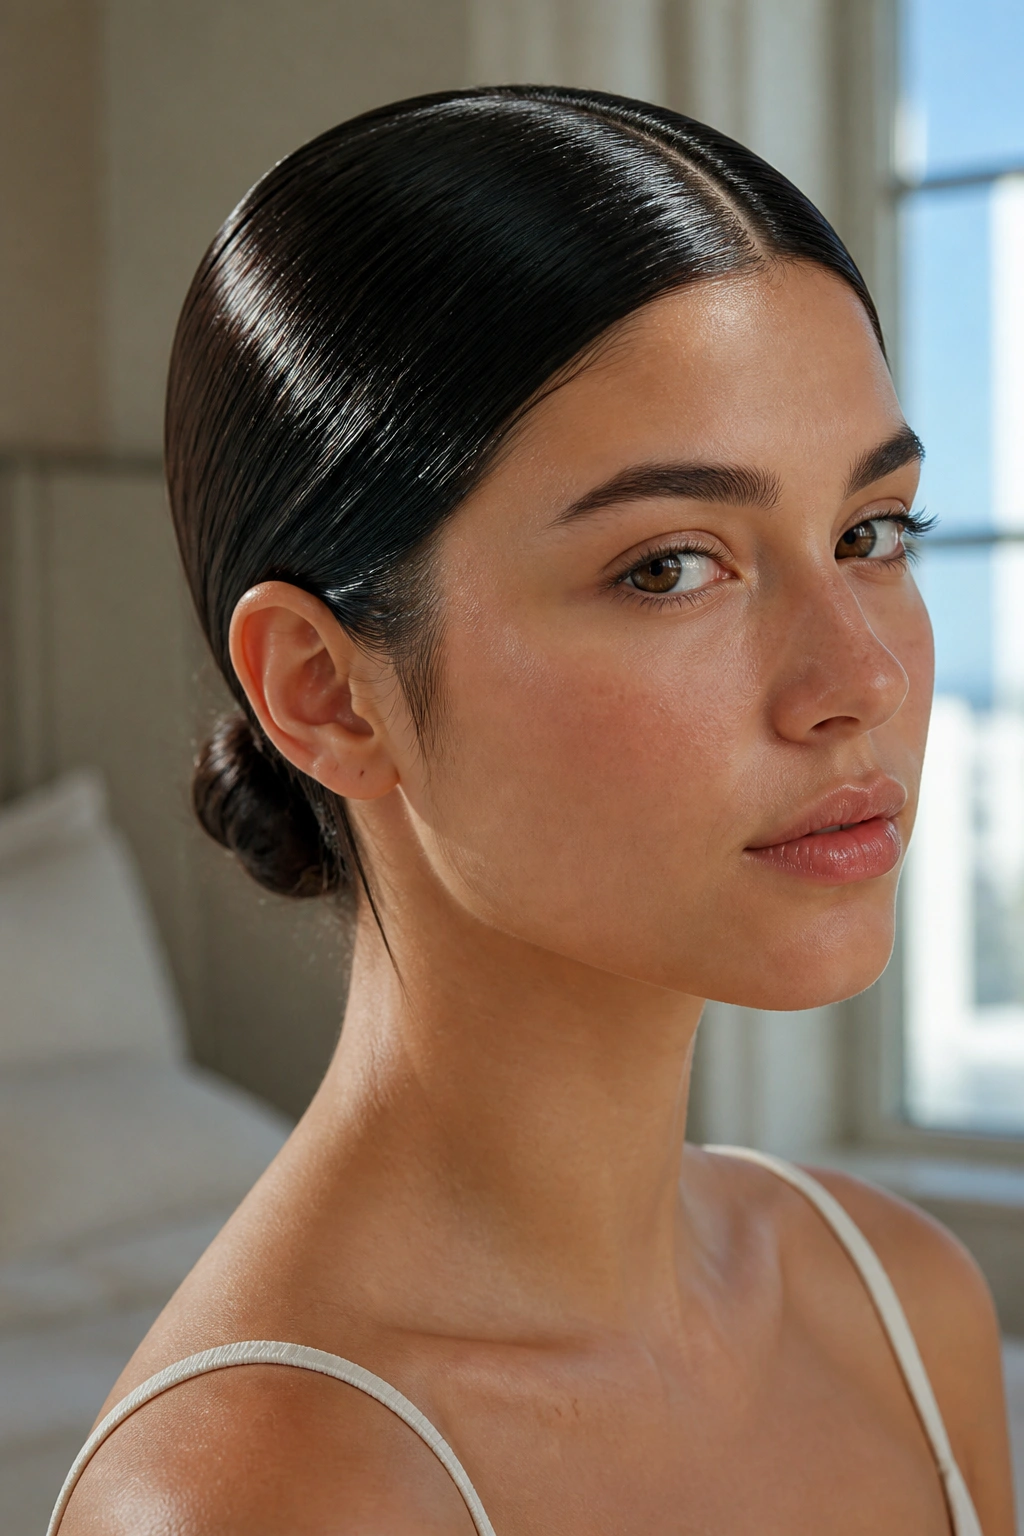
This is the wet hair look I reach for when I want my face completely clear and my hair to look like I made an actual plan. A center part gives the style its shape, and the low bun keeps it grounded instead of fussy. It’s clean, sharp, and the sort of look that survives a hot commute without falling apart in the first fifteen minutes.
Why It Works So Well
The trick is tension. Hair that’s brushed smooth from the hairline to the nape holds a glossy finish better than hair that’s half-wild and half-slicked. Use a leave-in conditioner on damp hair first, then follow with a medium- or strong-hold gel just at the top and sides.
Pull the hair into a low ponytail at the nape, twist it once or twice, and coil it into a tight bun. Pin it in place with bobby pins that match your hair color. A quick mist of shine spray at the end gives that polished, just-slept-on-a-silk-pillow feel.
Best for and what to watch
- Best for: medium to long hair, straight or lightly wavy textures, and anyone who wants a neat frame around the face.
- Watch for: too much product at the ends. That’s how the bun gets heavy and greasy-looking fast.
- Small win: tuck the ends of your part with the tail of a comb before the gel sets. It keeps the line crisp.
- If your hair is thick: make the ponytail base a little lower so the bun sits flat against your head.
My blunt advice: keep the crown flatter than you think. That’s what makes the style look intentional.
2. Slicked-Back Low Ponytail
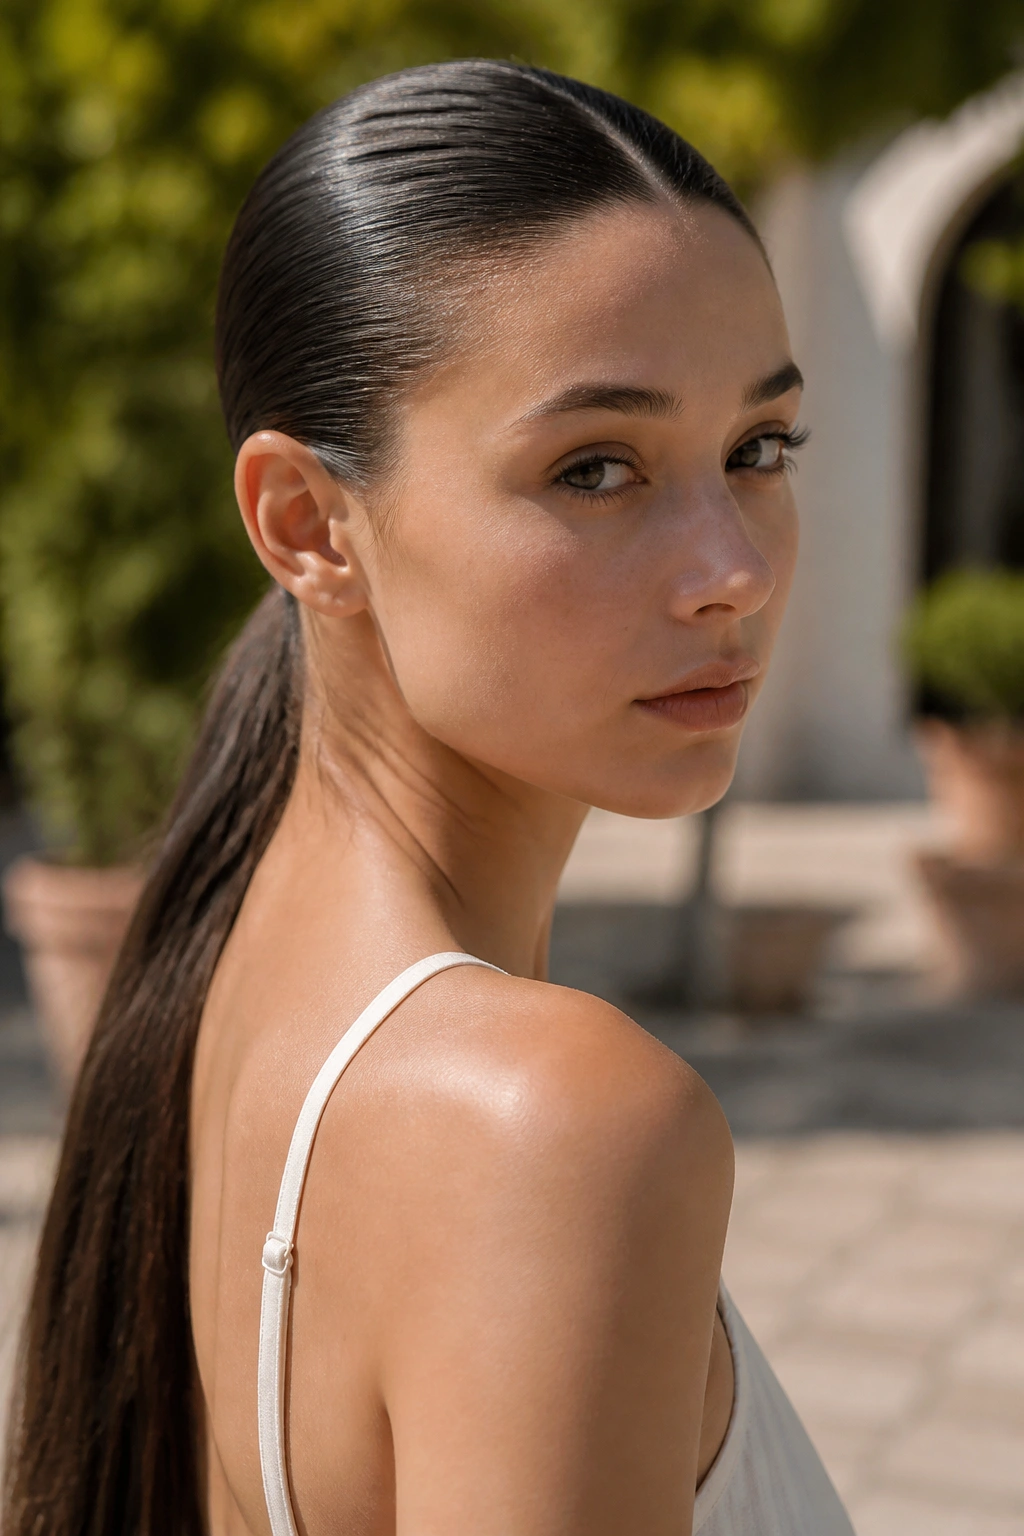
A low ponytail can look plain, or it can look expensive in the good, simple sense of the word. The difference is all in the base. When the top is combed back close to the head and the tail hangs glossy and straight, the whole thing feels deliberate instead of last-minute.
Why do I like this one so much for hot days? Because it’s easy to adjust. Too strict? Loosen the front a touch. Too casual? Wrap a small strand around the elastic and pin it underneath. The structure stays the same.
Use a paddle brush or a fine-tooth comb to smooth the sides after applying a little leave-in and a gel or pomade blend. If your hair is fine, stay with lightweight products. Heavy cream will make the ponytail collapse. If your hair is coarse or frizzy, start with water and work the product in from the roots, not the ends.
A silk scrunchie keeps the base from snagging if you wear this style all day. A clear elastic works too, but it can look a little harder, which is fine if that’s the mood you want.
3. Glossy Side-Part Bob Tuck
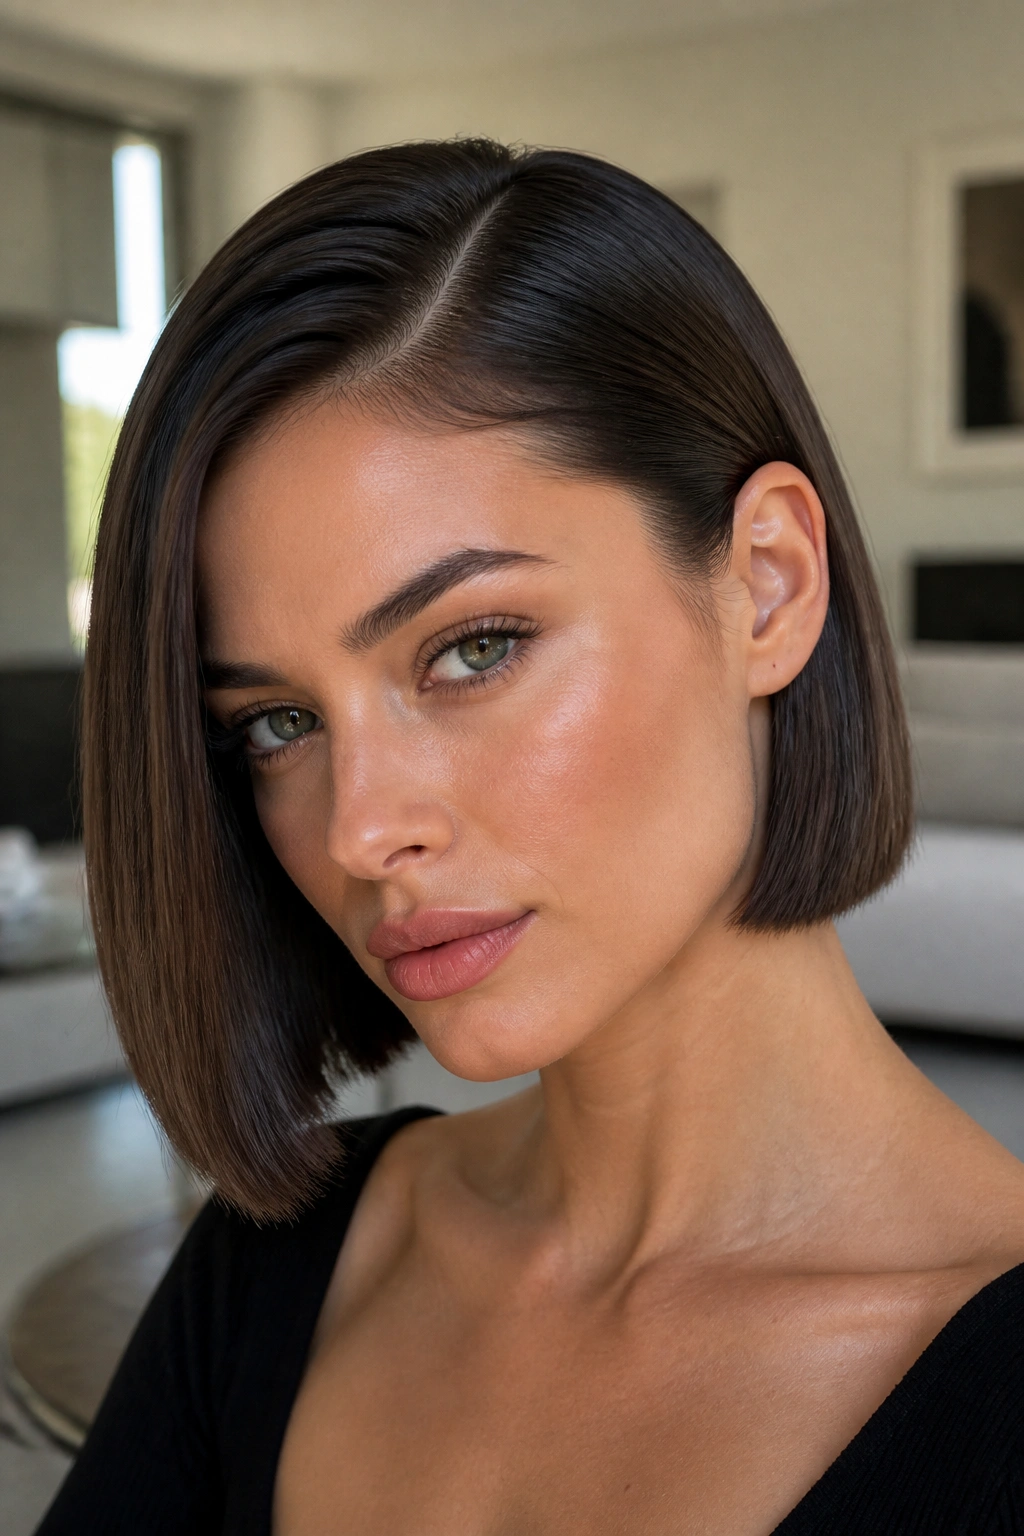
A bob gets sharper when you stop trying to make every strand move. This is one of the few wet hair looks for summer days that actually gets better with a little restraint. The shape sits close to the head, one side tucks neatly behind the ear, and the ends stay smooth instead of flipping every which way.
What Makes the Side Part Matter
A deep side part gives the bob more character than a middle part, especially if your cut already has blunt ends. The part creates a clean angle at the forehead, which keeps the look from reading flat. Work a small amount of styling cream through damp hair, then add a thin veil of gel over the top layer only.
A bob like this does not need much. Seriously. Too much product on short hair is obvious fast, and it can make the ends look stringy instead of glossy. If your hair tends to puff up at the ears, use your fingertips to press those sections down while the product is still flexible.
How to Keep It Fresh
- Tuck one side behind the ear and leave the other side loose.
- Let the ends stay slightly damp, not dripping.
- Use a comb with fine teeth to flatten the crown.
- Finish with a light mist of shine spray, not a heavy oil.
The beauty of this one is that it looks polished without feeling stiff. That matters on humid days.
4. Defined Wet Curls With a Gel Cast
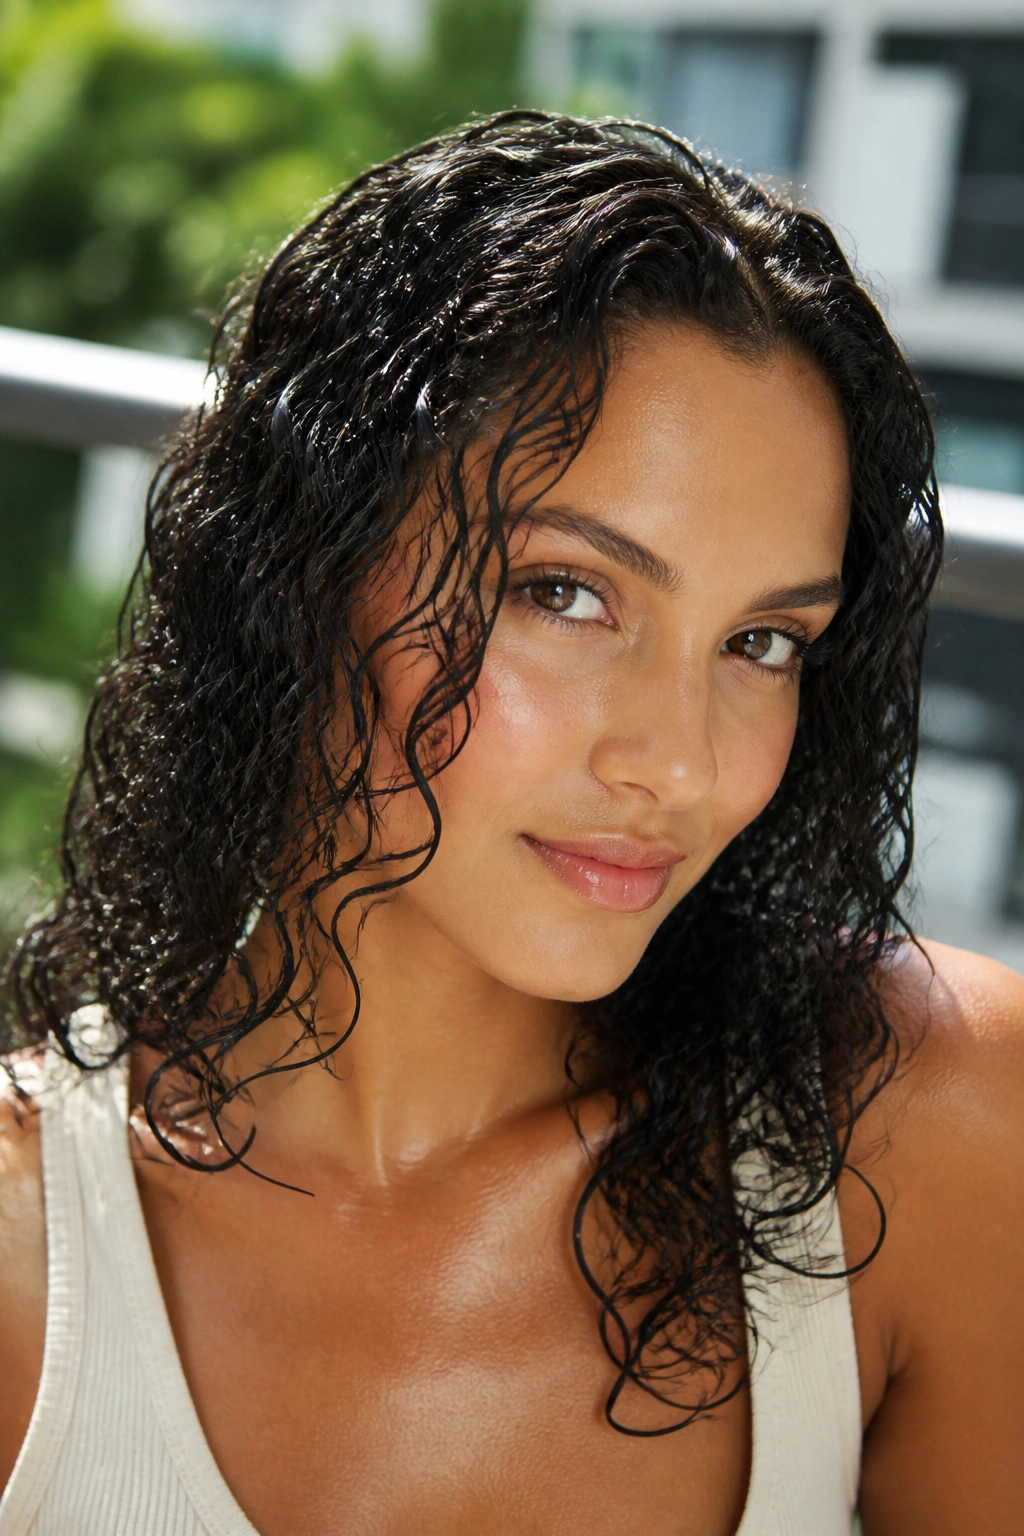
Curly hair can wear the wet look better than almost any other texture, mainly because curls already know how to hold shape. The goal is to keep the curl clumps together and let them dry with a glossy shell, then break that shell a little once everything is set.
Start with soaking-wet or very damp hair, then work in a leave-in conditioner and a curl cream if your hair likes moisture. Layer a gel on top using prayer hands, finger raking, or scrunching, depending on how much separation you want. A diffuser helps, but air-drying works too if you’re patient.
The part people usually miss
The cast matters. That slightly hard-feeling layer is what keeps the curl pattern from frizzing apart while it dries. Once your hair is fully dry, scrunch it gently with dry hands or a tiny bit of lightweight oil to soften the hold.
If your curls are loose, use less product and more scrunching. If they’re tighter, you can usually handle a stronger gel and still keep bounce. The point is definition, not helmet hair.
On a sticky summer day, this style is a relief. Your curls stay glossy, off the neck if you pin the top, and far less likely to turn into a triangle by noon.
5. Braided Wet Crown
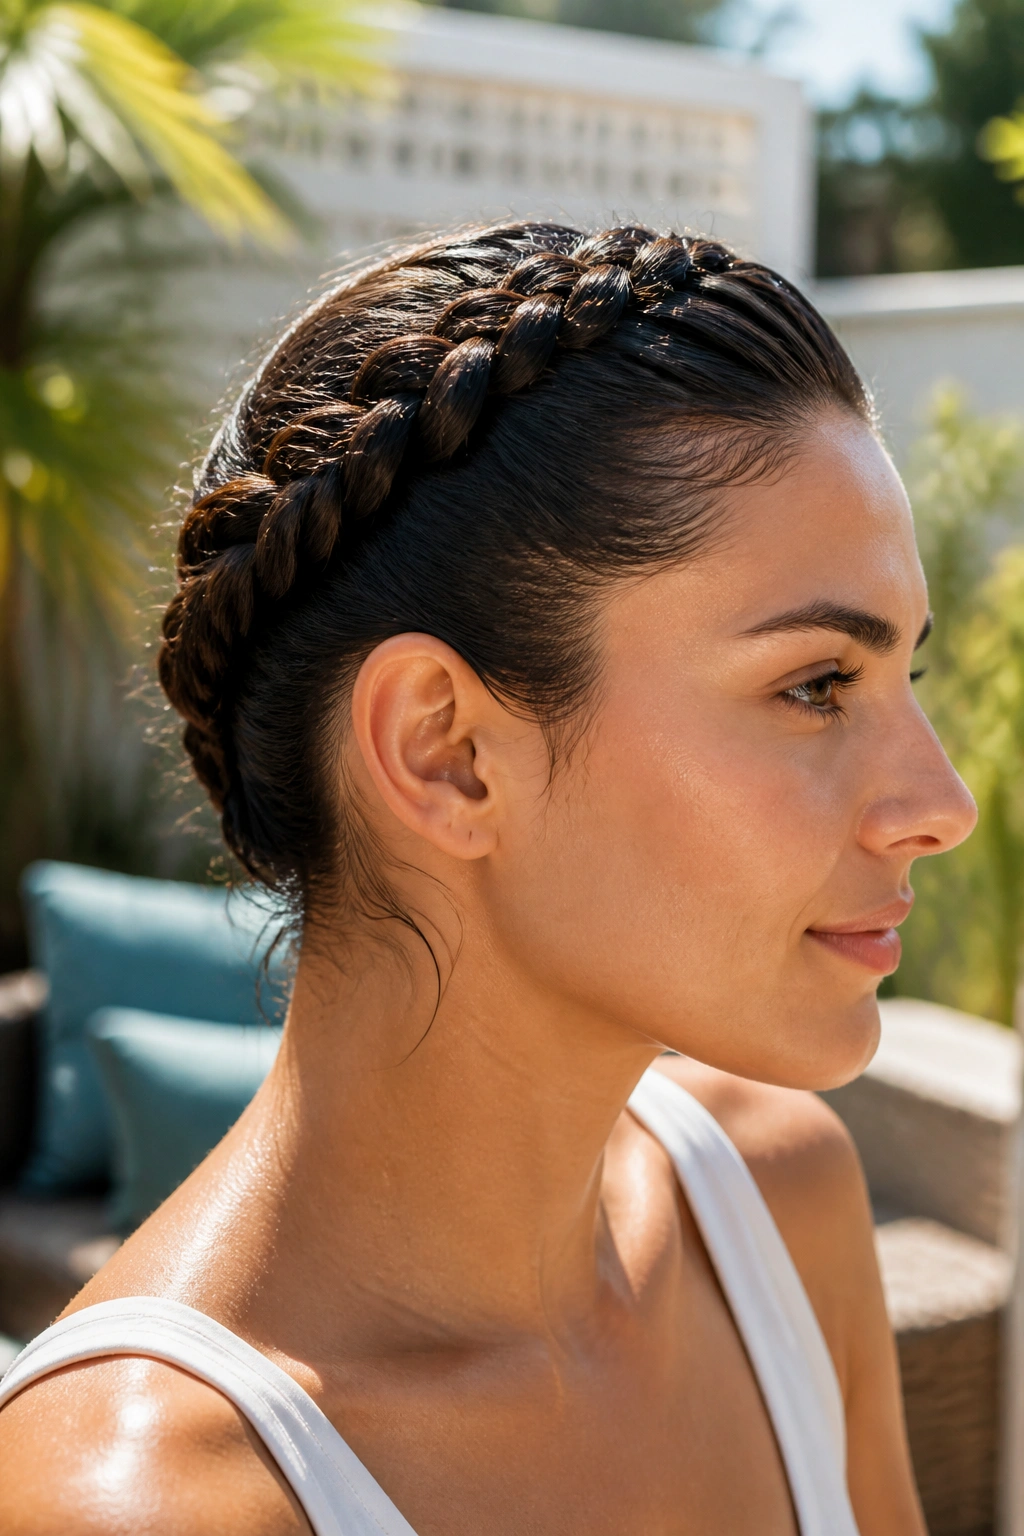
Braids and wet texture are old friends. The braid gives structure, the slicked top keeps the flyaways in line, and the whole style sits nicely on a hot neck when you’d rather not think about your hair at all.
I like this version best on long hair, but shoulder-length hair can do it too if the braid starts high enough. Apply a little styling cream or gel from the hairline back, then part the hair where you want the braid to begin. A Dutch braid reads bolder; a simple three-strand braid feels softer. Both work.
The reason this style earns a place on a summer list is practical. It stays put. A crown braid keeps strands away from sunscreen, sweat, and the back of your neck, which sounds boring until you’ve spent an afternoon re-tucking loose hair every ten minutes.
You can stop the braid at the nape and pin the rest into a low knot, or let the tail hang loose and damp. Either way, the top should look smooth before the braid starts. If the front is messy, the whole thing loses the point.
6. Half-Up Wet Top Knot
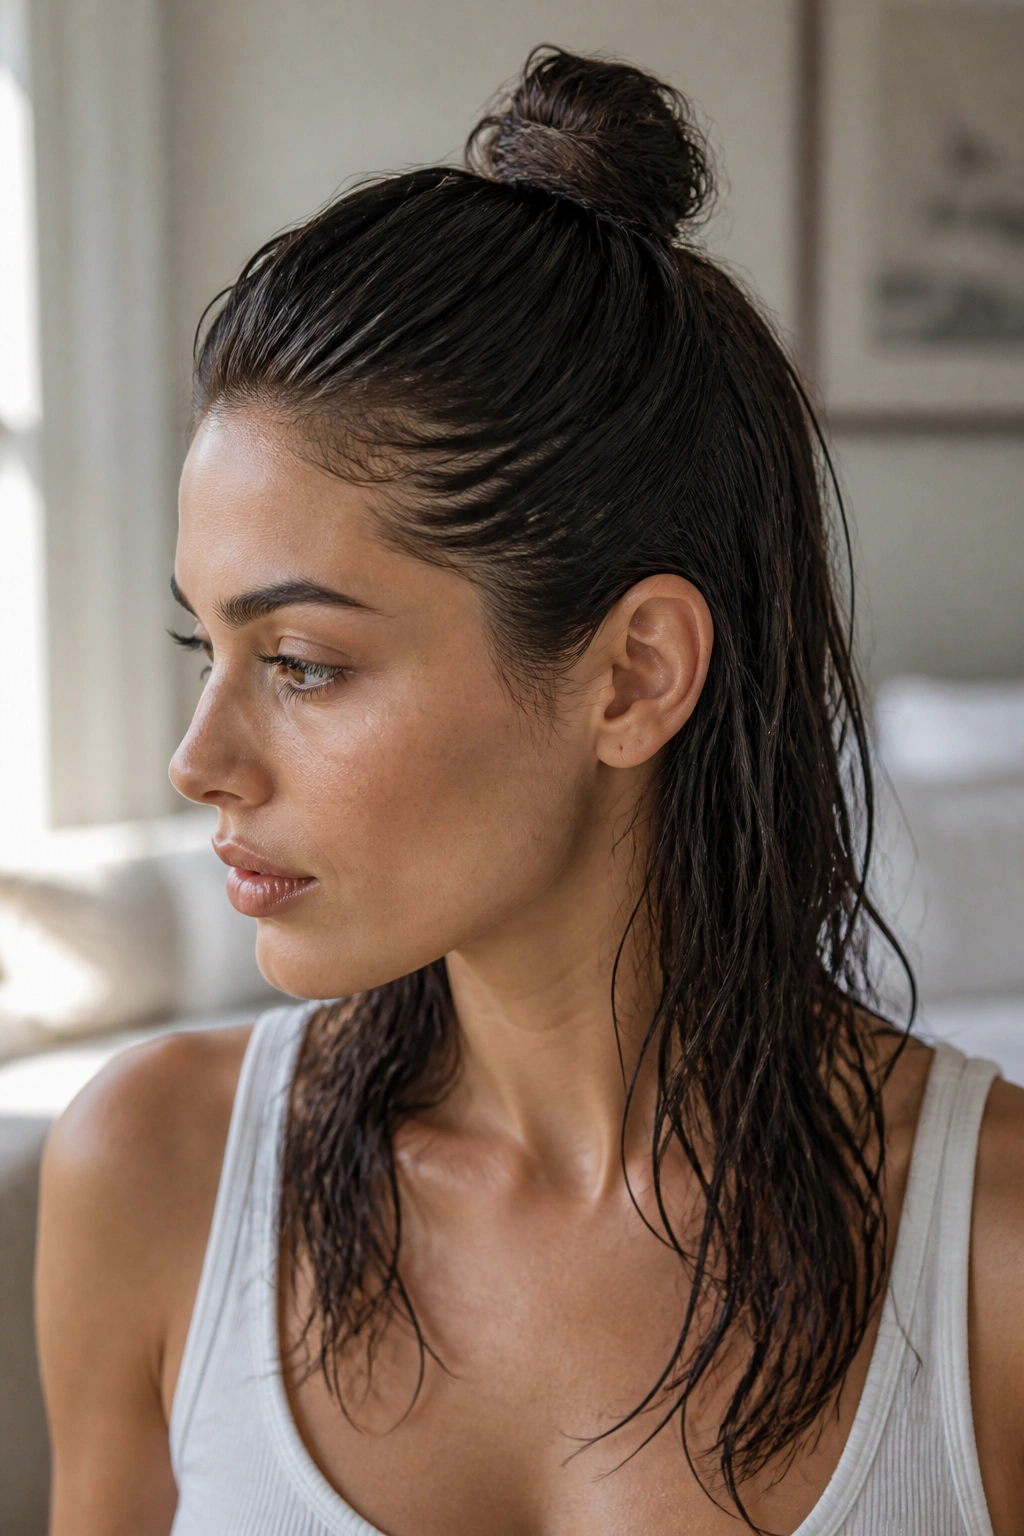
A half-up top knot is the move when you want the wet look without giving up movement through the lengths. It feels breezy. It also buys you a little forgiveness if the bottom half dries in the sun and gets a touch fuzzy.
Think of it as a compromise style, but in a good way. Slick the top section back with gel or styling cream, then twist it into a compact knot at the crown. Leave the lower half loose and damp, or use a curl cream if you want shape instead of flatness.
The split between polished top and freer bottom is what makes it work. It keeps hair off your face while still showing off some texture. If your hair is layered, this is especially nice, because shorter pieces around the face can soften the whole thing without you trying too hard.
A few practical notes:
- Keep the knot small so it doesn’t tip backward.
- Use pins, not just one elastic, if your hair is thick.
- Let the bottom half stay intentionally undone.
- Add a drop of shine serum only to the mid-lengths and ends.
This one is easy to wear with sunglasses, which sounds minor until you spend a full day outside.
7. Face-Framing Gel Waves
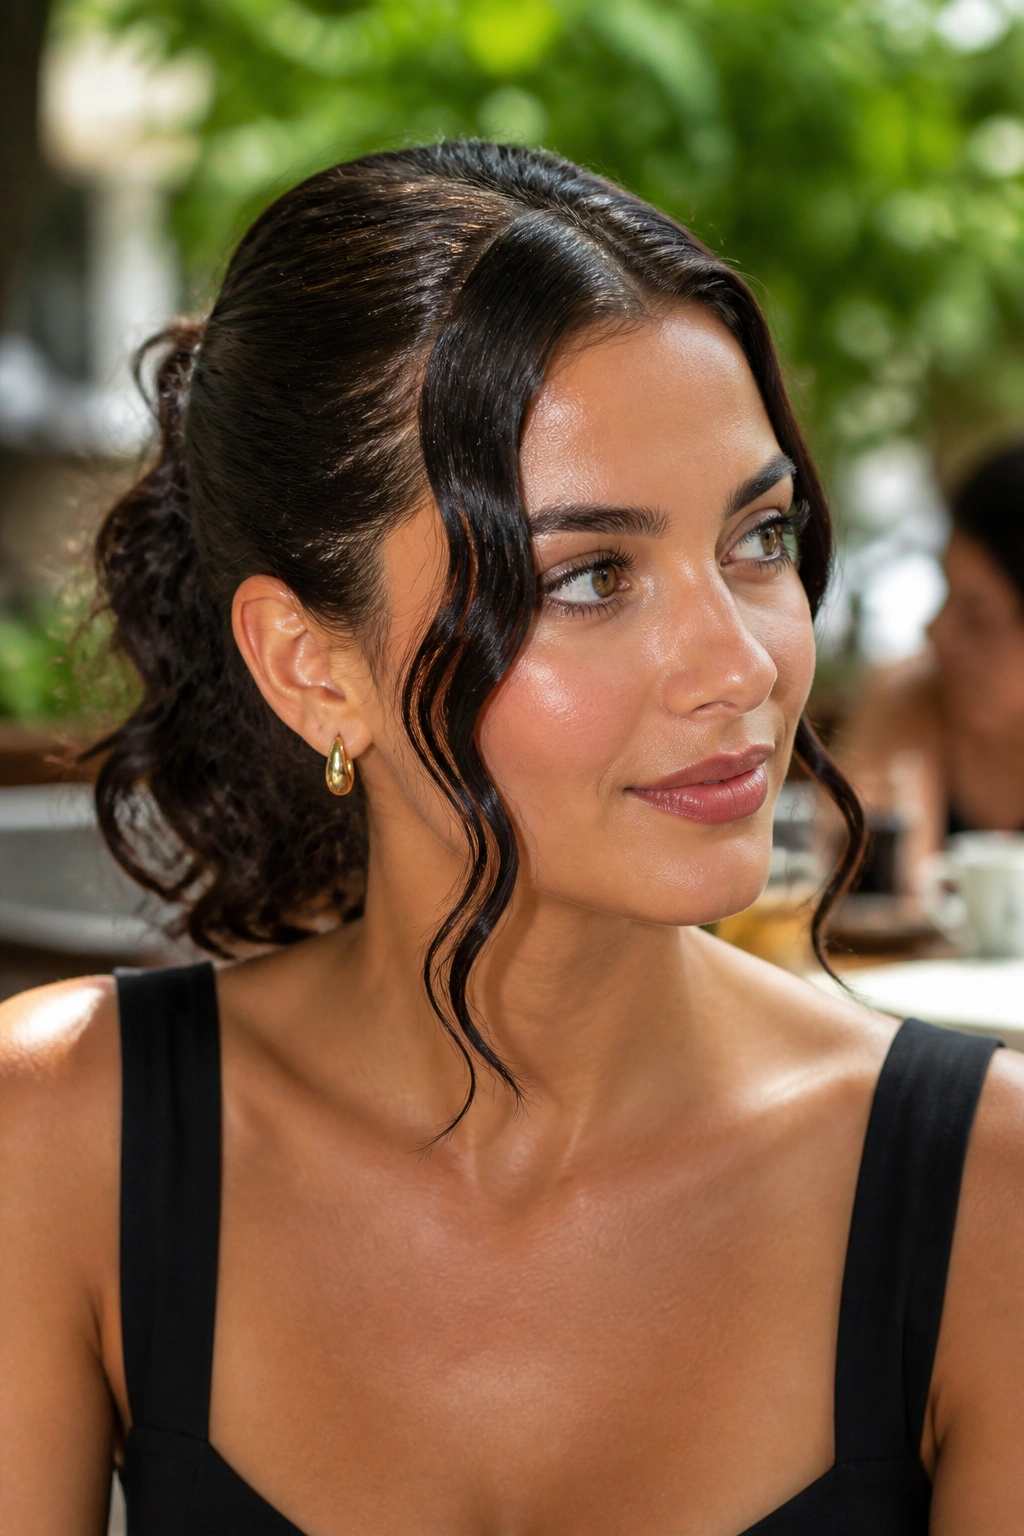
Some wet hair looks are about restraint. This one is about leaving a little movement where it matters. The front pieces get glossy and controlled, while the rest of the hair keeps its natural wave and swing.
Best way to shape the front
Start by parting the hair slightly off-center. Smooth a light gel or mousse through the first two inches around the hairline, then use your fingers to direct those front pieces backward and downward. If your hair bends easily, you can twist each front section once and let it fall in a soft curve.
The face-framing pieces should look separated, not clumpy. That’s the difference between “intentional” and “I got caught in rain.” A wide-tooth comb can help through the back, but I prefer fingers on the front because they keep the waves from getting overworked.
This style is useful when the rest of your hair is doing its own thing. Wavy hair that frizzes at the crown but behaves at the ends? Great. Let the ends live. Tame the top. That’s the whole idea.
Best product pairing: lightweight mousse at the roots, flexible gel at the front, and a touch of shine spray through the mid-lengths. Skip heavy butter or thick cream near the hairline. It kills the clean finish fast.
8. Deep Side-Part Pixie With Shine
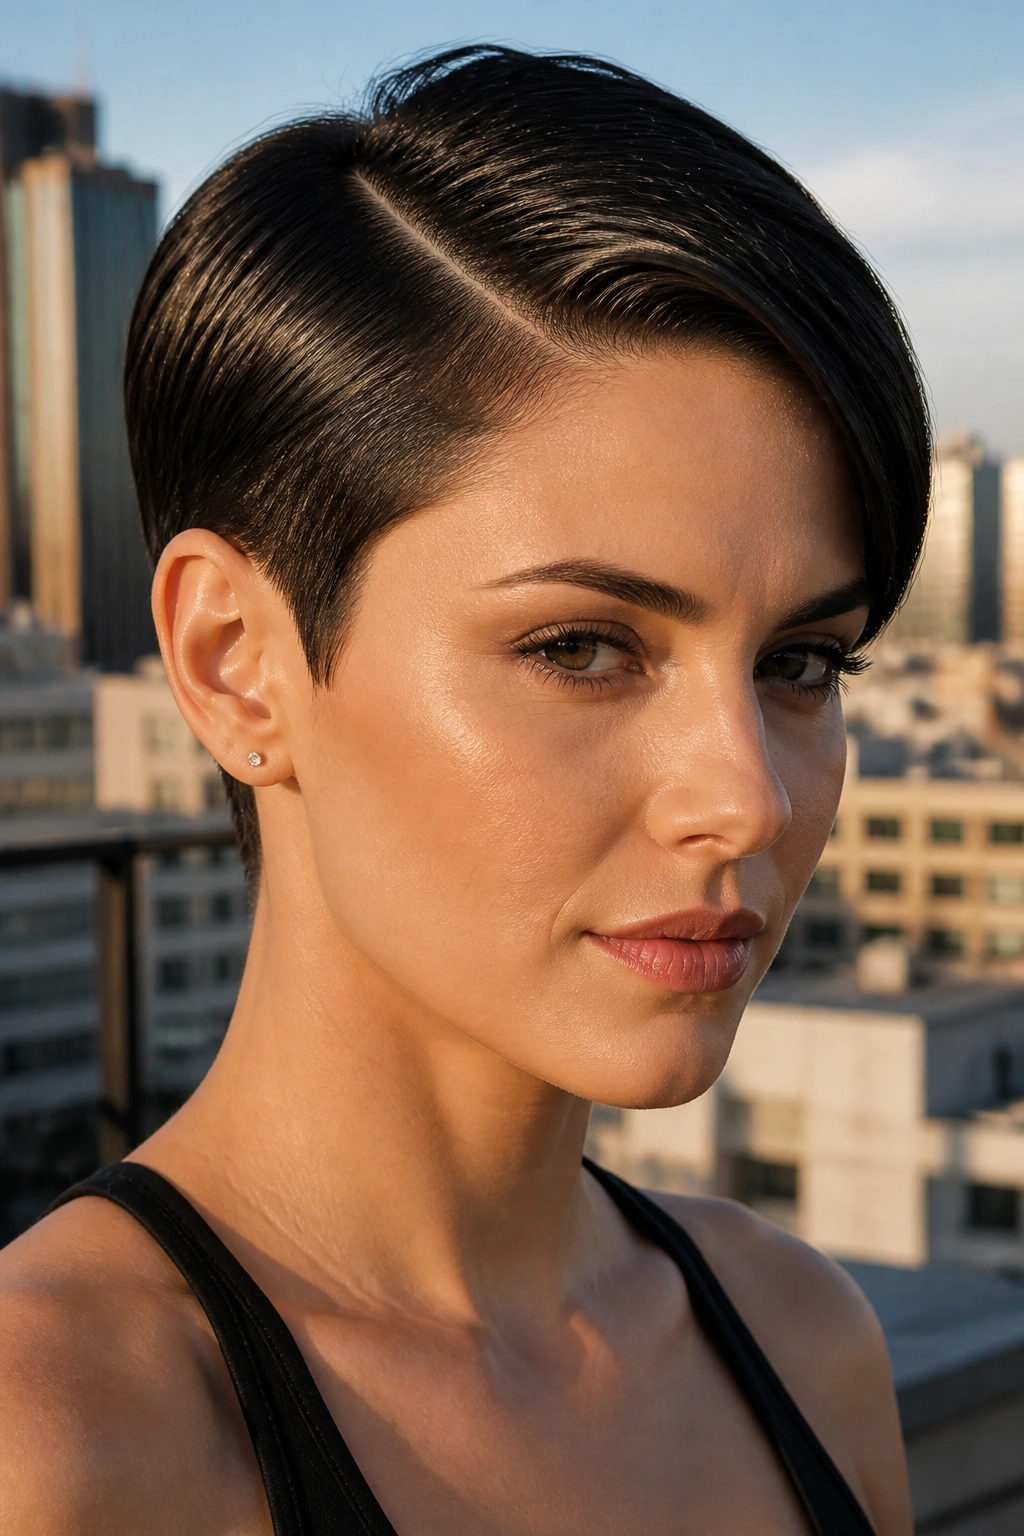
Short hair can look even more striking with a wet finish because there’s nowhere to hide. Every line shows. Every bend shows. That’s part of the fun. A pixie with a deep side part and glossy surface feels crisp, modern, and a little bit daring without requiring much length at all.
Use a pea-sized amount of pomade or a light styling wax, then warm it between your hands before touching the hair. That part matters. Cold product clumps on short hair, and clumps are the enemy here. Push the hair away from the face on the heavier side of the part, and keep the crown smooth rather than puffy.
A pixie like this lives or dies on quantity. Too much product, and it looks greasy. Too little, and the style puffs up the second you step outside. Start small, then add more only where the hair actually needs it.
The shine should sit on the surface, not soak through the whole cut. That keeps the edges neat and the texture visible. If you have a side-swept fringe, let it fall forward a little instead of forcing it flat. A small bend reads better than a frozen helmet.
9. Claw-Clip Twist With a Damp Finish
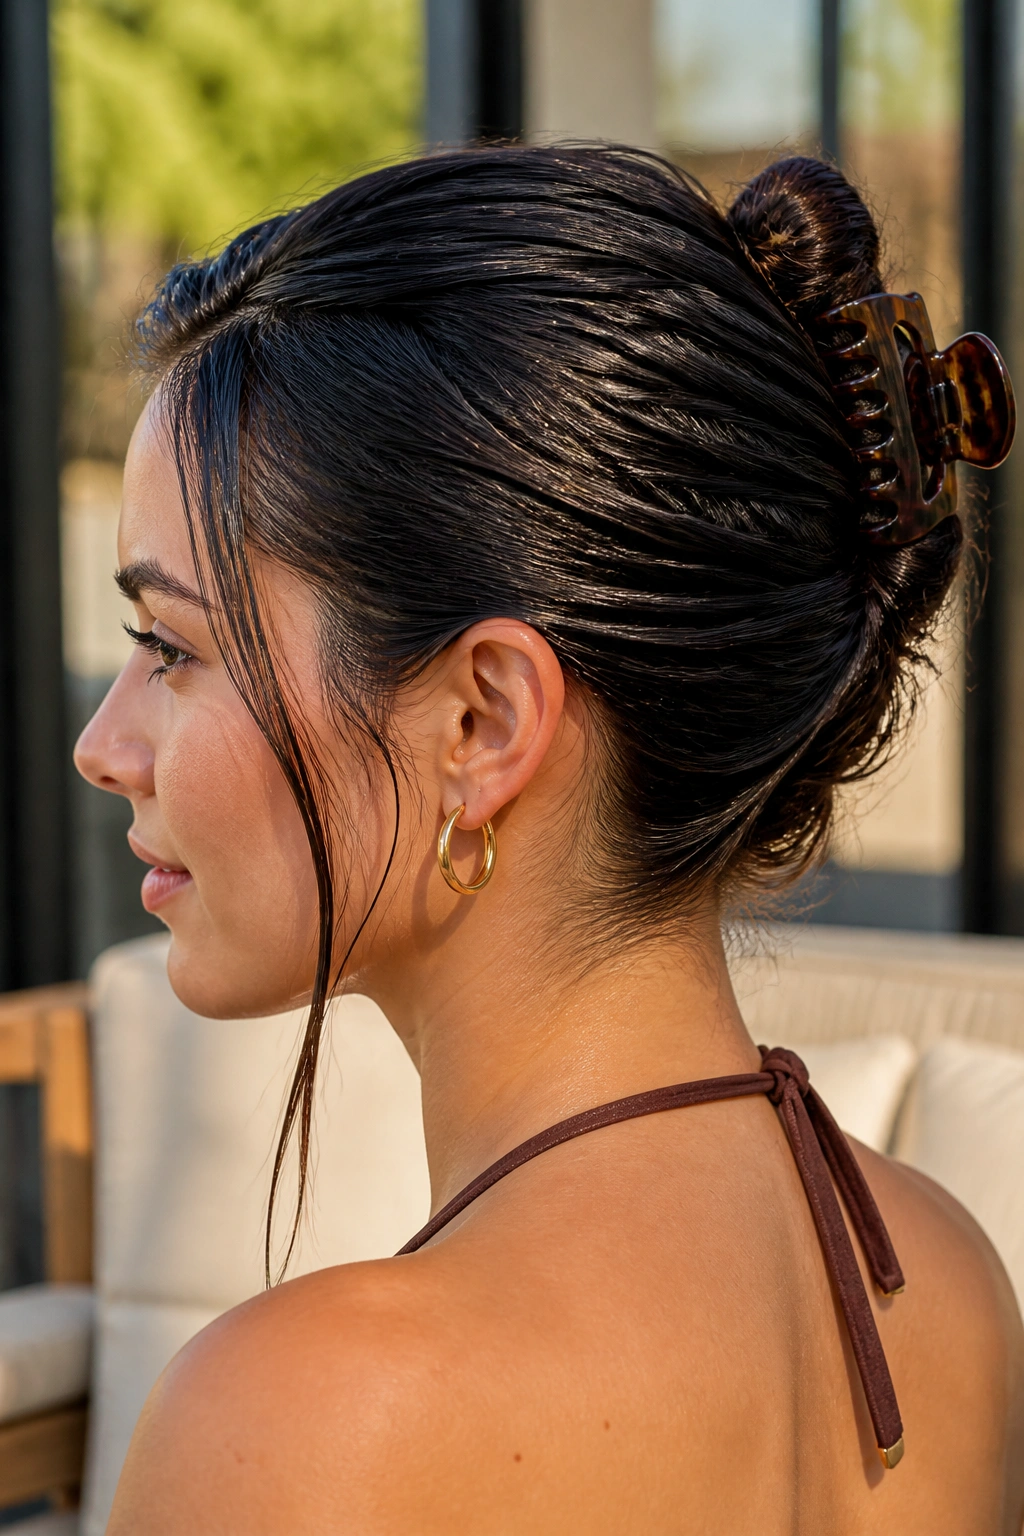
A claw clip can look lazy, or it can look like you knew exactly what you were doing. The damp-finish version sits in the second category. It’s fast, it keeps hair off your neck, and it has that slightly undone feel that works on warm, busy days.
Here’s the move: smooth the top with leave-in and a little gel, gather the hair at the back, twist it upward, and secure it with a medium or large clip. Leave a few ends out if your hair is layered. That little looseness keeps the style from feeling too severe.
What makes this different from a plain clip-up is the front. The hairline should be controlled. The clip itself can be matte, glossy, or a plain neutral color, but the finish at the scalp needs to look sleek. If the front is fuzzy, the clip just looks like you threw it up and left.
Details that help
- Use a clip with strong teeth if your hair is thick.
- Wet the front only, not the whole head, if you want the style to stay light.
- Twist higher for a sharper look, lower for a softer one.
- Let a few face pieces fall free if you want it less strict.
This is the one I’d choose for a long errand day, because it buys you time without looking like you gave up.
10. Glossy Low Chignon
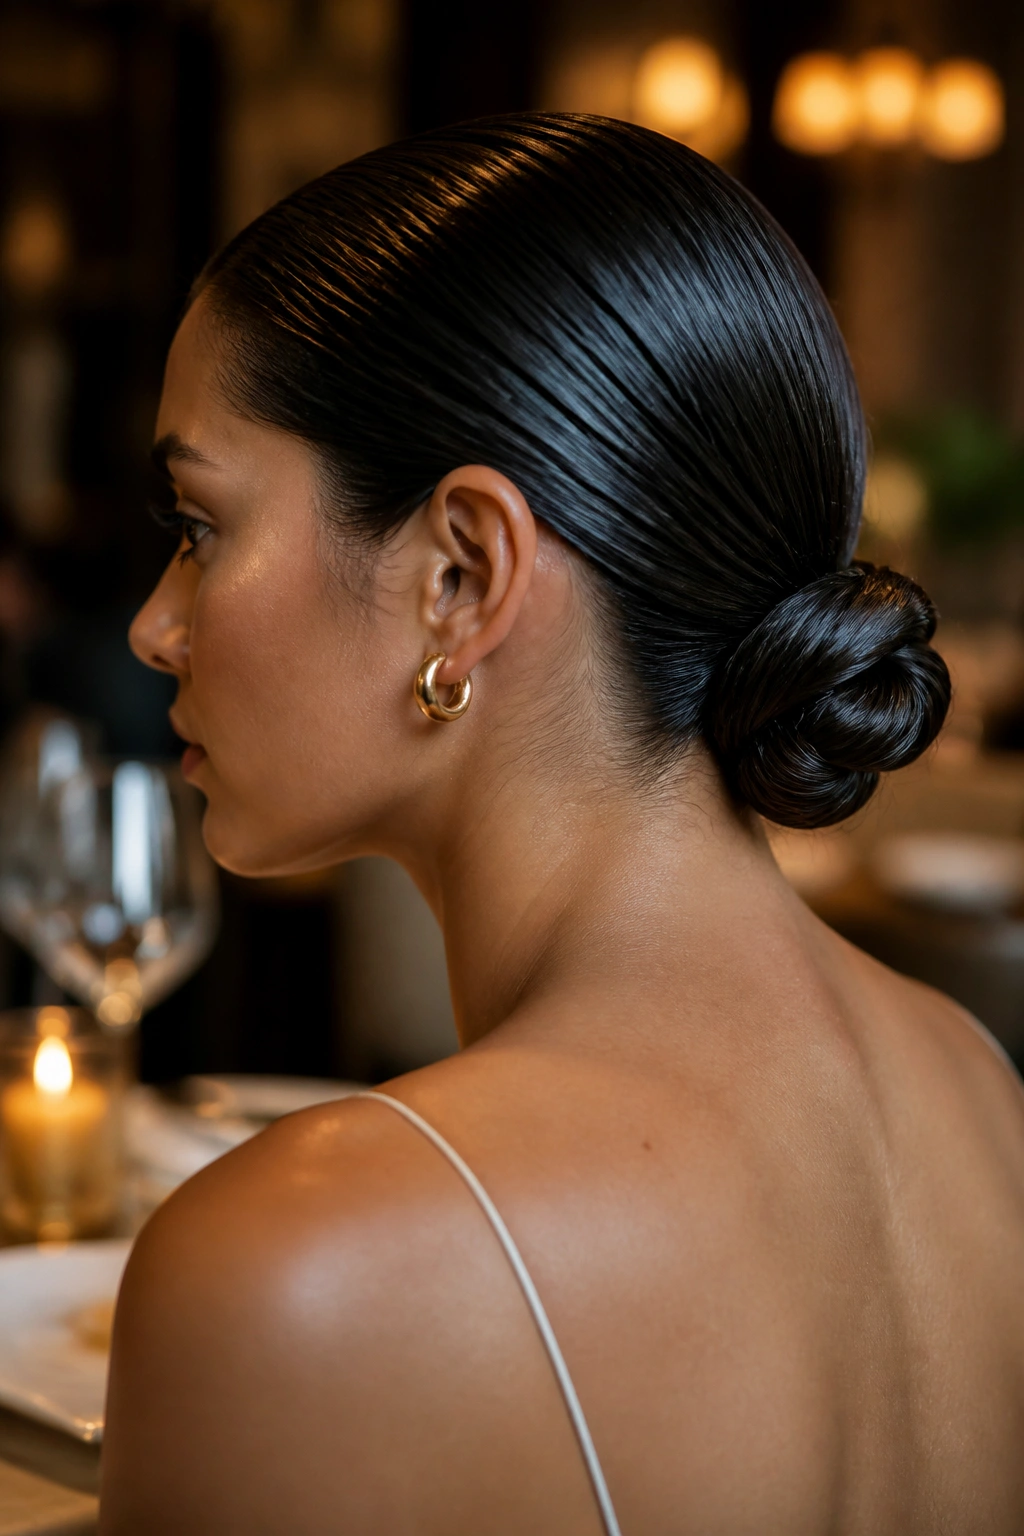
A chignon can be elegant without being stiff, and that’s the version worth wearing. The wet finish makes the shape feel cleaner, while the twist at the nape gives it a little depth. It’s a good pick for dinners, events, or any day when you want your hair to feel more dressed up than a ponytail.
The trick is soft control. Don’t drag every strand tight. Brush the hair back with a small amount of gel, create a low ponytail, then twist the length into a compact knot and pin it with a few discreet pins. If your hair is fine, tease the ponytail base just a touch before twisting. If it’s thick, split the tail into two parts and twist each part separately before pinning them together.
A chignon looks best when the surface is smooth but not over-pressed. That means the top should be polished, while the bun itself can show a little twist and texture. I’d rather see that than a perfectly round shape with no movement.
A tiny bit of serum on the palms before smoothing the crown helps the shine sit on top of the hair instead of soaking into it. Small difference. Big payoff.
11. Braided Wet Ponytail
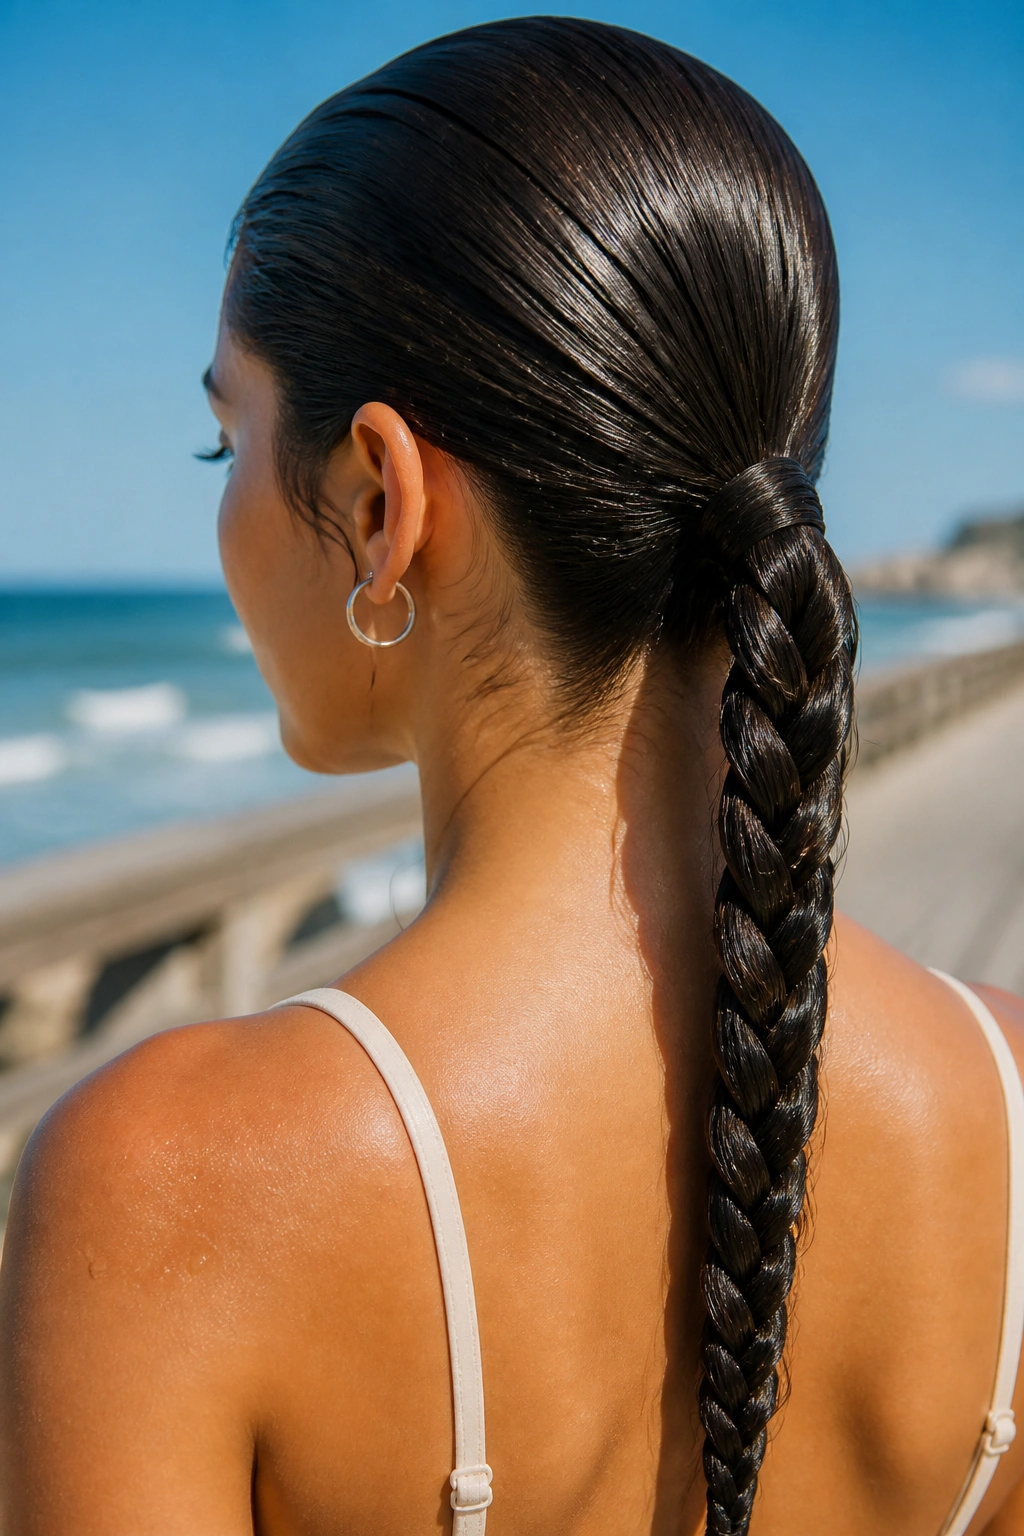
Why does a braided ponytail work so well in hot weather? Because the braid keeps the length under control, and the slick base makes the style look planned from the first glance. You get the neatness of a ponytail with a little more detail, which is usually enough to make it feel special.
Start with a smooth low or mid-height ponytail. Use gel or styling cream at the roots, then braid the tail all the way down. A standard three-strand braid is the easiest, but a fishtail braid looks especially good if you want the texture to stand out. Keep the braid snug near the top and a touch looser at the bottom so it doesn’t look rigid.
How to make it look intentional
- Wrap a small strand of hair around the elastic at the base.
- Set the part before you add product.
- Smooth the crown with a brush, not just your hands.
- Pull a few tiny pieces free around the ears if you want softness.
This style is especially useful if you move around a lot. It stays in place through humidity, sun, and a long stretch of being on your feet. The braid also keeps the ends from puffing out, which is half the battle with a wet look.
12. Scarf-Tied Slick Bun
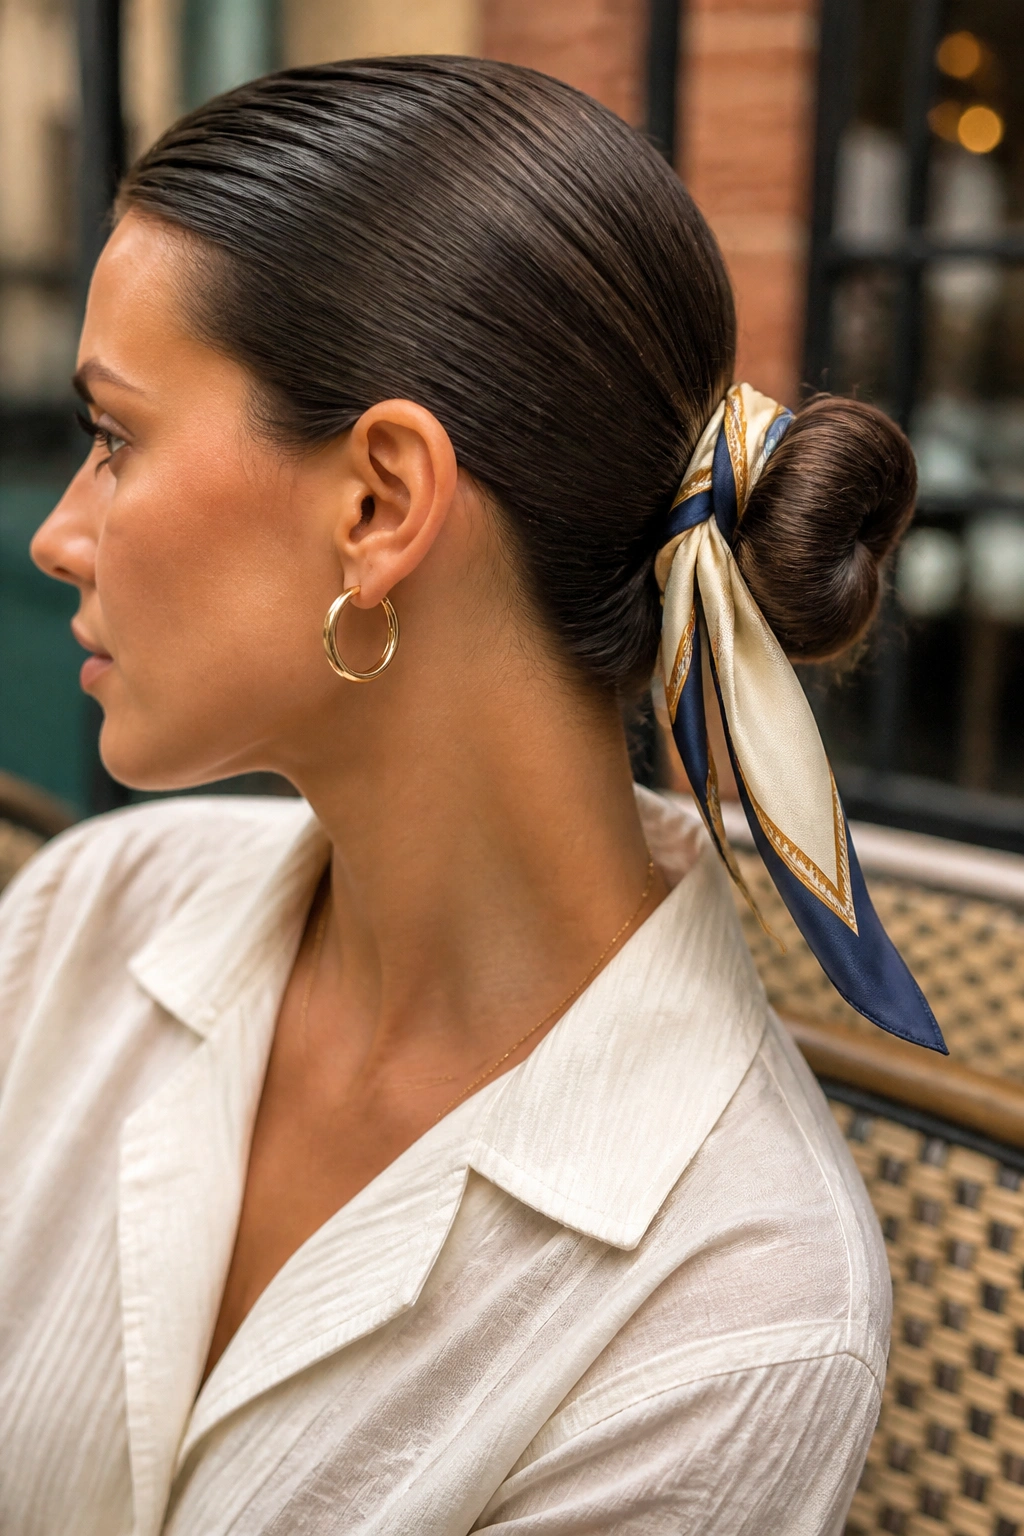
A scarf changes the whole mood of a slick bun. The bun itself can be simple, even tiny, but the fabric gives it color, shape, and a little personality. I like this one when I want the look to feel finished without relying on hair alone to do all the work.
Use a silk or satin scarf if your hair tangles easily. Cotton works too, though it grips a bit more. First, slick the hair back into a low bun or a compact coil. Then tie the scarf around the base, letting the ends trail or knotting them neatly on top. If the scarf is patterned, keep the bun clean. If the scarf is solid, you can loosen a few face pieces and let the style breathe.
The scarf also hides a multitude of sins. An elastic that’s not exactly pretty? Covered. A bun that’s a little smaller than you wanted? Hidden. That’s not cheating. That’s design.
This one suits beach walks, outdoor lunches, and those days when your hair wants to do its own thing. The scarf keeps the look from feeling too severe, and it takes less time than making a bun perfect from every angle.
13. Wet Look Faux Hawk for Curly Hair
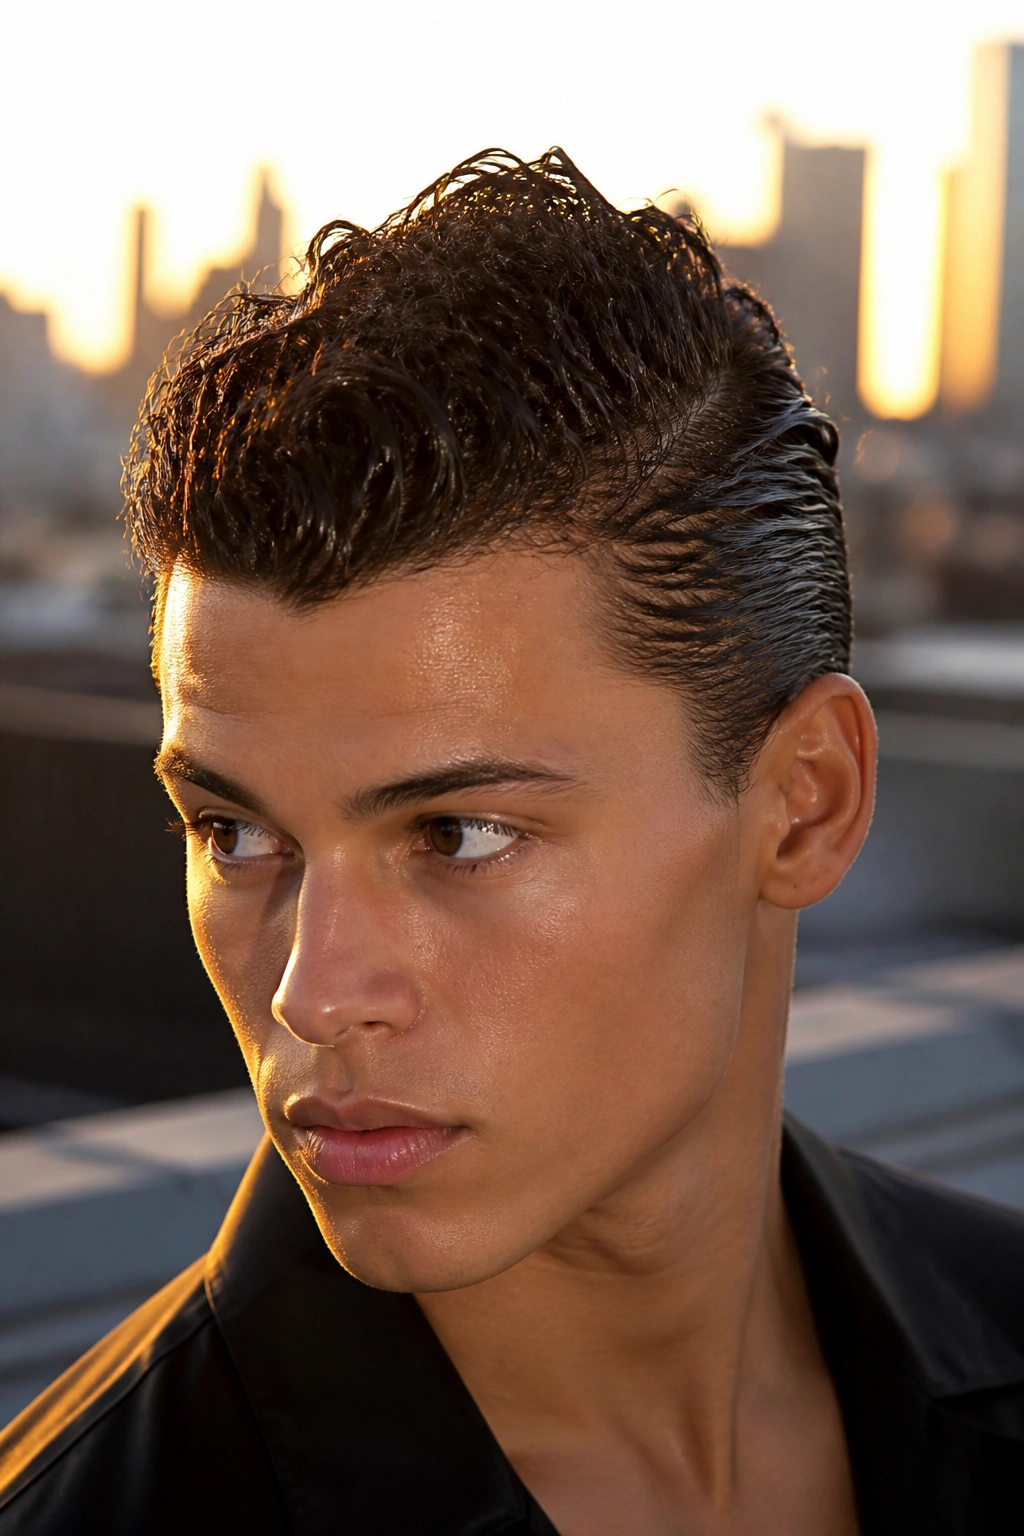
Curly hair gets to have some fun here. The faux hawk wet look keeps the sides smooth and lets the center line of curls stay full, tall, and defined. It’s part polished, part rebellious, and that mix works.
Where to keep the volume
The center strip should carry the shape. Slick the sides down with gel or edge control, then encourage the curls on top to stand up and forward a bit. You can do that with a curl cream underneath and a stronger gel on the outer layer. The result is a ridge of glossy texture running from forehead to crown.
This style looks best when you don’t fight the natural direction of your curls. If they want to lean left, let them lean left. If they spring up, great. The point is to create contrast between flat sides and textured center, not force a shape your hair refuses to hold.
A fine brush can help at the temples and around the ears. After that, hands are usually better. Too much brushing through curls breaks the pattern and makes the style puff. That’s the part most people mess up.
If your curls are tighter, the faux hawk can be dramatic in a good way. If they’re looser, it reads a little softer. Both versions work. The shine is what ties it together.
14. Tucked-Behind-the-Ears Slick Lob
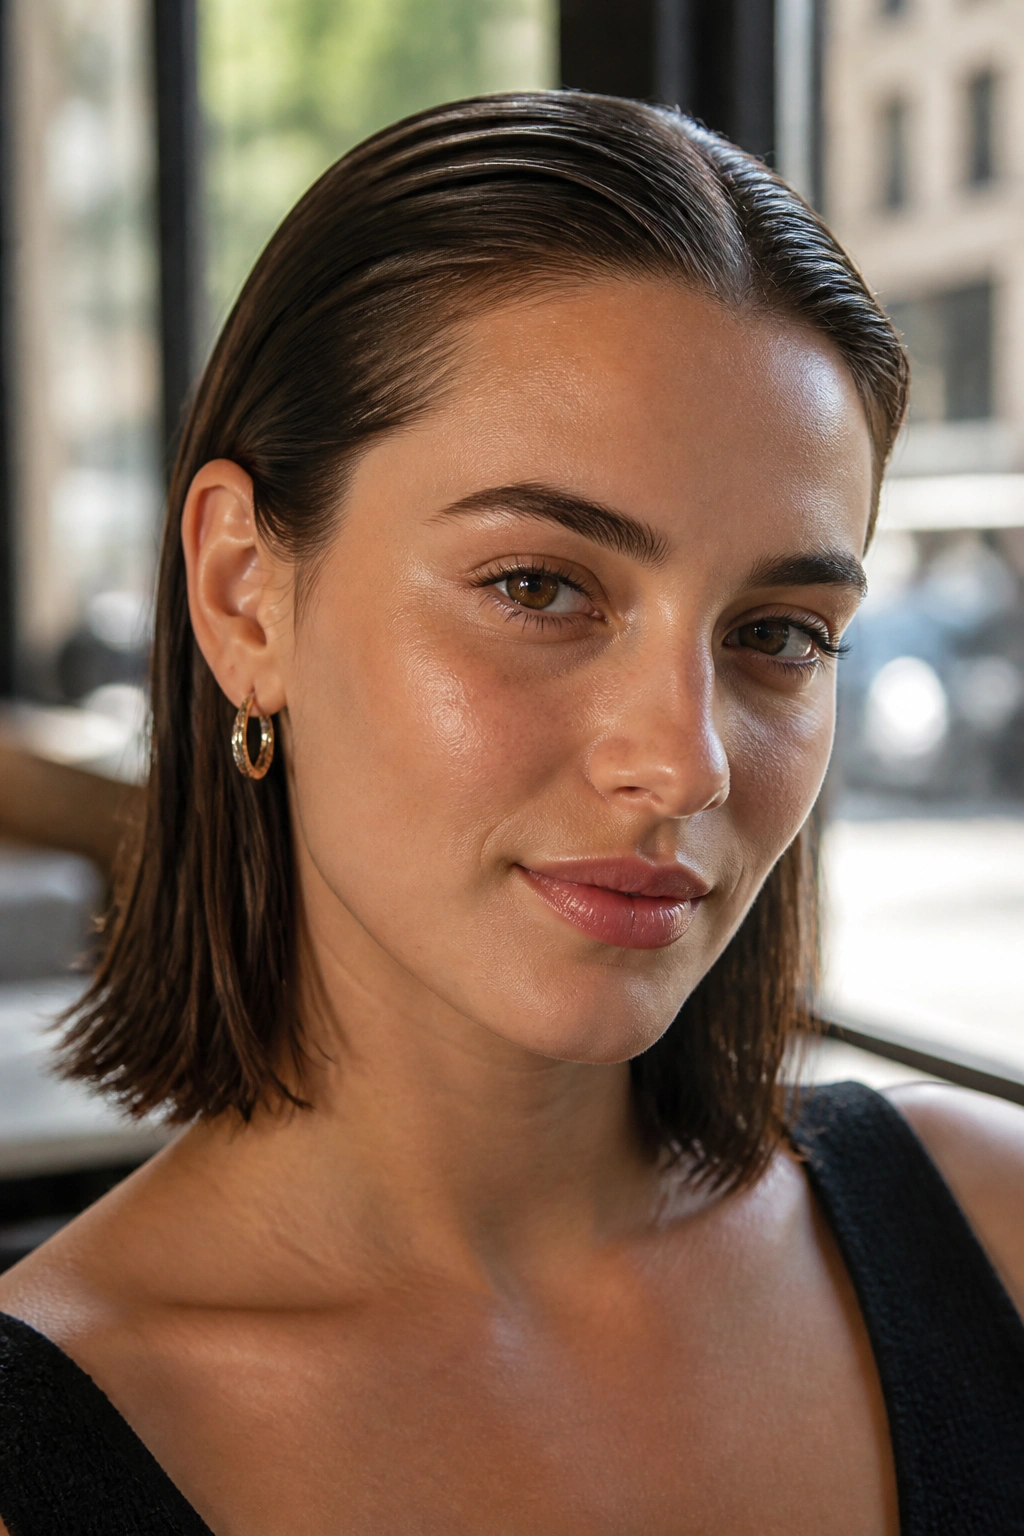
A lob that sits right at the shoulders has a nice problem: it can look too ordinary unless you give it shape. Tucking both sides behind the ears and keeping the top smooth fixes that fast. The wet finish adds a little edge, which helps the cut feel sharp instead of safe.
Use a small amount of gel or shine cream at the roots and around the temples, then comb the hair into a clean part. Tuck the front pieces behind the ears and let the lengths fall straight or slightly bent. If the ends want to curl outward, pin them for a few minutes while they dry a bit. That’s often enough to train them.
What I like most here is the balance. Your face stays open, the neckline stays visible, and the style still has movement through the back. It’s not as strict as a bun, not as casual as loose hair, and that middle ground is useful.
This also plays well with earrings. Hoop earrings, simple studs, even a bold drop earring — the tucked lob lets them show without competing for space. On a humid day, that small bit of face framing can make the whole thing feel lighter.
15. Air-Dried Glossy Texture
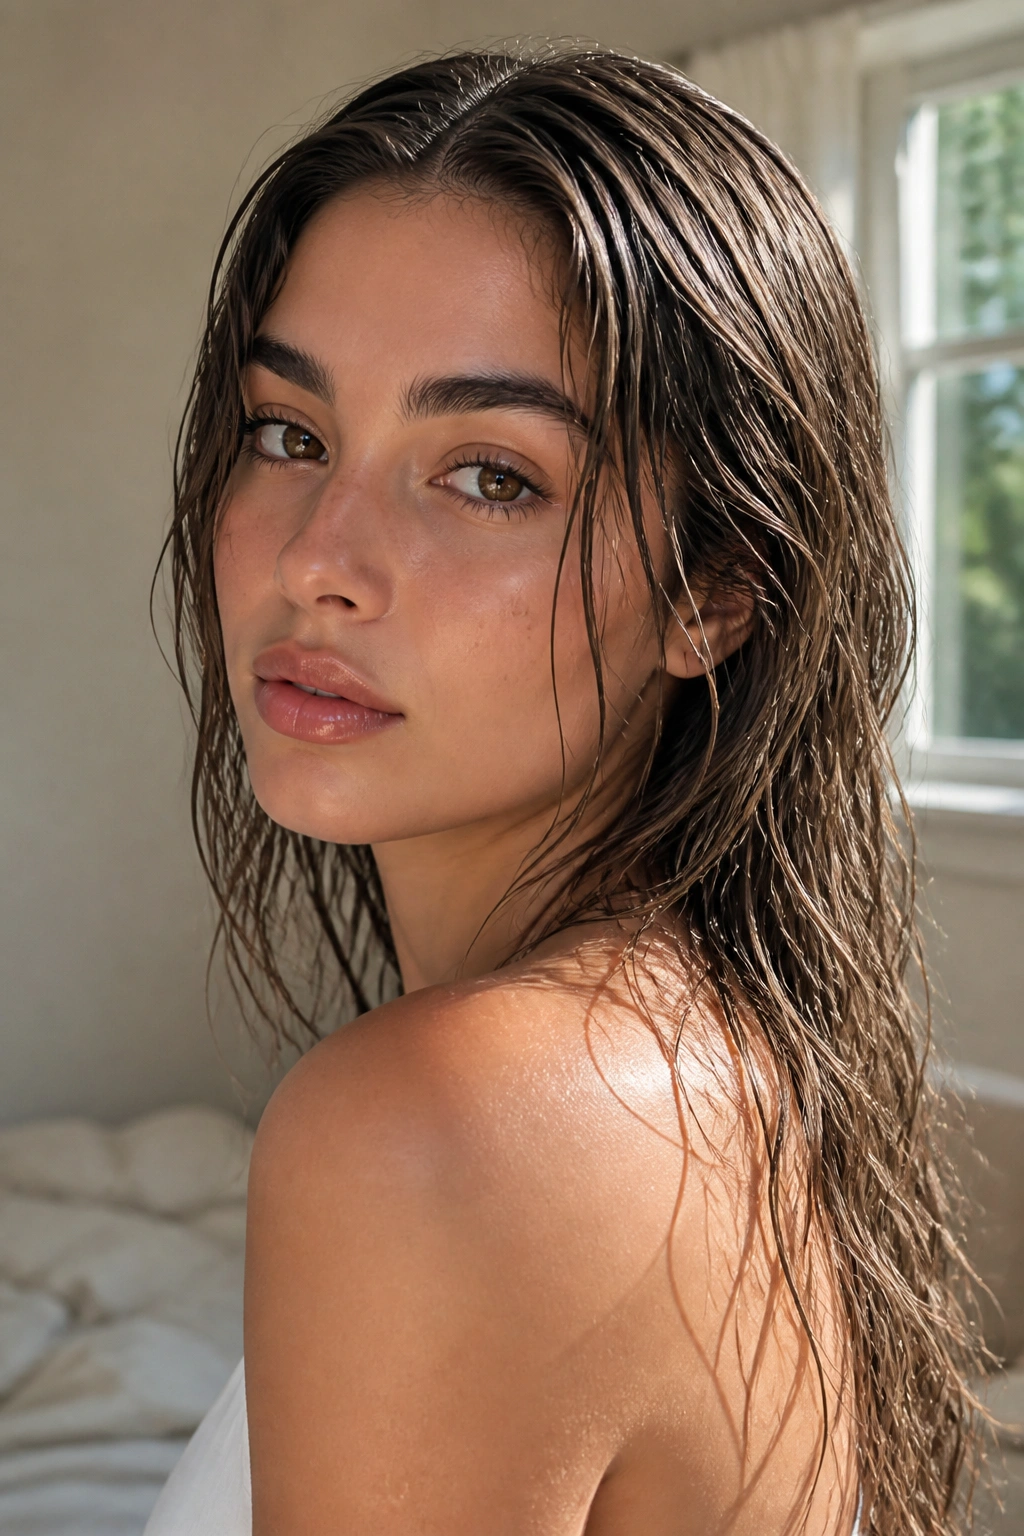
Not every wet hair look has to be slicked tight. Sometimes the nicest version is the one that lets your hair keep its own shape while still looking shiny and controlled. This is the softer finish: damp hair, a little product, and an air-dried surface that reads polished without looking overdone.
Start with a leave-in conditioner, then add a lightweight cream or mousse through the mid-lengths and ends. Use your fingers instead of a brush if you want movement. If you want a neater line at the crown, smooth that area with a comb and leave the rest alone. The contrast between flat top and freer lengths is what makes it interesting.
This style is a good match for waves and curls that already have a pattern you like. It’s also forgiving on long days, because as the hair dries, it keeps some softness instead of turning into a crunchy shell. That matters more than people think. Crunch has its place. Most of the time, it’s not the place.
A small amount of shine spray or serum can finish it, but go light. Too much and the whole thing slips from glossy to greasy in a hurry. The nicest wet hair looks for summer days usually have one thing in common: they look like hair, not product. That’s the standard I’d keep in mind, because it’s the one that still looks good when the temperature climbs and you’re halfway through the day.
If you want a quick rule for choosing among these looks, use this: the hotter and busier the day, the simpler the shape should be. A tight bun, a slick ponytail, a braid, or a clipped twist will outlast a fussy style almost every time. Leave the more relaxed versions for days when you’ve got a little time to keep an eye on them.
