



Long wavy hair has a habit of looking expensive when you leave it alone, then suddenly looking flat, fuzzy, or half-finished the second you overwork it. That’s why hair down styles for long wavy hair need a different mindset than straight-hair styling or tight curls: you’re not trying to force a shape onto the length. You’re trying to keep the movement, the bend, and that soft spill through the ends.
The best styles for long waves do one of two things. They either clean up the top and let the waves do the talking, or they add a small detail — a tuck, a braid, a clip, a side sweep — that makes the whole style look deliberate. Heavy oils, stiff hairspray, and too much brushing can wreck the shape fast. So can trying to make every wave identical. That’s where long wavy hair gets tricky. It wants to look relaxed, but not careless.
A good rule helps here: if your hair already has a natural wave, work with the bend you’ve got. A 1-inch or 1.25-inch curling iron, a wide-tooth comb, a light mousse, and a flexible-hold spray go a long way. So does a little patience while the hair cools. Cool hair holds shape. Warm hair forgets everything.
1. Center-Part Soft Waves with Polished Ends
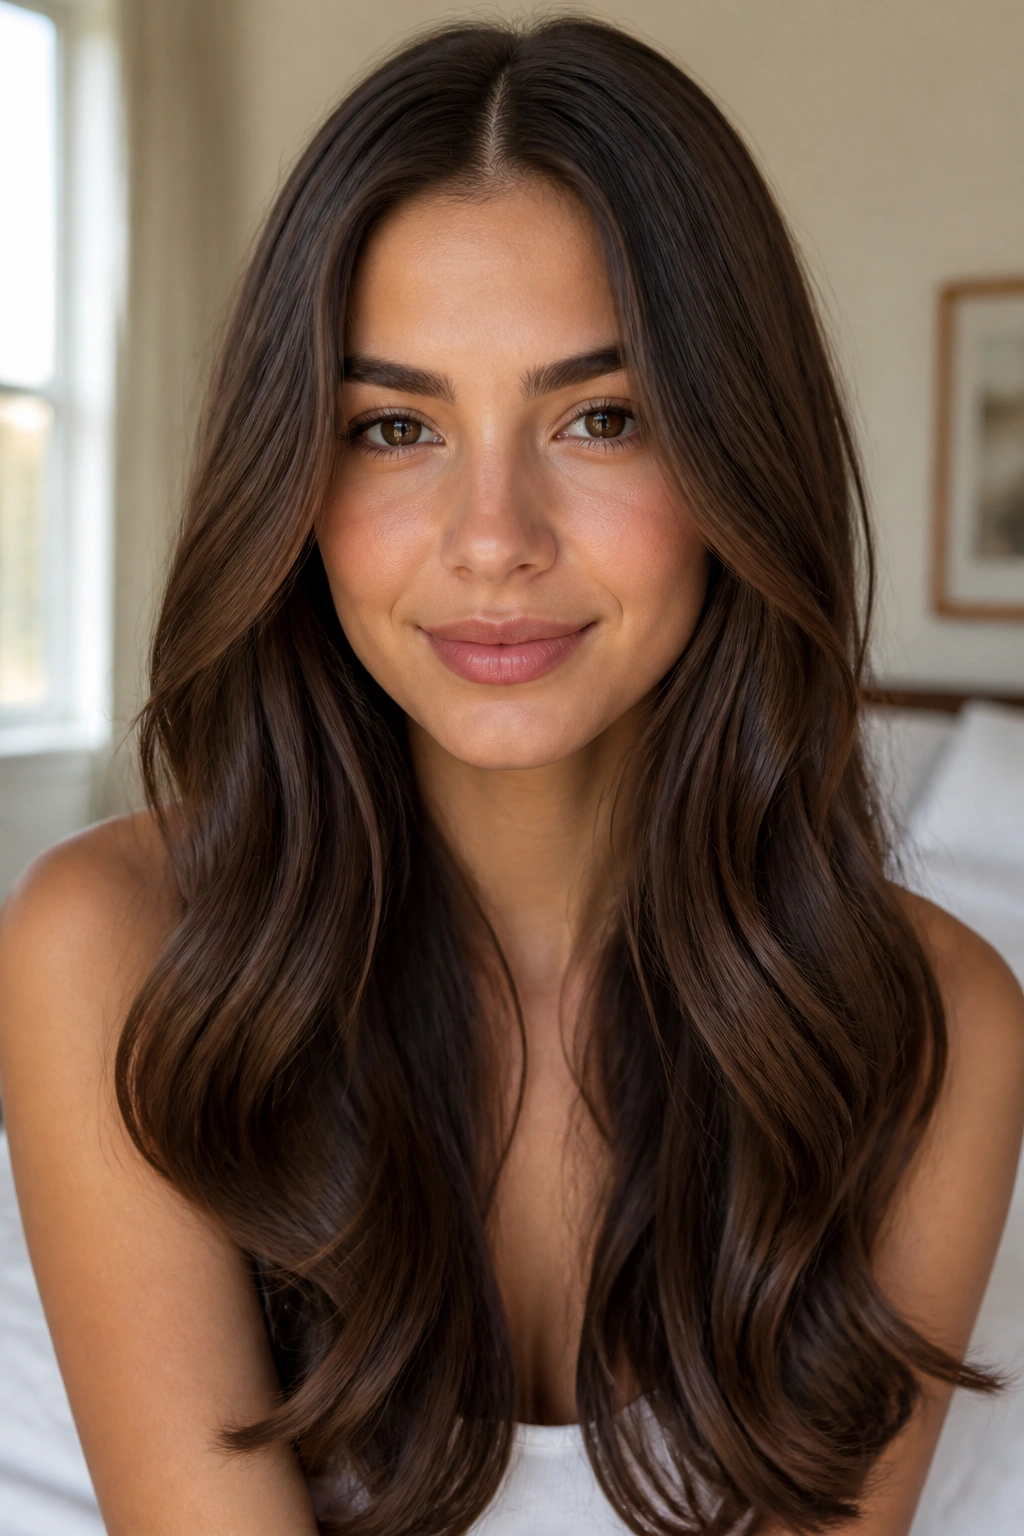
This is the style I reach for when the hair itself is doing most of the work. A clean center part and long, smooth waves make the length look intentional without asking for much fuss, which is exactly why it’s such a reliable option for long wavy hair.
Start by making the part straight and sharp, then curl only the mid-lengths and leave the last 1 to 1.5 inches out of the iron. That keeps the ends from ballooning out and gives the whole look a cleaner line. Once the curls cool, run fingers through them once, then stop. If you keep combing, the wave pattern turns sleepy.
A small detail that matters
The part should sit right in the middle of the crown, not drift back toward one side. That tiny change affects the whole shape. A flat root at the part makes the style look older and heavier than it needs to be.
- Use a 1.25-inch curling iron for soft bend.
- Curl away from the face on both sides.
- Finish with one pea-sized drop of serum on the ends only.
- Keep the crown smooth, not slick.
Best for: everyday wear, dinner plans, and outfits with simple necklines.
2. Deep Side-Part Waves with One Hidden Tuck
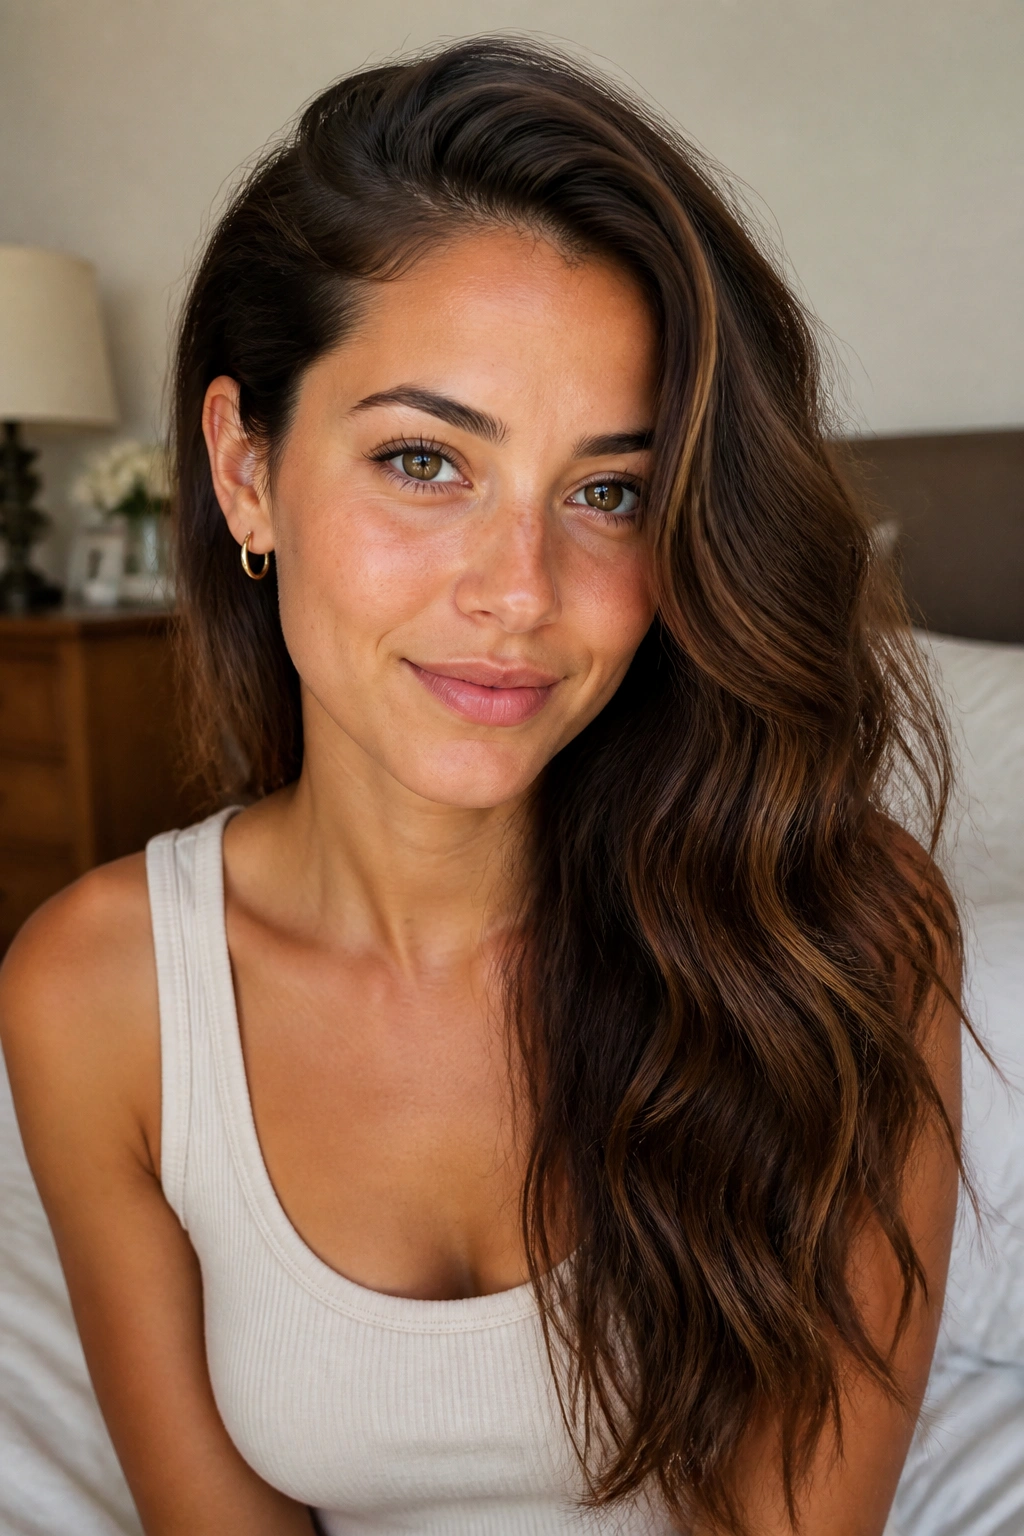
A deep side part does a lot of heavy lifting. It adds instant drama, and on long waves it makes the hair fall in a way that feels richer and more shaped than a center part alone.
Move the part about 2 to 3 inches off center, then tuck the smaller side behind one ear and pin it underneath a top layer. That hidden pin keeps the tuck from slipping without making the style look overdone. The larger side should drape forward and land over the shoulder or collarbone. That asymmetry is the whole point.
What I like about this style is that it works even when the wave pattern is loose and imperfect. In fact, a little unevenness helps here. The side with more hair gets movement; the tucked side gives the face room to breathe. If your hair tends to puff around the cheekbones, this shape reins that in fast.
Use a light mist of flexible hairspray only at the top. Not the ends. The ends need swing.
3. Curtain Waves Framing the Face
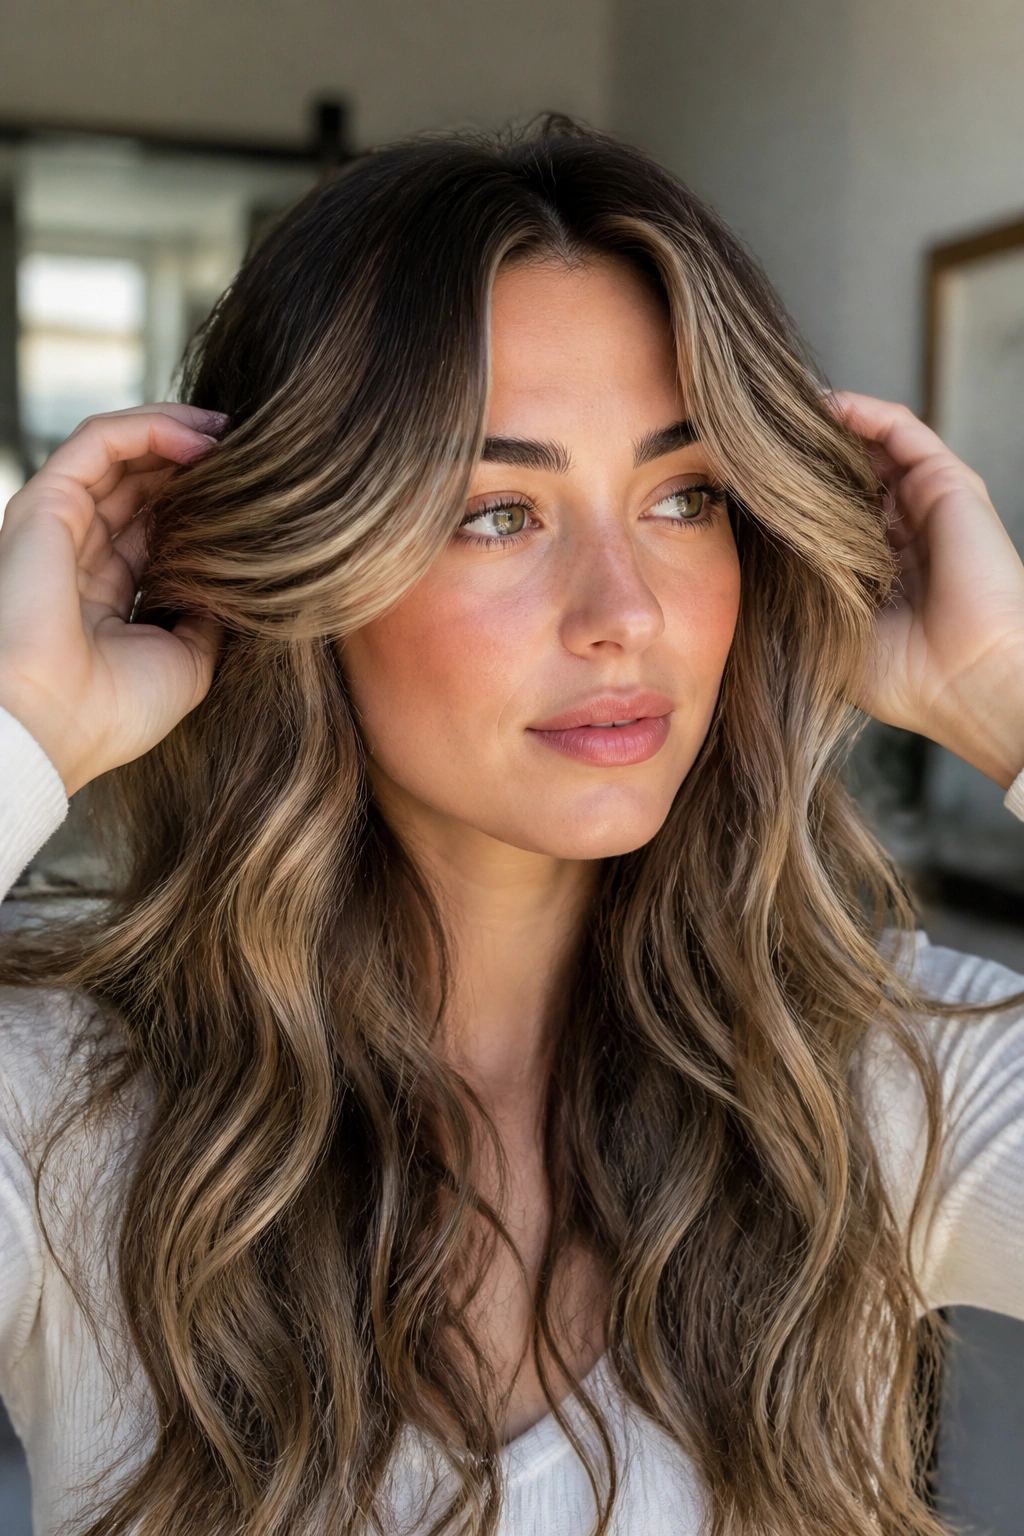
Why do curtain waves look so good on long hair? Because they break up the length right where the eye wants something to happen. You get movement near the cheekbones, a little lift around the eyes, and a softer fall through the rest.
The trick is in the front sections. Take two pieces from the hairline, about 1.5 to 2 inches wide, and curl them away from the face. Then let them cool in your hand before releasing them. That cooling moment matters more than people think. Warm hair drops faster than you want, and the front falls flat before the rest of the style even gets a chance.
How to style the front pieces
Clip the front pieces up while you work on the rest of the head. Then release them last, so they don’t get crushed by your fingers or the brush. If you want the front to frame the face without sticking to it, bend the ends outward just a little. Not much. A tiny bend is enough.
This style suits long layers, face-framing cuts, and anyone who wants a softer look without hiding their length.
4. Half-Up Twist with Loose Length
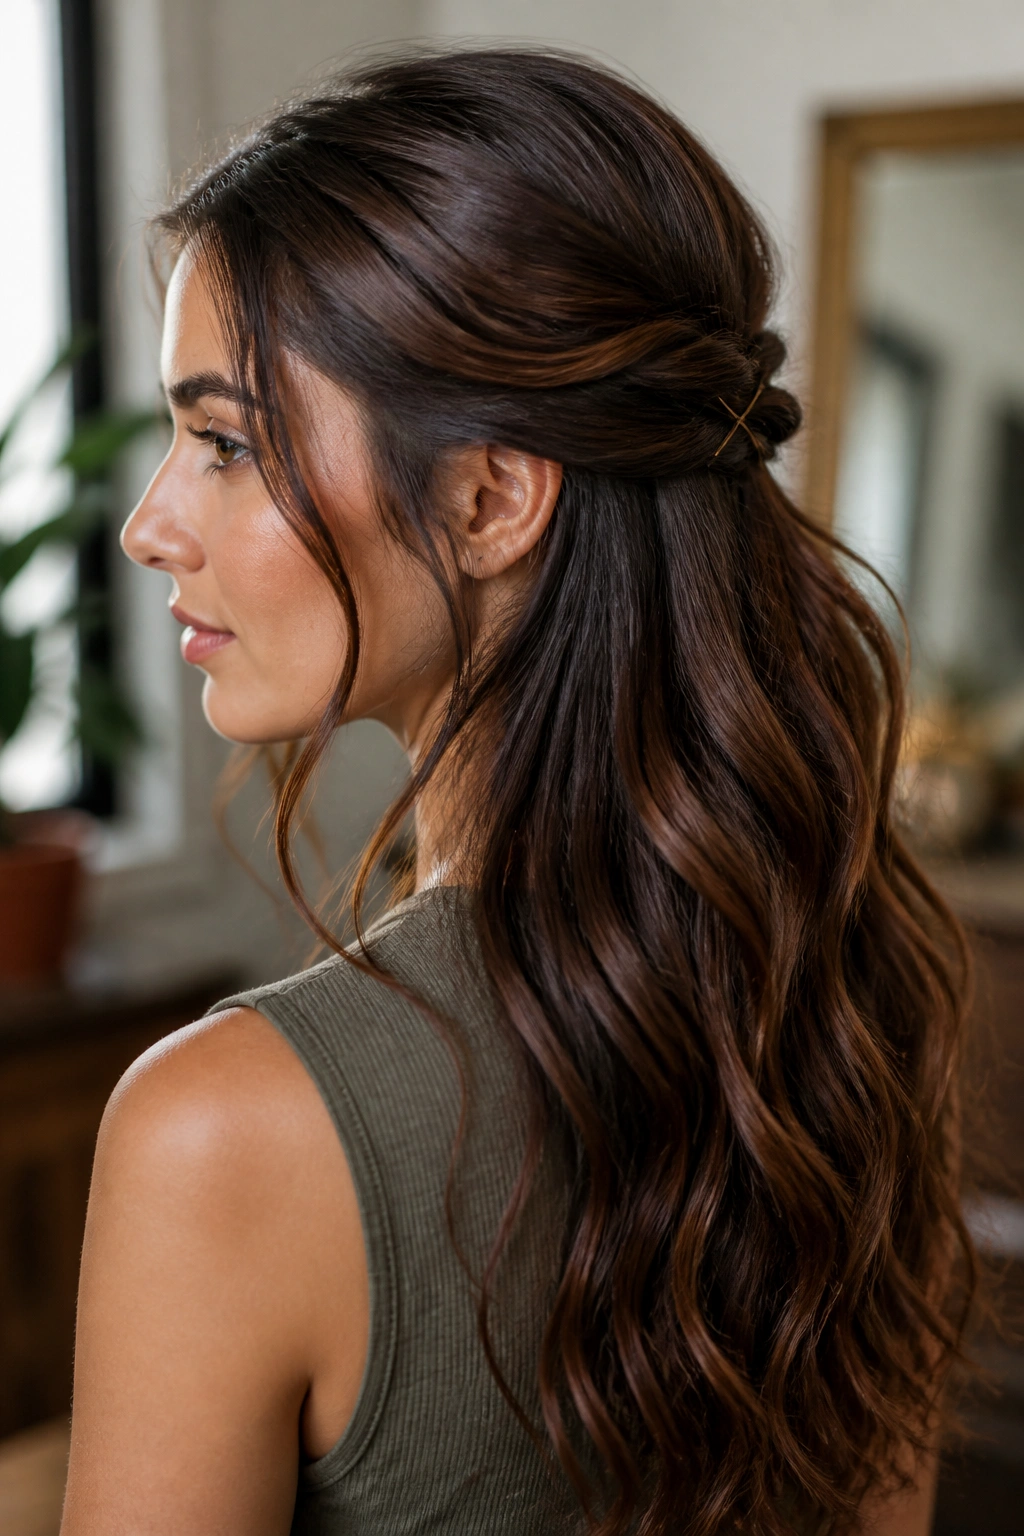
A half-up twist is the styling equivalent of tying your shoes and still looking neat. It keeps the top half under control, but the long wavy length stays down and visible, which is the whole appeal.
Twist one section from each temple back toward the crown, then pin them together with two bobby pins crossed in an X. That cross-pin method holds better than a single pin, especially on thicker hair. Pull the twist a touch looser before pinning if you want it to sit softer. Pulling it too tight makes the crown look small and the twist look severe.
This is a good answer for hair that falls into your face all day. You still get the relaxed wave pattern, but you also get a little lift where it counts. If your hair is fine, tease the crown by about half an inch before you twist. If it’s thick, skip the teasing and focus on pin placement instead.
A tiny spritz of texture spray at the roots helps. Keep it light.
5. Braided Crown Accent Over Long Waves

A braided crown accent gives long wavy hair a bit of structure without turning the whole head into braid territory. That balance is why I like it so much. It feels finished, but the length still stays loose and visible.
Take a thin section from behind one ear, braid it back toward the crown, then secure it under a section on the opposite side. Repeat on the other side if you want a fuller crown effect. Keep the braids narrow — about the width of a pinky finger — so they don’t swallow the wave pattern. Big braids can fight the texture and make the style feel busy.
The nicest part is the contrast. The crown looks controlled, while the hair through the back still moves. That contrast is what keeps the style from sliding into prom-hair territory. You want a little polish, not a helmet.
If your hair is layered, pin the braid ends underneath a heavier section so the shorter bits don’t poke out. They always do if you leave them exposed.
6. Sleek Roots and Airy Wave Ends

Unlike a fully curled style, this one keeps the crown smooth and lets the movement happen lower down. That’s a smart move for long wavy hair because it gives the hair a longer, sleeker line before the texture kicks in.
Start with a light mousse at the roots, then rough-dry with your fingers until the scalp is about 80 percent dry. After that, smooth the top with a paddle brush or a soft bristle brush, but leave the mid-lengths alone. Curl only the lower third of the hair, using a medium barrel and alternating directions. The result should be soft at the top and airy toward the bottom.
This works especially well when your waves go puffy near the crown. Smoothing the top removes that halo effect, but the ends still keep the shape. I also like it on days when the weather is damp and the hair wants to expand.
Best for thicker waves: keep the roots smoother and use less product through the ends. Too much cream near the bottom will drag the shape down.
7. Waterfall Braid Over Glossy Length
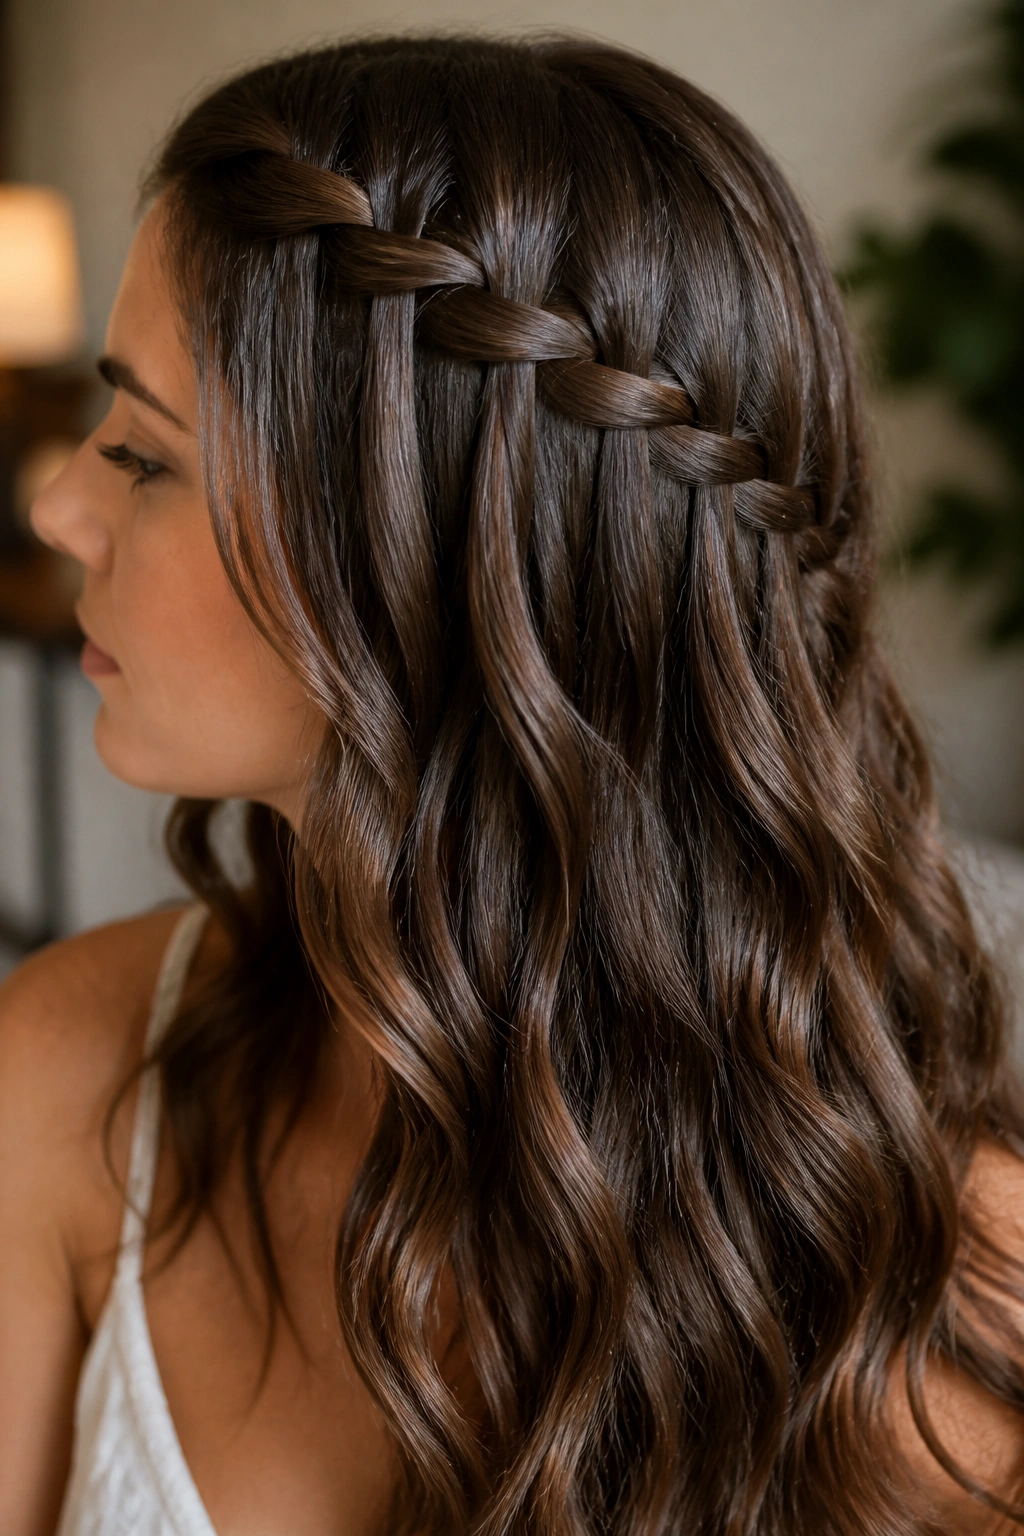
A waterfall braid looks fancier than it is. That’s part of the charm. It gives the eye a path across the head, while the long waves continue flowing underneath like you actually had time to think about your hair.
Start the braid above one temple and move it across the back of the head. Each time you cross a section, drop the bottom strand and replace it with a fresh piece from above. That’s the whole waterfall effect. The long hair left behind should stay down, loose, and well-defined. If the braid gets too tight, the style loses that soft spill.
What to keep in mind
This style needs a little grip. A mist of dry shampoo or texture spray at the roots helps the braid hold its shape. Do not load the ends with spray, though. The loose hair should still swing.
- Braid on slightly gritty hair, not silky-clean hair.
- Keep the braid section to one side of the head for easier pinning.
- Finish the braid with a clear elastic tucked under a layer.
- Smooth flyaways with a small dab of cream on your fingertips.
It’s a strong pick for weddings, events, or any outfit that deserves a little detail.
8. Low Side Sweep with Invisible Pins

A low side sweep is one of those styles that looks like it took thought, even when it didn’t. You sweep all the hair over one shoulder, pin the opposite side flat at the nape, and let the waves drape forward in one clean line.
The real trick is hiding the pins. Use two or three bobby pins at the nape, crossed or stacked, under the top layer. If you can see the pins, you’ve pinned too high. The shape should look like the hair chose that shoulder on its own.
This style is especially good if your waves are a little uneven that day. The sweep lets the texture read as softness instead of mess. It also pairs well with one-shoulder tops, open necklines, and big earrings, because the hair doesn’t compete with the clothes.
A tiny amount of shine spray on the top layer makes the sweep look smoother. Skip the ends if they’re already dry. They don’t need extra weight.
9. Tousled Beach Waves for Second-Day Hair
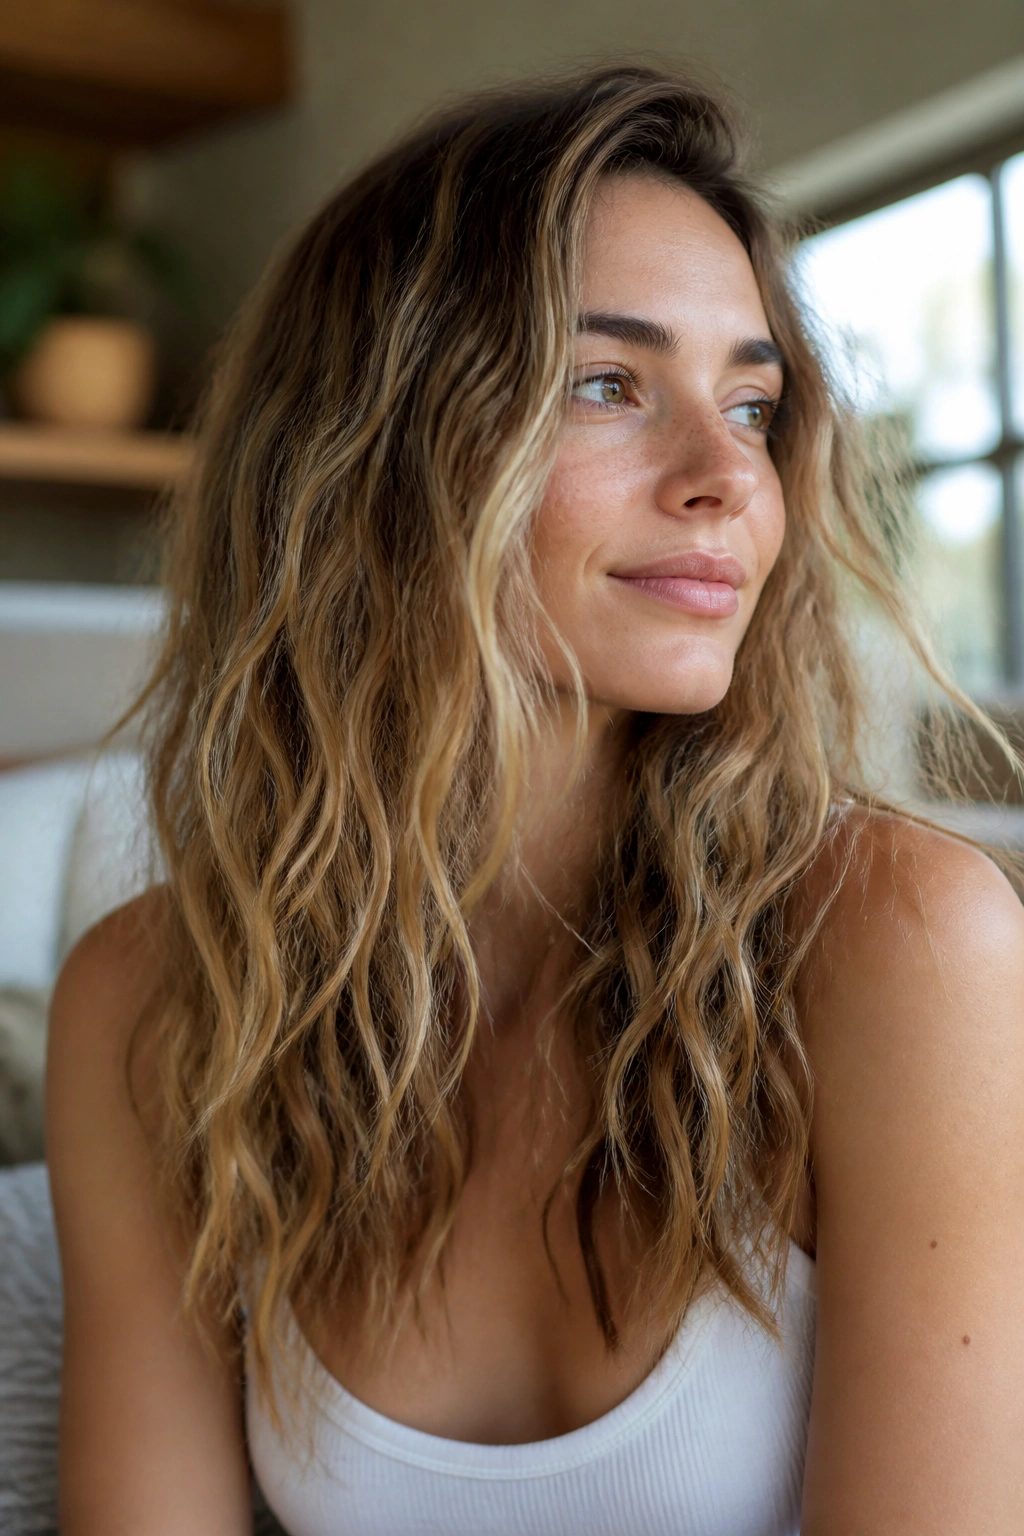
What makes beach waves work is not the salt spray. It’s the bend, the separation, and the refusal to over-polish them. Long wavy hair can wear this style well because the length keeps the texture from looking too choppy.
Mist a light salt spray or wave spray from mid-length to ends, then scrunch the hair in sections with your hands. If you use heat, a diffuser on low speed can help, but keep the nozzle moving. Hold it in one spot and the hair starts looking crinkled instead of soft. That’s not the look.
This is one of the few styles that can look better on day two or three than on wash day. A little scalp oil at the roots and a touch of grit through the ends make the waves stand up better. There’s a line, though. Too much salt spray dries the length and turns the ends chalky.
If your waves are fine, use less product than you think. Fine hair gets weighed down fast, and then the style collapses by lunch.
10. S-Bend Waves with a Wide Barrel
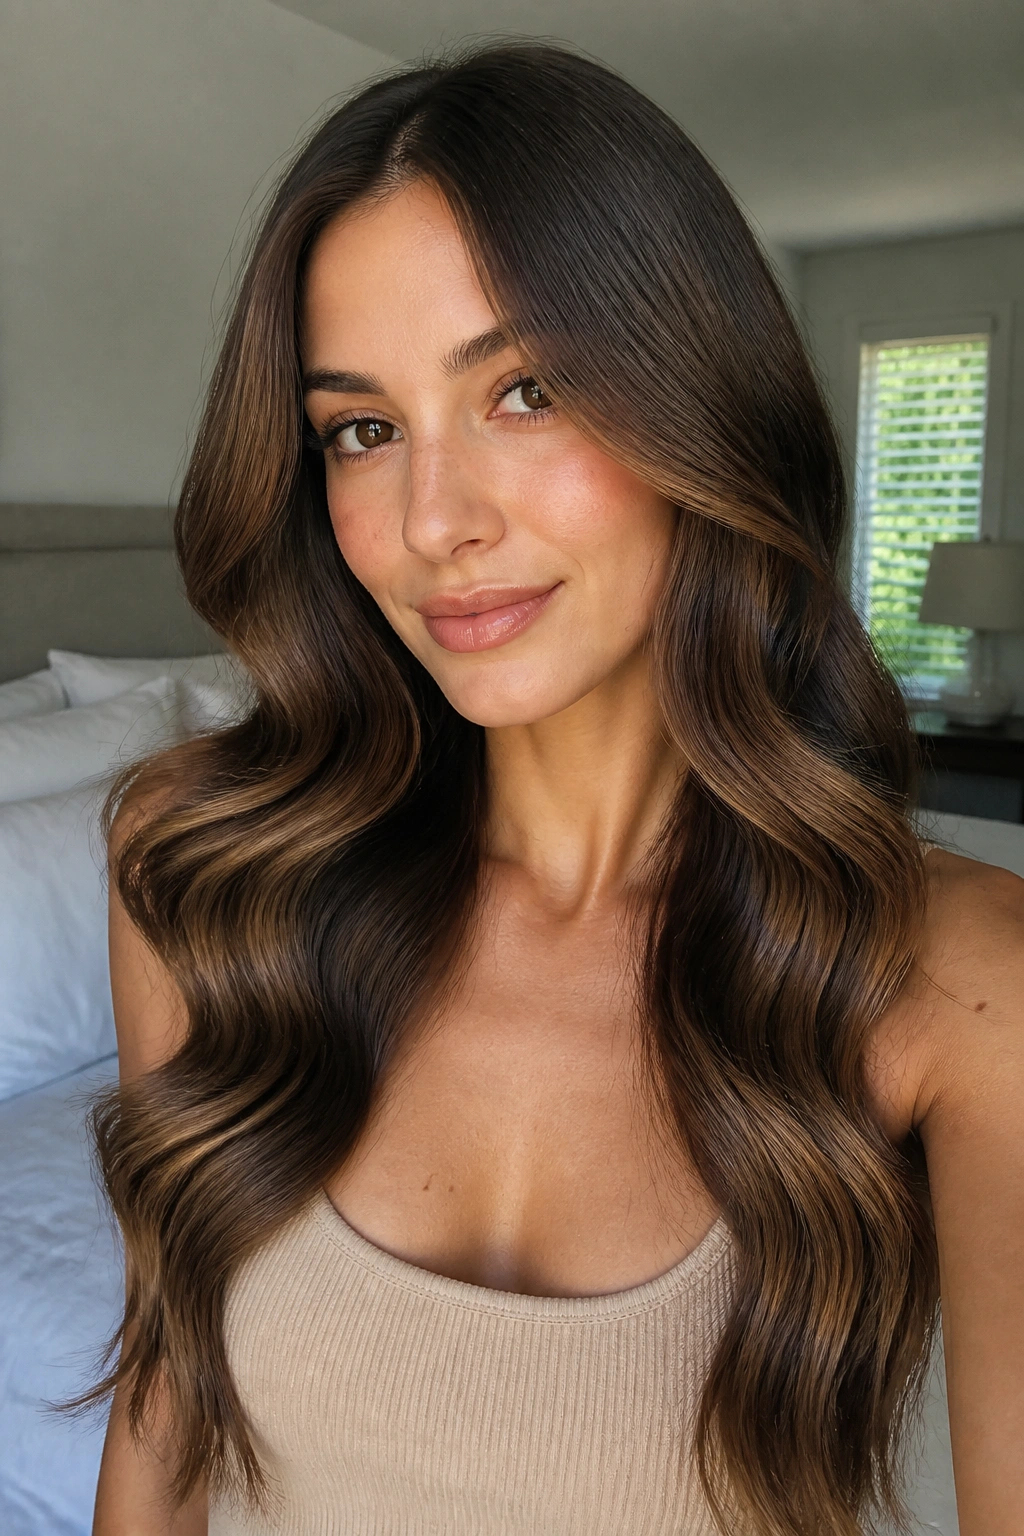
The shape here is smoother and more elongated than a standard curl. You’re looking for an S curve, not a spiral, which is why a 1.5-inch curling iron or wide flat iron works better than a smaller barrel.
Take a horizontal section, clamp near the root, and bend the iron back and forth in a gentle rhythm as you move down the strand. The goal is a soft wave that looks drawn rather than curled. It’s a cleaner finish for long hair, especially if your ends are thick. The bends should stack neatly into each other instead of puffing out.
The science of the shape
S-bend waves look good on long hair because they keep the line long. The wave pattern is visible, but the hair still hangs in one graceful sheet. That makes the length read even longer.
- Use small sections, about 1 inch wide.
- Keep the iron moving so you do not make hard creases.
- Let each section cool flat in your hand.
- Brush through once with a paddle brush for a softer finish.
This one takes a little practice. Once you get the hand motion, it goes fast.
11. Scarf-Tied Waves with a Soft Bow
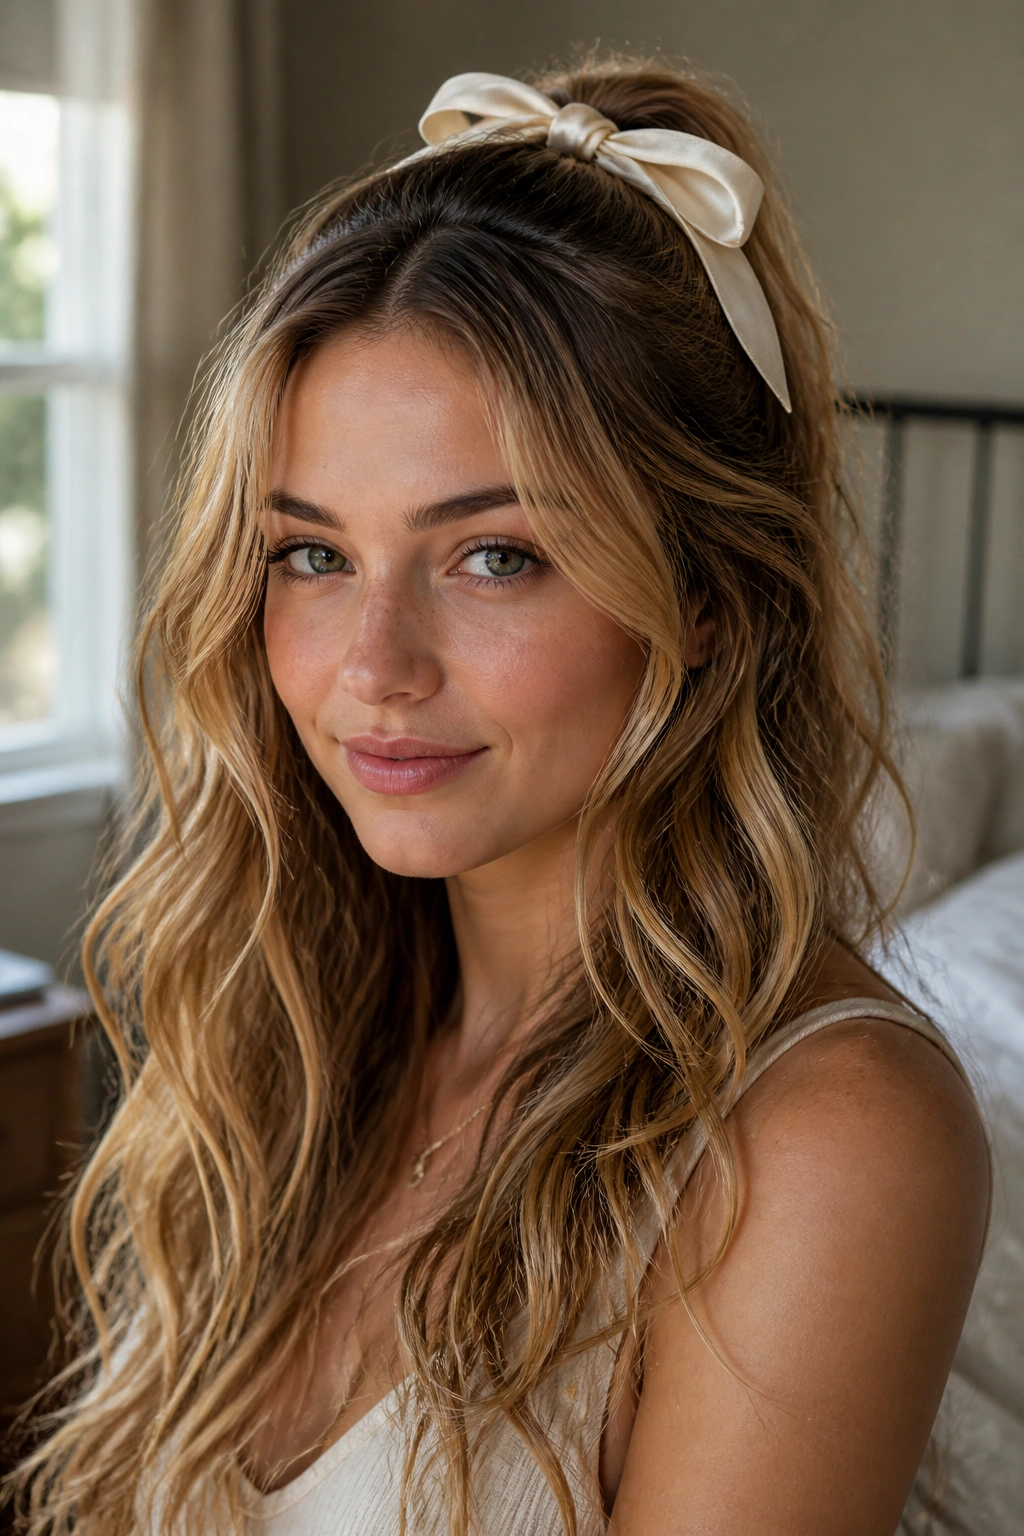
A scarf changes the mood of long wavy hair instantly. It can look playful, neat, retro, or just plain useful, depending on where you tie it. That flexibility makes it a strong option when you want hair down styles that still feel easy.
Fold a silk scarf into a long strip and tie it around the crown, just behind the hairline, or low at the back of the head. A 2 to 3 inch-wide strip works well for finer hair, while thicker hair can handle a wider fold without the scarf getting lost. The scarf gives the top half of the style a little shape, and the waves stay loose underneath.
This is one of those styles where the accessory should support the hair, not steal the show. Pick a scarf with enough contrast to show up, but not so much pattern that it fights the texture. A plain solid color often looks cleaner than a loud print.
The knot or bow doesn’t need to be perfect. A slightly skewed bow usually looks better than one that’s pulled tight and fussy.
12. Micro-Braid Accents Along the Hairline

Unlike a full braid, micro-braids keep the length visible while adding a bit of edge near the face. That makes them a smart middle ground for long wavy hair that needs a small detail, not a full new shape.
Take two or three tiny sections along the hairline, braid each one tightly for 2 to 4 inches, and secure with clear elastics. You can leave them on one side only, or mirror them on both sides if you want symmetry. The waves through the rest of the hair stay loose and soft, which keeps the style from feeling too styled.
This works best when the front hair has some texture already. Freshly washed, slippery hair makes the braids slide open faster. A bit of dry shampoo at the root gives the braid something to hold onto.
If you wear glasses, keep the braids slightly higher than the temples so they don’t get crowded by the frames. Small detail, big difference.
13. Vintage Side-Swept Waves for Dressy Nights
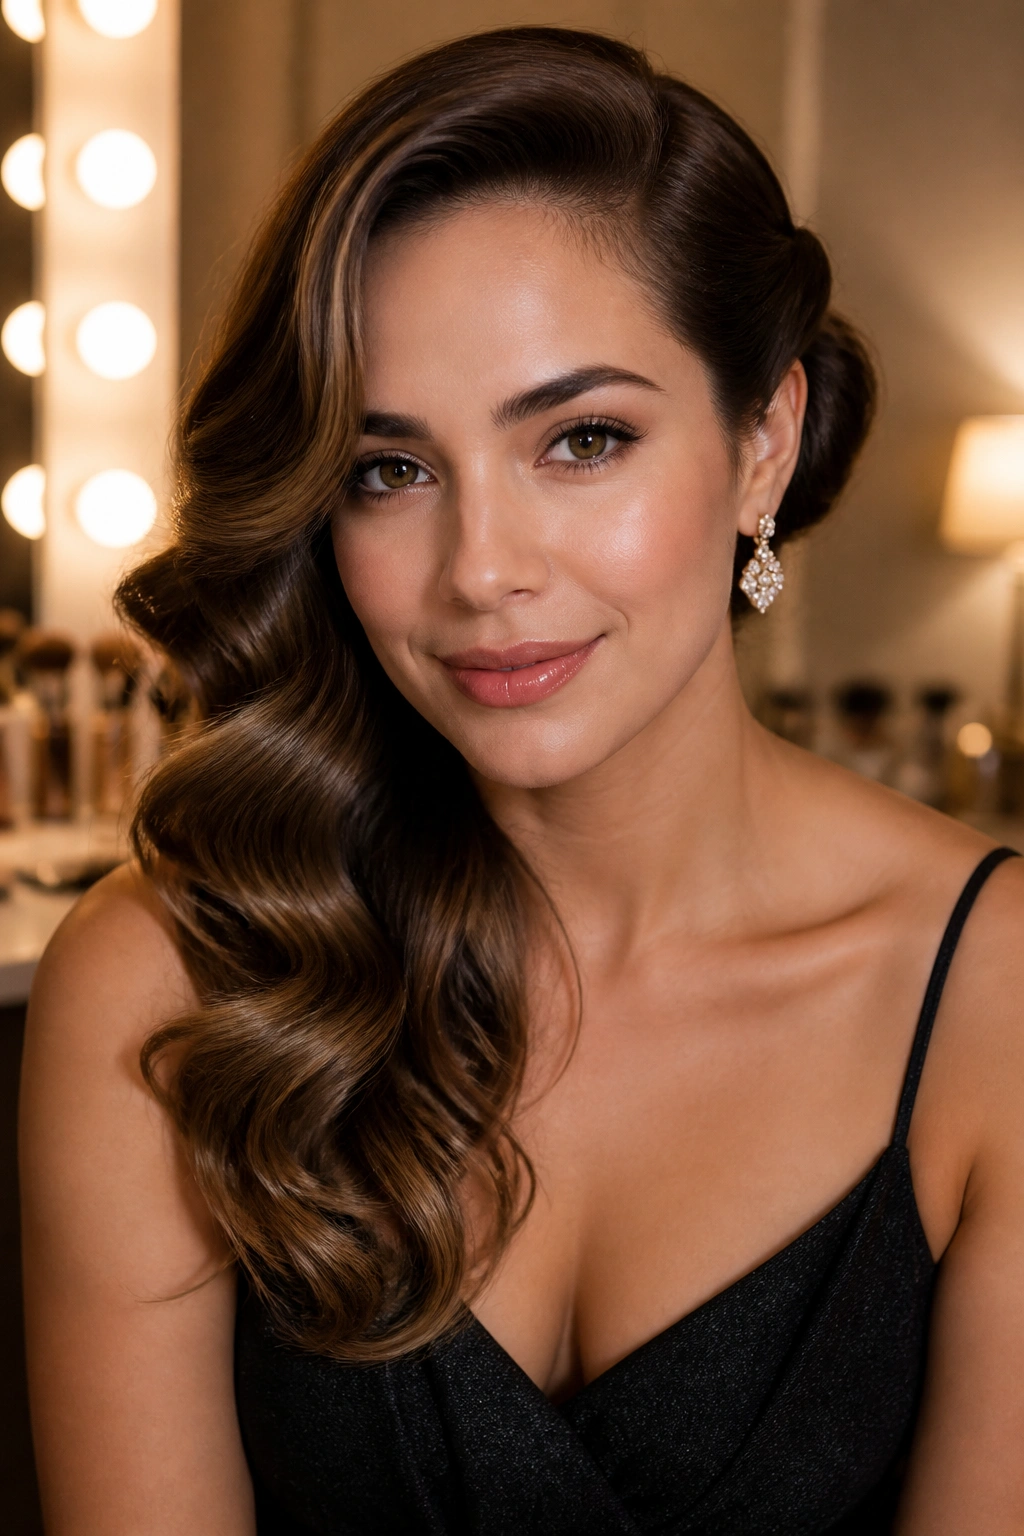
There’s a reason side-swept waves keep showing up in dressy settings. They control the volume, show the face, and let the hair fall in one dramatic direction. On long wavy hair, that shape lands beautifully because the length keeps the curve going.
Work with a deep side part and curl the hair in uniform sections away from the face. Once the curls cool, brush them out until they merge into one flowing wave pattern. Then sweep everything over one shoulder and pin the back side at the nape so the style stays anchored. A jeweled clip near the ear can finish it, but don’t overdo the shine if your dress already does the talking.
This style gets its polish from restraint. The ends should stay soft, not frayed. The top should have lift, not a bump. If you want the old-Hollywood feel, use a medium brush and a light mist of shine spray after the hair is set.
One strong pin beats five weak ones here. Every time.
14. Rope-Braid Half-Back for Easy Control

A rope-braid half-back is easier than it looks, which is good news because some braid styles on long hair become a mess fast. This one twists instead of braids, so it reads neat without needing much hand skill.
Split a front section into two pieces, twist each piece in the same direction, then wrap them around each other in the opposite direction. That’s the rope effect. Pull it back toward the crown, pin it, and repeat on the other side if you want a matched look. The rest of the hair stays down and wavy, so you keep the length in view.
Why people like it
It sits flatter than a traditional braid, so it’s kinder to heavy hair. It also shows off the wave pattern better because less of the hair gets folded away.
- Twist sections 2 inches wide or smaller.
- Keep tension even so the rope does not unravel.
- Use two crossed pins behind the crown for hold.
- Leave the ends loose and mixed into the waves.
This is a nice option when you want the hair off your face but still want the whole length to matter.
15. Blowout Waves with Bouncy Ends

A polished blowout is not the enemy of wavy hair. Done well, it gives the waves a clean root, a smooth middle, and ends that flip with a little life instead of sitting heavy.
Use a round brush while blow-drying, pulling sections taut and curling the ends under or away from the face depending on the direction you want. A 2-inch round brush works well on longer lengths because it lets the hair move without getting too tight around the barrel. When the section is dry, hit it with a cool shot for a few seconds before releasing it. That cool-down keeps the bend from dropping too fast.
This style looks especially good when the haircut has layers that already want to move. If the layers are blunt and heavy, the blowout can look broader than you expect. Still good. Just different.
A small amount of serum on the ends keeps them from puffing out. Use enough to tame, not enough to coat. That mistake shows up fast.
16. Minimalist Middle Part with Shine Serum

Can plain hair down be a style? Absolutely. On long wavy hair, a middle part with clean shine and controlled texture can look sharper than anything more involved.
Start with hair that’s dry and fully detangled, then create a straight part down the middle. Smooth the crown with your hands and a touch of leave-in cream, then warm one drop of lightweight serum between your palms and press it into the mid-lengths and ends. The key is definition, not slickness. You want the waves to look glossy and separated, not greasy.
This works best when your natural wave pattern is already clear and your ends are healthy. If the hair is frayed, the minimalist look can turn unfinished fast. A blunt trim helps more than people want to admit.
What to watch for
Do not add more serum halfway through the day unless the hair is actually dry. Extra product tends to sit on top of the wave instead of sinking in.
This style is calm. Clean. A little severe, in a good way.
17. Clipped-Back Temple Waves with Crown Volume

A small clip can change the whole balance of long hair. Pulling the temples back opens the face, while the crown keeps enough lift to stop the style from feeling flat.
Lift the top section at the root with a round brush or a Velcro roller for a few minutes, then clip the temple pieces back with two slim barrettes or a single decorative clip on each side. The important part is leaving the crown untouched after the lift. If you smooth it down right away, the volume disappears and you’re back where you started.
This style is good when you want hair out of the face but don’t want to surrender the length. It also works on hair that’s grown out a bit and has that loose, swingy shape around the jaw and shoulders. The waves hang freely, but the front has a job.
Keep the clips small enough that they disappear into the hair color if you want a softer effect. Larger clips can be fun too, though. They change the whole mood fast.
18. Loose Romantic Sweep Over One Shoulder
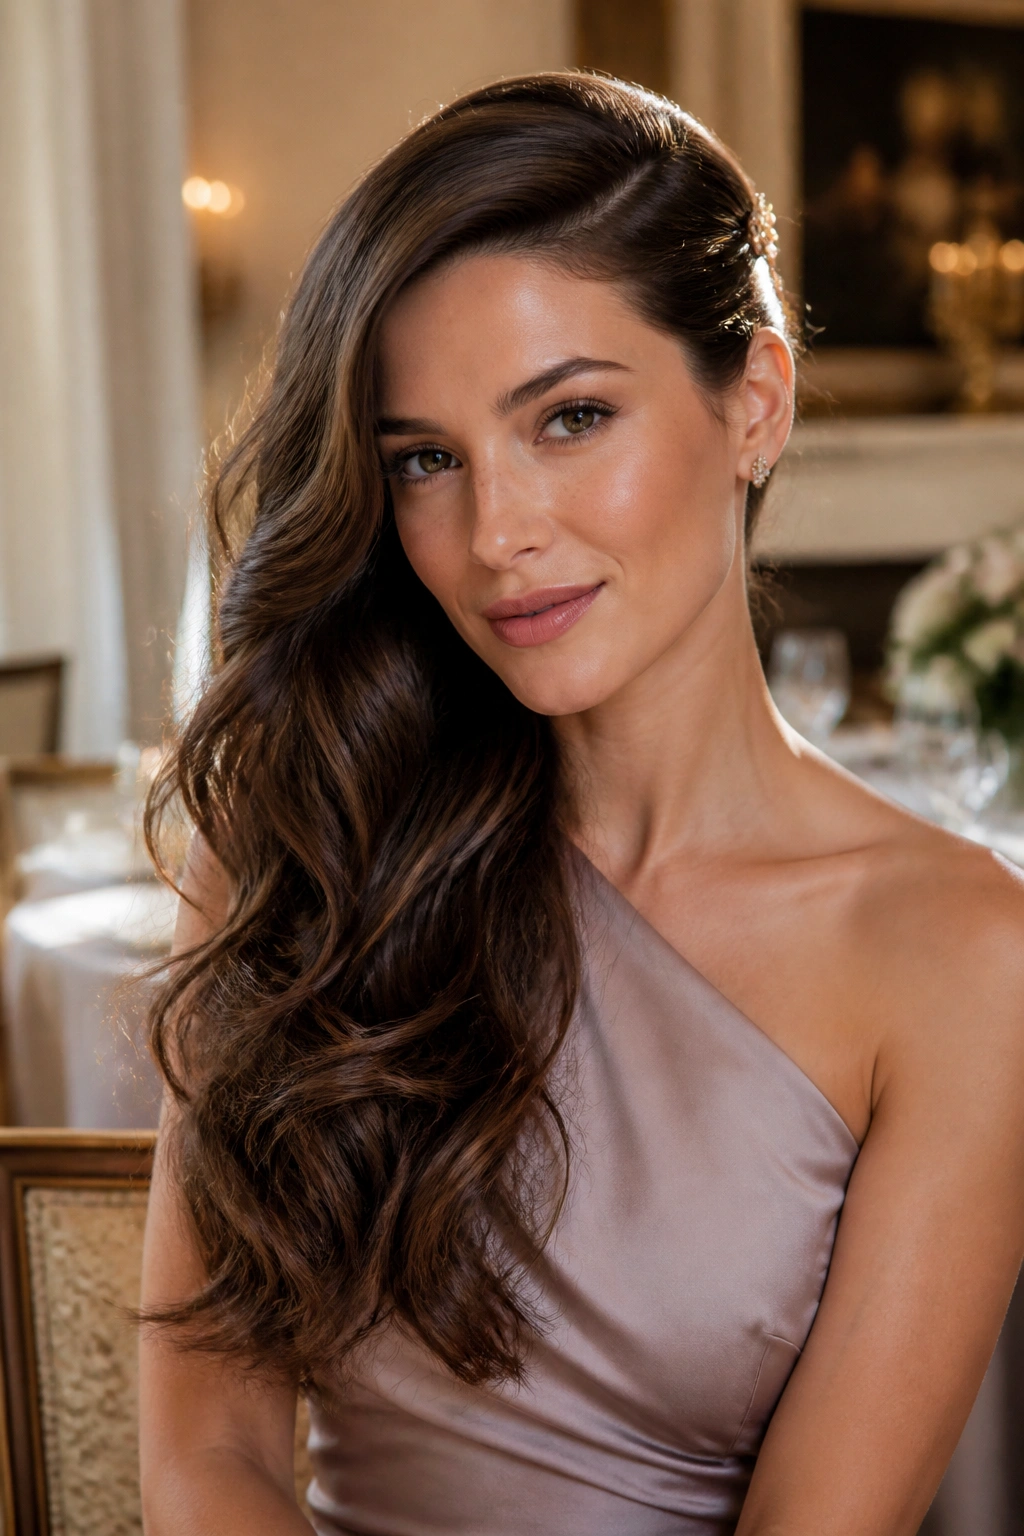
If you only keep one hair down style in your back pocket, make it a one-shoulder sweep. It flatters long wavy hair because the length stays visible, the movement stays soft, and the shape feels a little intentional without asking for a full styling session.
Brush or finger-comb the waves gently to one side, then pin the opposite side low and hidden behind the back of the ear or just above the nape. A single decorative pin near the shoulder can help hold the sweep in place, but the style should still fall loosely. That loose fall is what makes it feel romantic instead of stiff.
I like this one for dinners, photos, and any outfit with an open neckline. It gives you a line from shoulder to ends, which is a small thing, but it changes how the whole haircut reads. Long hair can disappear when it hangs straight down the back. Sweeping it forward solves that.
The best version has a little imperfection. One wave tucked deeper, one piece slipping free near the cheek, the ends resting over the collarbone instead of sitting like a curtain. That tiny bit of mess keeps it human.
