



A single braid across the front can change the whole mood of a hairstyle. Front braid hairstyles for Black women do that thing where they look simple at first glance, then suddenly make the rest of the style feel finished.
Some styles pull the hairline too tight and call it neat. Not the same thing. A front braid should frame your face, hold the style together, and leave your scalp calm enough that you can make it through the day without flinching when you turn your head.
The front is the first place people look. It is also the first place your own hands go when a style feels off. That is why braid placement, braid size, and tension matter more here than almost anywhere else on the head.
Some of the looks below are soft and easy to wear. Others have more structure, more drama, or more edge. Good. Hair should be allowed to have range.
1. Single Side Braid Into a Low Bun
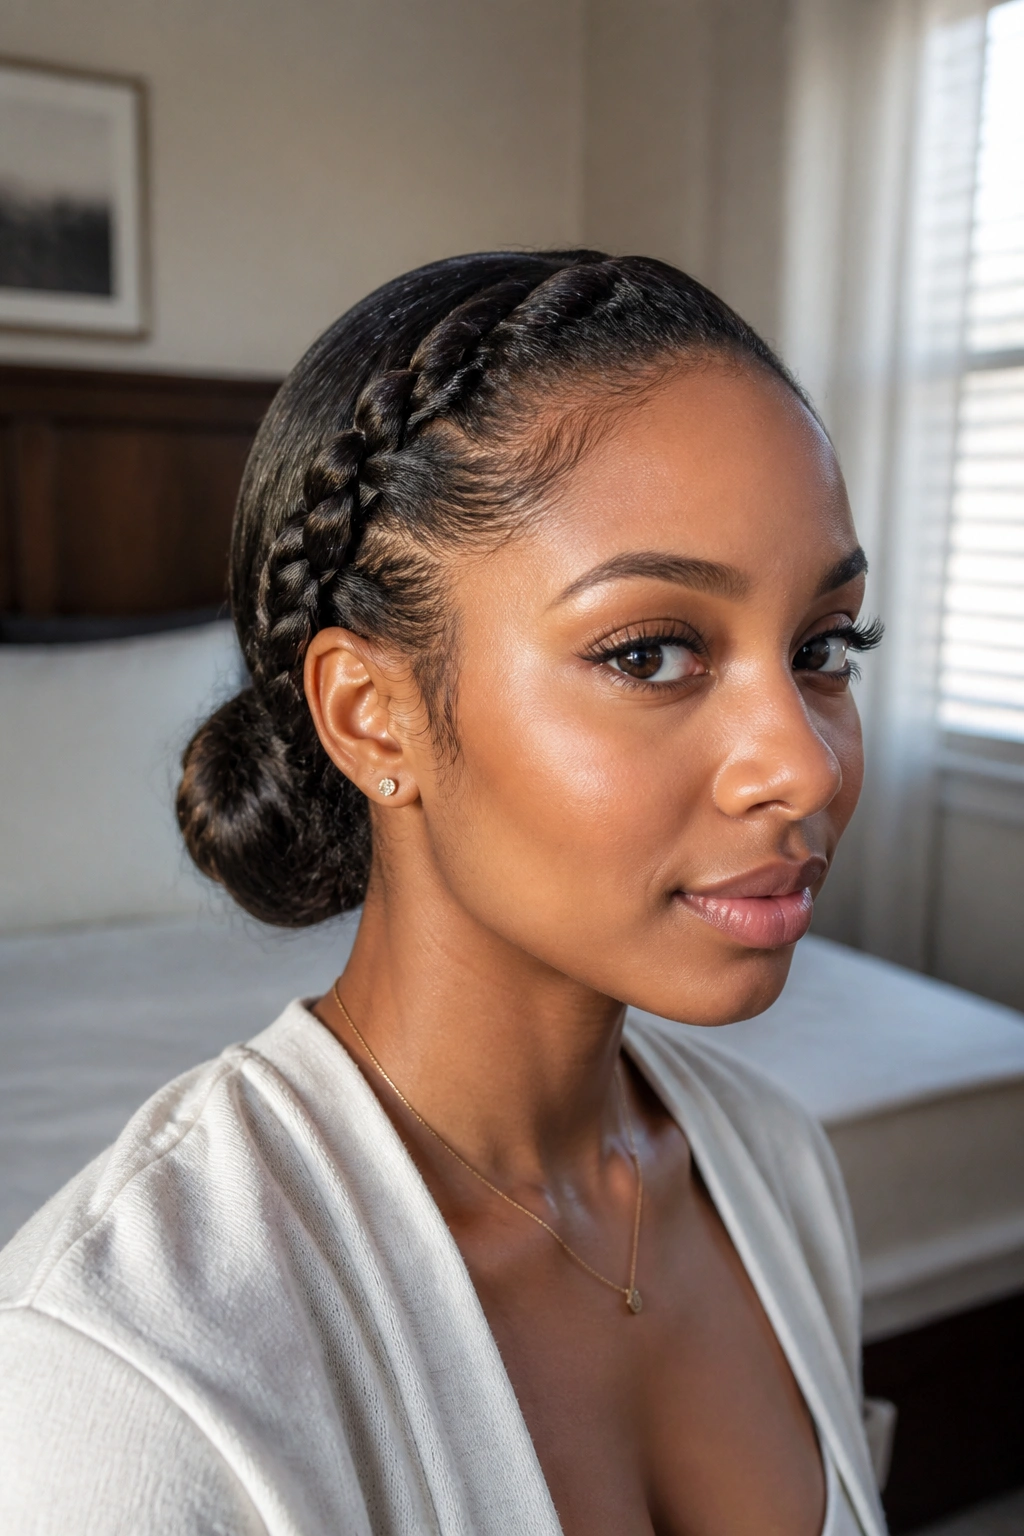
If you want one front braid to do a lot of work, start here. A single braid that sweeps from one side of the hairline and ends in a low bun gives you shape without making the front look overbuilt.
Why it works
The braid creates a clean line across the forehead and then pulls the eye down toward the bun. That gives the whole style a little movement, which is handy if your features already read strong and you want something softer around them. It also works nicely when your edges are a little fragile, because you only need one defined section at the front instead of a whole grid of tiny braids.
Keep the braid at least 1/4 inch off the hairline if your temples are tender. That tiny buffer matters more than people think.
- Best for medium to long natural hair, stretched hair, or braiding hair added into the front section
- Looks sharp with a middle part or a deep side part
- Works well if the rest of the hair is tucked into a low bun, folded puff, or chignon
- Easier to maintain than a full head of cornrows because the front does the visual heavy lifting
My favorite part: this style can look polished with very little extra fuss. A light mousse on the bun, a satin scarf for 10 minutes, and the braid still looks intentional the next morning.
2. Twin Center Front Braids

Two slim braids coming straight down from a center part are the kind of style that looks calm, balanced, and a little bit sharp. Nothing flashy. Just clean lines and a face-framing effect that never gets old.
A lot depends on the part. If the center part is crooked, the whole look starts wobbling. I like to dampen the part slightly, use a rat-tail comb, and draw the line in one slow pass instead of hacking at it. Stretched hair helps a lot here, because the braids lie flatter and the ends behave better.
This style is especially good if you wear glasses, because the braids sit away from the temples instead of crowding them. It also plays nicely with low buns, puff ponytails, and loose curls left in the back. The front reads tidy; the rest of the hair can stay soft.
Straight parts show everything.
If your hair is fine around the front, ask for the braids to start a little farther back — about half an inch — so the hairline is not doing too much work.
3. Braided Bang With Curly Ends

A braided bang changes a plain bun into something with shape. It brings the front forward without covering your face completely, which is useful when you want softness but do not want hair falling into your eyes all day.
What to tell your braider
Ask for a braid that starts on one side or just off-center and arcs across the forehead like a side bang. If you want the look to stay gentle, keep the braid medium-sized rather than tiny and tight. Tiny braids at the front can look busy fast, and they are less kind to delicate edges.
If you like a softer finish, leave the ends curly. Flexi-rods, perm rods, or a light braid-out on the loose ends all work. The contrast between the braid and the curls is what gives the style its charm.
- Good with buns, low ponies, and sleek half-up styles
- Works on natural hair, stretched hair, or added extensions
- Looks especially nice when the braid is pinned lightly instead of forced flat
- Gives shape to a simple base style without demanding a lot of length
The trick is not making the bang too perfect. A little swing at the end makes it feel alive.
4. Crown Braid Into a Low Puff
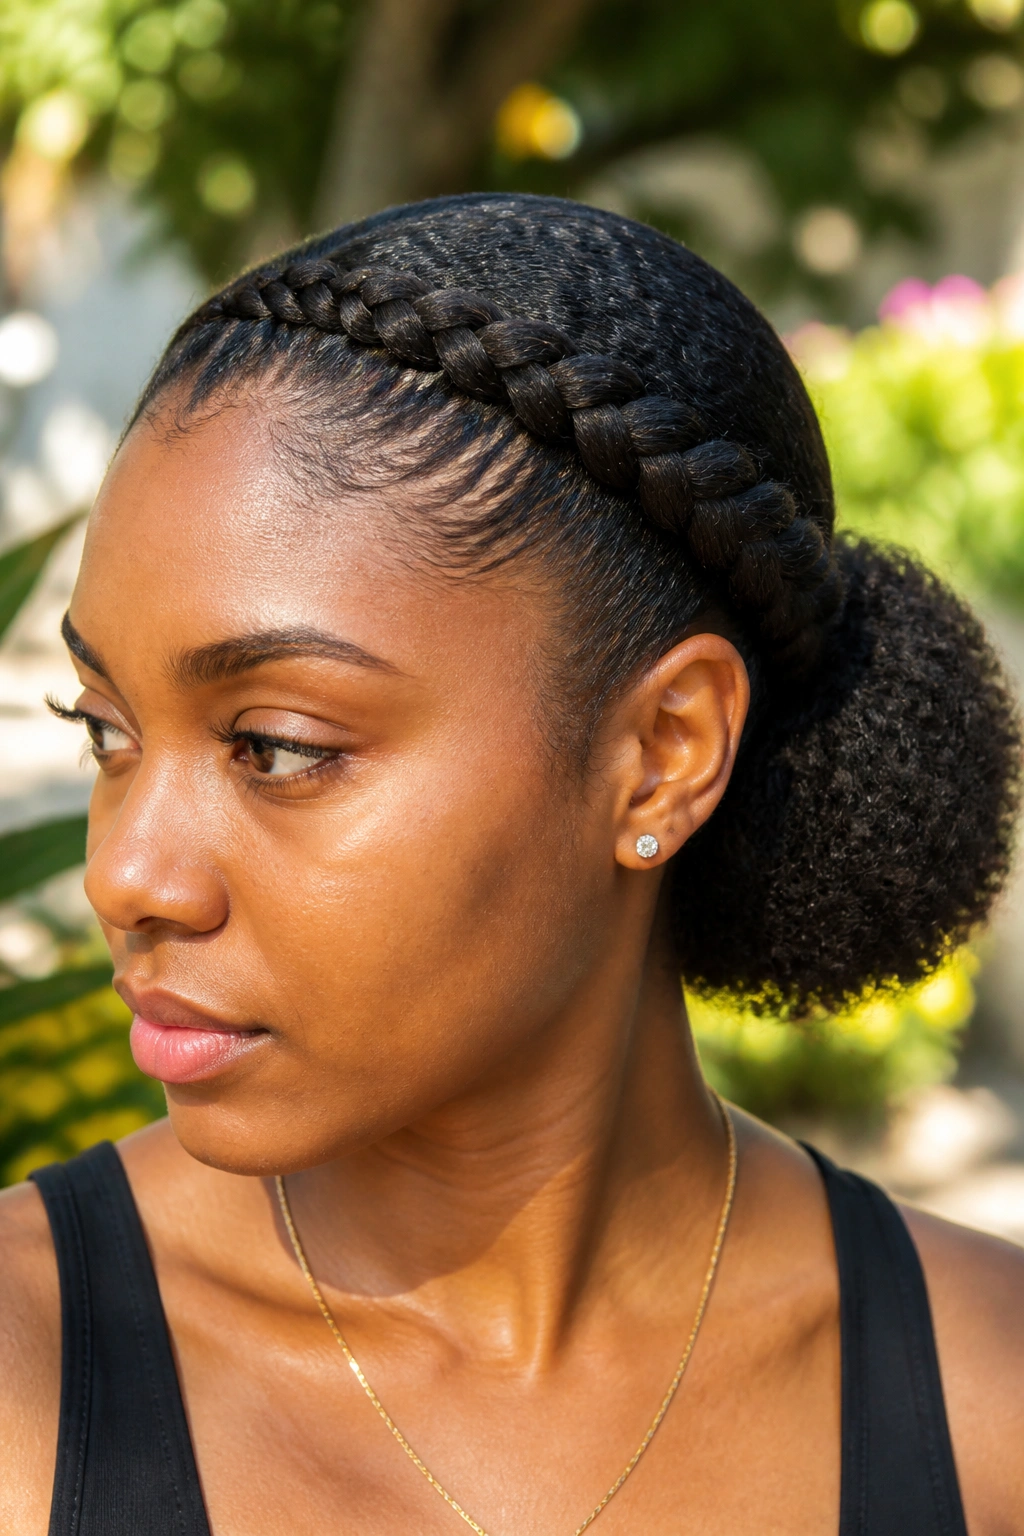
A crown braid is not only for formal occasions, and I will die on that hill. When it starts at one temple, travels across the front, and curves into a low puff, the effect is neat without turning stiff.
This one works especially well for thick natural hair. The puff brings the volume, while the braid at the front keeps the style controlled. That balance matters. If the puff is huge and the braid is tiny, the front can look lost. If the braid is too thick, the whole style starts looking heavy.
Volume matters here. The braid should guide the eye, not fight the puff for attention.
I like this style on days when I want my forehead open, my ears free, and my hair off my neck, but I still want more shape than a plain puff gives. It also handles earrings well, which sounds minor until you actually wear a pair of heavy hoops and realize how much a hairstyle can either help or annoy them.
If your hair is dense, ask the braider to keep the crown braid slightly wider so it does not disappear into the puff.
5. Feed-In Goddess Braids Around the Face
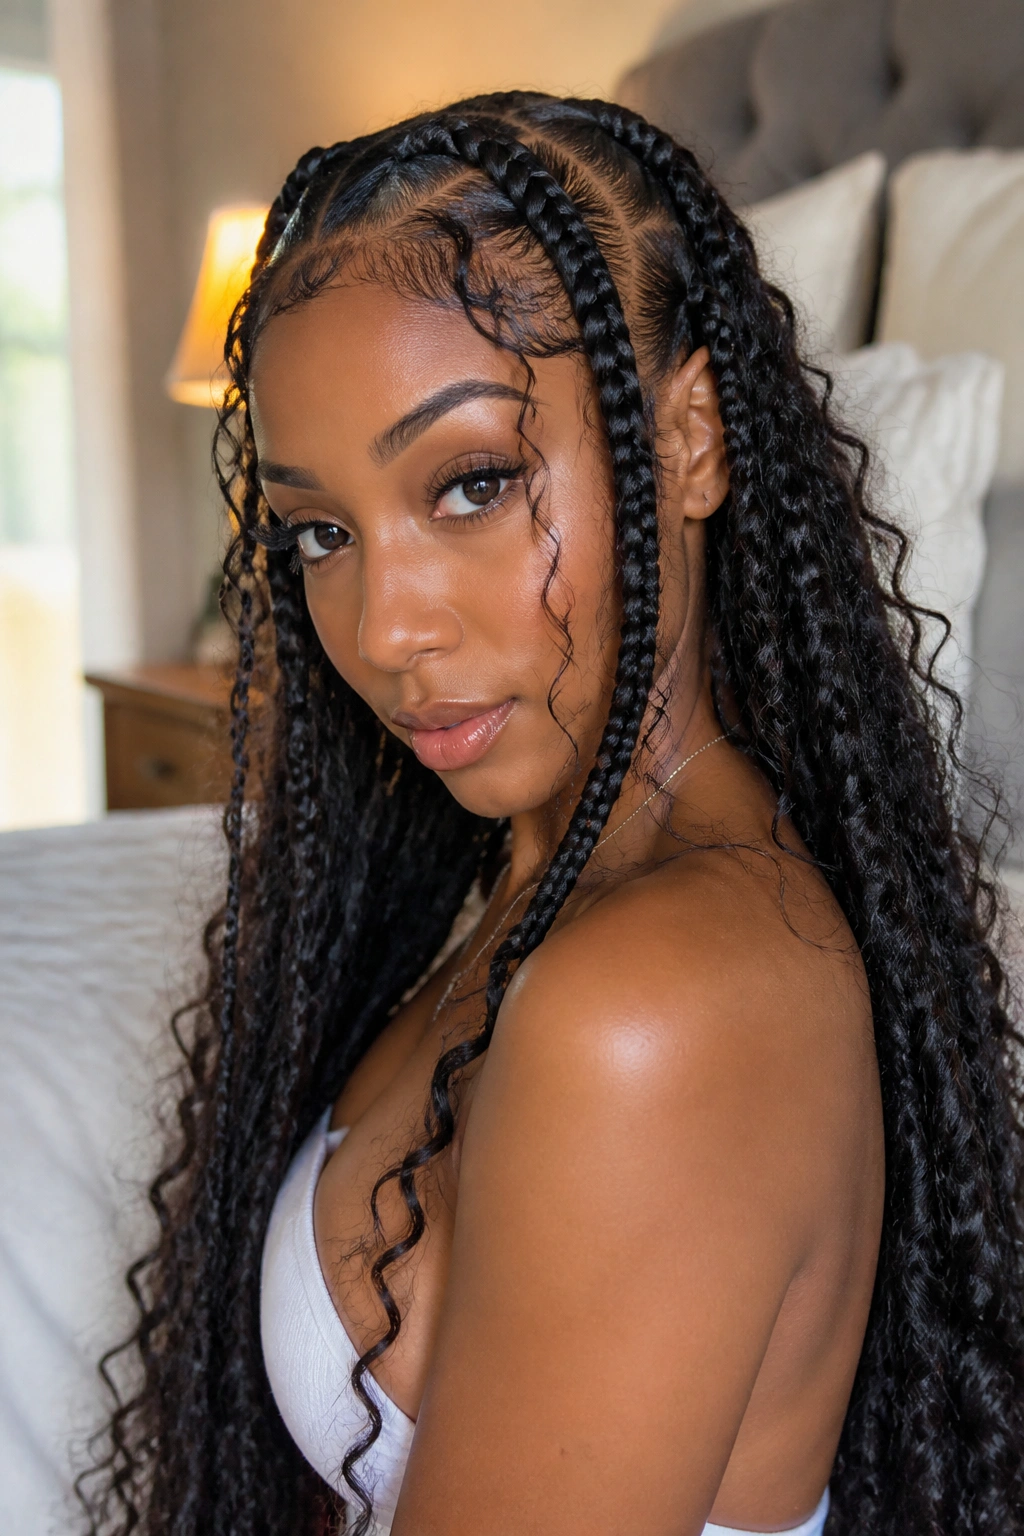
Feed-in braids are one of those styles that look polished before you even finish the hair. Because the extension hair is added gradually, the front does not start with a chunky knot, and that alone makes the whole style sit flatter.
What makes them different
A goddess braid with loose curls threaded through the length has a softer finish than a plain cornrow. The front braid frames the face, but the curls keep it from feeling too strict. It is a good choice if you want something that lands between sleek and romantic.
The feed-in part matters because it helps with tension. Instead of dropping a big lump of hair right at the start, the braid grows gradually. That makes the front easier to wear, especially if your hairline is picky. It also means the braid can stay neater as it gets longer.
How to wear it
- Ask for 2 or 3 face-framing feed-in braids instead of crowding the whole front
- Keep the braid starts soft and slightly raised, not glued down hard
- Let the loose curls begin a few inches below the scalp so they do not puff up at the roots
- Pair with a bun, a ponytail, or free-flowing lengths in the back
The look is pretty, yes, but the real win is that it stays readable even after a few days. It still has shape when the curls soften a bit.
6. Lemonade Braids With a Deep Side Sweep

Side-swept braids have attitude. They open one side of the face and let the braid line do all the talking on the other side. If you like a front braid that feels a little bolder, this one delivers without needing a pile of extras.
The deep side part is the whole point. Start it too shallow and the style loses that sweep. Start it too deep and the front can feel too heavy on one side. I like the part to sit just above the arch of the brow, then angle the braids back in a clean line. It gives the face room while still keeping the style intentional.
This style works well with longer braids, but it does not need them. Medium-length braids can look even better because the movement stays visible. On a sharp jawline, the angle looks clean. On a rounder face, it creates a nice diagonal that softens the shape.
But there is a catch. A strong side sweep can tug more on one temple if the braids are too small or too tight. Ask for larger sections near the front if your scalp does not love pressure. That keeps the style looking crisp without making it mean.
7. Braided Headband Over a Twist-Out
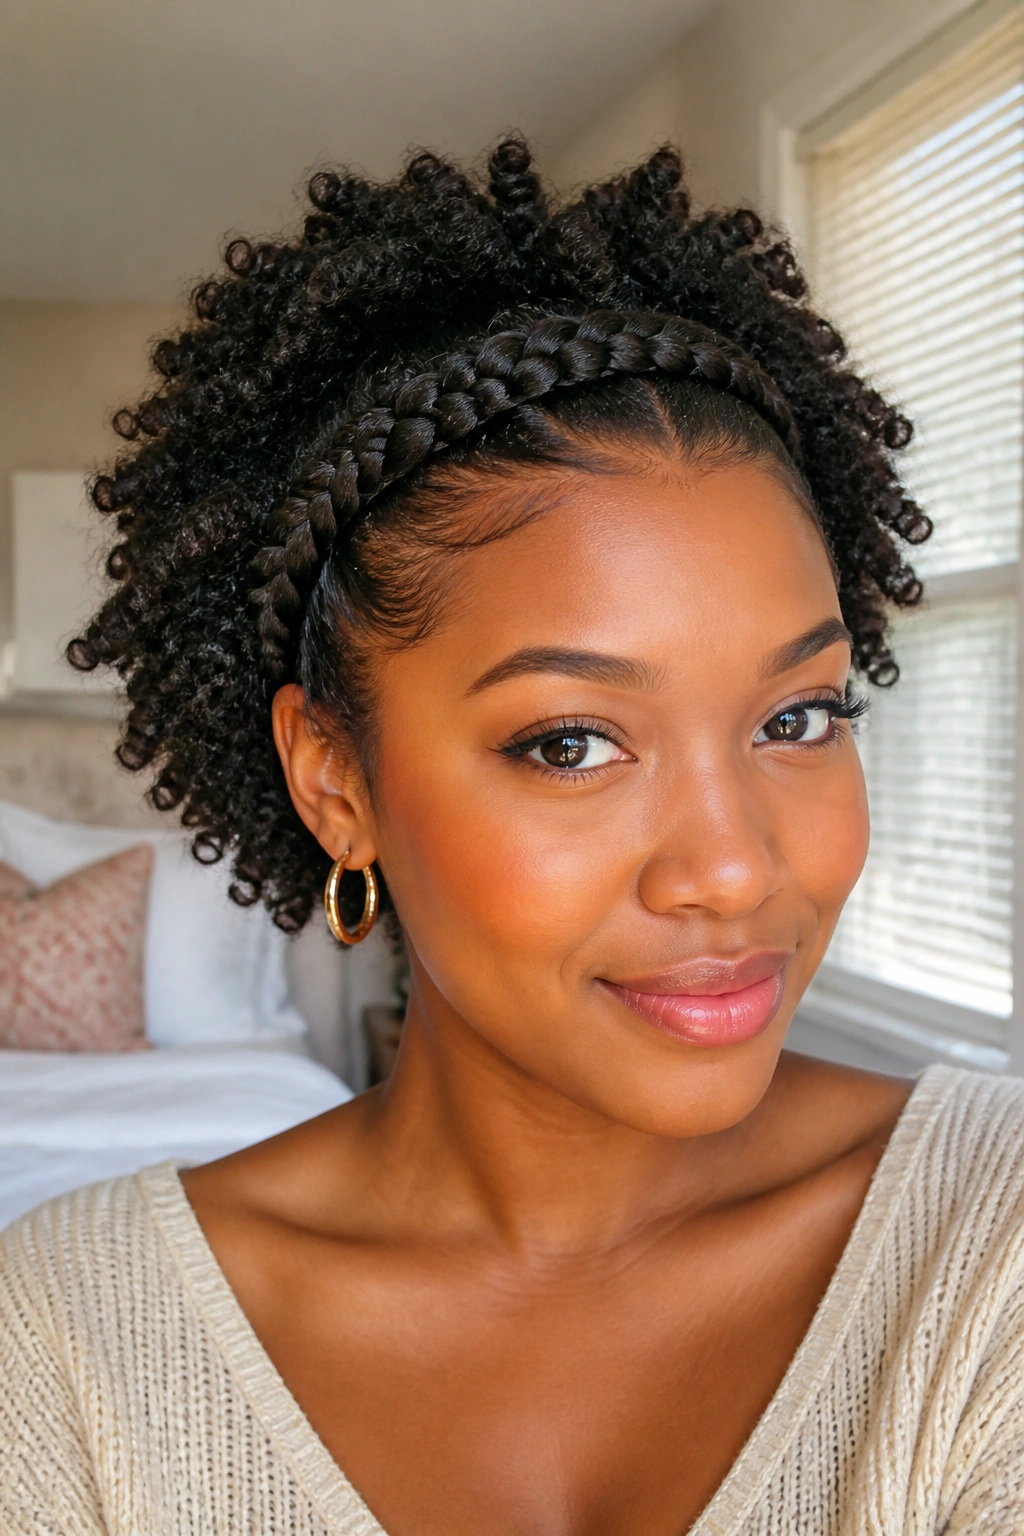
Some mornings call for a front braid that acts like an accessory. A braided headband does exactly that. The braid moves from ear to ear across the front, while the rest of the hair stays in a twist-out, wash-and-go, or blown-out texture.
The nice part is that only a small section of hair needs to be braided. That means the style gives you polish without locking up the whole head. If the back of your hair is big and soft, the front braid keeps it from looking unfinished. If the hair is shorter, the braid helps anchor the shape.
Why I keep coming back to this one
- It takes pressure off the front hairline because the braid can be wide and low-tension
- It works with a side part or a center part
- It gives a twist-out a clear frame instead of letting it sprawl everywhere
- It is easy to tuck behind one ear if you want the face more open
A braid about 1 to 1.5 inches wide usually does the job. Wider than that, and it starts acting like a helmet. Narrower, and it can look too delicate next to textured hair.
A little foam on the loose curls keeps the back from frizzing up too fast. Nothing fancy. Just enough to help the shape hold.
8. Zigzag Part Front Cornrows
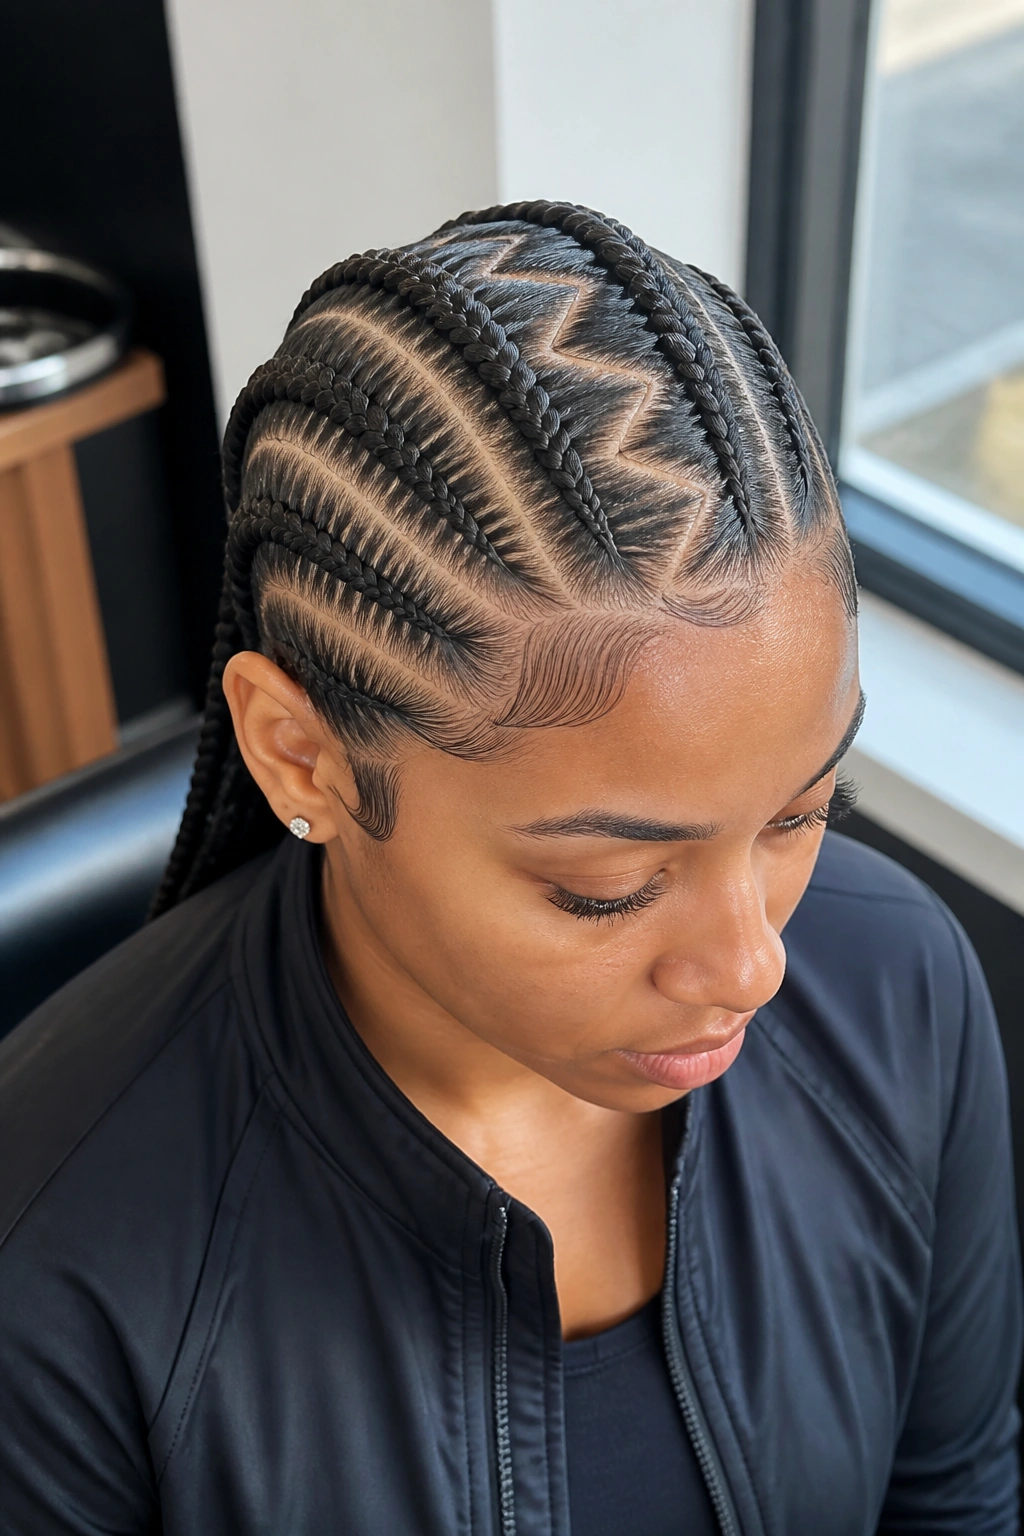
Straight parts are tidy. Zigzags have personality.
That is really the whole pitch. A zigzag front part turns plain cornrows into something with texture before the braids even begin. It catches the eye because the part itself is doing work, not just the braid pattern. If you like hairstyles that show detail from the front, this is an easy way to get it.
The cleanest zigzag patterns come from stretched hair and a sharp rat-tail comb. If the hair is too fluffy at the roots, the lines blur fast. A light mist of water or leave-in on the section can help the comb glide, but do not soak it. Wet hair can swell and make the part look wider than you planned.
This one suits shorter and medium lengths too, which is nice. You do not need a huge amount of hair for the pattern to read well. The braid itself can stay close to the scalp, and the parting becomes the design.
A crisp part is the point. If the zigzag is too busy, the front starts looking messy instead of styled.
9. Beaded Tribal Braids Across the Hairline

Beads change the mood fast. They add sound, movement, and a little weight at the ends, which can make front braids feel more finished and personal.
This look works best when the front braids are not too thin. Tiny braids with heavy beads can tug at the scalp and swing around in a way that gets annoying by lunchtime. A medium braid holds the beads better and keeps the front from feeling crowded.
A few practical details
- Place the first bead at least 3 to 4 inches from the scalp so the braid base stays light
- Use 2 to 4 beads per braid if you want movement without too much pull
- Wooden beads feel earthy and light
- Clear or metal cuffs feel sharper, but they can add more noise and weight
I also like this style because it gives the front braid some personality without forcing the rest of the hair to match. You can keep the back in loose curls, a bun, or even a puff. The beads make the front feel like its own moment.
If your hairline gets sore easily, do not pile bead after bead onto the front pieces. A few placed with care are enough.
10. Half-Up Knotless Braids With a Front Braid
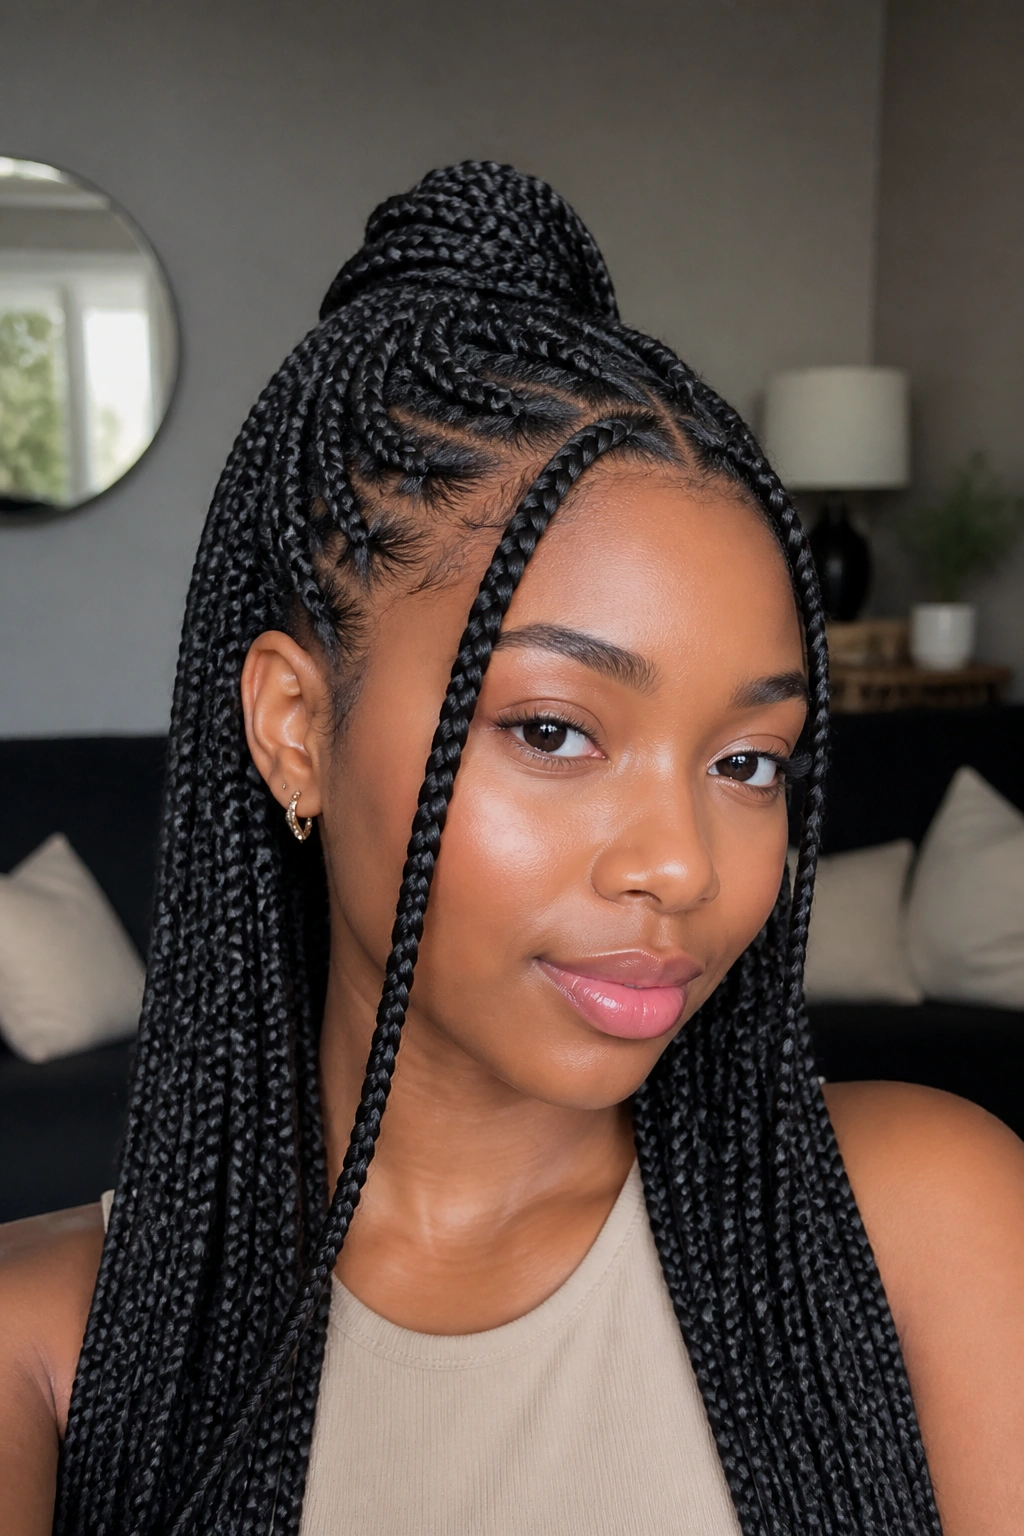
If you want a style that holds up for a long stretch without feeling dense right away, knotless braids are worth the time. Add a front braid to the mix, and the whole look gets more shape near the face while staying light in the back.
Knotless braids start more softly at the base because the extension hair is fed in gradually. That means less of that hard, bulky knot sitting at the scalp. It does not erase tension completely, so let’s not pretend it does, but it often feels gentler than a traditional start.
The front braid in a half-up style does two things at once. It keeps hair away from the face, and it gives you a little design point where people notice first. The rest of the braids can hang down or be gathered into a small bun, which is handy if you want to keep the neck cooler.
If your hair is fine, ask for a little more size in the front braid and lighter extensions overall. Heavy braids are beautiful for about ten minutes. Then your neck starts talking back.
This is one of the better options when you need a style that can last through busy weeks, travel, or long work days without asking for a full restyle every morning.
11. Front Braid Into a High Ponytail
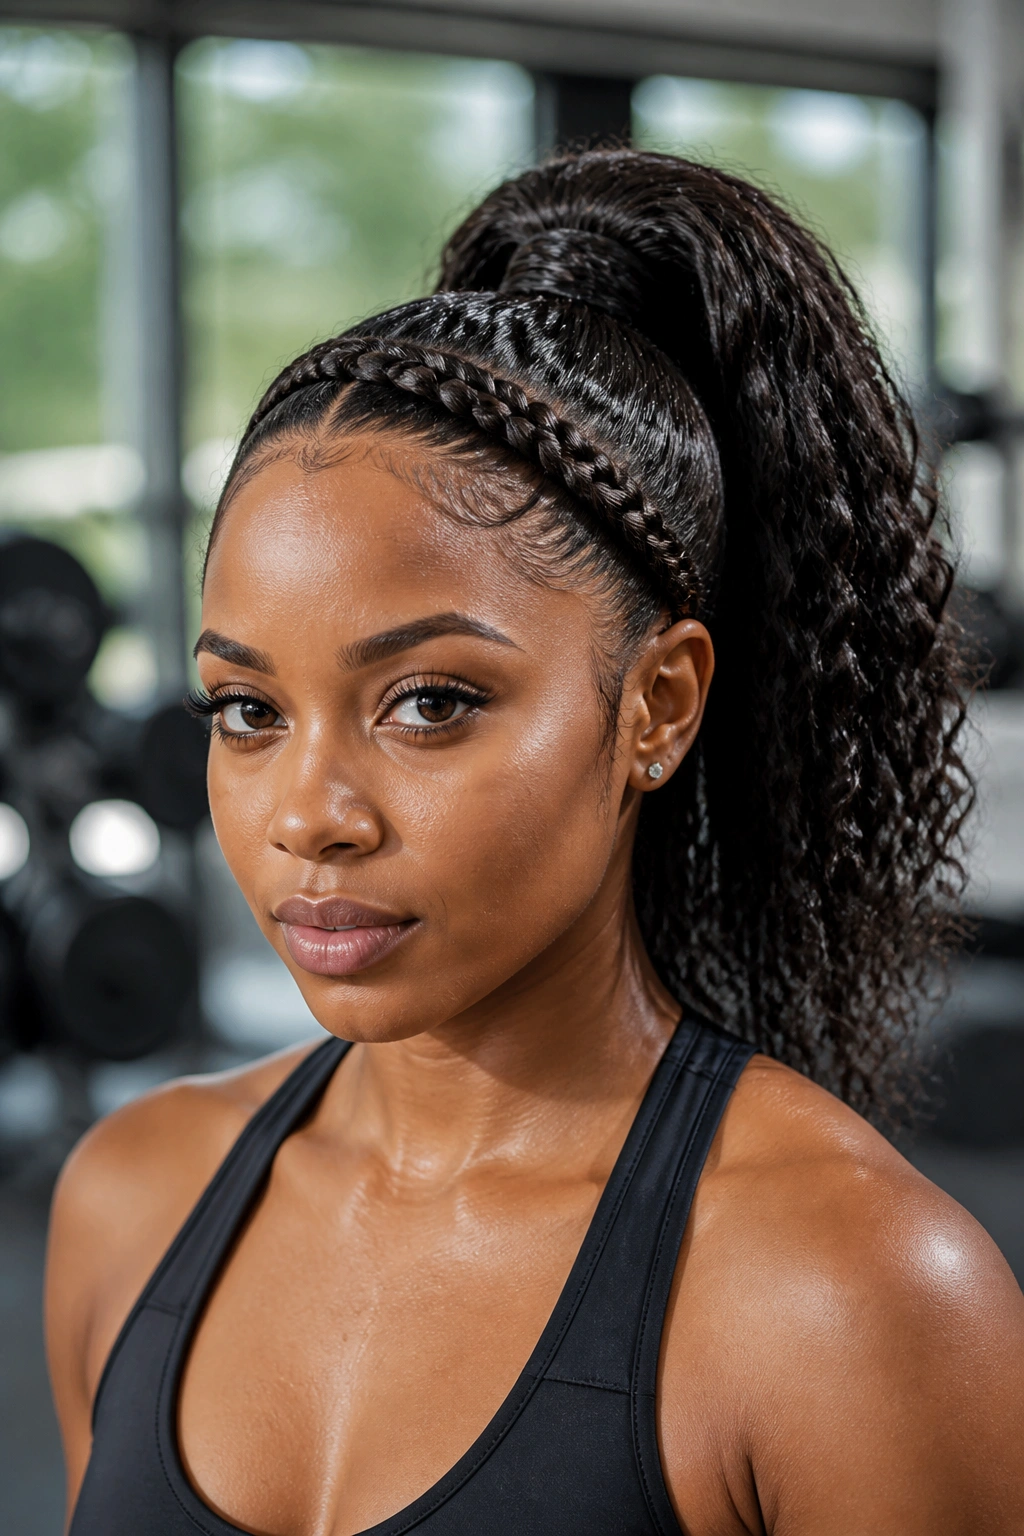
A high ponytail gets sharper when the front braid leads into it. Instead of a plain pull-back, you get a line that guides the eye upward and gives the style some structure before the ponytail even starts.
The best version of this style keeps the braid low enough at the temples that it does not press too hard. High ponytails already create lift and tension at the crown, so there is no need to crank the front down like you are trying to win a contest. A satin scrunchie or a bungee tie helps a lot because it holds without the sharp bite of a thin elastic.
This style is especially useful when you want your hair out of your face for hours. Gym day. Errand day. Workday. Any day that involves heat or movement. The front braid keeps the style from feeling plain, and the ponytail gives you swing.
A one-sentence reality check: tight does not equal neat.
If the hairline feels pulled after the first tie-up, lower the ponytail an inch and loosen the front braid at the start. You will still get height, just with less regret.
12. Halo Braid With a Low Bun

A halo braid has a calm, almost sculpted feel. It circles the head like a frame and then settles into a low bun at the back, which makes the front look organized without being severe.
Patience pays off here.
The braid usually starts near one temple and travels around the hairline, so the parting and direction need to be tidy. A halo braid leaves very little room for sloppy sections, because the curve exposes everything. That said, the finished style is worth the extra time if you like clean lines and a tucked-away front.
I like this look for events, but it is not only for special occasions. It can also be a smart everyday style if you are tired of hair falling into your face and do not want to keep brushing it back. The bun keeps the neck free, and the halo keeps the front smooth.
If you have thick hair, ask for a slightly wider braid so it does not disappear against the bun. If your hair is fine, a narrower braid helps the halo read more clearly.
A light shine product on the braid itself, not the whole head, is enough. Too much product near the scalp can make the style look oily by day two.
13. Mini Hairline Braids Into a Fro Puff
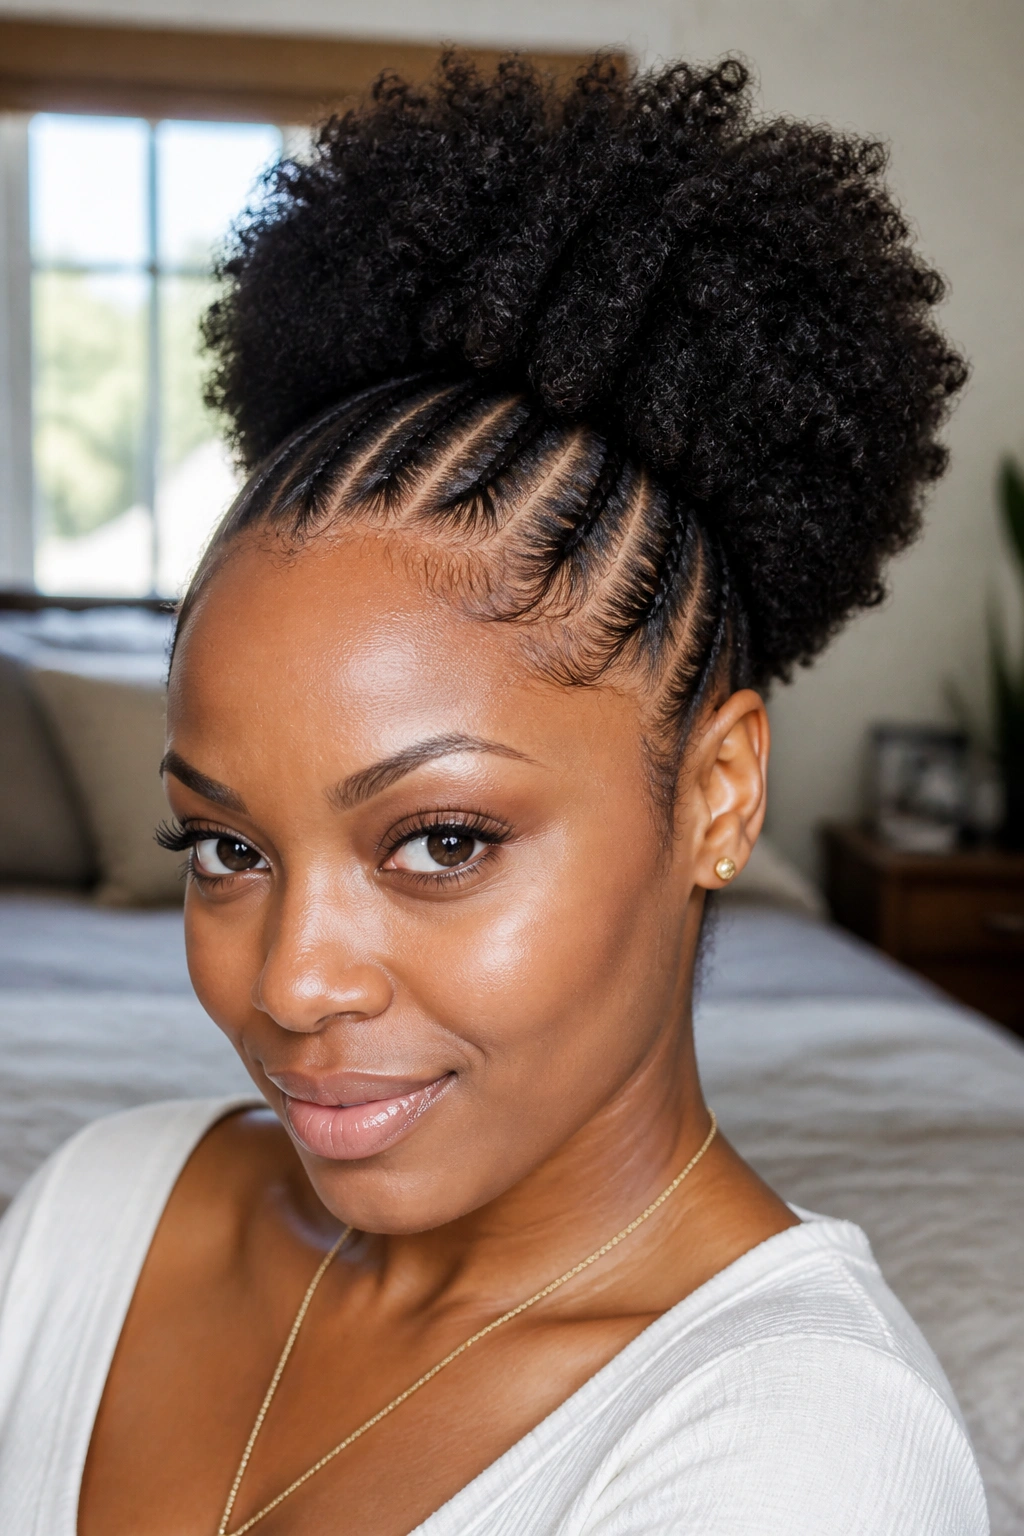
Small braids near the hairline can make a puff look deliberate instead of like a last-minute tie-up. That is the whole appeal. The front gets pattern and direction, while the puff stays full and soft.
What to watch for
You do not need a dozen tiny braids for this to work. Two to four slim braids across the front are plenty. If you pack the front too tightly, the look starts competing with the puff, and the hairline takes more stress than it needs.
A puff pick or wide-tooth comb helps the back stay rounded. I like to fluff the puff first, then smooth the front braid section after. That order matters. If you slick the front first and then battle the puff, the style can end up flat in the wrong places.
- Good for short to medium natural hair
- Nice when you want the face open but not bare
- Works with a high puff or a mid puff
- Needs a soft tie and a satin wrap at night
This is one of those styles that feels easy in real life, not just in photos. It gives structure without demanding perfection, which is always a relief.
14. Fishtail Front Braid With Loose Lengths
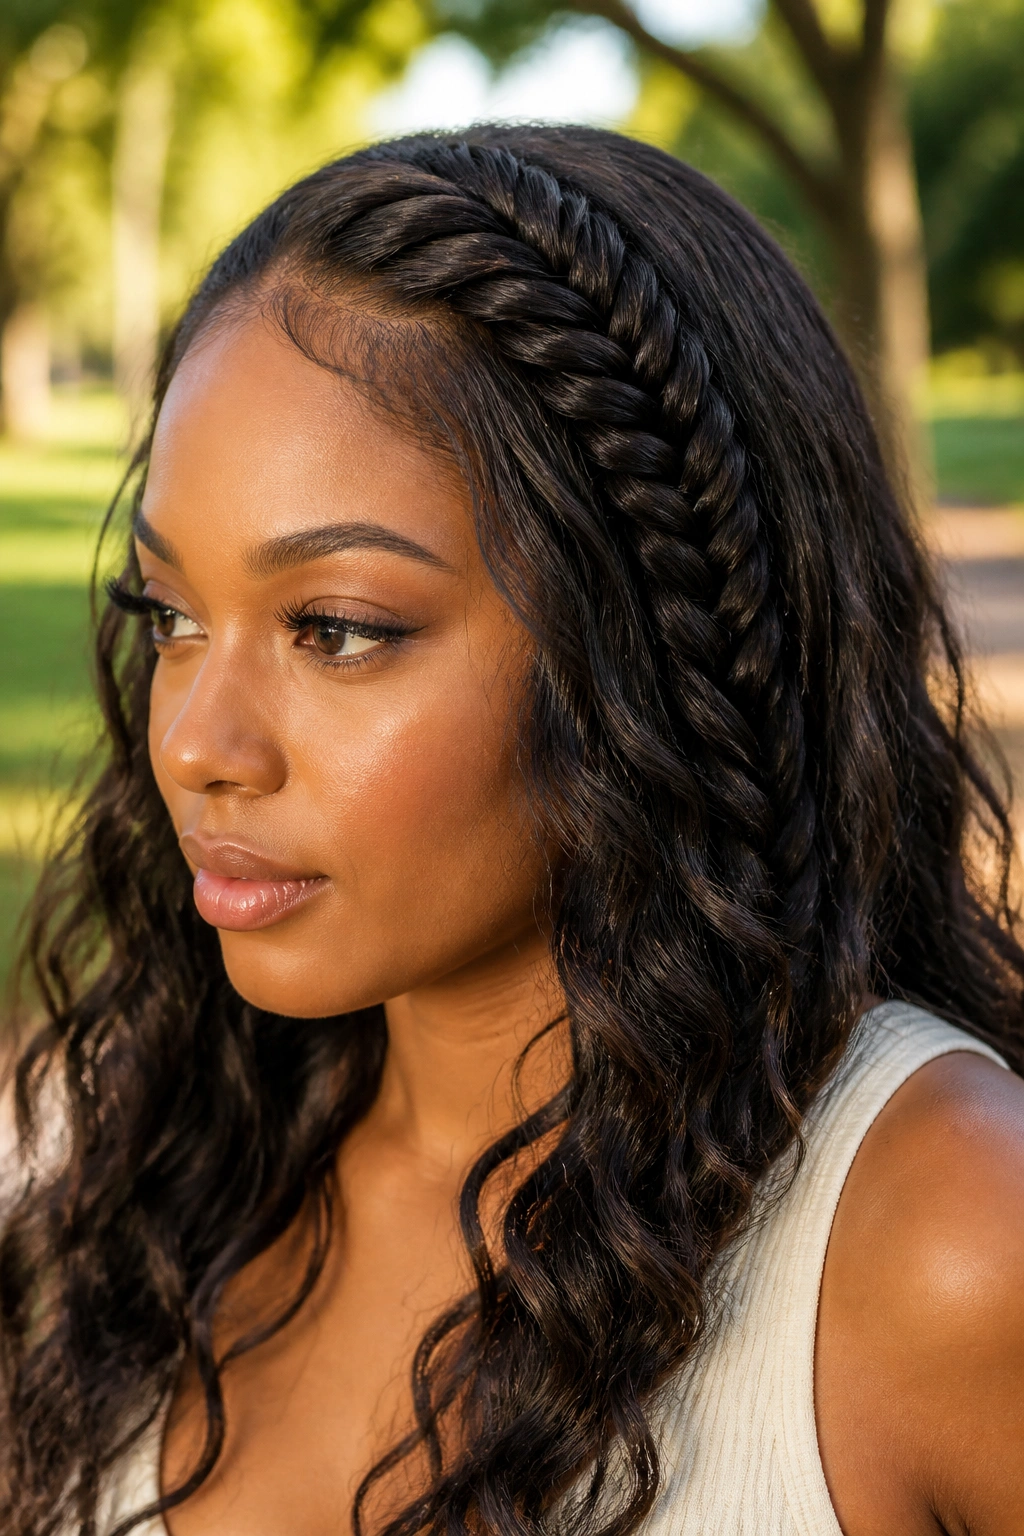
A fishtail braid at the front looks delicate, but it works best when it is kept a little loose. Too tight and it turns stiff. Too tiny and it disappears into the hair. The sweet spot sits somewhere in the middle.
On Black hair, this style usually behaves better when the front section is stretched first or when extensions are added. Fishtail braids need slip and neat separation between sections, and coily hair can fight that if you try to do it dry and fluffy. A small amount of cream or mousse helps, but the braid still needs grip, not slickness.
I like this one when the rest of the hair is left curly, straight, or in soft waves. The fishtail in front gives an elegant line, then the loose length keeps the style from feeling too precious. It is one of those looks that reads softer from the side than it does head-on.
How to keep it from falling apart
- Braid the front section slightly bigger than you think you need
- Keep the hands close to the scalp at the start, then loosen the weave as you move down
- Pin the end under the rest of the hair or behind the ear
- Use a light hold spray instead of heavy gel
A too-tight fishtail is a waste of good effort. Loose is better here.
15. Stitched Cornrows Into a Sleek Bun

Stitch braids are for the days you want the front to look sharp enough to cut glass. The raised, defined rows between each braid give the style a crisp, lined-up look that holds attention.
What makes the stitch look clean
The parting has to be patient. If the lines wander, the whole style shows it. That is why this look usually takes longer than a plain set of cornrows. The braider is not only making braids; they are drawing a pattern with the scalp as the canvas. Heavy-handed gel can help smooth the base, but too much makes the front look crunchy instead of clean.
A sleek bun at the back completes the look without stealing the show. It gives the front room to be the focal point. If the bun is too big, the stitch detail gets lost. If it is too small, the balance feels off. Medium is the safe lane.
- Works best on stretched hair
- Looks sharp with bold earrings or a structured neckline
- Holds up well for people who like their front hair completely off the face
- Needs a scarf at night to keep the parts from fuzzing
This is not a soft, sleepy style. It is crisp. If you want structure, this is one of the stronger choices on the whole list.
16. Braided Mohawk With Front Cornrows
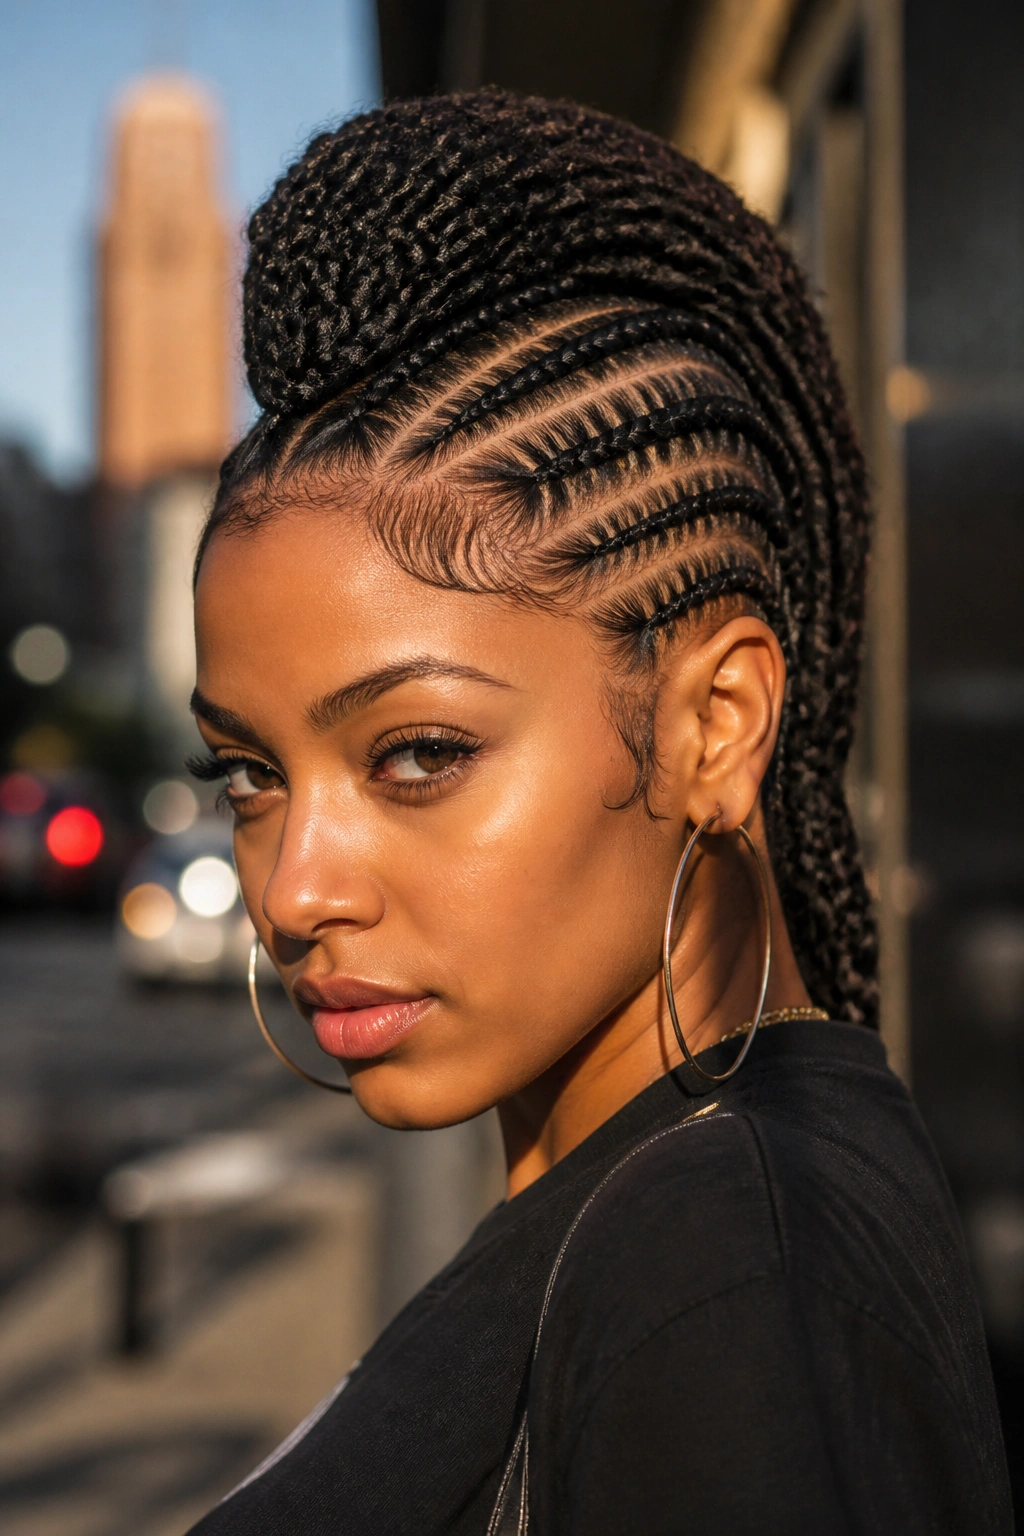
Some days the front braid should not whisper. It should announce itself.
A braided mohawk does that by bringing the braids forward at the sides and leaving the center section with height, texture, or its own braid pattern. The front cornrows guide the eye toward the middle, which makes the whole style feel bold without needing a lot of extra decoration.
This look works especially well if you like height. The center section can be a puff, a set of braids, or a stretched natural section with lots of volume. Either way, the front cornrows set the frame. They also make the face look a little lifted because the sides are pulled back while the middle stays full.
One thing to watch: the side braids should not be too thin if your hairline is sensitive. Thin braids at the temples can tug more than they should, especially when the mohawk shape is very raised. A slightly larger braid at the front keeps the style grounded.
This one has attitude.
If you like styles that make a room notice you when you walk in, this is the one that carries that energy without needing beads, cuffs, or anything extra.
17. Front Braid With a Loc Bun
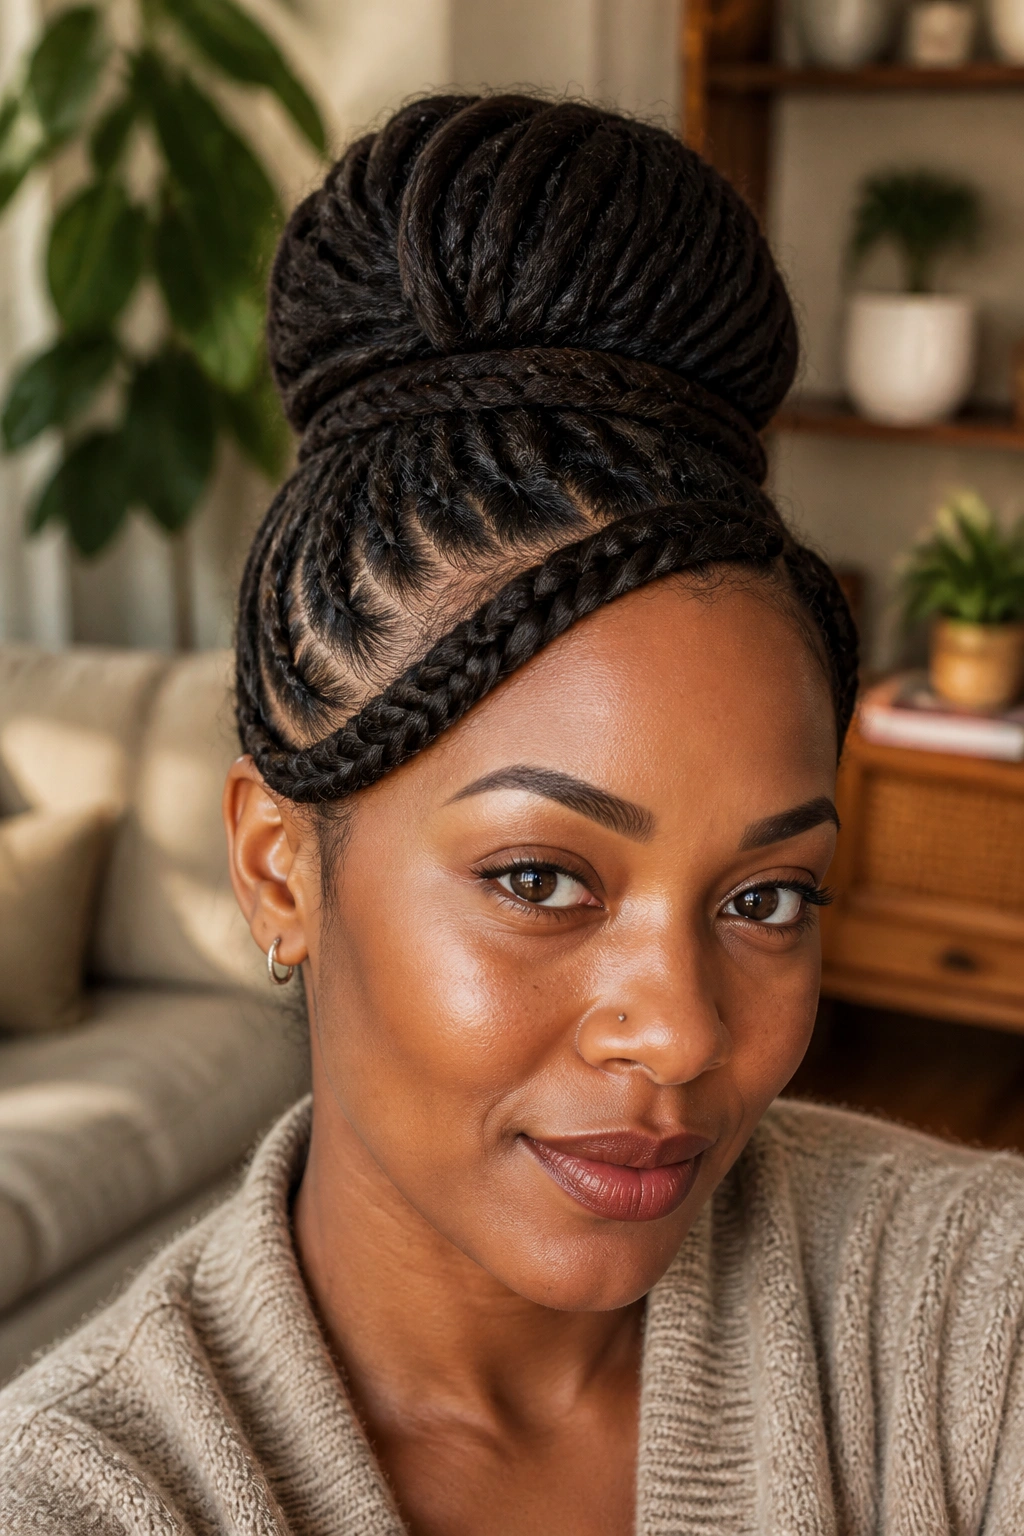
Locs change the texture of a front braid in a nice way. The braid has more body, more weight, and a little more shape than a braid on loose hair, so the front reads clearly even when the rest of the style stays simple.
A front loc braid into a bun is useful when you want your hair off your shoulders and still want a face-framing detail up front. It can be one loc swept across the forehead, or two locs braided together and pinned into the bun. Either way, the front area gets some movement while the bun keeps the rest of the hair controlled.
Small details that matter
- Keep the braid loose near the roots so the front does not pull
- Use a loc cuff or two only if you want accent, not weight
- Wrap the bun with a satin scarf at night so the front braid stays smooth
- If the locs are fresh, skip anything that puts extra stress on the edge line
I like this style because it respects the fact that locs already have presence. The front braid does not need to scream. It just needs to direct the eye and keep the shape clean.
18. Asymmetrical Front Braid With an Afro Puff

If you like a style that feels relaxed but still clearly styled, this one earns its keep. One front braid sweeps across one side of the hairline, while the puff does the rest of the visual work.
The asymmetry is what makes it interesting. A centered puff can feel straightforward. Add a braid that lands off to one side, and the face suddenly has a little architecture around it. It is the kind of style that works when you want a low-effort base with one small detail that changes everything.
I usually think of this as a strong option for medium natural hair, especially when the puff has a lot of texture. The braid helps anchor the front so the puff does not look like it was thrown together in a rush. It also works when your hair is in a not-quite-fresh state and you need one good detail to carry the whole look.
Use a light gel at the braid base and a soft cream on the puff. That keeps each part doing its own job instead of fighting for shine.
If your face shape already has strong symmetry, the off-center braid softens it a bit. If your features are softer, the angle gives the style some edge. Nice little tradeoff.
Final Thoughts

Front braids work best when they solve a real problem: hair in the eyes, a flat-looking puff, a bun that feels too plain, or a style that needs a little structure up front. The prettiest versions are the ones that respect the hairline first and decorate second.
If you are choosing between two sizes, I would pick the slightly larger braid almost every time. It usually sits better, pulls less, and looks cleaner after a day or two than a tiny braid that was pulled too tight from the start.
The front is where the pressure shows first. Treat it gently, keep the parts clean, and let the braid frame the face instead of wrestling it. That is the difference between a style that looks cute in the mirror and one you can live in.
