



Curly wedding hair has a habit of doing exactly the opposite of what you told it to do. The minute the pins come out, the shape shifts, the crown goes flat, and one ringlet — the one you were counting on — decides to sit across your cheek all night.
That’s why curly updo styles for weddings need a different kind of planning. You are not trying to erase texture. You’re building a shape that can survive a long ceremony, a long dinner, hugs from people who do not care about your bun, and a dance floor that will punish any style built too loosely.
Flat hair is the enemy.
The good news, if you want to call it that, is that curls give you something straight hair often has to fake: grip, body, and a little built-in drama. A good bridal updo on curly hair uses that texture instead of fighting it. The best versions leave the hairline soft, anchor the base well, and let the curl pattern do some of the visual work so the style still looks alive after hours of wear.
Some brides want polished and neat. Some want soft and romantic. Some want a style that looks expensive without looking stiff, which is fair enough. The styles below cover the whole spread — from low chignons and braided crowns to high buns, twists, and vintage rolls — so you can match the shape to the dress, the veil, and the kind of day you actually have ahead of you.
1. Low Curly Chignon With Face-Framing Pieces
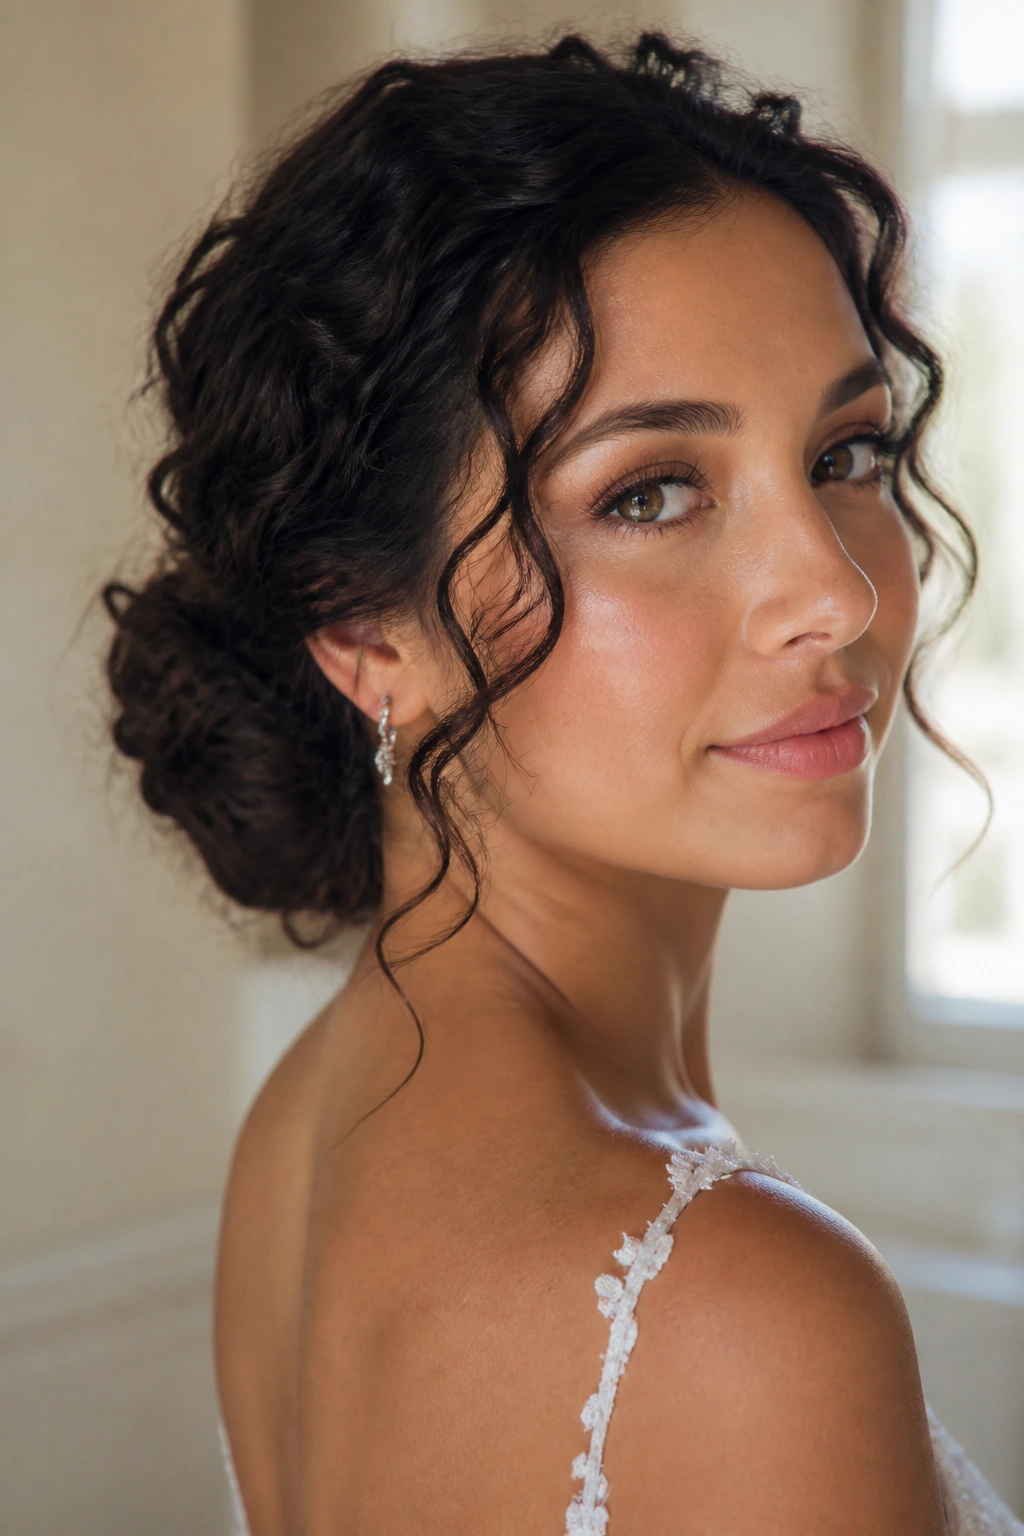
A low chignon is the style I trust when the dress has a detailed back or the wedding day runs long. It sits at the nape, so the weight stays close to the head, and curly texture gives it grip that fine straight hair rarely gets.
Why It Works for Curly Hair
A low chignon keeps the silhouette calm. That matters when the curls themselves already bring plenty of movement, because the style can start to feel busy if the bun sits too high or the front gets over-smoothed.
Leave two slim face-framing pieces, about a half inch each, and the whole thing softens up fast. One curl near the cheekbone and one around the jawline are enough. More than that, and the style starts to lose the clean shape that makes a chignon look bridal instead of accidental.
- Best for medium to thick curls that hold shape well
- Works nicely with a veil comb placed just above the bun
- Looks stronger when the bun is anchored with crossed pins, not one loose elastic
- Pairs well with earrings that have some length, because the neckline stays open
My favorite part: a low chignon looks quiet from the front and much richer from the back.
2. Soft Curly Bun With a Center Part
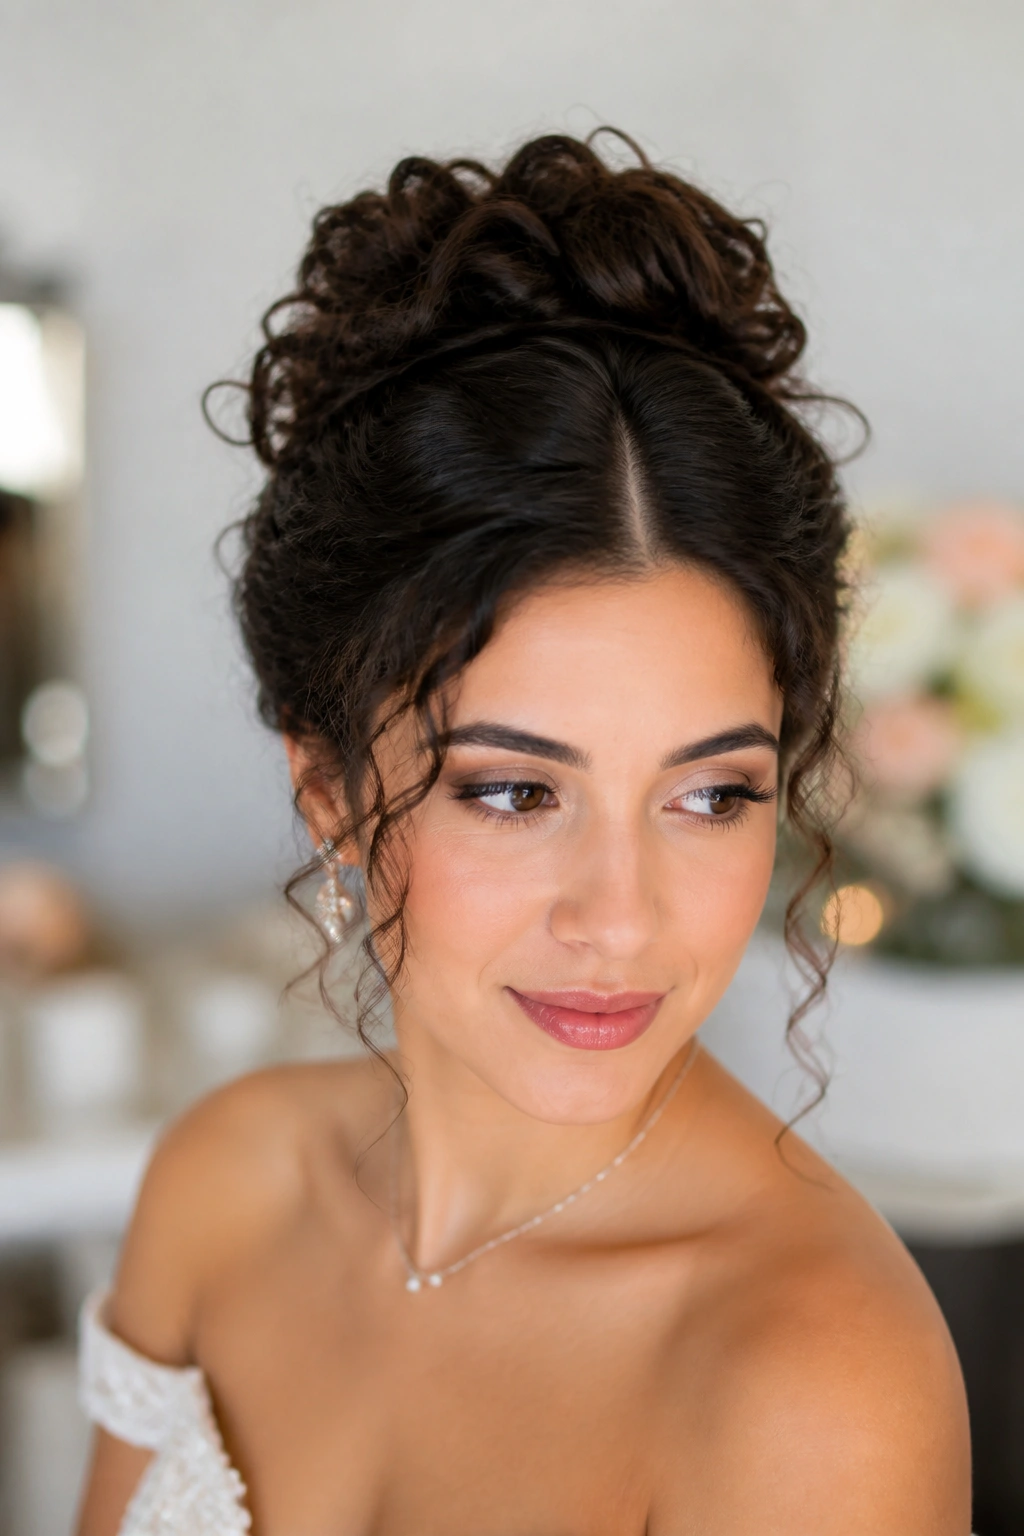
Need polish without stiffness? A center-part bun is the cleanest answer when the neckline is simple and the curls should do most of the talking.
The part gives the face symmetry, which is useful in wedding photos because the frame already feels intentional before you even get to the bun. I like this style when the bride wants the front completely open but still wants some movement at the crown. The center part can be as neat or as slightly lifted as you want, but the trick is to keep the part line crisp and the bun airy.
A good version never looks scraped back. The curls around the top should still have a little bend, even if they’re pinned into a smooth base. If the hair is freshly washed, a light mousse at the roots and a flexible spray before pinning will help the shape hold without turning it helmet-hard. That balance matters. Too much product, and the part looks wet. Too little, and the bun loosens before the first toast.
3. High Curly Top Knot
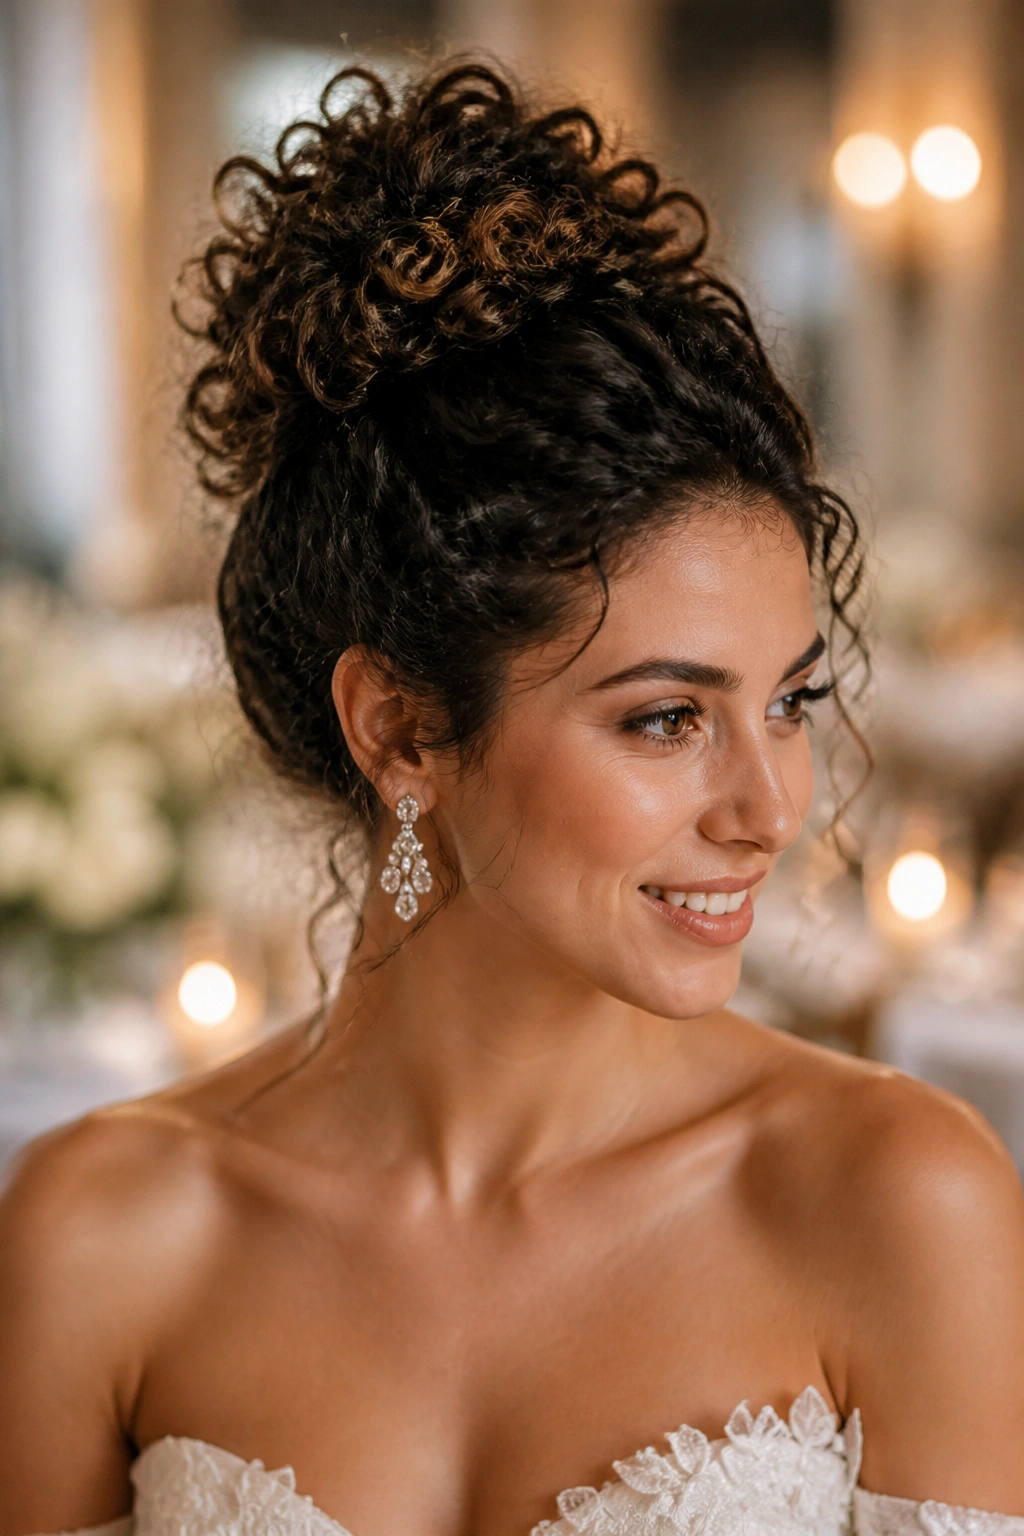
A high curly top knot is the move when you want height, clean shoulders, and a little bit of attitude. It also works well with strapless dresses because the eye goes straight up, which makes the neck look longer and the whole outline feel sharper.
Best With
- Strapless, square-neck, or off-the-shoulder dresses
- Smaller veils or no veil at all
- Brides who want the face fully open
- Hair with enough length to wrap once around the base without creating a giant knot
A top knot can go wrong fast if it’s too tight at the crown. That’s the trap. You want lift, not a severe pull that gives the style a gym-bun feel. Leave a little roundness at the scalp, especially around the temples, and let a few curls escape at the nape if the hair is layered.
I also like this style for humid weather, because a compact knot usually survives better than a wide, loose bun. It is not the softest option on the list. It is, however, one of the easiest to keep neat for twelve straight hours.
4. Curly French Twist With Crown Volume
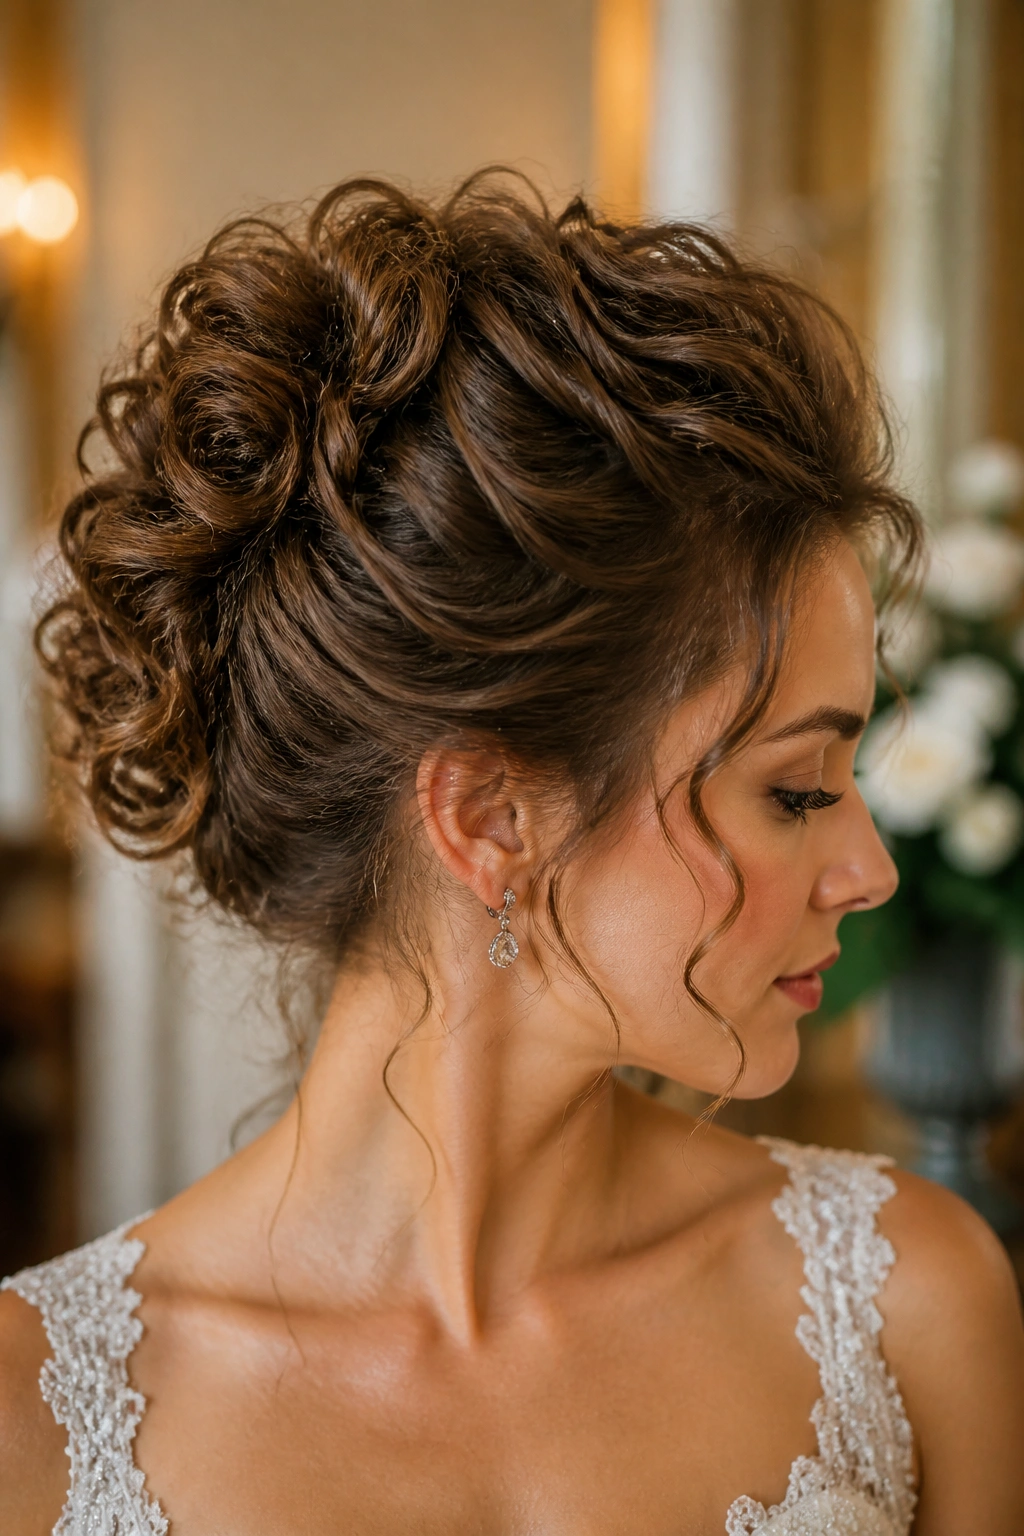
A French twist does not have to look severe. On curly hair, it can feel rich and modern, especially when the crown has a little lift instead of being flattened into the head.
The volume at the top is what keeps this style from reading too formal. Curly texture helps there because it creates a fuller shape without making the twist bulky. The roll itself should be tucked firmly, but not so tightly that it looks stiff from the side. That’s the line to watch.
Pins matter here. A lot. Use them in the direction the hair wants to fold, not against it, and the twist will sit flatter against the head. If your curls are long enough to hide the ends inside the roll, even better. If not, leave the last inch or so loose and coil it into the twist rather than forcing it under. That small decision keeps the finish from looking cramped.
This is one of the best curly wedding hairstyles for a formal room, a structured gown, or any bride who wants the hair to feel sculpted but not icy.
5. Side-Swept Curly Updo With a Deep Part
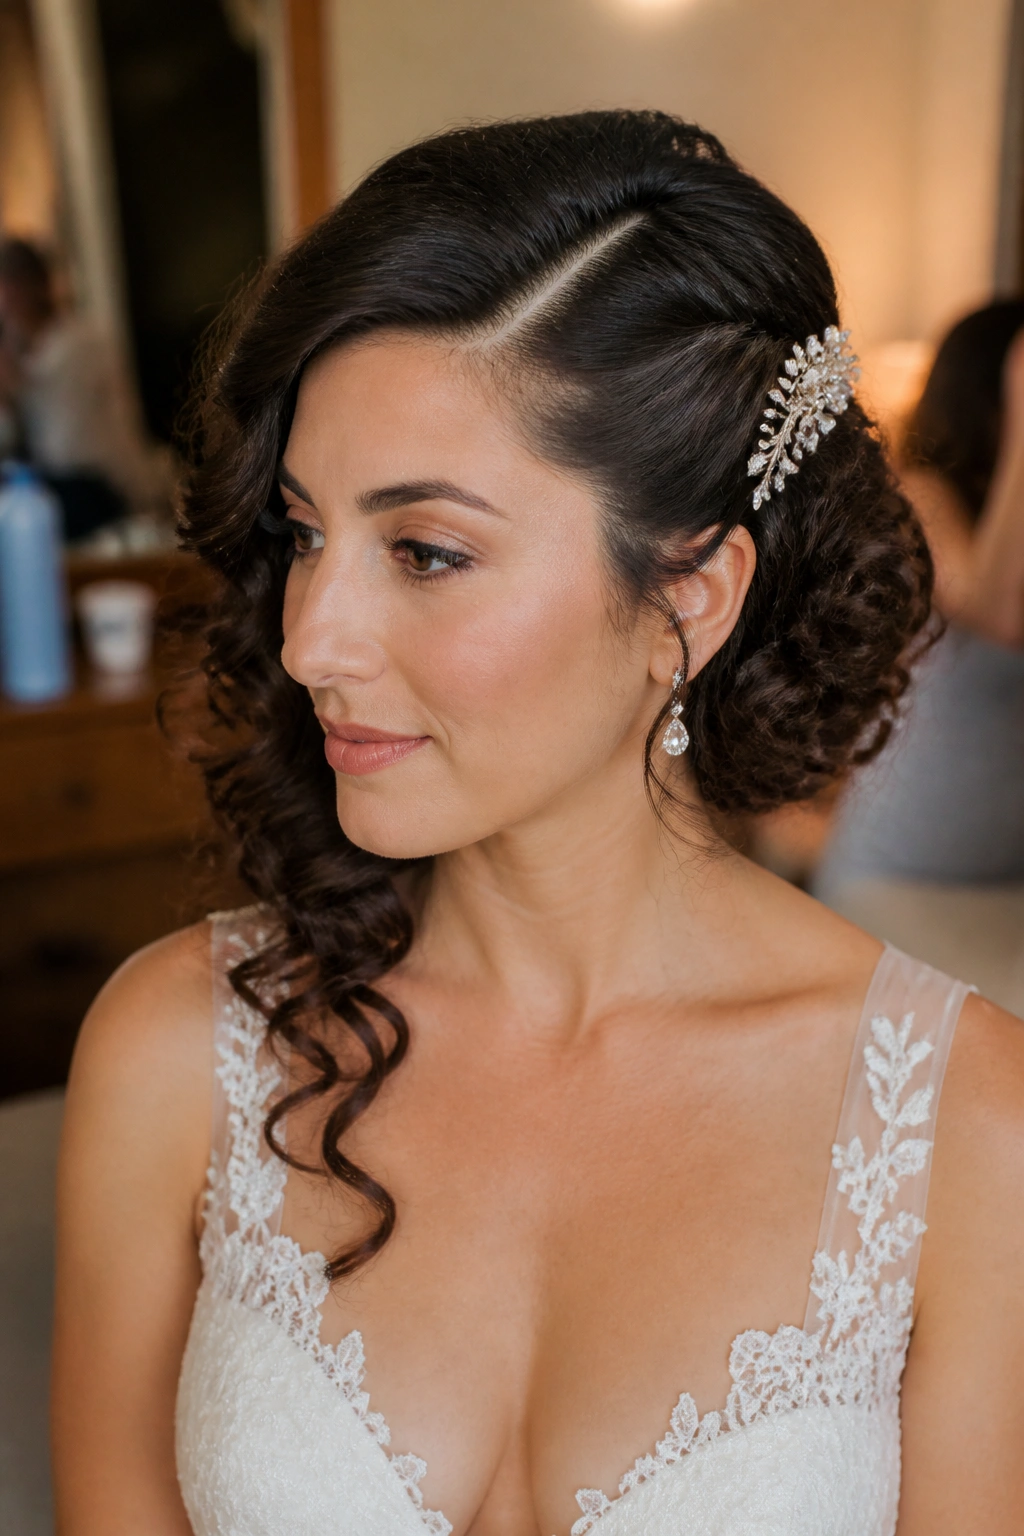
A deep side part changes everything. It gives the face a little drama before a single pin goes in, and on curly hair it creates a sweep that feels softer than a straight-back bun.
The shape is especially good if the dress has one shoulder detail or an asymmetrical neckline. One side of the head stays close and controlled, while the other side gathers into a fuller cushion of curls. That contrast is what makes the style interesting. It is not trying to be perfect on both sides, and that’s exactly why it works.
There is a nice little trick with this one: keep the part deeper than you think you need. About three to four inches off center usually gives enough movement without making the front collapse. Then tuck the heavier side low behind the ear and pin the curls upward, not back, so the shape keeps some lift. A small floral comb or a short row of crystal pins can follow the curve and make the style feel finished.
6. Braided Crown Into a Curly Bun
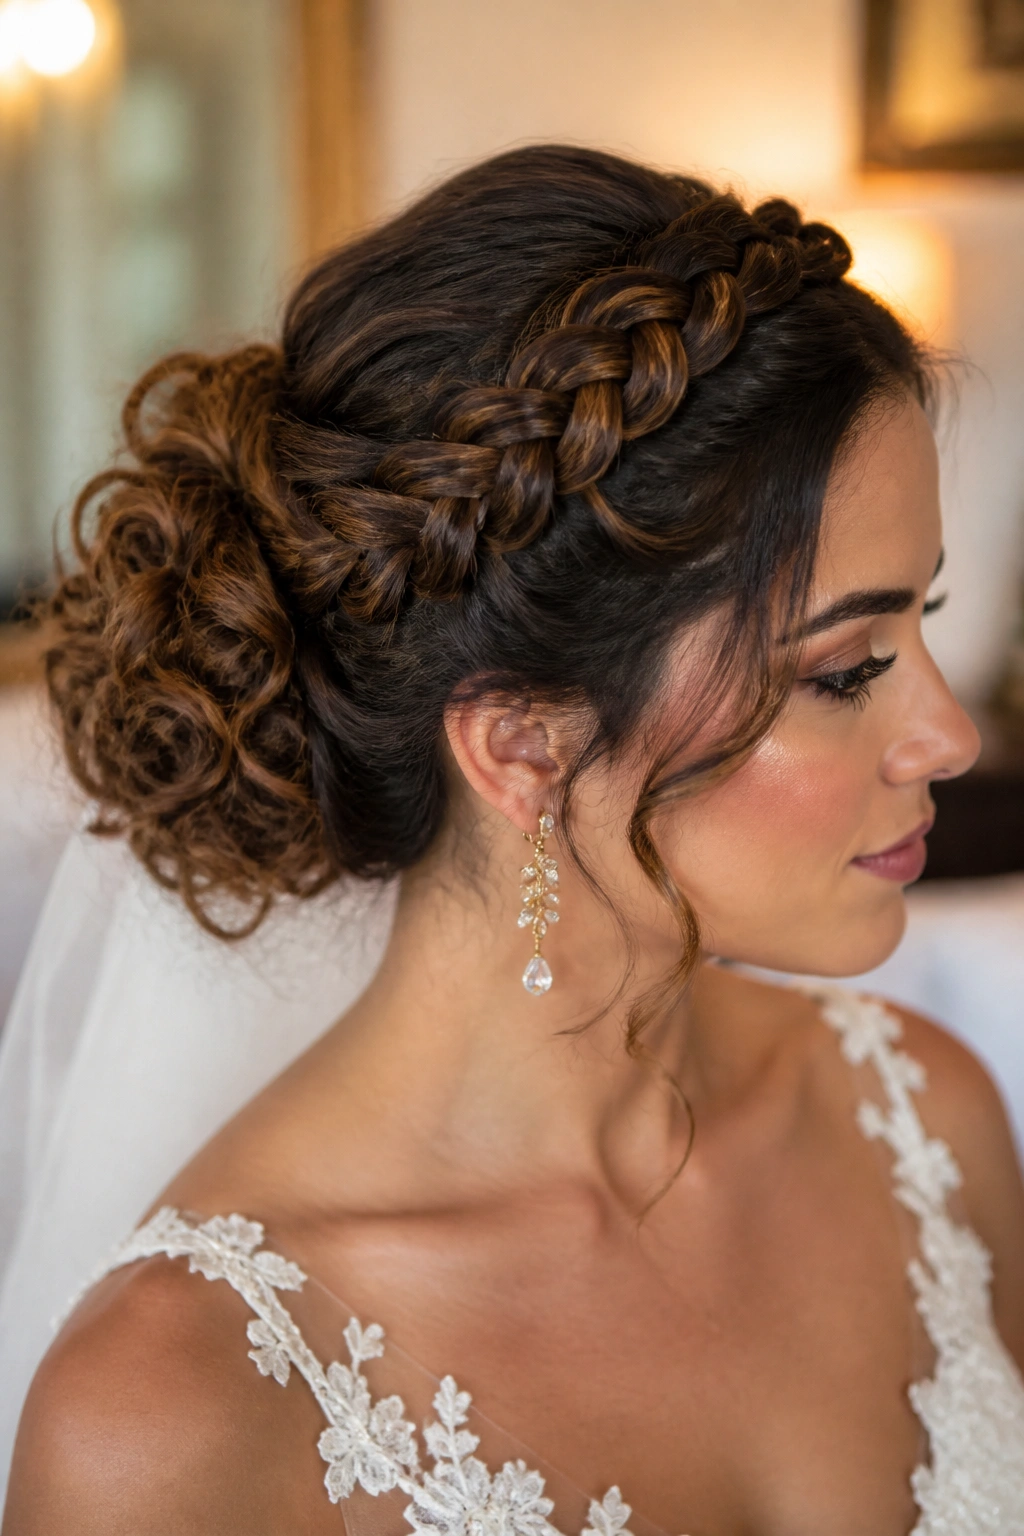
I keep seeing brides choose this when they want the front to stay calm all night. The braid acts like a built-in headband, and the bun gives the style a clean landing point at the back.
The braid does more than look pretty. It gives structure to curls that might otherwise puff out around the hairline by the time the ceremony starts. Start the braid at one temple, run it around the crown, and gather the remaining curls into a low bun or twisted knot. That keeps the top secure while still letting the curl pattern show in the back.
Small Details That Make It Work
- Braid the front section with tension that feels snug, not tight
- Leave the bun a little textured so it doesn’t compete with the braid
- Use hidden pins where the braid meets the bun
- Tuck a few ringlets at the nape if you want the style to feel softer
This one pairs well with veils, but only if the comb sits above the braid line. Put the veil too low, and it steals the shape.
7. Halo Braid With Pinned Curls
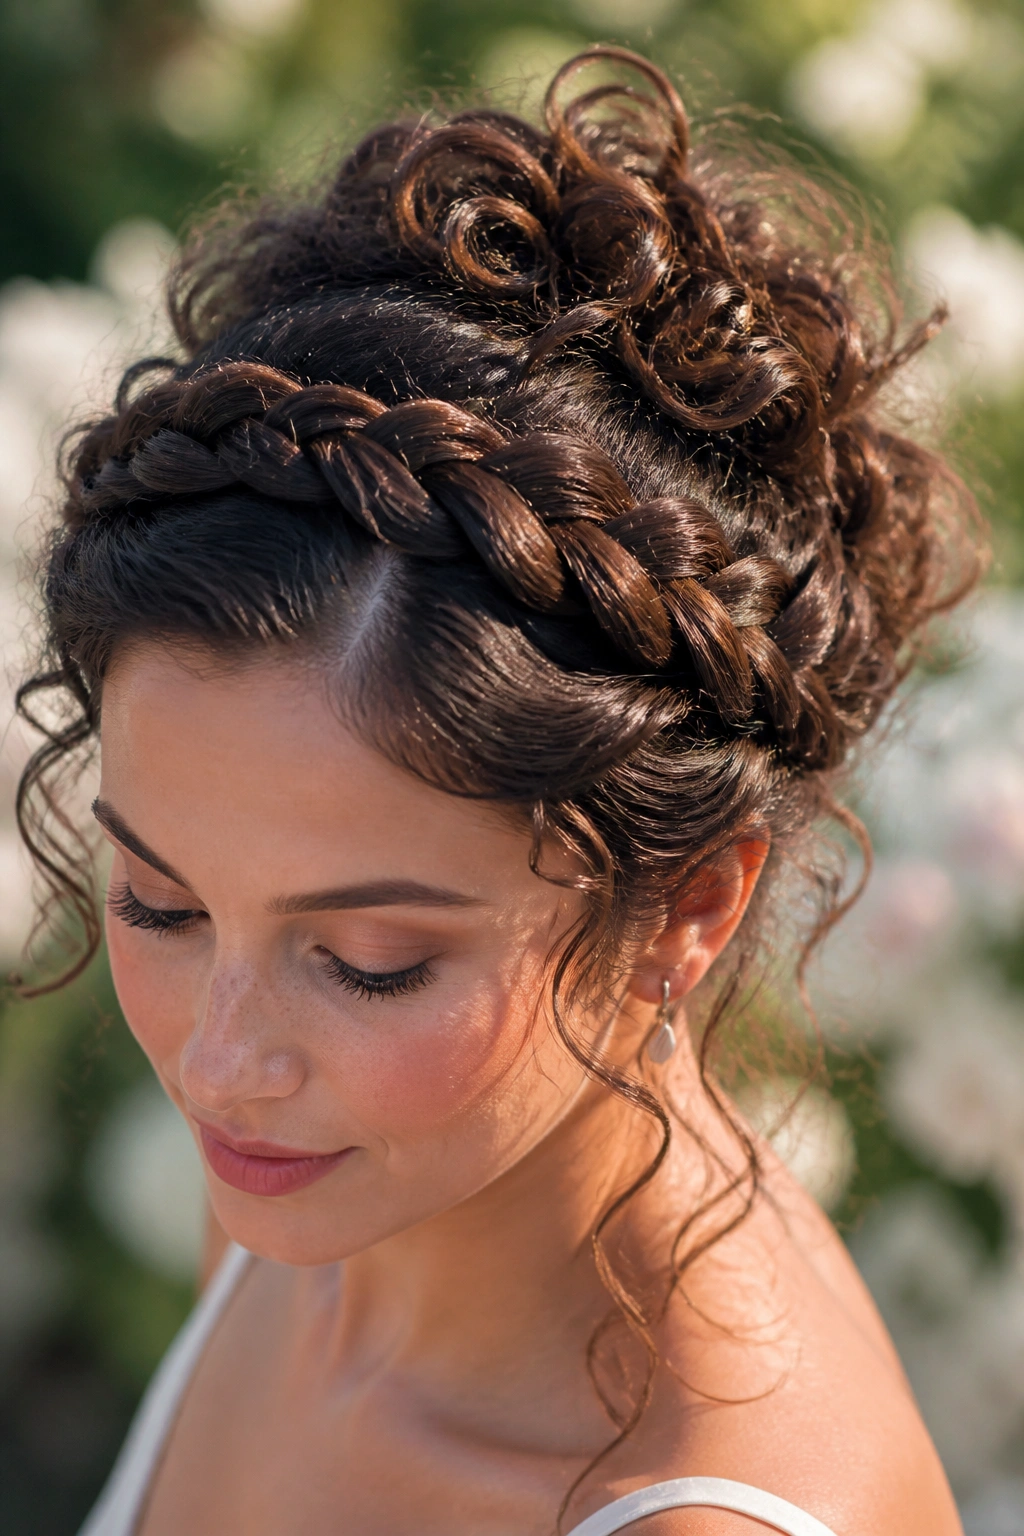
Unlike a full crown braid, a halo braid leaves the center a little freer, so the curls can sit inside the frame instead of being locked under it. That makes the whole style feel lighter.
It is a strong choice for outdoor ceremonies, especially if the air has any humidity in it at all. The braid around the perimeter controls the edges, which is usually where curly hair frizzes first, and the pinned curls in the middle keep the look wedding-ready rather than sporty. If your hair is long and dense, this style spreads the weight out nicely. If it is fine, the halo gives the illusion of more body without needing a lot of teasing.
I like a row of hidden pins every inch and a half or so along the braid line. That spacing keeps the braid from sliding without making the scalp feel poked. The center can stay loose and soft, but the outer frame should be firm. That contrast is what keeps the style from drifting apart by the time the cake gets cut.
8. Gibson Tuck With Curly Ends
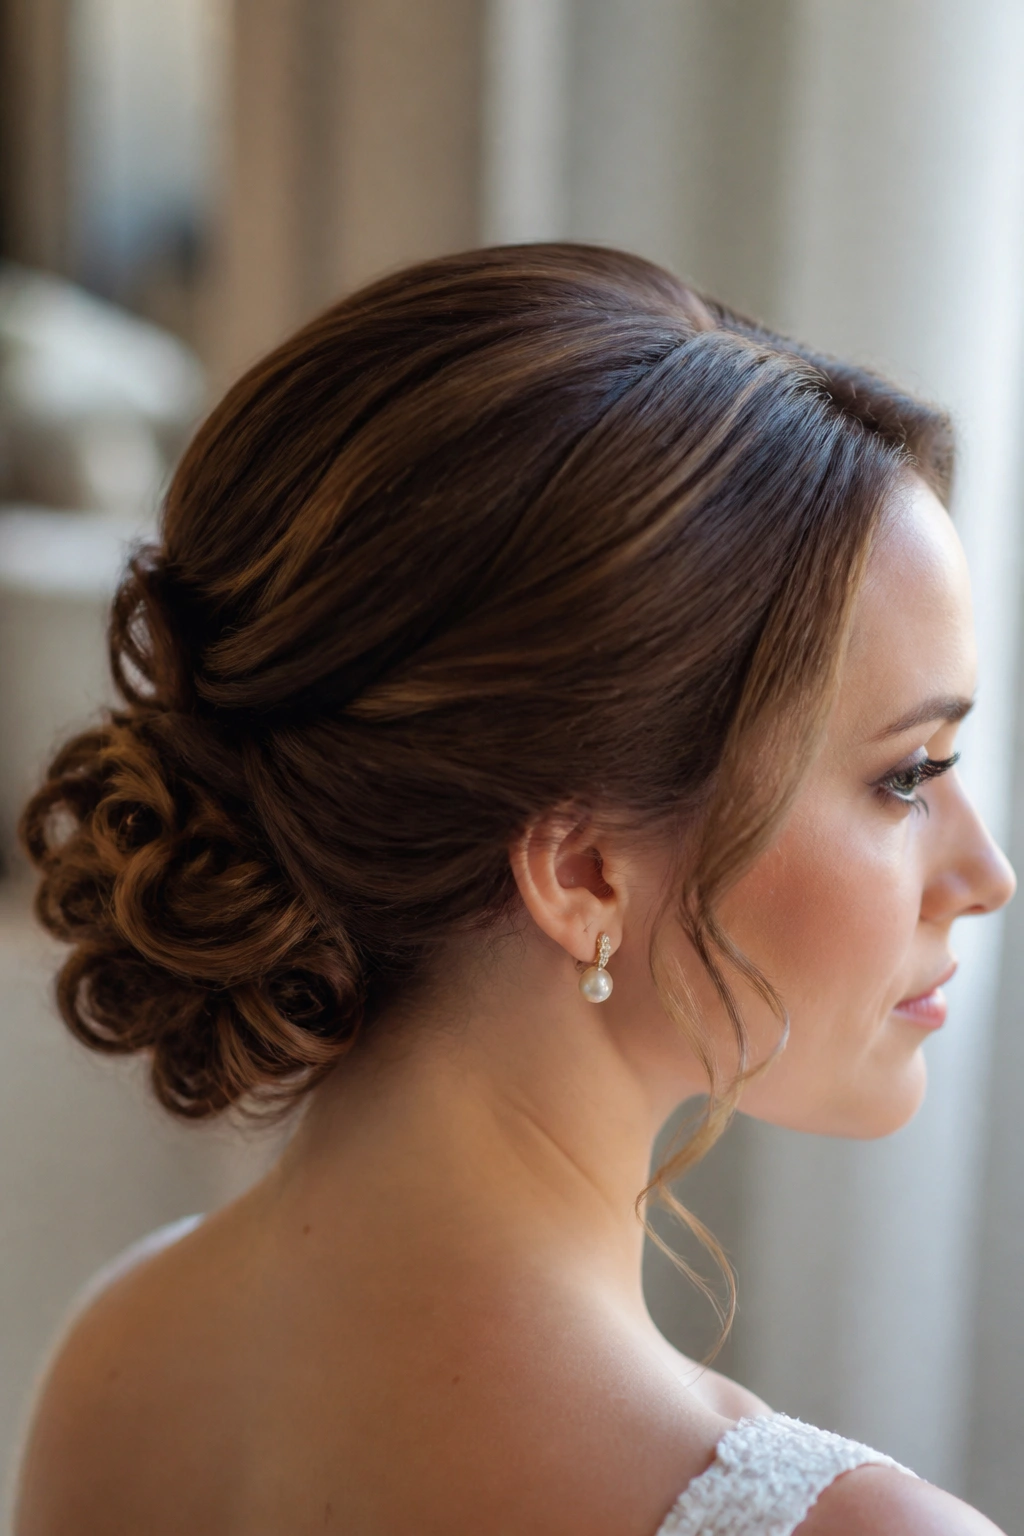
Why does the Gibson tuck still work on curly hair? Because the neckline stays clean, the sides stay smooth, and the tucked roll gives the style a vintage shape that never feels fussy when it’s done well.
Curly ends are the best part here. You do not have to hide every single strand. In fact, a few soft curls peeking from the roll make the style look richer and less copied. The tuck sits low, so it works beautifully with lace backs and higher necklines, and it suits medium-length curls that need a shape that does not rely on long wrapping pieces.
How to Keep the Roll Steady
- Use two small elastics instead of one giant one if the hair is heavy
- Pin the tuck from the center outward so it doesn’t collapse
- Keep the top smooth with a light brush, not a hard slick
- Leave the ends slightly curled so the finish does not feel too rigid
This is one of those styles that photographs better than it sounds.
9. Waterfall Braid Into a Curly Nape Twist
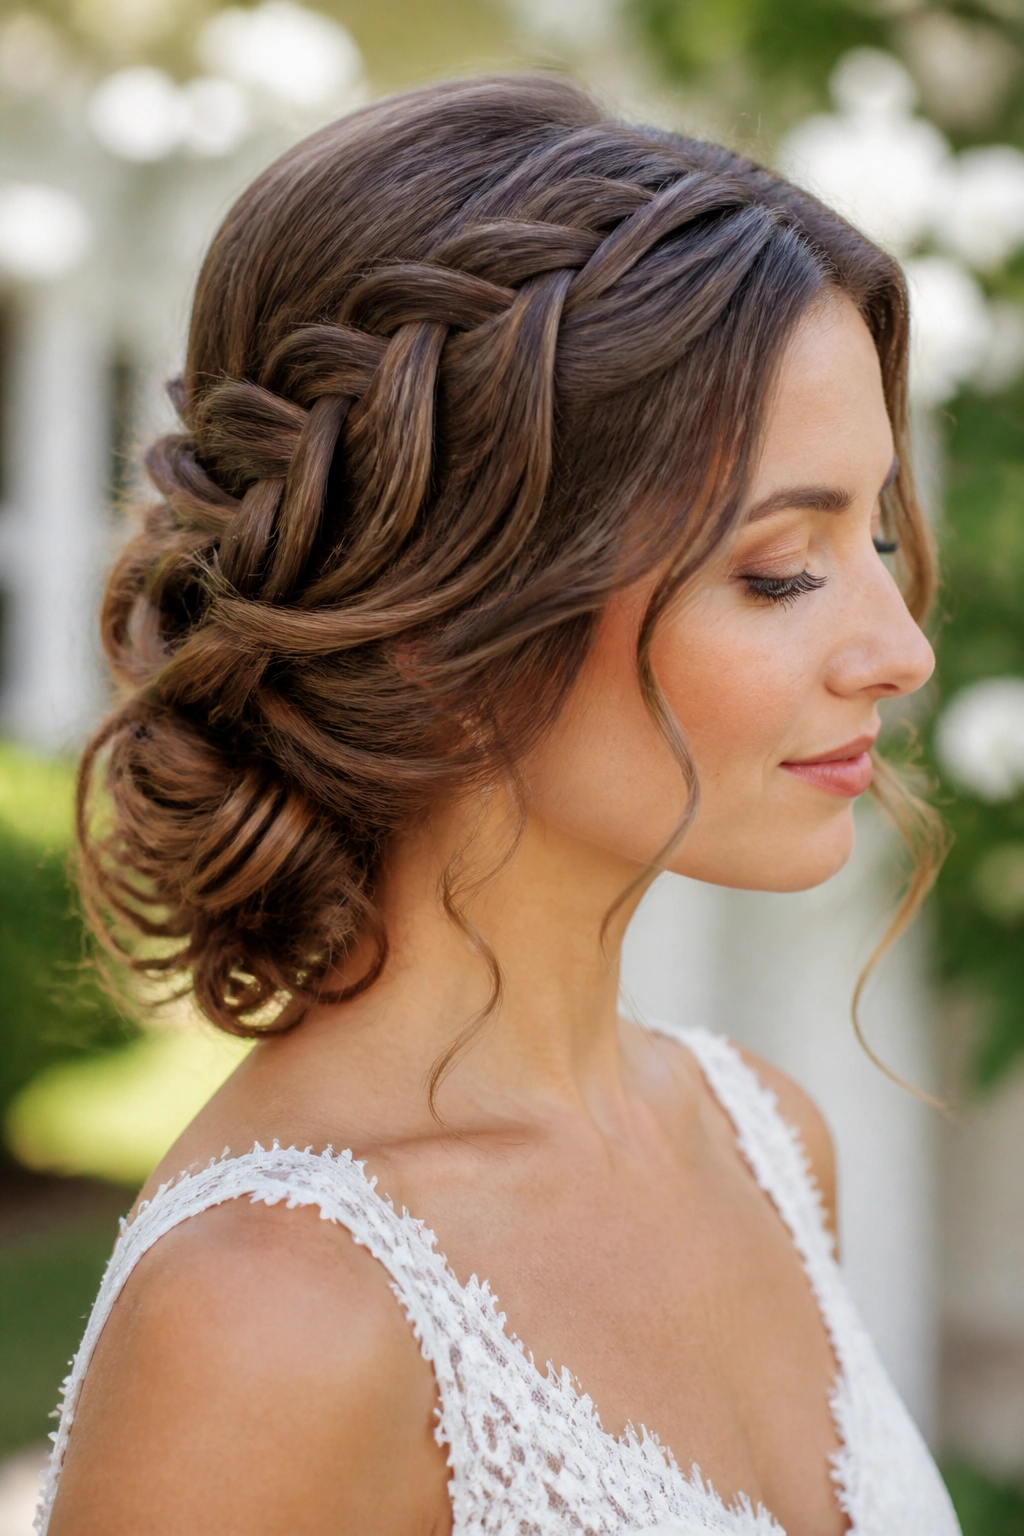
If you want something softer than a strict bun, the waterfall braid is a good halfway point. It gives the front a little motion, then sends the hair into a tucked shape at the nape where the curls can stay loose enough to feel romantic.
The braid itself is the interesting part. It creates that falling-through pattern along the side of the head, which looks lovely on layered curly hair because every release of the braid shows a bit of texture. From there, the remaining hair can be coiled into a low twist or a loose knot. The result feels airy rather than heavy.
This style is especially kind to hair that has a lot of layers. Instead of fighting the shorter pieces, it folds them into the shape. A floral pin where the braid meets the twist is usually enough decoration. You do not need much else. That’s one reason I like this style for brides who want detail without looking overdone. It has enough going on already.
10. Twisted Low Bun With Pearl Pins
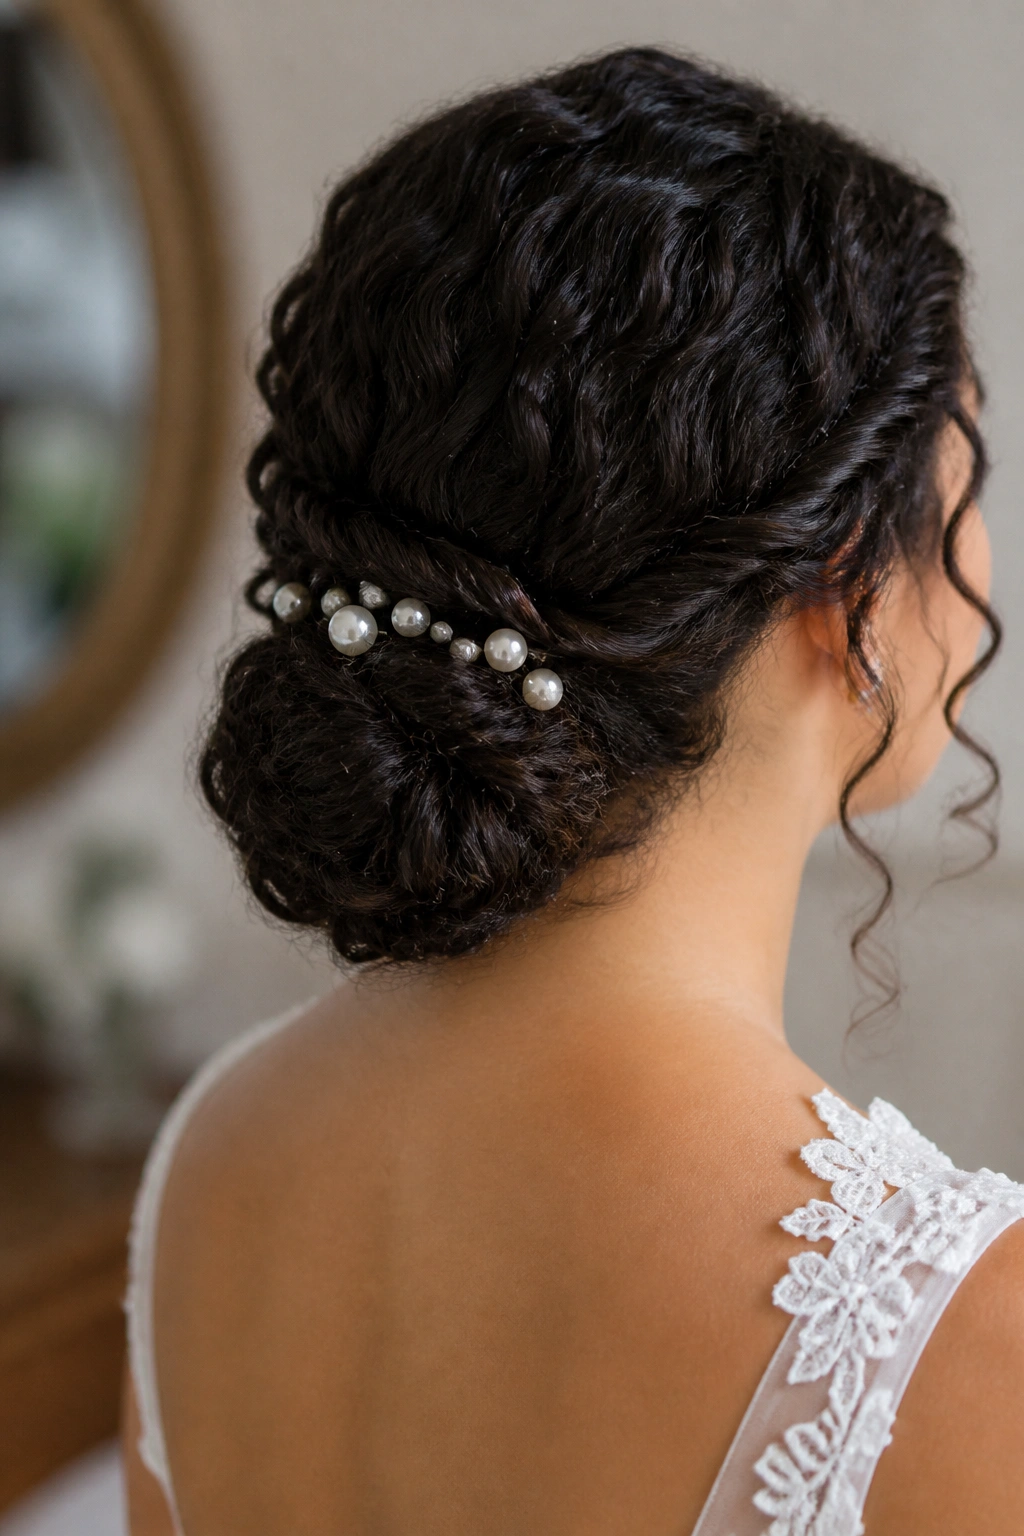
Pearl pins can save a simple bun from looking plain. They catch the eye in little points instead of competing with the curl pattern, and that restraint is part of the appeal.
The bun itself is built from two rope twists that meet at the nape and coil into a compact knot. Curly hair is good at this because the twists hold better than they would on slick straight hair. Once the bun is pinned, the pearl pins can be placed along one side of the curve or scattered in a small cluster near the base. Do not spread them too widely. A few well-placed pins look cleaner than a whole field of them.
The style works best when the bun is slightly off center, maybe by half an inch. That tiny shift gives the pearls a natural line to follow. If the dress is simple, the pins become the focal point. If the dress already has embellishment, keep the pearls to three or four so the look stays balanced.
11. Pinned Faux Hawk Curls
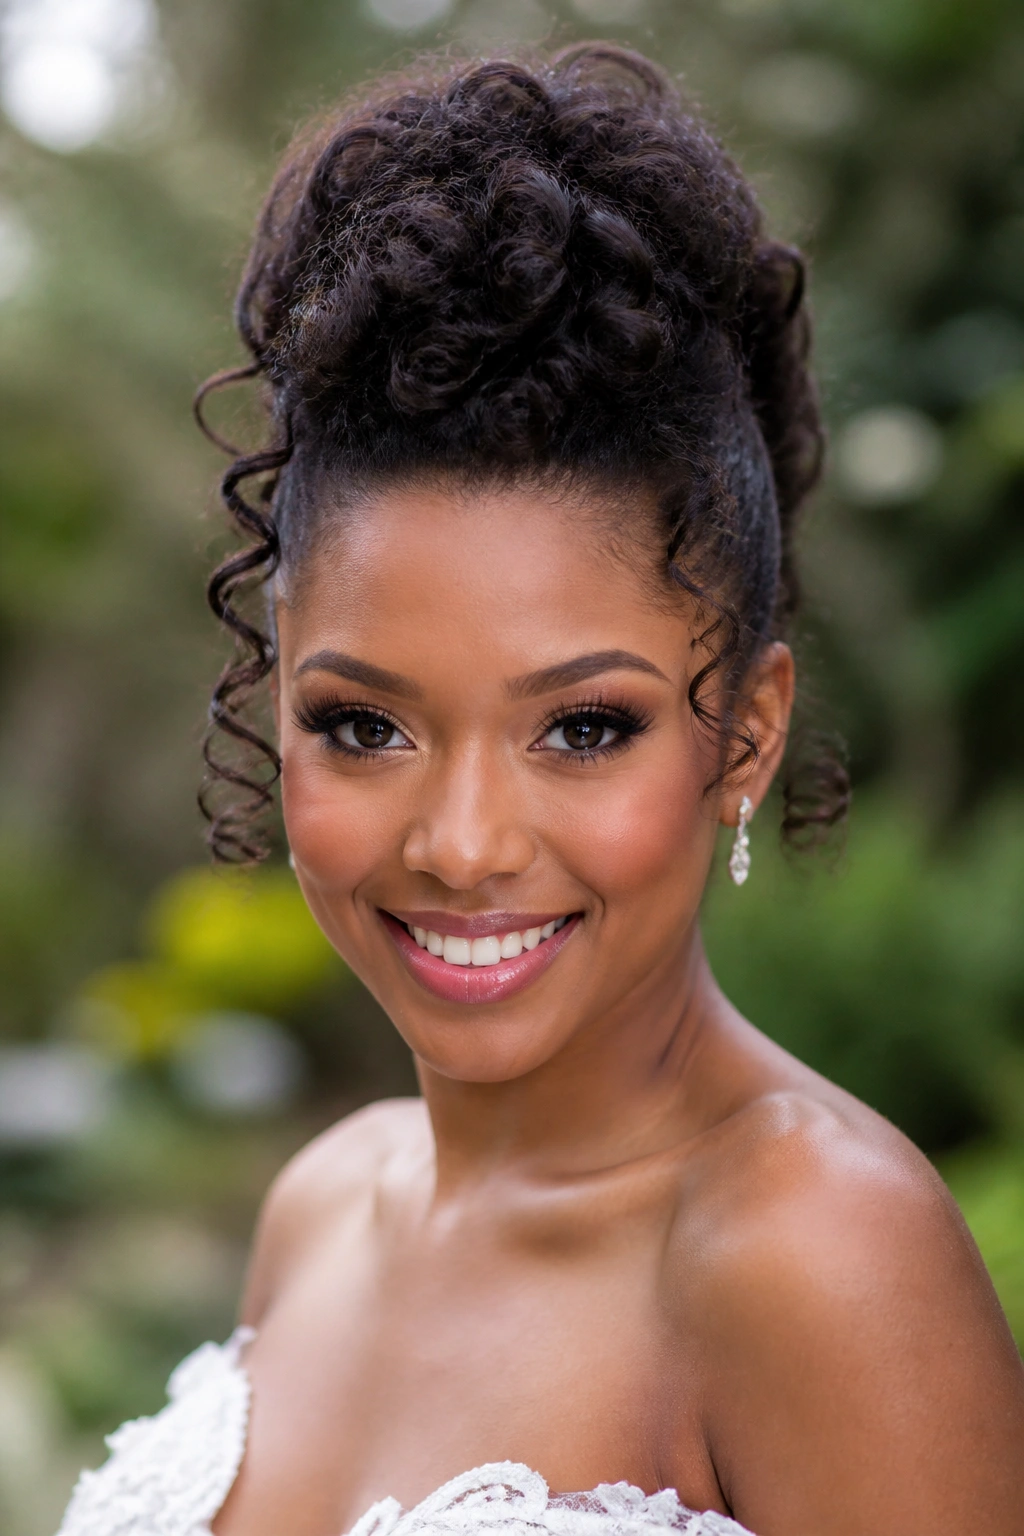
This is the style for the bride who likes structure but not sweetness. A pinned faux hawk keeps the sides close and builds a lifted ridge through the center, which gives curly hair a bit of edge without turning it into a costume.
It is also more wearable than people expect. You do not need a huge amount of teasing to make it work. The center section just needs enough lift to stand proud from the scalp, then the sides get pinned back in overlapping layers. The result feels modern and secure, and it holds surprisingly well because the shape uses the curl pattern as part of the support.
What Makes It Feel Wearable
- Keep the ridge broad, not skinny
- Pin the sides low and tight so the center can stay the focus
- Leave a few soft curls near the temples to avoid a harsh line
- Use hidden pins in crosswise pairs for better hold
I like this for brides who want to look a little bolder in photos. It has presence.
12. Sleek Crown With a Textured Bun
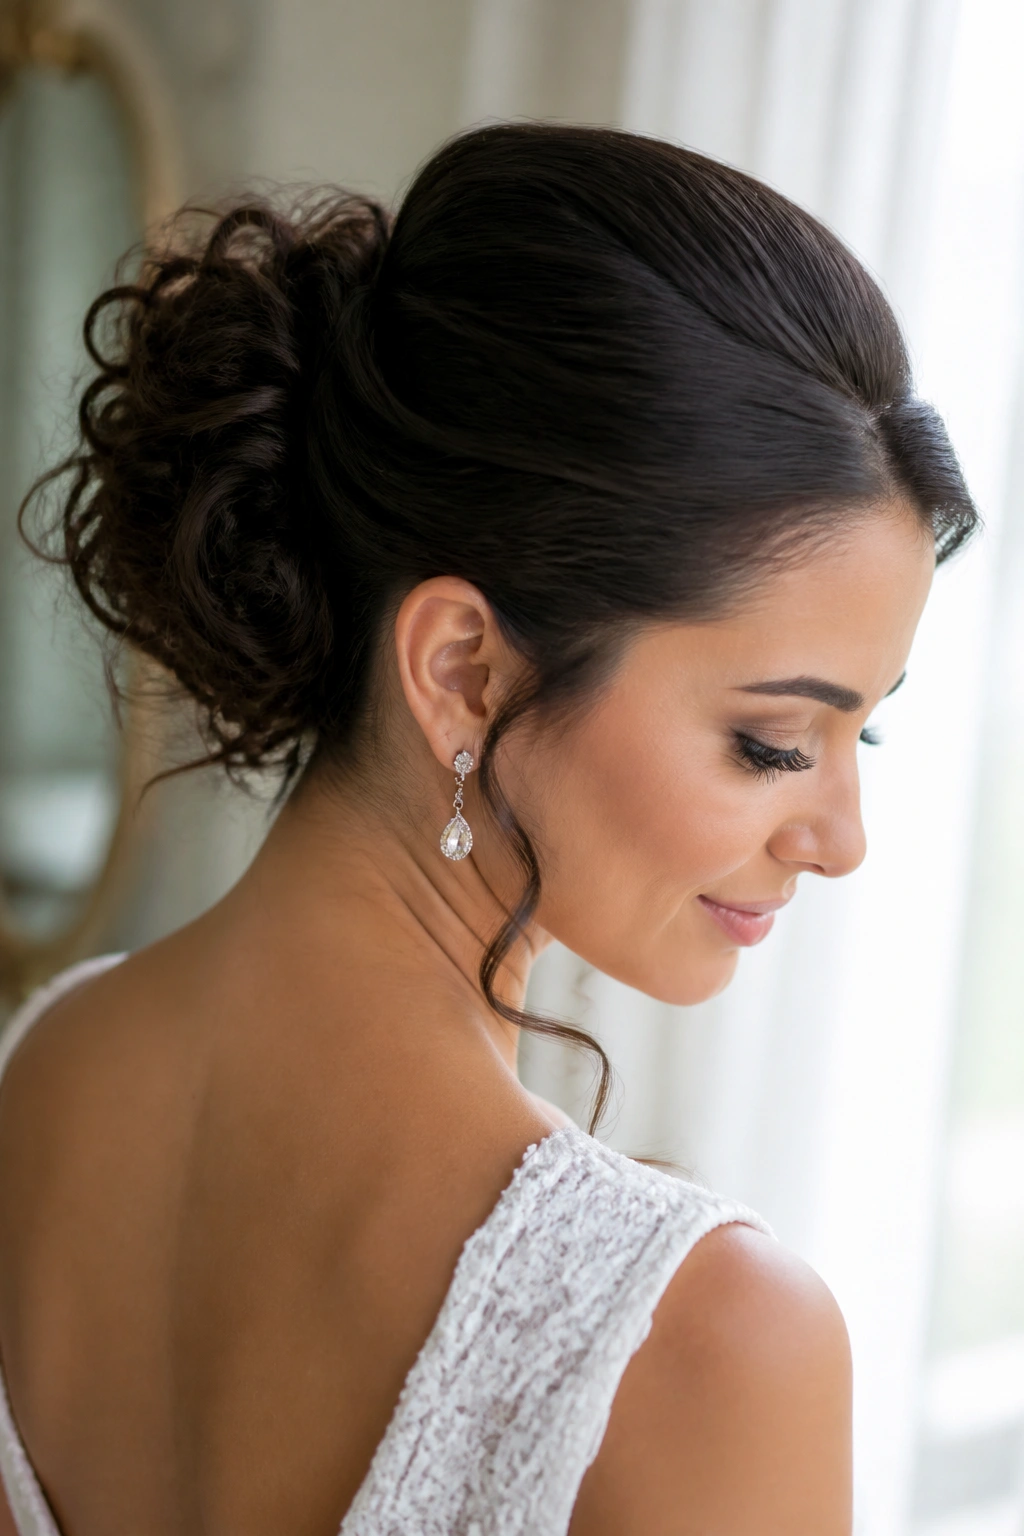
A sleek crown with a textured bun gives you two different moods in one style. The front is clean, smooth, and controlled; the back is full of curl and movement.
That contrast is what makes it feel elegant without looking flat. The crown should be brushed into place with just enough product to tame frizz, but not so much that it looks lacquered. A soft gel or a pea-sized amount of edge control at the hairline is usually enough. After that, the bun can stay deliberately textured, with curls left visible instead of tucked away so tightly that the shape disappears.
I like this on brides who want their face completely open but still want the back of the style to feel rich. It also works well with gowns that have a clean front and more detail in the back, because the hair mirrors the dress instead of competing with it. If you want the style to look expensive — and I mean that in the plain sense, not the showy sense — this is one of the safer bets.
13. Knot Bun With Curly Ends
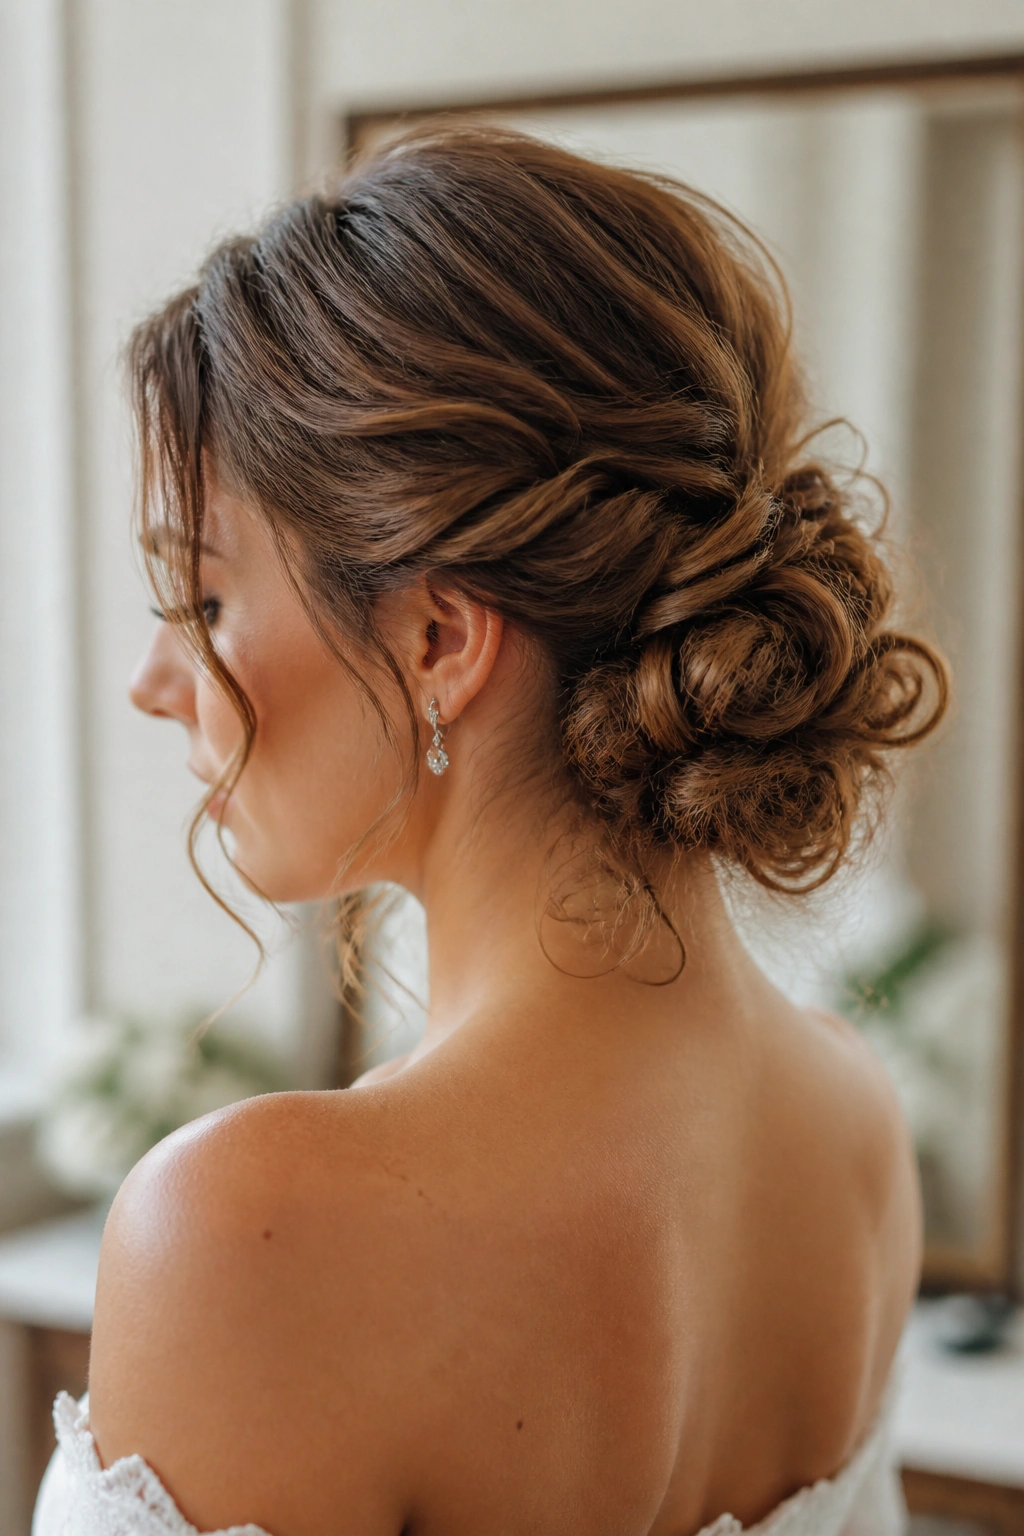
A knot bun is basically the neat, more playful cousin of the classic chignon. The hair is looped and tied into itself so the bun looks structured, but the ends can stay a little curly and visible at the edge.
That detail matters. Those loose ends stop the style from looking too sealed off. On curly hair, a knot bun also helps keep the shape from puffing out too much at the base because the loop creates its own internal hold. If your hair is shoulder length, a small filler pad or a tucked braid underneath can help the knot sit up instead of slouching flat.
What to Keep in Mind
- Set the knot about two inches above the nape for a balanced profile
- Let the ends peek out by half an inch to an inch
- Use a thin elastic that matches the hair color
- Pin the sides first, then shape the knot last
This one feels especially nice for brides who want movement but do not want a loose bun falling apart by dessert.
14. Double Bun Curly Updo
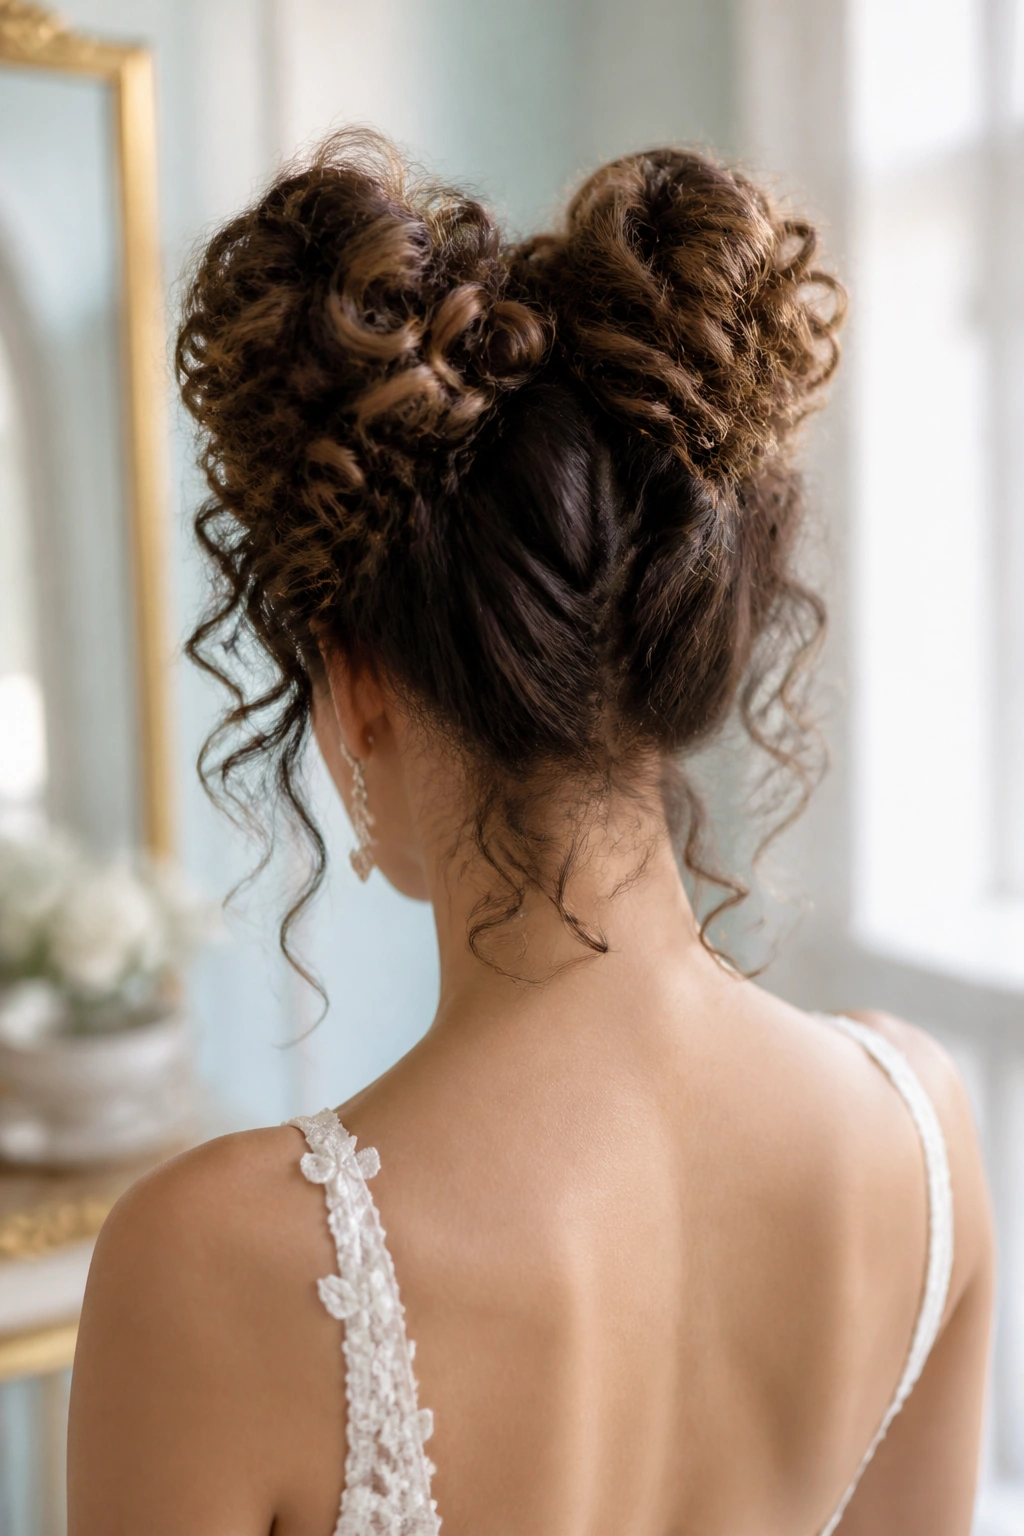
A double bun is cleaner than it sounds. Done well, it looks balanced, not childish, because the two buns share the weight and create a shape that sits neatly at the back of the head.
I like this style for thick curls that feel too heavy in one single bun. Splitting the volume into two compact knots makes the whole updo easier to pin and less likely to sag as the day goes on. You can stack the buns vertically for a long, lean shape, or place them side by side for something softer. Either way, the curl texture gives the buns more dimension than they would have on straight hair.
It works best when the buns are compact and the edges are tucked in, but not flattened to the point of losing all texture. That little bit of softness keeps it bridal. If the dress is simple, the double bun becomes a statement. If the dress already has a lot of detail, keep the buns smaller and lower so the hair supports the outfit instead of shouting over it.
15. Braided Low Bun for Natural Curls
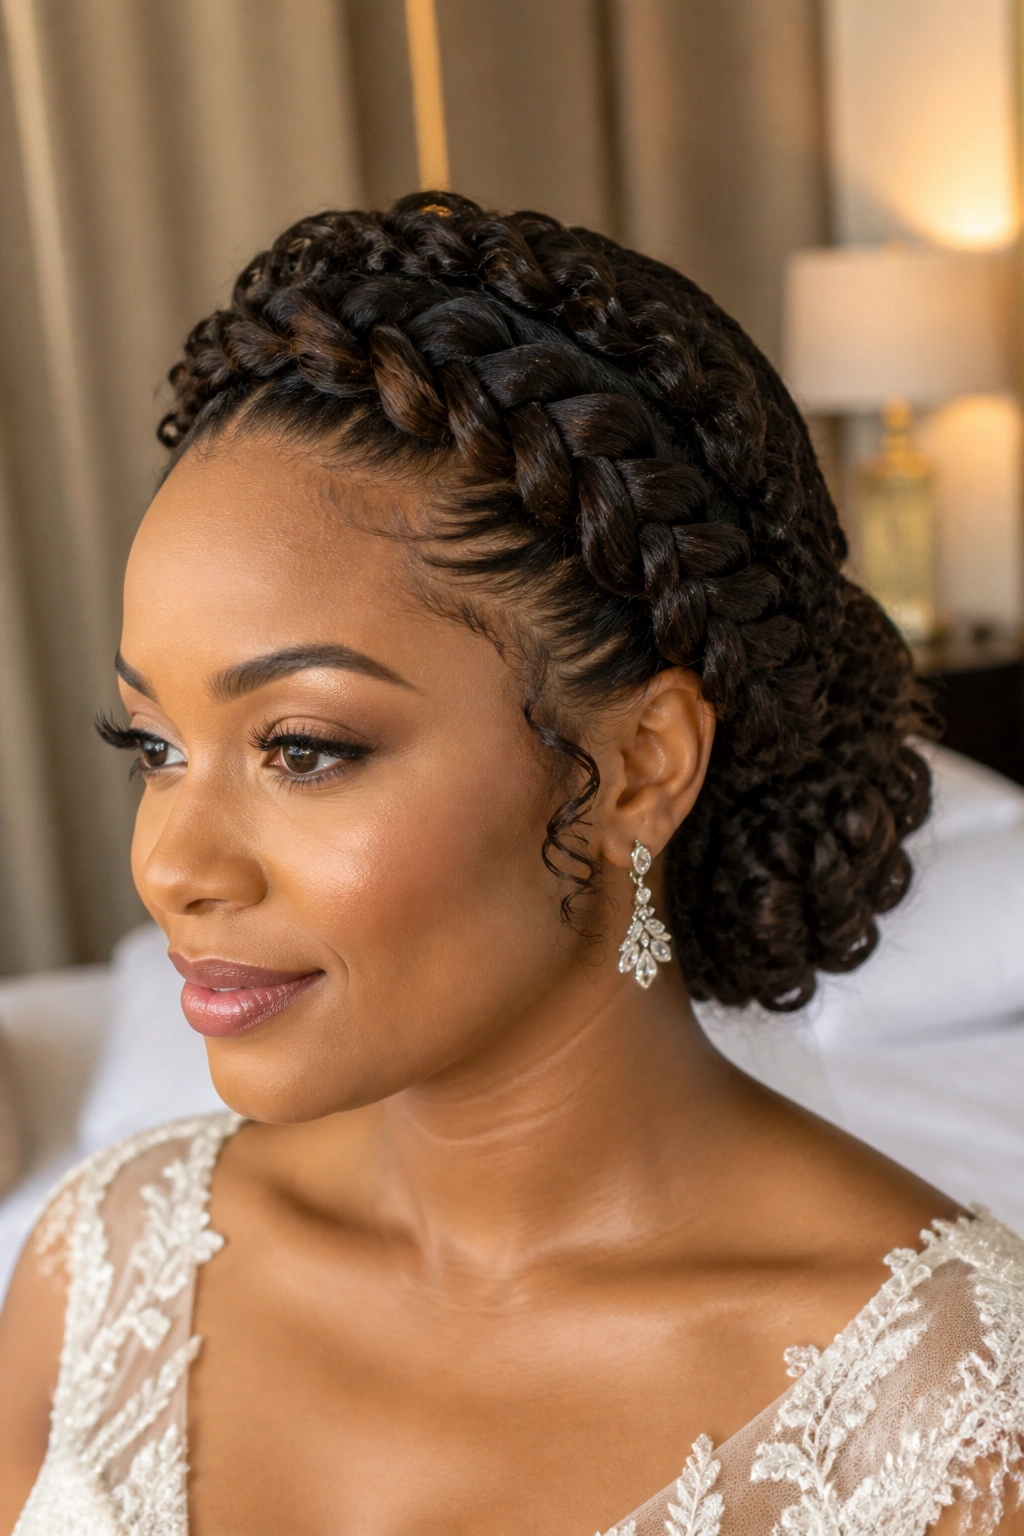
Can natural curls go into a low bun without looking bulky? Yes, if you braid the perimeter first and let the bun sit on a controlled base rather than a loose cloud of hair.
That’s the whole trick. The braid around the hairline or sides compresses the shape just enough to let the curls gather in a smoother way. For tighter coils, that braid can be a set of small cornrow-style sections or a single wrapped braid depending on the length. For looser curls, a simple side braid into the bun is usually enough.
Why This Version Lays Better
- The braid keeps the front from puffing out
- The bun sits flatter against the neck
- The style holds better if the roots are stretched a little before pinning
- The shape feels neat without losing the curl identity
This is one of my favorite wedding options for natural texture because it respects the hair instead of trying to force it into a shape it never wanted. It is a practical style, which sounds boring until you realize practical hair survives the entire reception.
16. Curly Updo With a Side Roll and Comb
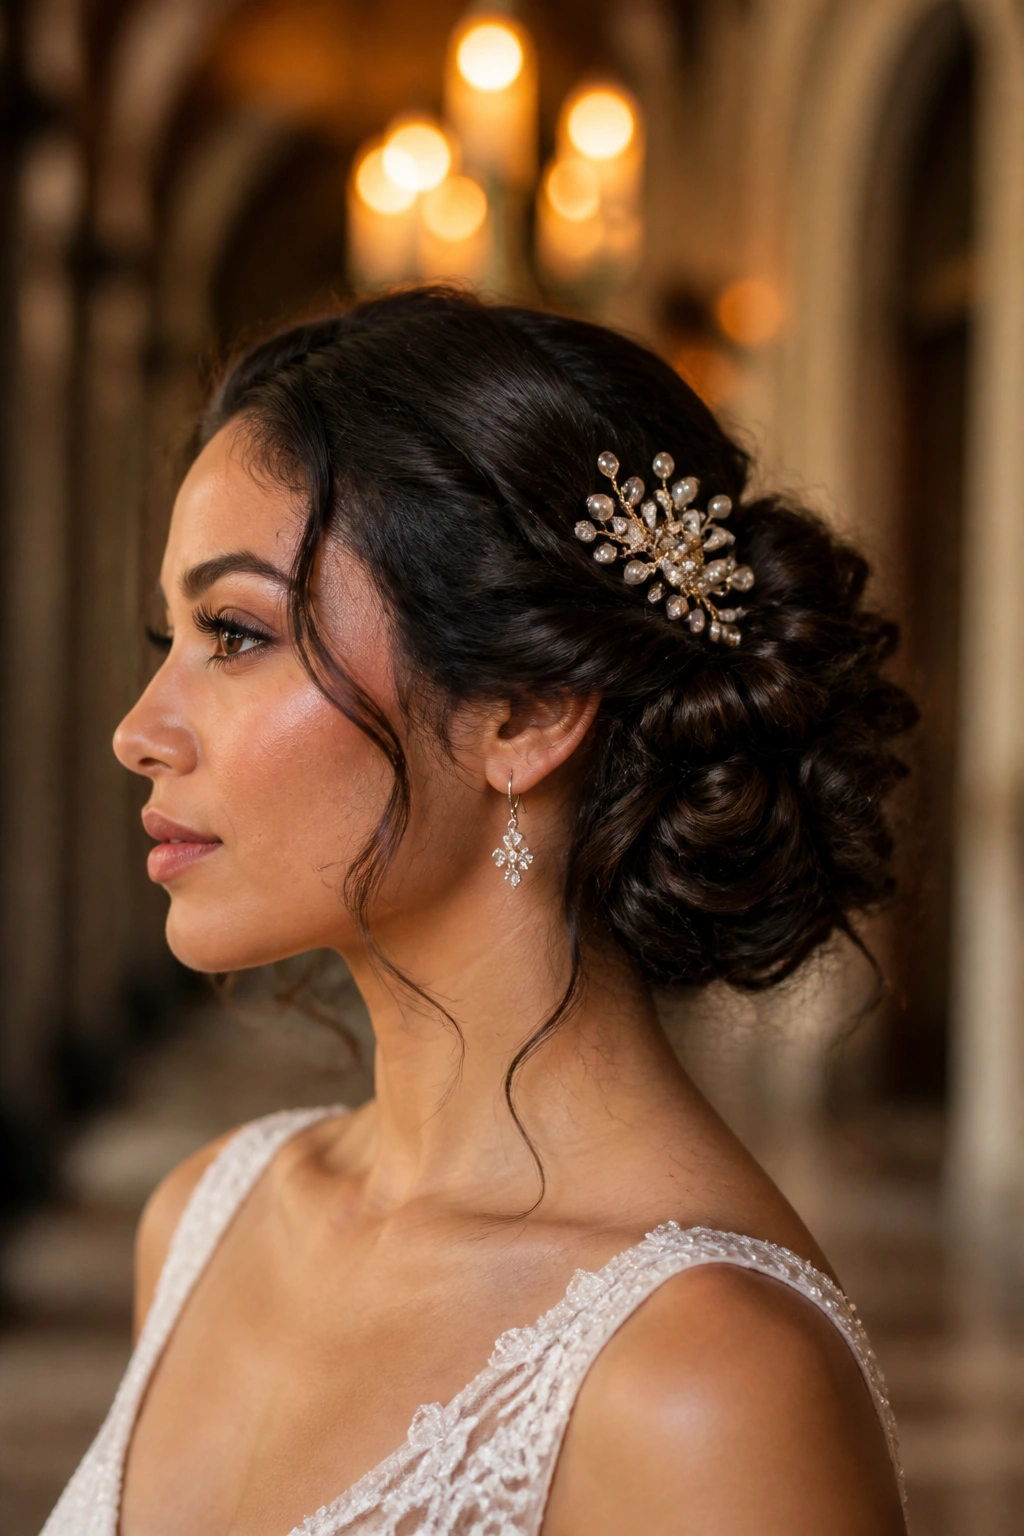
A side roll is one of those styles that looks more complicated than it is. The hair sweeps to one side, folds into a soft roll, and then gets pinned into a low pocket of curls near the ear or just behind it.
The result feels vintage in the best way. Not costume-y. Just polished. It works especially well when you want one side of the face open and the other side framed by a decorative comb. A comb with six to eight teeth is usually enough; anything bigger can start to overpower the roll. If the comb is metal or pearl-set, place it slightly above the widest part of the roll so it follows the curve instead of sitting on top of it like an afterthought.
This style suits gowns with a sweetheart neckline or a shoulder detail because the asymmetry echoes the dress. It also photographs well from the side, which matters more than people admit. One side view can carry a whole album when the hair has the right line.
17. Brushed-Wave Bridal Updo
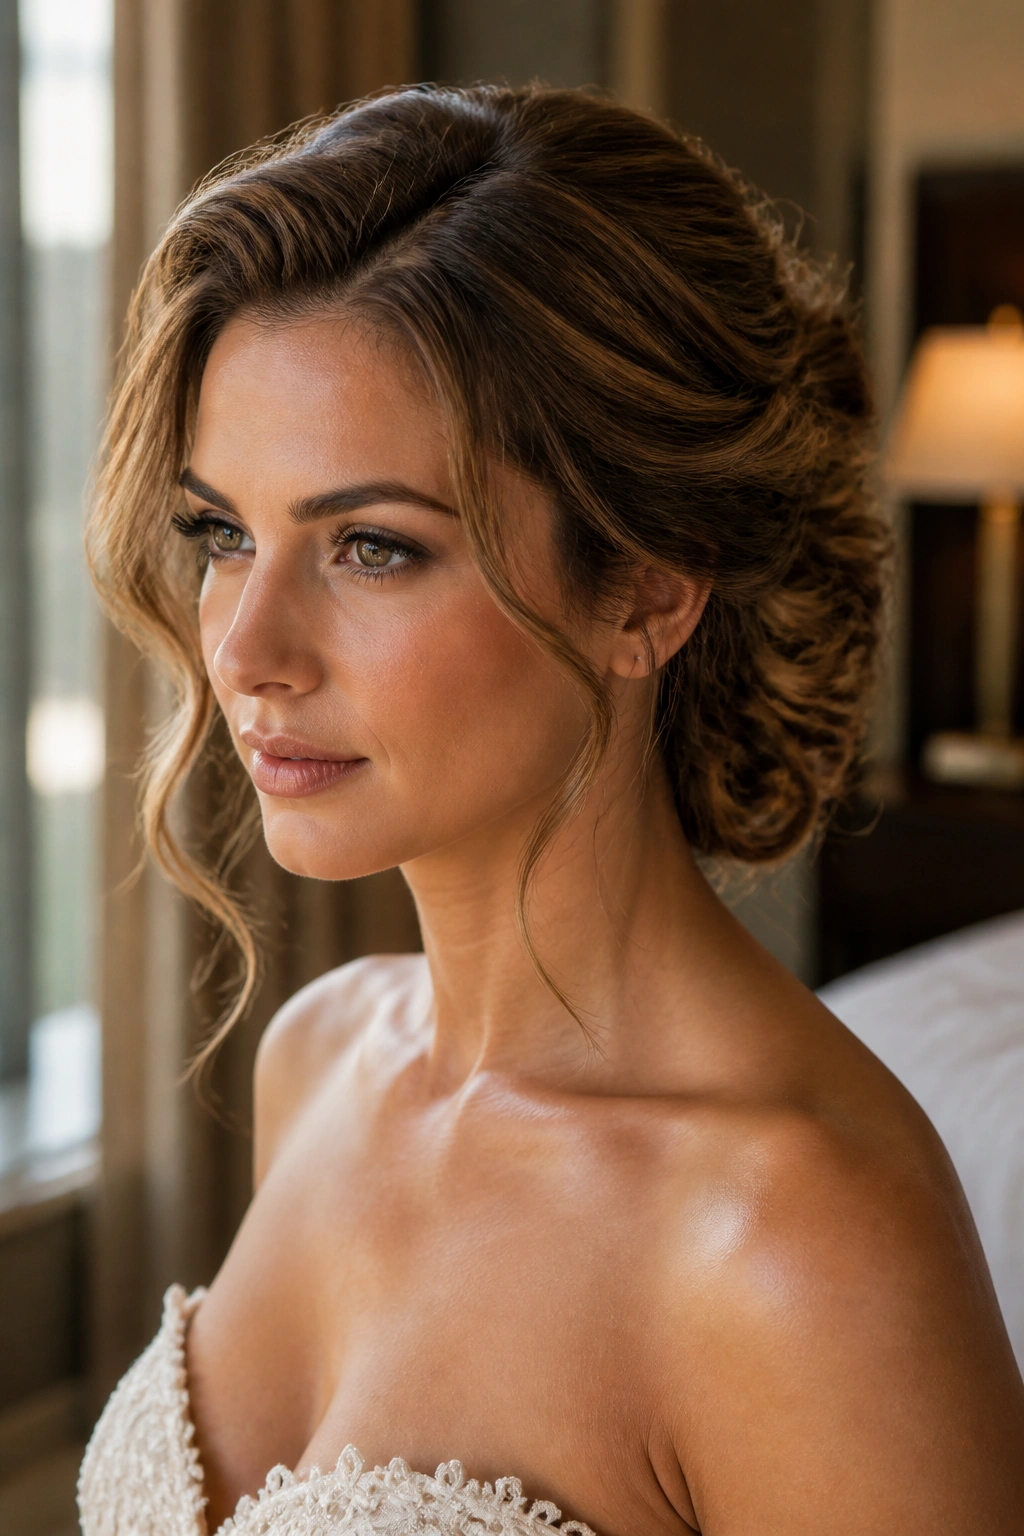
A brushed-wave bridal updo is softer than it sounds. The curls are not erased; they’re loosened just enough to create an old-Hollywood shape that feels smooth around the front and textured through the back.
I like this one for brides who want glamour without a hard shell of spray. You start with waves or loosely defined curls, then brush select sections into a flowing shape and pin them where they want to fall naturally. The key is to brush only when the hair has enough set to keep its direction. If you attack dry curls too early, frizz shows up fast and the whole thing gets fuzzy at the edges.
The style is lovely with satin, silk, and clean-lined dresses because the hair adds softness to the outfit. It is also a good choice if you want a style that looks a little different from the usual bun. There is more movement here. More curve. More room for the hair to show what it can do.
18. High Curly Bun With a Veil-Friendly Base
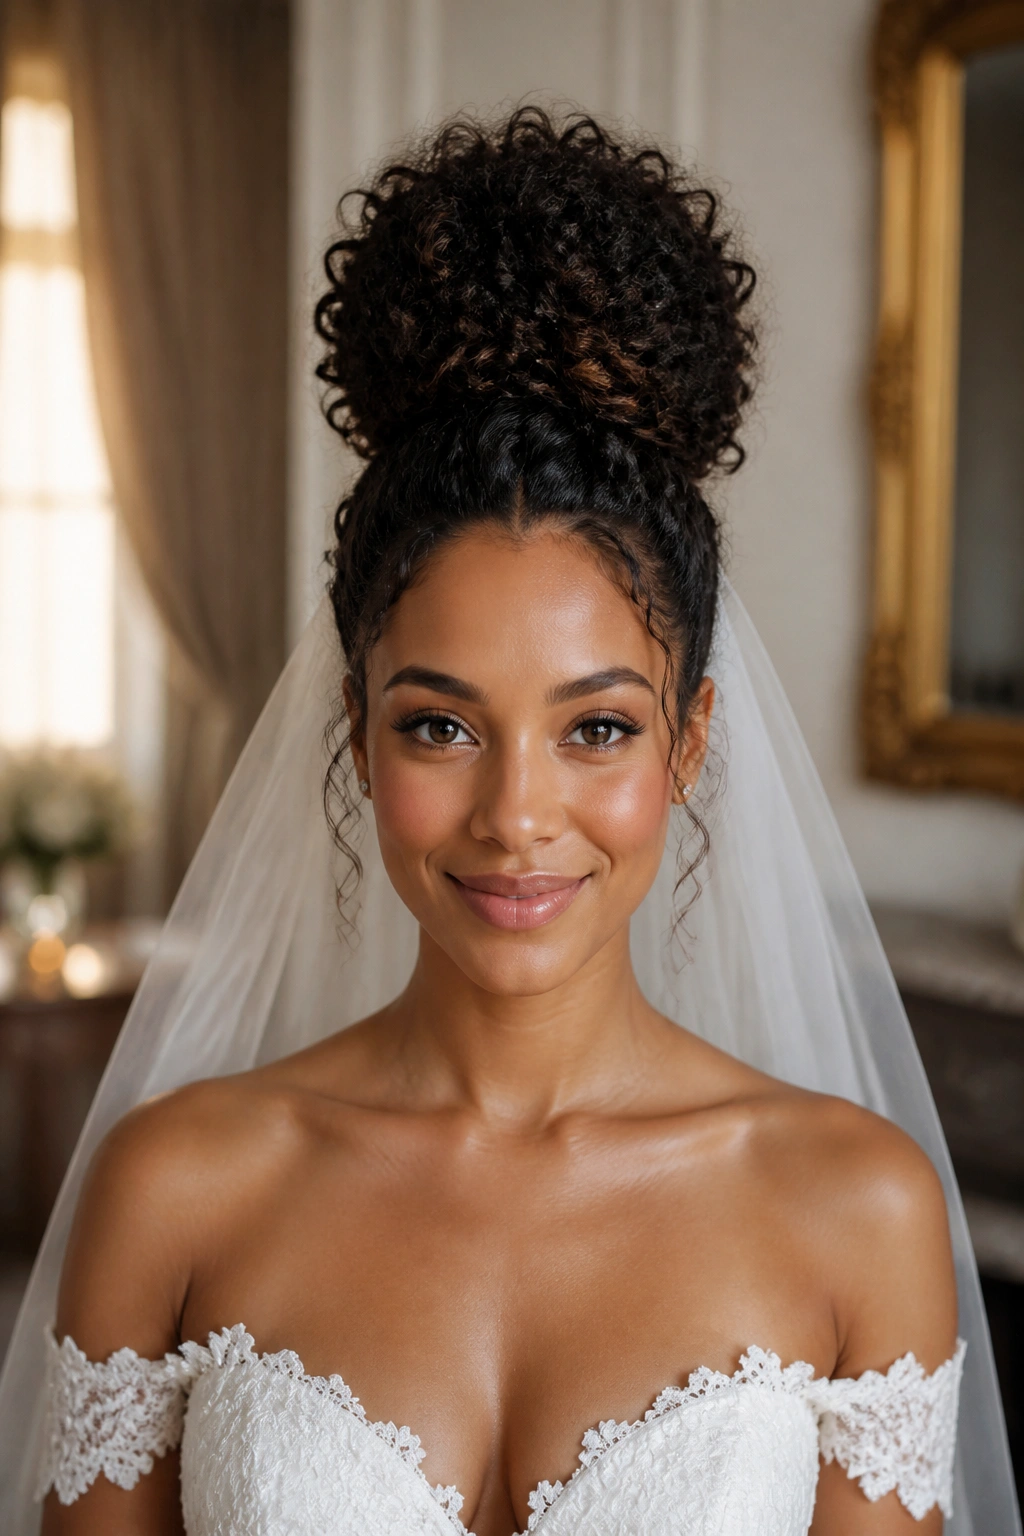
If the ceremony, the photos, and the dancing all happen in one long stretch, this is the style I trust most. A high curly bun with a veil-friendly base gives you height, security, and enough structure to keep the veil where it belongs.
The base has to be flat and firm. That part matters. Put the veil comb into the anchor zone, not through the softest part of the bun, or the whole shape can start to tilt by the end of the ceremony. I like a hidden hairnet under the bun when the curls are heavy, because it helps distribute the weight without making the style look stiff.
How to Keep It from Sagging
- Build the bun on two crossed anchor pins first
- Place the veil comb about an inch above the nape anchor, depending on the veil weight
- Keep the crown lifted, but not teased into a lump
- Tuck the curl ends inward so the outer edge stays smooth
A high bun is not the softest choice on this list, but it might be the smartest if you want something that stays clean from vows to last dance. If you are torn between two styles, pick the one that matches the neckline and the veil weight before you think about anything else.
Pick the shape that works with your curls, not the one that tries to flatten them into submission. The best wedding hair still looks like hair after an embrace, a long dinner, and a few hours under lights.
And if the style can survive your aunt’s hug without collapsing, that is usually a good sign.
