



Short hair and natural curls can be a fantastic match, but only when the cut is built for the curl instead of arguing with it. A good pixie does not flatten the texture or hide it. It gives the curls a shape they can actually hold.
Some of the most flattering curly pixie hairstyles leave enough length on top for the curl to spring, then clean up the sides so the whole outline looks intentional. That sounds simple. It isn’t, at least not if the cut is rushed. Shrinkage, density, and curl pattern all change the final look, which is why a pixie on natural curls can go from sharp to lopsided fast if the shape is wrong.
I’ve always liked curly pixies that keep a little softness near the hairline. Too much bluntness makes curls look boxed in. Too much texture everywhere can turn the head into a puff with no direction. The sweet spot is a shape that respects where the curls want to sit, then trims the excess so the eyes go to the face, not the frizz.
1. Rounded Curly Pixie for Natural Curls
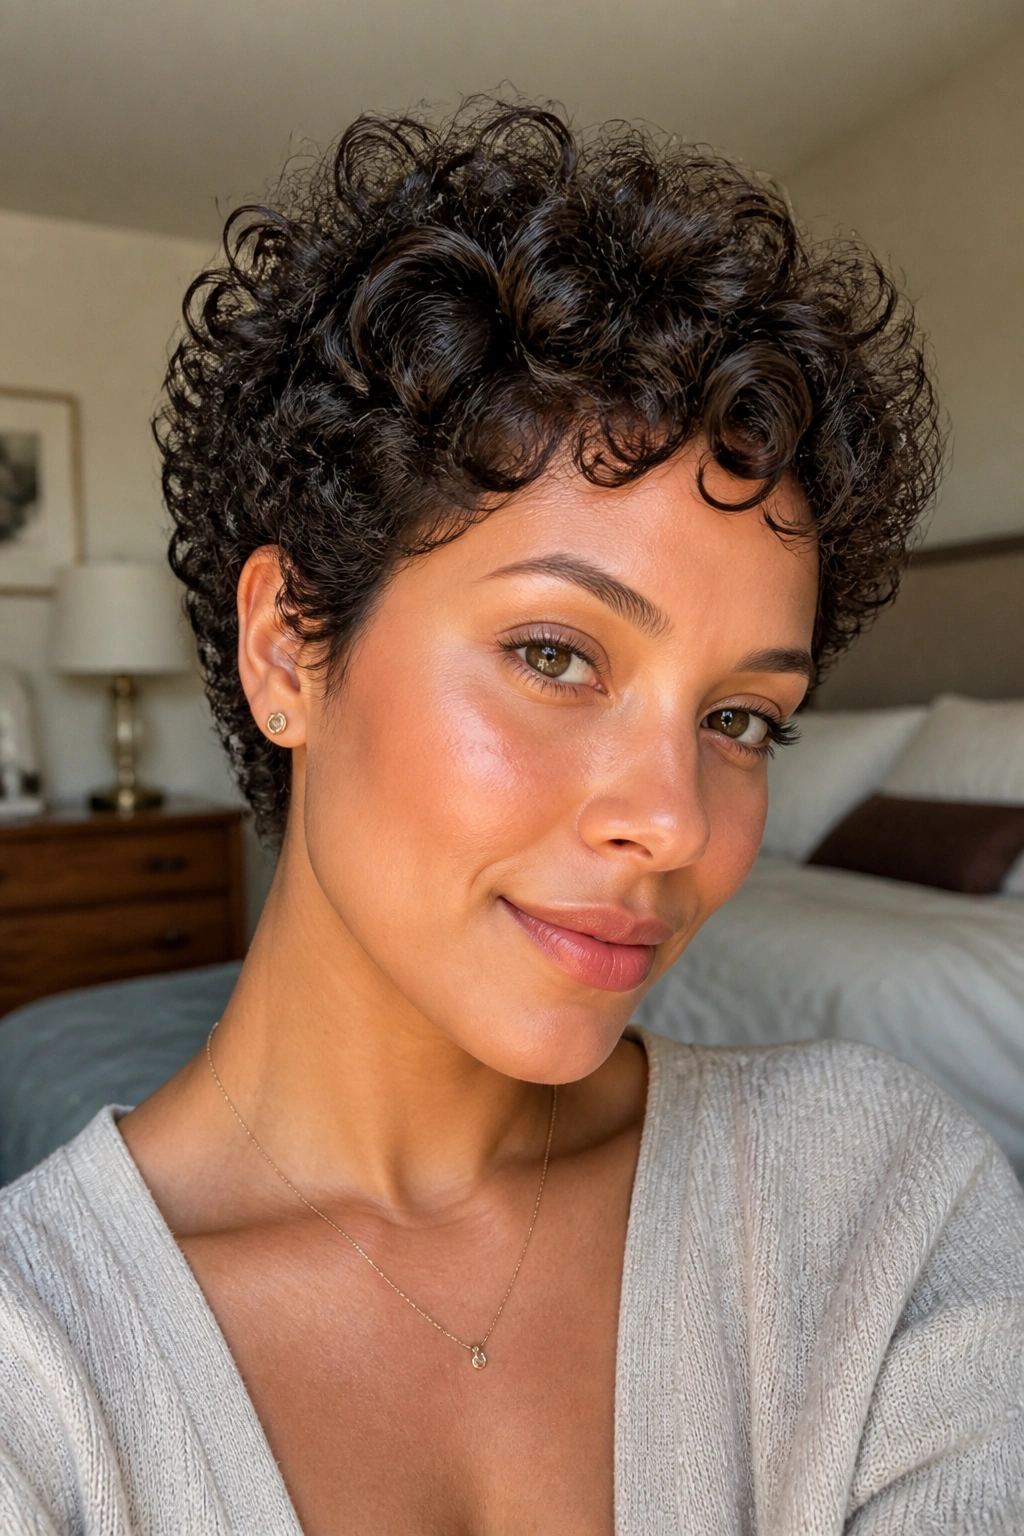
The rounded pixie is the style I reach for when someone wants their curls to look plush, not chopped off. It follows the head shape closely and lets the top form a soft halo, which works especially well for 2C to 3B curls that shrink a little but still want room to move.
What makes this cut work is the balance. The sides stay neat, the crown stays alive, and the silhouette feels smooth instead of boxy. Ask for a dry cut if your stylist knows what they’re doing. Wet curls lie. Dry curls tell the truth.
Leave roughly 2.5 to 4 inches on top, depending on curl density, and keep the nape and sides tighter without going too severe. A mousse or lightweight curl foam helps the shape stay airy. Heavy creams can drag the curl down and flatten the rounded look.
This one flatters oval, heart, and longer faces especially well because the curve around the head softens angles. It also looks good when you want the haircut to do the work, not your styling routine.
2. Tapered Curly Pixie with Short Sides
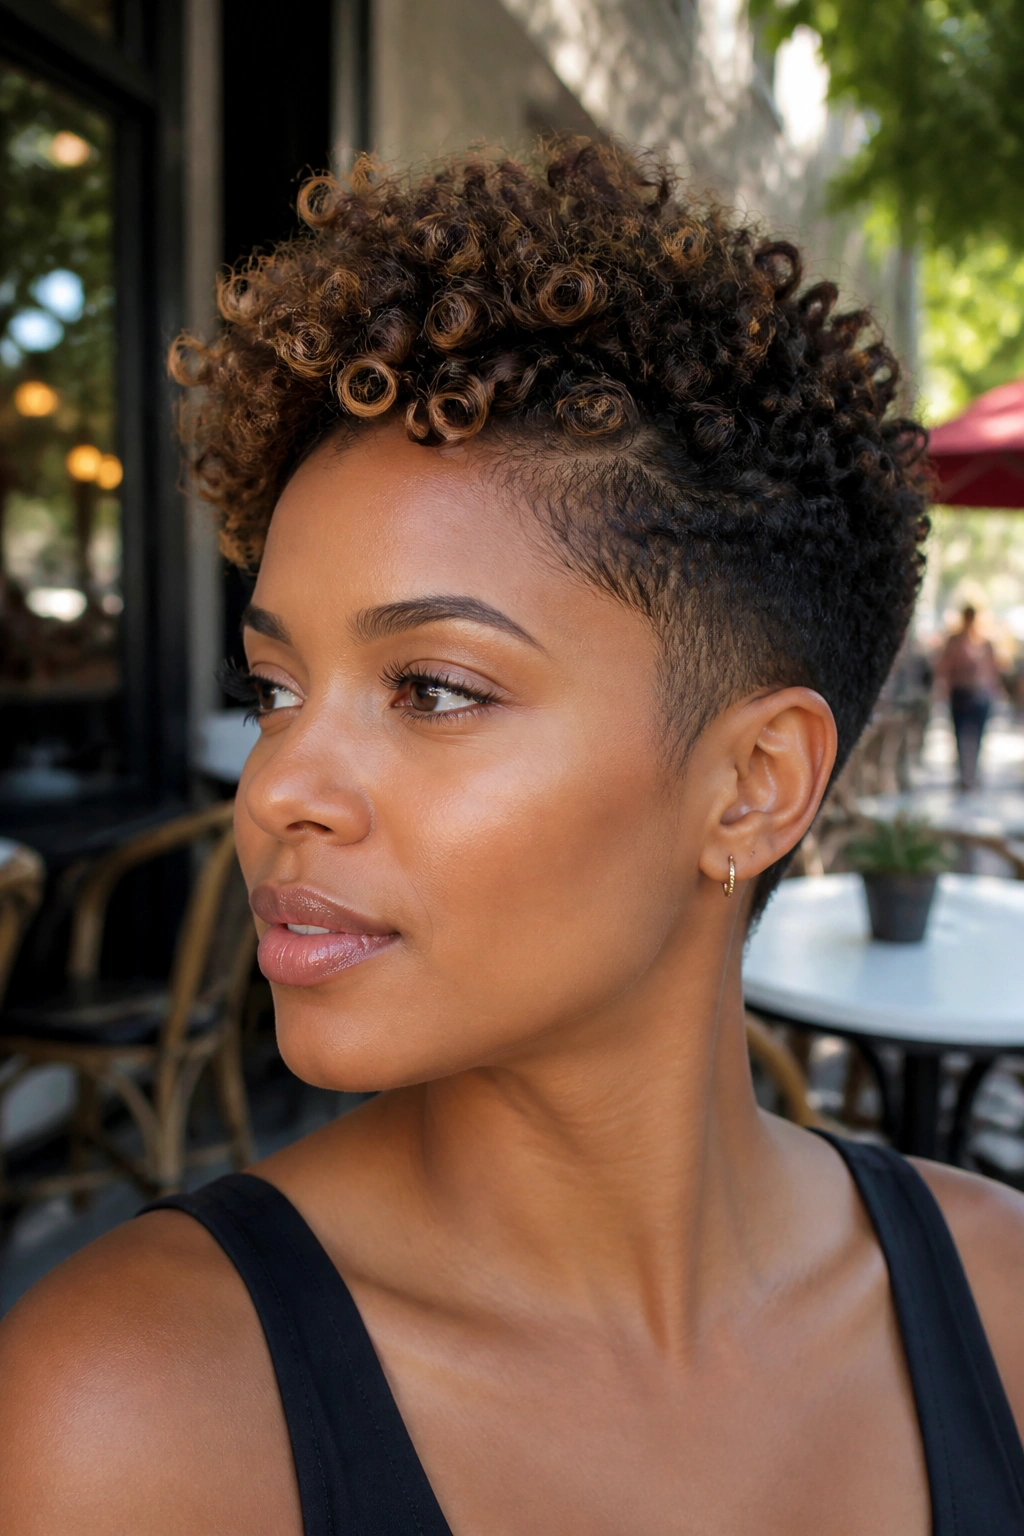
Why does a tapered side make such a difference? Because curly hair likes space where it needs volume and order where it doesn’t. A taper removes bulk around the ears and neckline, which keeps the whole cut from puffing out into a triangle.
What the Taper Does
A low taper at the temples and nape gives the top curls room to rise. That matters more with thick curls, where the lower layers can swell and make the head look wider than it really is. A clean taper keeps the outline sharp while the curls stay soft on top.
How to Ask for It
- Keep the top long enough to curl, usually 3 to 4 inches for looser spirals.
- Ask for the sides to taper gradually, not buzzed to the skin unless you want a harder edge.
- Leave some softness around the temple if your curls spring up a lot when dry.
- Use a diffuser on low heat and stop when the hair is about 80 percent dry.
This cut has a little swagger without trying too hard. It works best if you like a crisp shape and do not want to spend ten minutes fluffing the sides every morning. Thick hair especially benefits here.
3. Side-Swept Curly Pixie That Frames the Eyes
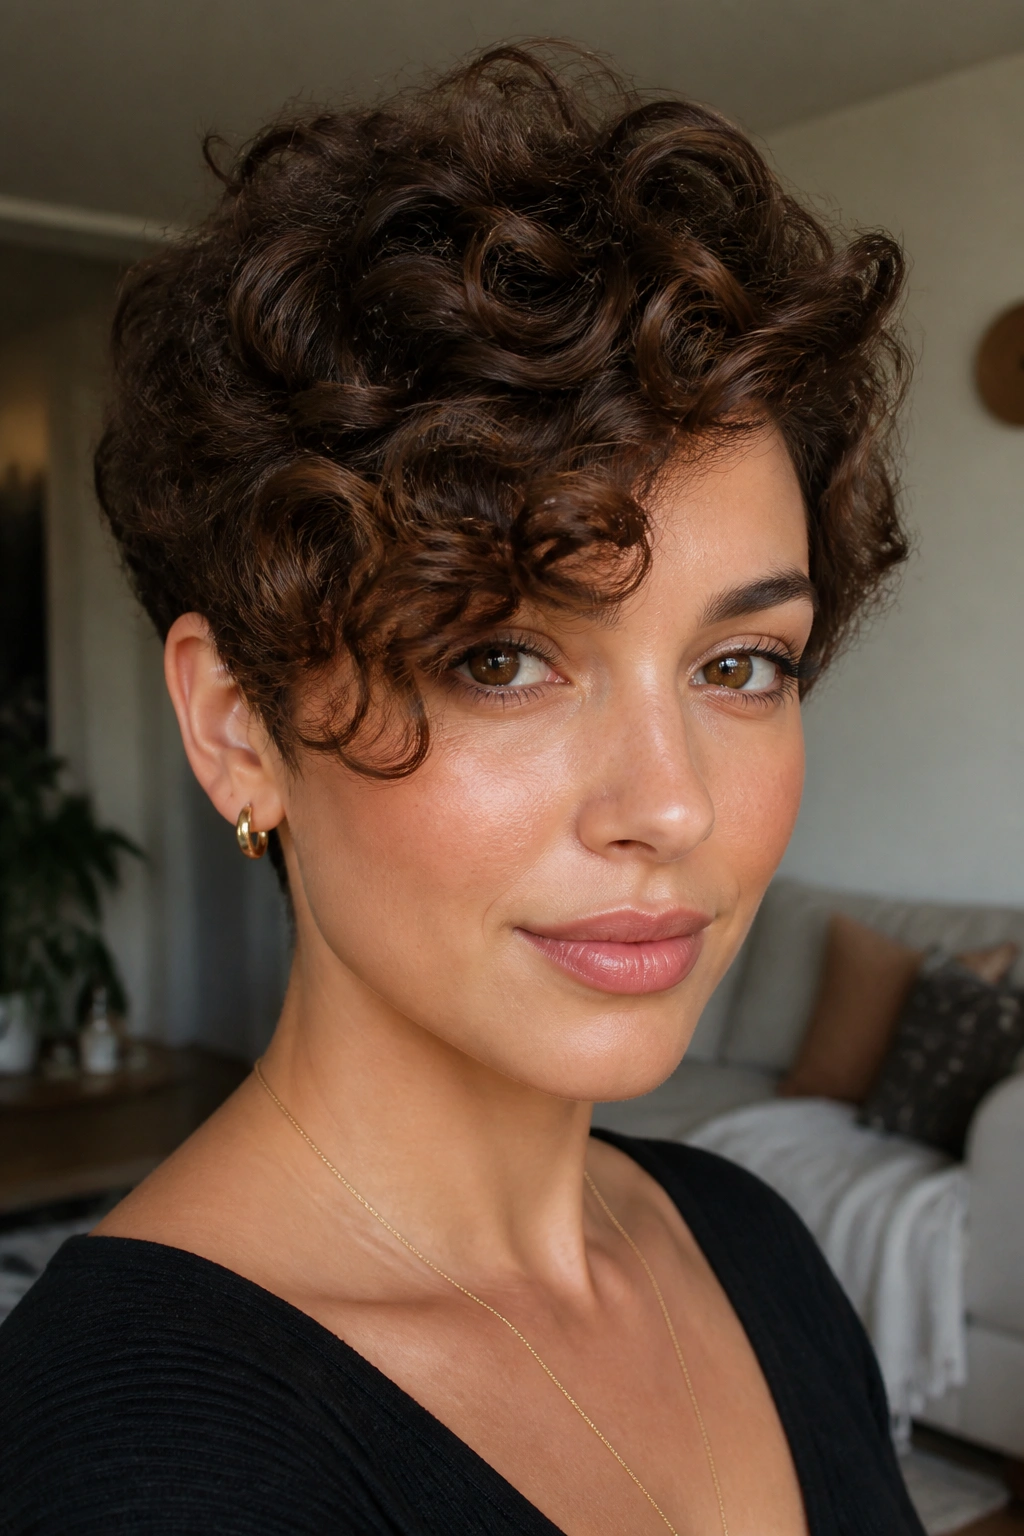
Picture a short curl cut that falls a little heavier on one side, lands across one brow, and gives the eyes a frame without dragging the whole style down. That is the appeal of the side-swept pixie. It feels easy, but the shape is doing a lot of work.
A side sweep can rescue a cowlick, soften a strong forehead, or shift attention away from a wide temple area. It also helps if your curls don’t behave evenly from left to right. Instead of fighting that difference, the haircut uses it.
- Best for people whose curls clump better on one side.
- Great if you want a little movement around the face.
- Works well with a side part that starts just off center, not far over.
- Looks strongest when the front pieces are slightly longer than the crown.
Use a small amount of curl cream at the front, then twist the fringe lightly with your fingers while it dries. Don’t brush it out. That’s how the shape turns fuzzy in ten minutes. This one is charming because it looks like you didn’t fuss, even though the cut is doing exactly what it should.
4. Long-Crown Curly Pixie with a Close Back
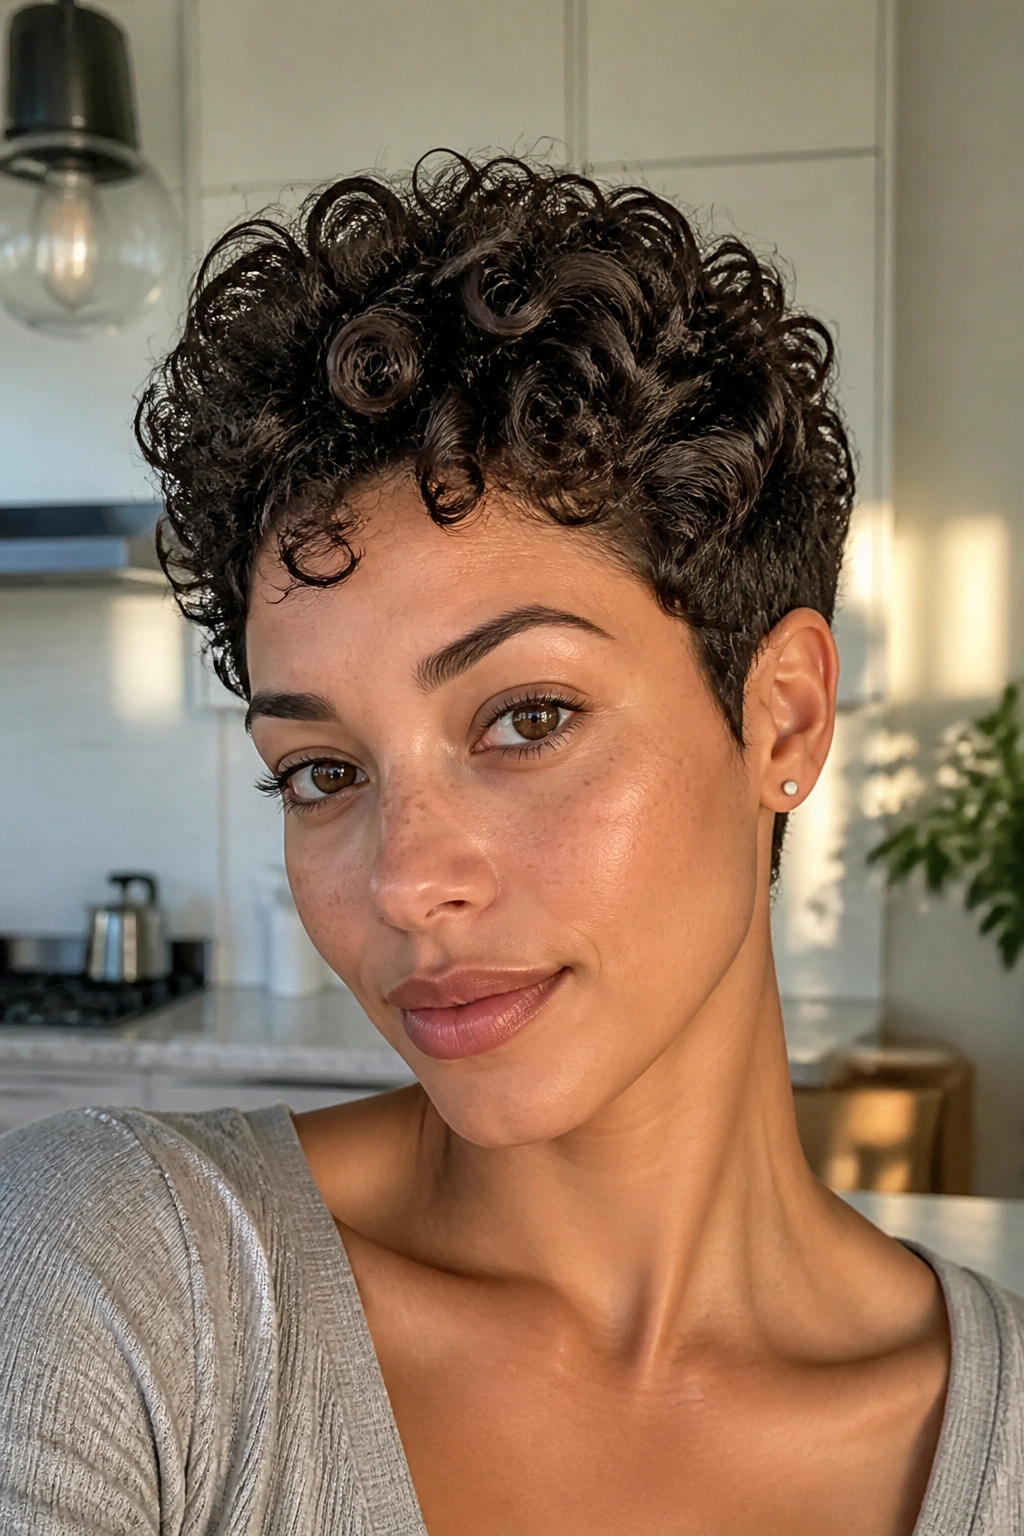
A longer crown changes everything. Seriously. If the back and sides are kept close while the top stays a little taller, the haircut suddenly gets lift, drama, and a cleaner neck line all at once.
This shape works because curls need somewhere to stack. If the crown is cut too short, the whole style can sit flat and round in the wrong way. Leave the crown a touch longer—think 4 inches or a little more on loose curls, less if your pattern is tight—and let the top layer fall forward or upward depending on how the curls spring.
I like this version for people with flatter roots or a narrow face. The extra height at the top adds presence, but the close back keeps it from feeling bulky. It also gives you more room to play with a side part, a bit of fringe, or a tousled finish.
A light mousse at the roots helps the lift stay in place. If you use gel, keep it away from the back unless you want the whole style to look slicked down. That is a different mood entirely.
5. Micro-Fringe Curly Pixie with a Sharp Little Bang
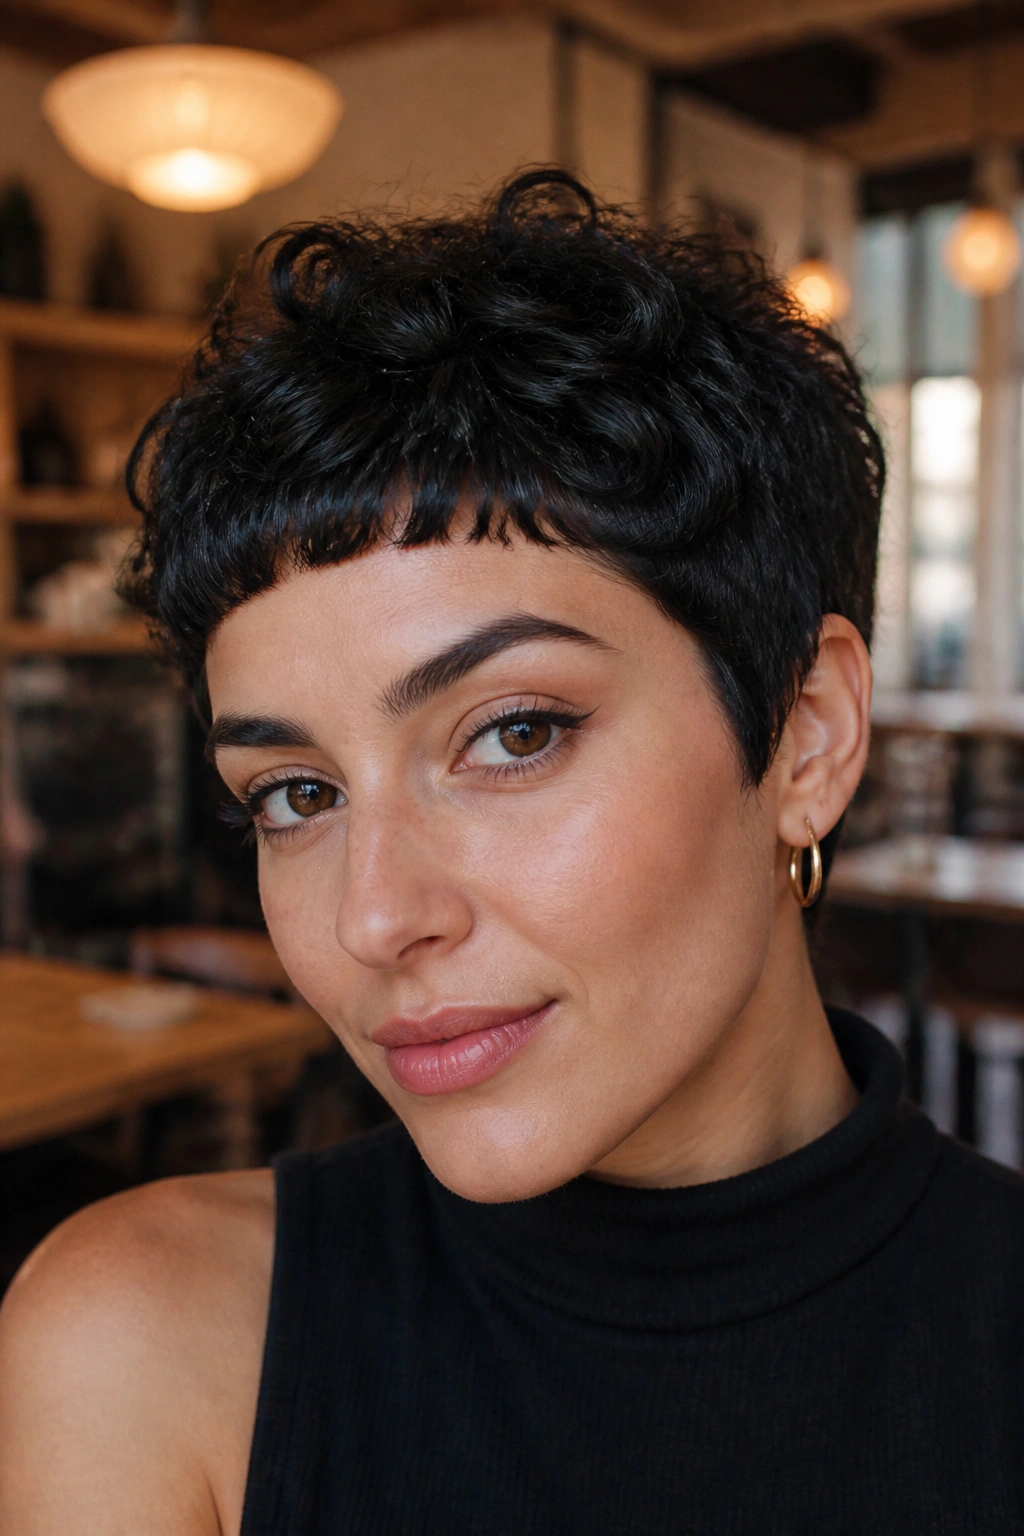
The micro-fringe pixie is not shy, and that’s the charm. A short curl fringe that sits above the brows changes the whole face shape in one move. It also lets the curls on top stay lively without hanging too far into the eyes.
Why It Works
A tiny fringe opens the face while still giving you texture right at the front. On fine curls, it can make the haircut feel fuller. On tighter curls, it creates a playful edge that looks better with a bit of definition than with a lot of brushing around.
Quick Notes
- Keep the fringe soft, not blunt like a straight-across line.
- Ask for point-cut ends so the curl can land naturally.
- Works well if your hairline is straight or slightly rounded.
- Needs a trim more often than a longer pixie because short fringe grows into the eyes fast.
Use a pea-sized amount of curl cream, then separate the fringe with the tip of a comb or your fingers while it dries. If you like a neat finish, a touch of gel at the ends keeps the curls from frizzing apart. If you like a messier finish, skip the gel and let the fringe spring on its own.
This style is a little cheeky. That’s why people either love it or ignore it completely.
6. Shaved-Temple Curly Pixie for Strong Contrast
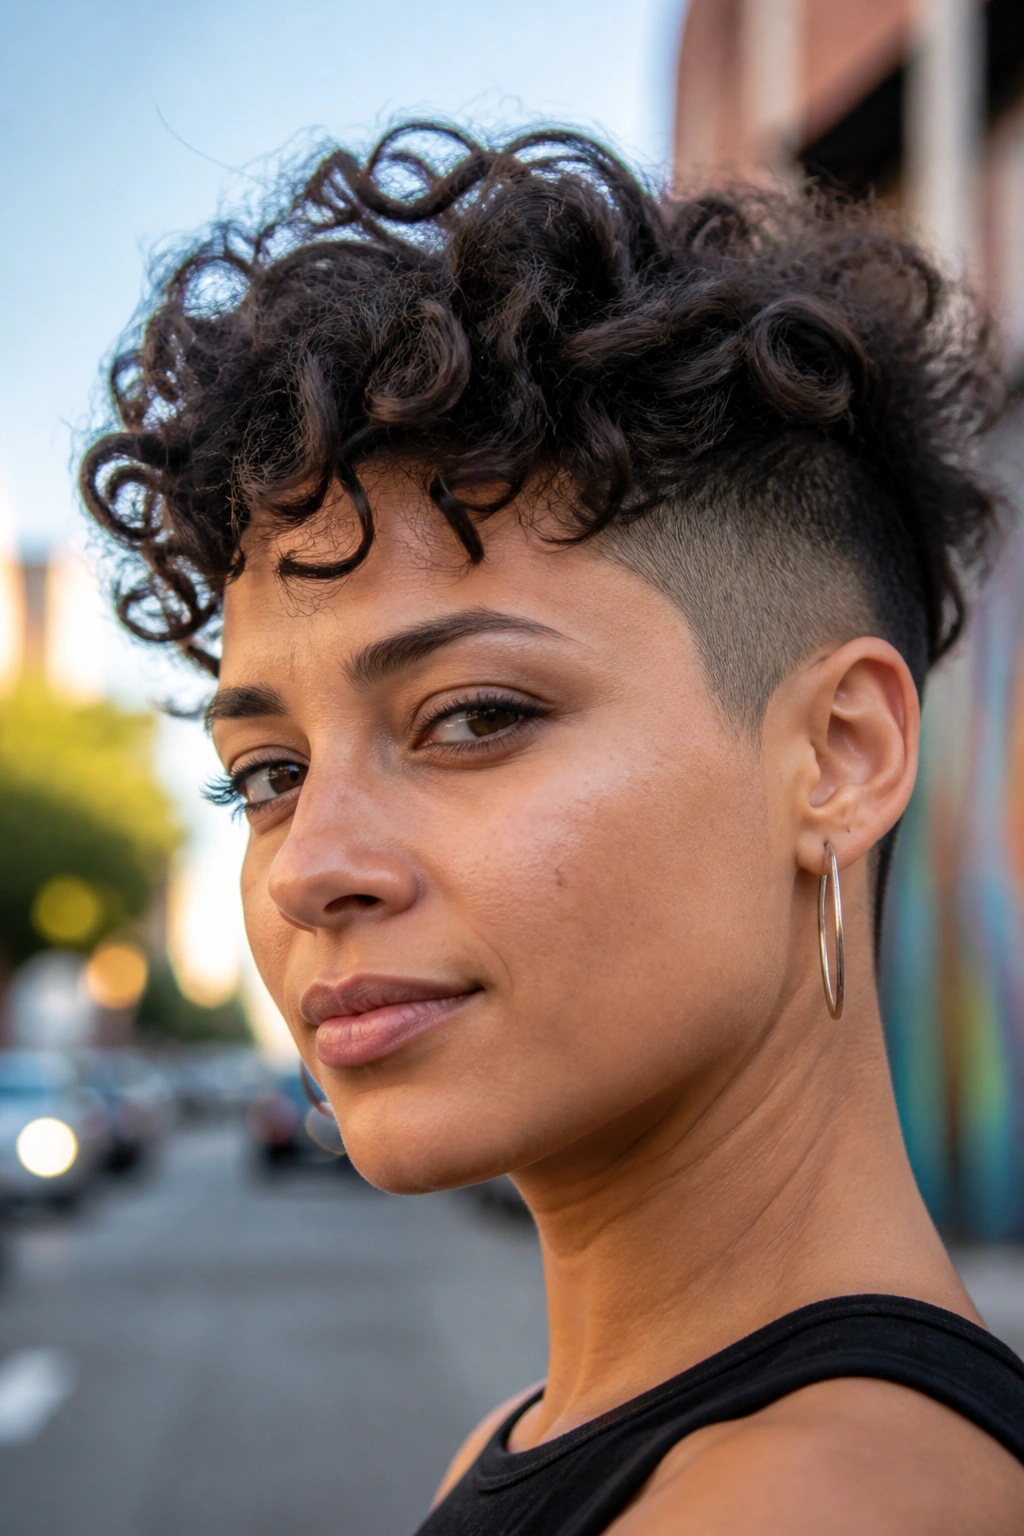
A shaved temple changes the silhouette immediately. Compared with an all-over short pixie, this version has edge, contrast, and a clean line that makes the curls on top look even fuller.
That contrast matters when your curls are thick or wide. Removing a narrow strip at the temple takes weight off the sides without sacrificing the curl pattern on top. The result is sharper, and the face gets more room. It also grows out with more personality than a plain taper, which is nice if you hate haircuts that disappear into the same shape after three weeks.
This style is especially good for dense 3B to 4A hair. The top can stay soft and springy while the side stays close enough to keep the outline from ballooning. If you want, the shaved section can be a thin strip or a wider panel. Wider gives more drama. Thin gives more flexibility.
A dab of edge control near the shaved side keeps the line clean. Just don’t overdo it. Too much product near the scalp makes the short side look greasy, and that ruins the whole point.
7. Finger-Coiled Pixie for Tight, Defined Texture
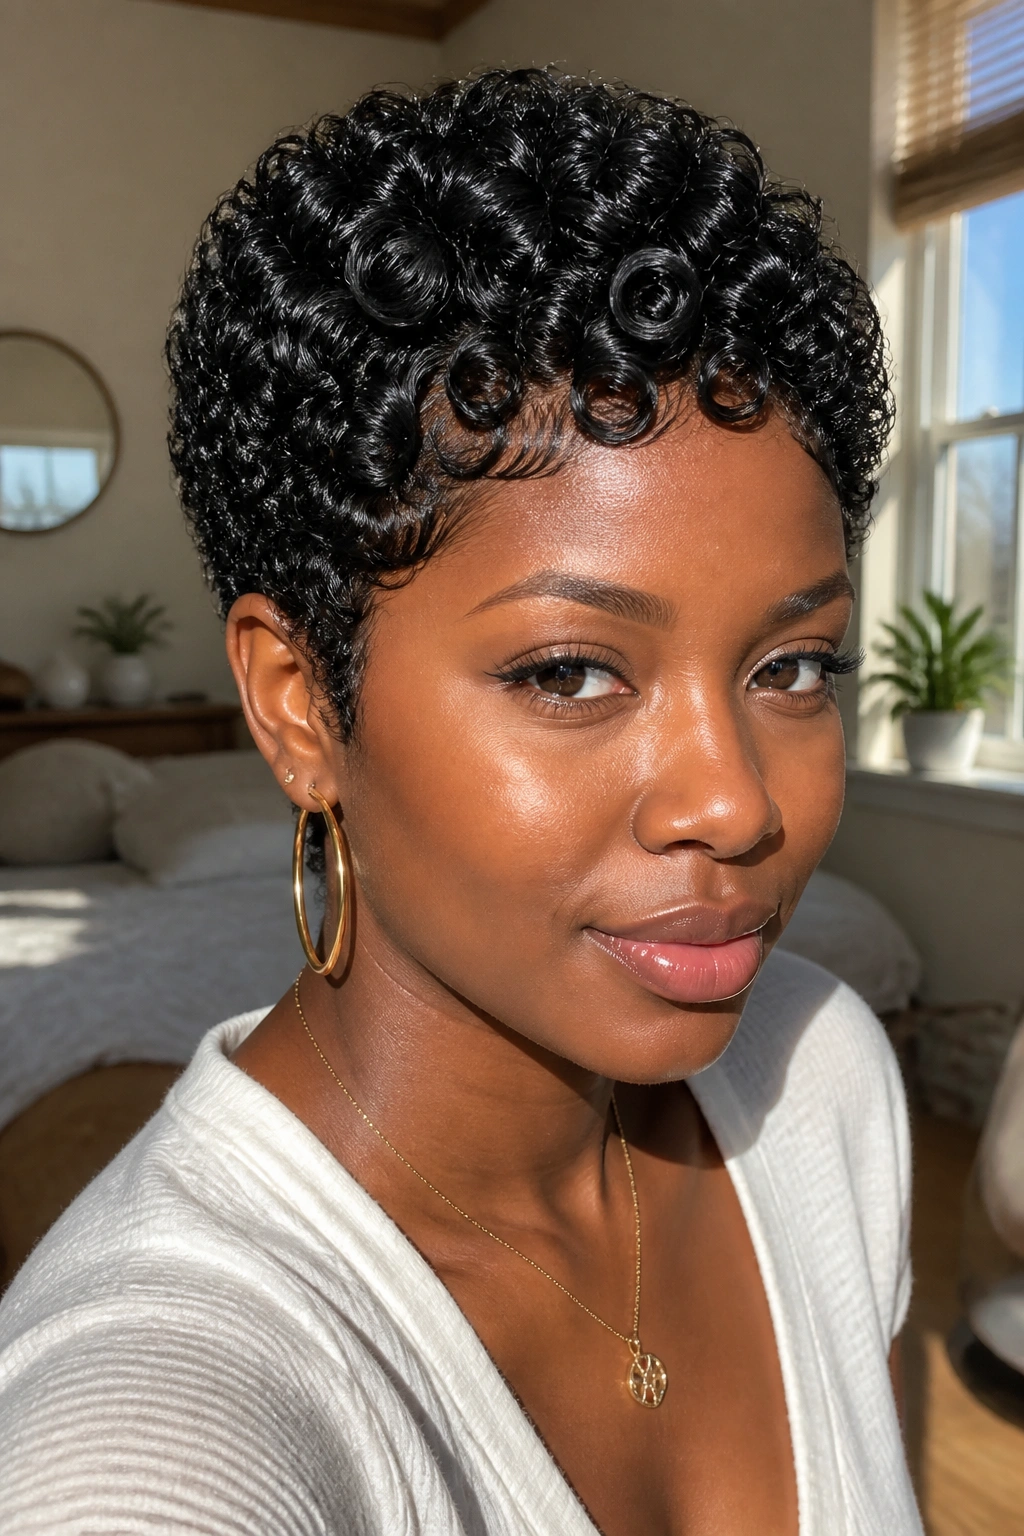
A finger-coiled pixie has a very specific feel: neat, sculpted, and full of little spirals that look placed on purpose. It’s a smart choice for coily textures that look better defined than fluffy. A wash-and-go can work, sure, but finger coils give you control where the curl pattern wants to spread.
I like this style on 4A to 4C hair because the coils create structure even when the cut is short. You don’t need much length. You do need patience. Small sections, a good slip product, and a steady hand matter more than speed.
Start with damp hair and work in a curl cream or strong-hold gel. Wrap each section around your finger until it forms a coil, then leave it alone. That’s the hard part. Touching them while they dry is how you get frizz before lunch.
- Best on hair that separates into small, clear sections.
- Works well with a close taper at the sides.
- Gives the top a sculpted, polished look.
- Lasts several days if you sleep in a satin bonnet.
This is one of those styles that looks simple from a distance and slightly obsessive up close. I mean that as a compliment.
8. Tousled Layered Curly Pixie with Movement
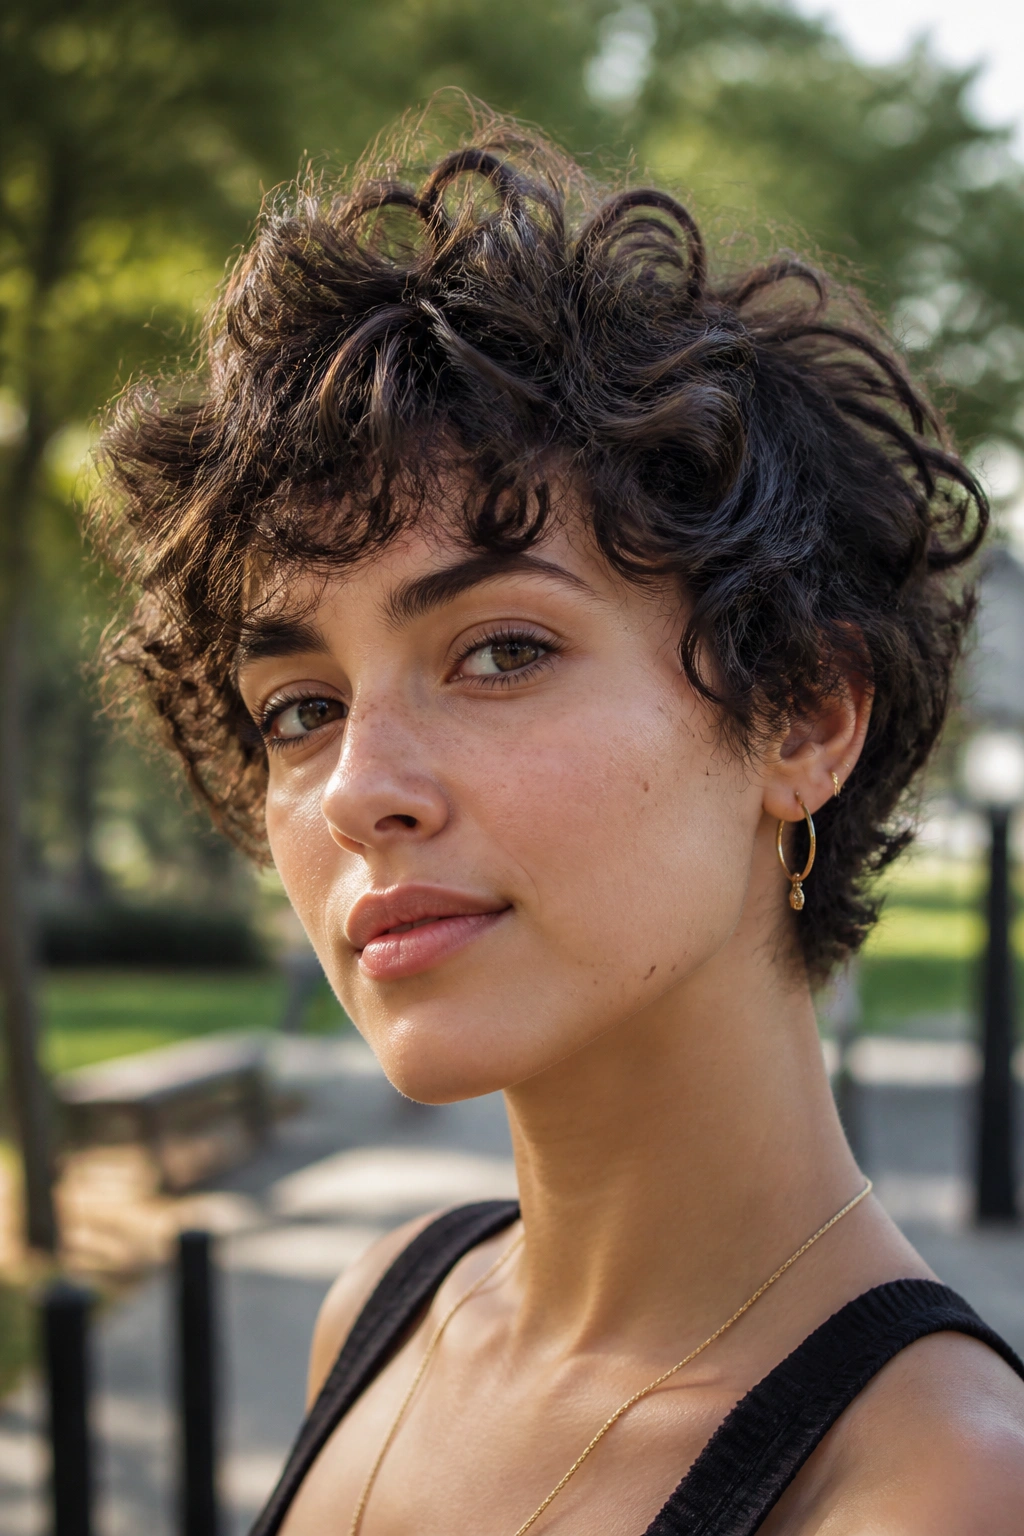
A layered pixie is what you choose when you don’t want the haircut to behave too neatly. The layers remove the heavy shelf that curly hair can create, and the whole style ends up lighter, looser, and a little wild in a good way.
Some curls need freedom more than structure. Mixed curl patterns are like that. One section may bend tighter, another may fall softer, and a blunt cut tends to exaggerate the mismatch. Layers help the curls land at different heights, which makes the whole head feel more natural.
The trick is not to over-layer the top. Too many short pieces can make the crown spiky and thin. A better cut keeps the crown longer, softens the interior, and lets the ends feather out. Then you use a diffuser until the hair is almost dry, scrunch it once, and stop touching it.
A mousse works better than a heavy cream here. Cream can weigh down the lighter pieces and make the texture look soggy by noon. This cut is ideal if you want a lived-in shape that still looks like a haircut, not a missed appointment.
9. Deep Side-Part Curly Pixie with a Swingy Front
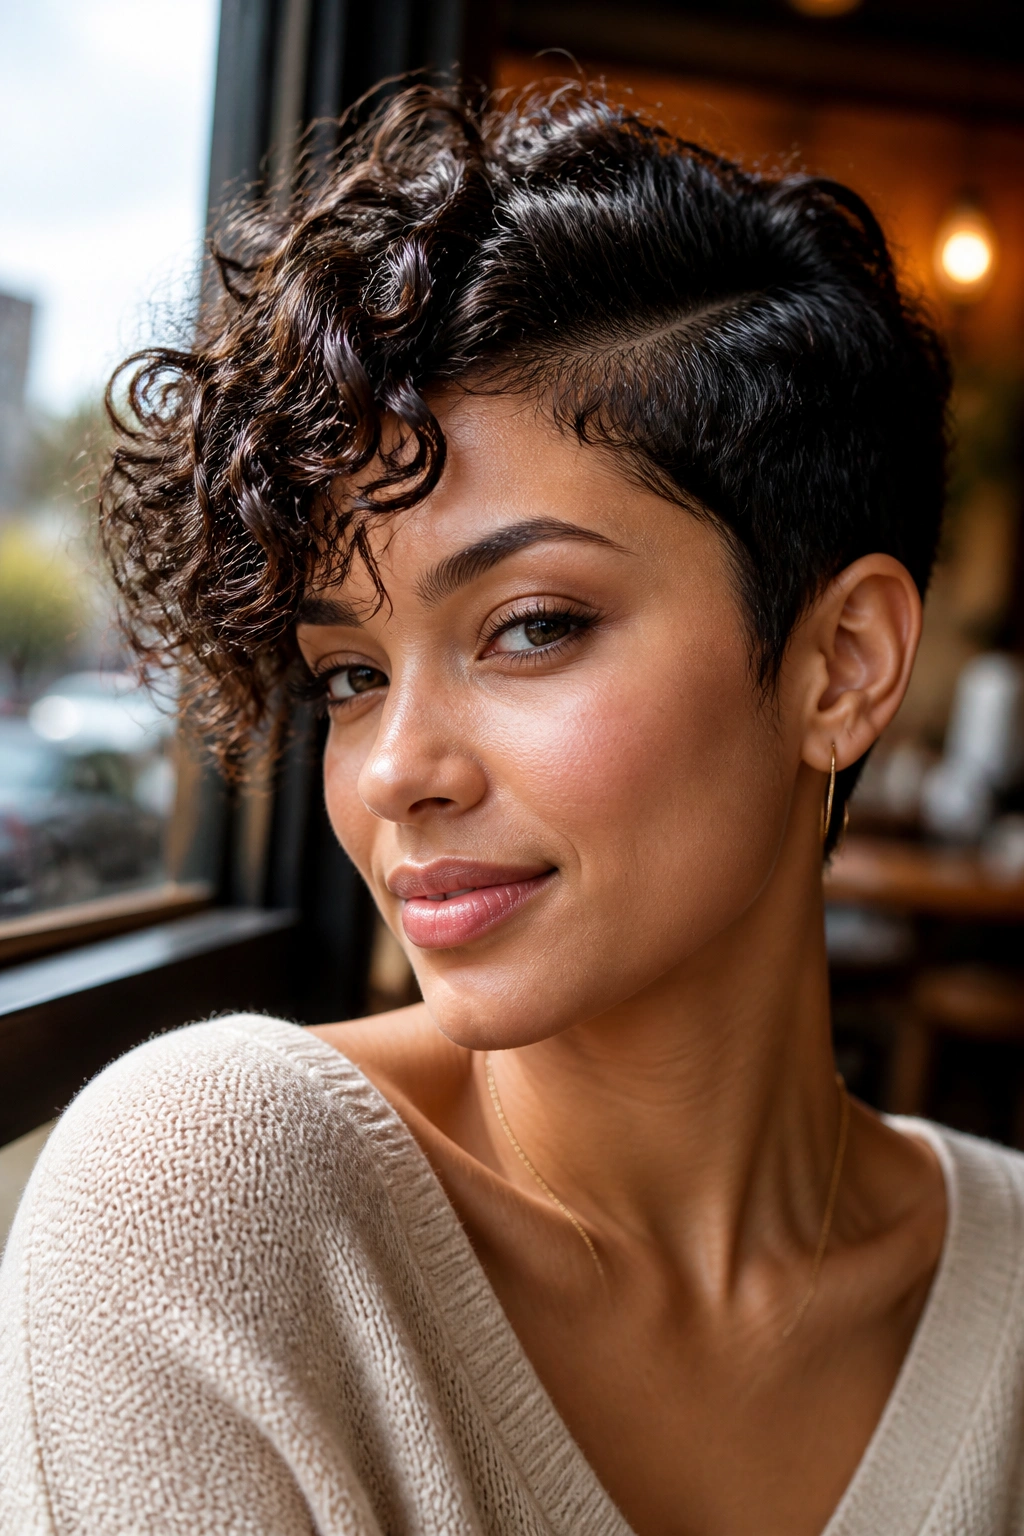
Can a side part change a whole cut? Absolutely. A deep part shifts weight, creates instant height, and makes a short curl style feel less symmetrical and a little more deliberate.
How to Style the Part
Start the part just above the arch of the eyebrow, then guide the front curls in the direction they want to fall. Do not force a hard line if your curls naturally break somewhere else. A soft part looks better on curly hair anyway because the shape reads as relaxed rather than carved.
This version is handy if one side of your hair is denser or if a cowlick keeps pushing the front up. The deep part uses that quirk instead of fighting it. It also flatters rounder faces because the diagonal line draws the eye up and across.
The top needs a bit more length than a very short pixie, usually enough for the front to drape instead of stand straight up. Use a lightweight gel at the root, then fluff the crown with your fingers once it dries. A comb can sharpen the part, but don’t overthink it. Curly hair looks better when the part is there, not perfect.
10. Soft Undercut Curly Pixie for Thick Hair
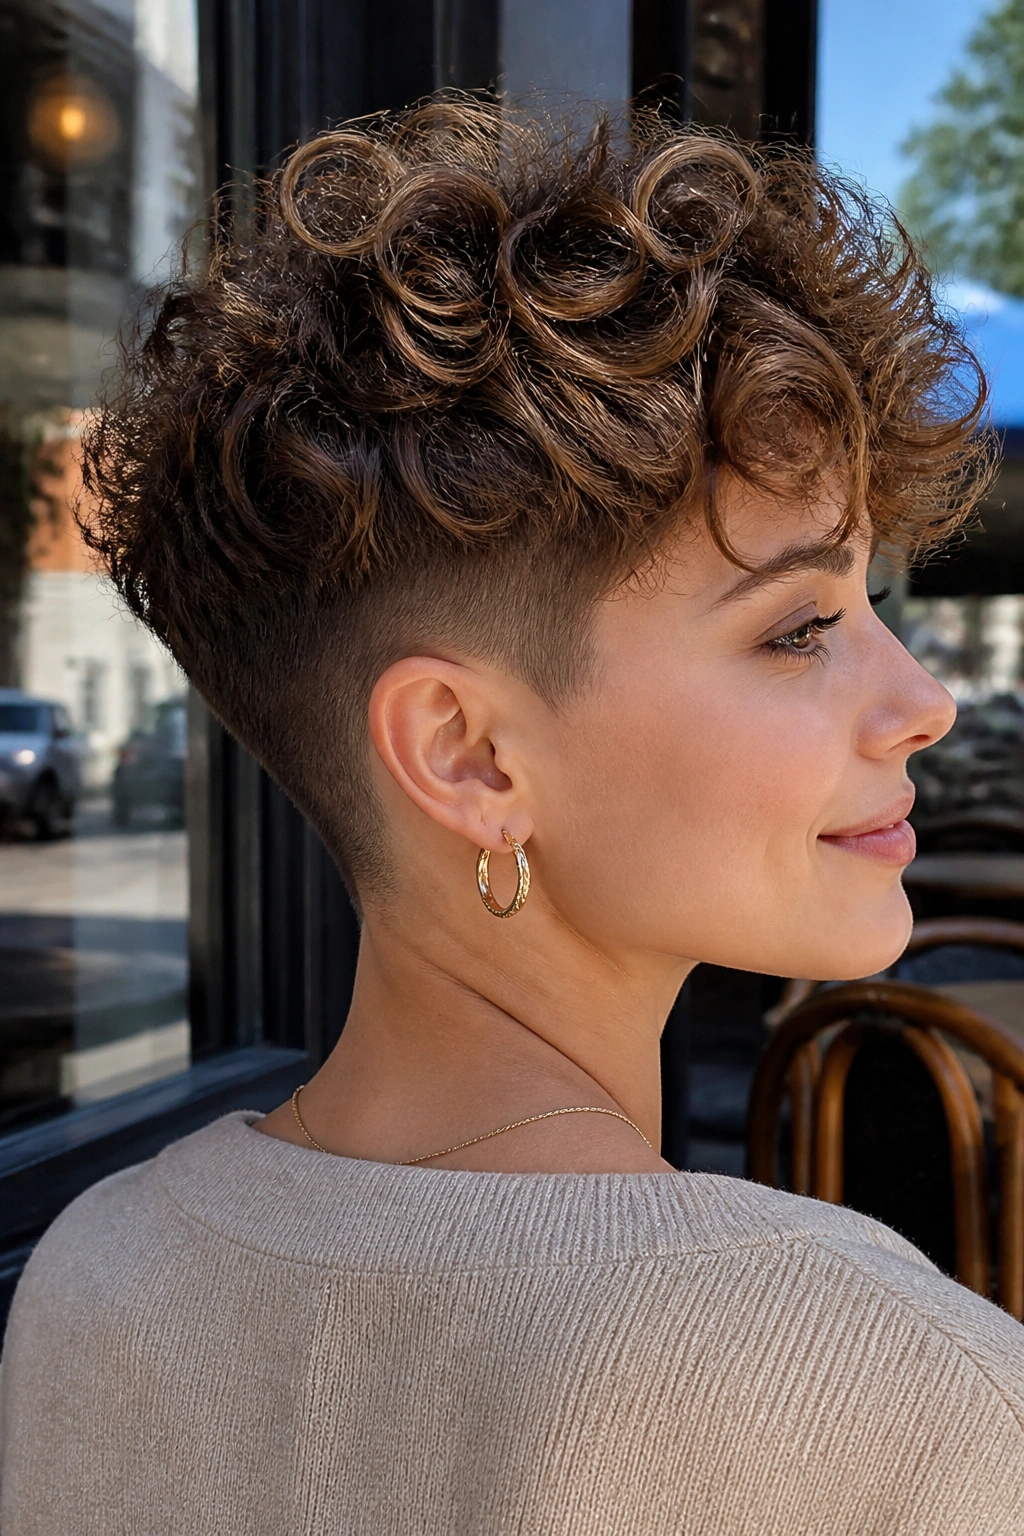
The soft undercut is the practical one in the group. Thick curls can get bulky fast, and an undercut clears out the hidden mass underneath so the top can sit properly. The key word here is soft. You are not building a hard fade unless that is your thing.
What Makes It Different
Unlike a shaved-side style, the undercut hides under the longer top layers. From the front, you still get a full curly pixie. From the side, the haircut feels much lighter and easier to shape. It’s one of the best fixes for hair that expands around the ears and nape.
Who It Suits
- People with dense 3B to 4A curls.
- Anyone who hates the triangle effect.
- Short cuts that collapse at the crown and puff out underneath.
- Hair that feels heavy even after thinning.
Ask for the underlayer to be removed in a way that follows your head shape. If the cut is too high, the top can look disconnected. Too low, and you do not gain enough control. A light curl gel gives the top definition while the undercut keeps the silhouette tidy. This one is less about drama and more about making thick curls behave.
11. Pompadour Curly Pixie with Lift at the Front
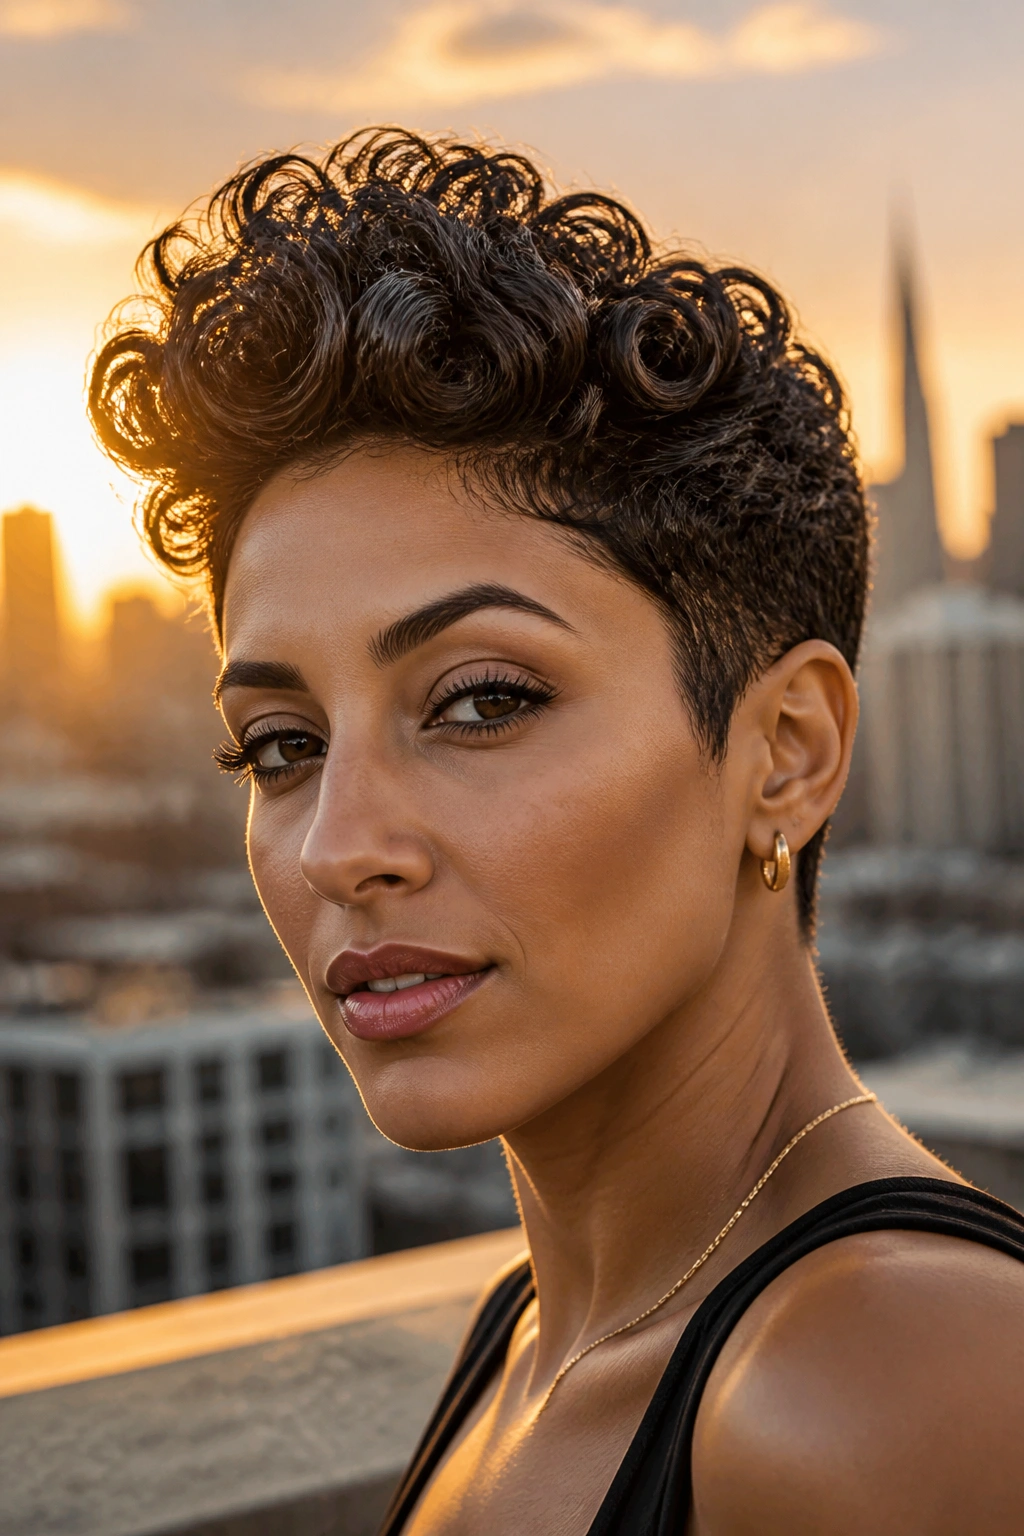
A curly pompadour pixie has attitude, and I mean that in the useful sense. It puts the lift at the front, keeps the sides tight, and turns the curl texture into height instead of spread.
This works because curls naturally stack if you guide them upward instead of outward. The front section gets the most length, the back stays shorter, and the result is a shape that feels lifted off the face. If your curls are 2C to 3A, this can be an especially nice way to create volume without giving up the clean shape of a pixie.
Use a root-lifting mousse or foam near the front and a diffuser aimed upward. When the hair is about three-quarters dry, stop pushing it around. Let the front set. If you keep rearranging it, the shape collapses and you end up with frizz where the height should be.
This style suits people who like a little edge and do not mind a haircut that asks for some styling time. Not a huge amount. Just enough to make the front look like it was meant to be there. Because it was.
12. Tapered-Nape Curly Pixie That Sits Cleanly on the Neck
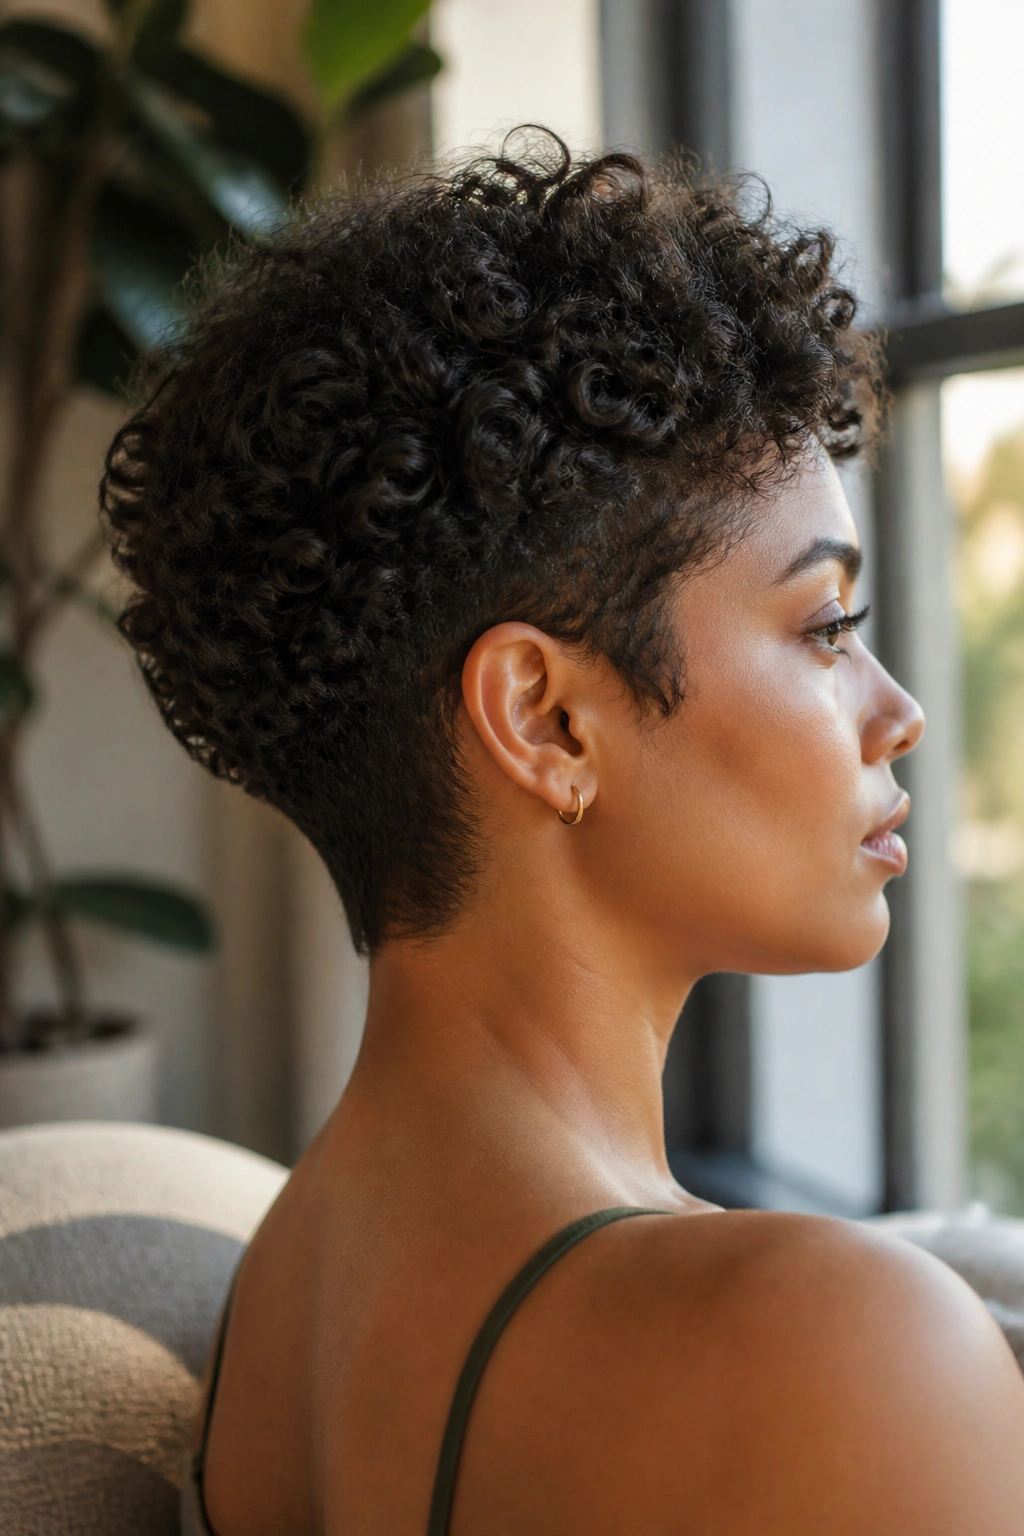
A tapered nape is one of those details people barely notice until it’s missing. Then the haircut looks heavy at the back and awkward around the neckline. A clean taper fixes that. It makes the pixie sit closer to the head and gives the curls on top more visual lift.
Compared with a blunt back, this version feels lighter and more finished. It’s a smart option if your curls grow fast at the nape or if you hate that fuzzy neck halo some short cuts get after a few weeks. A tapered nape also keeps collars from snagging the hair quite as much, which is one of those tiny practical things that matters more than it sounds.
Keep the top free to curl, and let the taper be gradual so the transition looks soft. If the back is cut too short too fast, the style can look severed instead of shaped. A little length in the transition zone helps the cut grow out more gracefully, too.
This is the kind of pixie that reads neat without being severe. Clean. Easy to live with. Not boring.
13. Asymmetrical Curly Pixie with One Longer Side
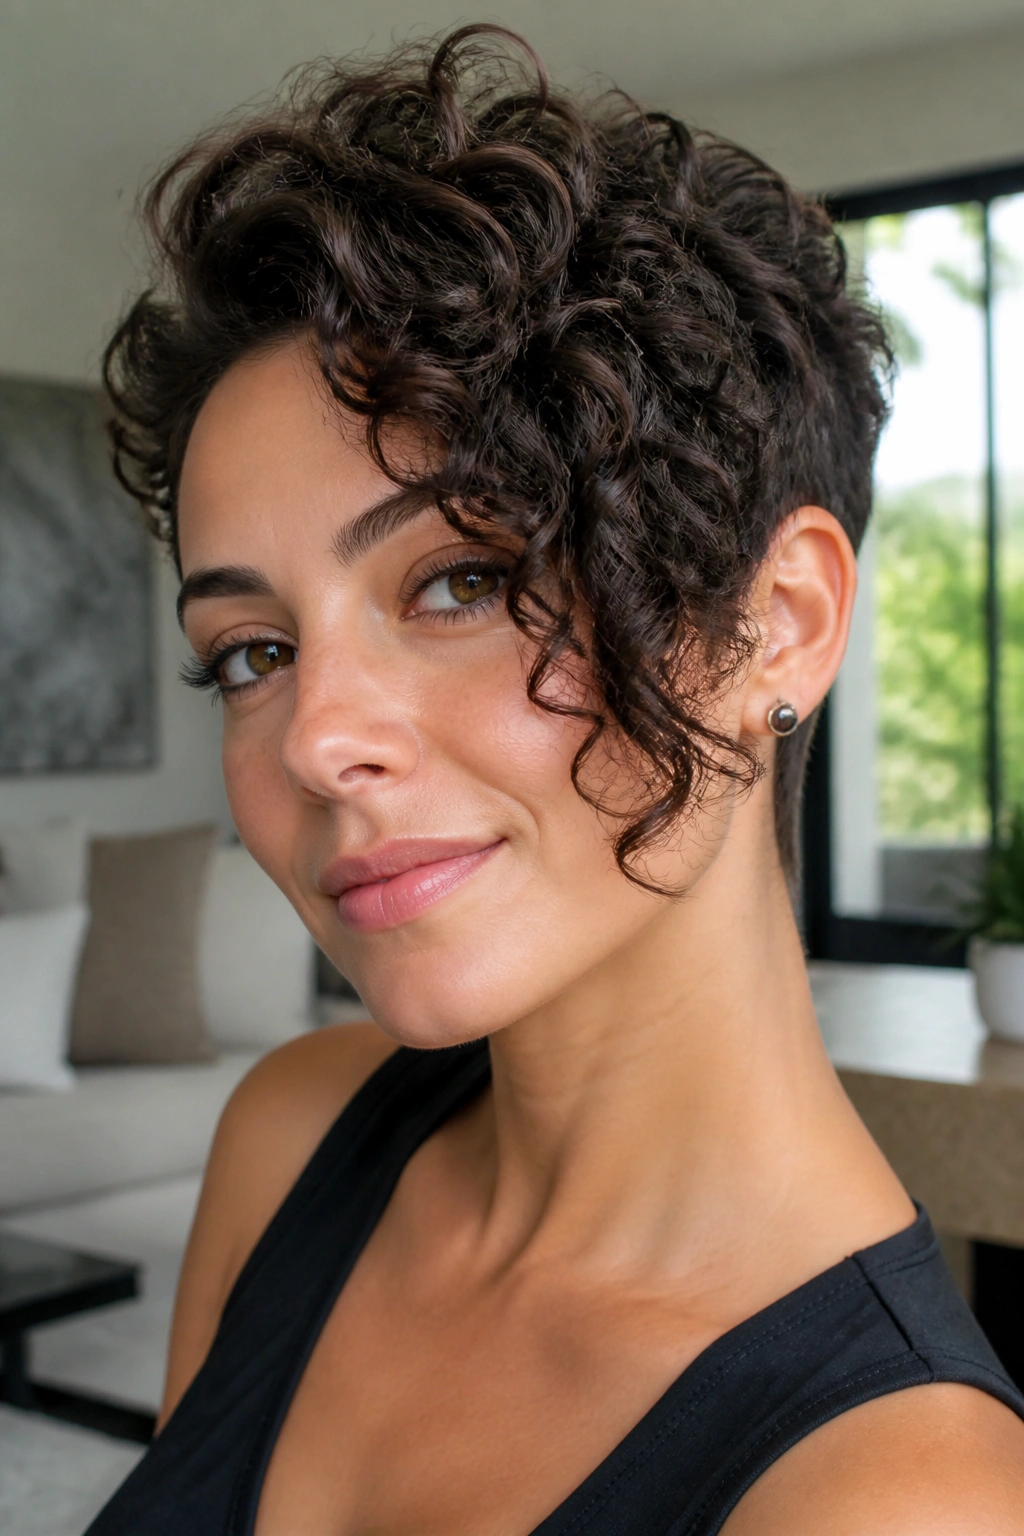
An asymmetrical pixie gives curly hair a place to misbehave on purpose. One side is left longer, the other side tighter, and the whole shape ends up with motion that a balanced cut sometimes lacks.
That difference in length can soften a strong jawline or add interest to a face that feels very even. It also works well if your curls naturally lean one way. Instead of trying to make both sides identical, the cut uses the curl’s own bias. That’s usually a better bet.
I like this style best when the longer side hits around the cheekbone or just below it, depending on how much face framing you want. The shorter side can tuck behind the ear or hug the temple. A light styling cream is enough if your curls already hold shape. If they need extra grip, use a gel on the longer side so it doesn’t droop.
There’s no need for the asymmetry to be dramatic. Even a subtle difference can make the pixie feel fresher. The main thing is that the cut should look intentional when you wear it down and still make sense when you tuck one side back.
14. Defined Ringlet Pixie for Clear Curl Separation
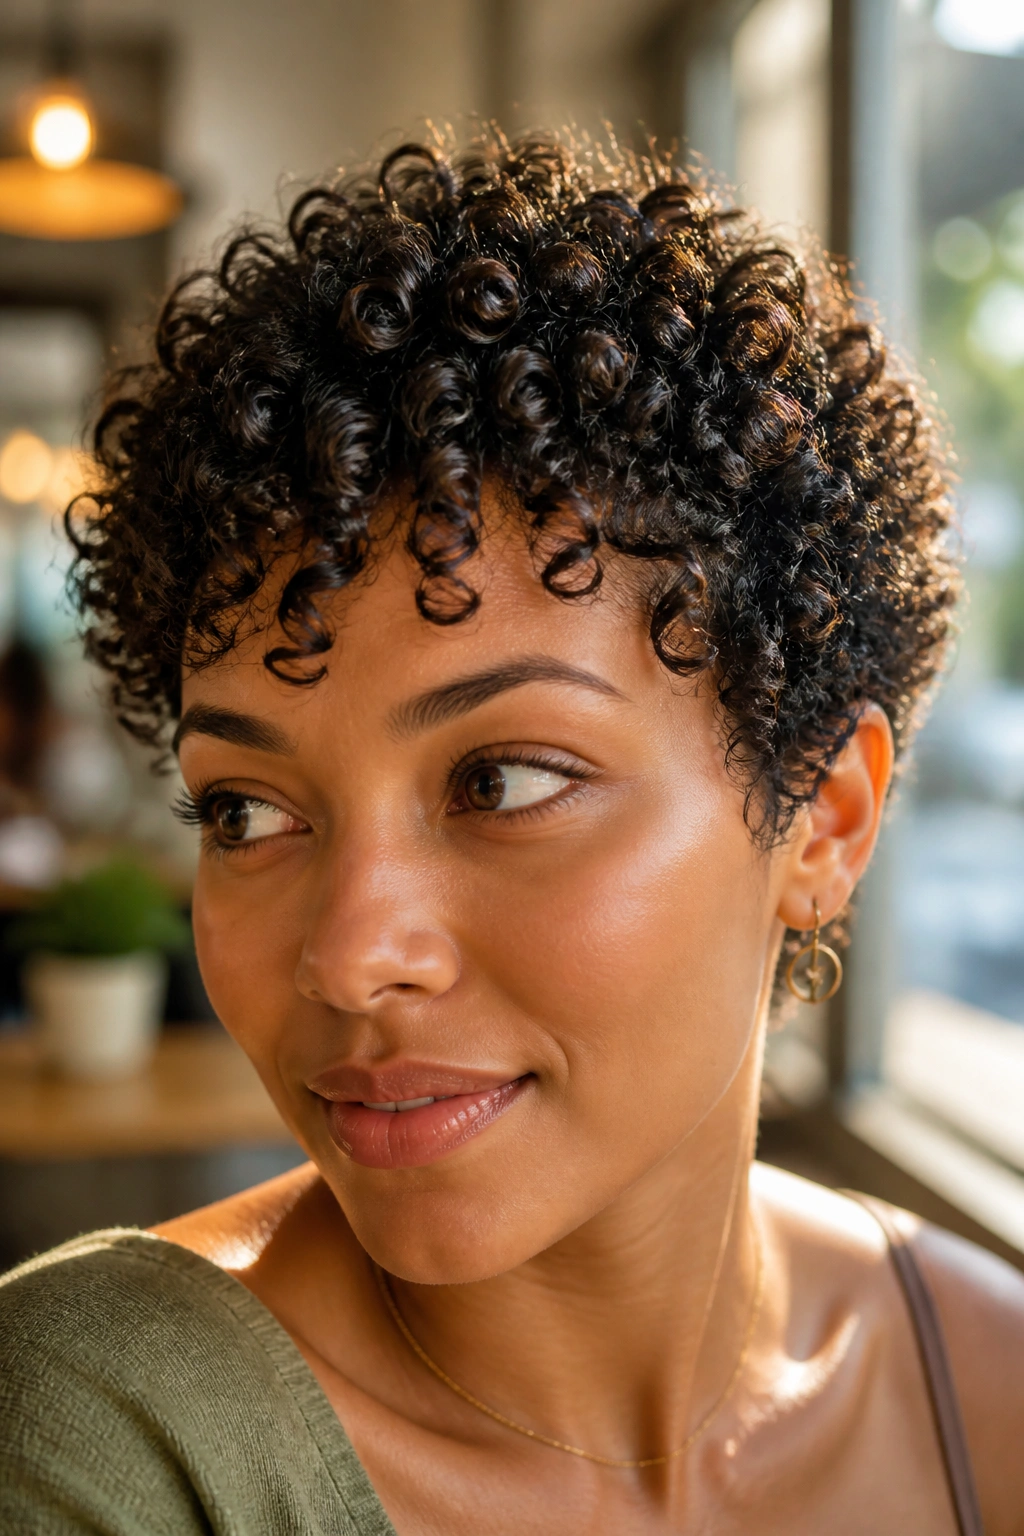
A defined ringlet pixie is for people who want each curl to show up with its own little shape. Not a cloud. Not a blur. Separate curls that sit cleanly and keep their edges.
The Products Matter Here
A cream-and-gel combo usually works better than cream alone. The cream softens, the gel holds, and the ringlets stay visible when the hair dries. If you use a brush, use it only to distribute product. Then stop. Brushing after the curl pattern has formed breaks the ringlets apart and makes the top frizzy.
How to Keep the Shape
- Apply product on soaking-wet or very damp hair.
- Section the hair into small pieces before scrunching.
- Diffuse on low heat, or air-dry if you have the time.
- Break the cast gently once the hair is dry and crisp.
This style loves curls with a clear spiral pattern, especially 3A to 3C texture. It also holds up well in a pixie because the shorter length prevents the ringlets from stretching out under their own weight. The result is neat, touchable, and a little fancy without looking stiff. That balance is harder to get than people think.
15. Fluffy Crown Curly Pixie That Builds Volume at the Top
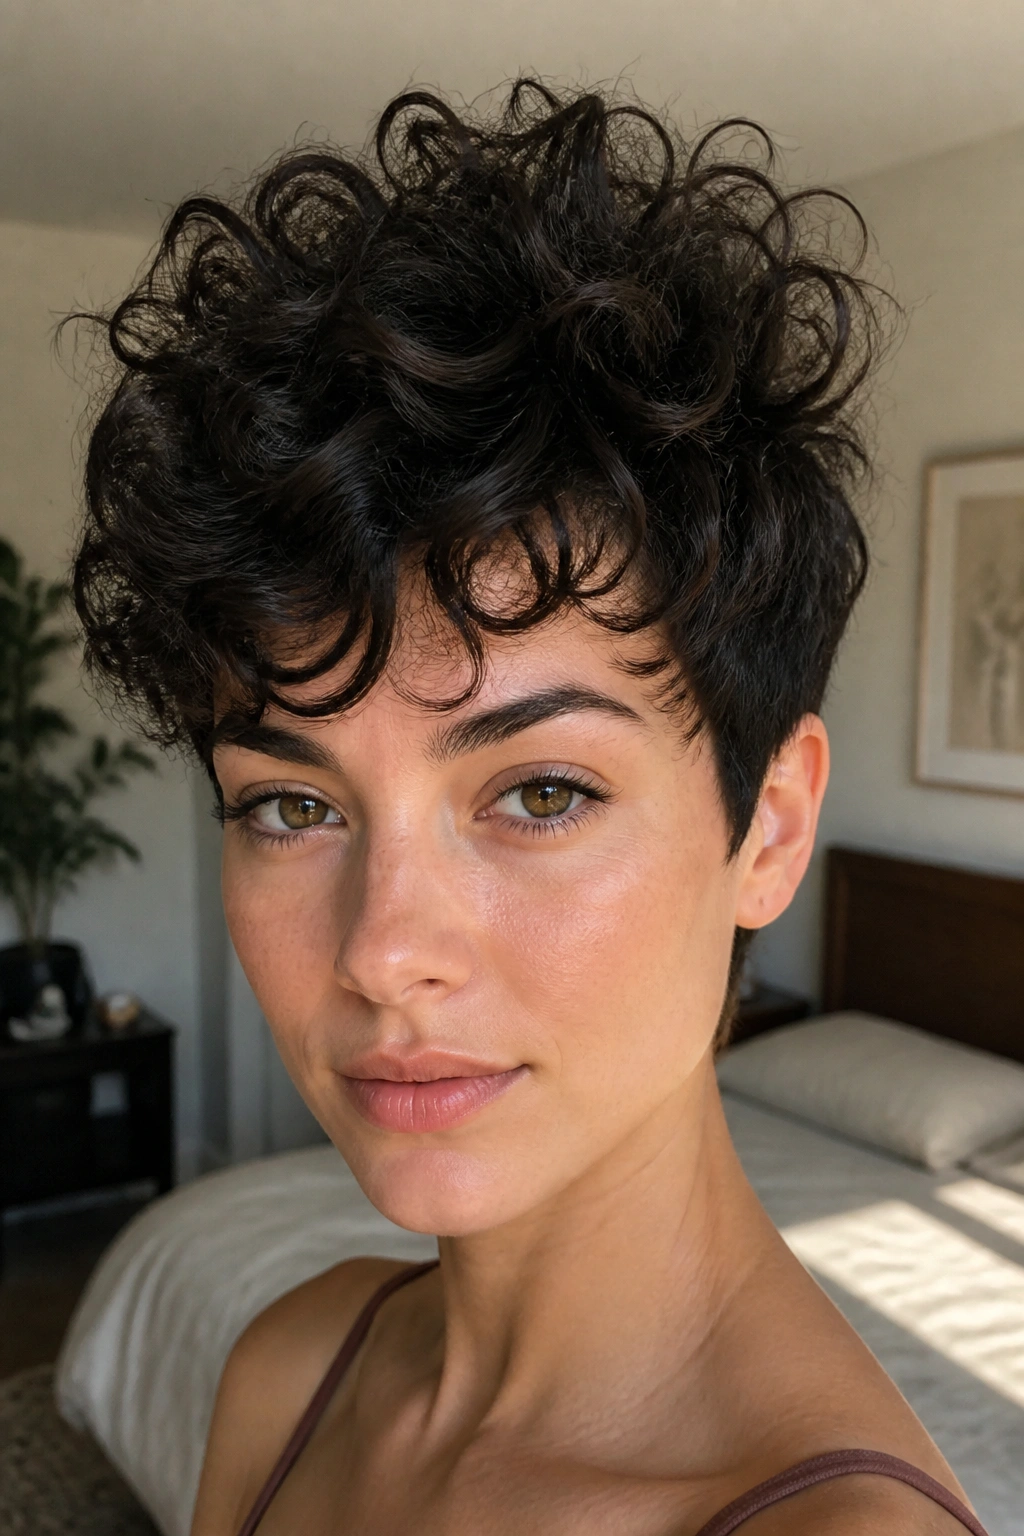
A fluffy crown pixie is a volume-first cut. The sides stay calmer, the top is given room to rise, and the crown becomes the most important part of the whole shape. If your hair is fine or your roots go flat fast, this can be a lifesaver.
The trick is to keep the top layers a bit longer and remove weight underneath. That gives the curls space to expand upward instead of out around the ears. A tiny root clip while drying can help, too, especially if your curls usually fall flat at the crown. It’s a low-tech fix, which I appreciate.
This cut is also useful if your face shape benefits from more height. Round faces, in particular, can look longer when the crown is lifted. The pixie still feels short and easy, but it has more presence than a flat crop.
Use a mousse rather than a rich cream. Heavy product makes the crown sink. If you need definition on the ends, add a touch of cream only there. The point is to keep the lift airy, not sticky. Sticky curls are miserable curls.
16. Sideburn-Heavy Curly Pixie with Soft Face Framing
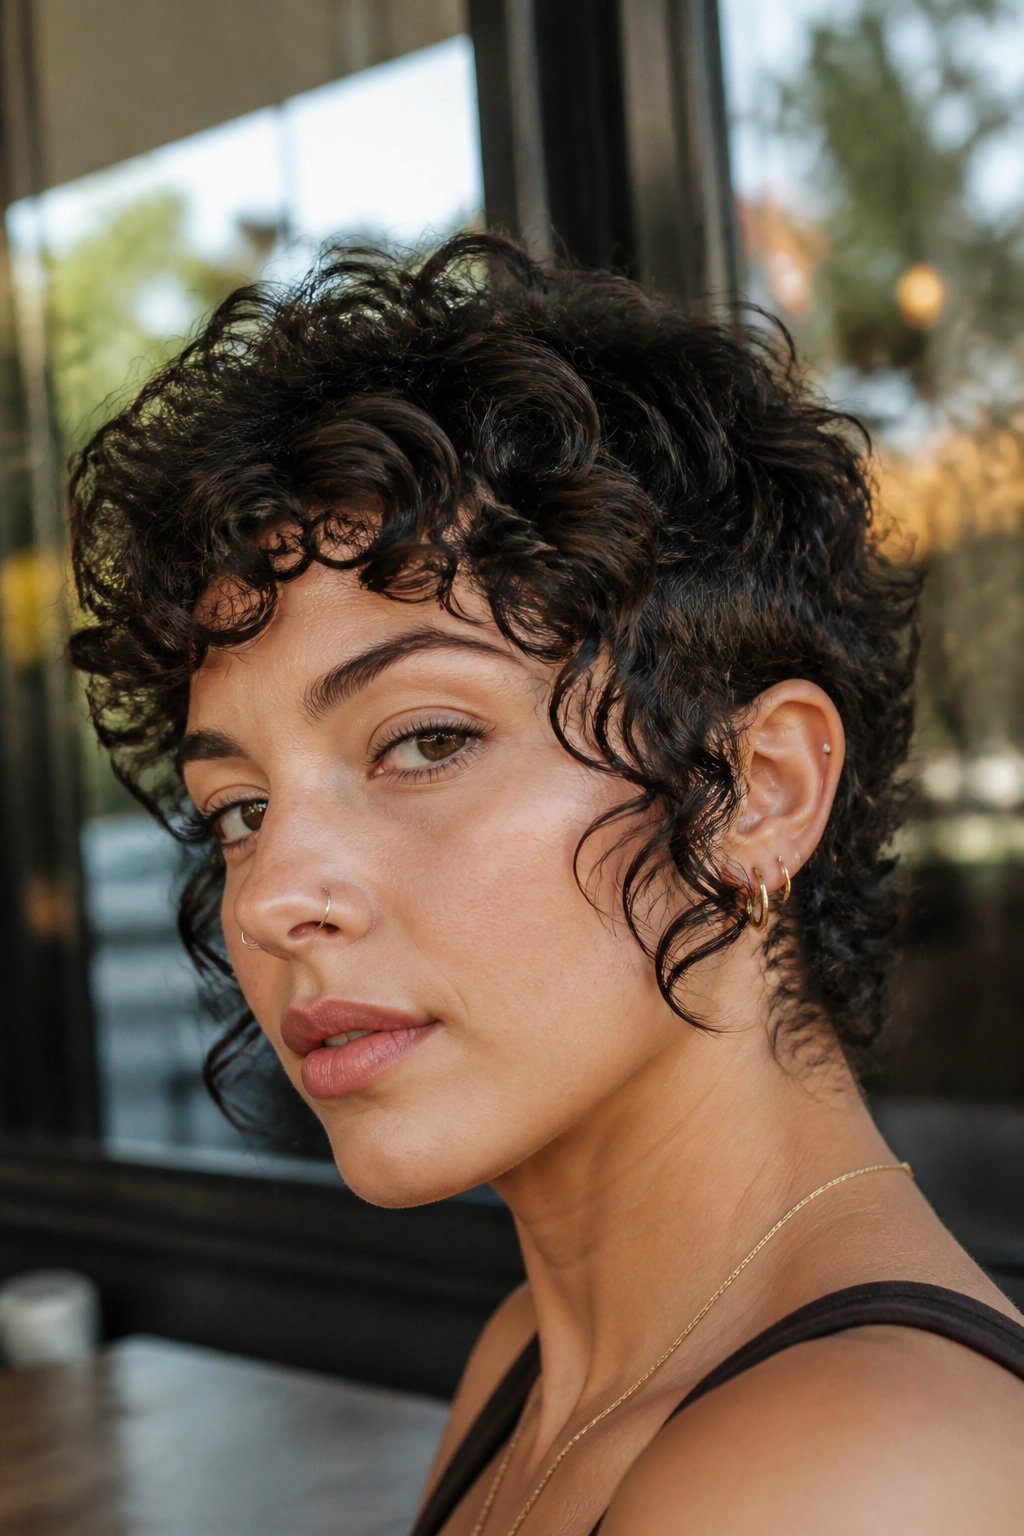
Sideburn-heavy sounds odd until you see it. Then it makes sense fast. Leaving a little more length around the sideburn area and temples creates a soft frame that can make short curls feel more finished and less abrupt.
This style works well for round or square faces because the longer side pieces narrow the face slightly. It also helps if you like the haircut to grow out in a graceful way. Sideburn pieces tend to blend into the rest of the cut better than a hard line does, which matters once the style passes the fresh-trim stage.
Small Details That Help
- Keep the sideburns piecey, not heavy.
- Ask for soft point-cut ends.
- Let a few curls fall forward near the cheekbone.
- Use a light gel only on the front pieces if they frizz first.
The rest of the pixie can stay tight or layered. The sideburn length is the part that changes the feeling of the cut most. It adds a little softness right where people look first, which is a smarter move than piling volume everywhere.
17. Pixie for Coily Hair with Extra Shape at the Top
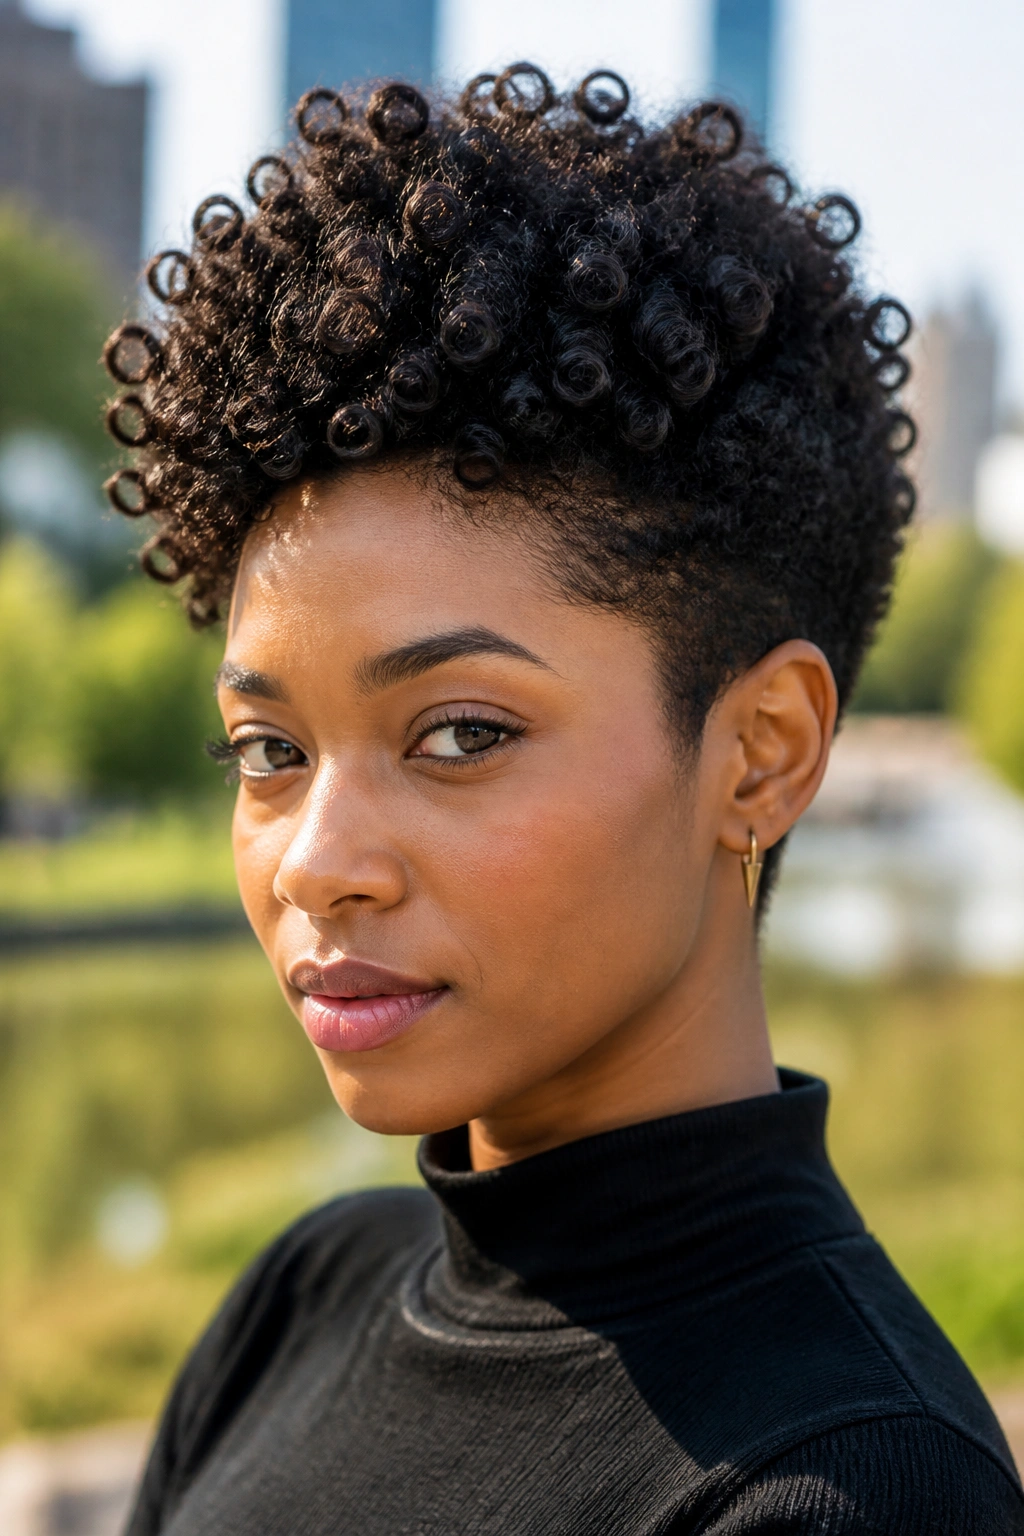
Curly pixies and coily pixies are cousins, not twins. Coily hair usually needs a little more length on top to show its shape, because shrinkage is stronger and the curl pattern can compress fast. Cutting too short can erase the texture you wanted to keep.
This style works best when the top is shaped around the coil pattern rather than flattened into a generic crop. The sides can be tapered close, but the crown should keep enough length for the coils to sit upright. If the haircut is done wet and cut too aggressively, the result can jump up much shorter than expected once it dries. That’s the part people regret most.
A great coily pixie often looks soft from the front and neat from the sides. It may even need a little more shape at the temple or nape so the overall silhouette does not turn round and bulky. A cream with hold, plus a bit of gel at the ends, gives the coils definition without making them crunchy.
This is the cut I’d pick for someone who wants a short style with texture still visible from across the room. Not flat. Not fuzzy. Just clean, compact coils with a shape worth keeping.
18. Grown-Out Curly Pixie That Stays Cute Between Cuts
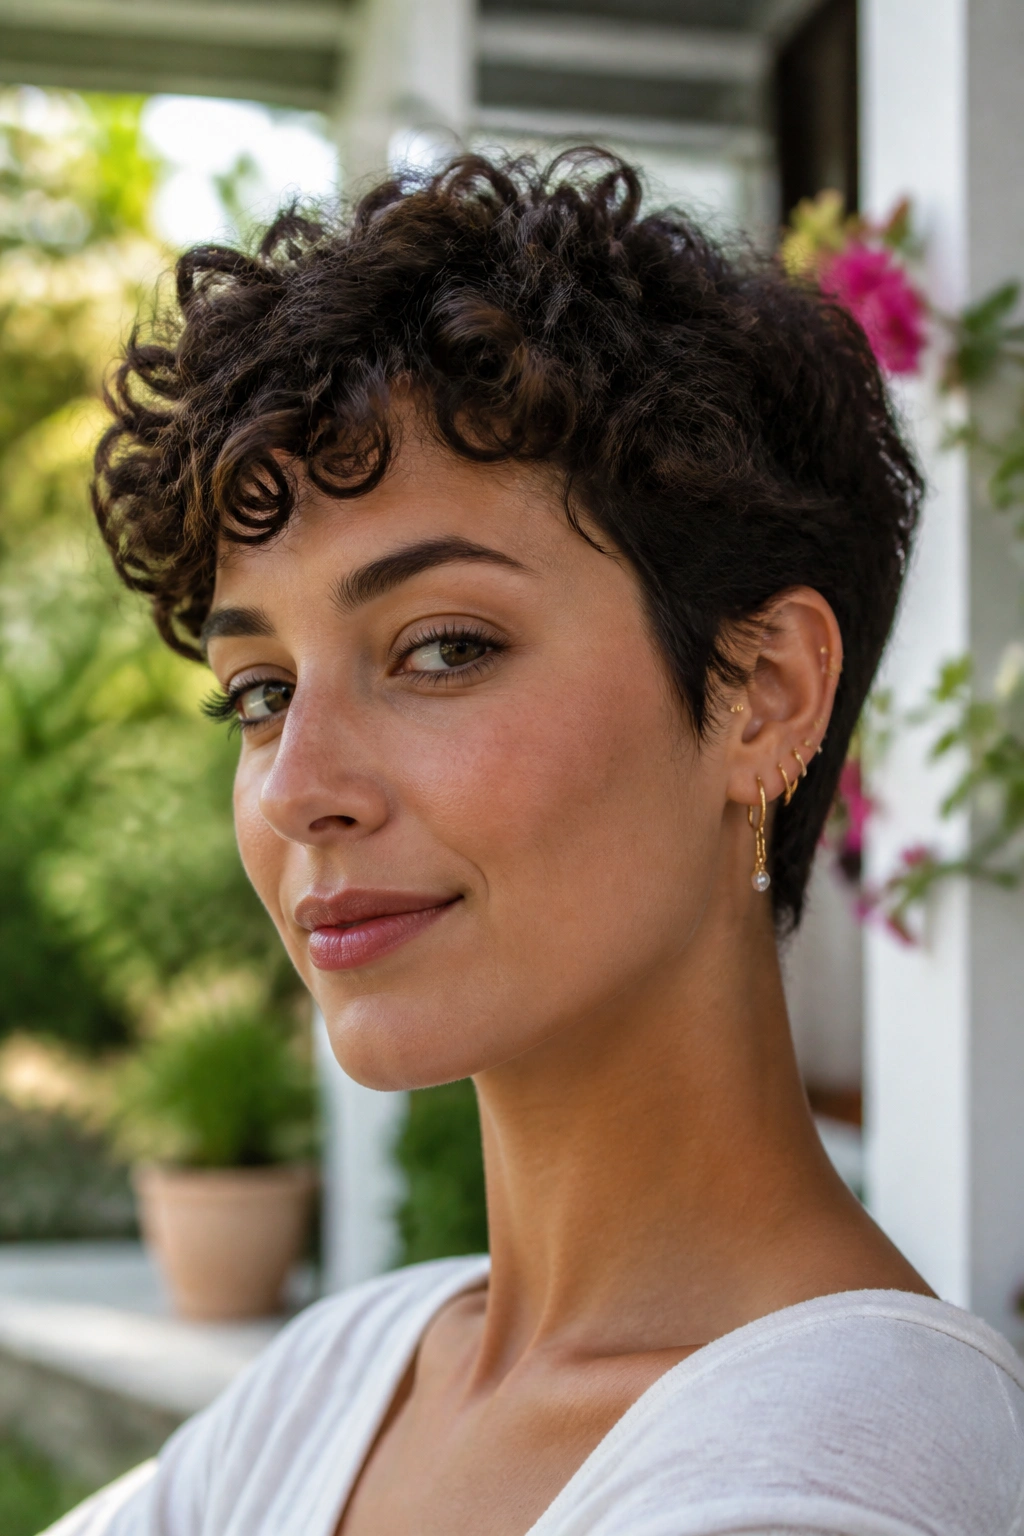
The grown-out pixie is the quiet hero of this whole list. It’s what happens when a short curly cut moves toward a bob-like shape without losing its edge. If your hair has grown past the original pixie line, the cut can still look good with the right shaping. It does not have to enter the awkward phase and stay there.
What matters here is keeping the neck clean and the crown controlled while the sides get a little more length. That stops the style from turning into a shapeless puff. The front can be swept, tucked, or left curly against the forehead, depending on how much length you have. A trim every 6 to 8 weeks keeps the outline from sliding into chaos.
I like this stage because it gives you options. You can keep growing it, tighten it back into a short crop, or split the difference and live in that soft in-between shape for a while. That middle ground is underrated. It lets natural curls breathe while still looking deliberate.
If you want one practical rule, it’s this: preserve the shape at the edges before you chase length on top. That single choice keeps the haircut looking like a style, not a compromise.
