



Twist bun hairstyles for long hair are the sort of styles that rescue a morning and still look like you bothered. That’s the sweet spot, really: hair off the neck, length still visible, and none of the severe little cookie-cutter bun shape that makes some updos feel stiff before you even leave the house.
Long hair gives a twist bun more to work with, which is both the blessing and the annoyance. You get thicker coils, prettier folds, and a lot more room to play with placement, but you also get weight, slippage, and those sneaky flyaways that seem to reappear the second you stop checking the mirror.
Some styles here are polished enough for a wedding. Some are the kind you throw on with a coat and boots and somehow still get compliments. A few depend on texture, a few love a second-day bend, and a few look better when you stop trying to make every strand obey. That part matters more than people admit.
The best twist bun is not always the one that looks the neatest from the front. Sometimes it’s the one that holds through a commute, a long dinner, or a humid room without stabbing your scalp with ten bobby pins. So let’s get into the styles that actually earn their keep.
1. Low Rope-Twist Bun at the Nape
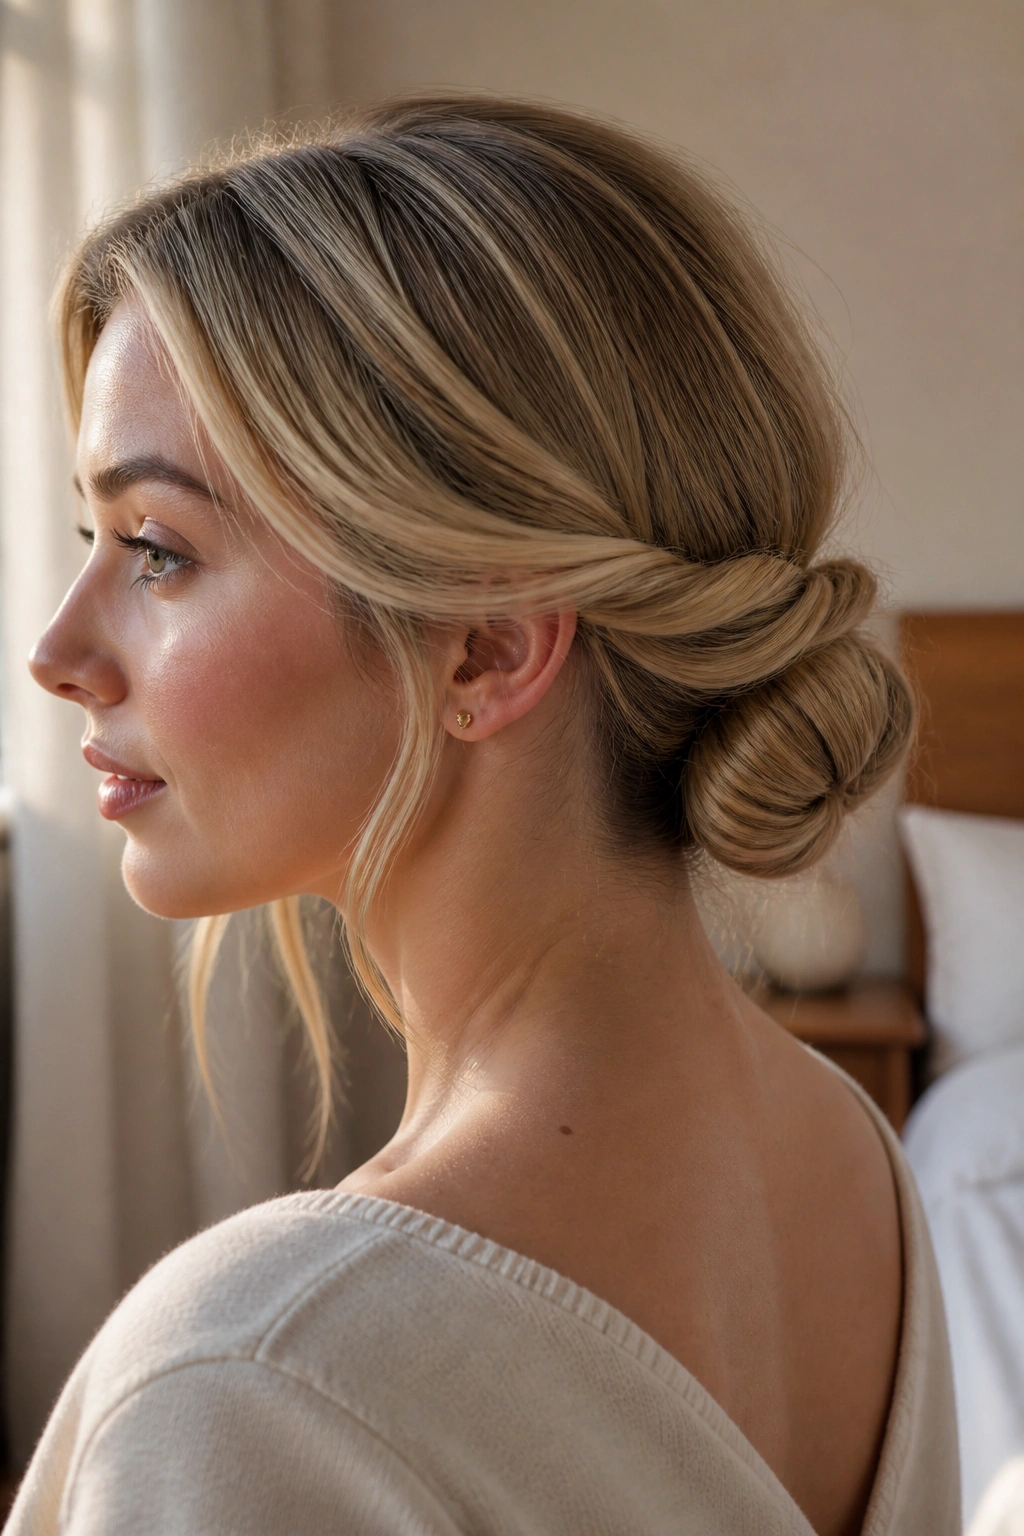
A low rope-twist bun is one of those styles that looks calm from the outside and a little more engineered underneath. The whole shape sits at the nape, which matters more than people think, because long hair gets heavy fast and a low placement keeps the weight from dragging on your roots.
Why It Works
Two rope twists give you more grip than one plain coil. You split the hair into sections, twist each section tightly in the same direction, then wrap them around each other before tucking the bundle into a bun. That cross-wrap gives the style a firmer hold and a richer shape, especially if your hair is past your shoulders.
It also looks good on hair that is straight, wavy, or somewhere in between. No fancy curl pattern required. If your hair is very smooth, a light mist of texturizing spray at the mid-lengths helps the twists hold their shape instead of sliding apart like polished ribbon.
- Best for medium to thick long hair
- Works with a middle part or a soft side part
- Holds well with 4 to 6 bobby pins and one small elastic
- Looks clean enough for work and soft enough for dinner
Tiny tip: leave a 1-inch tail from the final twist and pin it under the bun. That little tail gives the pins something to catch, which is the difference between “secure” and “why is this slipping again?”
2. Center-Part Twist Bun with a Wrapped Finish
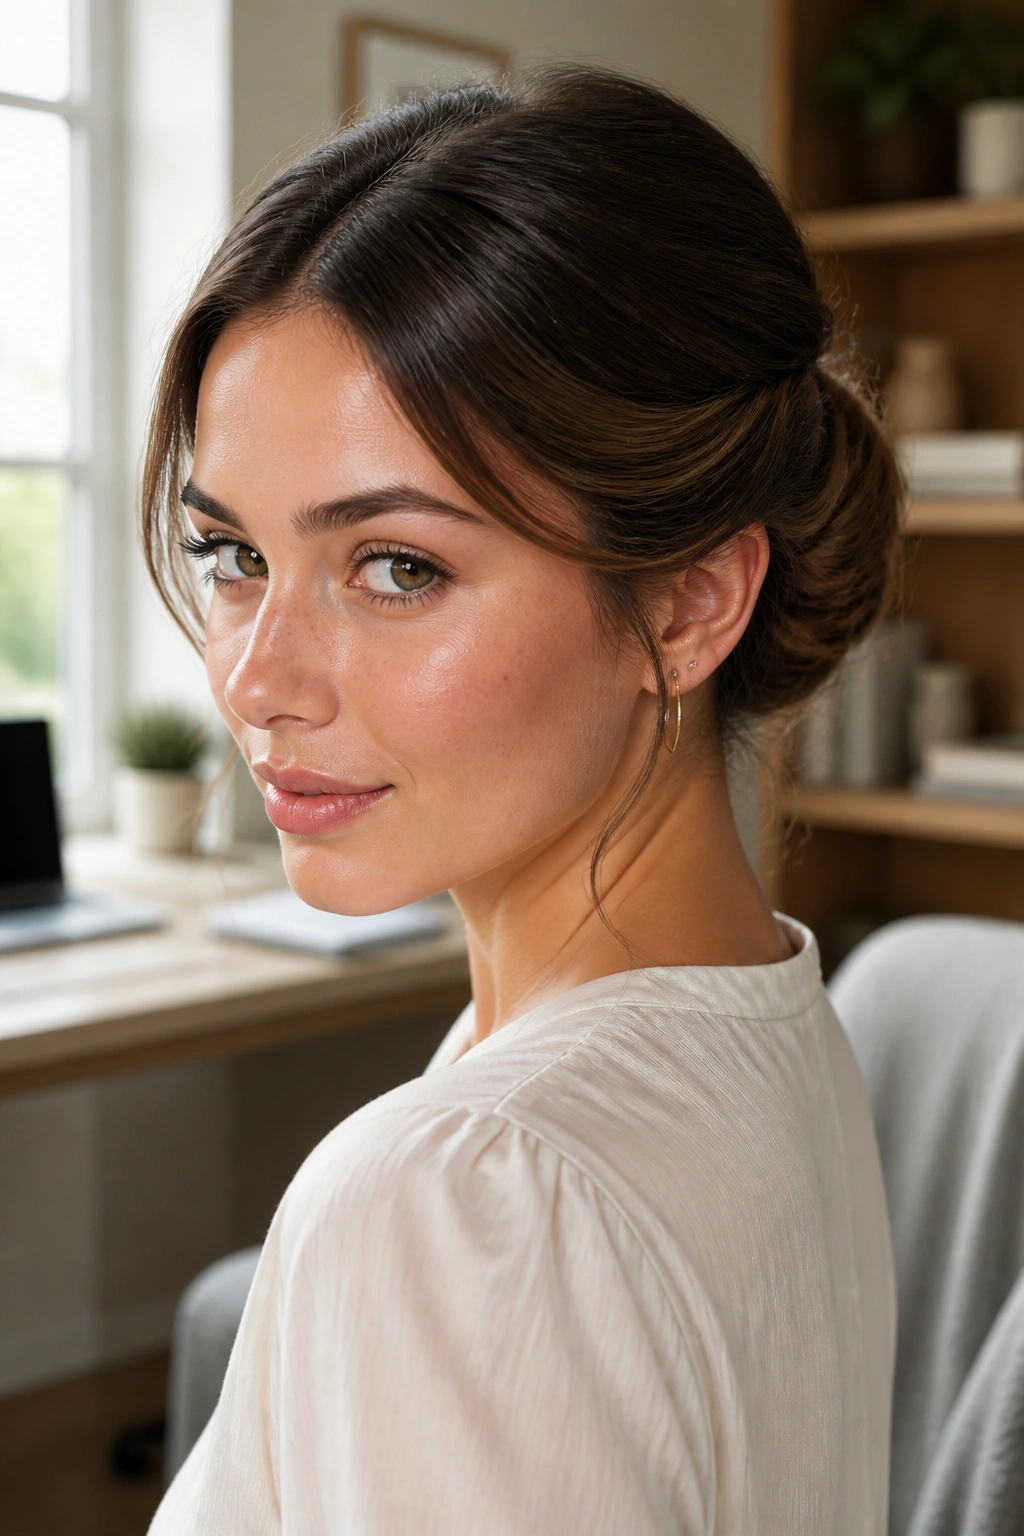
This is the cleanest twist bun in the bunch, and I mean that in the nicest way. A center part gives the whole style a crisp line, while the wrapped finish at the back turns the bun into one smooth shape instead of a lumpy knot.
The trick is to keep both sides even. Twist each side from the temple back toward the nape, then wrap them together into a low bun and hide the ends underneath. On long hair, that wrapped finish can look rich and full without needing padding. On thinner hair, the same shape reads more delicate, which is not a problem unless you’re trying to fake fullness.
What I like here is the balance. It feels formal, but not fussy. It works with a sharp blazer, a silk shirt, a wedding guest dress, even a plain black tee if you want to make the rest of the outfit do less work. If the hair around your crown tends to puff up, smooth it with a pea-sized amount of cream first, then brush it through before twisting. That little step saves you from the halo of frizz that always shows up in photos.
3. Half-Up Twist Bun with Loose Length
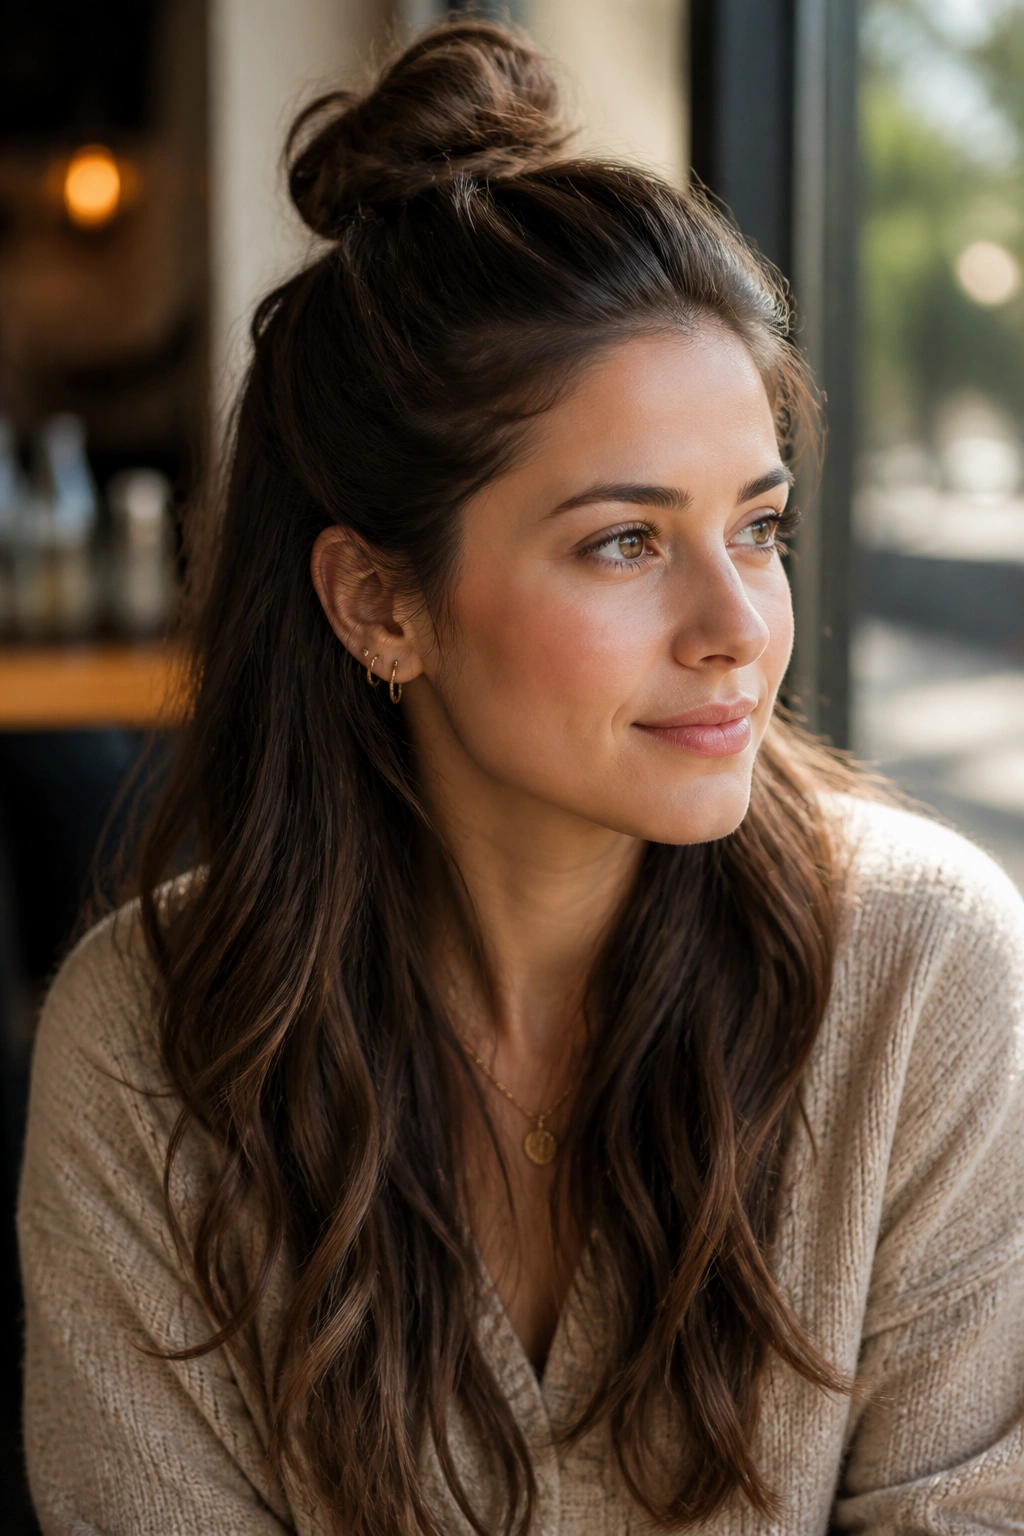
Can a twist bun still let long hair do its thing? Absolutely. The half-up twist bun is the answer when you want structure on top and movement below, which is a better trade than most people expect.
Start with the top section only, from temple to temple, and twist it back into a small bun or knot at the crown. Leave the rest of the length loose, and suddenly the style feels lighter, more relaxed, and a lot less committed. That matters on very long hair, because pulling every strand up can feel like overkill when you only want the face framed a little.
How I’d Wear It
The sweet spot is usually a bun that sits just above the occipital bone, not too high and not crushed into the top of the head. If your hair is layered, let the shorter pieces fall naturally instead of forcing them into the bun. They’ll soften the shape on their own.
A few soft bends through the loose length make the whole look feel finished. Nothing stiff. Nothing curled into perfect spirals. If you have time, a 1-inch iron and a quick bend at the ends is enough.
It’s the kind of style that works on a day when you want your hair out of your face but you do not want to lose the drama of long length. And honestly, that’s a very reasonable request.
4. Side-Swept Twist Bun for Formal Events
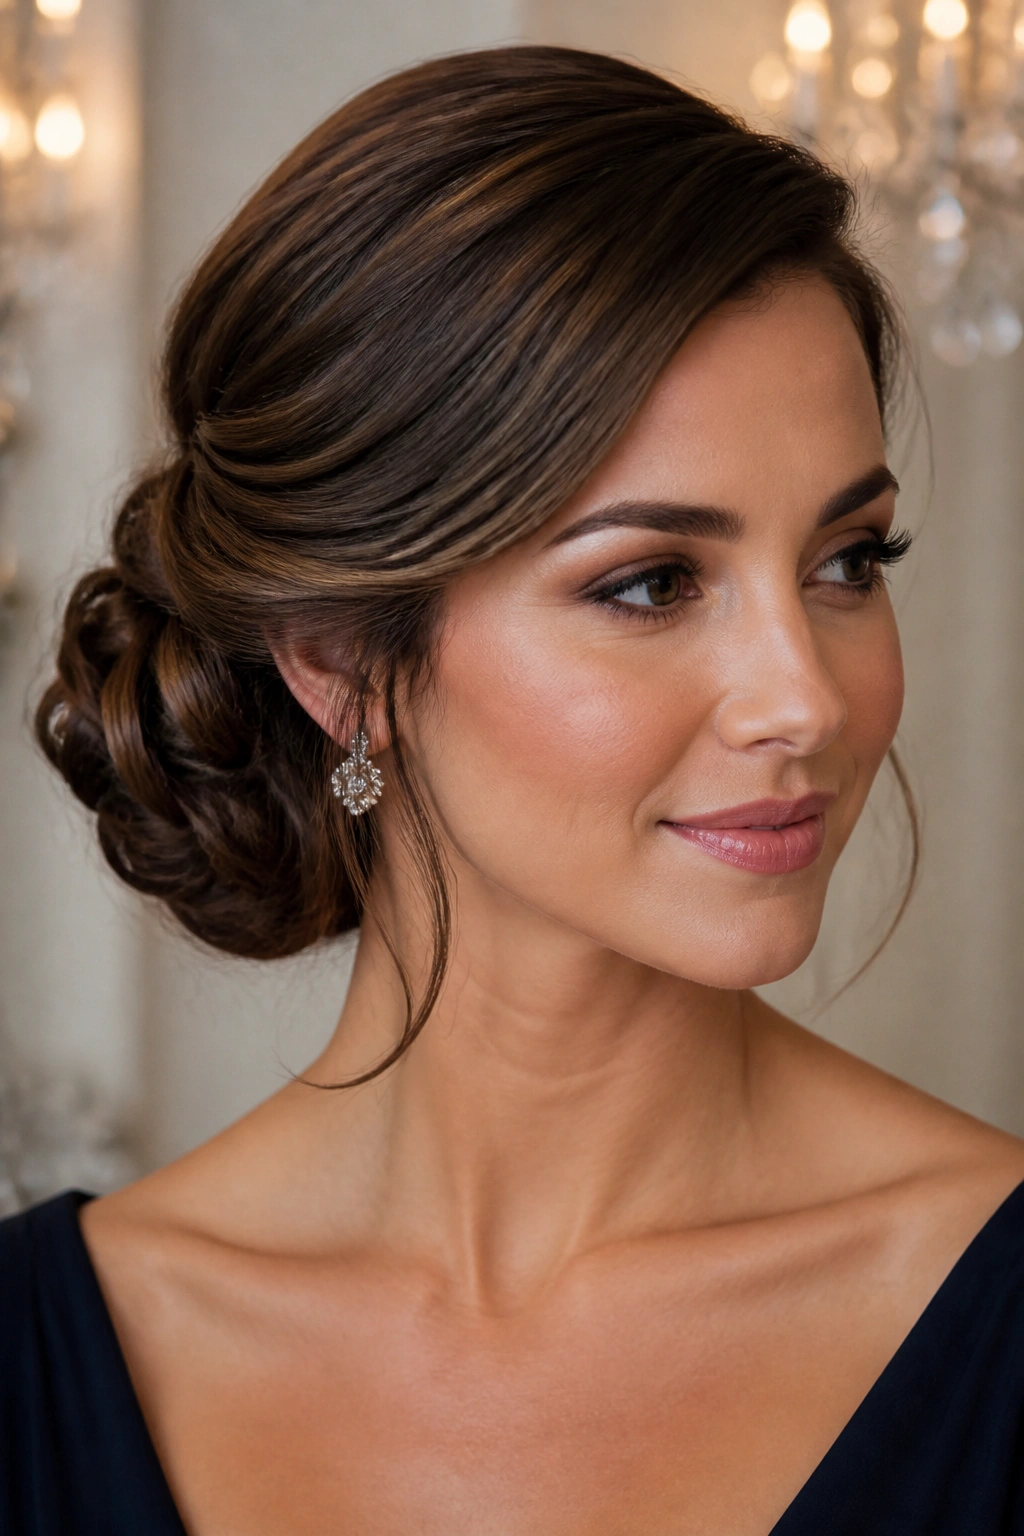
Picture one shoulder dress, a statement earring, and hair that needs to stay off the neckline. The side-swept twist bun is made for that situation, and it does its job without shouting about it.
The whole style starts with a deep side part, then the twist runs diagonally across the head into a bun placed slightly behind one ear or just above the nape on the opposite side. That diagonal line gives the face a gentle lift. It also makes long hair feel less bulky, because the mass is shifted off-center instead of stacked directly at the back.
- Best with smooth or lightly waved hair
- Looks especially good with a strong side part and tucked ear
- Use 2-inch sections for the twist so the shape stays defined
- Finish with a medium-hold spray, not a helmet of lacquer
What I’d watch for is tension. Pulling the twist too tight flattens the whole look and gives you that sharp, over-controlled finish that can feel dated fast. Leave a little looseness at the front. Let one or two pieces soften the cheekbone area. The style still reads formal, but it stops looking like it’s trying too hard.
5. Crown Twist Bun with a Braided Base
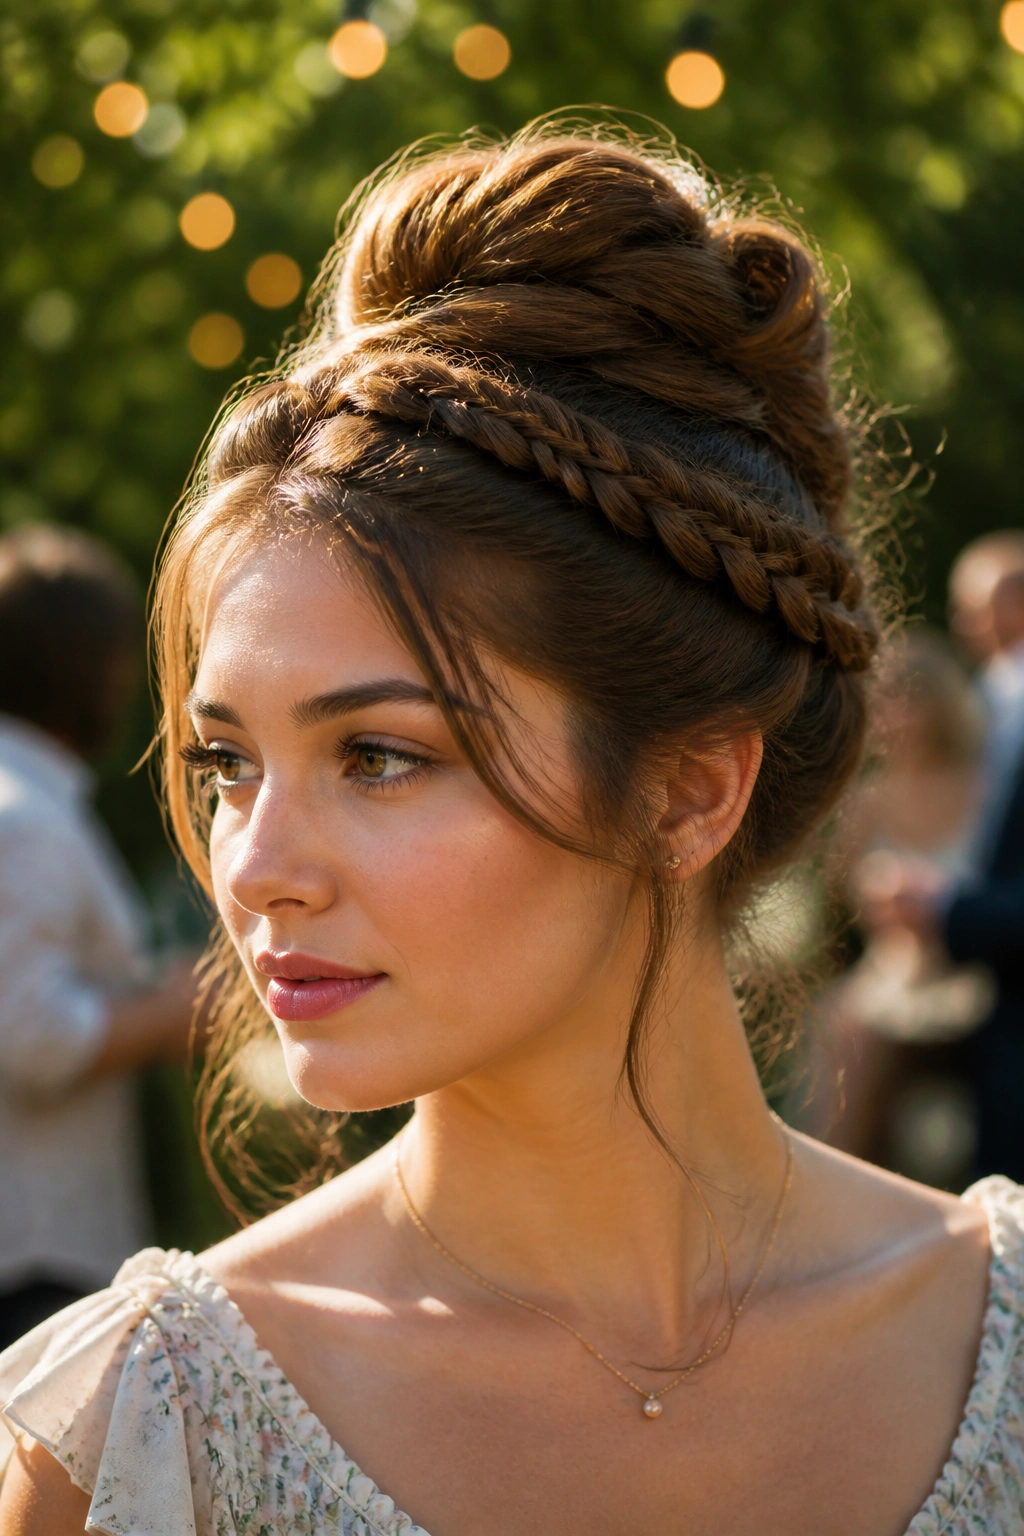
The crown twist bun is the romantic one in the group, and it’s one of those styles that makes long hair feel almost theatrical in a good way. A twisted band curves around the head like a soft halo, while a braided base anchors the bun and keeps the style from collapsing.
Long hair helps here because you’ve got enough length to build both the crown twist and the bun without running out of material halfway through. That’s the problem with shorter hair in this style: the shape can get flimsy at the back. With long hair, the bun has enough body to hold the story together.
The braid underneath does more than look pretty. It gives your pins something real to bite into, which is why this style lasts better than it looks like it should. If your hair is slippery, start with dry shampoo or texture spray through the roots and mid-lengths. Not a cloud of it. Just enough to give the strands some tooth.
This one shines at outdoor events, garden parties, or any time you want the hairline to look intentionally soft instead of scraped back. It takes a little patience, though. Arms up for too long and the style starts to feel like a workout. Worth it anyway.
6. Messy French Twist Bun with Soft Ends
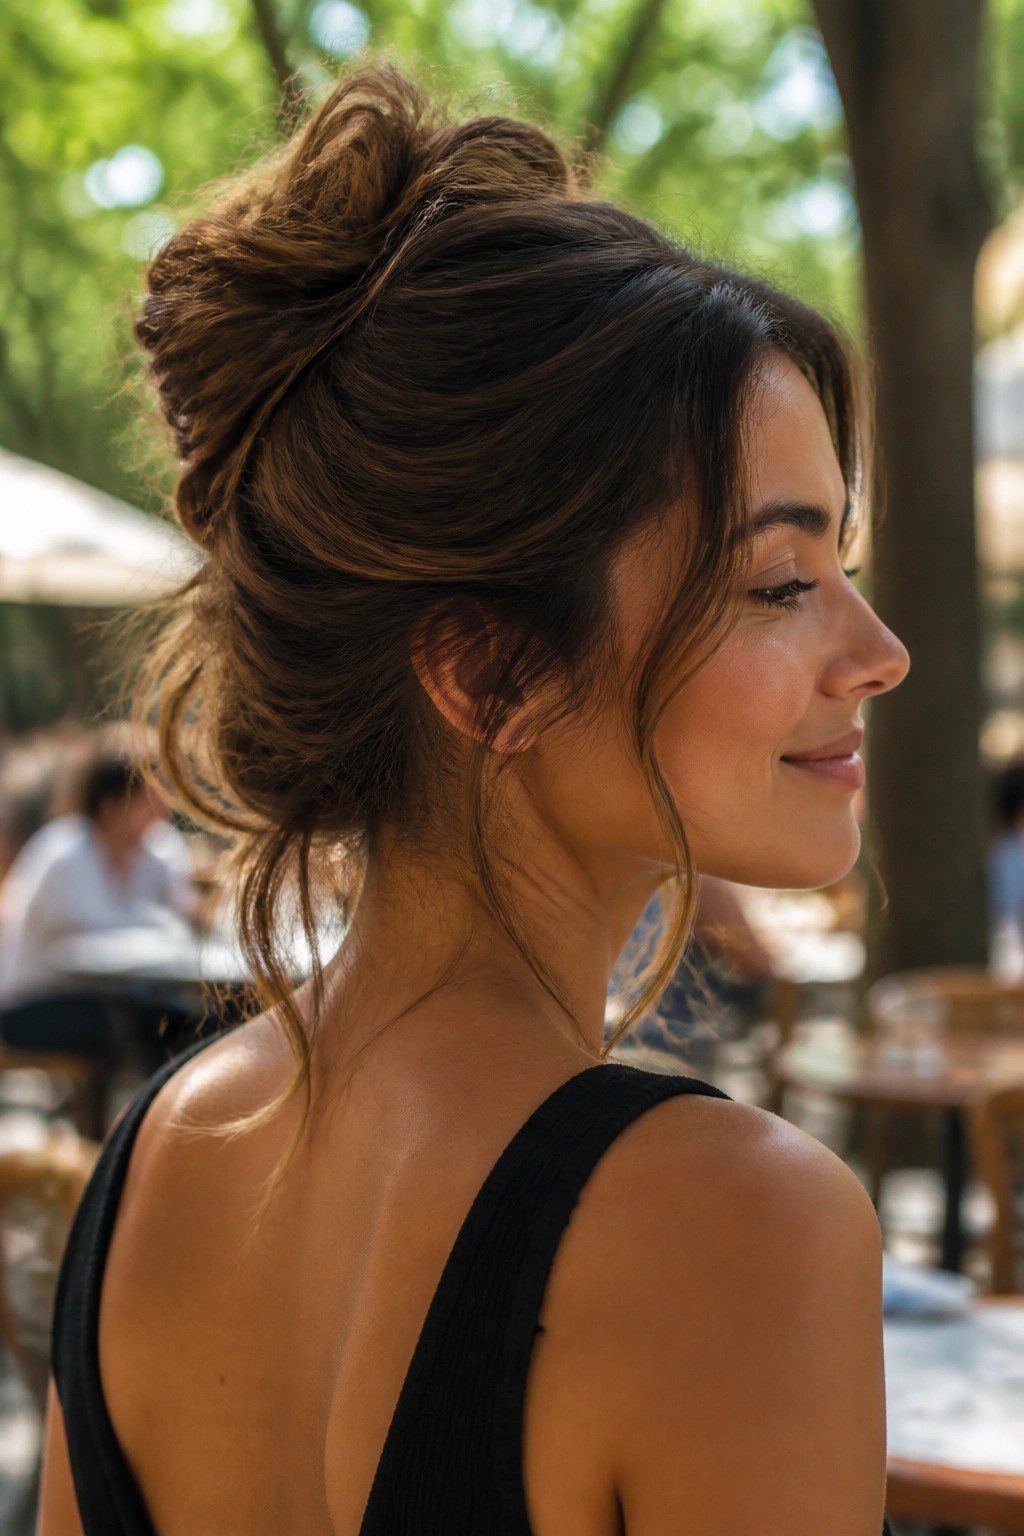
A neat French twist is elegant, but sometimes it feels a little too proper. The messy version is better when you want the same vertical shape with a bit more softness, a bit more air, and enough looseness to keep it from looking stern.
Unlike a classic French twist, this one does not need every strand tucked in with military precision. You roll the hair upward along the back of the head, pin it vertically, then leave a few soft ends peeking out or curved over the top. On long hair, those little imperfections help. They break up the bulk and stop the style from looking like a shell.
This is the bun I’d pick for dinner, a gallery opening, or a day when you want your hair up but not sealed into place. It also plays nicely with natural texture. A touch of wave keeps the twist from feeling too rigid, and if the ends are a little uneven, even better. A perfectly smooth messy twist is a contradiction I do not trust.
If your hair is very fine, rough it up first with a dry shampoo spray. If it’s thick, work in sections and pin as you go instead of trying to twist the whole thing at once. That is where most people get annoyed and give up.
7. Double Twist Bun for Thick Long Hair
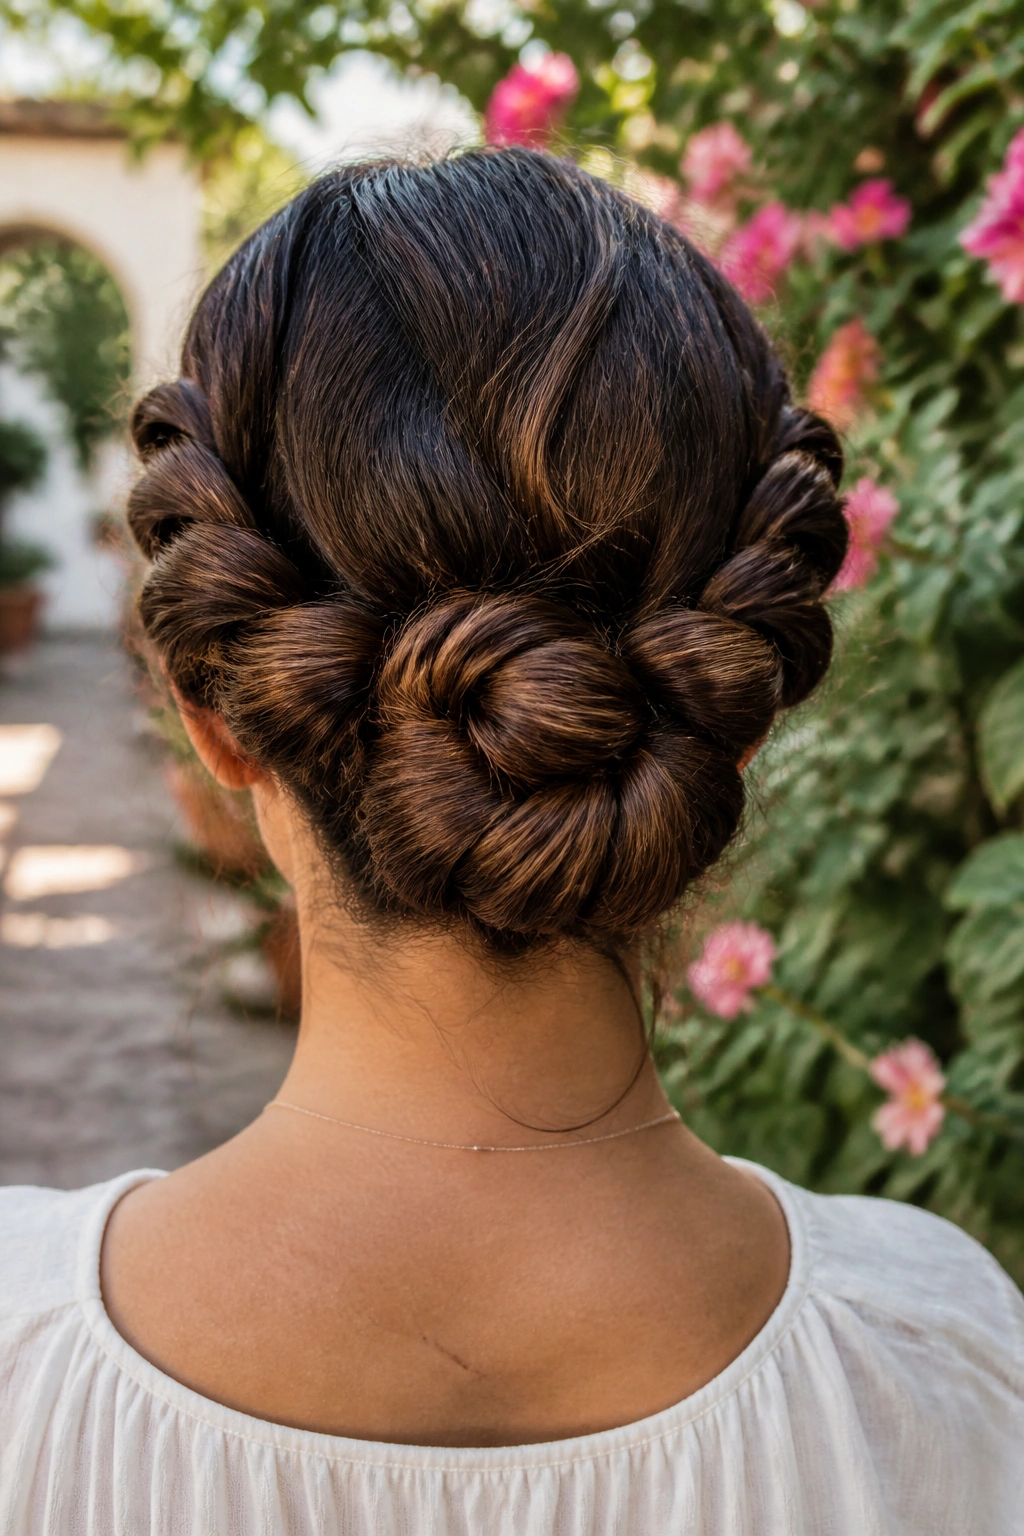
Thick hair needs more than one twist. That’s the whole point of this style, and it’s why it works so well when a single bun starts to feel like too much weight for one anchor point.
The Trick Behind the Shape
Split the hair into two low ponytails, then twist each ponytail tightly and wrap them around each other at the back. You end up with a bun that feels balanced instead of overloaded. For long, heavy hair, that split makes the style easier to secure and a lot kinder to your scalp.
The double structure also gives the bun more visual depth. One twist can look flat. Two twists look intentional. It’s a small difference, but it changes the whole read of the style. If you’ve got layers that slip loose, secure the first ponytail with a clear elastic, then wrap the second around it and pin the seams where the two pieces meet.
- Ideal for dense, waist-length, or very layered hair
- Use two elastics so the base stays stable
- Cross your bobby pins in an X for extra hold
- Great for long workdays, travel, and humid weather
Best move: pin the bun in stages instead of all at once. Build the first twist, check the balance, then add the second twist. It saves you from the lopsided giant lump that can happen when you rush it.
8. Sleek Chignon Twist Bun with a Deep Side Part
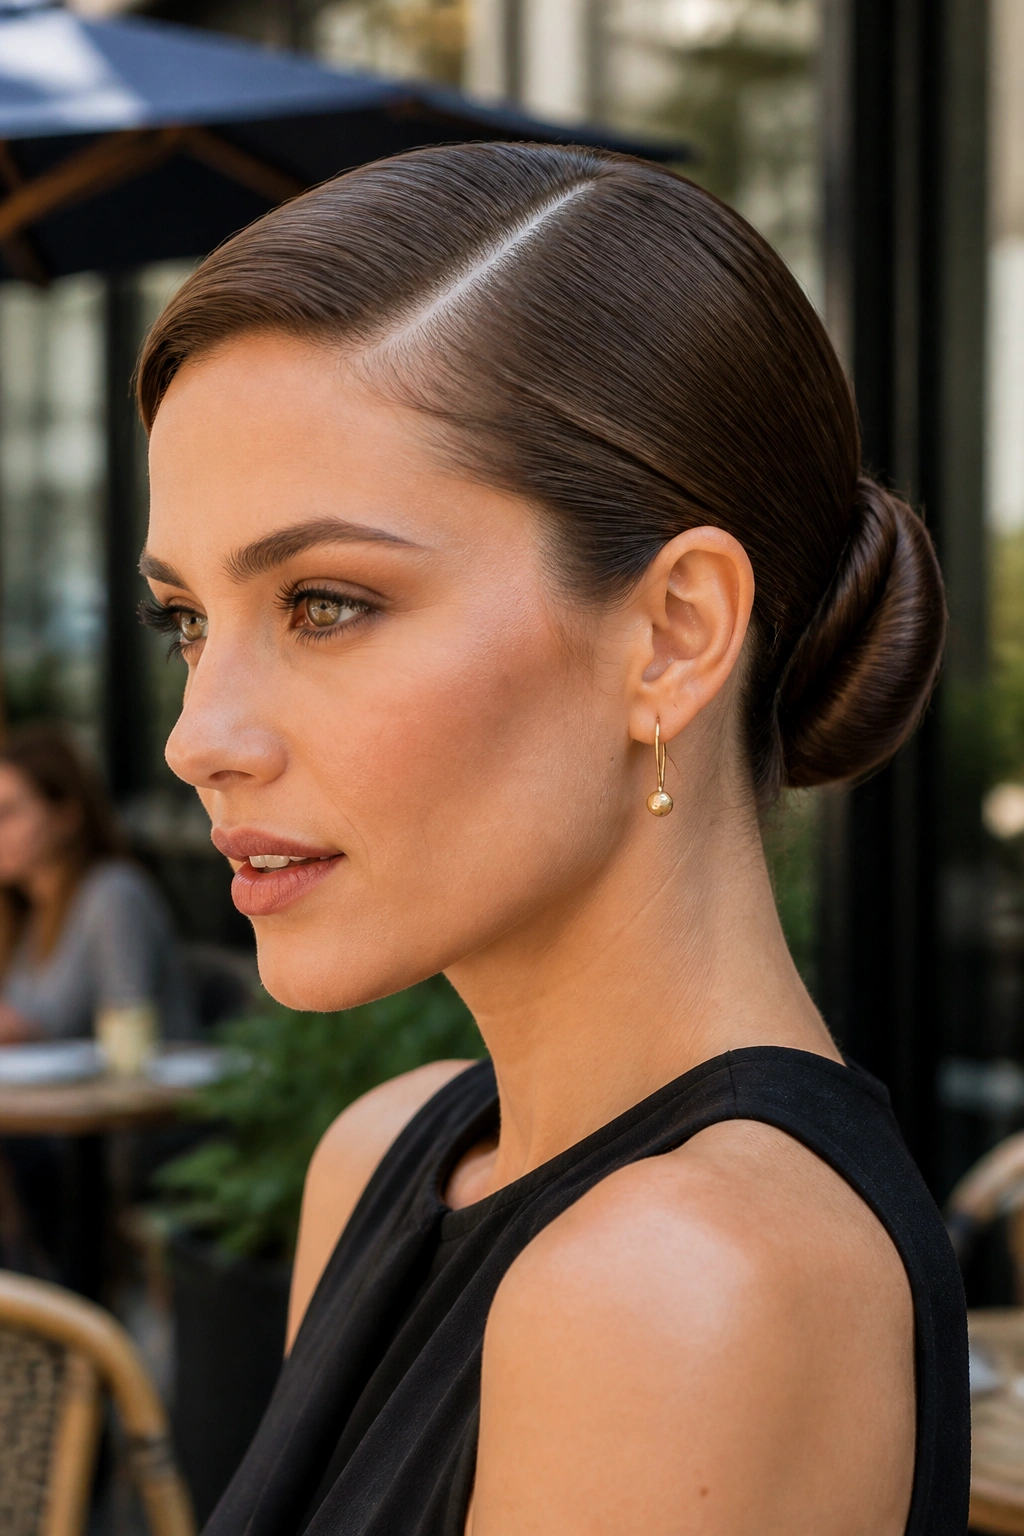
This one is all about restraint. A deep side part, a smooth crown, and a low chignon made from a tight twist give you a finish that feels sharp without looking severe.
What separates it from a regular low bun is the polish. The twist sits close to the head, almost like a folded ribbon, and the chignon tucks neatly into itself instead of spreading outward. Long hair is useful here because it gives the bun enough thickness to look substantial even when the surface is very smooth.
If your roots have a natural puff, tame them first with a soft brush and a little styling cream. Then twist the hair while keeping the line of the part clean. A toothbrush coated with hairspray works better than people admit, especially around the temples and the back of the ears. Quick. Precise. No drama.
I’d wear this with a tailored dress, a silk blouse, or anywhere that calls for a harder edge. It’s not the friendliest bun in the lineup, but that’s the point. Some styles should look disciplined.
9. Looping Twist Bun with Tucked Ends
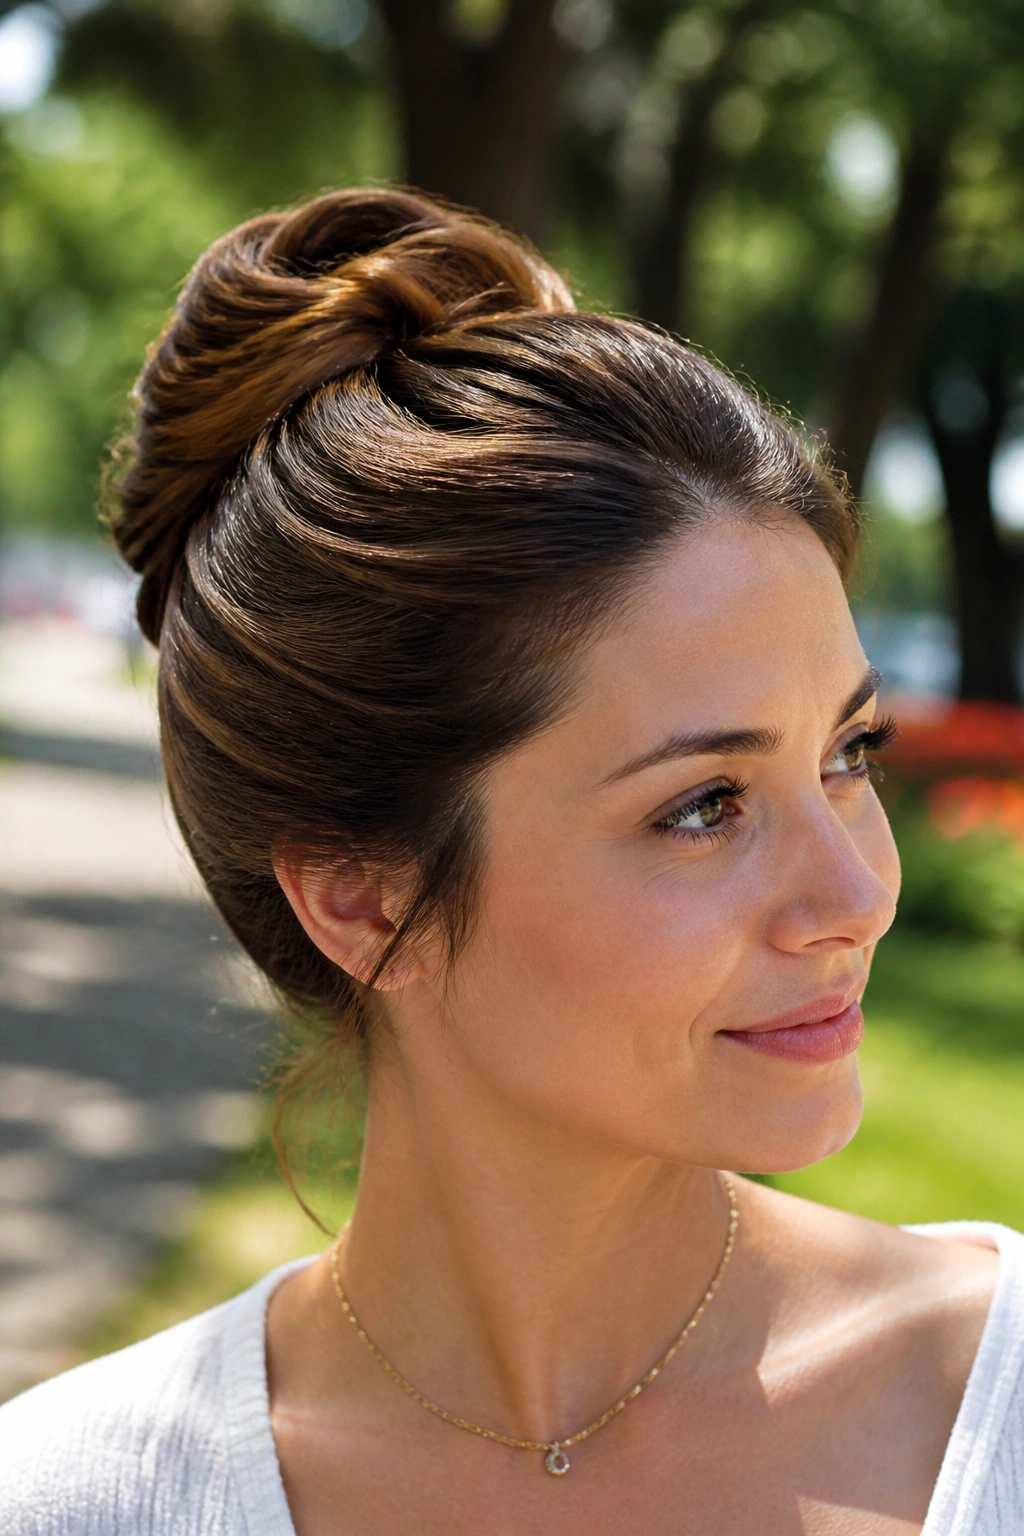
Why does this one work so well on long hair? Because long ends give you room to loop, fold, and tuck without the bun turning tiny or flat.
The looping twist bun is built from a long twist that folds back on itself in a rounded shape. Instead of winding the ends around and around, you create a loop, tuck the tail under, and pin the fold so it sits with a bit of lift. That creates a softer silhouette than a tight knot and a fuller one than a basic rolled bun.
How to Keep the Shape
The secret is not stuffing every strand into the same point. Pull the hair through in sections, then tuck the ends at slightly different angles so the bun holds its round shape. If you push everything into one seam, the style can collapse and look thin at the edges.
This is a good choice for long hair that tends to lose shape once pinned. It gives the ends a place to hide without making the bun look tiny. A few pins at the outer curve, not the center, usually do the job better.
It feels polished, but not severe. And that middle ground is often the hardest place to hit.
10. Face-Framing Twist Bun with Curtain Pieces
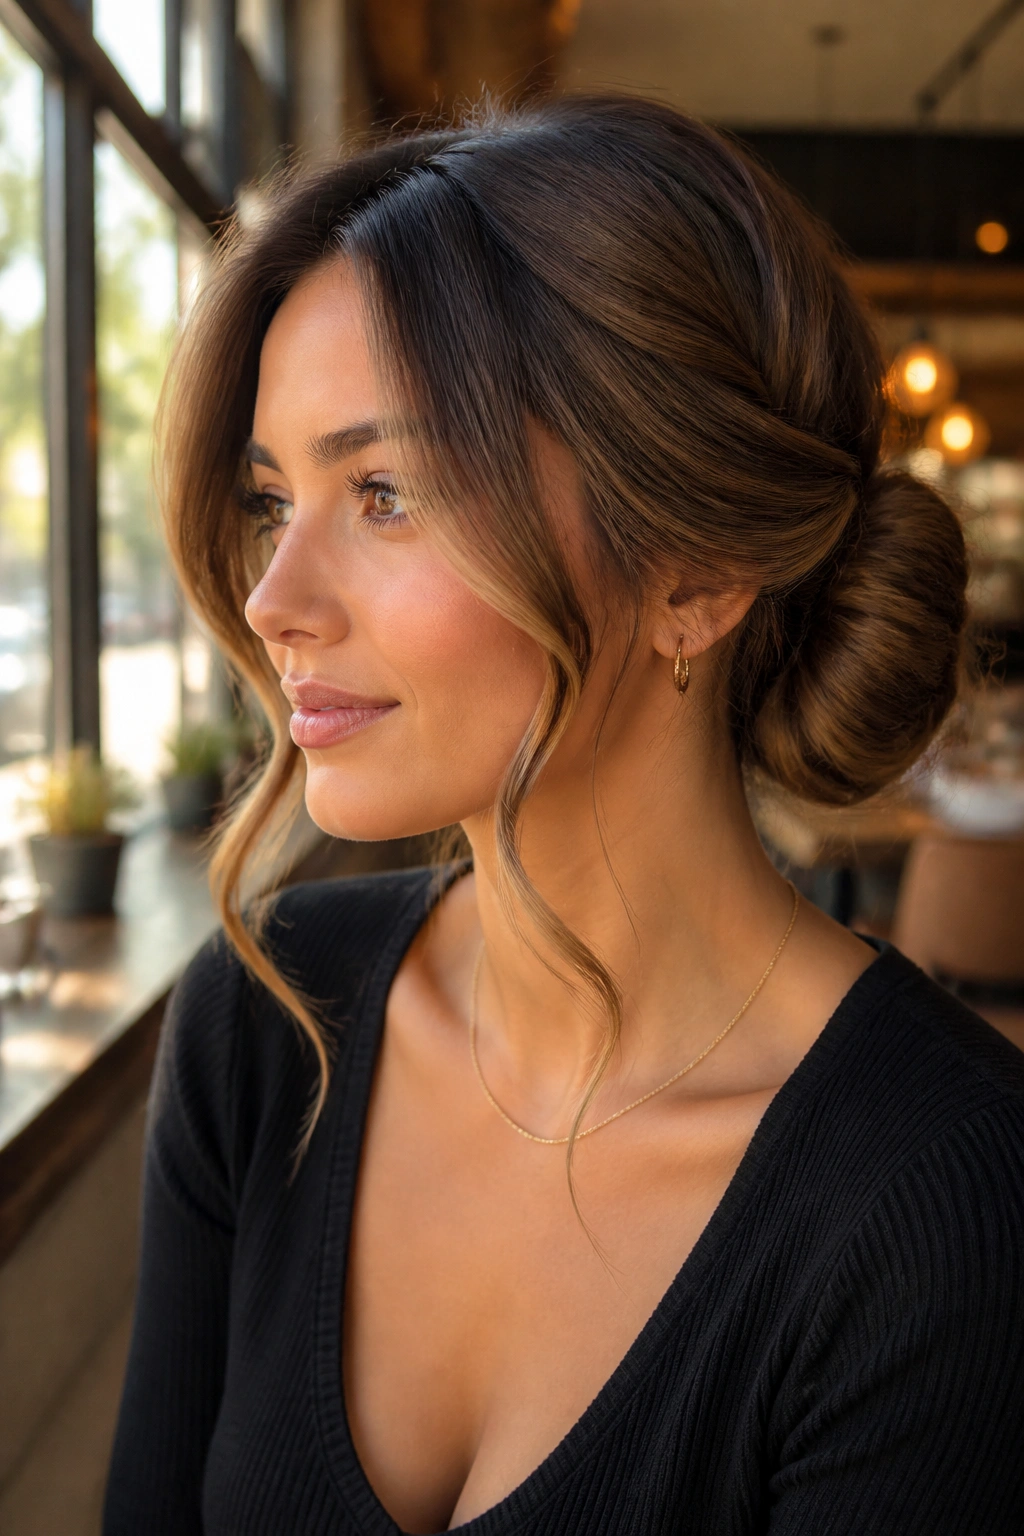
Someone who wants hair up but not severe usually ends up loving this style. The bun stays low and twisted, while the front pieces stay loose enough to soften the face and keep the whole look from feeling boxed in.
The key is to leave two front sections out before you start the bun. Not giant chunks. Just enough hair to frame the cheeks. A piece about 1 inch wide on each side is often enough, though thicker hair may need slightly more. Curl those pieces away from the face with a 1-inch iron or a warm round brush, then let the twist bun sit quietly behind them.
- Best for round, square, or long faces
- Works with curtain bangs or grown-out fringe
- Keep the bun low so the face-framing pieces stay the focus
- Use a flexible spray so the front doesn’t turn stiff
The balance matters. Too much volume on the sides and the style starts to feel crowded. Too little and the face-framing idea disappears. I like this one because it keeps the neck open while still giving the front of the hair a little motion. It looks deliberate, not overworked. That is harder to pull off than it sounds.
11. Milkmaid Twist Bun for Long Hair
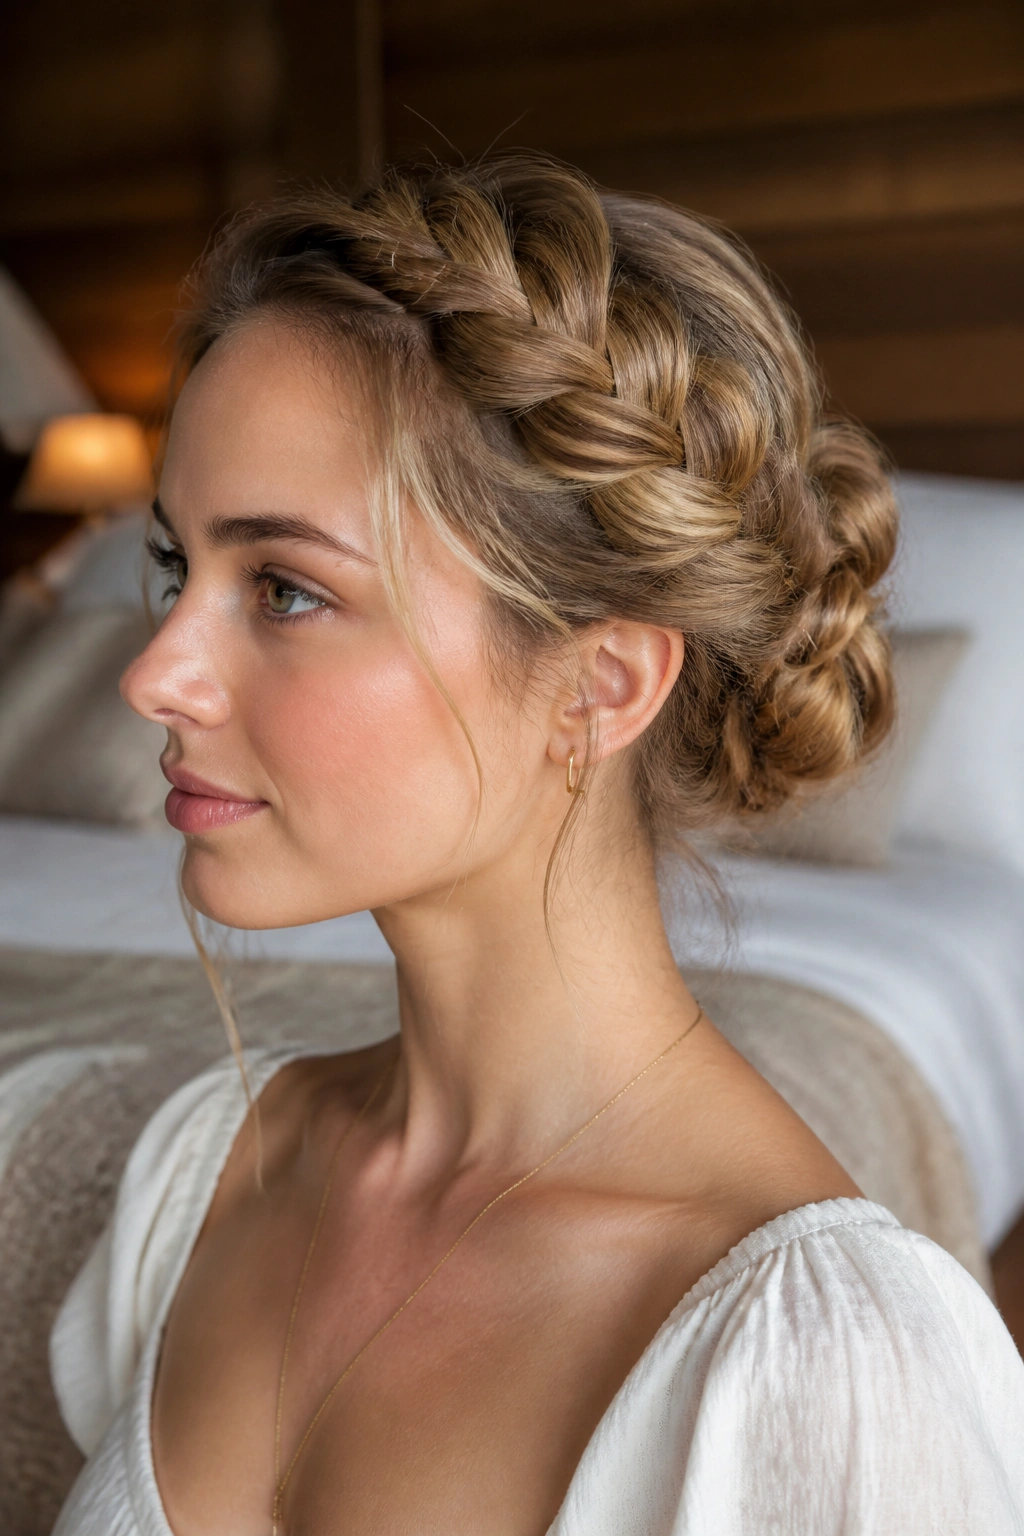
A milkmaid twist bun sits in that sweet old-fashioned lane where the hair feels romantic without tipping into costume. The twisted sections travel around the crown, meet at the back, and tuck into a bun or a tucked fold, depending on how much length you want to show.
Long hair gives this style a lot of help because the twists can be thicker and smoother. Shorter hair often leaves gaps. Longer hair closes those gaps and gives the whole shape a fuller, more continuous line. If the front sections are layered, a little hidden pinning behind the ears keeps them from sliding free.
What I like most is the way it changes the face. The crown twist opens the features, while the bun at the back keeps the style grounded. It’s good for dresses with open necklines, but it also works with a sweater and simple earrings if you want the rest of the outfit to stay easy. Nothing about it needs to feel precious.
One caution: if the hairline is fuzzy, brush it down before you twist. Once the style is set, fixing frizz near the crown is more annoying than it should be. Do the smoothing early and save yourself the muttering.
12. Claw-Clip Twist Bun with a Polished Bend
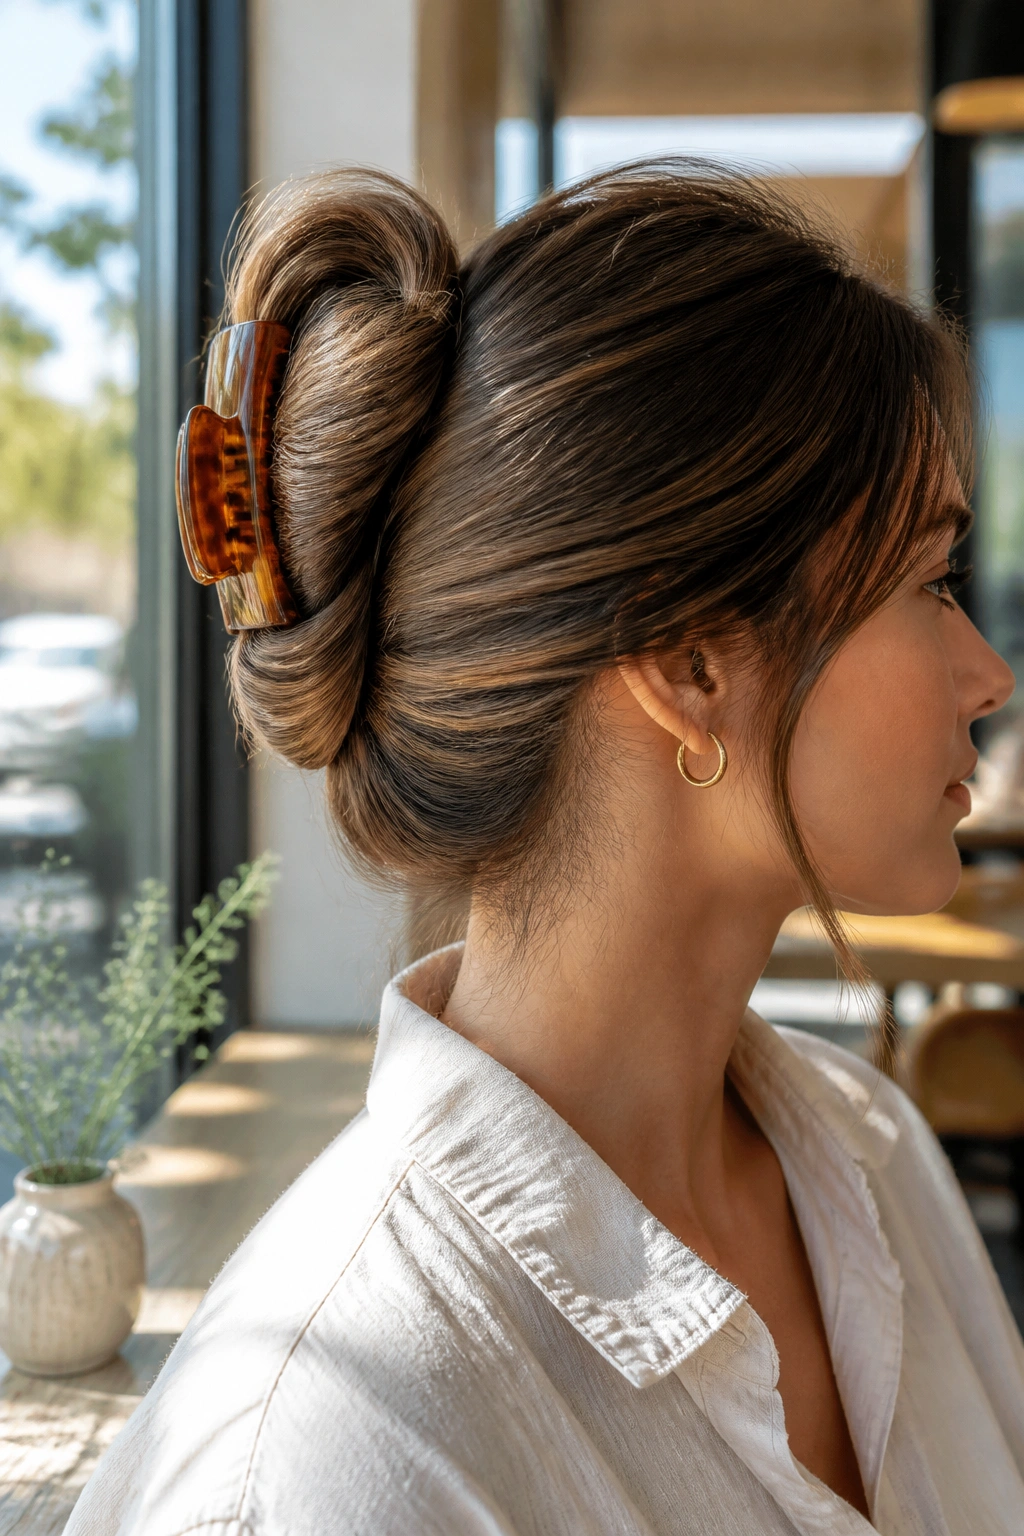
There’s a big difference between a lazy clip-up and a claw-clip twist bun that actually has shape. This one belongs in the second category.
Instead of pinning the whole bun into submission, you twist the hair into a loop, fold the length upward, and secure it with a medium or large claw clip so the ends bend neatly inside. For long hair, the clip needs to be sturdy — 3.5 to 4.5 inches is a decent range if your hair is dense or past the shoulders. Smaller clips tend to slide or crack under the weight.
This is the style I’d call useful. Not glamorous first, useful first. That matters on hot days, travel days, or any day when you want the hair up in under two minutes and still want the back of your head to look thought through. The polished bend gives it a cleaner finish than a random twist, and the clip keeps it easy to remove without pulling.
If your hair is extremely thick, stack two clips in an offset shape instead of forcing one clip to do everything. It’s not elegant, but it works. Which is sometimes the more elegant choice.
13. Ribbon-Wrapped Twist Bun
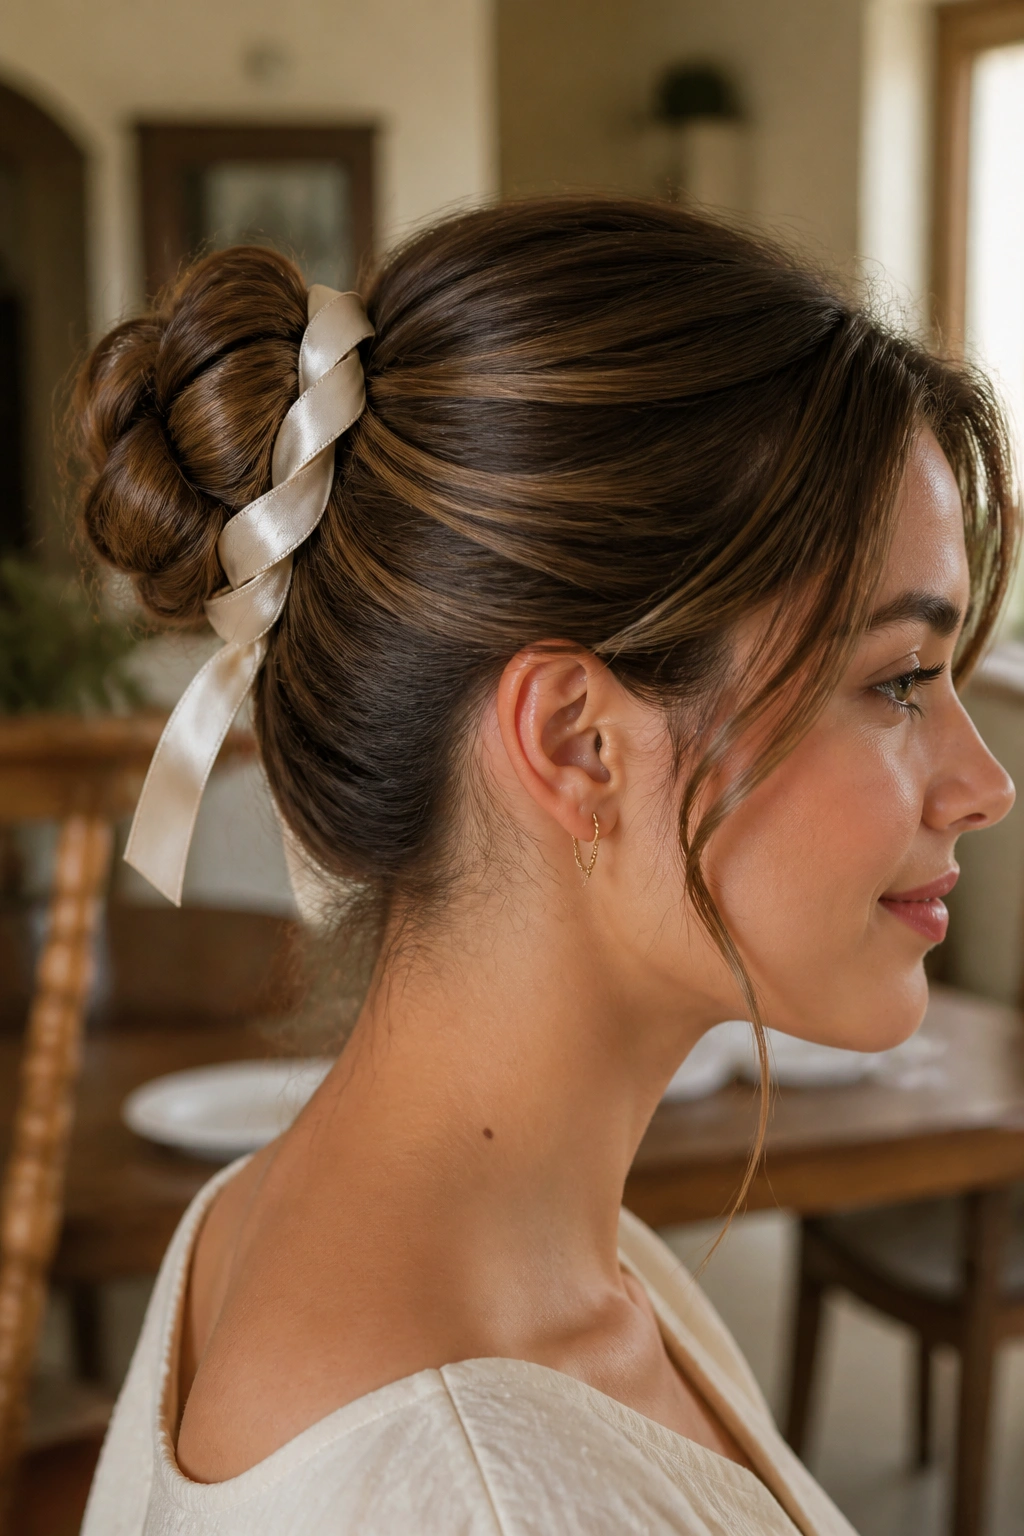
A ribbon changes everything faster than another pin ever will. Wrap one around a twist bun and the style stops reading as basic hair control and starts feeling intentional, which is a nice little upgrade for very little effort.
Why the Ribbon Matters
The texture of the ribbon matters more than people expect. Satin gives a smooth, glossy finish that works well with sleek buns. Velvet feels heavier and looks better when the hair has more body. A ribbon between 24 and 36 inches is usually enough for a long-haired bun, though very full hair may need more.
Start with a simple twist bun, then thread the ribbon around the base once or twice before tying it off or tucking the ends under the bun. You do not need to weave it through every section unless you want a more decorative look. The goal is contrast: soft hair, visible ribbon, clean knot.
It’s a nice trick for holidays, dinners, or when you want the bun to feel finished without adding more structure. I’d keep the rest of the style fairly simple. Too many details and the ribbon loses its job.
My preference: use a ribbon that is slightly narrower than you think you need. A wide bow can overpower the bun fast, while a slim one gives the style a cleaner line.
14. Textured Twist Bun for Second-Day Hair
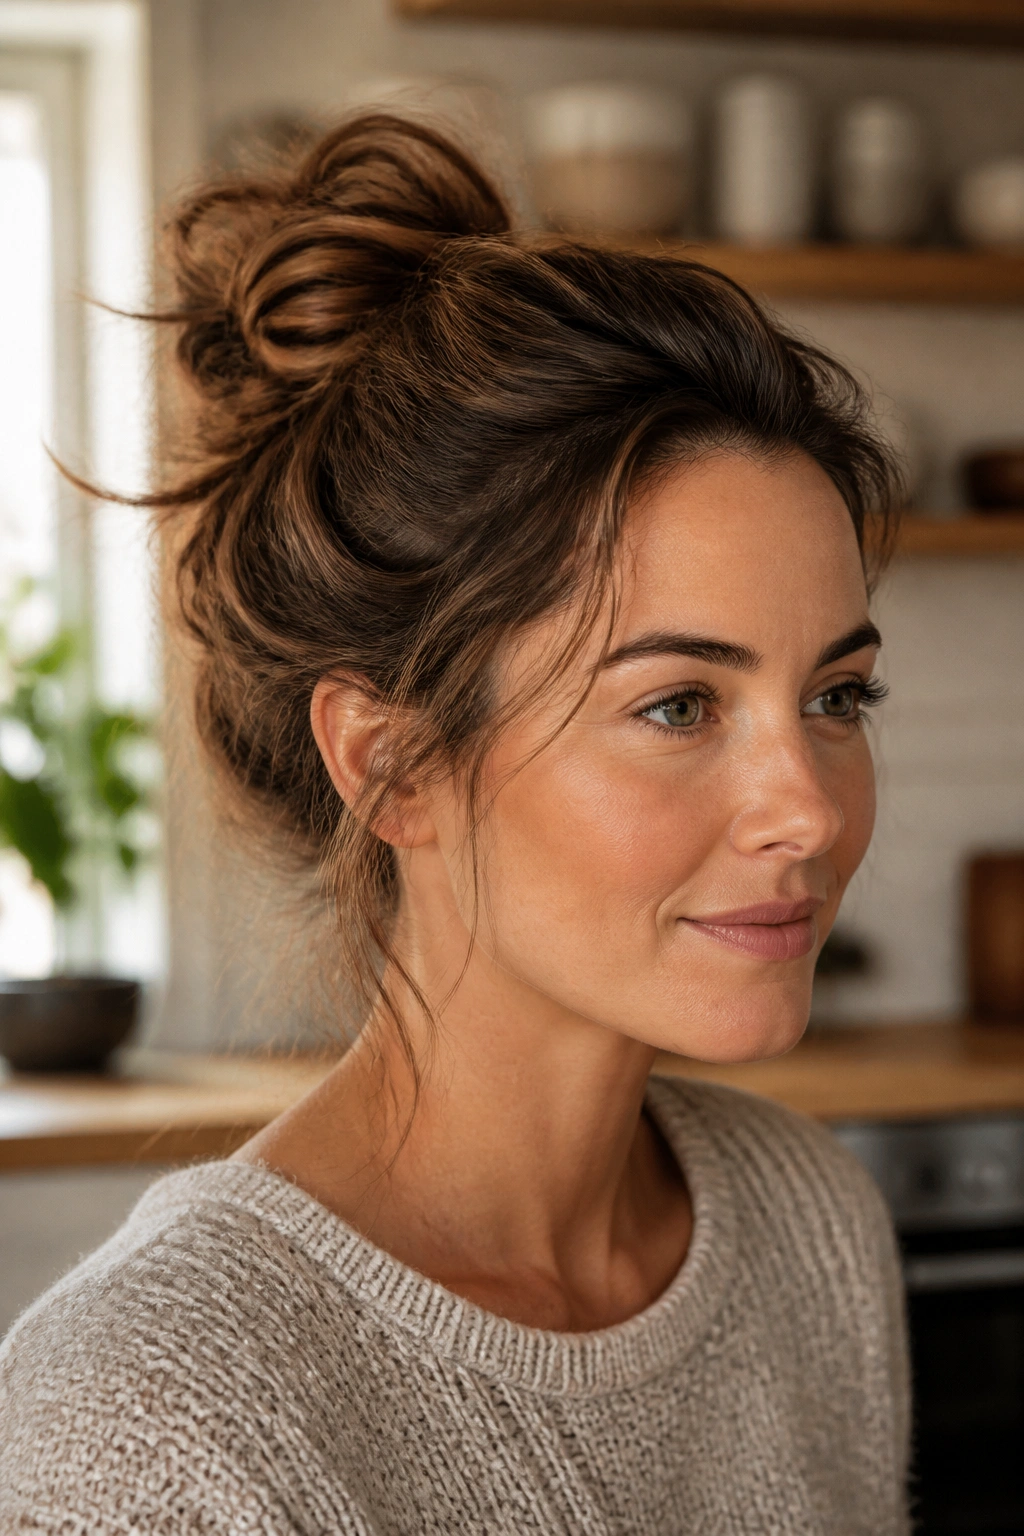
Second-day hair is not a backup plan here. It’s the point.
A textured twist bun loves hair that has a little grit, a little bend, and maybe a few pieces that refuse to lie perfectly flat. Freshly washed hair can be slippery, which makes it harder for the twists to stay put. By the next day, the strands have more grab, and that small difference often saves ten extra minutes of fixing.
Start with dry shampoo at the roots, then rough up the mid-lengths with your fingers or a wide-tooth comb. After that, twist the hair loosely instead of trying to smooth every piece into place. The bun should look lived-in, not sloppy. There’s a line there, and it’s thinner than people think.
This is the style I’d choose for errands, casual work days, or any time you want a bun that feels forgiving. If one piece slips loose, leave it. If the crown puffs a little, keep it. That softness is part of the charm, and it keeps the hairstyle from feeling overdone.
A lot of twist bun hairstyles fail because they try too hard to look perfect. This one improves when you stop fighting the texture.
15. Soft Knot Twist Bun for Everyday Wear
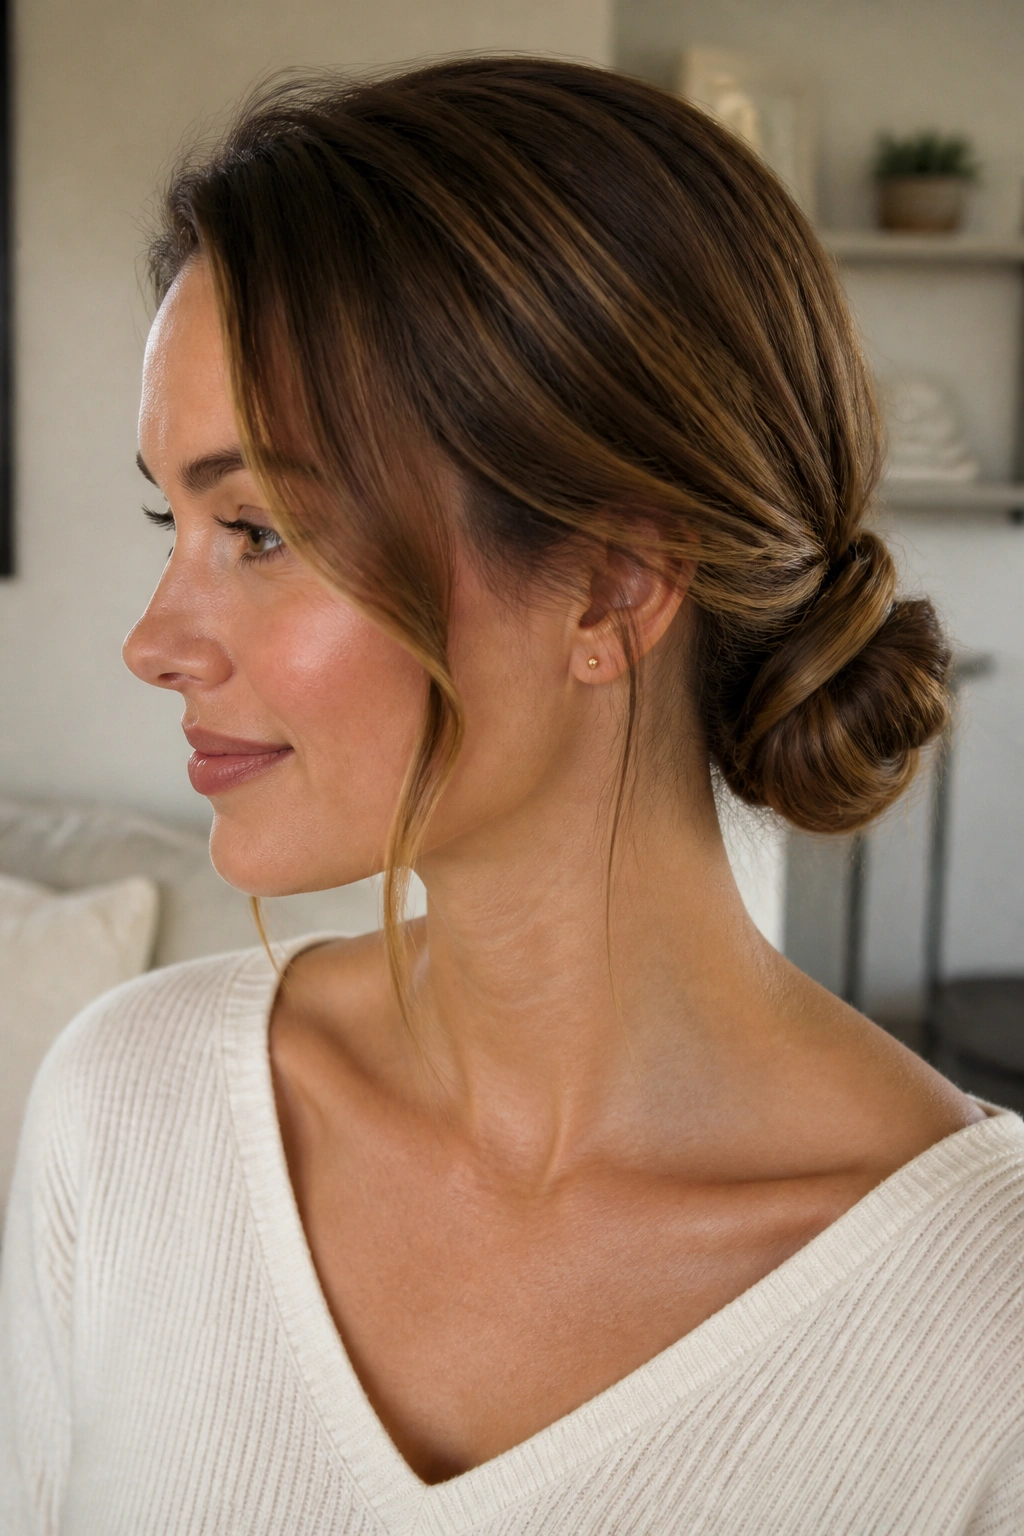
The soft knot twist bun is the one I keep coming back to because it doesn’t ask much and still looks like a proper style. It sits somewhere between a twist, a knot, and a low bun, which sounds vague until you see it on long hair and realize that the looseness is the whole appeal.
You twist the length, fold it into a gentle knot, and pin it just enough to hold. That’s it. No severe lines, no overpacked shape, no need to hide every end like you’re covering evidence. Long hair gives the knot enough substance to look full even when the edges stay soft.
What makes it useful is the mood. A higher knot feels a little sharper and opens the face. A lower knot feels calmer, almost quieter. Same style, different read. That small shift is why this bun works for school runs, office days, dinner plans, and all the ordinary things that still deserve decent hair.
If you remember only one thing from all these twist bun hairstyles for long hair, make it this: placement changes the whole story. Low reads easy. High reads lifted. Side-swept reads polished. Once you start noticing that, the rest gets easier. And the funny part is that the best versions never look like they took much time at all.
