



Medium hair is awkward in the nicest possible way. It’s long enough to gather into a bun, but short enough to slip loose if you get greedy with the pins.
That’s exactly why loose bun hairstyles for medium hair work so well when they’re built with a little structure and a little mess. A touch of dry shampoo at the roots, a few bobby pins crossed in an X, and a softened part can make the difference between “done” and “why is this falling apart in the mirror?”
The best versions do not fight your hair’s length. They use it. Some sit low and tidy, some are messy on purpose, and a few lean on braids or twists so the ends have somewhere to disappear. The styles below cover all of that, from office-safe to softly undone.
1. The Low Twisted Bun at the Nape
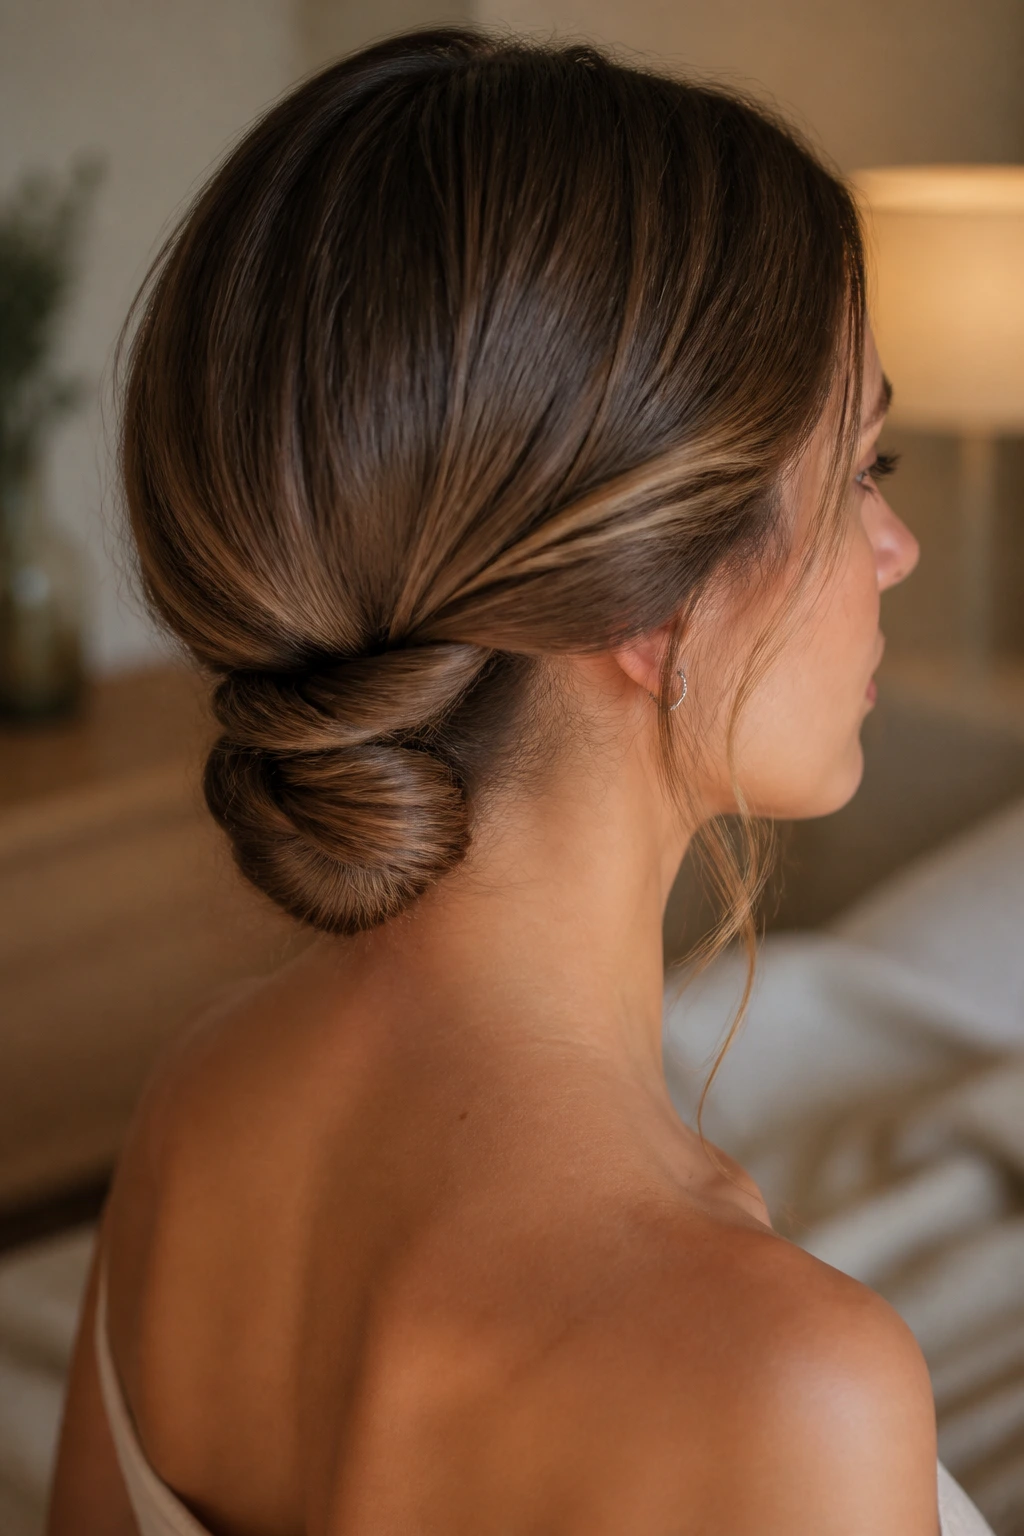
This is the bun I’d hand to someone who wants to look pulled together without looking stiff. It sits right at the base of the neck, which gives medium hair enough room to tuck in cleanly without the bun turning bulky.
Why It Works on Medium Hair
The shape is simple: part your hair, twist each side back, and secure the twists into a low coil. Medium-length strands tend to stay better here than in a high bun because the weight is lower and the ends have less distance to escape.
A center part makes it feel neat. A side part makes it softer. Either way, the twists give the bun a little spine, which matters when the layers start to loosen.
- Start with hair that has a bit of grip, not slippery freshly washed hair.
- Use 2 small elastics or one tiny one plus 4 to 6 bobby pins.
- Pull the twists gently apart after pinning so the bun looks soft, not tight.
Tiny trick: leave the last inch of the ends a little imperfect. A perfectly tucked nape bun can look severe on medium hair.
2. The Soft Mid-Height Bun With Face-Framing Pieces
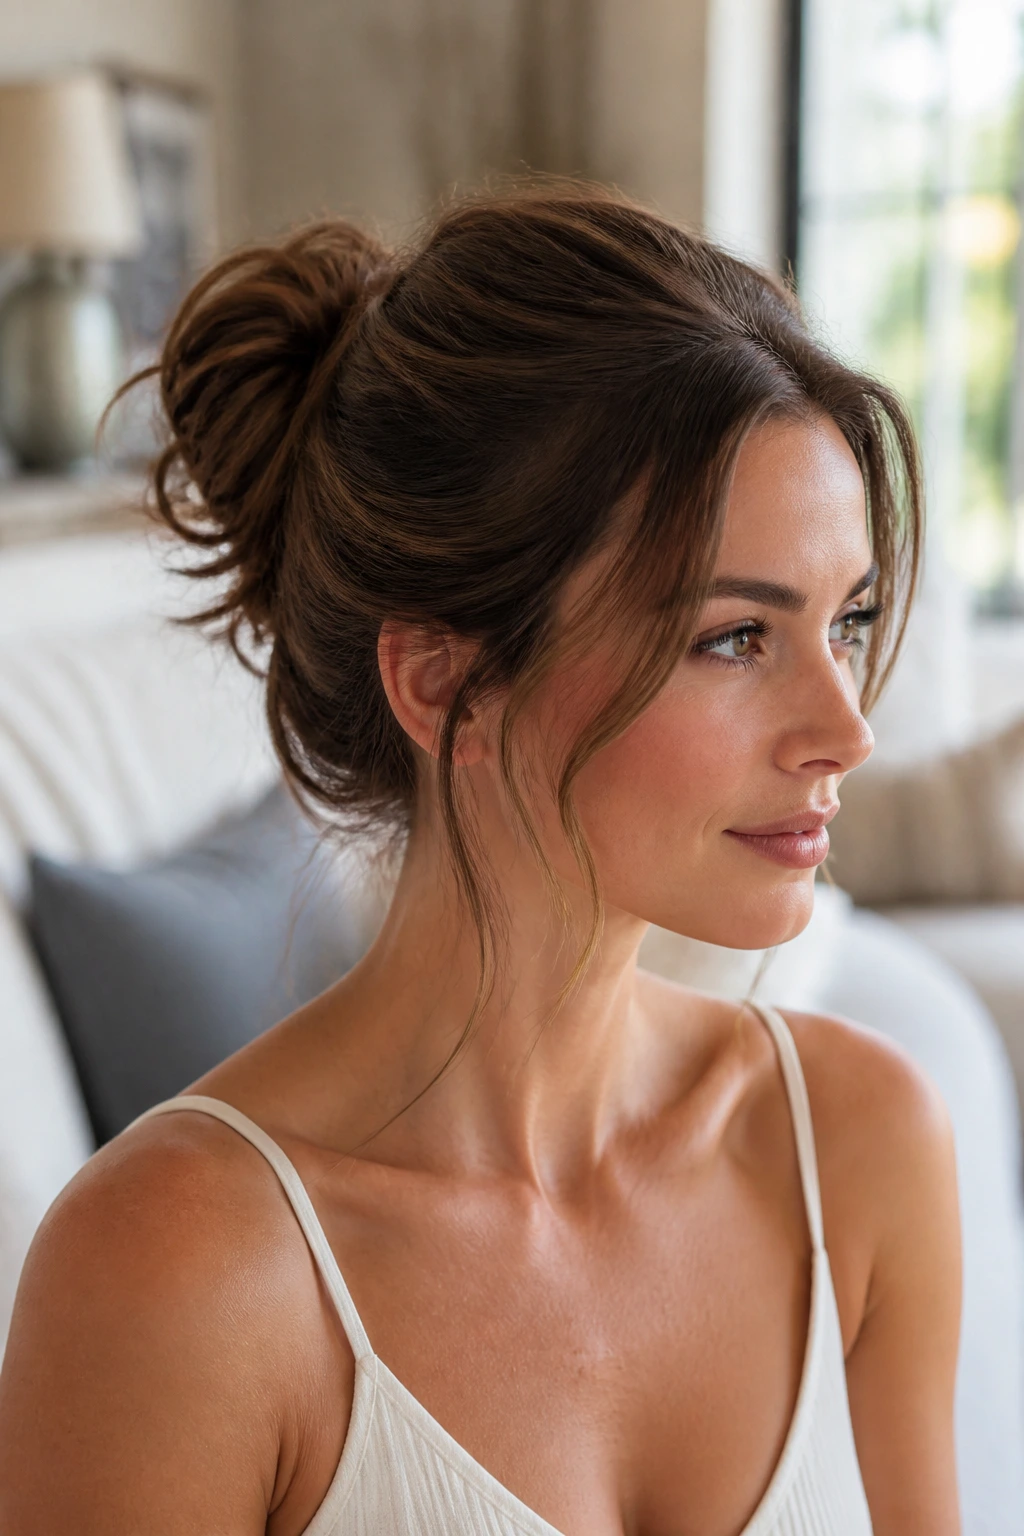
Move the knot up about an inch, and the whole mood changes. This version gives medium hair a lift at the crown without pushing the bun so high that it starts to feel unstable.
If your hair falls flat in a low bun, this is the fix. The extra height opens up the face, and the loose pieces around the temples stop the style from feeling too neat. I like this one when I want a bun that looks intentional but not precious.
The face-framing strands matter here. Keep them bent, not curled into ringlets. A quick wrap around a 1-inch iron is enough, then let them cool in your hand before you touch them. That little pause keeps the wave from going puffy.
A soft mid-height bun also plays well with medium hair that has layers. The shorter pieces can be tucked near the crown, while the longer ones form the bun itself. It’s a smart use of all that in-between length.
3. The Braided Bun That Looks More Complicated Than It Is
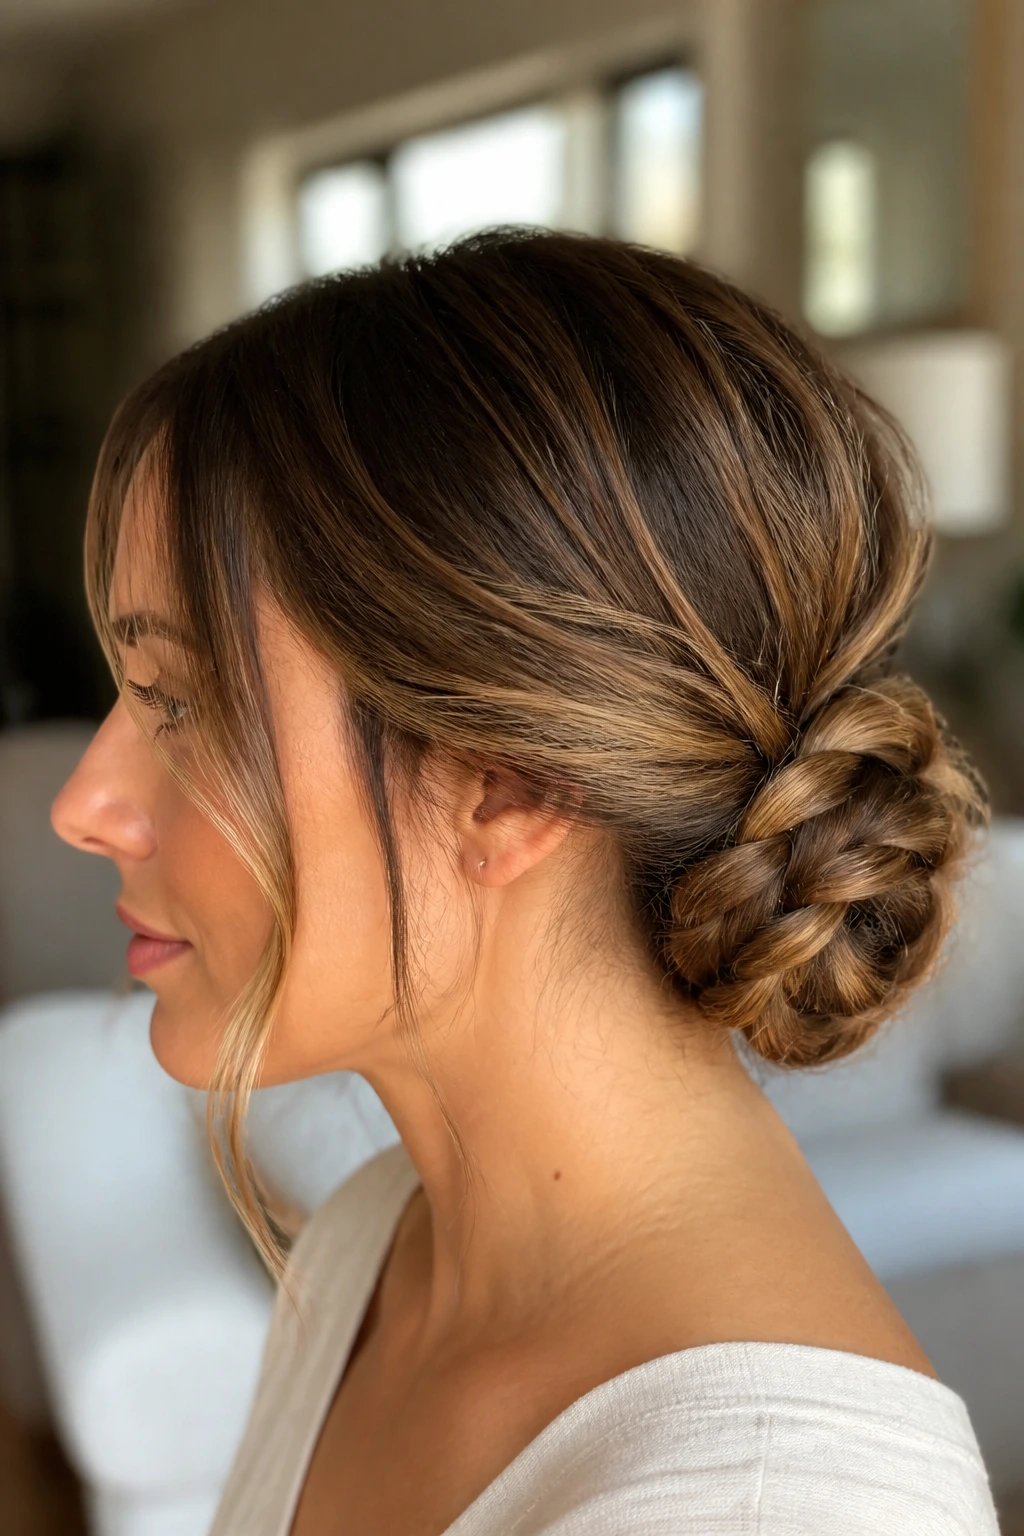
Why does a braid make a bun feel more finished? Because the braid gives the hair something to hold onto. Medium hair can be slick, and a plain coil sometimes needs help.
What Makes It Different
A braid adds texture before the bun even starts. Once you braid the ponytail or braid both sides into a low bun, the shape gets more grip and fewer flyaways. It also gives layered hair a place to disappear instead of poking out in every direction.
I like this style for hair that has a little slip to it. Straight medium hair can be tricky in a plain bun, but a braid helps create the visual weight that the length sometimes lacks.
How to Get the Look
- Make a low ponytail first.
- Braid the ponytail loosely, leaving it wide rather than tight.
- Coil the braid around its base and pin it from underneath.
- Tug at the braid a little so the plaits look fuller.
Best part: the braid does the hard work. You do not need a lot of product, and you do not need to hide every end perfectly.
4. The Side Swept Bun Behind One Ear
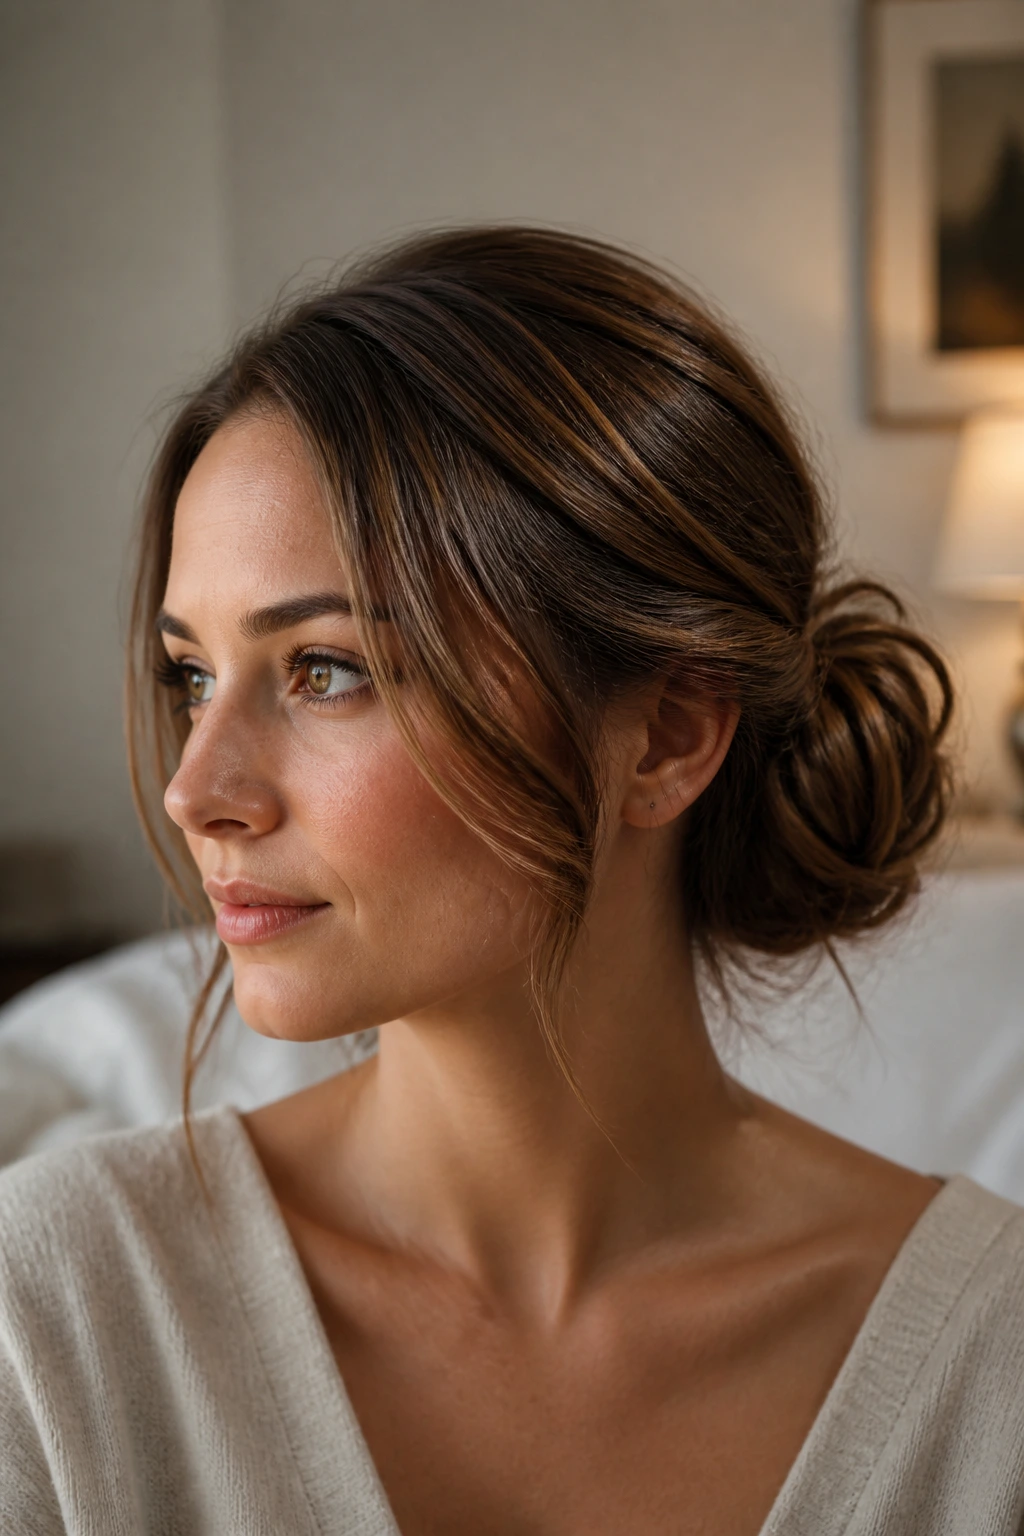
There’s something a little cinematic about a side bun. It’s the style I’d pick if I had a pair of earrings I wanted to show off or if I wanted one side of my face to stay open and clean.
The deep side part does most of the work. From there, the hair gets swept low and pinned just behind one ear, then gathered into a loose bun that rests off-center instead of dead in the middle of the head. That small shift makes medium hair look longer and more deliberate.
This one is especially nice if your layers are short around the front. Instead of fighting them, let them move toward the tucked side. A few loose pieces near the temple make the whole thing feel less formal.
A side bun can also save a bad hair day. Seriously. If one side has more volume than the other, use that asymmetry and call it design.
5. The Half-Up Loose Bun
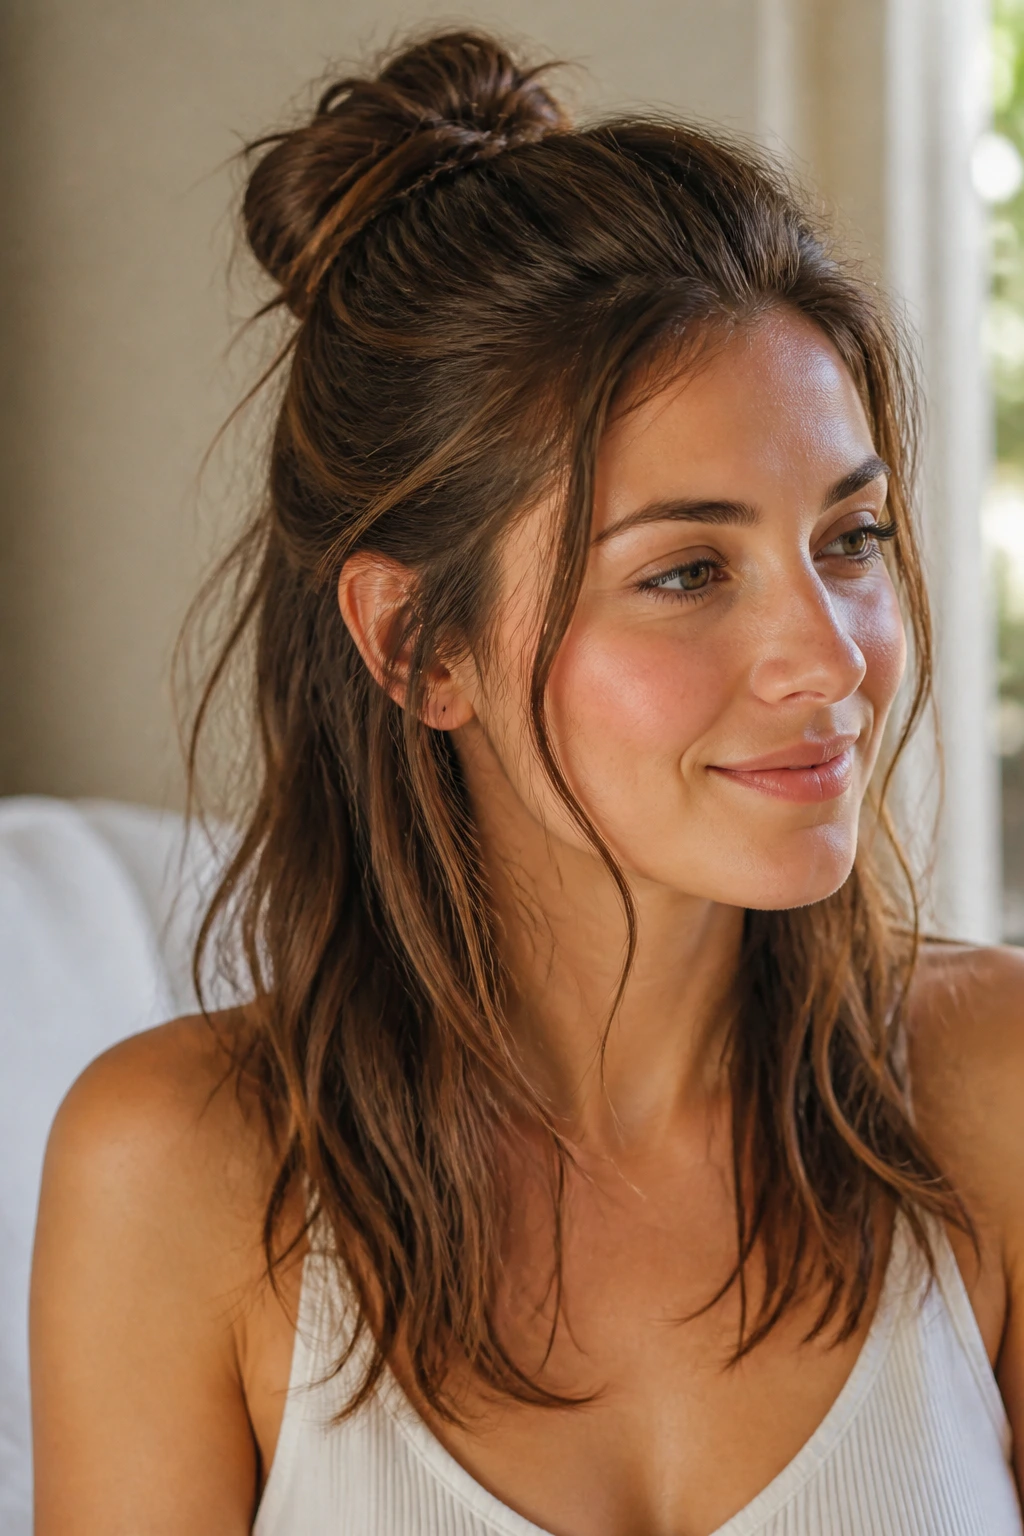
Some buns work because they control all your hair. This one works because it doesn’t.
A half-up loose bun is the style I reach for when I want the top half of my hair out of my face but still want some length hanging down. On medium hair, that matters. If you try to pull every strand into one bun, you can end up with something too small, too tight, or both.
The shape is simple: gather the crown and upper sides, twist them into a small bun, and leave the rest down. If your hair has a bend or wave already, even better. The bottom layers keep the style from looking overdone, and the little bun on top gives it enough personality to feel finished.
I like this one when the weather is humid or when I know I’ll be taking my hair down later. It does not commit the way a full updo does. That can be a relief.
Leave the bun slightly off-center if you want it to look softer. Center it if you want a cleaner line. Either way, the charm is in the contrast between the pinned top and the loose length below.
6. The Knotted Bun That Stays Put Without Looking Tight
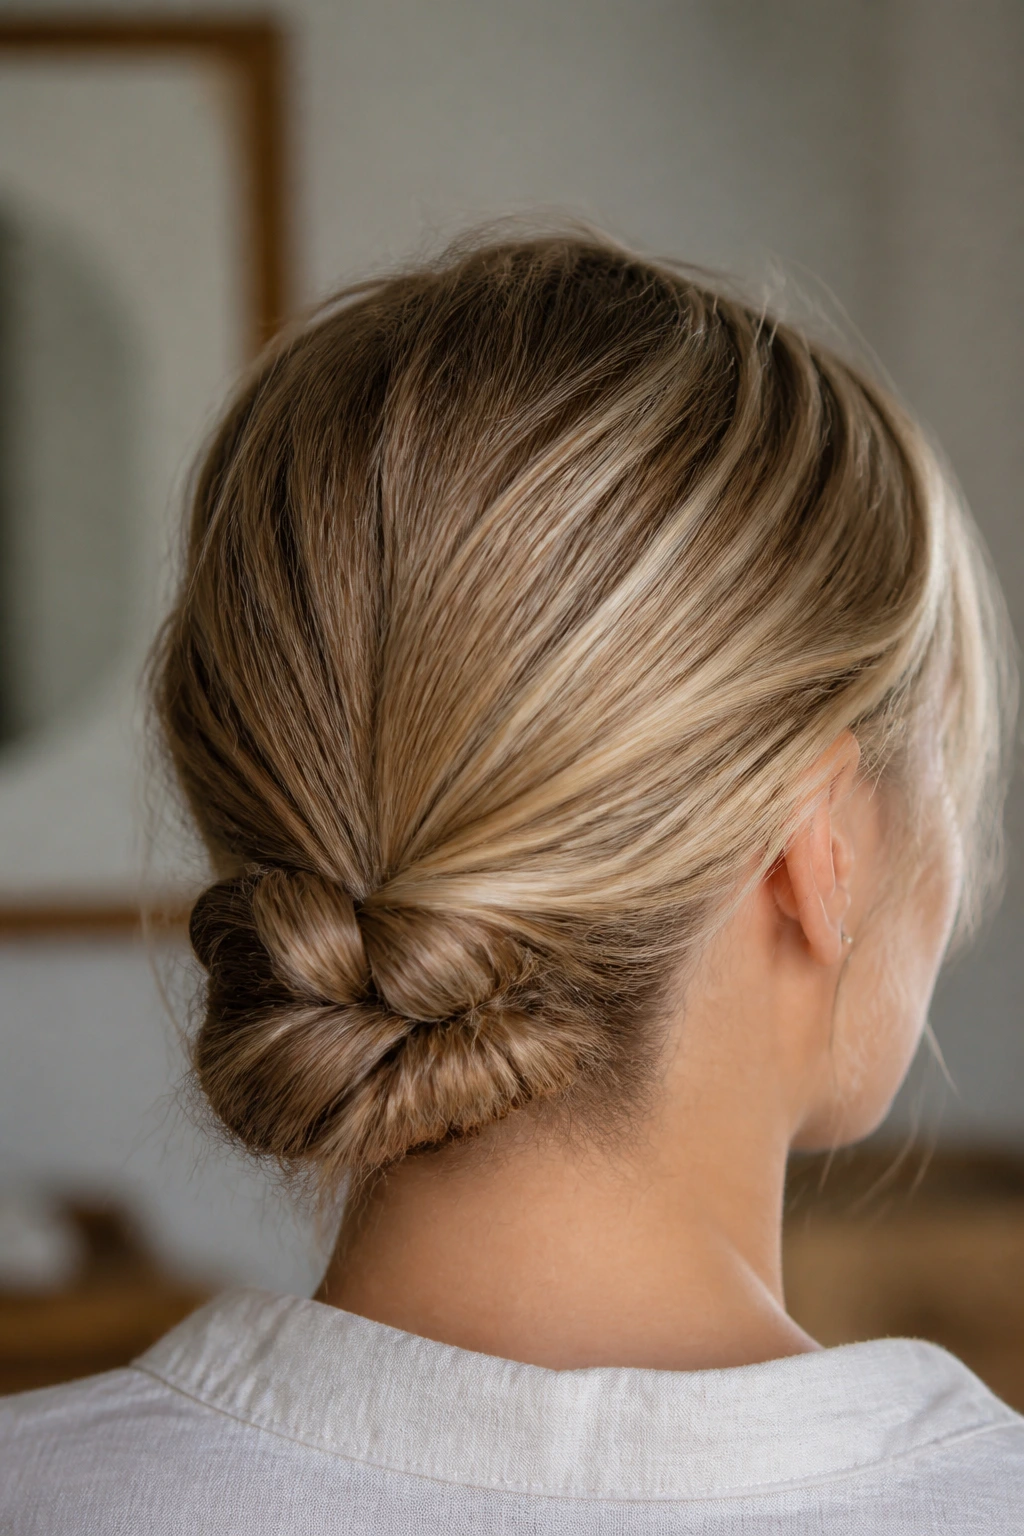
A regular bun can feel a little round and predictable. The knotted version has more shape in it, which is why I keep coming back to it for medium hair that has layers.
The trick is to split the ponytail into two sections, tie them into a loose knot, and then wrap the remaining ends around the base. That knot creates a locked-in center without making the style look rigid. It’s one of the better loose bun hairstyles for medium hair if you want grip without the helmet effect.
What Makes It Better Than a Standard Coil
The knot grabs the hair before the pins even go in. That means less slipping, especially if your hair is straight or freshly blown out. It also gives the bun a little texture in the middle, which makes the finished shape look fuller.
This style is a good match for medium hair that sits between blunt and layered. Blunt ends tuck in cleanly. Layers can be pinned under the knot so they don’t poke out.
If you want the bun to look softer, pinch the knot gently after it’s secured. Don’t flatten it. The tiny puff of air inside the shape is what keeps it from looking too neat.
7. The French Twist-Inspired Loose Bun
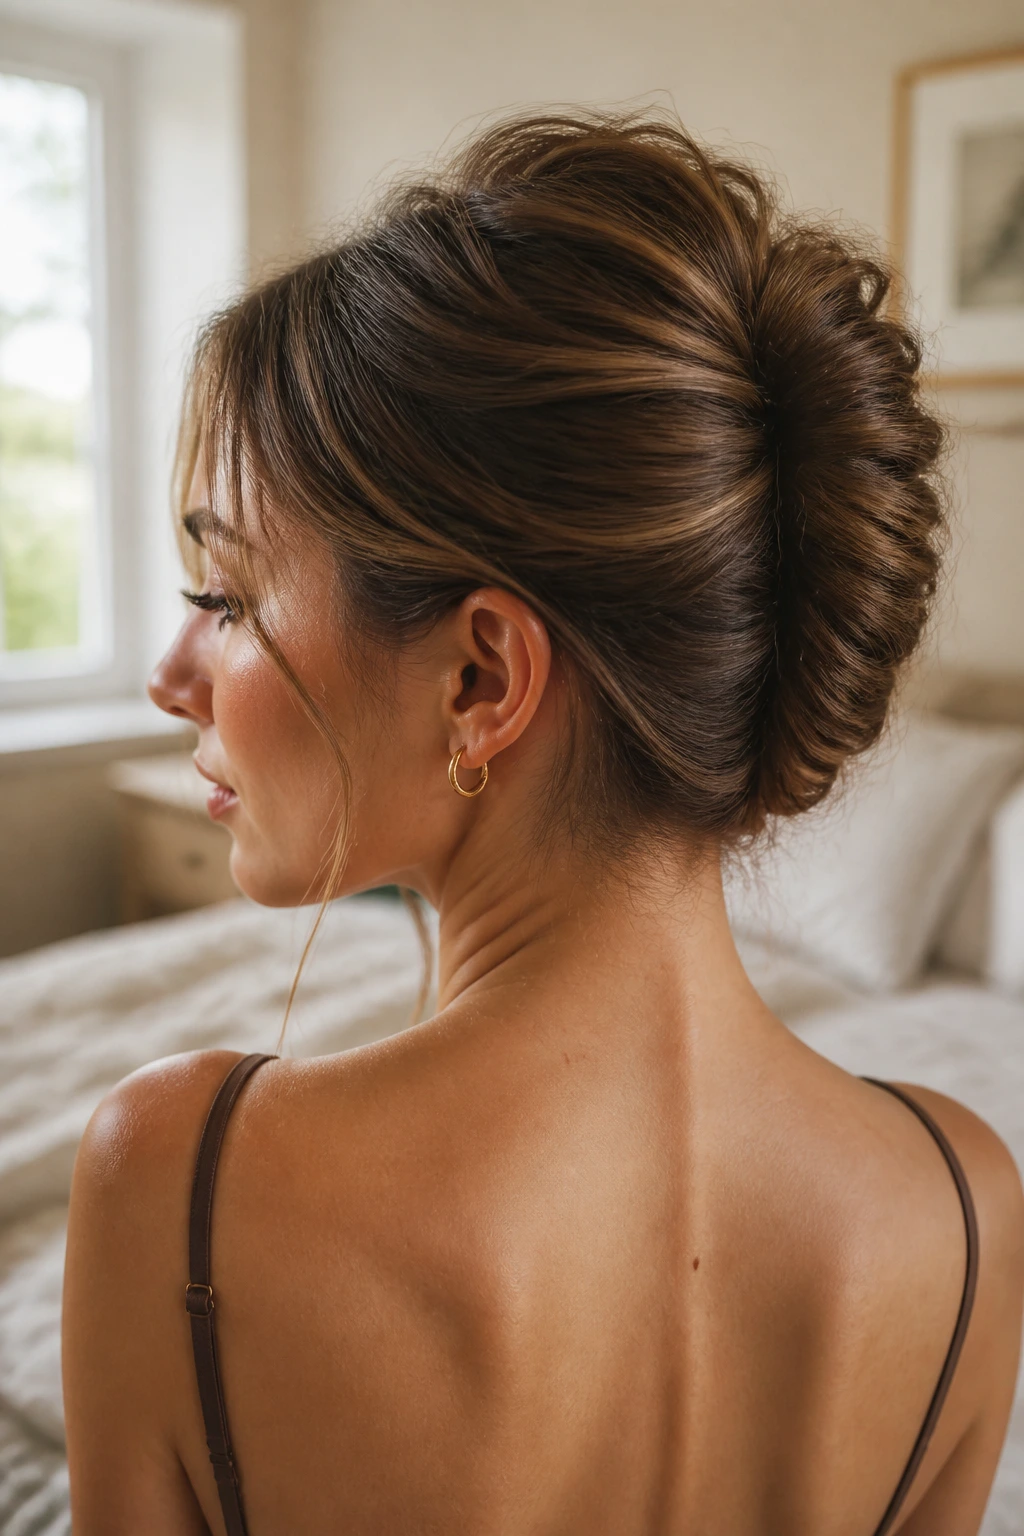
This is not a strict French twist. That would be too fussy for medium hair, and honestly, most people do not need that level of tension.
Instead, think of it as a relaxed version with the same vertical sweep. Hair gets gathered low, rolled upward along the back of the head, and pinned so the ends tuck into the middle. The result is a narrow, elegant shape with a softer edge than a formal twist.
A French twist-inspired bun is useful when you want the back of the head to look polished but not flat. Medium hair can struggle with height, and this style gives it a little spine without asking for a lot of length.
- Works well with a deep side part or a soft center part.
- Needs 4 to 8 pins, depending on how layered your hair is.
- Looks best when the roll is slightly loose at the top, not pressed tight to the scalp.
One thing I love: it keeps the neck clear while still leaving the bun shape visible from the side.
8. The Messy Top Bun With Soft Ends
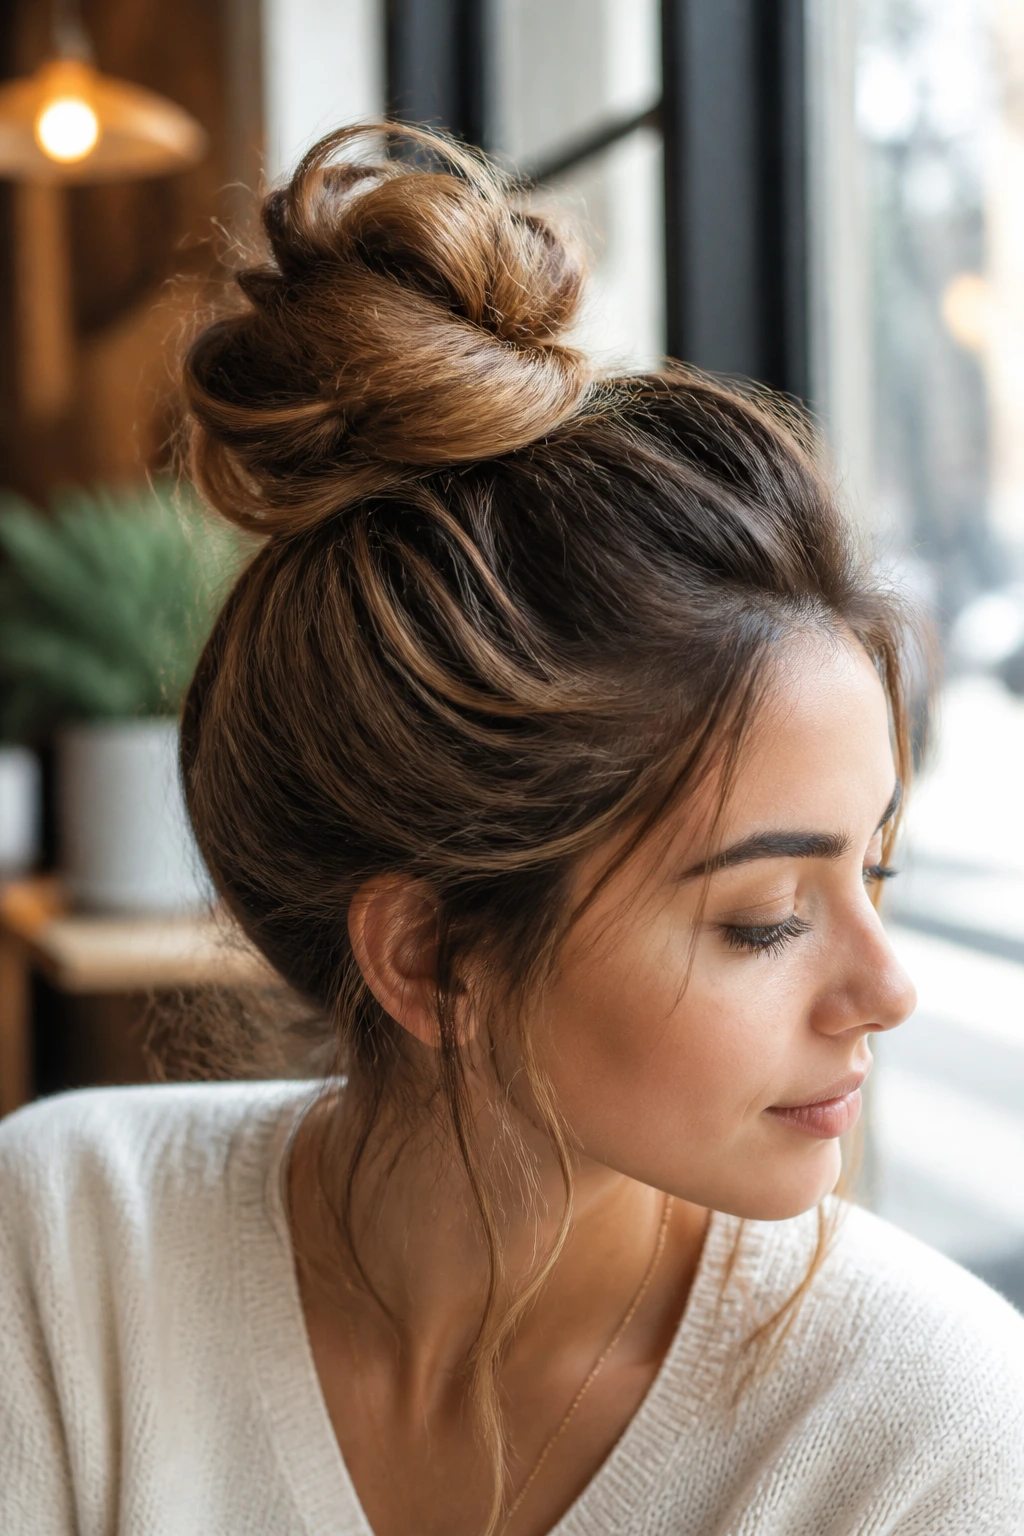
A high bun can still feel relaxed if you stop trying to smooth every strand into obedience. That’s the whole point of this one.
Gather the hair high, twist it loosely, and let the ends show a little. On medium hair, the bun will not balloon the way a long-hair knot can, so the shape stays more compact and wearable. That actually works in your favor. The style sits on top of the head instead of pulling it backward.
The best version is a little uneven. One side can be puffier. A few ends can stick out. The bun should look like you made it fast, then edited it just enough to avoid chaos.
I’d use this for errands, travel, or any day when you want your face clear and your neck free. It’s also decent for second-day hair because the extra texture helps the bun hold. If the crown is too flat, lift it with your fingers before you pin anything. Brush less than you think.
9. The Rope-Braid Bun With a Little Texture
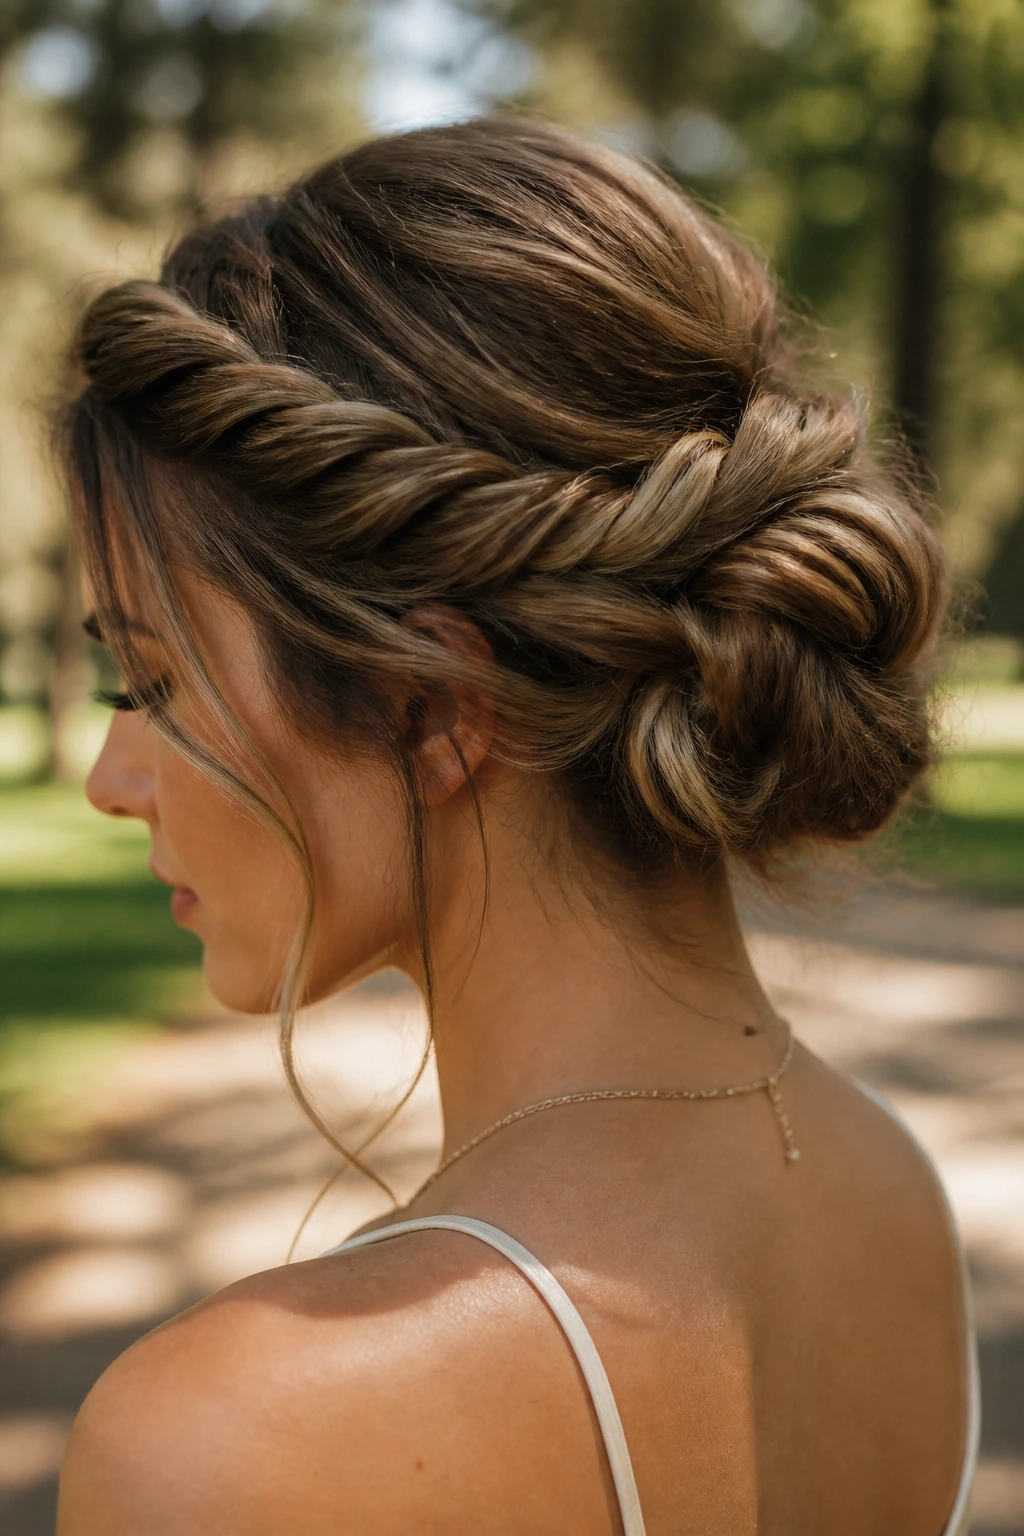
What if you want a bun that looks woven instead of twisted? A rope-braid bun gives you that without asking for a complicated hand.
Split the hair into two sections, twist both sections in the same direction, then wrap them around each other in the opposite direction. That rope texture gives medium hair more body than a plain twist, and it makes the bun hold in a slightly rounder shape.
The Science Behind the Shape
Rope braids cling to themselves. That’s the useful part. Each twist has a little friction, so the bun resists sliding around as much as a smooth coil. If your medium hair is fine, this can be a lifesaver.
You do not need perfection here. In fact, a rope braid looks better when it is not too tight. Loosen it after you wrap it, then pin the bun from several angles so the shape stays soft but secure.
I’d wear this one with simple clothes, because the bun already has enough texture to stand on its own. Add earrings if you want, but you do not need much else. The braid does the talking.
10. The Tucked-In Roll Bun
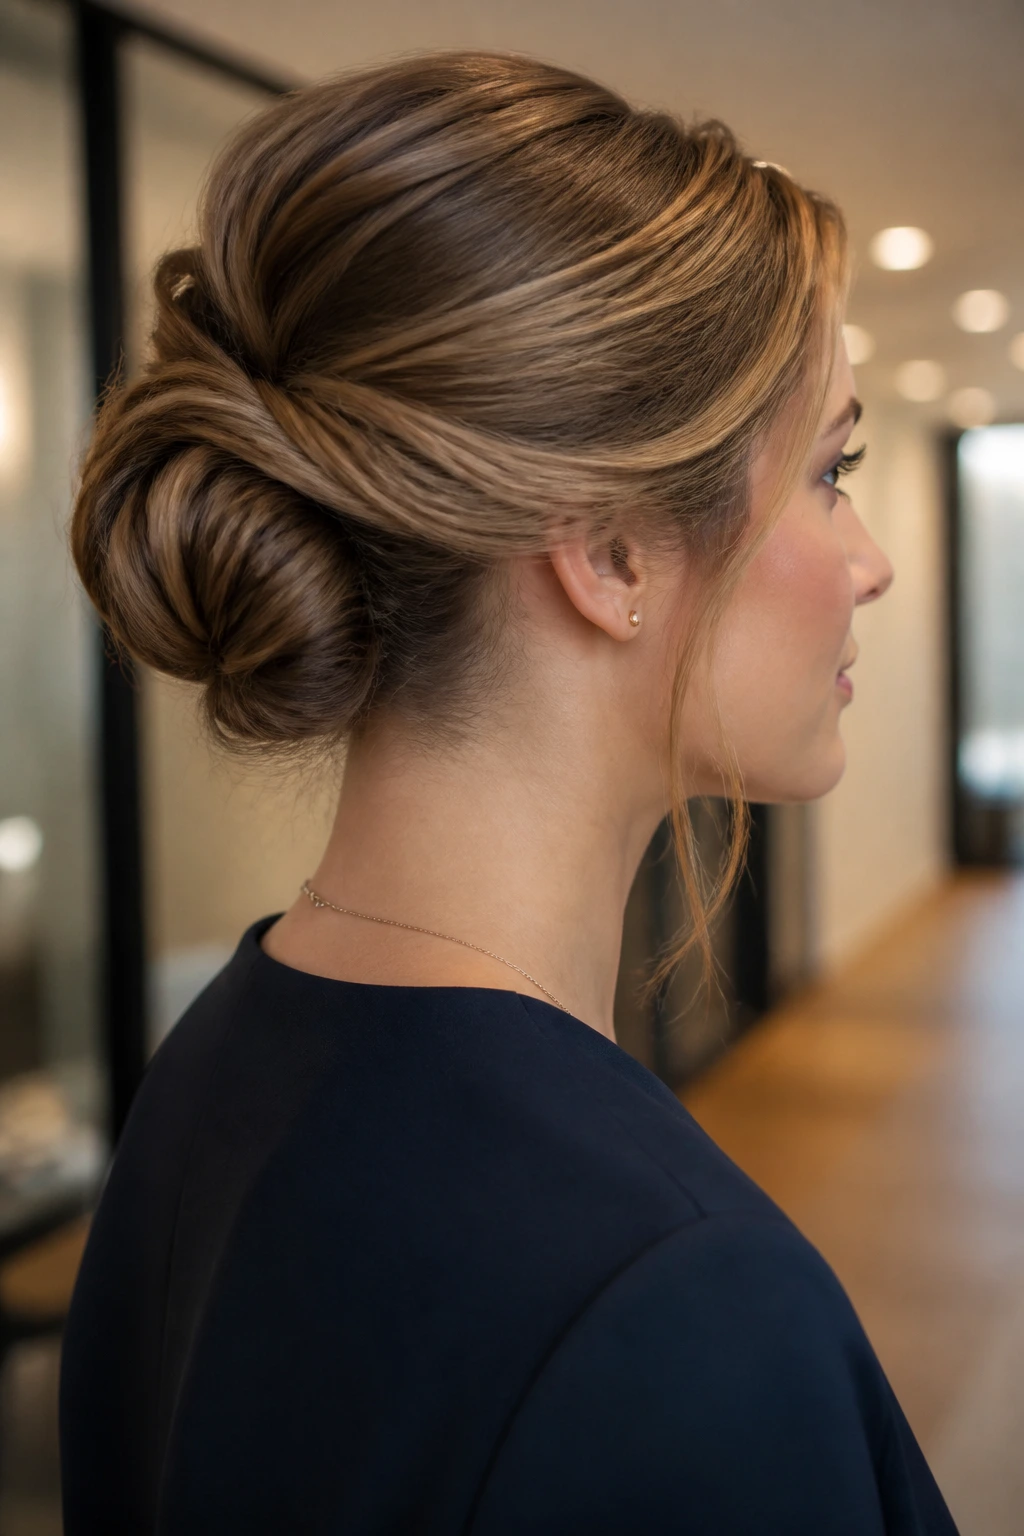
This is the bun I’d choose for meetings, dinners, or any setting where you want the hair off your neck and the finish to look calm. It has a cleaner outline than a messy knot, but it still feels relaxed.
The hair is gathered low, rolled upward, and tucked inward so the ends disappear under the fold. Medium hair is a nice length for this because it can create a compact roll without becoming bulky. You get the clean line of a chignon without having to pin a mountain of hair.
The trick is to keep the roll a little loose before you secure it. If you pull every strand tight at the start, the bun can sit flat and hard. A gentle roll gives the style some cushion.
This one also photographs well from the side, mostly because the shape is visible without being loud. Sorry, I know that sounds like a cliché, but it’s true. The curve at the back of the head does a lot of work on its own.
11. The Scarf-Wrapped Bun With a Soft Knot
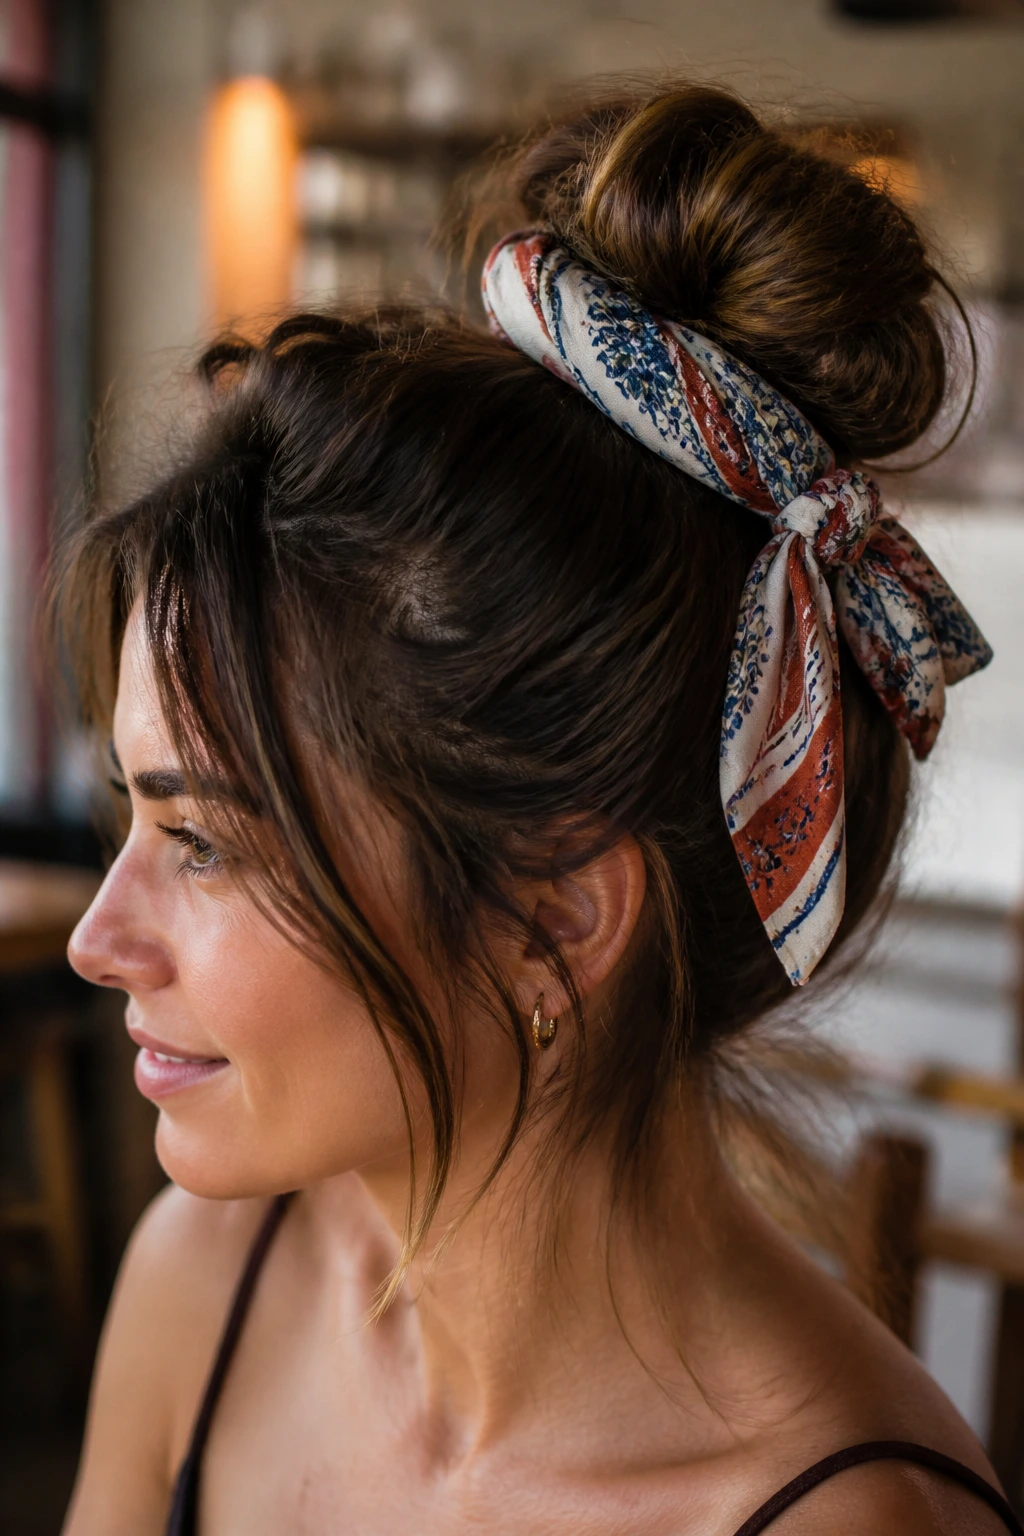
A scarf does two things here: it adds interest, and it gives medium hair a little grip. That second part gets overlooked all the time.
Start with a loose bun, then wrap a slim scarf around the base or tie it in a soft knot off to the side. A silk or cotton scarf works best when it’s narrow enough to sit neatly without swallowing the bun. Too much fabric can make medium hair look smaller than it is.
I like this style when I want the bun to feel less plain. The scarf can hide small pins, cover an awkward elastic, and make the whole thing feel finished without forcing the hair into a severe shape. If your hair is layered, the scarf can also keep the shorter pieces from escaping at the nape.
Pick a scarf with some contrast, but not so much that it becomes the only thing people notice. A simple stripe, a muted print, or a solid color with a bit of sheen usually does the job.
12. The Claw-Clip Faux Bun
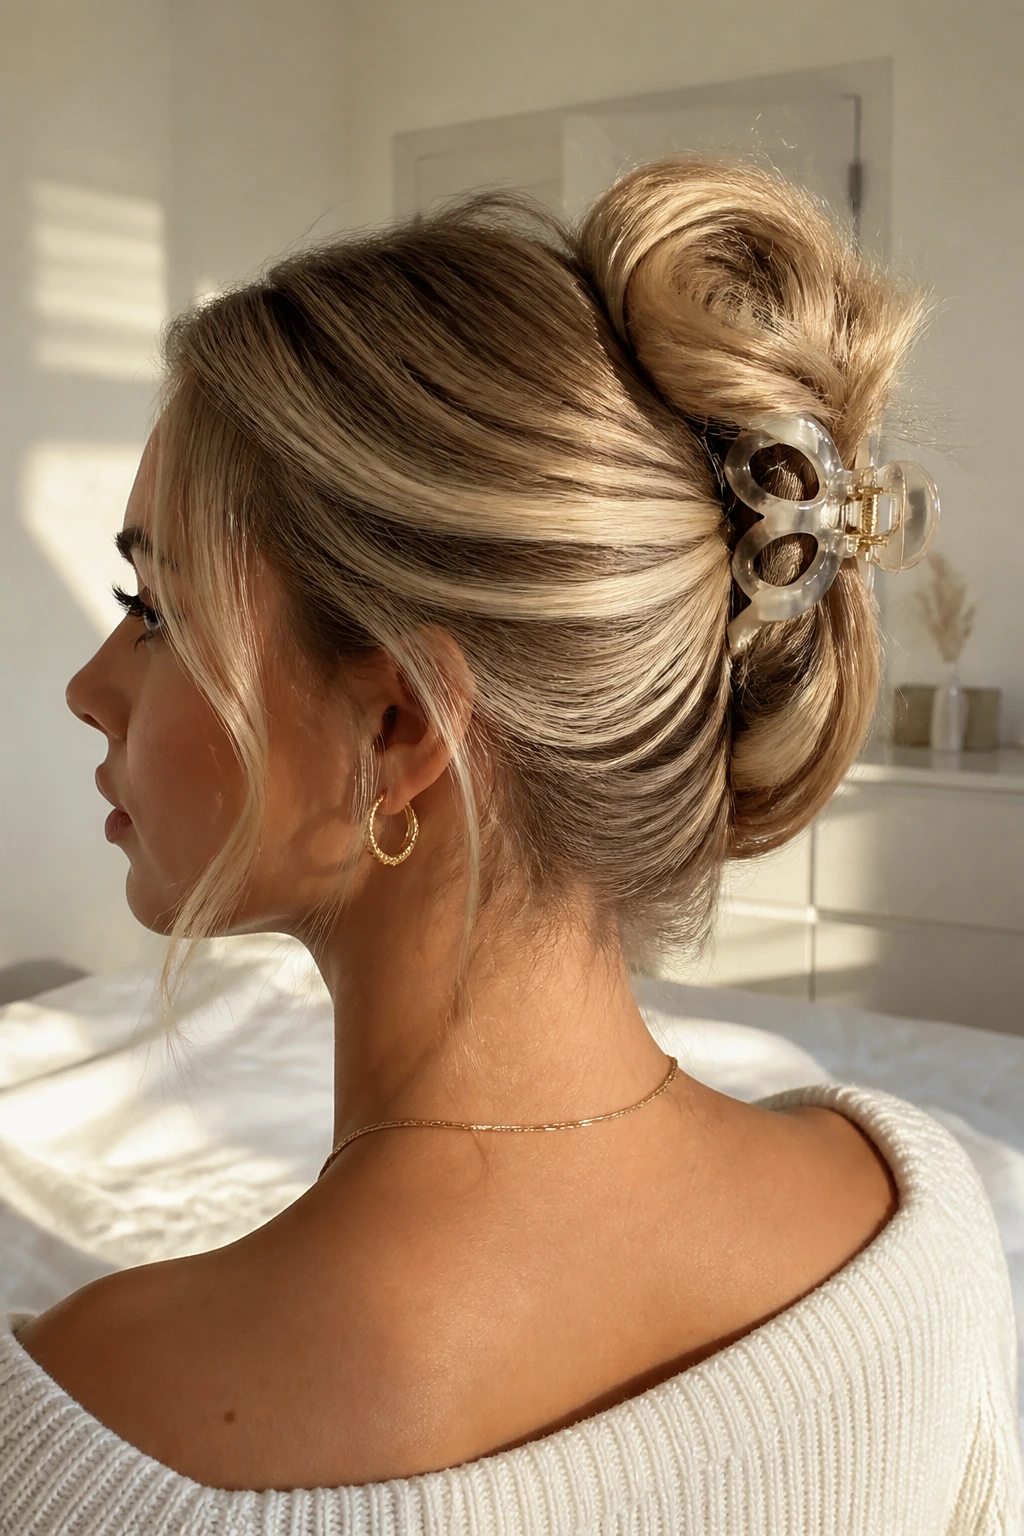
This one is for the days when you want the bun look but do not want the elastic headache. Or the pin hunt. Or the full mirror routine.
A claw-clip faux bun starts with a twist upward, then the clip grabs the folded hair and holds it in a loose bun shape. Medium hair is often the sweet spot for this style because there’s enough length to tuck, but not so much that the clip has to wrestle a giant loop.
Why I Prefer It Over a Tight Elastic Bun
Unlike a wrapped elastic bun, this style leaves the scalp alone. That matters if your hairline gets sore fast or if you hate the feeling of being pulled back all day. It also works well with layered cuts, since the clip can catch different lengths at once.
Use a medium claw clip, not a tiny one. A clip around 3 to 4 inches usually handles shoulder-length or collarbone-length hair better than the little fashion clips that barely hold a twist. If the bun feels loose, twist the hair once more before clipping.
It’s not the neatest style on the list. That’s the point. It looks like you knew exactly what you were doing, even if you did it in under a minute.
13. The Double-Loop Bun That Uses Every Inch of Medium Hair
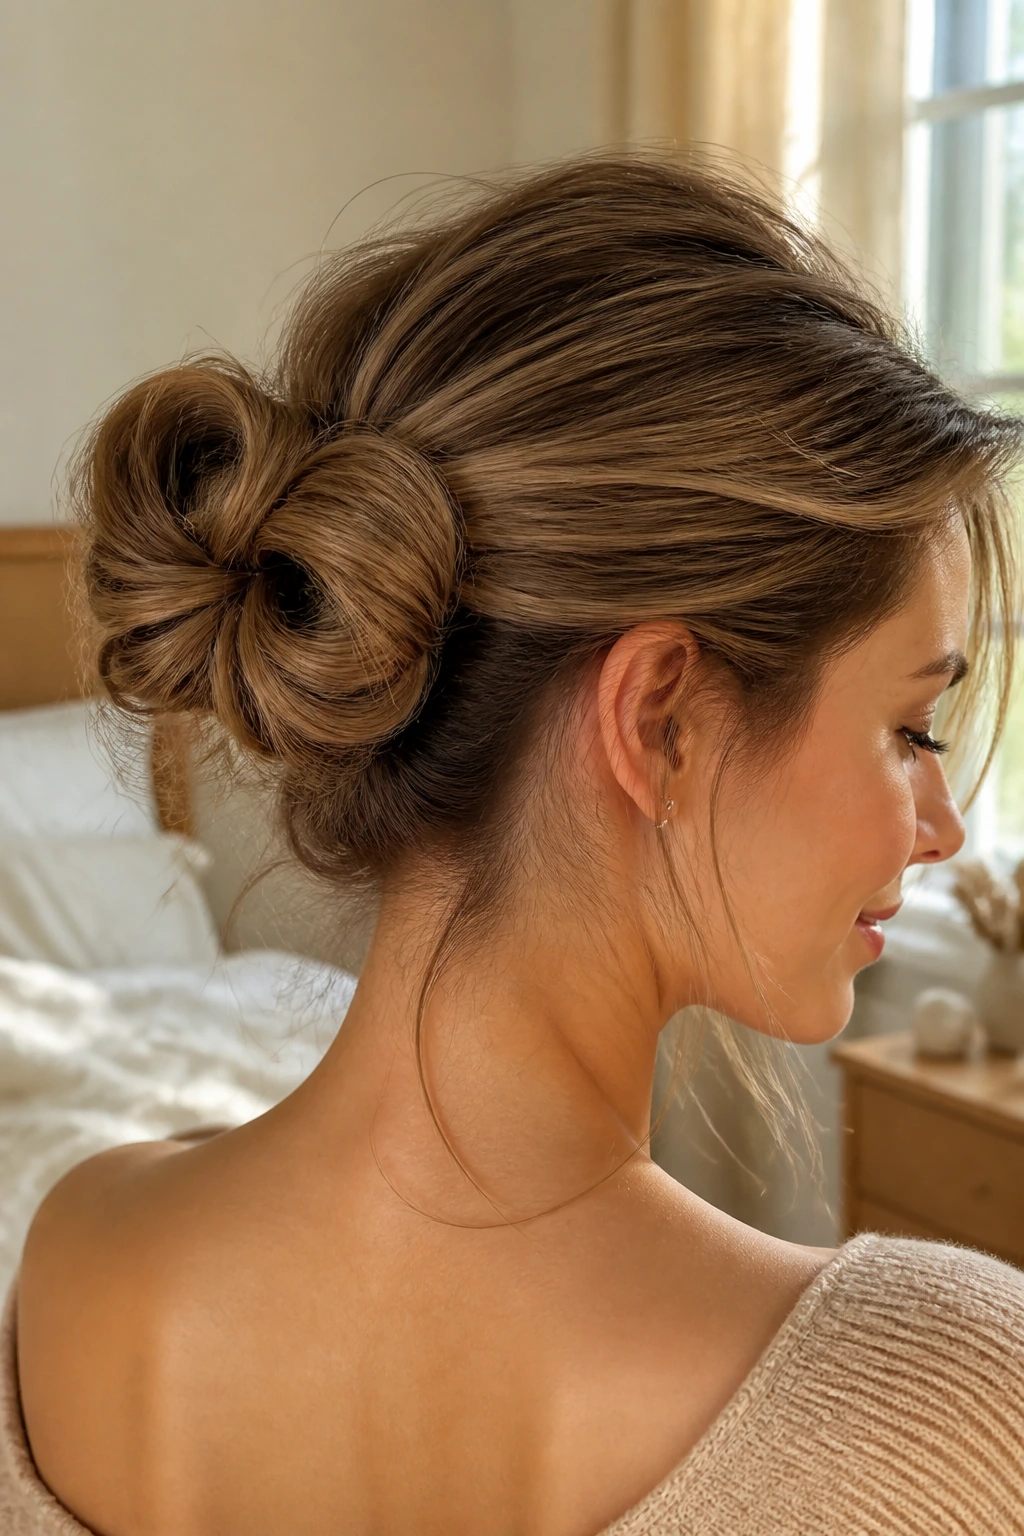
This is one of the smartest styles for medium hair because it makes the length do more than one job.
Instead of wrapping the ponytail into one round bun, split the length into two loops and pin them side by side. The shape ends up looking a bit like a ribbon or a folded knot, which gives the style more width than a plain coil. That extra width is useful when your hair is long enough to pin but not long enough to pile.
Why It Works on Collarbone-Length Hair
Medium hair can look sparse when it’s twisted into one small knot. Two loops solve that. They spread the bulk out and make the bun look fuller without requiring extra products or extensions.
This style also handles layers nicely. Shorter pieces can be tucked into the loop closest to the scalp, while longer pieces form the outer curve. If you want the bun to feel softer, pull the loops apart slightly before pinning. If you want it cleaner, keep the loops narrow.
It’s a little more architectural than a messy bun, but not fussy. That balance is rare, and it’s exactly why this one earns a place in the rotation.
14. The Braided Crown Into a Loose Bun
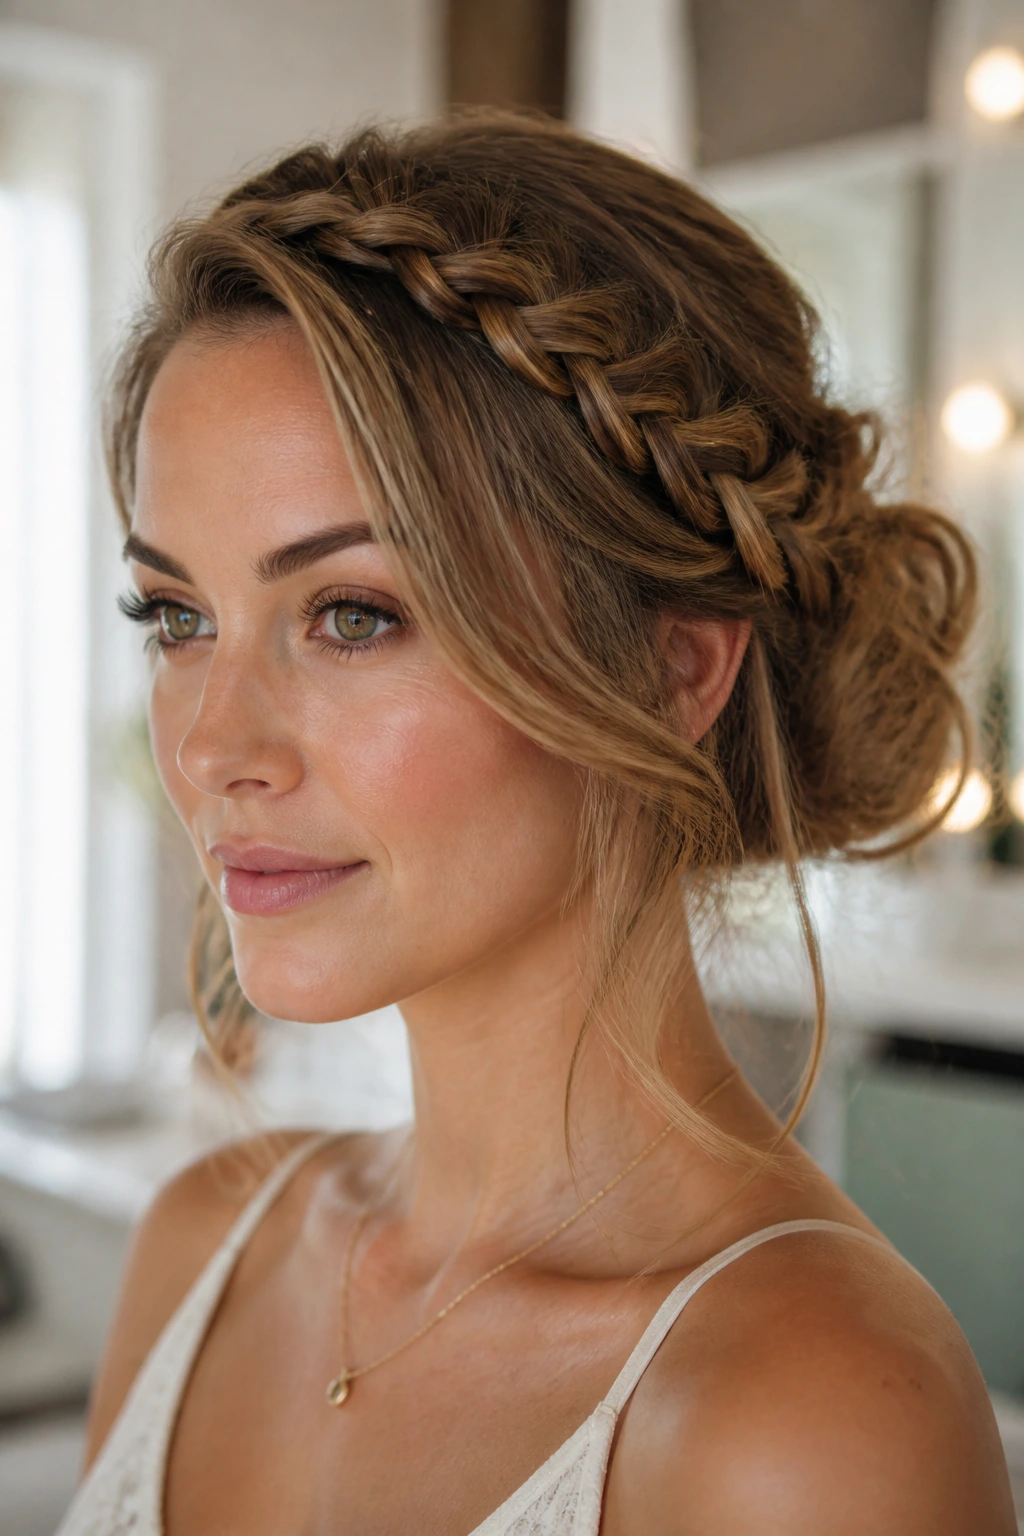
If you want something that feels dressed up without turning into a formal updo, braid first, bun second. That order matters.
A small braid along each side, or one braid from the temple back, frames the head before the bun begins. Then the loose ends get gathered at the nape or mid-back into a soft bun. Medium hair benefits from this because the braid gives the crown more shape while the bun keeps the rest of the style light.
The crown detail also helps hide layered ends near the front. Those shorter pieces can be braided in or tucked under the braid line, which cuts down on the frizz halo that shows up when medium hair is pinned loosely.
Wear this one when you want the style to look deliberate from the front and soft from the back. That’s the sweet spot. Not too formal. Not sloppy either. Just enough texture to keep people looking twice.
15. The Airy Curled Bun for Wavy or Curly Medium Hair
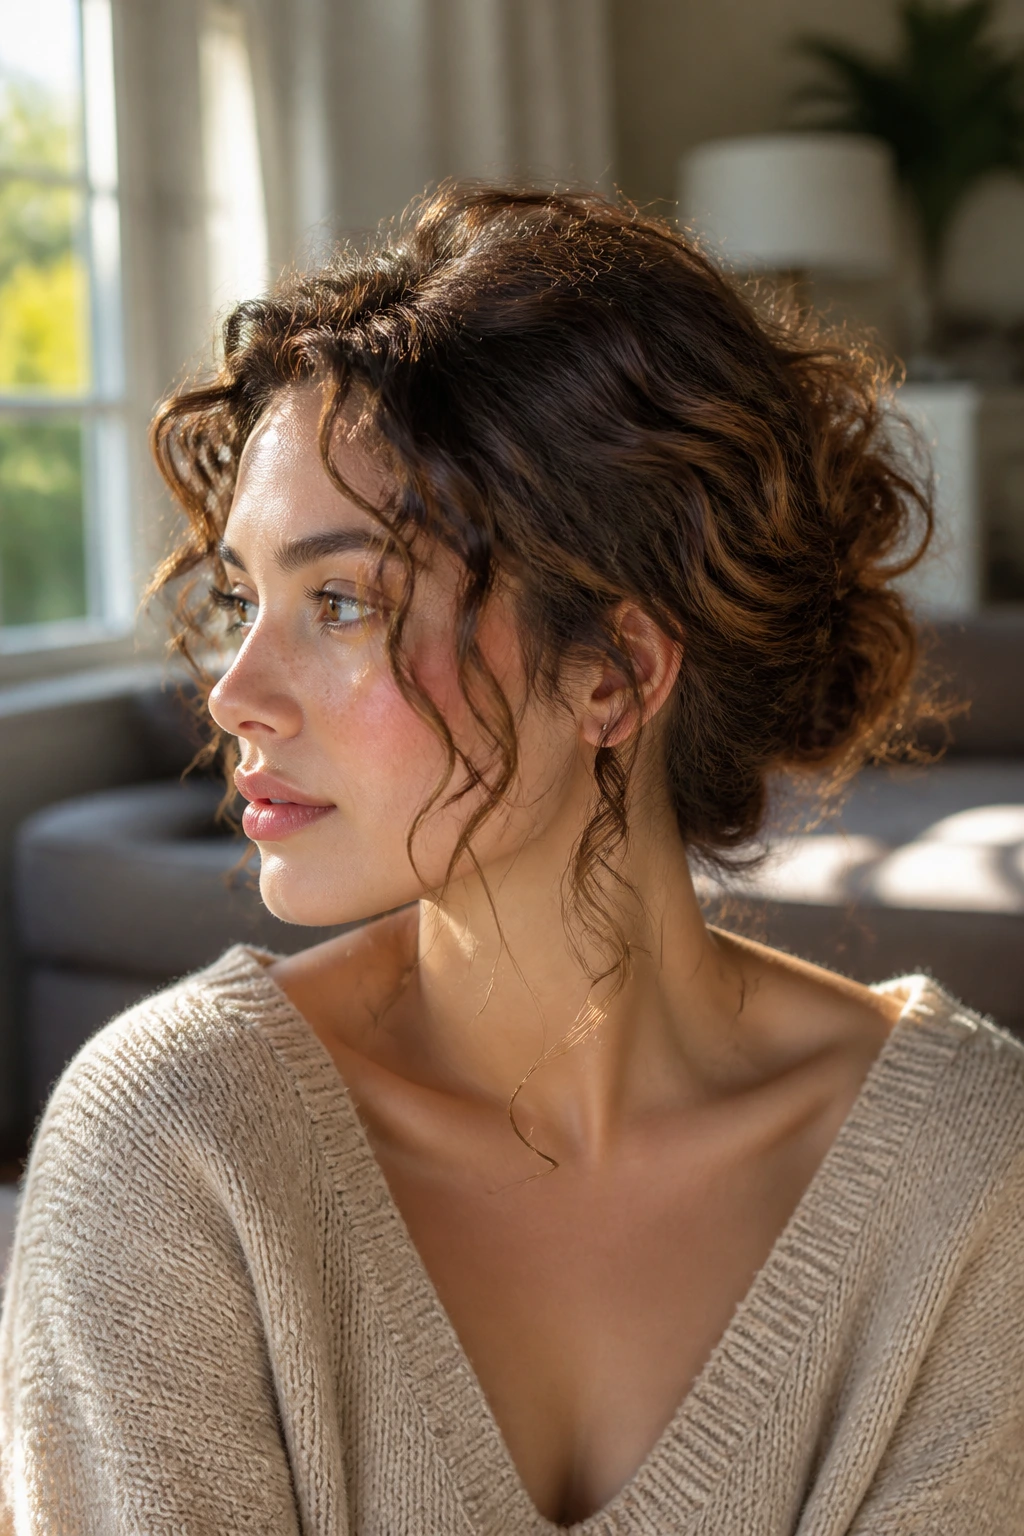
What do you do when your hair already has texture? You stop fighting it and build the bun around the bend you already have.
This version works especially well if your medium hair has a wave or curl pattern that springs on its own. Instead of brushing everything flat, shape the bun with your fingers, then let a few curled pieces stay visible around the face and neck. The bun ends up looking airy rather than forced.
A small curling iron can help if your natural texture is uneven. Wrap random sections for 8 to 10 seconds, let them cool, and then pin them into a loose bun without brushing them out. That keeps the shape from turning frizzy. A flexible-hold spray is enough here; heavy spray makes curls stick together in a bad way.
This is the style I’d pick for a softer, lived-in finish. It looks like you respected what your hair was already doing, which is usually a smarter move than trying to flatten it into obedience.
Final Thoughts
Medium hair does not need a perfect bun. It needs a bun with a plan. That can mean a low twist, a braided wrap, a loose knot, or a clip-held fake bun that looks softer than it sounds.
The styles that hold up best usually share the same secret: a secure base and a little freedom at the edges. Leave a few pieces alone. Pin from underneath. Stop before the hair turns helmet-hard.
And if one version keeps slipping, don’t blame the length too quickly. Medium hair often needs one extra pin in a different spot, not a completely different style. That tiny fix usually does more than another round of hairspray.
