



A right part can change a haircut without changing the haircut. That’s why right part hair ideas women are trying keep showing up in salons, on sidewalks, and in the mirror ten minutes before someone has to leave the house.
It’s a small move with a big effect. Shift the line a little to the right and the whole shape changes: roots get lift on one side, cheekbones look a little softer, and a plain style suddenly has a shape to it. Sometimes that’s all you need. No haircut. No dramatic color change. Just a comb, a few inches of direction, and hair that stops lying flat in the same old place.
I like styles like this because they work in real life. They survive errands, office air, humidity, second-day texture, and the odd moment when you have to go from casual to polished fast. A right part also lets you choose your mood: neat and glossy, loose and soft, sharp and editorial, or a little undone in that way that looks accidental but obviously isn’t.
The trick is not fighting the hair too hard. If your part wants to live near the left side, forcing it to the right can make the whole style look stiff. But if you let the line sit where the hair can accept it, then build around it with a bun, wave, braid, or clip, the result feels cleaner and more flattering. Small detail. Big payoff.
1. Sleek Right Part Low Bun
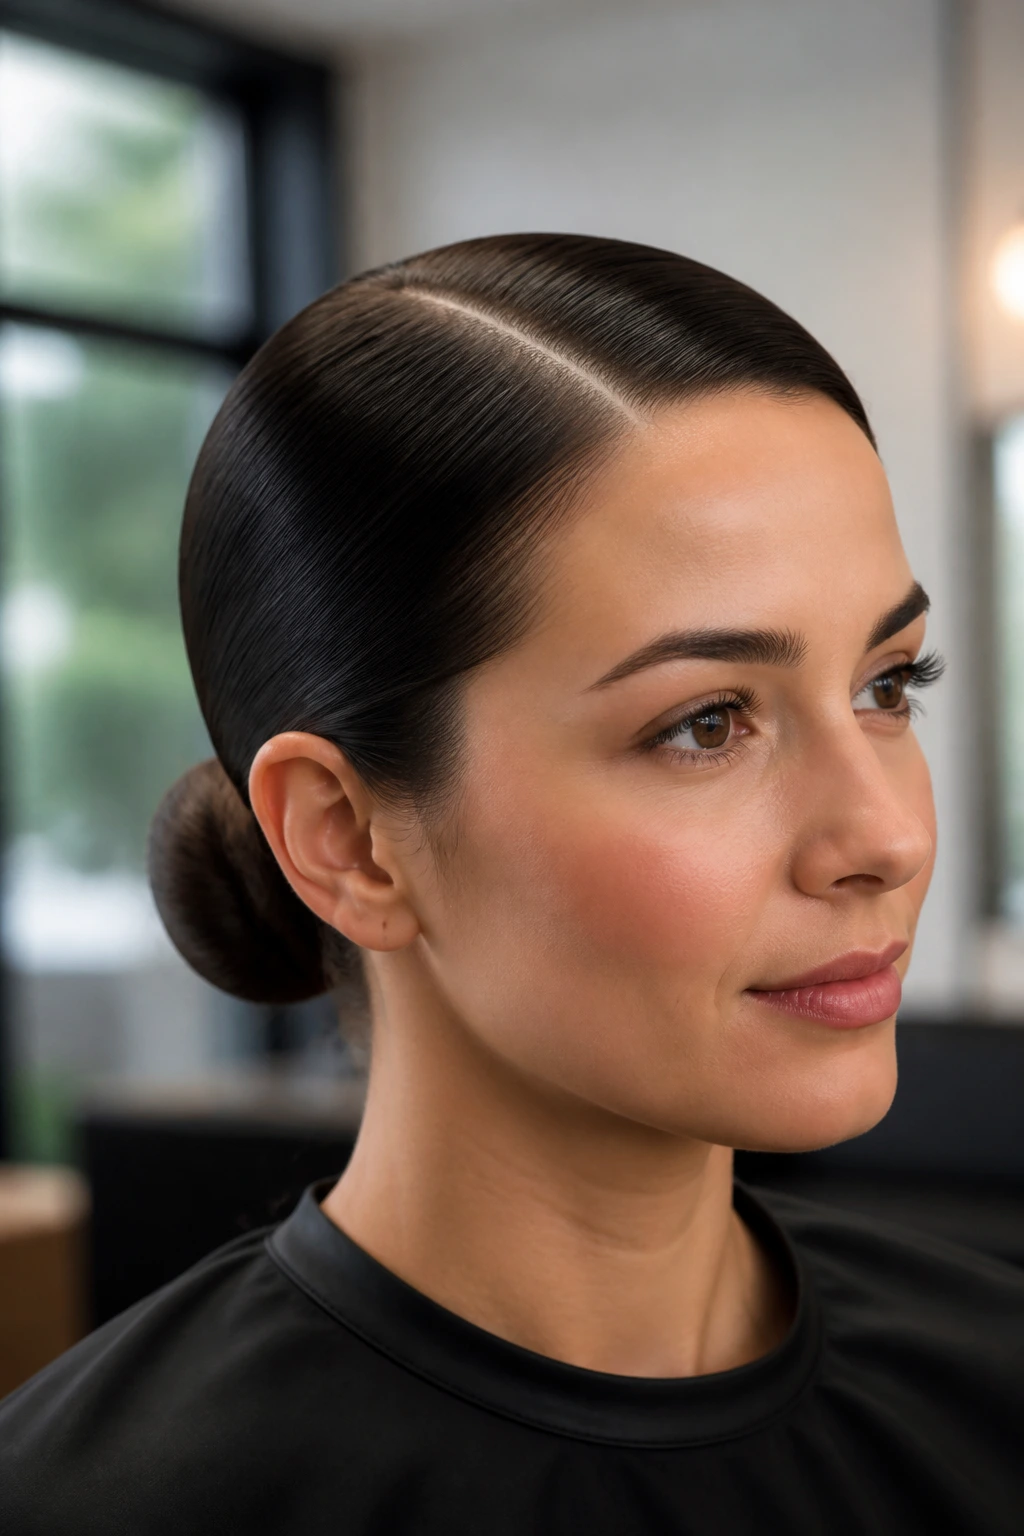
A low bun with a right part is one of those styles that looks calm even when the rest of the day is not. The part gives the front a clean diagonal line, and that line does a lot of the visual work before the bun even enters the picture. If you want something tidy that still has shape, this is a solid place to start.
Why It Works
The right part keeps the bun from feeling like a plain circle at the nape. It gives the top of the head a little lift on one side, which helps if your hair tends to sit flat near the crown. That matters more than people think. Flat roots can make a bun look sleepy.
A low bun also plays nicely with texture. Straight hair looks crisp here. Slightly wavy hair looks softer. If your hair is thick, smooth the top with a small amount of gel or cream before brushing it back. If it’s fine, mist the roots with dry shampoo first so the bun does not collapse after lunch.
- Works best on medium to long hair.
- A fine-tooth comb keeps the part clean.
- A small amount of gel at the temples tames flyaways.
- Place the bun a touch off-center so the part still shows.
Tiny tip: leave one thin face-framing piece loose if you want the style to feel less severe.
2. Soft Right Part Blowout

If you want one style that makes hair look fuller fast, this is the one I’d point to. A soft right-part blowout gives movement without making the ends look too curly or too done. It’s polished, but not stiff. And that matters when you want your hair to look like hair, not helmet material.
The right part gives the blowout a direction, so the volume has somewhere to go. Instead of puffing out evenly on both sides, the hair lifts more on the opposite side of the part, which makes the whole shape look livelier. A round brush helps, but the real trick is in the root work. Blow-dry the roots away from the part first, then guide the lengths down and under.
I like a 1½-inch round brush for shoulder-length hair and a slightly bigger one for longer hair. Small rollers clip in nicely while the hair cools, and that cooling time is what keeps the bend from falling out immediately. If your hair is fine, use a light volumizing mousse at the roots. If it’s thick, a heat protectant with a little smoothing power is enough.
Big hair, small effort.
3. Right Part Lob With Tucked Ends

Why does a lob look so good with a right part? Because the cut already has enough length to move, and the part gives that movement a direction. A lob without a part can drift into “fine, I did my hair” territory. Add a right part and it starts to look deliberate.
The shape works especially well when one side is tucked behind the ear. That tiny move shows off the jawline and gives the front a clean break. It also helps if your lob has blunt ends. The tuck softens the edge without making the cut lose its shape.
How to Wear It
Keep the part near the arch of the eyebrow if you want a gentle side sweep. Go deeper if you want more contrast and a little more lift on the opposite side. Either way, leave the ends smooth, not curled under too much. A flat iron bend at the last inch or two is enough.
- Best on collarbone-length cuts.
- Tucking one side works well with hoop earrings or a small gold stud.
- A smoothing serum keeps the tucked side from puffing out.
- If your hair flips at the ends, bend them in the same direction so the line feels clean.
This is one of those styles that looks even better after the second time you touch it up. Oddly enough, that’s part of the appeal.
4. Right Part Curtain Bangs
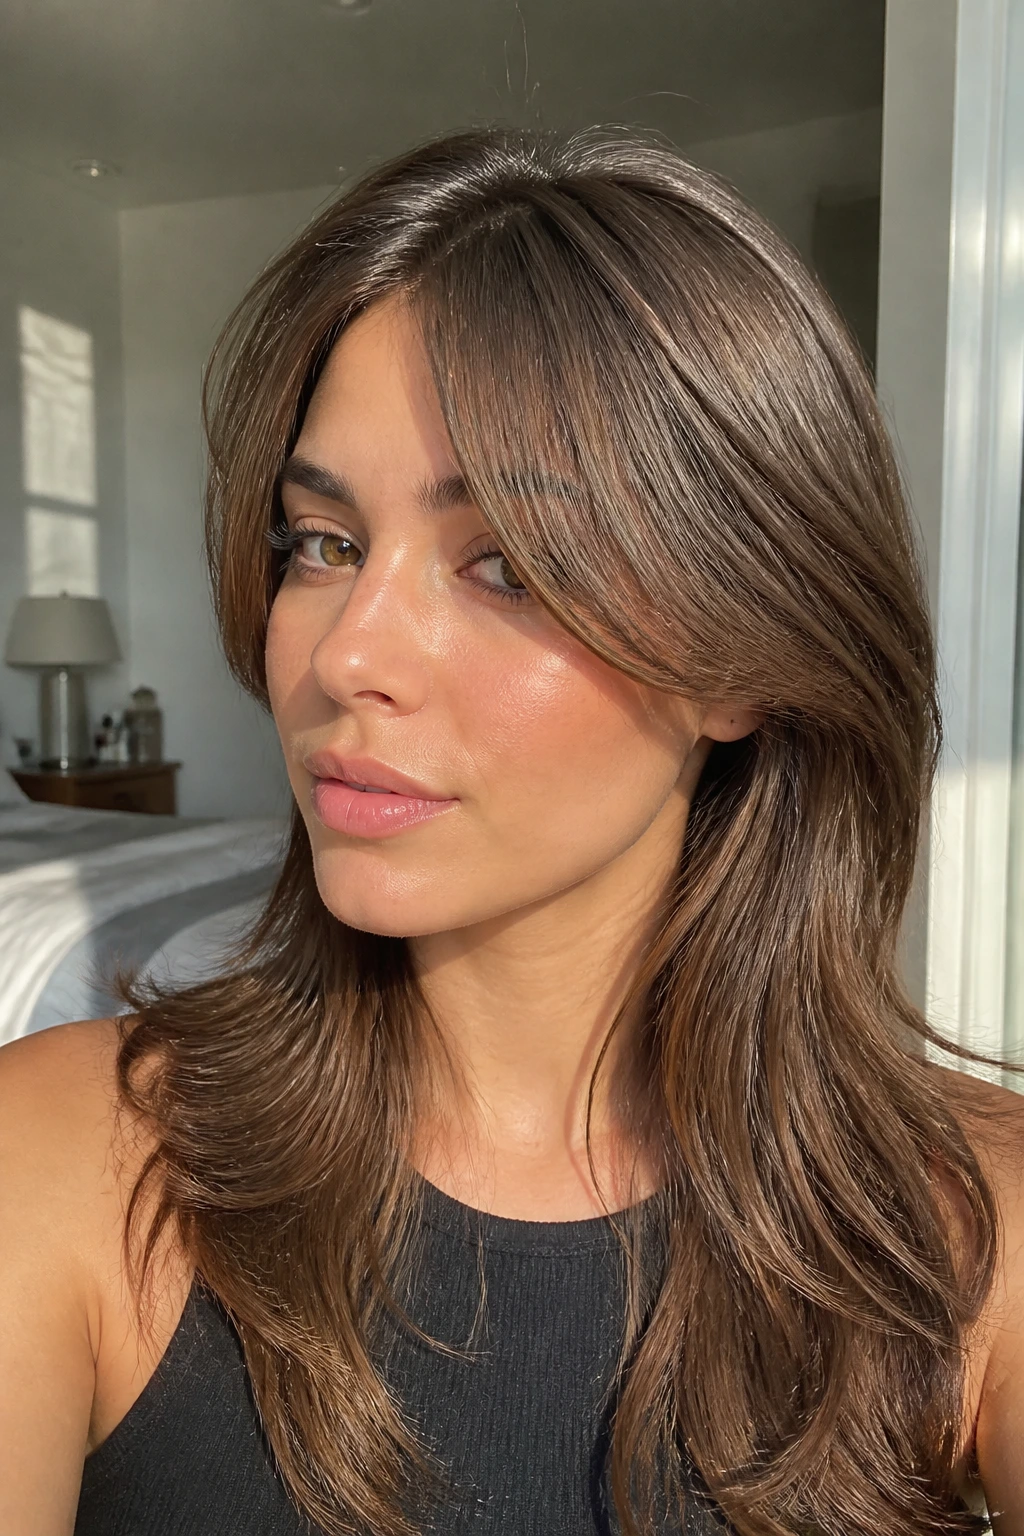
You can cut curtain bangs thinking they belong to a center part and still wear them with a right part later. In fact, that shift often makes them look softer. The shorter pieces don’t split so symmetrically, which gives the whole front section a nicer fall.
The magic is in the bend. A right part helps curtain bangs sweep across the forehead instead of opening like a curtain that’s been tugged from both sides. That means the fringe can skim the cheekbones, which is where these bangs usually look best. If you have a wider forehead, the side sweep can feel more balanced. If your face is narrow, keep the bend lighter so the bangs do not swallow your features.
What matters most is how you dry them. Blow-dry the bangs forward first, then steer them right with a round brush. If you let them dry in a random direction, they’ll split wherever they please, and that can look messy rather than soft. A little mousse at the roots helps the shape hold.
- Start with damp hair, not soaking wet bangs.
- Use a small round brush for better control.
- Aim the dryer downward so the fringe stays smooth.
- A pinch of texture spray at the ends gives the bangs movement.
The result feels easy, which is the whole point.
5. Deep Right Part Hollywood Waves
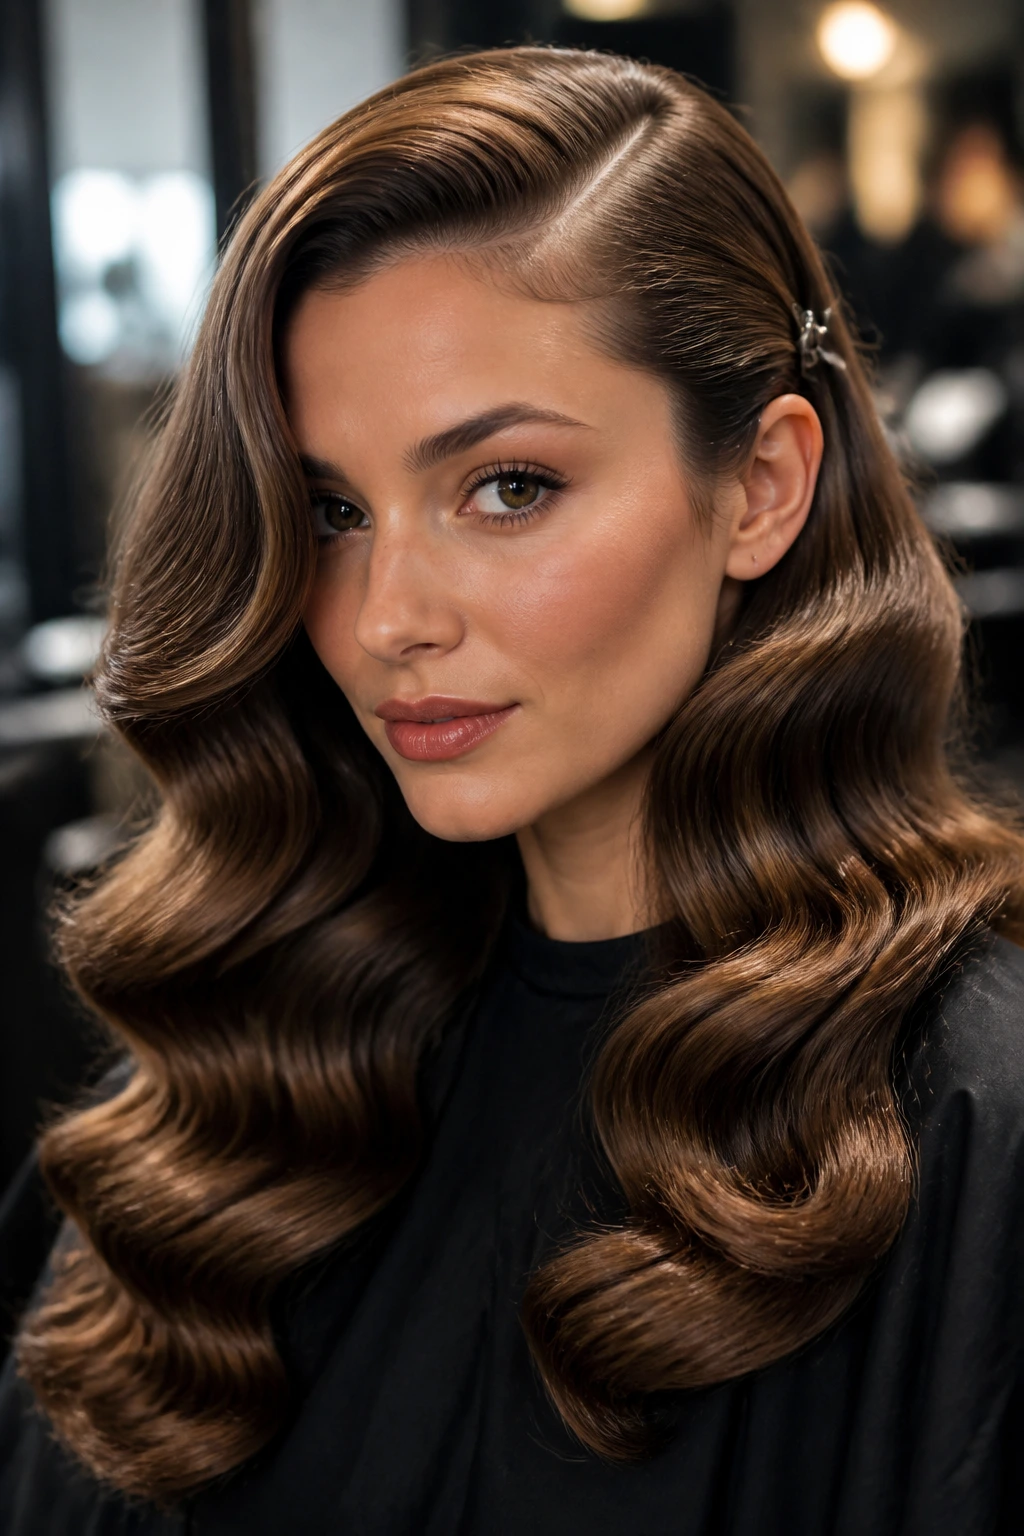
Glossy waves and a deep right part have an old-school kind of charm. Not fussy. Not frilly. Just polished hair with enough curve to look intentional from across a room. If you want something that feels dressier without turning into prom hair, this is the lane.
The right part lets the waves fall in a more dramatic sweep over one side of the face. That creates a strong line near the temple and a softer one near the cheek. On long hair, the effect is especially nice because the wave pattern has room to settle. On medium-length hair, it looks a little sharper, which I actually like.
I usually reach for a 1-inch curling iron for this style, then brush the curls out once they’re cool. The cooling part matters. If you brush too soon, the wave turns into frizz and the shape loses that smooth bend. Pinning the front section while it sets helps too, especially if your hair resists holding a curve.
Brush them out. Slowly.
Use a shine spray at the very end, not before. Too much product near the roots can flatten the part and make the whole look greasy. A soft side-swept wave should move when you turn your head. It should not stick.
6. Right Part French Bob

Unlike a blunt center-part bob, the right-part French bob has a little tilt to it. That tilt changes everything. The cut feels less boxy, the jawline gets a softer frame, and the whole style reads as slightly more relaxed without losing any sharpness.
This version works especially well if your bob hits around the jaw or just below it. The right part lets the front pieces fall across the face in a way that keeps the cut from feeling too symmetrical. If your hair is naturally straight, the line looks crisp. If it has a bit of wave, even better. The slight bend stops the bob from looking too engineered.
I’d recommend this for someone who likes structure but does not want hair that looks overworked. If your face is round, keep the part a little less deep so the width does not build too much on one side. If your face is longer, a deeper part can help bring more width across the top. That is one of the few times the same cut can play two different roles.
A French bob already has attitude. The right part just sharpens it.
7. Right Part High Ponytail
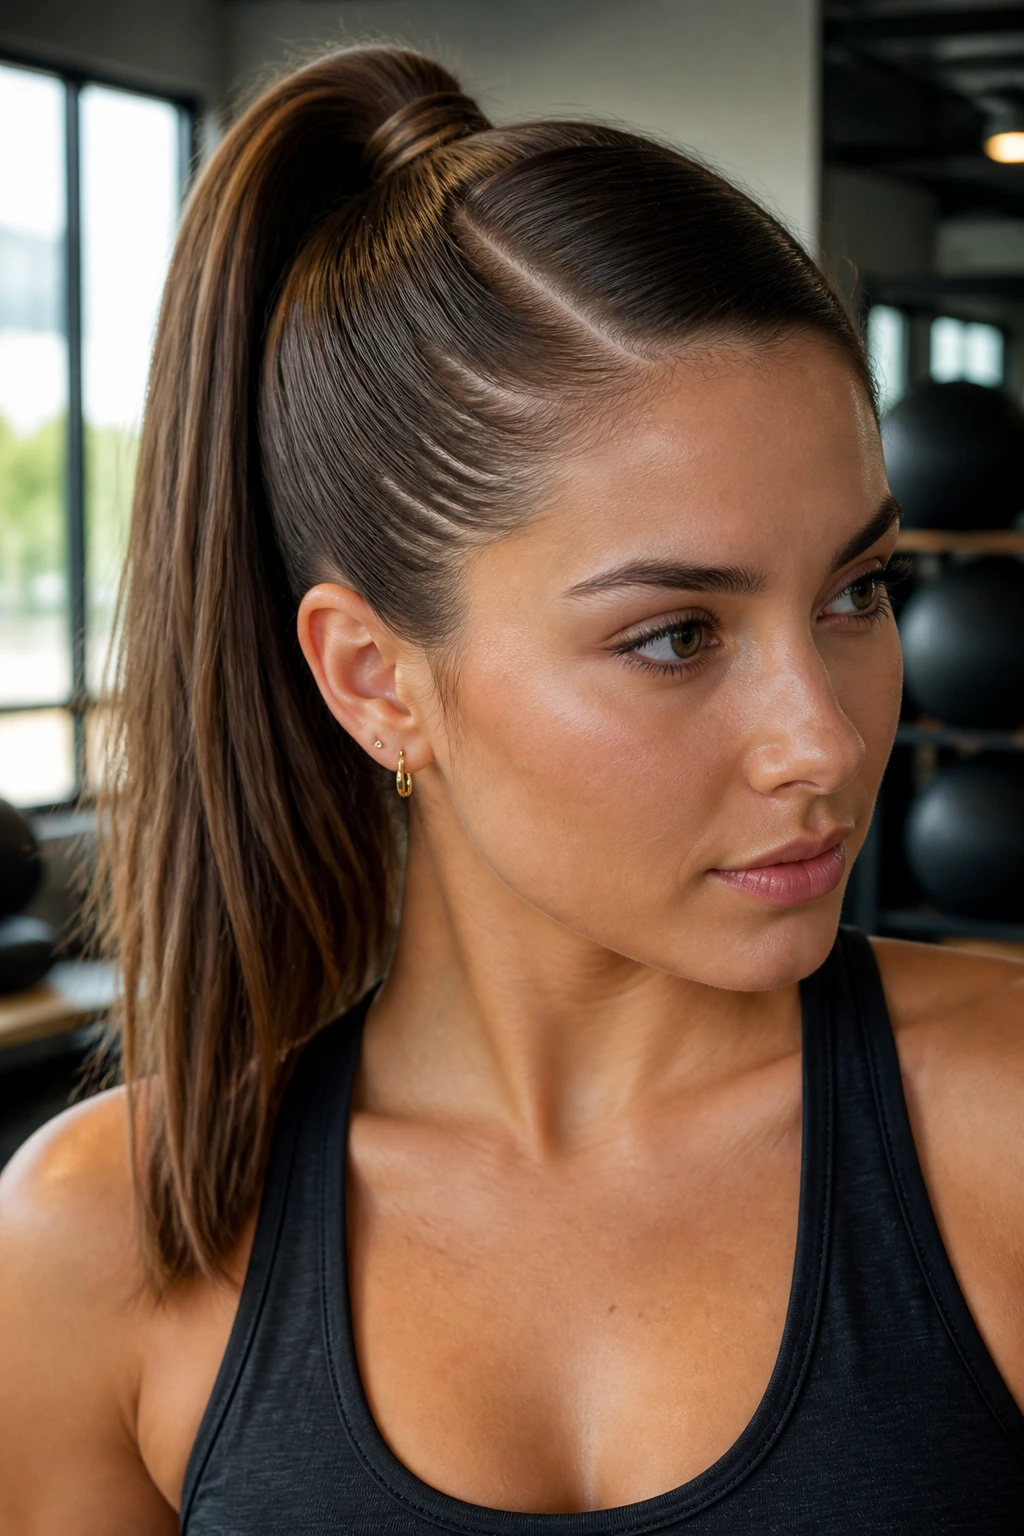
A high ponytail with a right part is the kind of style that can go to a gym class, a work meeting, or dinner without feeling out of place. The part gives the ponytail a clean front, and the height does the rest. Together, they make even a simple pony feel styled.
A Few Details That Matter
The best version starts with a smooth crown and a ponytail that sits high, not floating somewhere in the middle. Pull the hair back from the part with a boar bristle brush if you want a sleek finish. Use your hands if you want a little softness near the temples. Both can work.
- Place the ponytail about an inch above the crown for lift.
- Wrap a small section of hair around the elastic to hide it.
- Keep the front hairline smooth, but do not flatten the whole top.
- A little hairspray on the brush helps tame short flyaways.
If your hair is thick, secure the ponytail with two elastics stacked together. That keeps it from sagging by mid-afternoon. If it’s fine, tease the crown lightly before brushing it into place. Just a little. Too much teasing turns the front into a puffy mess, and nobody needs that.
A right part makes the ponytail feel less gym-basic and more finished.
8. Right Part Claw-Clip Twist

The claw-clip twist might be the easiest hairstyle that still looks deliberate. Add a right part and it stops looking like an afterthought. The front sweep gives the style shape, while the clip keeps the back loose enough to feel easy.
This is the style I’d choose on second-day hair, or even third-day hair if the roots still have a little life. The part helps control the front, and the twist does the rest. If you have layers, let the ends spill out a bit. That softness is part of the charm. If your hair is blunt-cut, leave the last two inches out of the clip so the finish does not look too rigid.
The claw clip should sit low enough that the twist holds, but not so low that it slides down the neck. A medium clip usually works for shoulder-length hair. A larger one makes sense for thick hair, though the teeth should grip without biting too hard. If the clip has to fight the hair, the style will not last long.
A few texture sprays at the roots can help, but don’t drown the hair in product. This look is meant to feel relaxed, not crunchy.
9. Right Part Shag With Piecey Ends
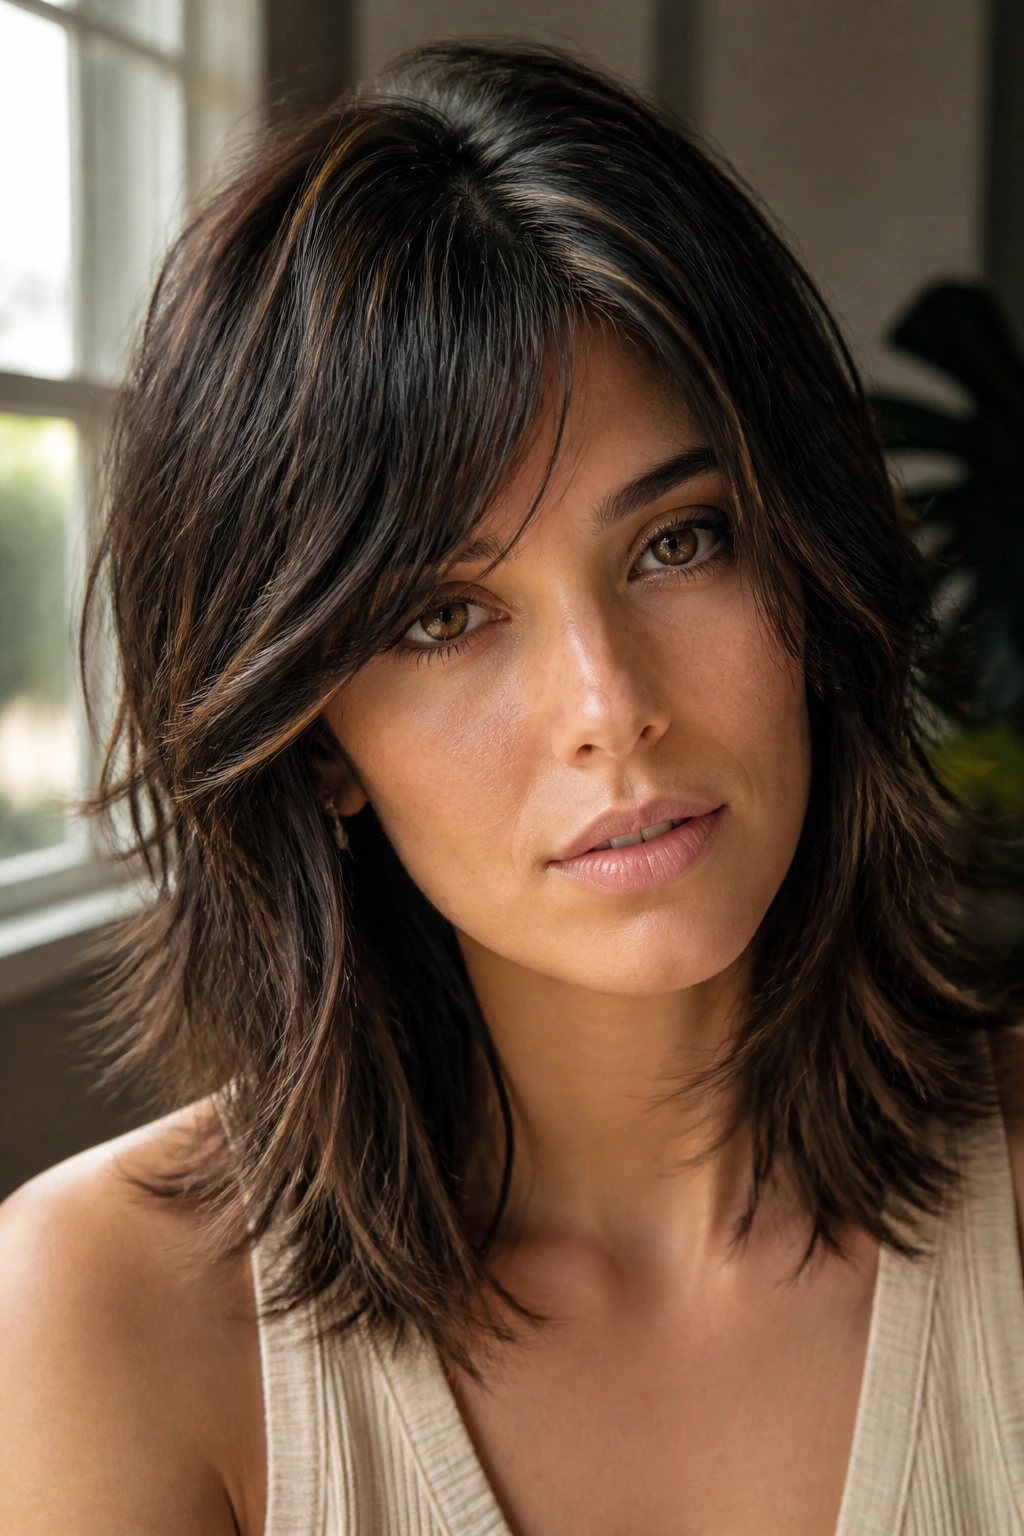
Can a right part make a shag feel softer? Yes. That’s the whole point. A shag already has movement and layers; the right part just gives all that texture somewhere to fall. Without it, the cut can feel a little too busy. With it, the layers look organized in the least fussy way possible.
This style is especially good for wavy hair because the part lets the texture break in a flattering direction. The shorter pieces near the front fall across one side of the face, while the longer layers sit underneath and create body. If your hair is curly, the same idea works, but the curls need enough moisture so they do not puff out around the part.
How to Style the Layers
Work mousse into damp roots, then diffuse until the hair is about 70 percent dry. After that, scrunch in a small amount of cream on the ends only. That keeps the layers separated without turning them stringy. If the crown starts to flatten, tip your head over and give the roots a quick blast of air.
- Best for wavy, curly, or lightly textured hair.
- A little grit at the roots helps the part stay in place.
- Use a diffuser if you want the layers to keep their shape.
- Skip heavy oils near the top; they drag the shape down.
A right-part shag should look lived-in, not overstyled. That’s the sweet spot.
10. Right Part Braided Crown
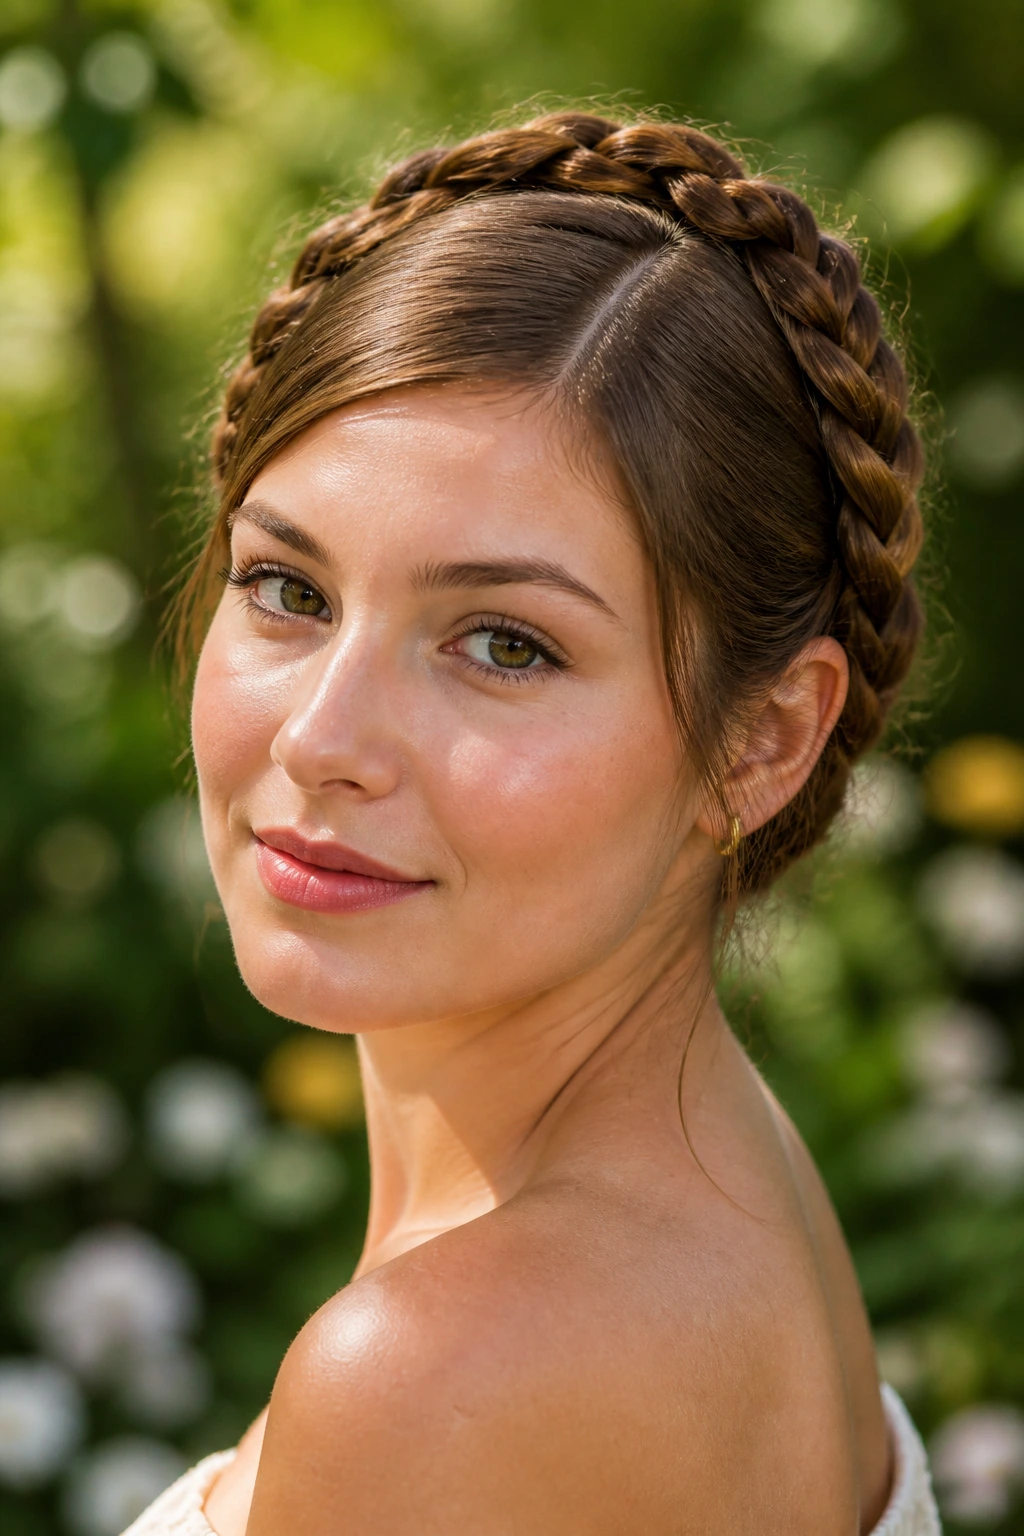
A right-part braided crown reads softer than the same braid started dead center. The diagonal launch point makes the braid feel more natural, and that matters if you want something pretty without looking overly formal. It also pulls the eye along the hairline in a way that flatters the forehead and temples.
This style is a nice choice when you want hair off your face but do not want a plain braid hanging down your back. Start the braid near the right part, move it along the hairline, and pin it around the crown or behind the ear. If you want more fullness, gently pull the braid apart after it’s secured. That “pancaking” step can make a small braid look twice as thick.
- Begin with dry hair that has some grip.
- A bit of texture spray before braiding helps.
- Secure with bobby pins that match your hair color if possible.
- Keep the braid slightly loose near the front so it does not pull the scalp.
This is one of those looks that can swing romantic or practical depending on how tight you braid it. Tighter feels tidy. Looser feels softer. Both are useful.
11. Right Part Pixie With Longer Fringe
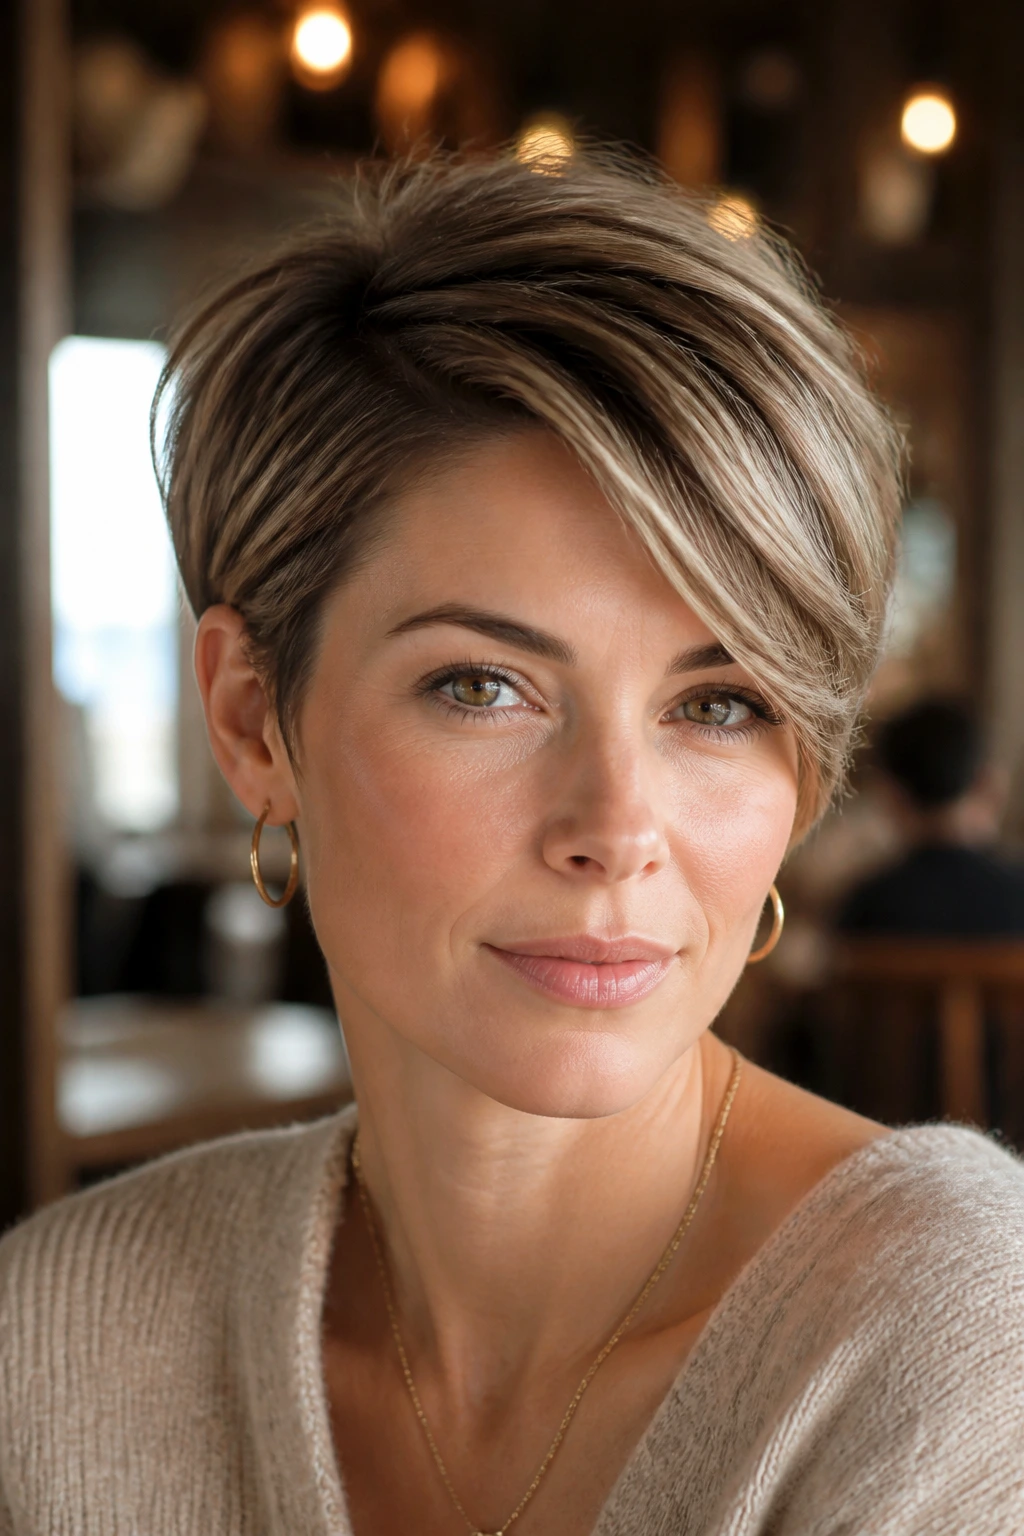
A pixie cut changes mood fast when the part changes. On a right part, the longer fringe can fall across one brow, skim the cheekbone, or tuck neatly behind the ear. That tiny shift gives the haircut more range than people expect from short hair.
I like this look when the cut has some length at the front and less bulk at the back. The right part creates movement at the top, which is where pixies can go flat if nobody pays attention. If your hair is fine, blow-drying the roots in the opposite direction first gives you a bit more lift. Then you brush them back into the right part. It sounds fussy. It isn’t. It takes thirty seconds.
A small dab of matte paste is enough for the ends. Use too much and the fringe turns stringy. Use too little and the cut loses shape. Short hair needs a light hand. Always.
The best part of this look is how face-aware it is. One side opens up, the other side softens, and you get a style that feels sharp without being hard.
12. Right Part Wet-Look Sweep
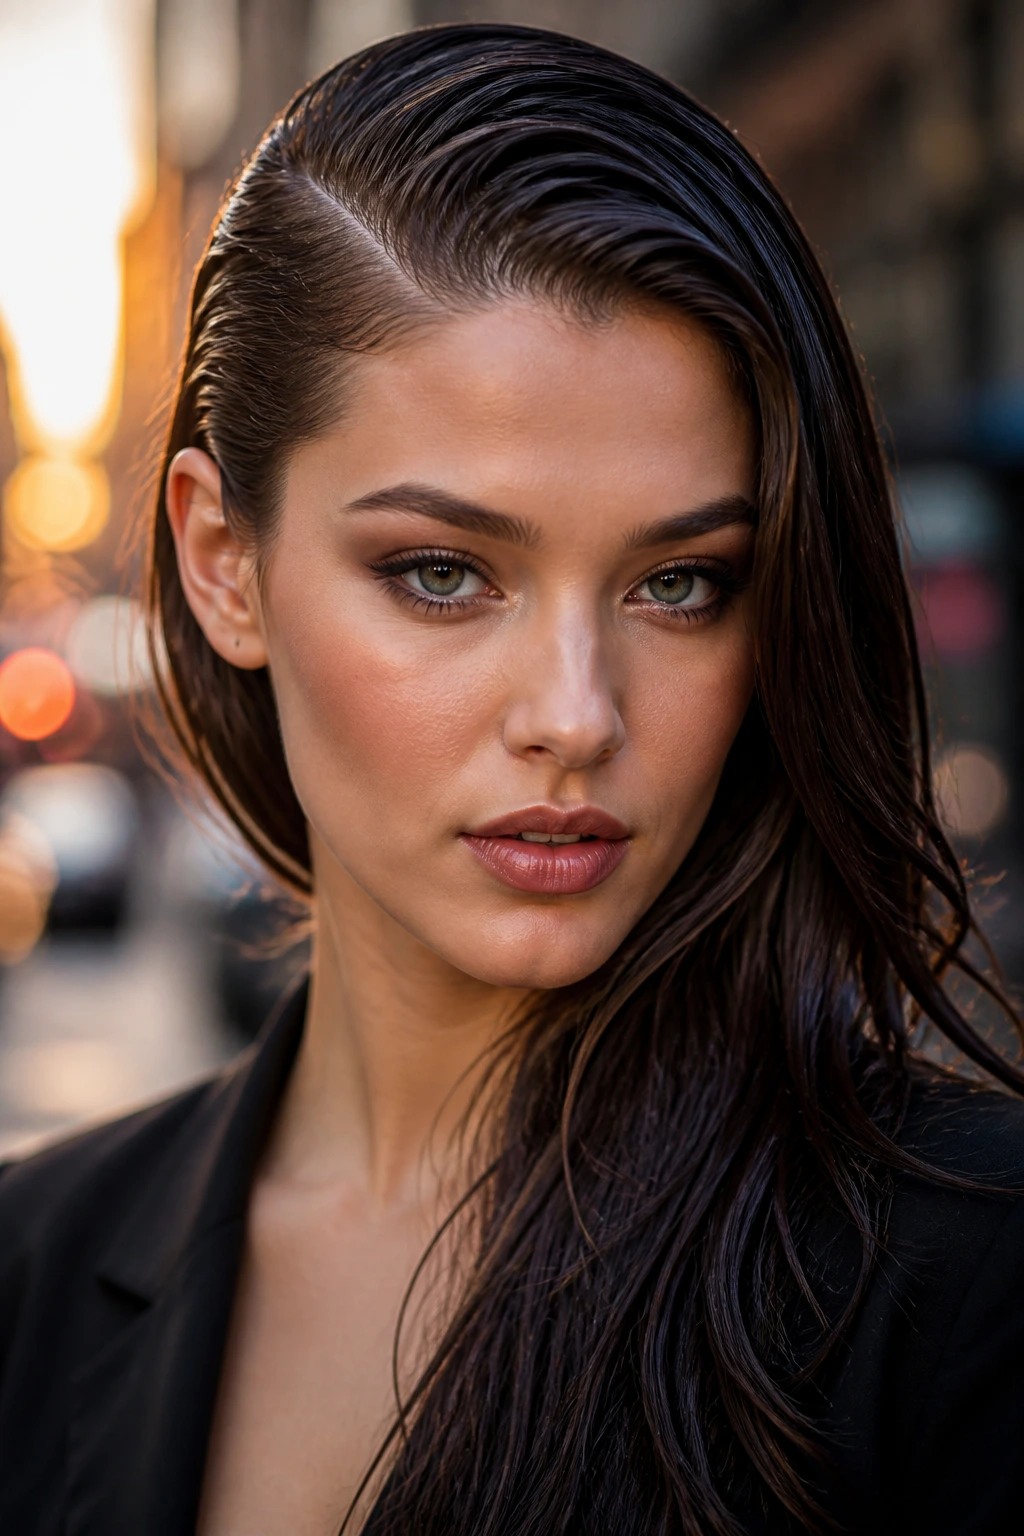
A wet-look sweep is not for every day, and that is exactly why it works. Compared with a dry sleek style, the glossy finish makes the right part feel more dramatic and a little more fashion-forward. The part itself becomes part of the design, not just the starting point.
This style works on short hair, long hair, and everything in between, but I like it best when the front section is controlled and the rest still has some movement. The trick is to keep the gel concentrated near the roots and the front sweep. If you coat the whole head, the hair can look sticky instead of shiny.
Use gel on damp hair, then comb the right part into place with a fine-tooth comb. Smooth the top with your hands or a brush, depending on how clean you want it. Finish with a light shine spray once the shape is set. Do not overdo the product at the roots or the style can flake later, especially if you keep touching it.
This is a strong look. It likes strong lipstick, sharp earrings, or a plain outfit that needs one anchor.
13. Right Part Half-Up Knot
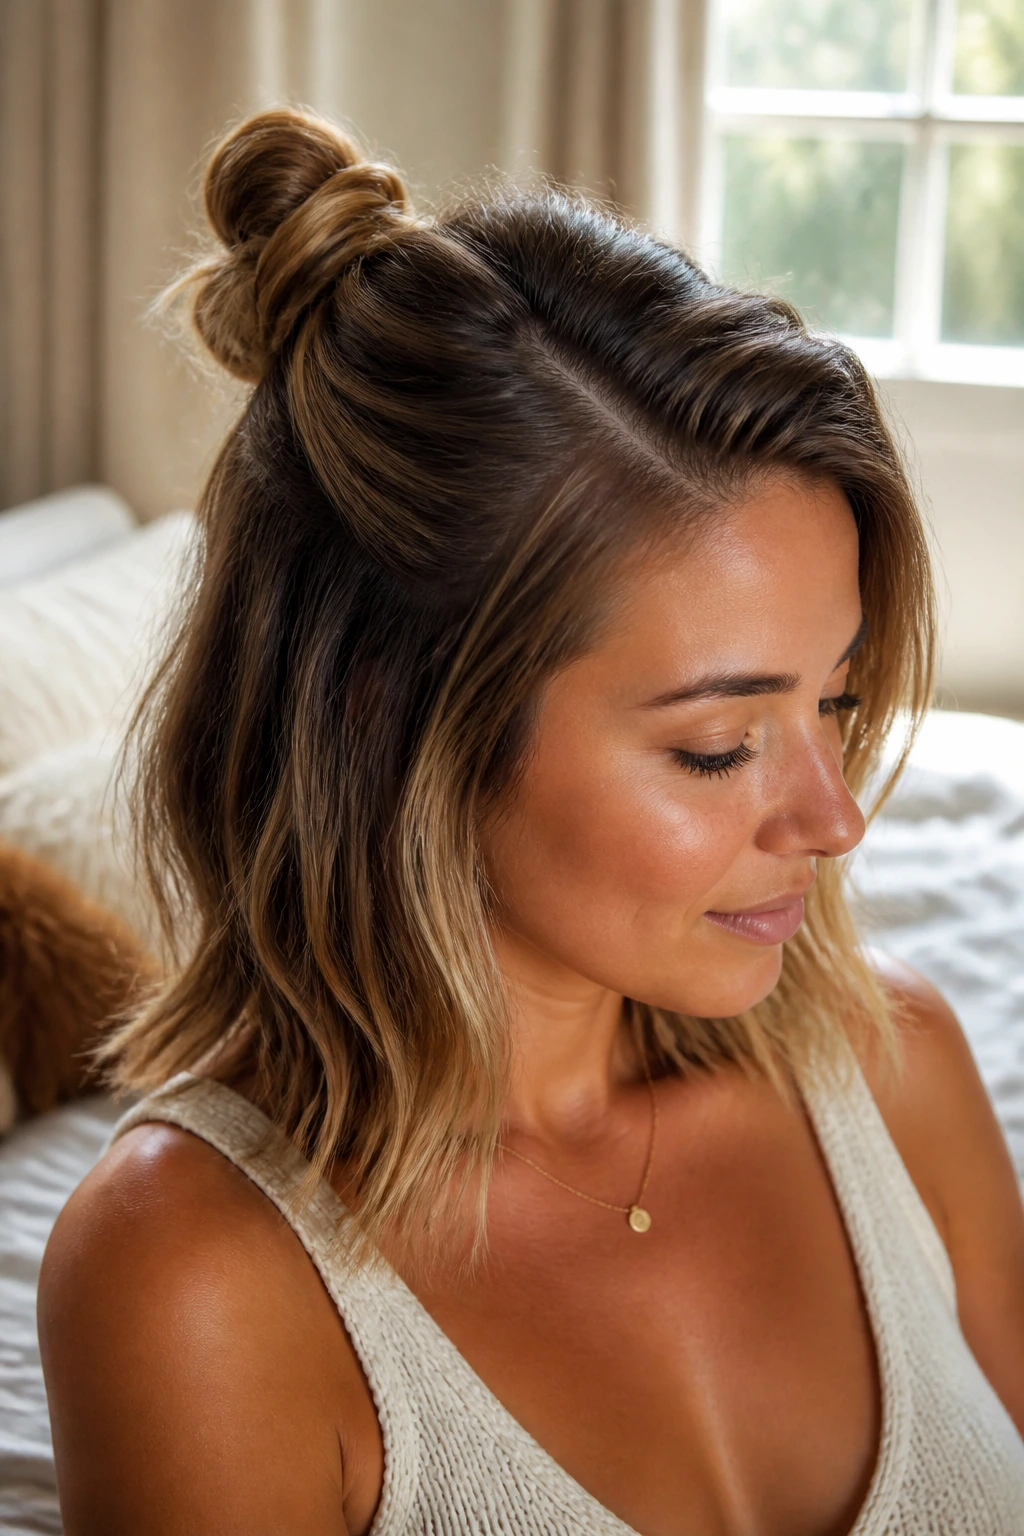
A right-part half-up knot is one of the easiest ways to make everyday hair look finished. The part lifts the front, the knot keeps the back loose, and the whole style lands somewhere between casual and put-together. It’s the sort of thing you can wear with jeans and still look like you made an effort.
Why It Works
The part adds shape before the knot even goes in. That matters because half-up styles can get boring fast when all the hair is pulled back evenly. A right part breaks that symmetry and gives the top section a little movement. It also helps the front pieces frame the face instead of being yanked straight back.
- Best for shoulder-length hair and longer.
- A bit of texture spray keeps the knot from sliding.
- Place the knot about 2 to 3 inches back from the hairline.
- Secure layered ends with one or two crossed bobby pins if they slip.
If your hair is very slippery, a tiny amount of dry shampoo at the roots helps. If it’s curly, don’t smooth it too hard. Let the texture stay visible. That loose, lived-in feel is part of why this style keeps getting worn.
14. Straight and Glassy With a Right Part
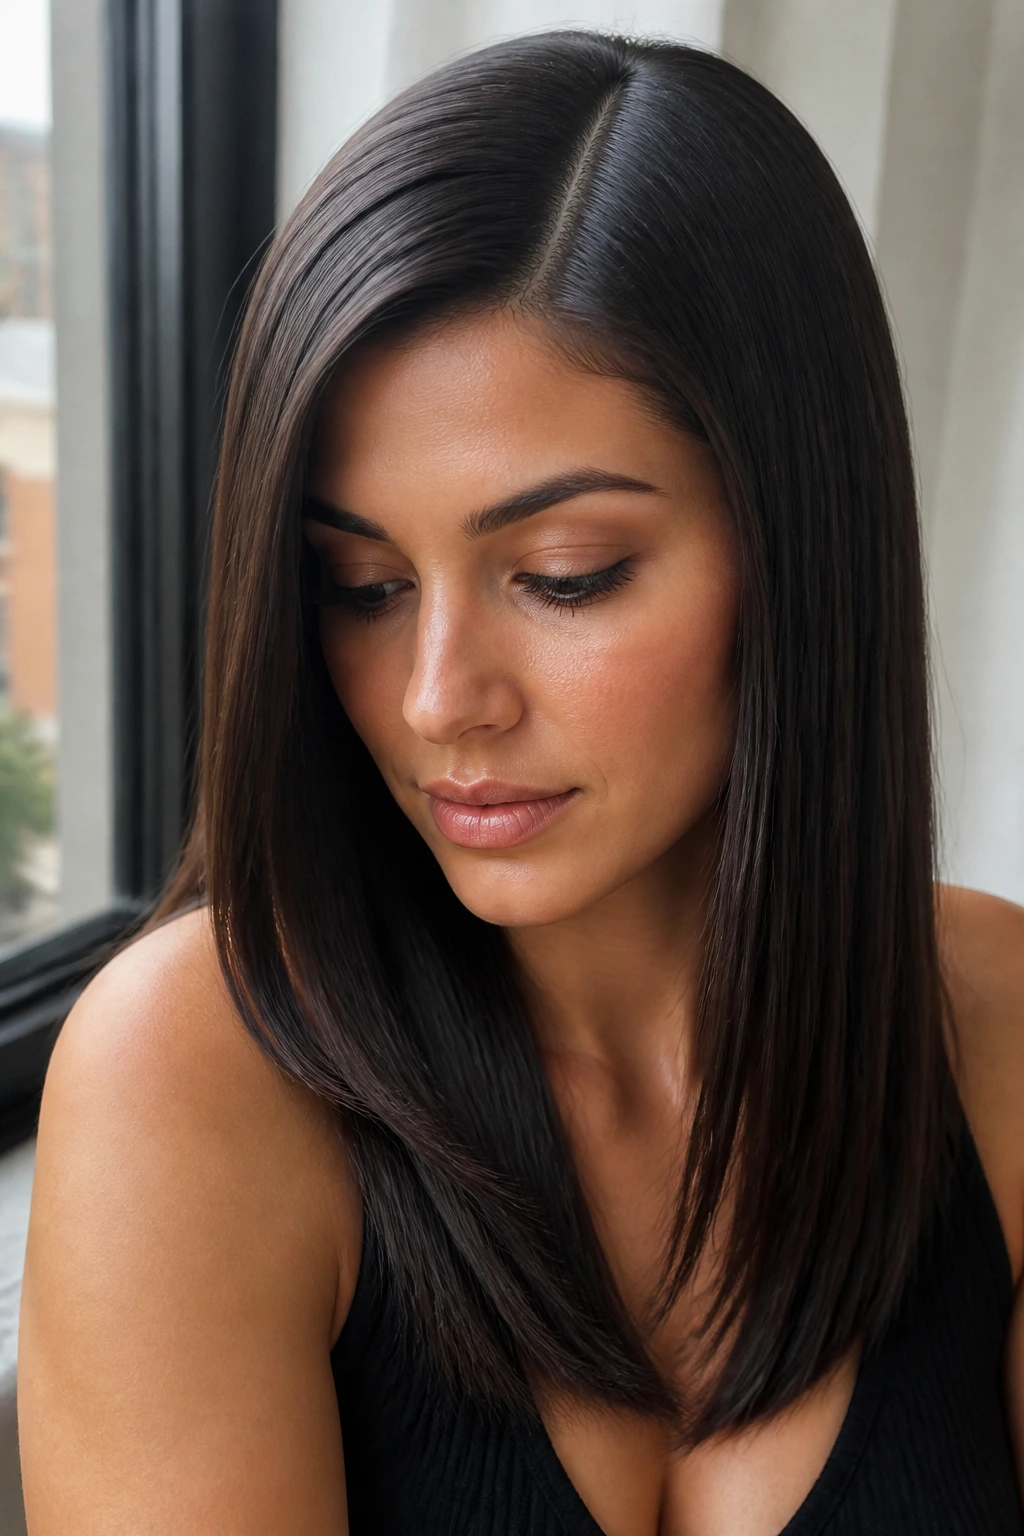
Straight hair and a right part can look almost severe in the best way. The clean line up top and the smooth lengths below create a style that feels sharp, simple, and a little expensive-looking without any extra work. If your hair is naturally straight, this is one of the easiest ways to make it look intentional.
The part matters more here than in a messy wave style because there is nowhere for bad shape to hide. If the roots collapse, the whole style looks tired. If the part is neat and the crown has a bit of lift, the hair suddenly looks polished. That is why I like a quick root-dry with a round brush before anything else. It builds a small bend at the top so the lengths can fall cleanly.
Use heat protectant, then flat iron in small sections if needed. Stop the shine product at the mid-lengths or the ends; too much near the scalp can flatten the top and make the style lose that glassy finish. A tiny tuck behind one ear can help if you want the line to show more clearly.
This look does not need a lot. It needs accuracy.
15. Right Part Fishtail Side Braid
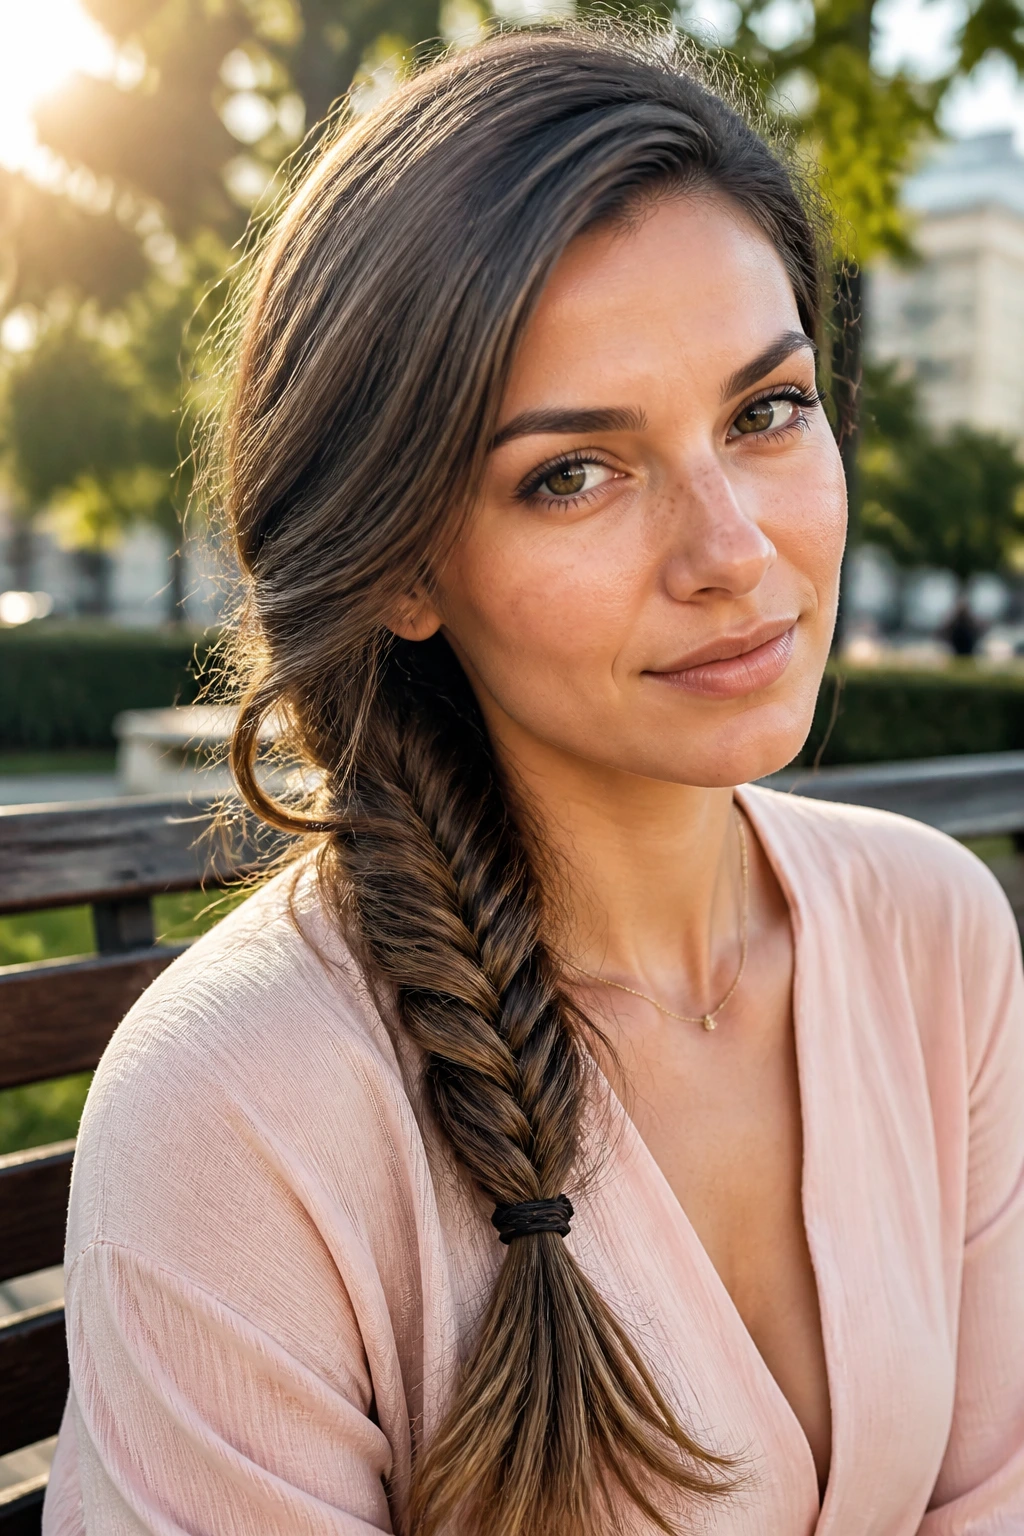
Why does a fishtail braid feel less plain with a right part? Because the part gives the braid a stronger starting line, and that line makes the whole style look more intentional before the weaving even begins. It also shifts the braid over one shoulder in a way that feels softer than a center-start braid pulled straight down the back.
This braid works best on hair with some grip. If your strands are clean and slippery, add a little texture spray first. The braid does not need to be perfect; in fact, a slightly loose fishtail looks better than a tight one that feels stiff. Start near the right part, gather the hair over the opposite shoulder, and braid down the side. Once it’s secured, tug gently on the outer edges to widen the braid and show the pattern.
How to Get the Braid to Look Fuller
- Pull the braid apart in small sections, not all at once.
- Leave a few tiny face-framing pieces out near the temples.
- Secure the end with a clear elastic if you want the braid to disappear.
- Mist the finished braid lightly with hairspray to keep the loops from slipping.
This is one of my favorites for days when hair needs to stay out of the face but still look like someone cared. A right part keeps it from feeling plain. The braid does the rest.
