



A pixie cut does not need long hair to look dressed up. It needs direction, a little grip, and a willingness to stop pretending every special-occasion style has to be a full bun.
That’s the first thing worth saying about pixie updo ideas for short hair. The phrase sounds limiting until you remember that short hair can be folded, pinned, tucked, twisted, slicked, and decorated in ways long hair can’t really match. A 1-inch crop behaves nothing like a grown-out pixie that brushes the nape, and the smartest styles are the ones that work with that difference instead of fighting it.
I’ve always liked short-hair styling best when it looks intentional without looking stiff. A dab of matte paste at the crown, two crossed bobby pins behind the ear, a side part that stays put—those small moves do more than a heavy spray-and-pray approach ever will. And if your hair is freshly washed and slippery, the whole thing gets harder than it should be. A little dry shampoo or texture spray at the roots solves more problems than people admit.
The ideas below lean into what short hair does well: pin, tuck, twist, slick, lift, and decorate. Some are polished enough for a formal event, some take three minutes and a mirror by the door, and a few work best when the haircut is slightly grown out. Good. That’s where the fun starts.
1. The Side-Part Pinback That Makes a Pixie Look Polished
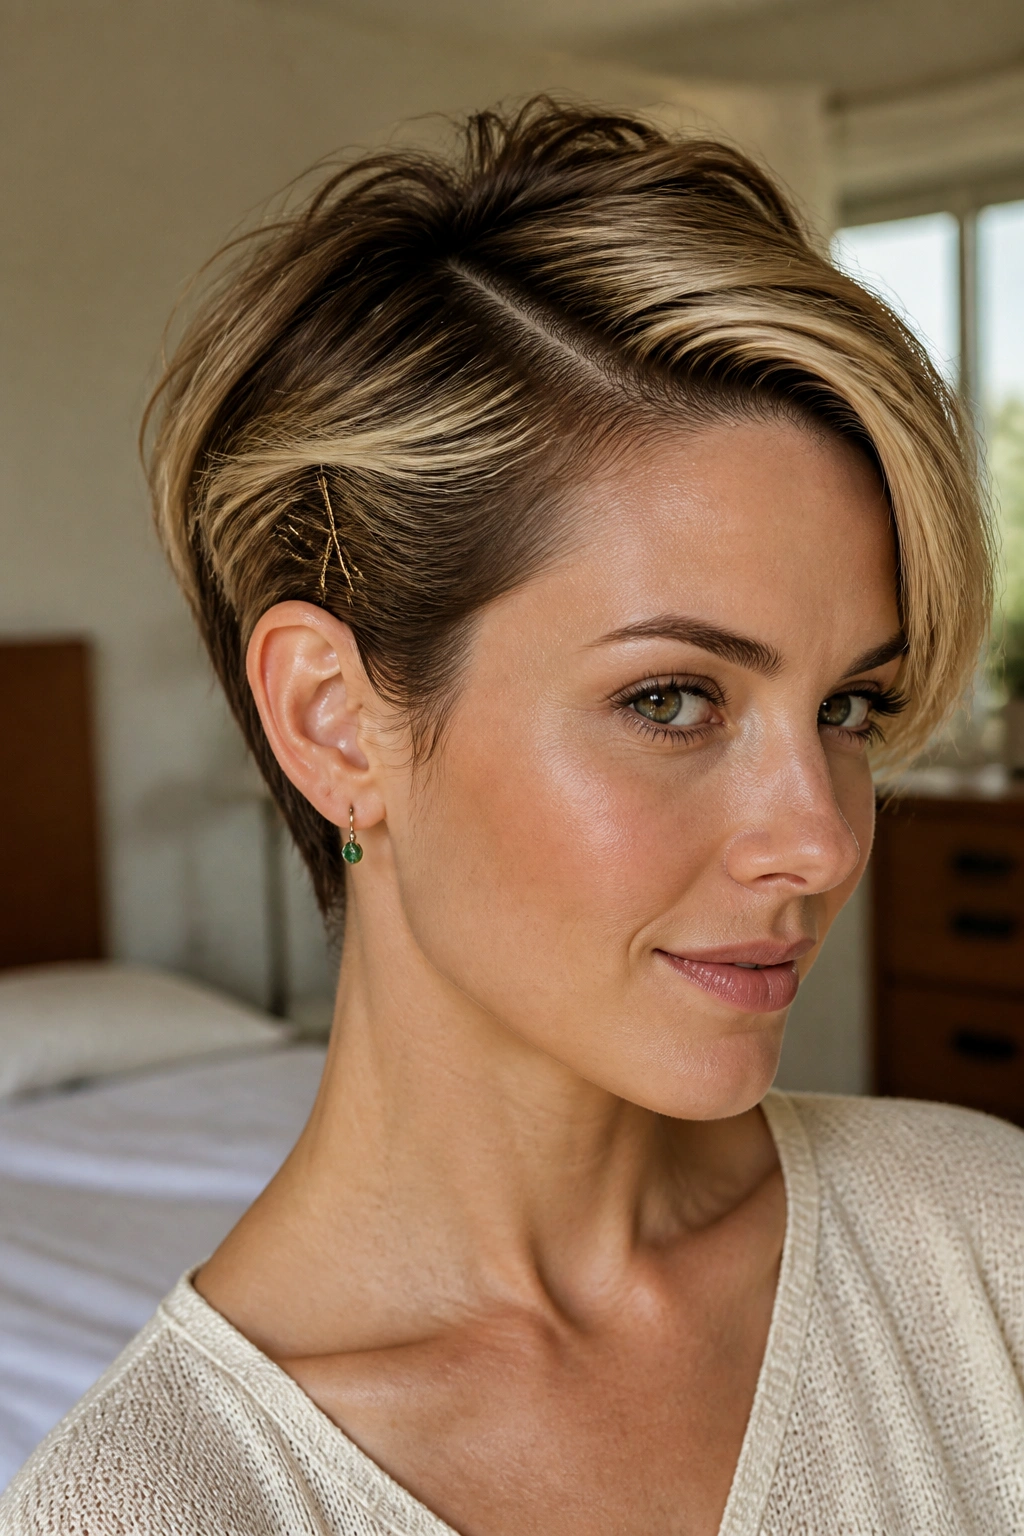
The cleanest short-hair updo is often the one that looks almost accidental.
Why it works on short hair
A deep side part gives the front a direction to follow, and a pinback behind one ear keeps the hair from collapsing into your face. That little bit of asymmetry does a lot. It opens the cheekbones, shows the cut line, and keeps the style from looking overly fussy.
- Use a pea-size amount of pomade or styling cream at the front, not all over the roots.
- Place 2 to 4 bobby pins behind the heavier side, crossing them in an X if the section feels slippery.
- Tuck the shortest fringe pieces first; they’re the ones that spring loose fastest.
- Finish with a mist of flexible hairspray from about 8 to 10 inches away.
Best part: it works on straight, wavy, and slightly curly pixies without needing extra length.
If the part line looks too sharp, rough it up with your fingertips and a tiny bit of dry shampoo. Tiny pins matter.
2. The Mini French Twist Rolled Into the Crown
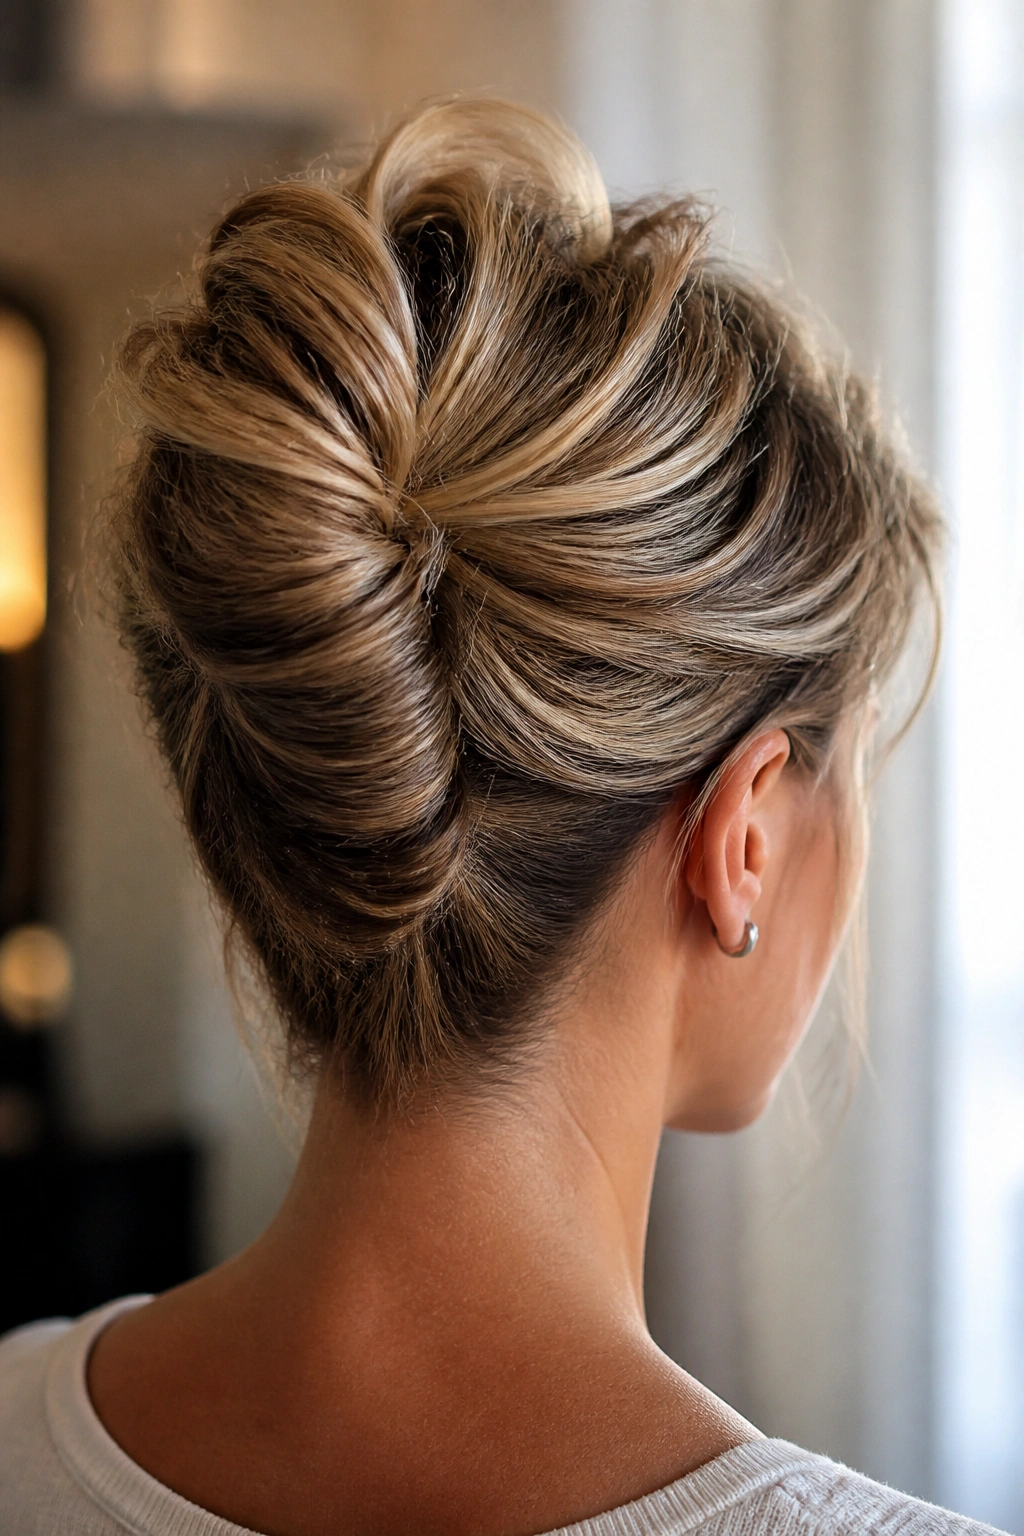
Can a pixie do a French twist? Yes—if you shrink it down and stop expecting a ballroom version.
A mini twist works best when the top layers are about 3 inches long and the nape is shorter. Gather the crown section, smooth it once with your fingers, then roll it inward toward the back of the head. The ends do not need to disappear perfectly. A few tiny pieces peeking out usually look better than forcing them flat.
How to keep the twist from sliding
Backcomb a small strip at the crown before you roll it. Not a bird’s nest. Just enough texture for the pins to grab. Then slide one pin upward through the base and a second pin across the roll so they lock together.
The shape should sit narrow and vertical, almost like a little shell at the back of the head. It’s especially good with pearl earrings and a clean neckline, because the hair stays close to the head and doesn’t compete with the outfit.
This one is a quiet achiever. No drama. No extra volume where you don’t want it.
3. The Lifted Faux Hawk That Uses Your Natural Texture
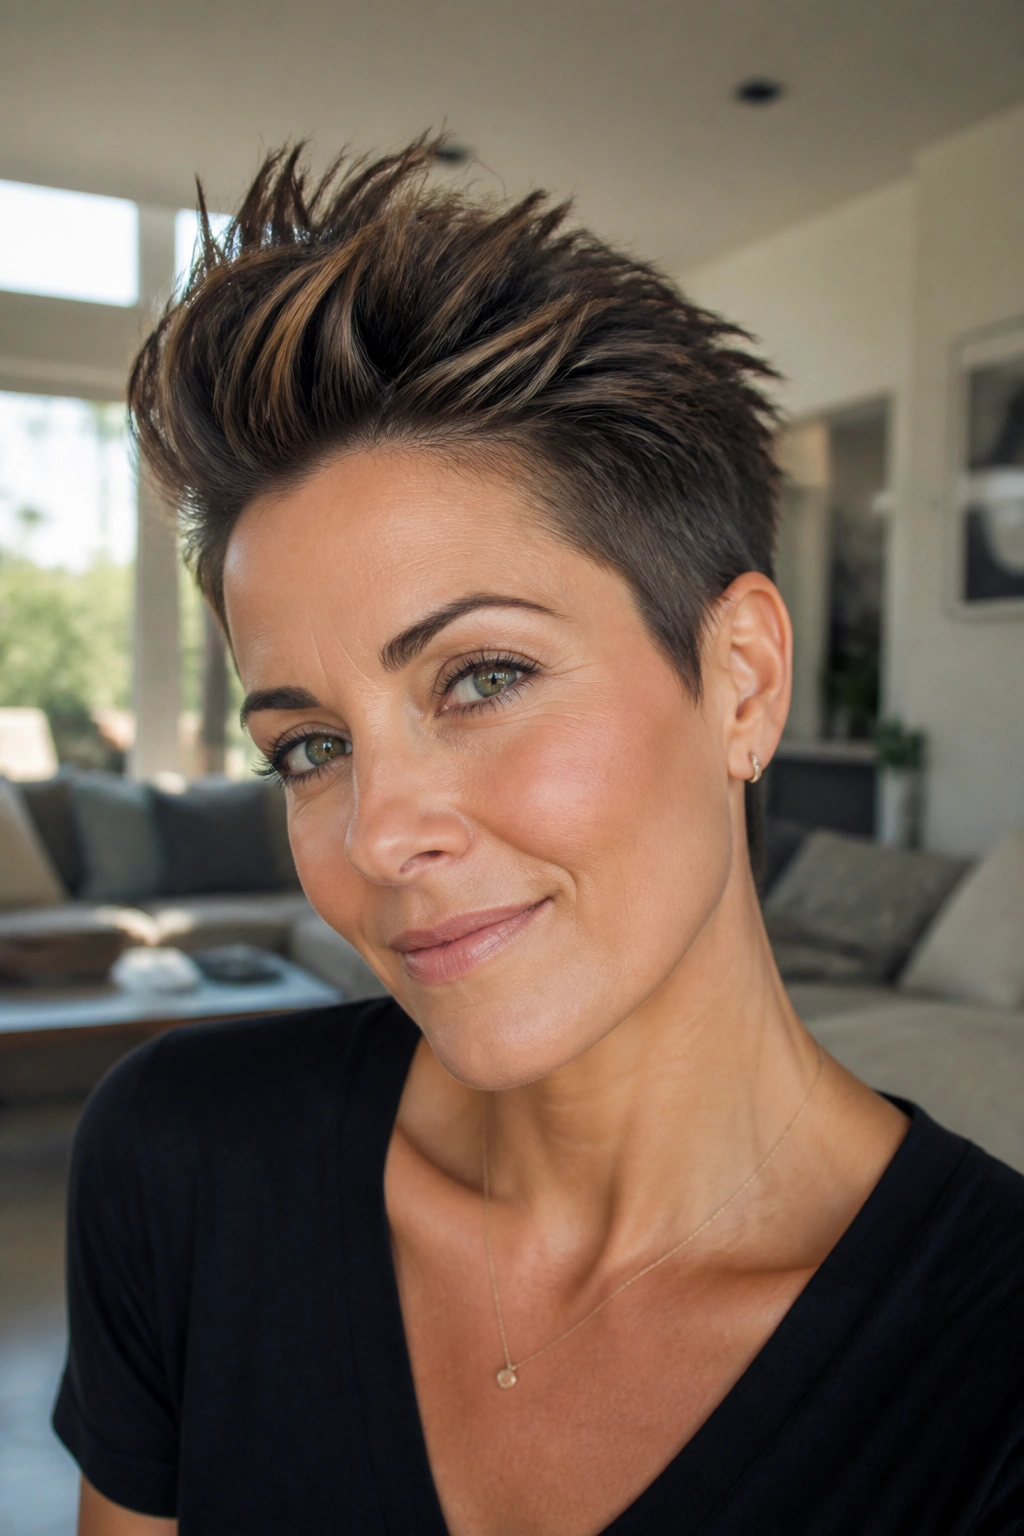
If your pixie has a little grit, this is the style that turns it into attitude.
A faux hawk works because the eye follows height. Pull the sides sleek or pin them close to the head, then work the top upward with mousse, paste, or a little root powder. The shape matters more than the exact finish. You want the crown to stand up, not flop over like you changed your mind halfway through.
What helps the shape hold
- Blow-dry the crown upward with your fingers or a small round brush.
- Use matte paste through the middle lengths, not the ends only.
- Smooth the sides with a touch of gel or leave them slightly piecey for contrast.
- Press the top into place with fingertips instead of a brush, which usually flattens the lift.
If your hair is fine, this style often looks better on second-day hair. Freshly washed hair can be too soft, and the whole thing loses that sharp ridge through the center. A dry texture spray at the roots makes a bigger difference than another round of hairspray.
It’s a blunt style. That’s why it works.
4. Braided Bangs That Sweep Into One Side

What do you do when the fringe is too short for a full braid but long enough to be annoying? Braid only the parts that matter.
A narrow French braid or rope twist starting at the hairline and ending at the temple can clear the face without swallowing the cut. The rest of the hair stays loose and piecey. That balance matters, because a pixie looks best when you can still see the shape of the haircut.
How to wear it
Keep the braid thin and close to the scalp. If it gets wide, it starts looking bulky fast, especially on fine hair. Secure the end with a clear elastic or a small pin tucked under the longer top layers.
A side braid like this is one of those short-hair updos that looks more complicated than it is. Which is useful. It buys you a dressed-up look without asking the haircut to do something impossible.
If your hair slips while you braid, work in a touch of styling cream first. Not much. Enough to stop flyaways, not enough to make the section greasy.
5. The Sleek Wet-Set Pixie Updo
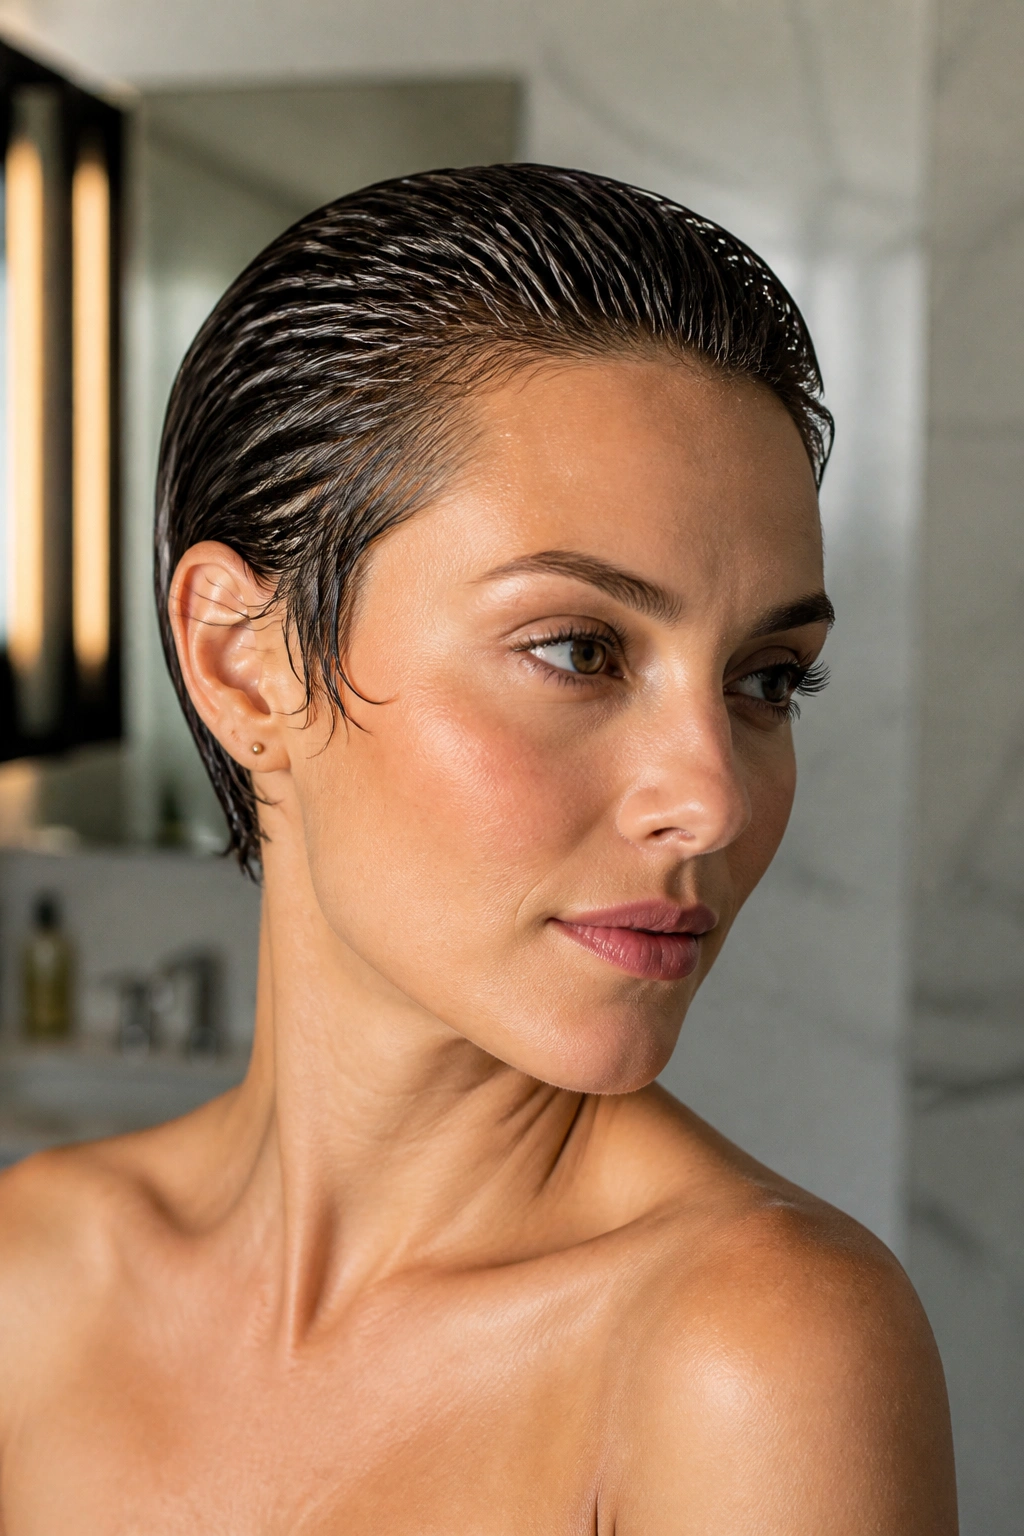
A slicked-back pixie has a kind of blunt confidence that fluffy styles can’t fake.
This is the look I reach for when the outfit is busy and the hair needs to behave. Start with damp hair, comb through a strong-hold gel, and direct the front backward or into a deep side part with a fine-tooth comb. Then press everything into place with your palms. The surface should look smooth and reflective, not soaked.
The key is control. Do not pile product onto the ends; that’s how you get crunchy tips and white flakes when the gel dries. Keep the gel mostly at the roots and the top layers, then use a tiny bit of shine cream on the surface if you want a glossier finish.
I like this style on straight pixies and on cropped curls that need taming. It also works when the haircut is fresh, because clean lines look deliberate on a sharp cut. If the edges at the hairline are fuzzy, use a small edge brush or a toothbrush with a little gel to smooth them down.
No volume. No apology. That’s the point.
6. The Tiny Top Knot That Cheats Extra Length
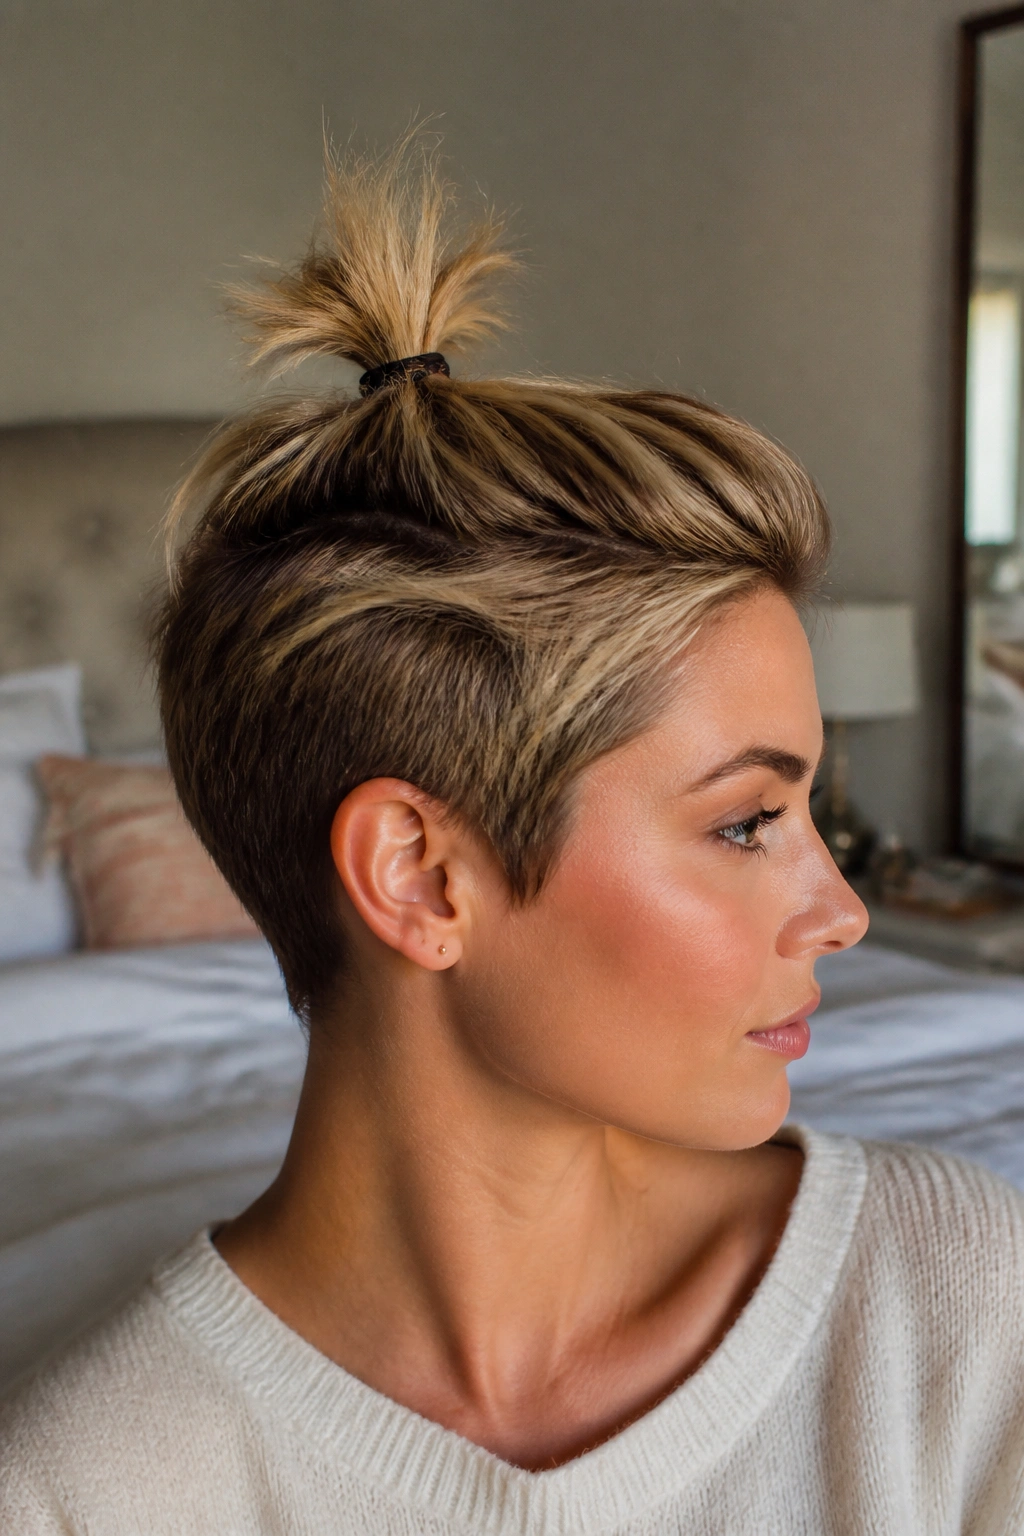
Unlike a full bun, this one is more of a small knot perched high enough to read as a style choice.
A tiny top knot works best on a grown-out pixie or a longer crop where the top can gather into a short ponytail. Pull the top section to the crown, secure it with a clear elastic, and twist the tail around its base once or twice. If the ends stick out, leave them. A little texture looks better than a tight ball that threatens to unravel.
What the knot really needs
- Enough length for a 2-inch tail, sometimes a bit less if your hair is thick.
- One small elastic that won’t snag the cut.
- Two bobby pins placed in opposite directions to lock the knot down.
- A light mist of texturizing spray so the roots don’t slide.
This style is best when the sides stay neat and the knot itself stays tiny. If you try to force a big bun, it starts looking awkward fast. The charm is in the scale. Short hair does not need to pretend it has extra inches.
A little loose texture around the crown makes the whole thing look less severe.
7. The Twisted Nape Roll That Hugs the Neck
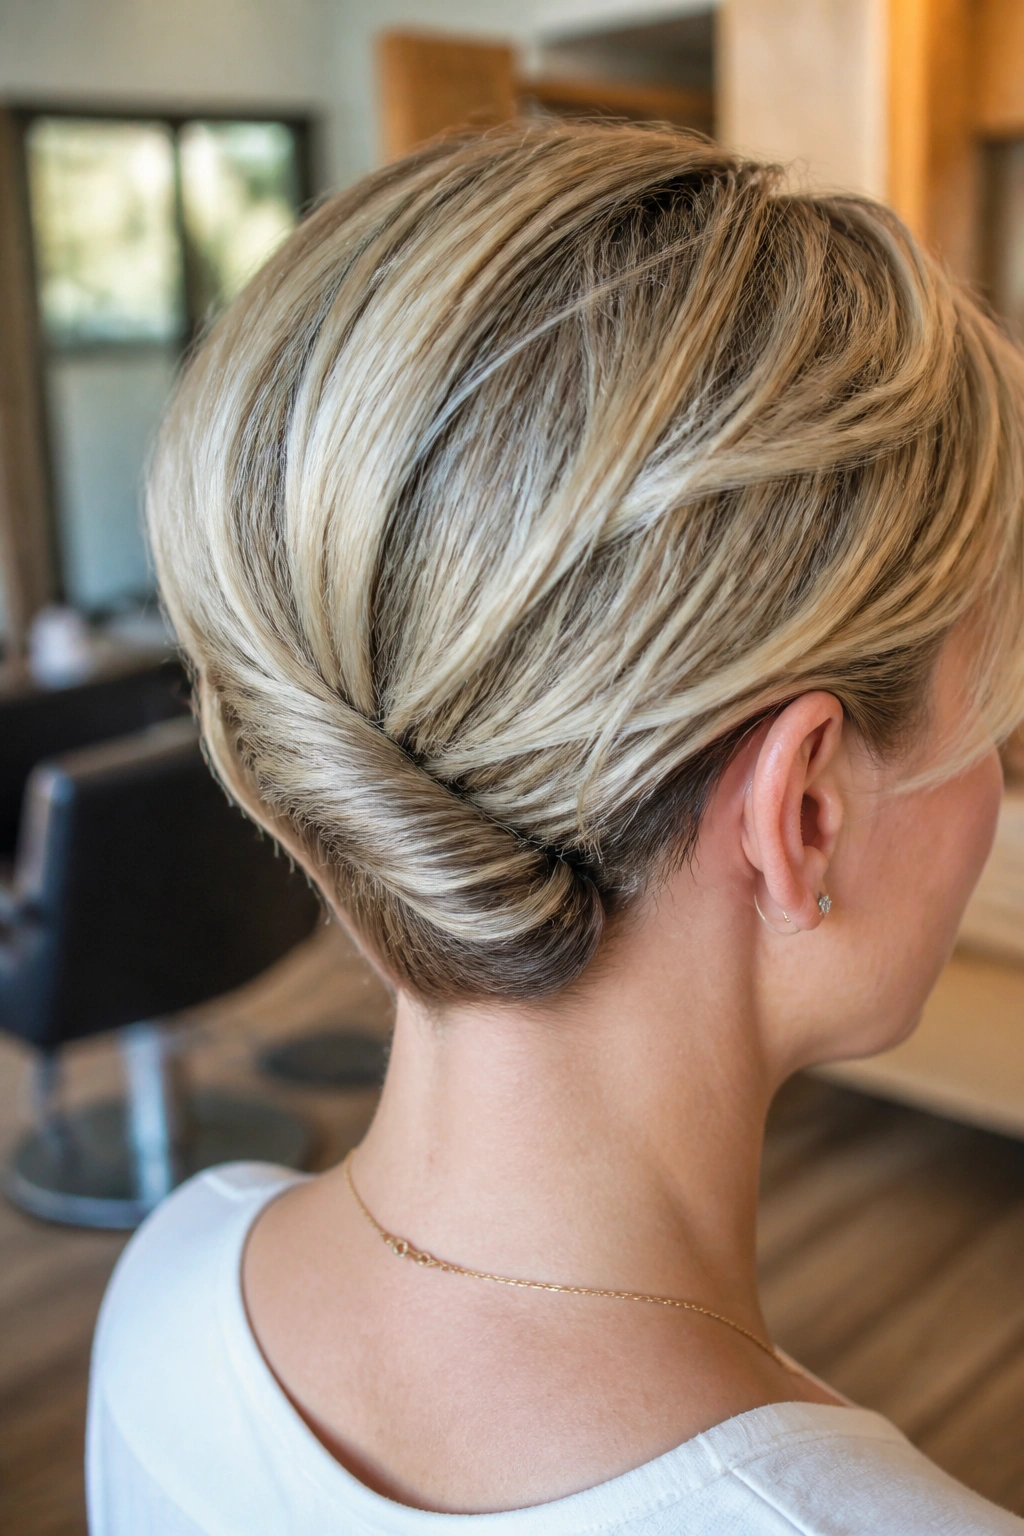
If the nape is the longest part of your cut, use it. That’s where this style earns its keep.
The hair at the back gets twisted inward and pinned low, almost like a rolled hem. It’s a smart shape for pixies with tapered sides because the roll follows the natural curve of the head. You’re not building height here. You’re creating a neat line that makes the neckline look elegant.
Why the nape is the best place to start
Short hair around the ears tends to spring free if you pull too hard. The nape is usually the most cooperative section, so it gives you a stable anchor. Start with the back pieces, twist them toward the center, and secure them with pins placed at a diagonal.
- Use 3 to 5 pins, depending on thickness.
- Cross the pins if the roll feels loose.
- Leave the top a little airy so the style doesn’t flatten the crown.
- Add a small comb of shine cream over the surface for a smoother finish.
I like this one because it feels neat without being severe. There’s enough softness to keep it human.
8. Soft Curls Pinned Back for an Old-Hollywood Sweep
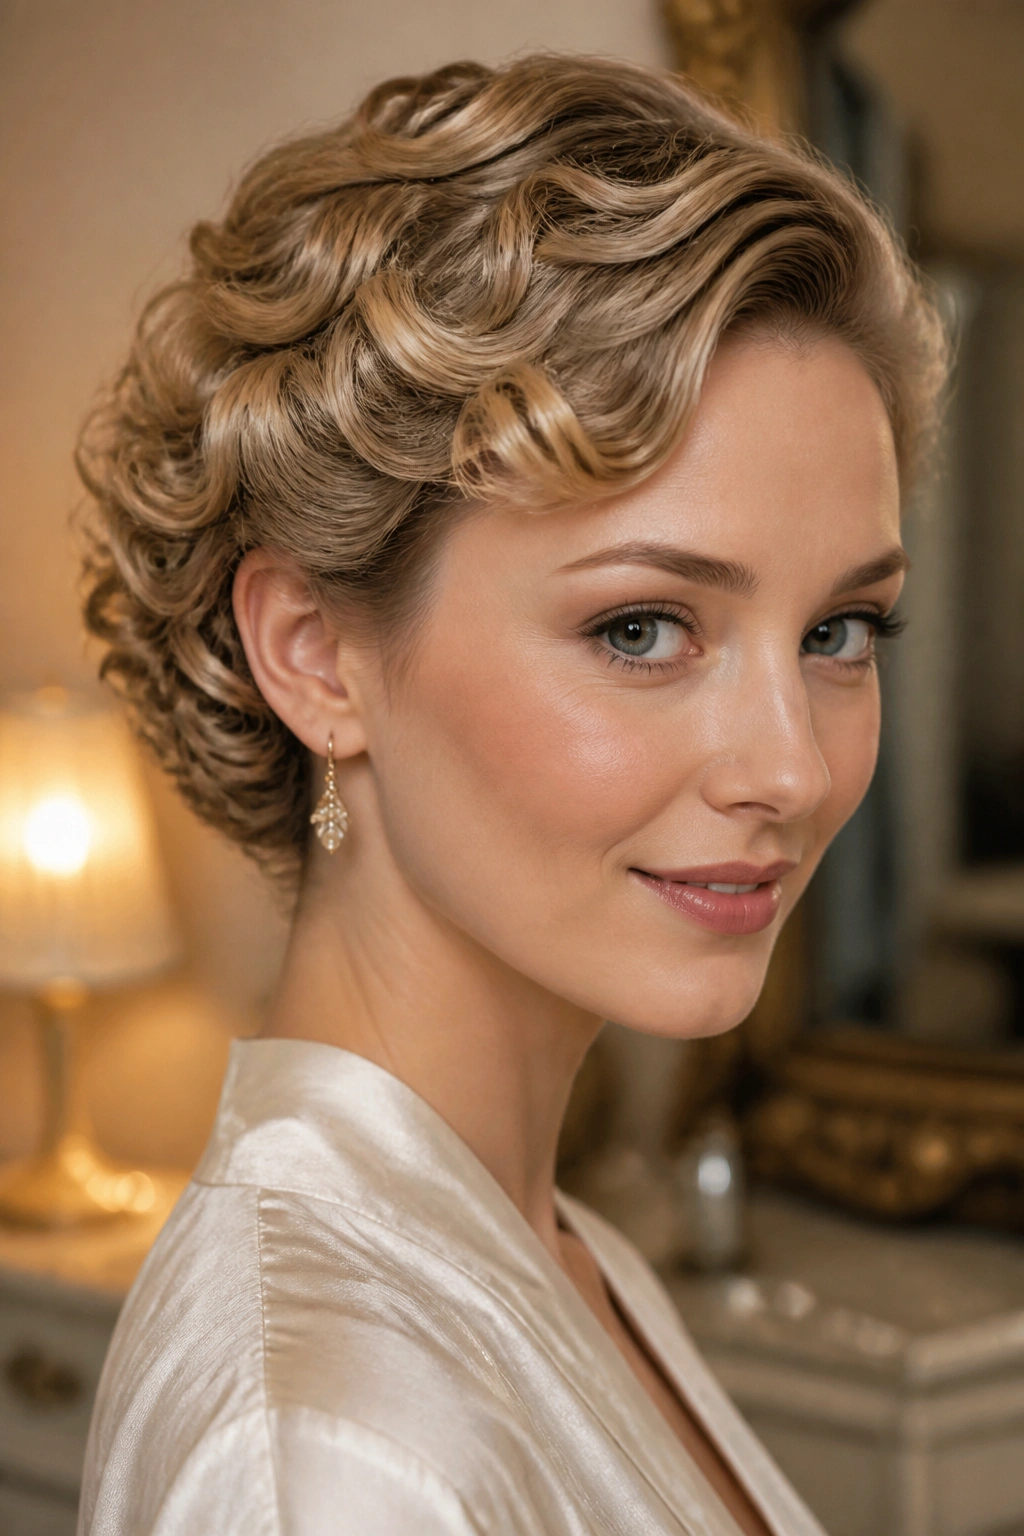
A pixie with a little curl can pull off a pinned-back sweep that feels far fancier than the effort it takes.
Curl small sections away from the face with a 3/4-inch wand, let each curl cool in your hand for a few seconds, and pin the front pieces back while they still hold some shape. Once the curls set, release the clips and guide the ends into a soft sweep over one ear or toward the back of the crown.
The trick is not making every curl perfect. A few different sizes look more natural on short hair. One curl may wrap tighter than the next. Fine. That unevenness keeps the style from feeling stiff, and the finished shape has a little movement when you turn your head.
Use a light mist of hairspray on the pinned curls before they cool, then brush only the surface with your fingers. A regular brush can break the pattern too much and turn the look into fuzz.
This is the style for earrings, clean necklines, and makeup that deserves a little spotlight.
9. The Bubble Sections That Stretch a Grown-Out Pixie
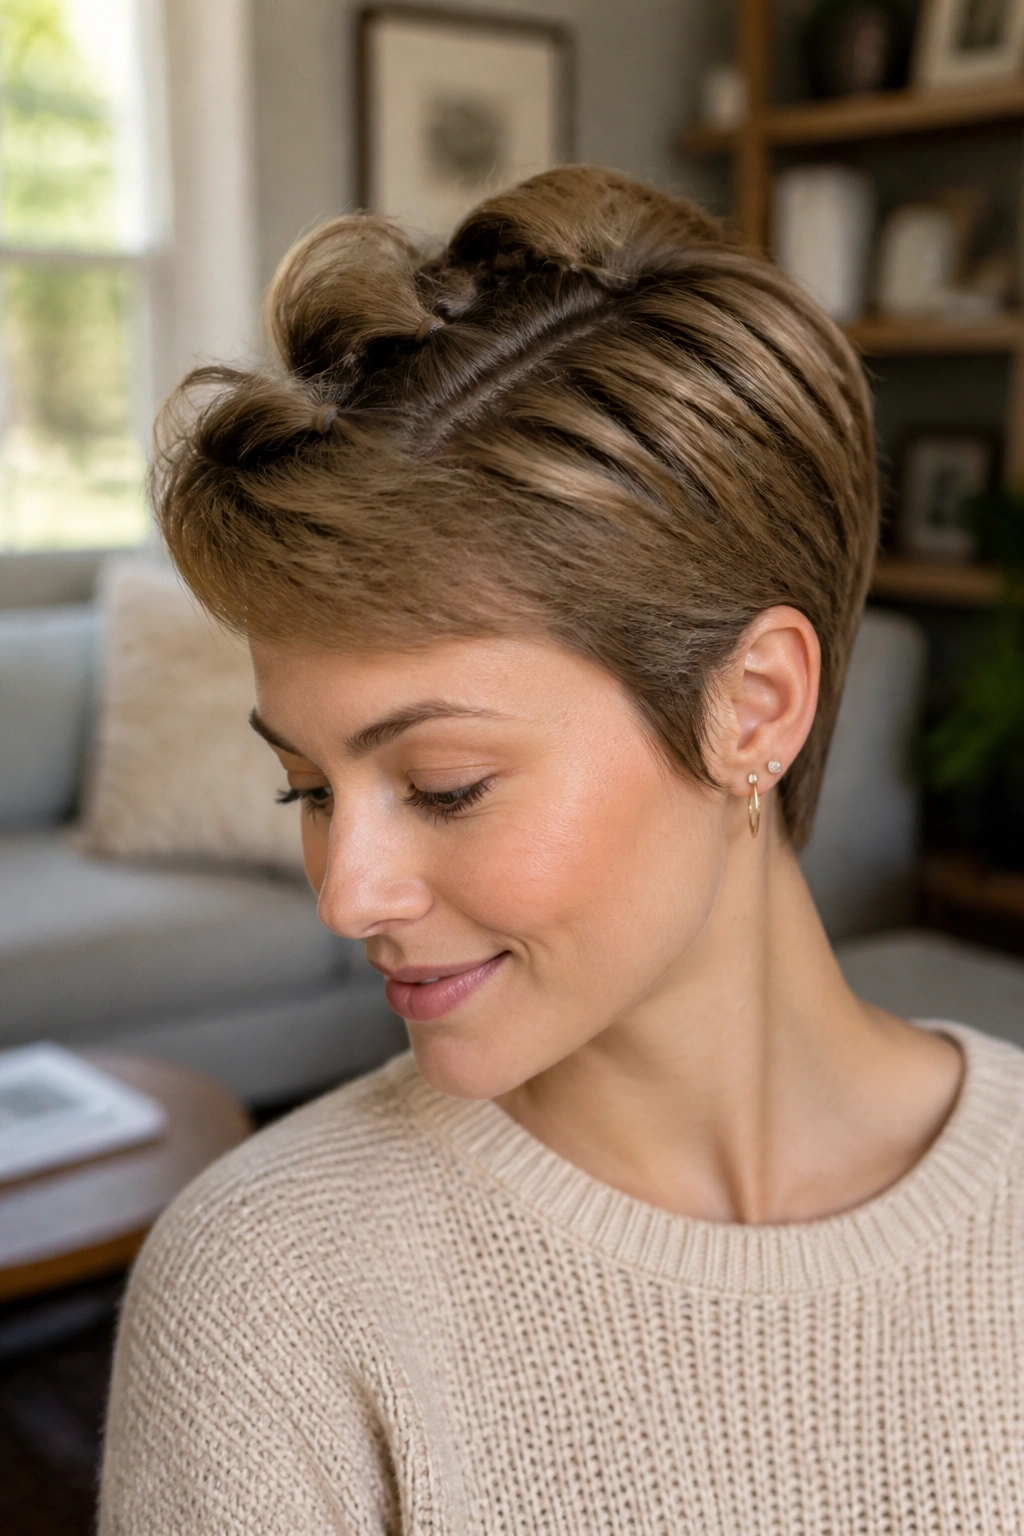
Tiny elastics can do more than people give them credit for.
On a longer pixie, you can build a short bubble style by sectioning the top or crown into 2 or 3 small ponytails and spacing them about 1 inch apart. After each elastic, gently pull the hair between the bands to create a rounded puff. The result is playful, but not childish if the sections stay narrow and the hair stays smooth.
What makes it work
The bubbles add shape without asking the haircut to become a full ponytail. That matters on short hair, because there may not be much tail to work with. Keep the ends tucked under the last elastic or pin them discreetly against the head.
- Use clear or hair-colored elastics so the sections read as shape, not hardware.
- Keep the bubbles small; oversized ones overwhelm a pixie fast.
- Smooth the sides with a little cream or gel so the center pattern stands out.
- Work on hair that has some grip, because slippery hair makes the bubbles collapse.
This is one of the few pixie updo ideas for short hair that looks playful without losing structure. A nice middle ground.
10. The Deep Side Tuck With a Statement Clip
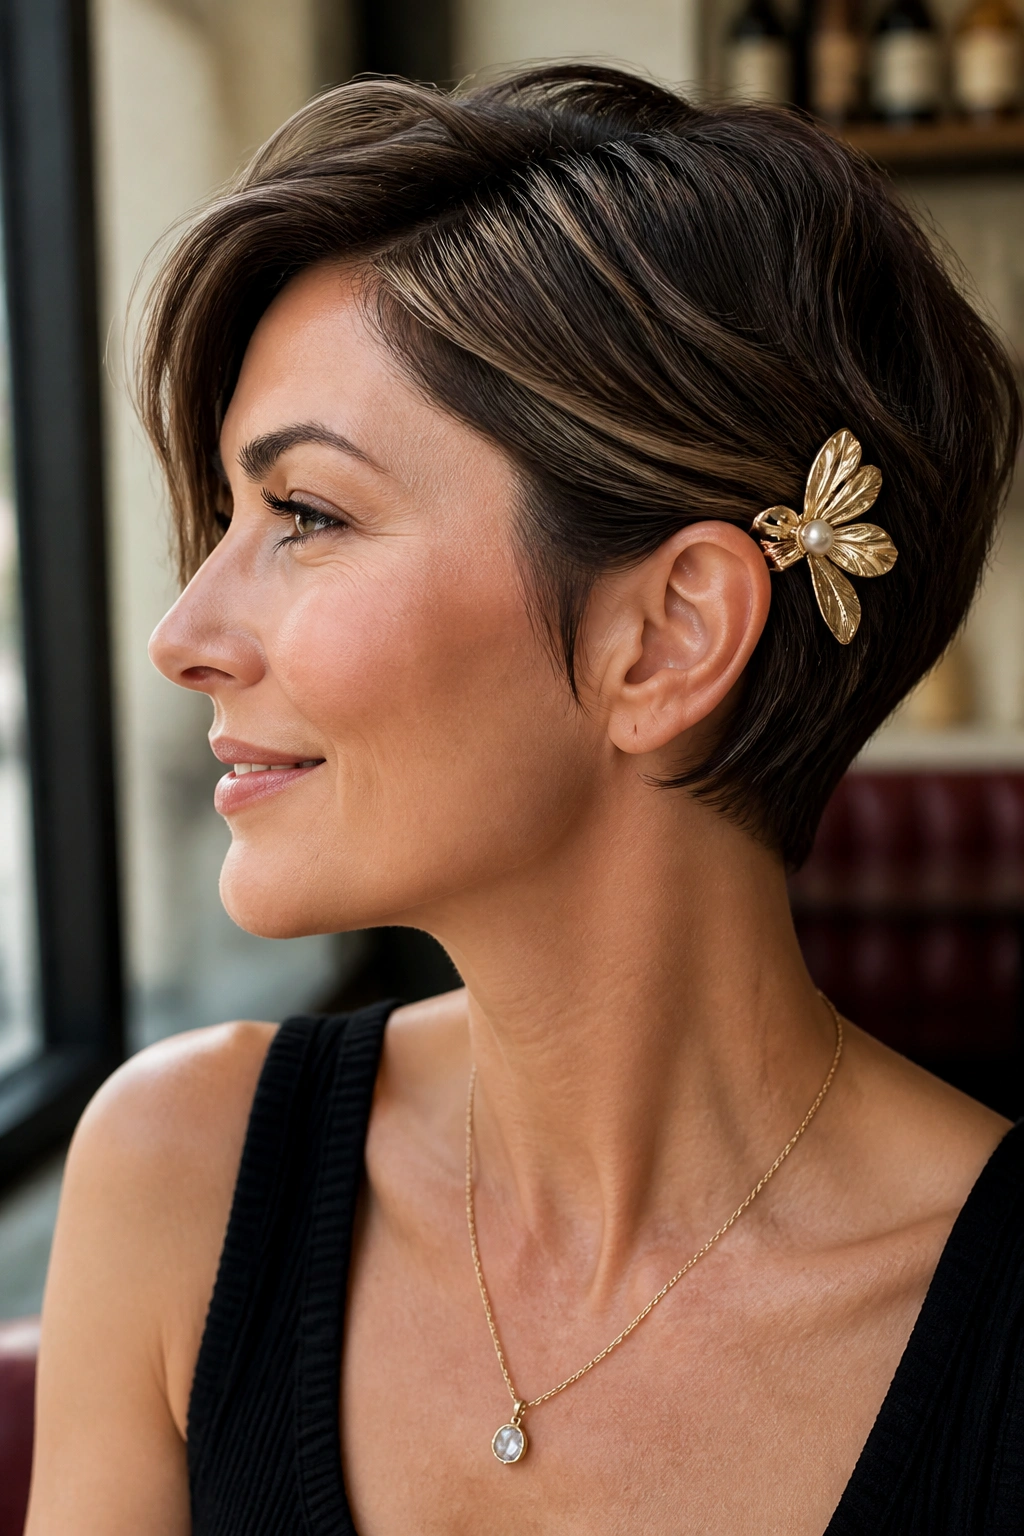
Sometimes the best updo is barely an updo at all.
A deep side tuck works because it clears the face, shows off the cut, and lets the accessory do some of the work. Sweep the heavier side behind the ear, pin the hidden layer flat, and place a statement clip or barrette over the tucked section. The clip should sit where the eye lands first, which is usually just above the jawline or slightly higher at the temple.
Picking the right clip
A tiny clip can vanish into a pixie. A huge one can swallow the haircut. The sweet spot is usually a piece about 2 to 3 inches long, with enough teeth or grip to hold short layers. Matte metal, pearl, resin, and simple tortoiseshell all work here.
The style suits straight hair, wavy hair, and even curly pixies that need one side controlled. It also saves you on days when the hair is behaving badly on one side and politely cooperating on the other.
If the tucked section keeps slipping, spray the underside of the hair, not the top. That gives the clip something to bite into.
11. Finger Waves Rolled Into a Pin-Up Shape
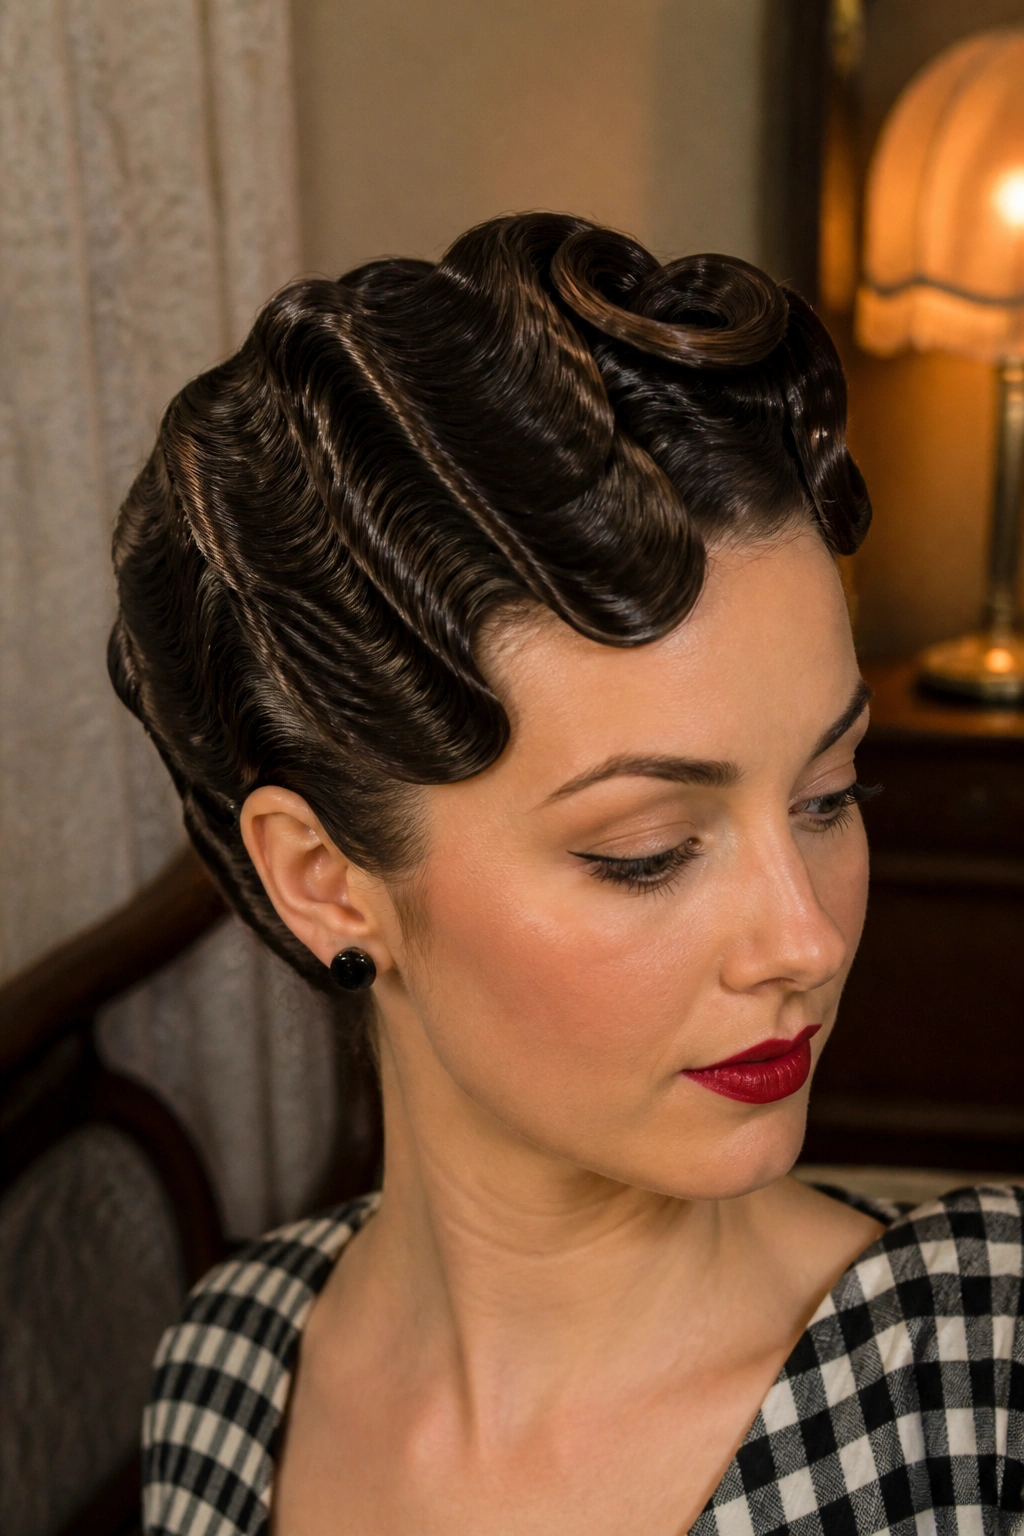
The hair should feel damp, tacky, and obedient before you start. That’s the right texture for finger waves.
Finger waves are one of the oldest tricks for short hair because they sculpt the cut instead of hiding it. Use a wave cream or strong gel on damp hair, then shape the ridges with a comb and your fingers, pressing the S-curves into place one section at a time. Small duckbill clips help hold the pattern while it dries, and they’re worth using even if they feel a bit old-school.
This style favors short, dense pixies and cuts with enough length at the front to mold. If the hair is too dry, the waves break apart. If it’s too wet, they slide. The middle ground matters. A lot.
I like finger waves because they look deliberate without needing much bulk. They sit close to the head, show off the hairline, and hold their own with bright lipstick or a simple black dress. There’s no fluff here. The shape does the talking.
A light shine spray at the end keeps the ridges from looking matte and dull.
12. The Micro Crown Braid That Sits Tight to the Head
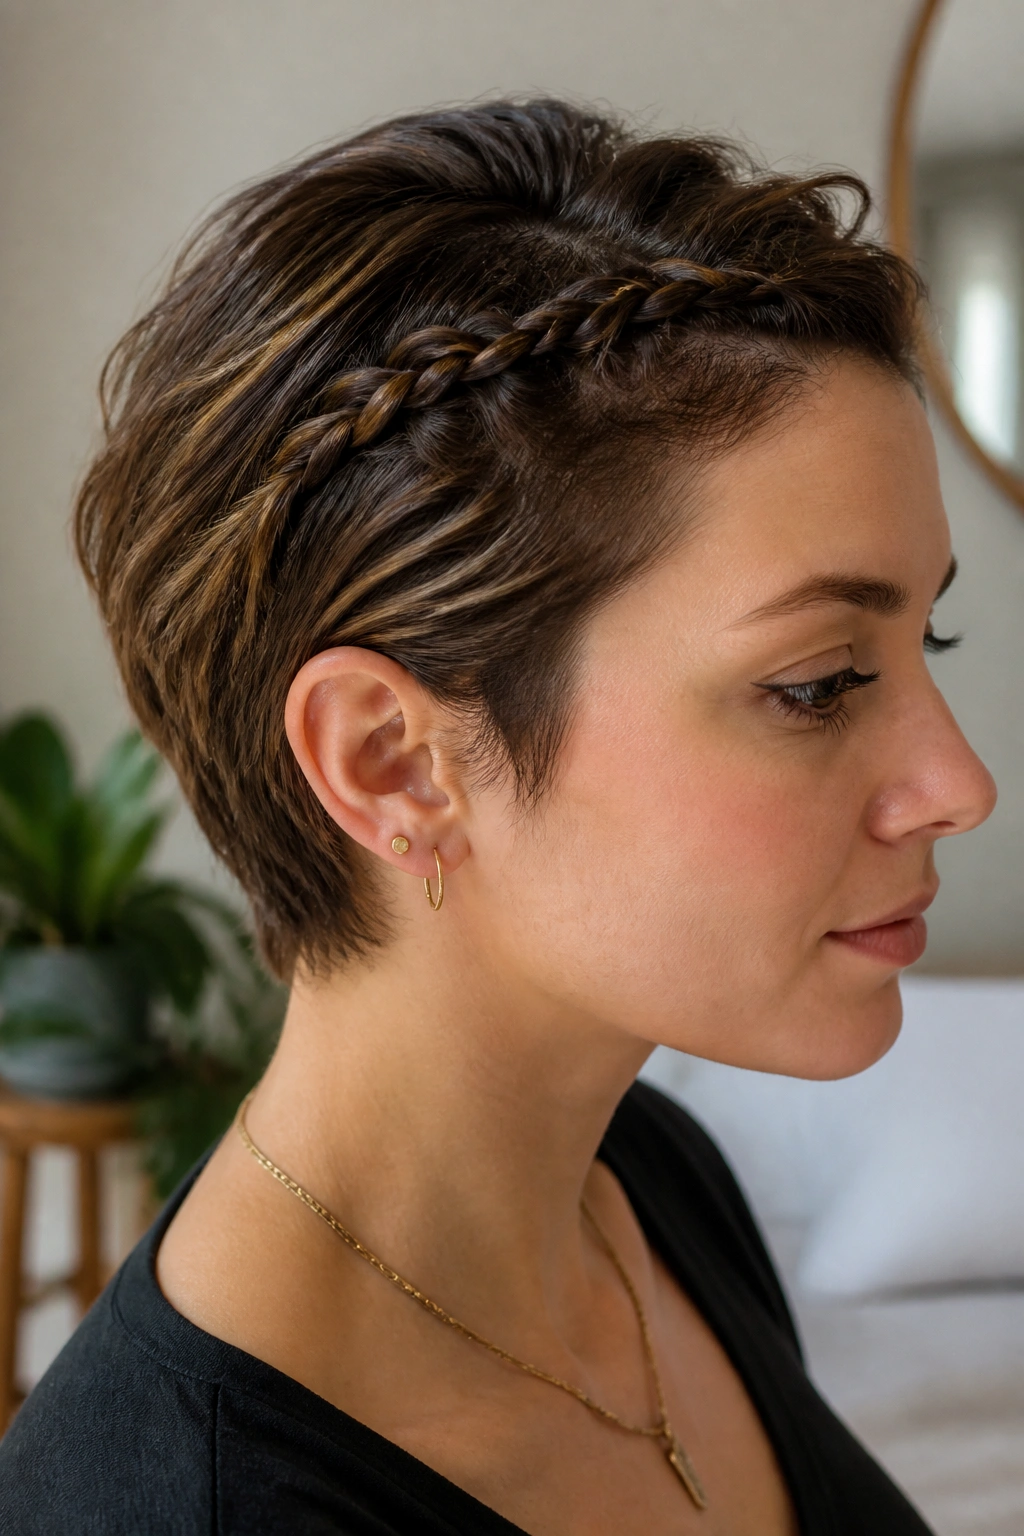
A braid can carry a pixie farther than you’d expect.
This version is tiny. You braid a narrow section along the crown or hairline, then pin the tail underneath so it disappears into the cut. The braid gives the style structure, while the rest of the hair stays loose enough to keep the haircut visible. That combination is what makes it work on short hair.
How small is small enough
Keep the braid close to the scalp and no wider than about 1 inch. Wider braids tend to loosen and puff out on short layers. If the braid starts slipping, stop and pin the last inch in place before it gets messy.
- Best on straight or slightly wavy hair with enough grip.
- Easier on a pixie that’s a little grown out.
- Looks cleaner when the part is crisp and the surface is smoothed first.
- Works well with a few face-framing pieces left free at the front.
This is different from braided bangs because it sits higher and feels more like an accent than a face-clearing move. Tiny change. Big effect.
13. The Half-Up Mini Chignon for a Longer Pixie
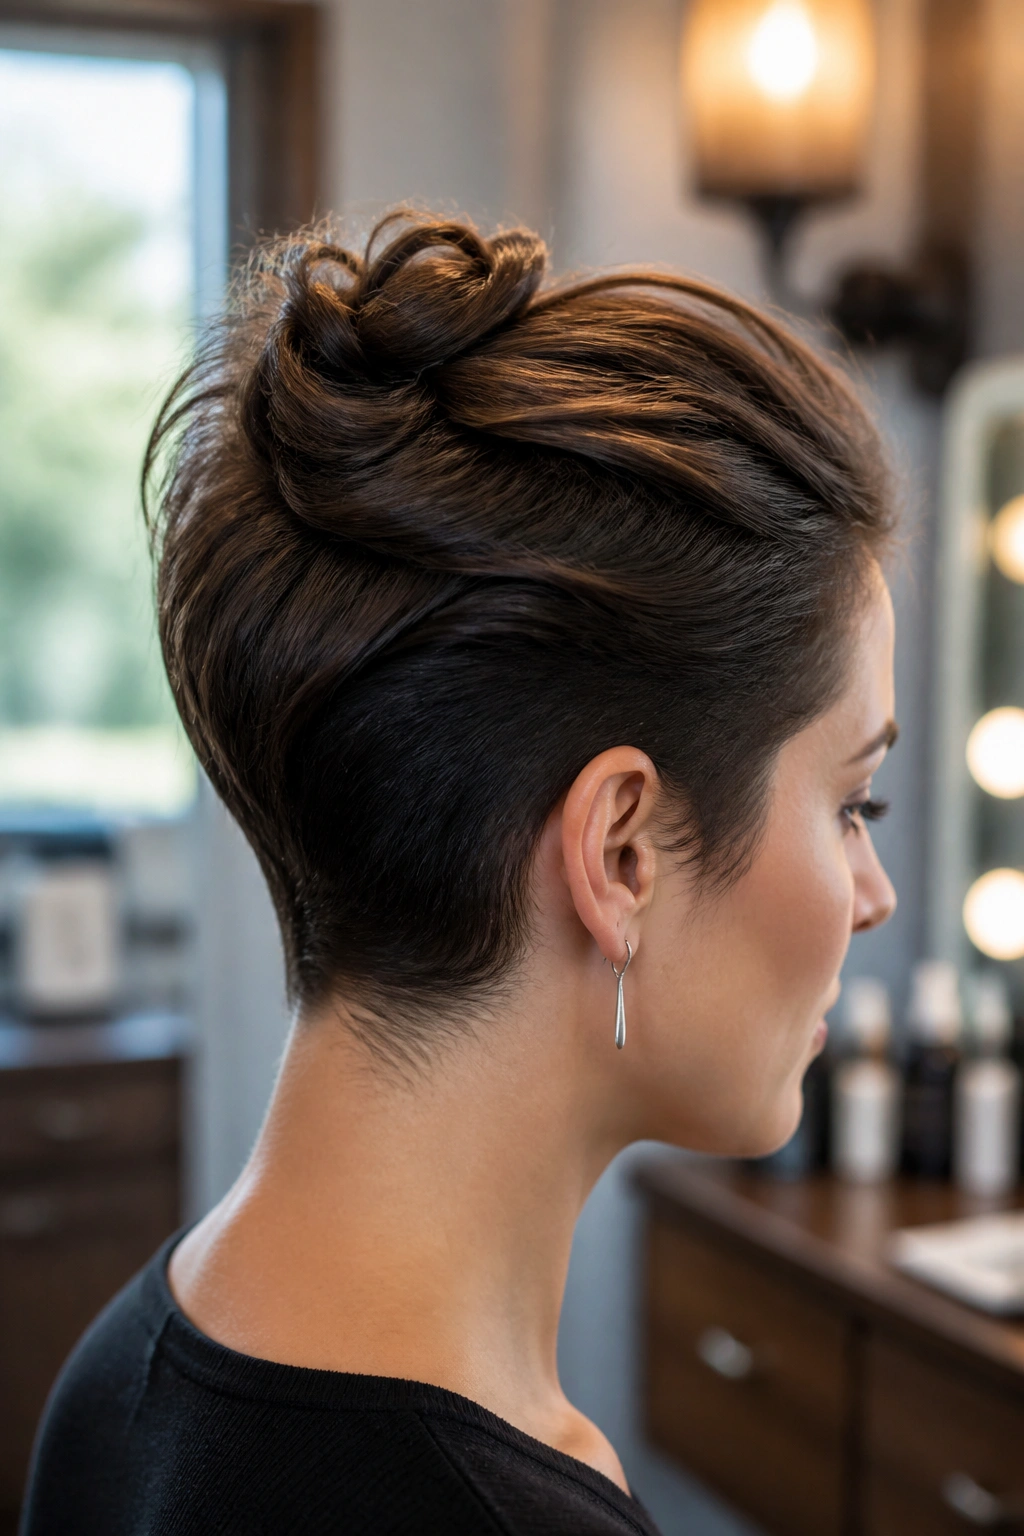
A mini chignon is not a full bun, and that’s exactly why it works.
This style suits a longer pixie, a bixie, or any crop with enough top length to gather at the back of the crown. Pull the upper half of the hair together, twist it into a tiny coil, and pin it flat rather than round. The chignon should sit small and close to the head, almost like a tucked knot with cleaner edges.
The shape matters more than the size. If the coil gets too fat, it starts looking unstable, which is the last thing you want on short hair. Keep the sides smooth, leave the lower section sleek, and let the tiny coil carry the whole look.
How to keep it from slipping
Use two pins at the base in a crisscross pattern, then a third pin if the top layer keeps rising. A light dusting of texture powder at the roots gives the coil more grip, especially on silky hair.
This is the style I’d pick for a dinner, a rehearsal, or any occasion where you want the haircut to look a little more dressed up without pretending it has extra length.
14. The Clip-Ladder Sweep That Takes Three Minutes
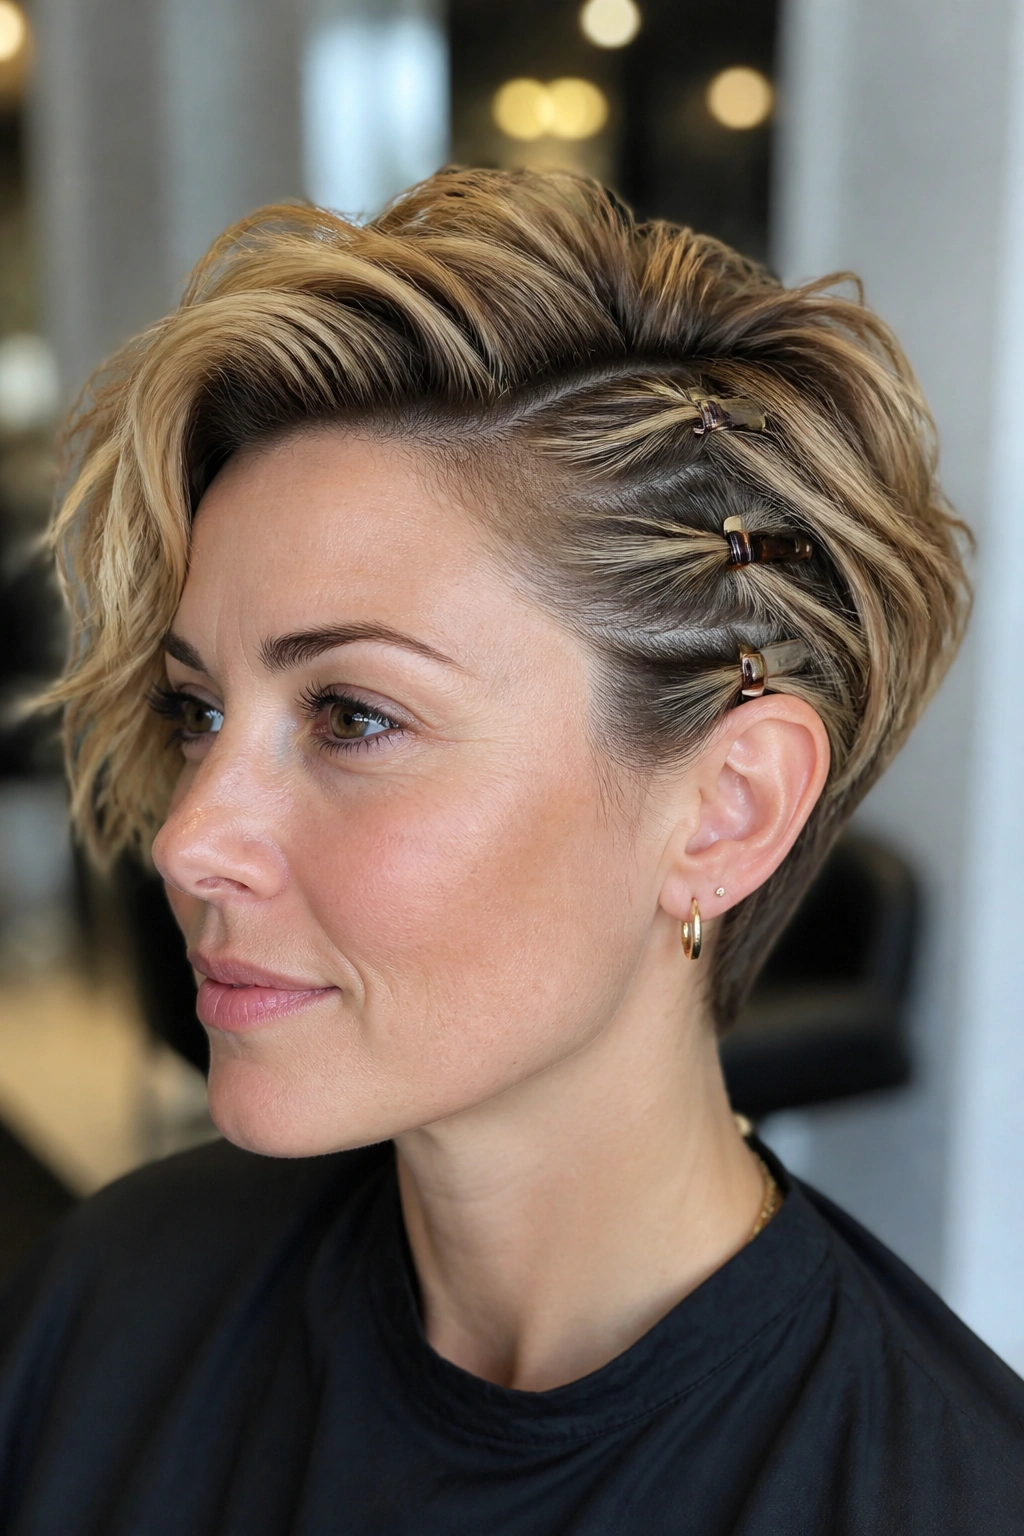
On days when you do not want to fight your hair, stacked clips solve everything.
The clip-ladder sweep works by directing one side of the pixie backward and securing it with two or three small clips in a line. Think of the clips as a visual path. The first one tames the temple, the second one keeps the side flat, and the third one adds finish. Place them about 1 inch apart, or a bit closer if the hair is short and slippery.
Choosing the shape of the ladder
You can go neat and symmetrical, or stack the clips on a slight diagonal for a softer line. Small metal barrettes look clean. Pearl clips read more dressed up. Matte resin feels a little cooler and less precious.
- Use a comb to smooth the section before clipping.
- Pin the underside first if the hair is thick.
- Mix one decorative clip with two plain ones when you want the style to feel balanced.
- Keep the rest of the hair airy, or the whole thing can look over-managed.
This one is practical, fast, and honestly underrated. It’s the short-hair version of getting dressed without overthinking the shoes.
15. Loose Wisps and a Soft Finish That Still Feels Dressed Up
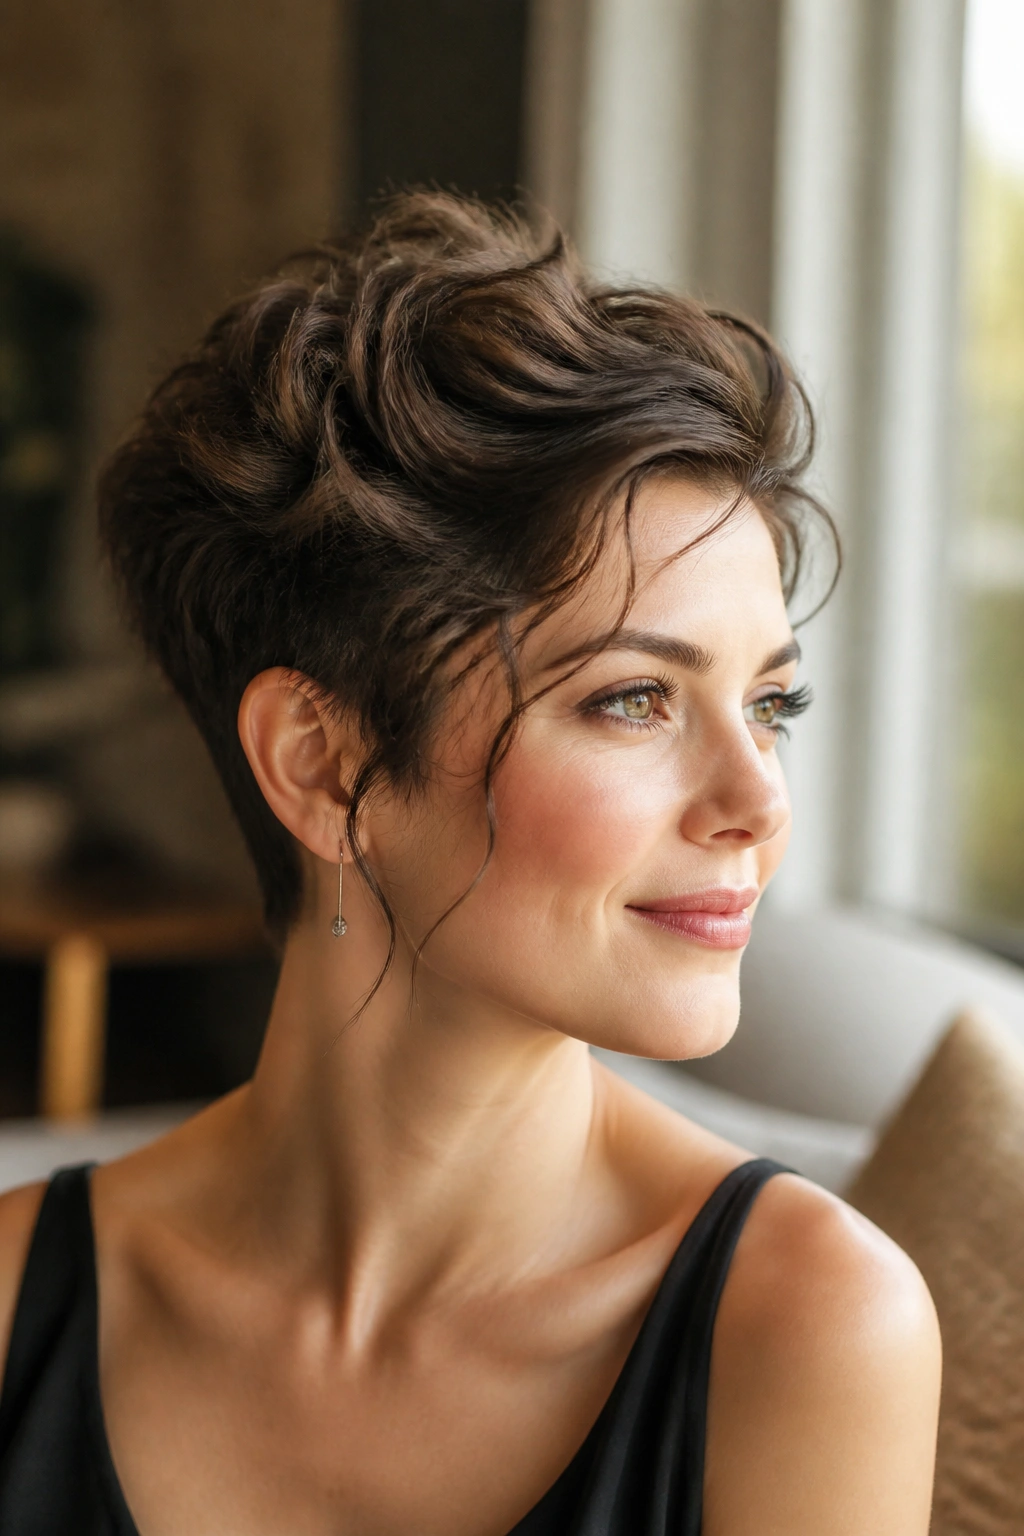
A pixie does not need to look pinned down to count as styled.
This finish leans into softness: a tucked back crown, a few loose wisps near the temples, and enough lift at the roots to keep the silhouette from falling flat. It works when you want the haircut to feel light and a little romantic instead of sharp or severe. The best part is that it lets the cut breathe. You still see the texture. You still see the neck. You still see the shape.
I like this look on cuts that have a bit of movement already, because forcing every strand into place kills the charm. A tiny bend at the fringe, one loose piece above the ear, and a soft hold spray are usually enough. If you want more polish, tuck one side farther back and leave the other side slightly fuller. That unevenness gives the style life.
No, it isn’t a full updo. That’s fine. Short hair rarely looks better when it tries too hard to act long. The better move is to keep it airy, controlled, and a touch imperfect—then let the cut do what it’s already good at.
