



Glasses change the job of a haircut. A style that looks balanced on its own can start fighting with the temple arms, the bridge, and the extra line of metal or acetate sitting right across your face.
That’s why long hairstyles that work with glasses usually do one of three things: they clear space around the temples, they move the eye up or down on purpose, or they use shape to make the frames feel like part of the look instead of an afterthought. Heavy hair can bury delicate frames. Thin hair can make bold frames look heavier than they need to.
I’ve always liked haircuts that know where to stop. A bang that lands a half-inch too low can hide the lenses; layers that begin at the wrong point can make the sides puff out and catch on the arms. Small changes matter here. A lot.
The styles below stay long, readable, and wearable. Some are polished, some are loose, some lean into texture, and a few are the sort of easy fixes you can do before work without standing in front of the mirror for twenty minutes. Start with the one that matches your frame shape, then pay attention to where the hair sits at the brow, cheekbone, and jaw. That detail does half the work.
1. Curtain Bangs and Long Layers With Glasses

Curtain bangs are the safest bet when you want movement near the face without letting hair sit on top of your frames. They split away from the center, skim the brow line, and sweep out toward the temples, which gives glasses room to breathe.
Why They Work So Well
The shape is doing the heavy lifting here. A good curtain bang opens the face in the same place where glasses tend to add structure, so the two parts feel like one idea instead of two competing ones. I like this style most with square, heart, and round faces, because the bang softens the upper face without swallowing it.
Ask for the shortest point to land at or just below the brow, then let the longest pieces curve down toward the cheekbone. If the shortest piece drops too low, the frames start to disappear. Too short, and the whole thing turns choppy.
- Best with medium to thick hair that can hold a bend.
- Works especially well with round, cat-eye, and oval frames.
- Style with a round brush, rolling the bangs away from the face.
- Keep the face-framing layers starting around the chin or collarbone.
If your frames are thick, keep the curtain pieces light at the temples. That tiny adjustment stops the look from feeling crowded.
2. Side-Swept Waves
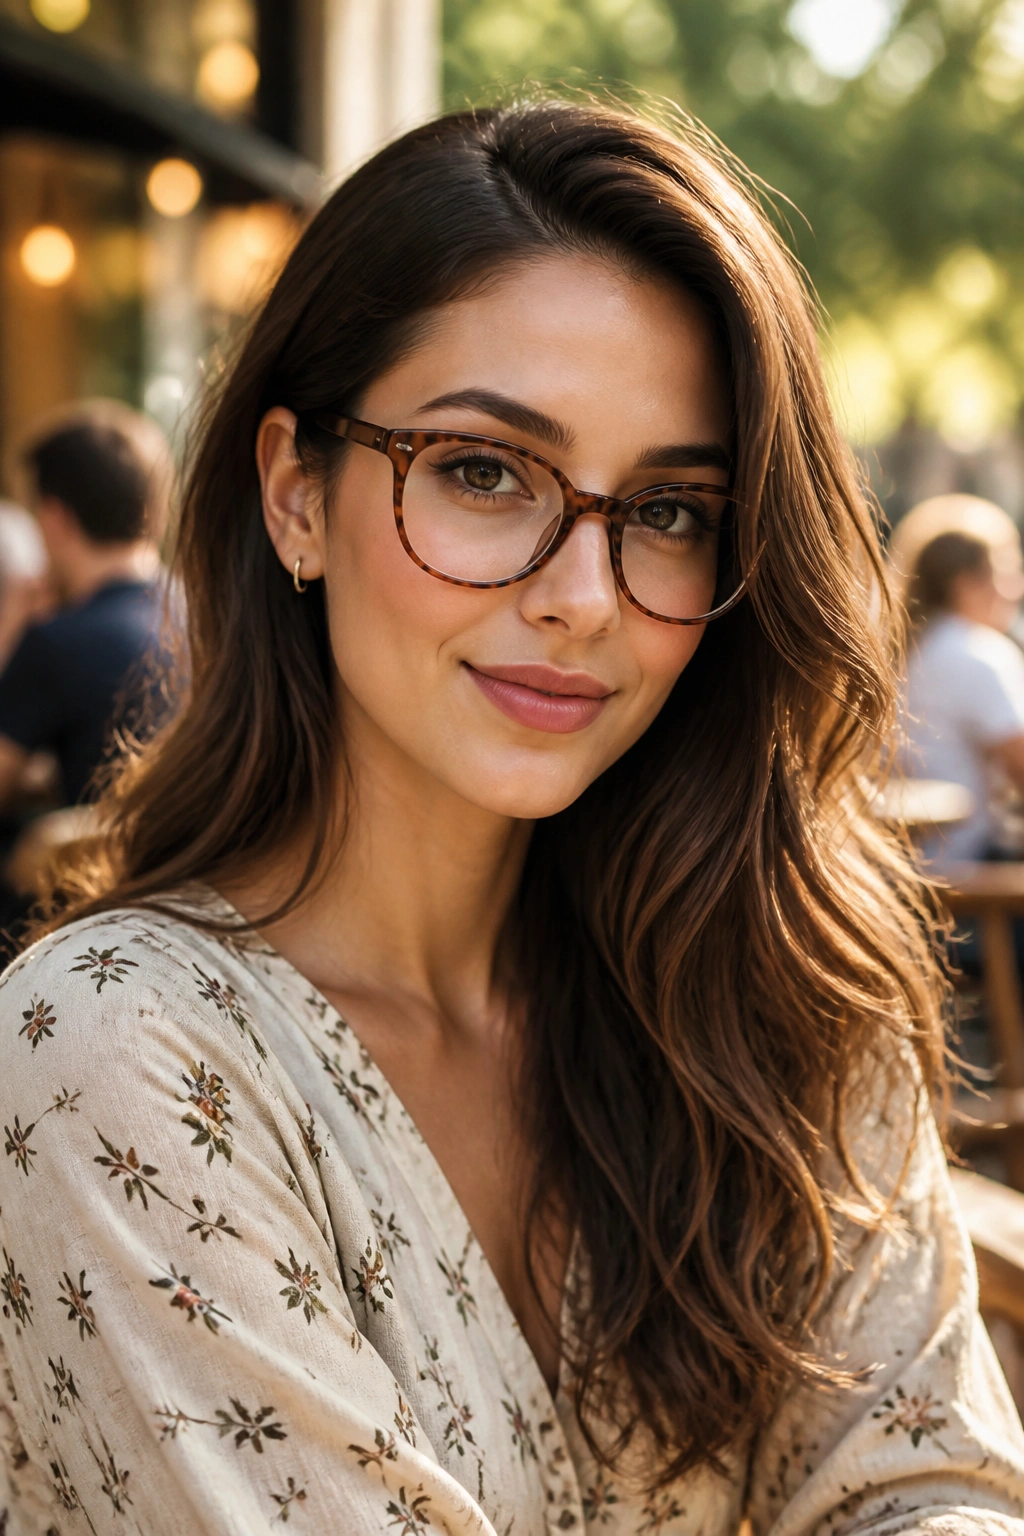
Why do side-swept waves look so good with glasses? Because they break the straight line that frames can create across the face. A deep or soft side part shifts the weight to one side, and the waves keep the rest of the length from sitting flat and heavy.
This one is especially nice if your glasses are angular. A square frame next to smooth, side-swept movement feels deliberate. A round frame next to the same style feels softer, less school-photo and more finished. The hair does not need to be huge. It just needs a little direction.
I’d use a 1.25-inch curling iron, curl away from the face, then brush the waves out once they cool. That last step matters. Tight curls can make glasses look tiny; looser bends give the face some air. Tuck the heavier side back behind one ear if the temple arm keeps getting lost in the hair.
This style is easy to overdo. Keep the wave pattern broad, not busy. One or two strong bends around the cheekbone are enough.
3. Sleek Center-Parted Straight Hair
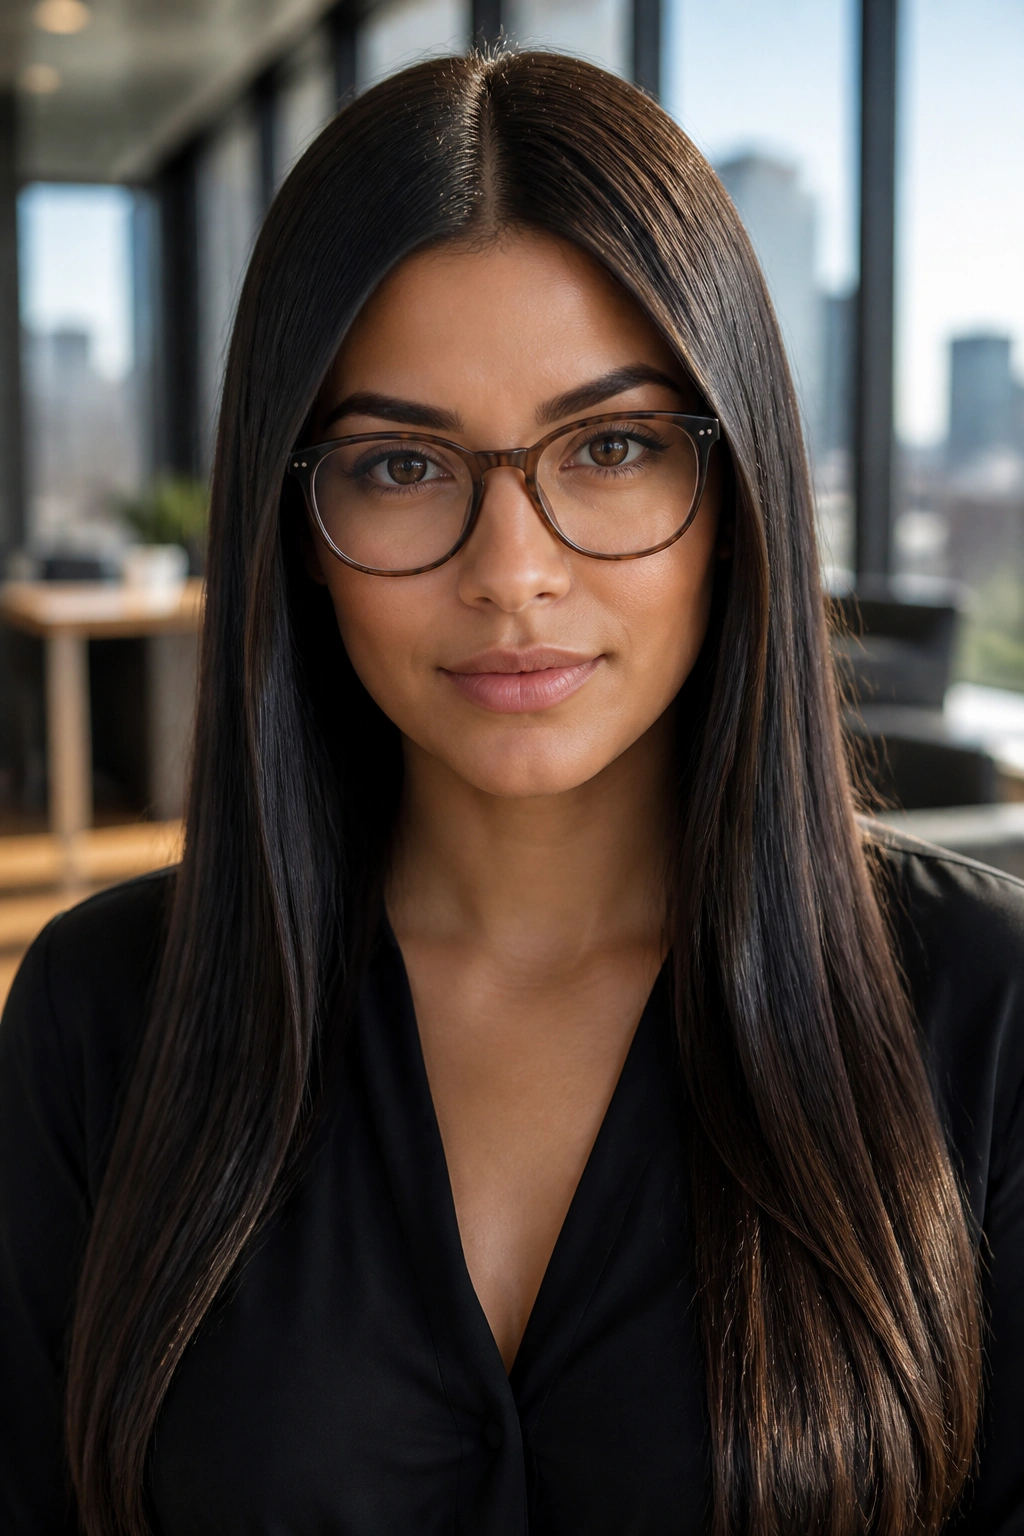
Straight hair gets called boring all the time. With glasses, that’s a lazy read.
A clean center part and long, straight lengths can make frames look intentional in a way that loose texture sometimes can’t. The sharp vertical line pulls the eye down, while the glasses give you a strong horizontal line. That contrast looks modern, but not in a try-hard way. It just looks clean.
Where It Shines
This style is strongest with rectangular, geometric, or cat-eye frames. Those shapes need a calm backdrop. If the hair is silky and the ends are blunt, the face stays open and the frames get room to stand out. I’d keep the length at the chest or lower, with a hemline that looks crisp rather than wispy.
No frizz. No fuzz. That is the whole point.
Use a smoothing cream before blow-drying, then finish with a flat iron in one slow pass if your hair needs it. A tiny bit of serum on the ends helps, but don’t coat the mid-lengths or the style starts looking flat and greasy. If your hair is heavily layered and your frames are ornate, this can get busy fast. In that case, I’d choose a softer shape.
4. Long Shag With Airy Fringe for Glasses

If your frames are bold enough to feel like part of your face, the long shag gives them room to breathe. It’s all about broken-up layers, loose movement, and an airy fringe that doesn’t sit heavy on the brow.
The key here is texture near the cheekbone, not bulk near the temples. A shag that starts too high can puff out around the sides and fight with the arms of the glasses. A better version keeps the layers feathered and the fringe see-through. You should still be able to see your forehead through it.
What to Ask Your Stylist For
- Keep the shortest layers around the cheekbone, not the temples.
- Ask for a fringe that stays light and separated.
- Let the lower layers fall to the collarbone or chest.
- Use point-cutting or a soft razor finish if your hair handles it well.
This style loves natural wave. Straight hair can wear it too, but it usually needs a bit more styling. I’d say it’s strongest on oval, heart, and long faces, especially if your glasses are thick acetate or a strong square shape.
The only catch is puff. If your hair swells in humidity, ask for less bulk at the sides. That one detail keeps the whole cut from turning triangular.
5. Half-Up, Half-Down With Crown Lift

Half-up hair solves two glasses problems at once: hair in the lenses and hair crowding the temples. It lifts the front away from the face, but it still leaves enough length down the back so you don’t lose that long-hair feeling.
The trick is the crown. If you pull the top section too flat, the style turns severe. If you lift it a little, the glasses sit in a cleaner frame and the face looks taller. I prefer this style with larger frames because the extra height keeps the upper half of the face from feeling boxed in.
Use a small claw clip or an elastic, then loosen the top section by a few millimeters after securing it. That tiny tug gives the style some life. Leave two thin face-framing pieces out in front if you want softness, but keep them clean. Scraggly strands are a mess next to glasses.
Keep the Crown Soft
- Gather hair from just above the temples, not from the hairline.
- Leave a 1-inch veil at the front if you want a gentler shape.
- Backcomb lightly at the crown only if your hair falls flat.
- Smooth the surface with your hands, not a hard brush.
This one works on almost any face shape, but it looks especially nice on round and square faces because the height changes the proportions a bit.
6. Loose Low Ponytail

The first time I wore a loose low ponytail with glasses, the whole face felt calmer. Less fuss. Less hair fighting the frame arms. It’s a simple style, but it solves the daily stuff better than most people give it credit for.
The ponytail sits below the frame line, so the temples stay clear. That matters more than you’d think, especially if your glasses have a wide arm or if your hair has a habit of sliding forward. When the tail sits at the nape, the front stays neat and the length still gets to show off.
Leave a little softness at the crown. Not a bump, not a tease, just enough slack so the hair doesn’t look pulled tight. Then wrap a small section around the elastic to hide it. If you want polish, add a few face-framing pieces around the jaw. If you want it more relaxed, keep the front section tucked back and let the ends move.
This style is best for long, straight, or lightly layered hair. It also plays nicely with oval and heart-shaped faces. It’s not flashy, and that’s the point. Sometimes that’s exactly what glasses need.
7. Brushed-Out Mermaid Waves
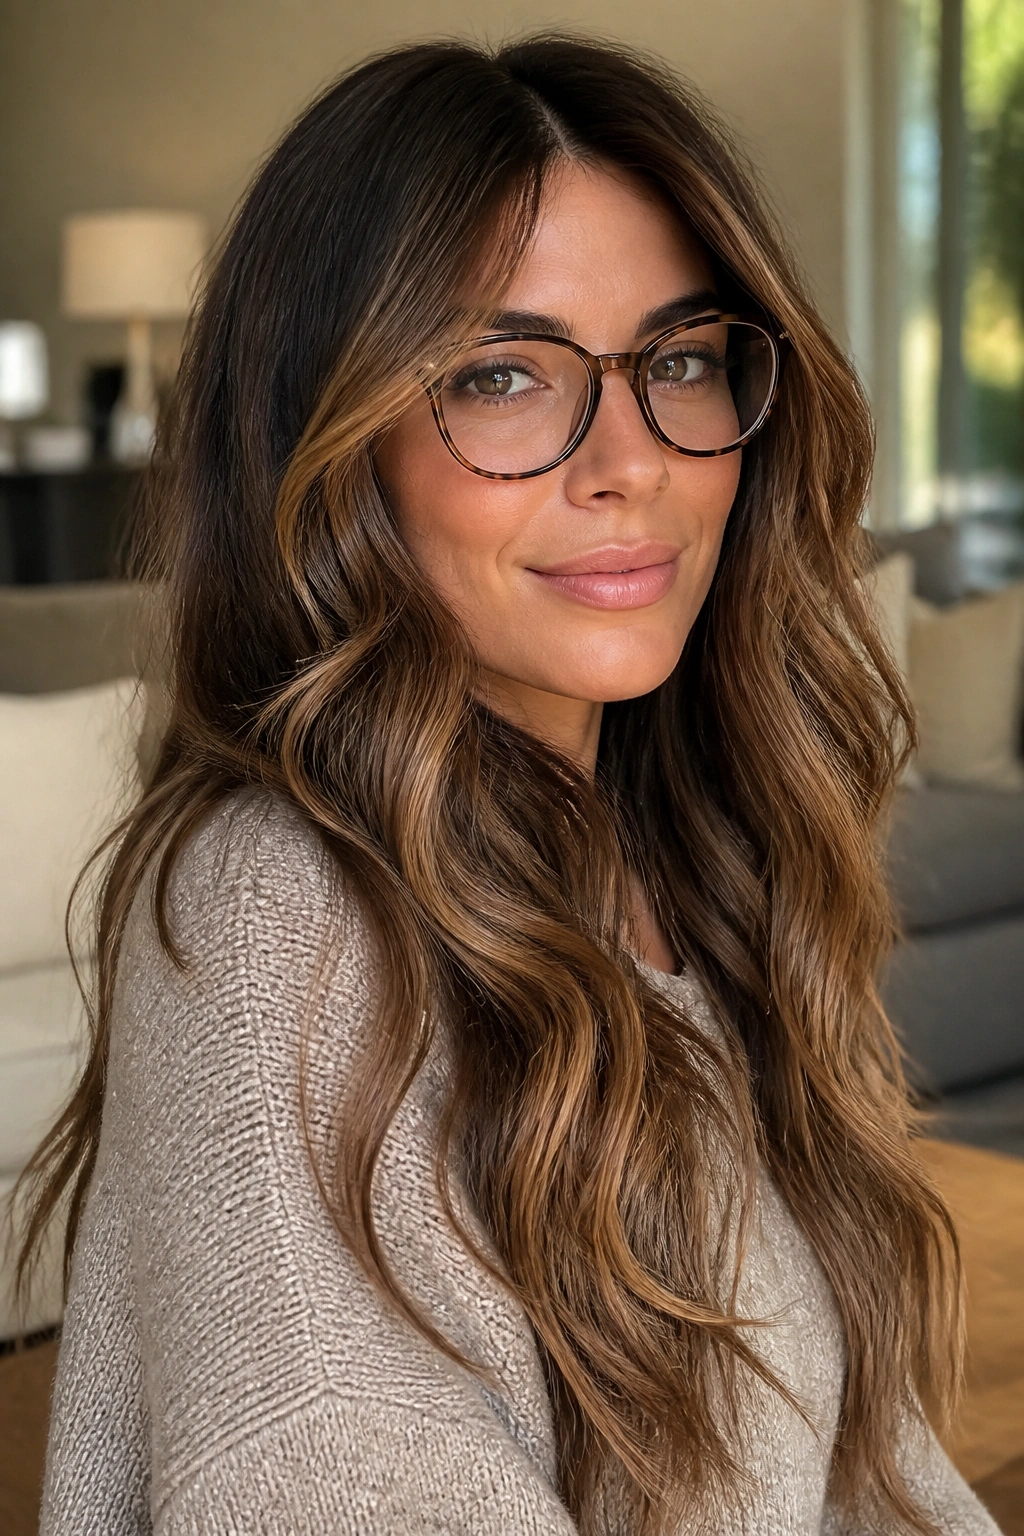
Soft, brushed-out waves move like one sheet instead of a stack of curls. That matters when you wear glasses, because busy texture near the temples can make the whole face look crowded.
I like this style when the frames are oversized or round. The broad waves echo that size without copying it too literally. You get balance, not sameness. Start the bend below the cheekbone so the upper face stays open, then brush the curls out once they’re cool so the finish looks relaxed rather than stiff.
A 1.25-inch or 1.5-inch curling iron usually gives the right shape. Wrap big sections, not tiny ones. Then run a paddle brush through the mid-lengths and ends, using a little serum on the palms if the hair needs shine. If you brush too hard, the waves collapse. If you don’t brush at all, the style can feel too formal for glasses that already have presence.
This one is lovely on thick hair, but it can also make fine hair look fuller if you keep the roots smooth. The move is broad shape, not volume for the sake of volume. Huge difference.
8. Deep Side Part With Glossy Curls

Want an easy way to make glasses look intentional instead of dominant? Move the part.
A deep side part changes the whole mood of long hair. It shifts the balance away from the center of the face, which gives the frames a little less competition and the curls a little more shape. Glossy curls help here because they hold the line, rather than exploding outward and making the sides feel crowded.
Where the Part Should Sit
- Start the part about 2 to 3 inches off center.
- Curl away from the face on the heavier side.
- Leave the front section on the lighter side a little longer so it skims the cheek.
- Finish with a light serum or shine spray on the ends only.
This works well with square, heart, and oval faces. It also pairs nicely with cat-eye or rectangular frames, since the curve of the hair softens the frame edge. I’d avoid making the curls too tight. Tight curls can make the frames look smaller than they are.
There’s a nice old-school polish to this style, but it doesn’t have to feel formal. Keep the curls soft and the side part deep enough to matter, and you get that easy, face-opening shape that glasses love.
9. Long C-Cut Layers
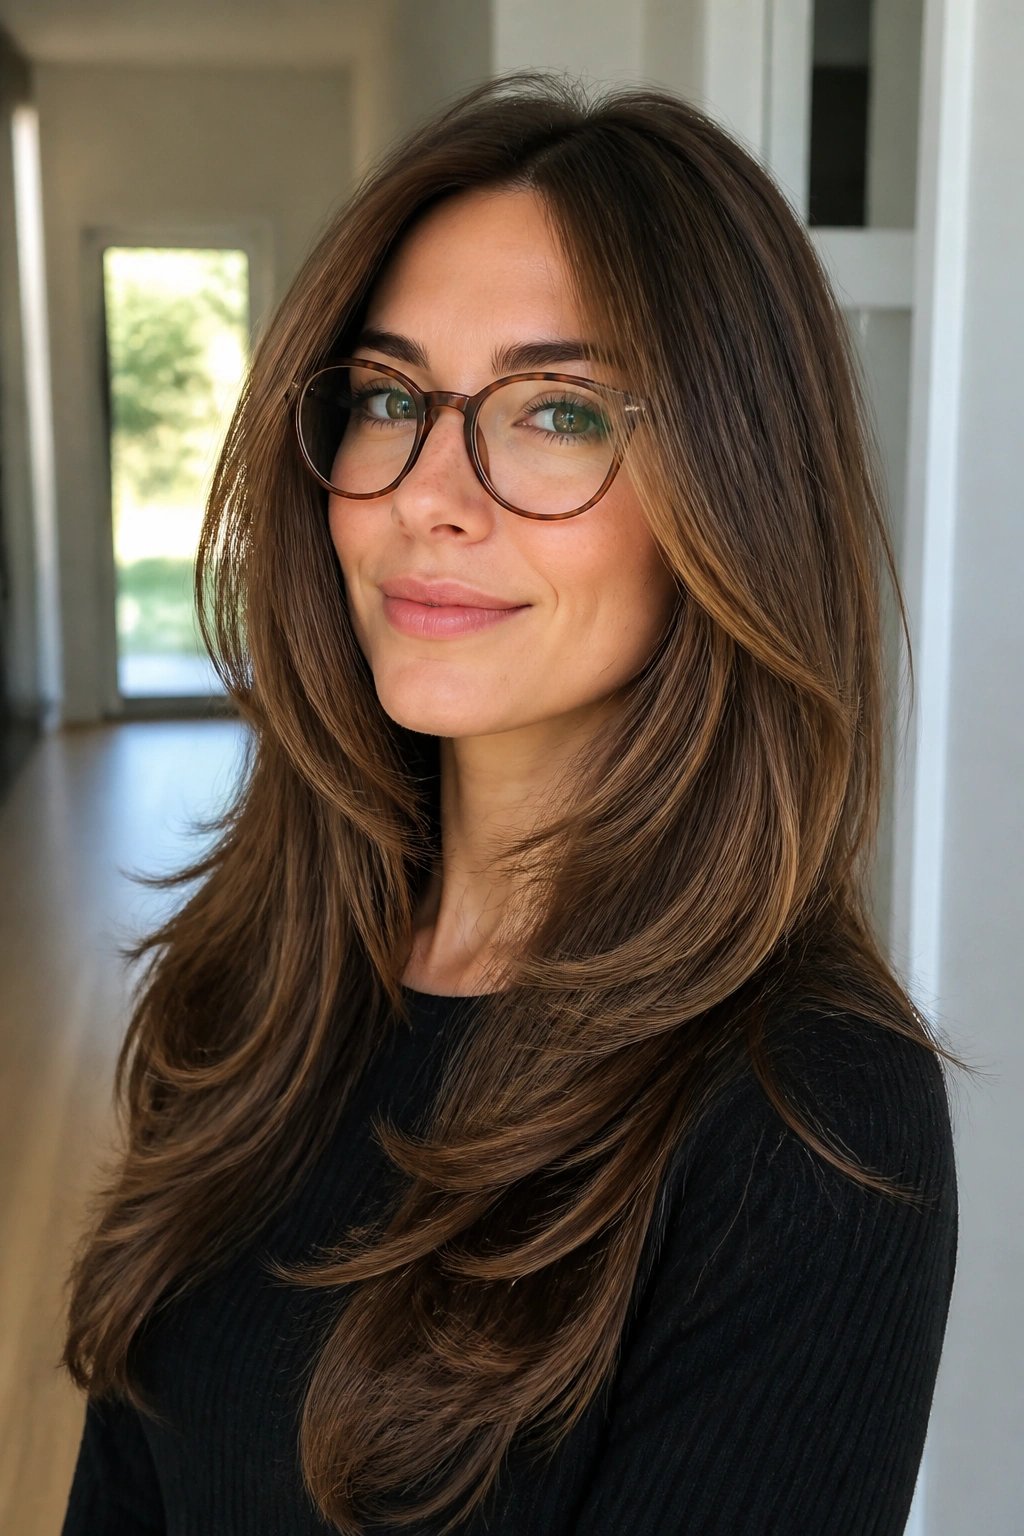
C-cut layers are one of the smartest long cuts for glasses because they curve around the face instead of dropping straight down it. The shape starts near the cheek, sweeps inward, and then falls longer through the body of the hair. That curve matters.
Compared with a blunt layer or a standard long layer, the C-shape feels smoother around the temple area. It keeps the sides from puffing out in a way that competes with the frame arms. If you’ve ever felt like your hair and glasses were having a fight on the sides of your face, this cut fixes a lot of that.
Ask for the shortest face-framing piece to land around the chin or just above it, then let the rest lengthen toward the chest. The goal is a soft arc, not a chopped-up front section. It’s especially strong on medium-thick hair, though fine hair can wear it too if the layers stay subtle.
I’d call this a low-drama haircut. It looks expensive without trying to look expensive, which is a rare thing. It also grows out gracefully, and that matters when you’re not in the mood for a high-maintenance schedule.
10. Side Braid Over One Shoulder With Glasses

Some days you want hair off your face, off your neck, and still long enough to feel like yours. The side braid does all three.
With glasses, the side braid is a smart move because it keeps the temple area clean. Nothing drifts forward and gets caught behind the arms. Nothing spills into the lenses when you lean down. It’s practical, but it doesn’t have to look plain. A braid pulled over one shoulder reads softer than a ponytail and less fussy than an updo.
Keep It Soft
- Braid slightly below the ear rather than tight against the scalp.
- Pull the braid apart a little after tying it off.
- Leave two thin front pieces if you want the face to stay open.
- Use texture spray first if your hair is very smooth or freshly washed.
This style shines with layered hair because the braid picks up the different lengths and makes them visible. It also works on round and oval faces, especially when the braid starts a little lower and falls below the frame line.
I like a loose three-strand braid here more than a super-polished fishtail, though both can work. The main thing is softness. If the braid feels rigid, it starts to look like a school uniform. If it moves a little, it feels modern.
11. Rounded Blowout Layers

A rounded blowout is the quickest way to make long hair feel finished around glasses. The shape lifts away from the face, curves inward near the jaw, and gives the whole head a bit of softness without turning the sides into a cloud.
This is a good match for narrow faces and sharper frames. The round brush creates movement that mirrors the curve of the glasses lens, especially with wire frames or slim acetate. You don’t need giant volume. You need a controlled bend that gives the eyes some breathing room.
Start with hair about 80 percent dry, then use a 2-inch round brush to direct the front layers away from the face. Turn the ends slightly under or slightly out, but stay consistent. Mixed directions can look messy around glasses, and messy is not the same thing as relaxed.
I should say this plainly: this style asks for heat styling. If you hate that, pick something else. But if you don’t mind a blow-dry, the payoff is a long hairstyle that looks deliberate from every angle, which is exactly what a pair of glasses likes.
12. One-Length Waist-Length Hair
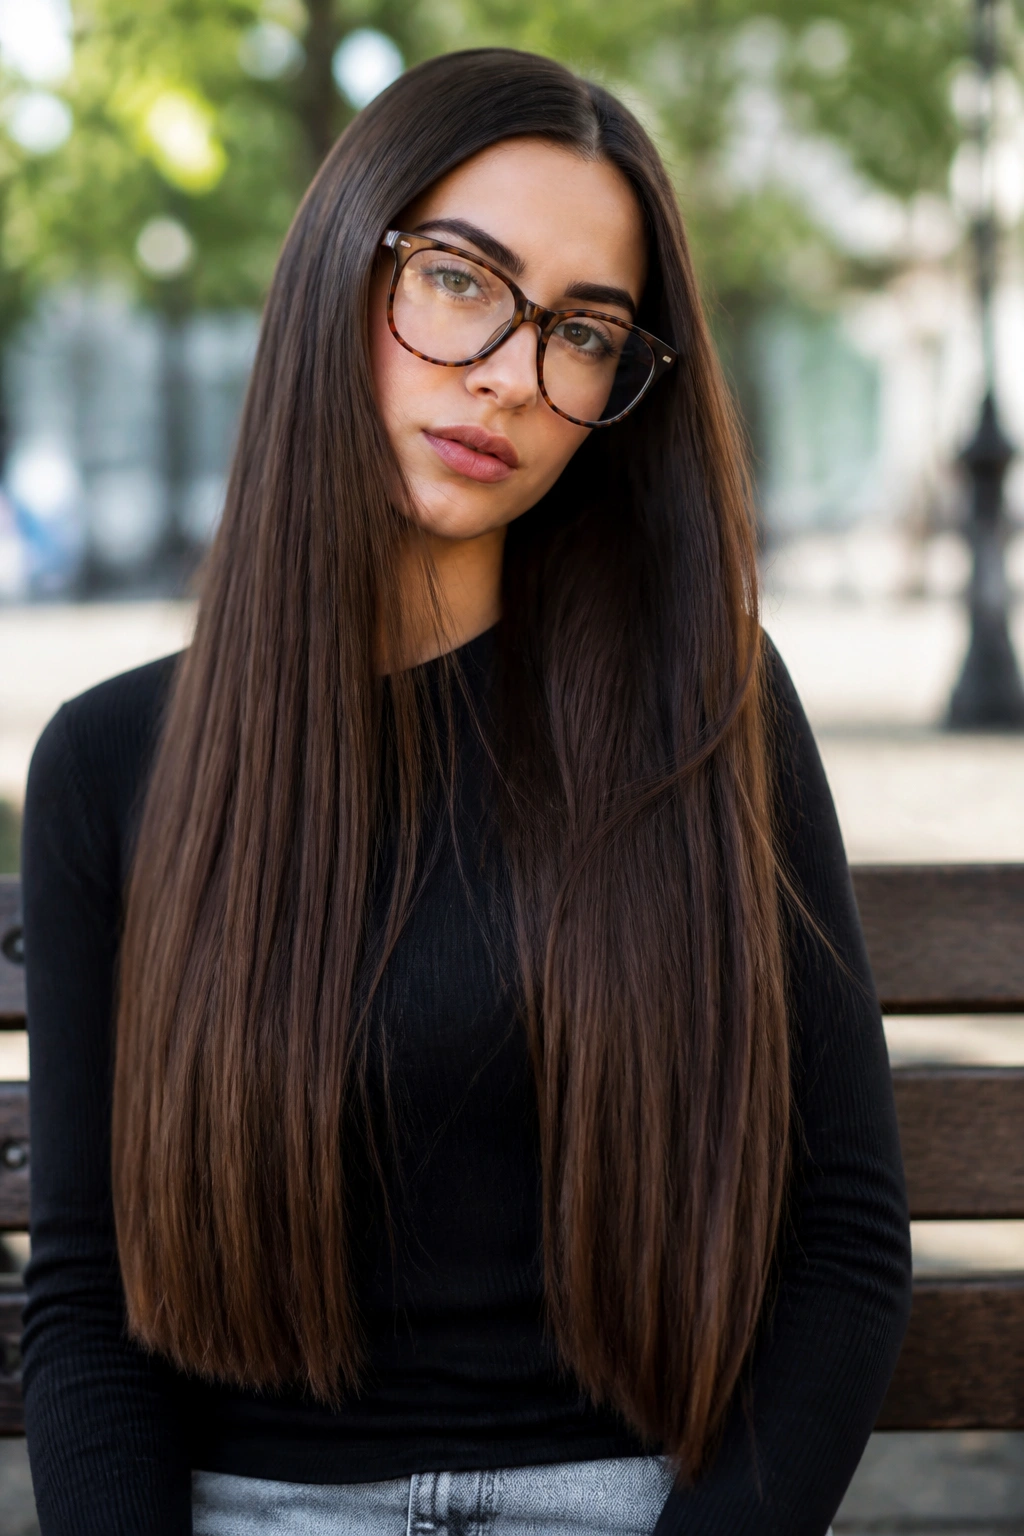
Long, one-length hair sounds plain until you put it next to a pair of strong frames. Then the clean line starts doing something useful.
No layers. That is the point.
A blunt hemline gives the face a strong vertical shape, which helps glasses stand out instead of getting swallowed by too much movement. It’s a very good choice if your frames are thin, minimal, or wire-like. The hair becomes the quiet backdrop, and the frames become the sharper detail. I especially like it on medium to thick hair, where the ends can stay full instead of looking straggly.
The caution is obvious, and worth saying anyway. If your hair is fine or dry at the ends, waist-length one-length hair can look tired fast. In that case, I’d keep the length a little higher, around mid-back, so the edge stays dense. You want a solid line, not a see-through curtain.
This cut looks best when the hair is healthy and smooth. A middle part makes it feel crisp; a soft off-center part makes it feel a little easier. Both work. The real trick is the finish at the ends.
13. Twisted Half-Up With Tendrils
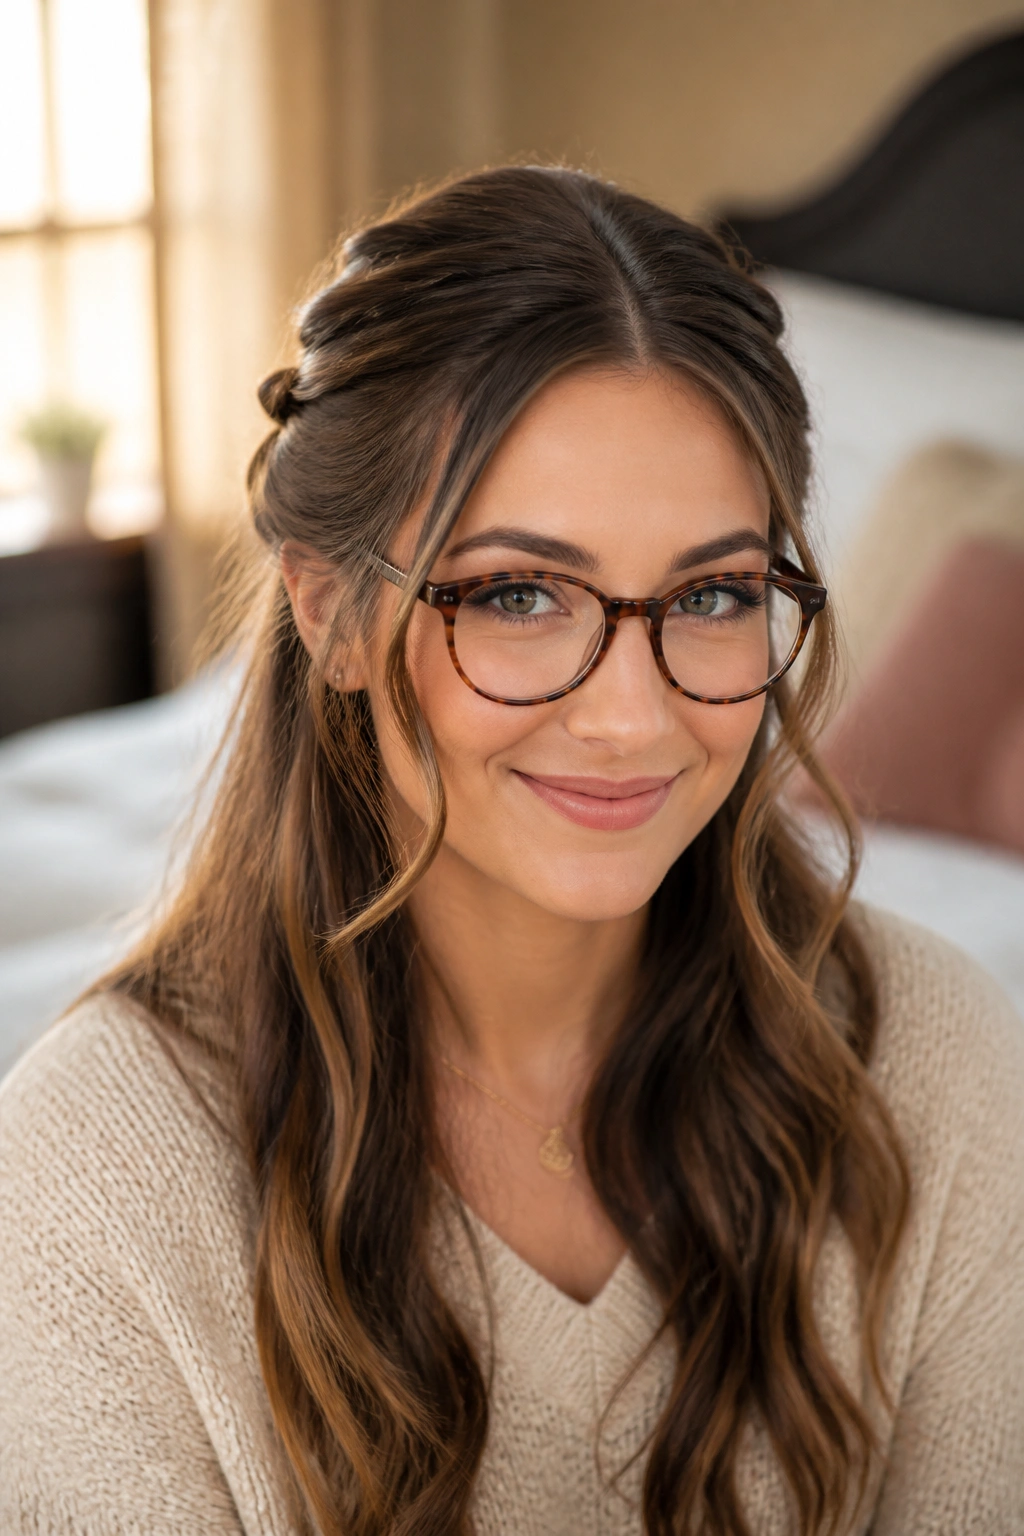
I keep coming back to this style because it solves the grown-up version of “I need my hair out of my face” without turning into a full updo. Two small twists at the temples, pinned at the back, leave the length down and the glasses fully visible.
The twist is what makes it better than a plain clip. It creates a line around the face that feels intentional, and it takes pressure off the temples. You can wear it with straight hair, wavy hair, or curls. It’s one of those styles that looks like you spent more time on it than you did, which is always useful.
The Small Detail That Matters
- Twist each front section back, away from the face.
- Pin the twists a little above the ear, not low near the jaw.
- Leave tendrils that stop around cheek or jaw length.
- Use two bobby pins crossed if the hair slips out easily.
This is nice with oval and heart-shaped faces, but it can work on nearly anyone because the tendrils are adjustable. You can keep them very light if your frames are bold, or leave them a little fuller if your frames are thin.
Don’t drown it in hairspray. A soft hold is enough.
14. High Ponytail With Soft Front Pieces

A high ponytail can look sharp with glasses, and not always in a good way. The fix is simple: keep the ponytail high enough to lift the face, but leave the front loose enough to soften the line.
That lift helps with round faces and heavier frames because it opens the cheek and brow area. The problem is tension. If the hair is pulled too tight, the whole look can feel severe, and glasses make that severity more obvious. A few soft front pieces change the tone immediately.
I’d place the ponytail at the crown rather than the absolute top of the head. Then wrap a strand around the elastic so the base looks clean. Leave two slim pieces at the front, ideally one on each side, and let them skim the cheekbones. They should soften the shape, not become a curtain.
This style is great for active days, long work days, and any moment when you want your hair up but not invisible. It works best with medium to thick hair, because the ponytail needs enough body to hold its shape. If your hair is fine, a little texture spray at the roots helps more than extra teasing.
15. Bubble Ponytail That Stays Clear of Glasses
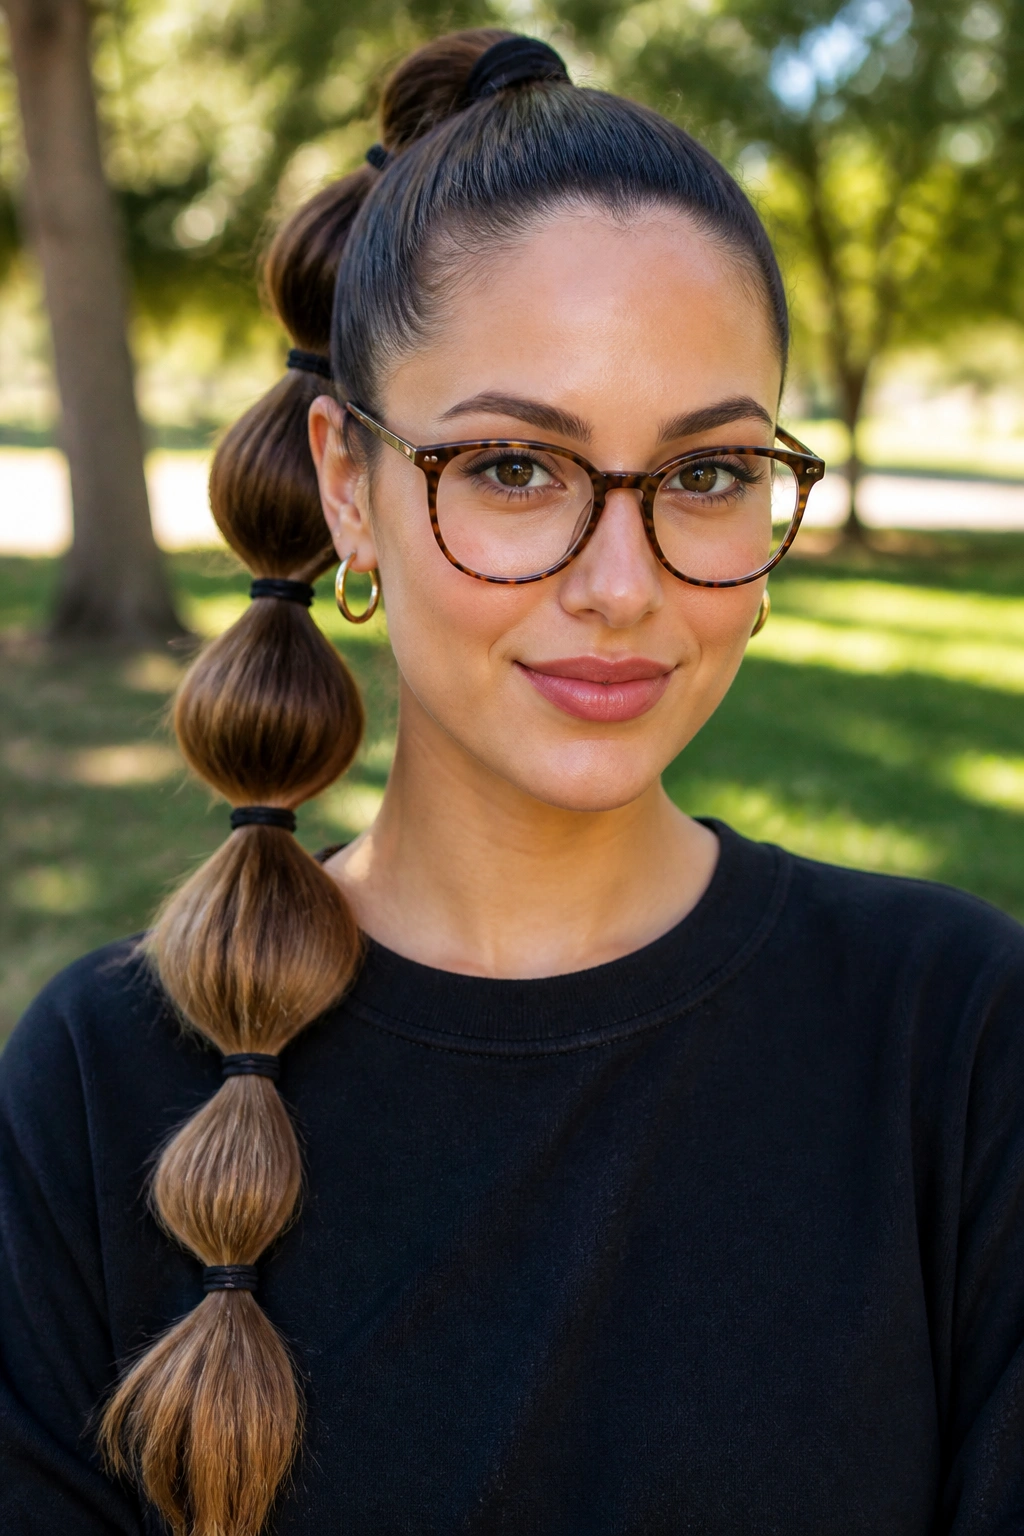
If you want something more playful than a regular ponytail, the bubble version keeps the long shape and stays far away from your frames. It’s clean at the top, structured down the length, and a little unexpected in a good way.
The spacing matters here. Each elastic creates a round section, so the bubbles need to be even enough to look deliberate. That rhythm keeps the style from collapsing into a plain ponytail with random ties on it. With glasses, the big advantage is that everything sits behind the face line. No hair near the temples. No stray pieces drifting into the lenses.
How to Keep the Bubbles Even
- Start with a smooth high or mid-height ponytail.
- Place small elastics about 2 to 3 inches apart.
- Gently tug each section outward on both sides after tying it off.
- Use clear elastics if you want the base to disappear.
This style is best on medium to thick hair, because the bubbles hold shape more easily. Thin hair can wear it too, but it usually needs a little texturizing spray first. I also like this for sporty frames and oversized glasses because the shape feels lively without being messy.
It takes a minute longer than a standard ponytail. Worth it.
Final Thoughts
The best long hairstyles with glasses do one of three things: they leave room where the frames sit, they add movement below the frames, or they use parting and volume to balance the shape of the eyewear. That’s the whole game, really. Not more hair. Better placed hair.
If your frames are bold, start with curtain bangs, a long shag, or a deep side part. If they’re slim, one-length hair, rounded blowout layers, or brushed-out waves give you a cleaner canvas. And if you need something fast on a regular morning, the low ponytail and twisted half-up styles are the ones I’d reach for first.
Bring a photo to your stylist and point to the brow, cheekbone, and jawline. That tiny bit of direction usually matters more than naming a trend. Once the haircut respects the frames, everything else settles into place.
