



Thinning hair and locs can sit on the same head and still look sharp. The trick is not pretending every strand is as thick as it used to be. It’s choosing loc styles for thinning hair that spread weight, soften the scalp line, and stop the eye from camping on the sparsest spots.
A lot of people reach for the same hard slick-back or a high ponytail, then wonder why the temples look even thinner by evening. Tight is not clever. It just makes the problem louder.
The best styles do three things at once: they sit low or off-center, they use the locs you already have to build visual density, and they keep pins, elastics, and added weight out of fragile areas. If the thinning is sudden, patchy, painful, or tied to itching, get a dermatologist or an experienced loctician to look at it before you keep styling over it.
Some of the ideas below are plain. That is the point. Plain styles usually win when you want the scalp to rest and the silhouette to look fuller, which is a nicer trade than chasing a dramatic look that falls flat by lunchtime.
1. Low Two-Strand Twist Bun

A low two-strand twist bun does more for thinning locs than a lot of flashier styles ever will. It gives the eye texture to follow, and texture is useful when the crown or temples are showing more scalp than you want.
Start by dividing the locs into pairs and twisting each pair loosely from root to end. Then coil those twists into a soft bun at the nape, not up at the crown. If the bun feels like it is pulling at the front hairline, it is too tight. Plain and simple.
Why the shape helps
The bun sits low enough that the tension stays away from the most fragile spots. That matters if your edges have gotten thin from retwisting, styling, or plain old wear over time.
The two-strand texture also adds a little bulk. Two thin locs twisted together read fuller than one flat section, and that visual thickness is often enough to make sparse areas feel less obvious.
- Best for thinning at the crown, temples, or nape
- Works well with shoulder-length locs and longer
- Keep the root loose and the coil soft
- Use 4 to 6 U-pins, crossed in an X if the bun needs support
One good rule: if you can feel the bun before you can see it, loosen it.
2. Barrel Rolls Down the Back
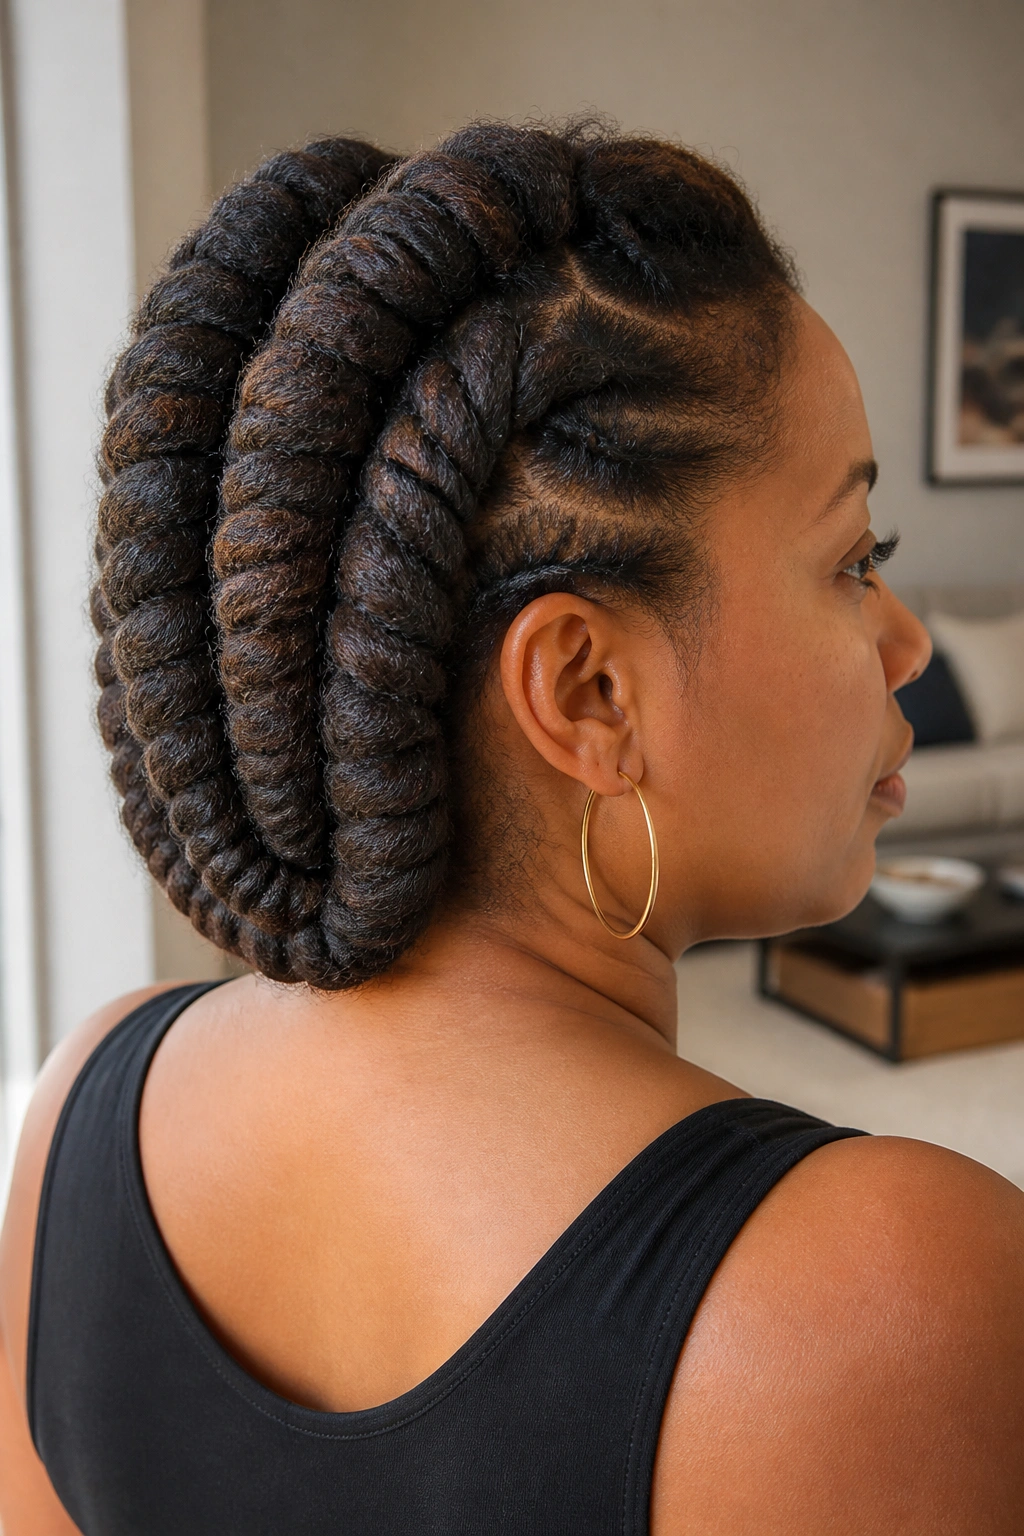
Barrel rolls can make fine locs look thicker because they spread the mass across the head instead of stacking everything into one knot. That simple shift changes how the style reads from the front and from the side.
Roll the locs in broad bands from each side toward the center back, almost like you are building soft columns along the head. The goal is width, not tightness. If you roll too skinny, the style turns into a little tube and loses the fullness trick that makes it useful in the first place.
Wide wins here.
The best version uses the natural weight of the locs to hide thin spots without making the style heavy. I like barrel rolls on medium-length locs because the shape does some of the visual work for you. You do not need a lot of accessories. You do not need a dramatic part either. The curve of the roll is the whole point.
Finish with a few hidden pins under the seam, then leave the ends tucked rather than hanging loose if your hairline is sparse. That keeps the eye on the roll, not on scattered ends that can look thinner than they are.
3. Side-Swept Pinned Locs
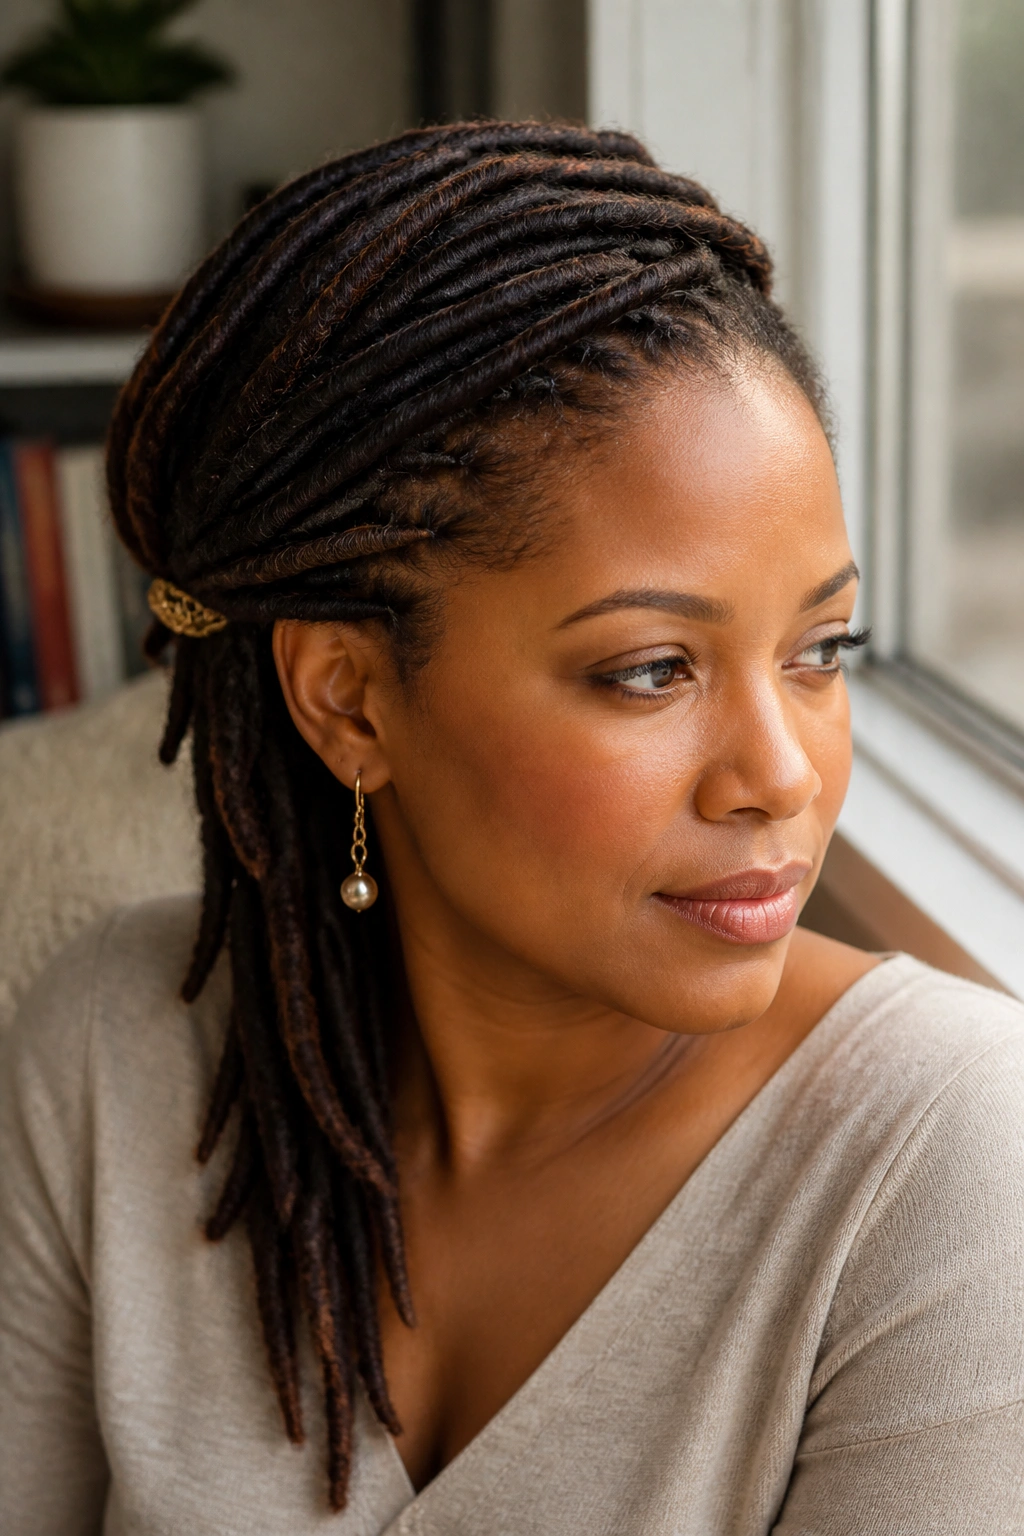
What if the thinning sits right at the front? Side-swept pinned locs are one of the cleanest answers I know.
The style works because the hair stops asking the viewer to stare straight at the hairline. Instead, it moves diagonally across the face, which creates a softer frame and hides the places that feel see-through. A deep side sweep also breaks up a straight center part, and straight parts can be unforgiving when density is uneven.
How to wear it
Start the part above one eyebrow and angle it back toward the opposite crown. Let the heavier side fall across the forehead, then pin only the back edge behind the ear or just above it. Do not pin the front too tightly. That is where people get greedy and ruin the whole effect.
- Keep 3 to 5 locs loose near the face
- Use 2 small pins, not a fistful of clips
- Let the sweep sit low enough to soften the temple line
- Avoid a crisp center part if the crown is thin
If you like a little polish, tuck one front loc behind the ear and leave the rest draped. It looks easy. And it is.
4. Low Nape Bun with a Loose Crown
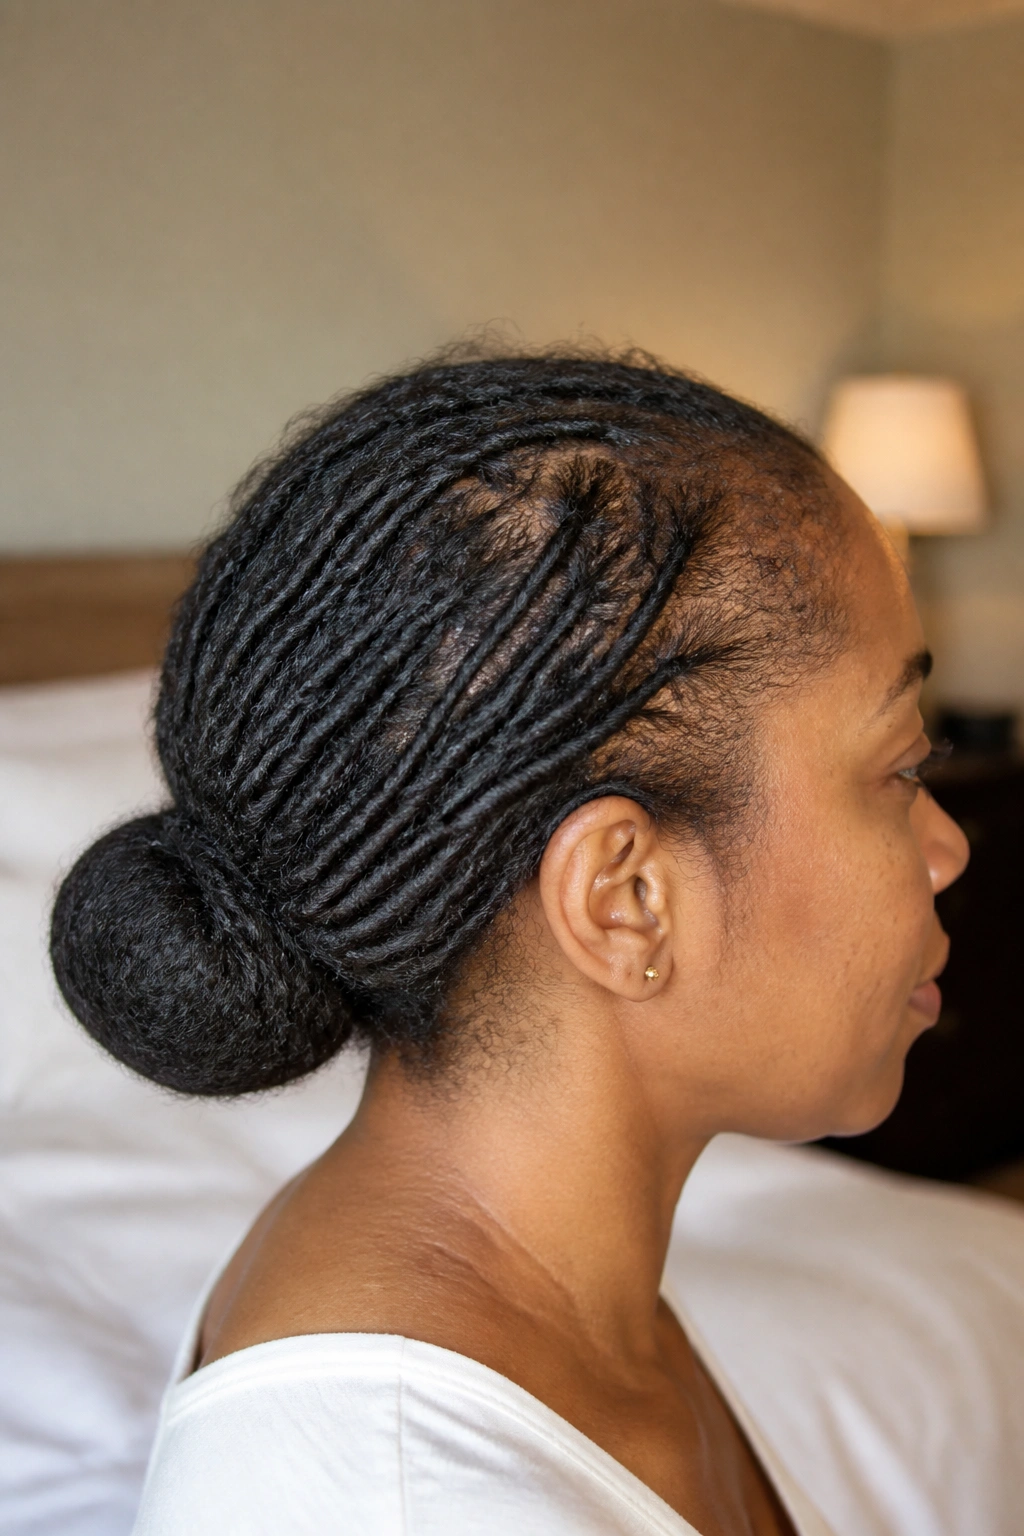
Picture a morning when the top of your head feels a little too open. The low nape bun is the style that calms that down without making the hair look dressed up in a way that fights the thinning.
The trick is to keep the bun almost hidden at the base of the skull while letting the upper locs rest with a little slack. You are not trying to build height. You are trying to make the scalp line less loud. A soft side part helps, but a no-part version works too if the crown is the area that needs the most quiet.
A low bun also keeps weight off the perimeter. That matters when the edges feel tired, because a lot of styles place the stress exactly where the hair is weakest. This one does the opposite. It gathers the length, secures it low, and leaves the top free enough to avoid that stretched, shiny look that can happen when hair is pulled too tight.
- Keep the bun centered at the nape
- Use a soft wrap, not a hard knot
- Tuck ends inward so the shape stays smooth
- Let one or two outer locs soften the bun if it looks too small
It is the closest thing to a reset button for a weary hairline.
5. Crown Wrap with a Deep Side Part
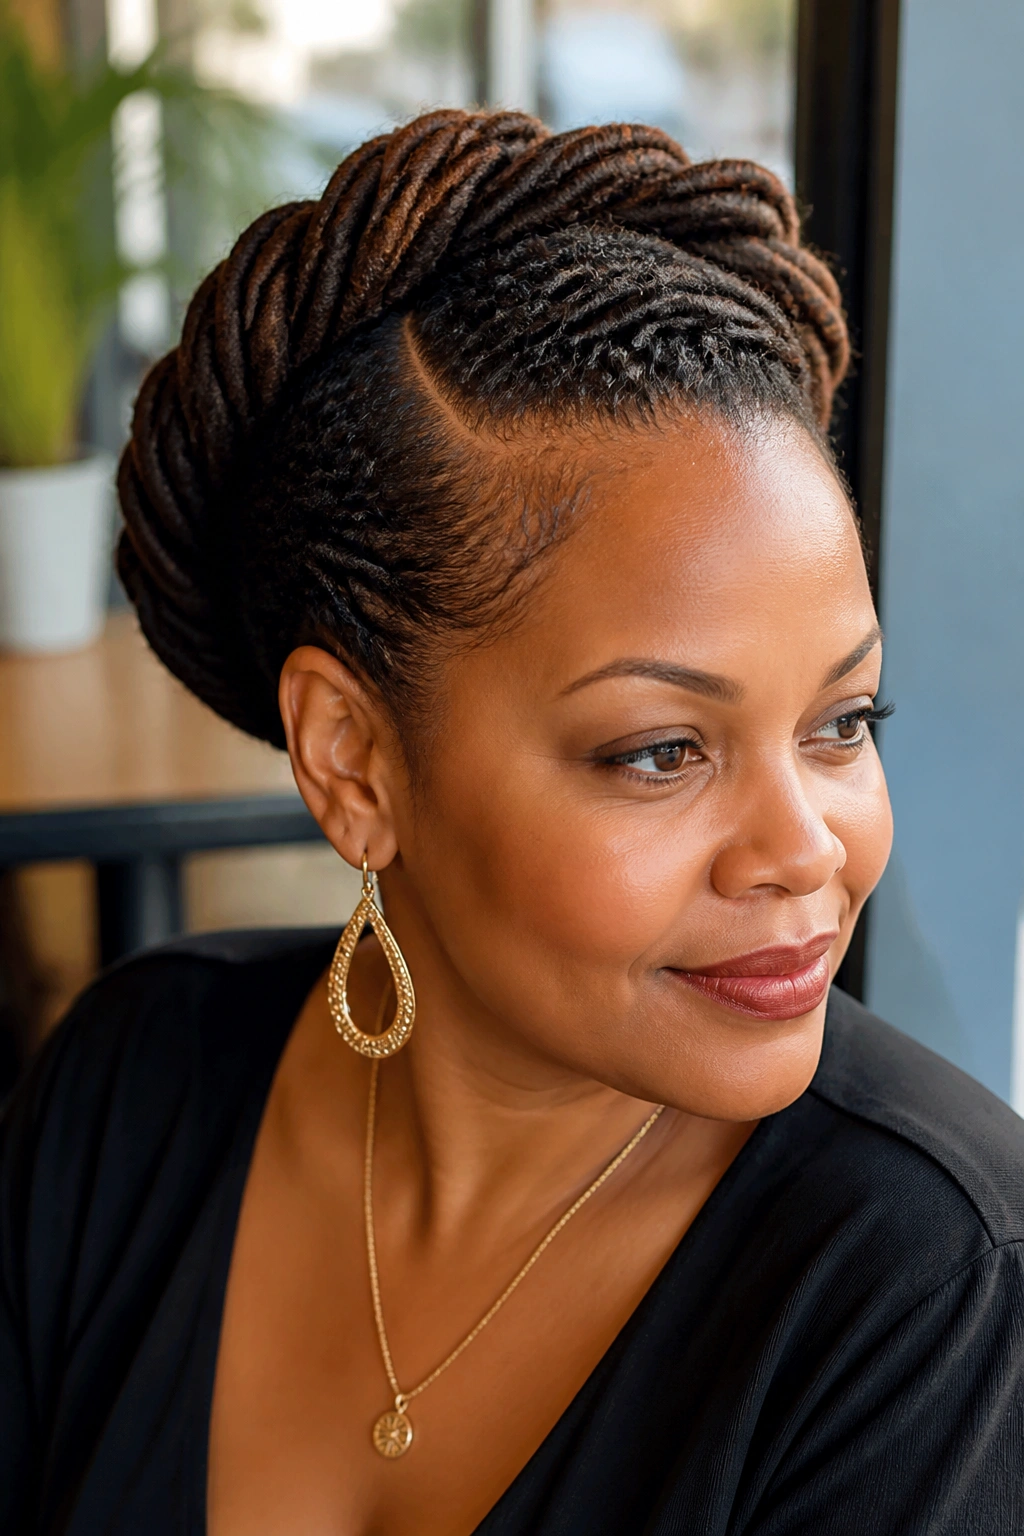
A deep side part changes the whole face of the style before the wrap even happens.
That is why I like a crown wrap for thinning hair that shows most at the top. The part pulls attention away from the middle and gives the eye a line to follow. Then the wrap carries the locs around the head in a way that feels intentional, almost like a soft halo, but not the stiff kind that leaves your scalp sore by noon.
A cleaner look does not always need more hair. Sometimes it just needs a better path.
If the crown is sparse, avoid a ruler-straight part. A slightly zigzagged or blurred part is kinder because it does not put a bright line down the exact area you are trying to soften. Wrap the locs loosely around the head, then pin them where the curve naturally wants to stop. The style should sit on the head, not clamp to it.
I also like this one because it buys you time between retwists. The roots are not being yanked, and the hairline gets a break while the shape still looks finished. That matters more than people admit. Healthy-looking locs are usually the ones that can stay calm for a few days without getting red at the edges.
A ruler-straight part is a tattletale.
6. Half-Up, Half-Down with Lifted Roots
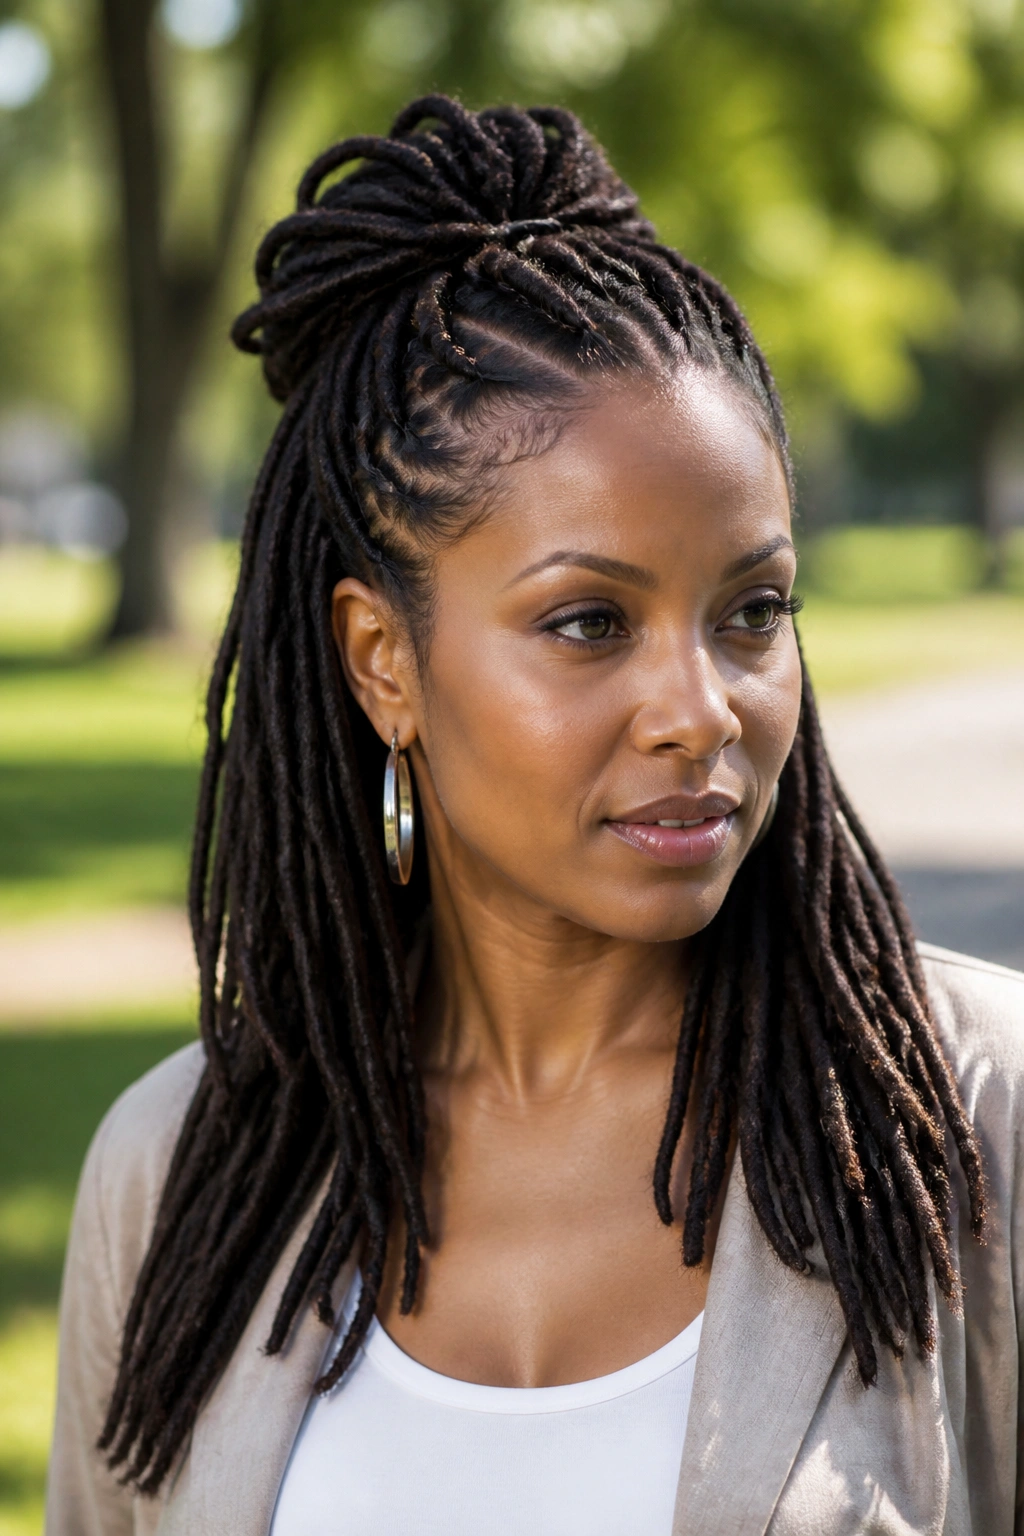
Unlike a full ponytail, this style leaves some locs down to soften the sides while the top gets just enough lift to stop the whole head from looking flat. That is a small difference on paper. On the head, it changes everything.
The half-up shape works best when the crown is thinner than the back and the ends still have decent body. You gather only the top third or so of the locs, secure them loosely, and let the lower section hang free. The loose lower length gives the style a little movement, and movement is useful because it keeps the eye from measuring every sparse spot.
The lift should stay gentle. If you drag the top section too high, the scalp under it gets exposed and the style loses the softness that makes it flattering. I usually think of this as a “quiet” half-up, not a tall one. It looks better when the lift begins near the ears or slightly above them rather than at the very top of the head.
This one is especially good when you want something that reads polished without feeling formal. It works for errands, work, a dinner out, and the kind of day where you need your hair to behave but not announce itself.
7. Flat Twist Front into a Tucked Back Bun

How do you handle thin temples without making them obvious? Flatten the front, then tuck the rest.
Flat twisting the first few locs on each side lets you guide the front hair back without stacking tension directly on the hairline. Once the front is secure, the rest can be gathered into a tucked bun at the back. The front flat twists act like rails. They hold the shape, but they do not shout for attention.
Where it works best
- Thinning at the temples
- Hairline that feels fragile after retwists
- Medium-length locs that need a tighter shape
- Styles that need to last all day without sagging
The useful part here is the order. You do not start by pulling everything back at once. You control the front first, then build the bun from there. That makes a difference if the perimeter is weak or if the front has broken shorter than the rest.
Keep the flat twists broad. Tiny twists can look neat, but they also create more tension points, and that is not the move when the goal is gentleness. A wider twist is kinder and often looks fuller anyway.
It is one of those styles that looks more complicated than it is, which is a nice bonus.
8. Rope-Twist Ponytail with a Wrapped Base

A rope-twist ponytail spreads the pull across several sections instead of pinching everything at one tie point. That makes it a smarter ponytail for thinning locs than the usual tight gather-and-go version.
Start by dividing the locs into two or four larger sections, twist each section into a rope, and then bring them together at the back into a loose ponytail. Wrap one loc around the base to cover the tie, then pin the wrap underneath so it stays put. The finish looks cleaner, and the base feels less sharp against the scalp.
Elastic bands are the problem here.
A thin band can create a hard line and make the hair at the crown look pressed flat. The wrapped base softens that line. It also hides any small gaps around the tie point, which is useful when the area near the crown has gotten sparse or the root growth is uneven.
This style is especially nice on longer locs because it gives you the polish of a ponytail without making every ounce of weight hang from one spot. If the ponytail starts to feel heavy, split it into two lower twists instead of forcing a single high one. The style will look calmer, and the scalp will thank you.
9. Faux Bangs from the Front Locs
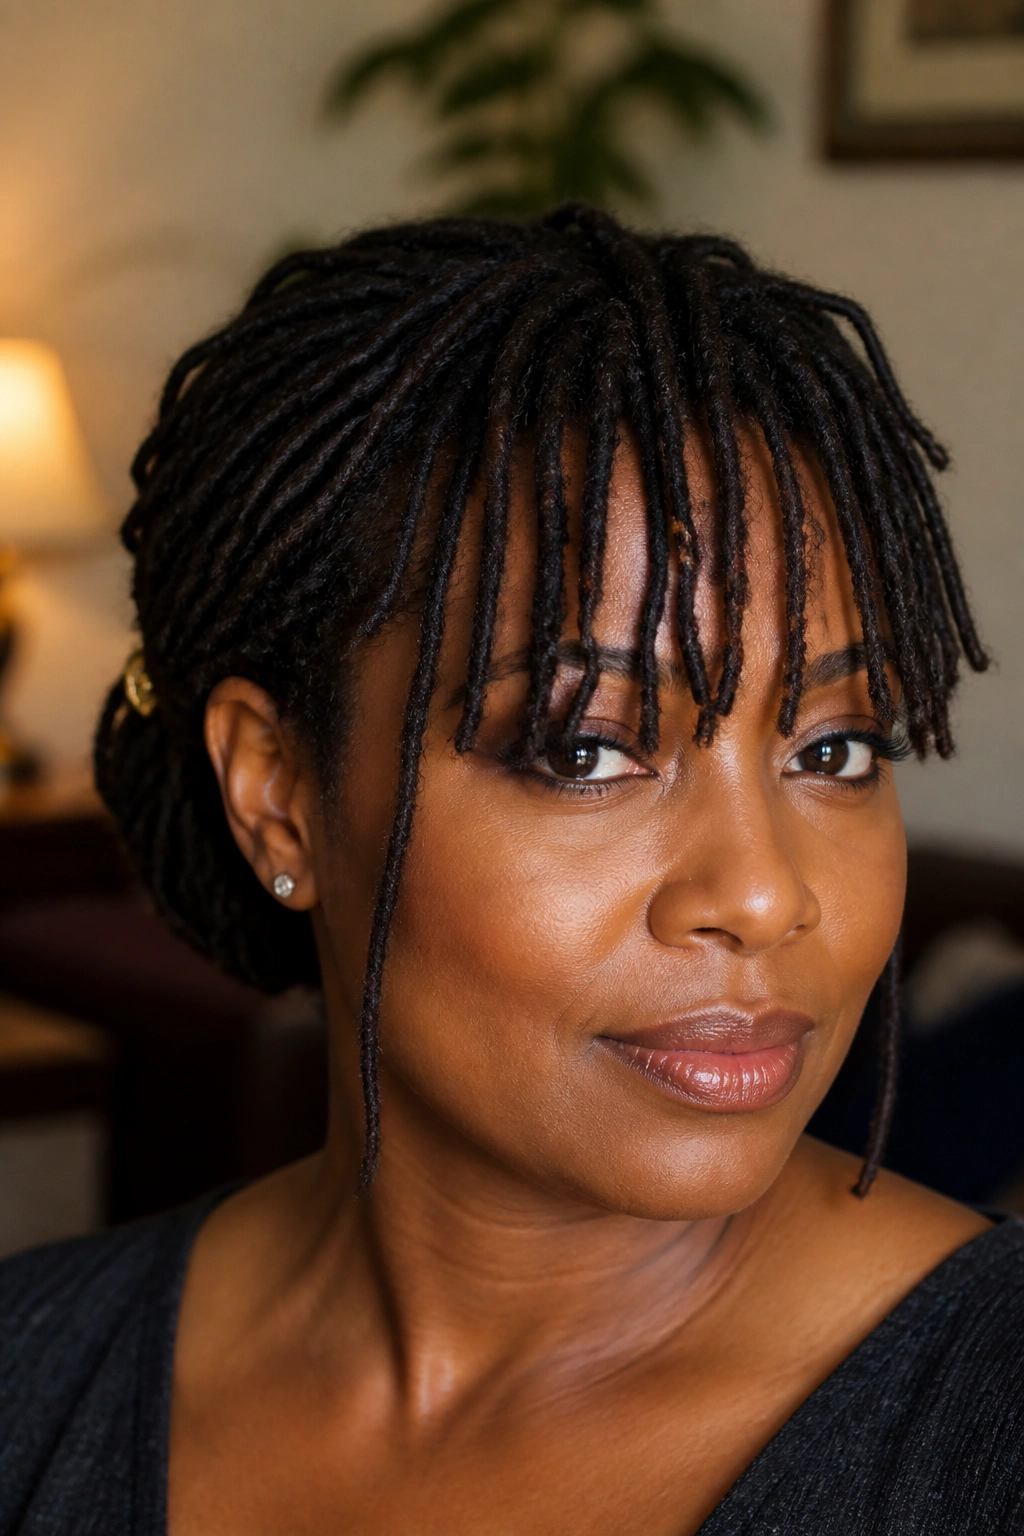
Can locs create the feeling of bangs without a cut? Absolutely, and it can be a smart move when the front hairline needs a little help.
The point of faux bangs is not to hide the forehead. It is to place enough texture in front that the eye stops measuring density at the roots. Bring a few front locs forward, let them skim the brow, and pin the rest of the hair back loosely so the fringe can do its work. If the ends are blunt, you get a stronger bang effect. If they are softer, the look reads more airy.
How to get the soft fringe look
Use 3 to 7 locs at the front, depending on thickness. Too many and the style turns heavy. Too few and the bangs look accidental. Start slightly off-center, let the locs fall across the brow, and pin them behind the ear or at the temple if they begin to slide.
The best part is that the bangs can cover a thin hairline without needing a tight front section. You are not forcing the root to perform. You are using the length to create a frame.
If your edges are delicate, keep the bangs loose enough to move when you blink or turn your head. Movement helps here. Frozen bangs can look fake fast.
10. Loc Petal Bun
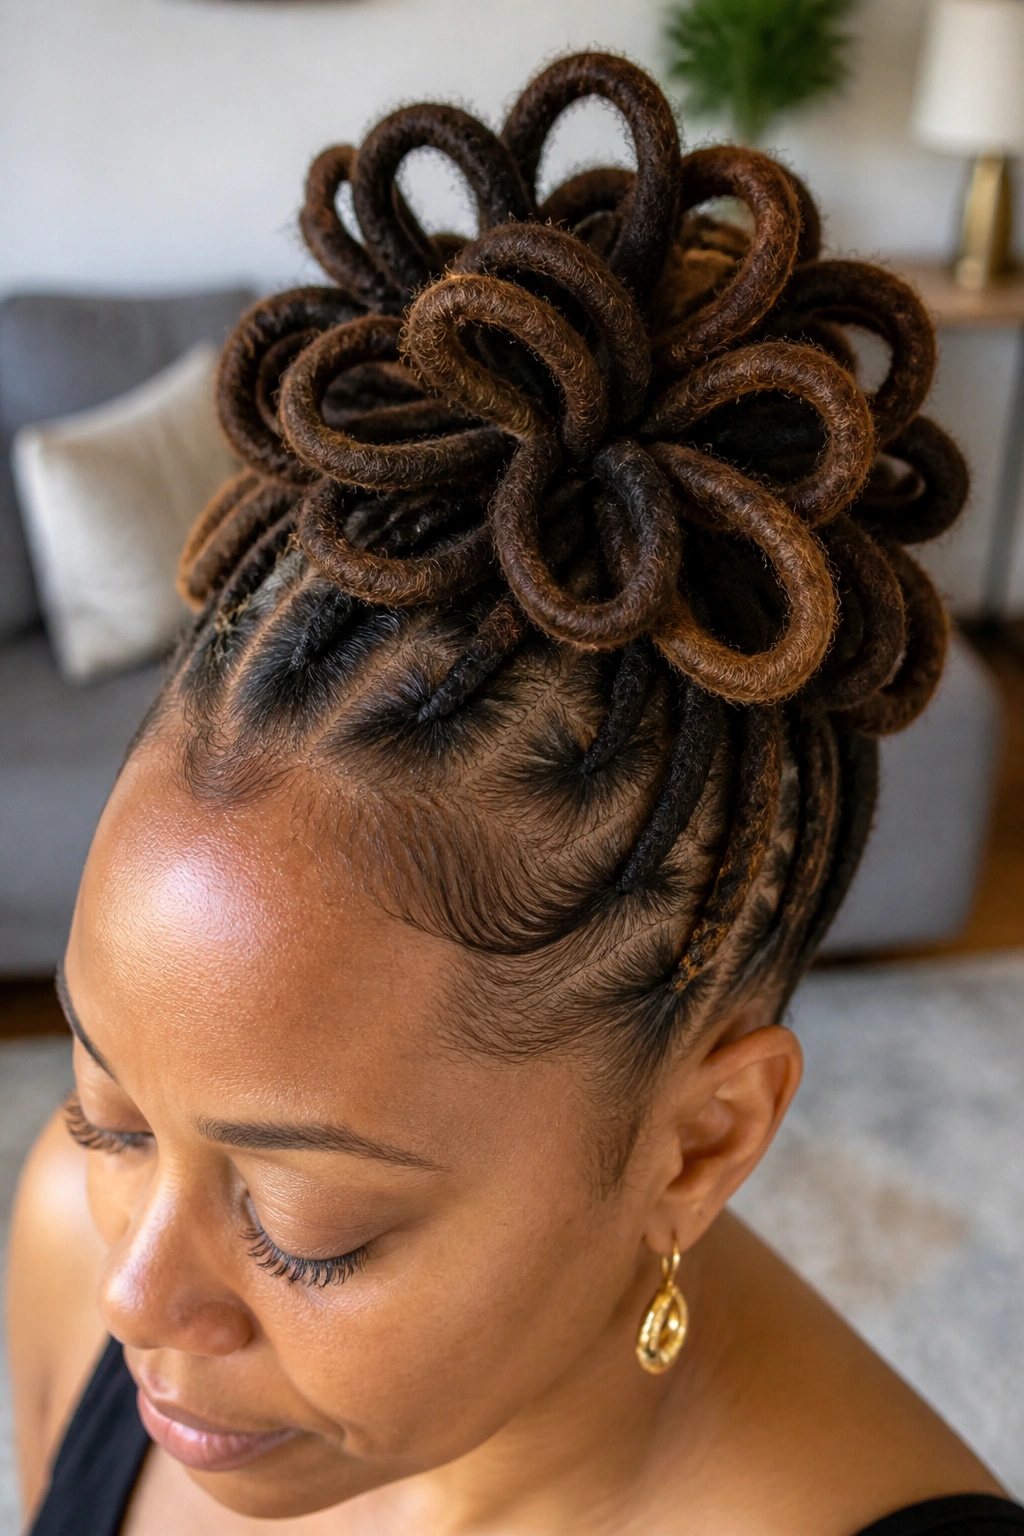
A petal bun sounds fancy, but the real benefit is density.
When locs are looped into overlapping petals, the bun gets a layered shape that reads fuller than a plain knot. That matters when the scalp at the crown shows through, because the looping creates shadows and curves where a flat bun would expose too much of the base. It is a good style for medium to long locs, especially if you want the hair off your neck without making the top look bare.
Build it in sections. Four to six sections is usually enough. Loop each section into a petal and pin where the loops meet, not through the most fragile roots. The edges of the petals can sit a little raised. They do not need to be perfectly smooth. In fact, a little lift at the edges helps the bun look thicker.
- Keep each loop broad, not tiny
- Hide pins under the overlap points
- Leave the bun low enough to protect the crown
- Use matte pins if you want the shape to disappear into the hair
The whole style works because it turns one compact knot into several soft shapes. That is a better visual trade when density is uneven.
11. Pineapple Puff with Soft Edges

A pineapple puff is not the friendliest style for every thinning pattern, and I say that bluntly because too many people yank their locs up high and call it protective.
It can work, though, if the base stays soft and the height is not extreme. The idea is to gather the locs loosely toward the top of the head, then let the ends fan out like a puff. On locs, that shape can look airy and relaxed. On a fragile hairline, it only works if the tension stays low and the perimeter is left alone.
The feel of it matters. If the scalp feels tight the second you lift the hair, stop there. A good pineapple should feel like a loose clamp, not a hard cinch. Use a satin scrunchie, not a thin elastic, and keep the front a little loose so the puff sits back from the hairline instead of right on top of it.
This style is best when the crown is only mildly thin and the sides still have some shape. If the temples are the weak point, the pineapple can pull too much attention there. In that case, a lower puff or a side-swept version is kinder.
I like the pineapple when someone wants the neck clear and the styling to look casual, but it needs restraint. That part is non-negotiable.
12. Bantu Knots on Locs
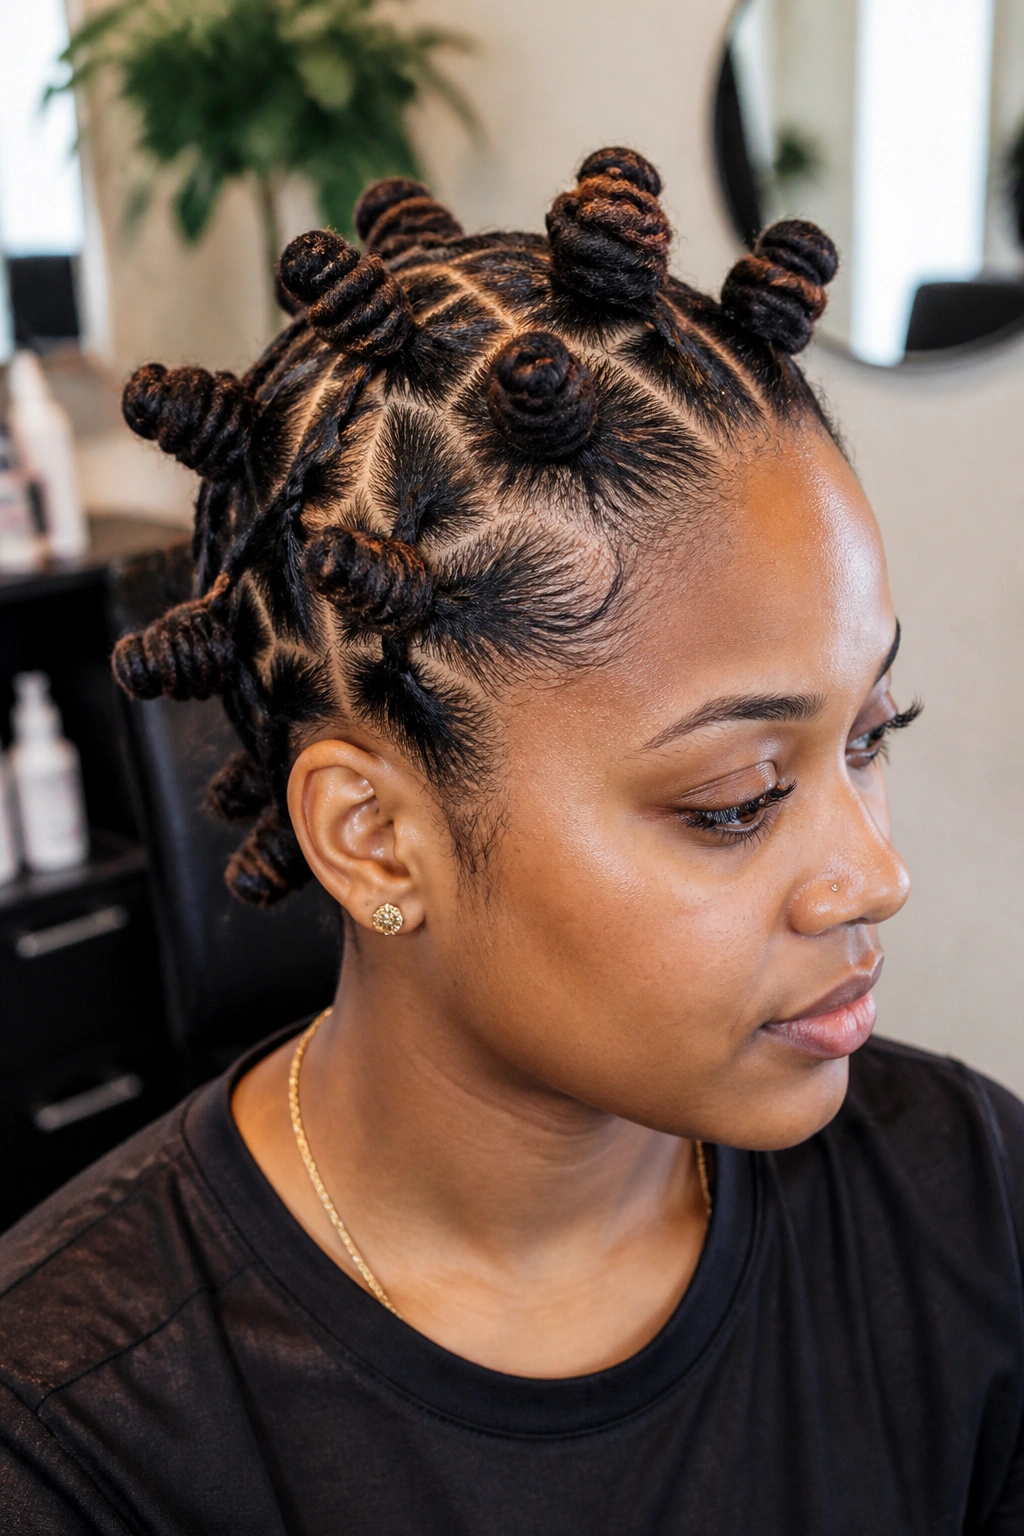
Unlike a plain bun, Bantu knots break the weight into small circles, which is useful when one big knot would show too much scalp.
That makes this style a nice fit for shorter locs, shoulder-length sets, or anyone who wants a more structured look without dragging everything back into one tight point. You can make six knots or ten, depending on density. Six gives a calmer, cleaner shape. Ten can look busy if the locs are thin, so I usually lean smaller only when the hair itself is fuller.
The bonus is the second-day pattern. If you unravel the knots later, the ends often keep a soft curl or bend. That can add a little fullness without adding hair. Nice trade. Not every protective style gives you that.
Six beats twelve here.
If the roots are sensitive, keep each knot low and broad rather than small and tight. Tiny knots may look neat in the mirror, but they can feel rough by the end of the day. This style should sit comfortably, almost like little cushions across the scalp.
It is a strong choice for people who want shape, a bit of texture later, and a style that can handle a shorter loc length without looking limp.
13. Scarf-Wrapped Side Bun
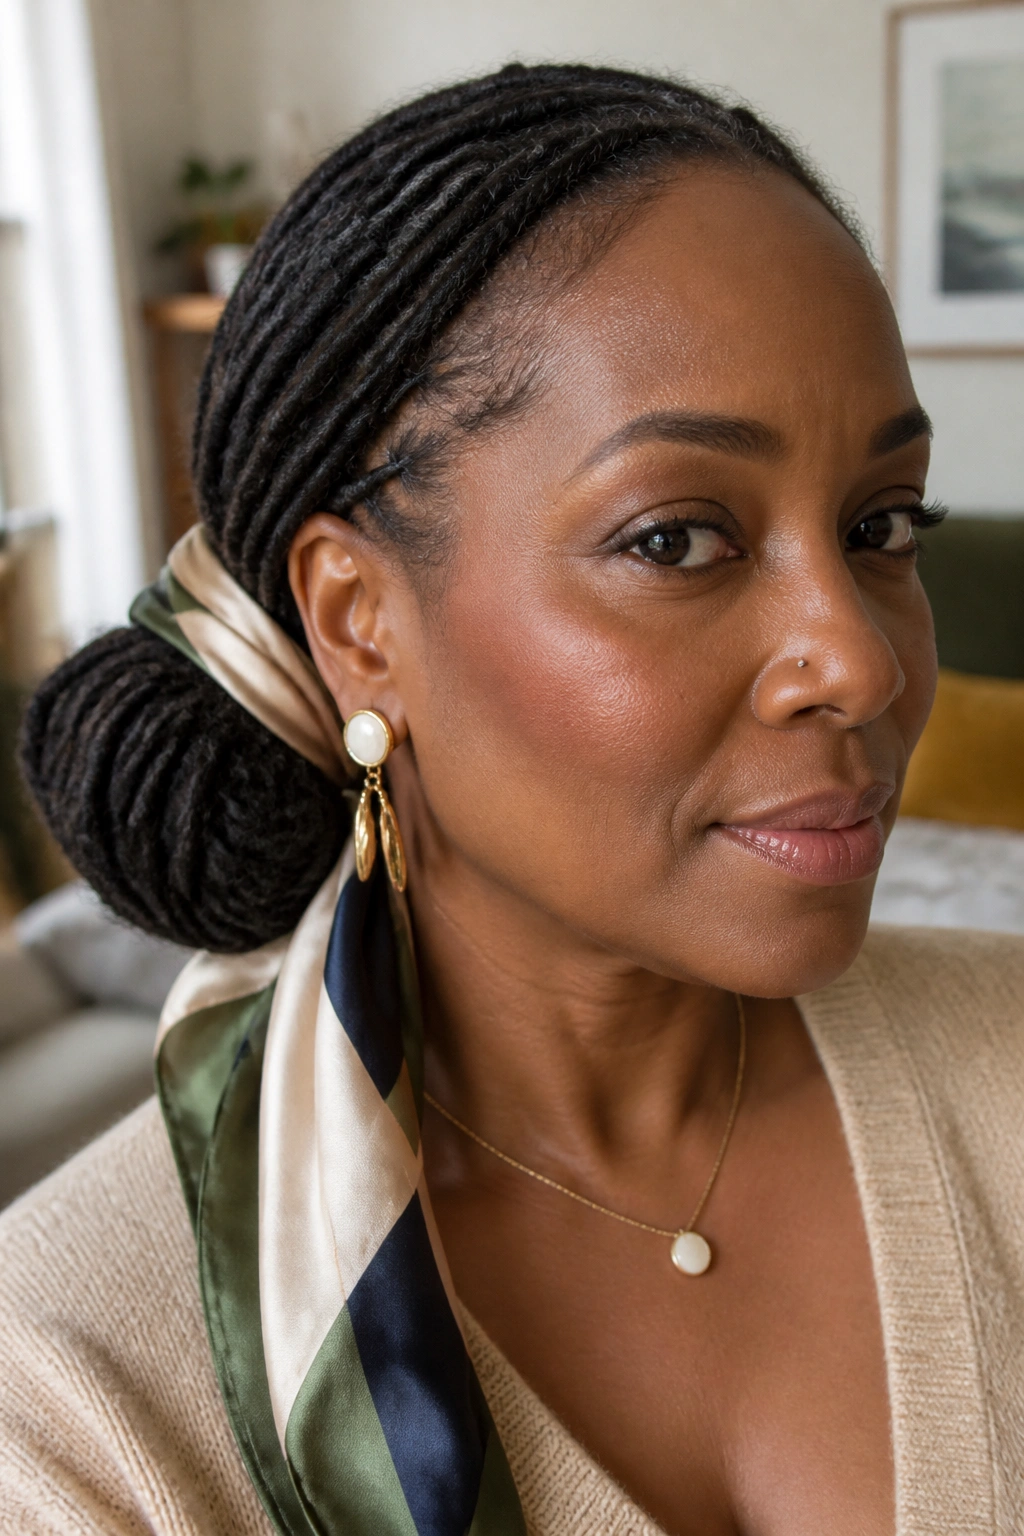
A scarf is not cheating. It is a smart way to move the eye away from thinning spots and keep the style sitting light.
The scarf-wrapped side bun works because it combines three things that thinning hair likes: low tension, soft coverage, and a clean line around the head. Put the bun low and to one side, then wrap a silk or satin scarf around the base so the knot sits just off the nape or above one ear. The scarf hides the tie point and gives the whole style a little shape, which matters when the locs themselves are not especially dense.
Why the scarf earns its place
The right scarf should feel smooth, not bulky. A 22- to 36-inch scarf is usually enough, depending on how much loc you want to wrap. One loop is often all you need. Too many wraps and the style gets heavy fast.
- Choose silk or satin so the fabric glides instead of grabbing
- Keep the scarf near the base, not across the whole head
- Leave one tail loose for softness
- Use the scarf to hide the bun, not to squeeze it flatter
This is the sort of style I reach for when the hair needs to rest but I still want the look to have some personality. It’s practical. It also saves you from over-manipulating the front.
14. Crisscross Pin-Up

A crisscross pin-up hides more scalp than a plain bun because your eye follows the X-pattern instead of the empty spaces between the locs.
That is the real advantage. The style creates movement across the head, and movement distracts from uneven density. Gather the locs in sections, cross one section over another, and pin them so the overlaps create a woven effect. It does not need to be perfect. In fact, too much neatness can make the gaps more noticeable.
Straight lines expose too much.
Keep the sections medium-sized so the pattern stays readable. If you split the locs too fine, the style loses shape and the scalp can peek through the spaces between pins. I usually like 4 to 6 crossed sections, depending on length. If the hair is longer, let the final ends tuck under the last cross rather than hanging straight down. That keeps the visual line tight and fuller.
This style works well for anyone who wants something a little more dressed up without leaning on heavy accessories. The crisscross pattern is the decoration. You do not need much else.
15. Loc Bob Tuck

What if you want the fullest-looking silhouette of all and do not mind losing length for a day? The loc bob tuck is the one that comes closest to a clean, dense shape.
It works by folding the locs inward so they read like a chin-length or neck-length bob, even when the actual length is much longer. That shorter outline gives the hair a thicker appearance because the ends are not hanging loose and pulling the eye down. You get a compact shape, more body at the sides, and less pressure on the scalp than a high style would create.
How to know if it suits you
- Best for longer locs that tuck easily
- Helpful when thinning sits at the crown, temples, or perimeter
- Works well if you want a polished look with little visible scalp
- Strong choice when you need the ends to disappear for a cleaner line
Start by parting the locs into 4 to 6 large sections. Fold each section under itself, pin the tuck at the nape or just behind the ear, then check the front from a mirror. If the outline looks too wide, pin the sides a little closer in. If it looks flat, loosen one section and let it curve outward.
If a style leaves your scalp sore by lunch, it is the wrong style. Fullness should look easy. And when thinning hair is in the picture, easy is usually the smarter look.
