



Thin hair usually does not need more effort. It needs a cleaner shape.
Fine hair and thin hair are not the same thing, and that distinction matters more than people think. Fine hair can have a lot of strands and still fall flat; thin hair can be sparse but each strand may be coarse. The best hairstyles that make thin hair look thicker work by playing with outline, parting, and where the weight sits — not by piling on layers until the ends go see-through.
A blunt edge can make a bigger difference than another can of styling spray. So can a higher crown, a smarter part, or a cut that stops right before the hair gets stringy at the bottom. I’ve seen plenty of people blame their hair texture when the real problem was the shape.
The good news? There are more flattering options than “just wear it long.” Some are cuts, some are styling tricks, and some are the kind of five-minute fixes that rescue a limp morning in a way that feels almost unfair. Once you know which shapes do the heavy lifting, picking the right one gets a lot easier.
1. The Blunt Bob That Makes Thin Hair Look Thicker

A blunt bob is the old reliable of thin-hair styling, and for good reason. One clean line at the bottom makes the ends look denser immediately, because the eye sees a solid shape instead of a wispy tail. If the cut lands around the jawline or just below it, the whole head looks fuller without needing extra length to fake volume.
Why the edge matters
The magic is in the perimeter. When hair is cut to one length, the ends stack visually, which gives the impression of more hair at the bottom. That matters most if your hair tends to separate into thin pieces once it gets past the shoulders.
A good blunt bob does not need to be severe. It can have a soft bend, a little movement, even a slight inward curve at the ends. What it should not have is a bunch of short interior layers that leave the bottom looking ragged.
- Ask for a one-length perimeter with no heavy layering.
- Keep the length at jaw to chin level for the strongest fullness effect.
- Use a round brush or small flat brush to tuck the ends under while drying.
- Skip aggressive razor cutting at the tips; it can make the edge look airy in a bad way.
Best tip: if the bob starts to flip out at the bottom, the line may be too thin or too stacked. A cleaner edge usually fixes the problem faster than more product.
2. The Collarbone Lob with Soft Ends
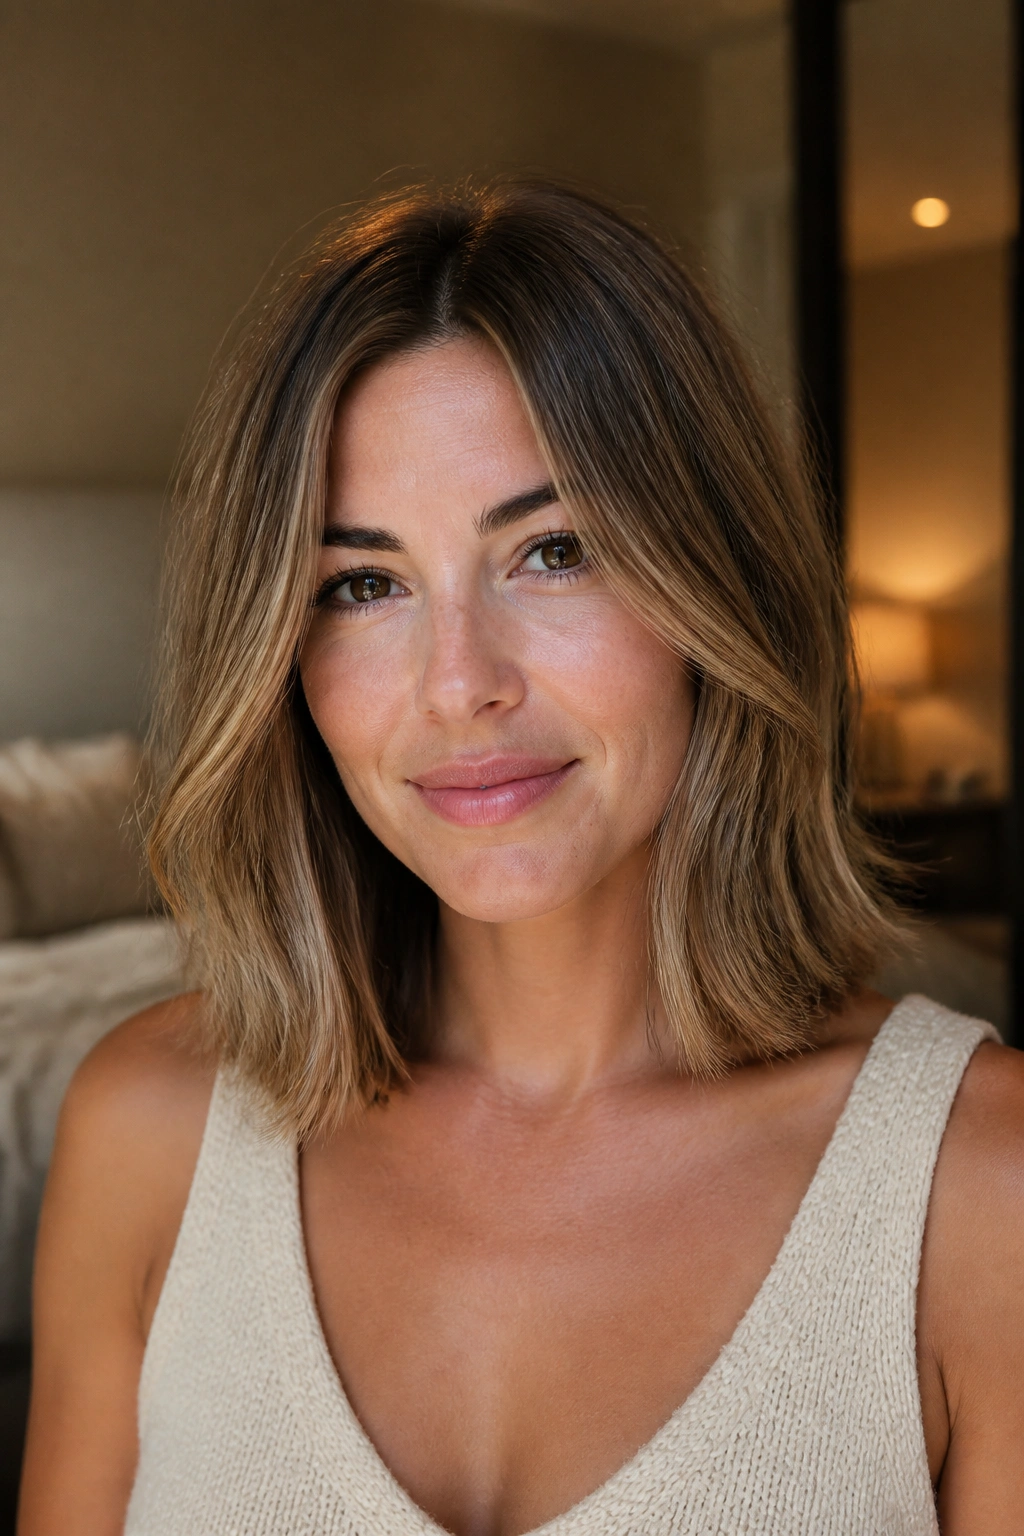
A collarbone lob is the haircut I’d hand to someone who wants thickness but is not ready to go short. It gives hair enough length to move, but not so much length that the ends start to disappear. That balance is the whole point — the hair still swings, but it doesn’t drag itself flat.
The best version sits right at the collarbone or just above it. That spot is useful because the hair can catch on the shoulders for a little natural lift, then fall back into place without looking stringy. If the cut is too long, the weight pulls everything down. If it’s too short, the shape can feel more exposed than full.
Soft ends help here too. I’m not talking about fluffy, over-textured tips that look frayed. I mean a slight bevel at the bottom so the lob doesn’t read as stiff. A polished bend, especially when the ends turn inward just a touch, gives the whole style more body.
This is also one of the easier styles to live with. It works air-dried, blown out, or curled in loose bends. And when the cut grows out, it usually stays wearable longer than a sharper bob. That matters. Not every good haircut needs constant babysitting.
3. The Deep Side Part with Crown Lift

Why does a side part work so fast? Because it changes the math of your hair.
A center part splits thin hair into two even halves, which can make the scalp show more and the sides fall flatter. A deep side part shifts the whole shape over by a couple of inches, and suddenly the crown has somewhere to go. That extra lift at the root is one of the quickest ways to fake density without changing the cut.
How to style it in five minutes
Start with damp hair and direct the part slightly off center — not all the way to the ear, unless you want a more dramatic sweep. Blow-dry the heavier side first, lifting the roots up and away from the scalp. Then clip that side up for a minute while it cools.
- Move the part 2 to 3 inches off center.
- Spray a root-lift mousse or light volumizer near the crown.
- Blow-dry the roots against the direction they’ll wear.
- Pin the lifted side while it cools so the shape lasts longer.
A deep side part can look especially good on straight hair that tends to fall limp by noon. It also softens a narrow face and gives the illusion of more hair on top. Simple trick. Big payoff.
4. Curtain Bangs with Shoulder-Length Layers
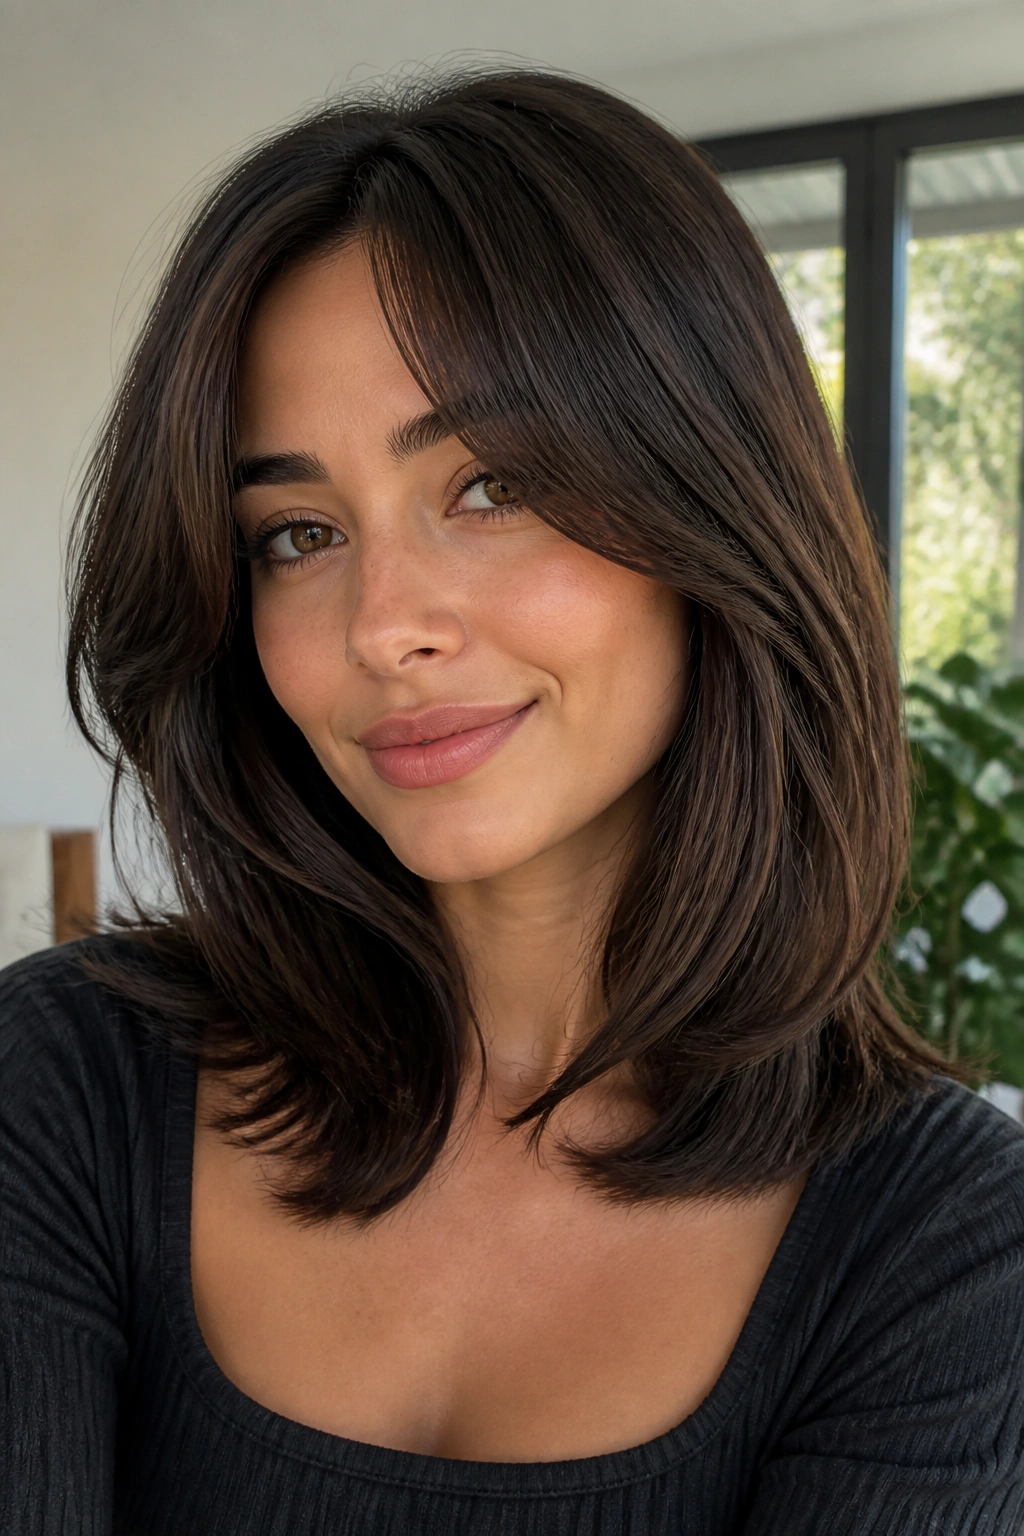
If the front of your hair goes flat before lunch, curtain bangs can carry more weight than people expect. They frame the face, but they also create the sense of fullness right where the eye lands first. That front area matters more than most people realize, because even a modest amount of lift there can make the whole style feel denser.
Shoulder-length hair is a sweet spot for this cut. It gives the bangs enough space to blend into the rest of the hair without turning into a thin fringe that sits awkwardly on the forehead. The longest pieces should graze the cheekbones or chin, not stop halfway up the face.
What you want is a soft sweep, not a choppy split. If the bangs are cut too short or too sparse, they can expose more forehead than they frame. But when they’re blended well, they spread volume across the front and create a fuller outline from the roots down.
A little round-brush bend makes a big difference here. Curl the bangs away from the face, then let them cool on the brush before you touch them. That tiny pause helps the shape hold. And yes, if your hair is fine and slippery, a bit of dry shampoo at the root before styling can help the fringe keep its lift.
5. The French Bob with a Soft Fringe
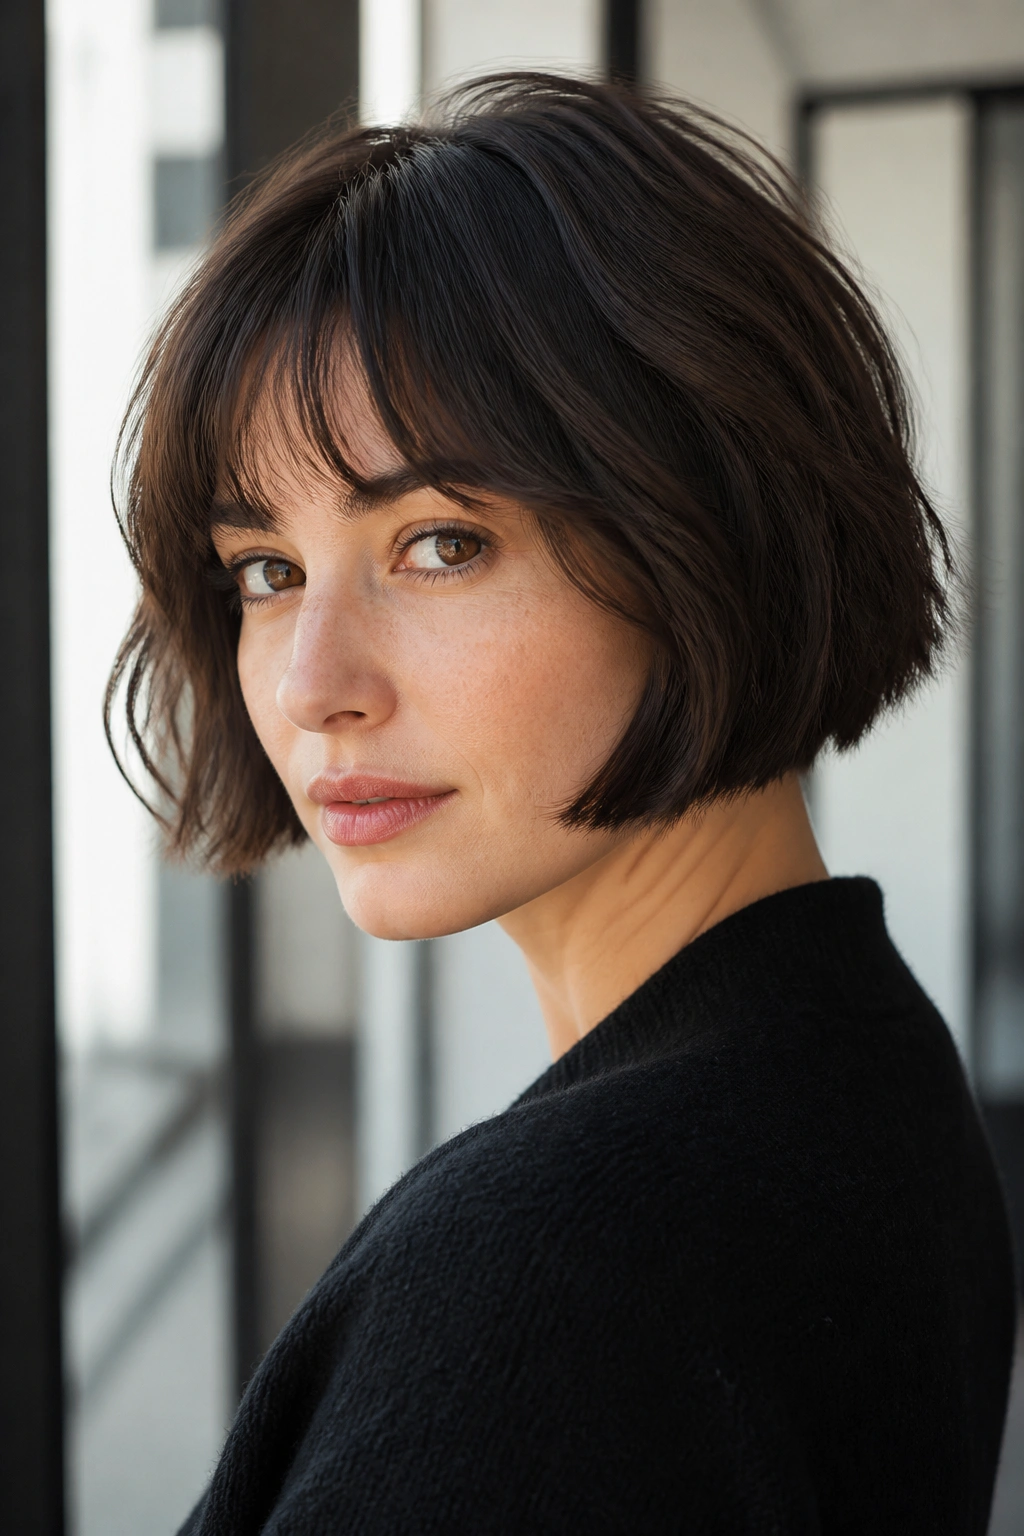
A French bob is short enough to look intentional and long enough to feel wearable, which is a nice combination when your hair is on the thin side. The cut usually lands around the cheekbones or jaw, and the soft fringe breaks up the face in a way that makes the whole style feel fuller. It’s a compact shape, and compact shapes tend to look denser.
This is one of those cuts that works best when you keep the ends clean. If the fringe is too wispy or the perimeter is too feathered, the style starts to lose the very thing that makes it useful. The goal is a strong outline with a little softness around the eyes and forehead, not a shredded finish that disappears in daylight.
I like this cut on hair that has a slight natural wave, because the texture helps it feel lived-in instead of helmet-like. Straight hair can wear it too, but it usually benefits from a quick bend with a small brush or a flat iron turned just at the ends. That tiny curve keeps the shape from looking severe.
One thing I’d avoid: excessive texturizing through the top. It sounds helpful, but too much removal makes the hair look airy instead of thick. The French bob wins when the weight stays where you can see it.
6. Long Layers That Start Below the Chin
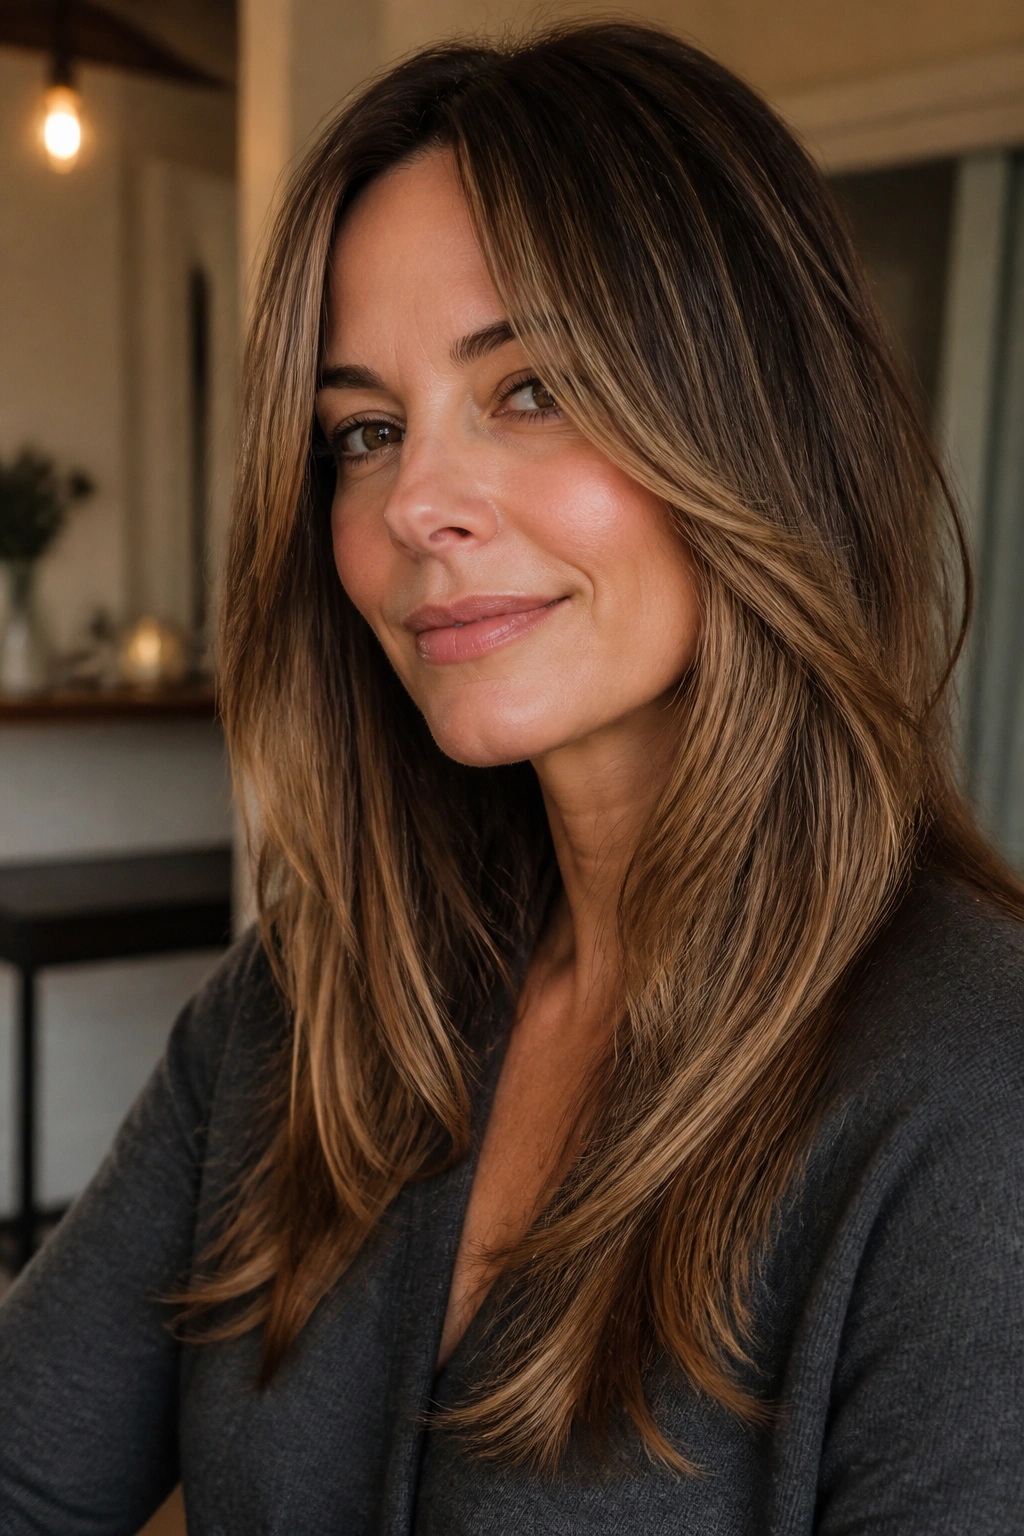
Not every layered cut helps thin hair. Some of them make it look like somebody took the ends and quietly removed half the evidence.
That’s why long layers can be smarter than short ones. When the first layer starts below the chin, the hair keeps enough weight through the bottom to still look full. You get movement without losing the outline, which is exactly what thin hair usually needs.
Where the layers should land
The placement matters more than the name. A good long-layer cut should feel smooth from top to bottom, not chopped into separate sections. The face frame can begin around the chin or just below it, then flow into longer pieces around the collarbone and chest.
- Keep the shortest layer below the chin if your ends are sparse.
- Ask for soft face framing, not a bunch of disconnected pieces.
- Avoid layers that stop at the cheekbone unless your hair is already dense.
- If you want movement, keep it concentrated near the lower third of the hair.
This style suits people who still want ponytail length. It also grows out gracefully, which is not a small thing. A lot of cuts look cute for six weeks and then turn weird. Long layers that start low tend to stay useful longer, and that’s worth a lot when you’re trying to make every strand count.
7. The Sleek Low Bun with a Full Crown

There’s a certain kind of low bun that makes thin hair look deliberate instead of sparse, and the difference is usually the crown. If you keep the top a little fuller before gathering the bun, the whole style reads as elegant and thicker than it really is. A low bun with a lifted crown concentrates volume where people notice it most.
Start by giving the roots some grip. A mist of dry shampoo or texture spray at the crown helps the hair hold a little air instead of sliding flat against the scalp. Then smooth the sides back gently, not aggressively. You want the top to look controlled, not slicked thin.
Small details that matter
- Backcomb the crown lightly, using short strokes.
- Gather the bun at the nape of the neck, not halfway up the head.
- Keep the bun small and rounded rather than wide and flat.
- Leave two face pieces or a side part if you want a softer finish.
This is one of my favorite options for events because it makes thin hair look organized. It does not pretend the hair is huge. It just gives it a better shape. And honestly, that usually looks more expensive than a bun that’s been teased into a cloud and forgotten.
8. Loose Waves That Make Thin Hair Look Thicker

Loose waves beat tight curls on thin hair more often than people expect. A one-inch curling iron creates bends that fill space, while tight curls can shrink the visual length and make the hair look smaller overall. The trick is not curliness for its own sake. It’s body.
Start with a heat protectant, then wrap sections away from the face and leave the last inch or so out. That unfinished end keeps the wave modern and stops the style from looking overdone. After the curls cool, brush them out with your fingers or a wide brush until they fall into soft S-shaped bends.
The cooling part matters. So many people touch the hair too early and flatten the bend before it sets. Give it a minute. Or two.
If your hair is fine, you’ll probably get better results from a few larger waves than from a full head of tiny curls. Those smaller curls can collapse fast and leave you with less volume than you started with. A loose wave pattern gives the illusion of more hair because it creates width as well as movement. That’s the real win.
9. The Half-Up Twist with a Lifted Crown
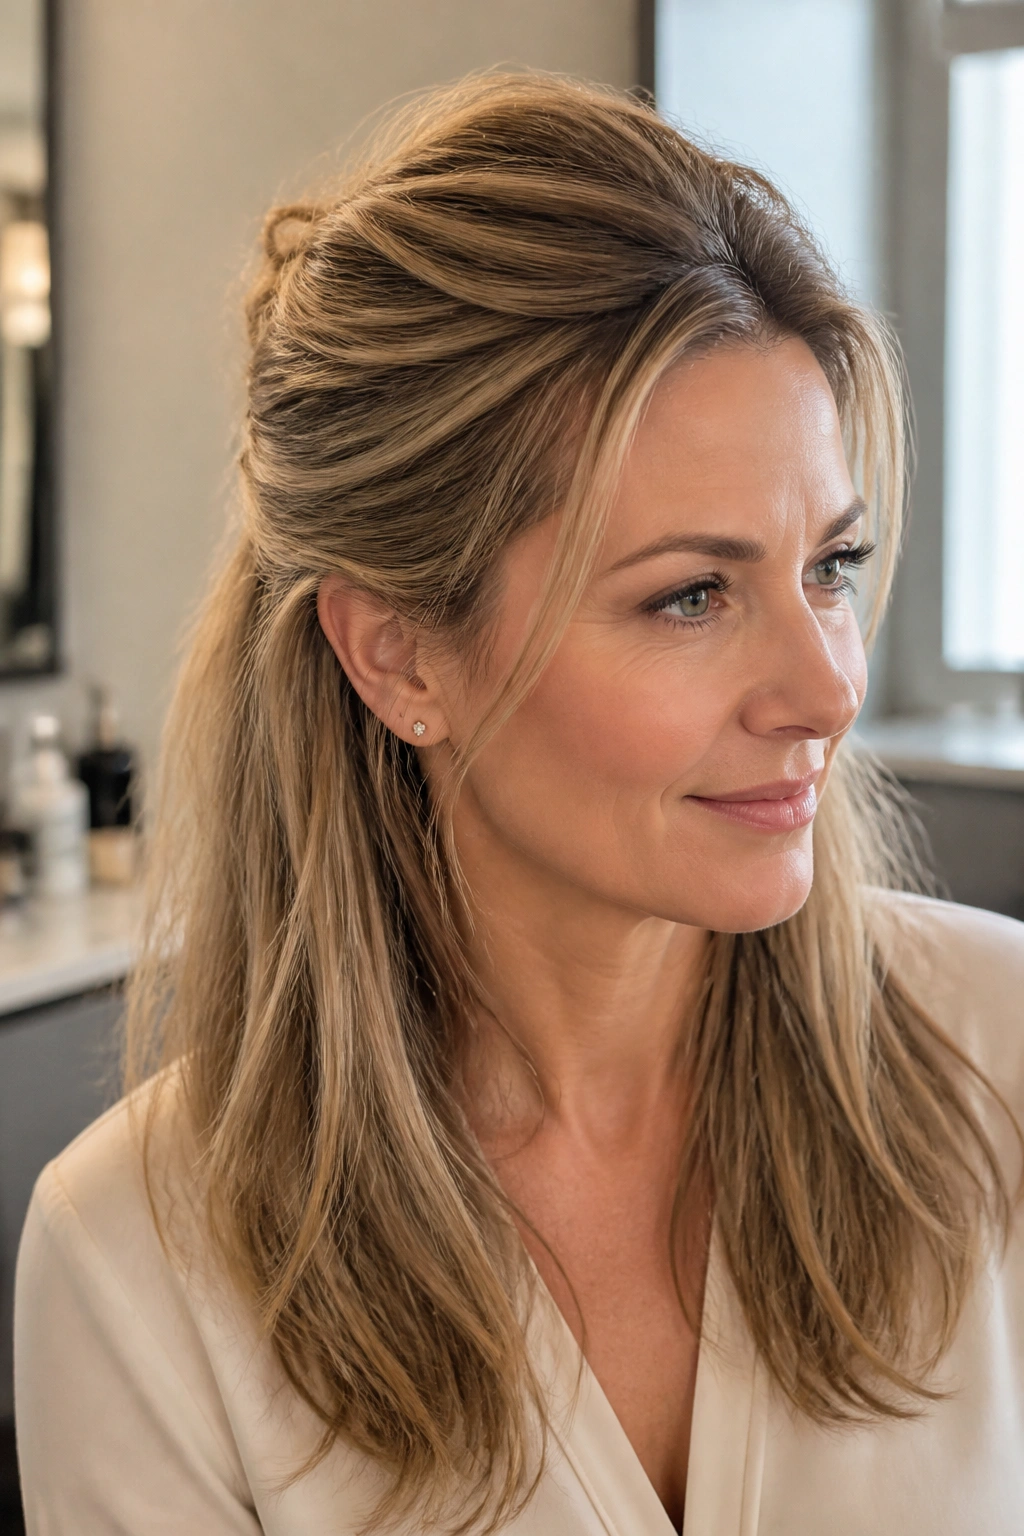
If you want to keep length but still show off more body on top, a half-up twist is a smart move. It pulls the upper section back just enough to create lift at the crown, while the lower hair stays loose and gives the style more visual weight. That split of responsibilities is what makes it work.
This style is especially handy on days when the front of your hair has gone flat but the ends still look decent. You can lift the top section, twist or clip it back, and leave the rest down so the whole thing looks fuller than a full ponytail would. It also works with straight or wavy hair, which gives it a lot of range.
How to pin it so it stays full
Take the top section from temple to temple, not just a thin strip from the middle. Lift it slightly before securing it so the roots don’t lie tight to the scalp. Then twist once or twice, clip it, and gently tug the crown with your fingertips.
- Use a small claw clip or two bobby pins hidden underneath.
- Pull the top section upward first, then back.
- Keep the twist loose enough to hold volume.
- Leave the lower section smooth or softly bent for balance.
It’s a simple style, but it has a nice side effect: it makes the head shape look rounder. Thin hair usually benefits from that.
10. The Bubble Ponytail
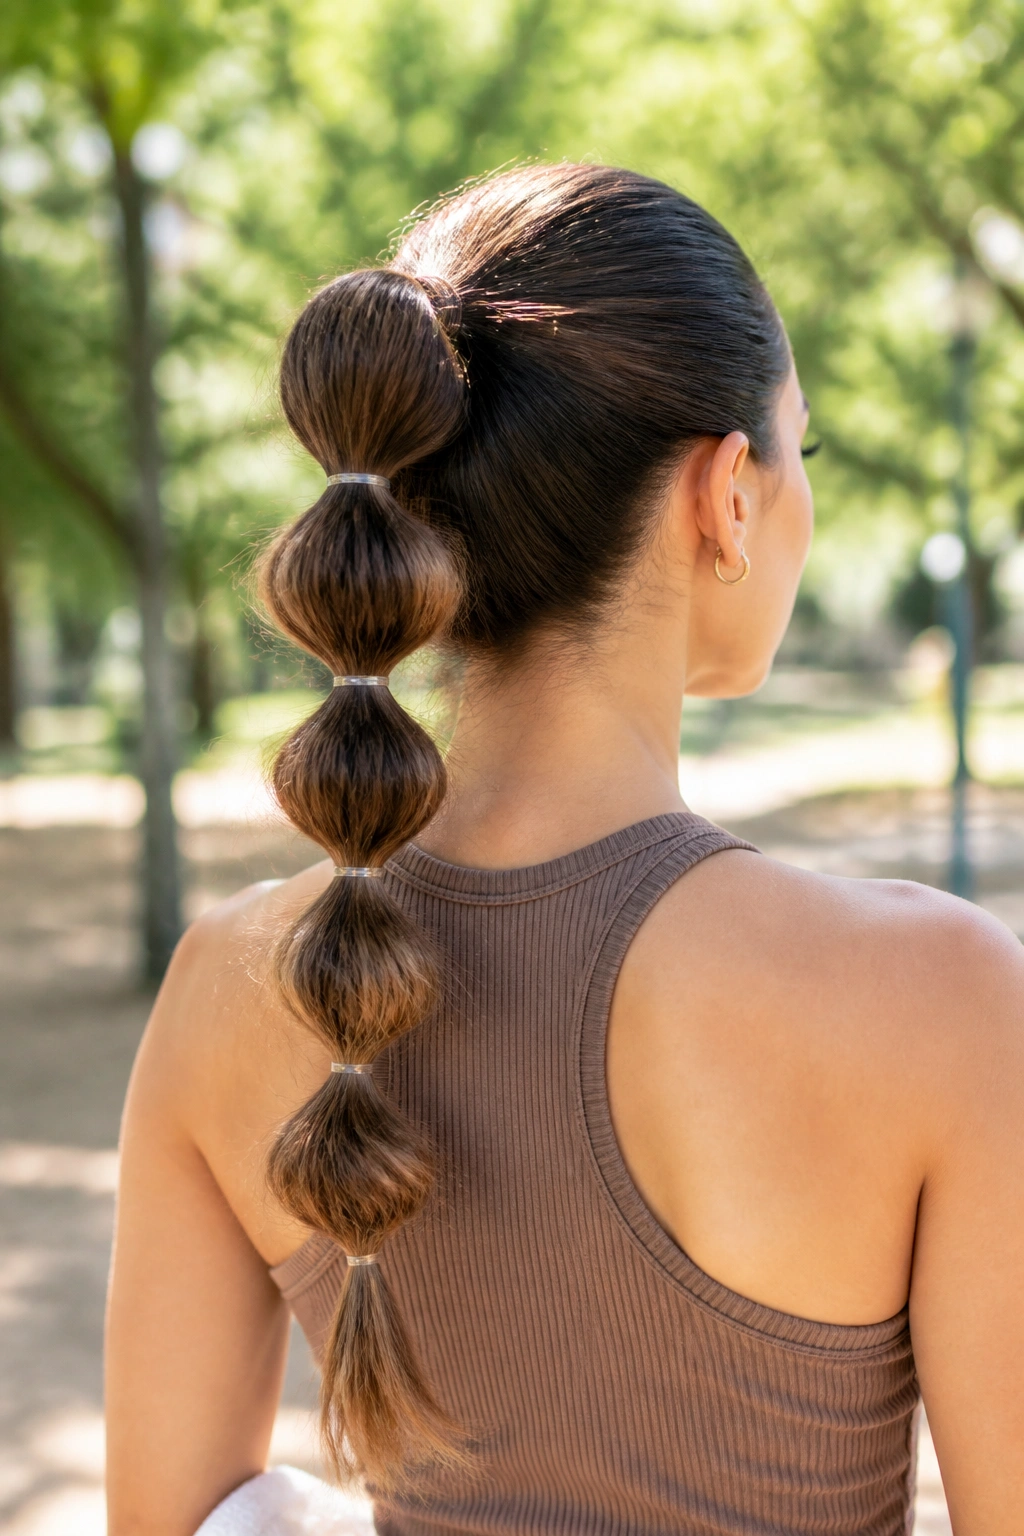
A regular ponytail can be unforgiving on thin hair because it puts all the attention on the narrow base. A bubble ponytail changes that by breaking the length into rounded sections, which gives the whole style more width. Each “bubble” acts like a small visual trick.
The setup is easy. Secure the hair in a ponytail, then add clear elastics every 1.5 to 2 inches down the length. Once the sections are in place, gently pull each one outward so it looks puffed rather than tight. That’s where the fullness comes from. It’s not about hiding the ponytail; it’s about shaping it.
This style works best on medium to long hair, but it can still help shorter lengths if you have enough to tie back. Second-day hair is often better than freshly washed hair because it has a little grip. If the roots are slippery, a touch of texturizing spray before tying can stop the style from collapsing too fast.
I like this one because it doesn’t ask thin hair to be something it isn’t. It just uses repeated sections to build the illusion of volume. Straight ponytail, no. Bubble ponytail, yes.
11. The Textured Pixie with Length on Top
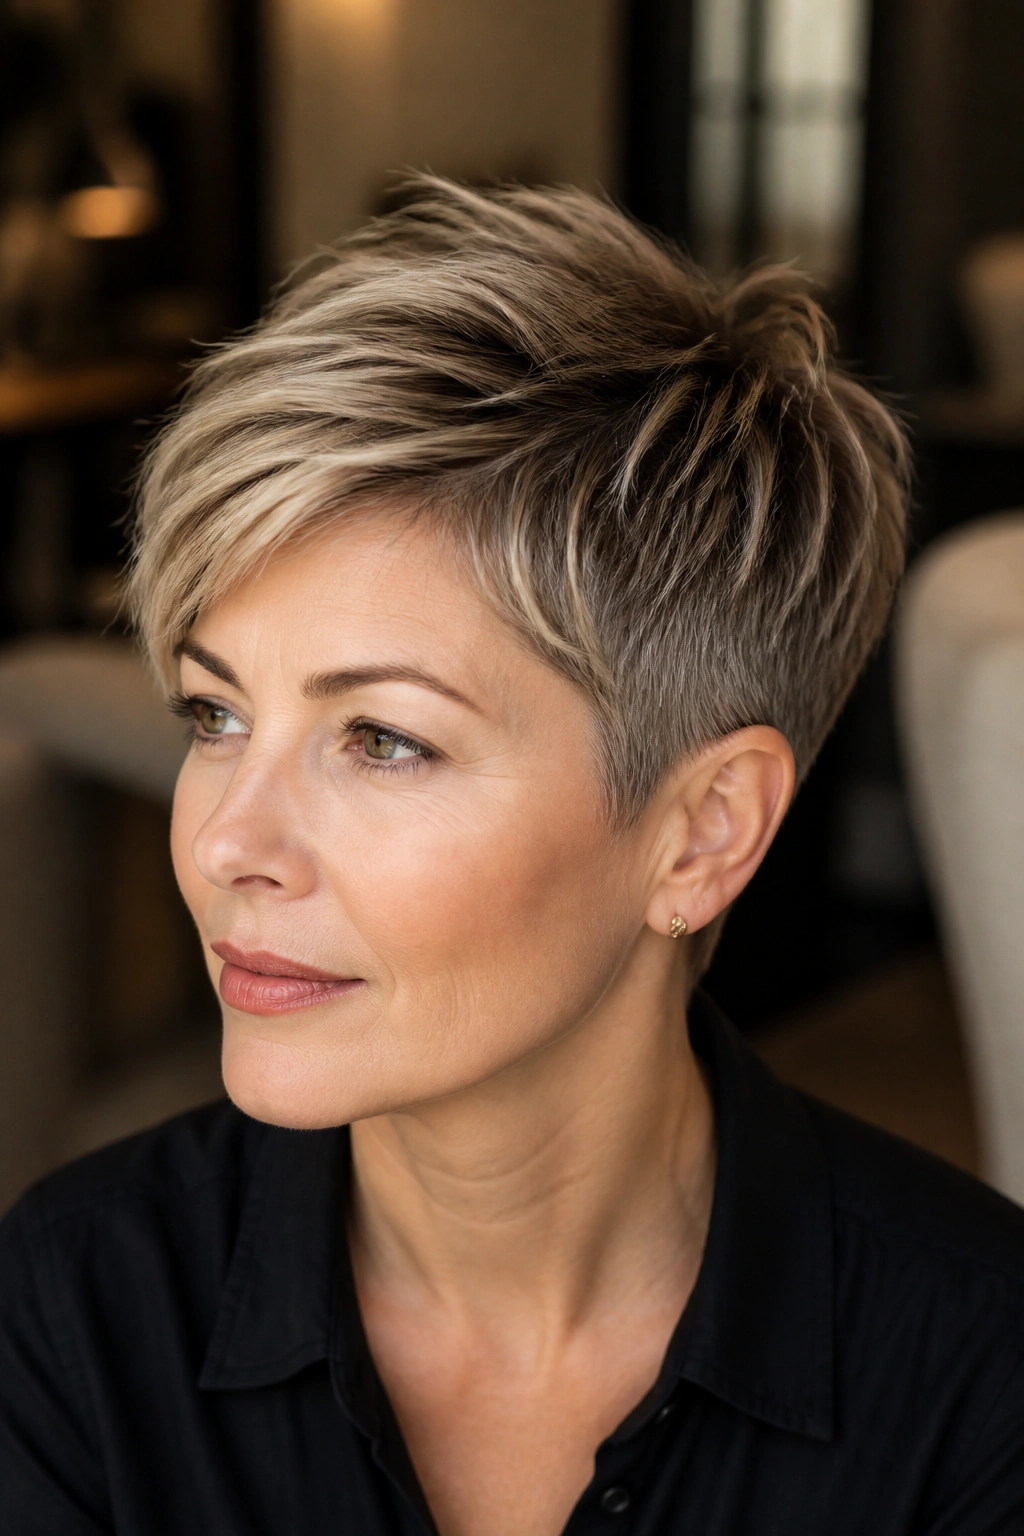
Short hair can make thin hair look thicker because it stops the strands from lying in a long, see-through curtain. The key is keeping enough length on top to style, while the sides stay tidy and close. A pixie with height beats a flat long cut when density is the problem.
The mistake people make is asking for too much thinning. A pixie should be cut to remove bulk where needed, not to shred every inch of hair into pieces. If the top is left a little longer, you can push it up, sweep it to one side, or rough it up with a matte paste. That tiny bit of lift adds a lot of perceived thickness.
I’m also a fan of soft side-swept fringe here. It keeps the front from looking too exposed and helps the cut feel fuller around the hairline. A very short, choppy pixie can work on some faces, but it often shows more scalp than people expect. A longer top gives you room to play.
This is one of those styles that looks especially good when it’s not perfect. A little finger-combed messiness gives the top movement, and movement reads as body. Too neat, and the hair can collapse into the skull.
12. The Controlled Shag at Shoulder Length
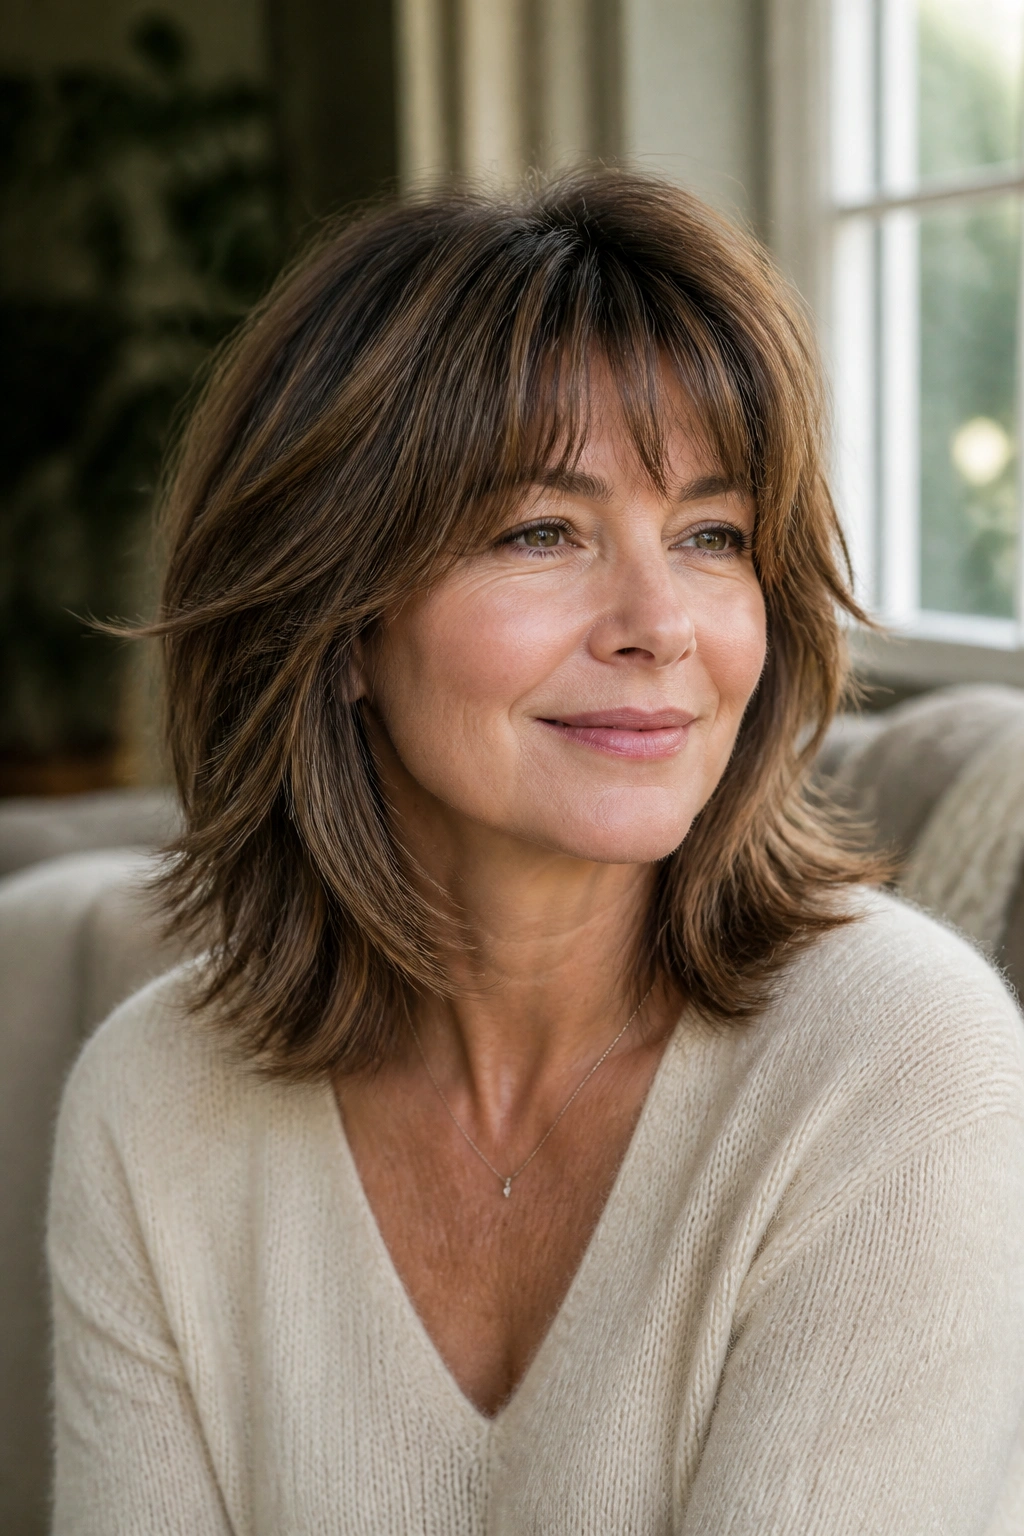
Can a shag work on thin hair? Yes — if the layers are controlled. A shoulder-length shag with soft movement can make the hair look fuller because it breaks up flatness, but it needs restraint. Too many short layers will leave the ends looking hollow.
The right version keeps the longest pieces around the shoulders and adds shape gradually, not all at once. You want lift around the crown, some movement around the face, and enough weight at the bottom to keep the cut from floating apart. That balance is what separates a good shag from a choppy mess.
What “controlled” means
- Layers should start low enough to keep the ends full.
- The face frame should blend smoothly, not stop in hard steps.
- A soft fringe can help, but it should not be so wispy that it disappears.
- The finish should feel movable, not shredded.
This cut works best if your hair has at least a little bend. Straight hair can wear it, but you’ll probably want a round brush or a low-effort wave to keep the shape from lying too flat. I wouldn’t hand a heavily layered shag to someone whose hair is very sparse at the ends. That version can make the problem worse. The controlled version, though? Good one. Quietly good.
13. Loose Braids That Are Gently Pancaked
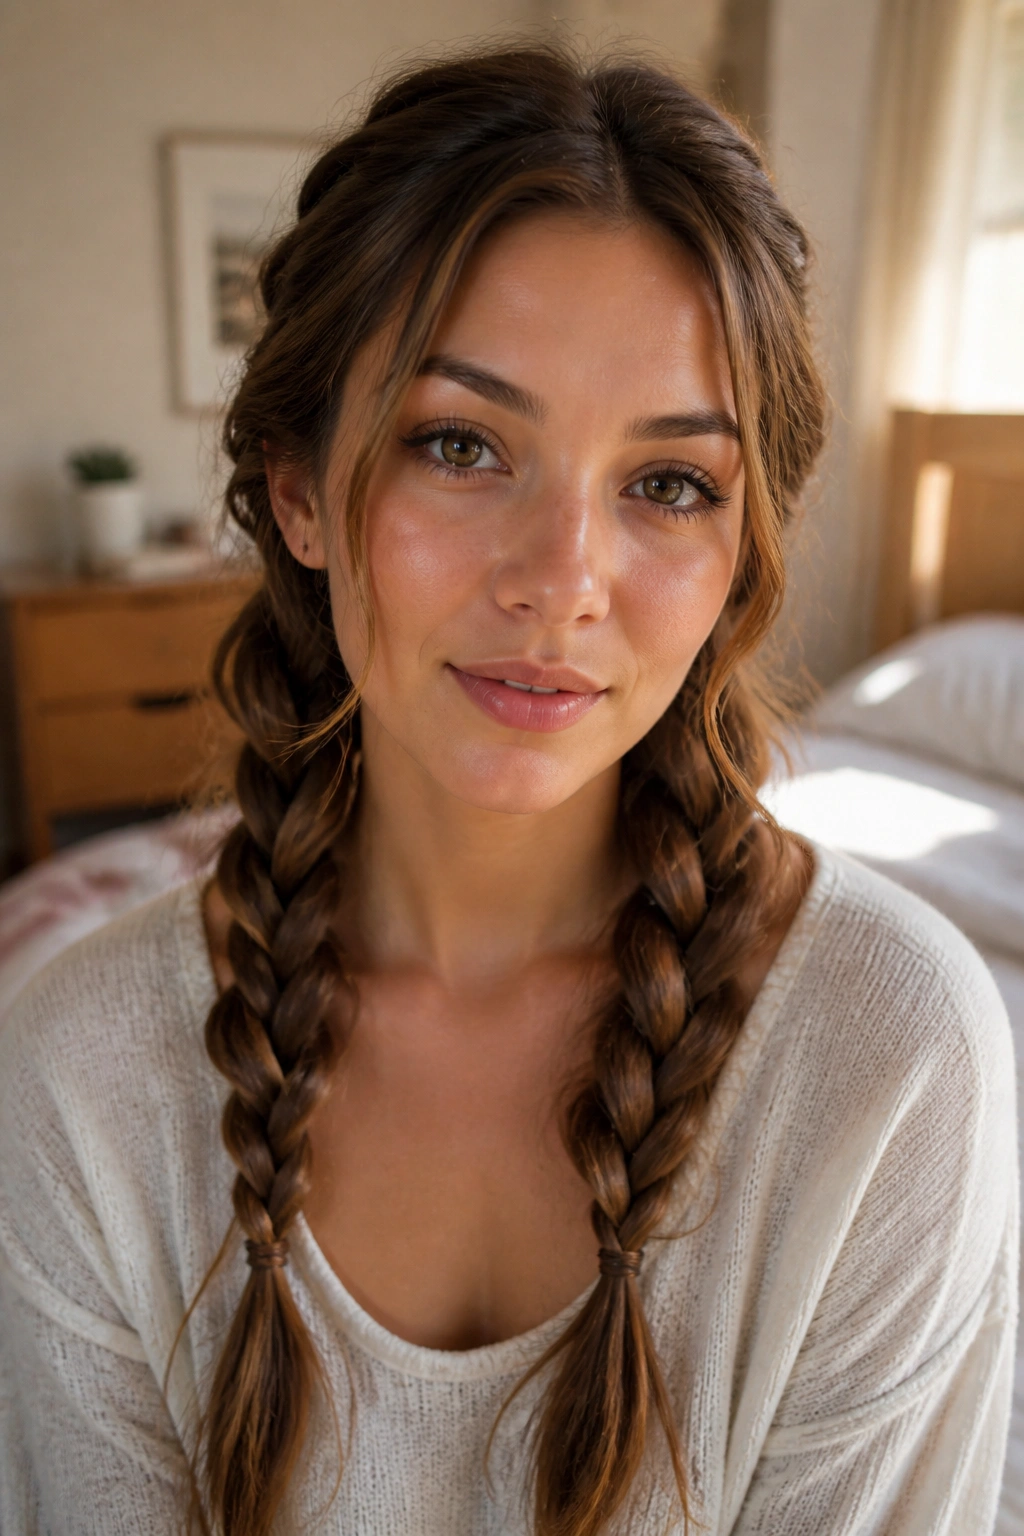
Tight braids are not the answer here. They can make thin hair look smaller because they squeeze the strands into a narrow rope and expose the scalp along the part. A loose braid that’s gently pancaked does the opposite — it widens the shape and makes the braid look fuller than the actual amount of hair would suggest.
A side braid, low braid, or even two soft braids all work if you keep the tension light. Once the braid is secured, pull the outer loops apart a little at a time. That’s the pancaking part. You’re widening the braid from the outside without completely wrecking the structure.
How to pancake without ruining it
- Start with hair that has a little grip, not bone-clean slippery hair.
- Braid loosely from the start so the sections have room to expand.
- Tug only the outer edges of each loop, working from bottom to top.
- Stop when the braid looks wider, not frizzy.
This is one of those styles that gets better with practice. The first few times, people usually pull too hard and lose the shape. Go slowly. The braid should look fuller, not fuzzy. On thin hair, that controlled looseness is the whole point.
14. The Wrapped Low Ponytail with Face Pieces
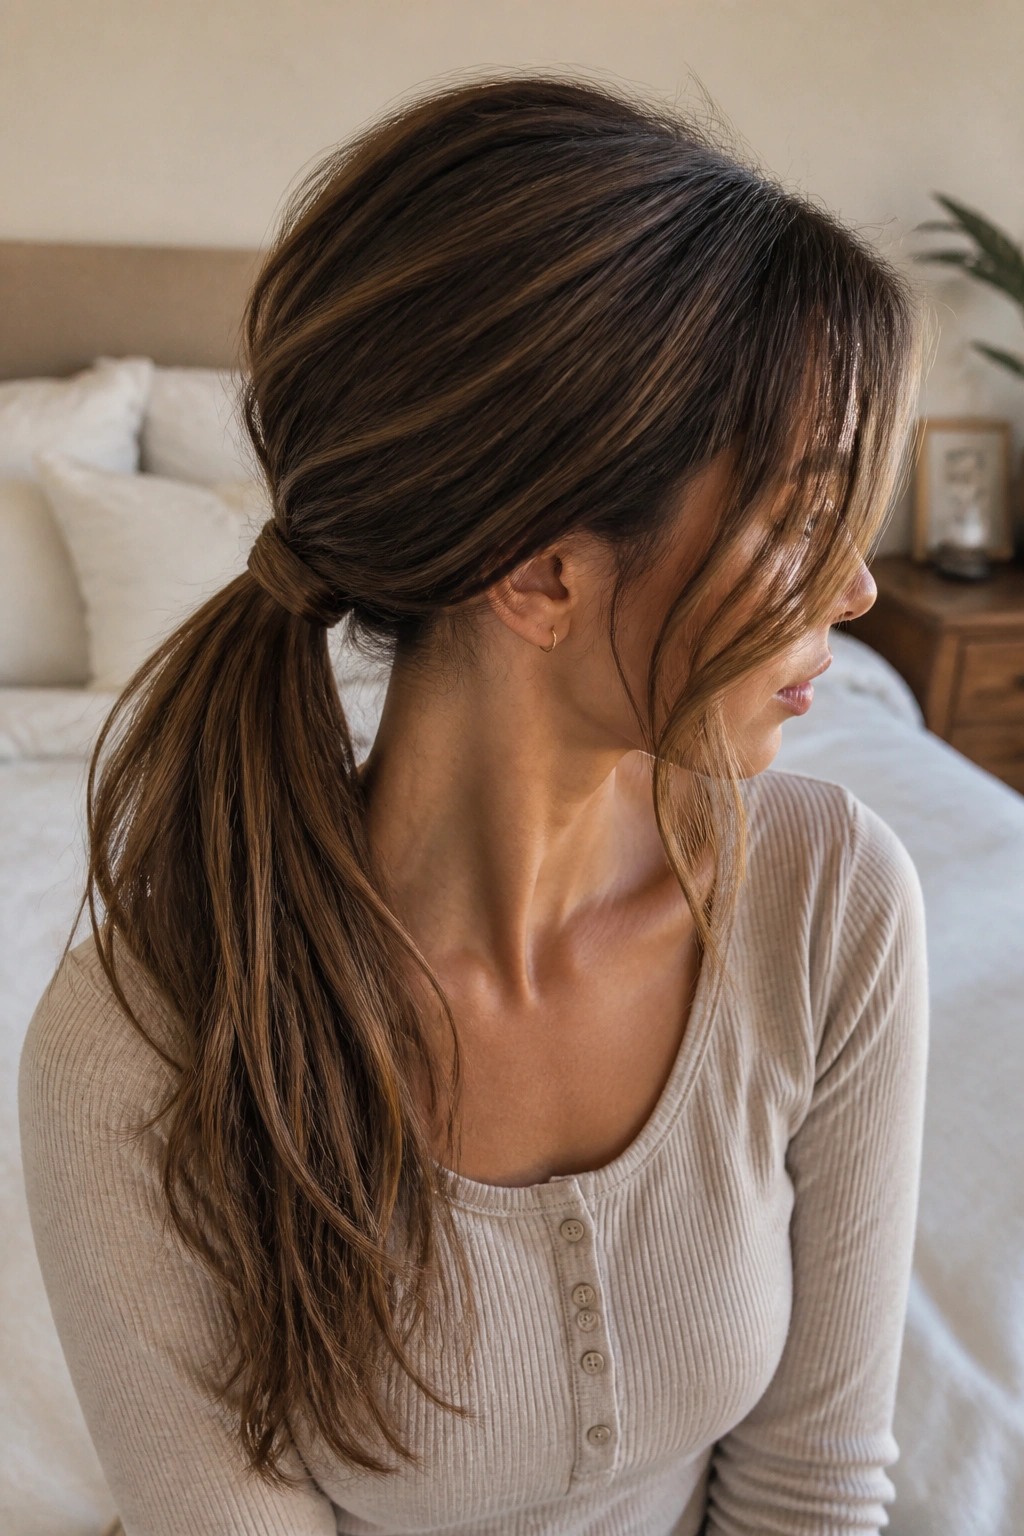
A low ponytail can look thin if the base is visible and the tail hangs straight. Wrap it, bend it, and soften the front, and suddenly it feels much more finished. The wrapped base hides the elastic and gives the style one continuous shape, which is easier on the eye.
Start by leaving a little height at the crown before smoothing the hair back. That tiny lift keeps the ponytail from looking pasted to the head. Once the ponytail is secure at the nape, take a small strand from underneath, wrap it around the elastic, and pin it beneath the ponytail so the base disappears.
The ends matter too. A slight bend at the tail — not a tight curl, just a soft turn with a flat iron — makes the length look less stringy. I also like a couple of face pieces left out around the temples. They keep the ponytail from feeling severe, which is useful when the hair is fine and needs a little softness.
The tiny tricks
- Use a smoothing cream only on mid-lengths and ends, not the roots.
- Keep the ponytail low, near the nape of the neck.
- Wrap one small strand around the elastic to hide the tie.
- Bend the tail once or twice so it doesn’t hang like a rope.
This style is neat without being stiff. That’s a rare combination.
15. The Side-Swept Blowout with Velcro Rollers
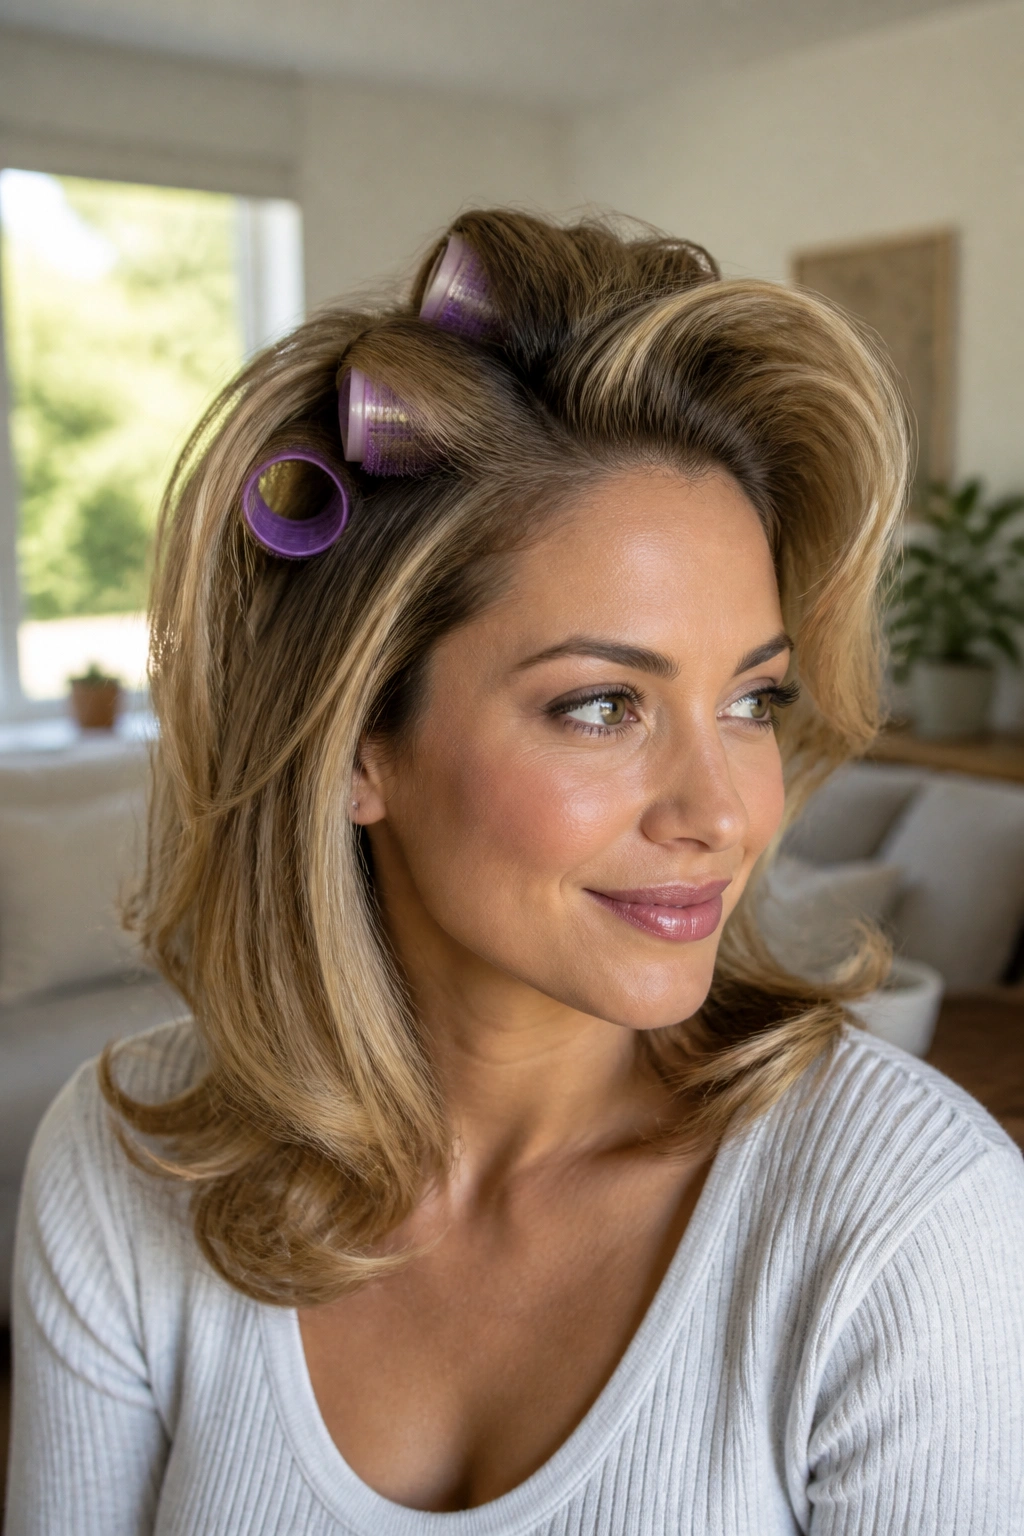
A side-swept blowout can make thin hair look fuller faster than almost anything else because it builds volume at the roots and keeps the shape lifted across the front. Velcro rollers are still useful for a reason — they hold hair up while it cools, and cooling is where the shape actually sets.
Start with mousse at the roots, then rough-dry the hair until it’s about 80 percent dry. Use a round brush to direct the front away from the face, and put a few medium Velcro rollers at the crown and top sections while the hair is still warm. Give them time to cool fully before removing them. If you rush that part, the volume falls out before you even get to the mirror.
The side sweep helps because it creates one dominant line instead of splitting the hair down the middle. That makes the top look higher and the front look softer at the same time. It’s a useful trick for events, dinner plans, or any day when flat roots are making you annoyed for no good reason.
Flat hair hates a set. A little patience with rollers can change the whole shape of the head, and that is often enough to make thin hair look much thicker than it really is.
