



Some mornings, the difference between “pulled together” and “I got dressed in the dark” is five bobby pins and a decent hair tie. Cute hairstyles for everyday wear do not need a curling iron marathon, a bathroom counter covered in tools, or a braid that takes half the morning to get right. The styles people repeat are usually the ones that work when you’re rushing, your hair has its own opinions, and the mirror light is unforgiving.
Day-two hair often behaves better than squeaky-clean hair. A little grit gives you grip, which is why so many of the best everyday looks hold a bend, a twist, or a braid without sliding apart by lunchtime. Fine hair needs texture. Thick hair needs stronger elastics and more pins. Shoulder-length hair likes shape more than length, and short hair usually looks best when one small detail — a clip, a tuck, a bend — does the heavy lifting.
I keep coming back to hairstyles that look intentional without feeling stiff. A tiny face-framing piece, a wrapped ponytail base, or a slightly loosened braid can change the whole mood of a style. Nothing here is precious. That’s the point.
If your hair is clean and slippery, or flat from sleeping on one side, start there. Pick the style that matches your length and texture first, then worry about the cute part second.
1. Low Ponytail with a Wrapped Base

A low ponytail can look plain in a hurry, but the wrapped base changes everything. It hides the elastic, gives the style a cleaner finish, and makes even a basic ponytail look like you meant it.
Why It Works
This style sits at the nape, so it stays comfortable all day and does not fight your collar or scarf. It’s especially good on straight or softly wavy hair because the wrapped section creates one neat visual line instead of a hard break.
- Use a snag-free elastic so the ponytail stays smooth.
- Take a 1-inch strand from the underside of the ponytail and wrap it around the elastic.
- Pin the end underneath with one bobby pin.
- Leave the crown slightly lifted instead of pressing it flat.
Best tip: pull the ponytail base up about 1/4 inch after tying it. That tiny bit of height keeps the style from looking too tight.
2. Claw Clip French Twist

A claw clip is one of the fastest ways to look put together. Not the giant party version, either — the smaller, everyday twist that takes thirty seconds and still holds through errands, a desk day, or a long commute.
The trick is to gather the hair low, twist it upward once, then fold the length back down before clipping. If you twist too hard, the shape turns stiff. If you twist too loosely, the clip slides. The sweet spot is somewhere in the middle, where the hair feels secure but still has a little movement at the ends.
For thick hair, a 4- to 5-inch clip usually works better than those tiny decorative ones. If your hair is fine, rough it up with dry shampoo first. The clip grabs better, and the style lasts longer.
3. Half-Up Mini Bun
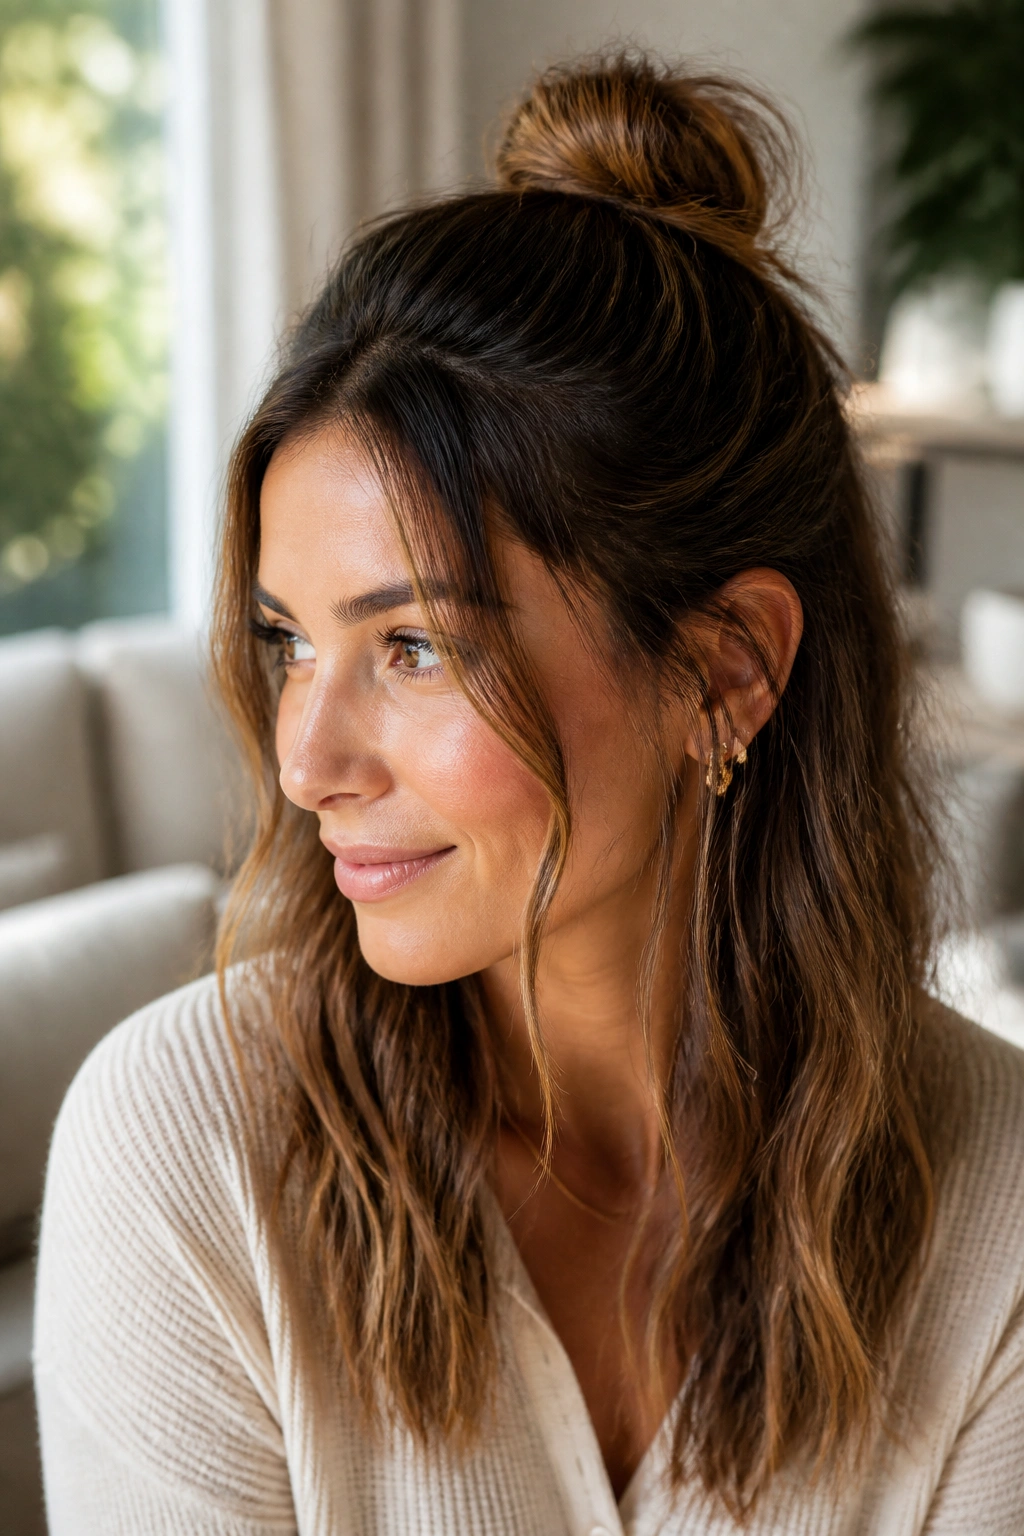
What if you want your hair off your face but still want some softness around it? A half-up mini bun does that job without making the whole style feel formal.
How to Keep It Small and Neat
The best version uses only the top section of hair, from temple to temple, and leaves the rest down. That keeps the bun compact instead of bulky. Twist the section once, coil it into a small knot, and secure it with a tiny elastic or two crossed pins.
- Keep the bun about the size of a plum, not a grapefruit.
- Leave the lower hair loose so the style still moves.
- Let a few shorter pieces fall around the face if your cut has layers.
- Use a light-hold spray only on the bun, not the whole head.
It’s a good choice for second-day hair because the top section usually has enough grip to stay in place without much fuss.
4. Sleek Center Part with Tucked Ends
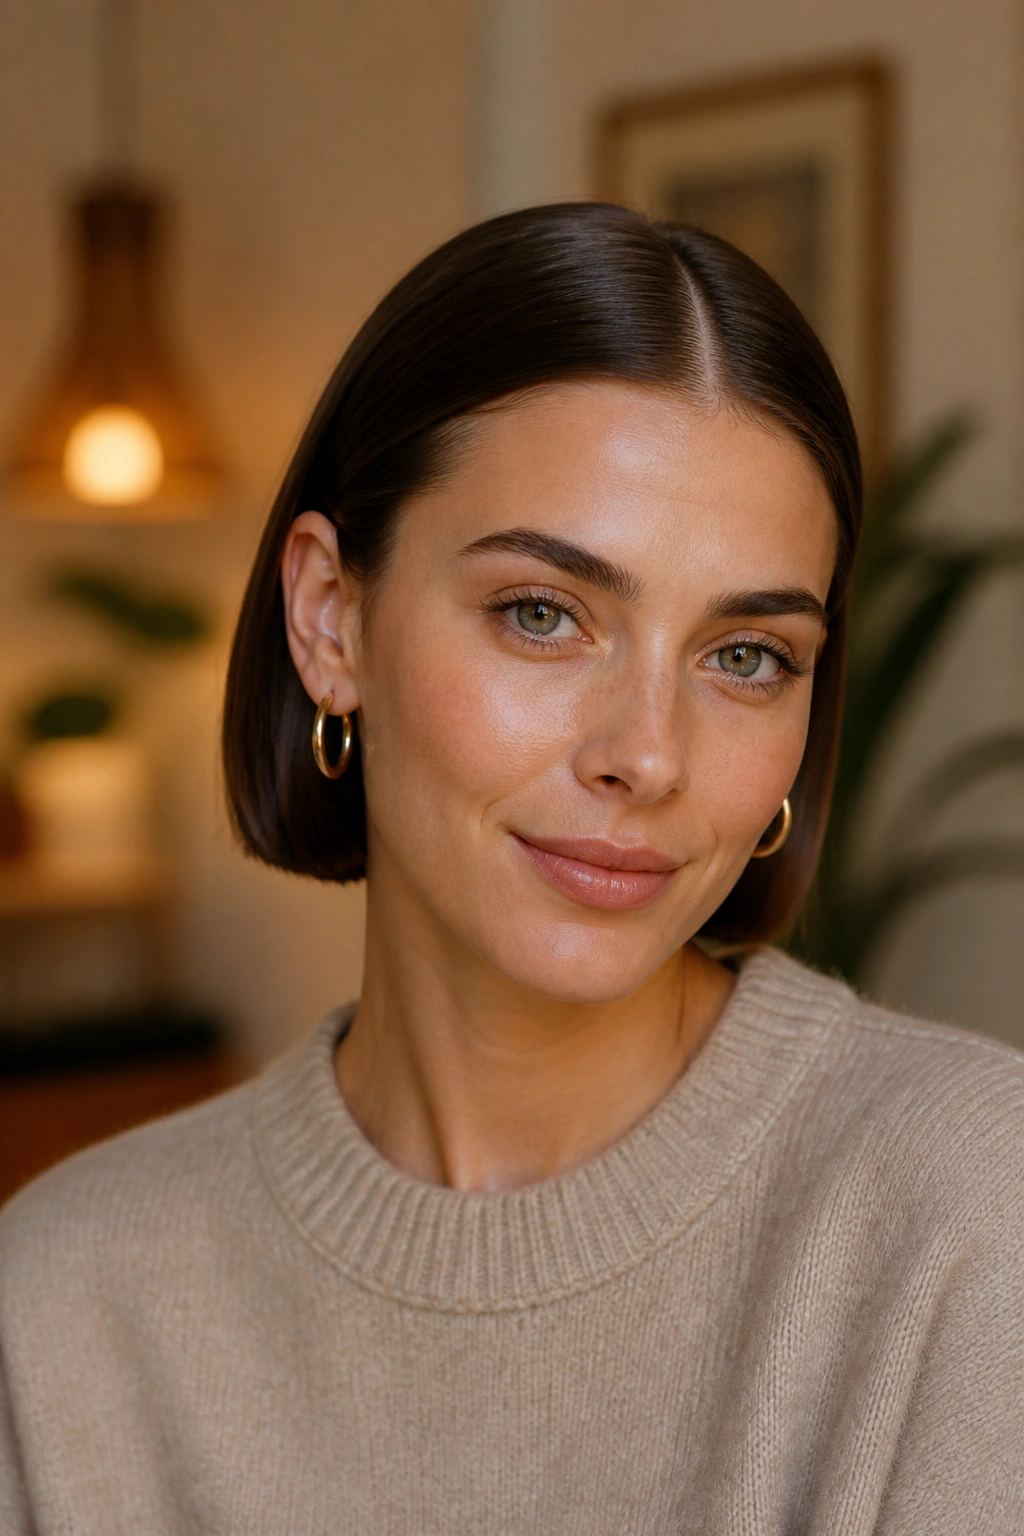
A bob that flips in random directions can still look polished. Tucking the ends behind the ears and keeping the part sharp gives short hair a clean shape, even when the cut itself is a little uneven from sleep or humidity.
The thing people miss is that this style does not need to be pin-straight. A soft bend at the ends is better than a flat ironed helmet. Run a tiny bit of serum through the mids and ends, then use a rat-tail comb to draw a neat center part. If the hair wants to puff out at the sides, tuck it behind the ears and secure one side with a flat barrette.
It’s especially nice on chin-length cuts and lobs. Longer face-framing pieces can stay out in front; that little bit of movement keeps the whole look from feeling severe.
5. Loose French Braid

A loose French braid is one of those styles that looks harder than it is. Done well, it feels casual and tidy at the same time, which is probably why people keep returning to it.
Start with hair that has a bit of texture — a little dry shampoo or a day or two of wear helps a lot. Braid from the crown downward, adding small sections as you go, but do not pull each pass tight. The braid should sit close to the head without looking pasted on. That’s the difference between graceful and rigid.
The part that makes it cute is the finish. Once the braid is secure, pinch the outer edges gently to widen it. Not too much. Just enough for the braid to look soft and full. If a few layers slip out near the temples, leave them. That looseness is doing half the work.
6. Bubble Ponytail
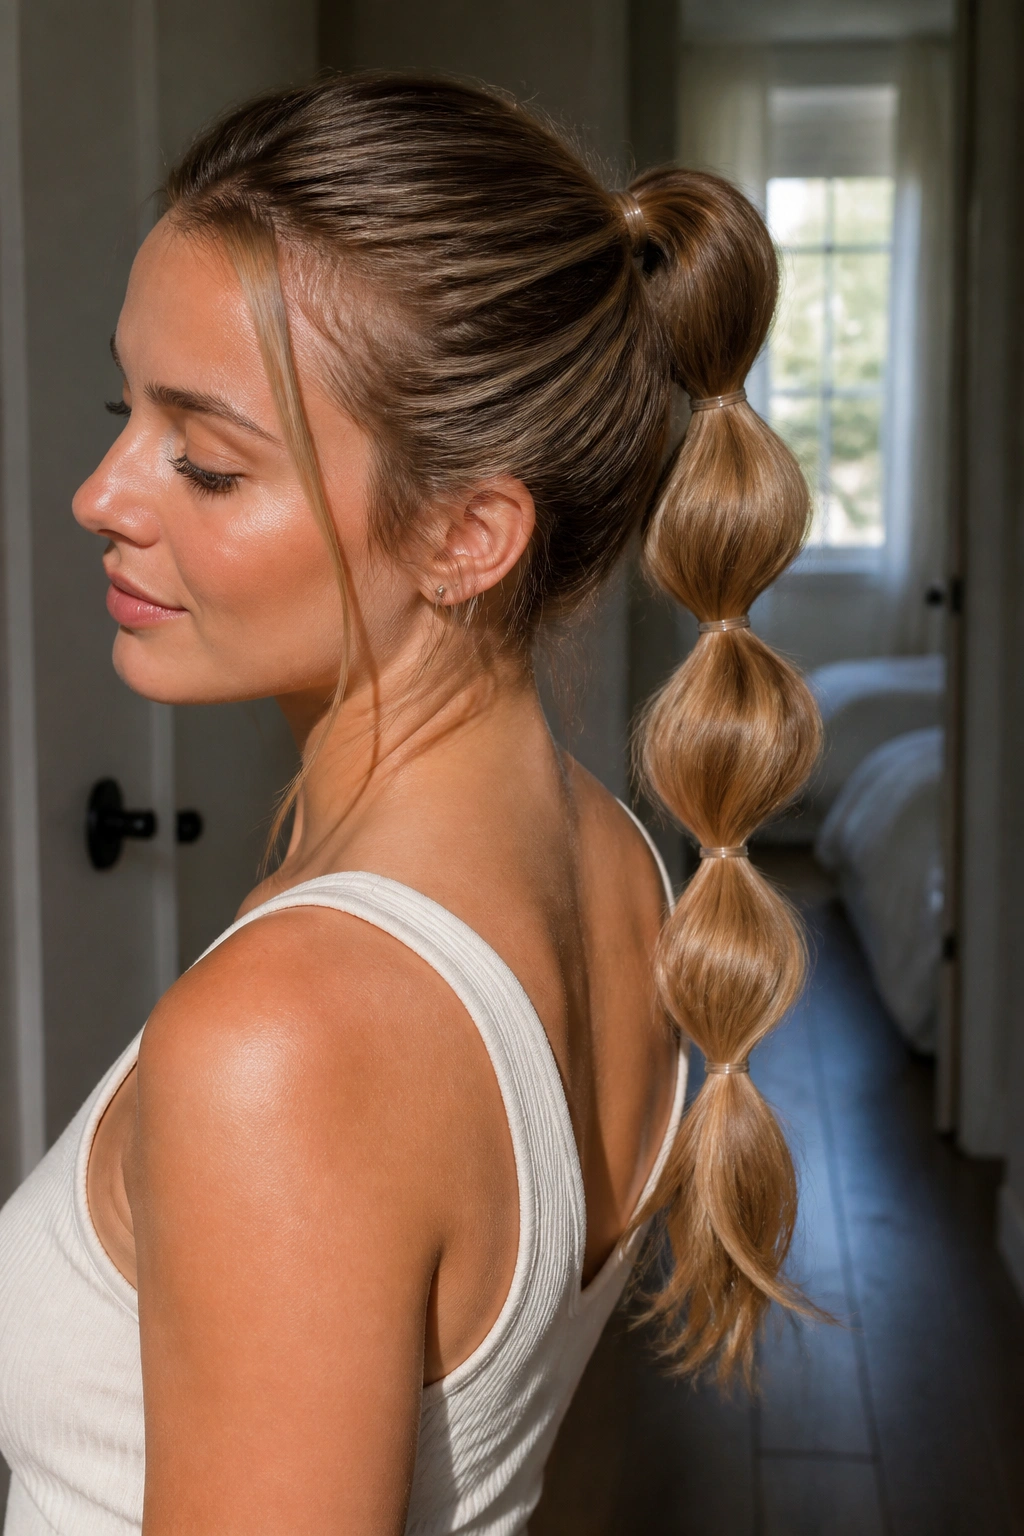
Unlike a regular ponytail, a bubble ponytail gives you shape even when your hair is flat at the roots. It looks playful, but it also reads clean and deliberate if you keep the bubbles evenly spaced.
Tie the hair into one ponytail first, then add clear elastics every 2 to 3 inches down the length. After that, tug each section outward with your fingers until it looks rounded. The bubbles should be full, not lopsided. If your hair is thick, use slightly larger gaps between elastics so the shape has room to breathe.
This style is especially good for long, straight hair because the bubbles show up clearly. It also works on layered hair if you mist the tail with a little texture spray first. A single wrapped strand at the base helps too. Small detail. Big difference.
7. Messy Low Bun with Face-Framing Pieces

A messy low bun gets a bad reputation when people make it too sloppy or too high. Put it low at the nape, leave two slim pieces around the face, and it suddenly looks soft instead of careless.
The Parts That Matter
The bun should feel a little loose, but not like it’s falling apart. Twist the ponytail into a coil, pin it horizontally, then tug one or two tiny loops free near the sides. That gives the bun shape without overthinking it.
- Leave two face pieces about 1/2 inch wide.
- Pin the bun low, near the collar line.
- Use 3 to 5 bobby pins, depending on thickness.
- Pull the crown up slightly before pinning.
My favorite part: this style works on hair that has gone flat by the end of the day. It hides the exact kind of mess that makes other styles impossible.
8. High Ponytail with Soft Curls
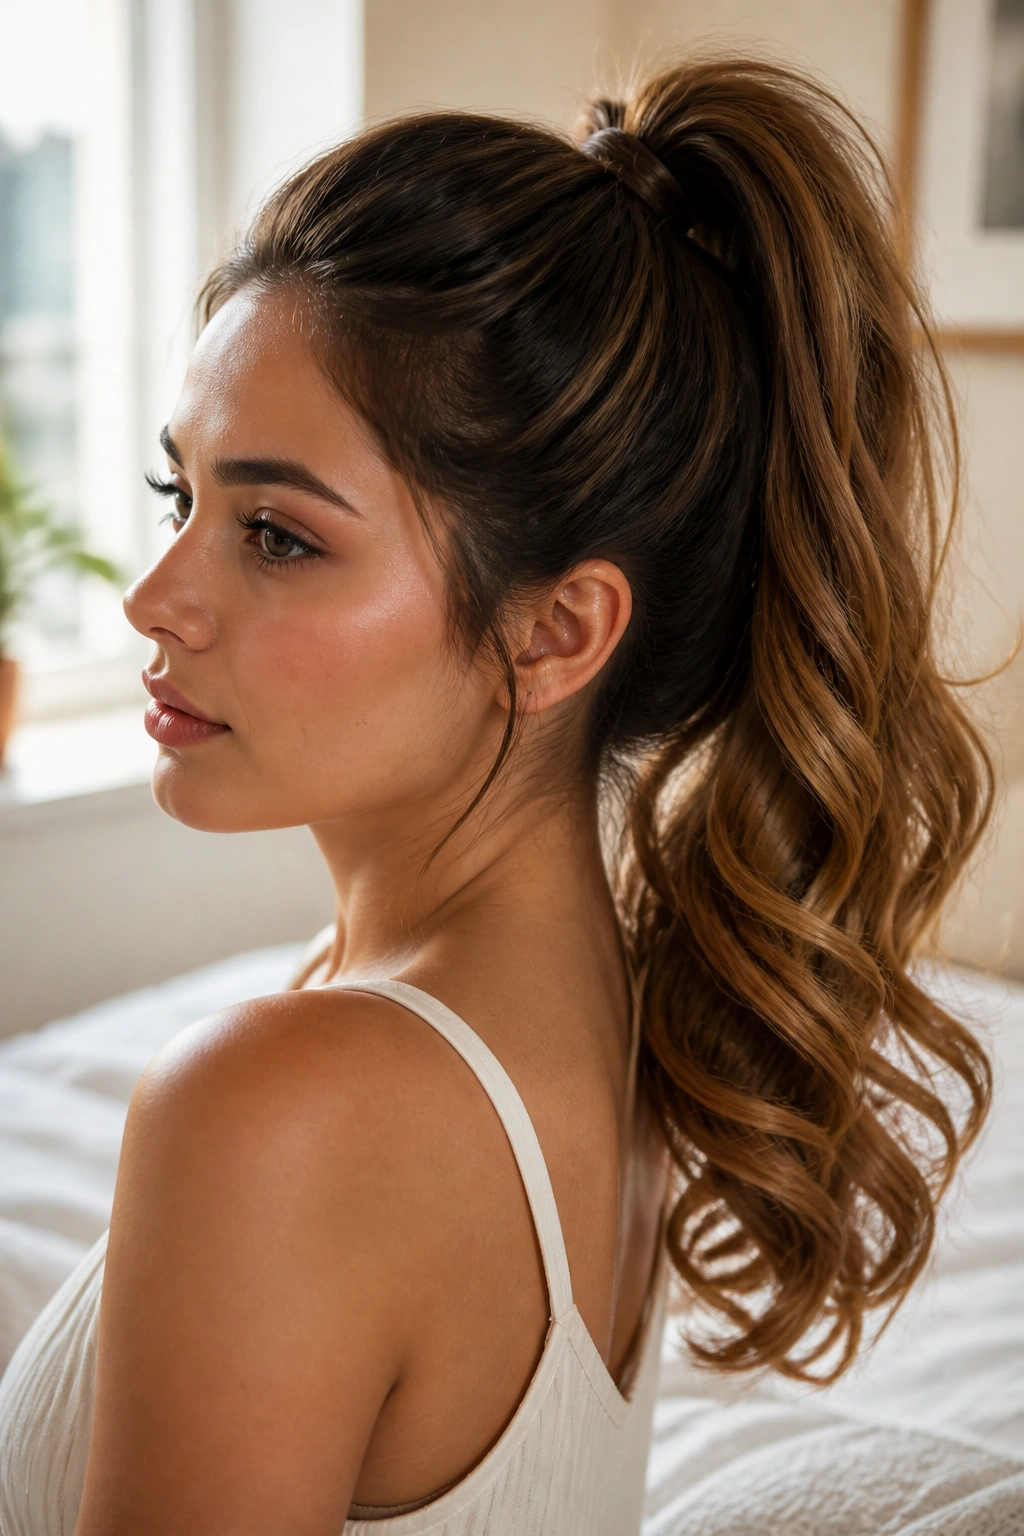
A high ponytail is only harsh when it’s pulled too tight and left pin-straight. Add a few soft curls, and the whole thing feels lighter, friendlier, and a lot more wearable.
The best version starts with a little lift at the crown. Tease the roots lightly if you need to, then smooth the top and secure the ponytail high but not painfully high. Wrap a strand around the elastic for a cleaner finish. After that, curl the tail in loose sections with a 1.25-inch iron or bend the ends with a brush and dryer if that’s more your speed.
This style is a good match for long hair that needs movement. It also works when you want a sporty look that doesn’t feel bare. If the curls are too perfect, brush them out once. That one pass softens the whole thing.
9. Rope-Braid Half-Up
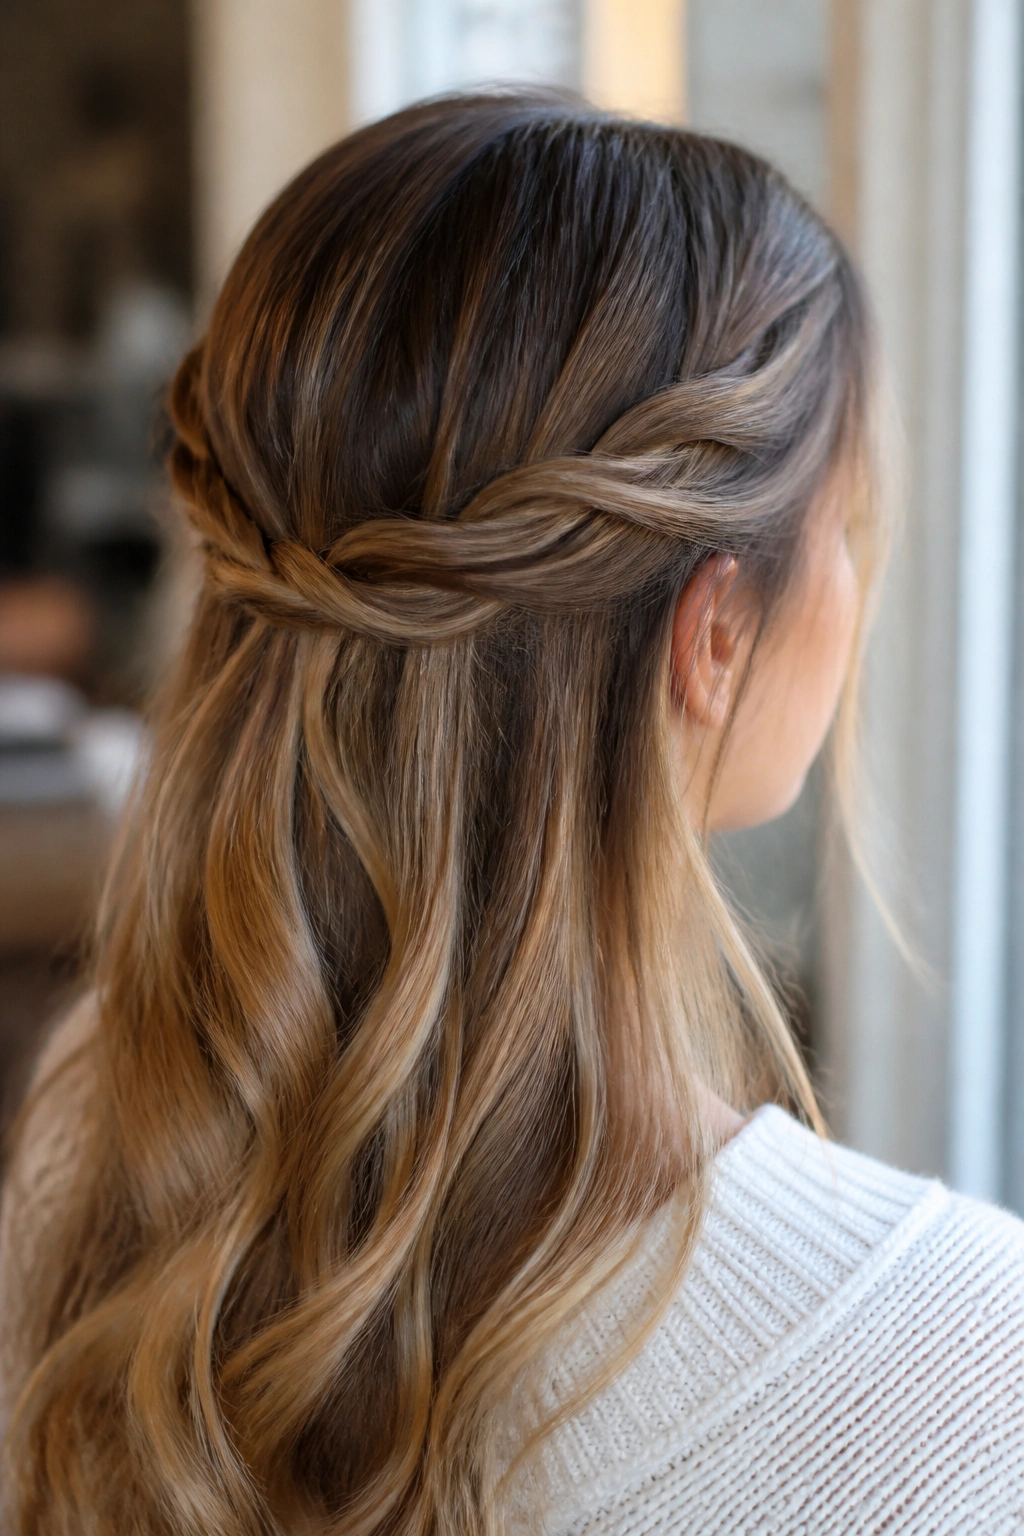
Need something faster than a braid and prettier than a half ponytail? Rope-braid half-up is the answer. It gives you that woven look without requiring three separate strands and a lot of patience.
Take two small sections from each side of the head, twist them away from your face, then cross them at the back and secure them. The movement is simple, but it looks more detailed than a plain twist. For slippery hair, a touch of dry shampoo near the roots helps the sections hold together instead of sliding apart.
How to Keep It from Unraveling
Pinch the twisted sections between your fingers while you work. That keeps the tension even. If the hair is layered, use one small clear elastic where the two twists meet before you pin them down. That extra anchor makes a difference.
10. Side Braid with a Little Volume
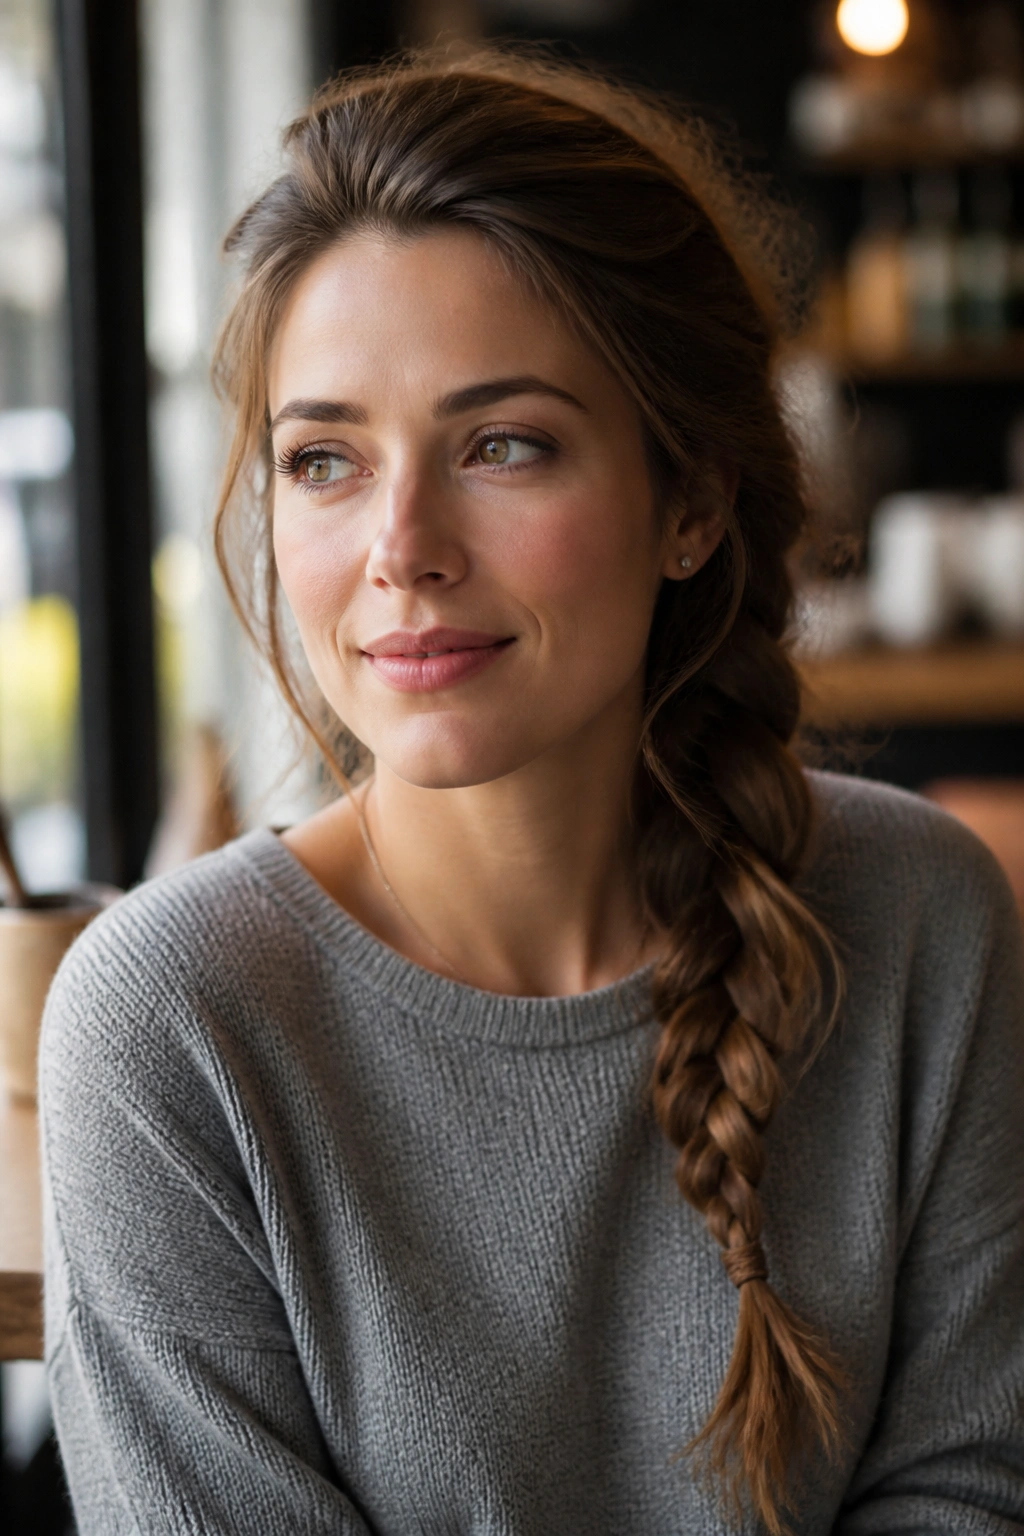
A side braid is the style you reach for when you want your hair out of the way but still visible. Put it over one shoulder, loosen it a bit, and it stops reading as school-day basic.
Start the braid just above one ear or slightly behind it, depending on how much volume you want at the top. That placement matters. Too low, and the style looks sleepy. Too high, and it starts to feel overdone. Keep the braid relaxed, then pull the outer edges gently once it’s tied off.
This one is a solid fit for medium and long hair, especially if your layers tend to escape from regular braids. A small ribbon or thin elastic at the end makes it feel more finished. Nothing fancy. Just enough.
11. Pinned-Back Waves
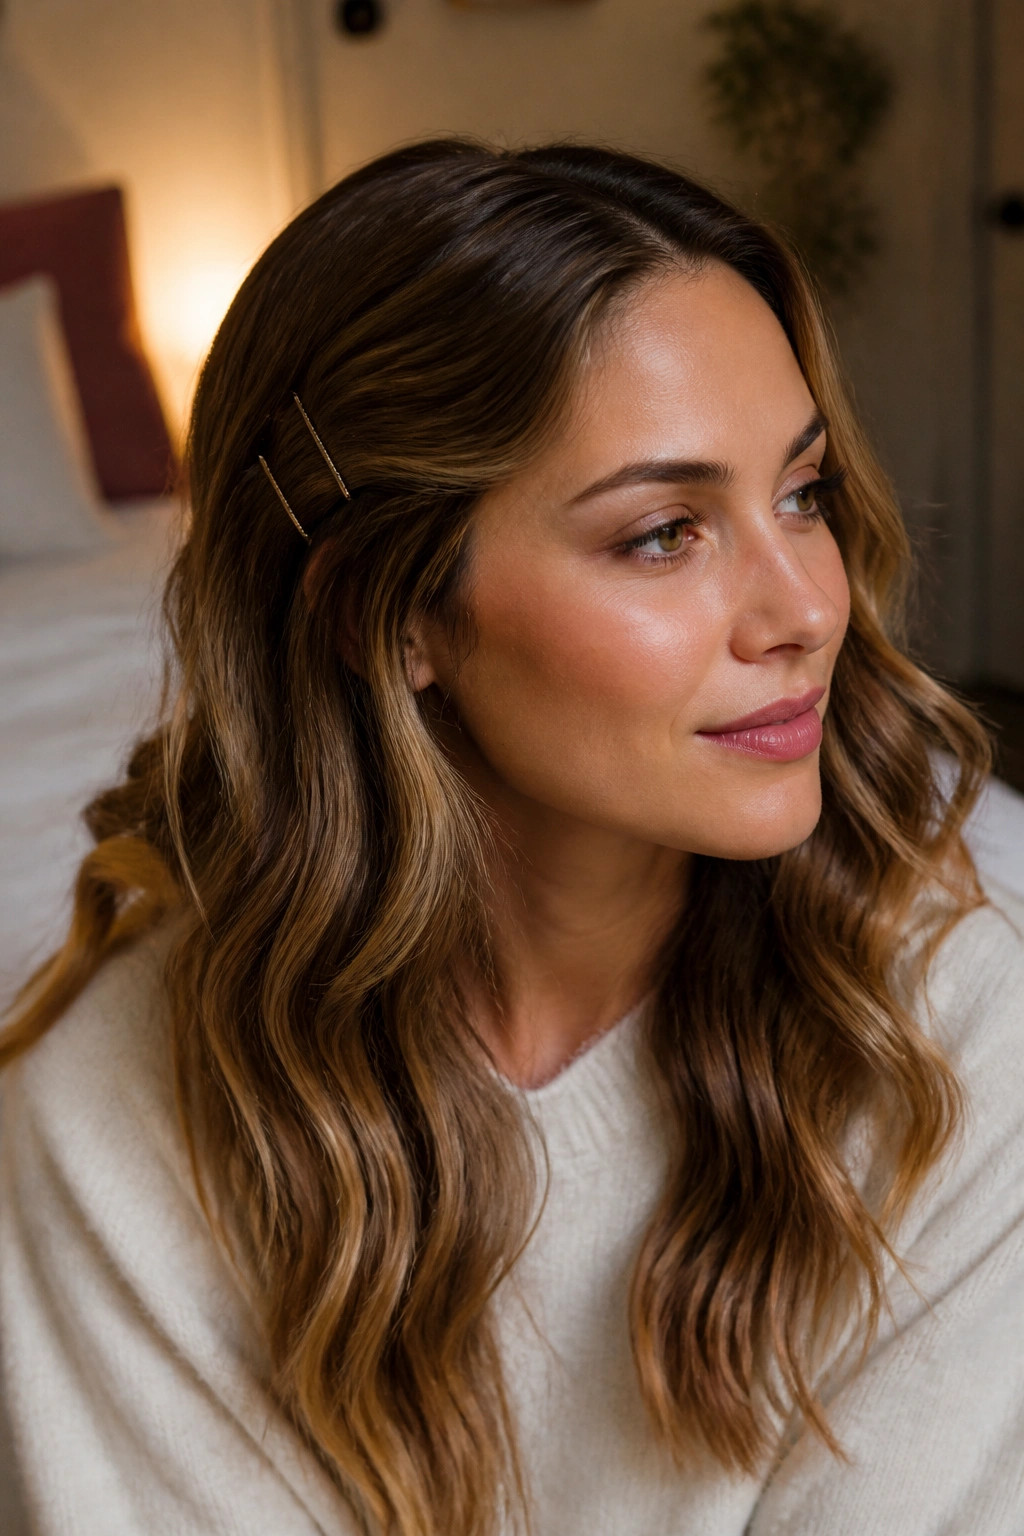
Pinned-back waves are what I recommend when you want your hair down but not in your face. Two bobby pins do most of the work, which is probably why this style never really gets old.
You can do it with natural waves, a loose curl, or even a flat iron bend on the front pieces. Part the hair where you like it, take a small section from each temple, and pin it back behind the ears. Cross the pins if you want them to grip better. That tiny detail keeps them from slipping out by midday.
The best part is how low-effort it feels. It works on day-two hair, fresh blowouts, and anything in between. If the ends are a little uneven, that’s fine. The style actually looks better when it isn’t too neat.
12. Double Mini Braids Around the Face

Double mini braids are one of the easiest ways to break up long hair without committing to a full braid. They sit close to the face, so they frame it nicely, and they also help with grow-out bangs or layers that refuse to stay put.
Where to Place Them
Take two small sections from the front, one on each side, and braid them down just a few inches. Tie them off with tiny elastics or tuck them behind the ear if the hair is short enough. Keep the braids narrow. Thick front braids can look heavy fast.
- Best on wavy or straight hair with a little texture.
- Works well when bangs are between lengths.
- Use clear elastics if you want the braids to disappear into the rest of the hair.
- Stop the braid before it gets bulky near the jaw.
This style is small, but it changes the whole shape of the haircut.
13. Braided Crown Accent

A braided crown accent gives you the look of a more involved style without the time drain of a full crown braid. It’s one of those hairstyles that feels fancy until you watch someone do it in under ten minutes.
Start near one temple, braid along the hairline, and pin the end across the back of the head. You can do a single braid or two smaller braids that meet in the middle. Either way, the goal is to keep the braid loose enough to sit flat without feeling tight at the scalp.
How to Keep It from Feeling Fussy
Use hair that has some grip, not freshly washed hair that wants to slide everywhere. A little texture spray helps. Hide the pin ends under the top layer of hair, and choose bobby pins that match your hair color if you can. That’s a tiny thing, but it keeps the crown from looking like it’s wearing hardware.
14. Twisted Half-Up Half-Down
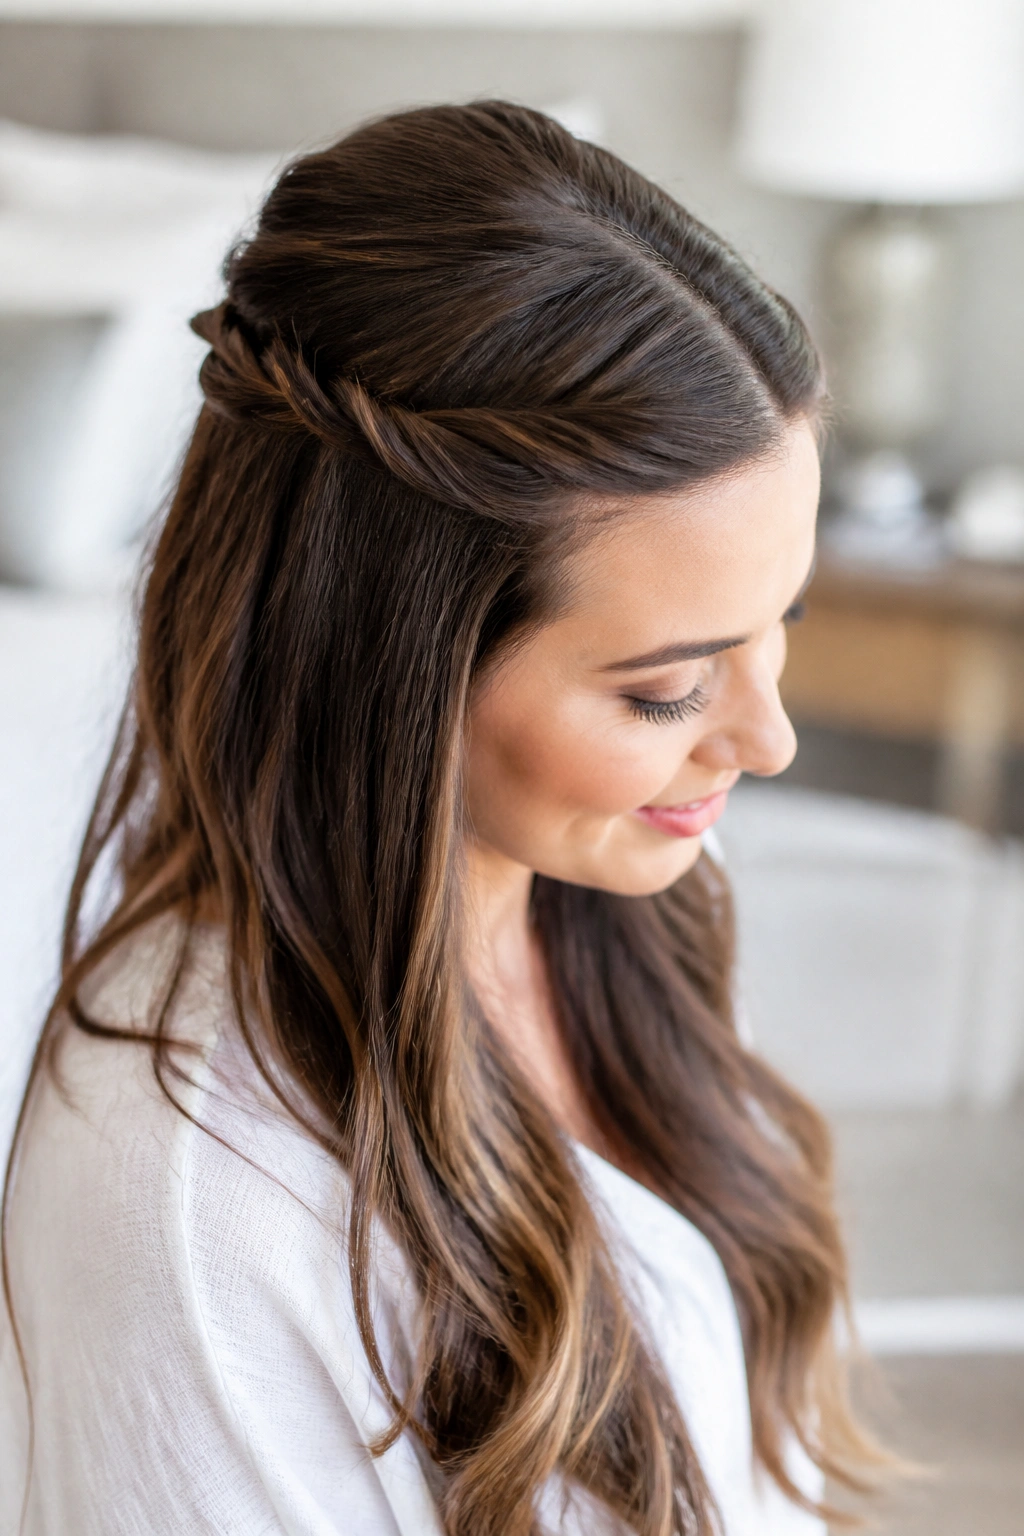
This is the style I suggest when someone says they want “something cute” but only has five minutes. It looks more intentional than a half ponytail and needs less coordination than a braid.
Take a section from each temple, twist them back toward the crown, and join them with a small elastic or a couple of pins. That’s the whole setup. The twist works especially well on layered hair because it holds those shorter front pieces in place without fighting them. If your hair is wavy, even better. The texture gives the twist a little body.
- Use a small clear elastic for a neat finish.
- Pin the join point flat against the head.
- Tug the twists slightly wider after securing them.
- Leave the lower hair loose and soft.
It’s tidy, but not stiff. That balance is the appeal.
15. Low Chignon

A low chignon is the grown-up cousin of a messy bun, but it does not need to be formal. Keep it loose and low, and it works for work, dinner, or a day when your hair has simply had enough.
The shape sits near the nape and folds the ends under, so the whole style looks smooth from the side. I like a side part with this one because it gives the bun a little asymmetry. A center part works too if you want things cleaner. Either way, pin the bun in a few spots instead of trying to force it into one perfect knot.
If your hair slips out of everything, mist the mid-lengths with texture spray first. That gives the pins something to grip. And don’t chase perfection here. A chignon looks better when one small section at the nape stays soft.
16. Mini Space Buns

Mini space buns can work for everyday wear if you keep them small and a little low. The giant festival version is a different beast. This one is softer, smaller, and much easier to wear with a normal outfit.
Divide the hair into two sections, one on each side of the part, and twist each into a small bun near the crown or slightly lower. Secure with elastics and pins. The key is keeping the buns compact so they read playful instead of costume-like. If your hair is thick, make the buns a little flatter. If it’s fine, loosen them a touch so they don’t disappear.
This style is especially cute with bangs or face-framing pieces. It also works when you want hair off your neck but still want some personality. Not every everyday hairstyle has to act serious.
17. Scarf-Tied Ponytail
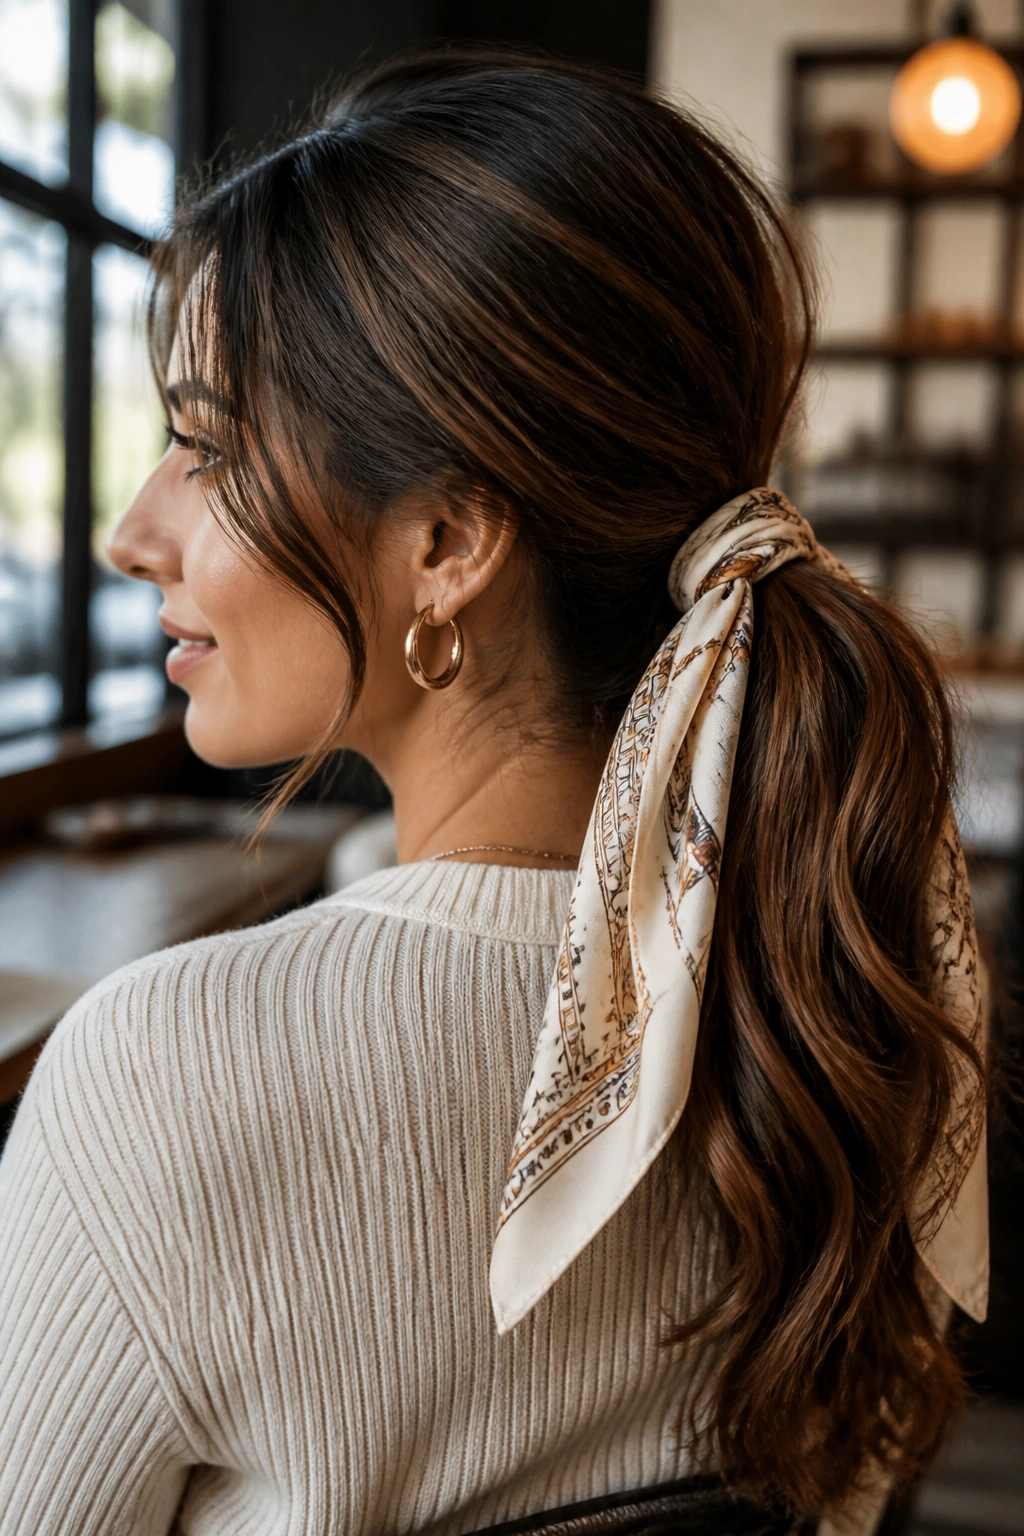
A scarf can do a lot of work. It hides a plain elastic, adds color, and makes even a simple ponytail feel styled on purpose.
Tie the hair into a low or mid ponytail first, then knot a scarf around the base so the tails hang down with the ponytail. Silk scarves slide more, so if your hair is fine, tuck the knot under the elastic or use a bobby pin to keep it in place. A cotton scarf grips better and is usually easier for everyday wear.
Choosing the Scarf
- Use a thin scarf for fine hair so the tie does not overwhelm the ponytail.
- Pick a wider scarf if you want the tails to show more.
- Neutral colors keep the look calm.
- Printed scarves work best when the rest of your outfit stays simple.
The scarf gives you a finished look without needing much skill. That’s a win.
18. Sleek Braid Ponytail

A braid ponytail is cleaner than a loose braid and less fussy than a full updo. Once the ponytail is secured, the braid stays in place and the shape reads tidy from every angle.
The front matters most here. Brush the hair back with a little gel or smoothing cream, then tie the ponytail at the height you want. Braid the length all the way down and finish with a small elastic. If you want it fuller, pull the braid apart gently after it’s tied off. Do that slowly. Fast tugging makes the braid lumpy.
This style is a good match for longer hair, humid weather, and mornings when you want to look neat without much thought. It also plays well with straight hair because the braid gives the tail some body that plain lengths often lack.
19. Dutch Braid Pigtails

Dutch braid pigtails are not just for kids, and when they’re worn low and loose, they can look surprisingly polished. The braid sits on top of the hair instead of sinking into it, which gives the style a little more shape.
Split the hair down the center, braid each side from the front toward the back, and keep the sections small. That helps the braid stay defined. If you want the style to feel more adult, stop the braid around shoulder length instead of taking it all the way down the back.
The Small Details That Help
- Start the braids close to the scalp so they hold.
- Keep the ends tied with small elastics.
- Pull the outer edges loose after braiding.
- Leave a tiny bit of softness around the hairline.
It’s practical too. This style keeps hair contained during a busy day without feeling like a hard bun.
20. Short Hair Barrette Sweep

Short hair needs its own tricks. A barrette sweep is one of the best because it works on bobs, lobs, and even some pixie cuts with enough length at the front.
Create a side part, sweep one side back, and secure it with two or three barrettes stacked slightly apart. If the hair is extra slippery, tease the back of the section lightly before clipping. A matte metal clip tends to stay put better than a shiny plastic one, especially if your hair is fine.
- Works best on one-day-old hair with a little texture.
- Use dry shampoo at the roots if the front is flat.
- Place the clips just above the temple so they do not pinch.
- Keep the rest of the hair soft and natural.
It’s small, but it changes the whole shape of a short cut.
21. Slicked-Back Bun
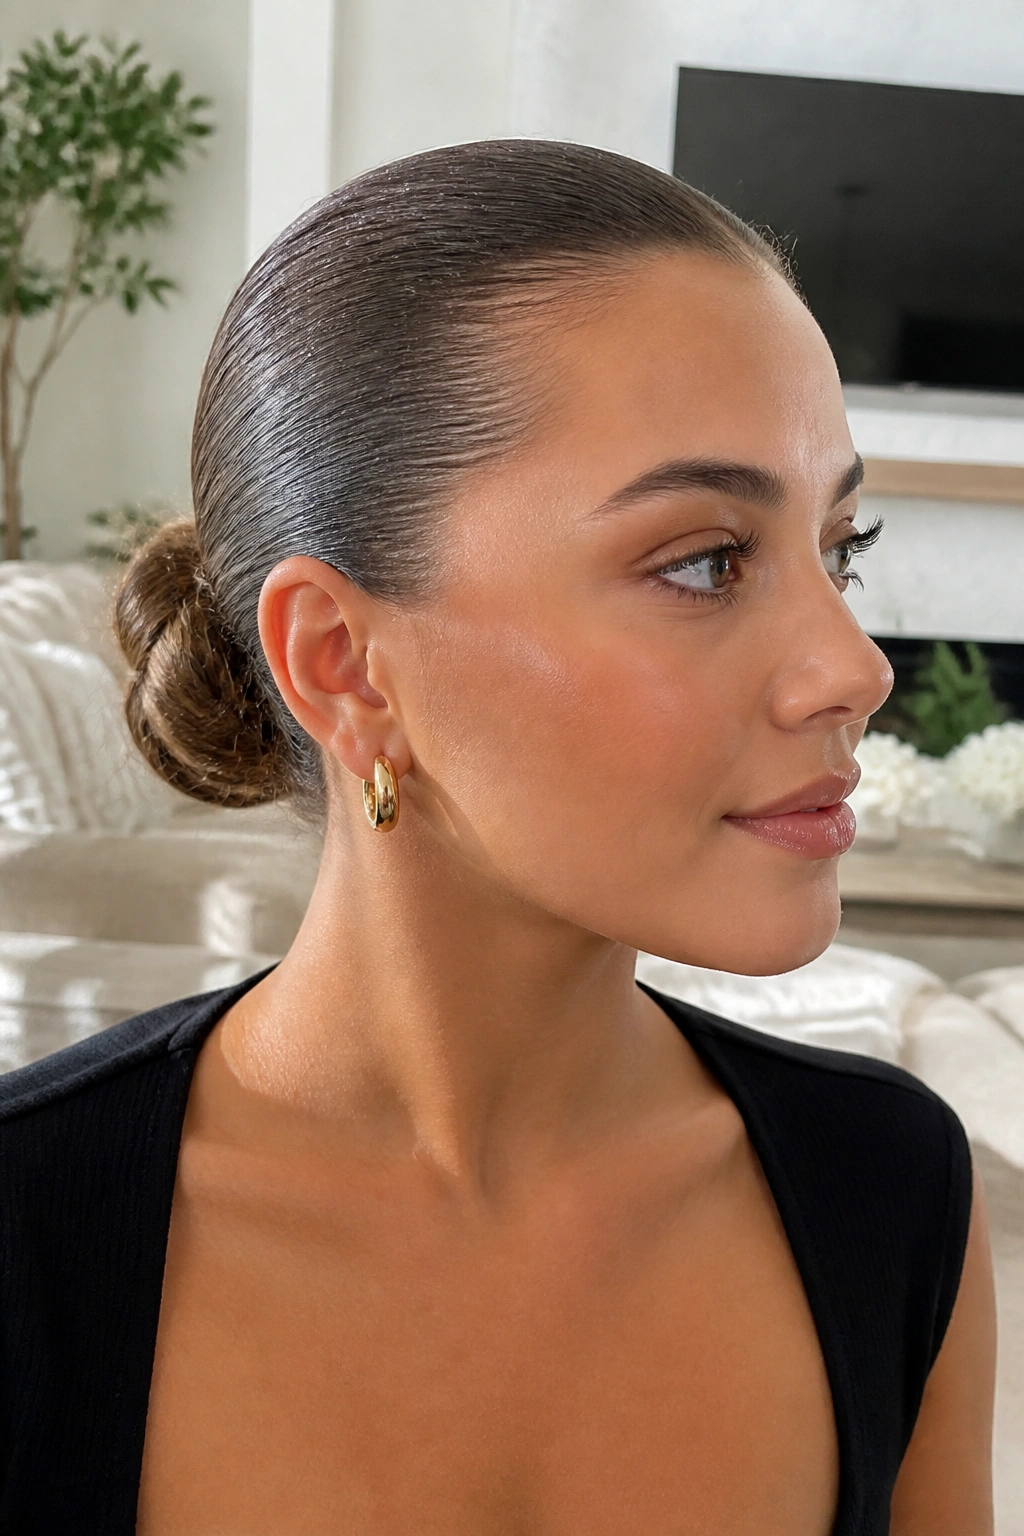
A slicked-back bun has a reputation for being severe, but it only looks harsh when the hairline is dragged too tight and the bun is wound like rope. Keep the front smooth and the bun soft, and the style turns elegant fast.
Start by smoothing gel or cream through the hairline and crown. Use a boar-bristle brush if you have one, because it lays the hair flat without leaving too many bumps. Gather the hair at mid-nape or slightly higher, twist it into a bun, and pin it in a few places instead of trying to lock it into one tight knot.
The best version leaves the bun itself a little round and relaxed. A tiny bit of shine on top is nice. A helmet-like finish is not. There’s a difference, and it matters.
22. Ponytail Braid

Take a plain ponytail, braid the tail, and you’ve already made the style look more considered. It’s that simple. The braid gives the ponytail texture, and the base keeps it secure through the day.
How to Make It Feel Fuller
Start by tying the ponytail a bit higher than you think you need. That keeps the braid from drooping. After braiding, tug the outer edges of each section outward, one pass at a time, until the braid looks thicker. Wrap a small strand around the elastic if you want the base to look cleaner.
- Use a firm elastic for the ponytail.
- Braid the length with even tension.
- Loosen the braid only after the end is secured.
- A little curl at the tail makes the style feel softer.
This is one of the easiest ways to make long hair look styled without changing the shape too much.
23. Mini Claw Clip Row

Mini claw clips are underrated. One clip can work, sure, but a row of them gives layered or medium-length hair a little structure without forcing it into one big shape.
Take small sections from the front or the top half of the head and secure each with a tiny clip, staggered slightly so they create a line across the back or side. It sounds playful, and it is, but it also solves a real problem: shorter layers that won’t stay pinned with one bobby pin.
The look works best when the clips are similar in color or finish. Matte neutrals keep things calm. Bright colors make the style feel more obvious. Neither is wrong; it depends on how much attention you want the clips to get. I like this style best on medium hair that needs a little help but not a full updo.
24. Fishtail Braid Over One Shoulder

A fishtail braid looks detailed even when the actual technique is pretty simple. That’s why it remains such a useful everyday style. It gives long hair texture without needing a lot of product or heat.
Split the hair into two sections, then take a thin piece from the outside of one section and cross it over to the other side. Keep repeating until you reach the end. The pieces should stay small. If they’re too big, the braid loses its pattern and starts looking like a loose twist instead.
This braid works best on hair with some grit. Second-day hair, dry shampoo, or a bit of mousse helps. Once it’s tied off, loosen the braid a little for width and drape it over one shoulder. It’s a small shift, but it softens the whole look.
25. Loose Top Knot with Tendrils

A top knot gets much better when it stops trying so hard. Keep it loose, keep it slightly messy, and leave two slim tendrils around the face. That’s the version people actually wear again.
Gather the hair at the crown, twist it into a knot, and secure it with pins or an elastic. Do not pull it so tight that the scalp feels stretched. The knot should sit high enough to clear your neck, but not so high that it starts looking severe. A few loose strands at the front soften the whole thing and make it feel less thrown together.
This style works on almost every texture because it does not need much precision. Fine hair benefits from dry shampoo first. Thick hair needs stronger pins and a bit more time. Either way, it’s one of those hairstyles that can move from coffee run to dinner without asking for a reset.
Final Thoughts
The best cute hairstyles for everyday wear are the ones you can redo without a mirror full of tools and a pep talk. If a style needs too much fuss, it will probably stay a “special occasion” style forever. The ones that stick are usually the ones with one good detail: a wrapped elastic, a loose braid, a neat clip, or a soft face-framing piece.
A small stash of basics goes a long way. Clear elastics, a few bobby pins, a claw clip that actually holds, and one decent texture spray can stretch your options fast. That’s not glamorous, but it’s useful, and useful hair is underrated.
Pick two or three looks from this list and make them your regulars. The more you repeat them, the faster they get, and the better they sit on your head the second and third time around.
