



Defined curls have a funny reputation. People talk about them like they’re fragile, high-maintenance, or somehow easier to admire than to wear, which is nonsense if you’ve ever seen a good curl pattern hit the light with a clean shape and a little gloss.
The real trick is not making curls behave. It’s giving them a shape they can hold: enough moisture, enough hold, and enough drying time so the curl clumps stay intact instead of puffing out into fuzzy little halos. Once that clicks, a lot of styling gets easier. Not effortless. Easier.
And yes, the same logic works on waves too. Looser patterns usually need lighter products and less manipulation, while tighter coils can handle stronger hold and more precise sectioning. Either way, the goal is the same: definition without stiffness. That’s the sweet spot people chase and then accidentally ruin by touching their hair too soon.
So let’s get into the styles that actually make curls look intentional, polished, and lived-in at the same time. Some are fast. Some take a little patience. A couple are the sort of thing you do when you want your hair to look like it had a good morning before you did.
1. Wash-and-Go With a Clean Side Part
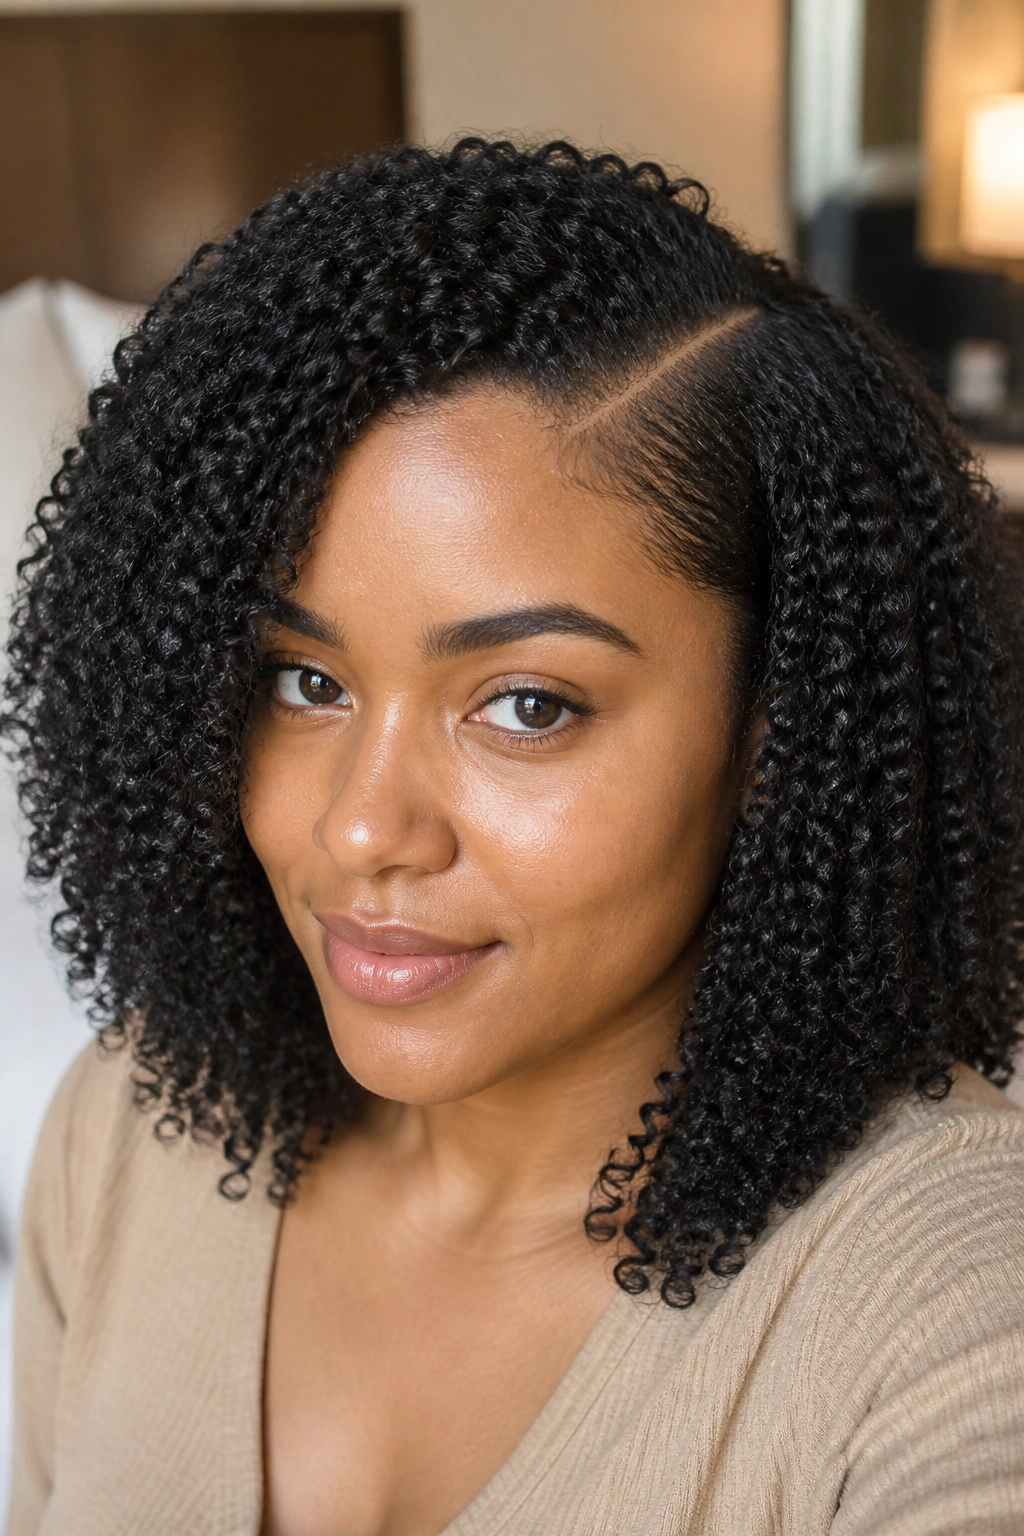
A wash-and-go with a clean side part is one of the easiest ways to make defined curls look deliberate instead of random. The part gives the whole style a shape, and the curl clumps fall in a direction that feels finished, even if you only used three products and a diffuser.
Why It Works
The side part changes the way the eye reads the hair. Instead of one big cloud, you get a clear line, a little lift at the crown, and curl groups that stack in a flattering way. That matters more than people think.
Use this style on soaking-wet hair. Smooth in a leave-in, rake through a curl cream, then add a strong-hold gel section by section. If your hair likes to separate, use a brush to encourage clumping before scrunching. If it likes to stick together too much, use your fingers and go slower.
- Make the part while the hair is wet, not half-dry.
- Work in 4 to 6 sections so the product sits evenly.
- Diffuse on low heat if you want more lift at the roots.
- Leave the cast alone until the hair is fully dry.
My one hard rule: do not fluff it too early. The cast is doing the work.
2. Twist-Out With Soft, Separated Ropes
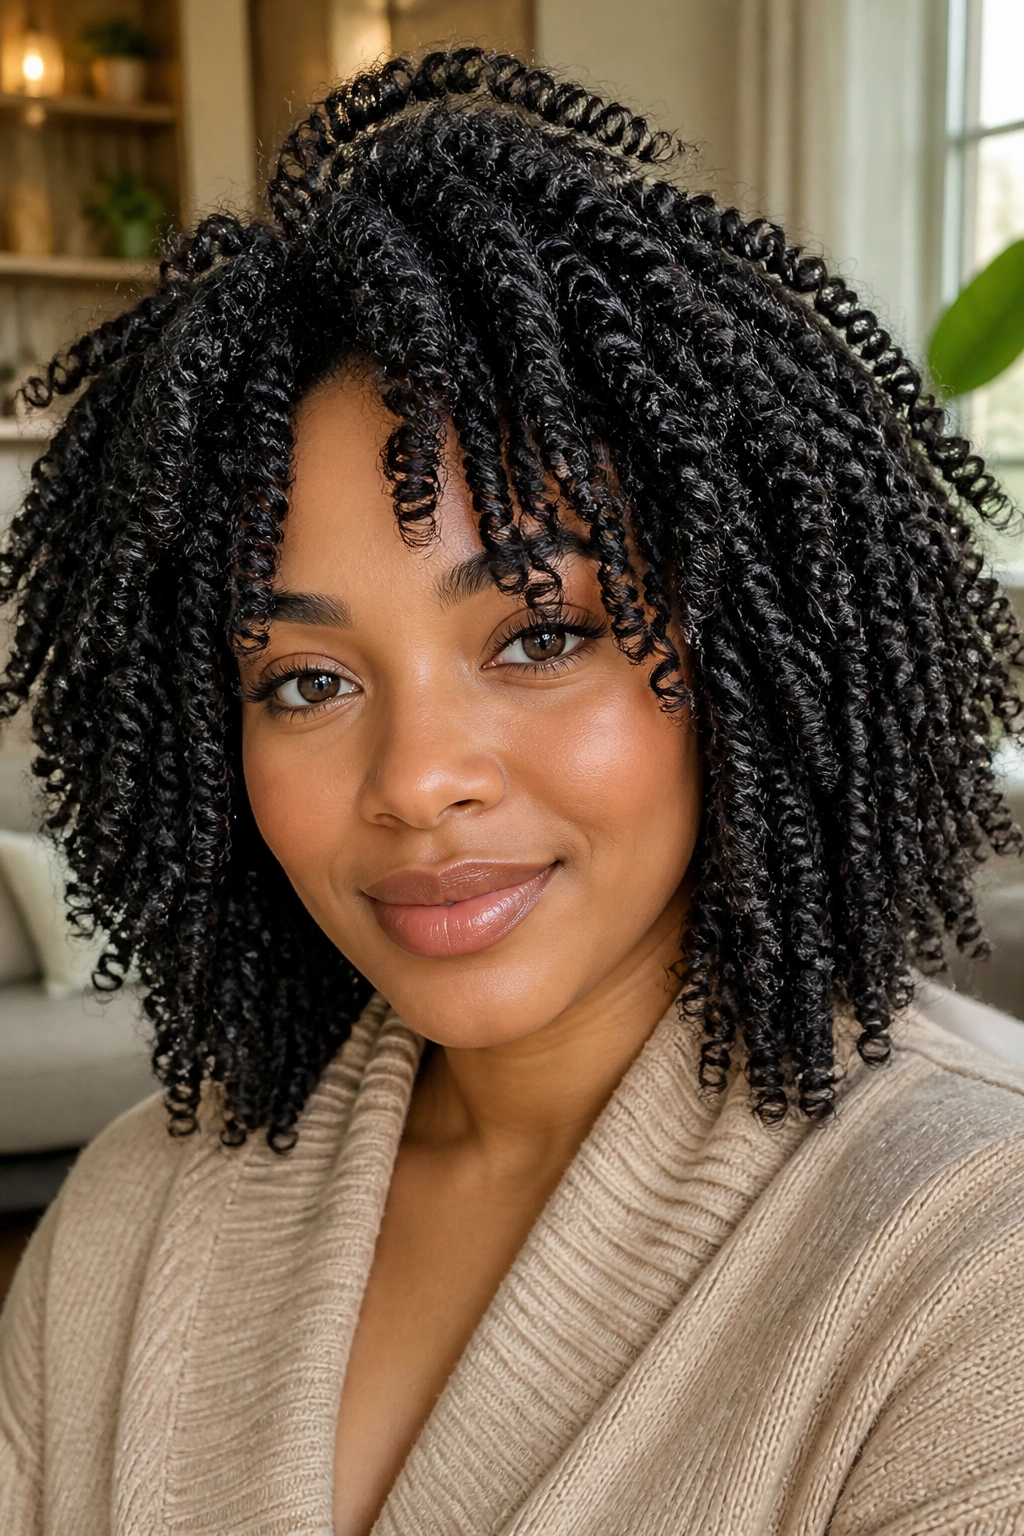
A twist-out is what I reach for when curls need more stretch and a little more body. It gives you definition with a softer edge than a gel-heavy wash-and-go, and the finished shape usually looks fuller at the ends than people expect.
Two-strand twists are the usual move, but the real difference is in the setup. Start on damp, not dripping, hair. Use a leave-in first, then a cream with slip, then a light gel or setting foam if your hair tends to frizz. If you twist on hair that is too wet, the inside can stay damp for ages, and that is how you wake up to limp sections that never fully set.
The separation matters too. Pull the twists apart only after they’re bone dry. Not “mostly dry.” Dry-dry. Then coat your fingers with a tiny bit of oil before separating so the strands slide apart without turning fuzzy. That tiny detail saves the whole style.
If you want the ends to look especially neat, twist each section down to the last inch and then coil the tail around your finger once before securing it. It sounds small. It isn’t.
3. Finger-Coiled Ends for Extra Shape
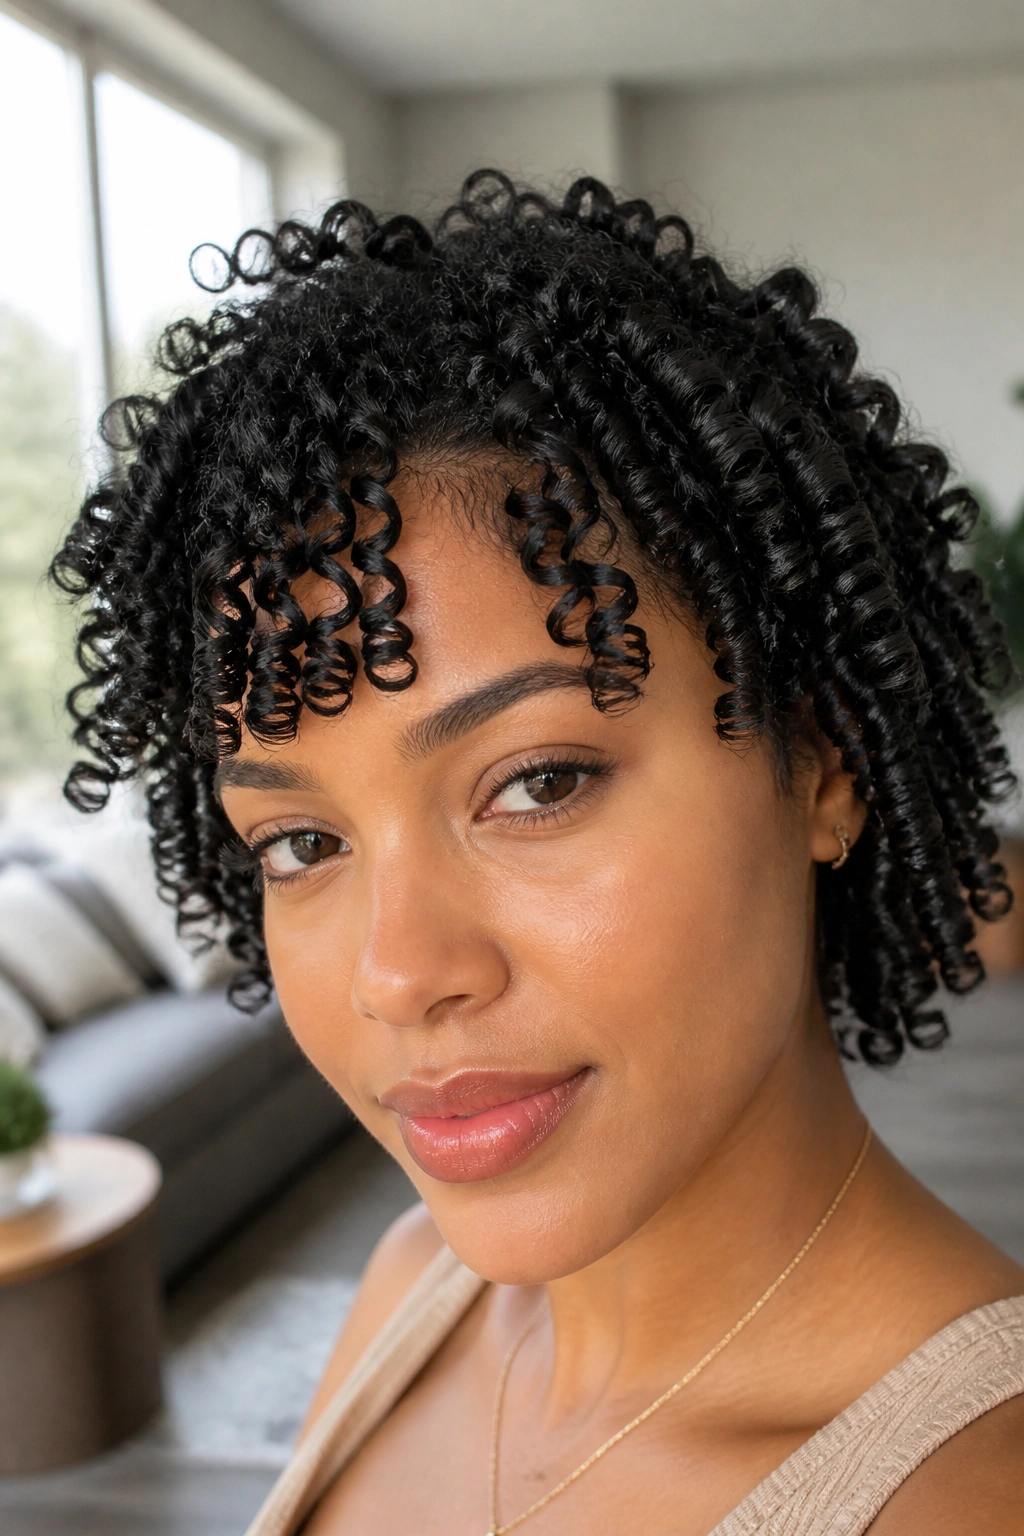
Why do finger coils make curls look so precise? Because they remove the guesswork from the ends, and ends are where a lot of curl styles fall apart. The root might look good, the middle might be fine, and then the tips stick out like they never got invited to the party.
How to Use It
Finger coils work beautifully on short curls, cropped cuts, bangs, or the pieces around your face. They also help when your texture is different at the front than it is in the back — which is common, by the way, and not a problem.
Take a tiny section, smooth in a little gel or curl jelly, and wrap it around your index finger until it springs into a coil. Let go gently. If it wants to unravel, add a touch more product and repeat. You do not need to coil the entire head unless you enjoy spending your evening on hair. A few strategic pieces can change the whole shape.
- Focus on the front, crown, and ends first.
- Use sections about the width of a pencil for tighter definition.
- Clip the coils in place for 10 to 15 minutes if they keep dropping.
- Dry them fully before separating or fluffing.
The style works best when you want the curls to look neat without feeling shellacked. Very neat. Very controlled. Still soft.
4. High Puff With Defined Front Pieces
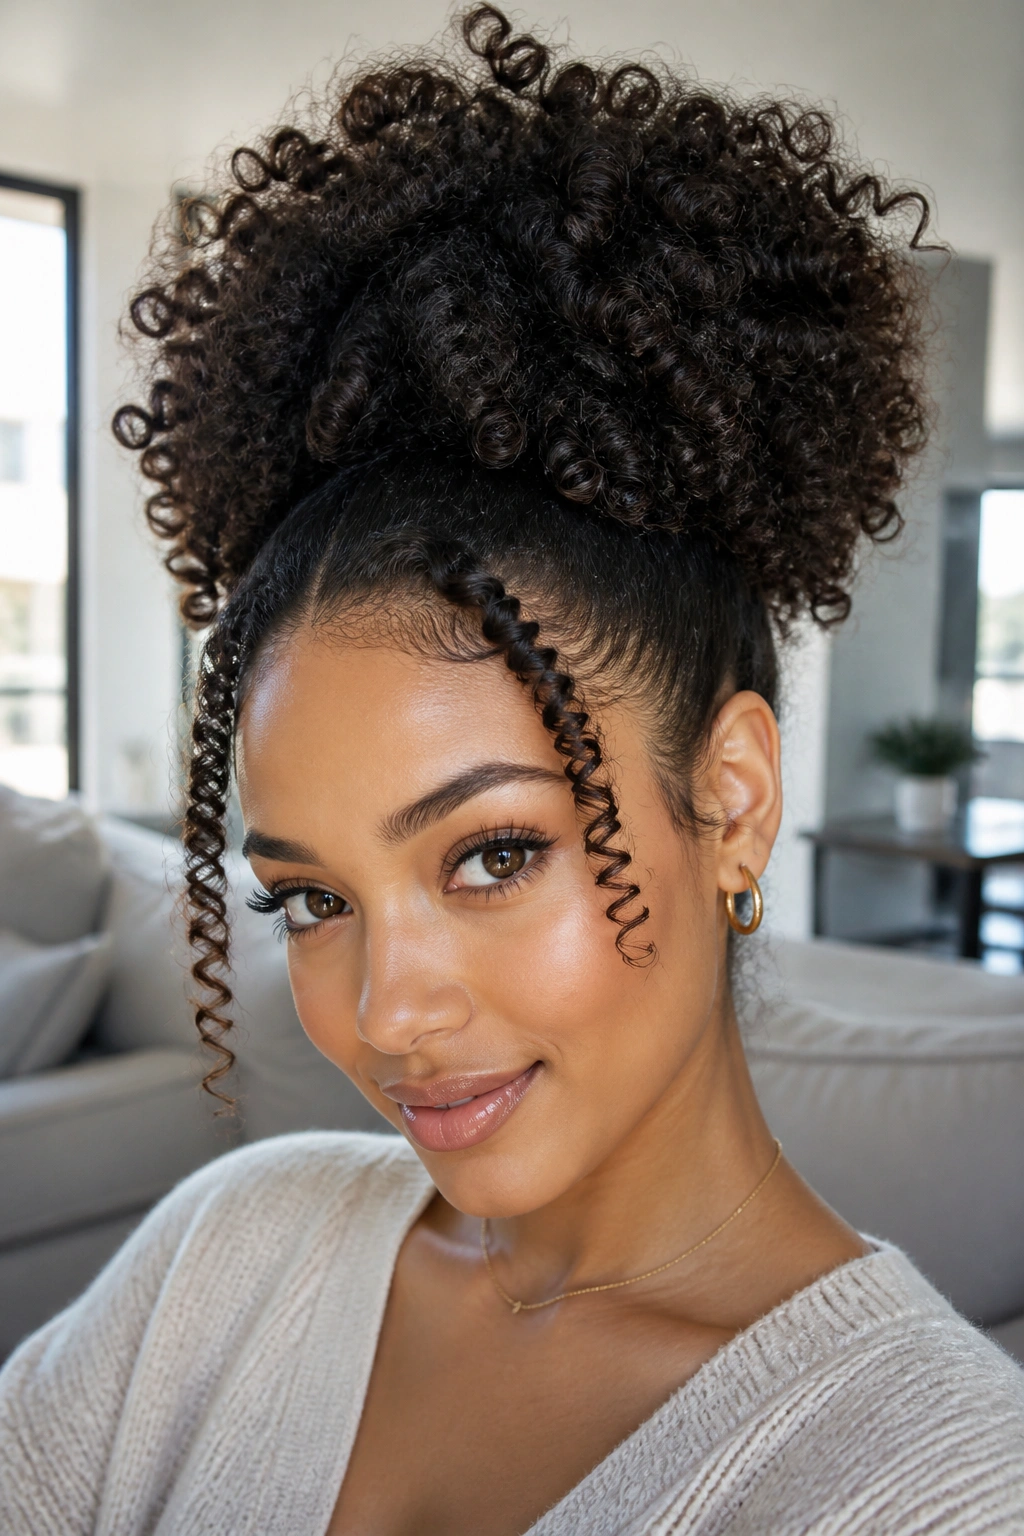
You know that day when the back of your hair is not cooperating, but the front still looks decent? That’s high-puff territory. It is one of the easiest ways to get height, shape, and curl definition without pretending the whole head needs a full reset.
The trick is balance. Smooth the sides and back with gel, a soft brush, and a satin scarf if you need a few minutes for the edges to settle. Leave the puff itself loose enough to show texture. Then pull out two or three face-framing curls at the front and define them with a little curl cream or gel on your fingertips.
Key Details That Matter
- Use a stretchy hair tie that won’t snag.
- Place the puff high enough to lift the face, but not so high that it feels off-balance.
- Keep the front pieces separate so they read as deliberate, not accidental.
- If the roots are frizzy, smooth only the perimeter; don’t chase every curl.
A high puff works on second-day curls, humid hair, and busy mornings when you want the style to look bigger than the effort behind it. Which, honestly, is the dream.
5. Curly Bob With Layered Ends
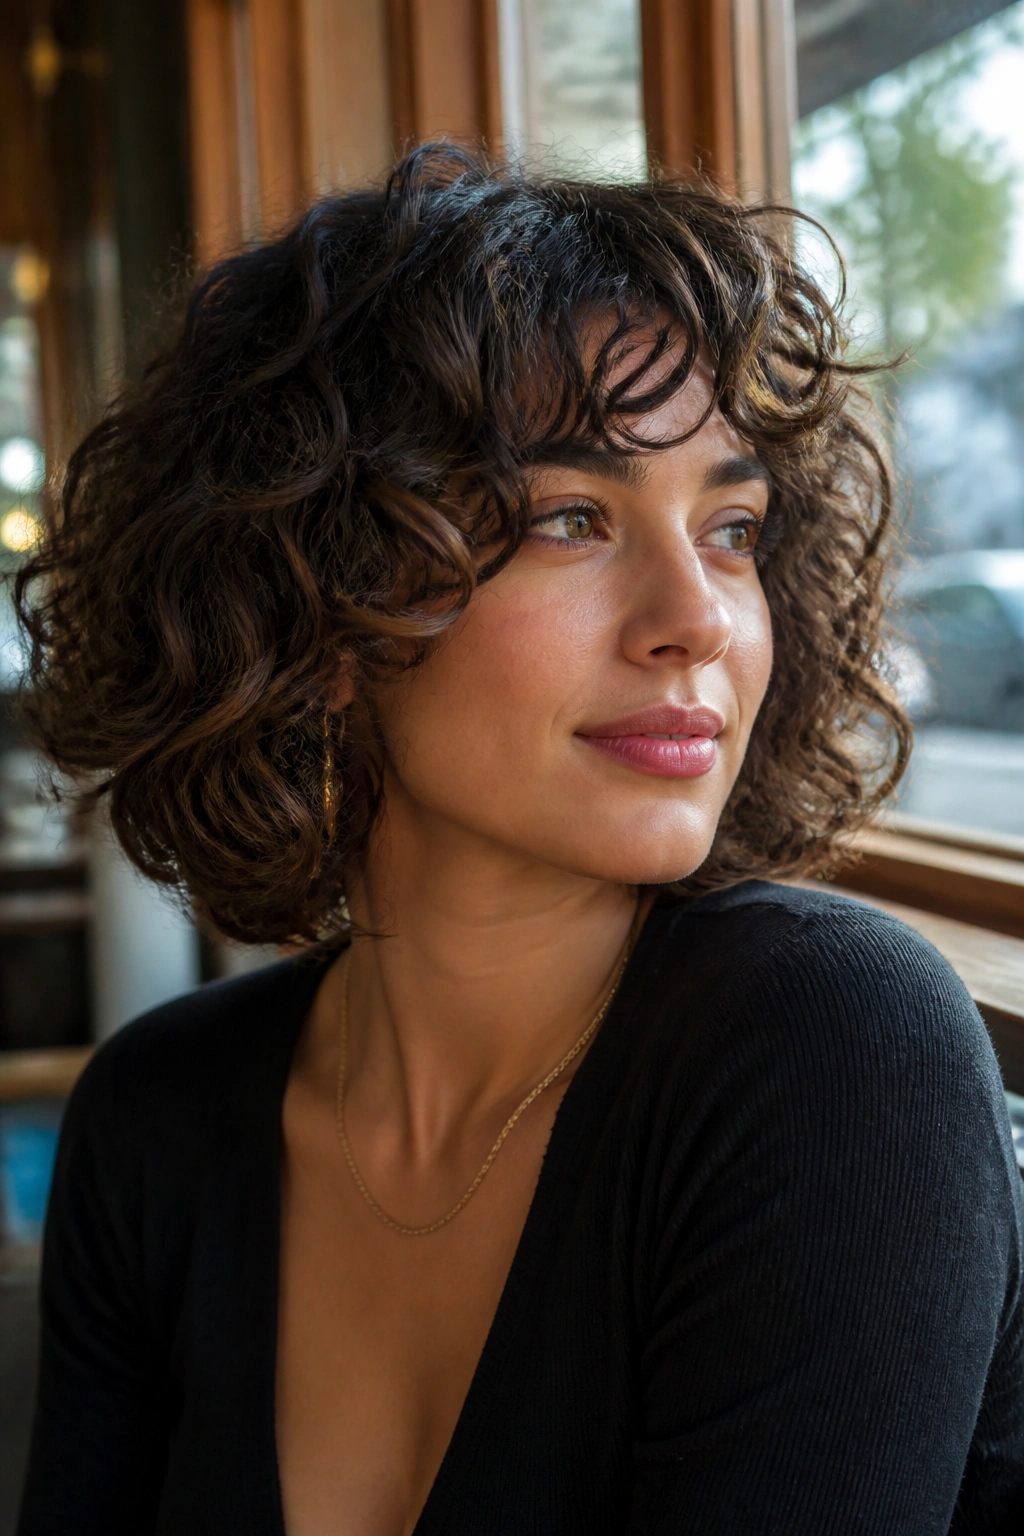
A curly bob lives or dies on the cut. That’s the blunt truth. Without layers, a bob can puff out at the sides and sit there looking boxy. With the right layering, the curls stack in a soft curve and the shape opens up around the jaw instead of swallowing it.
The style looks especially good when the ends are dense enough to hold their shape but not so heavy that they drag the whole cut down. A light mousse or a gel-cream combo helps, but I would never drown a bob in product. Too much weight at this length makes the curls collapse before lunch, and then you’re back to fighting your own hair.
A diffuser helps here, especially if you flip the head side to side while drying. That gives the roots some movement and keeps the silhouette from sticking to the scalp. Air-drying can work too, but only if your hair already has a decent curl pattern and you don’t mind waiting.
Nobody wants helmet hair.
The sweetest version of this look is the one where the curl clumps are visible, the edges are soft, and the bob sits with a little swing when you turn your head.
6. Half-Up Claw Clip With Loose Crown Curls

Compared with a full ponytail, a half-up claw clip keeps more of the curl pattern visible. That sounds obvious until you try it and realize how much a clip can do when you place it high enough to lift the crown and low enough to leave the length alone.
This style is one of my favorites for thick hair. A full pullback can flatten the top and make the ends lose their shape, but a half-up clip gives you a neat silhouette and still lets the lower curls do their thing. If you have shorter layers around the face, even better. They drop out softly and make the whole look feel less stiff.
A medium or large claw clip works best. Matte clips hold better than smooth plastic ones that slide around. Gather the top half, twist once or twice, and clip it so the curl ends spill over the top. Leave a few crown curls loose if your hair likes movement. That little mess keeps the style from looking overdone.
Best of all, it takes about a minute. Sometimes that is the whole reason to wear it.
7. Braid-Out With a Soft Middle Part

A braid-out gives you a different kind of definition: less springy than finger coils, more uniform than a wash-and-go. It’s a good choice when you want the curl pattern to look organized but not too rigid, especially on hair that needs a bit of stretch.
Start with damp hair and make a soft middle part if you want the style to feel symmetrical. The braid size matters. Smaller braids create tighter texture; larger ones give you a looser wave with more volume. If your hair is dense, you can break the head into 8 to 10 braids and still get a full finish. Fewer than that, and the result can get bulky fast.
What to Watch For
- Do not braid wet hair so tightly that the inside stays damp.
- Smooth the ends before sealing them, or they’ll fray when you take the braids down.
- Use a touch of setting foam if your texture is prone to puffing up.
- Separate only after complete drying, then fluff the roots with fingertips.
The braid-out shines when you want definition with a bit of softness at the edges. It is not the fastest style, but it holds shape well and gives you that “my curls are behaving, mostly” look.
8. Diffused Side-Swept Volume
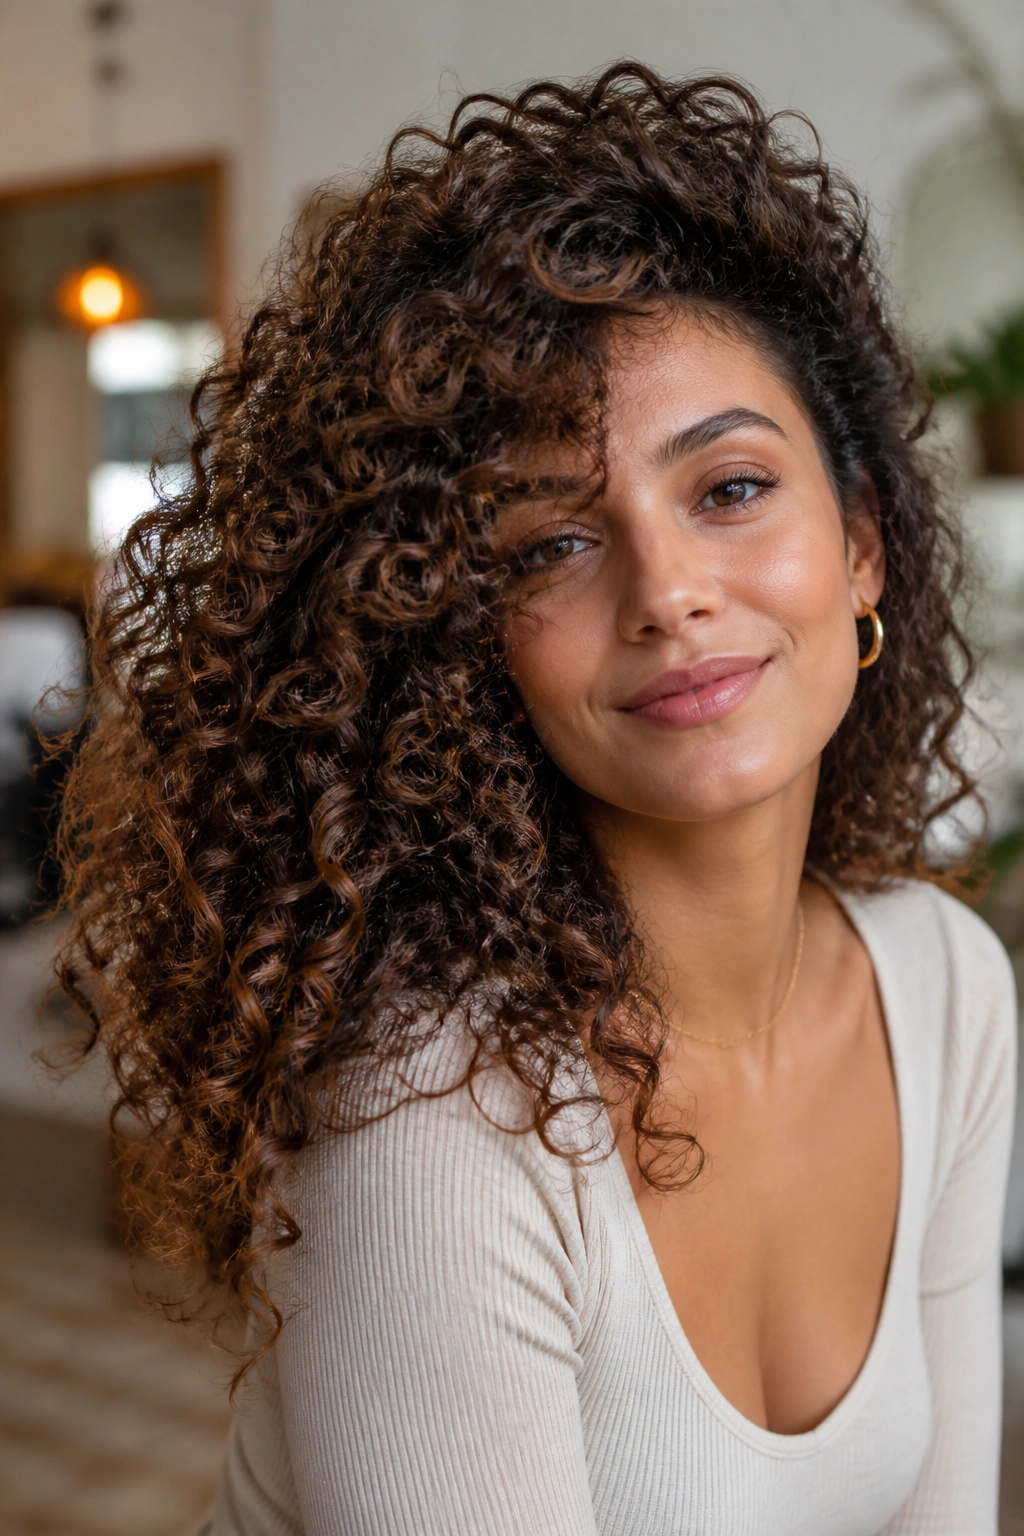
A side-swept set can make curls look fuller than a perfectly centered part ever will. It shifts the weight, gives one side more lift, and creates that slightly dramatic shape that makes the hair look bigger without looking fried or overworked.
The diffuser is doing half the work here. Use it on low heat and low speed, and hover around the roots first so the pattern starts to set before the ends get too dry. If you push the dryer directly into the curls, you can blow the clumps apart. If you let the diffuser sit too long in one place, you can create weird flat spots. There’s a middle ground. Hair always wants a middle ground.
Move the part far to one side while the hair is still damp. Then clip the roots at the heavy side for a few minutes if they collapse. That extra lift changes the whole shape. Side-swept volume works especially well for looser curls and waves because it helps the pattern look intentional instead of vague.
It also photographs like a dream, though that is not the reason to wear it. The reason is simpler: it looks good walking down the street.
9. Space Buns With Spiral Tendrils
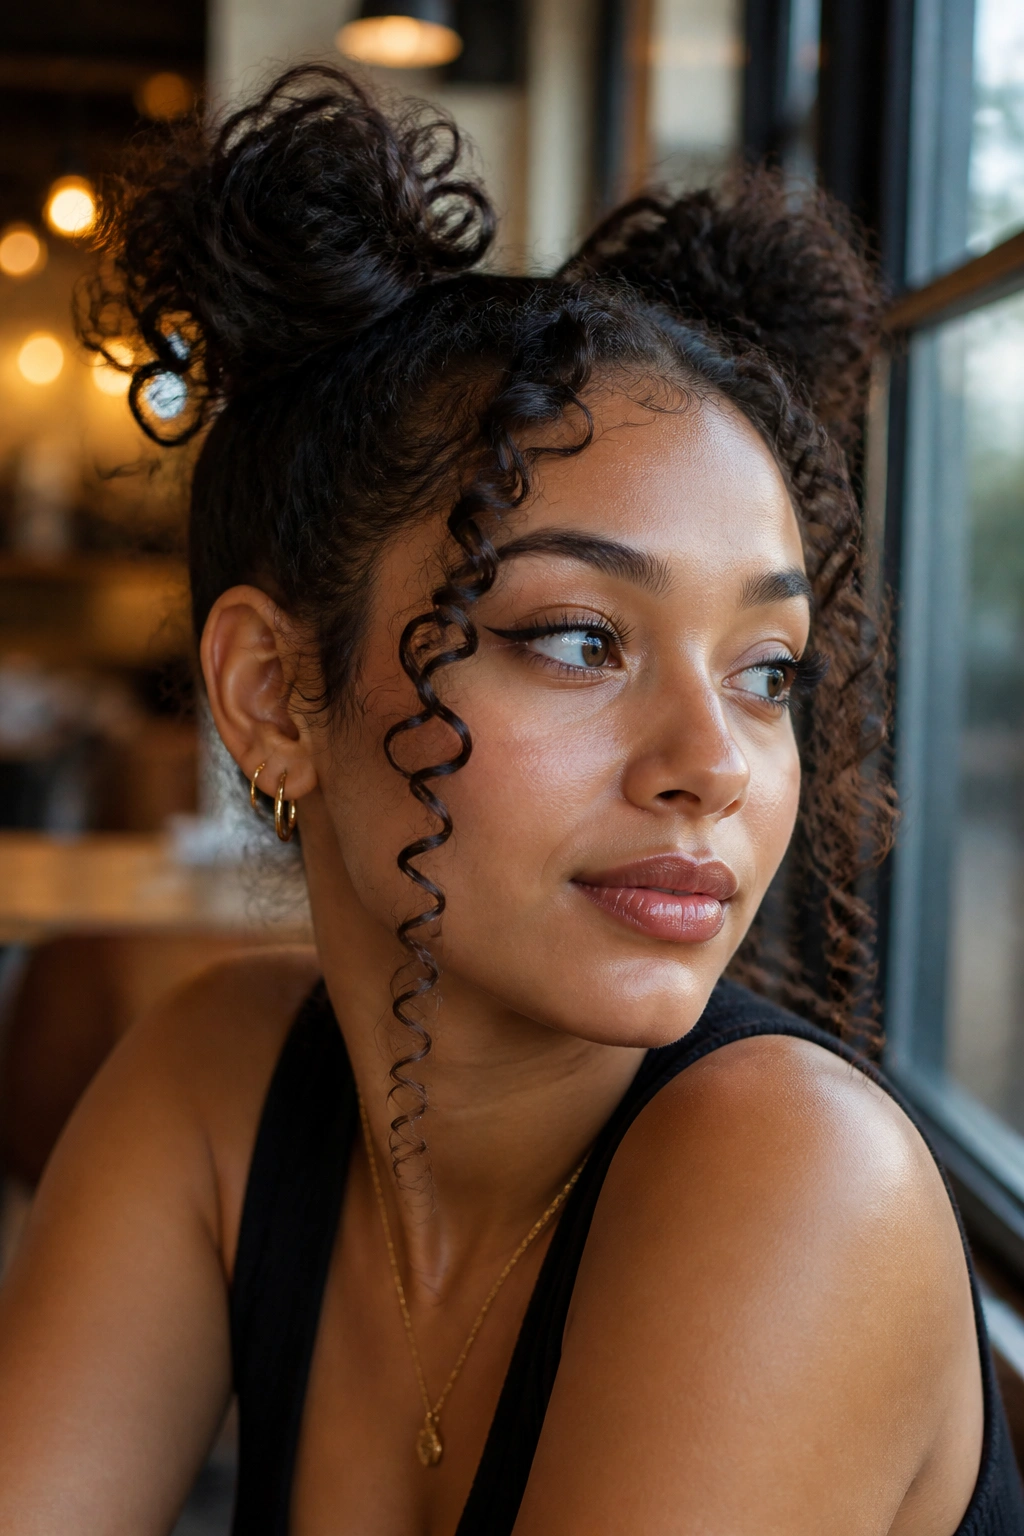
Space buns are not just for weekends and festivals. Done with a little care, they can look polished enough for an actual outing, and the defined tendrils in front keep them from feeling childish.
The version I like keeps the buns high and slightly messy, while the front curls stay separate and glossy. Smooth the hair at the root, part it cleanly down the middle, and pull each side into a small bun. Don’t yank the hair tight enough to flatten the pattern completely. Leave a bit of texture in the crown so the style still reads like curls, not a helmet pretending to be a hairstyle.
- Define the front pieces with a fingertip of gel or cream.
- Wrap the bun ends around themselves instead of tucking them into a hard knot.
- Keep the buns even, but not identical to the millimeter.
- If you have layers, let some shorter curls fall out on purpose.
The tendrils matter more than people think. They soften the look and make the buns feel connected to the rest of the curl pattern, which is what keeps the style from looking too severe.
10. Curly Shag With Curtain Bangs
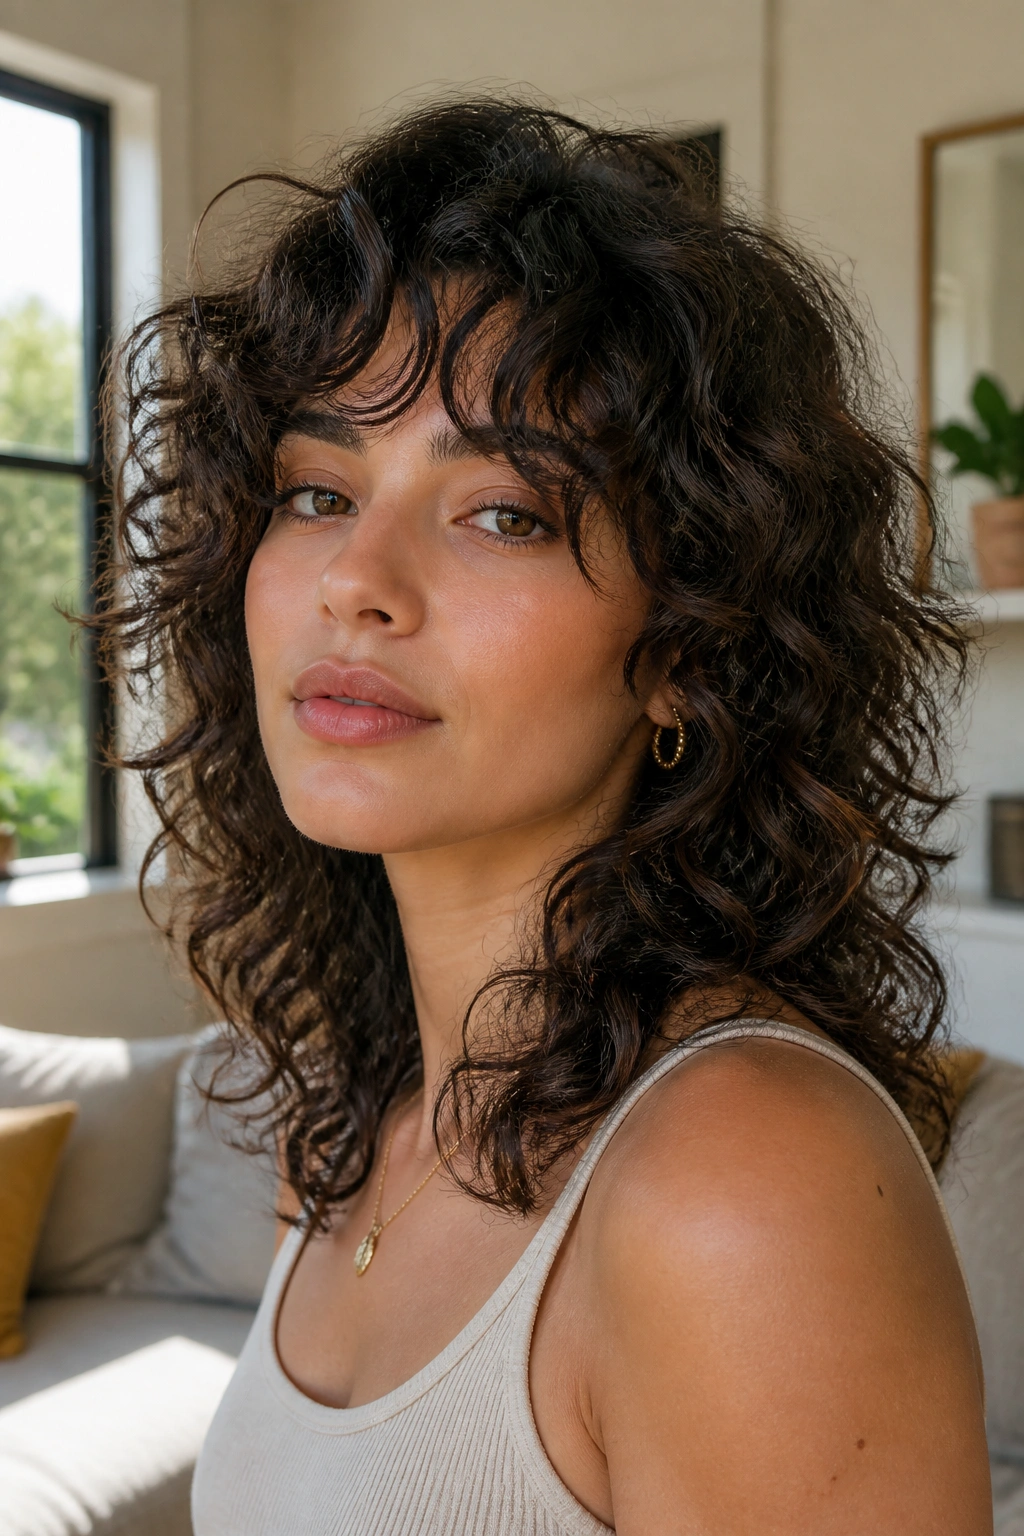
A curly shag is one of those cuts that looks casual until you study it for a second and realize how much the shape is doing. The layers remove bulk where curls tend to stack, while the curtain bangs frame the face and keep the top from sitting flat.
This style is a good fit for people who want movement without sacrificing definition. The bangs should be styled with less product than the rest of the hair, or they can turn stringy and heavy fast. I like to use a small amount of leave-in and then a light gel on the fringe only, followed by a gentle scrunch. The rest of the hair can take a creamier product, especially if the curl pattern is looser at the ends.
A shag also works well with diffusing because the layers lift in different directions. That gives you a lived-in shape that still shows the curl pattern instead of hiding it. Air-drying can work, but it tends to flatten the top unless your haircut already has a lot of internal shape.
This is not a timid style. It has personality. If your curls like volume and you do not mind a little movement around the face, it’s hard to beat.
11. Sleek Low Ponytail With Curly Ends

A low ponytail is sharper than a bun when you want the curl ends to stay visible. That’s the whole appeal. The crown looks smooth, the nape sits clean, and the curls at the tail give the style its texture instead of hiding it under a knot.
The neatest version starts with a soft brush at the top and sides, plus a small amount of gel or edge control where the hair tends to lift. Keep the pony low and secure it with a satin scrunchie or a covered elastic, then let the ends fall naturally or define them with a quick pass of curl cream. If you want more polish, wrap a small strand around the base of the ponytail to hide the tie.
This style is especially useful when your curls are a little frizzy but the ends still look good. You get the clean shape where you need it and the texture where it matters. It’s also one of the better choices for a dressier day, because it reads neat without flattening the whole head.
If a bun feels too strict, this is the better answer.
12. Flat-Twist Crown With Loose Back Curls

What if you want the front neat but refuse to flatten the rest? That’s where a flat-twist crown earns its keep. It keeps the hairline tidy, pulls the face open, and leaves the back free to show off the curl pattern.
How to Build It
Take two front sections and flat-twist them backward along the hairline, then pin them behind the crown. You can do this on both sides so they meet in the center, or sweep everything to one side if you want a softer shape. Either way, keep the twists snug enough to stay put but not so tight that they dent the hair.
The loose curls in back are the point. They give the style movement and stop the front from feeling too formal. A little mousse at the roots and a touch of gel on the twists usually does the job. If your hair is fine, don’t overload the crown with products or the twist can slide down by lunchtime.
This is a smart choice for weddings, interviews, or any day when you want your curls to look controlled without looking forced. It has structure, but it still feels like curly hair.
13. Mini Pineapple With Laid Edges
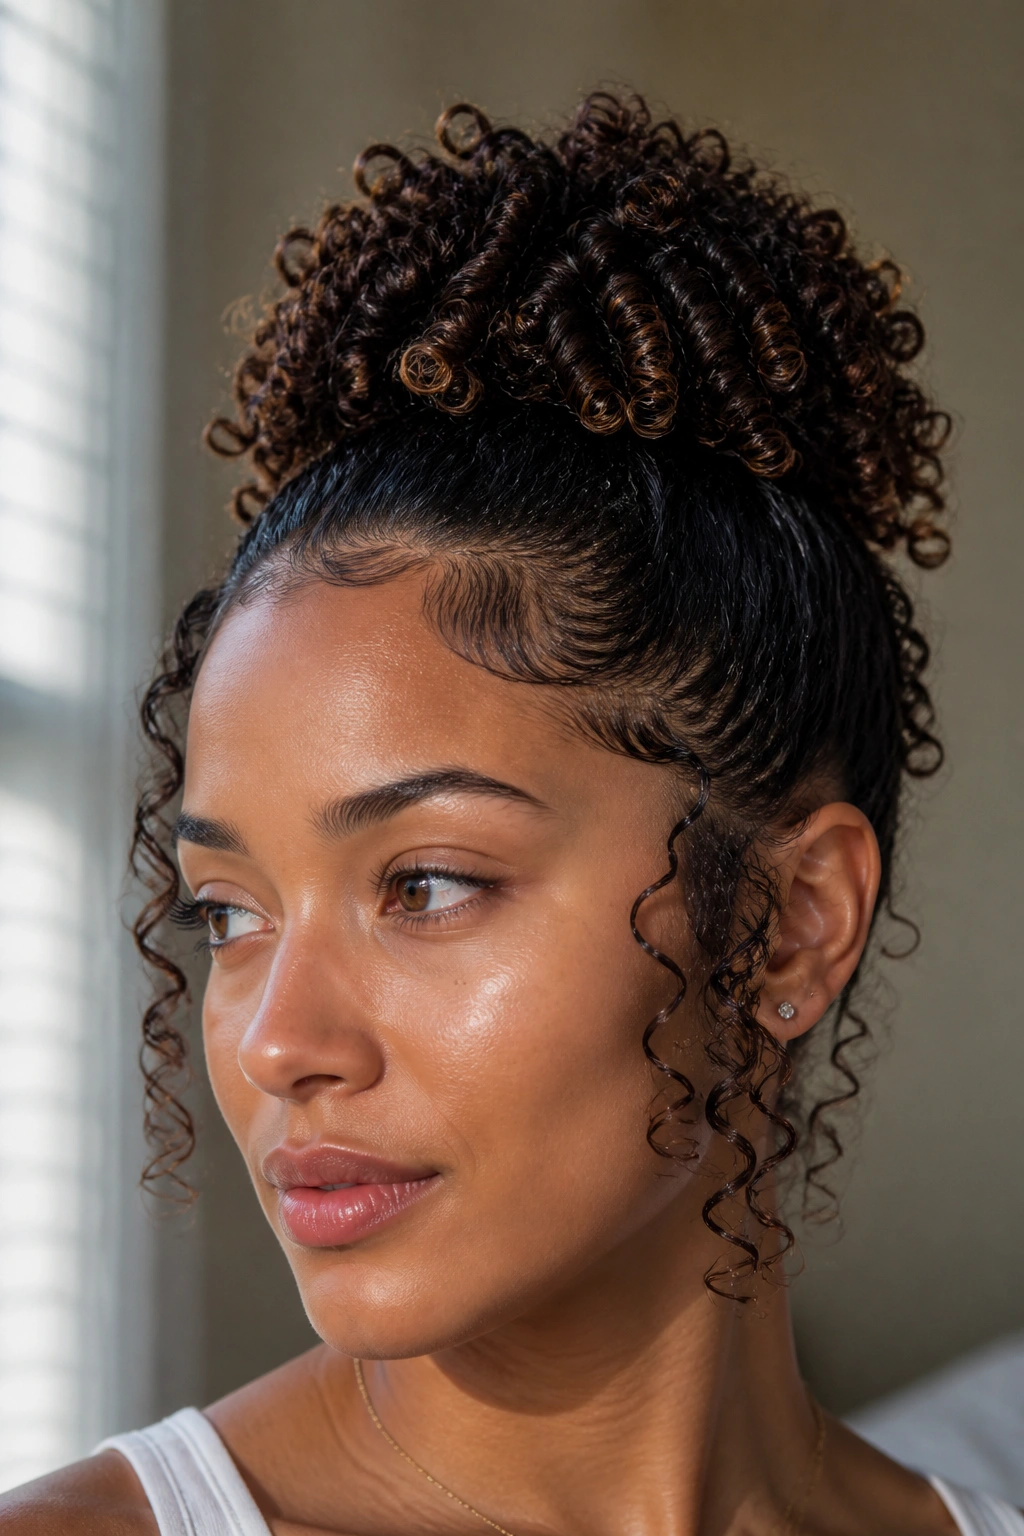
A pineapple is not sleep hair. Done neatly, it’s one of the quickest daytime styles for keeping curl definition intact while showing off the shape at the crown. A mini version sits high, keeps the length from getting crushed, and leaves the rest of the curls hanging with enough movement to look deliberate.
The shape works best when the ponytail is gathered loosely enough that the hair still has bounce. Too tight, and the crown goes flat. Too loose, and the style falls apart. Pull the hair to the highest point you can reach comfortably, secure it with a soft tie, then fan the curls over the top so the ends sit like a little waterfall.
- Smooth only the perimeter if you need a cleaner finish.
- Leave a few front curls out to soften the hairline.
- Use a satin scrunchie so the base doesn’t leave dents.
- Refresh the exposed curls with a mist of water and a dab of leave-in if they look thirsty.
This is a strong option for second- or third-day hair because it protects the curl pattern while keeping the style playful. It also saves you from having to restyle the whole head, which is the hidden appeal, really.
14. Bantu Knot-Out With Defined Ends

A Bantu knot-out gives you springy, rope-like texture that lands somewhere between a curl and a wave. The definition comes from how compact the knots are and how carefully you take them down later. Rush either part, and the finish gets fuzzy fast.
Start with damp hair and divide it into even sections. Twist each section until it coils on itself, then wrap the twist into a small knot and secure the end under the base. The knots need to dry all the way through. Not mostly. Through. If the centers stay damp, the pattern will collapse when you unravel them.
A Few Practical Details
- Use smaller sections for tighter definition.
- Keep product light near the roots to avoid buildup.
- Unravel with oiled fingertips so the hair slides apart cleanly.
- Separate each knot only once or twice for shape, then stop.
The beauty of this style is the texture variation. The roots stay more stretched, while the ends keep that springy pattern that looks a little sculpted. It is a bit more time-consuming than a wash-and-go, but the finish has a richness that makes the extra effort worth it on days when you want something different.
15. Low Bun With Face-Framing Ringlets
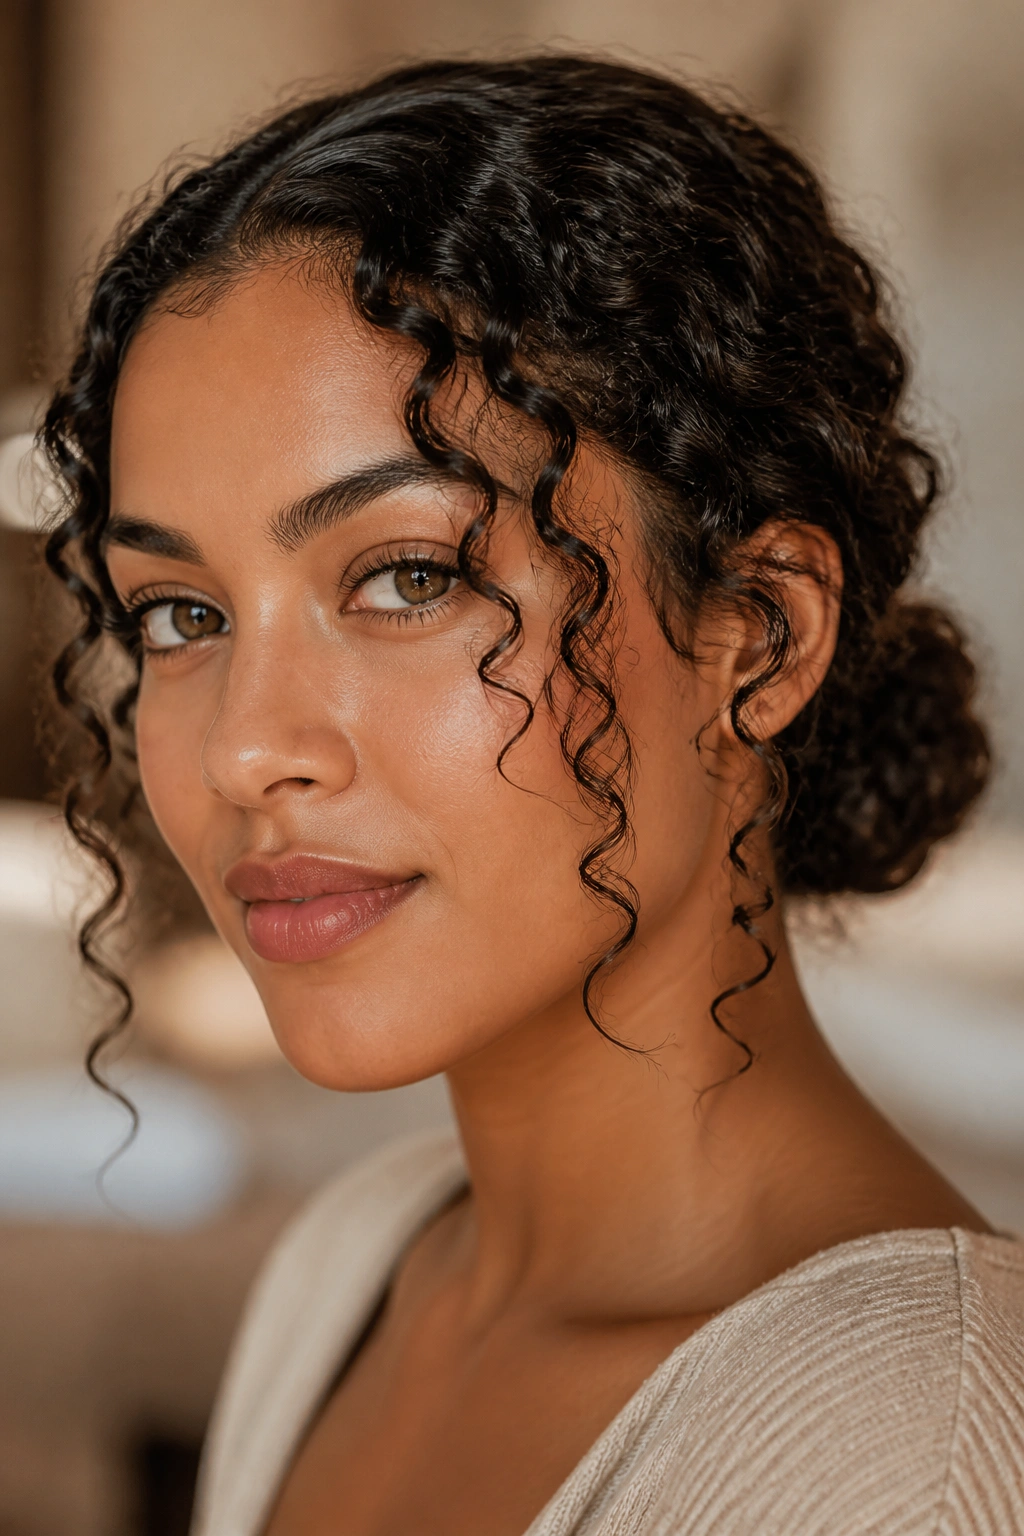
A low bun can look severe if you pull every curl back and pin it flat. Give it a couple of ringlets at the temples, though, and the whole thing changes. The face softens, the bun feels lighter, and the curl pattern stays visible where it counts.
I like this style for evenings, interviews, and any day when you want the hair out of the way without losing all personality. Smooth the crown gently, gather the length low at the nape, and twist it into a loose bun instead of a tight knot. Leave a few curls out around the face, then define those pieces with a small amount of cream or gel on your fingertips. If the bun itself needs more structure, pin it in place with bobby pins crossed in an X.
The best low bun is the one that still looks like curly hair after you’ve put it up. A satin scarf for 10 minutes can help the crown settle, and a quick mist of water on the front pieces can bring the ringlets back if they start to frizz.
When you want the curl pattern to do the talking, this is the one that gets the job done without trying too hard.
