



Chunky highlights can look expensive on brown hair, or they can look like somebody rushed the foil and called it a day. The difference usually comes down to two things: where the color sits, and how warm the caramel actually is. On the right brunette base, caramel chunky highlights on brown hair add movement, brighten the face, and keep the hair from looking flat under indoor light.
Chunky does not mean stripy. A good chunky highlight is a deliberate ribbon, not a random light streak, and the spacing matters just as much as the thickness. If the pieces are too close together, the hair starts to lose depth. If they’re too far apart, the color looks like a set of isolated marks.
Caramel is the sweet spot for brown hair because it still belongs to the brunette family. It can read golden, toffee, beige, or a little coppery, and that small shift changes the whole mood. On a dark brown base, colorists usually lift only enough to reach a warm caramel level rather than pushing all the way to blonde, which keeps the hair healthier-looking and the final result richer.
One sentence can make or break the look: placement does the work.
The 15 ideas below lean into different textures, parts, lengths, and undertones, because the same caramel ribbon does not flatter every brown head of hair in the same way. A wavy chestnut lob wants something different from a straight espresso bob. That’s the fun part.
1. Face-Framing Caramel Money Pieces
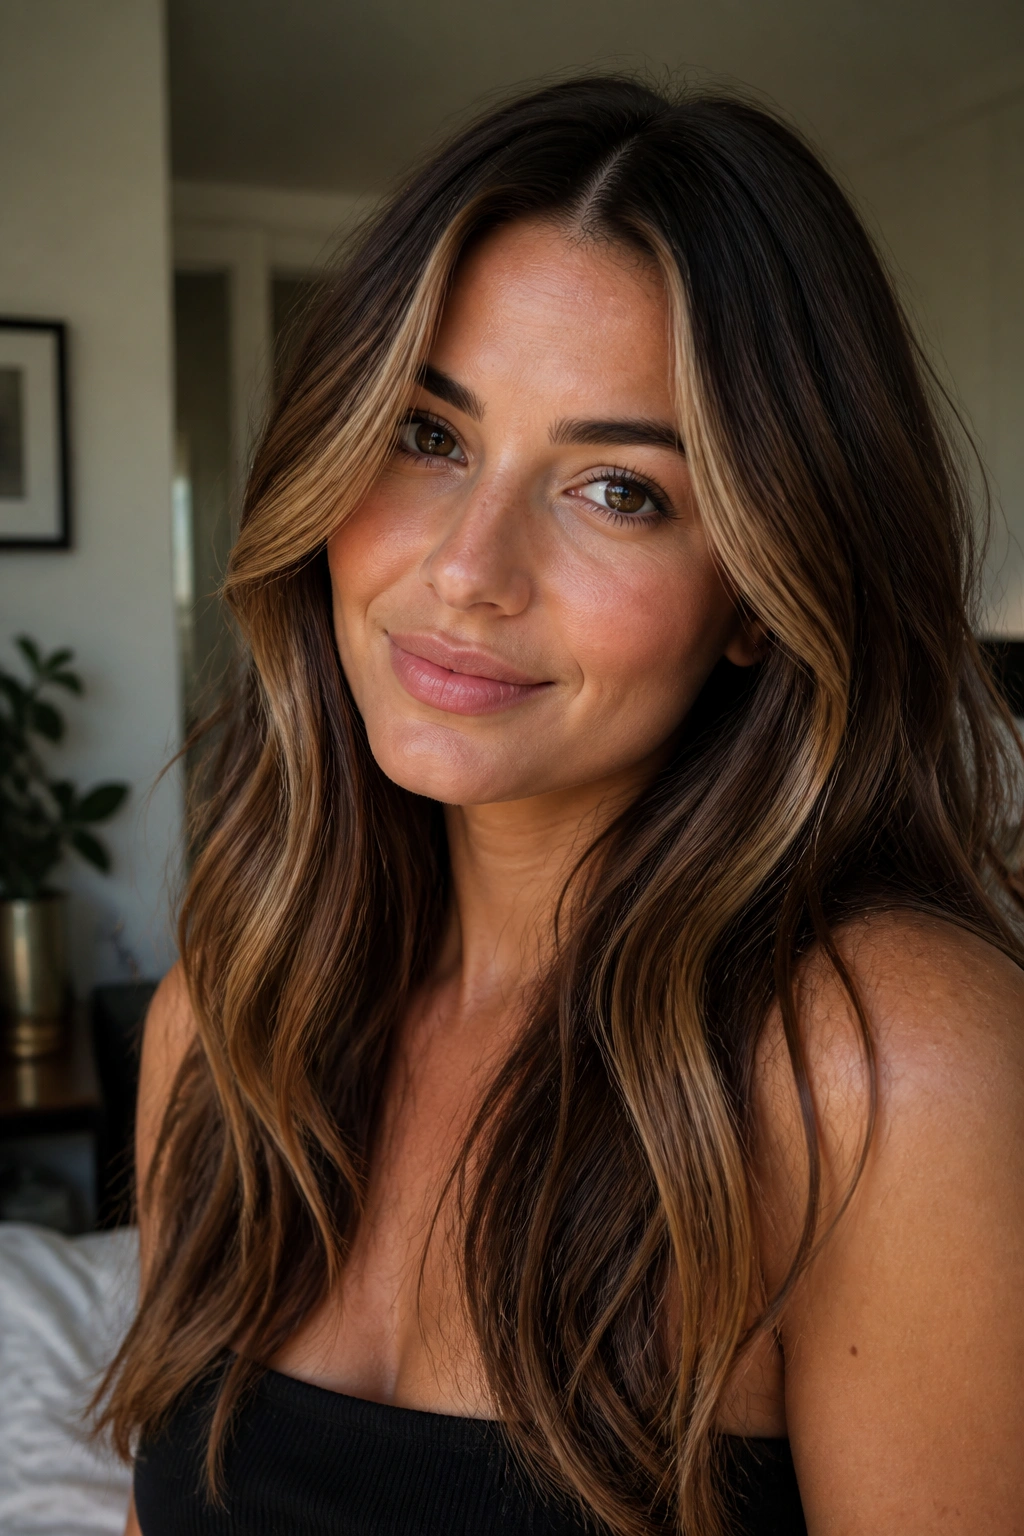
If you want the fastest visible change, the face frame is where the money should go. A chunky caramel money piece brightens brown hair without requiring the whole head to go lighter, and that matters when you want impact but still want your brunette base to stay visible.
The trick is thickness. Thin face-framing streaks can disappear once your hair falls into place, but a wider caramel panel around the hairline catches light every time you turn your head. On medium to deep brown hair, this kind of highlight can lift the whole face in a way that feels cleaner than adding brightness all over.
Why It Works
The best money pieces are not randomly placed on top of the front section. They start close enough to the face to show right away, then soften as they move back into the side layers. That keeps the color from looking like two disconnected stripes.
- Ask for two front panels about 1 to 1.5 inches wide.
- Keep the lift about 2 to 3 levels lighter than your base brown.
- Leave a 1/4- to 1/2-inch root shadow if you want an easier grow-out.
- Tone toward golden beige or soft toffee, not pale yellow.
One good money piece can do more than six scattered highlights. If you wear your hair parted in the middle, this is a strong place to start.
2. Thick Ribbon Highlights Through the Crown
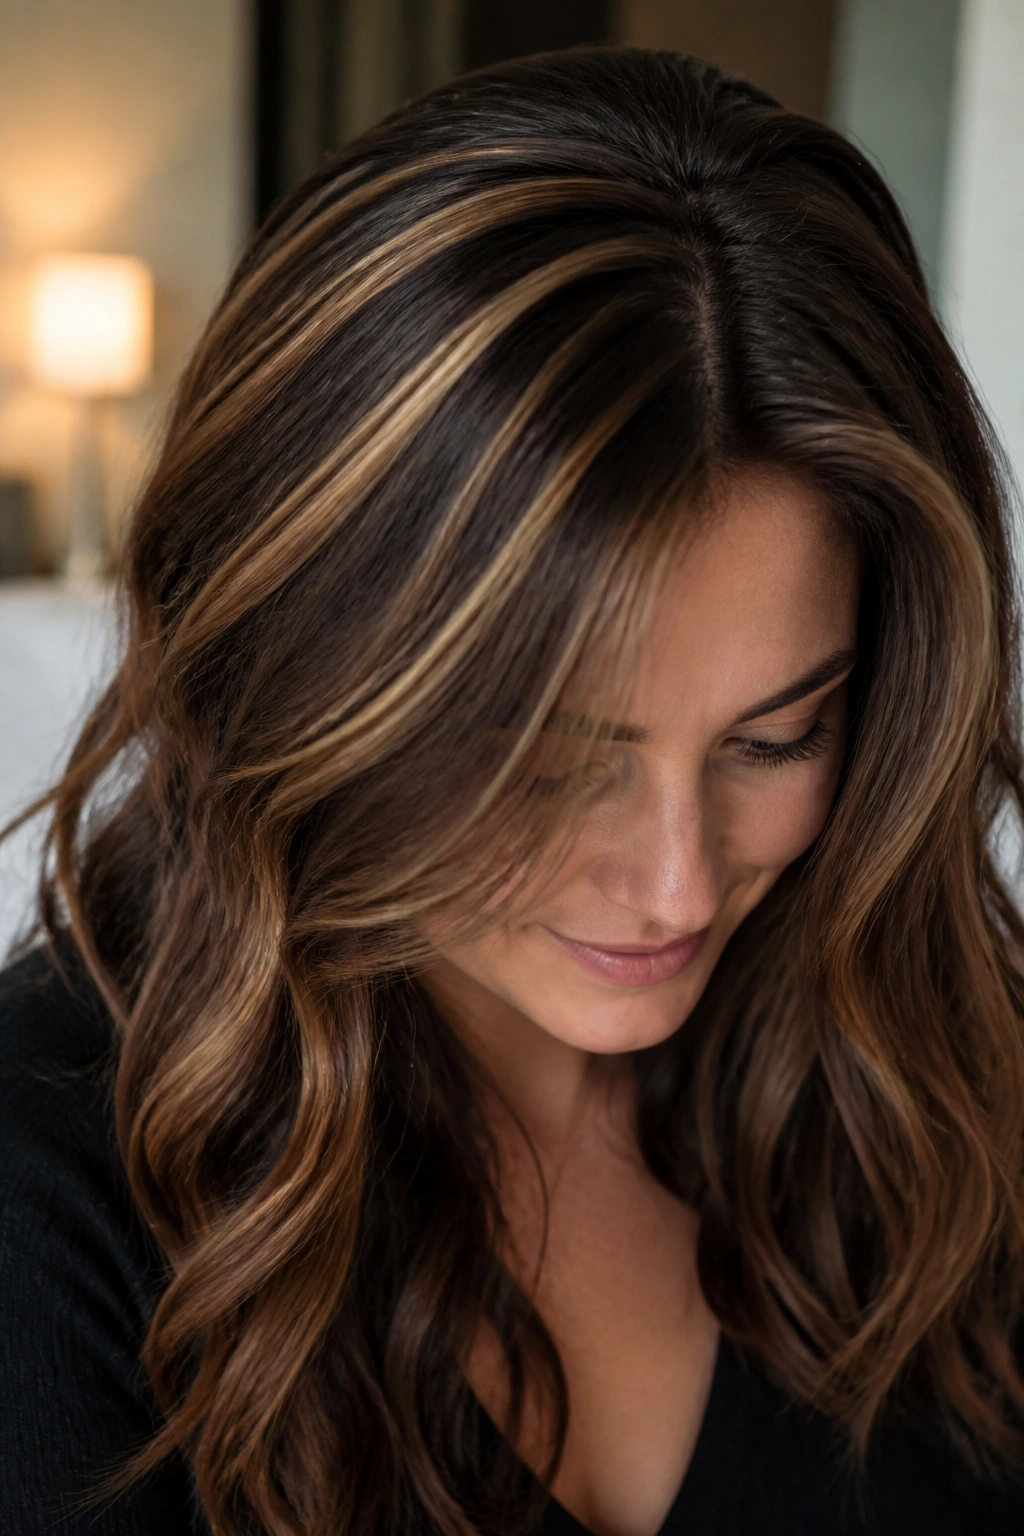
Chunky does not mean stripey. When the ribbons sit through the crown with enough space between them, brown hair gets lift and movement without losing its shape.
This style works especially well on dense hair because the crown is where brunette hair often feels heaviest. A few wide caramel ribbons break up that block of color and create the illusion of volume, even when the haircut itself is simple. On straighter textures, the highlights show as clean bands. On hair with a little bend, they read softer and more dimensional.
Placement matters more than people think. If the ribbons are packed too closely, the top starts to look busy. If they’re spaced with a little brunette left between them, each caramel piece can breathe.
That spacing matters.
Ask your colorist for broad slices at the crown and upper sides, then let the lower layers stay darker. The contrast is what gives the style its punch. On long brown hair, this pattern can make even a plain blowout feel more deliberate.
3. Caramel Chunky Highlights on Wavy Chestnut Brown Hair
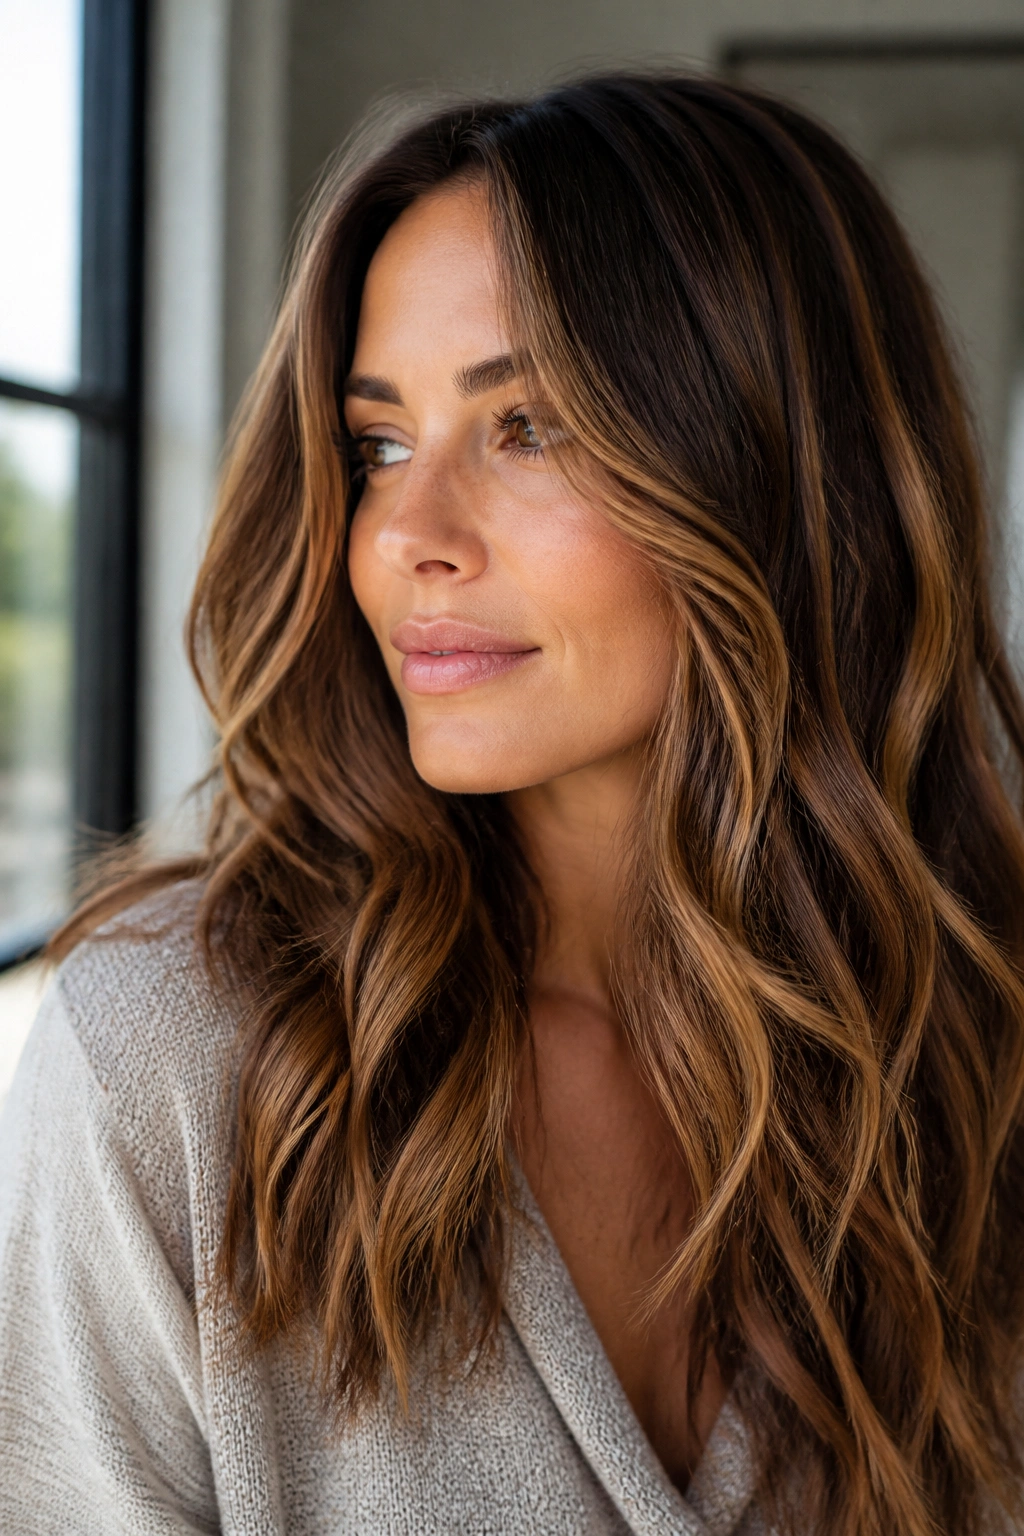
Why do chunky caramel highlights look softer on waves than on pin-straight hair? Because the bend in the hair breaks up the edges for you. Chestnut brown hair already has warmth in it, and caramel just nudges that warmth forward instead of fighting it.
Waves are forgiving in a way straight strands aren’t. A thick caramel panel that might look too obvious on flat hair can look effortless once it bends around the cheekbone and folds into the next wave. The result feels fuller, not louder. That’s why chestnut bases are such a good match for this color family.
How to Style It
A wavy cut needs a little shaping or the highlights can fall flat. You do not need perfect curls. You need movement.
- Use a 1.25-inch curling iron or wand and leave the ends out for a looser finish.
- Wrap only the mid-lengths for 6 to 8 seconds per section.
- Scrunch in a light cream or foam, not a heavy oil that makes the color look dark.
- Let a few front pieces fall forward so the caramel hits the cheekbones.
If you want the look to feel less polished and more lived-in, ask for fewer pieces but make them wider. On waves, that reads better than a dozen tiny streaks.
4. Rooted Caramel with a Soft Shadow Base
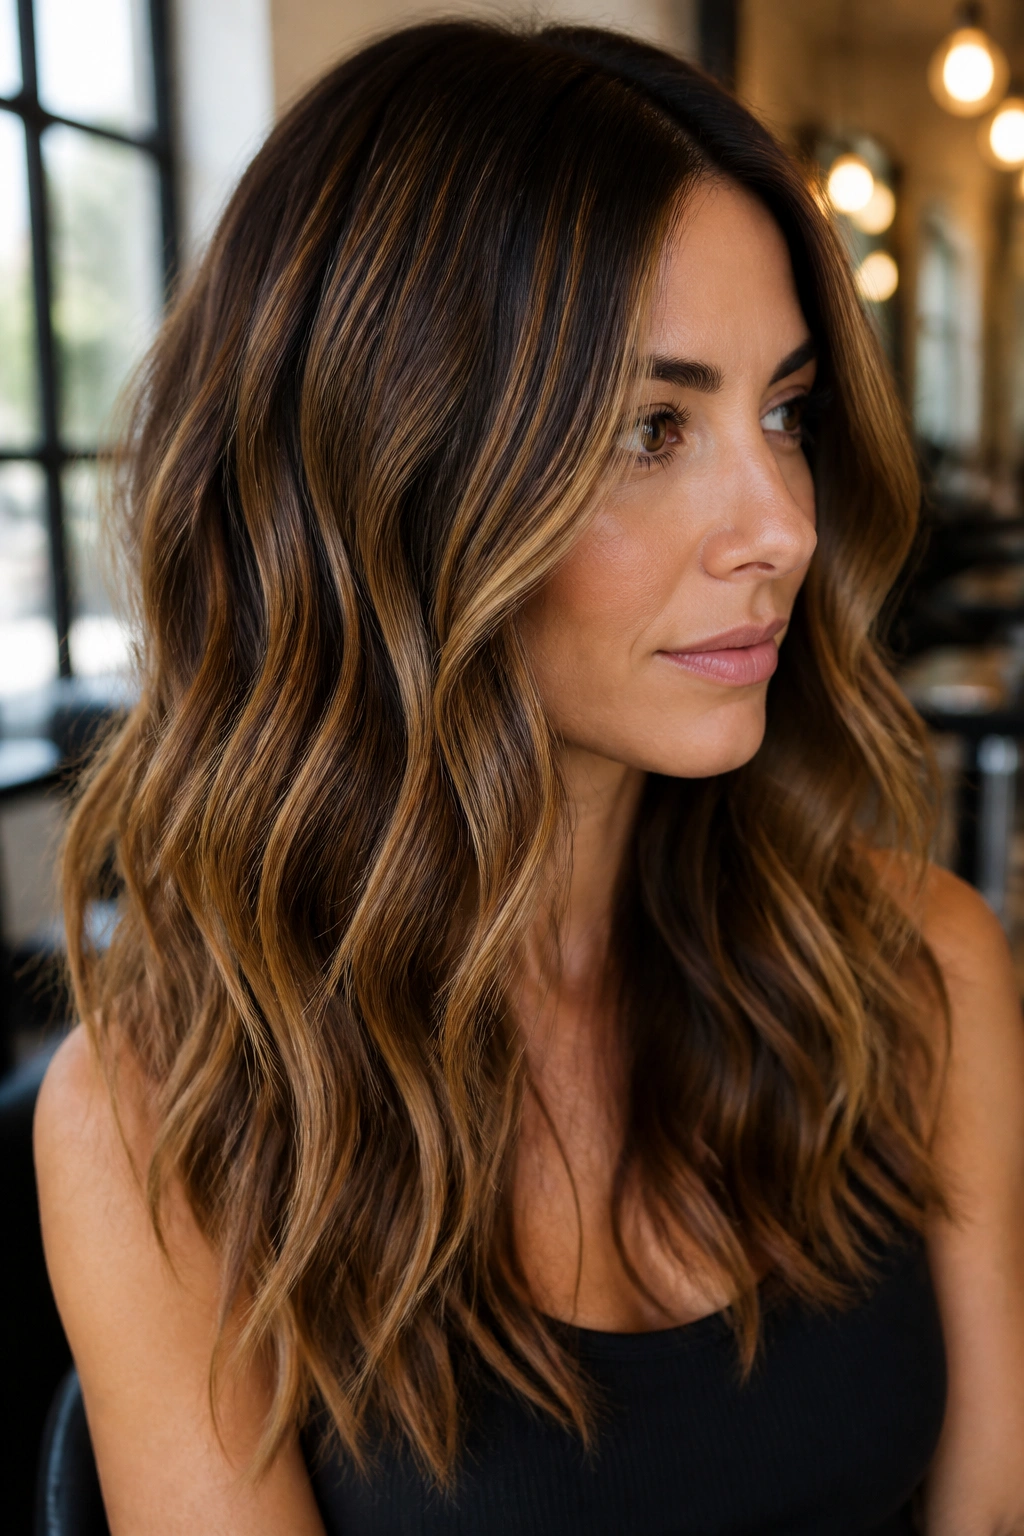
If you hate staring at your roots every four weeks, a shadow base is the move. The darker root gives caramel chunky highlights a softer edge, and brown hair grows out in a way that feels intentional instead of obvious.
This is the version I reach for when someone wants visible color but not the maintenance headache that comes with a high-contrast blonde. The roots stay close to the natural brunette shade, then the caramel opens up from the mids to the ends. On medium brown hair, the shift can be gentle. On darker brown hair, it can be a bigger contrast without looking harsh.
How Much Root To Leave
A little shadow goes a long way. Too much root and the color looks unfinished. Too little and you lose the easy grow-out that makes this style useful.
- Leave about 1 inch of root depth if you want a softer transition.
- Keep the highlights starting below the scalp area, not right at the part.
- Ask for a smoky brunette gloss at the root if your hair tends to pull warm.
- Refresh the glaze every 6 to 8 weeks to keep the caramel from getting flat.
The grow-out is the point here. It lets the color soften instead of screaming for a touch-up.
5. Toasted Caramel Panels for Long Layered Hair
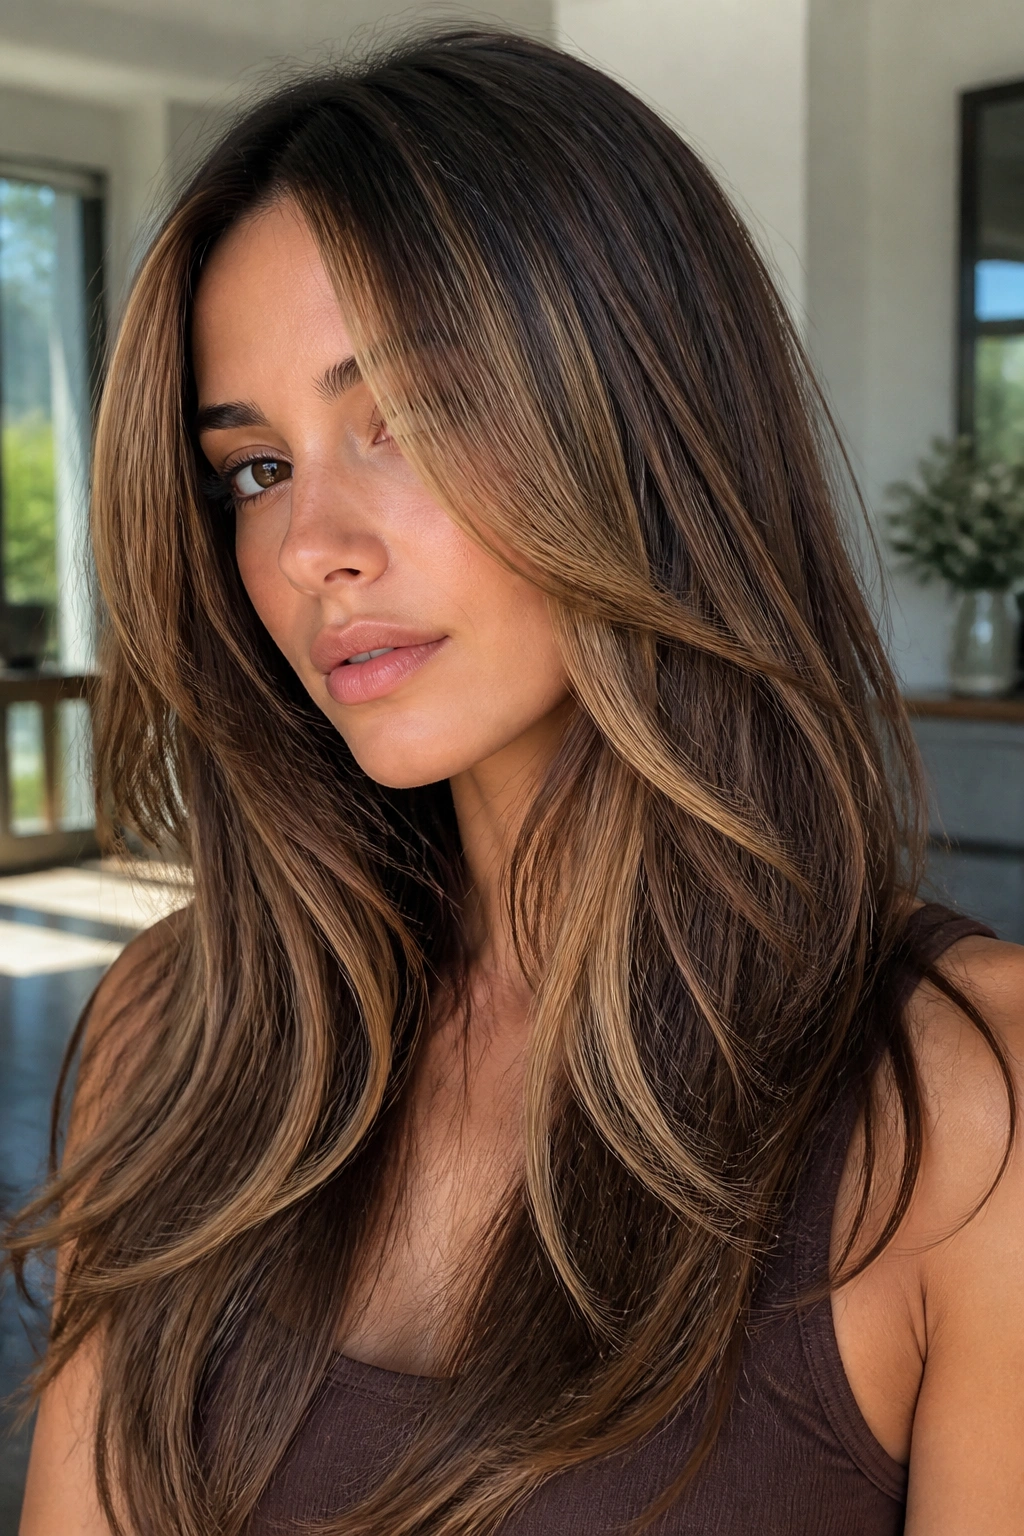
On long brown hair, thick caramel ribbons move best when the cut has actual layers to catch them. Without layers, the color can sit there and feel heavy. With them, the highlights flick in and out as the hair moves, which is where the style starts to feel alive.
I like this look on hair that falls past the shoulders because the length gives the caramel room to stretch. A few wider panels near the face and mid-lengths are enough. Push the color too far down the length of one solid blunt section, and the whole thing can start to look blocky.
Long layers help the highlights follow the shape of the haircut. The caramel shows at the bends, hides in the low spots, and changes every time you tuck the hair behind your ear.
That little shift is what sells it.
For styling, a round brush or large hot brush is enough. Pull the layers up and away from the head as you dry, then finish with a light glossing serum on the ends. Keep the product off the roots or the caramel can lose its shine fast.
6. Chunky Highlights on a Curly Brunette Bob
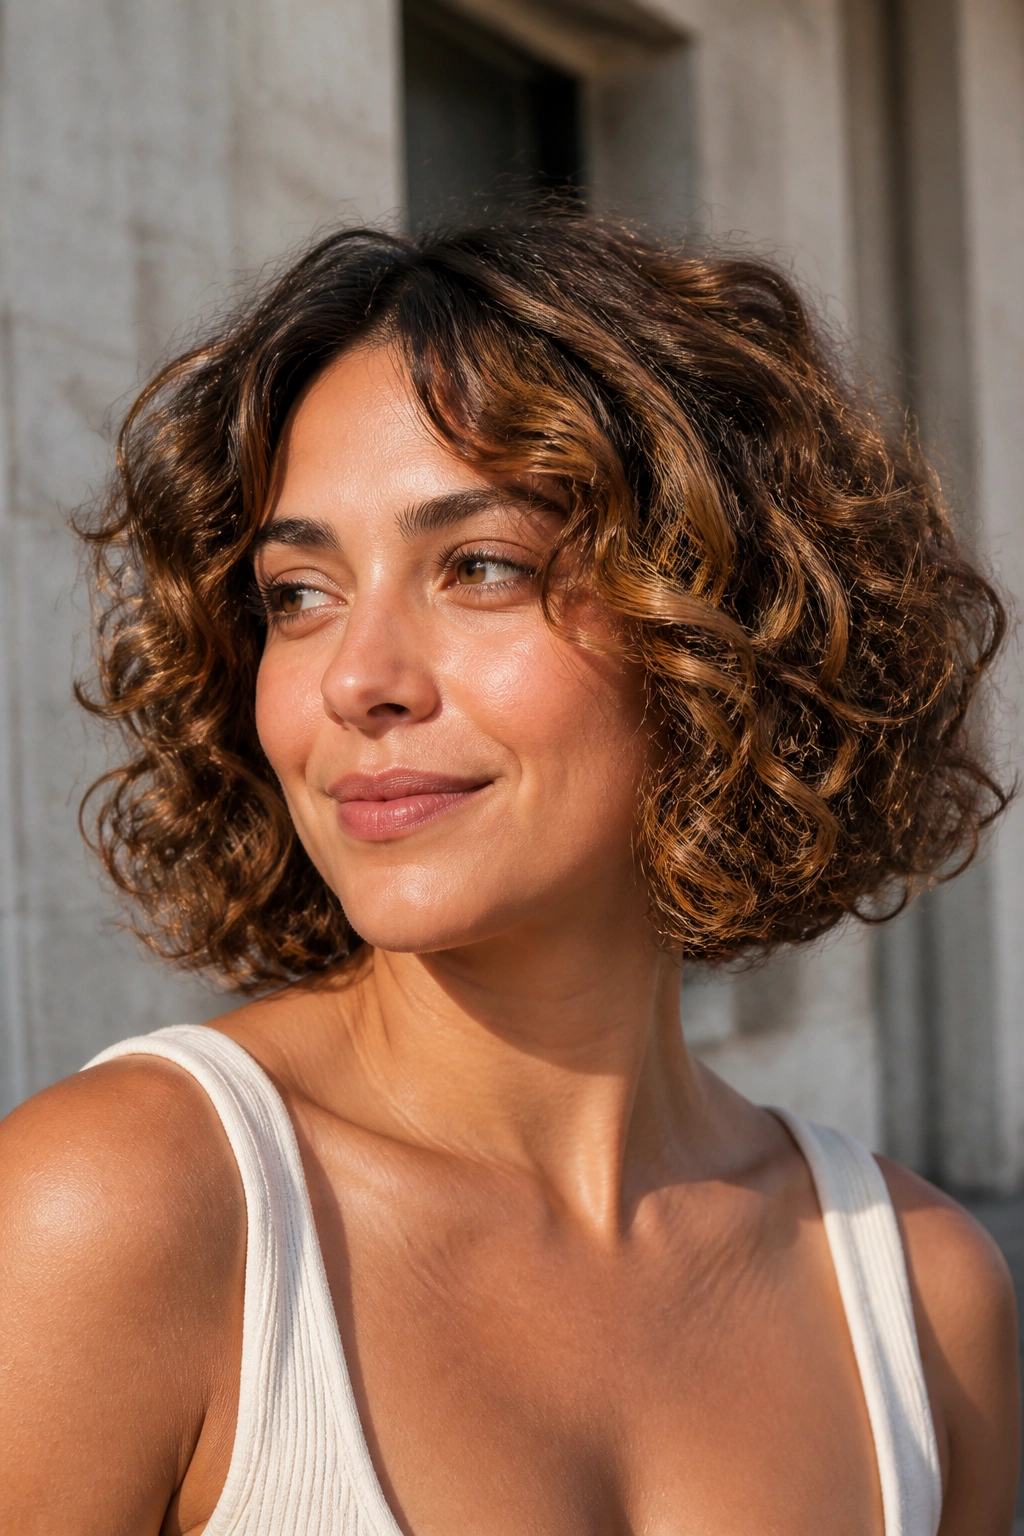
Curly hair does not need the same map as straight hair. A curly brunette bob wants chunkier caramel placement because the curl pattern shrinks the hair and hides fine streaks fast.
The best version lives where the curls actually show: around the face, across the top, and through the outer layers of the bob. If you put the lightest pieces underneath too much curl, they disappear. If you place them too high and too narrow, the result can look busy once the curls spring up.
This style works especially well on people who wear their curls naturally most days. The caramel gives the bob more shape, and the bob keeps the color from feeling too spread out. It’s a neat little partnership.
What To Ask For
- Use larger sections on the surface of the curls.
- Keep the lightest pieces around the temples and cheekbones.
- Leave the back a little darker so the cut keeps its shape.
- Diffuse on low heat and avoid brushing the curls out dry.
Think of the highlights as part of the curl pattern, not on top of it. That’s what keeps the look from turning into a fuzzy halo.
7. Beige-Caramel Pieces for Ash Brown Hair
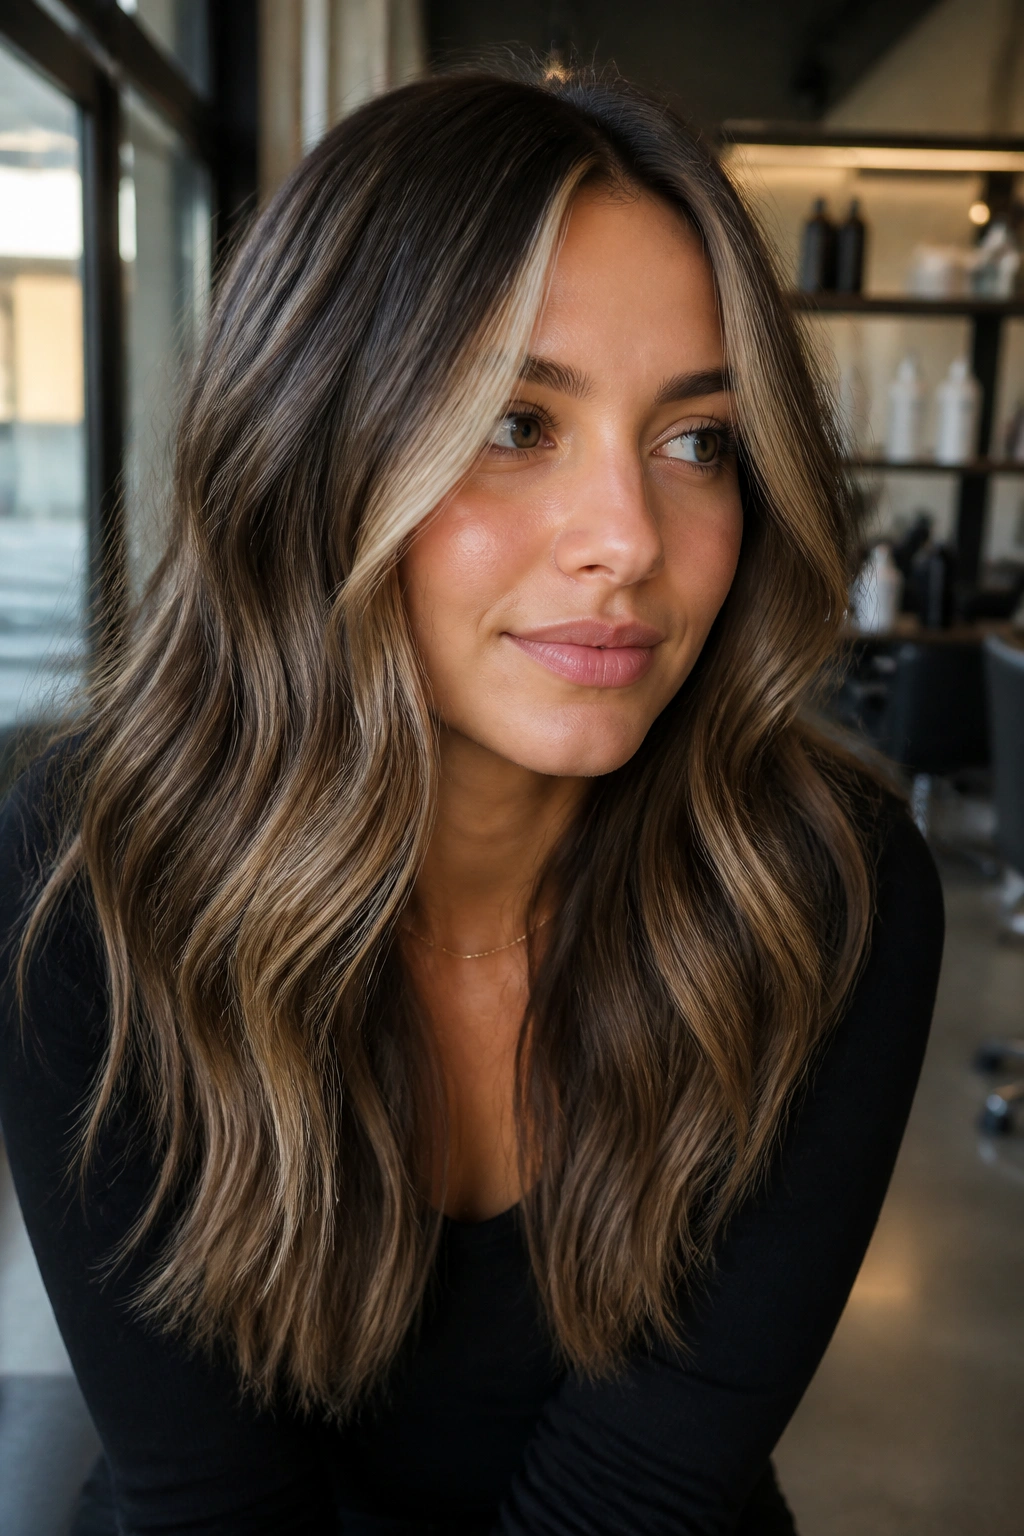
Not every caramel should lean gold. If your brown hair has an ashier base, a warm caramel that’s too yellow can look off fast, and nobody wants that orange shift halfway through a color appointment.
Beige-caramel is the cleaner choice here. It keeps the warmth soft, but it doesn’t fight the cool notes already in the hair. The result is a chunky highlight that still feels rich, just a little calmer and less sunny than a golden version.
What To Ask For
Say the words out loud. Colorists understand them well, and they cut through a lot of guesswork.
- Ask for beige-caramel, not honey-blonde.
- Keep the lift around level 7 if your base is ash brown.
- Finish with a neutral-beige gloss instead of a gold-heavy toner.
- Leave some cooler brunette pieces between the highlights so the color doesn’t blur.
If your hair tends to go brassy, this is where maintenance matters. A color-safe shampoo and a cool rinse can help, but don’t overdo purple shampoo. Too much of it can wipe out the warmth that makes caramel look like caramel in the first place.
8. Copper-Caramel Mix on Deep Espresso Brown Hair

Dark espresso brown can swallow a weak caramel. If the highlight isn’t warm enough, or if the lift stops too soon, the color barely registers once the hair dries.
That’s why copper-caramel works so well on very dark brown bases. The copper note gives the highlight a little extra presence, so the pieces don’t disappear into the depth of the hair. It also keeps the finished look from leaning muddy, which can happen when a colorist tries to force a cool beige tone onto very dark brunette hair.
This is not a blonde look. It is warmer, richer, and a little bolder.
On dark hair, the process often needs more patience. A colorist may aim for two to three levels of lift first, then gloss the hair into a caramel-copper tone. That second step is where the color becomes wearable. Without it, the highlight can look flat or orange in the wrong way.
A bond-building treatment helps here too, especially if the hair has already been colored before. The hair stays happier, and the final shine lasts longer.
9. Hidden Caramel Underlights That Peek Through
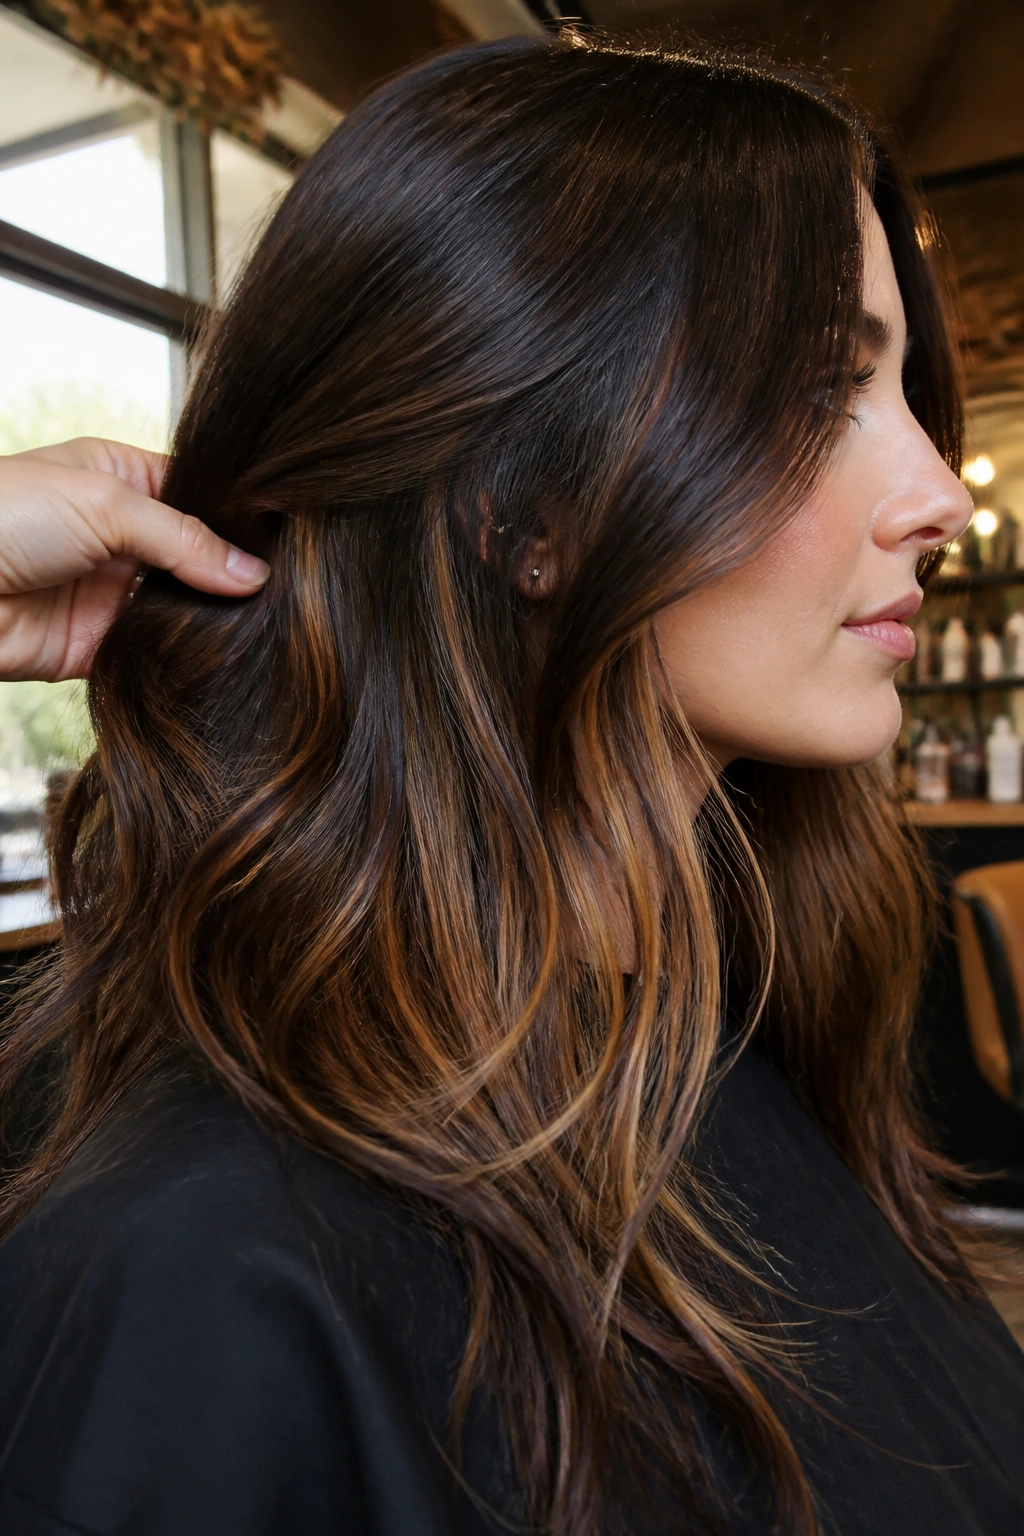
Not all highlights have to live on top. Hidden caramel underlights sit beneath the surface layers, so they show when the hair moves, when you tuck it behind your ear, or when you wear it up.
This is one of my favorite ways to do chunky highlights on brown hair because it gives you surprise without forcing the color to shout from the first glance. From the front, the hair can still read as brunette. Then the light catches the lower layers and the caramel flashes through. It’s a good look for people who like a little edge but do not want the maintenance of a full brightening.
Subtle from the front. Loud in motion.
The placement works best if the top layer stays dense enough to hide and reveal the color on its own. Ask for underlights that sit through the lower mids and sides, not all the way at the nape only. That gives you more movement when the hair swings.
If you wear ponytails or half-up styles often, this one makes a lot of sense. It gives you a second look without needing a second haircut.
10. Wide Highlight Panels for Straight Brown Hair

Why do some straight-haired brunettes love wide highlights while others regret them? Straight hair shows every line. If the panel spacing is wrong, the style can drift into hard stripes fast.
The fix is balance. Wide highlight panels can look fantastic on straight brown hair when the edges are softened and the gaps between the pieces are intentional. You want enough brunette left between the caramel ribbons so the eye can still follow the shape of the haircut. A little bend at the ends helps too. Flat, perfectly straight hair can make even a beautiful highlight look blunt.
I prefer this version on blunt lobs and long, straight cuts with clean edges. The color gives the haircut movement it wouldn’t have otherwise.
A few details help a lot:
- Keep the panels wider than a pencil but narrower than 1.5 inches.
- Leave brunette lanes between the light pieces.
- Add a soft C-bend at the ends with a flat iron or round brush.
- Use a lightweight serum only on the last 2 to 3 inches of the hair.
That bend at the end is the difference between polished and stiff.
11. Curtain Bang Caramel Highlights
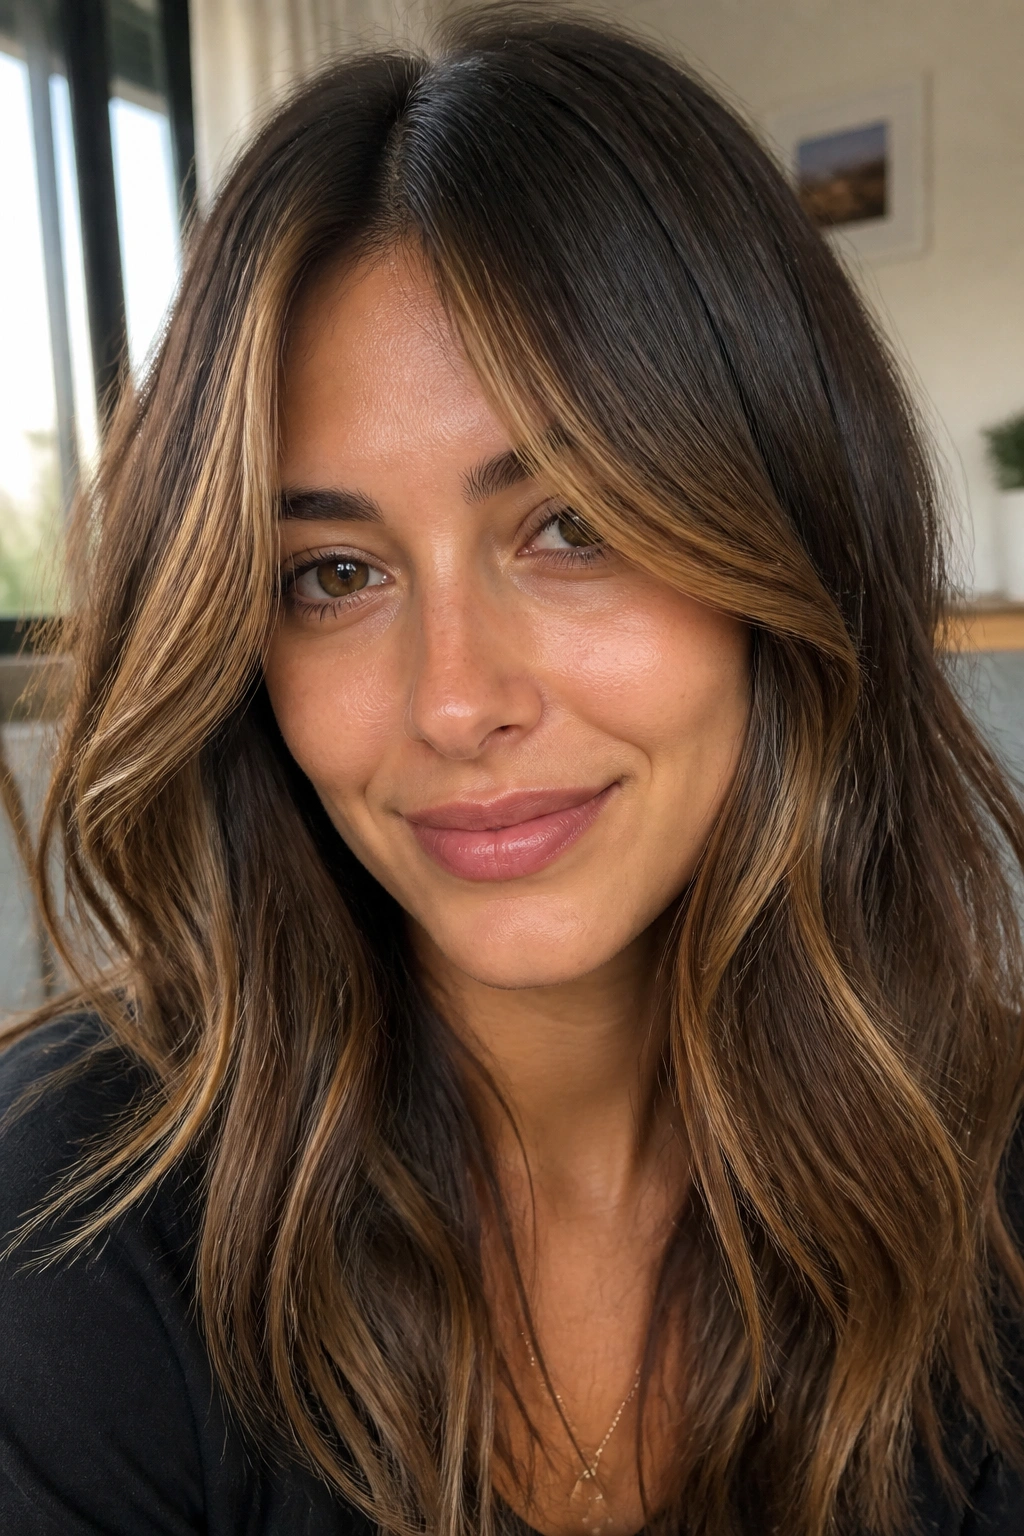
Curtain bangs change the whole conversation. Once the fringe is part of the cut, the caramel needs to frame it, not fight it.
This is a smart place to put a few chunky pieces because curtain bangs already split the eye at the center or just off-center. A wider caramel sweep on each side of the part can make the bangs look fuller and the face look softer. The trick is not to flood the bangs with too much light. You want the color to sit in the fold, not across the whole fringe like a stripe.
What to Watch For
- Keep the lightest pieces about 1/2 inch away from the hairline if your forehead is short.
- Bring color into the outer bend of the bangs, not only the ends.
- Ask for a little more brightness at the temples than at the center of the fringe.
- Trim the bangs often enough that they keep their shape with the highlight placement.
If your bangs are thick, this look can get dramatic fast. If they’re wispy, lighter pieces should be softer and a bit narrower. Either way, the movement is what makes it work.
12. Melted Caramel Balayage With Chunky Ends
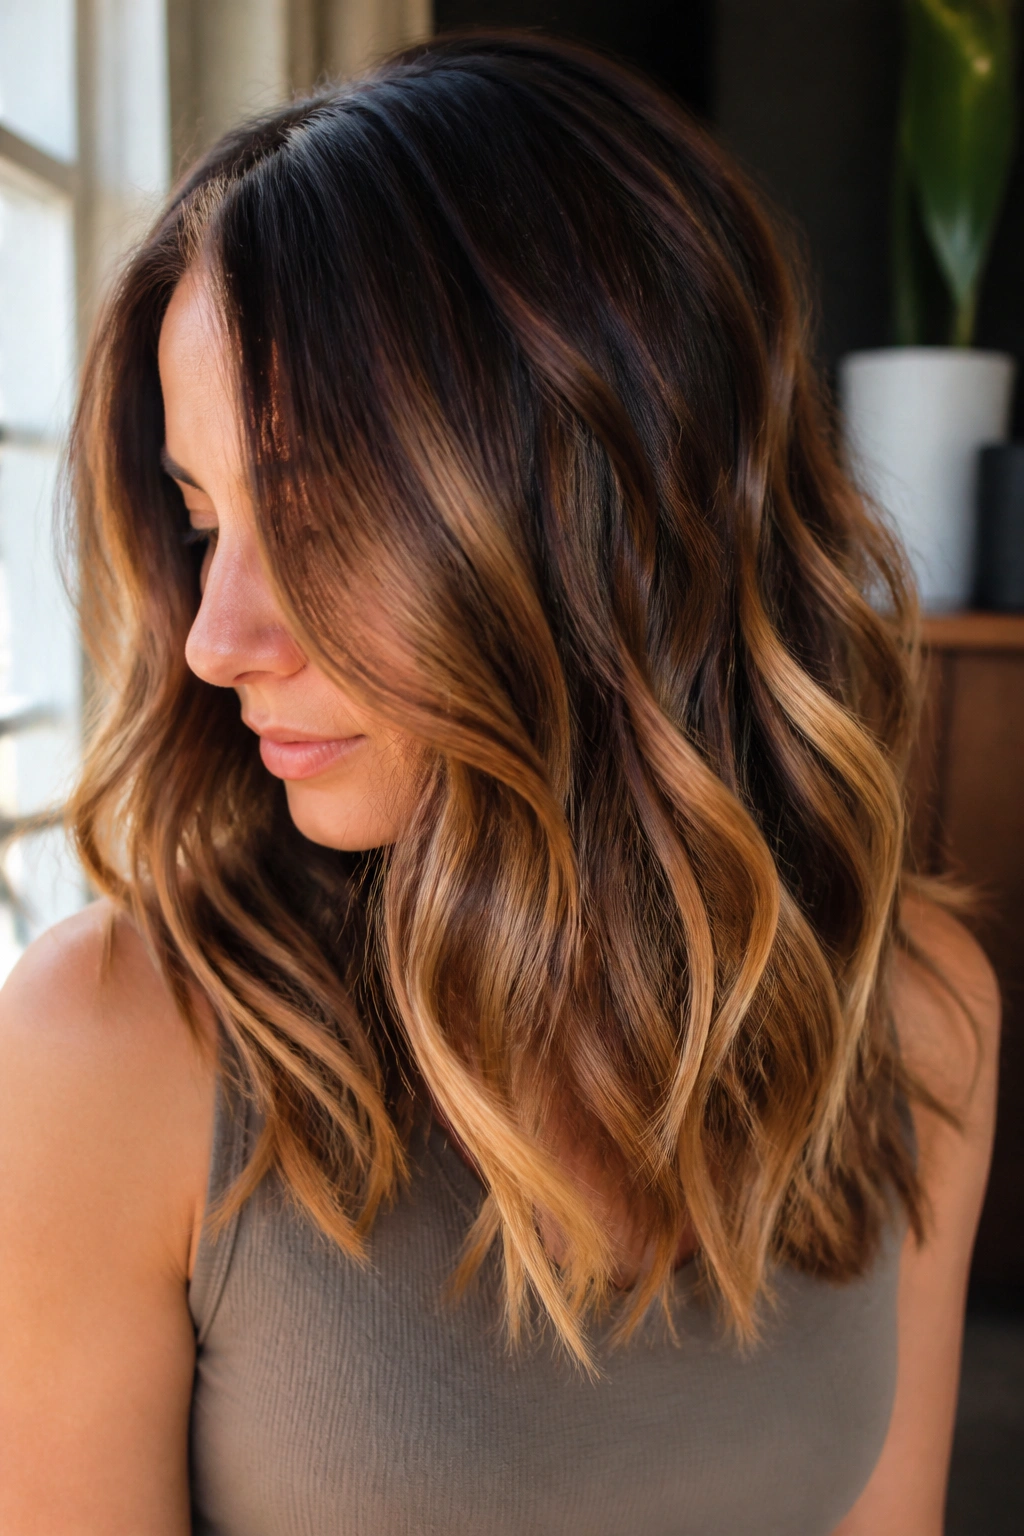
This is the version for people who want softness up top and punch at the ends. The root area stays blended, then the caramel shows up more boldly as the hair moves down the length.
It sits somewhere between balayage and classic foils. The top doesn’t scream for attention, but the ends carry enough caramel to feel deliberate. On brown hair, that matters because too much brightness near the scalp can look harsh once the hair grows a little. A melted finish keeps the look easy to live with.
Medium to long hair handles this shape best. The length gives the ends room to show off the chunkier pieces, and the soft root keeps the style from reading as high-maintenance. If you toss your hair into a bun sometimes, the lighter ends still peek out and keep the look interesting.
This is also one of the better choices if you like your brown hair to stay brown. You get dimension without turning the whole head into highlight territory.
13. Thick Caramel Highlights for Medium Brown Hair

Medium brown hair may be the easiest base for caramel. It has enough depth for contrast and enough warmth to keep the highlights from looking flat.
That middle ground gives you options. You can go honey, toffee, beige, or a little toasted, and the hair still tends to hold the shape of the color well. On very dark brunette hair, caramel can get lost if the lift is too gentle. On very light brown hair, the same tone can start to look washed out. Medium brown sits right in the sweet spot.
The Sweet Spot
The most flattering caramel depends on the undertone in the skin and the finish you want from the hair.
- Honey caramel reads warmer and brighter.
- Beige caramel feels softer and a little quieter.
- Toffee caramel keeps more richness and looks good on denser hair.
- A neutral gloss can keep the color from swinging too orange.
If you are unsure what to ask for, bring one thing to the chair: a photo with the same base depth as your own hair. That saves a lot of guessing. Medium brown hair changes a lot under salon lights, and the right photo helps keep the caramel honest.
14. Shoulder-Length Caramel Streaks With a Blowout Finish
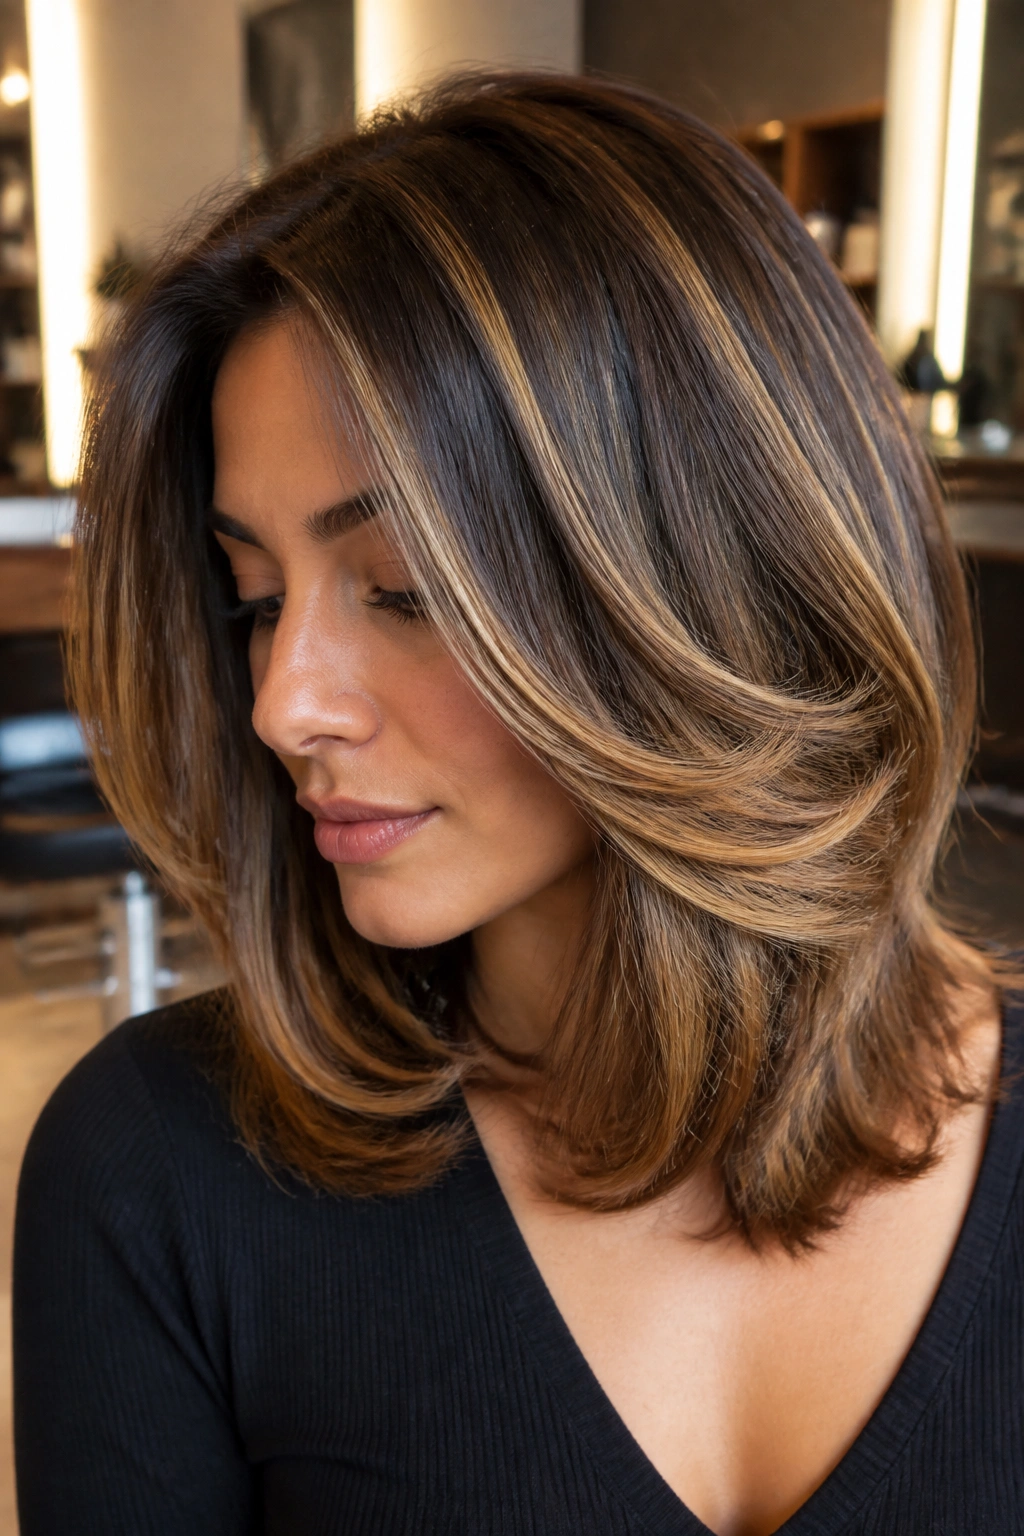
A collarbone-length cut changes how thick highlights land. The hair swings, the ends flip, and the caramel catches the movement in a way that longer hair sometimes hides.
This is a strong choice if you live in a round-brush blowout. The smooth shape makes the wide caramel streaks look polished, and the shoulder-length cut stops the style from feeling heavy. Too much color on a blunt shoulder-length cut can make the ends feel boxy. A few bold pieces near the face and through the mid-lengths keep the shape lighter.
Why the Cut Matters
- Shoulder-length hair shows the transition from brown to caramel faster than long hair does.
- A blowout helps the wide panels sit cleanly instead of folding into each other.
- Slightly layered ends keep the color from looking like a solid block.
- If your hair flips under at the shoulders, place the lightest pieces above that bend so they stay visible.
This is one of those looks that gets better with movement. If the hair is too still, the color reads flatter than it should. Once the brush and dryer have done their work, the caramel feels much more alive.
15. Deep Side-Part Caramel Highlights for High Contrast
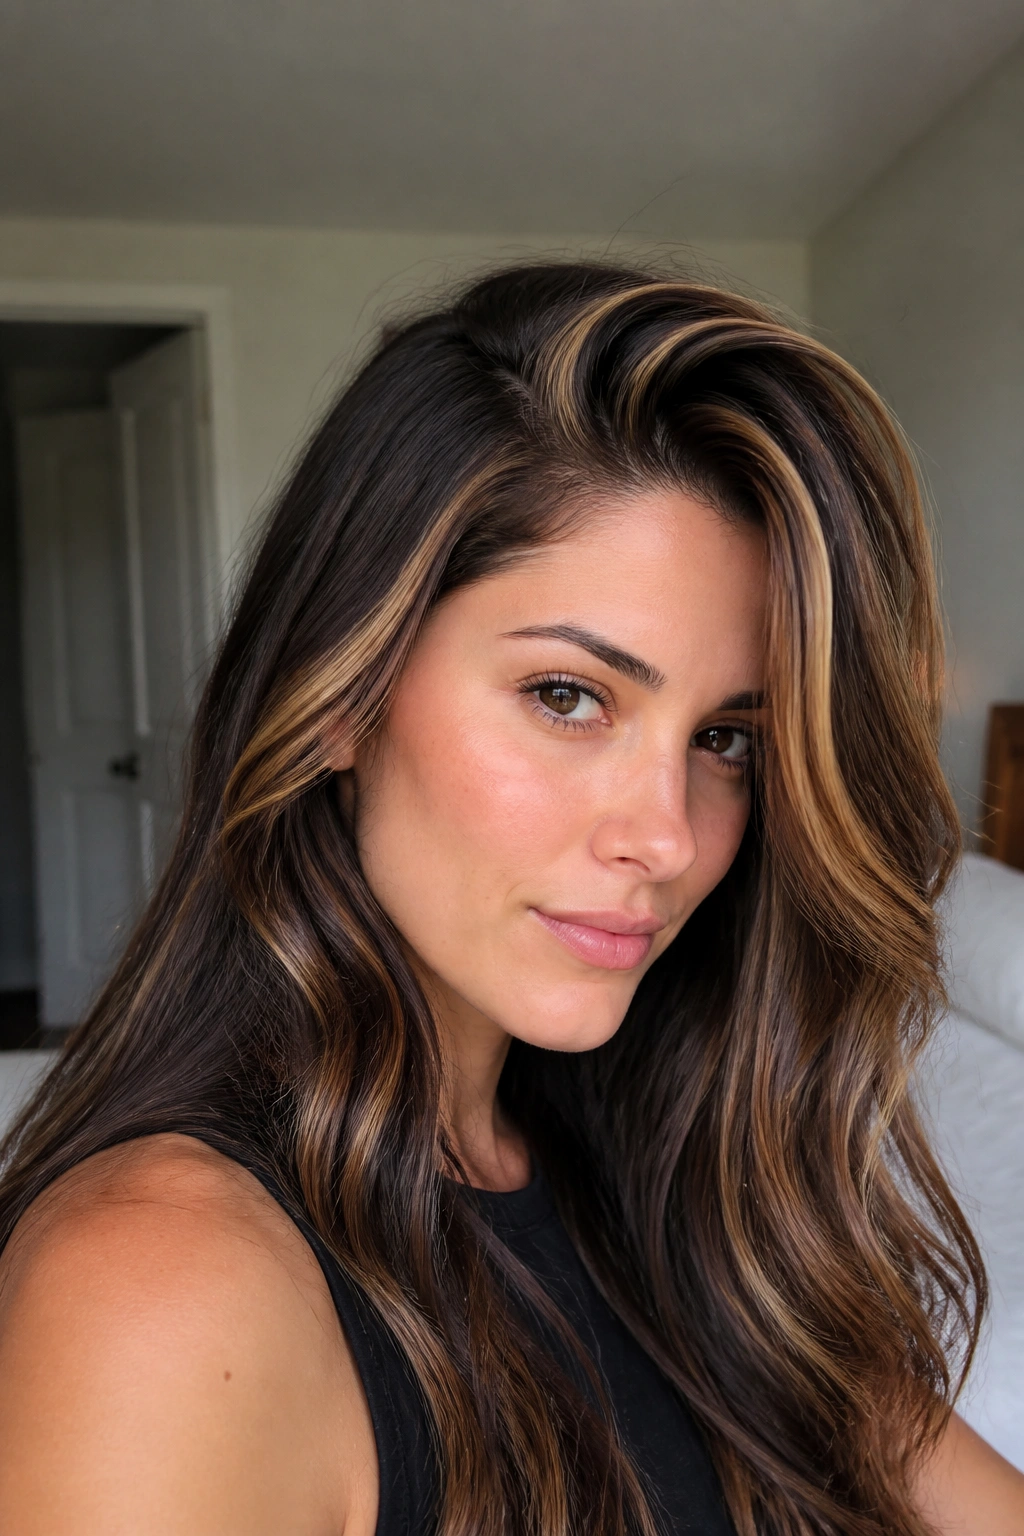
If you’re torn between subtle and bold, go with a deep side part. It gives caramel chunky highlights a built-in focal point and lets the darker brown side of the hair anchor the look.
The side part concentrates brightness on one side of the face, which makes the caramel look stronger without adding more color. It is a good option for fine hair because the lifted side creates a little extra visual weight, and it’s also useful if you want to soften a square jaw or bring more shape to a rounder face. The highlight itself doesn’t need to be louder. The part does some of the drama for you.
This style is especially nice if you like to tuck one side behind your ear. The caramel shows up, then disappears, then shows up again. That little bit of movement keeps the hair from feeling stiff.
If you want a practical starting point, ask for a slightly deeper side part, a few wider caramel panels near the front, and a softer finish through the rest of the brown base. It’s a smart place to begin because you can always add more brightness later. Starting with the part gives you control, and control is underrated in color work.
