



A bad bang trim shows in the mirror fast. One snip lands too high, the next falls at an odd angle, and suddenly you are pinning your fringe back with a barrette while pretending it was the plan all along. The bang styles easiest to trim at home are the ones that forgive small mistakes, grow out in a soft shape, and do not depend on a ruler-straight line.
I care a lot more about shape than perfection here. A home bang trim should keep hair off your eyes, soften the face, and preserve movement. Hair shrinks as it dries, cowlicks push pieces sideways, and a fringe that looks even while wet can sit half an inch shorter once it’s dry.
The safest styles are the ones you can adjust in tiny increments. You cut 1/8 inch at a time, check the fall, then go again if needed. That is not glamorous, but it saves a lot of regret.
Regret is expensive.
These 15 bang styles work because they grow out cleanly and tolerate a slightly imperfect hand. Some are soft and wispy, some are fuller, and a few are bolder if you are comfortable with more upkeep. Curtain bangs are usually where people begin.
1. Curtain Bangs
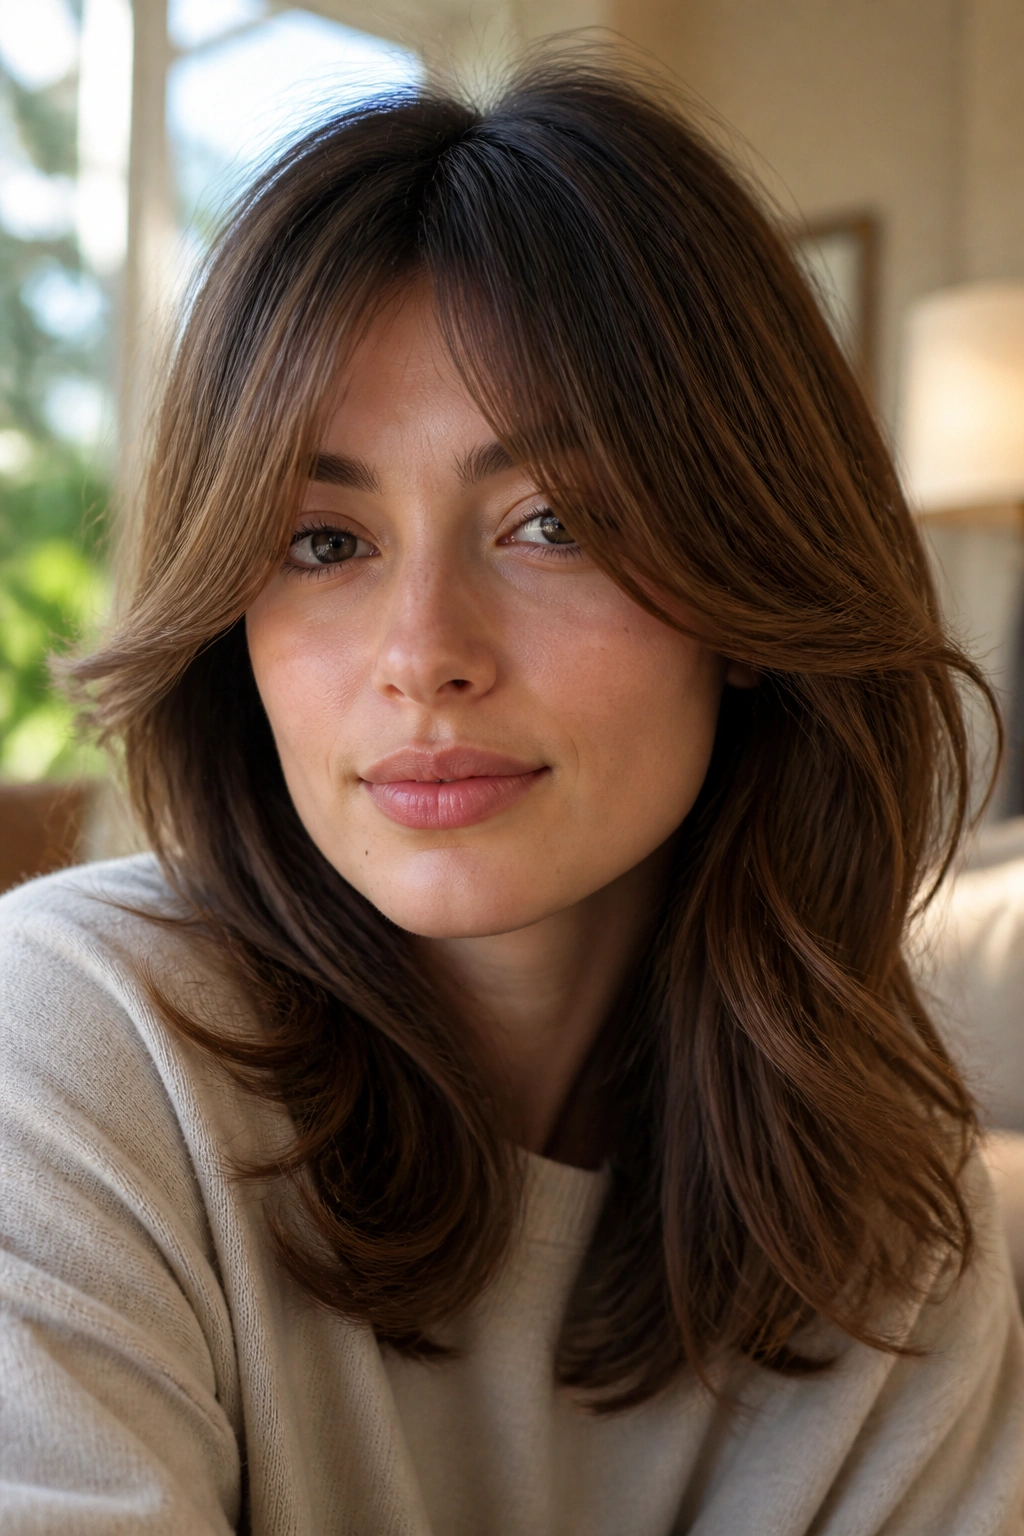
Curtain bangs are the easiest place to start because the shape already gives you room to breathe. The center opens up, the sides lengthen toward the cheekbones, and a tiny mismatch disappears into the sweep instead of screaming from the mirror.
Why this cut forgives mistakes
A curtain fringe can be trimmed with the hair split down the middle and pulled straight out from the face, then point-cut with the scissors angled up into the ends. That softens the line and keeps the front from turning into a blunt shelf. Keep the shortest point around the bridge of the nose the first time; you can always trim higher later.
- Works best on straight, wavy, and loose curly hair that falls with a little bend.
- Trim dry or nearly dry so you can see where the pieces actually land.
- Stop at 1/8 to 1/4 inch per pass.
- Let the outer corners graze the cheekbones or jaw for a softer grow-out.
Best move: cut the center last. The sides tell you the shape.
2. Bottleneck Bangs
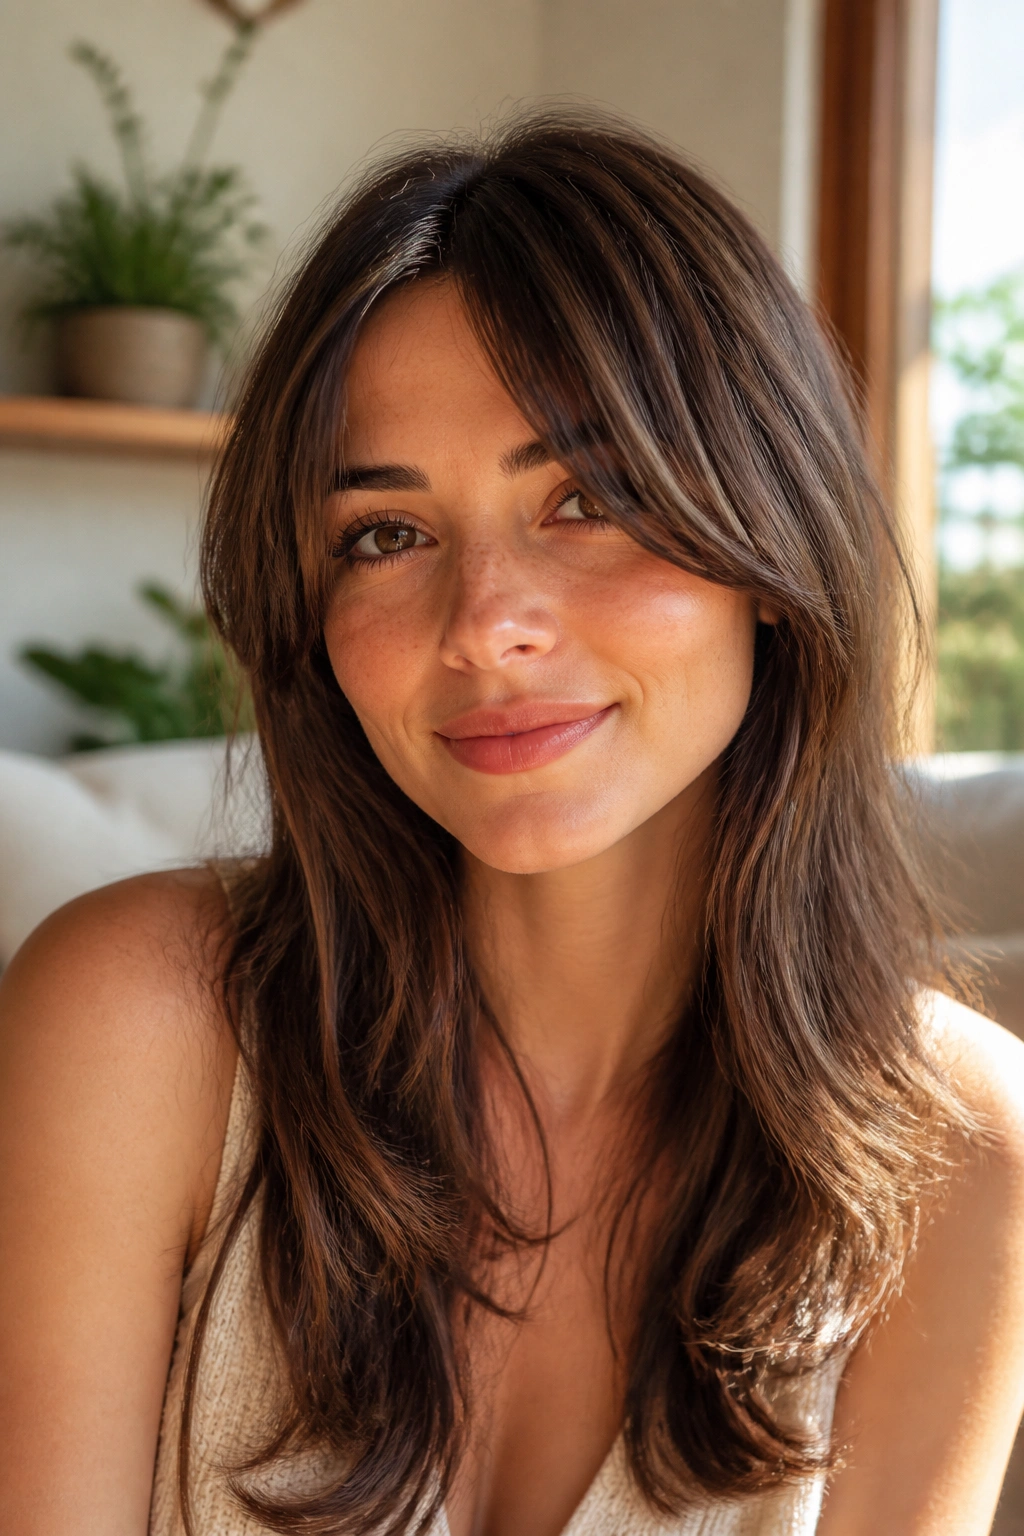
Bottleneck bangs are the sweet spot between a full fringe and curtain bangs. They start a little narrower in the middle, then open out at the temples, which means your home trim has some built-in forgiveness before the shape looks off.
The reason they work so well at home is simple: you are not drawing one hard line across the forehead. You are shaping a small funnel of hair that gets slightly longer as it moves outward. That makes tiny mistakes much less obvious, especially if your hair has any texture at all.
If you want a fringe that feels polished without acting precious, this is a smart choice. The middle can sit near the brow, while the sides drift down toward the cheekbone. If one side ends up a touch shorter, it still reads as movement rather than failure. I love that about this style. It does the heavy lifting for you.
3. Side-Swept Bangs
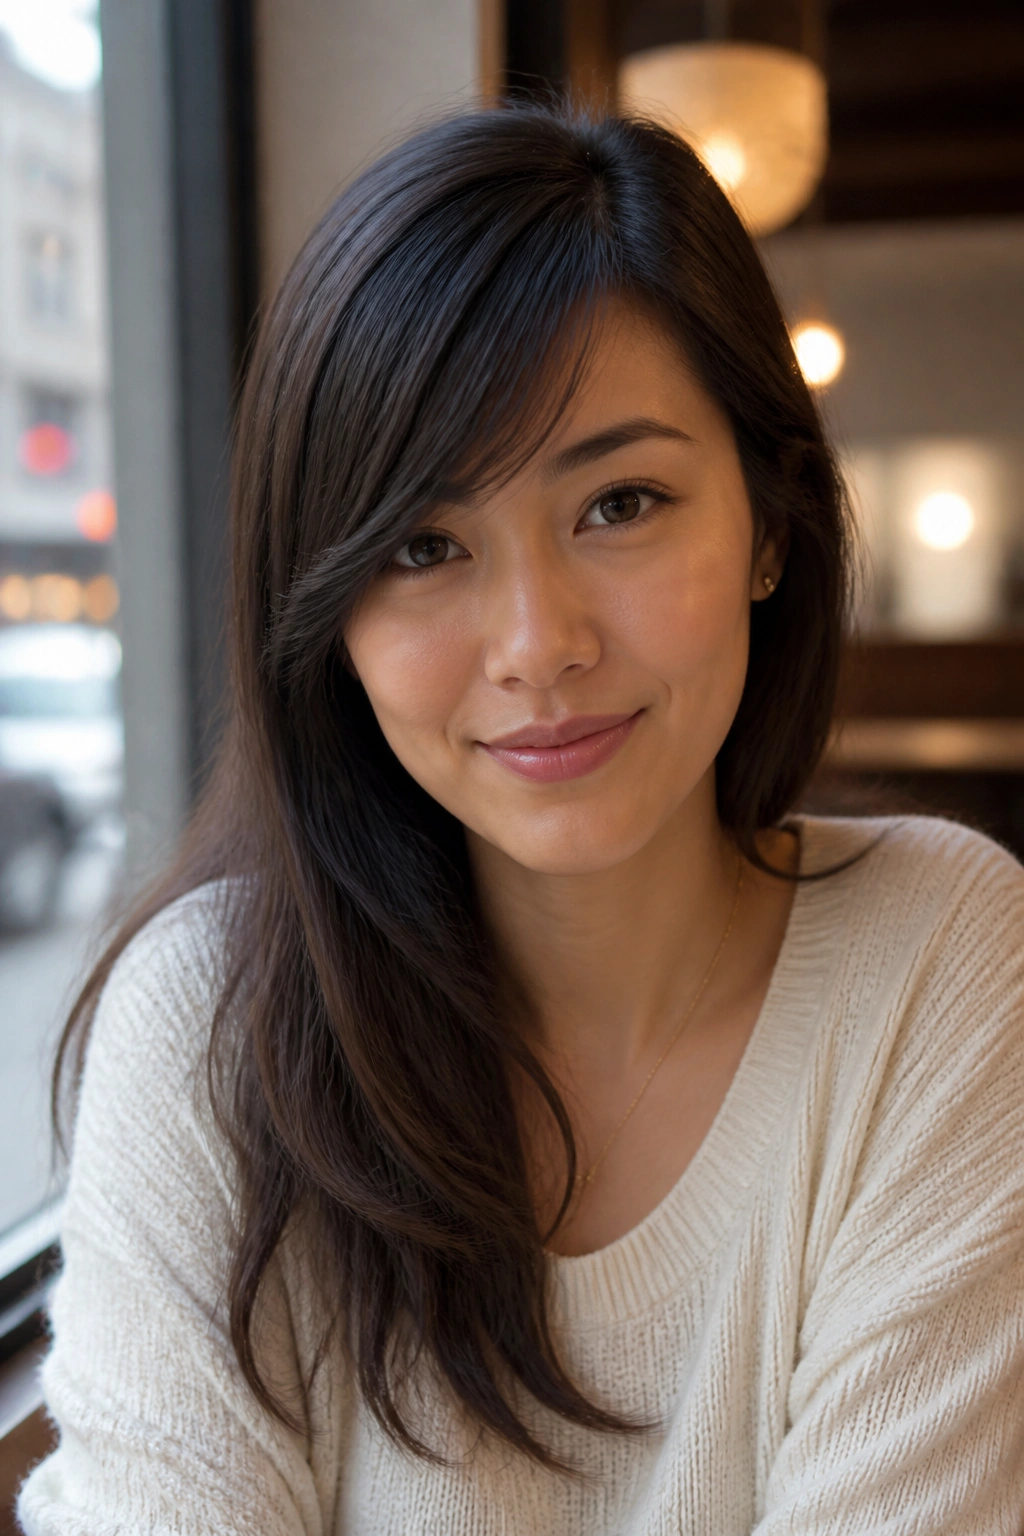
Why do side-swept bangs survive a shaky home trim better than most fringes? Because the eye expects asymmetry. A diagonal line can be a little messy and still look intentional, which is a gift when your bathroom mirror is not exactly a salon setup.
How to trim the sweep
Start by finding the direction your hair naturally wants to fall. Then section off only the front pieces that actually reach the face, not a giant triangle that drags half your hair into the cut. Pull the section across the forehead, angle your fingers downward, and take off a small amount from the longest edge first.
The trick is to keep the shortest part near the brow bone and let the length taper toward the temple. If the sweep feels too heavy, trim the top edge in tiny point cuts rather than slicing across the whole section. That keeps the bang soft and prevents the dreaded helmet look.
- Best for cowlicks that push hair off-center.
- Trim on dry hair so the diagonal reads clearly.
- Use the natural side part, not the one you wish you had.
- Keep a few longer face-framing pieces if you want extra softness.
4. Wispy See-Through Bangs
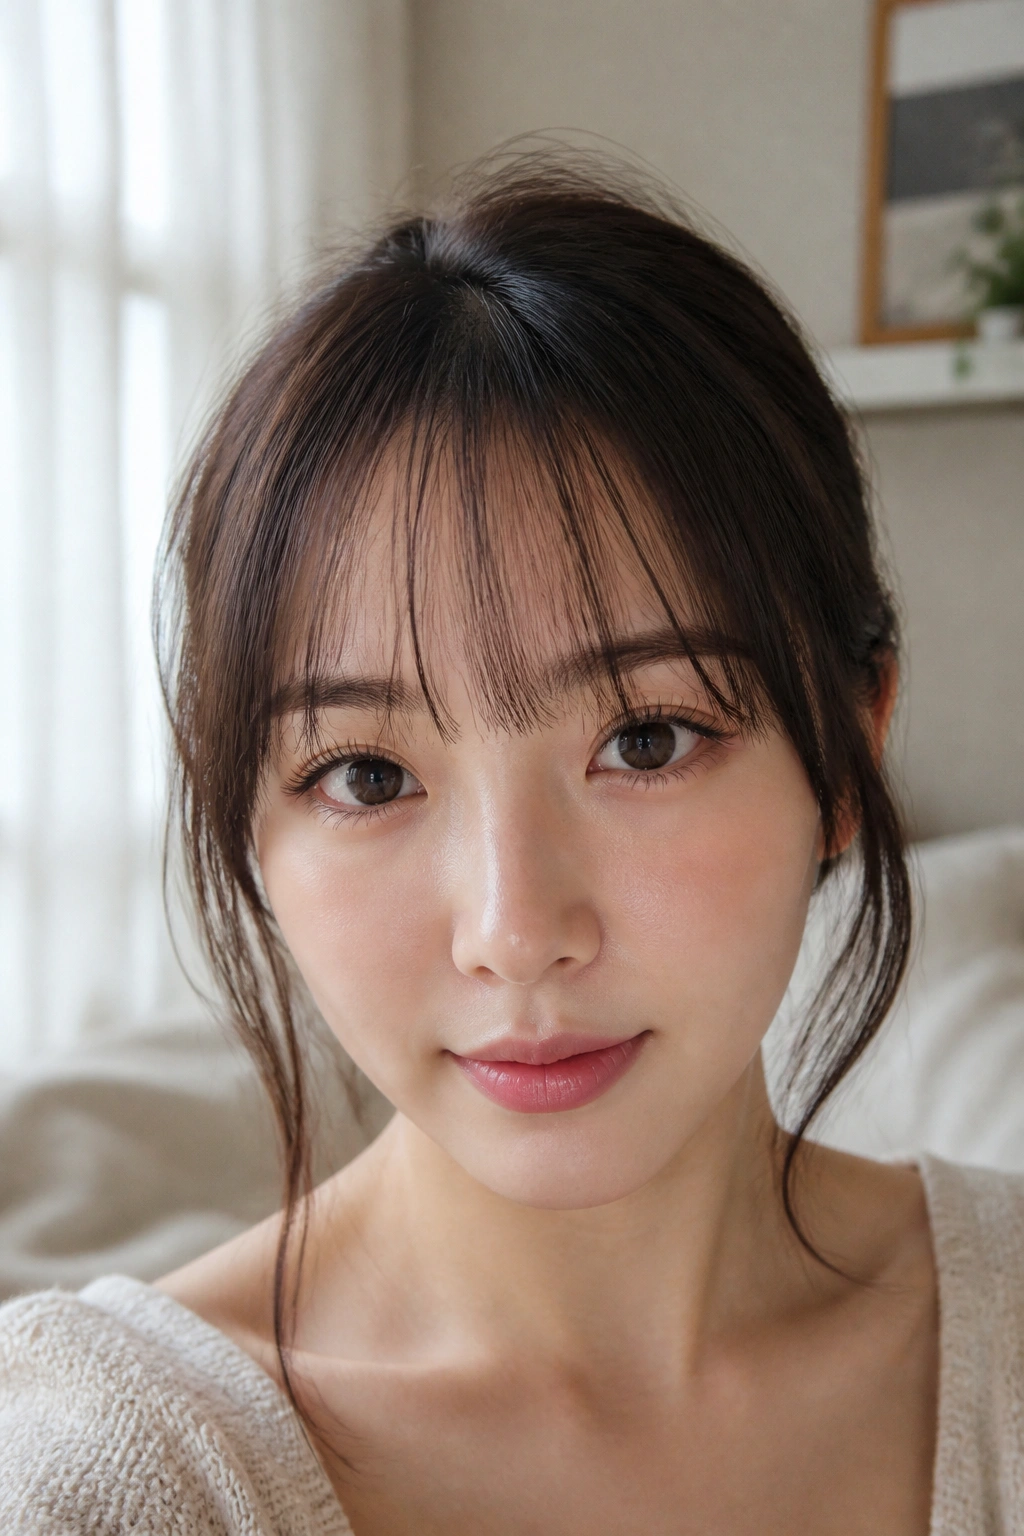
If your fringe tends to separate on its own, wispy bangs are your friend. They look airy on purpose, so a tiny uneven patch usually blends in instead of standing out like a mistake.
Think of this style as a light veil across the forehead, not a wall of hair. The strands are sparse enough that you can trim them in narrow sections and still keep the whole thing soft. That makes them friendlier than a dense blunt fringe, especially if your hair is fine or medium in thickness.
What to watch for
Do not reach for thinning shears and go wild. That is how wispy bangs turn limp and stringy. Use sharp scissors, hold the hair between your fingers, and take tiny vertical snips into the ends. The goal is to break up the line, not erase it.
- Keep them near brow length or a touch longer.
- Trim in small, separated sections.
- Leave the temples a little longer so they fade into the rest of the hair.
- Stop before they feel too sparse; see-through does not mean patchy.
Good rule: if you can see too much scalp through the fringe, you’ve gone too far.
5. Brow-Grazing Blunt Bangs
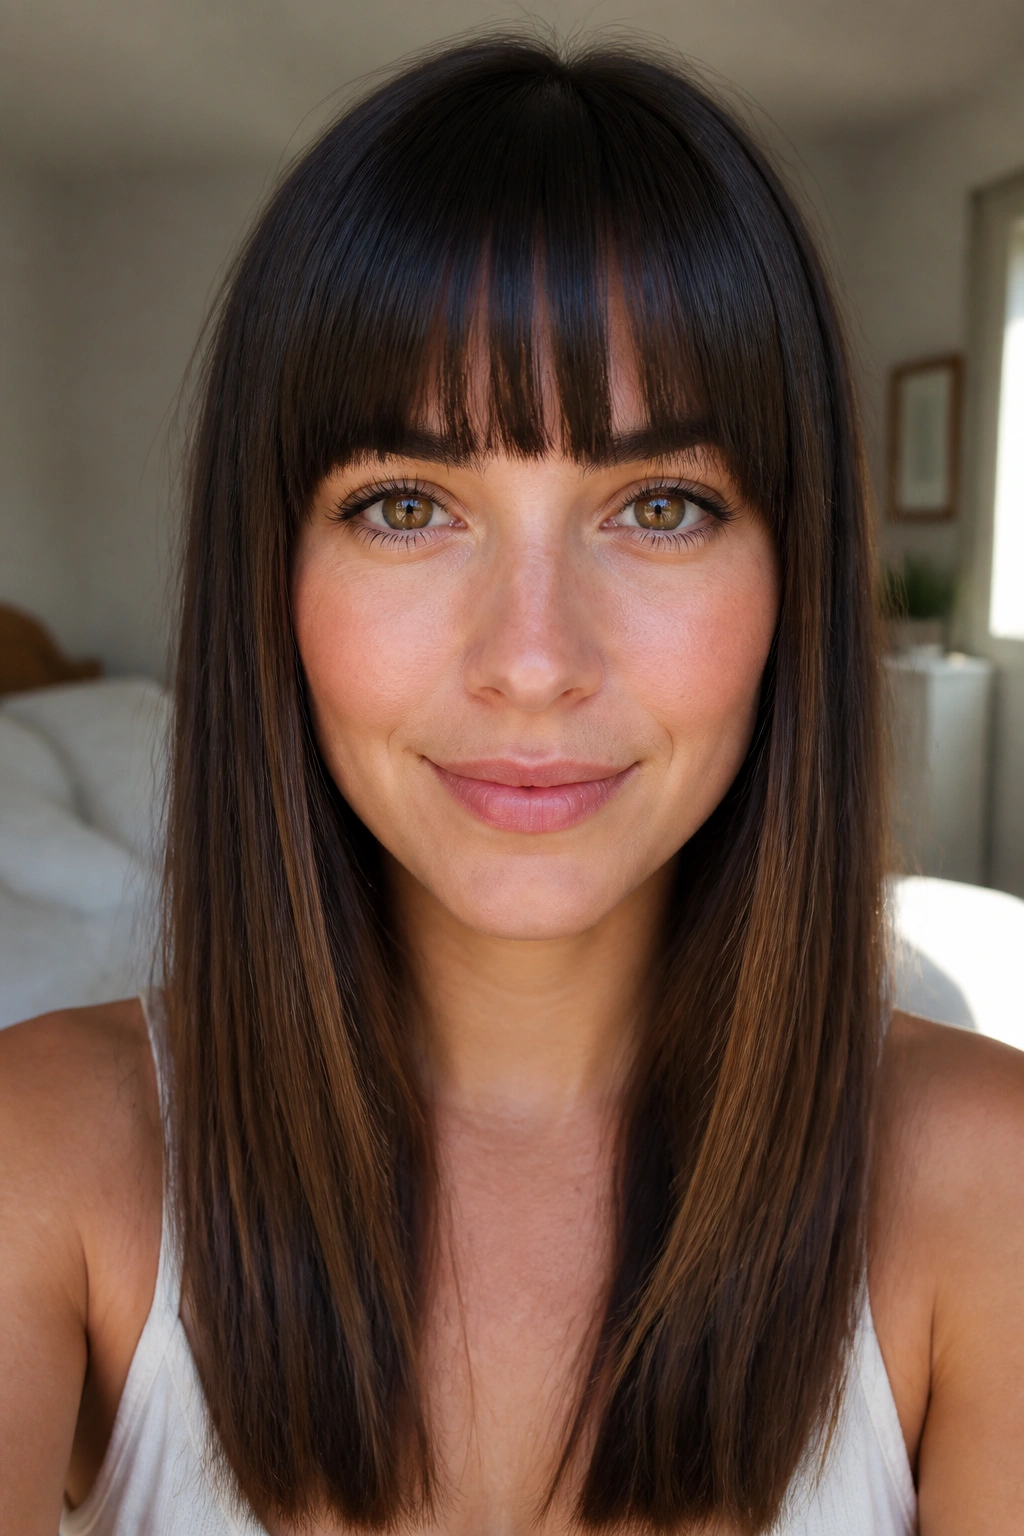
A blunt fringe sounds intimidating, but a brow-grazing version is easier to manage than people think. The reason is length. If you keep it just long enough to kiss the brows, you have a little slack before the cut starts to feel severe.
The home-trim trick here is to work with very small amounts and keep the scissors moving vertically into the ends. That preserves a straight-looking edge without chopping the whole front into a hard, boxy line. You want the bangs to fall heavy enough to look deliberate, but not so short that every millimeter matters.
This style is best when your hair is naturally straight or close to it. Wavy hair can work too, though you need to respect how much it bends as it dries. Cut dry, check it in daylight, and resist the urge to “fix” the line five times in one sitting. That usually makes the edge wobble.
The blunt bang is a little like a good hem on pants. A tiny trim helps. A panicked overhaul does not.
6. Micro Bangs

Micro bangs are not forgiving in the salon-chair sense, but they are easy to tidy at home once the shape is already short. You can see the whole line at once, which means you are not guessing where the fringe lands behind layers of hair.
That said, this is a style for people who like commitment. Micro bangs sit well above the brows, sometimes closer to the middle of the forehead, and they need regular touch-ups because even a quarter inch changes the feel. They look sharp on dense straight hair and can feel edgy on wavy textures, but they are less friendly if your cowlick splits the front like a fork.
If you keep them a touch piecey, they are easier to maintain. A perfectly blunt micro fringe shows every wobble. A softly chipped one hides the hand a bit better. I would recommend this style only if you are happy to trim in tiny steps and accept a little imperfection as part of the look.
7. Feathered Bangs
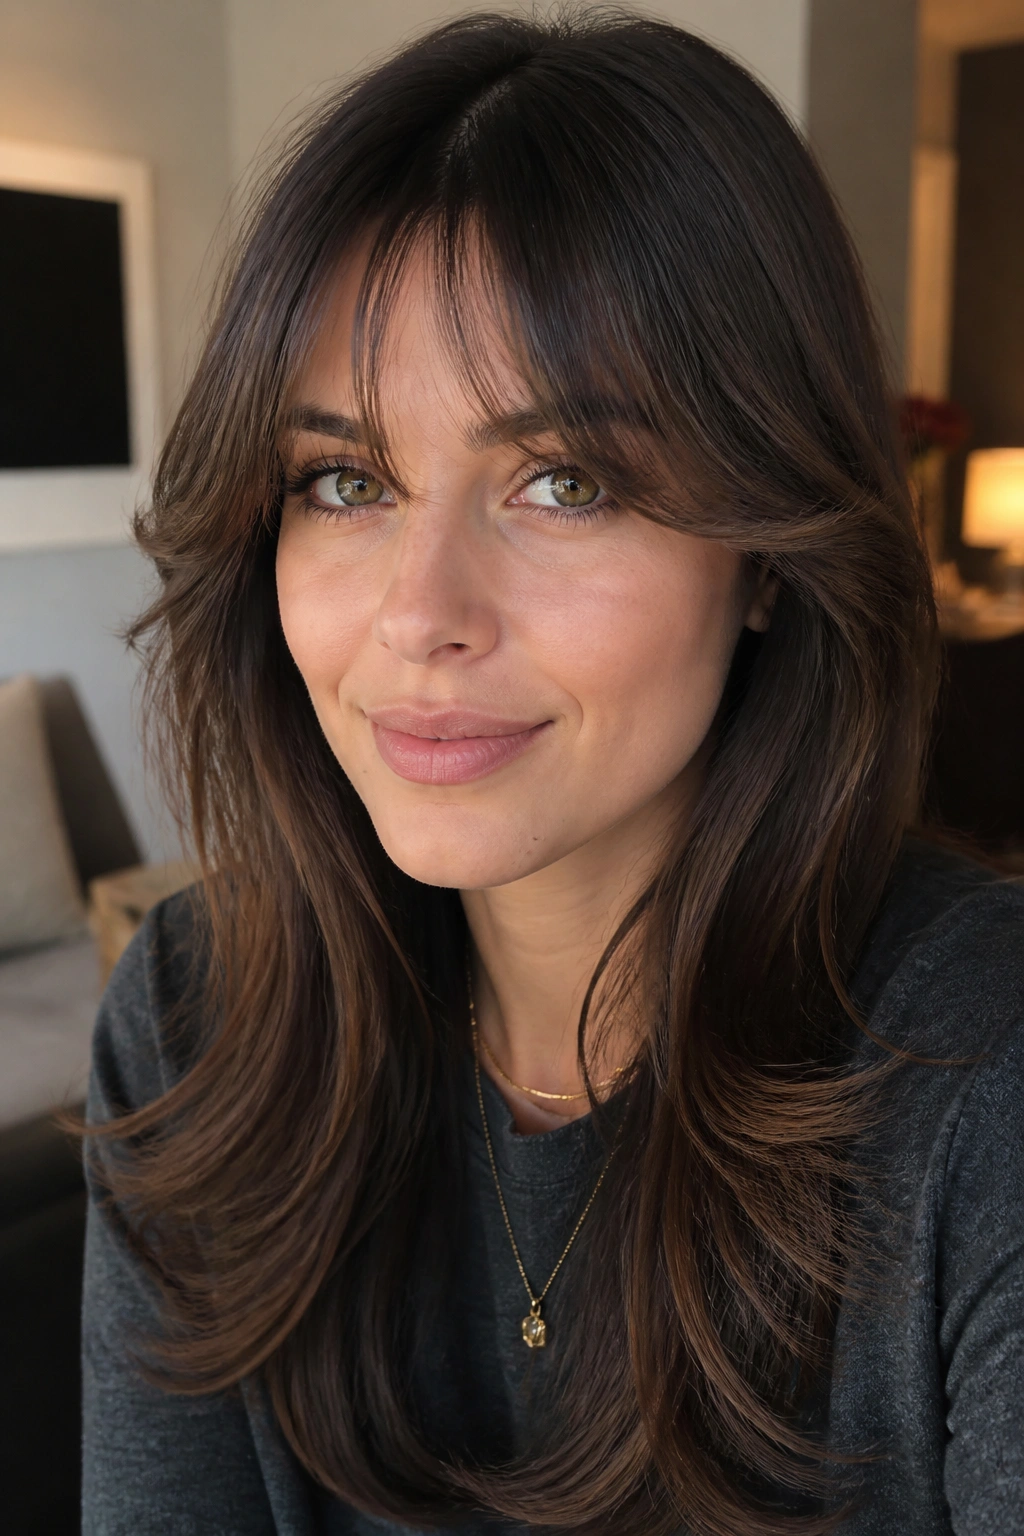
Feathered bangs are built on softness, which is exactly why they work well for home trimming. You are not trying to create a hard wall of hair. You are removing weight so the fringe bends and lifts instead of sitting flat across the forehead.
Point-cutting makes the difference
Use the tips of the scissors and cut upward into the ends at a slight angle. That leaves little tapered pieces instead of one blunt edge. If the fringe feels too heavy after that, take another pass through only the thickest spots. Don’t slash across the whole thing in one go. That is how feathered bangs lose their shape and start looking chewed up.
A feathered fringe usually looks best when the center is a touch shorter than the sides. That small lift keeps the hair off the eyes while letting the outer pieces melt into the rest of the cut. It also gives you more room to be imperfect. Nice trade.
- Best on layered cuts.
- Works on straight or wavy hair.
- Trim only the densest pieces if the fringe feels bulky.
- Leave the ends soft, not wispy to the point of vanishing.
8. Rounded Bangs
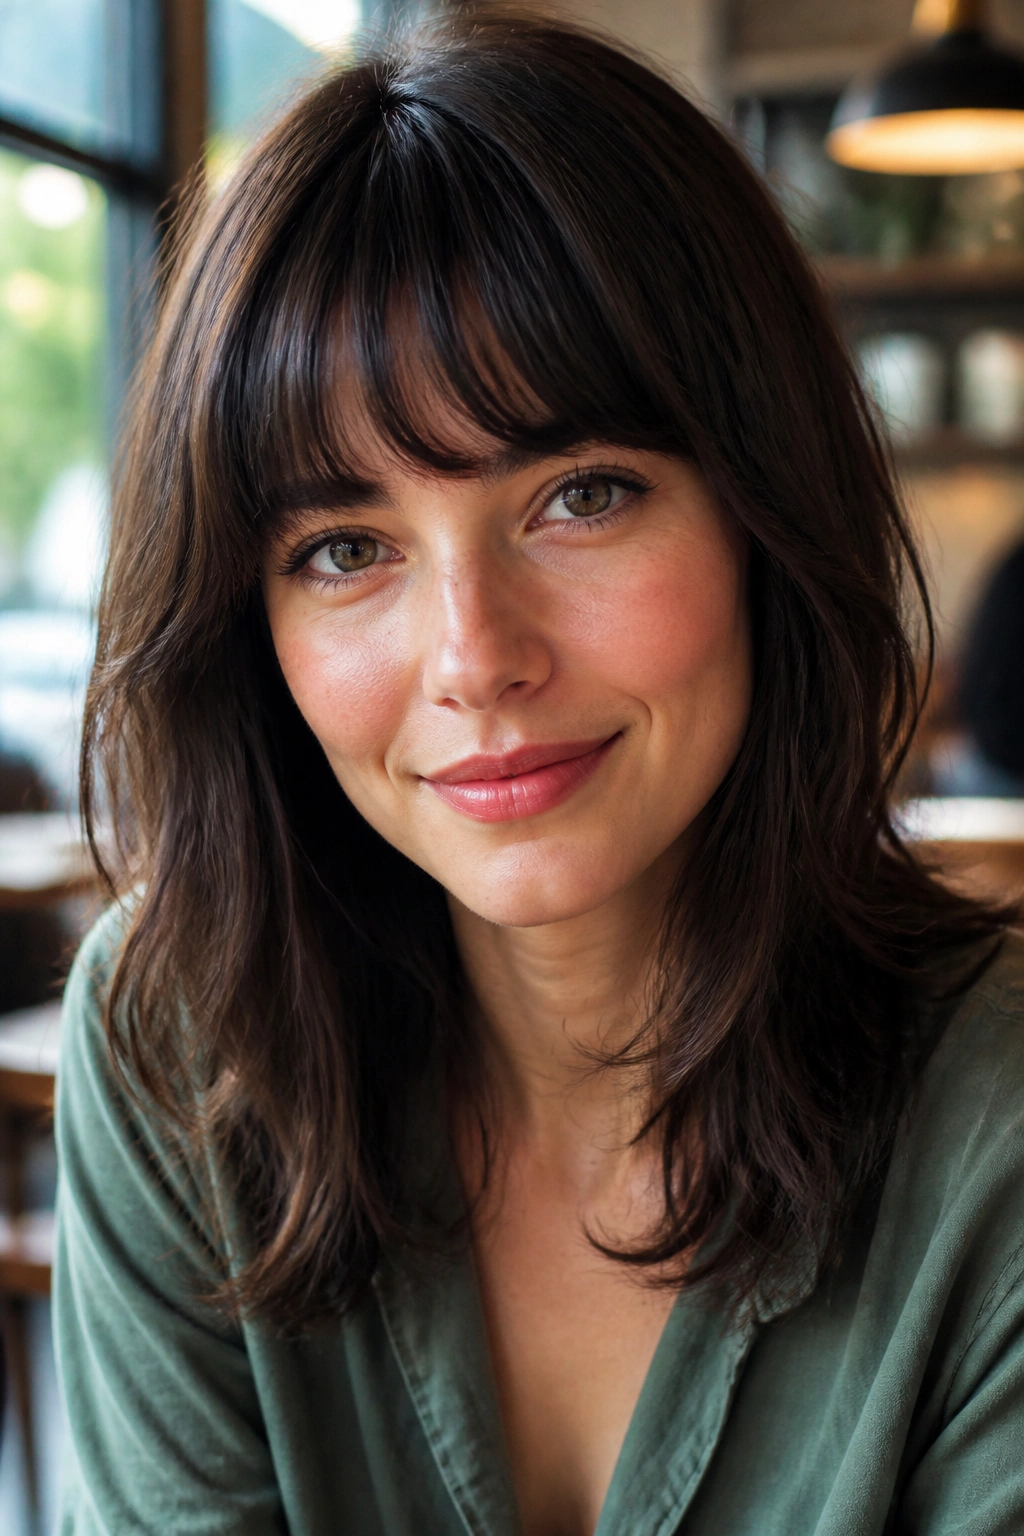
Rounded bangs are easier to trim than they look because you are following a curve, not drawing a ruler line. That curve can flatter the face and hide a tiny off-angle snip far better than a flat, blunt fringe.
The shape usually starts a little shorter in the center and drifts longer at the sides, which means your fingers can guide the hair in small sections without needing a perfect eye. If you have thick hair, this style can take weight out of the front without turning the fringe choppy. If you have fine hair, it adds a soft frame without demanding much styling.
I like this style for people who hate the hard feel of a straight-across bang. It’s gentler. It also grows out in a civilized way, which matters more than people admit. A fringe that turns into a puffy shelf after two weeks is a nuisance. Rounded bangs stay more cooperative.
9. Birkin Bangs
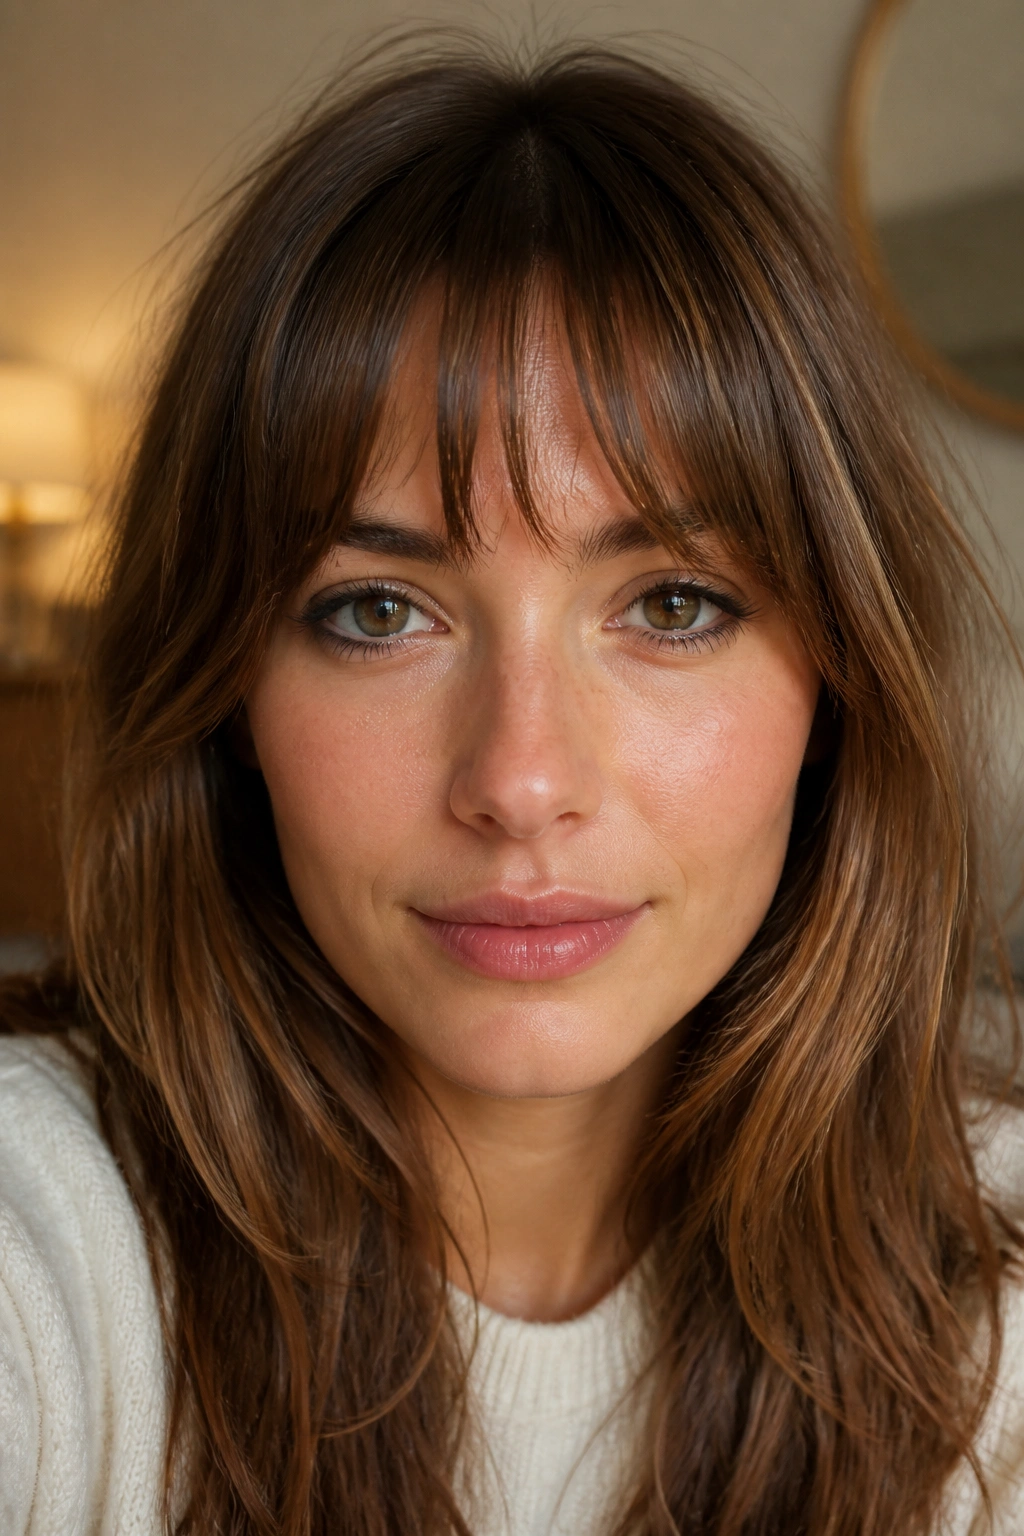
What makes Birkin bangs so practical at home? They live in that loose middle ground between a full fringe and a face-framing sweep, so you can keep them a little longer and still get the look. They should feel airy, a touch uneven, and never too stiff.
The easy part is that this style does not punish you for leaving some length. In fact, a slightly longer Birkin fringe often looks better than an overcut one. The hair sits around the brow line, separates naturally, and leaves a few longer pieces at the sides that soften the face. If you cut them dry and resist the urge to make the front perfectly even, you will usually land in the right zone.
How to keep them airy
Hold the fringe low and snip into the tips, not across the whole line. Leave the center a bit fuller than you think and let the temples fall away from the face. The whole point is softness. A Birkin bang that feels too neat has lost the charm.
- Keep them brow length or just below.
- Use point cuts, not blunt chops.
- Let the edges taper into the cheekbone.
- Trim less often than a micro fringe, more often than curtain bangs.
10. Choppy Piecey Bangs
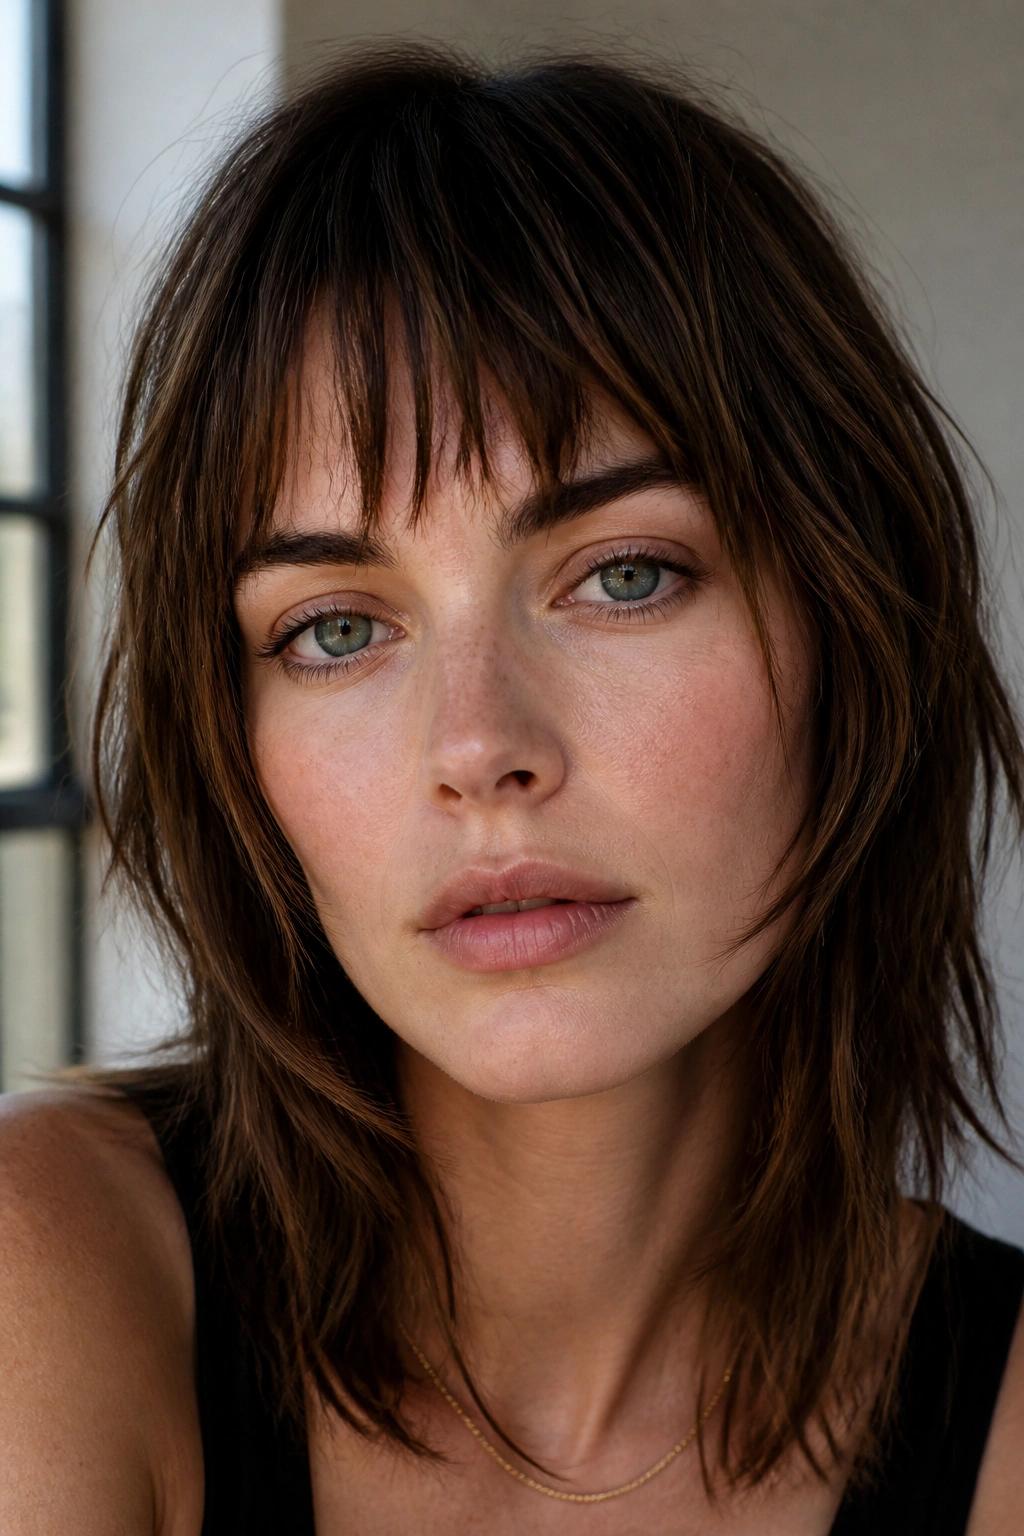
If your hair already has texture, choppy bangs can look better with a little imperfection in them. That’s the nice part. The pieces separate on their own, so a tiny uneven snip reads as texture instead of damage.
Picture a fringe that does not sit as one solid curtain. The strands break up into small sections, some a little longer, some a little shorter, and the eye reads the whole thing as movement. That is why this style is so easy to maintain at home. You are not chasing a pristine edge. You are keeping the texture alive.
Use the point-cutting technique and work in narrow vertical slices. If one spot feels heavy, remove weight from just that spot. Do not try to even everything out at once. Choppy bangs look best when they keep a bit of roughness at the ends.
Good fit: thick hair, shag cuts, and anyone who likes a fringe that looks a little lived-in on purpose.
11. Shag Bangs
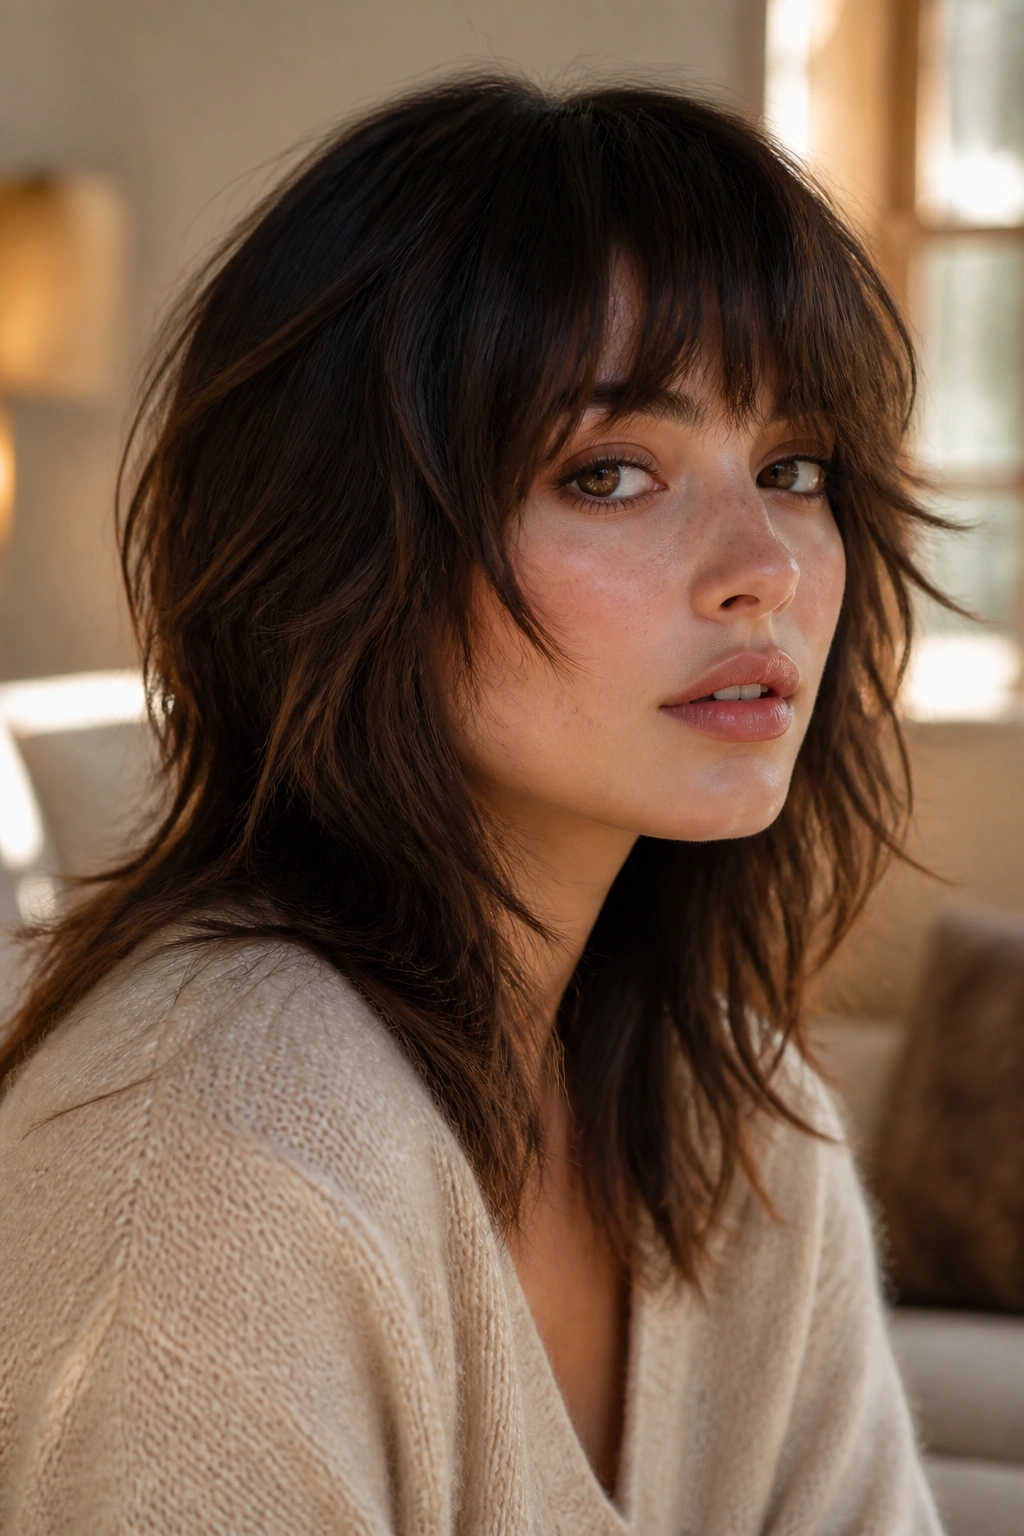
Shag bangs are built for people who do not want their fringe to behave like a separate haircut. They blend into layers, which is why home upkeep tends to be easier than it looks. You are maintaining a shape that already likes to move.
The front pieces usually sit somewhere between the brow and the cheekbone, and they break into layers rather than one solid line. That gives you a lot of room to clean up the ends without wrecking the whole cut. A small trim at the nose-to-brow zone can freshen the fringe, while the rest of the shag keeps the shape soft.
I think this is one of the most forgiving options for wavy hair. The bends hide tiny mistakes. Even straight hair can work if you keep the ends feathered and avoid cutting a hard line across the front.
The best part is that shag bangs rarely look overdone after a home trim. They are supposed to look a little loose. That saves you from the kind of pressure that makes hands shake.
12. Face-Framing Fringe
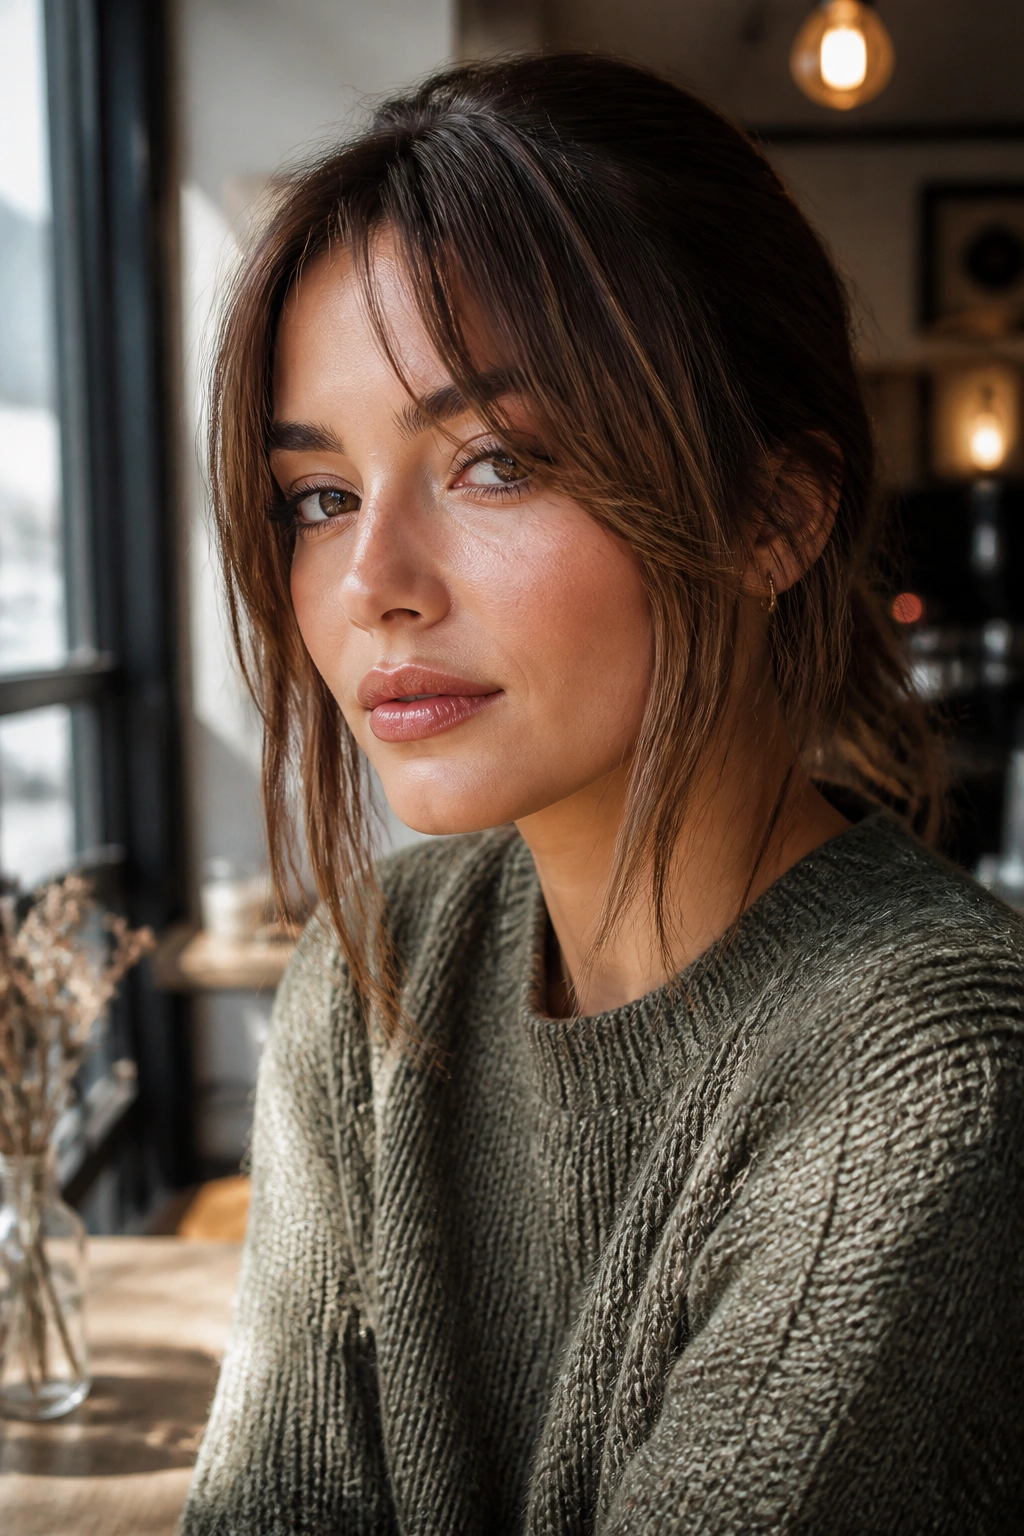
Unlike a full forehead fringe, face-framing fringe gives you a lot of escape room. The shortest pieces can sit at the cheekbone or lip line, and that extra length means a small miscut hides inside the rest of the hair instead of sitting right in the middle of your face.
This is a smart choice if you want bangs without committing to a full line across the forehead. It also suits people who want their cut to grow out gracefully. A face-framing fringe usually works with the rest of the haircut, not against it, so a home trim is more about tidying the shape than redrawing it from scratch.
I like this option for people who wear their hair up often. The front pieces still do work when the hair is down, and they soften a bun or ponytail without needing constant attention. If one side ends up slightly off, it blends into the rest of the front layers fast. That is the whole appeal.
13. Split Fringe
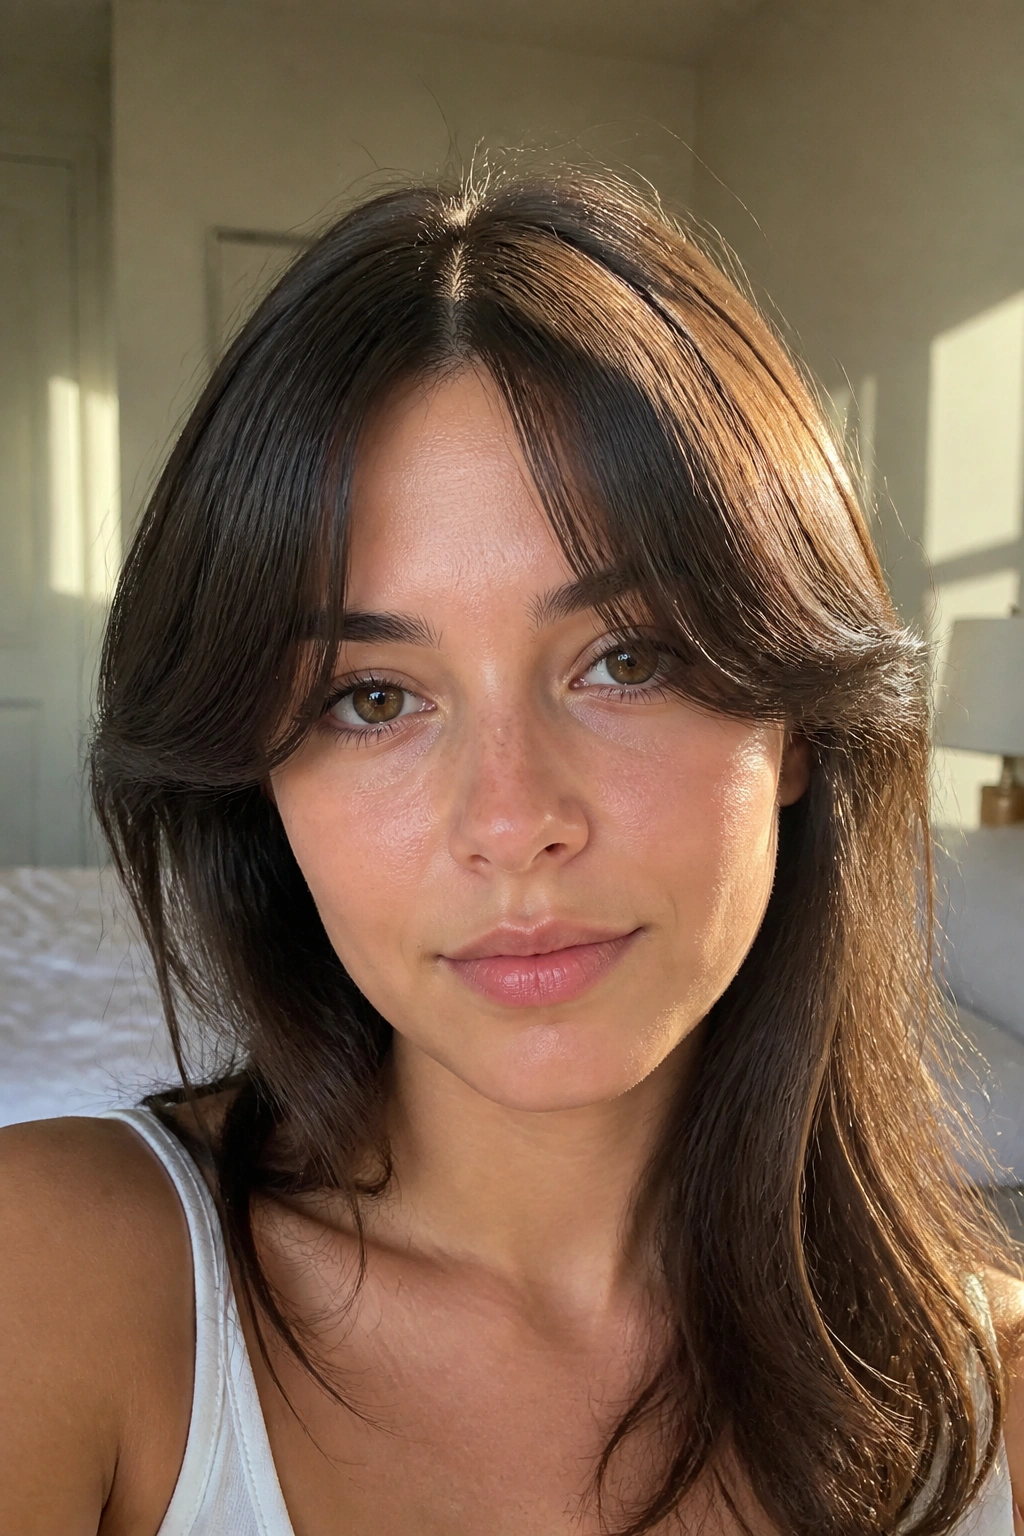
A split fringe is basically a center part with more intention behind it. The pieces fall away from the middle, but they stay a little closer to the face than curtain bangs do, which makes the shape easy to maintain with small trims.
How to trim the part
Section the fringe down the center, then work on one side at a time. Pull each side forward and make tiny diagonal snips toward the longest point. Leave the middle a touch shorter, then let the rest lengthen as it moves outward. You are shaping two soft wings, not making one hard line.
- Best if you like a fringe that opens the face.
- Trim on dry hair so the split stays visible.
- Keep both sides near the same length, but do not panic if one side sits a little differently.
- Use the natural gap, not a forced one.
Small tip: if the center starts to feel too thick, remove weight from the middle only. Leave the edges alone.
14. Grown-Out Bangs
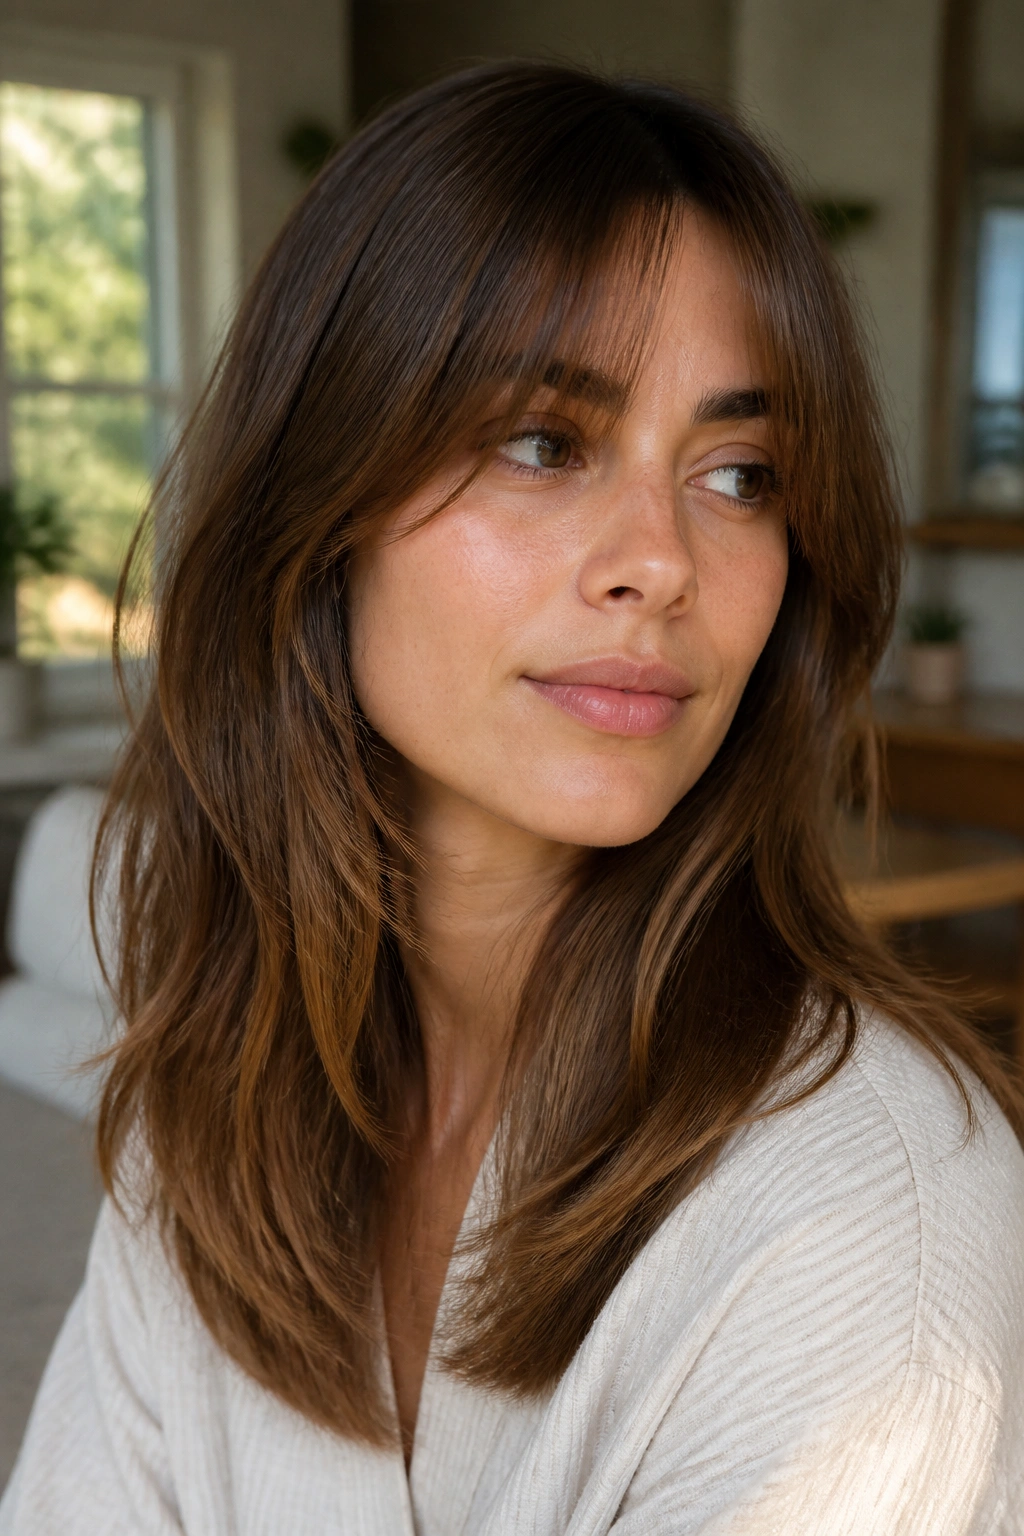
Grown-out bangs are the most forgiving fringe in the bunch, and I mean that in the nicest possible way. You are mostly preserving shape, not creating one from scratch, which makes them a lot safer to trim at home.
They usually sit somewhere between cheekbone and jaw length, sometimes blending into layers so smoothly that they barely read as bangs at all. That is what makes them easy. If the trim comes out a touch uneven, the pieces still fall into the haircut around them. You are not trying to hit one exact line. You are just keeping the front from swallowing your eyes.
The smartest way to maintain them is to dust only the ends that start to feel heavy. A quarter inch can matter here, but not much more. Keep the center pieces longer than you think, and let the outer edges do most of the shaping work. This style is a relief for anyone who likes bangs in theory but dislikes babysitting them in practice.
15. Curly Bangs
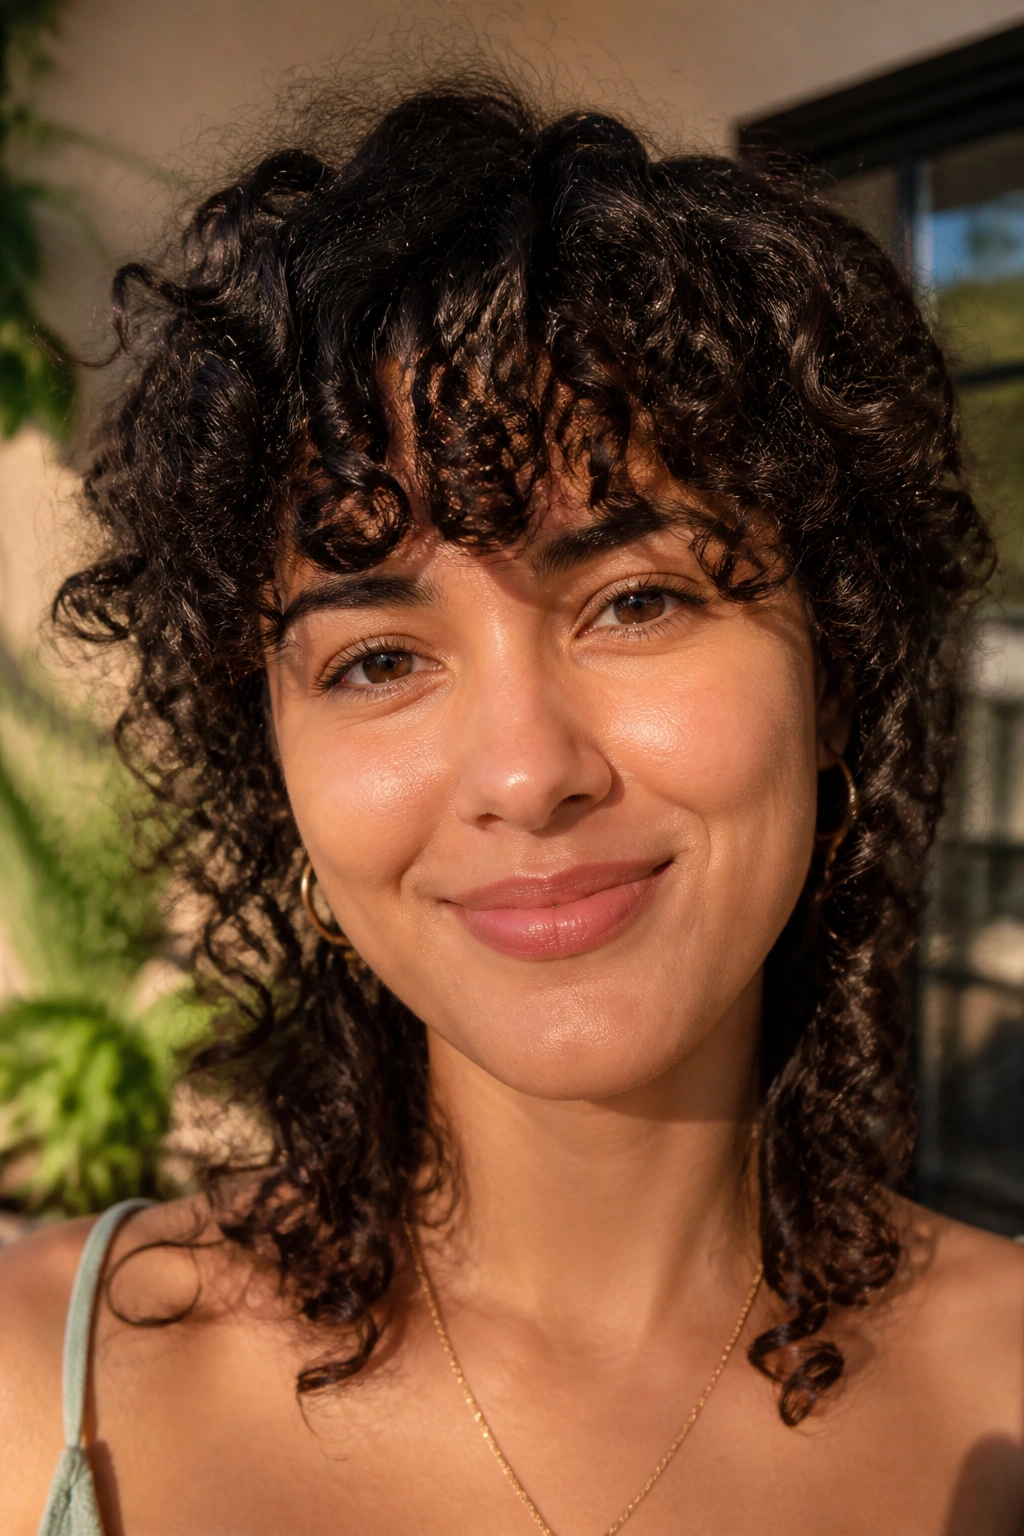
Curly bangs are easier to trim at home than straight bangs if you respect the spring factor. A curl will shrink when it dries, sometimes a lot, and that built-in bounce hides tiny asymmetries that would be obvious on straighter hair.
The safest method is to cut them dry, curl by curl, while the hair is sitting in its natural pattern. Trim a single curl, let it spring back, then judge the next move. If you slice across a whole row of curls while they are stretched out, you usually end up too short. That is the classic mistake, and it happens fast.
Curly fringe can look soft, playful, and surprisingly polished when it’s maintained with a light hand. Keep the shortest curls a little longer than you think you need, because shrinkage is real. A half-inch difference on paper can be a full eyebrow’s worth on the forehead. That’s the part people forget.
If your curls are tight, this style can still work. You just need patience and a very small pair of sharp scissors. No rushing. Curly bangs punish rushing.
Final Thoughts
The safest bang styles to trim at home are the ones that leave you some wiggle room: curtain bangs, bottleneck bangs, side-swept shapes, shaggy fringe, and anything that softens into the rest of the haircut. The harder the line, the less room you have to recover from a shaky hand.
Dry hair, sharp scissors, and tiny snips matter more than bravado. A fringe should look good from three feet away, not like it was engineered under studio lights.
If you want the lowest-stress place to begin, start with a longer, softer shape and trim less than you think. That rule has saved more bangs than any fancy technique ever did.
