



Hair has a habit of acting up at the exact wrong time. You can go from fine to frizzy in one coffee break, and the style you meant to wear suddenly looks like you slept in a wind tunnel.
That’s why easy hairstyles you can do at home matter more than people admit. Not the Pinterest-level stuff that needs twelve pins, a round brush, and a calm afternoon. I mean the repeatable shapes that work on clean hair, second-day hair, curly hair, straight hair, long hair, shoulder-length hair — the ones you can fix with a brush, a couple of elastics, and maybe a claw clip if you’re feeling fancy.
The best part is that “easy” does not have to mean boring. A low ponytail can look sharp. A braid can look soft and polished. A bun can look intentional instead of like a last-minute apology. The trick is placement, tension, and knowing when to stop fussing.
So if your hair tends to fight you, good. A few of these will still hold. Start with the first one when you want something clean and fast.
1. The Low Sleek Ponytail with a Center Part
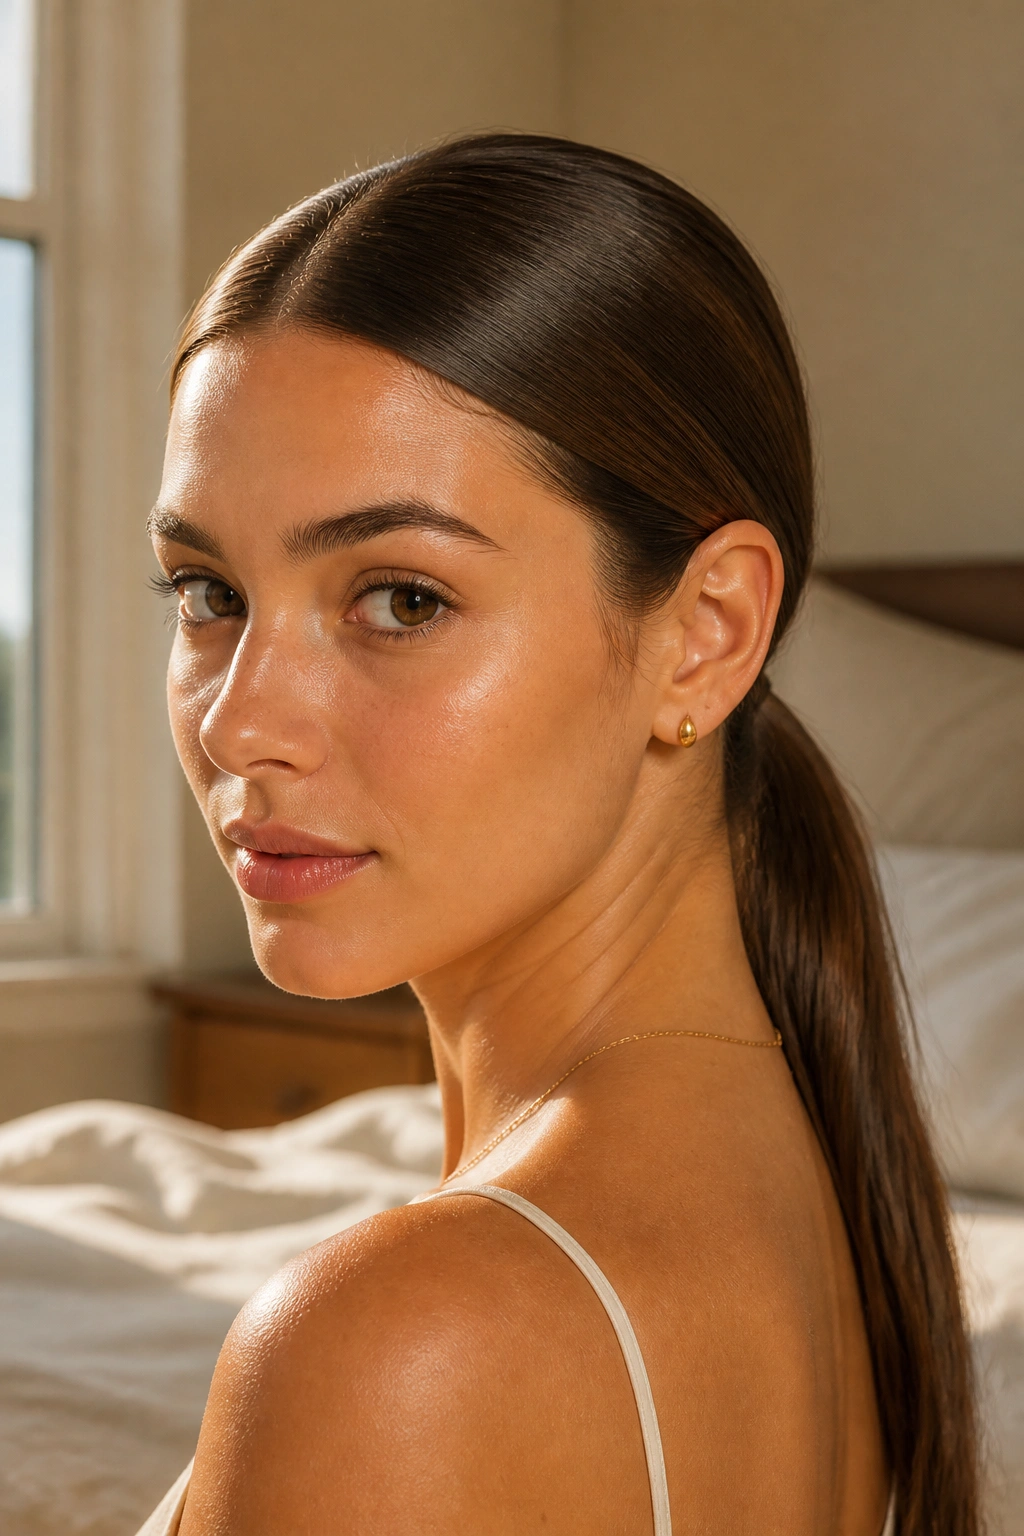
This is the hairstyle I reach for when hair needs to look calm on purpose. A low sleek ponytail sounds plain, but a clean center part and a smooth crown change everything. It reads neat, not dull.
Why It Works
The shape sits close to the head, so flyaways are less visible and the whole thing stays put longer. It’s also one of the few styles that works on fresh hair and on hair that’s lived through a full day. If your ends are dry, a tiny bit of serum on the last 2 inches keeps the ponytail from looking rough.
A small detail matters here: place the ponytail about 1 to 2 inches above the nape. Too low and it can sag. Too high and it stops looking sleek.
- Use a fine-tooth comb or the tail end of a brush to make the part straight.
- Smooth the sides back with a light gel or styling cream.
- Wrap a 1-inch strand of hair around the elastic for a cleaner finish.
- Hide the end of that wrap underneath with one bobby pin.
Tiny tip: if your hair puffs up near the temples, press that area down with your palms after the gel goes on. Hands first. Brush second.
2. The Messy Bun with Soft Face-Framing Pieces

A messy bun only looks good when it feels a little lazy, not sloppy. That sounds picky, but it’s true. The difference is usually two loose pieces near the face and a crown that has a bit of lift instead of being crushed flat.
Pull your hair into a high or mid ponytail, twist it once or twice, then coil it into a bun. Stop tightening when the bun looks full enough from the front. If you keep tugging, it starts to look overworked.
The face-framing strands should be light, not dramatic. Leave out a section about the width of your thumb on each side, then curl the ends slightly with your fingers if they look too sharp. Dry shampoo helps here too, especially if the roots are shiny and the bun needs grip.
This is a good style for days when your hair is not cooperating and you do not want to negotiate with it.
3. The Claw-Clip French Twist for Easy At-Home Styling
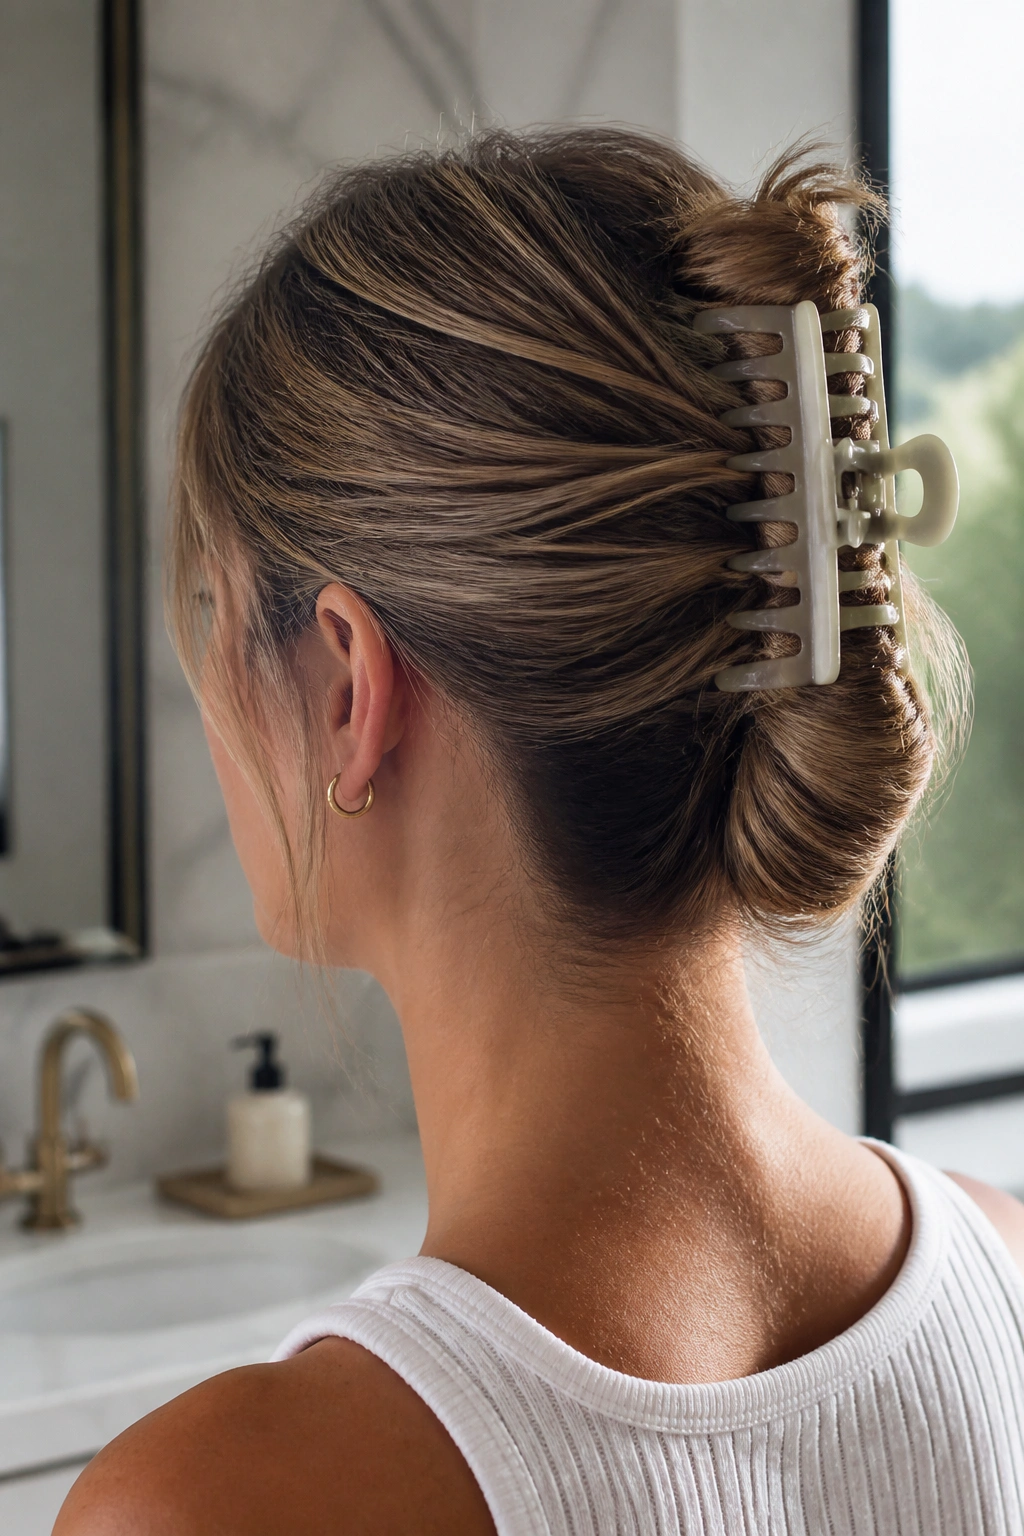
A claw clip can look very ordinary until you place it right. Then it turns into one of the fastest at-home hairstyles that still feels polished. I like this one on medium to long hair because the twist gives shape, and the clip keeps the whole thing from sliding apart.
How to Make It Hold
Gather your hair at the back of your head as if you were making a low ponytail, twist it upward, and fold the length back toward the crown. The ends can tuck into the twist, or they can fan out a little if your hair is thick. Place the clip vertically, not sideways, so it grabs more hair.
- Best with a medium or large claw clip.
- Works well on slightly dirty hair because the texture helps the clip hold.
- Use a few pins if the top layer keeps slipping.
- Keep the twist loose enough that the shape has depth.
A soft French twist is one of those styles that looks far more complicated than it is. That is why people keep wearing it. It looks like effort. It isn’t.
4. The Half-Up Twist That Takes Less Than Five Minutes

Half-up styles are the safest bet when you want hair off your face but do not want a full updo. The twist at the back adds a little shape without taking away length, which is why this one works for school runs, desk days, and rushed mornings.
Take a section from each temple, twist both sections back, and secure them together with a small clear elastic or a tiny claw clip. If your hair is layered, the twist will look softer. If it’s blunt-cut, it looks cleaner and a little sharper.
Best Part
You can leave the rest straight, wave it, or let it air-dry into its own texture. No heat required. That matters more than people think, because a half-up style looks better when the lower half of the hair still moves.
A quick spray of texture at the roots gives the twist something to grab. Without that, silky hair tends to slide apart by lunch.
5. The High Ponytail with a Wrapped Base
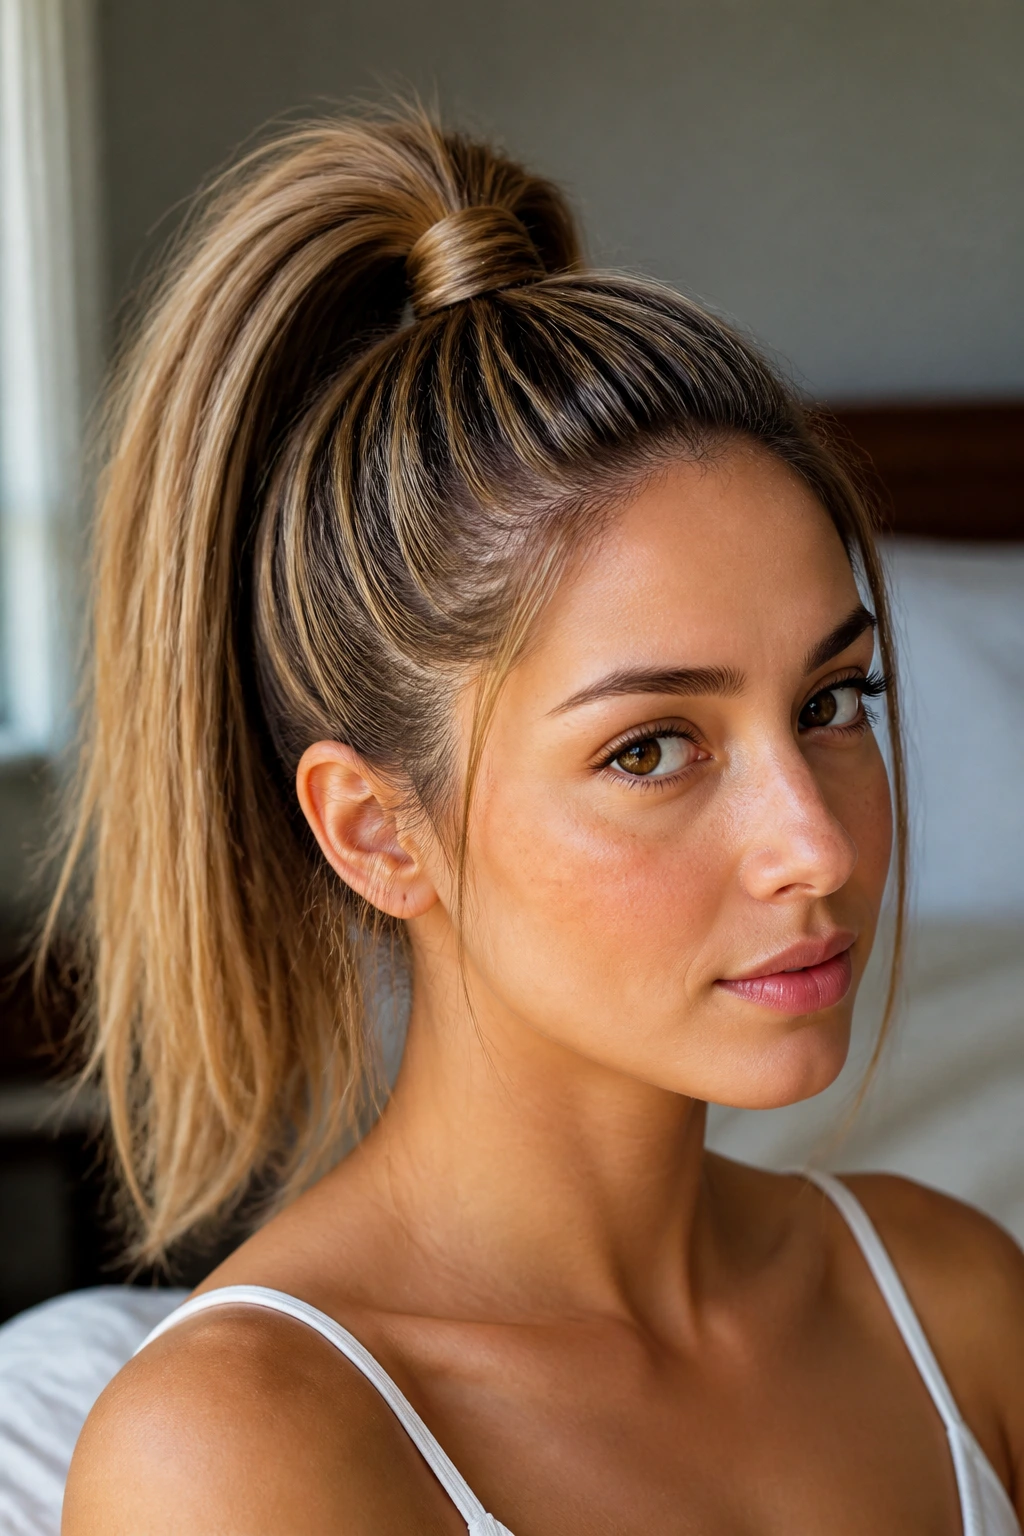
This is the ponytail that makes a plain outfit feel more put together. A high placement lifts the face, and a wrapped base hides the elastic so the style looks finished instead of rushed.
Brush your hair upward from the temples and nape, then secure it at the crown. Before you tighten the elastic all the way, pull the ponytail through once and smooth the top with your free hand. That tiny pause keeps lumps from forming.
A wrapped base is worth the extra ten seconds. Take a small strand from underneath the ponytail, wind it around the elastic, and pin it underneath. The result is cleaner, and the ponytail looks fuller at the same time.
If your hair is very fine, tease the ponytail at the roots with a comb. Not much. Just enough to keep it from looking flat against the head.
6. The Classic Three-Strand Braid
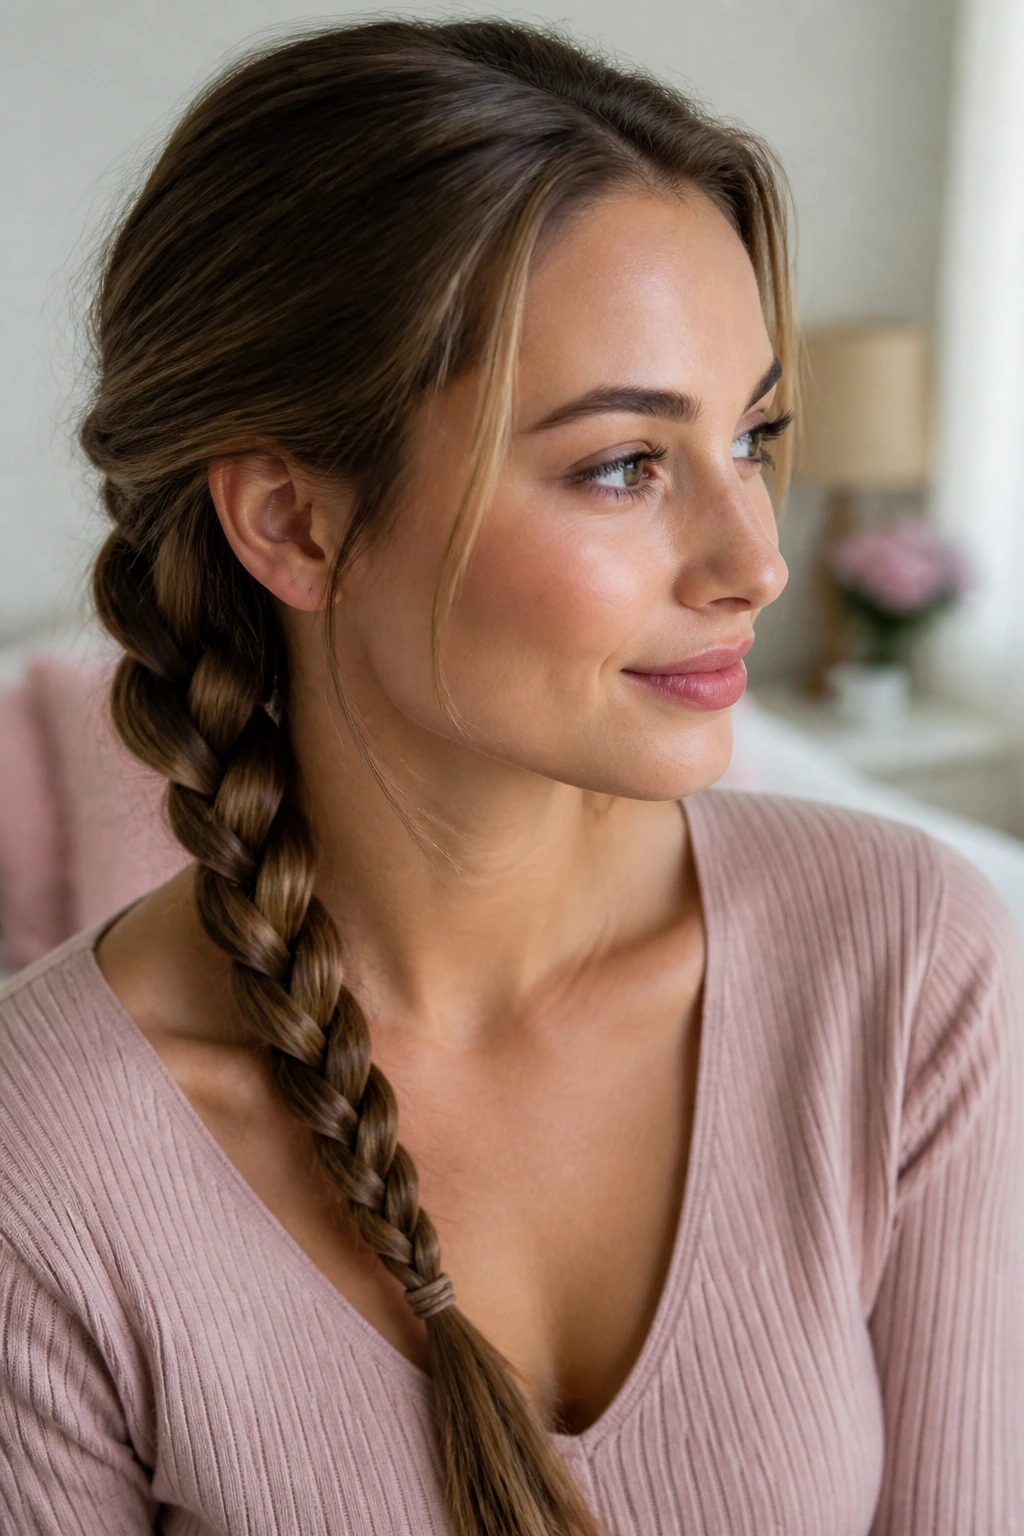
The basic braid earns its place because it never asks for much. Clean hair, damp hair, wavy hair — it works on all of them. It also keeps ends contained, which is useful if you’re cooking, studying, or just sick of hair brushing your shoulders all day.
How to Keep It Even
Divide the ponytail into three equal sections. Cross the outer right section over the middle, then the outer left over the new middle. Keep the tension steady, not tight. If one side starts to look thicker, pause and smooth it before you keep going.
- Start higher for a sportier look.
- Start lower for a softer, slower look.
- Finish with a clear elastic and pinch the braid gently to widen it.
- Mist the length lightly if your hair is slippery.
A simple braid is one of those styles that gets better the more you wear it. The hands learn the rhythm. Your fingers get faster. And the whole thing starts taking less time than finding a hair tie.
7. The Dutch Braid That Sits on Top of the Hair
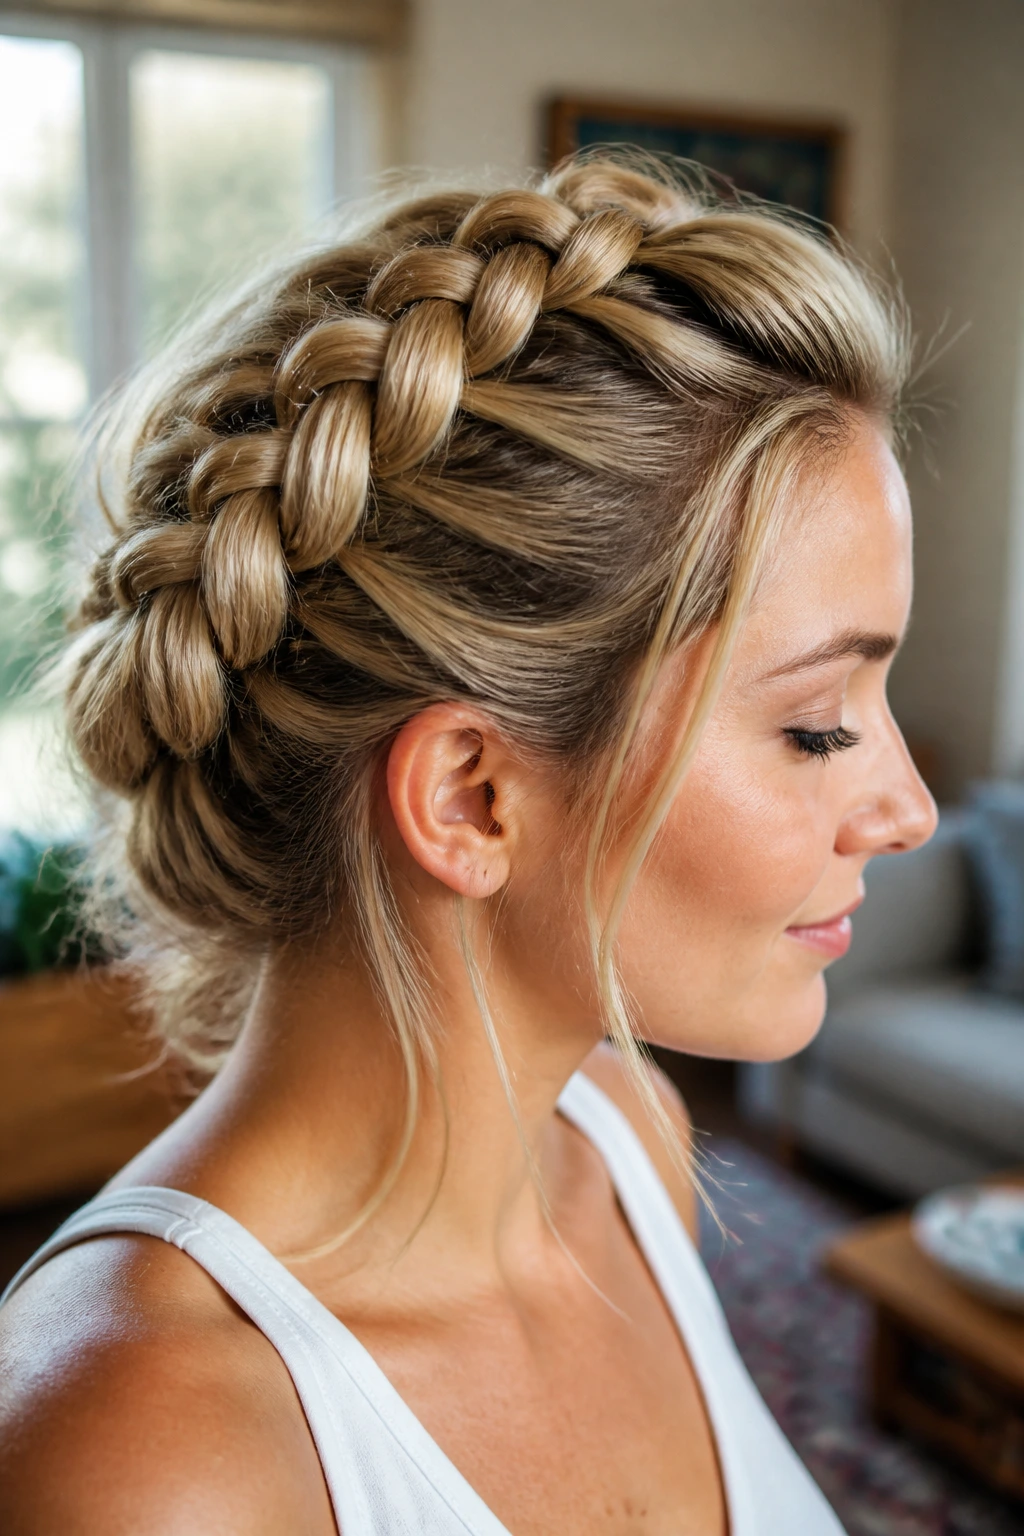
People see a Dutch braid and assume it needs serious skill. It doesn’t. It’s the same three-strand idea as a regular braid, only you cross the sections under instead of over, which makes the braid sit up from the scalp.
That raised shape is the whole point. It gives the braid more texture and more visible pattern, so even a slightly messy version still looks intentional. I like it best when you’re going somewhere active and want your hair to stay out of the way without looking plain.
Start at the hairline, take three sections, and keep adding small pieces as you braid down the head. The parts do not need to be perfect. If you can keep the tension even, the braid will look good.
The first time you do it, your arms may feel awkward. That passes. After a couple of tries, your hands stop fighting the angle.
8. The Fishtail Braid with a Loose, Soft Finish
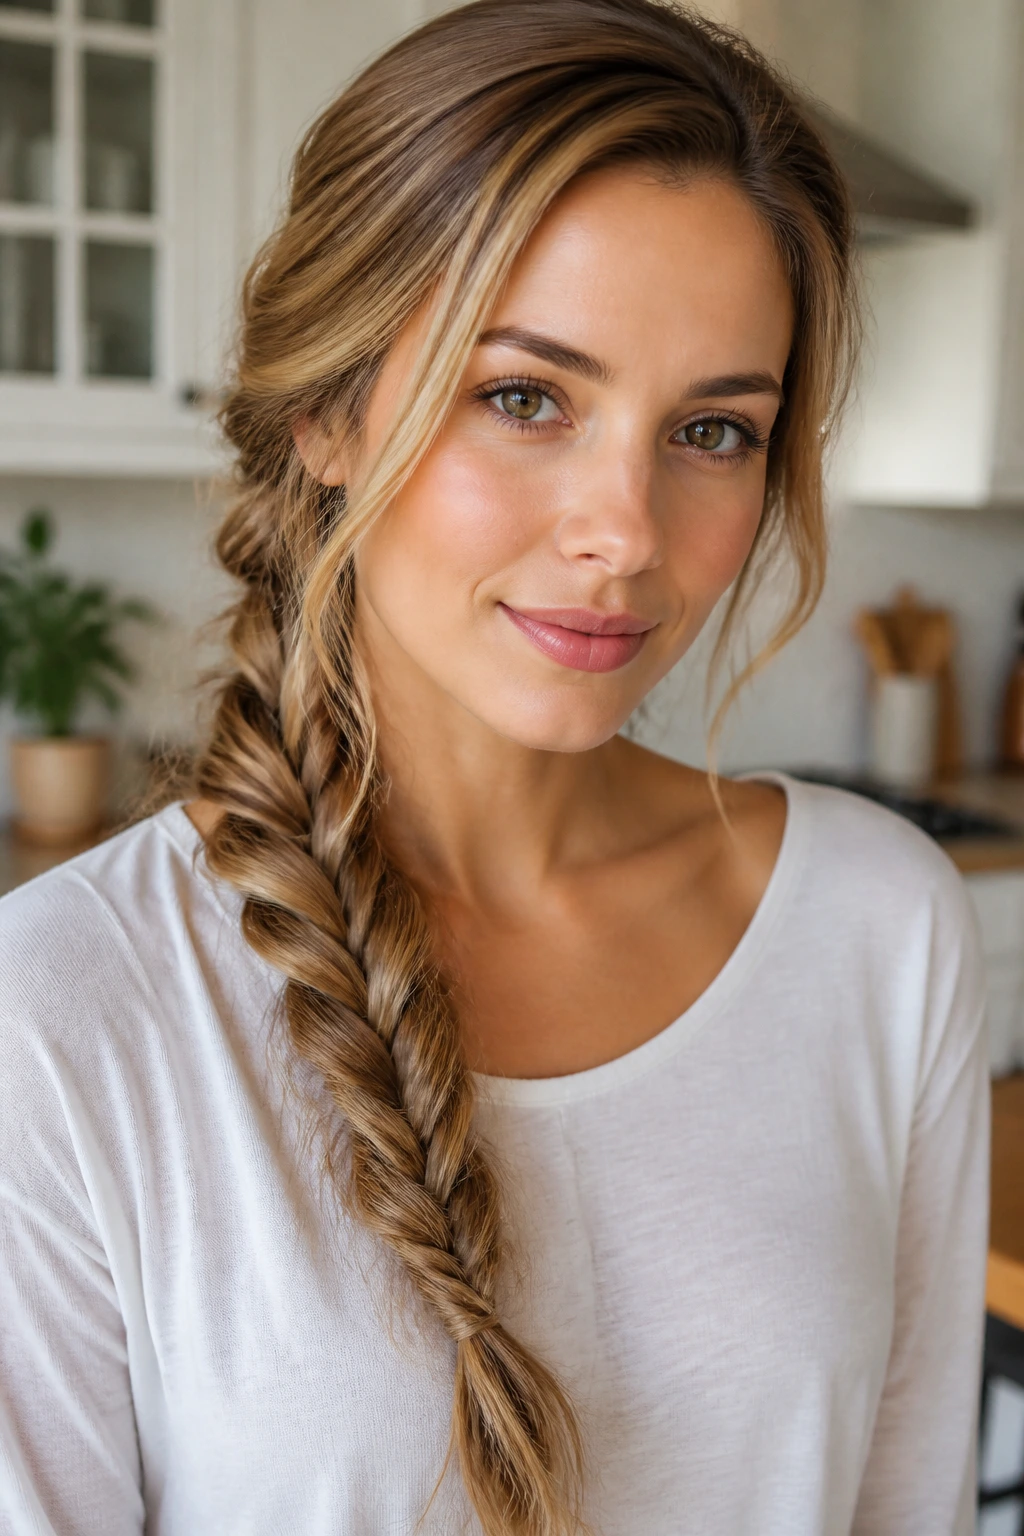
A fishtail braid looks detailed because the pattern is tighter and more broken up than a regular braid. The actual method is simple: split the hair into two sections, then take tiny outer pieces and cross them over to the other side.
It takes more patience than speed. That is the tradeoff. But once you get the rhythm, it becomes oddly soothing.
What Makes It Different
The smaller the pieces, the finer the pattern. If you want a cleaner look, keep the sections thin. If you want a chunkier braid, take bigger pieces and loosen the finished braid by pinching it gently from the sides.
A fishtail looks especially good on long hair because the pattern has room to show off. On shoulder-length hair, it still works, but the braid will sit shorter and feel more casual.
Try it with a center part and a low ponytail base if you want the braid to hang neatly over one shoulder. That version is easier to manage and less likely to fall apart halfway through the day.
9. The Bubble Ponytail
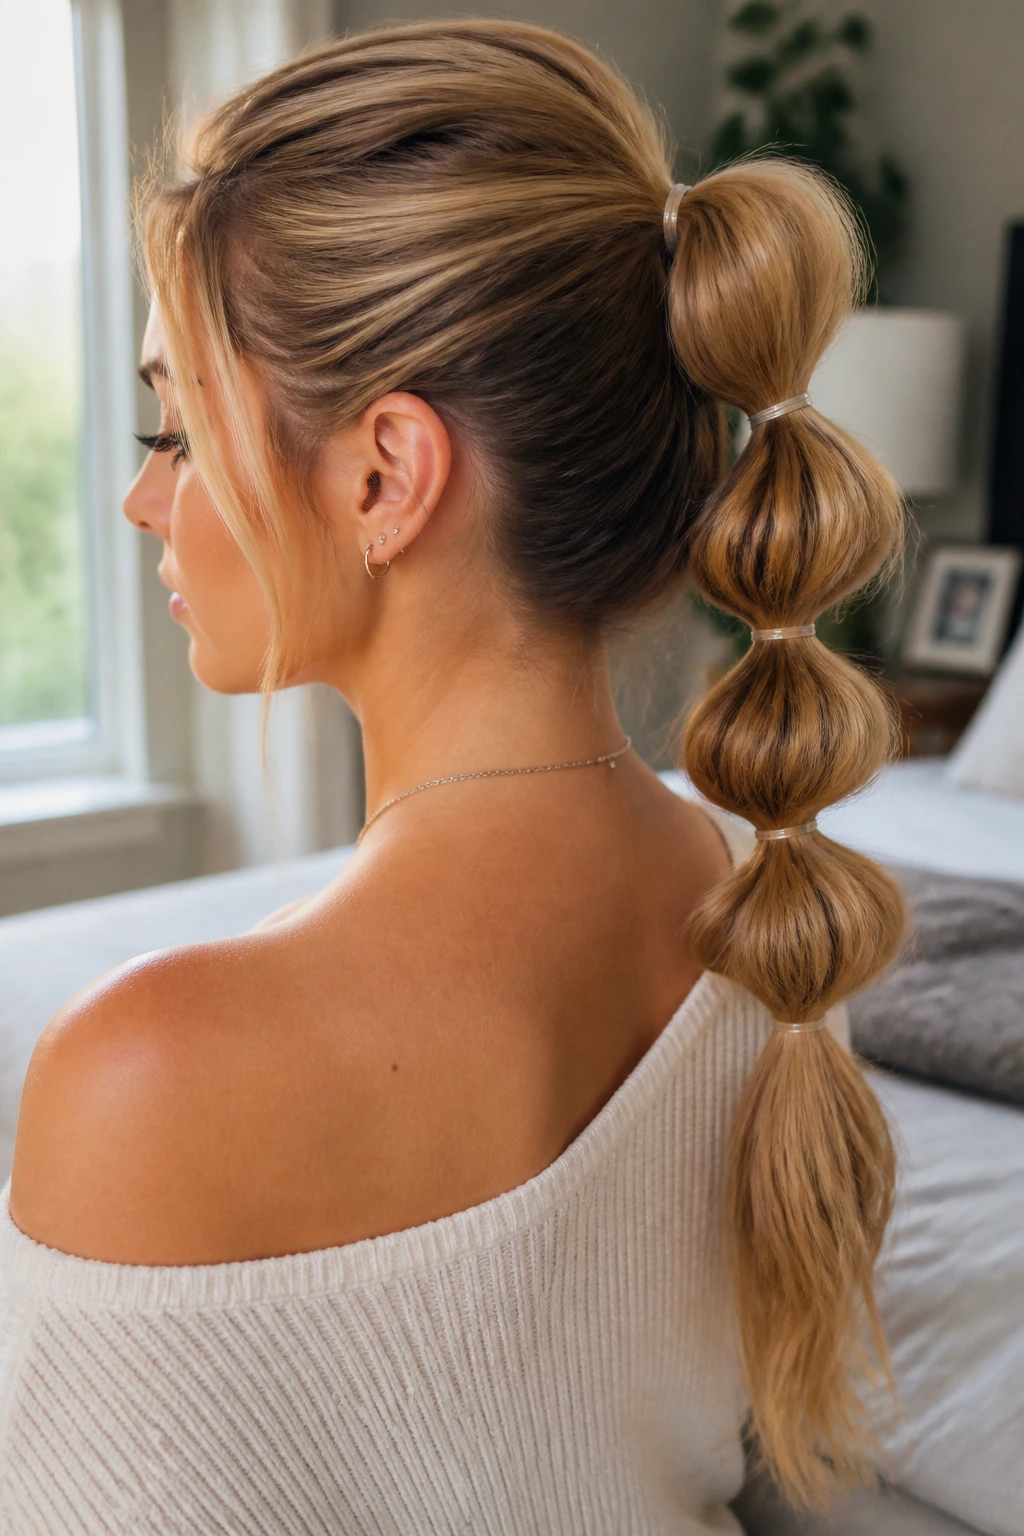
This one always gets more attention than it deserves, and I mean that in a good way. A bubble ponytail looks playful, but it’s basically a sequence of evenly spaced elastics with the sections puffed out between them.
Tie your hair into a ponytail first. Then add elastics every 2 to 3 inches down the length. After each one, gently pull the section between the elastics outward until it has a rounded shape.
- Use clear elastics for a clean finish.
- A little texture spray helps the bubbles stay full.
- Works best on medium to long hair.
- Pull the bubbles a bit wider from the sides, not the center, so they keep their shape.
The nice thing here is that the style looks deliberate even when it is slightly uneven. That makes it a forgiving choice for days when your hands are not cooperating.
10. The Double Space Buns

Space buns are one of those styles that can look very cute or very theatrical, depending on how tight you make them. Keep them relaxed and they work for everyday wear. Make them tiny and tight, and they start to feel costume-like.
Part the hair down the middle, then create two high pigtails. Twist each pigtail around its base into a bun and secure with an elastic or a couple of pins. Leave a few shorter pieces out if your cut is layered. That softens the shape immediately.
Keeping Them Even
Check the placement in a mirror before you secure both sides. One bun sitting half an inch higher than the other is enough to throw the whole thing off. Small difference. Big visual impact.
They are especially useful on second-day hair because the texture makes the buns hold better. Freshly washed hair can be too slippery unless you add dry shampoo first.
If you want them to feel less juvenile, keep the buns small and the part neat. That’s the trick.
11. The Top Knot That Actually Stays Put
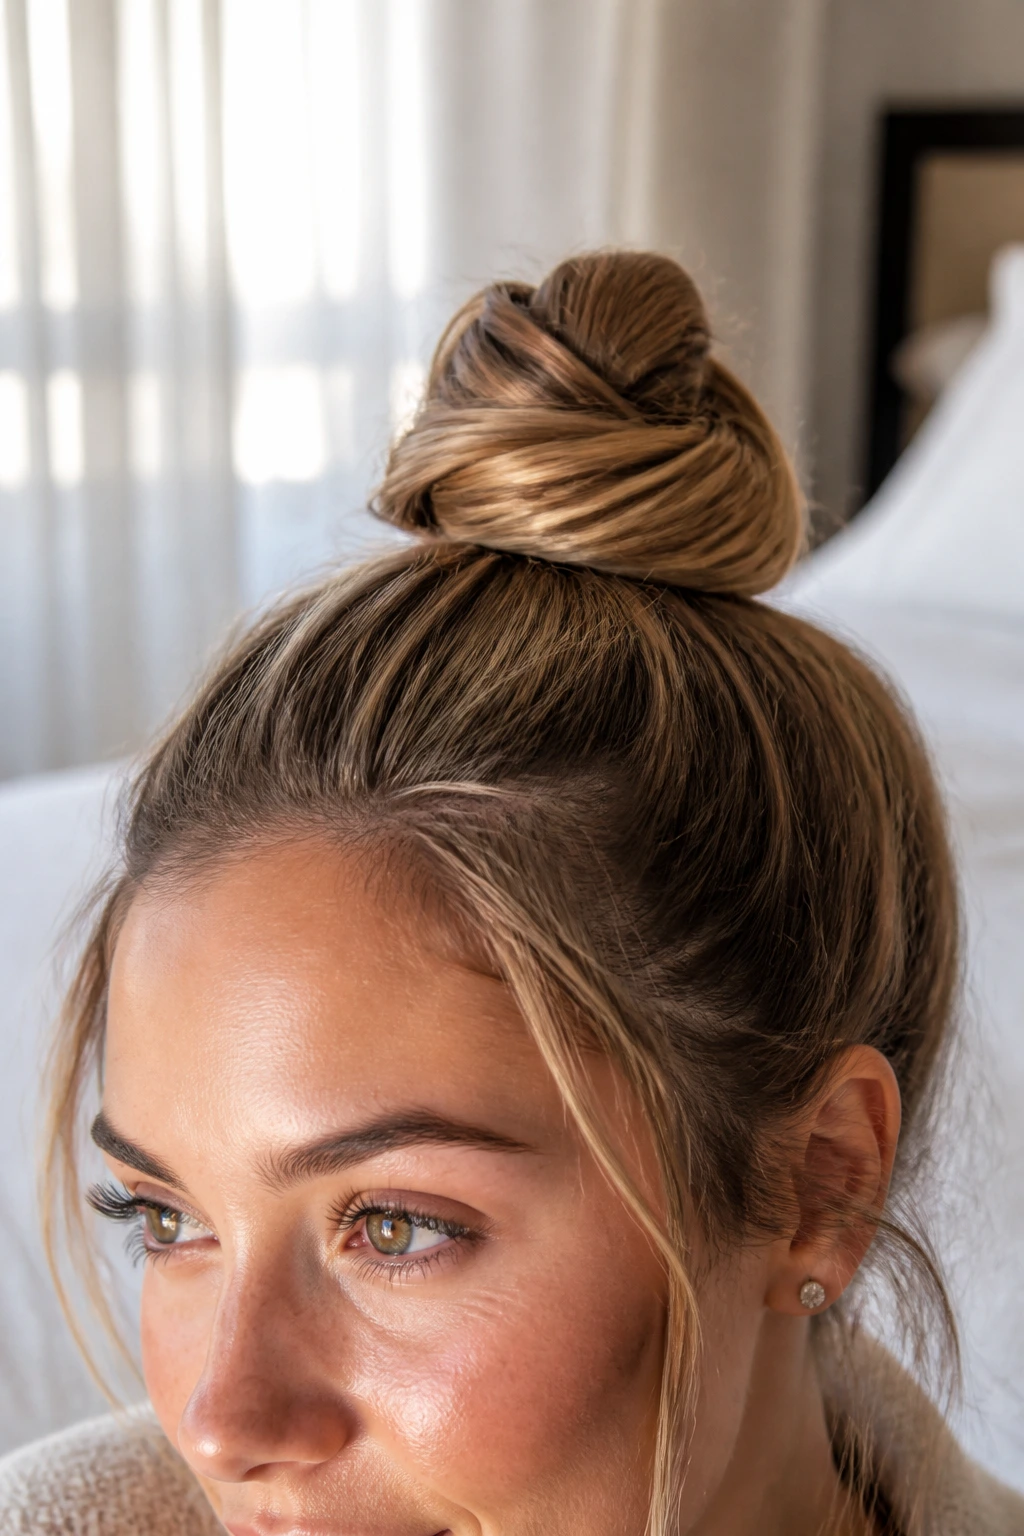
A good top knot should feel secure the second you pin it. If it wobbles when you shake your head, it isn’t finished. The best version starts with a high ponytail, then loops or twists around itself until a compact knot forms at the crown.
The placement matters more than the size. Too far forward and it pulls at your hairline. Too far back and it looks like a low bun that got lost. Right on top gives the cleanest shape.
I like this style for greasy roots because it hides shine and makes the hair at the crown look controlled. A little dry shampoo at the roots helps, but do not overdo it or the top starts to look chalky.
The edges around the face can stay smooth, or you can pull a few wisps loose for a softer shape. Either works. The knot itself should be the star.
12. The Low Bun with a Side Part
A side part changes the mood of a bun in a second. With a center part, the style feels more polished and balanced. With a side part, it feels softer, almost a little old-school in a good way.
Brush the hair into a low ponytail at the nape, but keep the side part visible. Twist the ponytail into a bun and pin the ends underneath. The bun does not need to be perfect. In fact, a slightly imperfect coil looks better because the side part already gives the style structure.
This is a nice option when you want your face framed but not exposed. A side-swept front section can sit neatly along the temple without needing much fixing.
It also plays well with earrings. Small hoops, studs, even a single barrette — all of them make sense here. That’s one reason I keep coming back to it.
13. The Twisted Crown Half-Up

Twisted crown styles feel fancier than they are. Take two sections from just above each ear, twist them back along the head, and secure them together at the back. The effect is soft, neat, and slightly romantic without becoming fussy.
Where It Helps Most
This one is especially useful when your front layers keep falling into your eyes. The twists hold those pieces back while leaving the rest of the hair down, which is a nice middle ground on days when you want movement.
- Best on shoulder-length hair and longer.
- Use two bobby pins in an X if the twist slips.
- A little wave in the loose lengths helps the style blend better.
- Works with straight hair too, but the twists look fuller on textured hair.
The nice thing is that it does not need heat or tools beyond a couple of pins. A small detail, but that matters when you’re trying to get out the door without turning the bathroom into a project.
14. The Headband Tuck
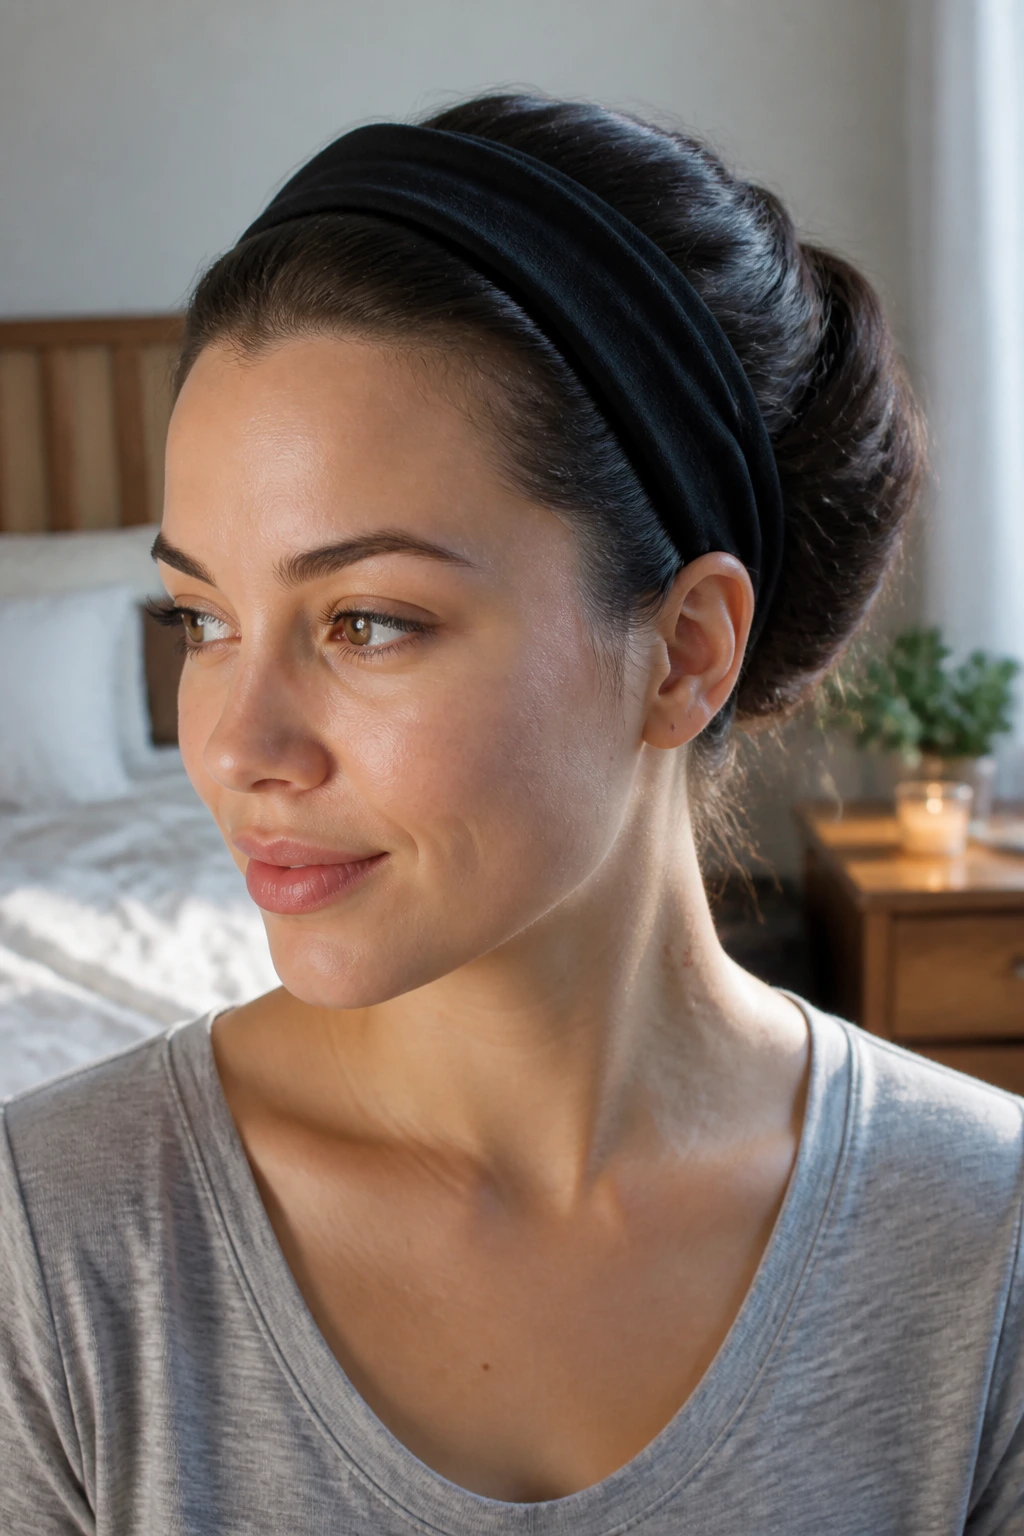
This one is almost unfairly easy. Put on a stretchy headband, then tuck the hair into it section by section until the length rolls up and disappears. It sounds too simple to work, yet it gives a neat, vintage-looking finish in under five minutes.
Start with hair that’s brushed smooth. Place the headband just behind the hairline, not too far back, or the tuck gets loose. Then tuck the ends upward and around the band until the whole length sits inside the roll.
- Best for medium-length hair.
- A little texture gives the tuck more grip.
- Use pins at the nape if the roll starts to loosen.
- A wide headband makes the style softer; a narrow one makes it cleaner.
This is one of the best easy hairstyles you can do at home when your hair is neither clean nor fully dirty enough for a ponytail. It handles that awkward middle day beautifully.
15. The Slicked-Back Bun
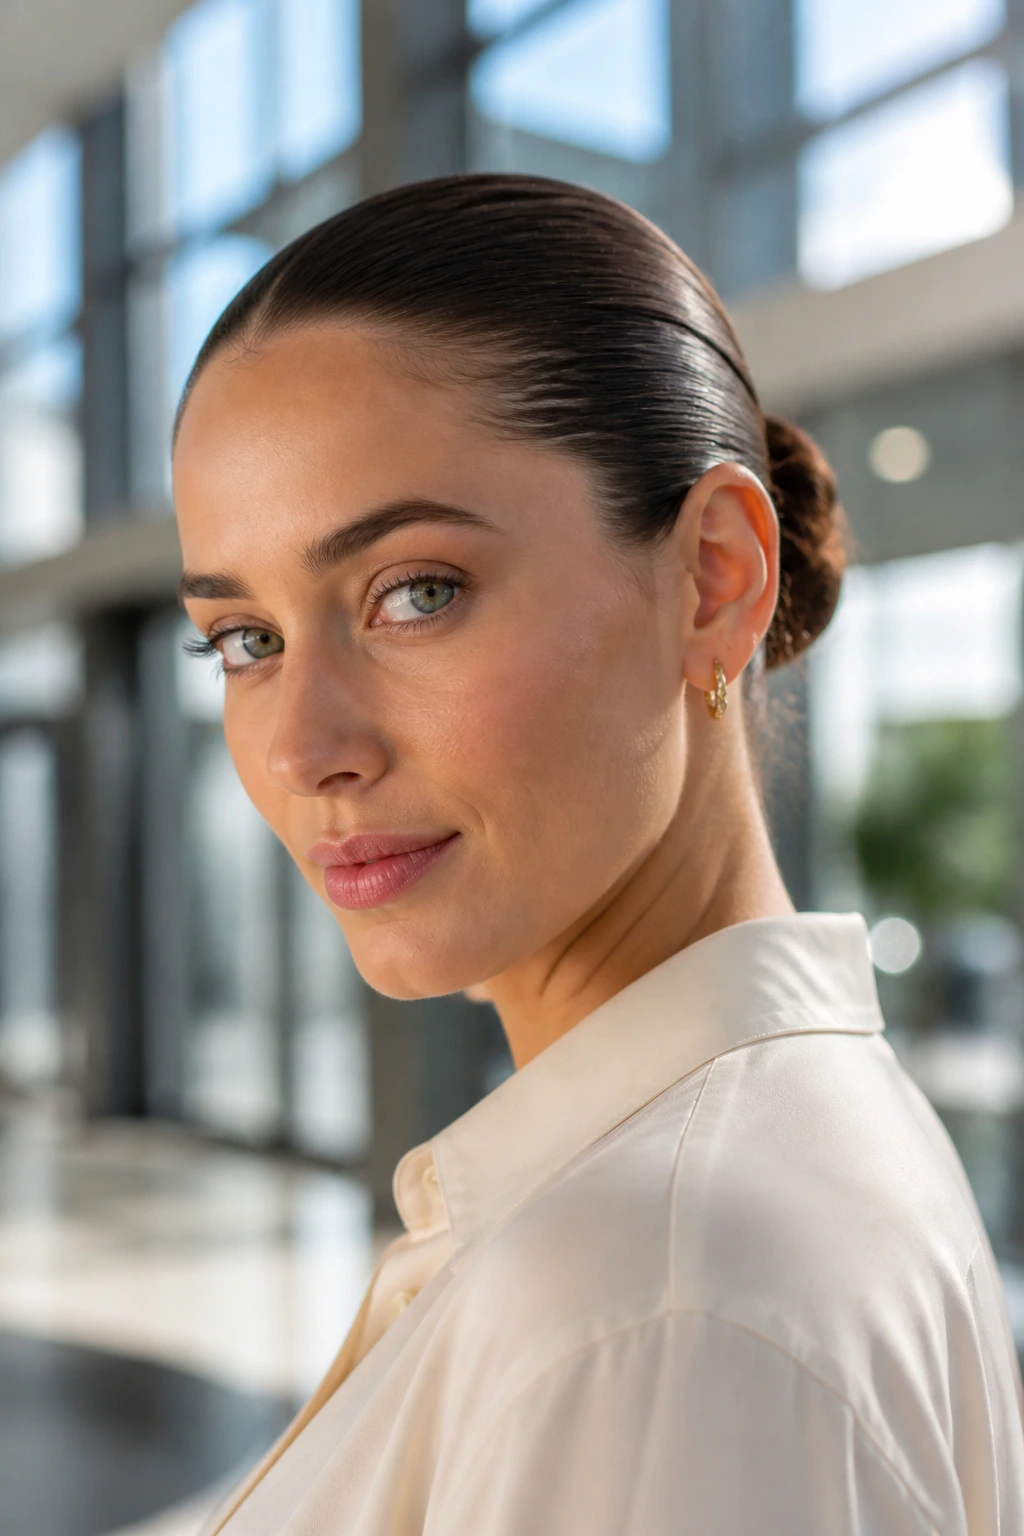
This style has a sharper edge than the others, and I like that. It’s blunt in a good way. The hair is brushed straight back from the hairline, held with gel or styling cream, and tucked into a bun low or mid-head.
The key is a clean surface. If the roots are greasy in random patches, the bun can look uneven. If the hair is too fluffy, the front won’t smooth down. A pea-sized amount of gel spread through the top layer usually does the job.
A slicked-back bun is not only for nights out. It works for errands, office days, and anything where you want the face to feel open and the hair to behave. Just don’t keep touching it after you smooth it. That’s how you get the frizz halo.
One good brush stroke beats ten half-hearted ones.
16. The Rope Braid Ponytail

A rope braid is one of those styles people assume is tricky because the twist looks structured. It isn’t. You split the ponytail into two sections, twist each section in the same direction, then wrap them around each other in the opposite direction. That opposite motion is what keeps the rope shape tight.
The Small Detail That Matters
Hold the ends while you work. If you let go too early, the braid unravels and turns into a loose twist. That’s the main failure point, and it’s easy to fix once you know it.
- Start with a mid or low ponytail.
- Twist each section firmly before crossing them.
- Secure the end with a small elastic.
- Lightly stretch the finished braid so it looks fuller.
It’s a strong choice for slippery hair because the twist gives the style a grip that a regular braid sometimes lacks. Also, it looks neat from every angle, which is more useful than it sounds.
17. The Pigtail Braids

Pigtail braids are simple, direct, and a little bit nostalgic. Part the hair down the middle, braid each side, and keep the tension even so both braids sit at the same height. That’s the whole move.
The style works best when the part is clean and the braids start at the same point near the temples. If one side starts lower than the other, the symmetry gets lost right away. Not a disaster. Just a thing to watch.
I like this style for busy days because it keeps everything secure. No hair falling into your face, no loose ends brushing your neck, no constant re-tucking. It also handles hats and jackets well, which makes it practical in a way that loose hair often isn’t.
If your hair is fine, braid a little tighter at the top and loosen the lower half after securing it. That gives the braid some thickness without making it stiff.
18. The Low Pigtail Buns

Two small buns at the nape look playful, but they’re surprisingly easy to wear. Divide the hair into two low pigtails, twist each one, and wrap them into buns near the base of the neck. Secure with elastics or pins.
Good for Fine Hair
These work especially well on finer hair because the smaller buns do not need a ton of volume to look finished. They also sit comfortably under jackets and scarves, which is a small thing until you’re wearing one all day.
- Make the part straight if you want a cleaner finish.
- Leave the buns slightly off-center if you want a softer look.
- Pin the buns low so they do not stick out awkwardly.
- Use a texturizing spray if the hair is too slippery.
A lot of people skip this style because it sounds cute in a childish way. That’s a mistake. Kept neat, it reads modern and tidy.
19. The Side Braid
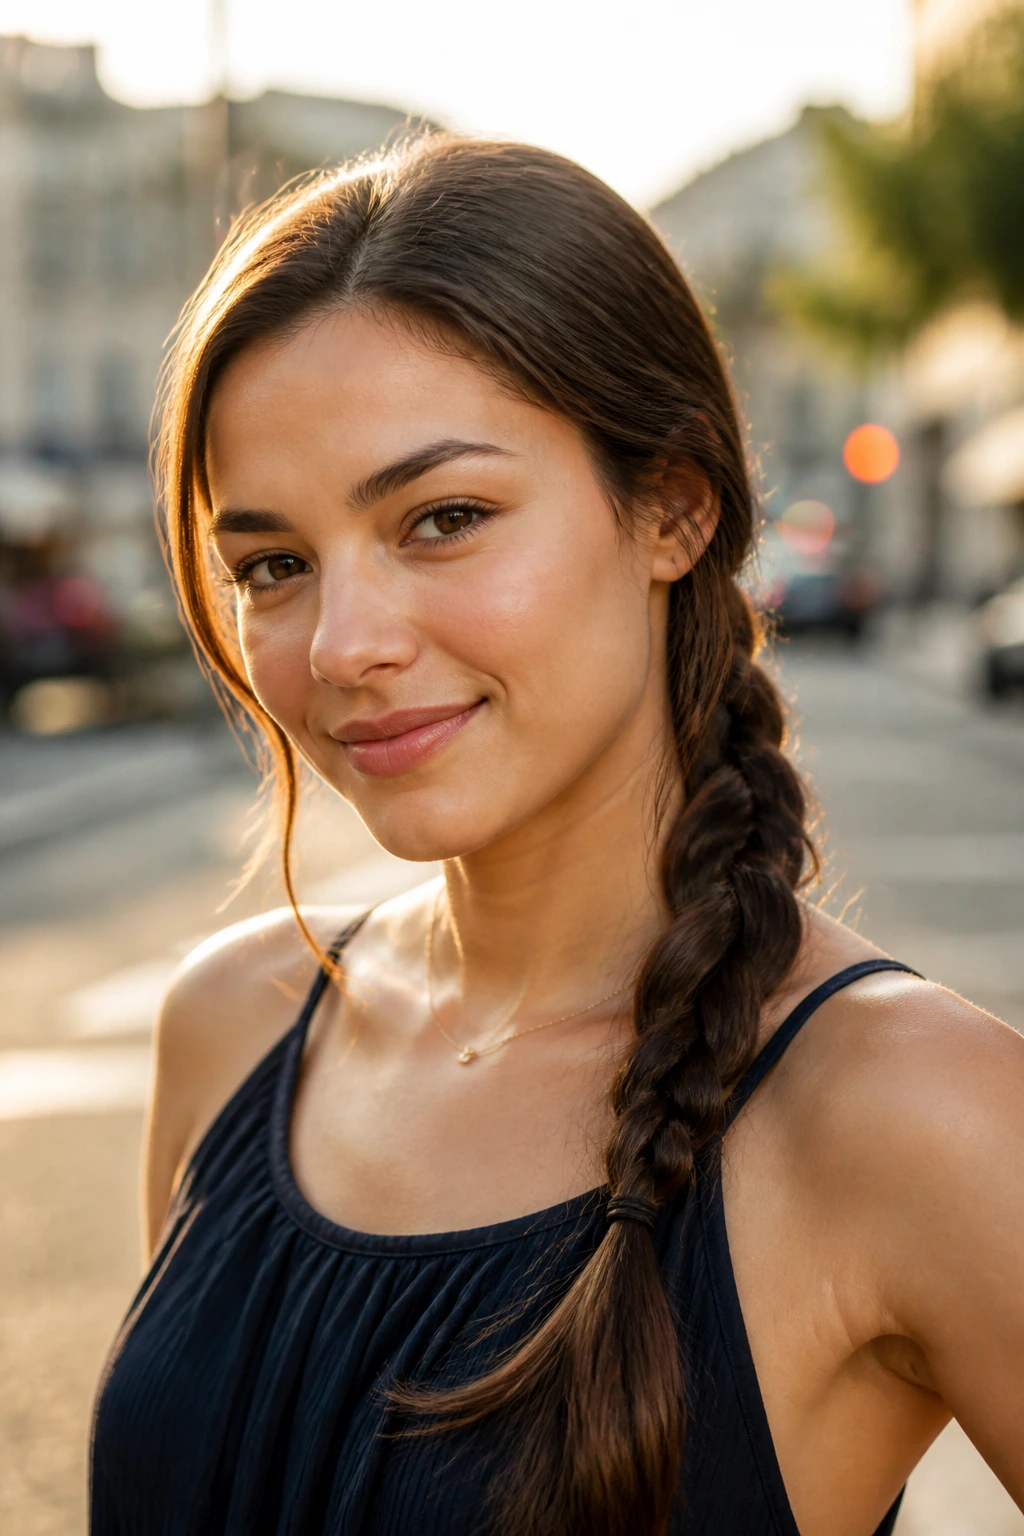
A side braid feels easier to live with than a braid down the back. You can see it, reach it, and adjust it without twisting your neck into a knot. That alone makes it worth wearing more often.
Sweep all the hair to one shoulder, then braid it loosely or tightly depending on the mood. A loose side braid feels softer and a bit more casual. A tight one stays cleaner for longer.
The style gets even better when you start the braid near the temple and let it fall over the shoulder naturally. That front section frames the face without needing bangs. If your hair is long, the braid hangs like a rope and looks fuller. If it’s medium-length, it feels light and manageable.
A scarf woven through the base can change the whole look, but even without one, the braid still does its job. Easy. Practical. No drama.
20. The Curly Pineapple

Curly hair deserves its own category because the rules are different. A pineapple is basically a very high, very loose gather that lets curls sit on top of the head without being crushed. It keeps the curl pattern intact and protects the shape.
Gather the hair at the crown with a soft scrunchie, not a tight elastic. Let the curls spill forward and out instead of pulling them flat. The goal is height with softness, not a tight knot.
This style is especially good when you want to preserve curls overnight or keep them off your neck during the day. A satin pillowcase helps at night, and a satin scrunchie is kinder than a regular tie.
If some curls droop in the morning, spritz them lightly with water and reshape by hand. No need to start over. Curl hair usually responds better to a little coaxing than to a full reset.
21. Heatless Waves with Braids
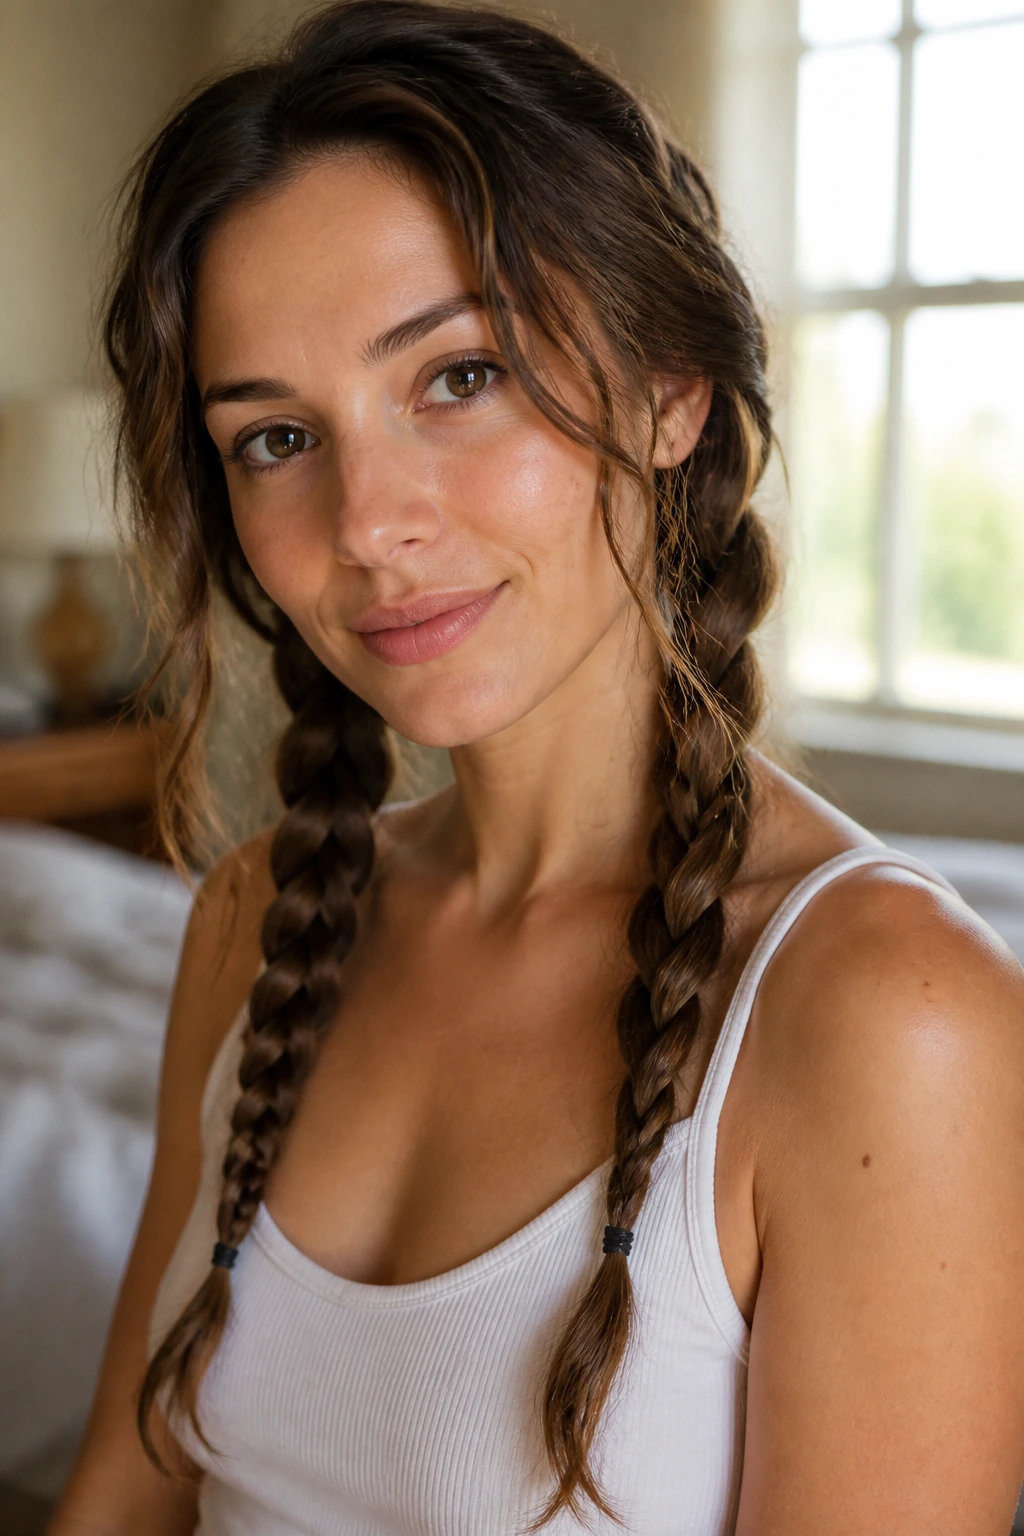
Braiding damp hair and sleeping on it is one of the oldest tricks in the book because it works. The waves are softer than hot-tool curls, and the style gives you something useful while the hair dries. You do not need much. Two braids make loose waves; four make a tighter pattern.
How to Get a Cleaner Wave
Start with hair that is about 80 percent dry, not soaking wet. Wet hair braided too tightly can dry with odd bends, and nobody wants that. A small leave-in conditioner on the mids and ends helps the wave look smoother when you take the braids out.
- Use one braid on each side for big waves.
- Use four braids for a finer ripple.
- Secure the ends with soft elastics.
- Undo the braids only when the hair is fully dry.
The best part is the way the wave pattern looks imperfect in a good way. It has movement, not machine-made sameness. That makes it one of the easiest styles to wear when you want the hair to look styled without looking stiff.
22. The Mini Claw-Clip Half-Up

Mini claw clips are perfect when you want to do something with the top half of your hair but do not want a full updo. Take small sections from each side, twist them back, and clip them together in the center or slightly off to one side.
The clips keep the hair off the face without flattening the crown. That’s the point. A single large clip can feel heavy on short or fine hair, while two or three tiny clips spread the hold out in a lighter way.
This style works especially well on bob-length hair and collarbone-length cuts. It can also rescue fringe that won’t behave. If the front pieces are too short to twist cleanly, pin them back loosely and let the clips do the visible work.
Tiny clips are having their moment for a reason. They’re fast. They’re cute. And they don’t ask much of your hair.
23. The Bandana Ponytail

A bandana changes a plain ponytail almost instantly. Fold the scarf into a strip about 2 inches wide, tie the ponytail first, then knot the bandana around the base or weave it through the elastic. The hair does not need to be perfect underneath because the fabric pulls attention upward.
What Makes It Feel Intentional
Pick a scarf with enough stiffness to hold a shape. If it’s too silky, the knot can slide loose and the whole thing gets annoying. Cotton or a cotton blend usually behaves better.
- Tie the bandana slightly off-center for a softer look.
- Let the ends hang if you want movement.
- Wrap the scarf once around the base if you want the ponytail to feel tighter.
- Match the scarf to one color in your outfit if you want it to look planned.
This is one of those styles that can look casual or sharp depending on the scarf. The hair itself stays simple, which is part of why it works.
24. The Faux Bob
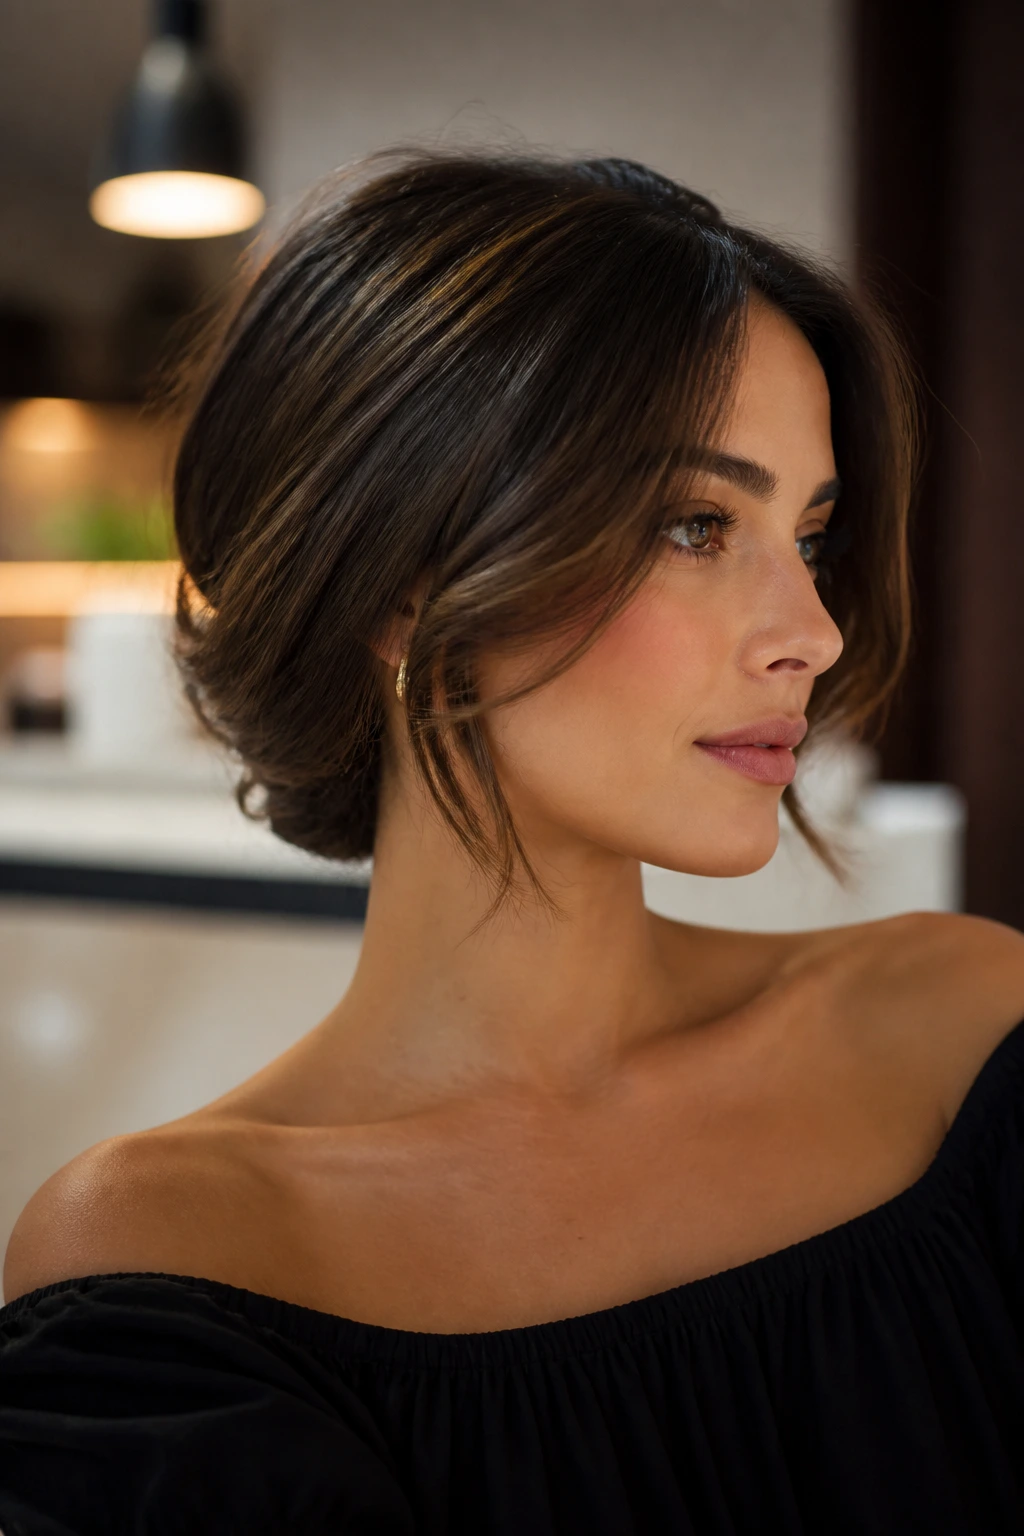
A faux bob is the answer when you want shorter hair for a day without cutting a single strand. Tuck the ends under, pin them at the nape, and let the top layer fall over the hidden length. The illusion is the fun part.
Start with hair that has a little bend or wave, because pin-straight hair can reveal the trick more easily. Gather the length low, fold the ends upward inside the body of the hair, and pin the tucked section in place. Then shape the outer layer over the top until the outline looks like a bob.
A side part helps a lot here. So does a bit of texture spray. The hair needs enough grip to stay folded, especially if it’s silky.
This style is not meant to fool anyone up close. It’s meant to create the feeling of shorter hair from a few feet away. That’s enough for a dinner, an event, or a day when you want something different without commitment.
25. The Flip-Through Ponytail
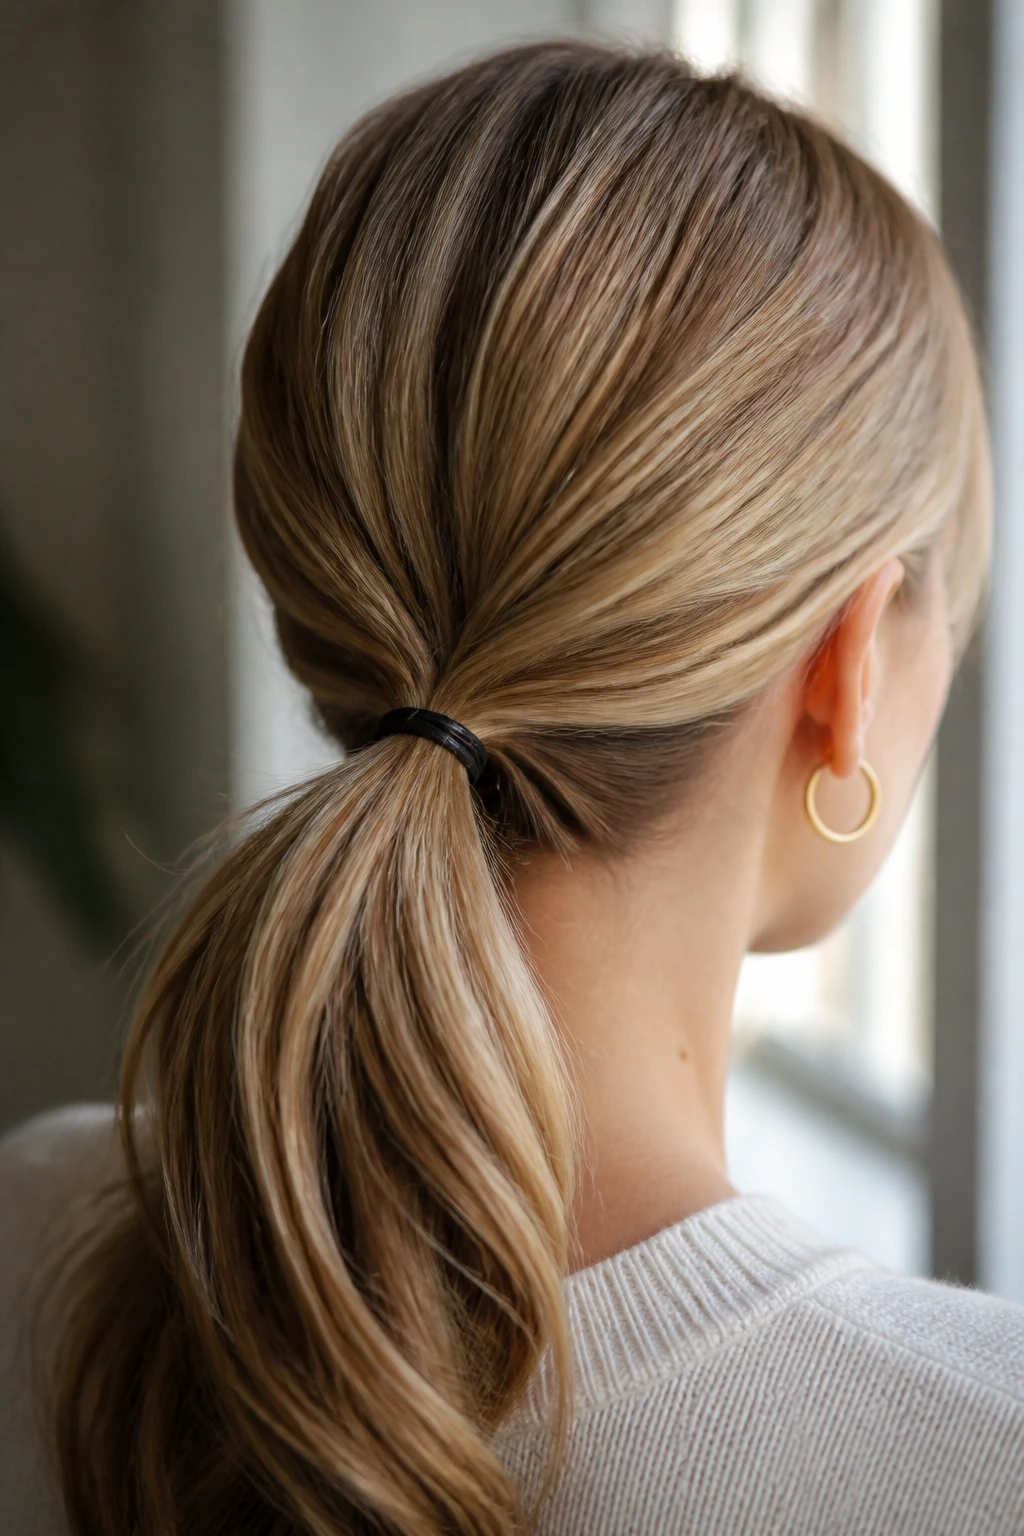
A flip-through ponytail — some people call it a topsy ponytail — is a small trick that makes a normal ponytail look more finished. You make a ponytail, split the hair above the elastic, and pull the length through the opening so it flips inward.
Why It’s So Useful
It adds a little shape at the base without needing extra tools. That makes it a nice option when you want something neat but don’t want to spend time wrapping a strand around the elastic.
- Works best on low or mid ponytails.
- Leave a little room above the elastic before flipping.
- Pull the ponytail gently so the opening does not collapse.
- Add a second flip lower down if your hair is long enough.
The result is subtle, which is why I like it. It looks like you paid attention, even though the trick takes maybe a minute once your hands know the move.
26. The Low Chignon with a Soft Loop

A chignon sounds formal, but the easy version is barely more complicated than a bun. Pull the hair into a low ponytail, twist the length into a loose loop, and pin the ends underneath so the shape sits softly at the nape.
The loop is what gives it the chignon feel. Without that loop, it’s just another bun. With it, the style looks smoother and slightly more refined, especially if the hair is parted cleanly.
I like this one when the outfit is simple and the hair needs to carry a little polish. The shape works best if you keep the twist loose enough to show some texture. Too tight and it becomes severe. Too loose and it falls apart.
A few hidden pins are better than one big clamp here. You want the bun to feel anchored but not crunchy.
27. The Crown Braid
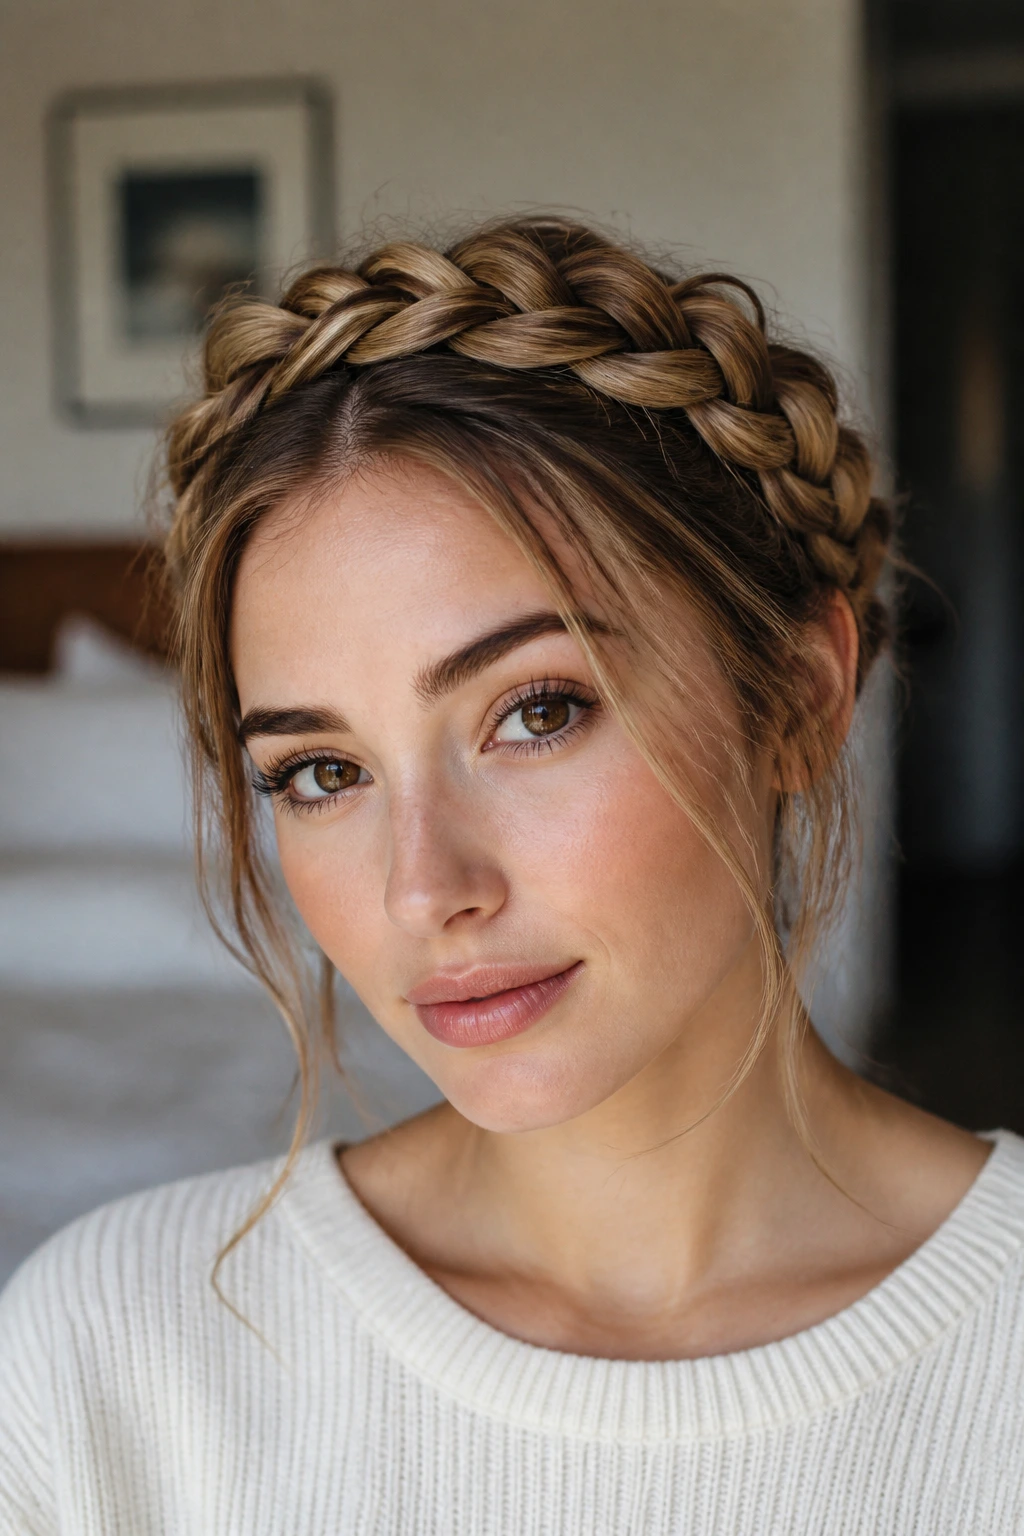
A crown braid wraps around the head like a halo, which sounds complicated and looks intimidating until you break it down. Braid one side, bring it across the top or around the back, and pin it into place so it sits close to the scalp.
Unlike a twisted crown half-up, this one uses a real braid across the head. That gives it more texture and makes it hold better on longer hair.
Where It Shines
It’s a solid choice when you want the hair off your face and still want the front to feel soft. Loose tendrils around the temples can keep it from looking too rigid.
- Use bobby pins that match your hair color.
- Secure the braid every few inches as it curves around.
- Keep the braid slightly loose so it can follow the head shape.
- Finish with a light mist, not a heavy spray.
It takes a little more practice than a ponytail, sure. But once you’ve done it two or three times, it becomes one of those styles you can do on autopilot.
28. The Scarf-Wrapped Low Bun
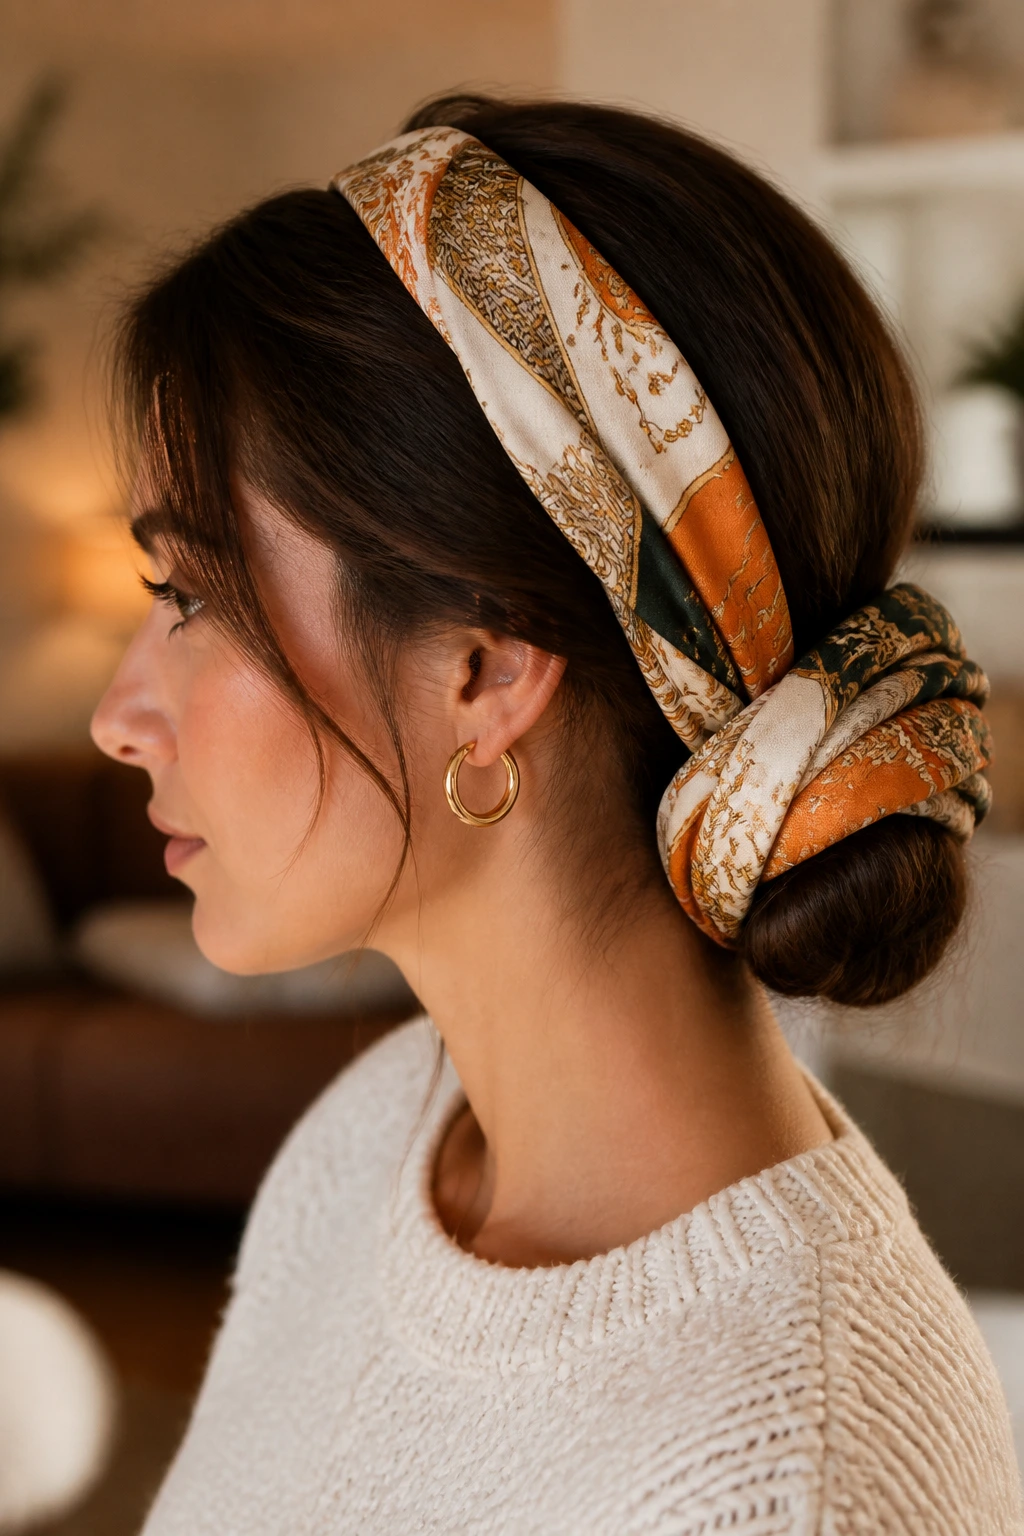
A scarf can hide a plain bun’s rough edges in the best way. Tie the bun first, then wrap a scarf around the base and knot it so the fabric sits snugly against the head. The scarf covers pins, softens the shape, and adds color without requiring a separate accessory.
Keep the bun low and compact so the scarf has something to sit against. If the bun is too big, the wrap can slide around. If it’s too tiny, the scarf ends up doing all the work.
A slightly oversized scarf is easier to manage than a very thin one. You get more fabric to knot, and the style feels less fragile. This is one of my favorite no-heat tricks for making second-day hair look like it was planned.
The best part is how forgiving it is. Slightly messy bun? Fine. Slightly uneven wrap? Still fine.
29. The Wet-Look Side Part with a Barrette
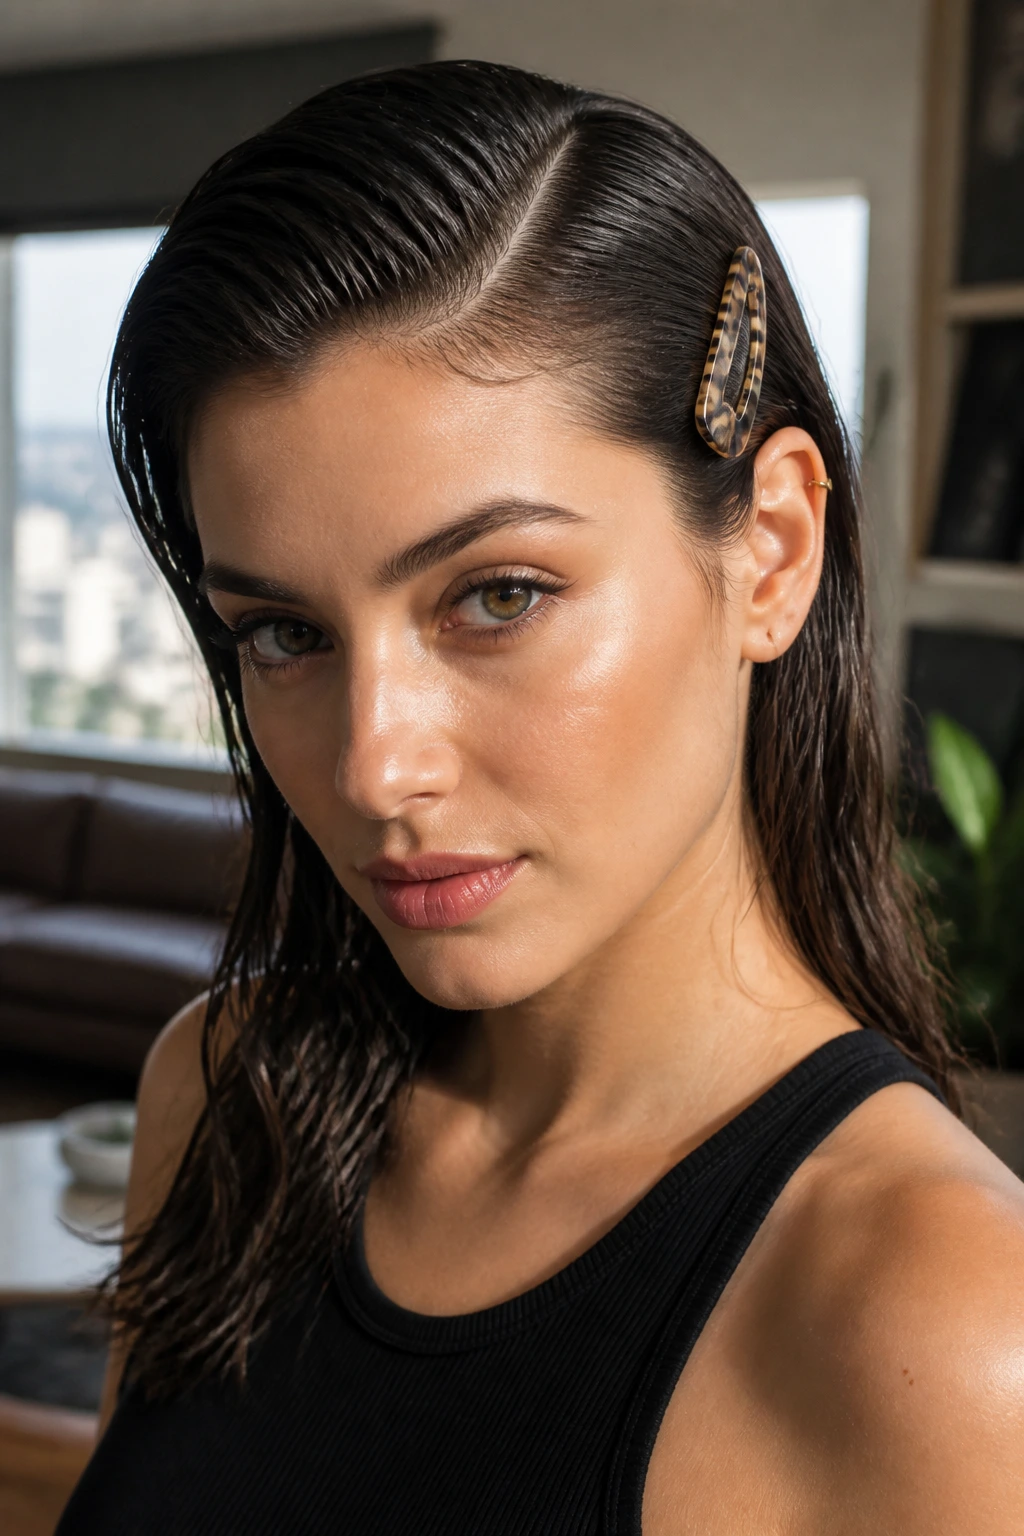
This style has a sharper edge than the others, and it is not shy about it. A deep side part, a smooth crown, and one strong barrette on the heavier side give the hair a sleek, glossy finish that feels deliberate.
Work a small amount of gel through damp hair, then comb the part straight back into the side. Tuck one side behind the ear and pin it with a barrette or decorative clip. Let the other side fall naturally so the contrast shows.
The key is restraint. Use enough product to smooth the surface, but not so much that the hair looks hard or wet in clumps. A soft shine is better than a sticky helmet.
This is a good style when you want something clean and a little dramatic without doing much at all. It is one of the fastest ways to make plain hair look dressed up.
30. The Braided Bun from a Single Braid
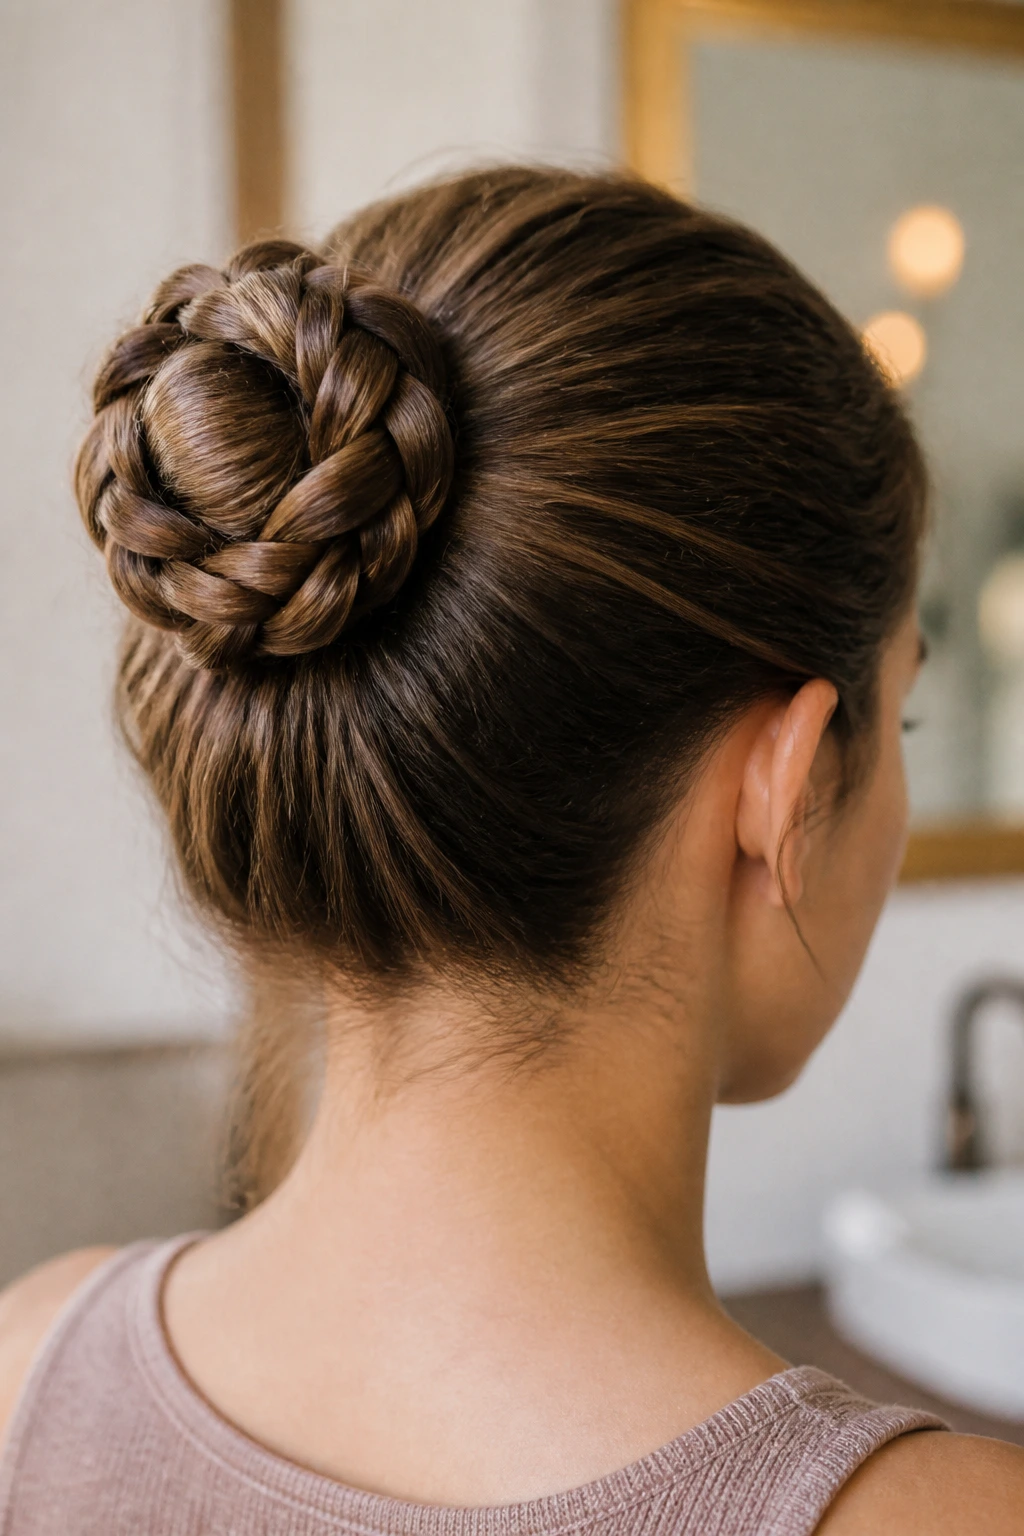
This is the tidy-up style I use when I want a bun with more texture than the usual twist. First make one braid — low, medium, or high — then wrap that braid around its own base and pin it into a bun. The braid texture gives the finished shape more grip and a little visual detail.
The Quick Version
A low ponytail base makes the bun feel softer, while a higher base makes it cleaner and more compact. Either way, the braid should be secure before you start wrapping. If the plait is loose, the bun can unravel at the edges.
- Braid the ponytail all the way to the ends.
- Secure the end with a tiny elastic.
- Coil the braid around the base and pin as you go.
- Tuck the end underneath so it disappears.
This style is a strong last-minute fix because it holds well and looks more finished than a plain bun. It also works when your hair is a little frizzy — the braid texture covers a lot.
Final Thoughts
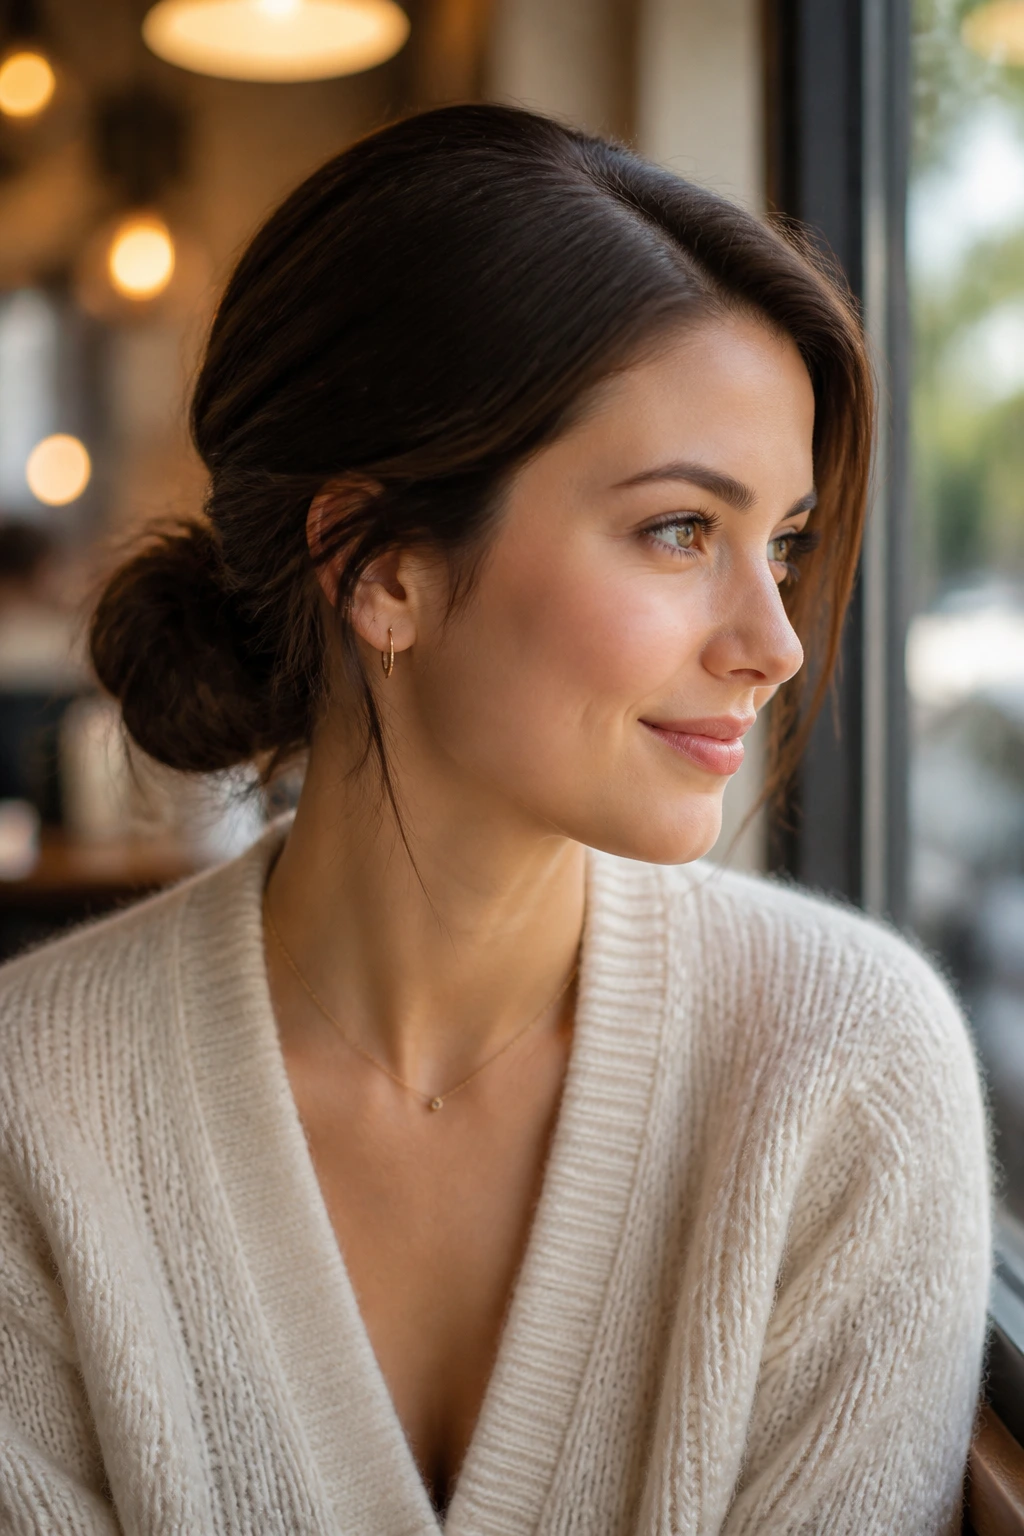
The easiest hairstyles are usually the ones with one clear idea: smooth it back, twist it up, braid it through, or pin it away. Simple shapes win because they are fast enough to repeat, and repeatable hair is the kind that actually gets worn.
If you want a small kit that covers most of these, keep clear elastics, a few bobby pins, a claw clip, dry shampoo, and one good scarf in the drawer. That setup handles more bad hair days than most people expect.
Start with two or three styles that suit your hair texture and length, then keep rotating them until they feel automatic. That’s the real trick. Not perfection — just a few reliable ways to make your hair behave.
