



Medium length hairstyles for women have one rare advantage: they can look polished in ten minutes and still hold up when the day gets messy. That’s the sweet spot most people are chasing, even if they don’t say it out loud.
Shoulder-grazing hair can do more than people give it credit for. It can swing, bend, twist, tuck, clip, braid, and still feel like a normal head of hair instead of a helmet. The trick is picking styles that work with the cut you already have, not against it.
I keep coming back to medium length because it’s the easiest length to live with when you want options. Long hair often needs more time and more product. Short hair can be adorable, sure, but it doesn’t always give you room for a quick bun, a braid, or a soft half-up moment when you want to look a little more put together.
The best styles here are the ones that survive real life: humid mornings, second-day texture, flat roots, awkward grow-out phases, the whole lot. Some are clean and sleek, some are messy on purpose, and a few are the kind of styles you can do in the car at a red light if you’re honest about it. The first one is the most forgiving of the bunch, and that’s usually where I tell people to start.
1. Face-Framing Lob for Medium Length Hair

A face-framing lob is the haircut I’d hand to anyone who wants an easy win. The length hits around the collarbone, which means it moves instead of sitting heavy, and the front pieces can skim the cheekbones or jaw depending on what you want to soften.
A 1-inch round brush bend at the ends is enough. You do not need full curls unless that’s your thing. Blow-dry the front away from the face, then tuck one side behind the ear and leave the other loose. That tiny asymmetry keeps the style from looking too done.
If your hair is fine, ask for the longest layers to stay below the chin so the shape doesn’t get wispy. Thick hair can take more internal layering, but the edge should still look clean. That’s the whole charm here: easy, swingy, and not trying too hard.
2. Collarbone Shag with Airy Layers
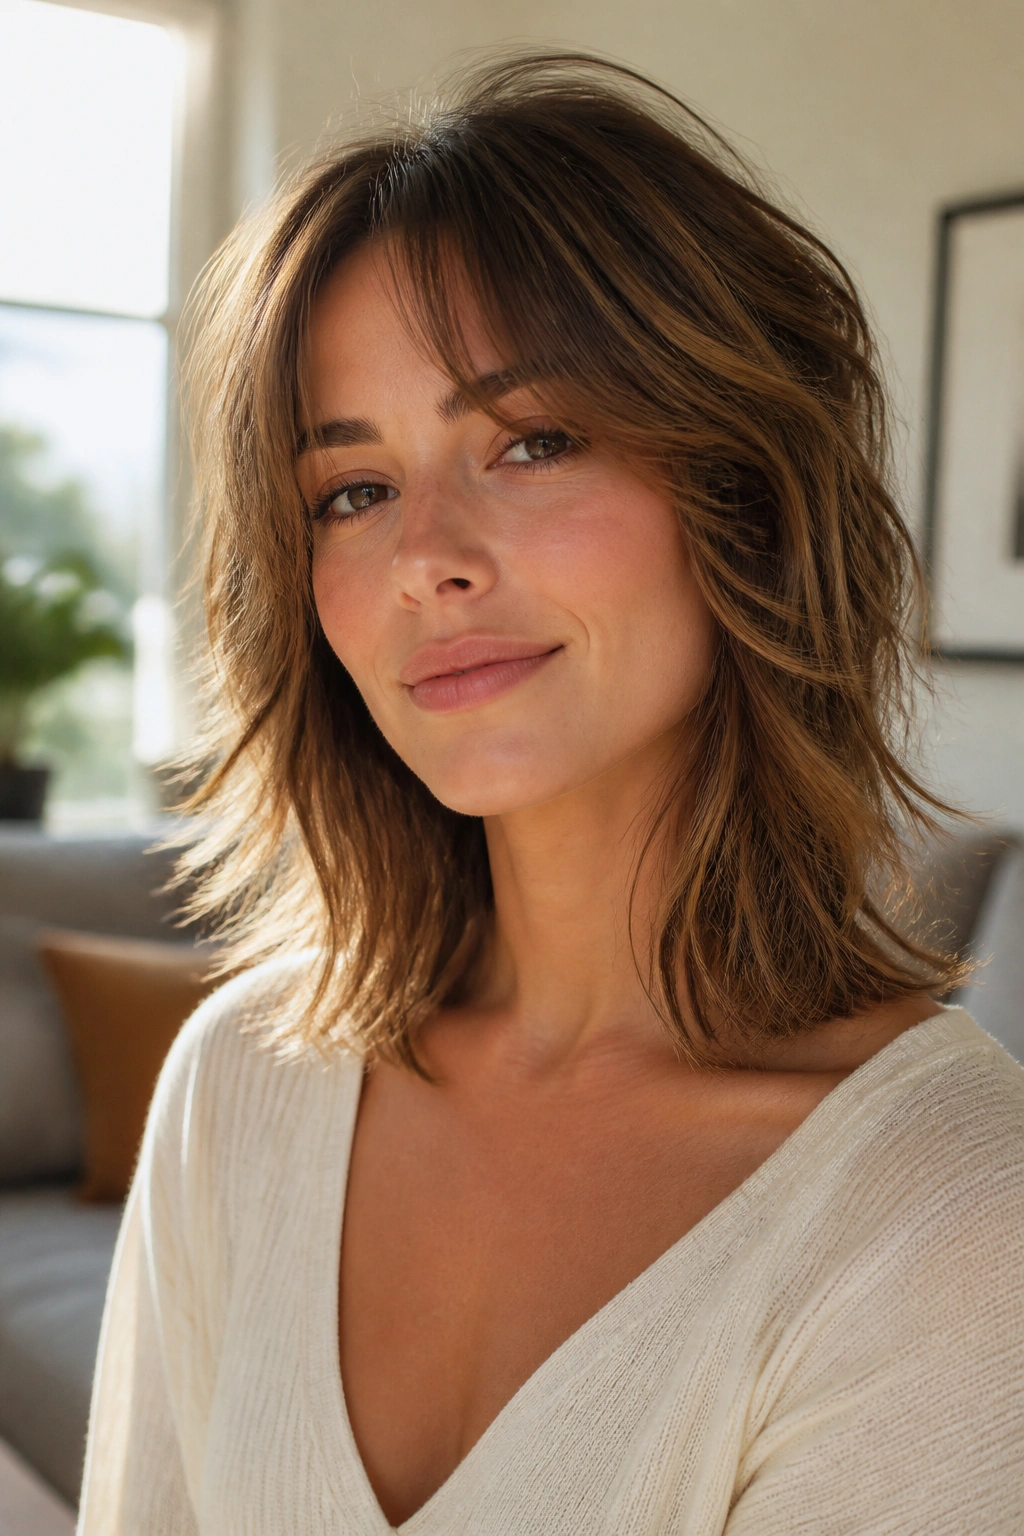
The collarbone shag is the best move when your hair falls flat by lunchtime. The layers do the lifting for you, and the whole cut has a little movement even when you only rough-dry it with your hands.
Why It Works
The shorter layers around the crown stop the top from collapsing, while the longer pieces keep the shape from feeling choppy in a bad way. On medium hair, that balance matters. Too many short layers and the cut puffs up. Too few and it just hangs there.
A pea-sized amount of mousse at the roots helps, especially if your hair tends to separate into sad little sections. After that, twist 1-inch pieces around your fingers while drying. Not perfect. Better that way.
Quick Styling Notes
- Use a light mousse at the root, not a heavy cream.
- Dry with your head upside down for about 30 seconds, then flip back and smooth the top.
- Scrunch the mid-lengths with a little texture spray if the ends need a rougher finish.
- Skip a brush on day one if you want the layers to keep their shape.
My opinion: this style looks best when it’s a little messy. Clean shag hair often loses the whole point.
3. Blunt One-Length Lob
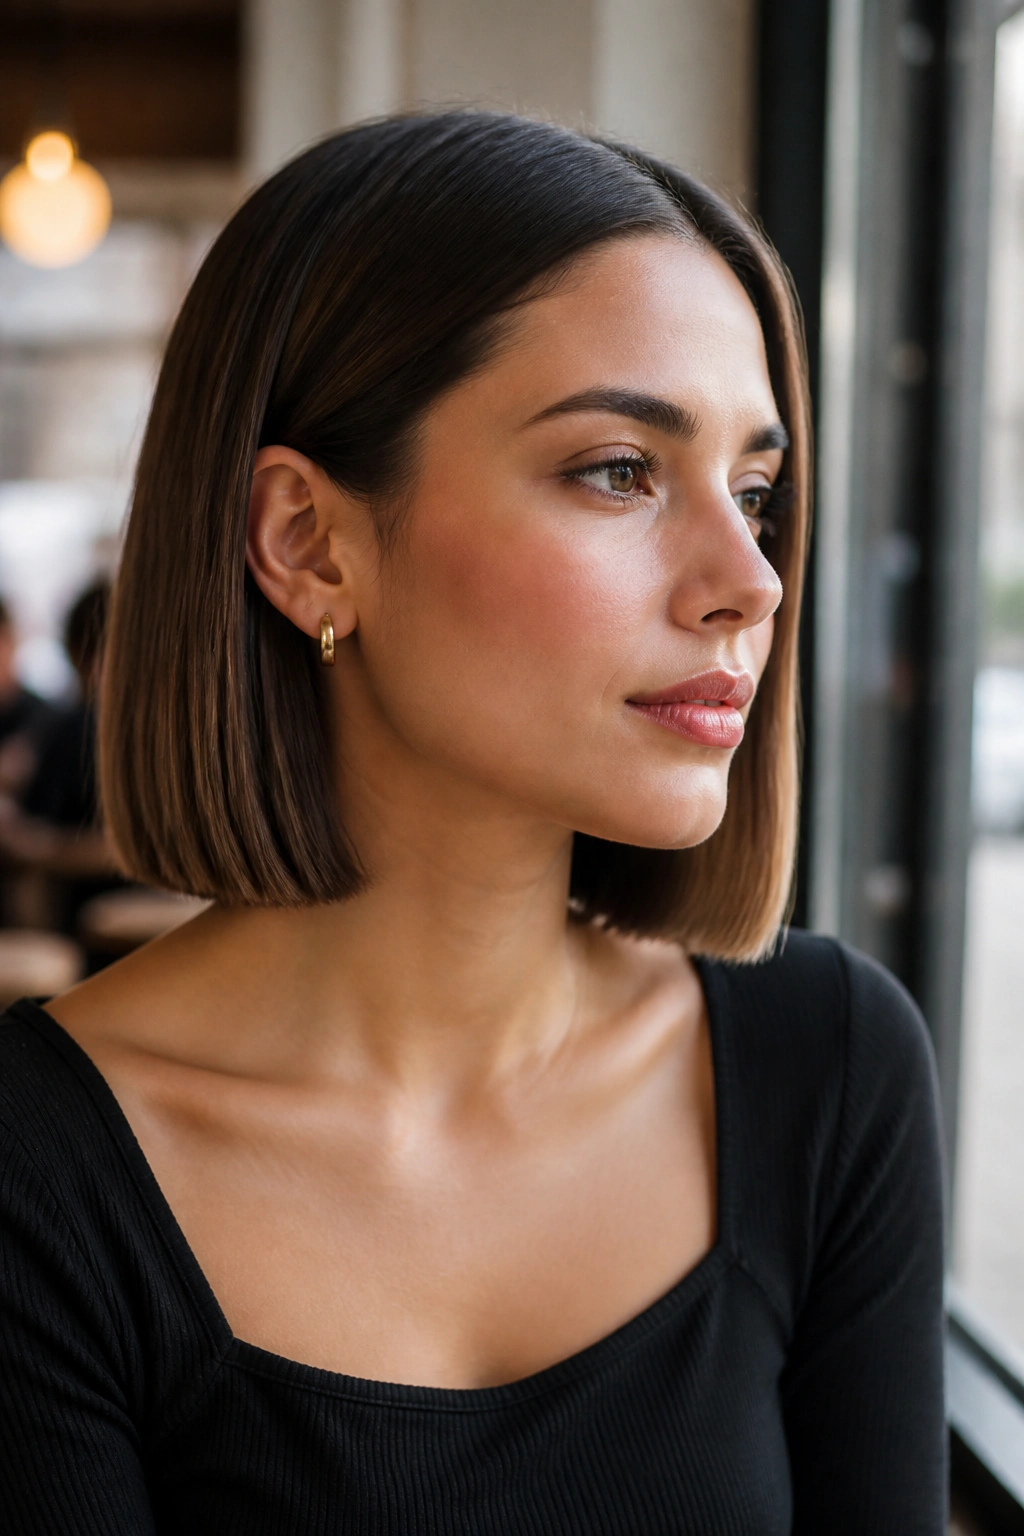
Want hair that looks polished with almost no effort? A blunt lob does that better than almost anything else on this list.
The straight edge gives the cut a solid outline, so even when the roots go a little flat, the shape still reads clean. That’s why it works so well on medium length hair: there’s enough length to tuck behind the ear or pin back, but not so much that the ends start to fray into chaos.
How I’d Style It
A flat iron set to 300°F to 350°F is usually enough for most hair types. Glide it through in one slow pass, then finish with a drop or two of shine serum on the very ends. Don’t load the roots with product. That’s how the style starts looking greasy by afternoon.
For a softer feel, bend the front pieces away from the face by half an inch. That little turn keeps the cut from feeling severe. And if your hair is naturally straight, honestly, even better. This one barely needs help.
4. Curtain Bangs with Loose Waves

Curtain bangs change the whole mood of medium length hair. They make the cut feel lighter around the face, and they do it without forcing you into a full fringe maintenance routine.
The trick is keeping the wave loose enough that the bangs blend, not fight, the rest of the hair. A 1.25-inch curling iron is a sweet spot here. Wrap the mid-lengths away from the face, leave the last inch out, and let the ends stay a bit straighter. That little contrast looks modern without trying to look modern.
If your bangs separate in a weird way, mist them with water and blow-dry them forward first. Then split them in the center with your fingers. That is usually enough. Too much round-brush work can make them sit too stiff, and stiff curtain bangs are nobody’s friend.
This style works especially well if your hair has some natural bend. Straight hair can do it too, but it needs a few extra minutes with the iron.
5. Half-Up Twist with a Statement Barrette
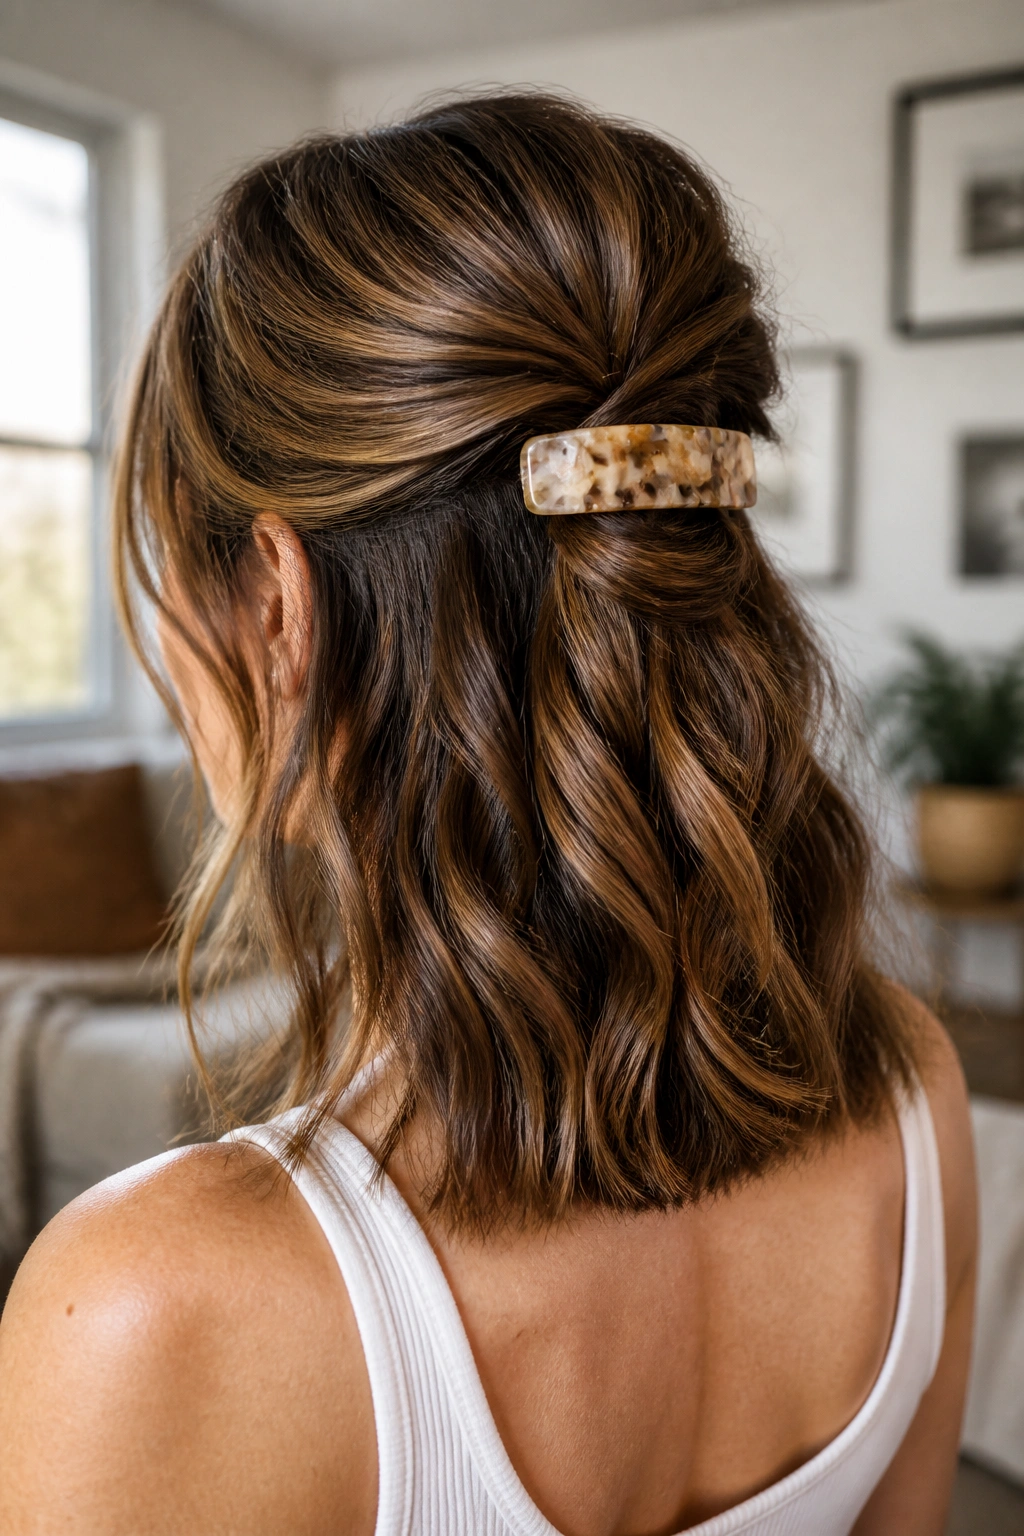
You know that moment when the ends look fine, the crown looks flat, and you need something that feels intentional in two minutes? This is the answer.
Twist back two sections from the temples, cross them at the back of the head, and pin them under a medium-sized barrette. I like a barrette with a little width, because tiny clips tend to slide out of medium hair before lunch. Leave the bottom half loose and let it move.
The style looks better if the front pieces are not perfect. A little bend around the face keeps it soft. If your hair is slippery, spray the twist with dry texturizing spray before clipping. That gives the barrette something to grip.
A small detail matters here: place the clip a finger’s width above the occipital bone, not right on the flat back of the head. It sits more naturally there. Also, this is one of those styles that makes plain hair feel dressed up without any drama.
6. Textured Wavy Lob with Salt Spray
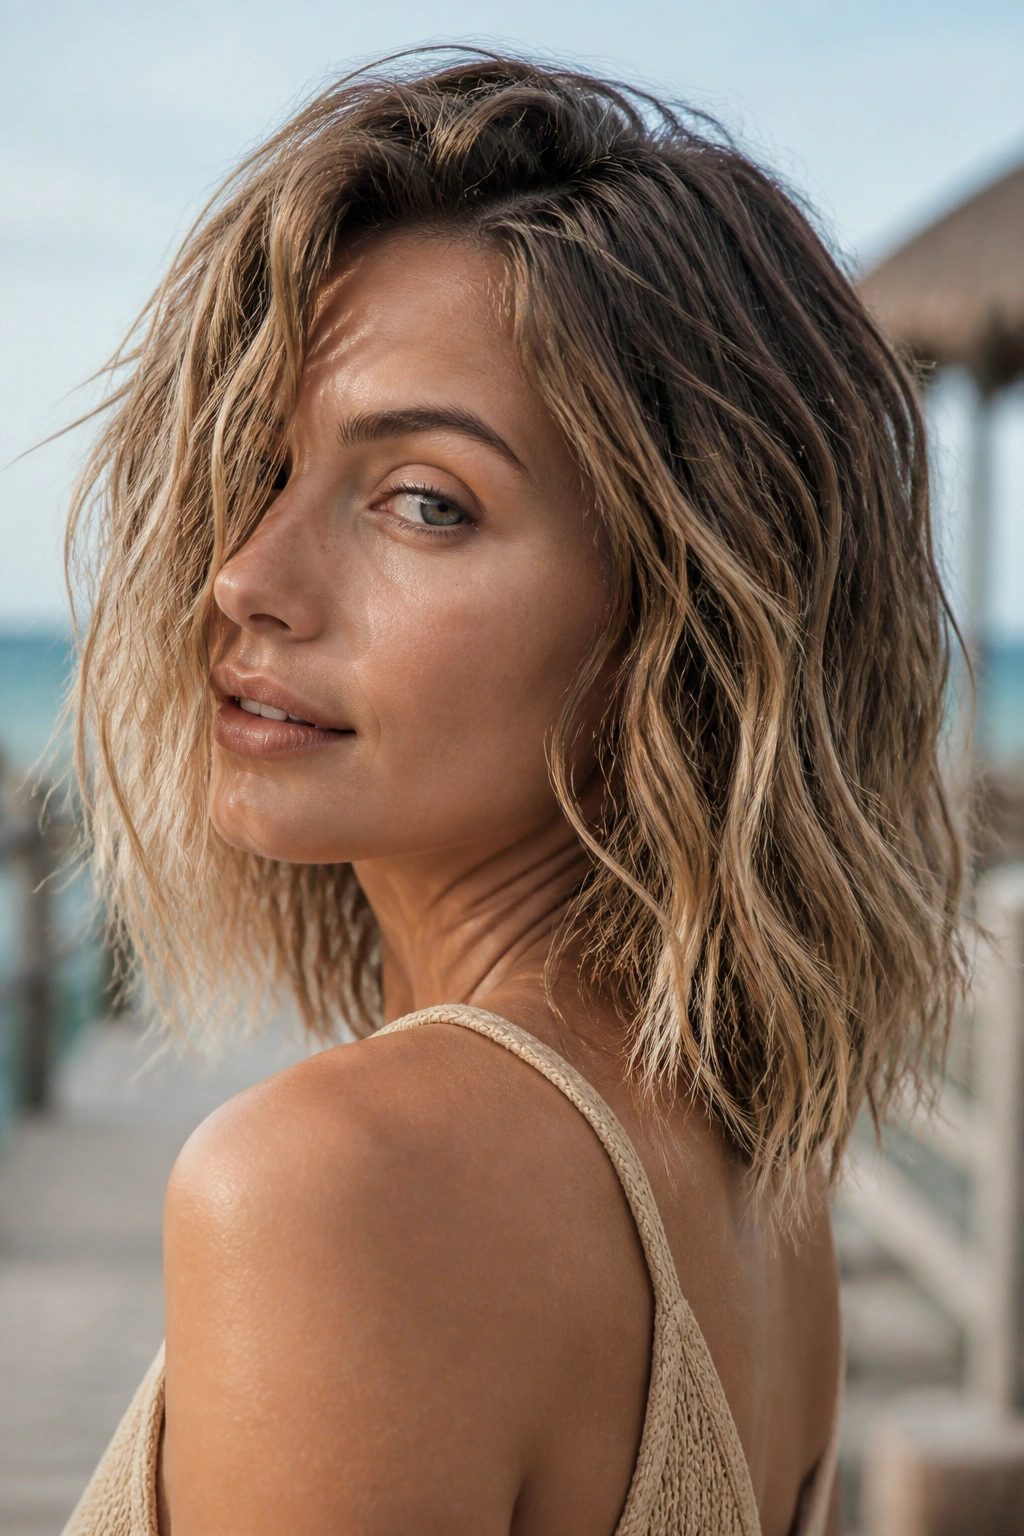
Textured waves on medium hair can look beachy or crunchy, and the line between those two is thinner than people think. The difference is usually the amount of product.
A salt spray should go on damp hair, not drenched hair. Two or three spritzes through the mid-lengths is enough. Then scrunch with a microfiber towel and let the hair dry about 80 percent before touching it again. If you start fiddling too early, the wave clumps in odd places.
I like this look because it has a little grit. The hair doesn’t need to look shiny to look good. In fact, too much shine makes it feel weighed down. A wavy lob with texture reads casual, but it still looks finished if the front pieces are lightly tucked behind one ear or clipped back on one side.
If your hair is fine, pair the salt spray with a lightweight mousse. Thick hair usually needs less help and more patience.
7. Deep Side Part with Soft Volume
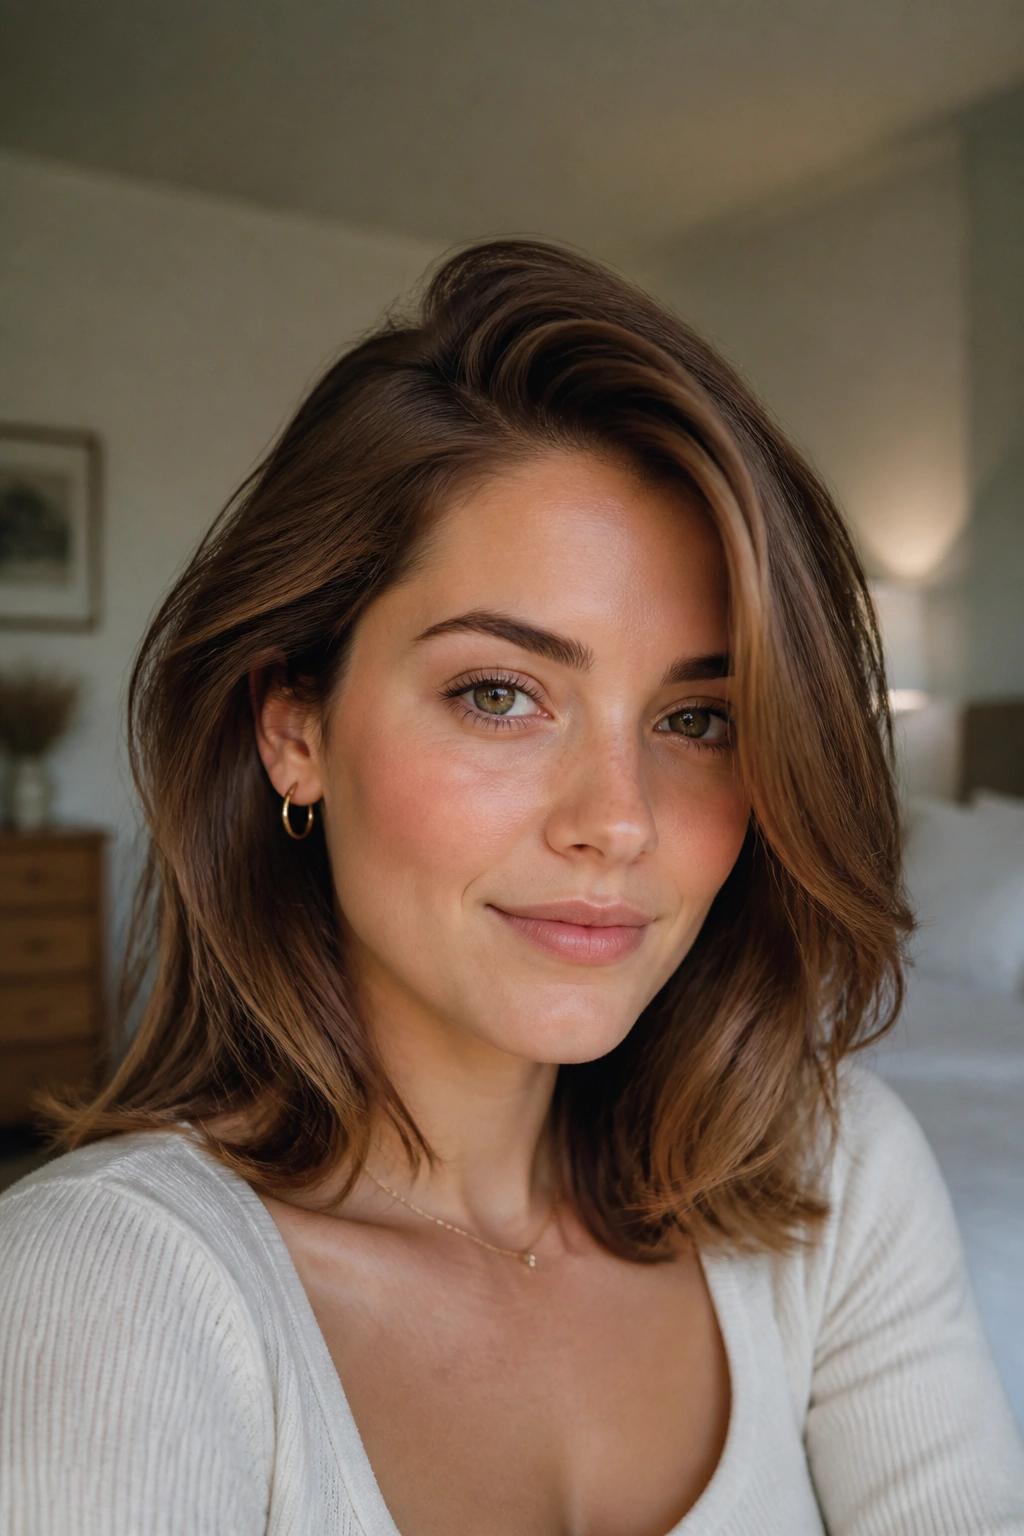
A deep side part is one of those styles that changes your whole face shape with one comb stroke. That sounds dramatic, but it’s true. Move the part over by two or three inches and the roots instantly get a little lift.
What Makes It Work
The side with less hair lies flatter, which makes the other side look fuller. On medium length hair, that fullness matters because it keeps the style from looking heavy at the bottom. A soft bend through the ends makes the whole thing look intentional, not accidental.
How to Style It Fast
- Blow-dry the roots in the opposite direction first.
- Clip the fuller side at the crown for 5 minutes while it cools.
- Use a 1-inch curling iron only on the ends if the length needs shape.
- Tuck one side behind the ear to show the jawline.
If your hair is thin, this is one of the easiest ways to fake more body without a lot of teasing. Just don’t leave the part in the same exact place every day. Hair gets stubborn.
8. Sleek Center-Part Lob
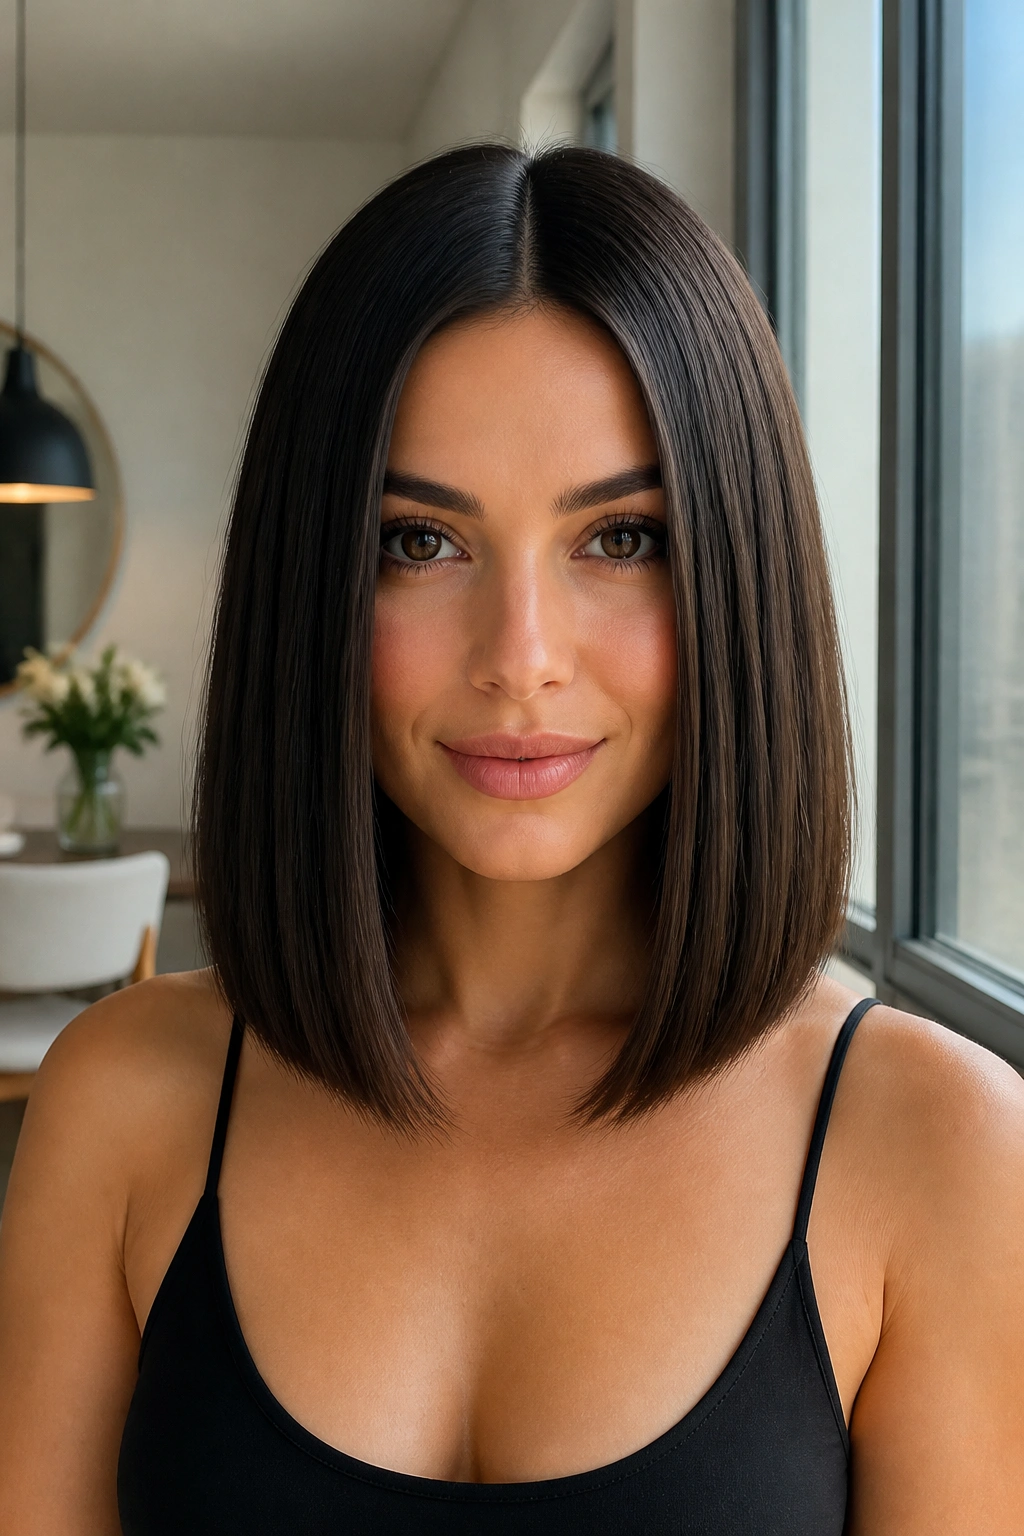
A sleek center part can look severe in photos and strangely elegant in real life. The key is keeping the finish smooth without flattening all the life out of it.
I like to use a fine-tooth comb and a flat iron on this style. Start at the nape, take small sections, and keep the iron moving. If one pass doesn’t smooth the section, wait a moment and go back through it. Repeated slow passes on the same spot can make the ends look fried, and that never helps.
A tiny bit of serum on the palms goes a long way. Press it over the top layer, then stop. If your roots get oily quickly, skip the crown and use only a light mist on the mids and ends.
This style looks especially good with earrings. The hair gets out of the way, the part feels crisp, and the shoulder length keeps it from looking severe. It’s clean, but not cold.
9. Claw-Clip French Twist Half-Up
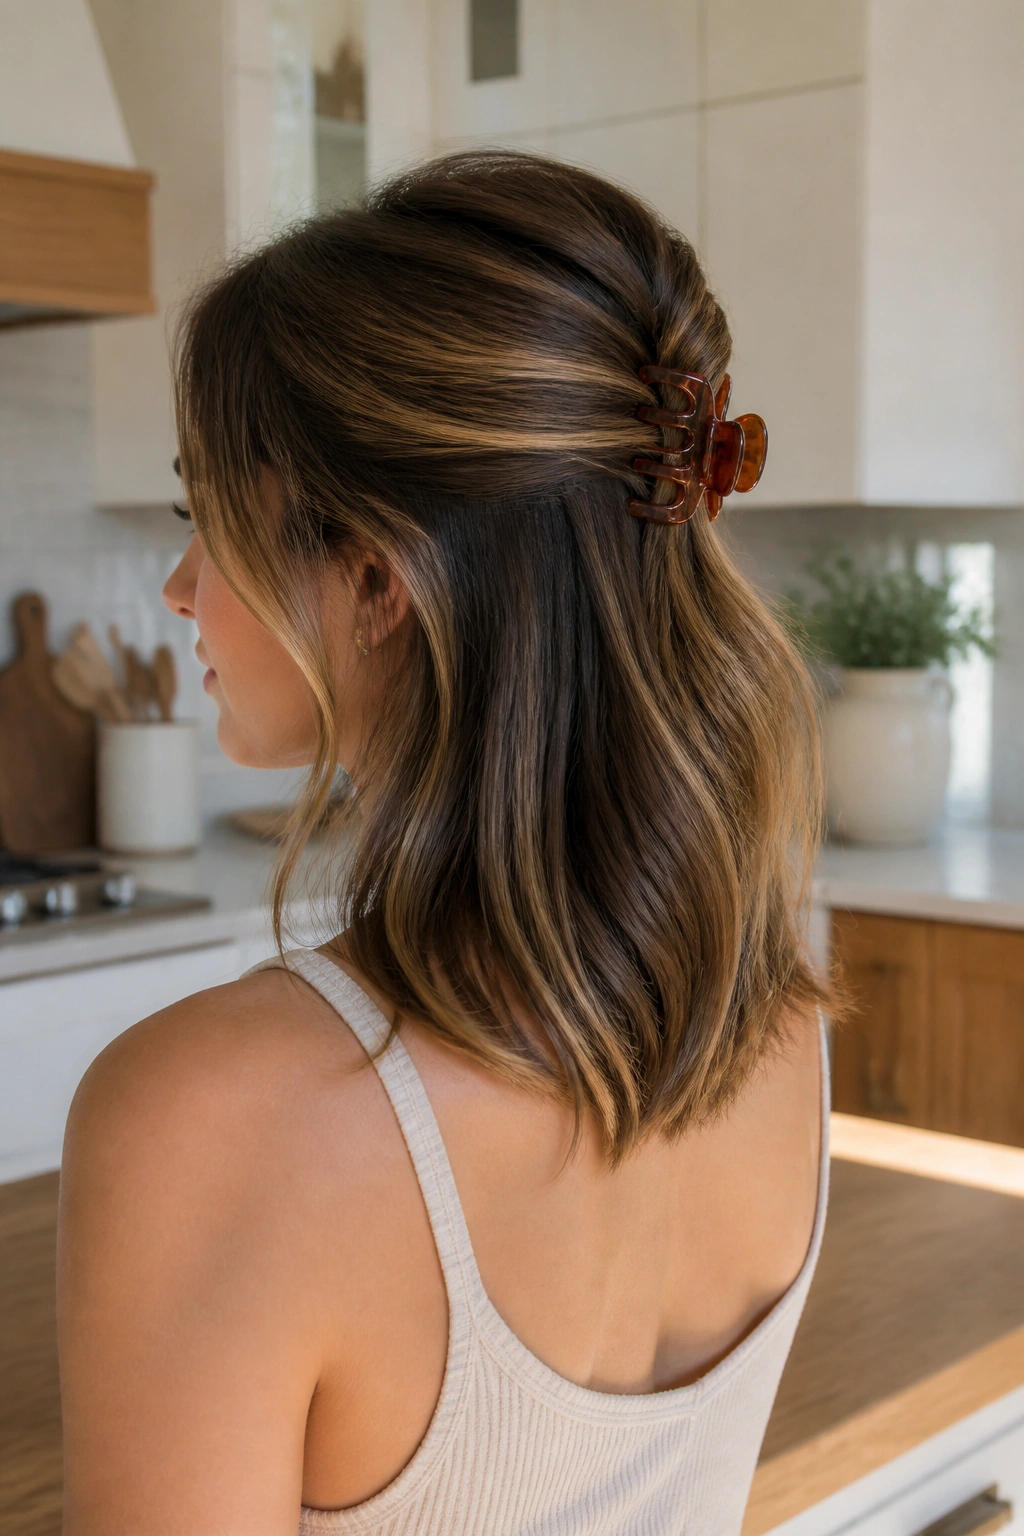
Claw clips are having a long, practical life for a reason: they work. Medium length hair is the perfect length for them, because there’s enough hair to twist but not so much that the clip has to fight for its life.
Twist the top half of your hair upward, fold the length once, and clamp the clip where the twist feels snug. If the ends poke out, let them. That is part of the appeal. The style should look slightly loose, not packed into place like a storage box.
Use a medium claw clip with strong teeth. Tiny decorative clips are cute until the hair slips out in an hour. If you want extra grip, rough up the roots with dry shampoo first, even on clean hair.
This is the style I reach for when I need hair off my neck but still want some shape around the face. It looks casual with jeans and a sweater, and it still works with a dress. Very few hair tricks do both.
10. Shoulder-Grazing Layers with Flipped Ends
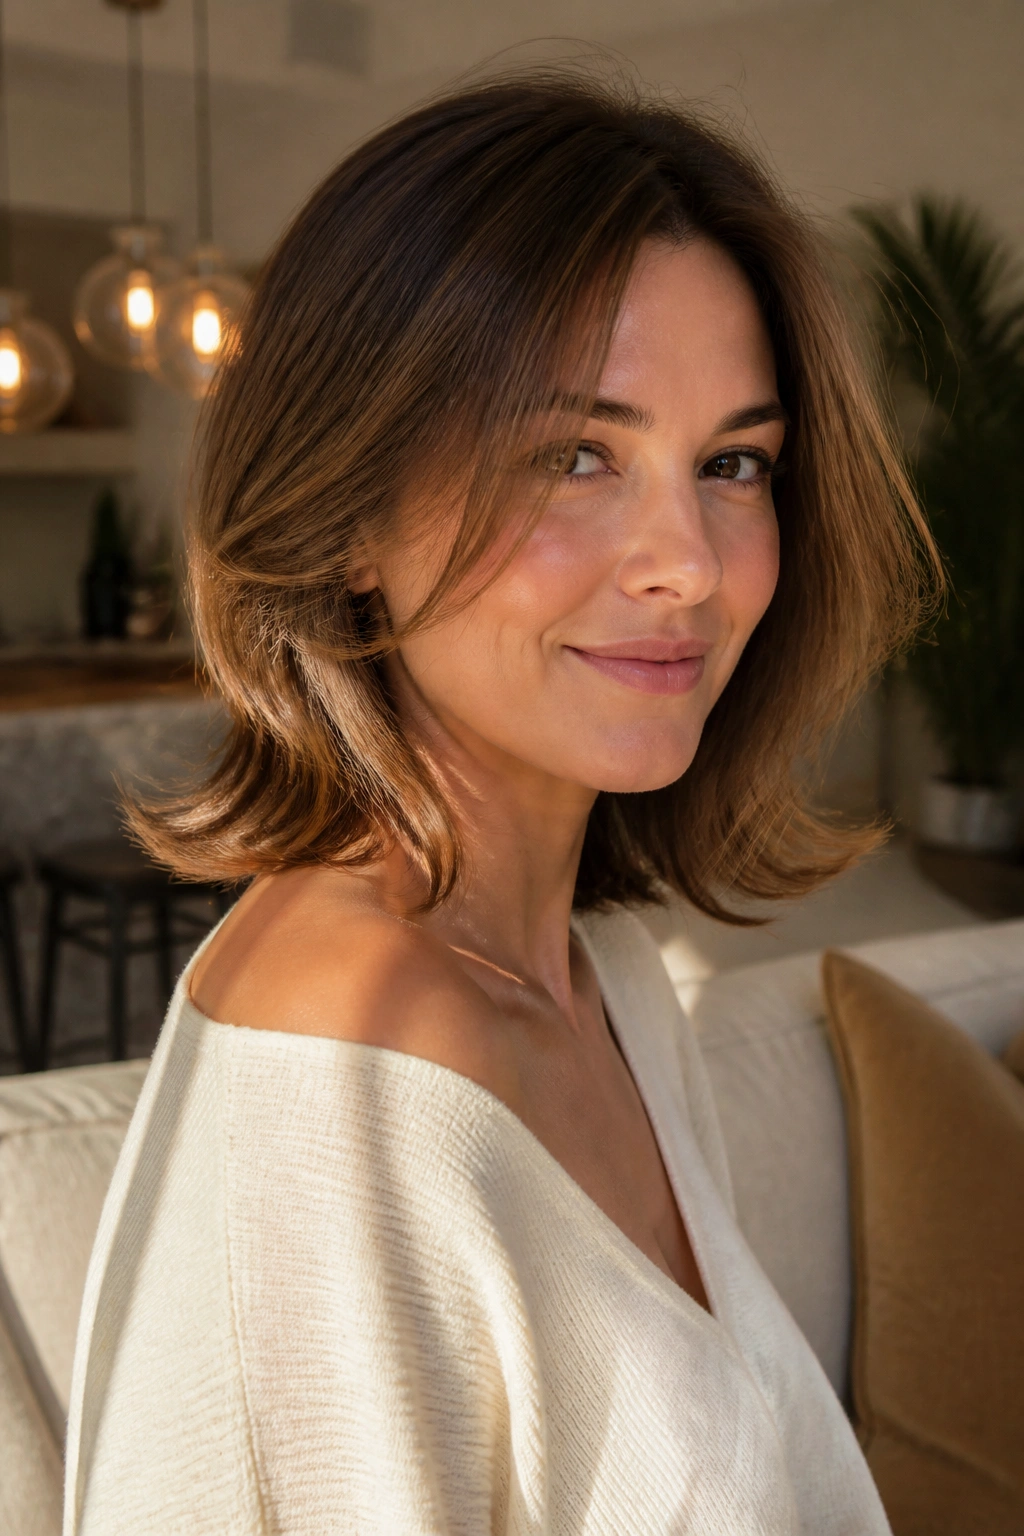
Shoulder-grazing layers with flipped ends have that easy 90s shape people keep coming back to for a reason. The ends flick out just enough to keep the cut lively, and the layers stop the shape from feeling boxy.
A round brush or a 1.5-inch curling iron does the job. Blow the hair out with the brush, then turn the ends outward for the last inch or so. You do not need every piece to flip the same way. In fact, if they all mirror each other, the style starts looking too neat.
This is one of the few medium length hairstyles for women that can work on both straight and slightly wavy hair without a lot of fuss. On straight hair, the flip gives it personality. On wavy hair, the layers keep it from puffing out like a triangle.
If you want the style to stay soft, use a light-hold spray only on the ends. Keep the root area touchable. That makes a bigger difference than people expect.
11. Braided Crown with Loose Length
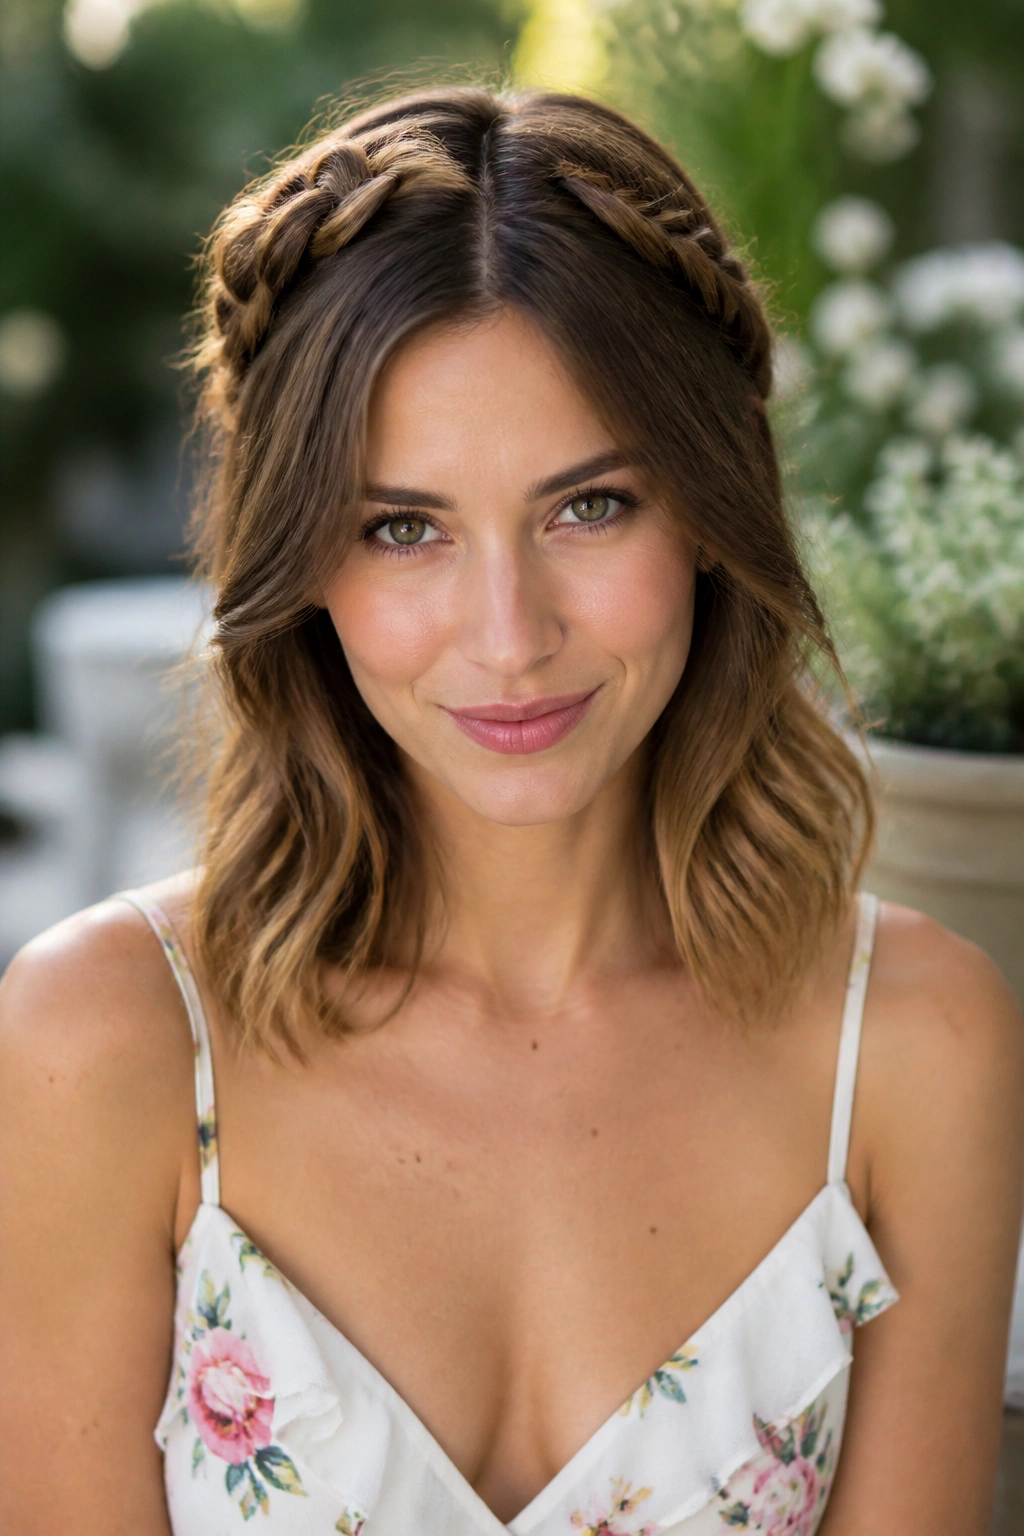
A braided crown sounds fancier than it is. Really, it’s just two braids pulled back from the temples and pinned across the back of the head, which makes medium hair look much more styled than it actually is.
The Best Part
The length doesn’t need to be super long for this to work. Medium hair has enough weight to hold the braid shape without dragging it down, which is one reason the style stays neat longer than people expect.
How I’d Do It
- Take a 2-inch section above each ear.
- Braid each section loosely, not tight.
- Cross the braids at the back and pin them with bobby pins that match your hair color.
- Leave the bottom half loose and add a soft wave if the ends need shape.
This one is good for dinners, weddings, or any day when you want hair off your face without reaching for a full updo. It also hides greasy roots at the temples better than most styles, which is a small but useful thing.
12. Low Bun with Face-Framing Pieces

A low bun on medium length hair can be trickier than on long hair, but when it works, it looks tidy and soft at the same time. The shorter length keeps the bun from getting heavy or droopy.
Pull the hair into a low ponytail at the nape, twist it once, then coil the length into a bun and pin it from underneath. Leave out two thin face-framing pieces before you start. Those front pieces are what keep the style from feeling too severe.
If your layers keep escaping, spray the hair lightly before twisting. You want the bun to have some grip. A tiny amount of pomade on the fingertips helps smooth the top without making it look slick.
This is a good one for work, events, or hot days when you want your neck free. It isn’t flashy. That’s the point.
13. Bubble Ponytail
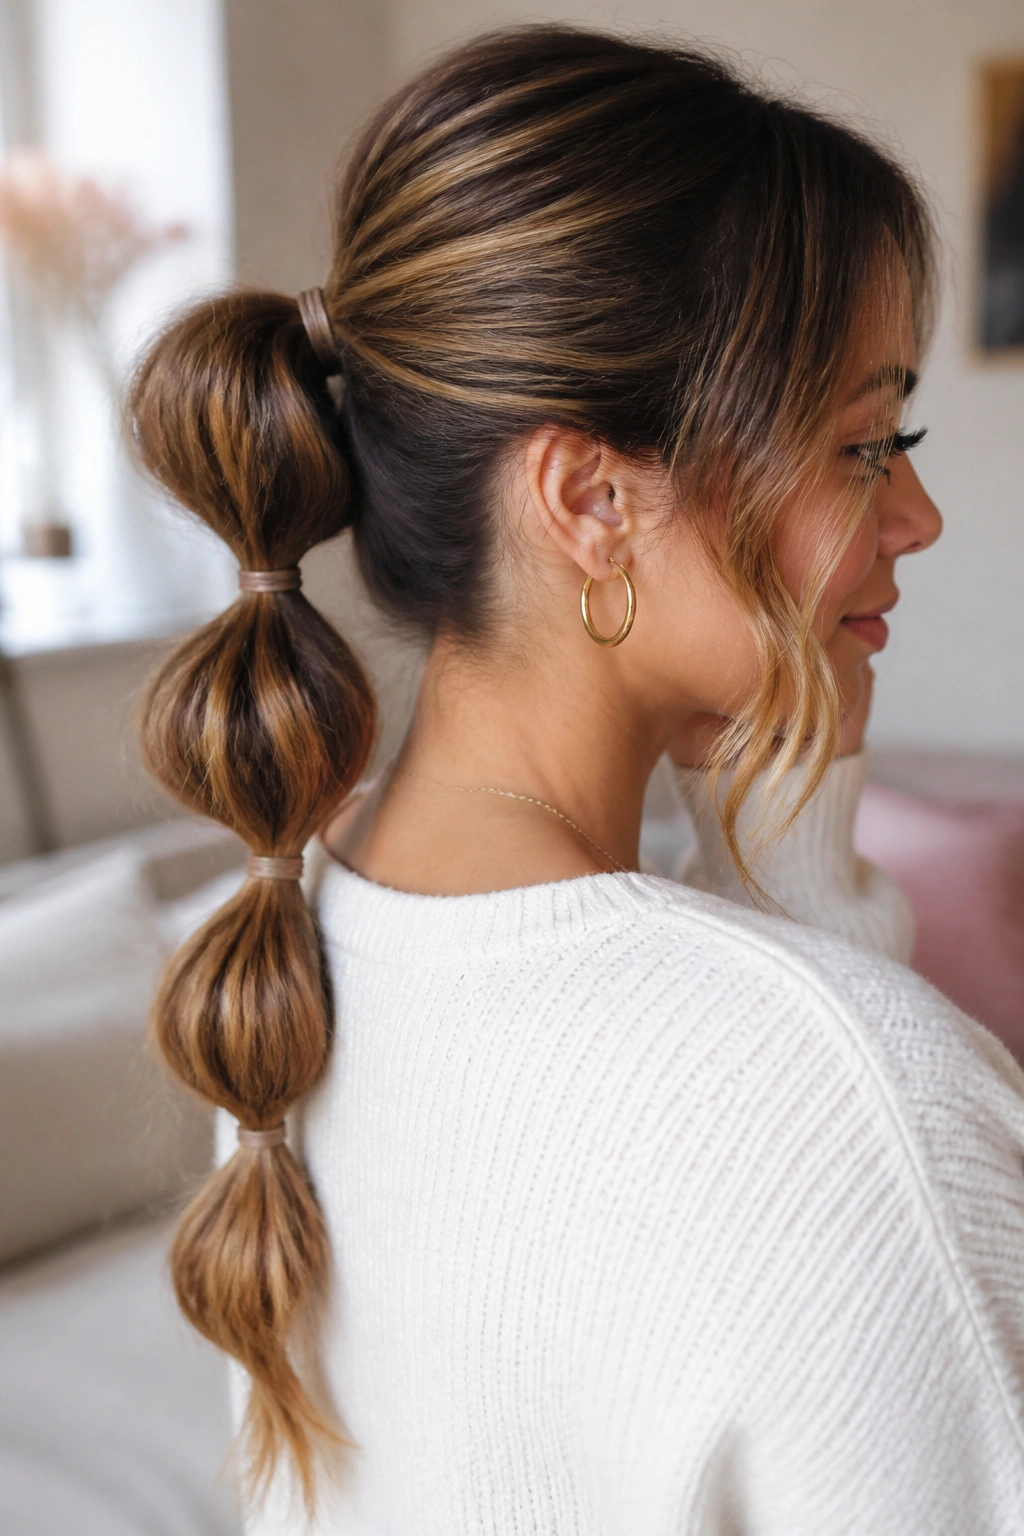
A bubble ponytail is playful without looking juvenile, which is harder to pull off than it sounds. The spacing matters more than the ponytail itself.
Tie the hair back first, then add small clear elastics every 2 to 3 inches down the length. Gently tug each section outward so it forms a rounded bubble. Don’t pull too hard. You want shape, not gaps.
Medium length hair is ideal for this because the bubbles stack neatly without becoming too long or too tiny. If your hair is layered, hide the shorter pieces by smoothing them into the base with a little gel or cream first.
This style works when you want something different but not fussy. It’s one of those styles that looks like it took more time than it did, which I respect.
14. Side-Parted Soft Curls

Soft curls with a side part give medium length hair a little glamour without crossing into prom territory. The curl pattern should be loose and brushable, not tight and shiny.
Wrap 1-inch sections around a curling iron for 8 to 10 seconds each, leaving the ends out on a few pieces so the shape doesn’t turn too uniform. After the curls cool, brush them out with a paddle brush or even your fingers. That step matters. Fresh curls can look stiff, and stiff curls age the whole style.
A side part gives the curls a better fall. One side sits fuller, the other side can tuck back a little, and the result feels soft around the face. If your hair gets frizzy fast, use a tiny drop of oil only at the ends after brushing.
This is the sort of style that works for date night, dinner, or a day when you just want your hair to look like you paid attention to it.
15. Choppy Wolf Cut for Medium Hair

The wolf cut gets attention because it has attitude, but the reason it works on medium hair is simple: the shape is built for movement. Shorter crown layers and longer, uneven ends give you a style that looks best when it is not trying to be perfect.
Why It Feels Different
Unlike a blunt cut, this one uses contrast. The top can be lifted with a diffuser, while the ends stay piecey and loose. That makes the hair feel fuller near the crown and lighter at the bottom, which is a smart trade on medium lengths.
What I’d Use
- Sea salt spray for grip.
- A diffuser on low heat.
- A pea-sized amount of styling paste on the ends.
- Fingers, not a brush, once the hair is dry.
If your hair is straight, this cut needs a little more styling to come alive. If it has natural wave or bend, it practically styles itself. Either way, the point is to let the shape do the work.
16. Low Pony with Wrapped Base

A low ponytail can be boring. It can also be one of the neatest-looking styles you own if you treat it like more than a backup plan.
Gather the hair at the nape, secure it with a tight elastic, then take a thin strand from underneath and wrap it around the base once or twice. Pin the tail underneath with a bobby pin. That tiny detail cleans everything up.
Medium hair is the right length for this because the ponytail sits full enough to look intentional but still short enough to feel light. If the crown is flat, lift the roots with a tail comb before you secure the pony. A little crown height changes the whole mood.
This style reads polished at work and easy on weekends. I like that it doesn’t shout. It just looks finished.
17. Double Mini Braids with Loose Waves
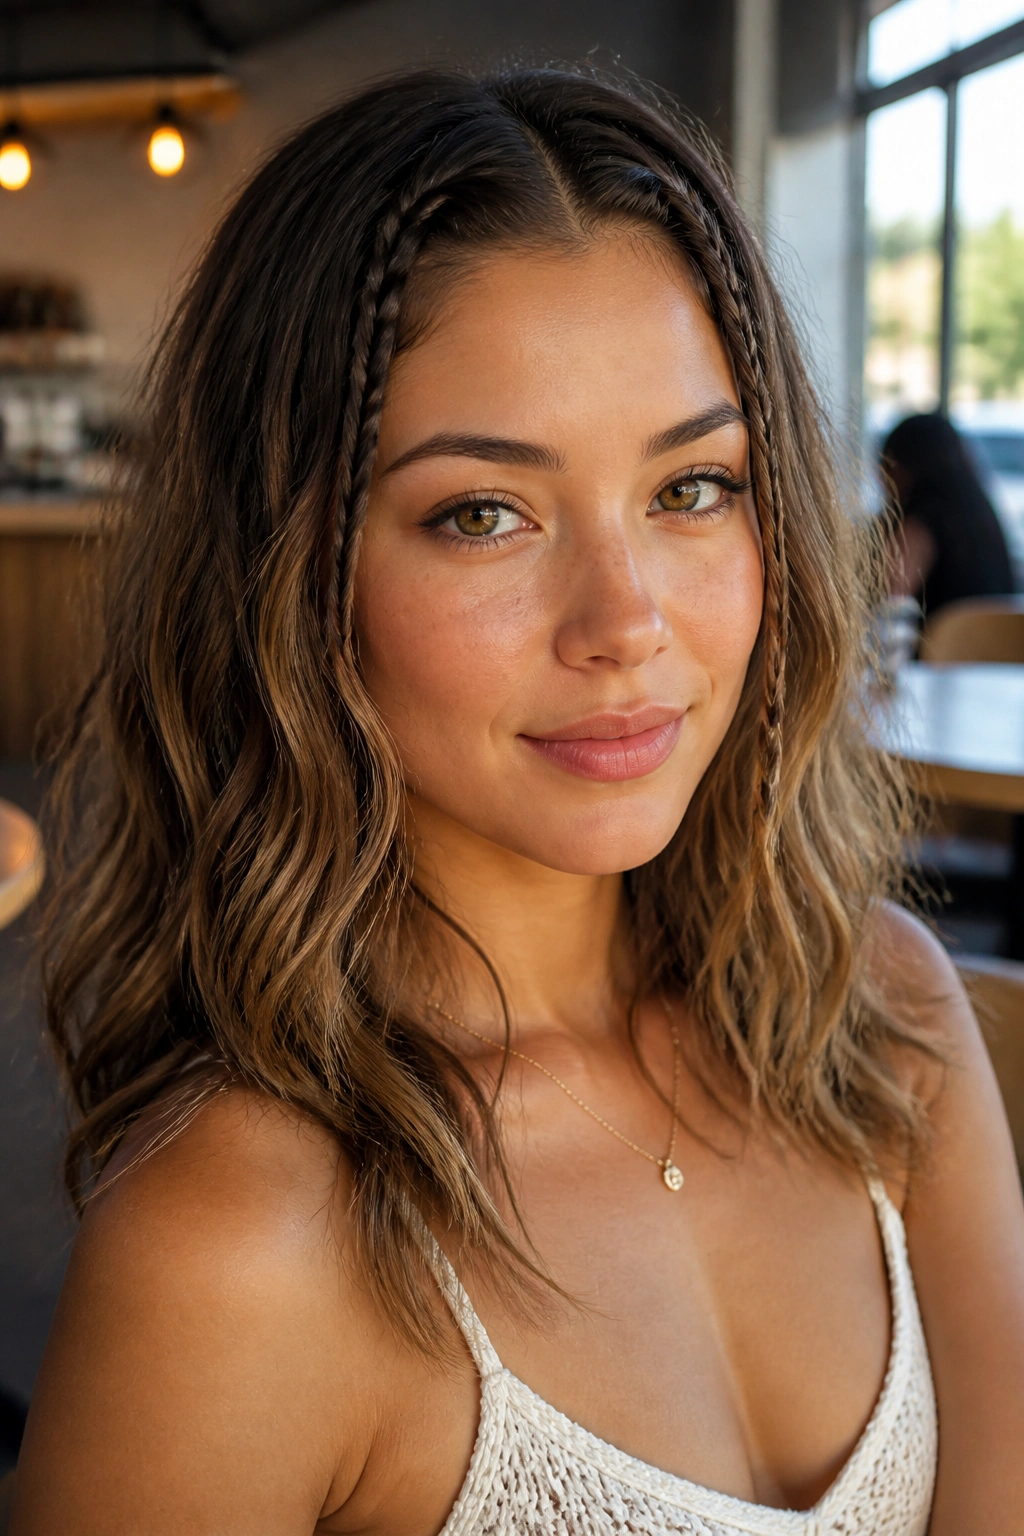
Two small braids near the front can soften medium length hair fast. They pull the eye upward, break up a plain wave pattern, and add a little structure without committing to a full braid set.
Take one 1-inch section from each side near the temples and braid them back toward the ears. Secure each braid with a tiny clear elastic or pin them behind the ear. Leave the rest of the hair loose in soft waves.
The style is especially good when the front pieces won’t behave. Instead of fighting flyaways, fold them into the braids. That’s a useful move on days when your hair has its own opinions.
This one feels casual, a little boho, and easy to wear with sweaters, denim, or summer dresses. It is not precious. That’s what makes it work.
18. Tucked-Behind-the-Ears Straight Hair

Straight hair tucked behind the ears sounds almost too simple, but simplicity can be a style choice when the cut is right. On medium hair, this works best when the ends are blunt or only lightly layered.
Smooth the hair with a flat iron, then use a dab of cream to calm the top layer. Tuck both sides behind the ears and let the hair rest against the neck and shoulders. That’s it. Sometimes a small gold hoop or a visible earring does half the styling work for you.
The part should be neat, and the hair should lie flat without looking pasted down. If it’s too glossy, the style turns stiff. If it’s too fluffy, it loses the clean line that makes it interesting.
I like this style on days when you want to look put together and do not want to spend ten extra minutes proving it.
19. Round-Brushed Blowout with Crown Lift

A good blowout is still a good blowout. The shape may be familiar, but on medium length hair it gives you a swingy outline that feels lively even when the rest of the outfit is basic.
The Pieces That Matter
- A large round brush for smoothing.
- A blow-dryer nozzle for directing airflow.
- Velcro rollers or clips at the crown while the hair cools.
- A light finishing spray that won’t freeze the ends.
Start at the roots and pull the hair up and back for lift. Then turn the ends under or out depending on the mood you want. For more body, let the hair cool in rollers for 10 minutes before brushing them out.
This style can look expensive when it is done well, but it can also fall flat if the crown is ignored. That’s the mistake people make. The bottom is easy. The root shape is where the style lives.
20. S-Shape Waves for Medium Length Hair

S-shape waves have a softer feel than barrel curls, and that makes them one of my favorite medium length hairstyles for women who want movement without obvious curls. The wave bends back and forth in a gentler rhythm, so the hair looks polished but not stiff.
Use a 1-inch iron and alternate the direction of each section while leaving the last inch straighter. Then brush the waves out once they cool. That gives you the curved, ribbon-like finish that makes this style stand out from basic curls.
If your hair is thick, keep the sections narrow so the wave pattern stays visible. If it’s fine, a little root spray before styling helps the shape last. I’d skip heavy cream here. It can make the wave collapse early and take the bounce out of the whole look.
This style works for everyday wear, but it also photographs well if you want something a little softer than a plain blowout.
21. Half-Back Clip with Crown Volume
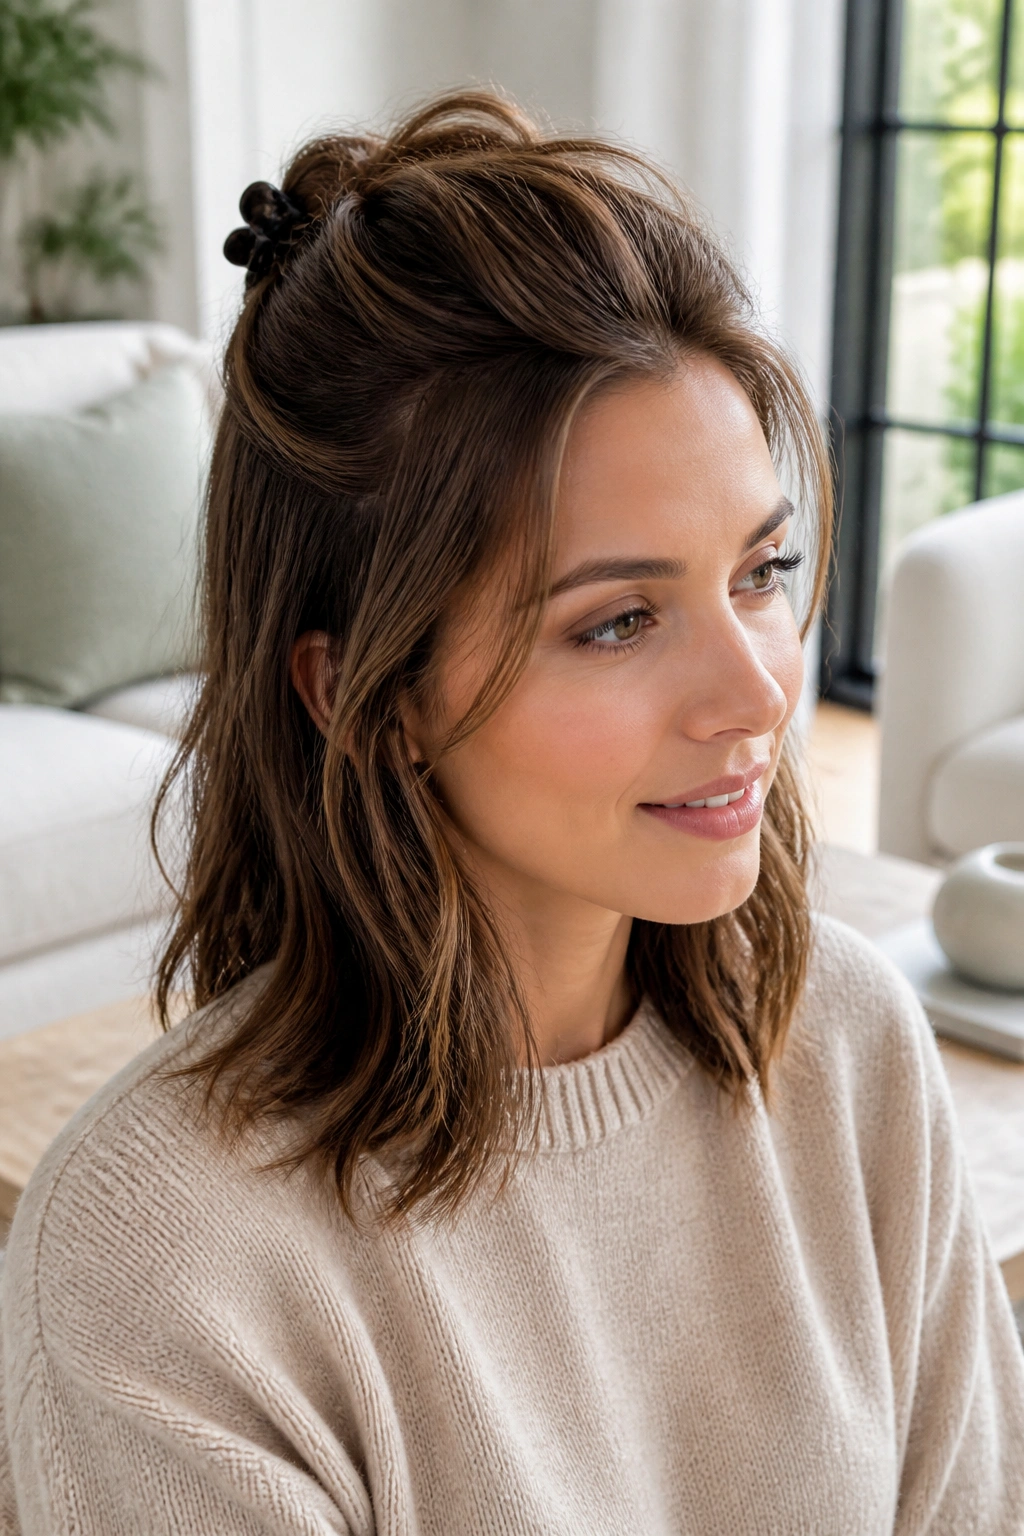
This style is for the person who wants hair off the face but still wants body at the top. It’s a small fix that makes a big visual difference.
How to Place It
Lift the crown gently with a tail comb, then clip back only the top third of the hair. Leave the lower lengths loose so the head shape doesn’t get flattened. A curved clip or a medium barrette works better than something tiny, because the hair has to hold its own weight.
The crown volume should stay soft. You’re not building a mountain. A little lift at the top and movement around the shoulders is enough.
Where It Shines
- Brunch.
- Workdays.
- School runs.
- Those days when your hair is clean but not cooperating.
This is a low-effort style that still looks considered. It also works well with second-day texture, which is one reason I keep it in rotation.
22. Messy French Twist for Mid-Length Hair
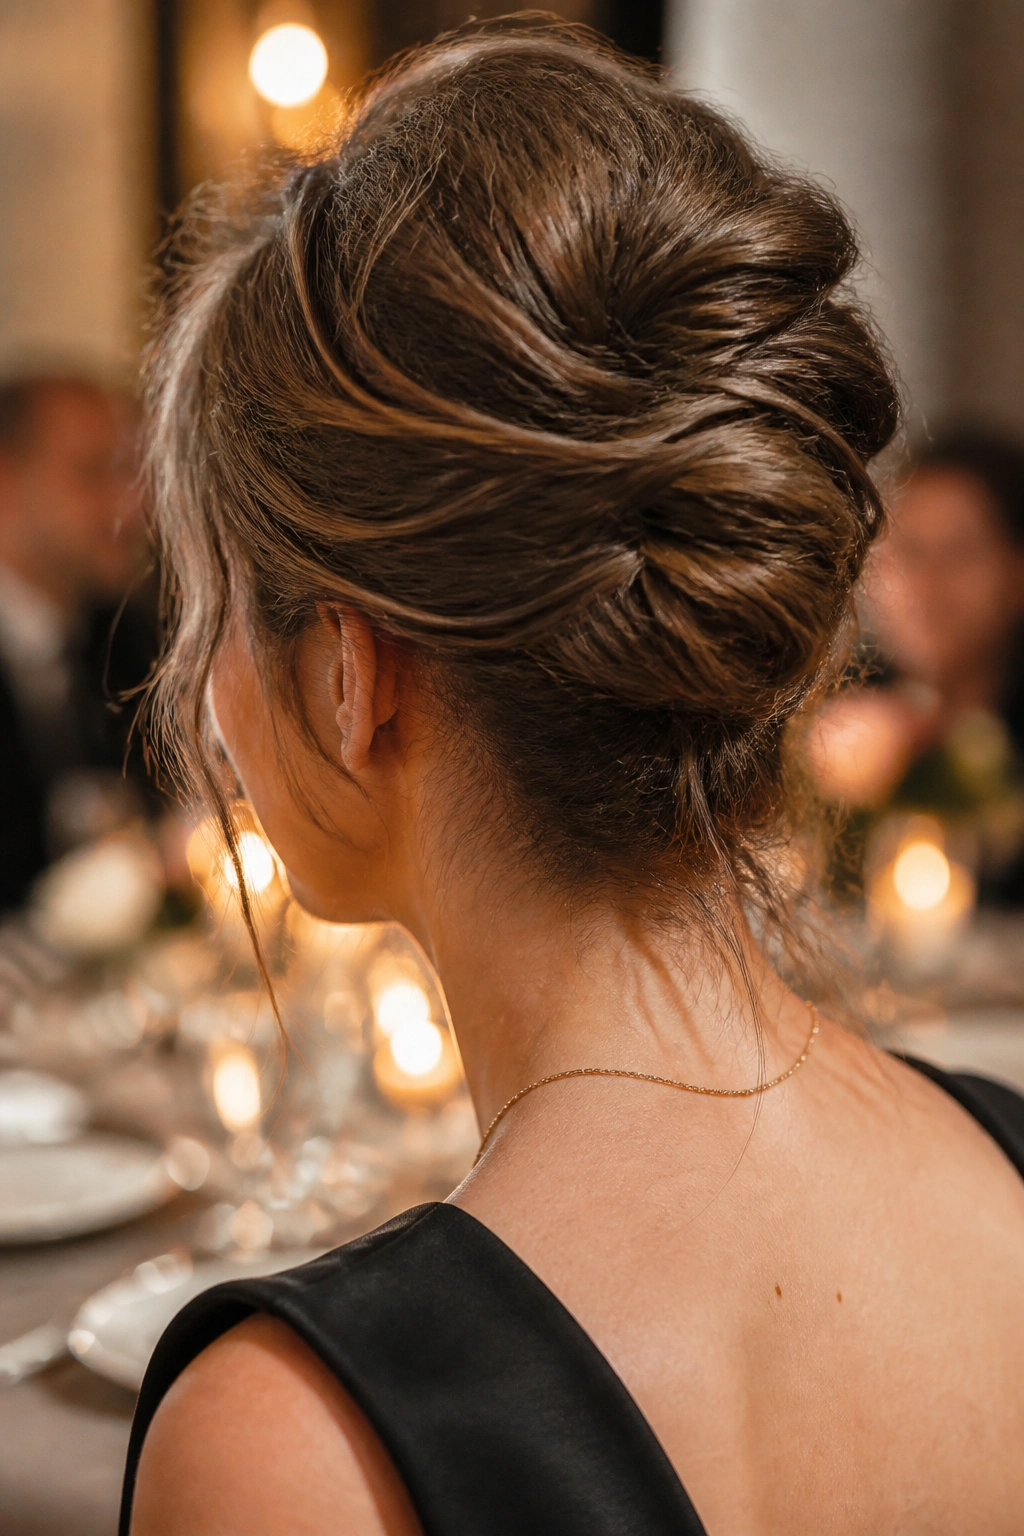
A French twist does not need to look formal. That’s the part people forget.
For medium length hair, a slightly messy twist is often better than a perfectly neat one because the shorter length gives the style more texture and less bulk. Roll the hair upward at the back, fold the ends in, and pin the shape with bobby pins from the inside out. Leave a few small pieces loose around the temple and nape.
If the hair is too clean and slippery, it will slide. A little dry shampoo or texturizing spray fixes that fast. You want grip before you start pinning. Otherwise you’ll keep chasing the twist around the back of your head, and that gets old in a hurry.
This is a smart style for dinners, events, or any time you want an updo that feels lighter than a bun. It’s a little undone. That’s the charm.
23. Sleek Wet-Look Side Part

A wet-look side part is bold, but on medium hair it doesn’t have to feel severe. The key is stopping the gel at the right place.
Comb a strong-hold gel through damp hair, starting at the roots and smoothing it back toward one side. Keep the product concentrated near the scalp and front section. The ends can stay softer. If everything is slicked back to the same degree, the style loses shape fast.
I like this look for evening events or a sharp outfit because it keeps the face open and the hair under control. It also works well with earrings, which I keep mentioning because it’s true: this style gives the jewelry room to do its job.
A side part makes the finish feel more wearable than a strict center part. That tiny shift softens the look and keeps it from feeling too hard.
24. Ribbon-Tied Half Ponytail

A ribbon-tied half ponytail is one of those small details that makes medium length hair feel sweet without tipping into costume territory. The ribbon should be about 1 to 2 inches wide, depending on how noticeable you want it.
Pull the top section into a half ponytail at the back of the crown, secure it with a thin elastic, then tie the ribbon over the base. Let the ends hang loose. If the hair is curled or lightly waved, the style feels softer. Straight hair works too, though I’d add a slight bend to the ends so the ribbon doesn’t feel too stiff against the rest of the look.
This is especially nice when you want something feminine but low-fuss. It also survives a long day better than you’d expect, since the lower half stays down and balanced.
A satin ribbon looks more polished. A cotton ribbon feels casual. Pick the one that matches the rest of your clothes, and the style falls into place.
25. Air-Dried Layers for Medium Length Hair
Air-dried layers are the quiet workhorse of medium length hairstyles for women who do not want to spend half the morning in front of a mirror. The cut does the heavy lifting. Your job is mostly to keep the shape from drying in weird, lumpy directions.
After washing, work in a light leave-in cream from the ears down, then scrunch the ends with your hands. If your hair bends naturally, let it fall where it wants for the first 15 minutes before touching it again. If it dries too flat at the roots, clip the crown up while it’s still damp. That little lift matters more than people think.
The best version of this style looks lived in, not lazy. Soft bends around the face, a bit of movement at the ends, and no giant frizz halo. If your hair is very straight, you can still make this work, but it may need a few twists while damp to encourage shape. If it’s wavy, you’re in luck.
This is the one I’d save for real life. Not the fantasy version of real life. The actual one, where the coffee is getting cold and you still want your hair to look like you meant it.
