



Big curls have a way of stealing the whole room, but only when they’re built with enough shape to move. Flat roots, stiff ends, and too much cream can turn even gorgeous texture into a heavy curtain. The sweet spot for voluminous curl looks is bounce: hair that lifts at the scalp, opens through the mid-lengths, and still keeps enough definition to look deliberate.
That’s where a lot of people get tripped up. They chase shine, add product, smooth everything down, and wonder why the hair looks smaller than it did after a quick finger fluff. Volume in curls is rarely about piling on more product. It’s about balance — layers in the right place, drying in the right direction, and choosing a shape that gives the curls room to swell without turning puffy in the bad way.
Big curl hair can be soft or glam, loose or tight, polished or messy in a very good way. The fun part is that the same curl pattern can look completely different depending on where the part sits, how the ends are cut, and whether the roots are lifted while they dry. That’s why one style can look airy and expensive while another feels dense and heavy, even on the same head of hair.
So let’s get into the looks that make curls look full, springy, and alive — not weighed down, not overworked, just properly built.
1. Brushed-Out Spiral Curls With a Soft Side Part
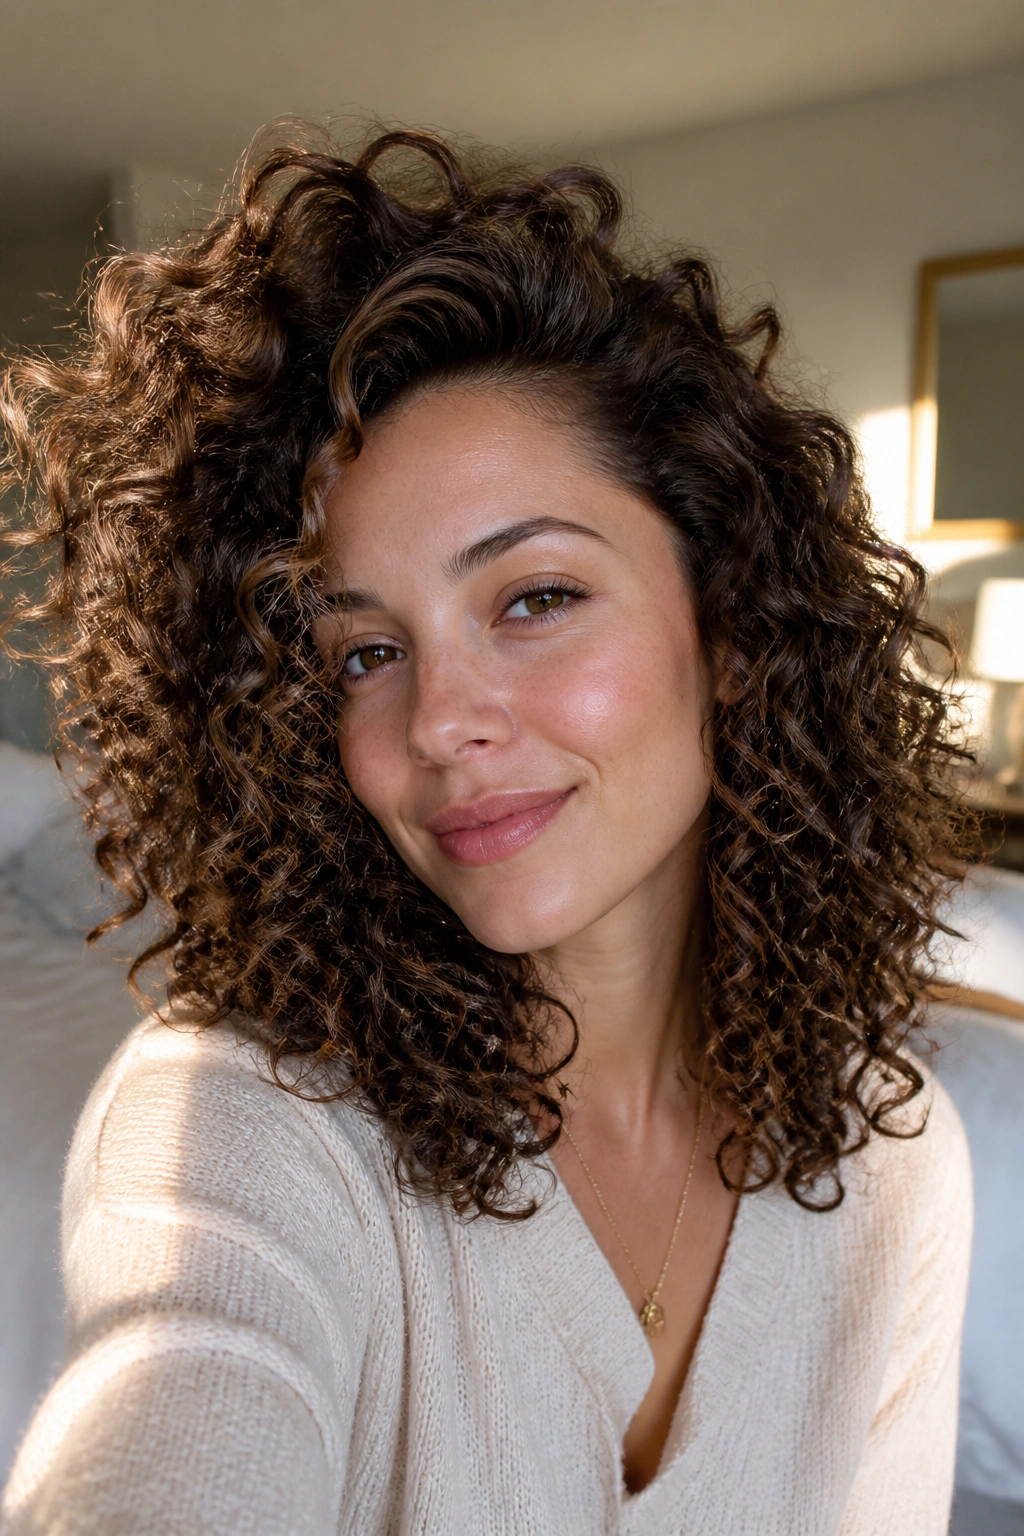
Brushed-out spiral curls are the hairstyle equivalent of opening a window in a warm room. The curls start defined, then get loosened into a cloud of movement that looks bigger than life without losing shape.
Why this look works
The trick is to set the hair with enough structure first. Use a 1-inch curling iron or wand on dry hair, wrap 1-inch sections away from the face, and let every section cool fully before you touch it. Once the curls are cool, rake through them with a wide-tooth comb or a soft paddle brush, then stop before you overdo it.
A soft side part helps the crown rise instead of sitting flat. It also keeps brushed-out curls from reading too round in the wrong way. I like this look on shoulder-length cuts and longer hair because the movement shows up fast, even if the actual curl pattern is loose.
Quick styling notes
- Use a light mousse at the roots before drying.
- Finish with a flexible-hold hairspray, not a stiff helmet spray.
- If the ends look dry, smooth one drop of oil through them only.
- Don’t brush until the curls are fully cool. Seriously.
The result should look fluffy, touchable, and a little bit undone. Not messy. Just alive.
2. Layered Corkscrew Curls With Crown Lift
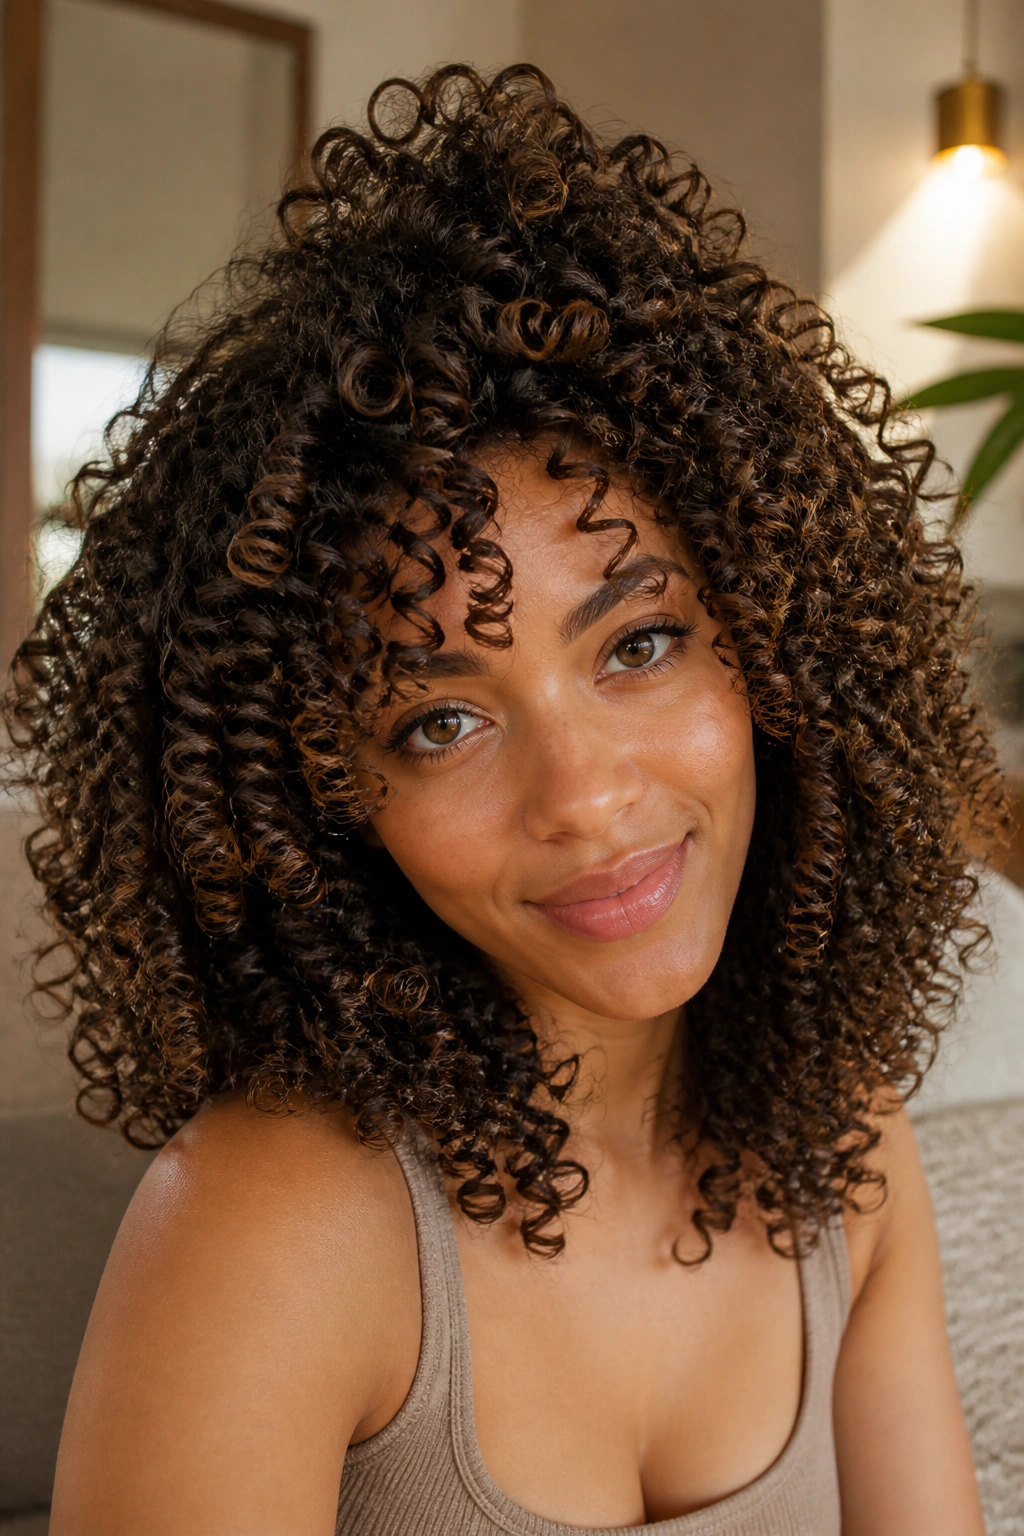
Layers are doing most of the work here. Without them, tight curls can stack into a triangle shape. With them, the hair lifts at the crown and falls in a way that feels full from top to bottom.
Ask for long, rounded layers if your curls are medium to tight. If the layers are too short, the hair can shrink up and get frizzy at the ends, which is not the same thing as volume. A good cut should leave enough weight to keep the shape polished while taking some bulk out of the lower half.
Styling is simple, but the details matter. Apply a curl cream only from the mid-lengths down, then follow with a small amount of gel at the roots for hold. Diffuse upside down for the first five minutes, then flip upright and finish with the dryer pointed at the crown. That little change lifts the roots without roughing up the whole cuticle.
This is the look for people who want full curls, not fluffy chaos. It’s especially good if your hair gets wide at the bottom and flat at the top. The crown lift changes everything.
3. Curly Shag With an Airy Fringe
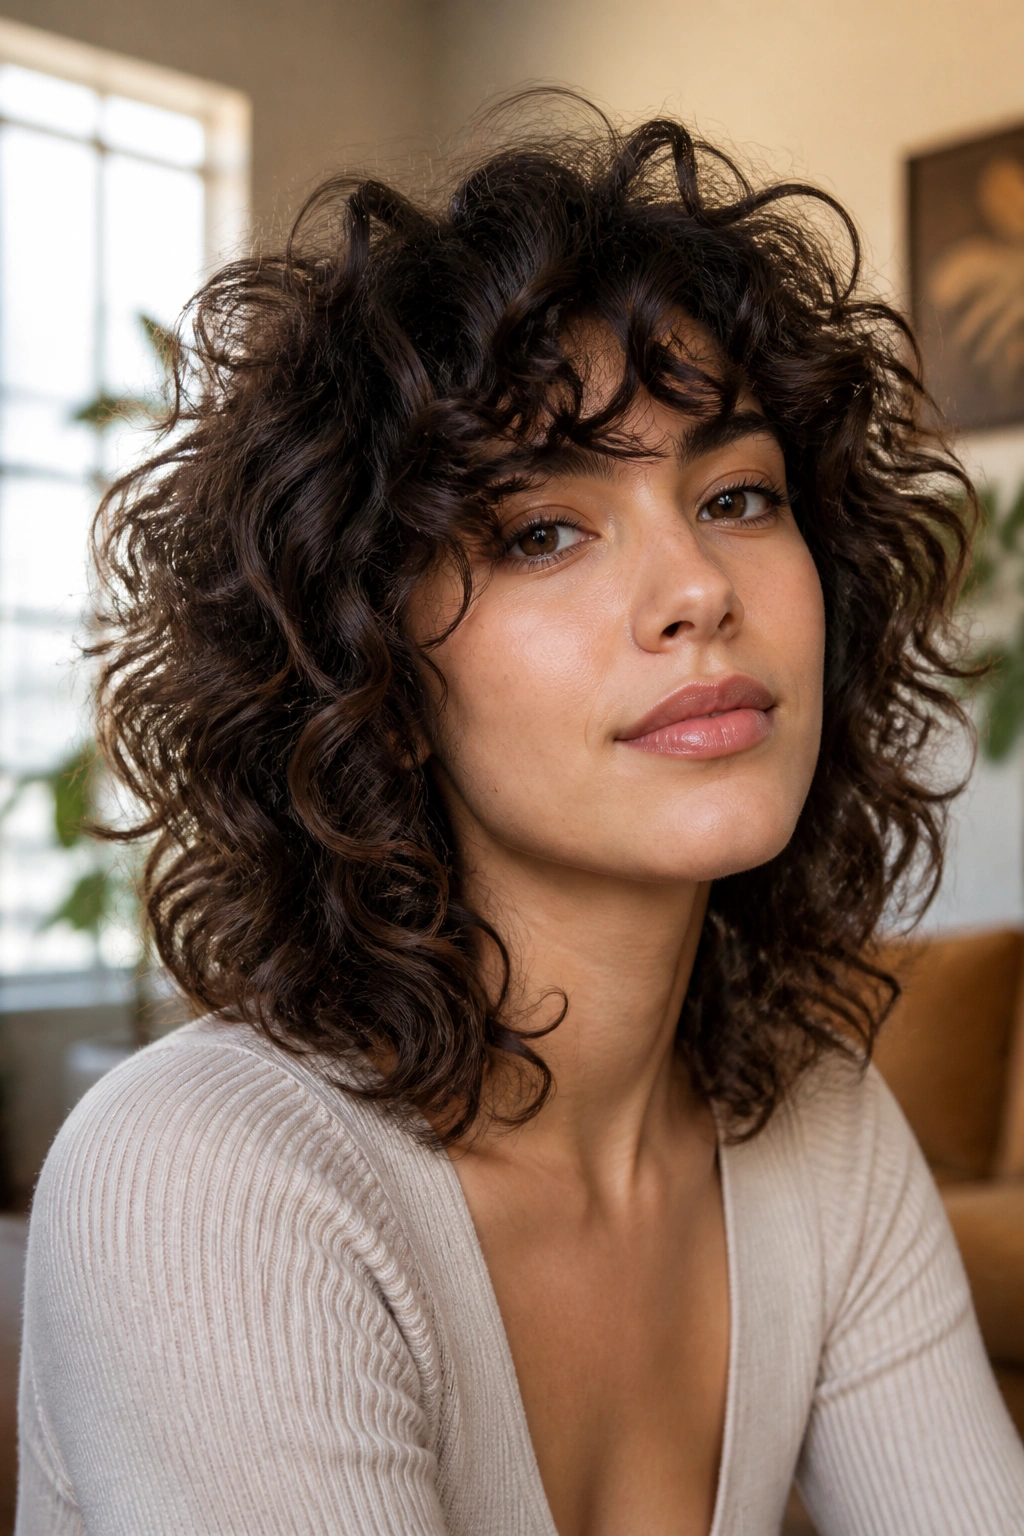
Why does a shag make curls look so full? Because it takes away the dead weight. That’s the whole secret, and honestly, it’s one of the few haircut tricks that lives up to the hype.
A curly shag uses choppy layers to keep the curl pattern separate, which means the hair can spring instead of clumping into one heavy shape. The fringe matters too. An airy bang or soft curly fringe draws the eye up, which makes the whole style feel bigger at the top even if the lengths are medium.
What to ask for
- Dry cutting works well on most curl types, because shrinkage can fool you when hair is wet.
- Keep the bangs soft and piecey rather than blunt.
- Make sure the shortest layers still have enough length to curl, not just puff.
How to style it
Scrunch in a foam or light gel while the hair is damp, then diffuse on low heat until about 85% dry. After that, leave it alone for a few minutes before shaking the roots out with your fingers. If you touch it too soon, the top gets frizzy and the shag loses its shape.
The best shags look a little wild in a controlled way. That’s the sweet spot.
4. Deep Side-Swept Glam Waves
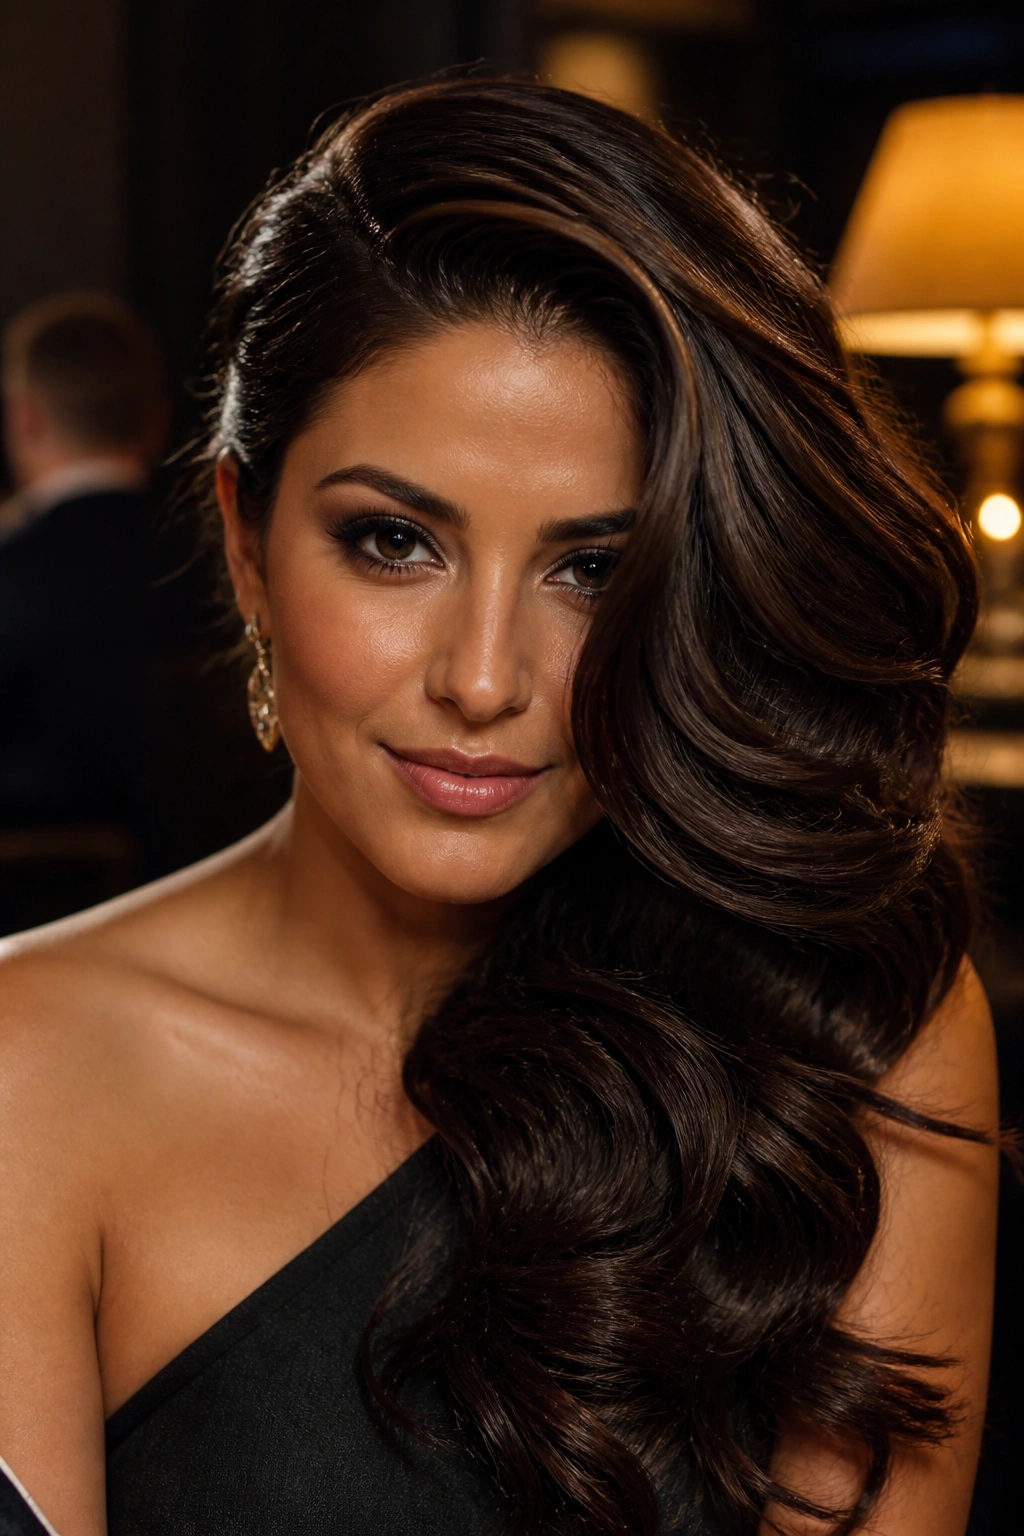
A deep side part can make curls look twice as lush without adding a single product. It shifts the weight of the hair, creates height at the crown, and lets one side fall in a dramatic sweep that feels old-school in the best way.
This look works especially well on medium and long hair that already has some natural bend. Set the whole head with a 1.25-inch curling wand, but wrap the front sections away from the face and leave the very ends out for a softer wave. Once everything cools, clip the front wave in place for 10 minutes so it keeps that swooping shape.
Then brush it out gently. Not half-heartedly — gently. Use a boar bristle brush or a soft paddle brush, then tuck one side behind the ear and mist the top with a light-hold spray. The front should feel glossy, not crunchy.
It’s a strong choice for evenings, weddings, or any day when you want hair that looks styled without looking stiff. The side sweep does a lot of the visual work.
5. Rounded Afro With Stretched Roots
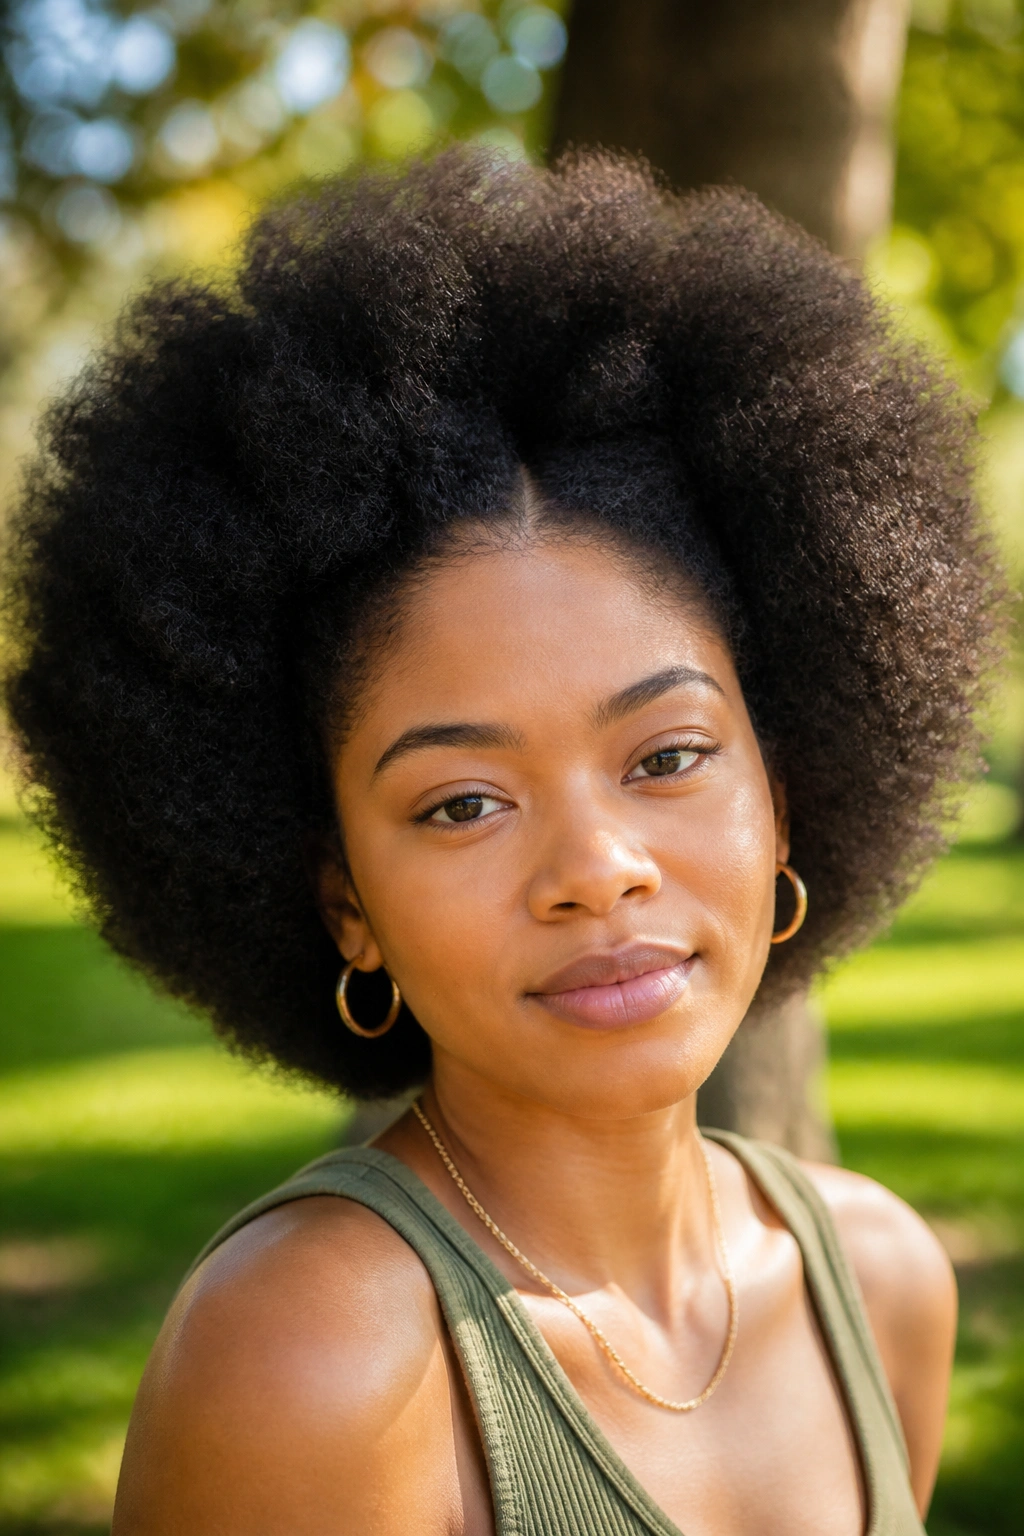
A rounded afro is one of the cleanest ways to get volume that looks intentional from every angle. The shape is the point. The fullness is the point. Nothing about it needs to be apologetic.
The best versions keep the outline rounded instead of wide at the sides. That usually means drying the hair in sections, stretching the roots a little with banding, twist-outs, or a diffuser, and then picking only the roots once the hair is dry. Do not pick the ends first. That’s how you steal definition from the style and make it frizz out faster.
Moisture still matters here. Start with a leave-in, then add a styling cream or mousse that gives hold without making the hair sticky. If the hair is very dense, use a denman brush or fingers to define the curls before drying, but don’t chase perfection in every section. A rounded afro looks best when it has a little variation in the curl pattern.
A small pick at the roots, used carefully, creates that soft halo effect. That halo is the whole magic.
6. Half-Up Crown Lift With Loose Ends
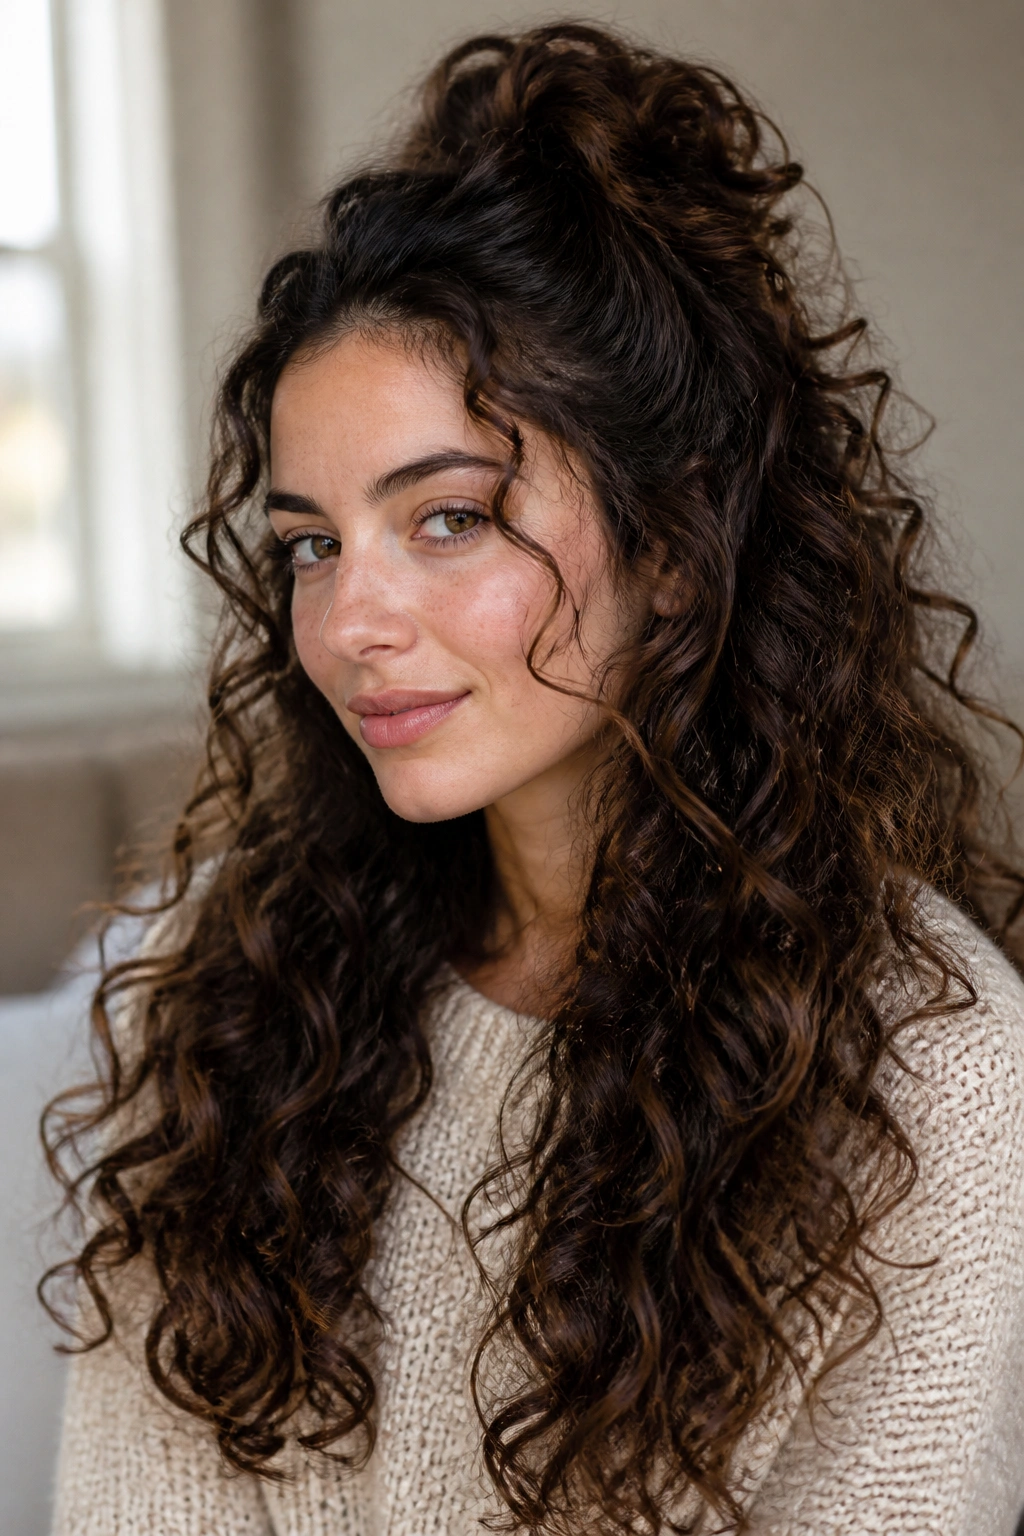
A half-up style can look flat if you just grab the top layer and call it done. The better version lifts the crown, keeps the sides soft, and leaves the curls free to spill over the shoulders.
This is the look I reach for when the hair needs to stay out of the face but still look full. Pull back the top section from temple to temple, then secure it with a small claw clip or two hidden pins crossed into an X. Leave enough hair around the hairline so the half-up section doesn’t tug the front tight. That tiny bit of looseness gives the illusion of thicker hair.
The bottom half should stay defined. If the curls have gone a little soft, revive them with a mist of water and a pea-sized amount of cream rubbed between the palms. Then scrunch from the ends upward.
It’s a good everyday style, but it also dresses up fast with a barrette or a velvet ribbon. The crown stays lifted, the lengths stay bouncy, and the whole thing feels much bigger than a simple half-up should.
7. Old Hollywood Barrel Curls
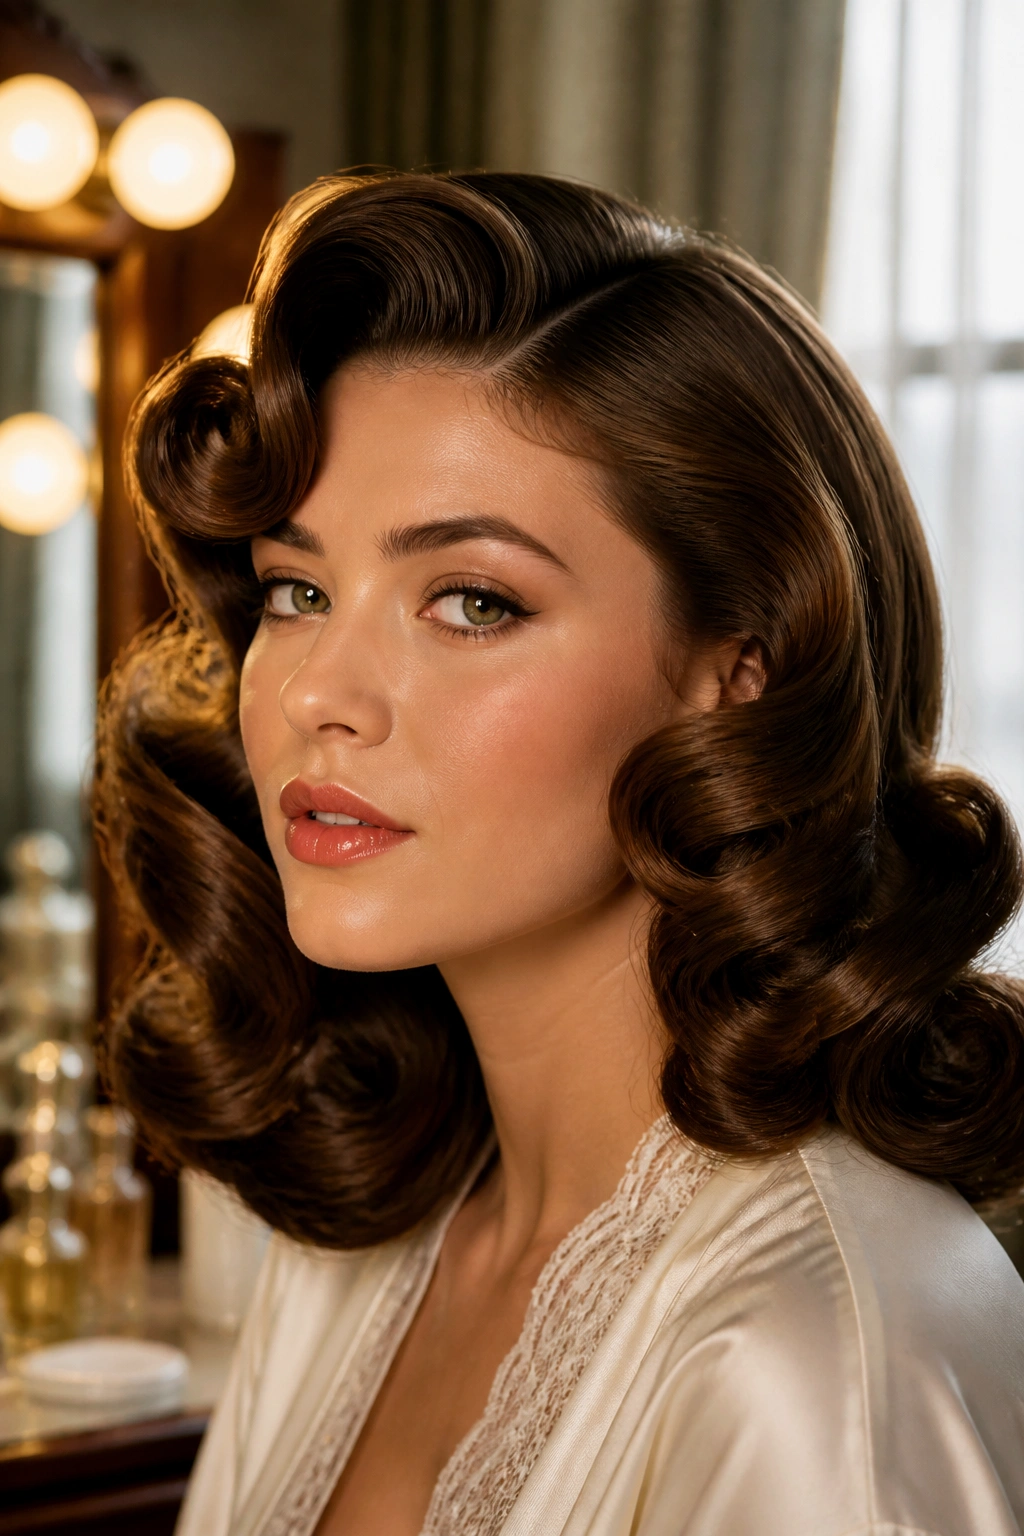
Barrel curls can look very polished, but they only stay glamorous if you set them with enough structure. A half-baked barrel curl falls apart fast and ends up looking limp. Nobody wants that.
The set that keeps them from going soft
Use a 1.5-inch curling iron on dry hair and wrap larger sections in the same direction. Pin each curl while it cools, even if you think you don’t need to. You do. Cooling in place is what gives the wave its memory and keeps the root area from collapsing.
Once the curls are cool, brush them into one smooth direction with a soft brush. Then shape the front around the face and spray only the outer layer. If you spray too close, the curls lose that satiny finish and start to look stiff.
Best details to know
- Works best on medium to long hair
- Needs a clean part, usually deep side or soft side
- Looks richer when the ends are slightly tucked
- Holds better on second-day hair than on freshly washed hair
This look is dramatic without being fussy. That’s why it keeps coming back.
8. Shoulder-Grazing Curly Lob
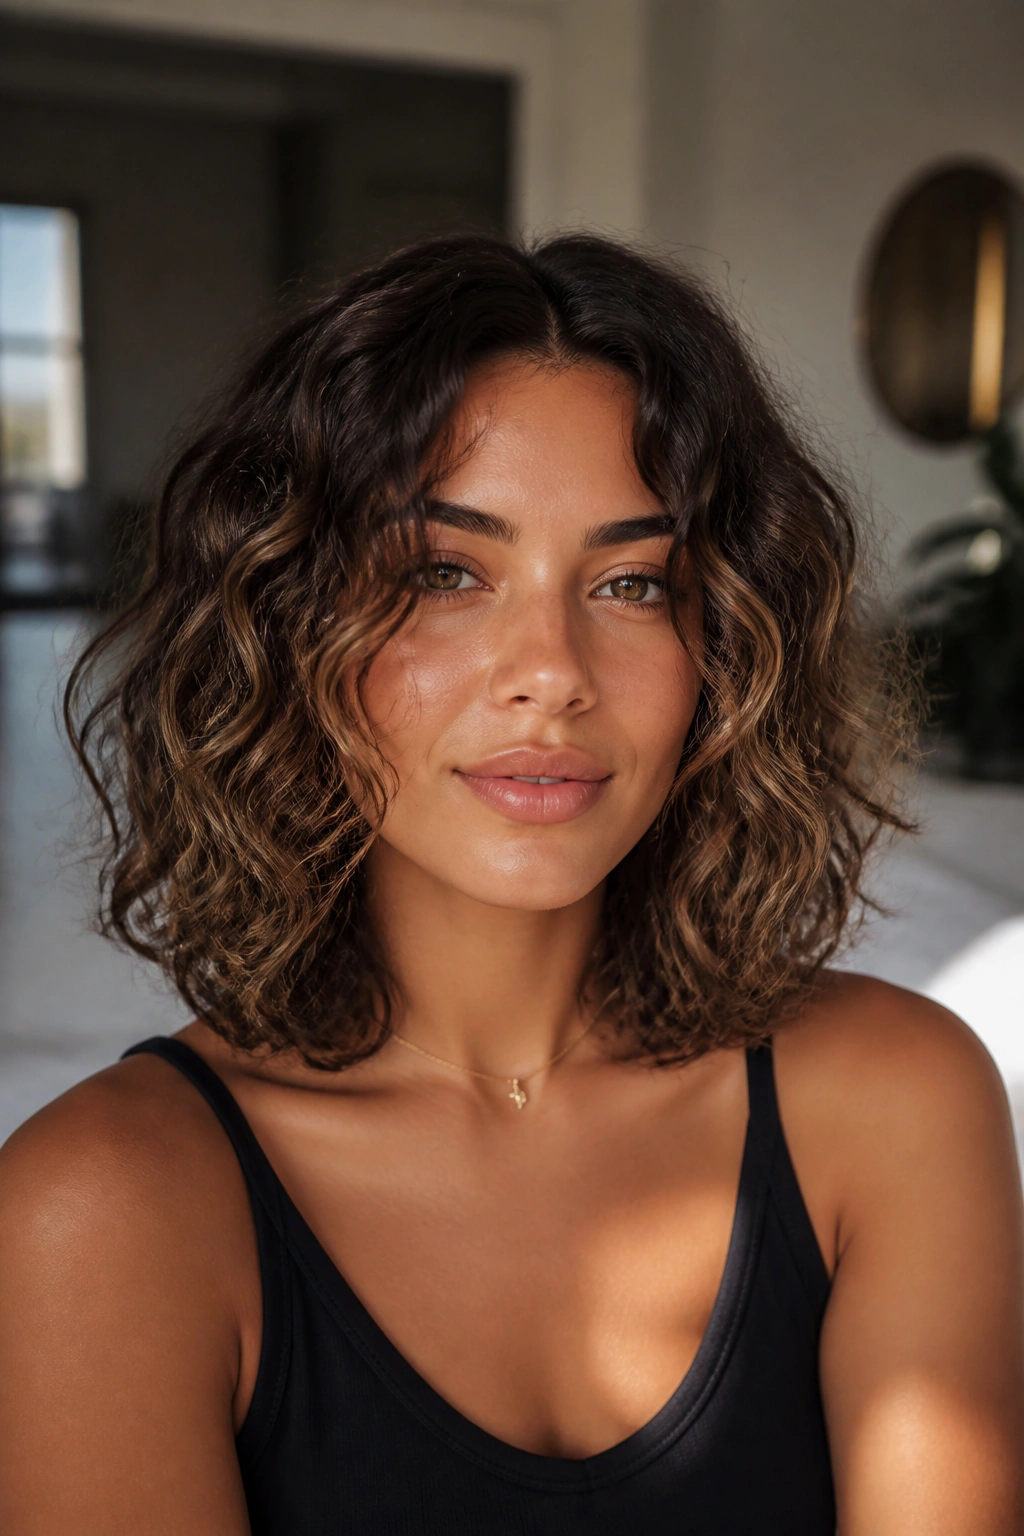
A curly lob sits in that sweet spot where the hair is long enough to feel full but short enough to bounce. The movement is the whole point. Every step makes the ends swing a little, and that gives the style energy.
The cut should be slightly longer in front or evenly blunt with soft layers inside, depending on how thick the hair is. If the cut is too heavily layered, the lob can lose its body and start looking stringy. If it’s too heavy, it can get triangular. The middle ground is what you want.
Styling takes very little once the shape is right. Apply mousse to damp hair, scrunch, diffuse, and then break the cast with your hands when the hair is dry. A center part keeps it casual, while a slight off-center part makes the crown look taller. Both work.
This is one of the easiest big-curl looks to live with because it never feels overdone. It just feels bouncy. And that’s enough.
9. Mermaid Waves With Root Volume
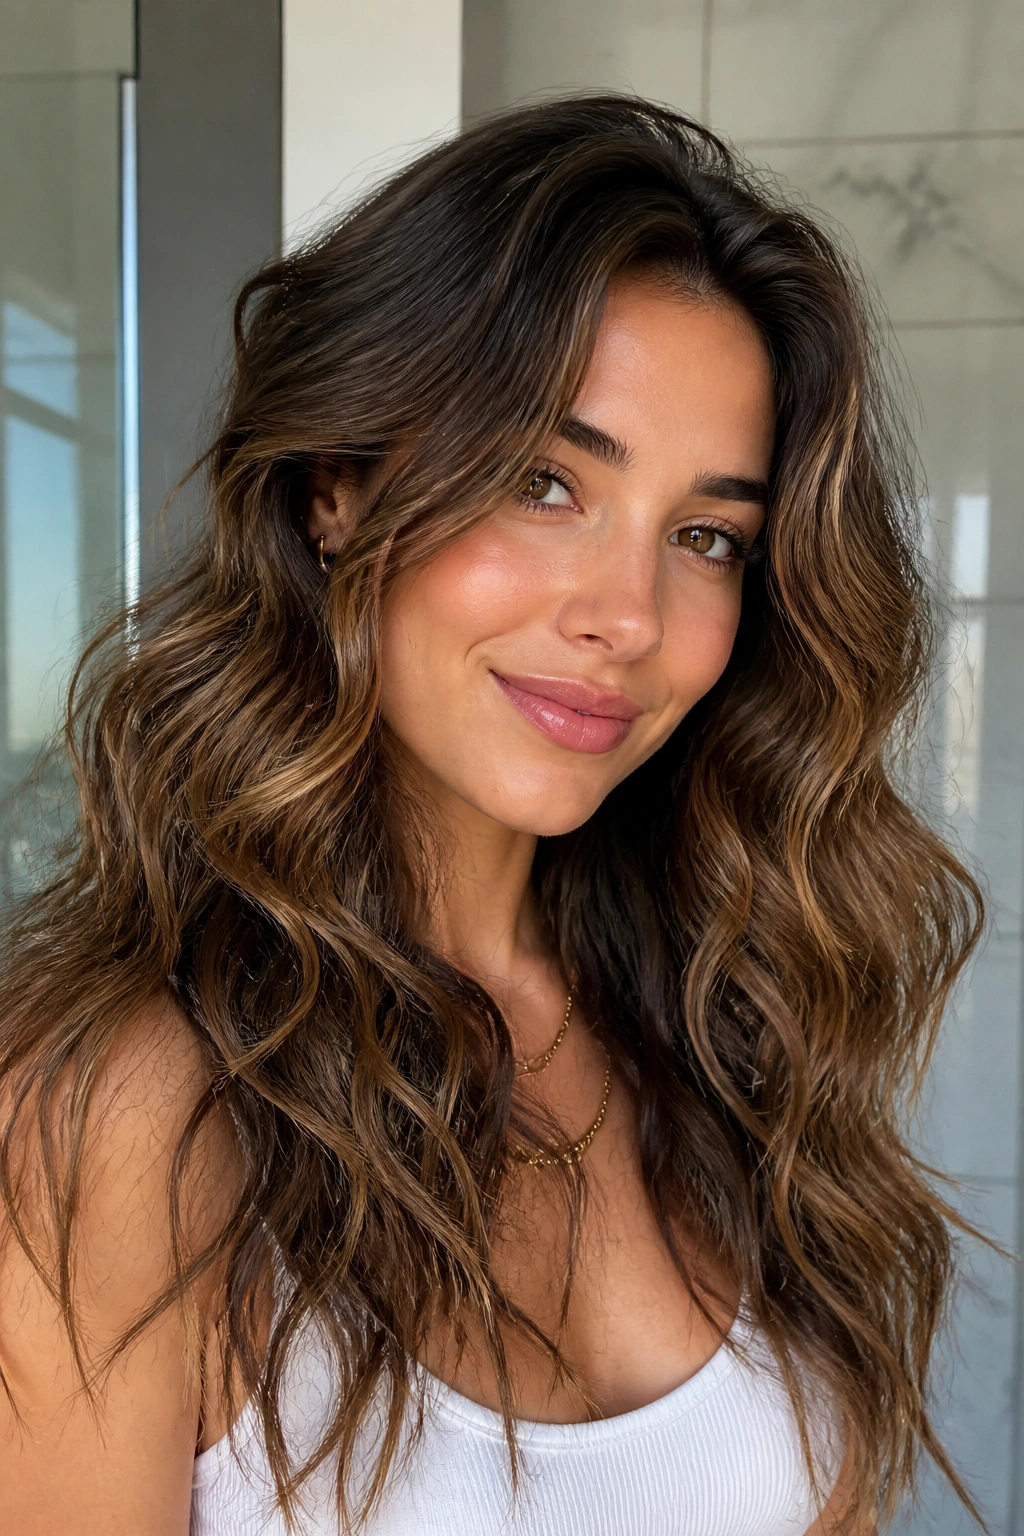
Loose waves only look good when the roots have life. If the top sits flat, the whole style reads like a wet rope. That is the part people forget.
A wide-barrel wand or large hot rollers can make this look fast. Use 1.5-inch sections, wrap them loosely, and leave the last inch or so out so the wave doesn’t turn into a full curl. Once the hair cools, brush through with your fingers first, then a wide brush if you want it softer.
A little foam at the roots keeps the top from sinking. I also like clipping the crown for 10 minutes while the hair cools. It sounds old-fashioned because it is, and it works. If the lengths are very long, flip the hair side to side while you diffuse so the roots dry with some lift instead of clinging to the head.
The look should feel soft, loose, and touchable, not beachy in the overused sense. More like big, rippled movement that keeps going.
10. Pineapple Puff With Face-Framing Pieces
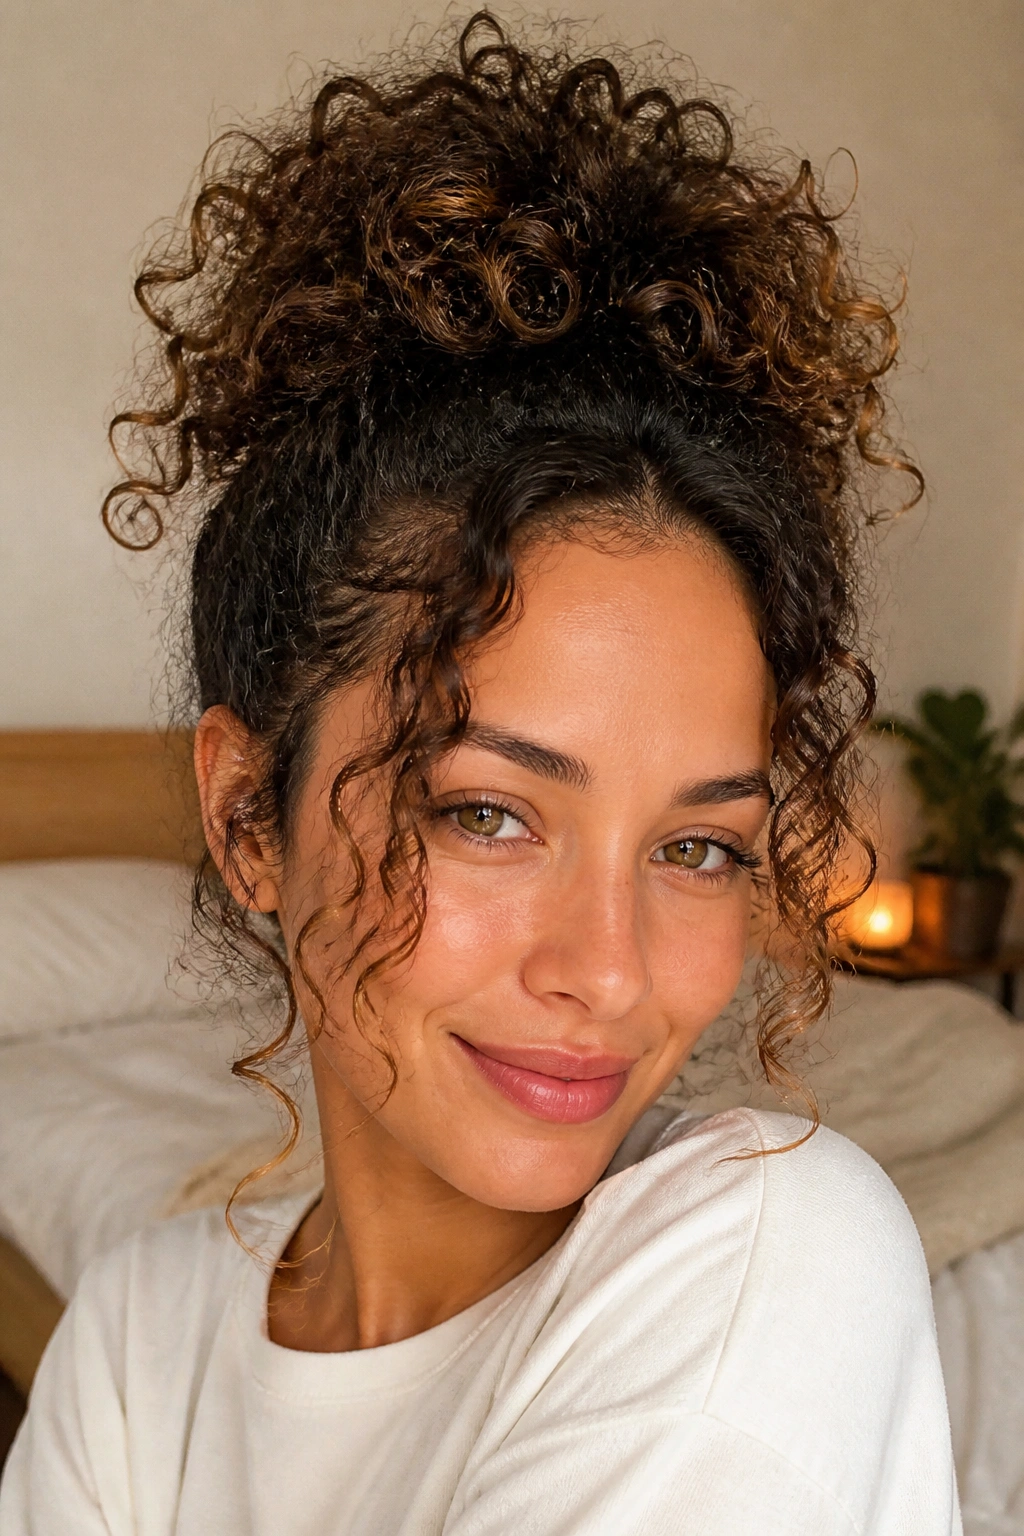
Second-day curls love this style. So do busy mornings. It gets the hair off the neck, keeps the crown high, and leaves enough curl around the face to avoid that “I gave up” feeling.
Gather the hair into a loose high ponytail right at the crown, then stop before you pull it all the way through on the last wrap if your hair tie allows it. That creates a puff instead of a tight knot. If the hair is longer, let the ends curl forward or to the side. If it’s shorter, let the shape fan out naturally.
A few face-framing pieces make the style look finished. Pull two small sections loose at the temples, twist them lightly with your fingers, and let them fall where they want. That softens the top and keeps the silhouette from feeling too sharp.
This is a smart choice for curls that flatten overnight because the pineapple shape restores height fast. It’s practical, yes, but it still has personality. A good one never looks lazy.
11. Face-Framing Spiral Curls With a Center Part
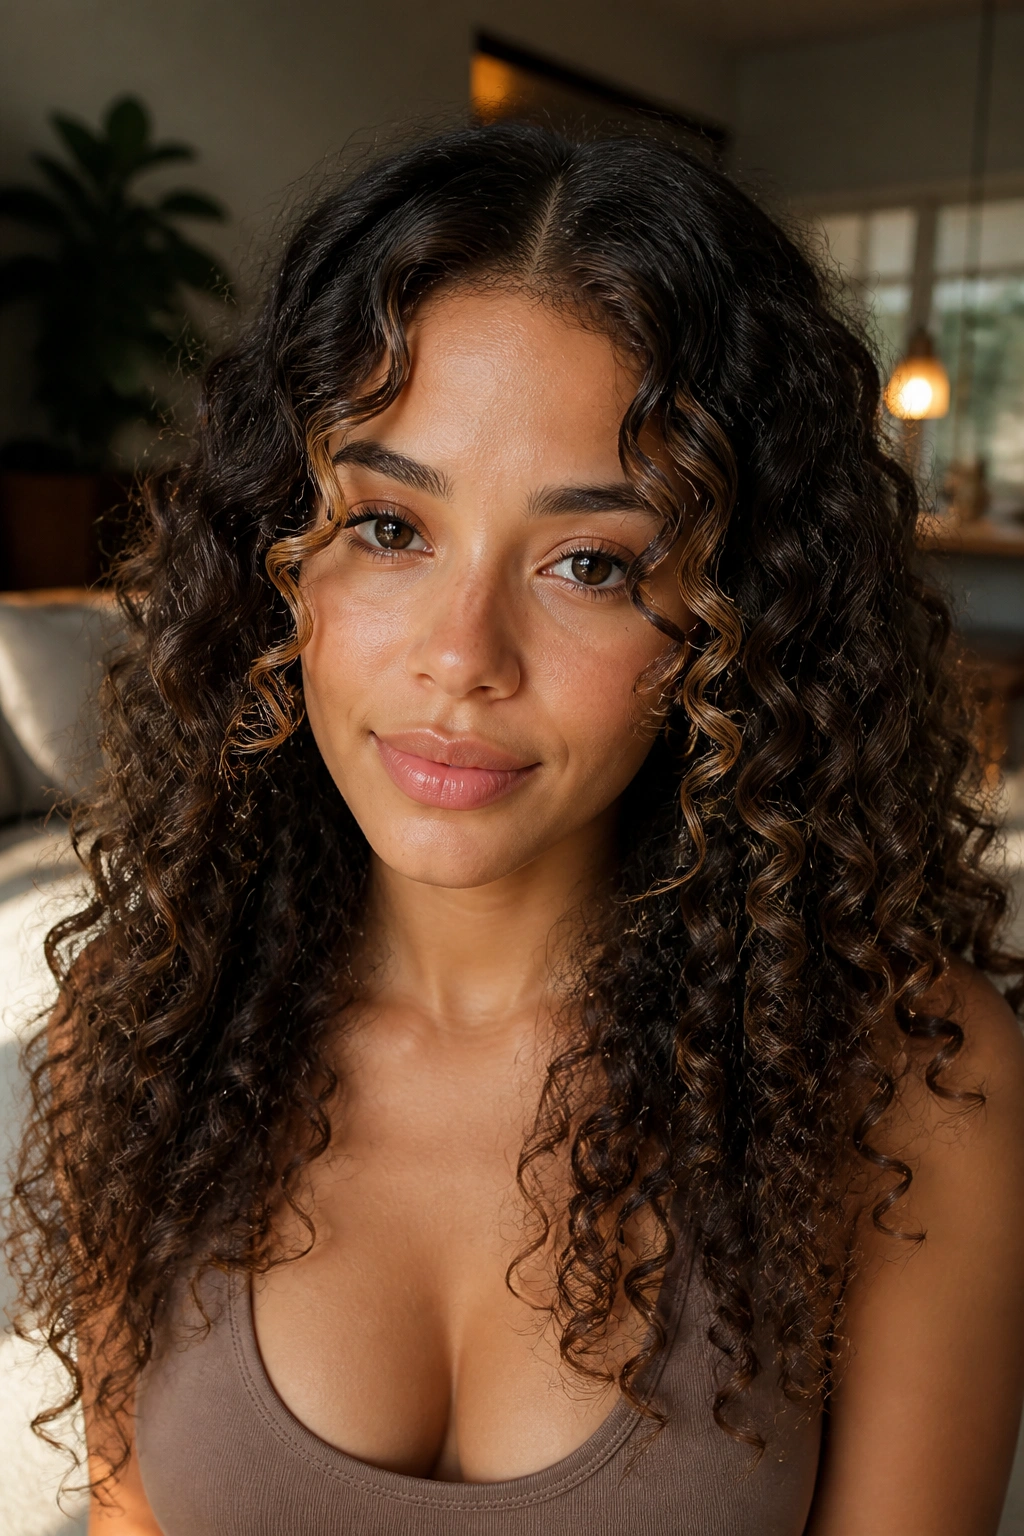
A center part can make curls look fuller, not flatter, when the front is shaped correctly. The trick is to let the curl fall around the face instead of dragging everything straight down.
This style works best with long layers or a cut that has shorter pieces around the cheekbones and jaw. Curl the front pieces away from the face with a small iron or define them by finger-coiling while the hair is damp. Either way, those front curls should sit forward and slightly outward, which gives the face more width and the hair more presence.
The rest of the hair can stay loose and springy. Use a diffuser on low heat, then shake out the roots with your fingertips once the hair is dry. If the top goes too flat, flip the part for a minute while you finish drying. That little switch adds lift without making the whole style messy.
This is a strong choice for anyone who wants the hair to frame the face without hiding it. It feels balanced, and the center part keeps the volume from drifting to one side.
12. Voluminous Curly Ponytail
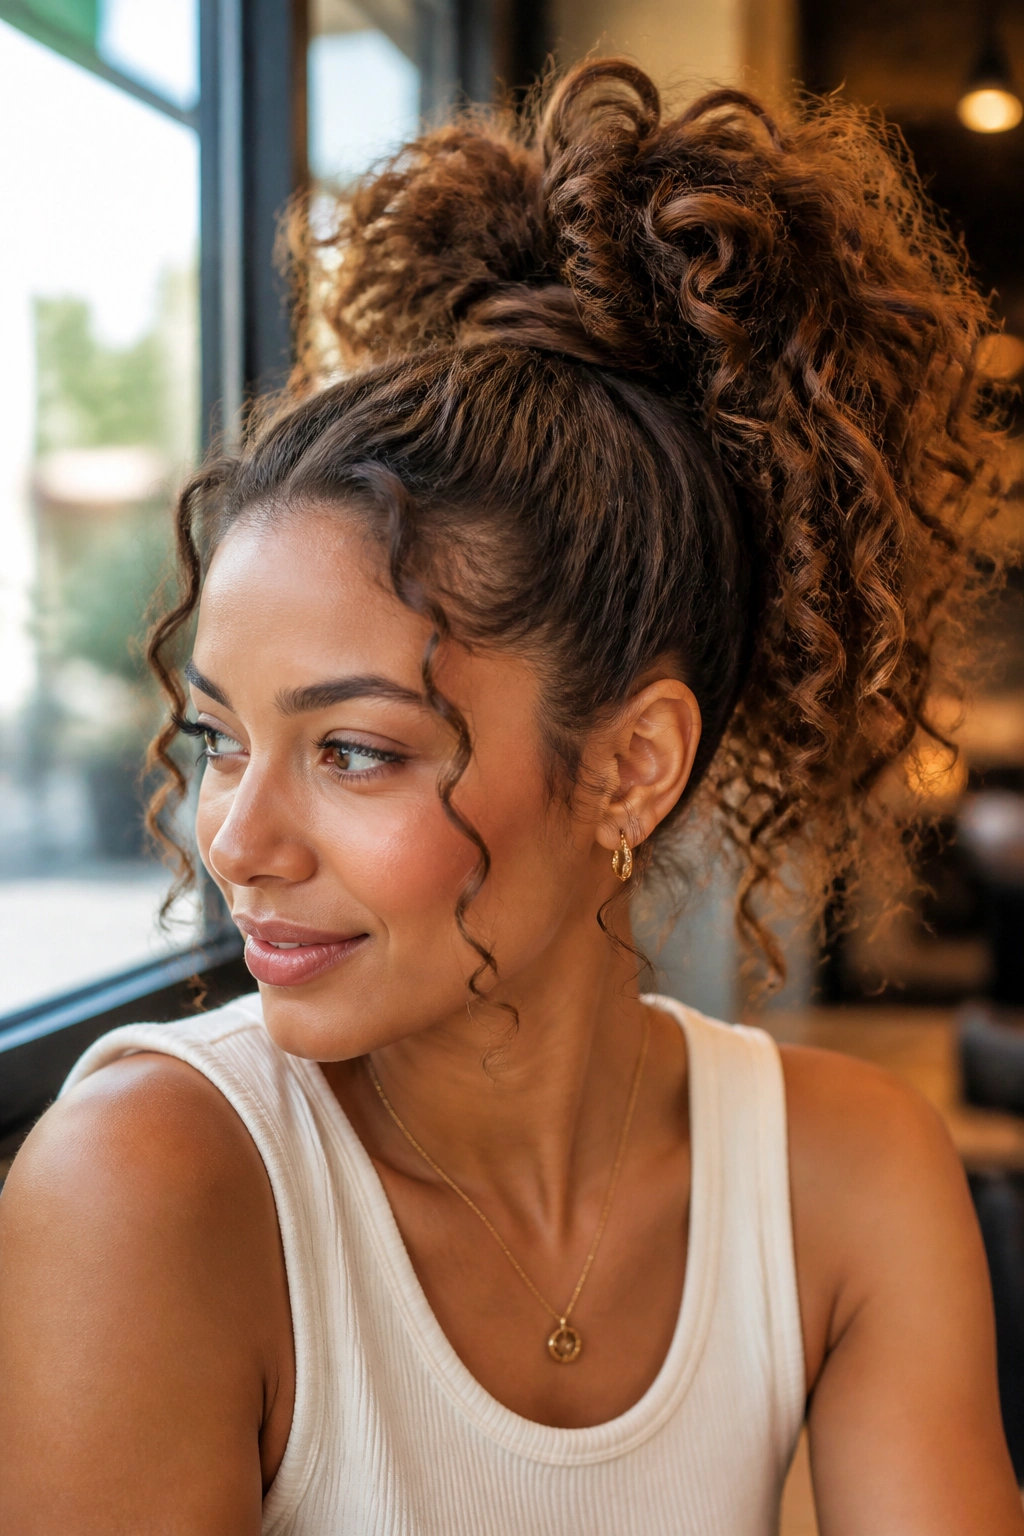
Can a ponytail still look full? Absolutely. It just needs the crown to stay lifted and the curls to stay soft enough to move.
Start by sectioning the top half of the hair and brushing the roots upward before gathering everything together. If the hair is thick, split the ponytail into two stacked ponytails — one above the other — and then hide the lower one under the upper section. That trick creates height without making the style look bulky at the base. Wrap a small curl around the elastic to finish.
The lengths should stay as curly as possible. Don’t brush them into submission. A tiny bit of serum on the palms is enough if the ends need smoothing. If the ponytail feels too perfect, pull a few pieces near the temples and crown loose with the tip of a tail comb.
This style is practical, but it still reads as styled. It works for school, work, dinner, and the kind of day when hair needs to behave without looking boring.
13. Stacked Curly Bob
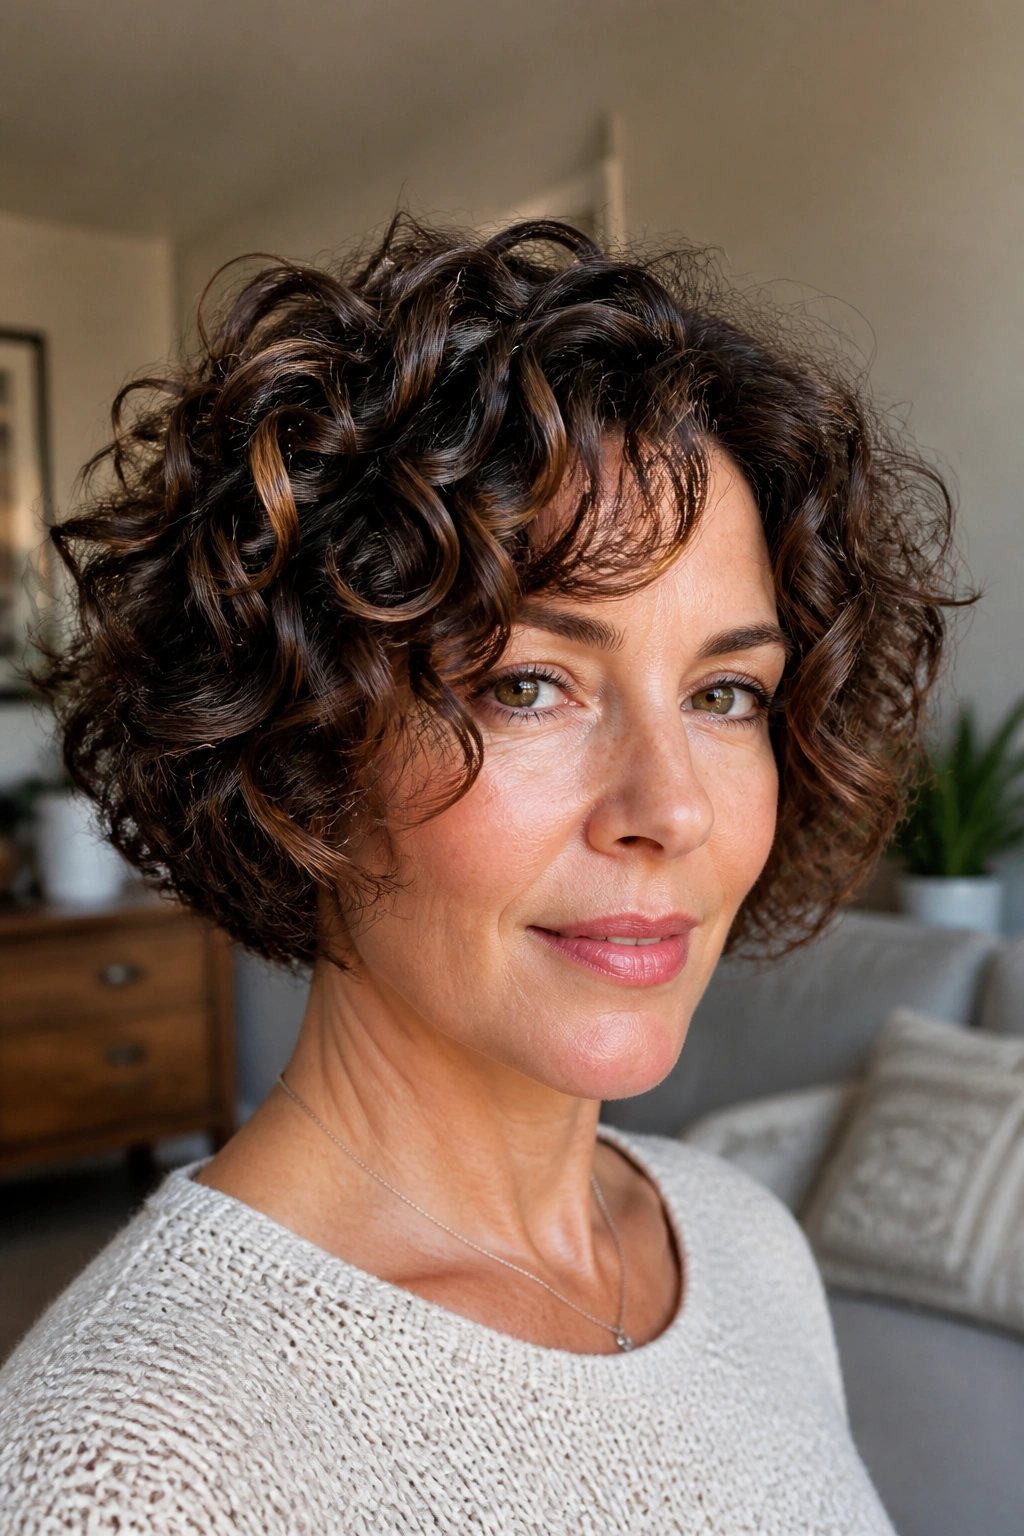
A stacked curly bob is all about shape. The shorter back lifts the style, while the fuller front keeps it looking round and lively instead of boxy.
The cut should be cleaner through the nape and a little longer around the jaw. That lets the curls stack into a rounded outline without puffing straight out at the sides. If your curls are fine, this cut can make them look thicker fast. If your curls are dense, it removes bulk where it’s least needed and keeps the silhouette tidy.
Drying matters a lot here. Use a diffuser and direct the airflow up at the roots, not across the curls. Once dry, tip the head forward and separate the curls at the crown with fingertips only. A pick can help at the roots, but use it sparingly. The shape should stay compact and bouncy, not exploded.
This is one of those cuts that does half the work for you. The bob shape gives the hair a base, and the curls take care of the movement.
14. Diffused Wash-and-Go With Root Clipping
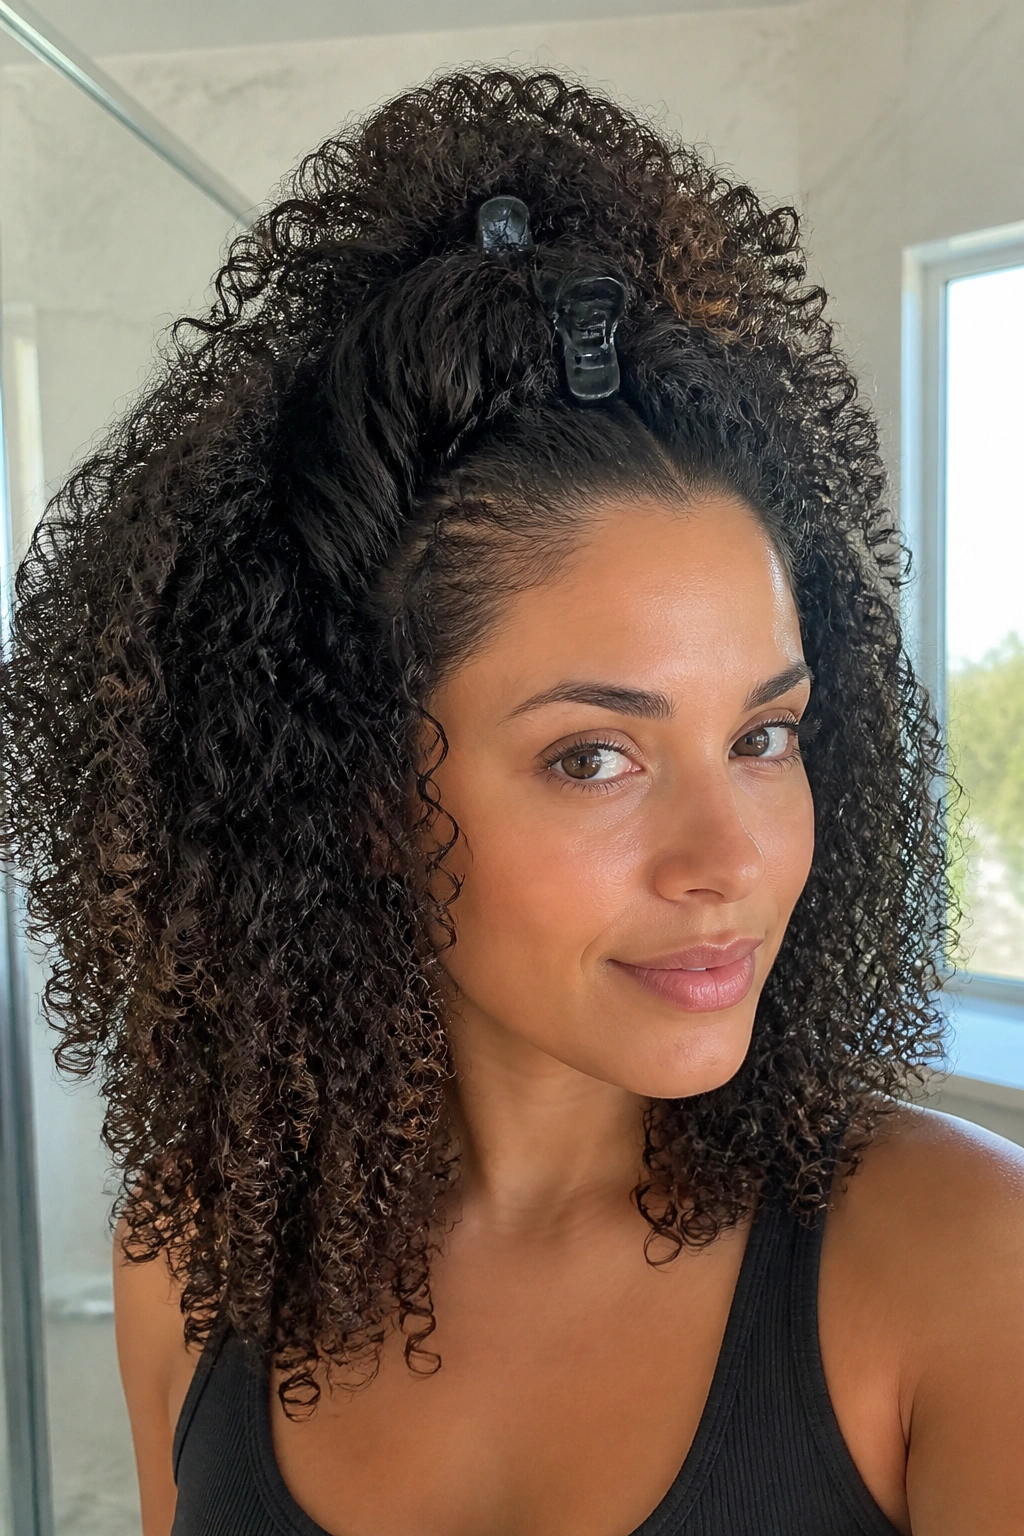
A wash-and-go can look full or flat depending on one thing: how the roots dry. If they stick to the scalp, the style loses its shape before lunch.
The drying setup
Apply leave-in and stylers to soaking-wet hair, then scrunch in a mousse or gel while the curls are still clumped together. Clip the roots at the crown with small duckbill clips or metal clips, lifting the hair slightly away from the scalp. That tiny gap matters more than people think.
Diffuse on low heat and low speed, and stop once the hair is about 85% dry. If you keep blasting it after that, the curls can get frizzy and weirdly rigid. Let the final bit air-dry, then remove the clips and shake the roots loose with your fingers.
What makes it work
- Wet hair holds product more evenly
- Root clips create lift while the shape sets
- Low heat keeps the curl pattern intact
- Touching the hair too early breaks the definition
This look is for people who want their natural curl pattern to do the talking. Clean, lifted, and full. No drama required.
15. Twist-Out With Stretched Roots
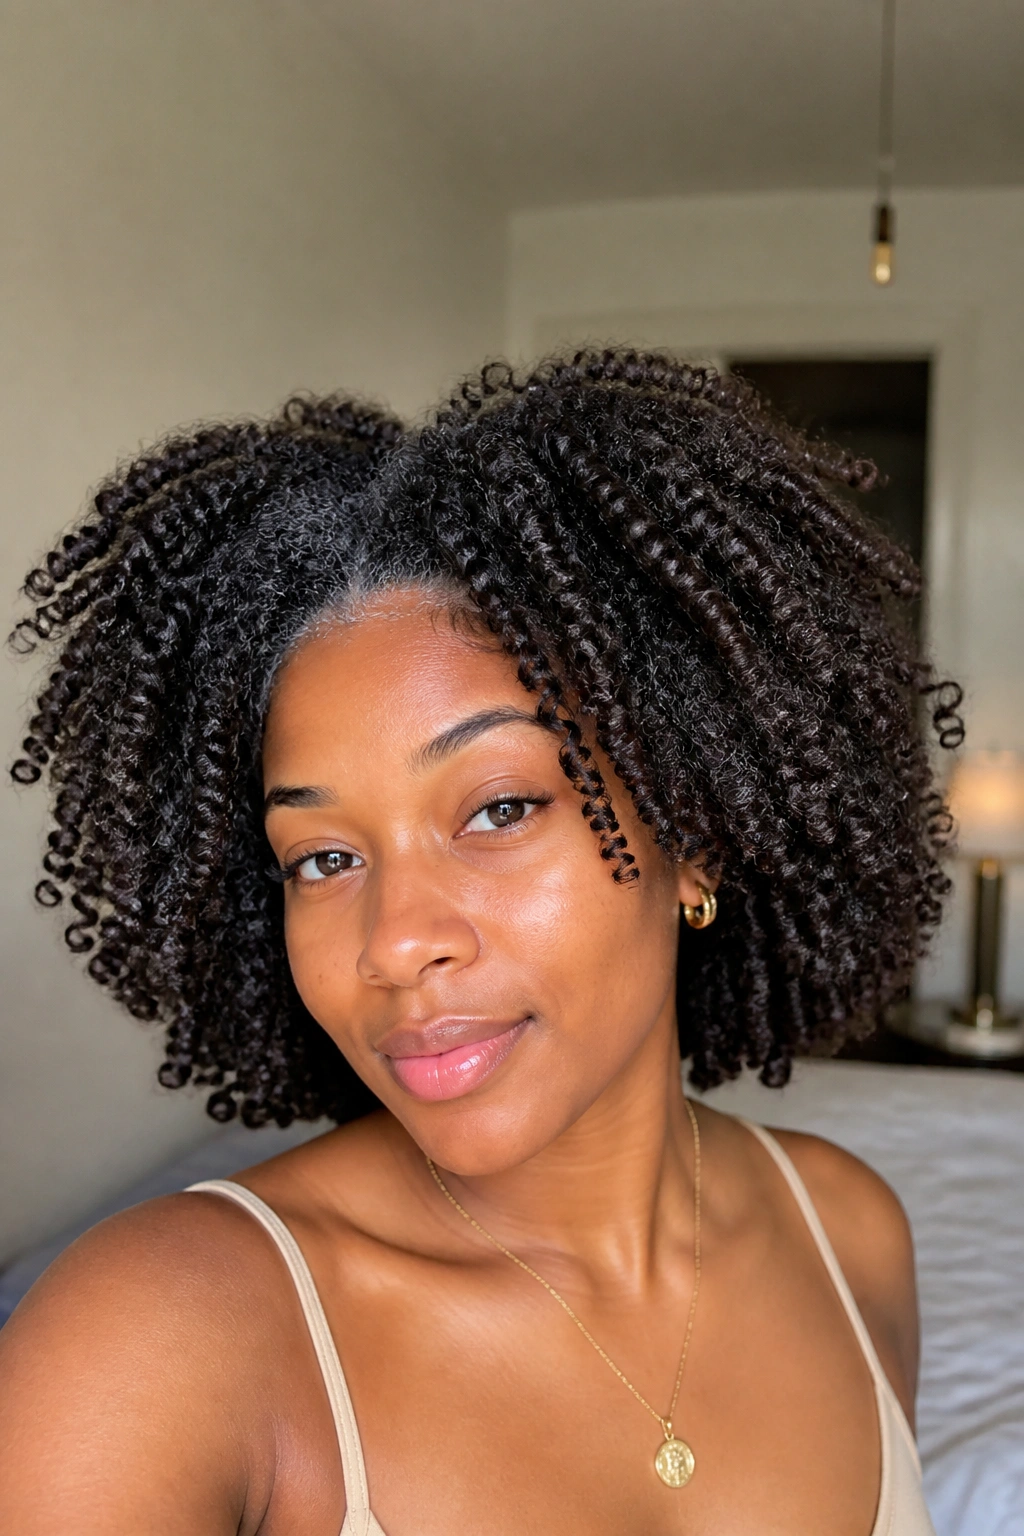
A good twist-out gives you soft, springy texture with more body than a wash-and-go. The stretch at the roots helps the style look fuller instead of shrinking straight up.
Start on damp hair with a leave-in and a light styling cream or foam. Twist in medium sections if you want bigger curls, or smaller sections if you want more definition. The key is tension: firm enough to set the pattern, loose enough that the twist doesn’t leave a dent through the middle. Let it dry completely. Overnight is better than half a day. Half-dry twists are a shortcut to frizz.
Once dry, separate each twist gently with oiled fingers. Not too much. If the ends catch, stop and ease them apart another way. Then pick the roots only if you need more height.
This style is a favorite because it gives texture without looking stiff. The curls open up into a soft halo, and the stretch at the base keeps the shape from puffing too hard. It’s a classic for a reason.
16. Curtain Bangs and Long Loose Curls
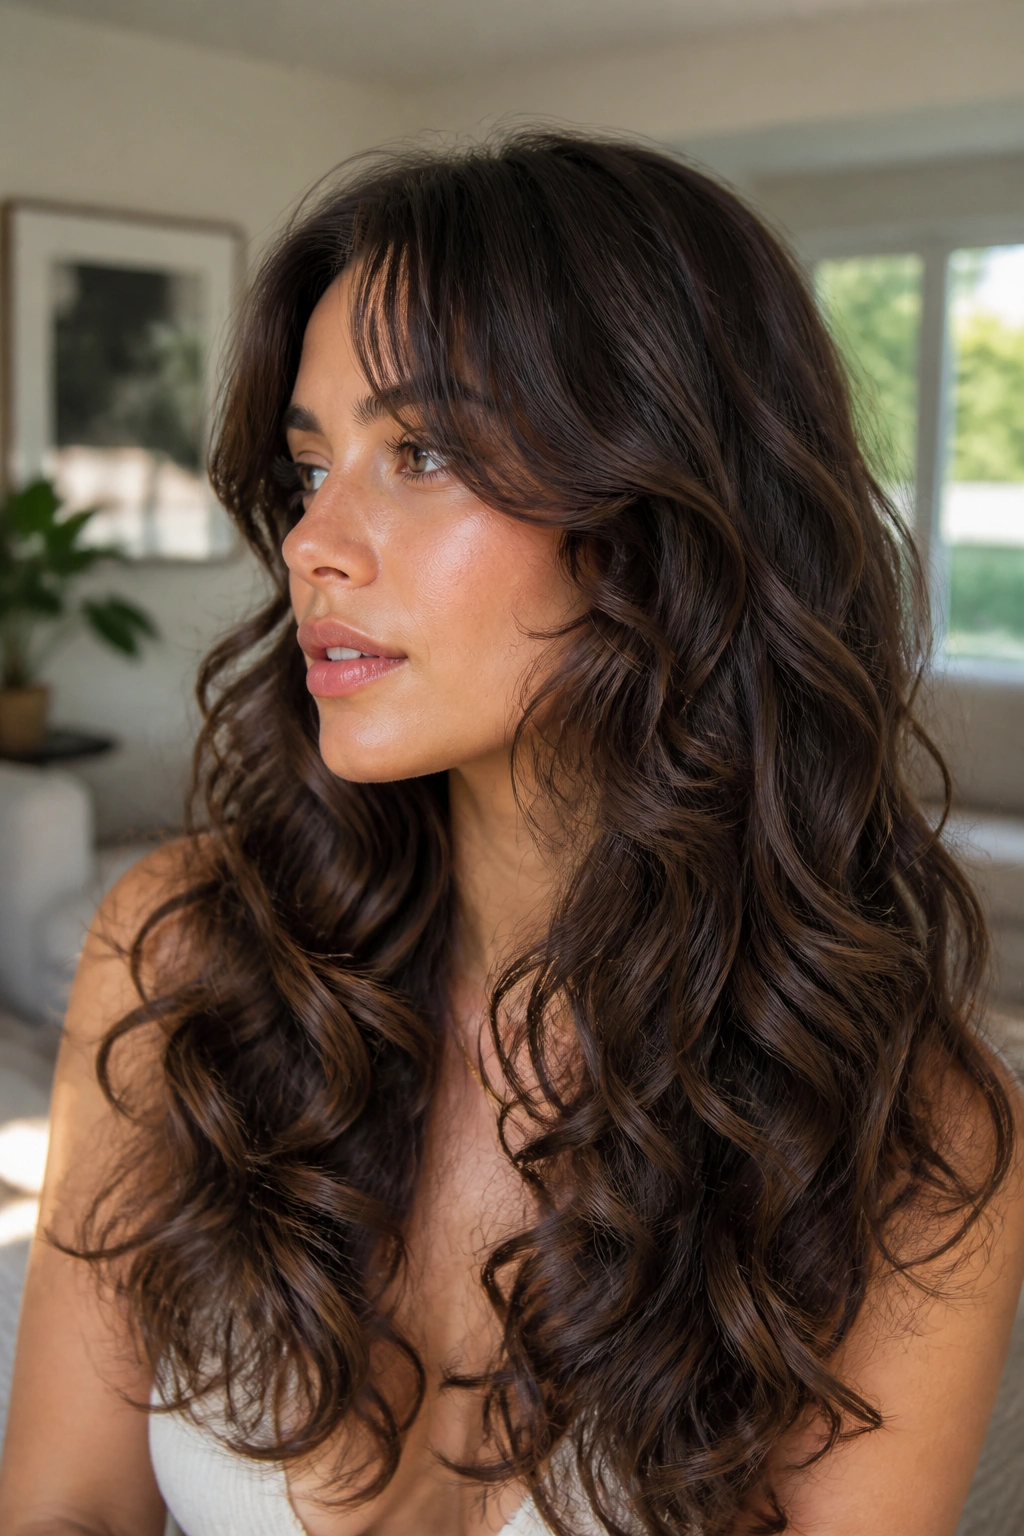
Curtain bangs can make long curls look bigger by changing where the eye lands. Instead of one long curtain from root to end, you get lift at the front and movement right around the face.
The best version keeps the bangs long enough to split naturally, usually somewhere around the cheekbones or jaw depending on curl shrinkage. Dry-cutting helps because wet bangs can fool everyone. A good stylist will leave more length than you think you need. Curls shrink. A lot. Cutting them too short is where the regret starts.
Style the bangs first when the hair is damp. Push them forward, then guide them away from the center as they dry. That creates the soft split. The rest of the hair can stay long and loose, with curls brushed apart only slightly so the body stays full.
This look works especially well if you want your hair to feel lighter around the face without losing overall length. It softens hard features, lifts the eyes, and makes the whole style look more finished.
17. Velcro-Roller Blowout Curls
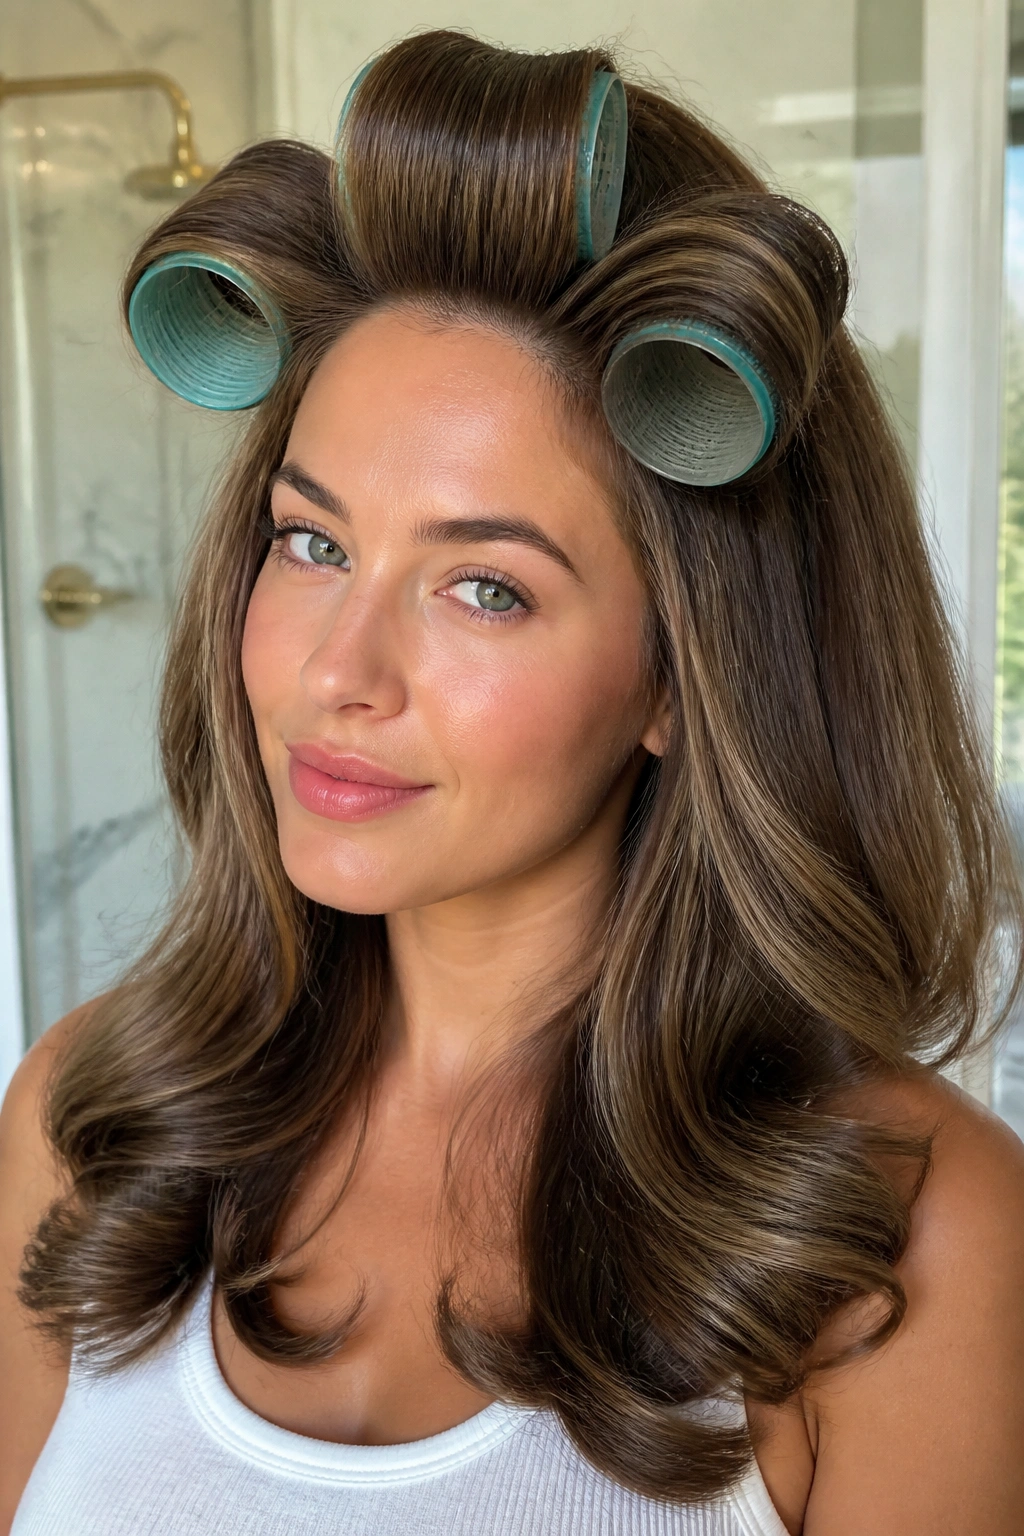
Rollers still earn their place. They give you root lift and bend at the same time, which is hard to beat if you want big curls that don’t collapse the moment you leave the house.
How to set it up
Blow-dry the hair until it’s smooth but not flattened. Then wrap sections around large Velcro rollers, usually 1.5 to 2 inches wide depending on hair length. Place the rollers at the crown and front first, because those are the spots that lose shape fastest. Let the hair cool fully before removing them. If you rush this, the style falls early. No mystery there.
After the rollers come out, brush lightly at the ends and use your fingers at the roots. A small amount of serum on the palms can calm flyaways, but don’t coat the whole head or you’ll lose the bounce.
Why it’s still worth doing
- Creates root lift without teasing
- Gives ends a smooth, rounded bend
- Works beautifully on medium and thick hair
- Holds better when the hair is fully cool before styling out
The finished look is full, soft, and very touchable. It has that lifted salon shape people notice from across a room.
18. Curly French Twist With Loose Ends
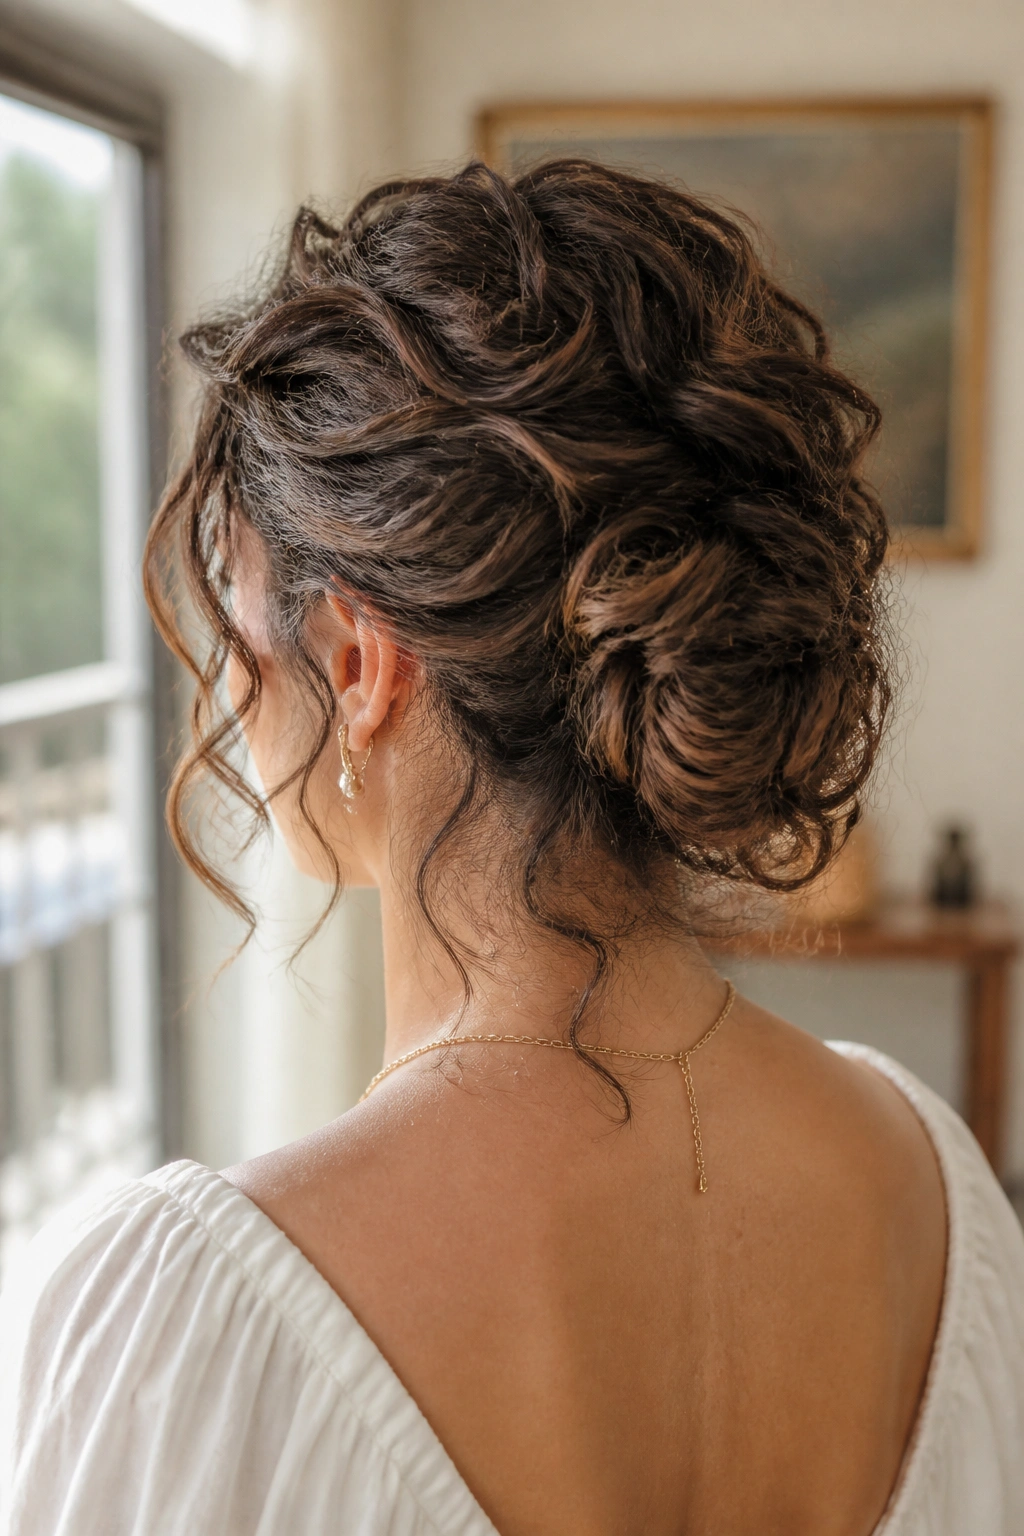
A French twist doesn’t have to look strict. On curly hair, it can feel soft and full, especially when you leave the ends loose on purpose.
Pull the hair back loosely, twist it upward from the nape, and pin the shell of the twist in place without flattening the sides too much. Then leave a few curled ends out at the top or bottom, depending on where the length is falling. Those loose pieces make the style feel lived-in instead of severe.
This is one of the best ways to keep the neck clear while still showing off texture. If the hair is very thick, twist only part of it and tuck the rest into the fold. That keeps the twist from becoming a heavy lump. If the hair is finer, backcomb the roots lightly at the crown before pinning so the style doesn’t slip.
The result feels dressy but not stiff. That matters. Curly hair looks best when it keeps some softness in formal styles.
19. Deep Side Part With Cascading Curls
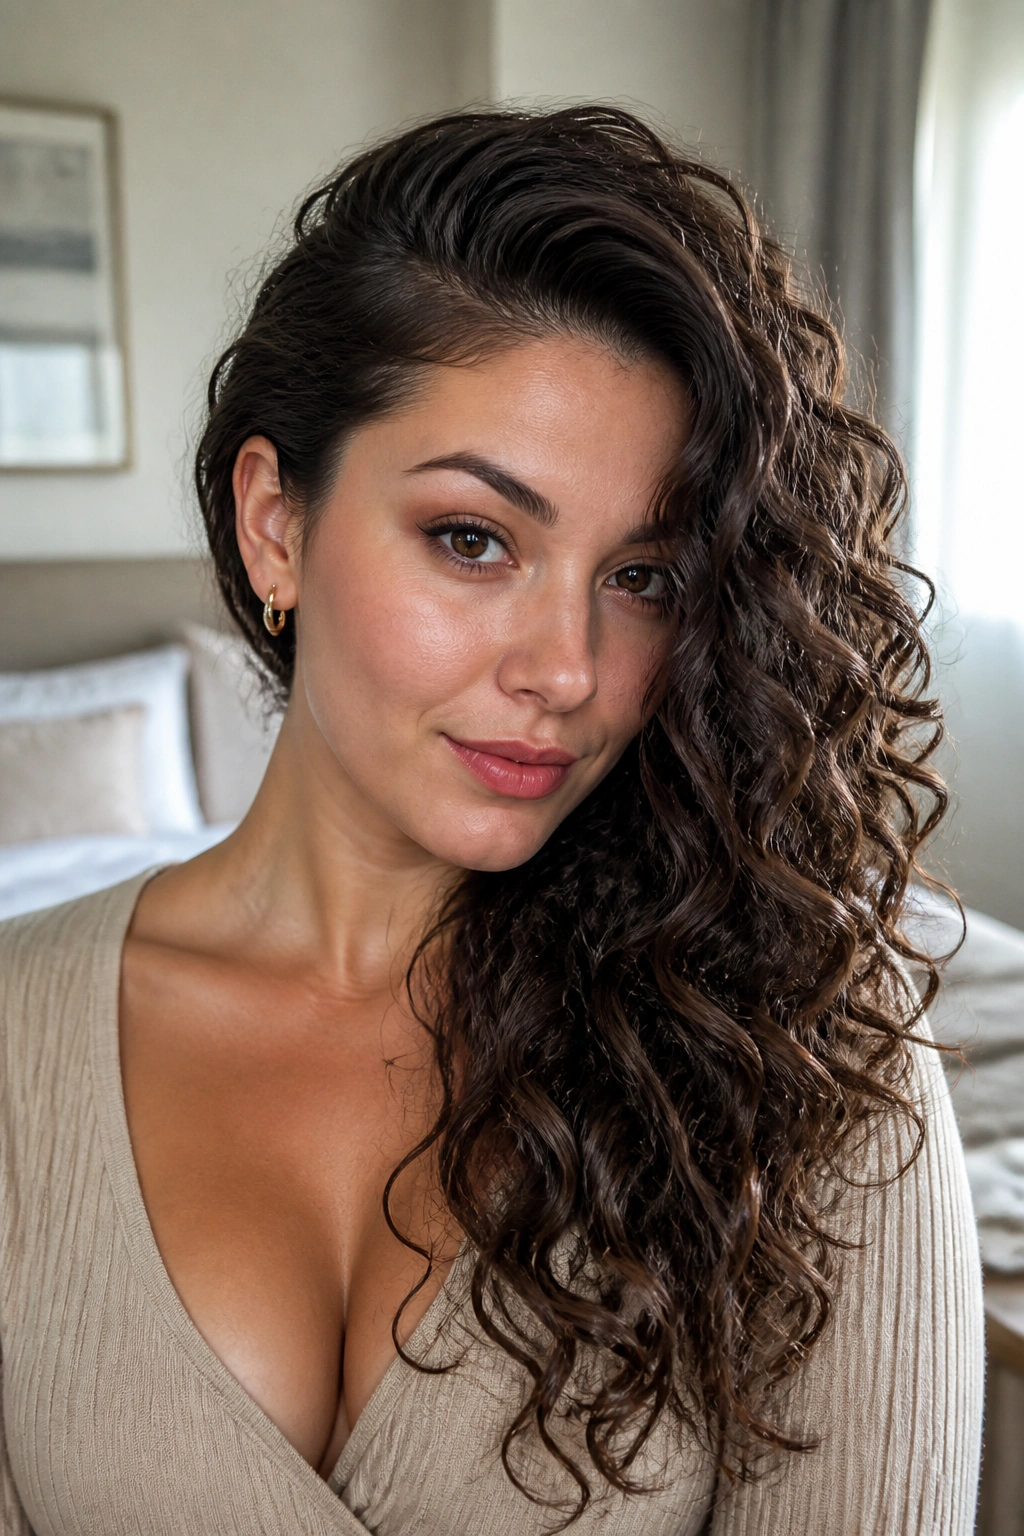
A deep side part changes the whole personality of curly hair. One side gets height, the other side gets that long cascade that falls over the shoulder and sways when you move.
This look works best when the front is shaped to follow the part, not fight it. Lift the crown with mousse or root spray, then direct the hair across the top with your hands while it dries. On the heavier side, let the curls drape forward. On the smaller side, tuck the hair slightly behind the ear or pin it just above the temple so the contrast shows.
It’s a smarter, less formal version of side-swept glam waves. The curls can stay more defined and less brushed out, which keeps the style looking rich and textured. A little shine spray on the outer layer helps, but don’t use so much that the hair looks oily.
This shape is especially nice on long hair because it shows off both the volume at the top and the length through the ends. One part. Big payoff.
20. Satin-Ribbon Curls With a Soft Half-Up Tie
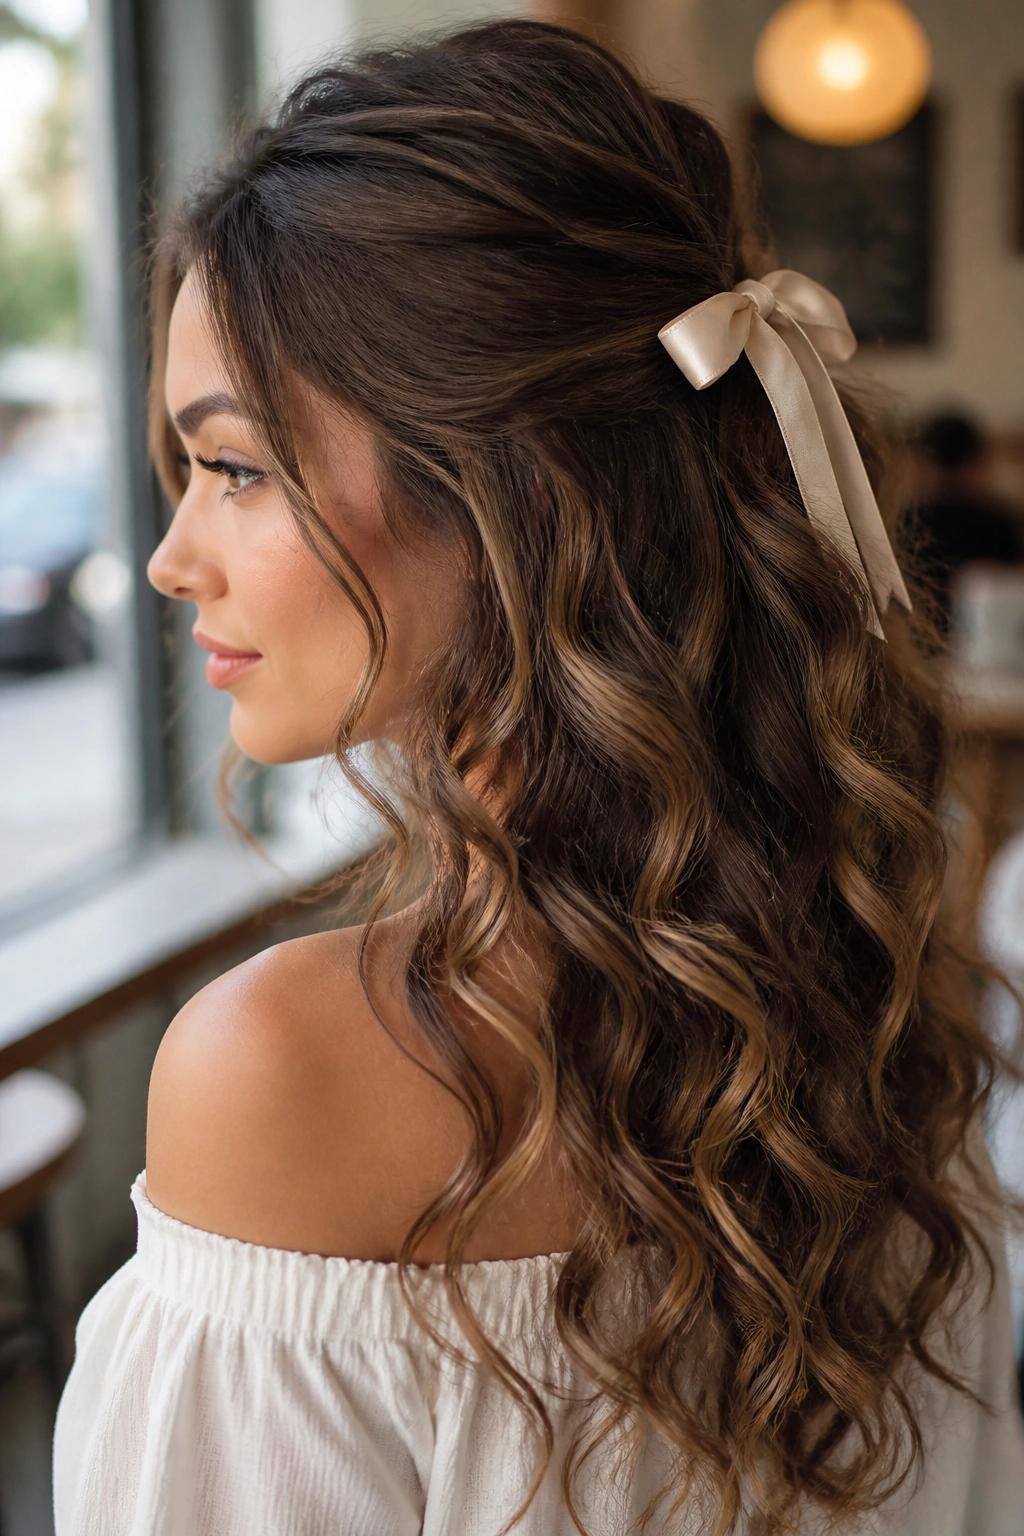
A satin ribbon changes the feel of curls fast. It softens the look, keeps some hair off the face, and gives the whole style a little visual lift without needing a complicated updo.
Tie a half-up section with a narrow satin ribbon — about 1 inch wide is enough for most hair. Keep the tie loose so the crown still has height, then let the rest of the curls fall naturally. If the ribbon sits too tight, the style loses its bounce and starts to look pressed. That’s the opposite of what you want.
The ribbon itself matters. Matte satin or silk looks gentler than a shiny craft ribbon, and a slightly wider bow works better on thicker curls. On finer hair, keep the bow small so it doesn’t overwhelm the shape.
This look is sweet without being childish. It works for brunch, showers, date nights, or any day when you want the curls to look soft and a little dressed up. The volume stays where it should — in the hair, not the accessory.
21. Gel-Cast Curls With Soft Separation
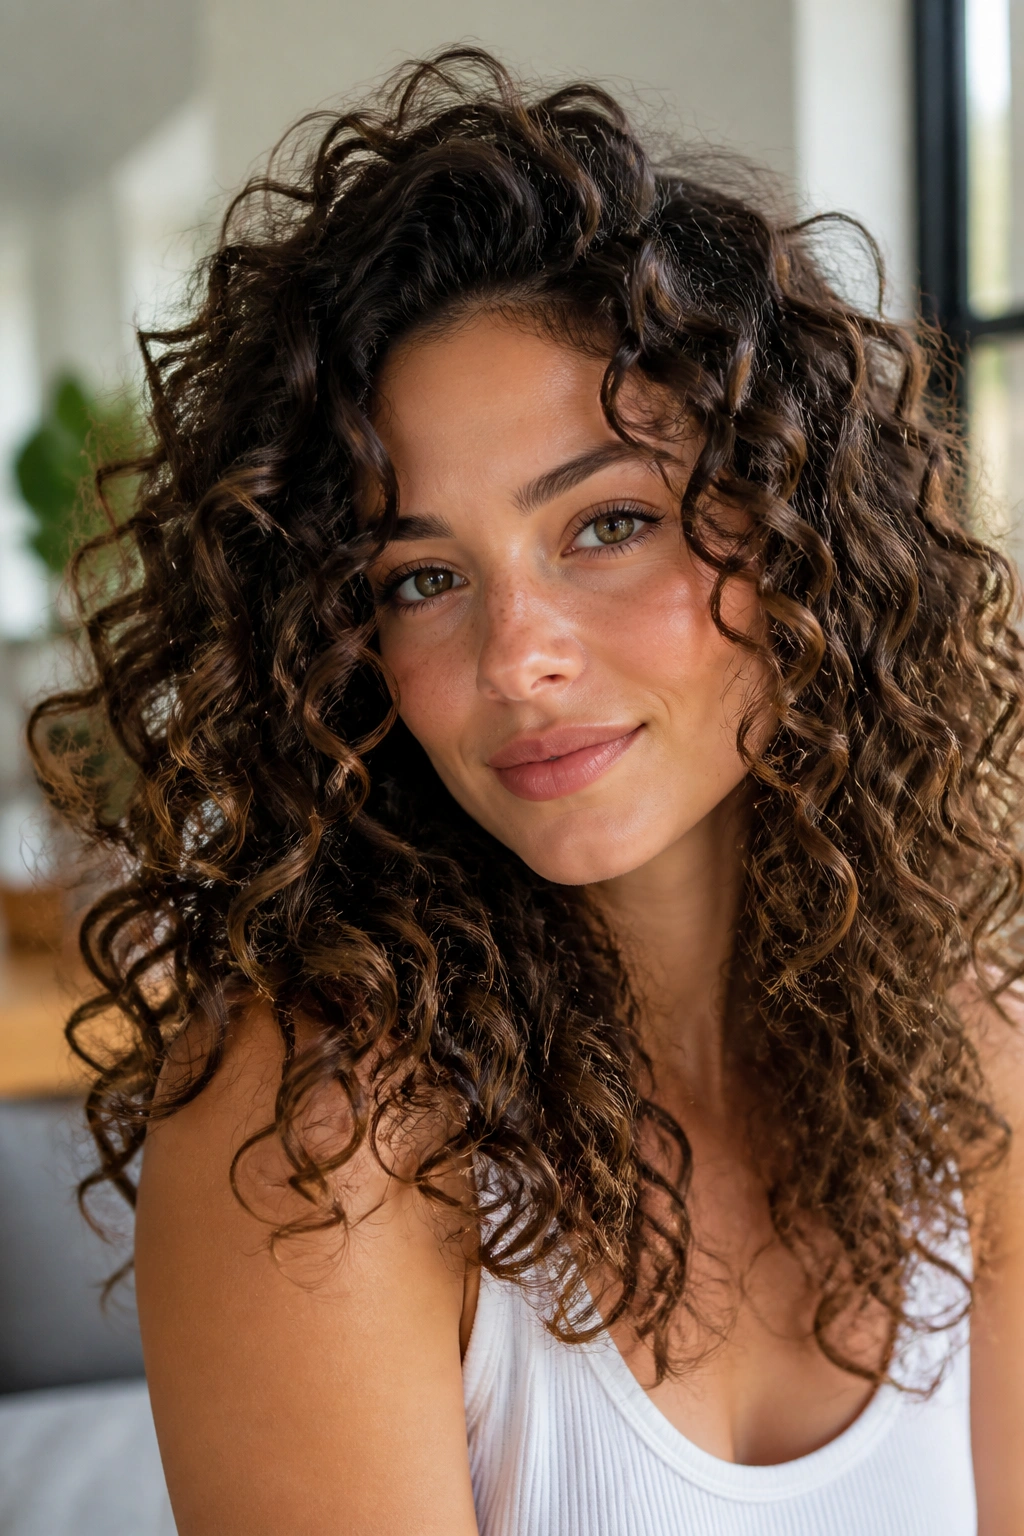
Strong definition and big volume can live in the same style. The gel cast is what makes that possible.
Apply a curl gel to wet hair in sections, then scrunch until the curls clump together and feel coated but not sticky. Diffuse or air-dry until the hair forms a firm cast. That cast looks a little crunchy at first, and that’s fine. Once the hair is fully dry, scrunch it out with dry hands or a touch of serum. The curls break apart into soft, full pieces instead of one wet-looking mass.
What keeps it bouncy
- Don’t disturb the curls before they’re dry
- Use enough gel to hold shape, not enough to glue the hair together
- Scrunch out the cast only after the hair is truly dry
- Keep the roots lifted while drying so the top doesn’t collapse
This look is a good fit if you want hold that lasts but still want movement. It’s polished, but not stiff. And the separation gives the curls that airy, expensive-looking fullness people keep trying to chase with heavier creams.
22. Big Romantic Updo With Loose Tendrils
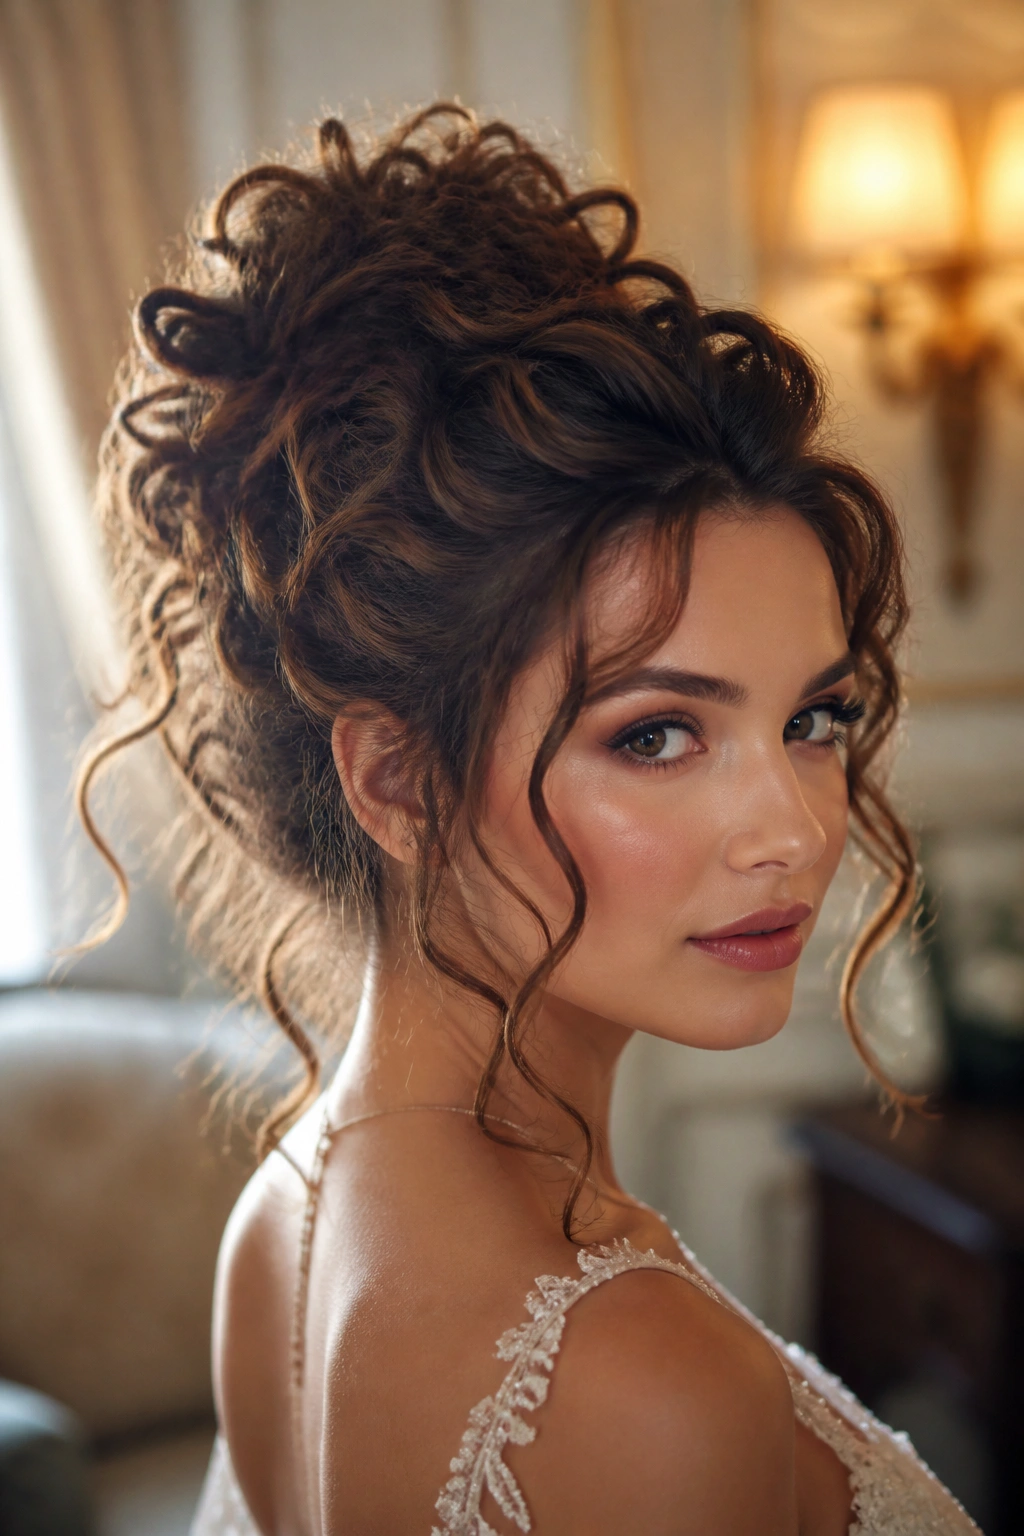
A big curly updo can be softer than it looks. The trick is to keep the volume in the crown and let a few tendrils fall free around the face and ears.
Start by building lift at the roots with mousse or a light spray, then gather the hair loosely into a low or mid updo. Pin the curls in sections instead of wrapping them into one tight knot. That keeps the shape open and lets the curls keep their spring. Leave 2 to 4 tendrils out near the face and nape so the style feels airy.
If your hair is very long, fold the curls into the center of the bun instead of smoothing them flat. If it’s shorter, let the texture create the shape for you. A little backcombing at the crown can help, but use it sparingly. Too much teasing makes the finish look dry and tired.
This is the style that gives you height, softness, and a bit of romance without turning the hair into a stiff formal helmet. It’s the right note to end on: full, touchable, and built to move.
Final Thoughts
Big curls look best when the shape supports the texture instead of fighting it. A great cut, a smart part, and a little root lift do more than a mountain of product ever will.
The styles here all lean on the same idea in different ways: give the curls room, keep the crown alive, and protect the movement at the ends. That’s what makes hair look full instead of weighed down.
And if the curls fall a little by the end of the day? That’s normal. A quick shake at the roots, a finger through the part, and a light mist of spray can bring the whole thing back without starting over.
