



Thick curls have opinions. They spread out, spring up, and take over a shape the moment the cut stops giving them a reason not to. Medium length is often the sweet spot, though, because it gives you enough room for movement without asking your hair to carry its full weight down your back.
That’s the real trick with medium length curly hairstyles for thick hair: the style can’t fight the density. It has to work with it. A blunt line that looks neat in the salon mirror can turn into a triangle by lunch, while a cut with the right layers can make the same hair look lighter, bouncier, and far easier to live with.
There’s also shrinkage, which people love to underestimate. A shoulder-length curl can land somewhere between chin and collarbone once it dries, and the difference between those two points matters a lot when the hair is thick. Cut too short and you lose movement. Leave it too heavy and the ends drag everything down.
The good shapes give curls somewhere to go. The better ones also make your morning routine faster, which is the part nobody puts on the mood board but everyone cares about once the humidity shows up.
1. Layered Curly Lob
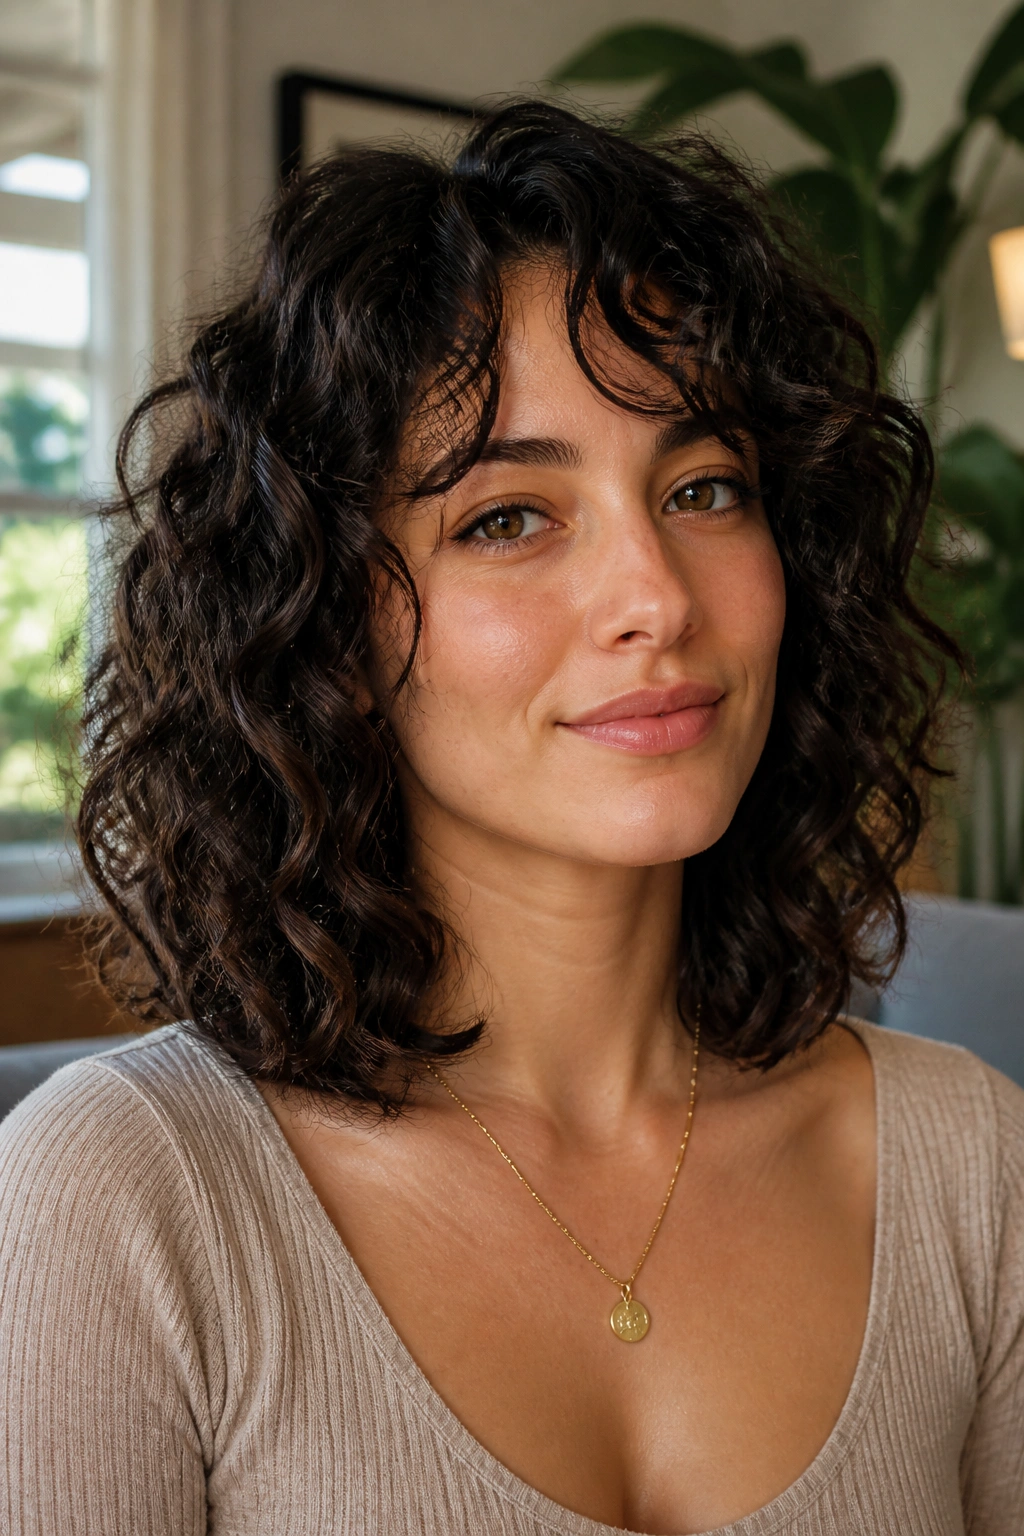
A layered curly lob is the easiest way to give thick curls room to breathe without losing that medium-length feel. The lob sits around the collarbone, so the hair still has enough weight to settle, but the layers stop the ends from stacking up into a heavy block.
Why it works on thick hair
What I like here is the balance. The cut keeps length at the perimeter, then removes some of the bulk through the middle and around the face. That means your curls can drop into loose groups instead of puffing out in one giant wall.
Ask for layers that start below the chin if you want the shape to stay full. Shorter layers can work, but on dense hair they sometimes create too much bounce near the crown and too much width at the sides. A lob with soft, staggered layers usually behaves better.
- Best for people who want movement without a dramatic chop
- Works well with diffused curls or a simple air-dry
- Looks especially good when the front pieces graze the collarbone
Pro tip: if your hair grows wide at the sides, keep the shortest layers around the cheekbone, not above it. That small change makes the whole cut sit better.
2. Rounded Shoulder-Length Cut
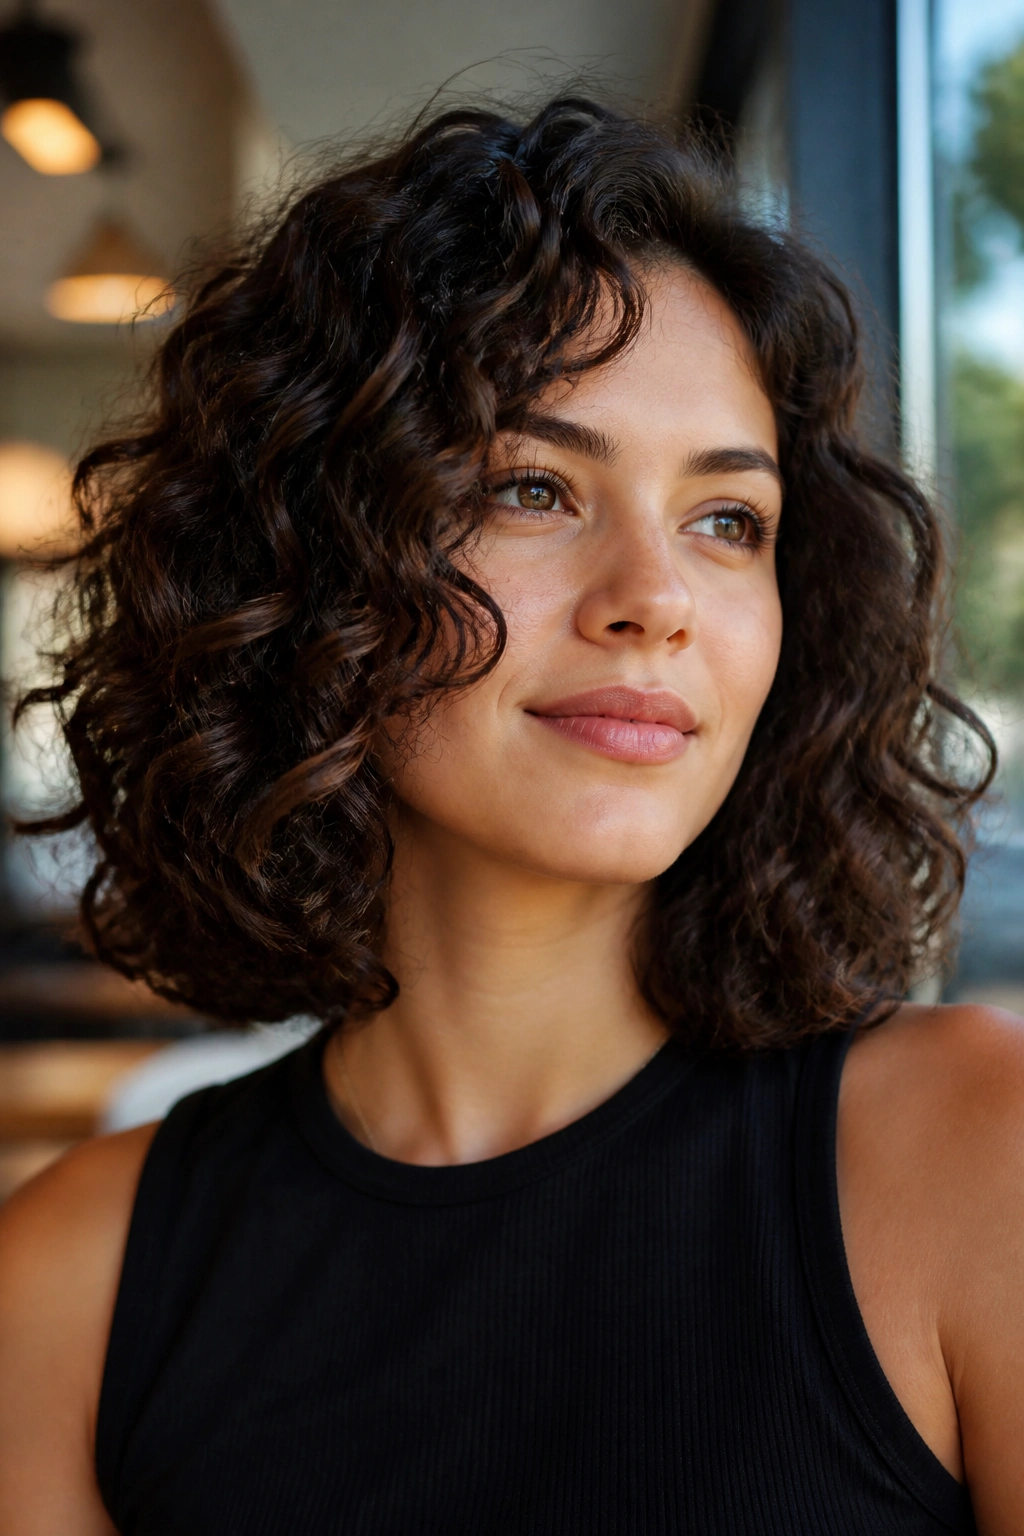
A rounded shoulder-length cut is the answer when thick curls start to look boxy. Instead of letting the outline hang straight, the shape curves inward a little at the bottom, so the hair reads as full rather than bulky.
That rounded edge matters more than people think. Thick hair can hold a shape, but it can also hold the wrong shape for days. A clean, softly curved line keeps the ends from jutting out at odd angles, especially if your curls are a mix of tighter spirals and looser pieces.
I like this cut for anyone who wants polish without fuss. It looks neat on day one, then settles into something softer on day two. If you wear glasses, it plays nicely with the frame line too, because the shoulders of the cut do not compete with your face.
The one thing I would avoid is over-thinning the ends. That can make the lower half fray and turn frizzy faster than you’d expect.
3. Curly Shag with Fringe
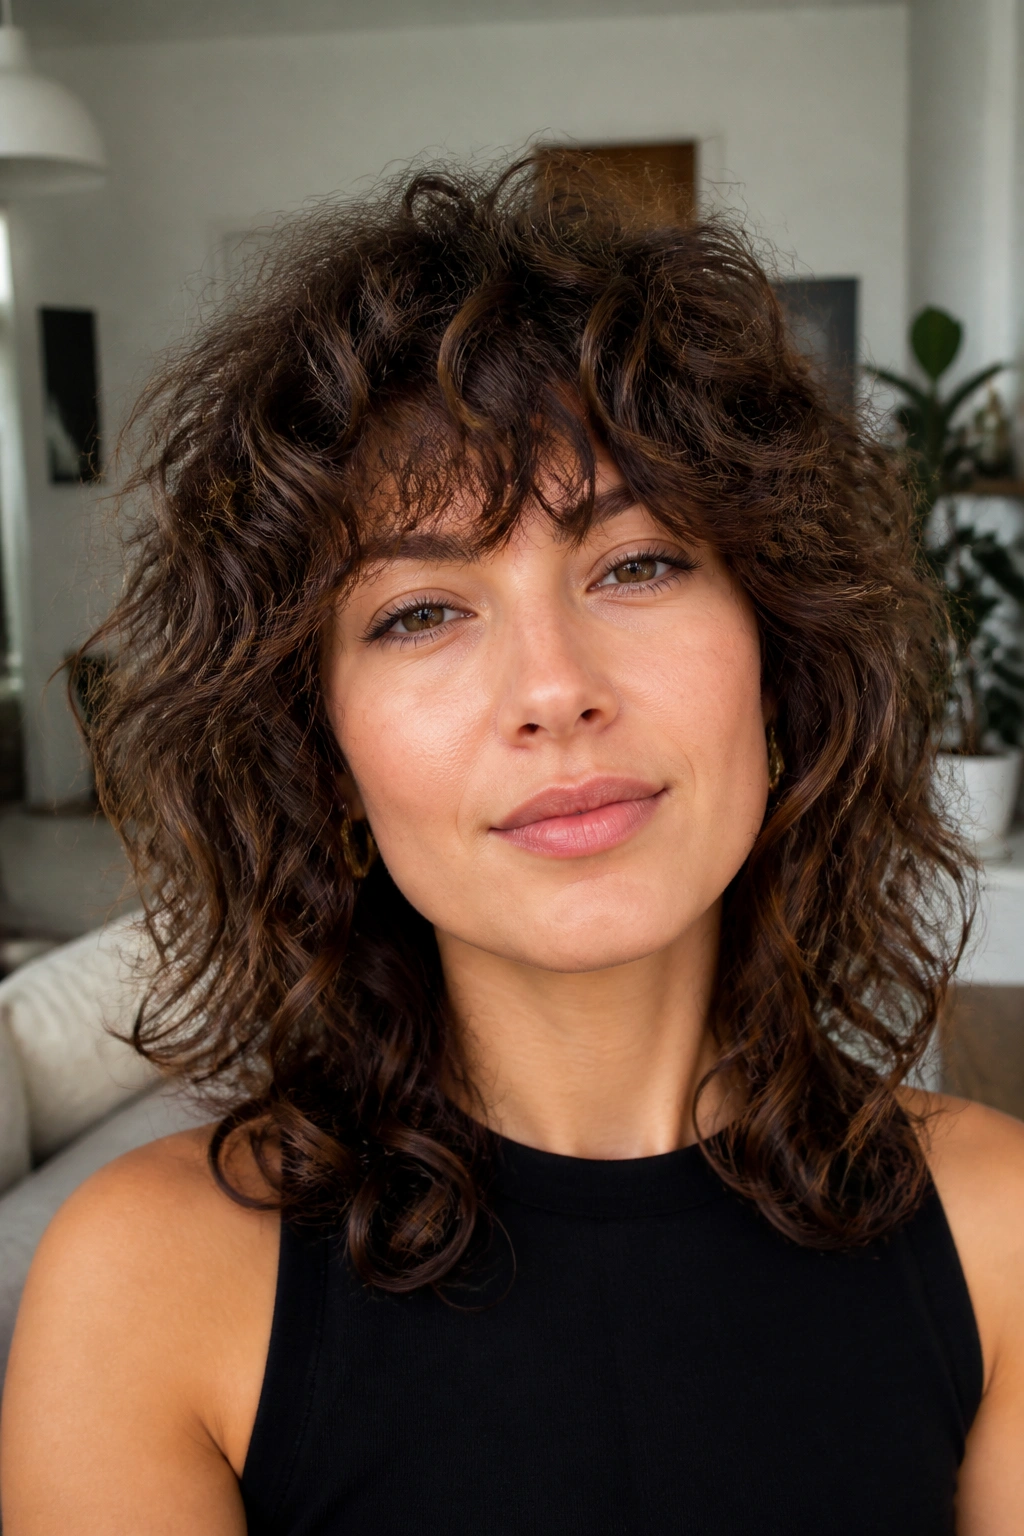
Want a little attitude in the shape? The curly shag with fringe has it. It breaks up density fast, lifts the crown, and gives thick hair a lived-in texture that feels deliberate instead of overworked.
Why the shag helps thick curls
The shag is basically a shortcut to movement. Shorter layers at the top keep the roots from lying flat, while longer layers underneath preserve the length you still want. Add a fringe, and the face gets instant shape without needing a full blowout.
The fringe does need respect. Cut it too short and it can bounce up higher than expected. A brow-grazing fringe or a soft curl fringe usually behaves better on thick hair because the weight helps it sit.
How to wear it
- Diffuse the fringe first so it does not dry crooked
- Scrunch in a light gel to keep the layer separation clean
- Trim it more often than the rest of the cut, since bangs show shrinkage faster
One thing to know: this cut looks best when it is a little imperfect. If you want every curl to land in a strict pattern, the shag will probably annoy you.
4. Curly Wolf Cut
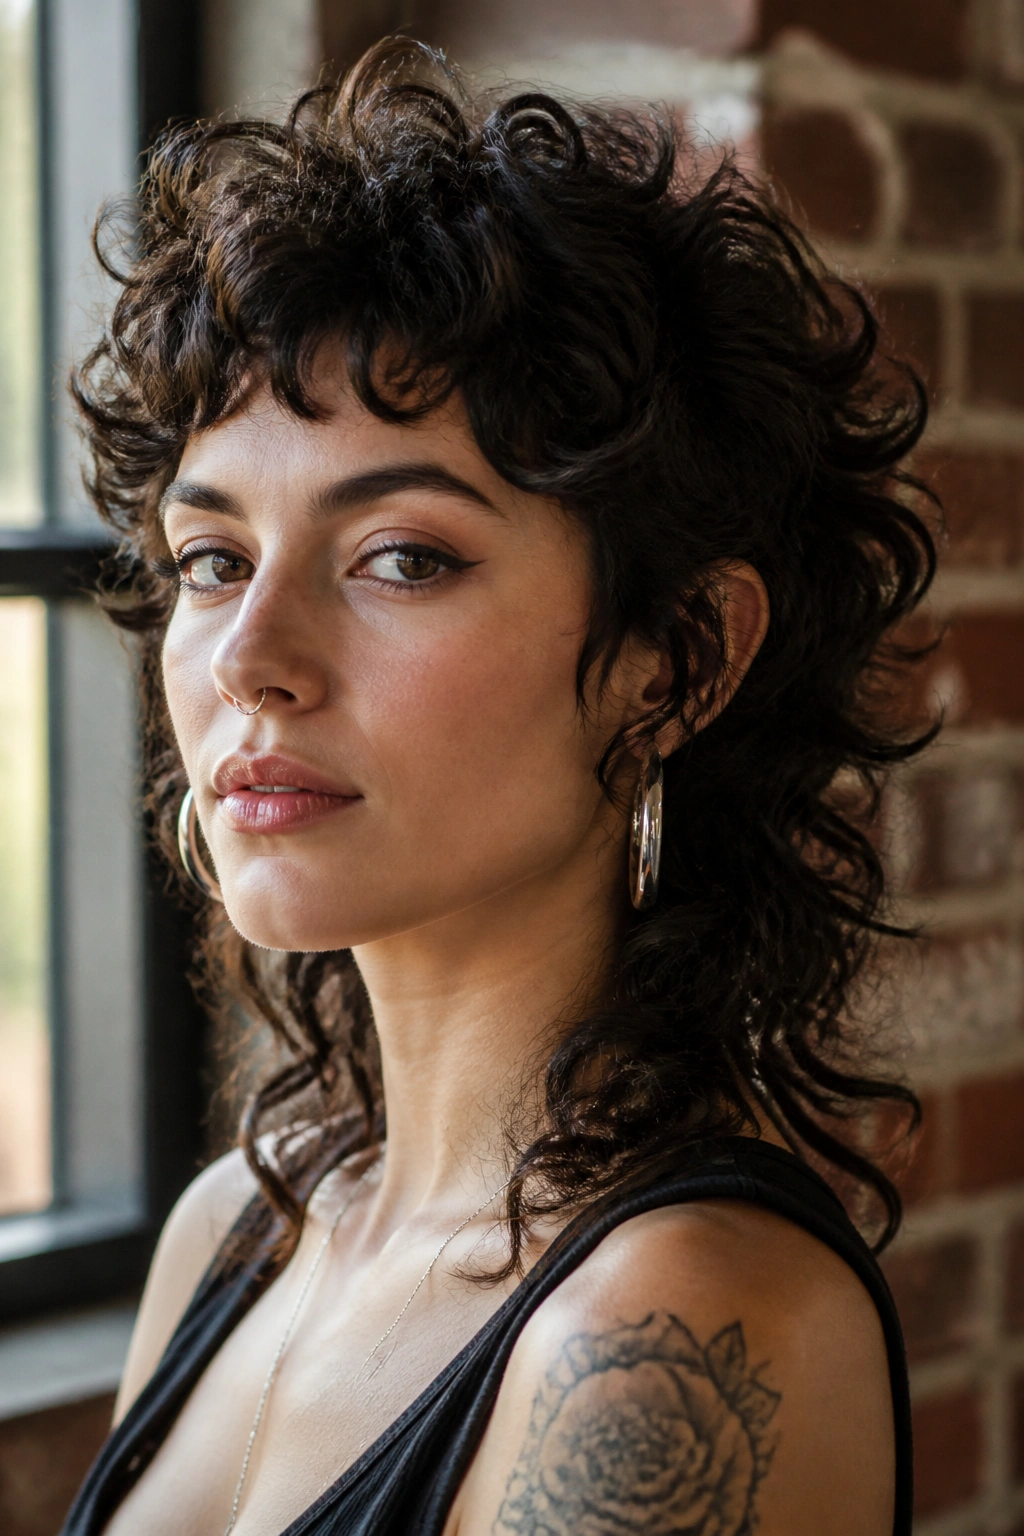
A curly wolf cut is for the person who wants volume with a little bite. It has the shag’s layers, but the contrast is sharper — shorter at the top, longer through the back, and a touch messier in the best way.
On thick hair, that difference matters. A wolf cut removes bulk where curls tend to balloon, especially near the crown and around the ears. The lower length stays heavy enough to swing, which keeps the style from looking too airy or too short.
This one is bold, though. It is not the cut I would hand to someone who wants a tidy outline every morning. It likes texture, separated curls, and a bit of roughness around the edges. If you air-dry thick hair and then shake it out with your fingers, the wolf cut tends to look intentional. If you brush it into submission, the whole point disappears.
Ask your stylist for a soft wolf cut, not a choppy mullet. That wording helps a lot more than saying you want layers and hoping for the best.
5. Collarbone Cut with Curtain Bangs
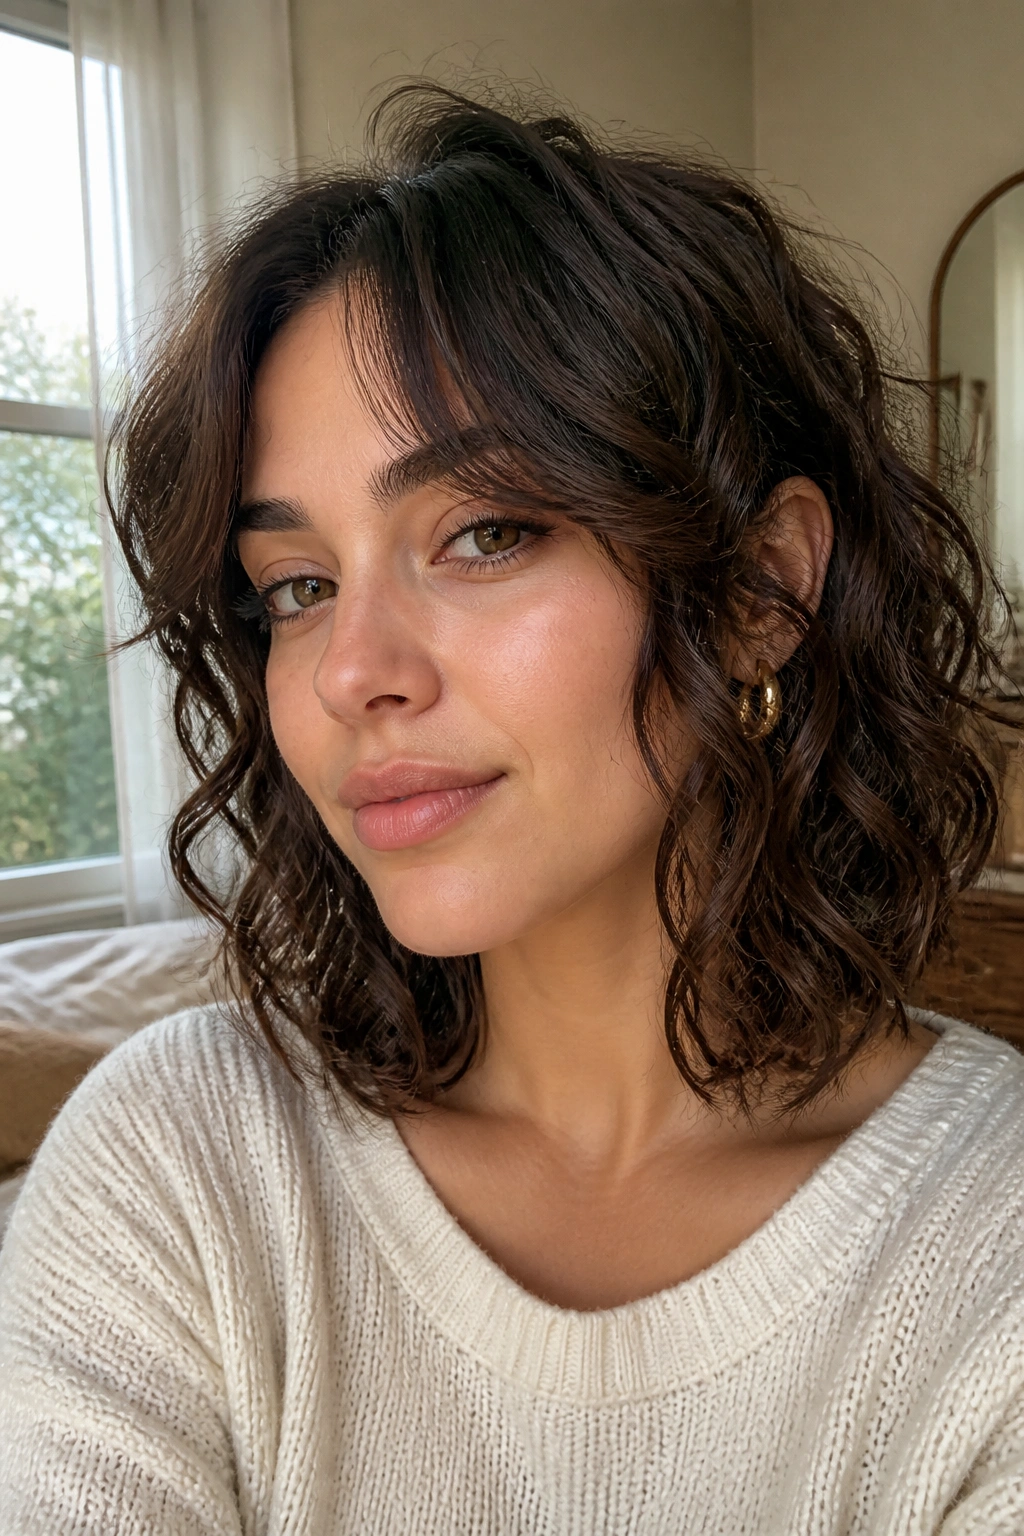
Compared with a blunt collarbone cut, curtain bangs make thick curls feel lighter right away. They open up the face, split the bulk at the front, and give the whole cut a little movement even when the rest of the hair is worn down.
The sweet spot is usually around the cheekbone. That gives the bangs enough length to tuck, bend, or curl away from the face instead of sticking straight out. On thick curls, curtain bangs can be a blessing because they stop the front from looking too heavy.
I also like this shape for people who wear their hair half up a lot. The bangs frame the face while the rest of the curls pull back cleanly, so you do not lose all the softness at once. It is a small thing, but it changes the way the haircut behaves day to day.
Dry the bangs separately if you can. Even a few extra minutes with a diffuser or a round brush can keep them from drying in a weird split.
6. Deep Side Part Volume Sweep
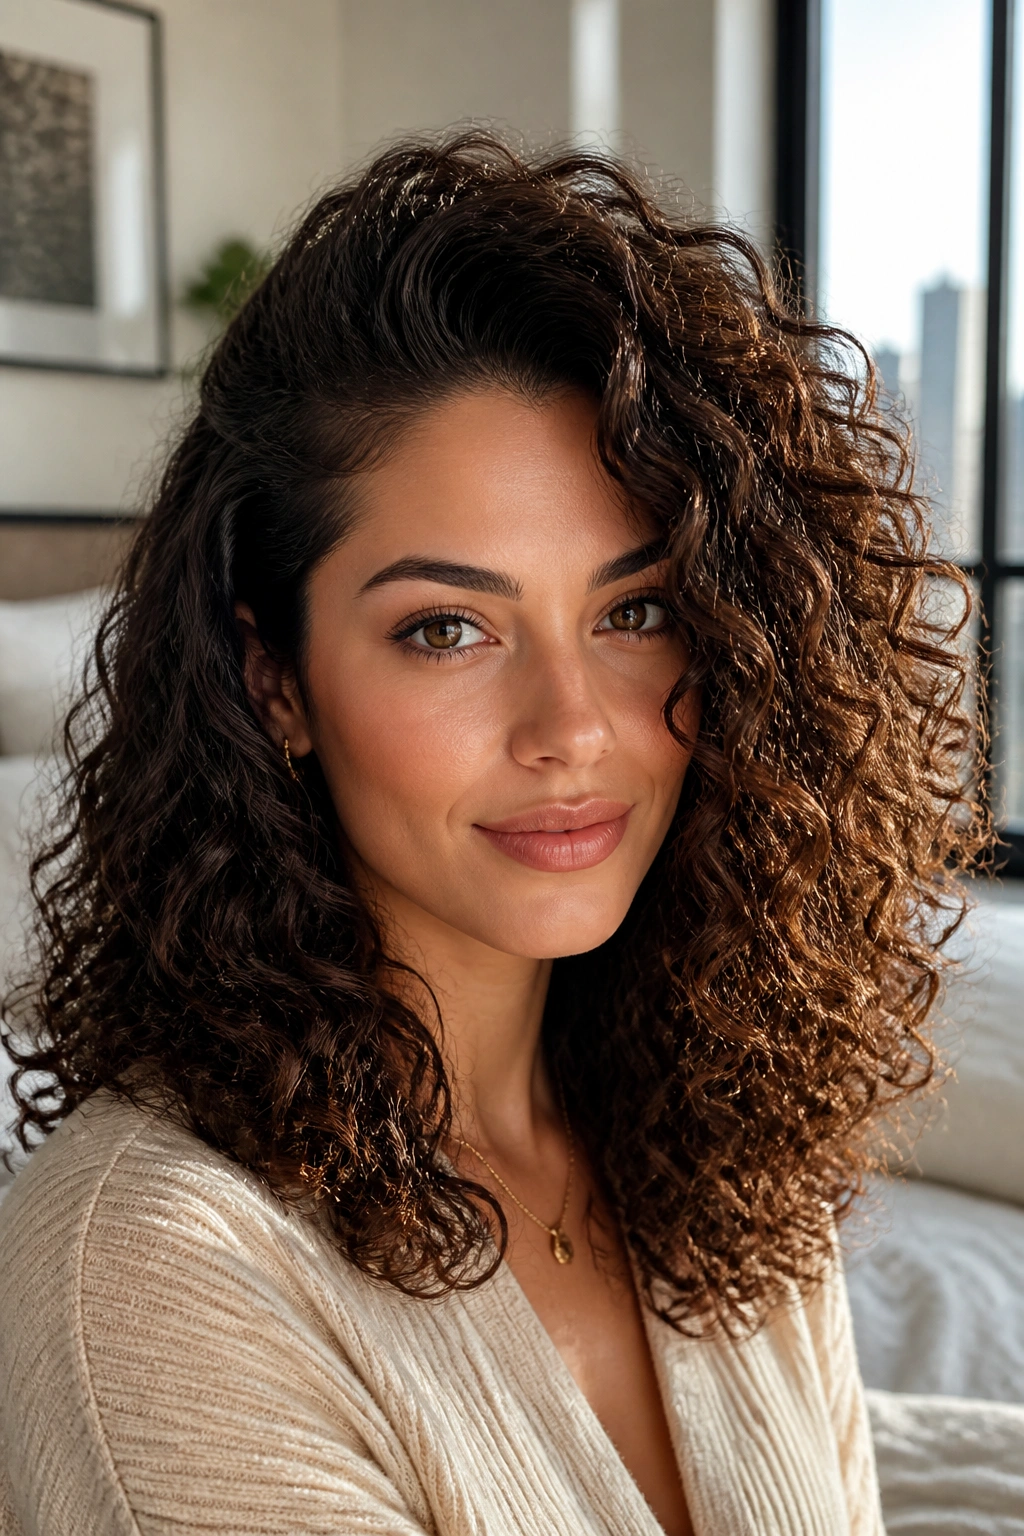
A deep side part can change thick curls in about thirty seconds. Seriously. Shift the part, and the hair suddenly has lift at the roots, more movement across the forehead, and a little asymmetry that keeps heavy curls from sitting like a helmet.
That parting line does more than people expect. It changes where the weight falls, which matters a lot when the density is high and the curls naturally want to collapse into the same place every time. A deep side part spreads the volume out, and the style feels softer without losing fullness.
The best version is slightly off-center, not way over to one side. Too deep and the heavy side can drag the whole look down. A small shift is enough.
- Change the part while the hair is still damp
- Clip the heavier side up for the first ten minutes of drying
- Finish by lifting the roots with your fingers, not a brush
My take: this is one of the quickest fixes for a flat crown and a wide lower shape.
7. Face-Framing Layers
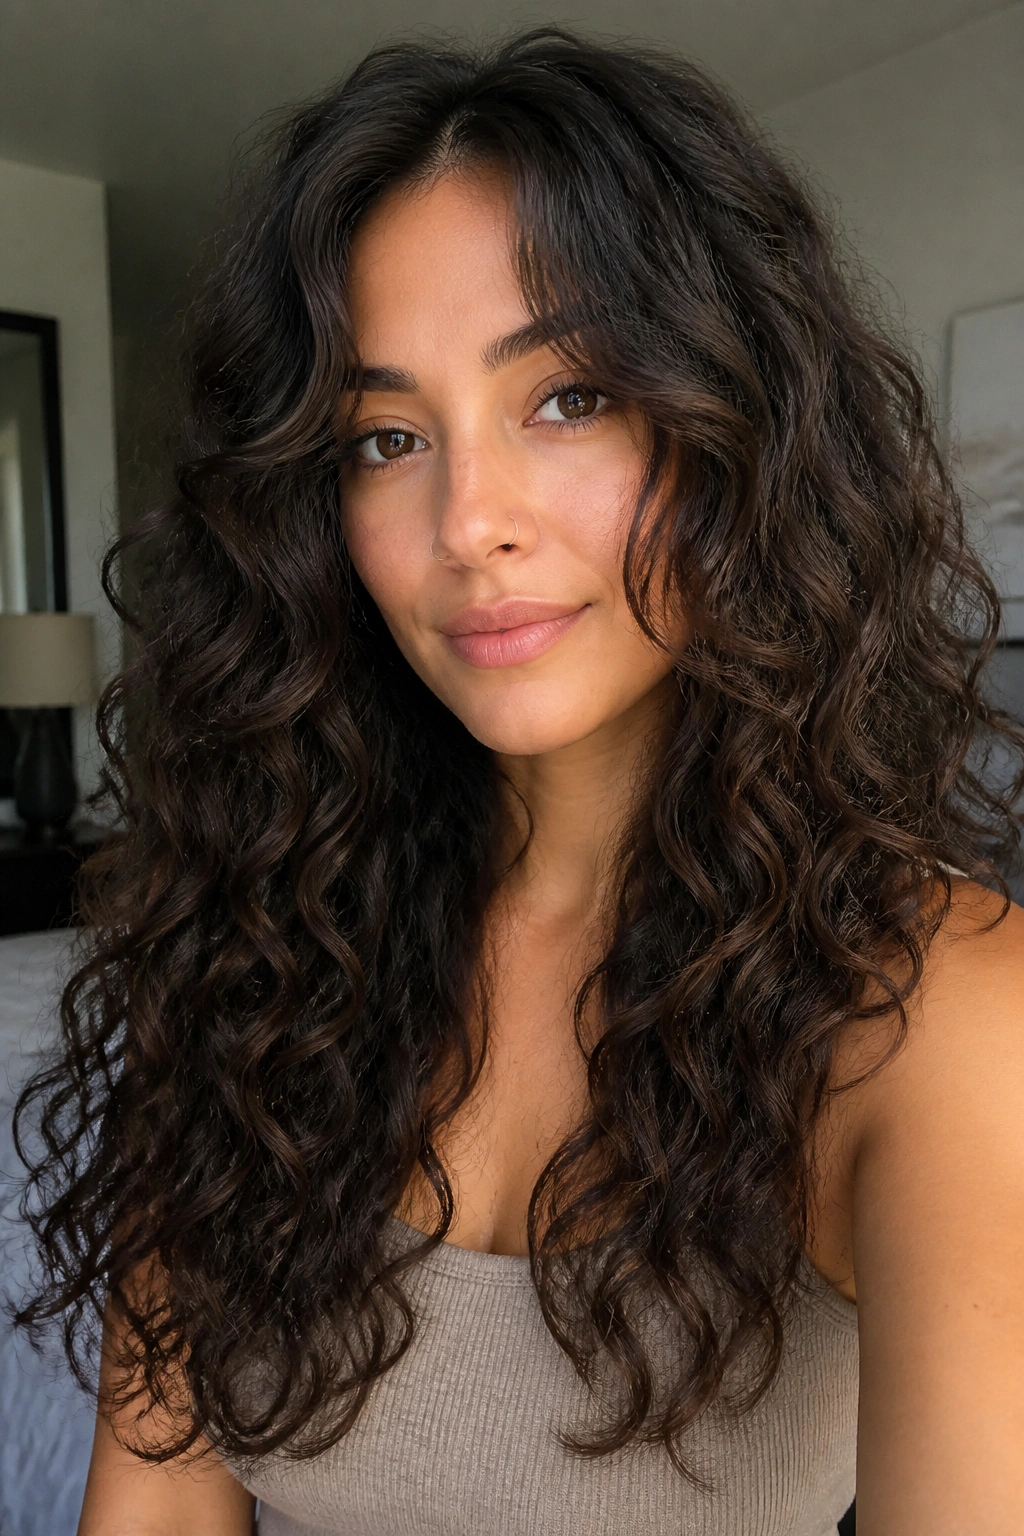
Long face-framing layers are the quiet hero of medium length curly hairstyles for thick hair. They do not scream for attention, but they change the whole mood of the cut by pulling some of the weight away from the cheeks and jawline.
The best face-framing layers start around the lip or chin and then blend down. That keeps them long enough to curl nicely without turning into little springy bits that sit too high on the face. Thick curls need that extra length more than finer hair does, because shrinkage can be sneaky.
I reach for this shape when the hair feels heavy but you still want to keep the length. It helps if you like wearing your hair loose more than tied back, since the front pieces will do a lot of the visual work. The back can stay fuller and longer, while the front does the softening.
One smart move: ask your stylist to cut those front layers dry or mostly dry. You see the fall of the curl better that way.
8. Half-Up Half-Down with Lift at the Crown
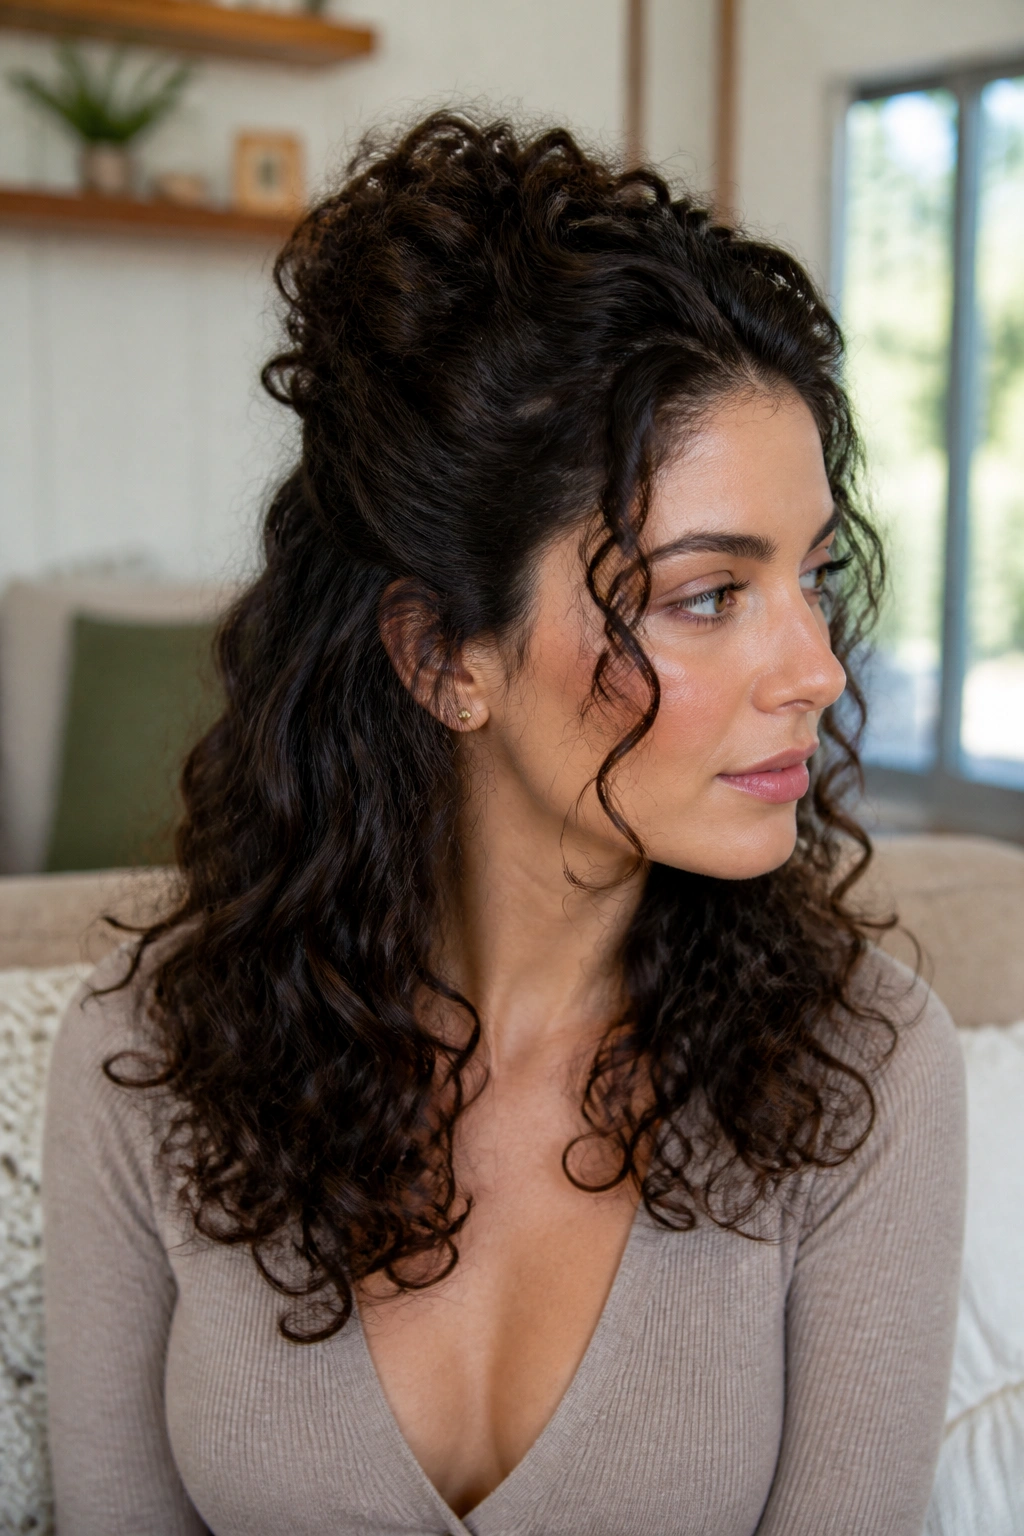
Half-up styles are where thick curls actually help you. The volume becomes the point instead of the problem, and that changes the whole game.
How to keep the crown from collapsing
The trick is to collect only the top third of the hair, then secure it high enough to lift the crown but not so high that the style turns into a ponytail. If you pull the top section too tight, the sides flatten and the back gets all the attention. Loose is better here.
Use two bobby pins instead of one if the hair keeps slipping. Thick curls have weight, and a single pin can slide out faster than you’d like. A matte clip or coil tie also holds better than a shiny elastic, which tends to snag and leave a dent.
- Leave a few curls loose around the temples
- Fluff the crown after securing the top section
- Keep the half-up section slightly messy so it doesn’t fight the curl pattern
This is one of those styles that works on day one and day three. That alone makes it worth knowing.
9. Pineapple Puff
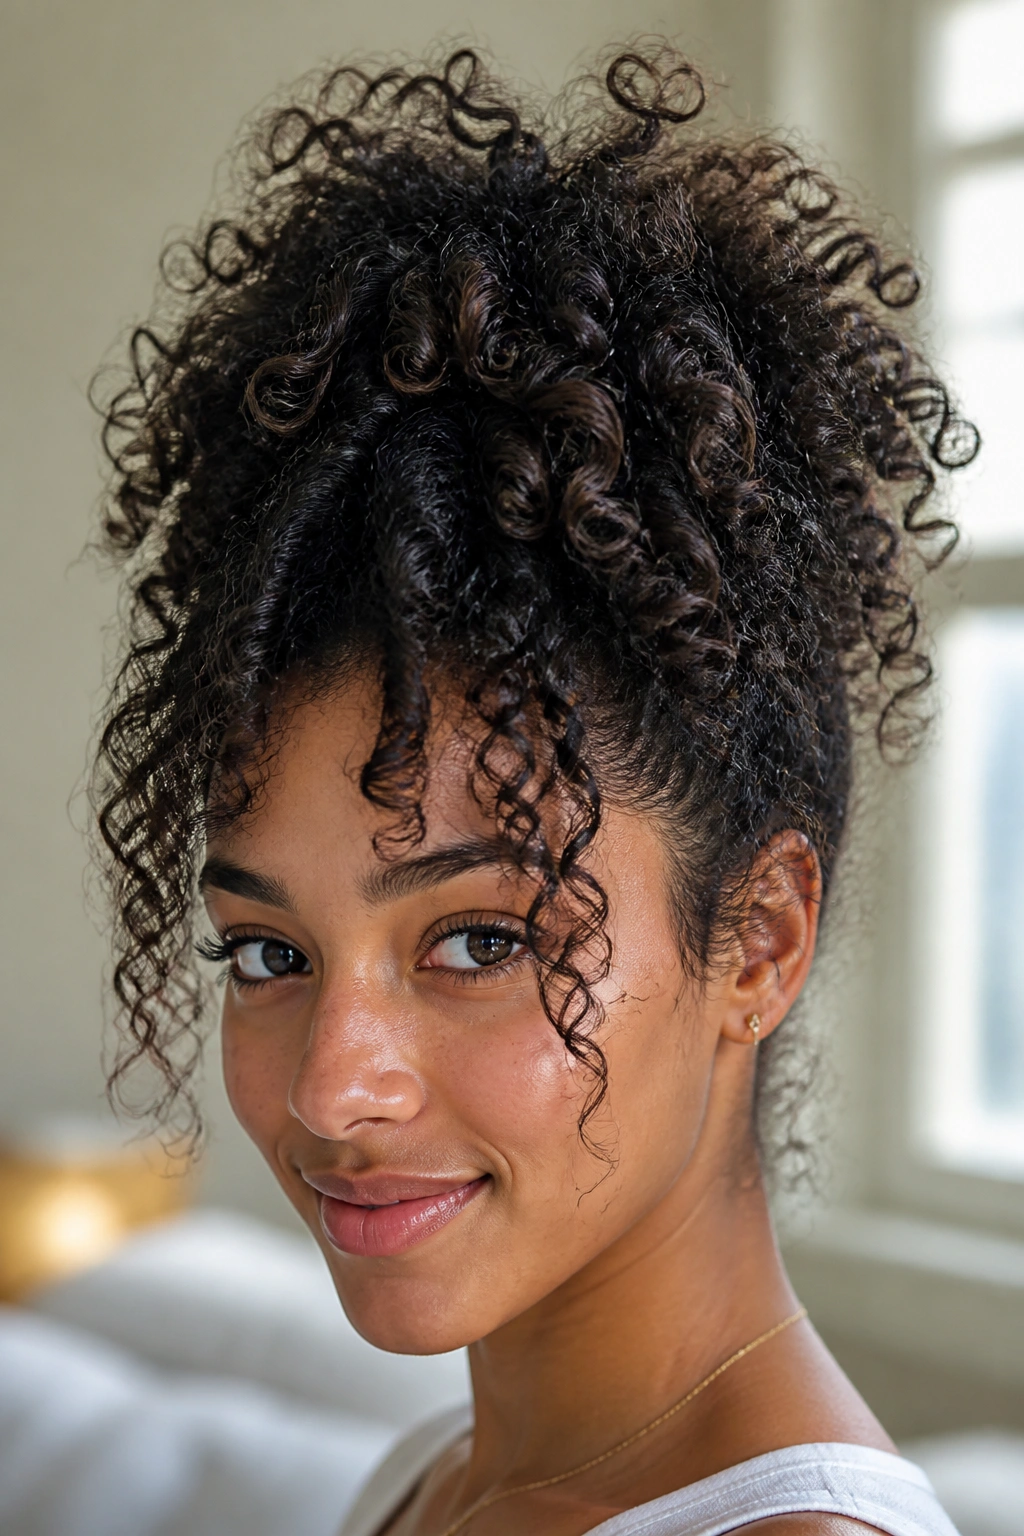
A pineapple puff is the easiest way to keep thick curls looking lively when you do not want to start from scratch. It sits high, stays loose, and keeps the curl clumps from getting crushed while still giving the hair a fun shape.
The high placement is the whole point. By gathering the hair at the crown and letting the ends fall forward, you protect the curl pattern and create a rounded shape that looks fuller than a standard ponytail. It also keeps the neck clear, which is a nice bonus when your hair feels heavy.
Use a satin scrunchie or a soft tie, not a thin elastic. The tighter the band, the more the curls get flattened at the base. A pineapple should feel secure, not tight.
This style is also practical for sleeping, which is why people keep coming back to it. Pull it loose in the morning, shake it out, and you usually get more shape than you started with.
10. Claw-Clip French Twist
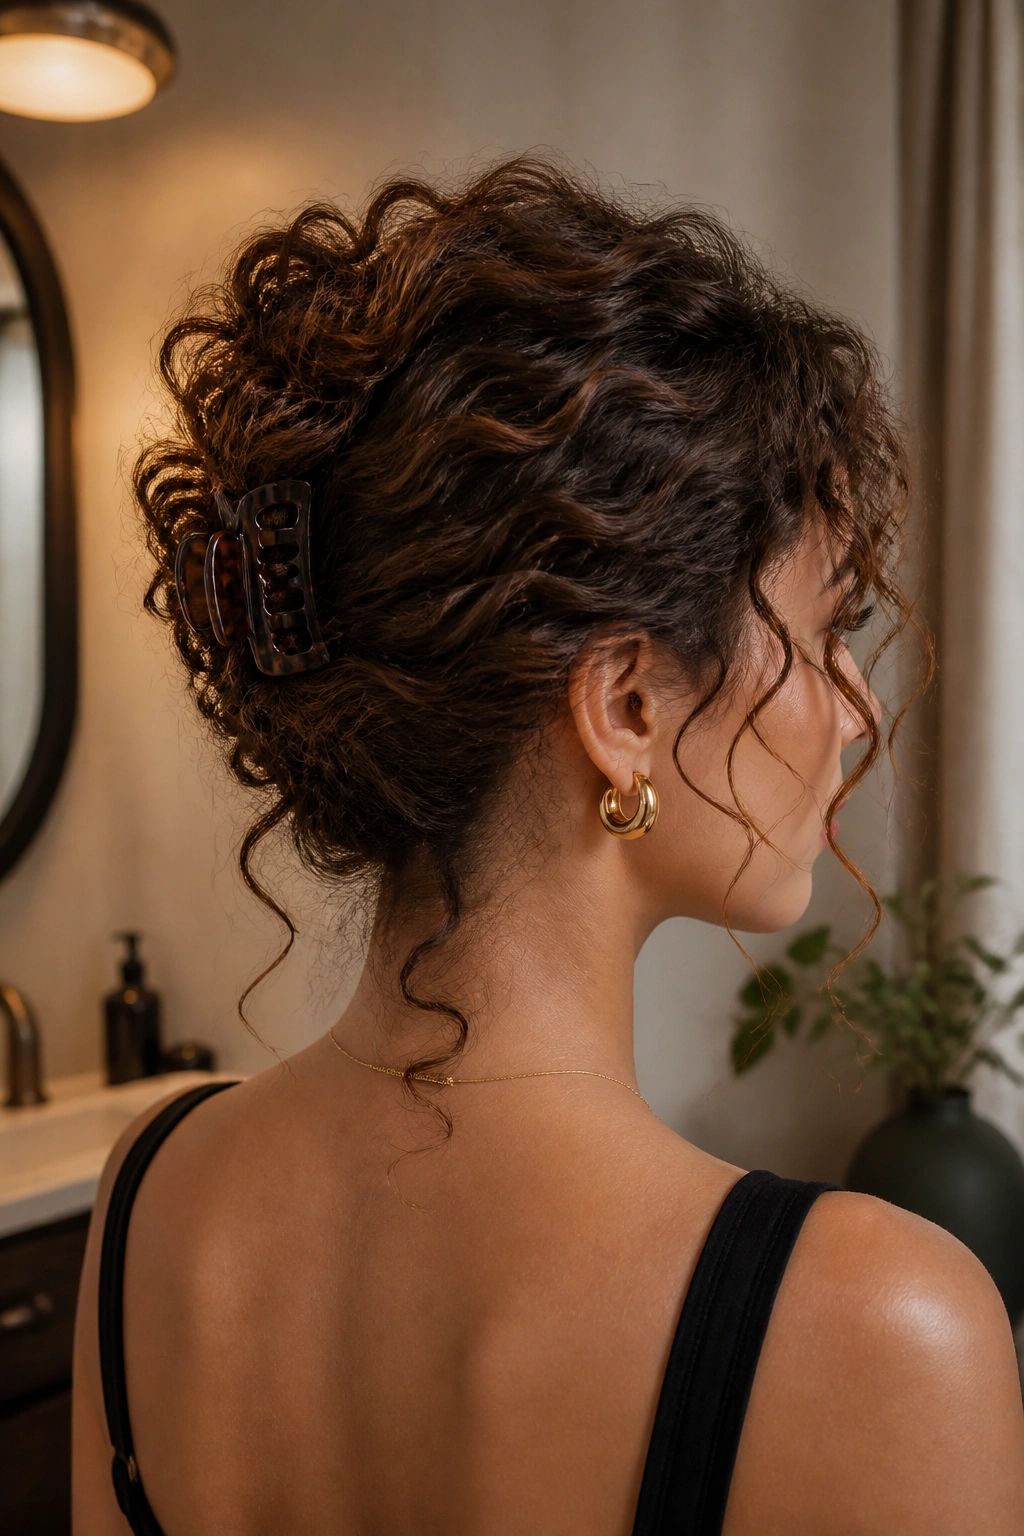
A claw-clip French twist can save a thick curly day when the hair feels too much for a full style but too good to hide completely. It has that easy, slightly undone look, and thick curls give it enough body to stay interesting.
The trick is to gather the hair upward in sections, twist it once or twice, then fold the length into the clip instead of trying to force every strand into place. That little bit of looseness helps the curls keep their shape. If the hair is heavy, use two clips — one to catch the center and another to support the bottom fold.
I like this one because it does not flatten the curl pattern as much as a tight bun. You still get texture at the back, which keeps the style from feeling stiff.
One warning: if your curls are very springy, leave a few ends out on purpose. A fully hidden twist on thick hair can look smaller than you want.
11. Low Curly Chignon with Tendrils
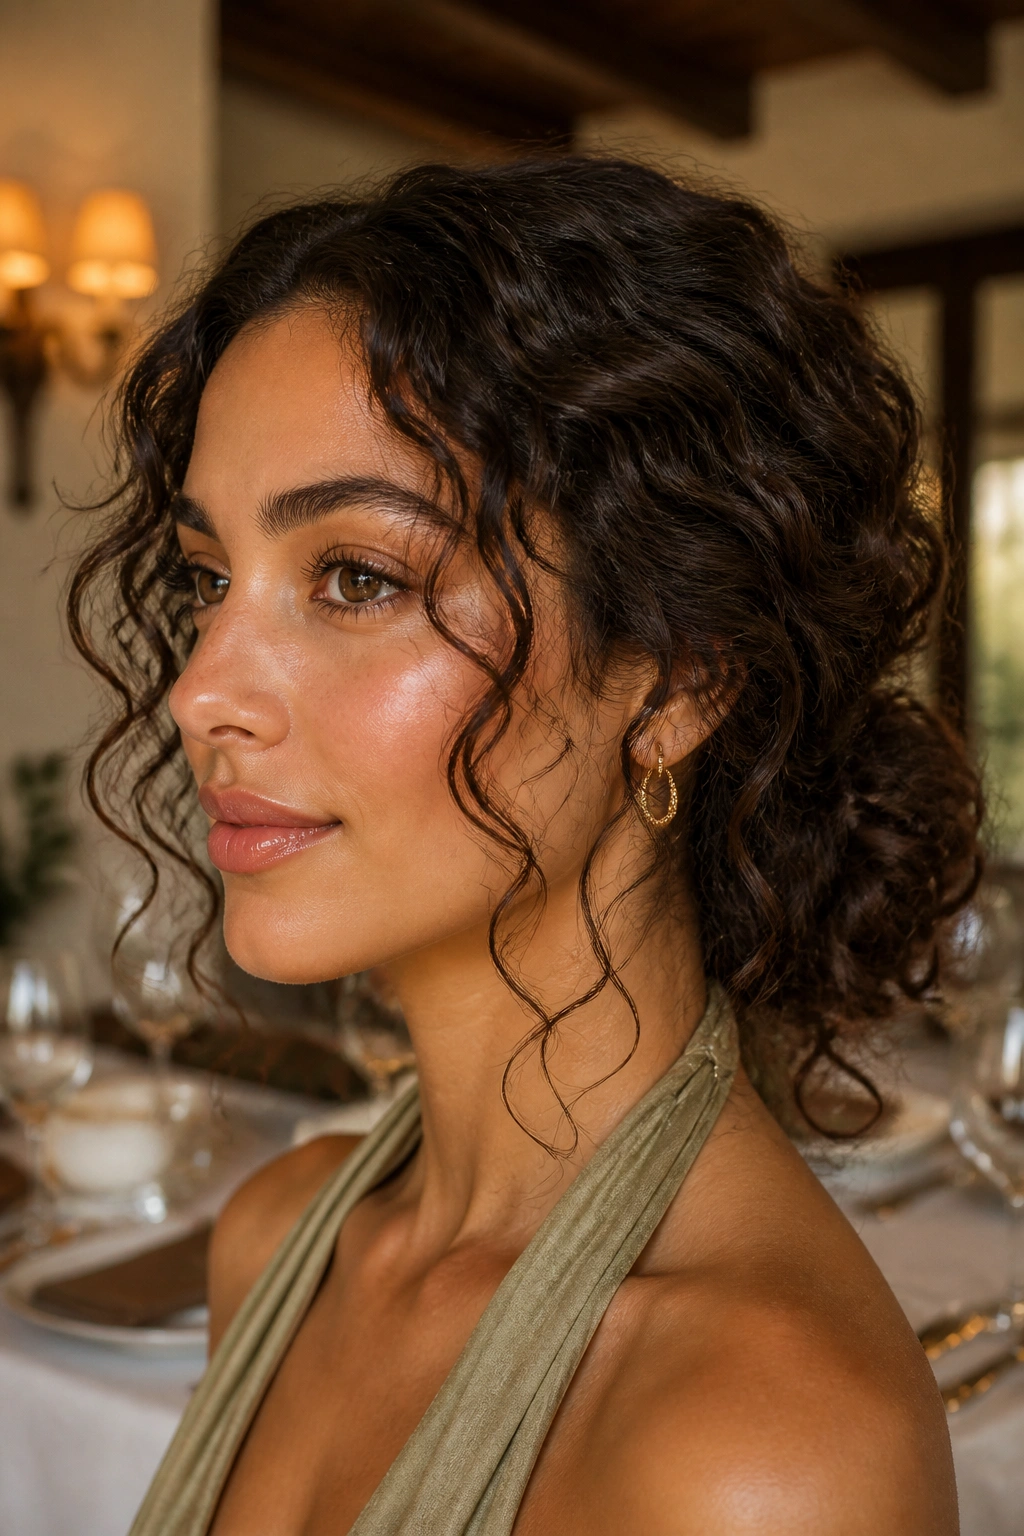
Need something more polished? A low curly chignon is the kind of style that makes thick hair look intentional without making it look stiff.
The shape sits at the nape and gathers the bulk into one soft knot. That lower placement matters, because thick curls can look top-heavy if you pin them too high. Leave a few tendrils loose around the temples and jawline, and the whole thing softens right away.
What to watch for
A chignon works best when it is pinned in three spots instead of one. One pin at the twist, one under the fold, one on the side. That spreads the weight and keeps the bun from sagging an hour later.
- Keep the bun loose enough to show curl texture
- Smooth the crown with your hands, not a stiff brush
- Choose bobby pins that match your hair color so they disappear
This is a good dinner style, but it also works for workdays when your hair needs to stay off your neck.
12. Side-Swept Curls with a Decorative Clip
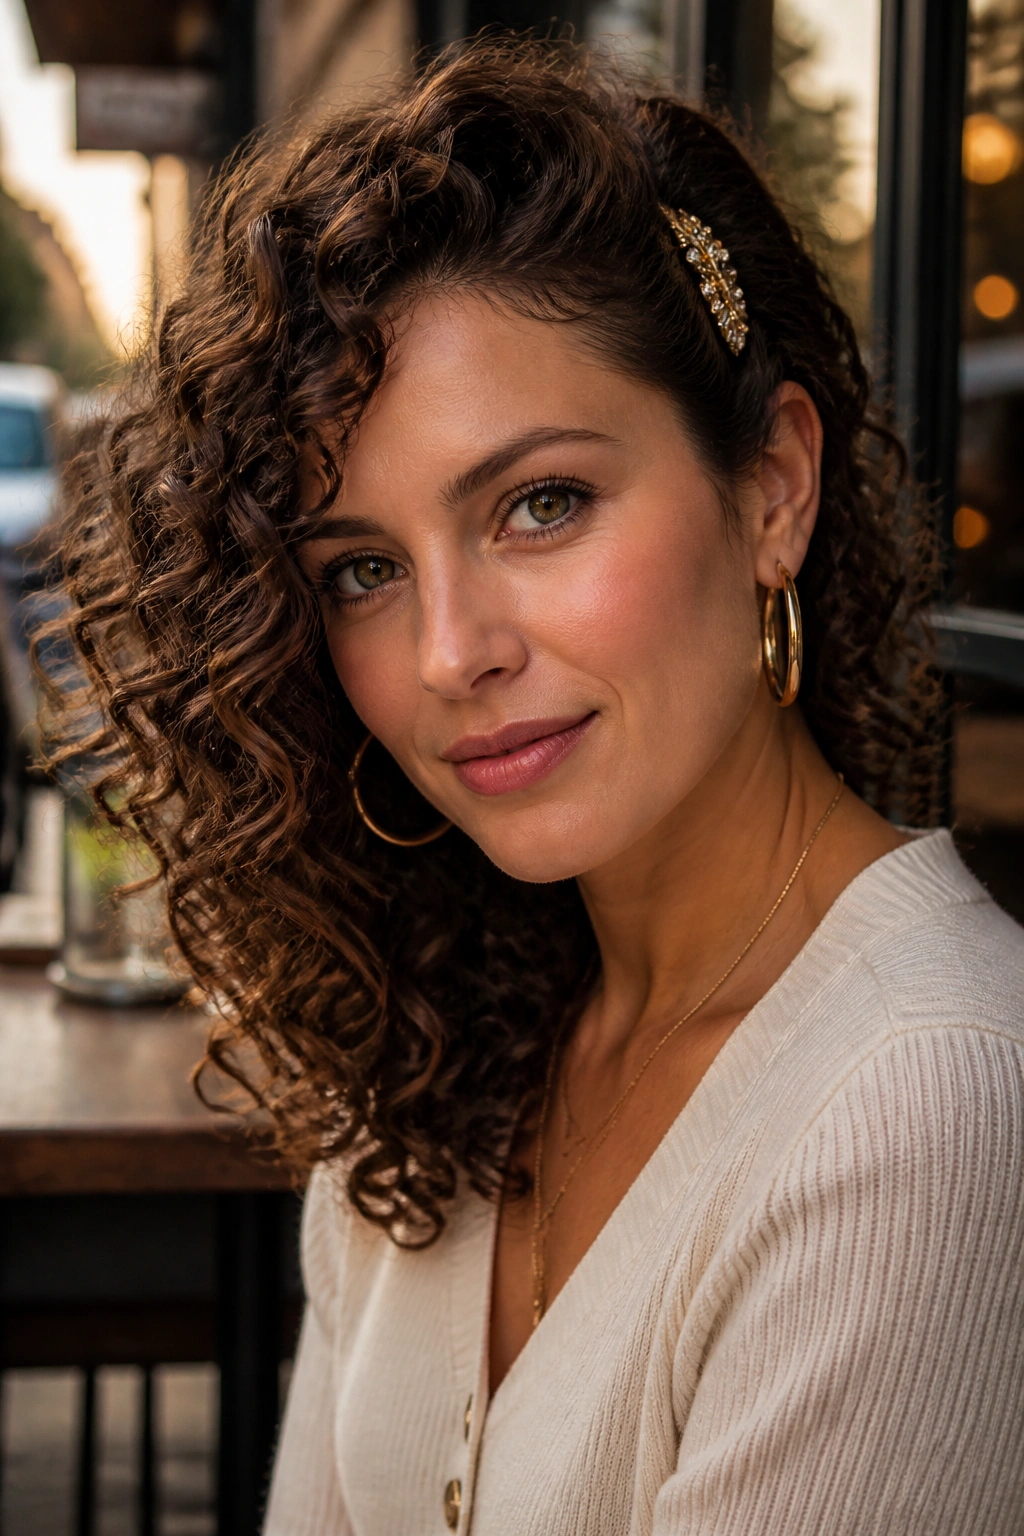
A side-swept style with a decorative clip gives thick curls a little control without hiding the texture. One side stays open, the other gets pinned back, and the whole look feels lighter around the face.
Compared with a full updo, this is a much easier way to tame volume. The clip holds the side away from your eyes, but the curls remain loose through the back and down the shoulders. It is the kind of styling trick that saves you when your hair is fresh, fluffy, and not quite willing to cooperate.
The clip should sit just above the ear or just behind the temple. Too low and it gets lost in the bulk. Too high and it can make the style feel stiff.
This is especially nice with medium length hair because the layers have room to fall over the shoulder instead of getting stuck in one place. A simple metal barrette or a flat claw clip usually works better than a tiny decorative pin.
13. Defined Wash-and-Go

A defined wash-and-go is still one of the strongest options for thick curls, as long as the styling steps are clean and the hold is strong enough. Thick hair needs help grouping itself into tidy curls, or the style can swell up before it finishes drying.
The order matters
Start with leave-in conditioner on soaking-wet hair, then follow with a curl cream if your hair likes moisture. Seal the shape with gel, working in sections so the product coats the curls evenly. Scrunch upward, then stop touching it.
Drying is where people get impatient and mess it up. If you break the curl clumps too early, the hair frizzes before the cast sets. Let it dry fully, then scrunch out the stiffness with dry hands or a drop of oil.
- Apply product in 4 to 6 sections if the hair is very dense
- Use a wide-tooth comb only while the hair is wet
- Do not fluff the roots until the outside is dry
This style rewards patience. It does not reward fiddling.
14. Air-Dried Soft Volume

Sometimes you want the curls to look soft, not crisp. Air-dried volume is the answer when you want movement, touchable texture, and less product sitting in the hair.
The vibe is looser than a defined wash-and-go. You still use cream or light gel, but not so much that the curls lock into hard, separated spirals. Thick hair benefits from that softer finish because it keeps the shape from feeling too heavy or overbuilt.
I especially like this when the curl pattern is mixed — tighter at the back, looser near the front, or a little wavier under the top layer. Air-drying lets those differences blend instead of fighting each other. A diffuser can help for the first few minutes, then you can let the rest dry on its own.
Try not to brush it once it is dry. That is the quickest way to lose the soft shape and end up with a puffier, less controlled look.
15. Diffused Root-Lift Style
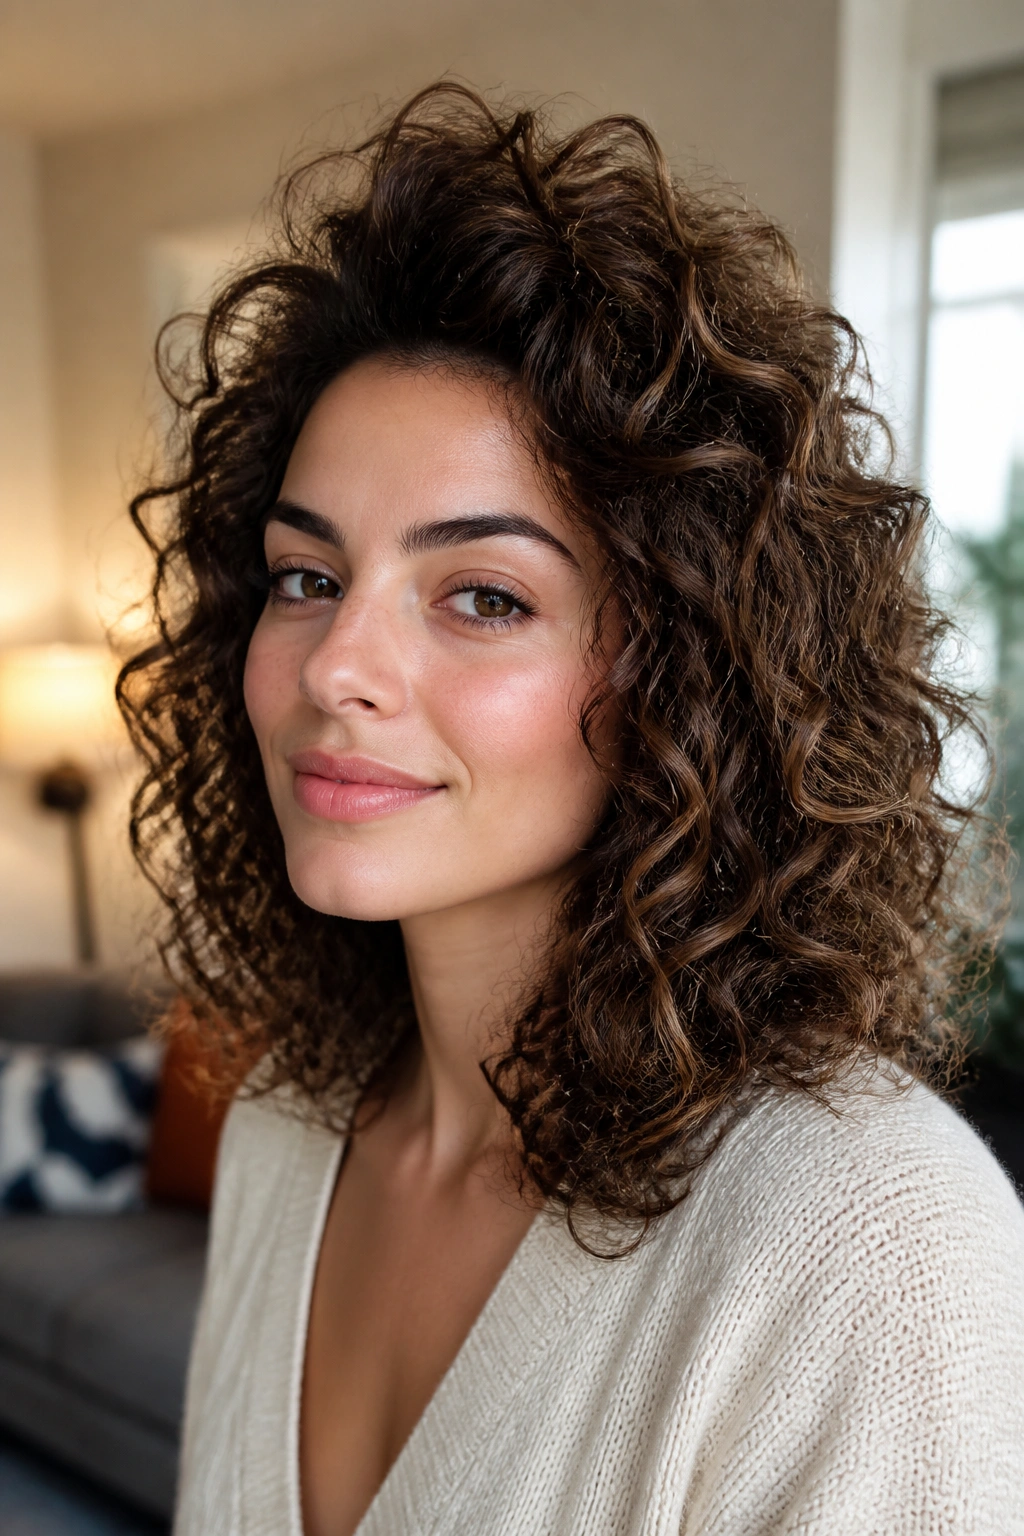
Flat roots are the enemy of thick curls. A diffused root-lift style fixes that fast by setting the top section first and keeping the crown from drying in one heavy sheet.
Use low heat and a low fan speed. Cup a section into the diffuser, lift it toward the scalp, and hold for ten to twenty seconds before moving on. Then switch sides instead of blasting one area for too long. That side-to-side rhythm helps the roots dry with more lift and less frizz.
The biggest mistake is flipping the head around and shaking too much. That can separate the curls before they finish setting. Better to lift in sections, then stop once the top feels 80 to 90 percent dry.
This style works especially well on medium length curls because the weight is enough to settle the shape, but not so much that the roots stay glued down forever. It is a small technical fix, and it changes a lot.
16. Twist-Out with Stretched Ends

A twist-out is one of my favorite ways to give thick curls definition without making them shrink into one tight mass. Two-strand twists stretch the hair a little while it dries, so the finished shape looks elongated and tidy.
Why thick hair likes this method
Dense hair holds the twist pattern well. Once the twists are fully dry, you can separate them gently and get a fuller result with more length showing at the ends. That stretch is helpful if your curls tend to sit high and compact on their own.
Use medium-sized sections, not tiny ones. Tiny twists on thick hair can take forever to dry and make the hair look overly busy. Medium sections give you a cleaner shape and a quicker prep time.
- Apply a bit of cream before twisting, then a light gel at the ends
- Let the twists dry completely before separating
- Rub a small amount of oil on your hands before taking them down
If you want a style with shape but less puff, this is a smart one to keep in rotation.
17. Braid-Out with Loose Waves
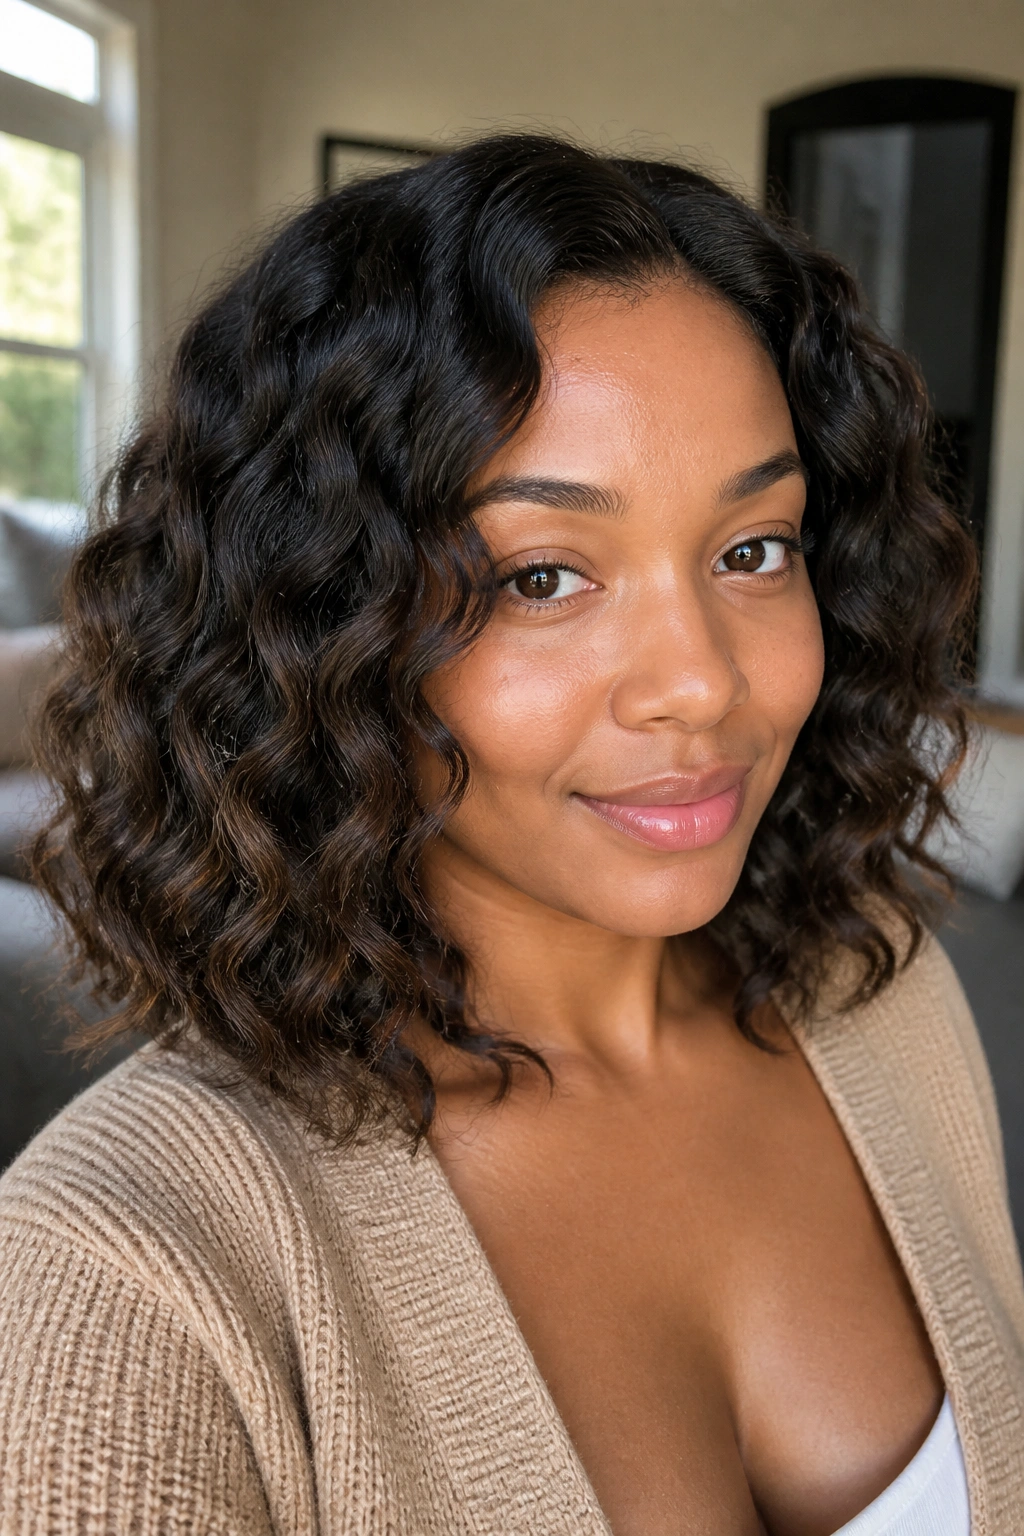
A braid-out gives thick curls a wider, softer wave pattern than a twist-out. That matters when you want the hair stretched, fluffy, and a little less round.
Compared with two-strand twists, braids press the hair into a flatter pattern, which can be helpful if your curl density makes the style feel too wide at the sides. The finished shape tends to sit closer to the head at the top and open up more through the lengths.
I usually think of braid-outs as a good fit for people who want movement but not too much spring. They also work well if your pattern is tighter underneath and looser on top, because the braid evens things out a little.
Use anywhere from 8 to 12 braids depending on density and length. Fewer braids give broader waves; more braids give a tighter pattern. Wait until the hair is fully dry before undoing them, or you’ll lose the definition fast.
18. Half-Up Braided Crown

A half-up braided crown looks more involved than it is, which is part of the appeal. Thick curls fill out the braid nicely, so the style looks full even when the braid itself is simple.
Start by braiding a section from each temple or just above the ears, then pin the braids across the top or meet them at the back. Let the rest of the curls hang loose underneath. That contrast — controlled on top, free underneath — gives the style its shape.
This works especially well for thicker medium length hair because the braid does not look skinny or underfed. It has enough body to read clearly from the front, which is the whole point.
- Keep the braid close to the hairline if you want more lift
- Pancake the braid gently for a fuller look
- Secure the ends with bobby pins instead of a chunky elastic
It is a good choice for weddings, lunches, or any day you want the hair out of your face but still visible.
19. Curly Faux Hawk
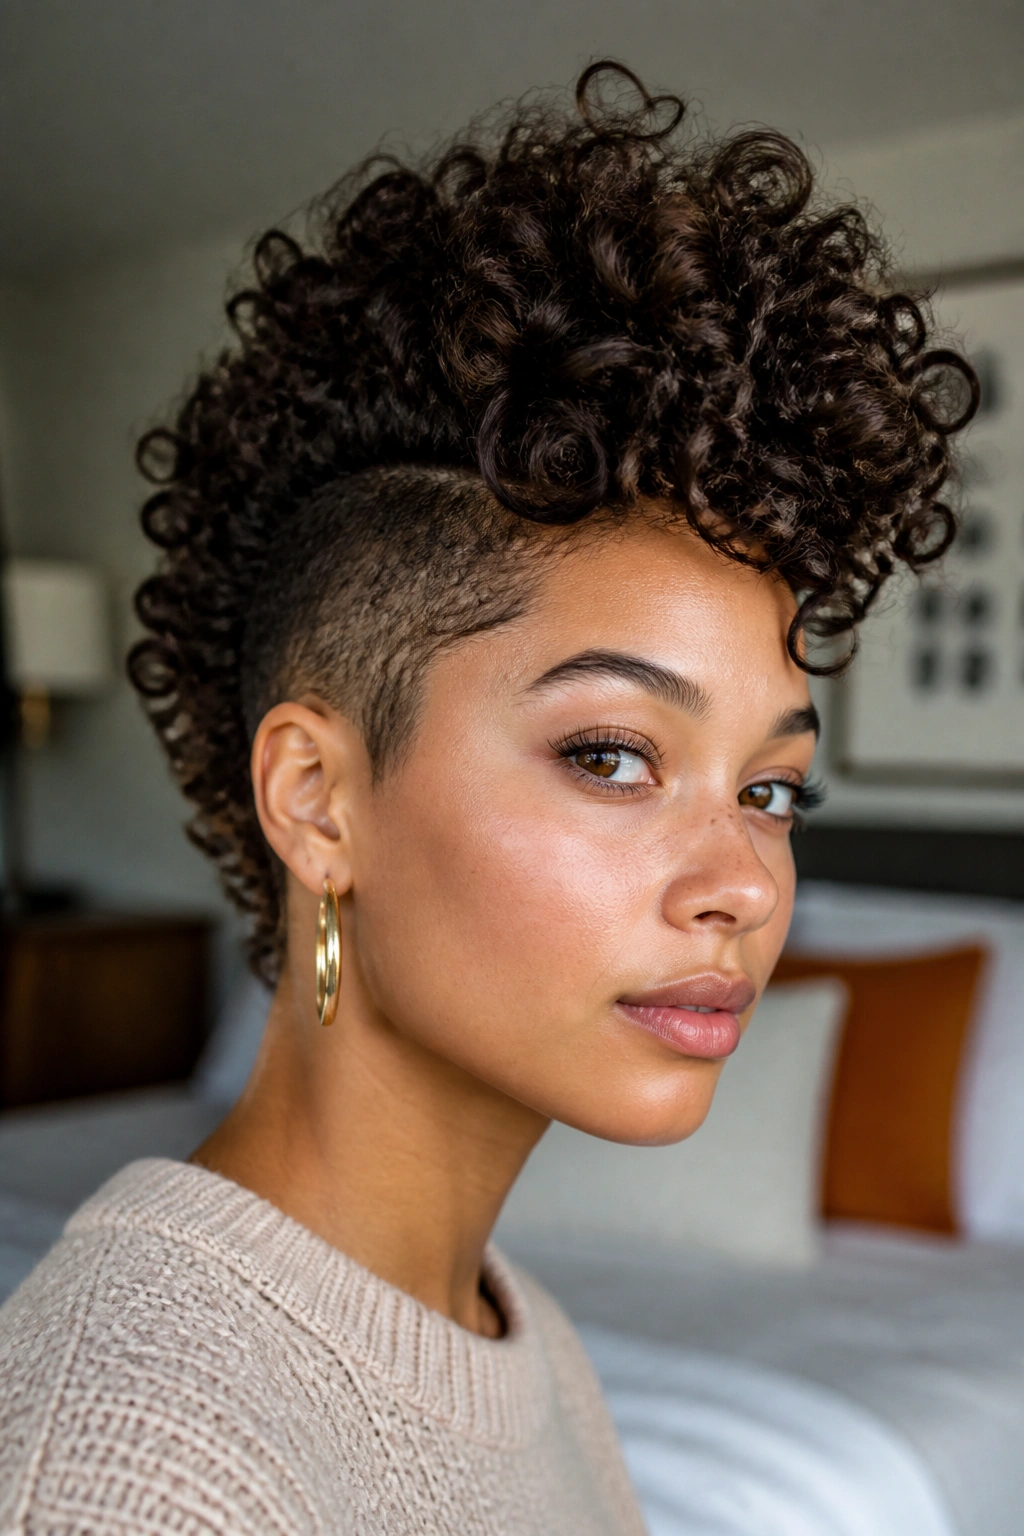
A curly faux hawk is one of the quickest ways to make medium length thick curls look bold without cutting the sides short. Pin the sides back, keep the middle section high, and the whole style suddenly feels sharper.
The center ridge is where the personality lives. That middle strip should stay fluffy and tall, while the sides get tucked or pinned flat enough to show off the shape. Thick curls are useful here because they naturally create height, so you do not have to build much.
This is a style that looks especially good on curls with some spring in them. Loose waves can do it too, but tighter curls hold the lift better. Use a strong enough pin or clip that the sides stay put, because once the hair starts slipping, the shape loses its clean line.
A little edge, a little mess, and a lot of texture. That is the whole charm.
20. Low Curly Ponytail with Wrapped Base
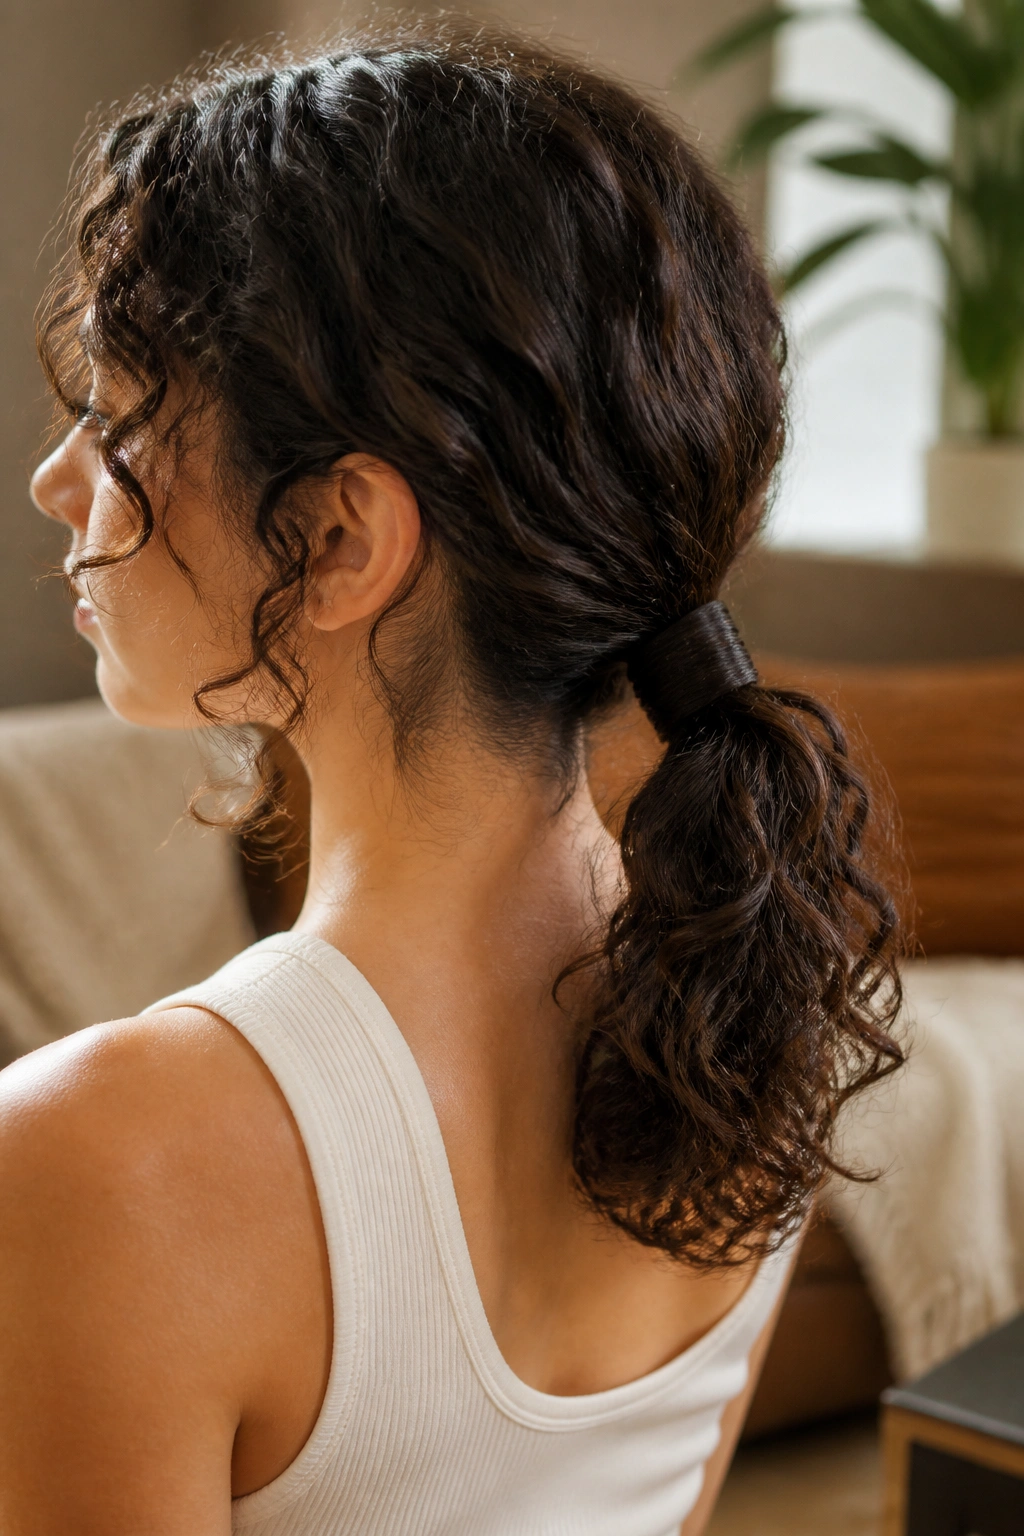
A low curly ponytail is a smart middle ground when you want your hair controlled but still visible. It keeps the bulk at the nape, shows off the lengths, and feels less severe than a bun.
How to keep the crown smooth
Brush or smooth only the top layer back, then gather the ponytail loosely at the base of the neck. Leave the ponytail itself curly and full. If you want a cleaner finish, wrap a small curl or a thin piece of hair around the elastic and pin it underneath.
That wrapped base is a small detail, but it changes the whole look. The ponytail goes from practical to finished without needing much extra work.
- Use a soft brush on the crown only
- Keep the ponytail loose enough to preserve curl shape
- Add a few face-framing pieces if the style feels too strict
This is one of those styles that can go from grocery run to dinner table without much change. That’s rare, and useful.
21. Pinned-Back Temple Twist

A pinned-back temple twist is the style I reach for when the hair is almost right but not quite obedient. You twist the hair at the temples back toward the ears, pin it neatly, and leave the rest of the curls down.
It sounds tiny, and it is. But on thick medium hair, those side pieces can carry a lot of visual weight. Taking them back opens the face, calms the outline, and leaves the curls free through the lengths where they look best.
This is also a good refresh style for day three or four. The roots may be a little less lively, but the rest of the hair still has body. A temple twist lets you hide the sleepy parts without pretending the whole style is new.
I like to keep this one loose enough that the twist shows. If you pin it too flat, it starts to feel like a compromise instead of a style. The curl pattern should still be visible around the twist.
22. Halo Braid with Curly Ends

A halo braid can be a beautiful match for thick medium curls because the fullness of the hair gives the braid presence. It does not need to be tiny or perfect. In fact, it looks better when it is a little plush.
If your hair is just on the shorter side of medium length, you may not get a full braid all the way around without a few pins helping at the back. That is fine. Start where the braid will hold, then tuck the ends under or let a few curls peek out near the nape. Those loose ends keep the style from feeling too strict.
The halo braid is one of the few upstyles that can handle real density without looking skimpy. The braid has room to sit, and the loose curls soften the line around the head. It works for events, sure, but it also has a calm, everyday feel if you keep the finish loose.
When thick curls are given room to move, medium length stops fighting you and starts making sense. That is the thread through all of these styles. Some reduce bulk, some show it off, and a few do both at once — which is usually the sweet spot.
