



Defined natural curls look best when the shape does half the work. A good cut helps, sure, but the real difference is how the hair is set, dried, and left alone long enough to hold its pattern.
The mistake I see most often is treating curly hair like straight hair with a little texture. It is not. If you rake through wet curls with the wrong brush, pile them into a loose clip before they dry, or rush the dry time, you end up with soft-looking hair that has no clear shape. The curl is still there, but it gets swallowed by frizz and flat spots.
The fix is usually simpler than people expect. Smaller sections, the right amount of hold, and a style that respects shrinkage can make curls look crisp without making them stiff or crunchy in a bad way.
A style should work with the pattern you already have. Some days that means a wash-and-go with a gel cast; other days it means twisting, braiding, tucking, or pulling the hair up so the ends stay neat. The styles below lean into that logic, and the details matter.
1. Wash-and-Go With a Strong Gel Cast

If your curls already have good spring, a wash-and-go can look cleaner than almost anything else. The key is not chasing softness too early. You want the gel cast first, the softness later.
Why It Works
A wash-and-go gives defined natural curls the chance to dry in their own shape instead of being forced into a new one. Start on soaking wet hair, work in a leave-in with slip, then seal the curl pattern with a strong-hold gel. Once dry, the hair feels firm. That’s normal.
Hands off the curls while they dry.
When the cast is fully set, scrunch it out with dry hands or a drop of light oil. The result is soft on the outside, but the curl clumps stay neat and separated. This is the style I reach for when I want to see the curl pattern itself, not a bunch of flyaways competing with it.
Quick Setup
- Apply products in 4 to 8 sections so every curl gets coated.
- Use a comb or finger rake, but stop once the curls clump together.
- Diffuse on low heat and low speed if you need speed; high heat can rough up the cuticle.
- Let the hair dry 100% before scrunching out the cast.
Best tip: if your roots stay flat, clip them at the crown while the hair dries. A small metal duckbill clip at the root can lift the whole look without disturbing the ends.
2. Twist-Out on Stretched Curls
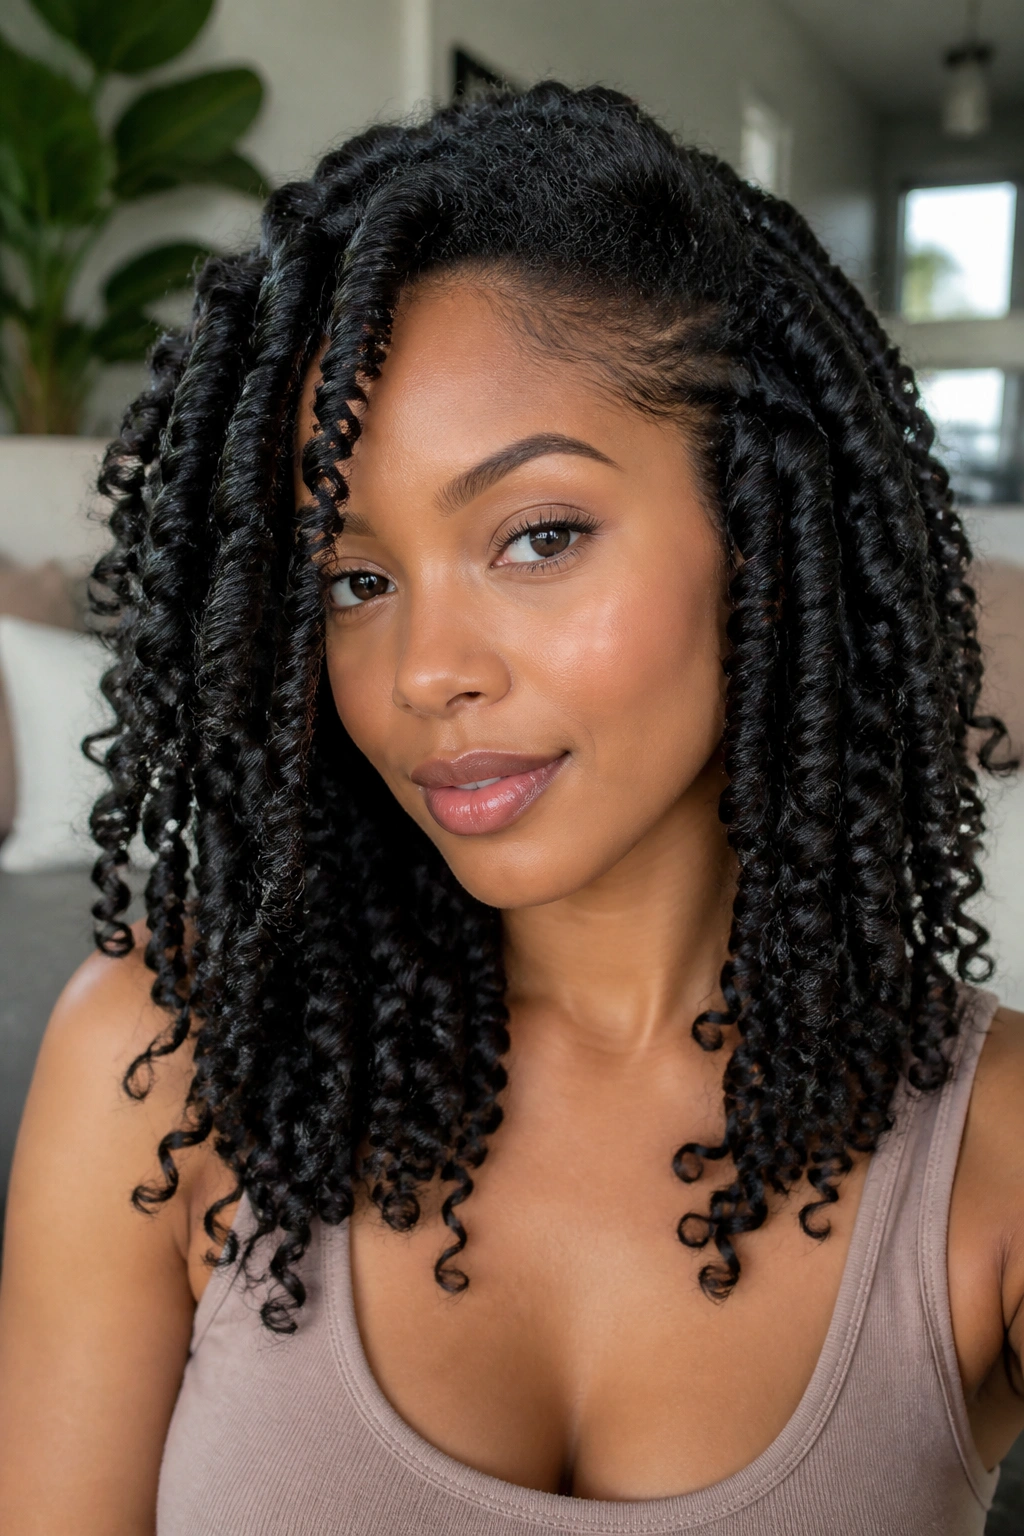
A good twist-out gives you definition with a little more body at the same time. That’s the appeal. The coils look organized, but the style still has movement instead of that ultra-tight finish a wash-and-go can give.
Twist-outs work best when the hair is damp, not dripping. If the hair is too wet, the twist can take forever to dry and the inside stays mushy. If it’s too dry, the twist can frizz before it sets. I like to think of it as “cool and damp,” the kind of dampness that disappears from your hands in a few seconds.
The twist size controls the final look. More twists = more definition. Fewer twists = bigger hair. A head of 10 to 14 medium twists gives a balanced shape on shoulder-length curls. Smaller twists can look sharper, but they take longer to take down and separate.
Do not separate too early. Let the hair dry fully, coat your fingertips with a tiny bit of oil, then unravel each twist slowly from the bottom up. Pulling from the roots first is how people wreck the pattern they spent all that time building.
3. Braid-Outs for a Crisp Zigzag Curl Pattern
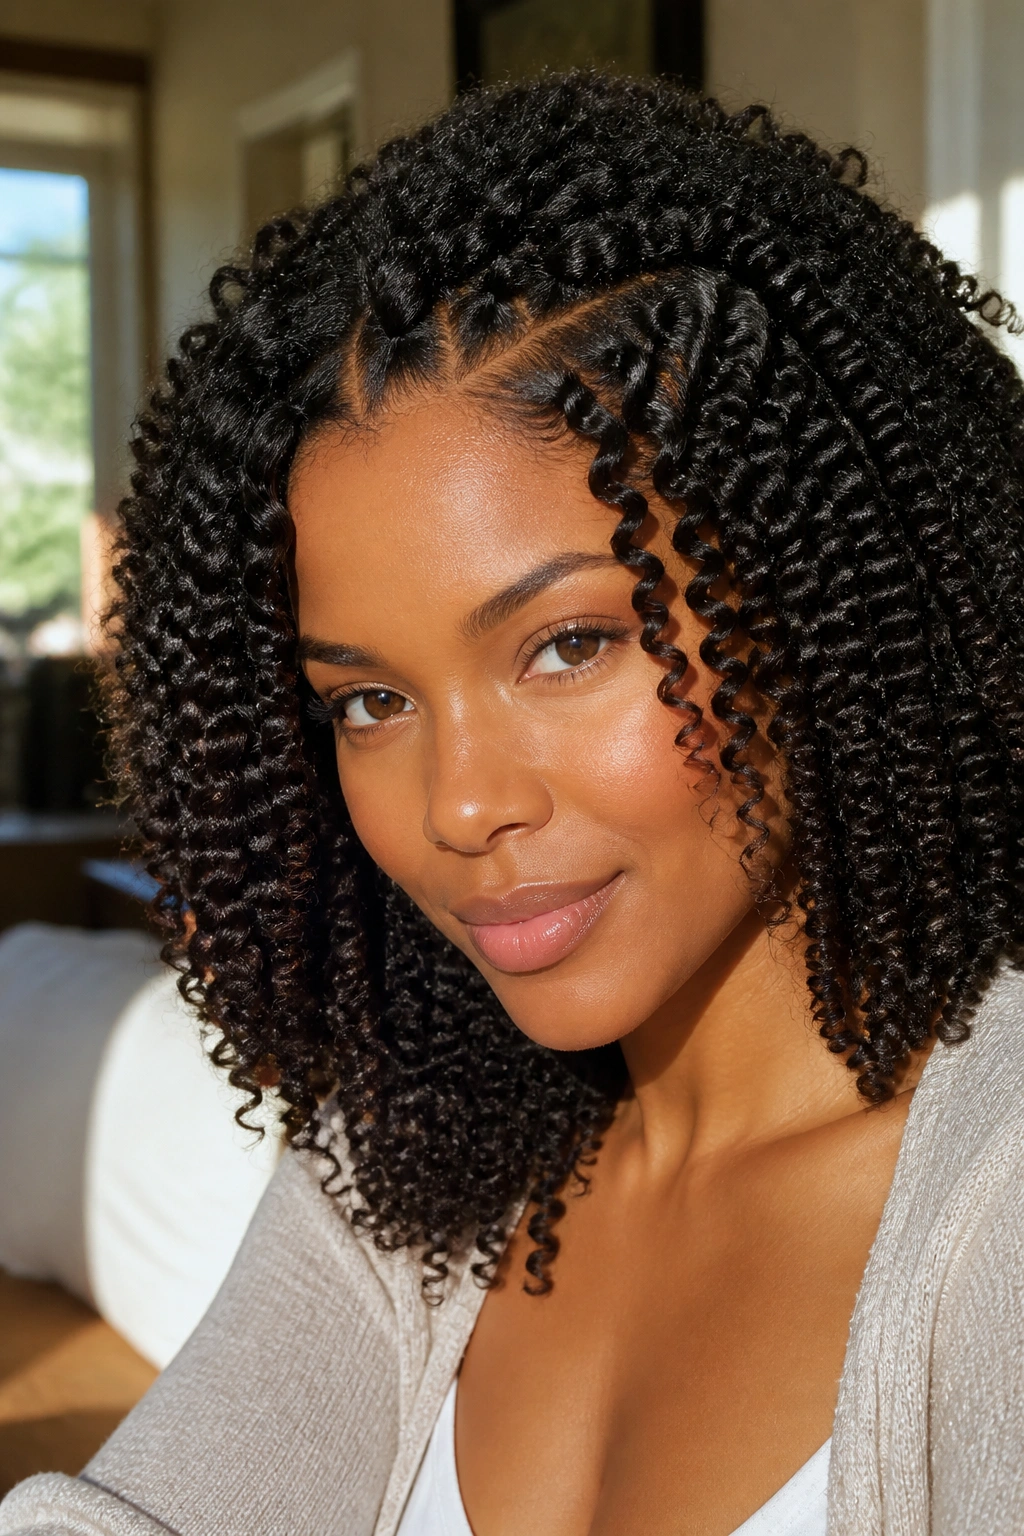
Why do braid-outs look so full? Because the braid shape leaves a firmer imprint on the hair shaft than a two-strand twist does. The finish has more body, a little more edge, and a pattern that reads as deliberate even when the curls are soft.
That makes braid-outs a smart choice when your curls need help looking separated. They work well on damp hair that has already had a leave-in and a cream or mousse layered through it. The braid does the shaping; the product does the holding. If you skip the hold, the definition falls apart before the hair dries.
How to Set It
- Make 6 to 10 braids for a medium-length head.
- Use smaller sections near the hairline so the front doesn’t puff out first.
- Secure the ends with a small elastic if they slip open.
- Unbraid only when the hair feels dry all the way through, not cool in one spot and damp in another.
A braid-out gives a different mood than a twist-out. It is less smooth, a little more textured, and often fuller at the ends. If you like hair that looks defined but not overly neat, this one hits the sweet spot.
4. Finger Coils for Short Defined Natural Curls

Short curls can look sharp, but only when each coil gets its own little job. That’s where finger coils earn their keep. They make the curl pattern look intentional, almost sculpted, without needing much length.
Picture a fresh cut with tapered sides and a few inches on top. Finger coils give that shape a clean finish fast. You work in tiny sections, wrap the hair around a fingertip, and let each coil dry in place. The curls end up looking more uniform than a quick scrunch style, which is why this option is so good for short natural hair.
What Makes Them Hold
- Use sections about half an inch wide for tighter definition.
- Apply a slippery curl cream or gel before coiling.
- Twist each coil in the same direction so the set stays tidy.
- Dry under a hood dryer or wait overnight with a satin bonnet.
Tiny coils last longer than you’d think. The catch is time. This is not a rushed style, and if the sections are too big, the coils collapse into fuzzy loops instead of neat spirals. Keep the parts clean and the product light enough that the hair still has bounce.
A rat-tail comb helps here. So does patience. Both.
5. Pineapple Puff With Loose, Defined Ends
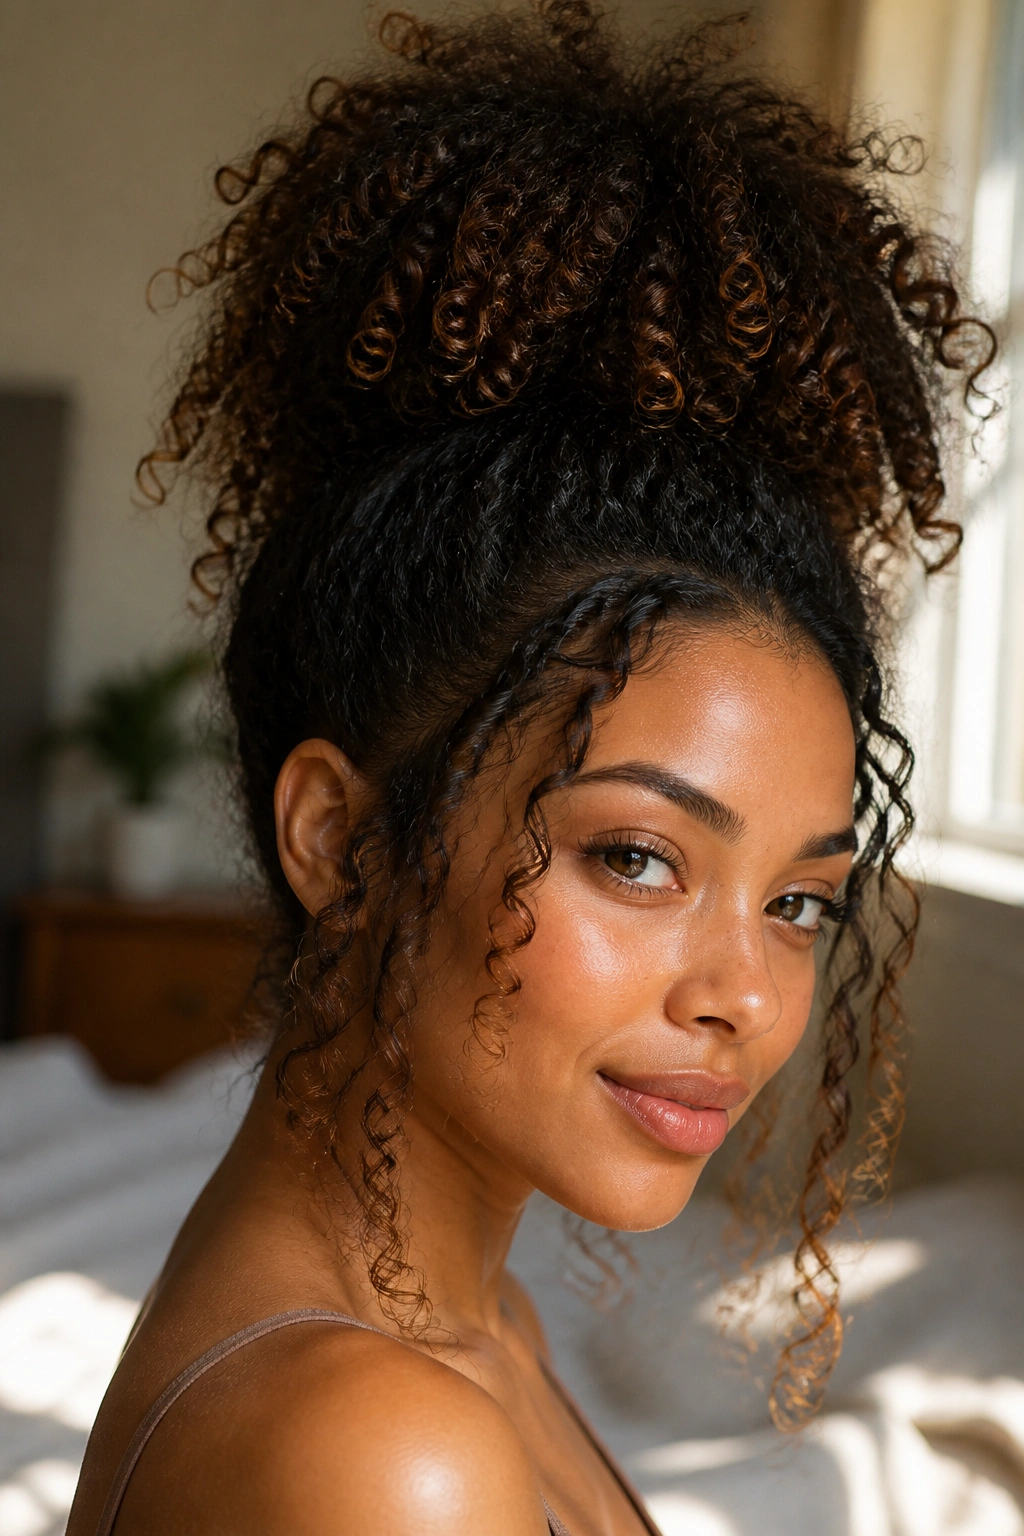
A pineapple puff is the easiest way to keep curls looking lively without dragging all of them back into a tight style. The hair sits high on the head, the curl pattern stays visible, and the whole look feels relaxed rather than overworked.
I like this one for second- or third-day curls that still have some shape. Pull the hair up with a soft satin scrunchie or a stretchy band that won’t snag, then let the puff fall naturally over the crown. If the front pieces are still defined, leave them out. If they’re frizzy, smooth them back lightly with a mist of water and a pea-sized amount of gel.
One sentence matters here: don’t flatten the puff. People often pull the band too tight and crush the roots, which makes the top look thin even when the rest of the hair is full.
The texture at the back can be beautiful when it’s slightly imperfect. That’s part of the charm. A pineapple puff works because it keeps the curls on display while getting the hair off your neck, and on busy days that combination is hard to beat.
6. Flat Twists Into a Low Bun
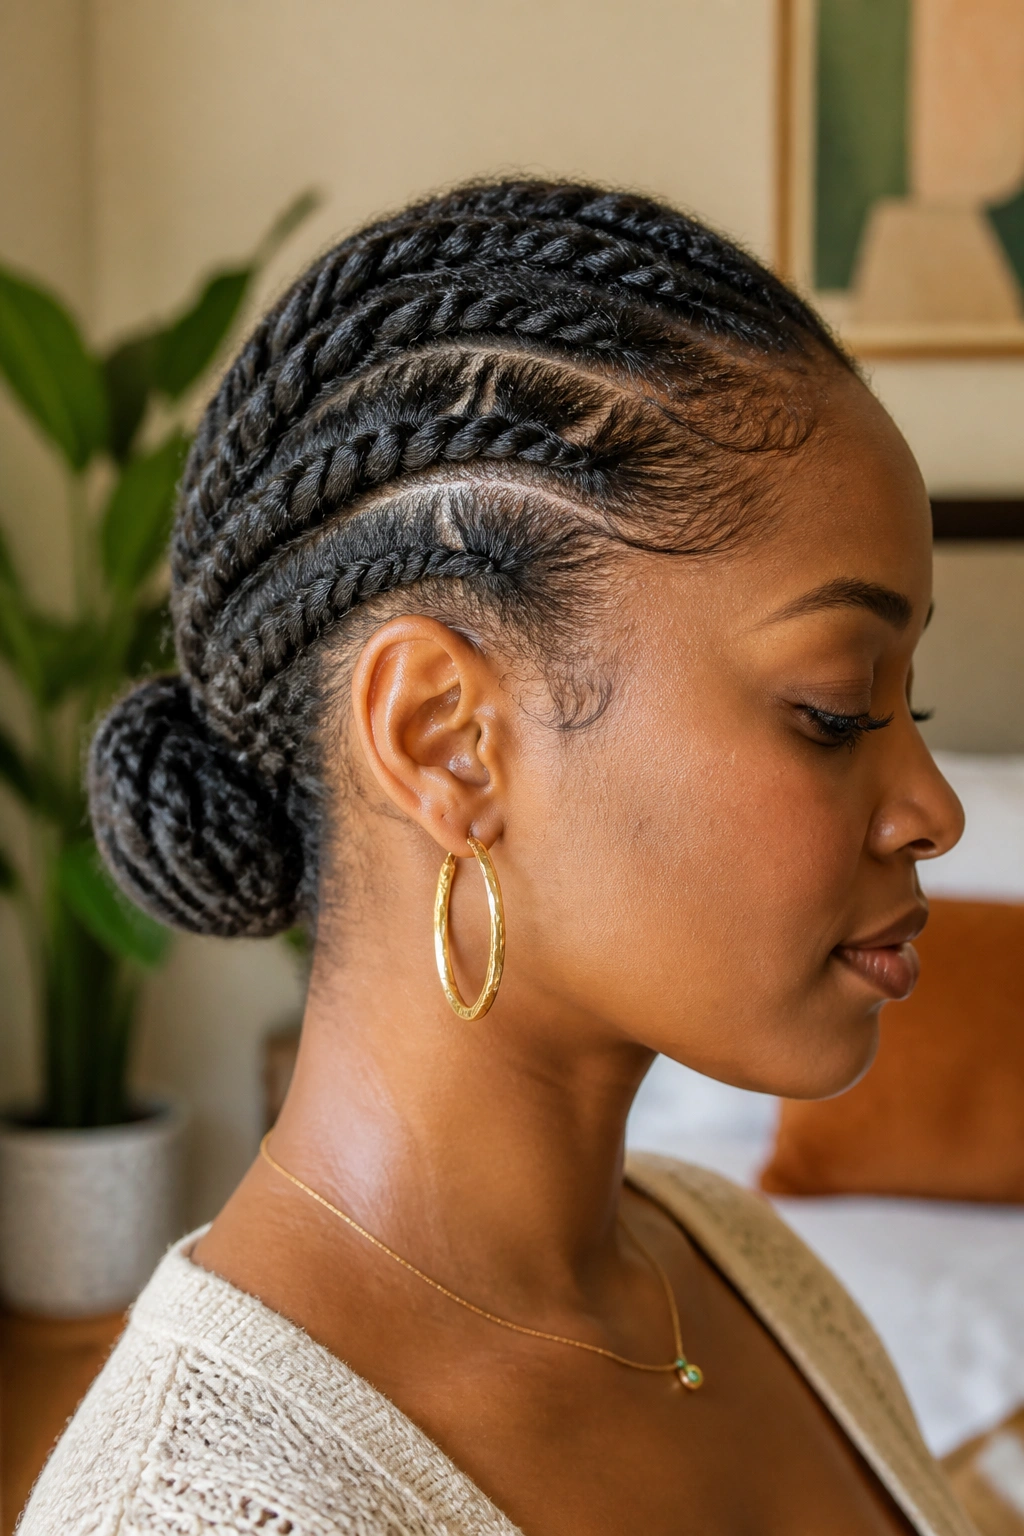
Flat twists sit closer to the scalp than standard braids, and that changes the whole feel of the style. They look neat, stay put, and put less strain on the hairline when they’re done with a soft hand. If you want something polished but not stiff, this is a solid place to land.
The style works especially well when the hair is medium to long and the ends are a little older. Twist the hair back from the front or from a side part, then gather the ends into a low bun at the nape. You can tuck the bun under itself, pin it flat, or leave a small coil sitting low and centered.
A few things make it cleaner:
- Keep the part lines straight and simple.
- Use 2 to 6 flat twists, depending on density.
- Smooth the base with a little gel, not a thick layer of edge control.
- Pin the bun with bobby pins crossed in an X if it keeps slipping.
Compared with cornrows, flat twists often feel gentler and easier to take down. Compared with a loose bun, they look more finished. That middle ground is the reason people come back to them.
7. Half-Up, Half-Down With a Clipped Crown
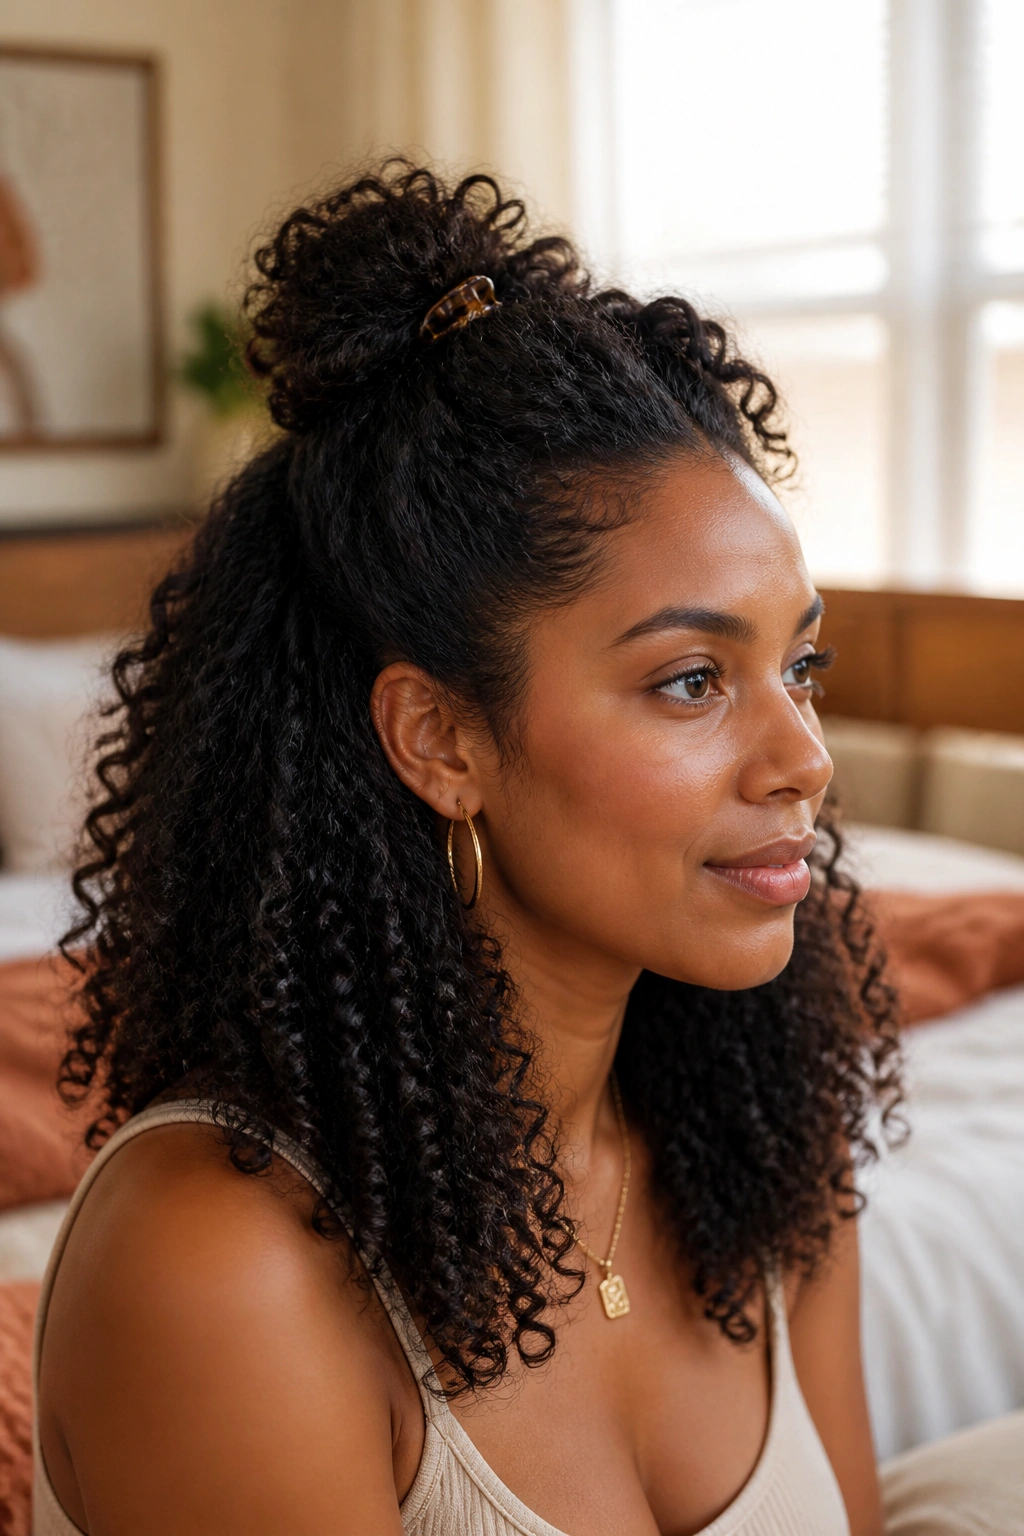
Half-up styles are useful because they let you show off the curl pattern and keep the front from taking over your face. The top section gets lifted, the rest stays loose, and the shape feels balanced without much fuss.
What matters most is where the top section starts. Too low, and the style looks accidental. Too high, and it starts to resemble a top knot with the bottom left out. I like to take a line from temple to temple and gather everything above it, then secure it with a clip, mini claw, or a small elastic wrapped in hair.
What to Lift, What to Leave
- Lift the crown only if you want a little height.
- Leave the bottom curls untouched so the style keeps movement.
- Use a side part if you want the face shape to soften a bit.
- Clip the top while it is still damp if you need extra hold at the root.
This works well on day-one hair and even better on hair that has started to lose a little volume underneath. The top section gives structure. The loose curls keep it from looking too formal. That combination is why half-up styles show up so often for natural curls in real life, not just in photos.
8. Mini Twists for Long Wear and Low Fuss
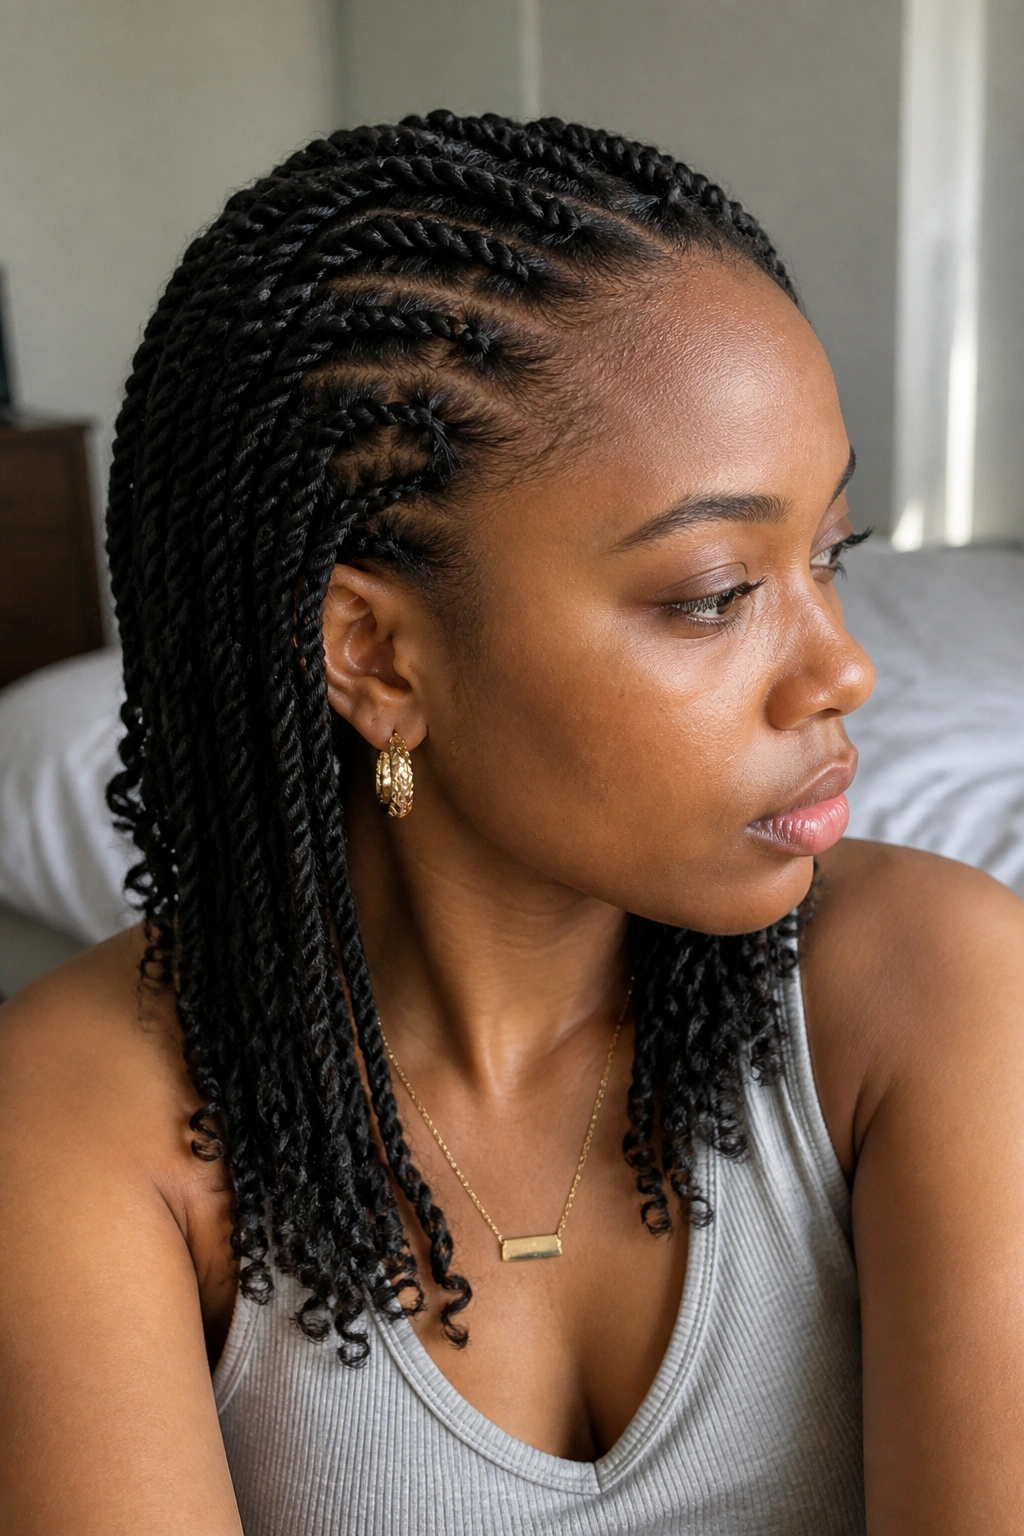
Mini twists are not quick. They are worth it anyway.
What you get is a protective style that can last longer than a twist-out and keep the curl pattern tucked away from constant hands, wind, and pillow friction. Each twist is small—usually about the width of a straw—and the finished look has a rope-like texture that reads clean even when it gets a little softer over time.
Start with detangled, stretched hair if you can. A leave-in, then a cream, then a small bit of gel on the ends tends to work better than piling on one heavy product. Heavy twists droop. Light twists spring.
The first night matters. Sleep in a satin bonnet or on a satin pillowcase, and tuck loose ends before bed so they do not unravel at the collar. If a twist starts to loosen, retwist only the end instead of redoing the whole strand. That saves time and keeps the roots from getting frizzy too fast.
Mini twists can also be unraveled later for a soft twist-out. That double use is part of the appeal. You get one style, then a second life from the same set.
9. Crown Braid With Loose Curly Ends

Pulling a braid around the hairline changes the whole mood of curly hair. It keeps the front controlled, leaves the rest visible, and creates a frame that looks finished without hiding the curls you actually want to show.
This style works best when the hair has a little stretch. A fresh wash-and-go can work, but a lightly stretched blowout or a twist-out gives the braid more grip and makes the base easier to control. The braid can be one side-to-side halo or a short braided section that ends behind the ear and leaves the rest loose.
The loose ends matter. They keep the style from looking too rigid. If the hair is shoulder length or longer, let the ends fall in their natural curl pattern or add a few finger coils at the bottom for extra shape.
A crown braid is one of those styles that looks more complicated than it is. It is mostly parting, tension control, and a willingness to pin the braid into place when it starts drifting. Use small pins, not giant ones. Giant pins show. Small ones disappear.
10. Bantu Knots That Double as a Style
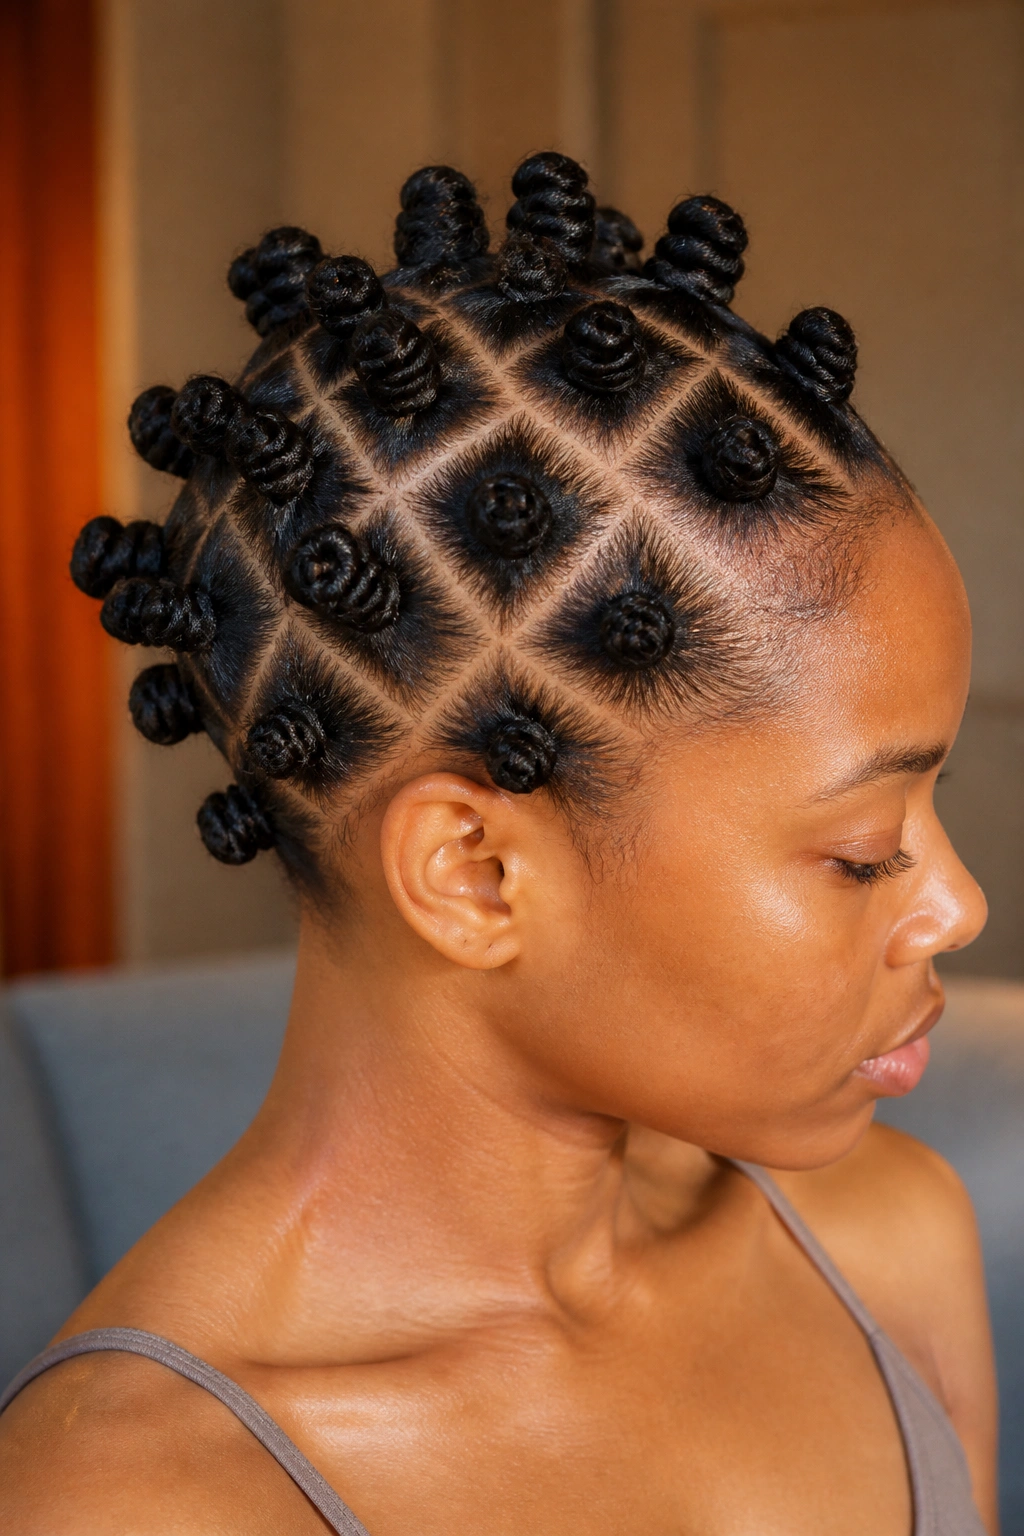
Bantu knots are one of the rare styles that give you two looks in one set. Worn as knots, they look sculptural and neat. Taken down later, they leave behind a knot-out with soft, springy definition.
The setup matters here more than people think. Section size changes the whole finish. Smaller sections make tighter knots and a more defined take-down. Bigger sections make a rounder shape and a looser unravel. On shorter hair, a few dozen tiny knots can look polished. On longer hair, fewer bigger knots are often easier to sleep in.
What the Knots Do
- They keep the hair stretched while it dries.
- They create a clear curl pattern once taken down.
- They protect the ends from constant rubbing.
- They work best when each section is smooth from root to tip before twisting into the knot.
A little product goes a long way. Too much cream leaves the hair sticky and heavy inside the knot. Too little leaves the ends rough and fuzzy. The sweet spot is a light coating that makes the section feel smooth when you slide your fingers down it.
Be gentle at the scalp. Tight knots around the hairline can pull hard, and that is not worth the look. A neat set should feel secure, not painful.
11. Space Buns With Curly Ends
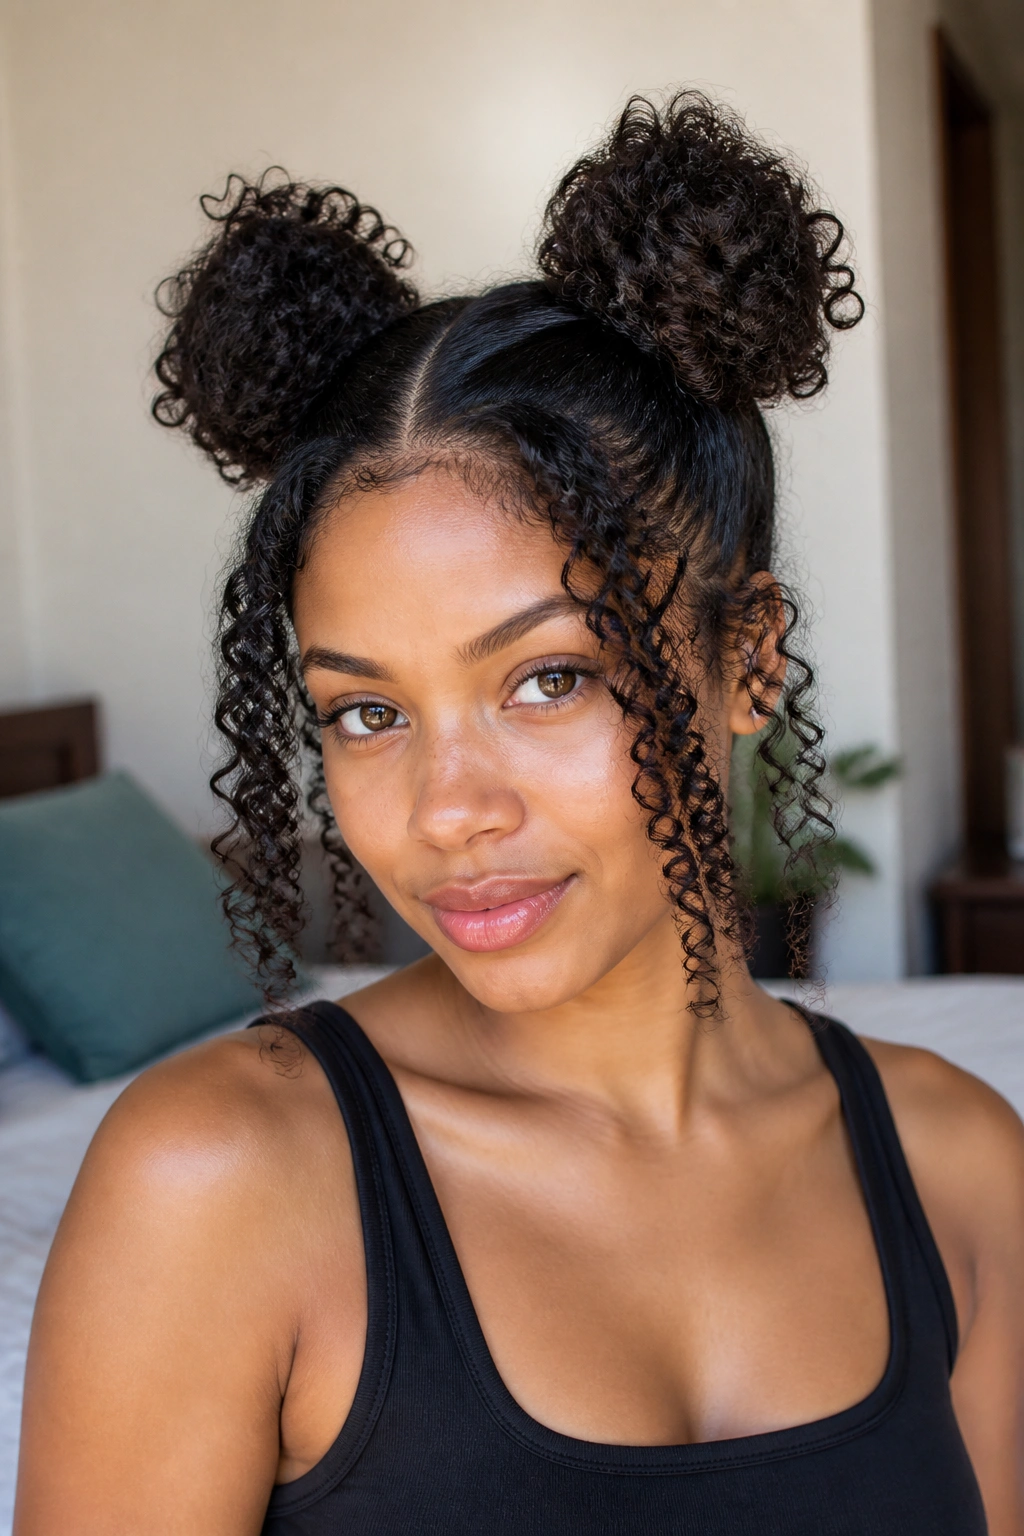
Space buns give curls a playful shape without asking the whole head to behave the same way. Two buns, two focal points, and a little curl left out at the ends can make the style feel casual in the best way.
I like this when the curls are still defined but the roots have gone a little soft. Part the hair down the middle, gather each side high, and twist or wrap each section into a bun. Leave the ends curly if the length allows. If not, coil the ends around the bun and pin them in place so the texture still shows.
One sentence is enough here: symmetry is the whole game. If one bun sits an inch higher than the other, you’ll notice it every time you look in the mirror.
A few front pieces can make the style even better. Pull out a small section near the temples and define it with a bit of mousse or gel so it frames the face instead of frizzing out by noon. Space buns work because they turn shrinkage into shape rather than fighting it. That’s a smart move on curly hair.
12. Side-Part Curly Fro With a Defined Front
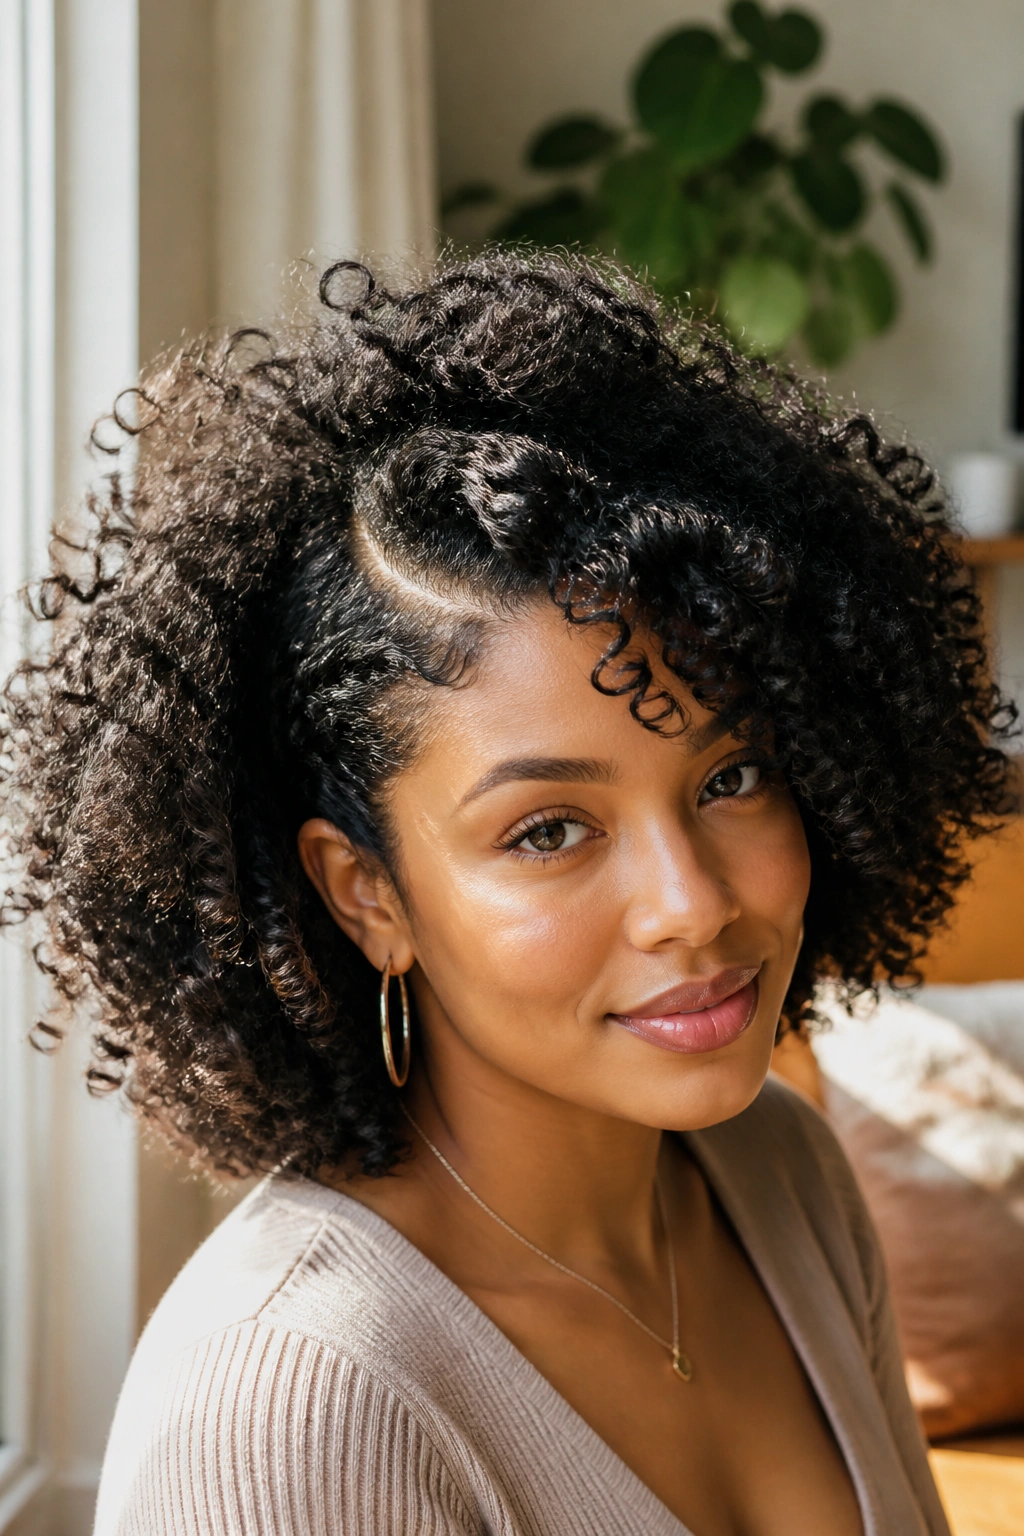
You do not need to pin everything up to make curls look polished. Sometimes the cleanest answer is a deep side part, a little root lift, and enough definition near the face to make the whole shape read as deliberate.
This style is especially good when the curls are soft but still clumped well. Create the part while the hair is damp so it holds better, then set the front section with finger raking or a small brush if that suits your texture. The rest can stay free. A curl fro with a side part looks fuller than a center part on many faces because the weight falls to one side and gives the style more movement.
The front deserves a bit of extra care. A few defined pieces near the cheekbone can make the cut look sharper, even if the rest of the hair leans fluffy. That contrast is the point. You do not need every strand to behave the same way.
A side part also helps on days when the crown is flat. Shift the line, fluff the roots with your fingertips, and the shape changes fast. No extra styling needed, which is about as practical as curly hair gets.
13. Sleek Puff With Defined Front Pieces
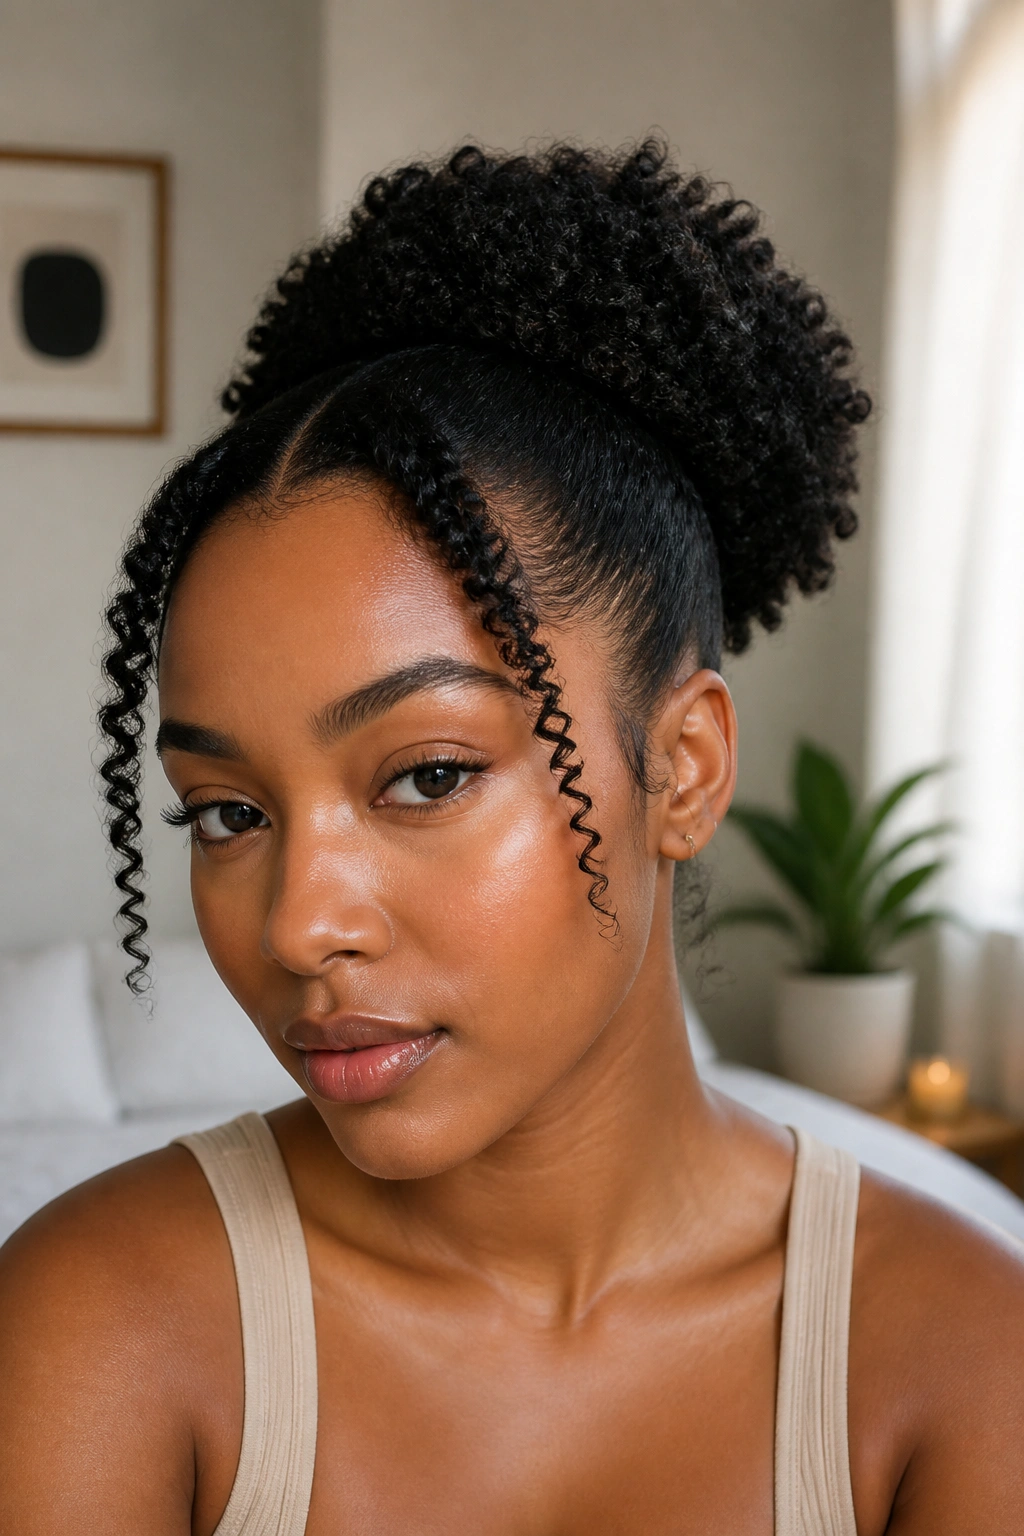
A sleek puff keeps the base smooth and lets the curls at the back stay full, which is a nice change from styles that either flatten everything or leave everything loose. It gives you height, a neat hairline, and enough curl texture to keep the look from feeling severe.
Start with a clean part or a brushed-back front, then smooth the perimeter with gel or mousse. I prefer using a light hand at the hairline and saving the stronger hold for the edges that actually need it. A thick layer at the front can flake when it dries. Thin layers dry cleaner and feel lighter.
Leave a few front pieces out if you want the face to soften. Those pieces can be finger-coiled, twirled, or brushed through once and allowed to spring into a gentle wave. The contrast between the sleek front and the full puff behind it is what makes the style interesting.
What to Watch For
- Keep the puff band wide enough so it does not dig into the scalp.
- Smooth the base in sections, not all at once.
- Let the front dry before you touch it again.
- Avoid heavy oils at the roots; they can make the style slide.
This one is practical, fast, and a little dramatic in the best way.
14. Rolled Tuck Into a Low Chignon
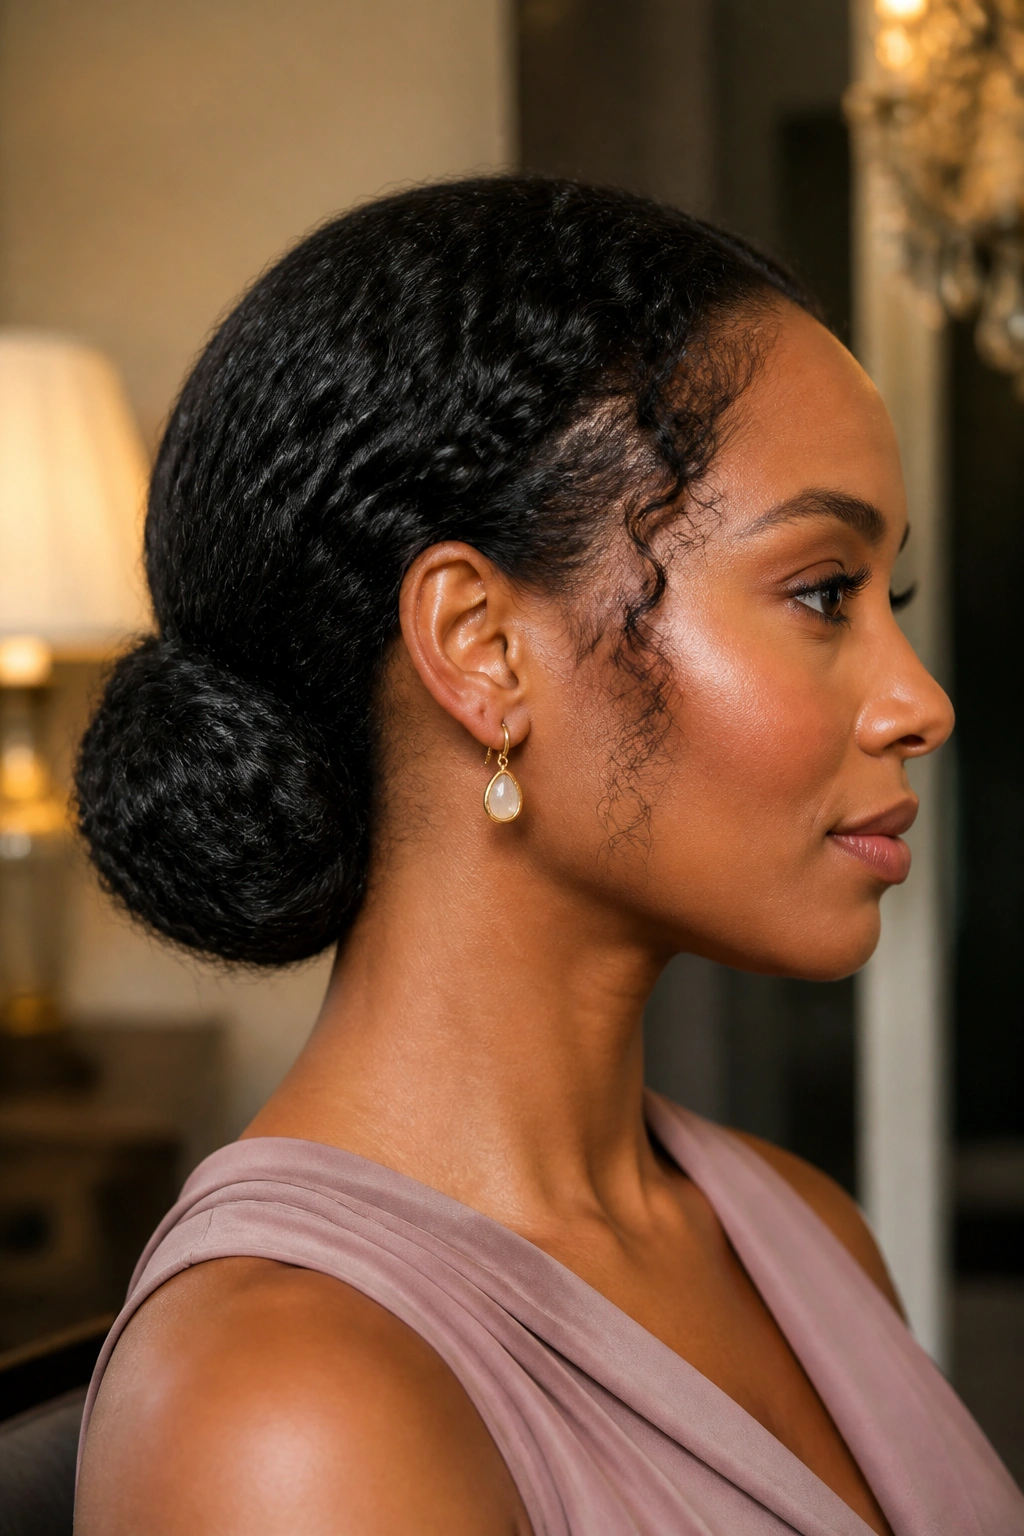
When the ends are older and the roots still look good, a low tuck saves the day. A rolled chignon sits close to the neck, keeps the curls contained, and can look more elegant than a plain bun without asking for salon-level precision.
This style works on stretched curls, twist-outs, or even a blown-out base. Pull the hair back gently, roll the lengths upward or inward, and tuck the ends into the fold. Use bobby pins or U-pins to hold the shape. If your hair is layered, anchor the shorter pieces first, then pin the longer pieces over them so the surface looks smooth.
A low chignon is also kind to the ends. They stay hidden, which means less rubbing against collars and less dryness by the time you take the style down. That matters on curly hair, where the oldest ends are usually the first to fray.
You can keep it neat or leave a few curly pieces around the temples. A clean tuck looks formal. A few soft pieces make it easier to wear for a normal day instead of a dress-up moment. Both versions work.
15. Headband Style With Finger-Raked Definition

A stretchy headband can rescue curls faster than almost any other accessory. It keeps the face open, hides a rough root area, and still lets the definition on the lengths do the talking.
Place the band about an inch behind the hairline, then push the curls back just enough to create soft volume at the crown. If the front pieces need help, finger-rake a little leave-in or water-based mist through them and twist the ends around your fingers once or twice. That tiny bit of shaping goes a long way.
The style works for days when the curls are not perfect but are still worth wearing down. You get a cleaner outline without losing the texture. You also get a break from manipulating the whole head, which is useful when the hair has already been stretched, slept on, or restyled a few times.
If you want the fastest fix in this whole list, this is it. It takes almost no time, it plays well with frizz, and it does not hide the hair the way a full updo can. On curl days that feel a little rough, that matters.
A final thought: the best hairstyles for defined natural curls are the ones that respect the curl pattern instead of fighting it. Some days that means gel and a diffuser. Some days it means a braid, a knot, or a puff that lets the shape hold while the ends stay protected. Pick the style that matches the time you have, the length you’re working with, and how much of your own texture you want to show.
