



The trick to salon-made hair color is rarely the shade itself. It’s the placement. A caramel brunette can look flat or rich, a blonde can look striped or soft, and the difference usually comes down to where the light starts, where it stops, and how the root is handled.
That’s why the best hair color techniques are never only about “going lighter” or “going darker.” They’re about direction, section size, saturation, depth, and the little bits that most people never notice at first glance. Good colorists think like painters, yes, but also like architects. One wrong line near the part can make the whole head read harsher than it should.
I’m a fan of color that moves when the hair moves. If a style only looks good in a front-facing selfie, it usually falls apart once the head turns or the light shifts. The techniques below earn their place because they create dimension, softness, and contrast that still make sense two inches away from a mirror.
Some of these are subtle. Some are louder on purpose. All of them can look expensive when they’re done with clean sections, the right tone, and a little restraint — not sloppy paint and a hopeful toner bowl.
1. Balayage
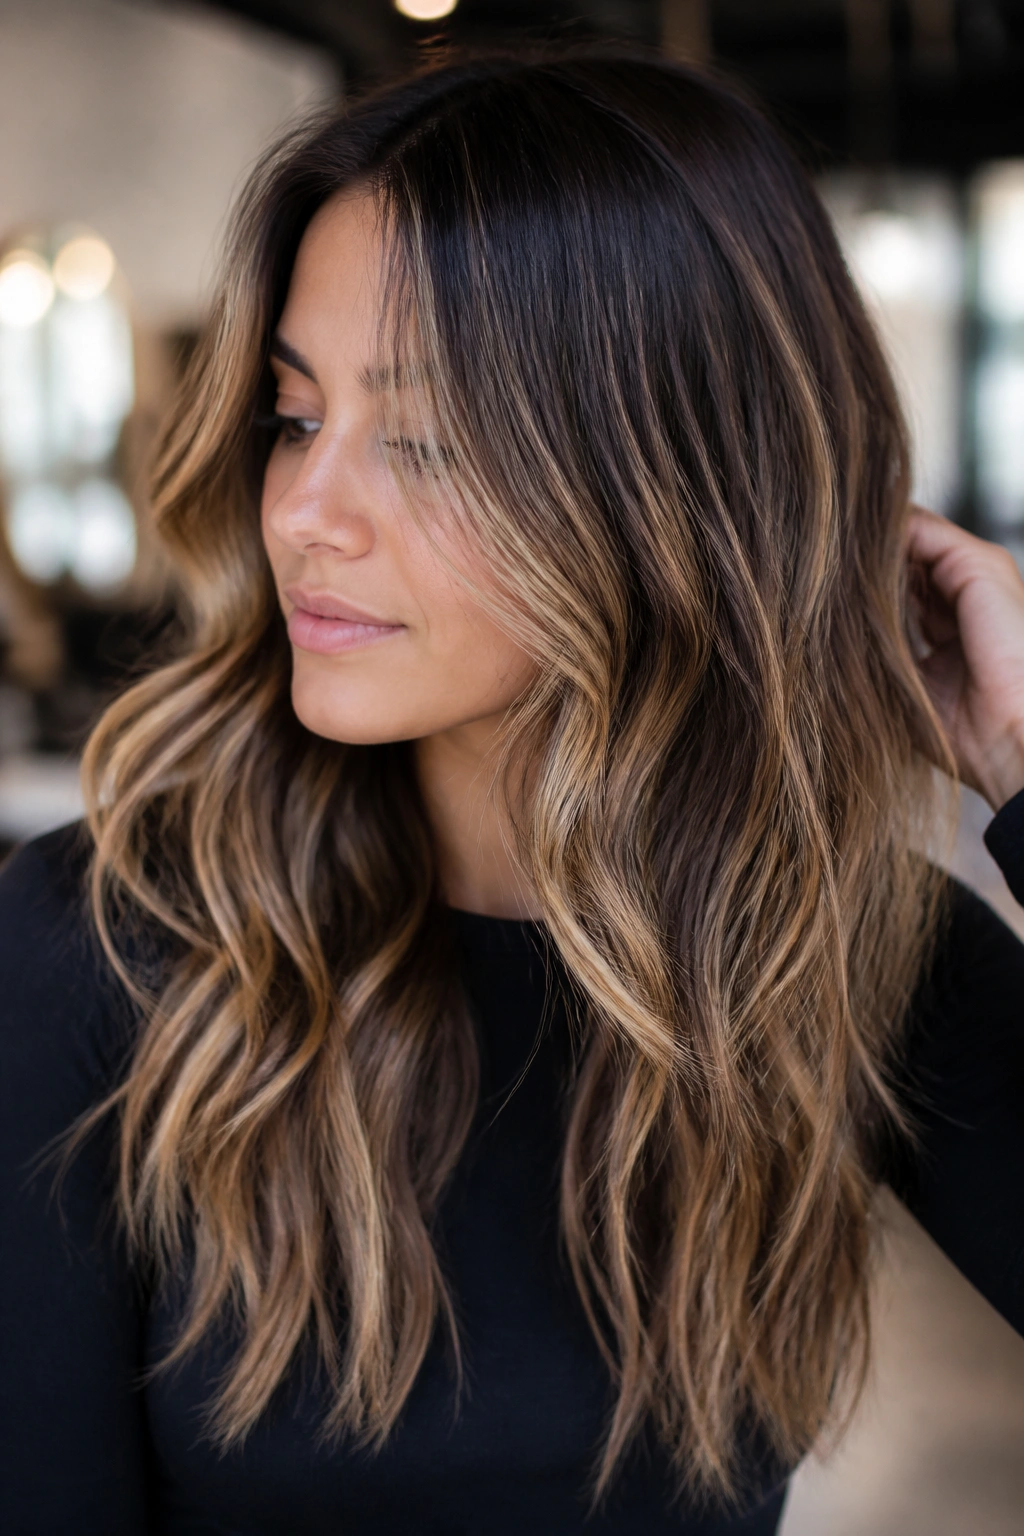
Balayage is still the easiest way to make hair color look soft instead of striped. The word gets thrown around so much that people sometimes forget what it actually is: hand-painted lightness placed where the hair would naturally catch sun, not plastered from root to tip.
What makes balayage read as salon-made is the way it leaves the root area calmer. A good colorist usually starts lower on the head, then builds brightness through the mid-lengths and ends. That keeps the grow-out line from looking harsh. It also gives the hair that easy, lived-in movement that flat foil work can miss if the placement is too even.
Where Balayage Should Start
The best balayage rarely begins right at the scalp. It usually starts somewhere around the top third of the strand or lower, depending on the haircut and how much lift the hair can handle. That little gap near the root is what keeps the color from looking pasted on.
Short layers need a lighter hand. Long waves can take broader strokes. And if the ends are porous, the painterly bits should be feathered even more carefully so they don’t grab too dark or too pale.
- Paint more brightness where the hair bends.
- Keep the root area softer than the ends.
- Use a dry, airy hand near the face.
- Leave some untouched pieces for contrast.
Best for: waves, curls, layered cuts, and anyone who wants dimension without obvious lines.
2. Traditional Foil Highlights
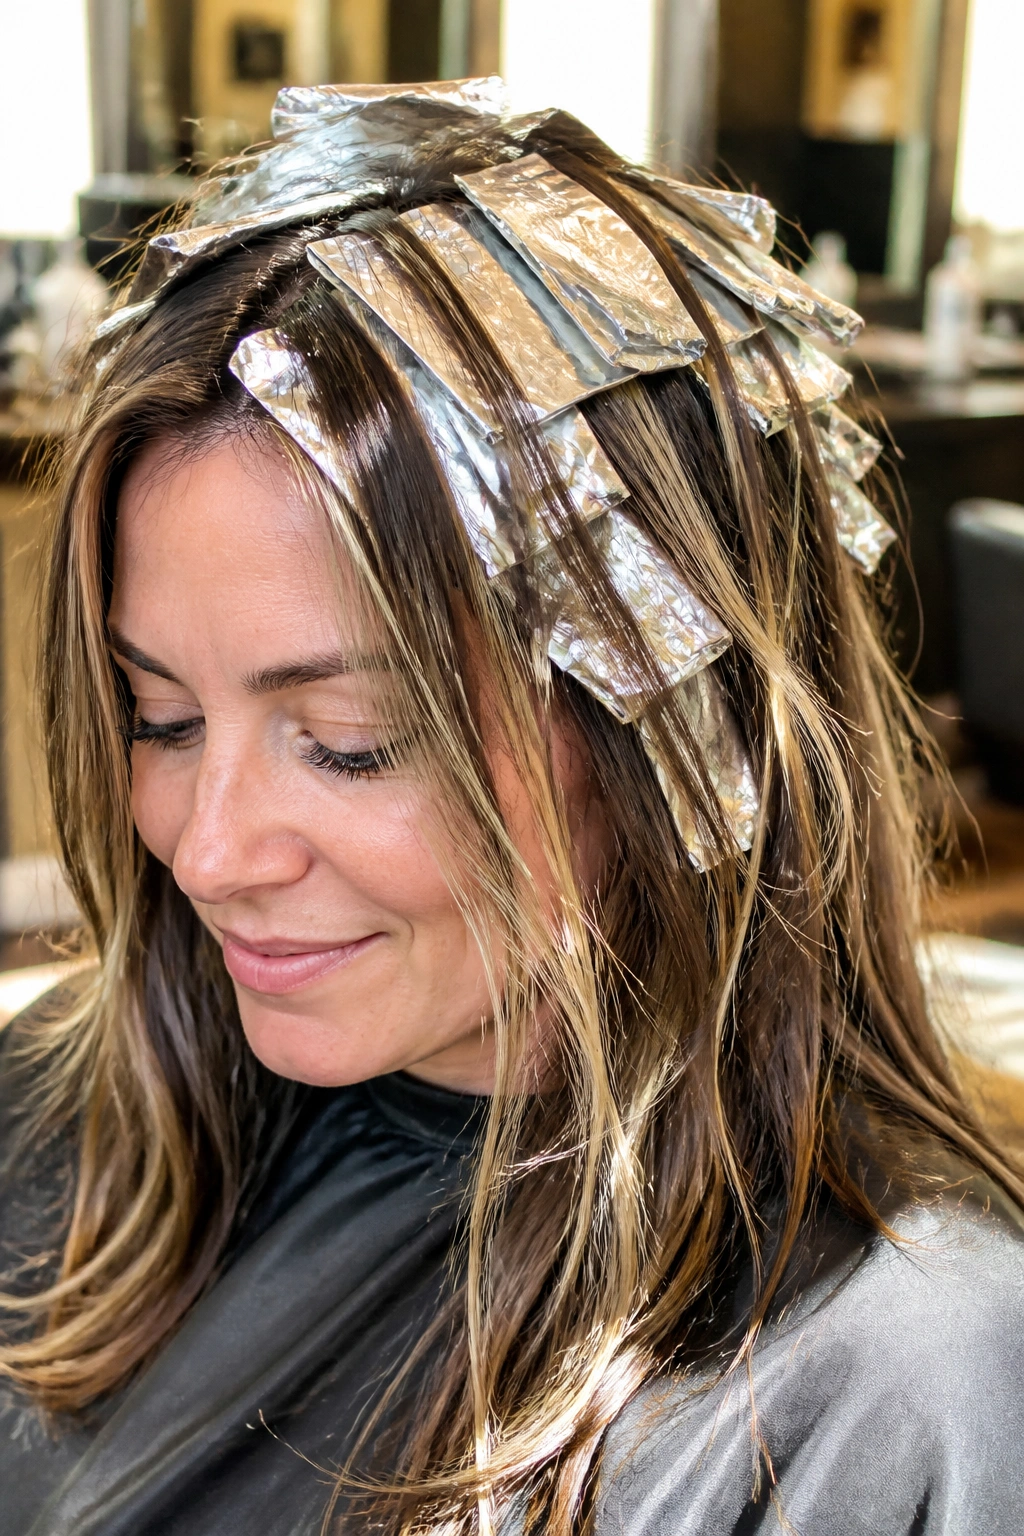
Foils are the blunt instrument of hair color, and I mean that as a compliment. When you want real brightness, clean lift, and a controlled result, foil highlights still do the heavy lifting better than most methods.
The reason they look salon-made is simple: foils give you precision. A colorist can choose exactly how fine or wide each slice should be, how much saturation it gets, and how warm or cool the lifted piece will read once it’s toned. That control is what keeps blondes from turning patchy and brunettes from looking muddy.
Foils are also the better choice when the hair needs extra lift. Dark bases, resistant strands, and coarse textures often respond better when the hair is wrapped and insulated. The foil traps heat and keeps the lightener working evenly, which matters more than people think. Uneven lift is where the cheap look starts.
Use finer weaves for a softer finish. Use a mix of fine and medium slices if you want brightness without the old-school zebra effect. The result should feel deliberate, not sprayed on.
3. Babylights
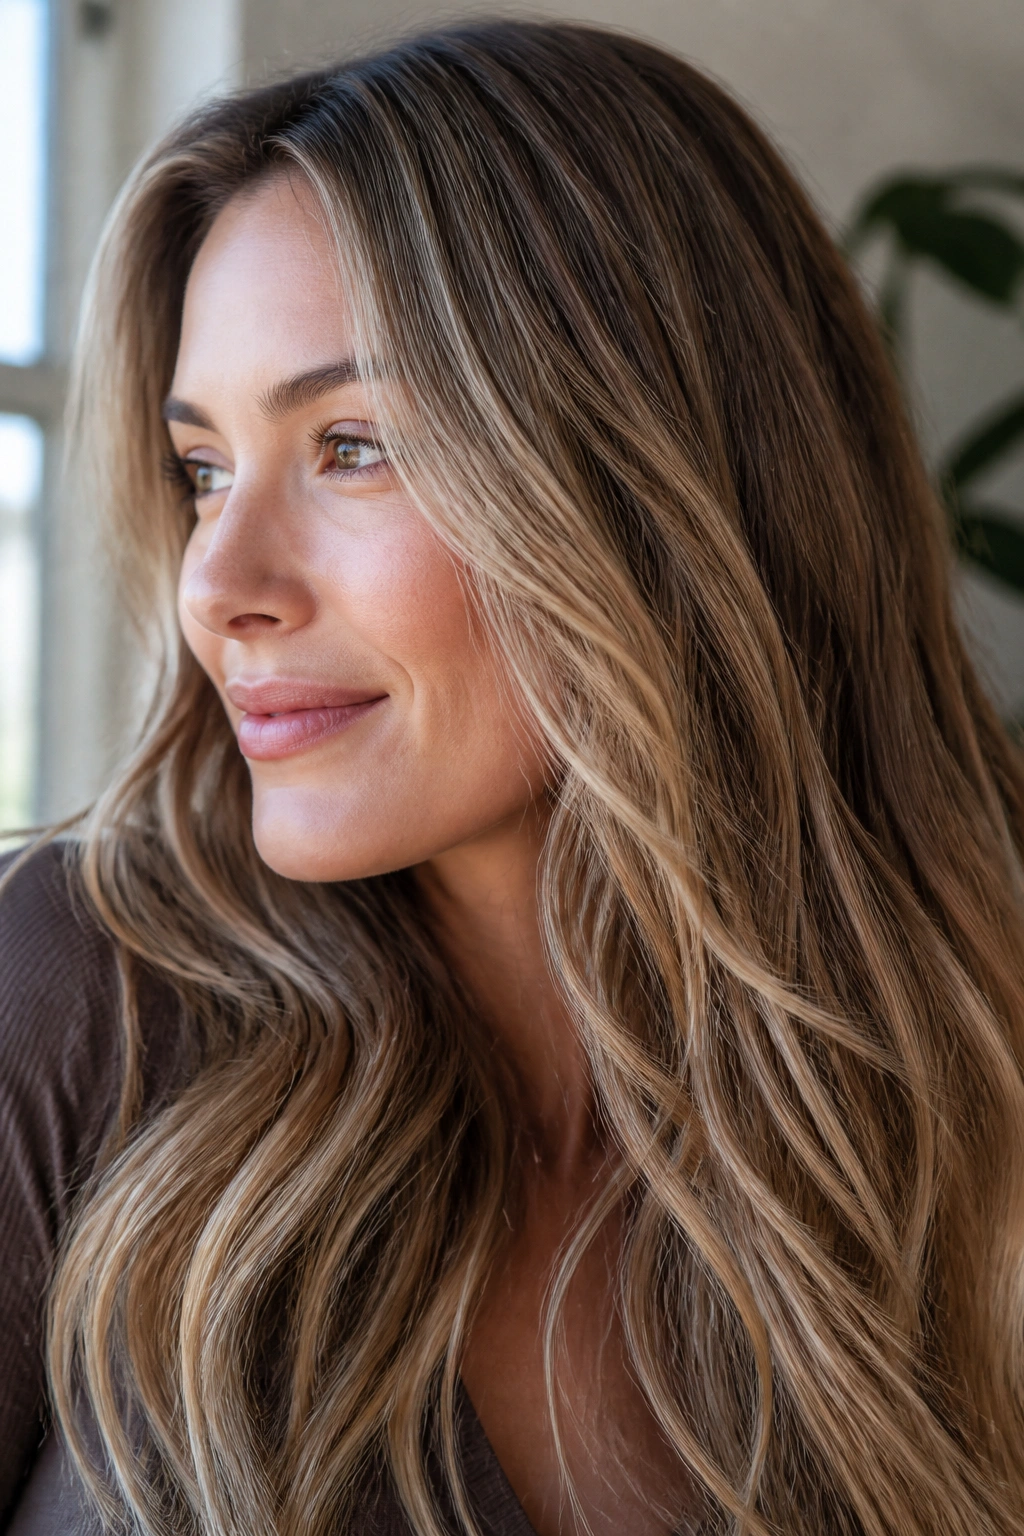
Why do some blondes look airy and others look streaky? Babylights are a big part of the answer. They’re tiny, fine highlights woven in very narrow sections so the color reads like a soft shimmer instead of obvious lines.
The magic is in the size of the slice. Babylights often use micro-weaves, sometimes only a couple of millimeters wide, especially around the part line, hairline, and crown. That gives you a brighter look without the chunky contrast that can make hair seem overprocessed. It’s a slower service, no doubt, but the finish is worth it when the goal is a delicate lift.
Micro-Sections Matter
Babylights look best when they’re placed with patience. If the pieces are too wide, they stop being babylights and start looking like ordinary highlights. That’s the whole game.
They’re especially useful on fine hair, because fine strands can get overwhelmed fast. Tiny ribbons of light add movement without making the hair look sparse. On darker hair, babylights can be layered over a deeper base to create the illusion of thickness.
- Keep the sections narrow near the face.
- Use them at the part line for brightness where people actually look.
- Pair them with a soft toner so the contrast stays gentle.
Best for: first-time blondes, fine hair, and anyone who wants a polished, almost whisper-soft finish.
4. Teasy Lights
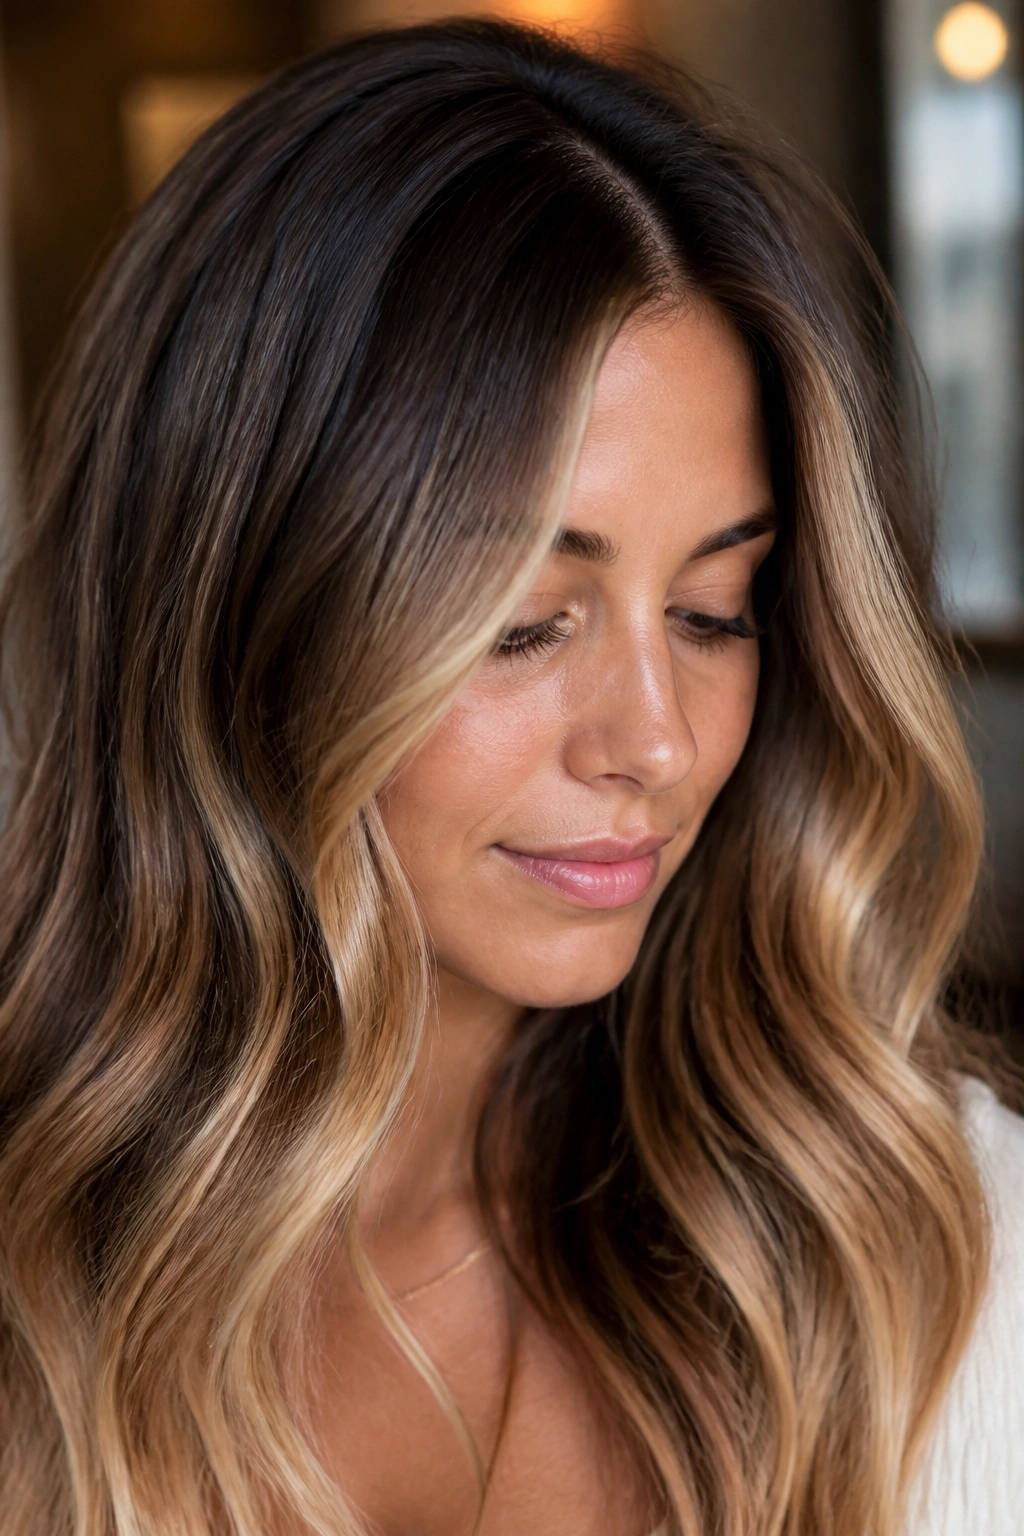
A client wants brightness but hates obvious foils. That’s where teasy lights earn their keep. The root area is lightly backcombed before lightener is applied, and that teasing creates a soft blur so the grow-out line doesn’t hit like a wall.
It’s a clever trick. The teased section protects the root from lifting too hard while still allowing the ends to lighten. That gives the stylist a built-in buffer, which is why teasy lights often look softer than regular highlights even when they’re fairly bright.
What Teasing Actually Does
The tease is not there to make the hair messy. It’s there to diffuse the transition. Shorter hairs stay at the top of the tease, longer hairs slip into the foil or lightener, and the result is a feathered blend instead of a clean stripe.
This technique shines on brunettes going lighter because it softens the line that usually gives away foil work. It also helps on haircuts with lots of layers, where a hard highlight line can look choppy.
Do not over-tease. Too much backcombing can trap product poorly and leave the ends looking tired instead of lifted. A gentle tease, placed with intention, is enough.
5. Foilyage
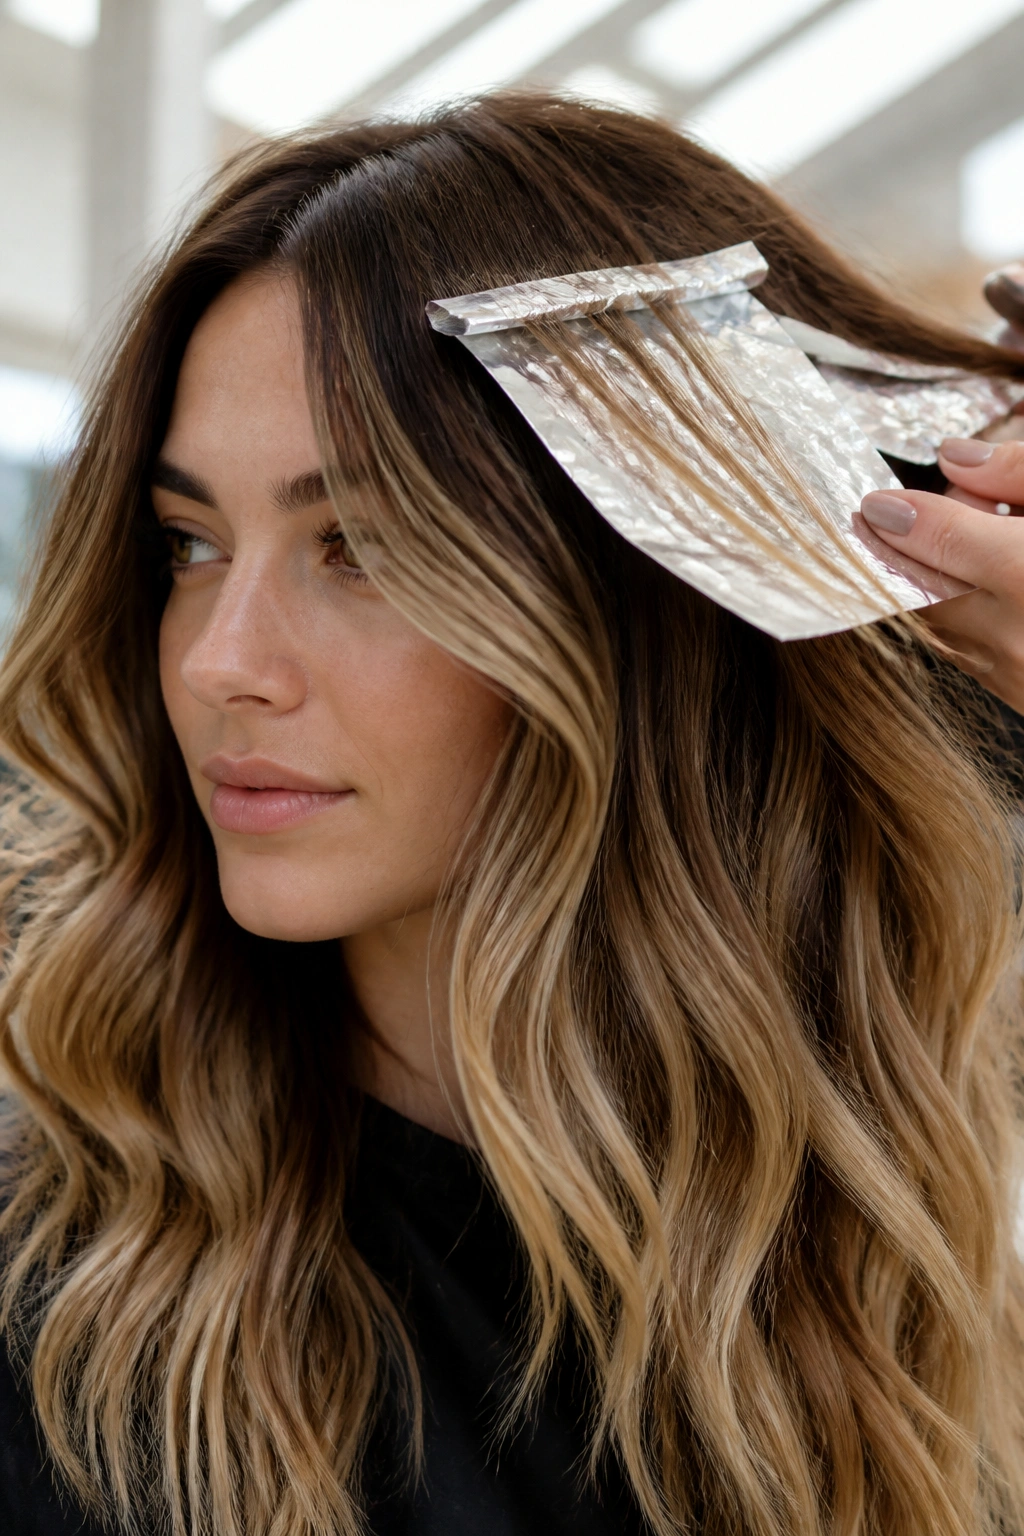
Foilyage sits between hand-painting and foil work, and that’s why it catches so many people off guard in the best way. The colorist paints the hair like balayage, then wraps selected pieces in foil to push the lift a little further.
That combination matters. You get the soft placement of balayage, but you also get the extra brightness and control that foils provide. The finished color tends to look airy at the ends and blended at the root, which is a good place to be if you want brightness without a harsh line.
Foilyage is especially useful on darker bases that resist lifting in open air. If the hair needs more power to get pale enough, the foil gives it that push. It’s also smart for thick hair, because the foil keeps the heat even across a bigger amount of hair.
The key is not to over-pack the painted section. Foilyage should still feel loose and directional. If it starts looking like regular foil highlights with a new name, the softness is gone.
6. Root Shadow
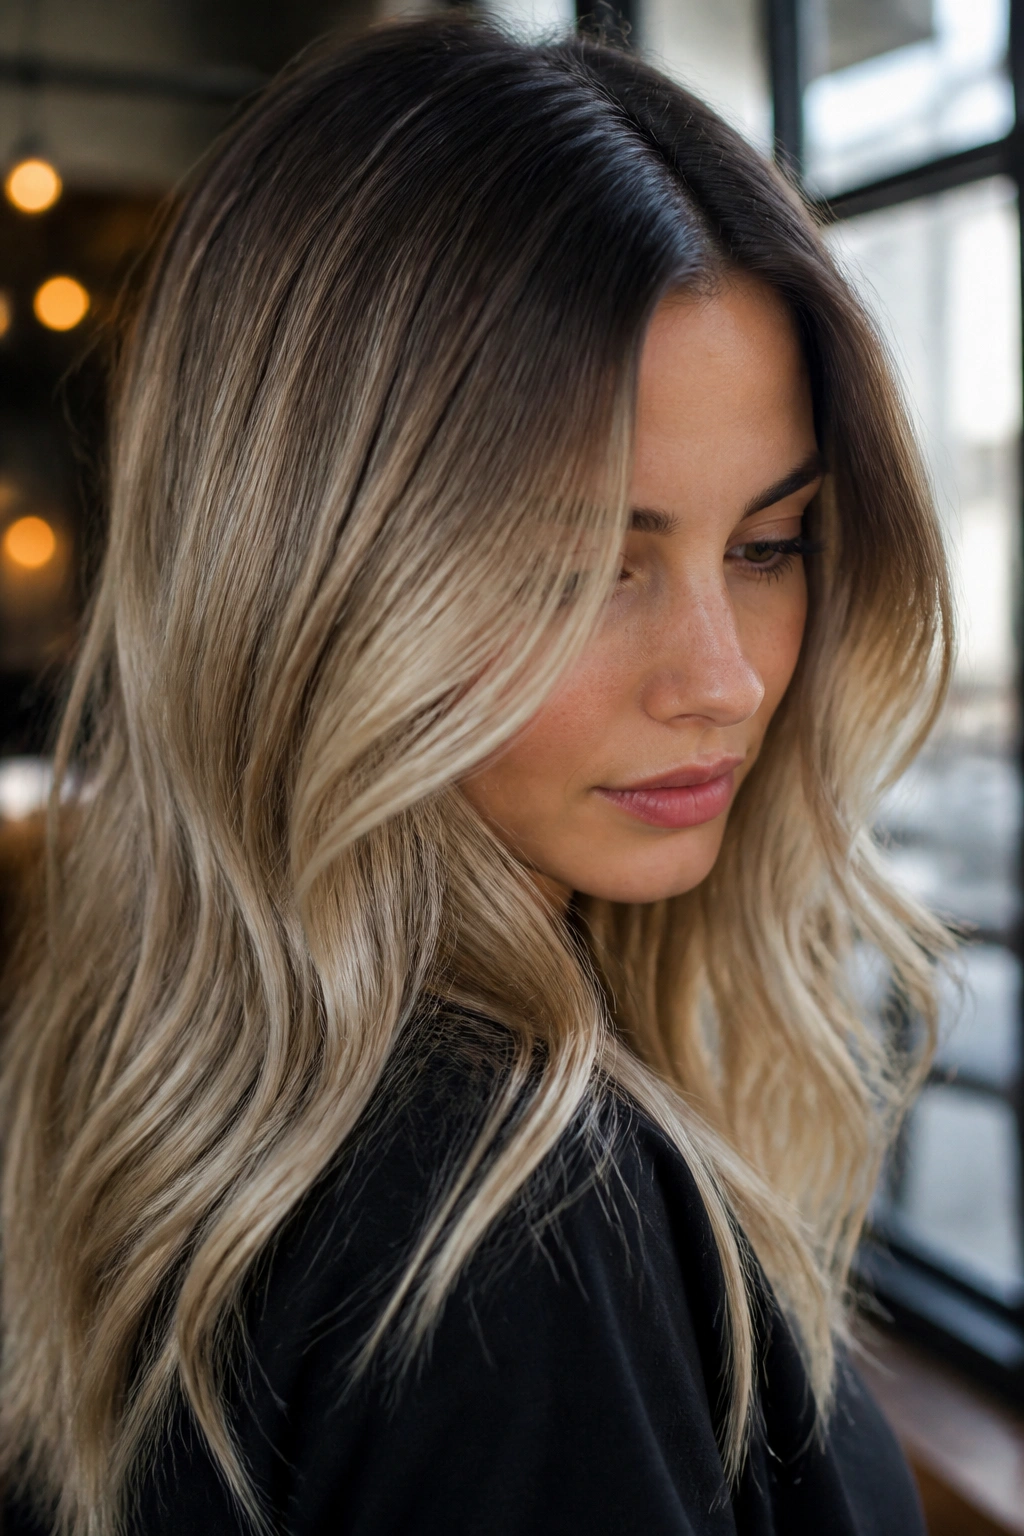
A shadow root is the reason blonde can grow out without screaming for attention. The root area is toned slightly deeper than the rest of the hair, creating a soft transition between natural regrowth and lighter lengths.
What people like about this technique is that it makes bright color feel anchored. A pale blonde with a shadow root looks more believable than a blunt platinum base that starts right at the scalp. It also buys time between salon visits, which is useful whether the color is cool, beige, or warm.
The shade at the root usually only needs to be one or two levels deeper than the lighter pieces. Go darker than that and the melt can get too heavy. Go too close to the blonde and the effect disappears. The sweet spot is a soft blur, not a hard band.
This technique pairs well with balayage, foilyage, and babylights because it ties all the lighter pieces together. It’s one of those small salon moves that makes the whole head read cleaner.
7. Color Melt
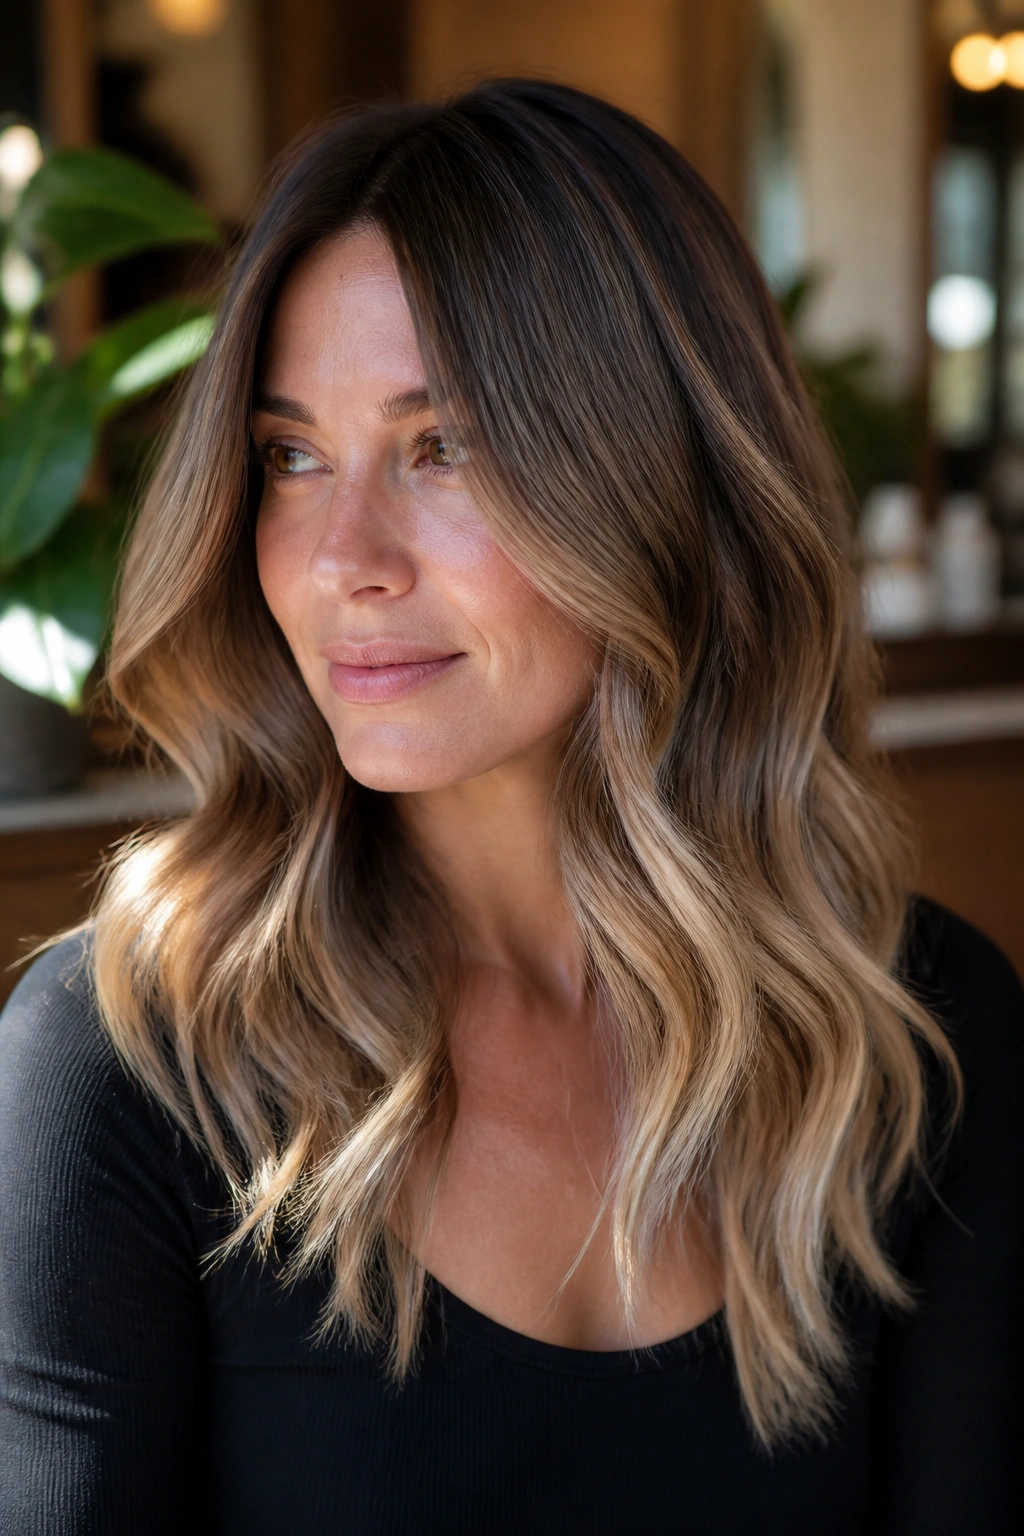
What happens when root, mid-length, and ends stop fighting each other? You get a color melt. This technique blends several tones into one continuous flow, so the eye never lands on a sharp line.
Color melt works because each zone is chosen to sit close to the one before it. The root might be a deeper neutral brown, the middle a softened caramel, and the ends a lighter beige blonde. The shades are not supposed to scream. They’re supposed to slide into each other.
The best melts look like they were built from the inside out. A colorist usually overlaps the transition zones a little, so there’s no obvious shelf where one tone stops and the next begins. That is where the expensive look comes from. Not from the exact colors, but from the way they meet.
How to Make the Blend Disappear
Start with undertones that play nicely together. Cool root with icy ends can look flat if the middle section is skipped. Warm root with warm ends can turn orange if the transition is too abrupt.
A strong melt also needs enough difference to show movement. If all three shades are too close, the result becomes muddy. If they’re too far apart, it becomes a stripe. Neither is the goal.
8. Money Piece

The money piece works because it steals light before the rest of the hair even gets a chance to. It’s the brighter section placed right around the face, usually at the hairline and just behind it, where the eye lands first.
This technique can be bold or soft. A narrow, bright money piece gives a quick lift without changing the whole head. A wider one makes a bigger statement and can wake up an otherwise muted brunette or blonde. The trick is to match the size of the bright section to the haircut and face shape, not to slap on a giant stripe because it looks dramatic in the chair.
I like this technique on layered hair, because the face-framing pieces can fall forward in a flattering way. On very fine hair, though, too much brightness near the front can make the hairline look thin. That’s where restraint pays off.
Keep the tone clean. A yellow money piece looks cheap fast. Beige, soft gold, or neutral blonde tends to behave better, especially near the face where skin tone matters more.
9. Face-Framing Highlights
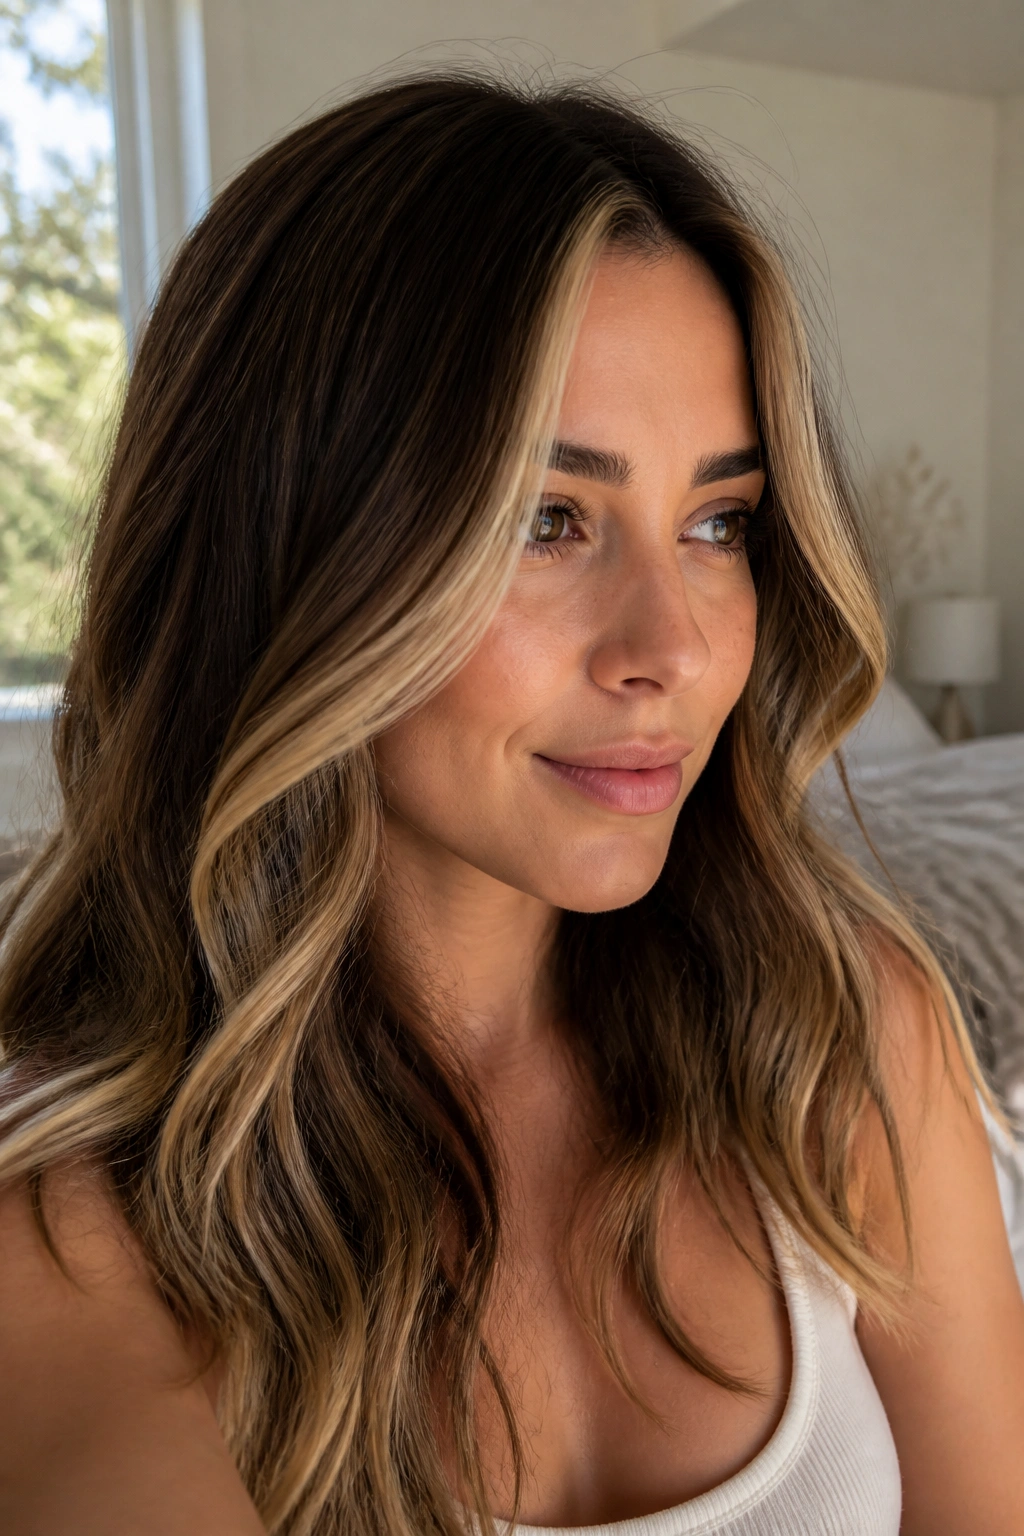
The money piece is not the only way to brighten a face. Face-framing highlights can be softer, subtler, and honestly more wearable when you don’t want a bold front streak.
These pieces usually sit from the temple down toward the cheekbone or jaw, depending on the cut. A good colorist places them where the hair naturally falls, which means the brightness shows when the hair is tucked behind the ear, waved, or clipped back. That little bit of movement is what sells the look.
Face-framing highlights are useful because they can change the mood of a haircut without changing the whole head. A brunette bob can feel lighter around the face. Long waves can look more lifted. Even a simple ponytail becomes more interesting when the front sections hold a little extra brightness.
Use these with a softer toner than you’d use on a full blonde service. The front pieces sit close to the skin, and anything too harsh or icy can look a bit stark.
10. Lowlights
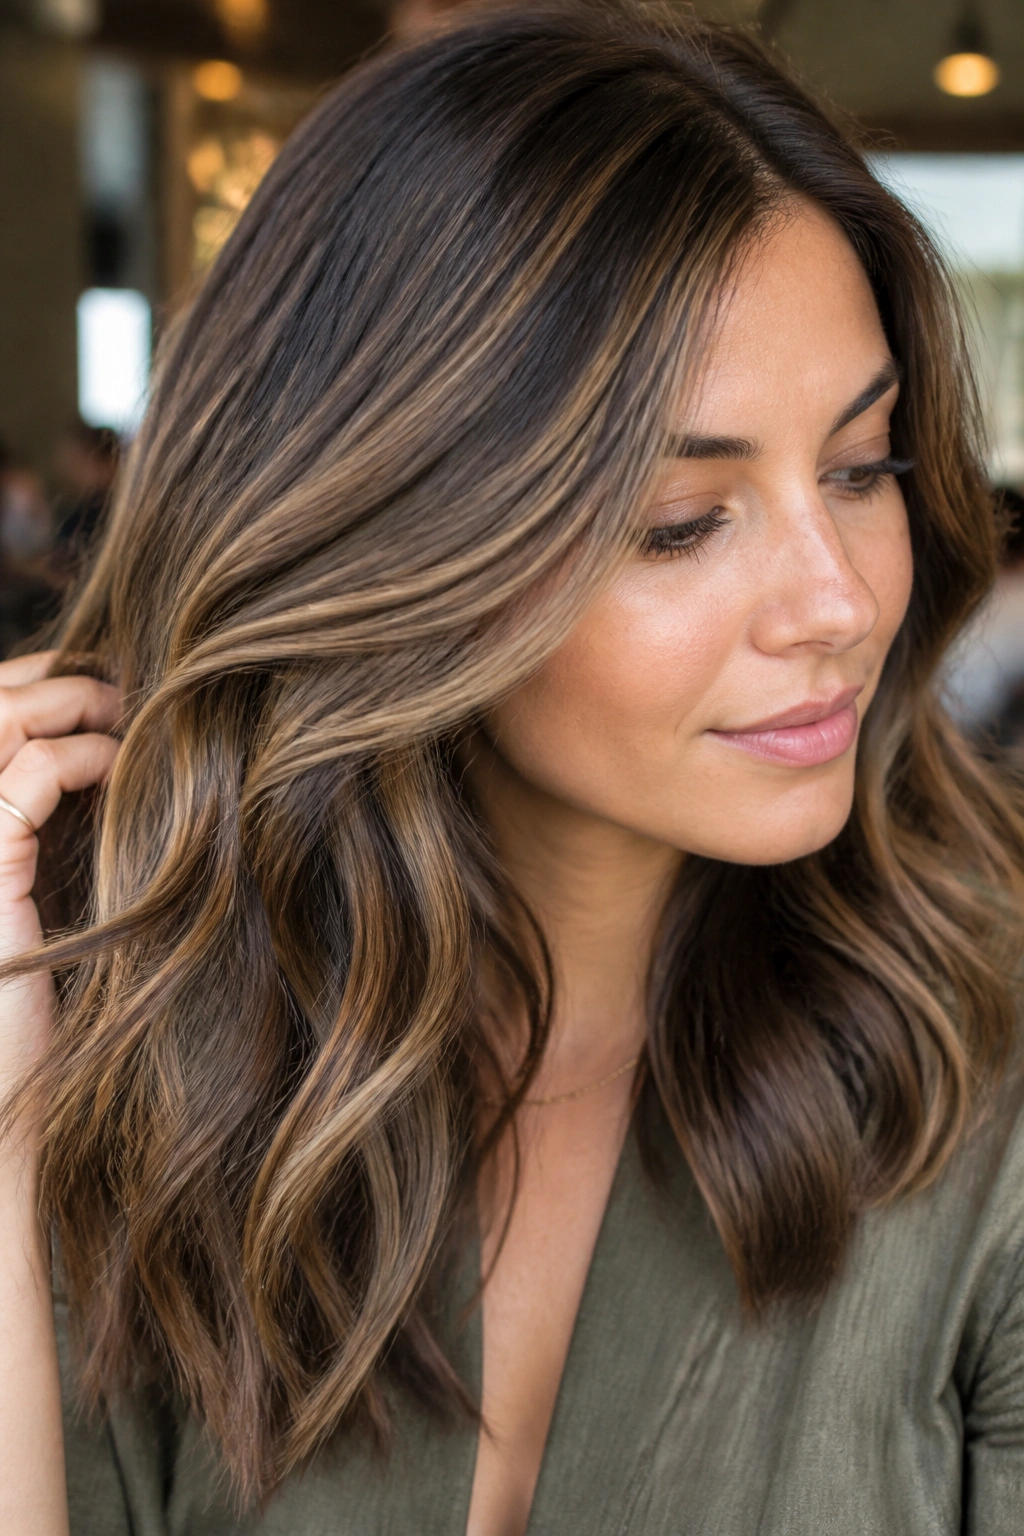
Too much light can make hair look thin. That’s the part people forget. Lowlights add darkness back into the hair, which gives the lighter pieces something to sit against and makes the whole head look richer.
A good lowlight is usually one or two levels deeper than the base, not a sudden leap into dark brown. The aim is contrast, not shadow. On blondes, lowlights can stop the color from looking washed out. On lighter brunettes, they can create the kind of depth that makes waves and curls look fuller.
Where Depth Helps Most
The best lowlights are not scattered at random. They’re usually placed where the hair needs visual weight — underneath brighter panels, through the mid-lengths, or near the interior of the haircut where light usually escapes.
- Use them to break up overly bright blondes.
- Add them near the nape for hidden depth.
- Keep them softer around the face unless the cut needs stronger contrast.
A flat blonde often needs lowlights more than another round of highlights. That sounds counterintuitive, but it’s true. Sometimes the fastest way to make hair look more expensive is to stop making it lighter.
11. Ribbon Highlights
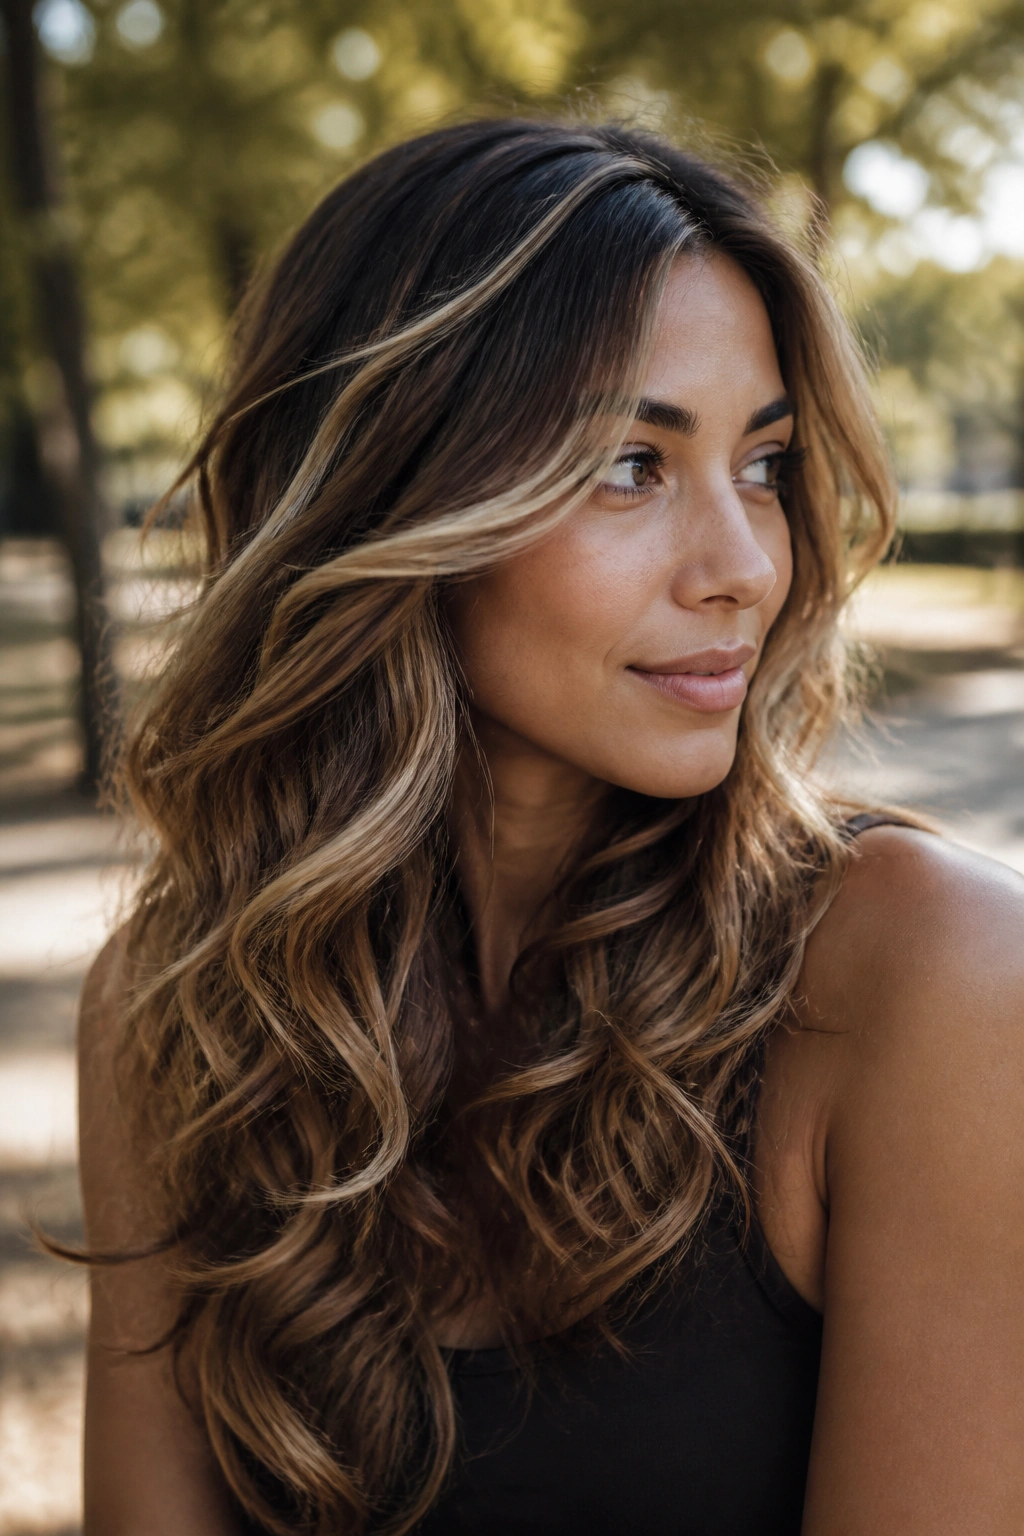
Ribbon highlights move like satin strips through curls and bends. They’re broader than babylights and softer than chunky streaks, which makes them one of the nicest techniques for hair that has natural movement.
The reason they look salon-made is the way they follow the hair’s shape. Instead of sitting like dotted lines, ribbon highlights curve through the mid-lengths and ends, letting waves and texture carry the light. On straight hair, they read more obvious. On loose curls, they melt into the pattern and look far more natural.
This is one of my favorite techniques for medium-length cuts, because the ribbons show up when the hair swings. They also help long layers avoid that heavy curtain effect where everything looks the same from top to bottom.
Tone matters here. If the ribbons are too cool against warm base color, the contrast can get choppy. A neutral or softly beige ribbon usually looks cleaner and more expensive.
12. Airtouch Highlights
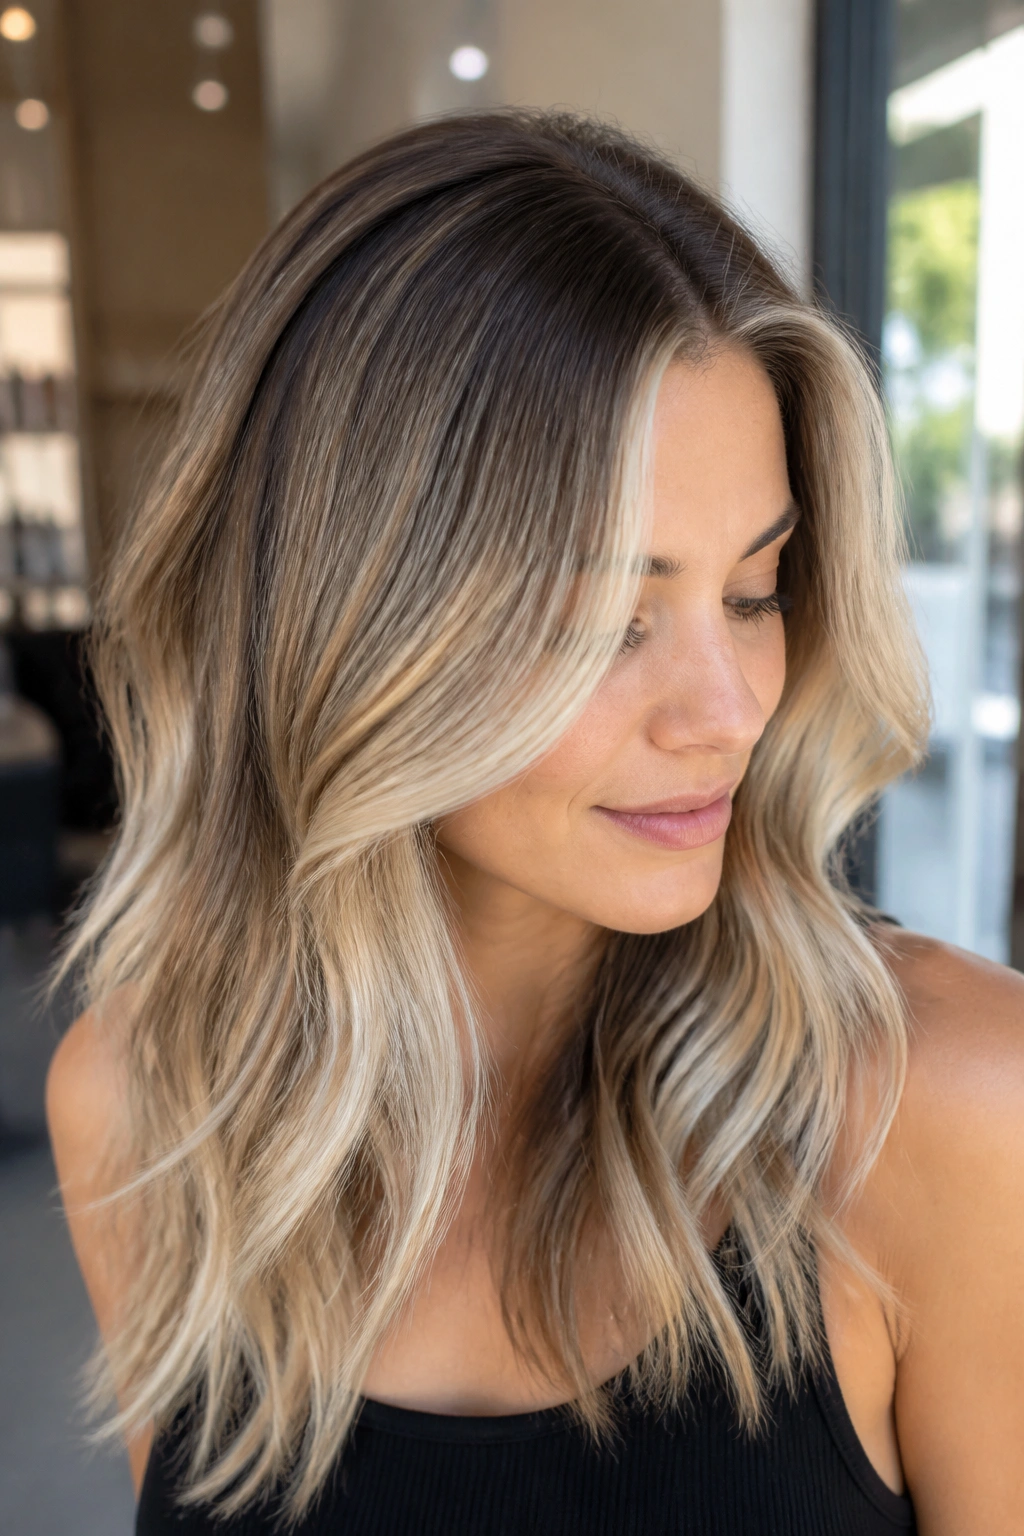
What if the shortest hairs never made it into the foil? That’s the whole trick behind airtouch. The hair is blown out with a dryer, and the shorter pieces are pushed away before lightener goes on the longer strands that stay in the section.
That gives you one of the softest blends in color work. The stronger strands get painted, the finer flyaway bits get left out, and the result is less of a hard demarcation at the root. It’s clever, and a little fussy, which is probably why it looks so polished when it’s done well.
Why Airtouch Grows Out Softly
The root area stays blurred because not every strand is forced into the same level of lift. That means the line between new growth and colored hair gets diffused from the beginning, not patched later with toner.
Airtouch is great for people who want dimensional blonde without that chunky foil look. It also works well on dense hair, where normal highlights can get crowded and heavy.
- Best on medium to thick hair.
- Useful when you want a clean blend near the crown.
- Better than standard foils if you hate obvious grow-out lines.
It takes time. No way around that. But the finish can be gorgeous.
13. Ombré
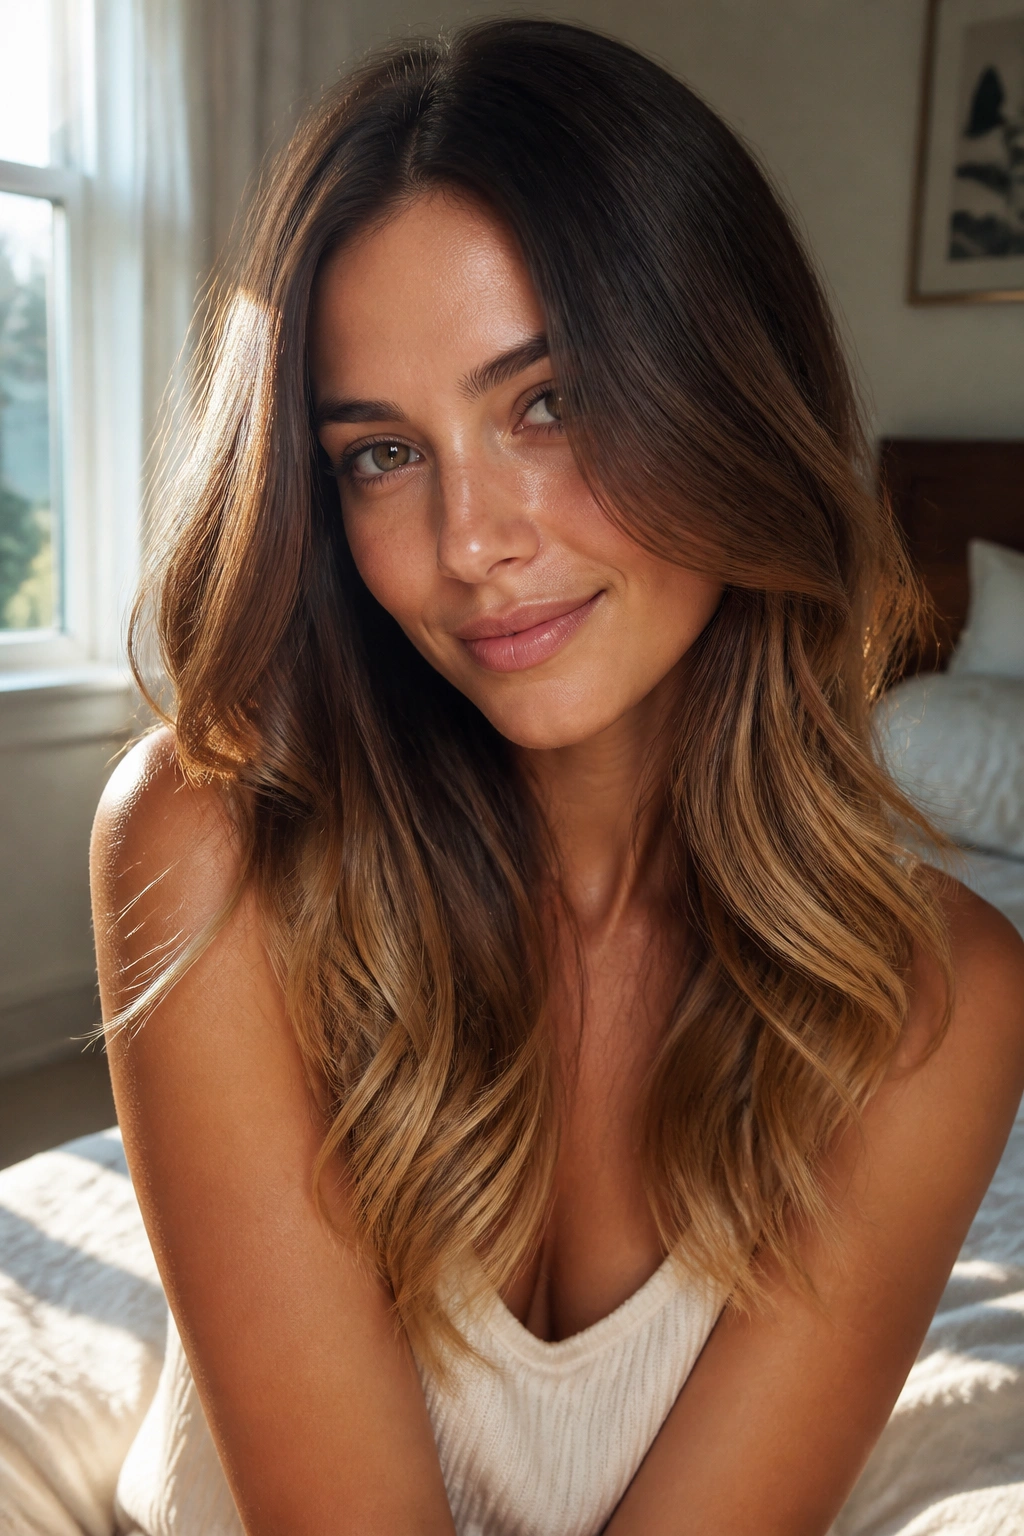
Ombré only looks cheap when the transition starts too high. Done properly, it’s a slow fade from darker roots to lighter ends, with the shift happening low enough on the head to feel deliberate.
That’s why modern ombré tends to start below the chin or even closer to the shoulders, depending on the haircut. The darker root keeps the color grounded, and the lighter ends create the visual payoff. If the gradient is smooth, the eye reads movement instead of a blunt color block.
This technique is especially useful for people who want a lighter look without constant root maintenance. Since the root stays darker by design, regrowth doesn’t interrupt the style as aggressively. The edges near the transition still need soft blending, though. If the line is too sudden, the whole thing slips into dip-dye territory.
Ombré works best when the tone at the ends is chosen carefully. Too much warmth can make the fade look brassy. Too much ash can make it feel flat. Somewhere in the middle is usually cleaner.
14. Sombre
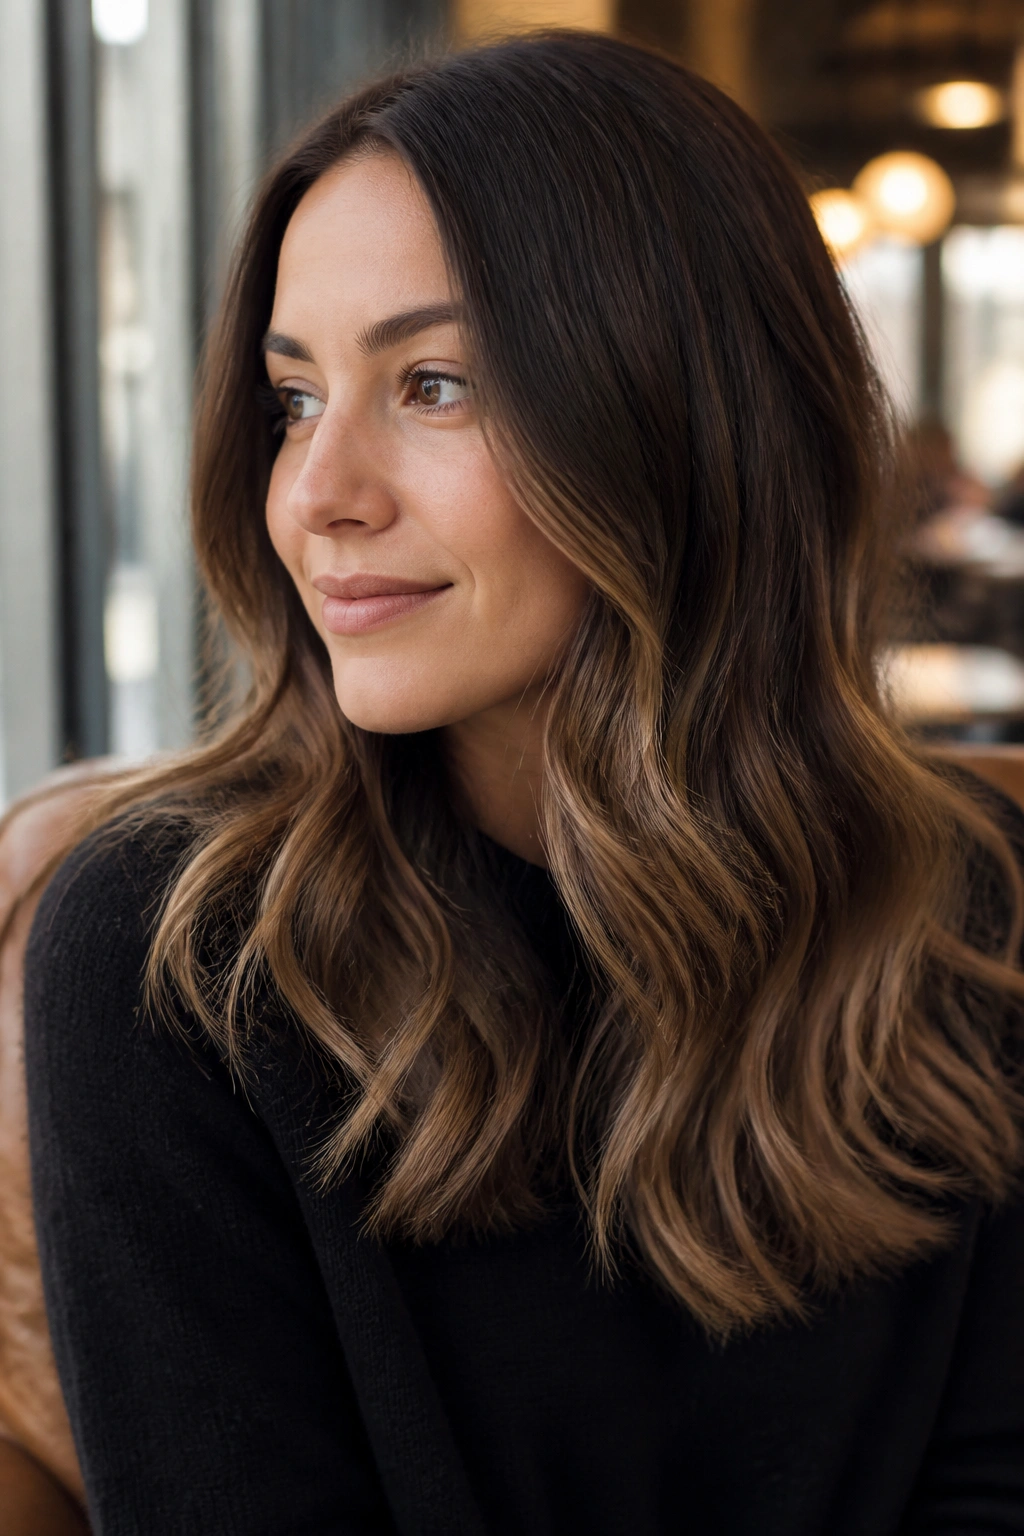
Sombre is ombré with the volume turned down. The dark-to-light shift is still there, but the contrast is softer, the ends aren’t as pale, and the overall finish feels more wearable for daily life.
This is one of those techniques that quietly makes hair look better without announcing itself. The root depth and the lighter ends are separated by only a small tonal gap, which means the result feels blended instead of dramatic. If ombré is a clear gradient, sombre is a fogged version of that same idea.
It works especially well on people who want dimension but dislike seeing obvious color bands. It’s also a good bridge for brunettes who want warmth around the face and lighter ends without going fully blonde.
The mistake is making sombre too subtle. If every shade sits within a whisper of the next, the hair can end up looking one-note. You still need enough contrast to show movement. Just not so much that it looks like a two-color experiment.
15. Chunky Highlights

Chunky highlights can look chic or dated in a heartbeat. The difference is all in the placement, width, and tone. Clean, intentional chunks with a soft root can look bold in a good way. Random thick stripes with no blending? Not so much.
The salon-made version uses fewer but wider sections, often placed where movement matters most — around the face, through the top layers, or in a pattern that works with the haircut. On shags, curls, and blunt cuts, chunky highlights can look sharp and fashion-forward when the contrast is planned.
A lot of people assume chunky color always needs to be loud. It doesn’t. A caramel chunk against a deep brunette base can be striking without looking cartoonish. Same with soft copper or beige blonde. What makes it feel intentional is the spacing. The chunks should have breathing room.
Don’t scatter them like confetti. That is the quickest path to chaos. One or two clean placements usually do more for the haircut than a dozen random stripes.
16. Peekaboo Color
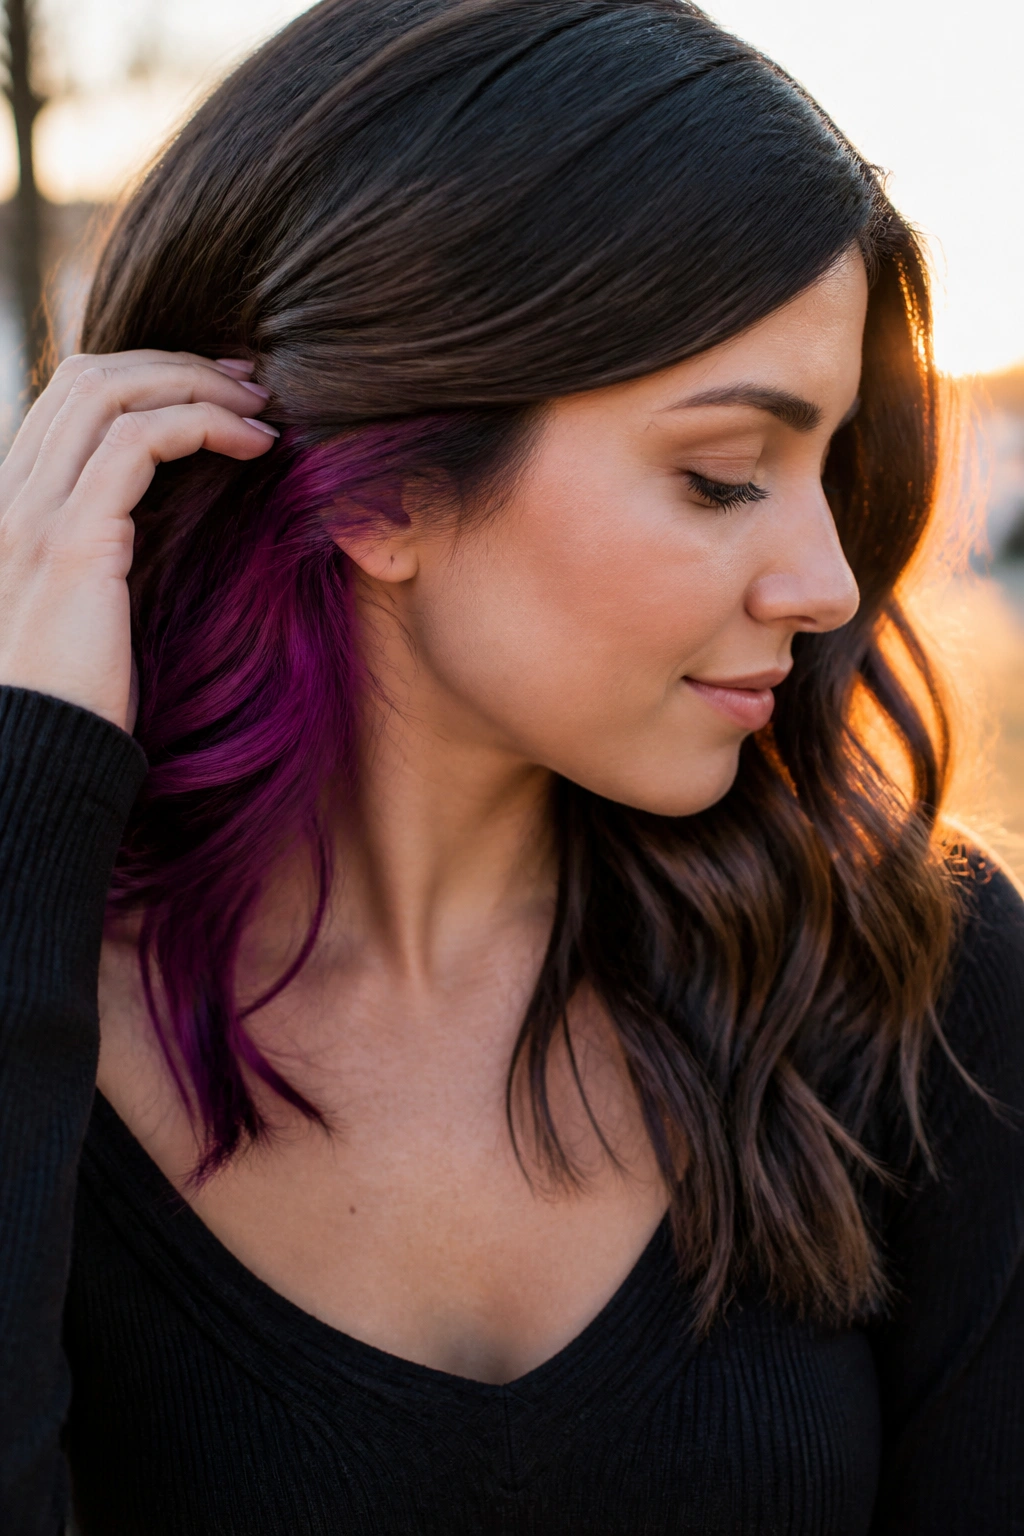
The most fun color is often the color nobody sees at first. Peekaboo color sits underneath the top layer, so it stays hidden until the hair moves, gets tucked behind the ear, or goes into a bun.
That hidden placement is exactly why it looks salon-made. The top layer stays polished and wearable, while the underneath panels carry the surprise. It can be a vivid shade, a soft pastel, or just a deeper contrast color if you want subtle drama instead of neon.
Peekaboo color works best when the haircut has enough movement to reveal it. Long hair, lobs, and layered shags are all good candidates. Straight, heavy cuts can hide it too well unless the color is placed high enough under the crown.
Maintenance is flexible here, which is a nice change. Since the color is tucked away, it can grow out a little more quietly than an all-over vivid shade. That makes it a smart option for people who want personality without needing the whole head to shout.
17. Panel Coloring
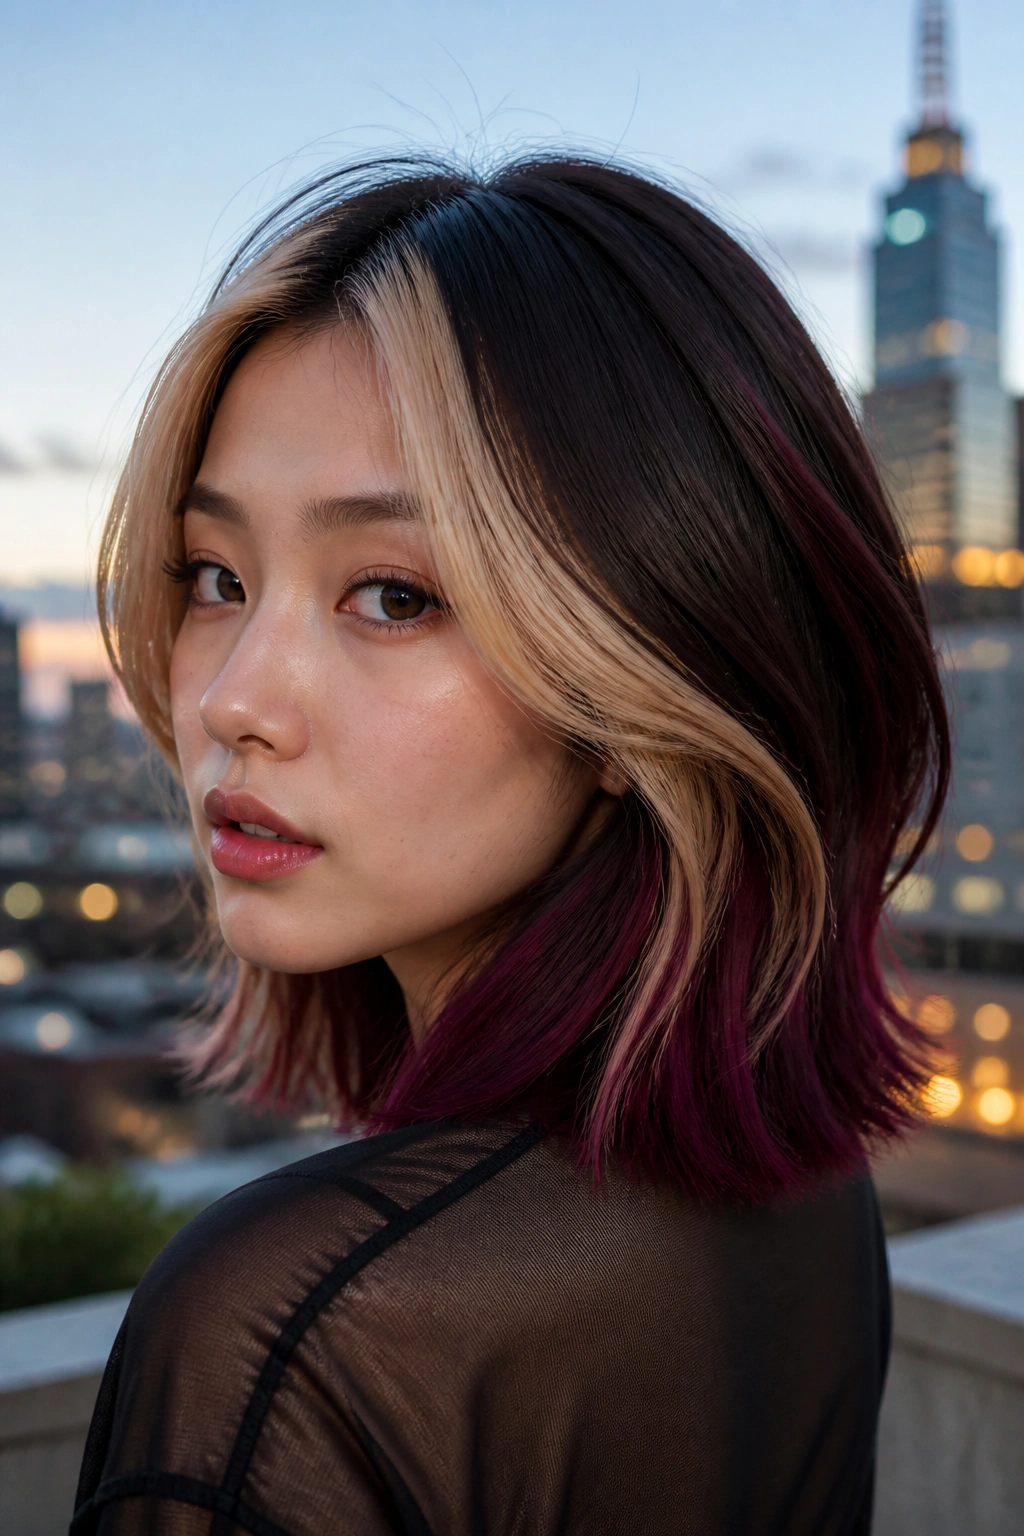
Panel coloring is the salon version of painting with blocks instead of brushstrokes. Instead of scattering highlights everywhere, the colorist works in deliberate zones — maybe a face panel, a crown panel, and an underlayer panel — so the final look has shape.
This technique is especially useful when a client wants dimension that feels graphic rather than soft. It can be subtle if the tones are close together, or bold if the panels contrast more. Either way, the result reads controlled. Nothing feels random.
The best panel color respects the haircut. A blunt bob can hold strong panels beautifully because the lines are clean. Layers need more care, since chopped sections can make the divisions too obvious if the placement is lazy.
One good rule: keep the panels connected by tone or finish, even if the shades differ. That prevents the hair from looking like separate pieces fighting each other. The color should feel designed.
18. Glossing and Toning

Why does salon color sometimes look shiny even when the shade itself is simple? A lot of the answer is glossing. This finishing step adds translucency, adjusts tone, and smooths down the look of the cuticle so the color reflects light more evenly.
A gloss can be clear, beige, golden, smoky, or anything in between. A toner is usually more specific about neutralizing unwanted warmth or brass, while a gloss focuses more on shine and softness. In practice, the two often overlap, and stylists use both to make the color feel finished instead of raw.
Gloss vs Toner
A toner changes the visible tone after lightening. A gloss can do that too, but it often leaves a softer, more reflective surface. That’s why blondes often look better after a gloss, even when the underlying highlights have not changed much.
It’s also the easiest rescue step when color feels too matte or flat. A brunette with a neutral glaze can suddenly look richer. A blonde can look cleaner. A red can hold its shape longer without screaming orange at the edges.
Glossing is not dramatic. That’s the point. It’s the final layer that makes the whole color job feel like it belongs together.
19. Gray Blending with Micro-Foils
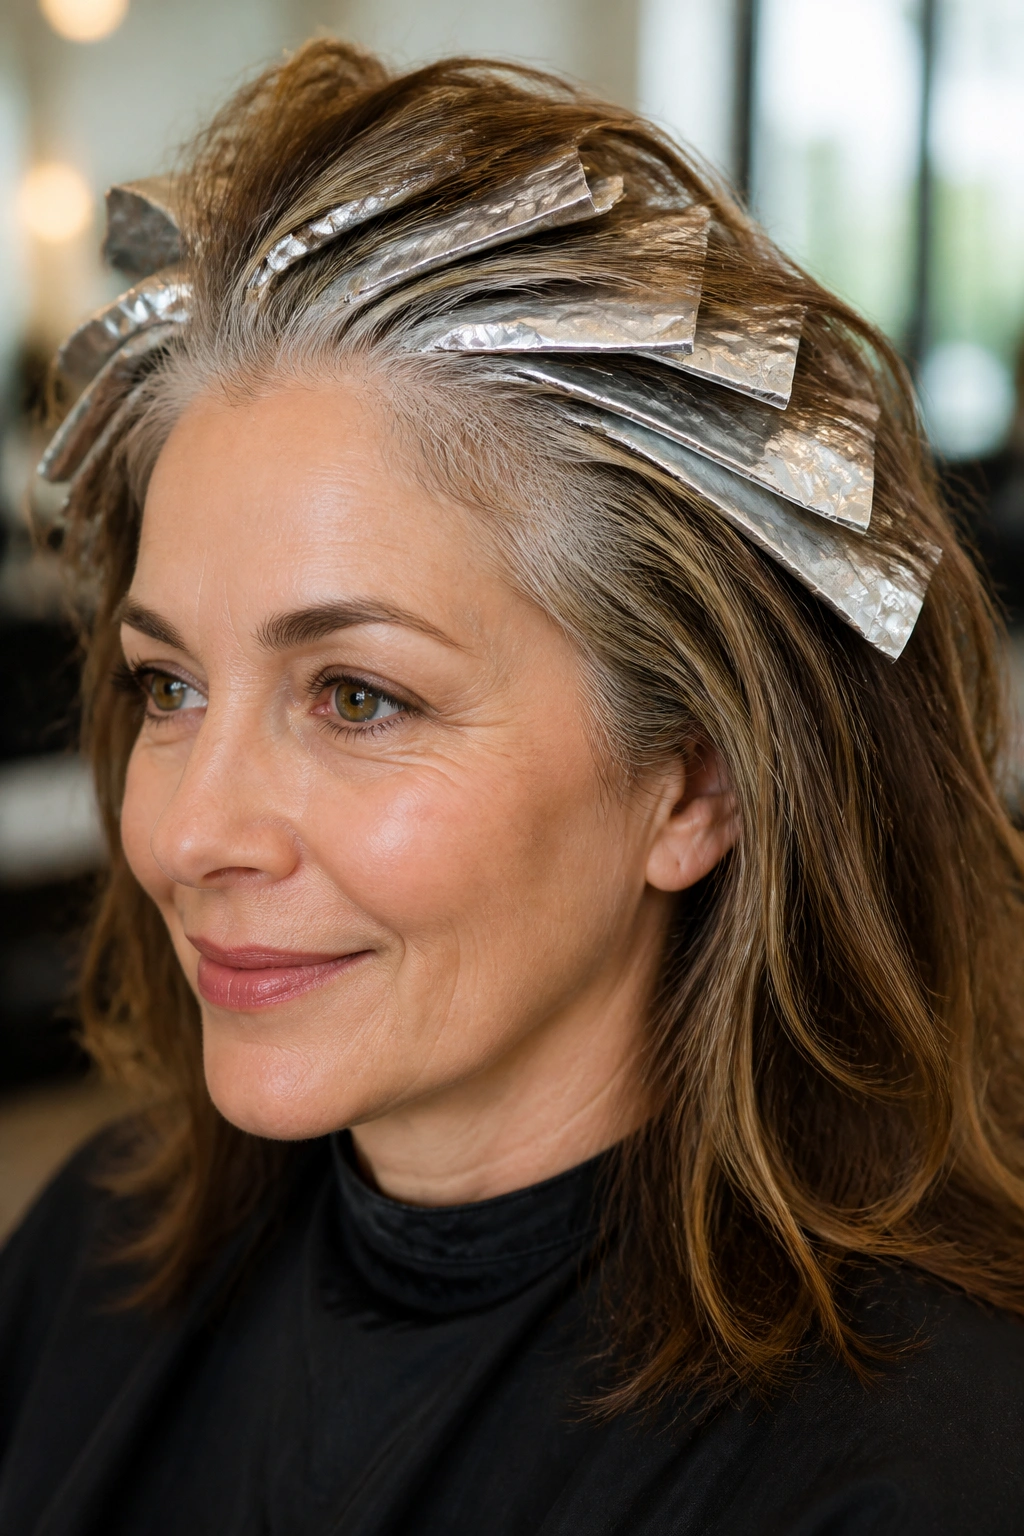
If you do not want full coverage, gray blending is the quieter move. Instead of hiding every gray strand, the colorist uses micro-foils or fine slices to soften the contrast between silver and the surrounding base.
That approach can look more natural than solid coverage, especially when the goal is to keep dimension and movement. The gray doesn’t disappear entirely. It gets folded into the overall color so the grow-out is less obvious and the regrowth line feels softer.
Who Gray Blending Helps Most
This technique works well for people with a mix of gray and pigmented hair rather than full white coverage. It’s also useful when the hair has multiple textures, because the micro-foils create subtle variation without a heavy block of color.
- Best around the hairline and temples.
- Useful when you want to keep some sparkle in the gray.
- Better than full coverage if you hate a solid root every few weeks.
The tone choice matters here. Too warm, and the gray can turn brassy. Too ash-heavy, and the whole head can look dull. A neutral blend usually holds up best.
20. Splashlights
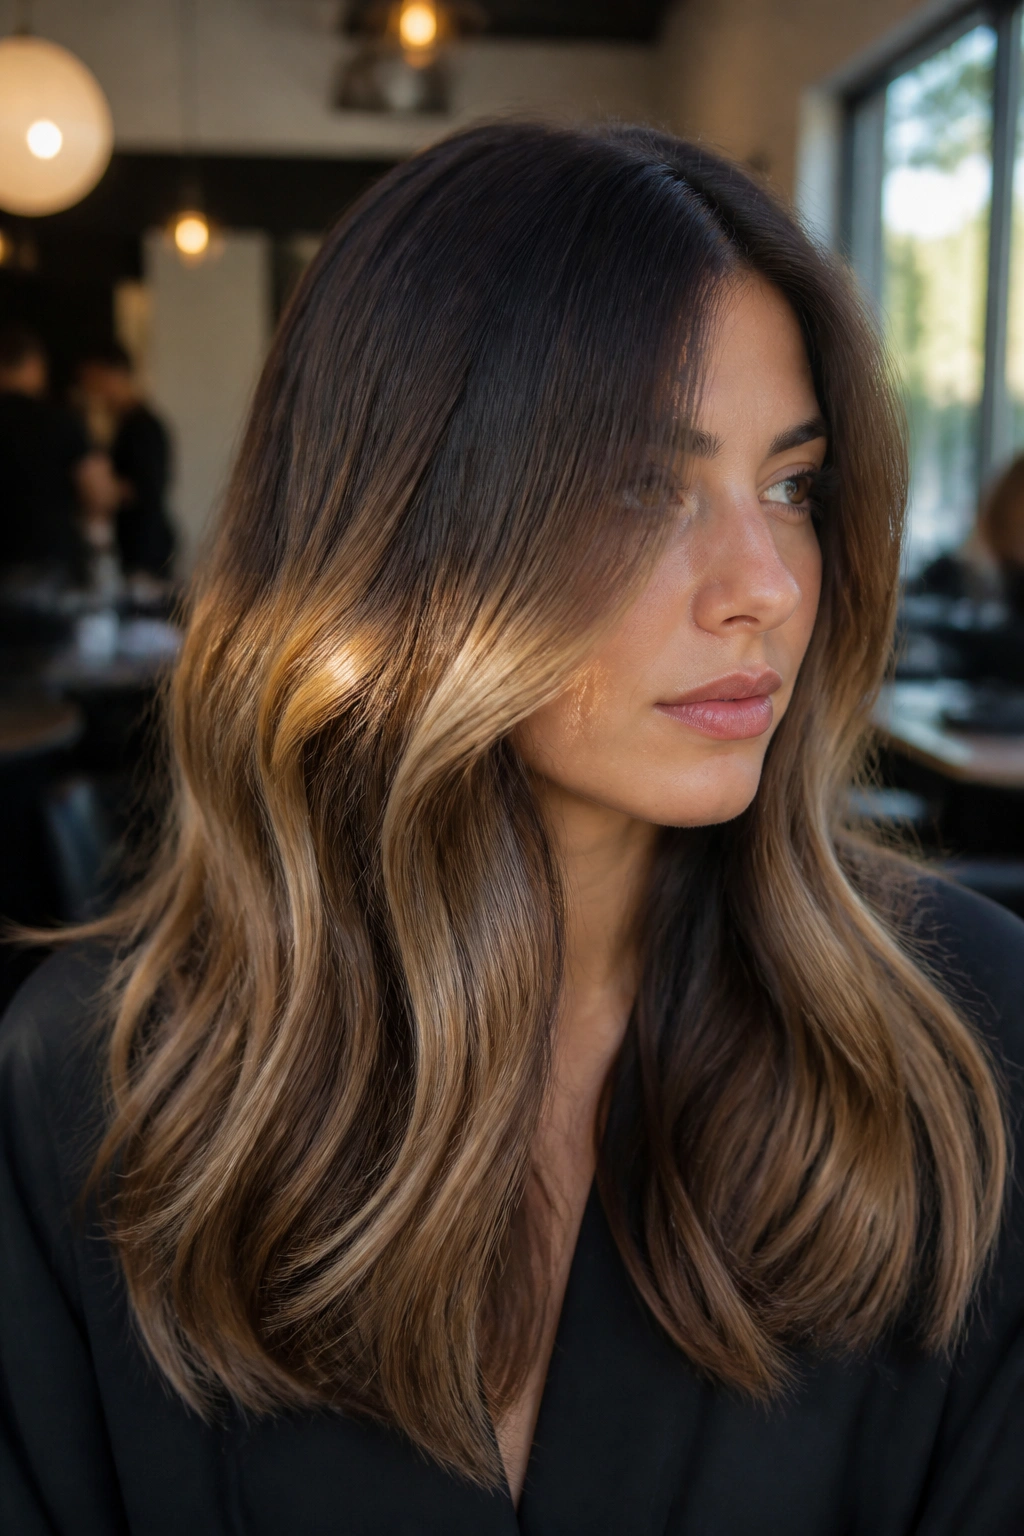
A splashlight is a horizontal flash of brightness that makes hair move in a way a regular highlight just can’t. The lighter band sits through the middle section of the hair, so when the hair swings, the bright piece appears and disappears like a quick hit of light.
It’s a strong look, and it has to be placed carefully. Too high, and it starts to look like a stripe. Too low, and it gets lost. The sweet spot is usually through the mid-lengths where the hair actually bends and moves, especially on longer cuts.
This technique works best when the rest of the color is calmer. A busy base with a splashlight can become confusing fast. A smoother background lets the bright band do its job. Straight and wavy hair show it differently, too — straight hair makes the line more graphic, while waves soften it a bit.
If there’s one thing worth taking from all twenty techniques, it’s this: salon-made color is about balance, not excess. The prettiest result usually has some depth left in it. A little shadow near the root. A little softness at the line. Enough brightness to catch the eye, but not so much that the hair stops looking like hair.
