



Wavy hair can be deceptive. On a good day, it looks soft and easy; on a bad one, the roots collapse, the ends puff out, and the whole shape feels like it changed its mind halfway through drying. That is exactly why air dry hairstyles for wavy hair matter so much. The goal is not to fight the bend in your hair. The goal is to give it a shape that dries in a way you can actually live with.
A lot of people make the same mistake with waves: too much product at the root, too much touching, too much optimism. Heavy cream can sink a 2B wave into a limp triangle. A little mousse, a light leave-in, and a part that suits your face can do more than a drawer full of hot tools. Serious.
The best part is that air-dried waves don’t need to look unfinished. They can look tidy, romantic, sharp, sporty, or lazy-in-the-best-way, depending on how you set them while they’re still damp. A few clips, a braid, a twist, or even the right ponytail placement changes the whole mood.
What matters most is shape. The styles below lean into the wave pattern instead of flattening it, and that little difference is usually the one people notice first.
1. Scrunched Shoulder Waves That Dry With Lift
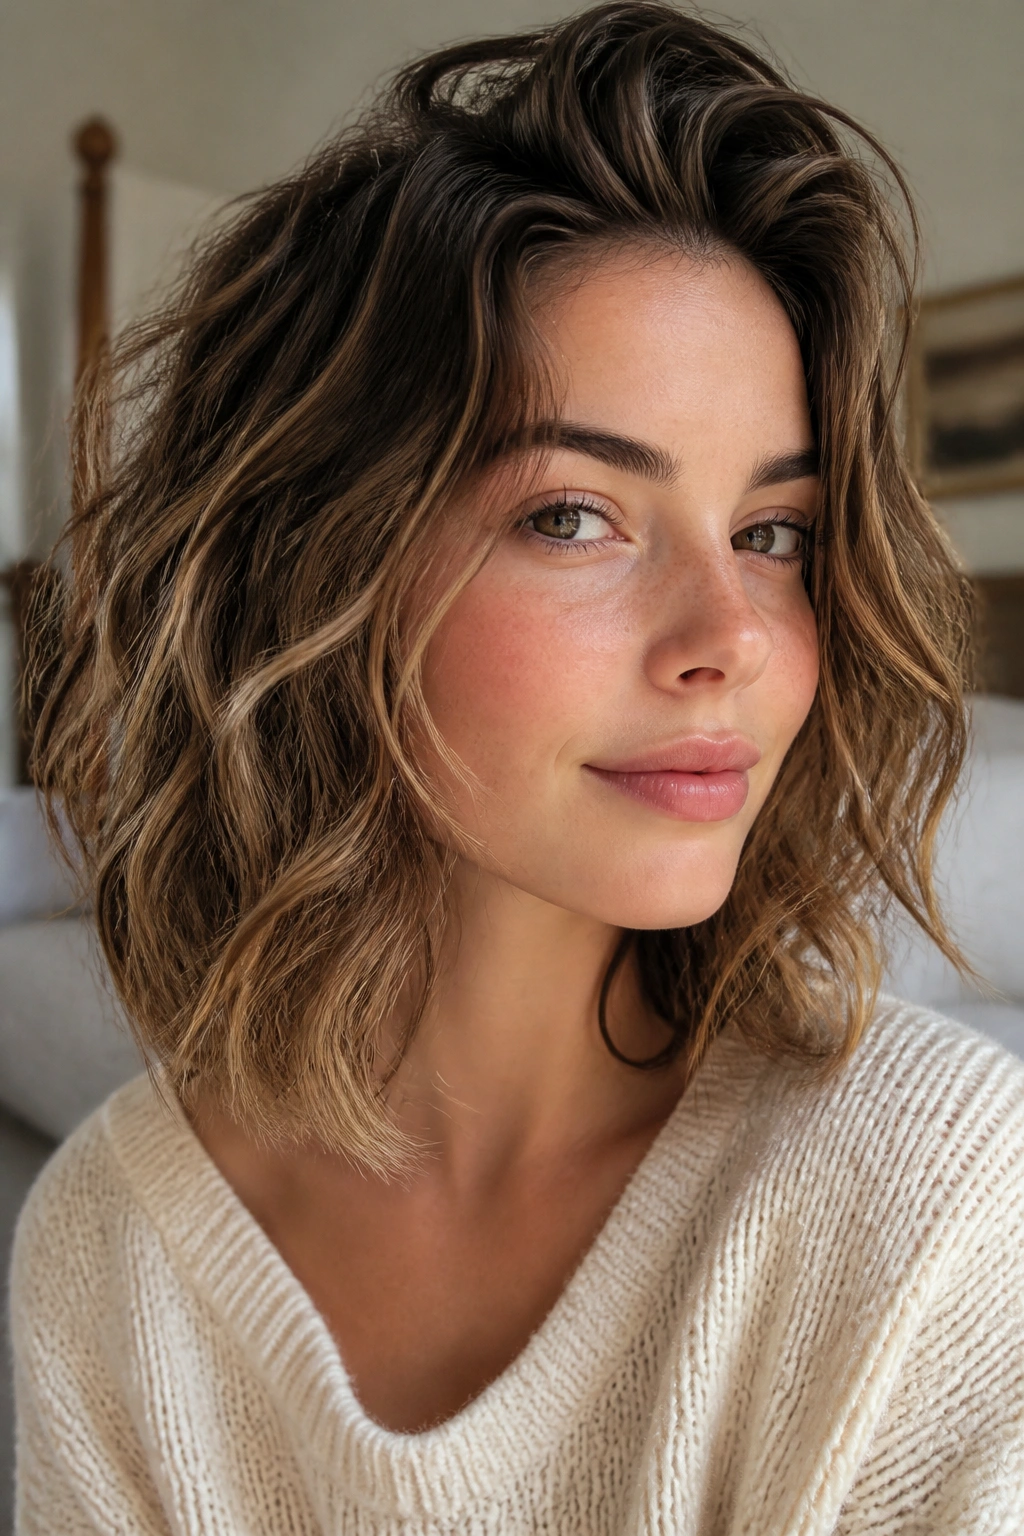
This is the easiest place to start. If your hair already bends well on its own, scrunched shoulder waves let the texture do the heavy lifting while you keep the crown from looking too flat.
Why It Works
The trick is to set the wave before it dries. After washing, squeeze out water with a cotton T-shirt or microfiber towel, then scrunch in a light mousse from mid-lengths to ends. I like a mousse more than a heavy cream here because it gives the wave a bit of memory without dragging it down.
Let your hair fall where it wants, then scrunch once more after five minutes. That second scrunch matters. It breaks up the stiff, wet shape and starts the soft wave clump that makes the finish look intentional instead of random.
Quick Details That Make It Better
- Best for shoulder-length or longer wavy hair.
- Works well with a side part or center part.
- Leave the root area mostly product-free if your hair gets oily fast.
- Stop touching it once it starts drying.
Tiny tip: if the ends dry faster than the crown, clip the top layer up for 10 minutes so the shape doesn’t flatten before the rest catches up.
2. The Deep Side Part That Makes Waves Look Fuller
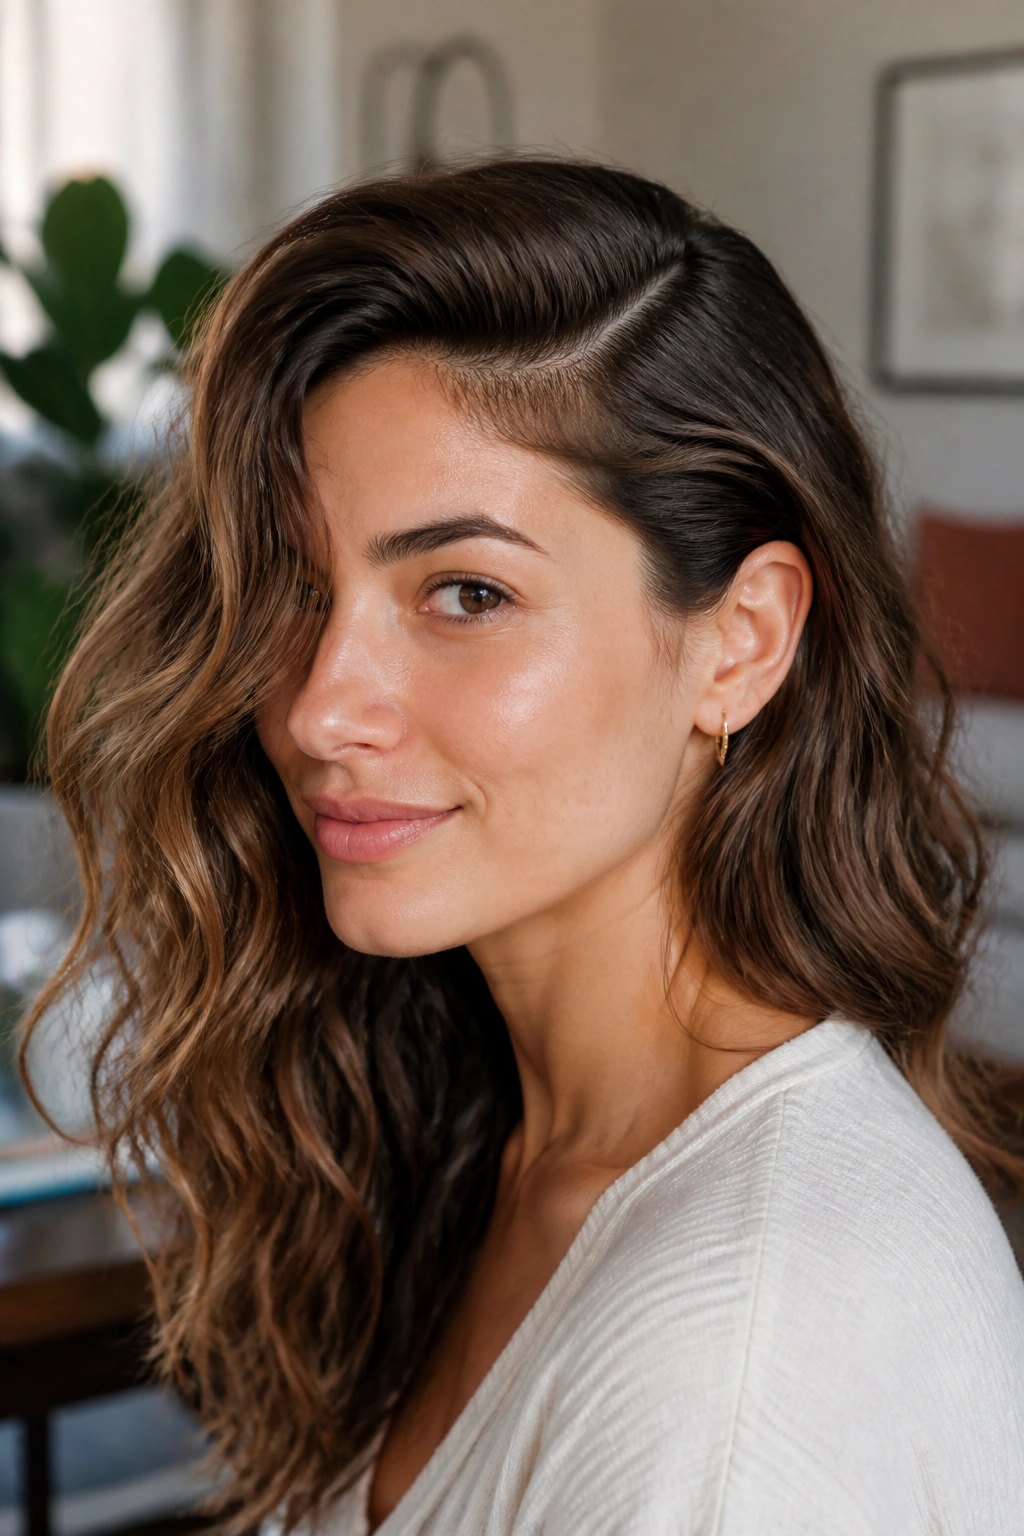
A deep side part is the fastest way to make wavy hair look denser without adding a single tool. It changes the whole balance of the head, and that matters more than people think.
Start on damp hair and draw the part from the arch of one eyebrow back toward the crown, then smooth the heavier side behind the ear so the wave falls in a cleaner sheet. The smaller side gets a little more volume near the forehead, which makes the whole style feel fuller. That’s the real trick: you are not creating more hair, you are just moving the weight around.
I like this look on waves that get a little lazy at the root. A center part can be lovely, but it also shows flatness fast. A side part hides a lot of that and gives the front pieces a nicer swing as they dry.
If your hair has a stubborn bend in one direction, the deep part can help redirect it without forcing a full restyle. Simple. Cheap. Useful.
3. Root-Clipped Lift for Flat Crown Waves
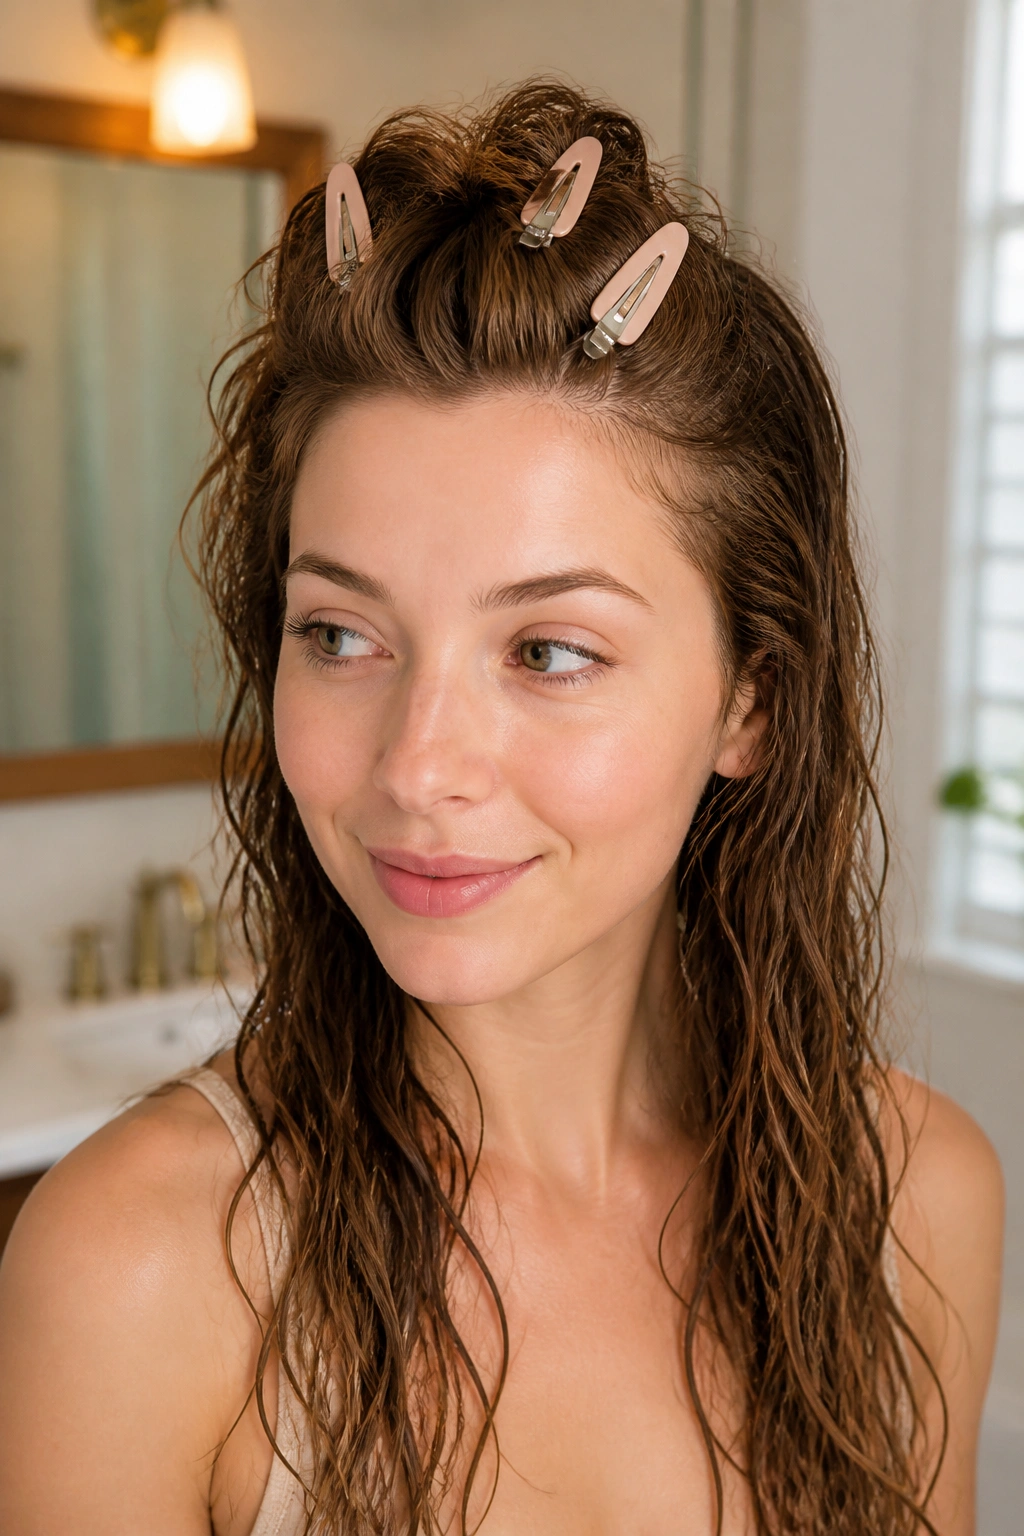
Why do some wavy styles look good at the ends and sleepy at the scalp? Usually because the root dries in a smashed-down position, and once that happens, the rest of the style is fighting uphill.
How to Get the Lift
Use two or three duckbill clips or small claw clips at the crown while the hair is still damp. Lift a thin section straight up, place the clip at the root, and let the section sit away from the scalp while it dries. That little gap gives the top a soft bend instead of a dent.
The placement matters. Put the clips where your hair tends to go flat — usually one on each side of the part and one closer to the crown swirl. Don’t overdo it. Too many clips can leave ridges, and ridges are not the same thing as volume.
When the hair is about 80% dry, remove the clips and shake out the roots with your fingertips. That last step keeps the lift soft.
Best for: fine waves, long waves, and anyone whose top layer dries faster than the underneath layer.
4. The Half-Up Twist That Keeps the Top Soft
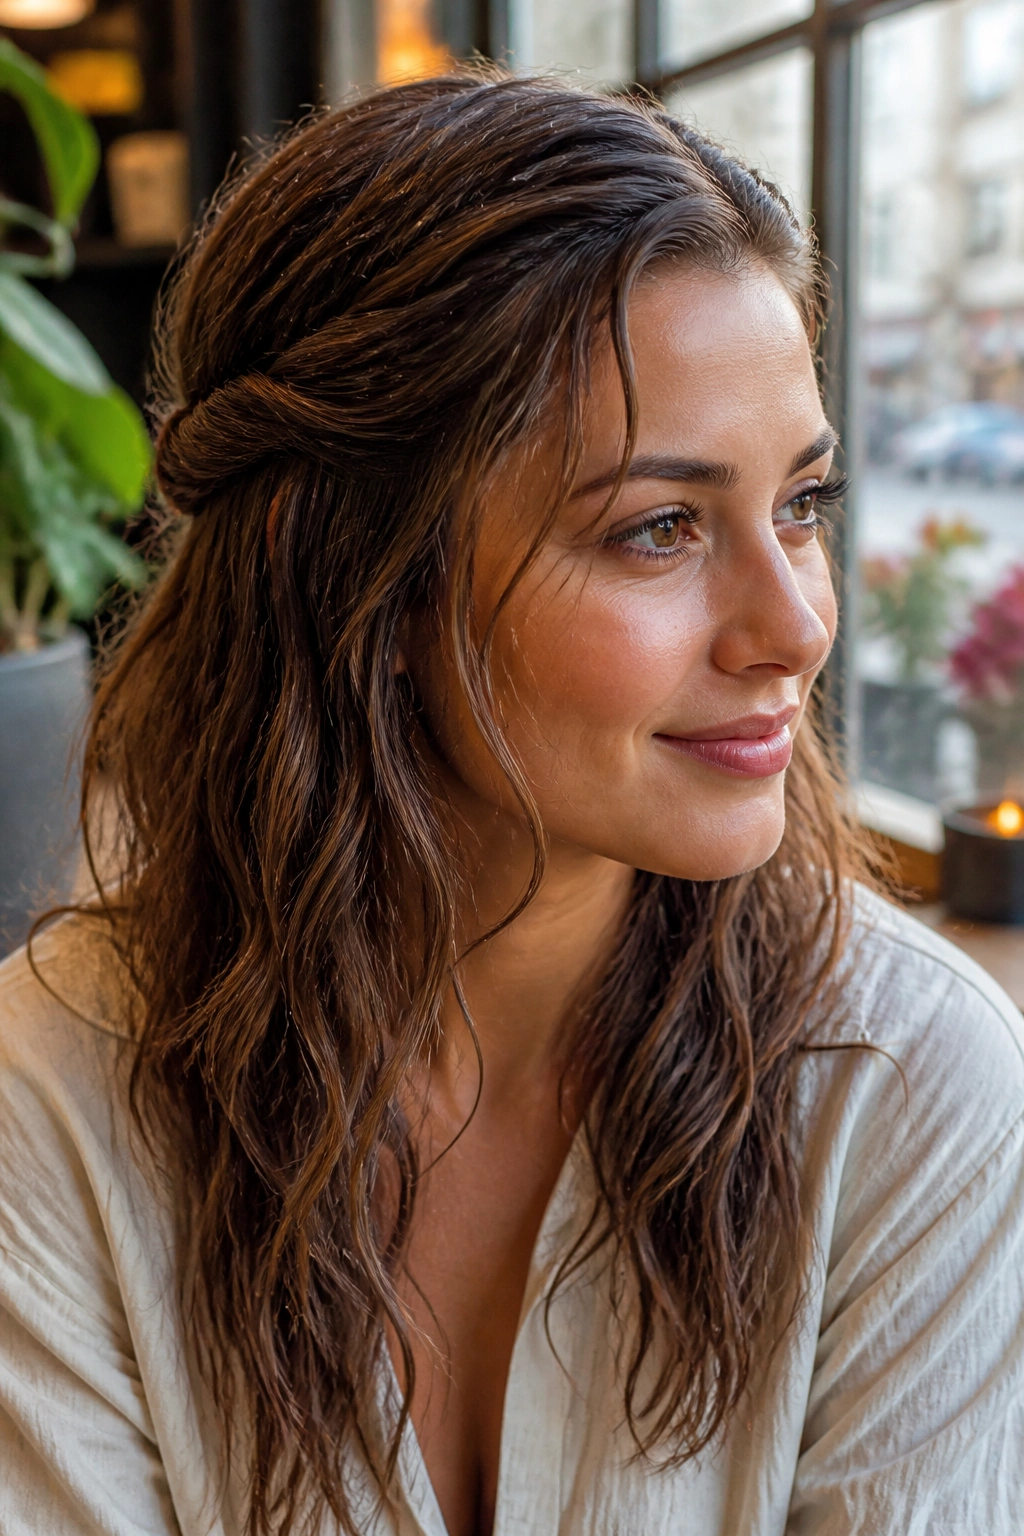
If your crown turns fuzzy by the time you finish your coffee, this one is worth keeping in your back pocket. The half-up twist keeps the top controlled while leaving the lower waves free to dry in their own shape.
A small section from each temple gets twisted back and pinned or tied at the back of the head. The twist gives you a neat line across the top, but it does not crush the wave pattern the way a tight ponytail can. I reach for this when hair is damp but not dripping, because the twist holds better when there’s still a little water weight in the lengths.
It’s also forgiving. The pieces don’t need to be perfect. Slightly uneven twists often look better anyway, because they stop the style from feeling too polished for air-dried hair.
What to Watch For
- Keep the twist low enough that it doesn’t tug the front hairline.
- Use one flat pin per side if your hair is short.
- Pull a few face-framing pieces loose before it sets.
Best use: errands, office days, or any time you want the wave pattern to show but not get in your face.
5. The Low Ponytail With Face-Framing Pieces

A low ponytail sounds plain until you see it on wavy hair. Then it starts to look like a deliberate style instead of a backup plan.
Pull the hair to the nape of the neck, but do not smooth every strand into submission. Leave the front pieces free, and let the wave pattern stay visible through the length of the ponytail. If the ponytail is too tight, the root goes flat and the ends stick out in an awkward way. A soft elastic and a gentle hand solve most of that.
I like to wrap a tiny section of hair around the elastic, because it hides the band and makes the shape feel cleaner. If your waves are on the looser side, this works especially well with a middle or slightly off-center part. The front pieces soften the face, and the back looks neat without losing movement.
One small thing: if your hair slips out of ponytails by lunch, mist the base with a little water and a touch of styling gel before tying it. That gives the elastic something to grip.
6. The Claw-Clip French Twist for Loose Texture

This style does not try to be perfect. That is why it works.
A claw-clip French twist lets wavy hair stay gathered without forcing it into a hard, sleek shape. Compared with a tight twist, this version leaves the ends a little loose and the surface a little uneven, which suits waves better. You twist the lengths upward, fold them in, and catch the whole thing with a medium or large claw clip.
The size of the clip matters more than people expect. Too small, and the hair spills. Too big, and the shape slumps. For shoulder-length waves, a medium clip usually holds better than a giant decorative one. If your hair is thick, choose a clip with strong springs and a slightly curved spine.
This style is especially useful on day-two hair, when the wave pattern has settled but the roots need a reset. It also looks good when a few shorter pieces escape around the nape. That little messiness is part of the charm here.
Best for: quick clean-up, lunch plans, or hot weather when you want your neck free.
7. Loose Braids That Dry Into Soft Ropey Waves
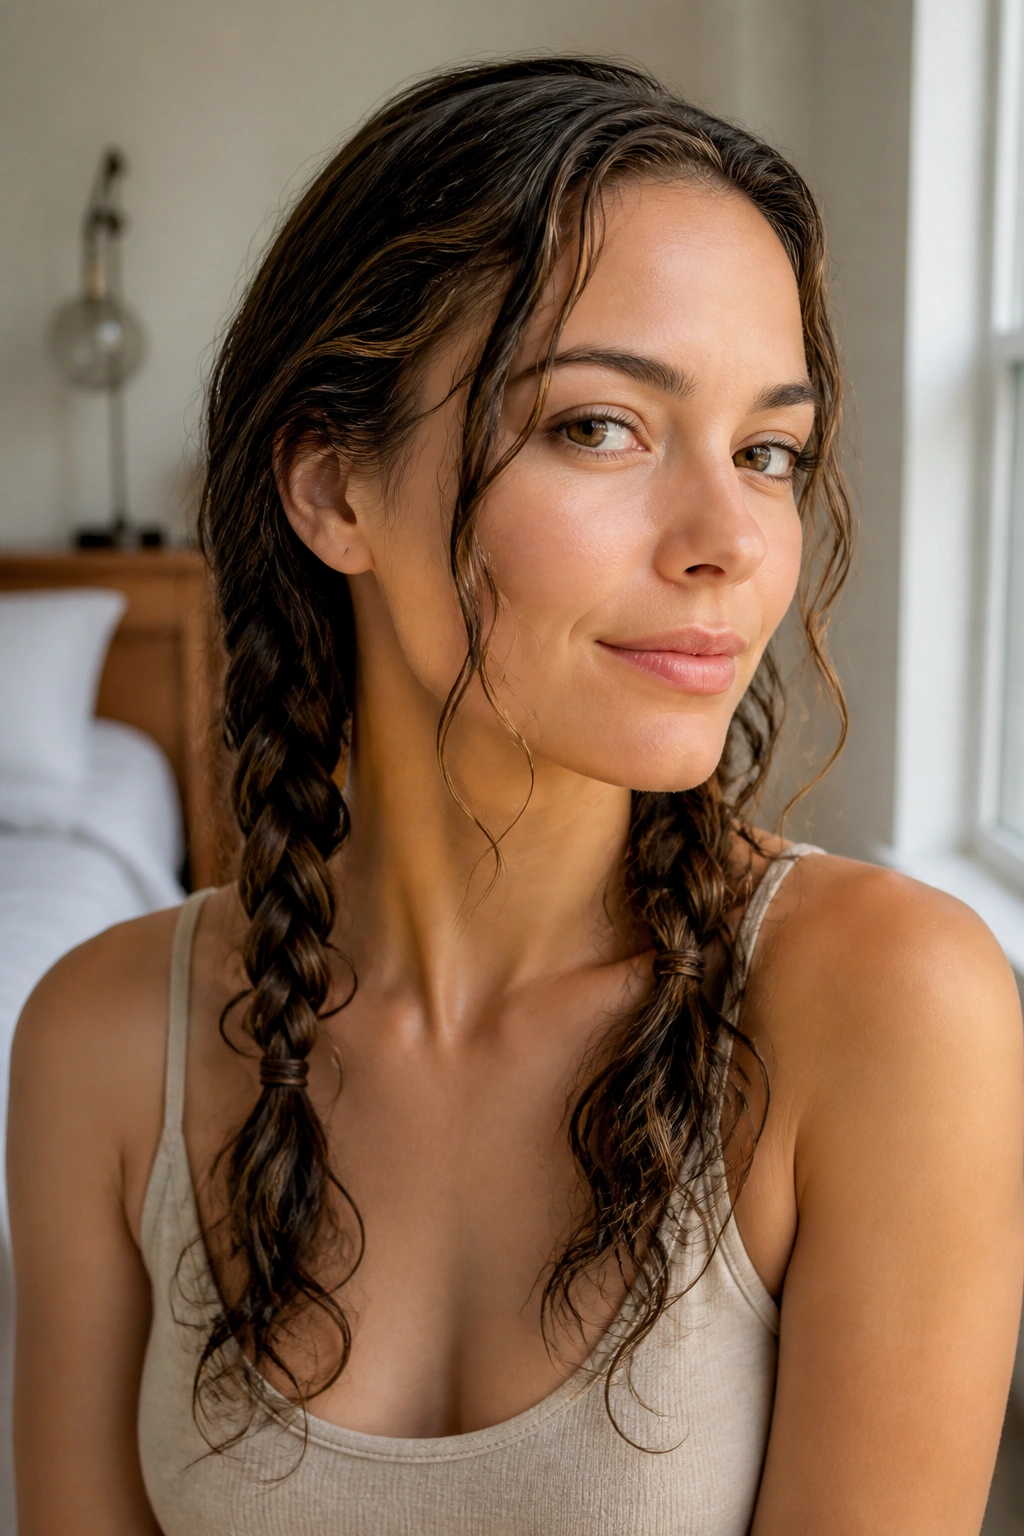
Braiding damp wavy hair is one of those old tricks that keeps getting reused because it works. The braid changes the wave shape while the hair dries, so you end up with a softer, more defined pattern when you let it down.
What Makes It Different
A loose three-strand braid gives you a more relaxed finish than a tight braid, which can leave the hair looking crimped in a way that feels dated. Keep the tension low, start below the ears, and leave the top section a little loose so the roots do not go pin-straight.
You can do one braid down the back or two braids if you want a more even pattern. I prefer two when the hair is thick, because one braid can leave the middle too compressed and the outer layers too fuzzy.
How to Use It
- Braid while the hair is damp, not soaking.
- Secure with a soft elastic.
- Undo it only when the hair is fully dry.
- Separate the waves with your fingers, not a brush.
Small warning: if you braid too tightly, the result can look sharper than you expected. Loose is the point.
8. The Headband Tuck That Hides Frizz Fast
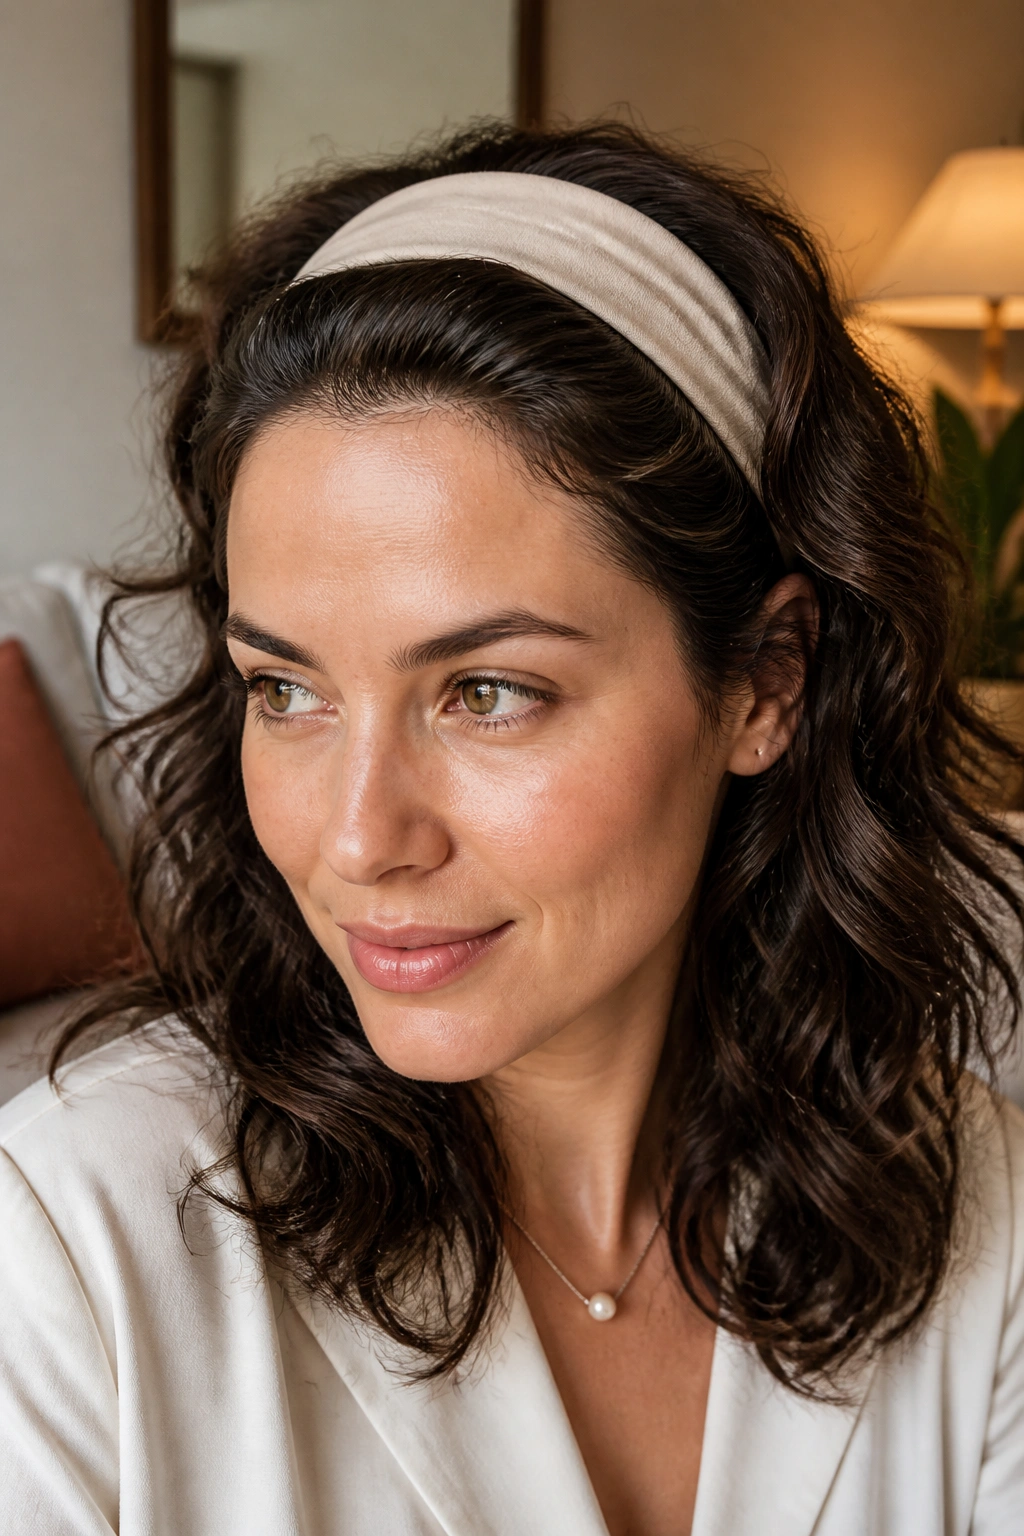
A headband tuck is what I reach for when the front of the hair is having a bad day and the rest is behaving. It controls the hairline, keeps flyaways in one place, and still lets the wave pattern show through the length.
Place a stretchy headband just behind the hairline, then tuck the front sections around and under it so the waves fold back softly. Don’t jam every strand in. The style looks better when a few bent ends peek out near the temples and the nape. That little unevenness keeps it from looking too stiff.
This one is especially good for wavy hair that gets bigger as it dries. The headband gives the front a clean frame while the rest keeps its softness. If your hair is dense, choose a wide headband with a bit of grip so it stays put. Thin plastic bands tend to slide and pinch, which is annoying fast.
It’s not a dramatic style. That’s the point. Sometimes the best move is to contain the chaos and move on.
9. The Pineapple Bun That Protects the Wave Pattern
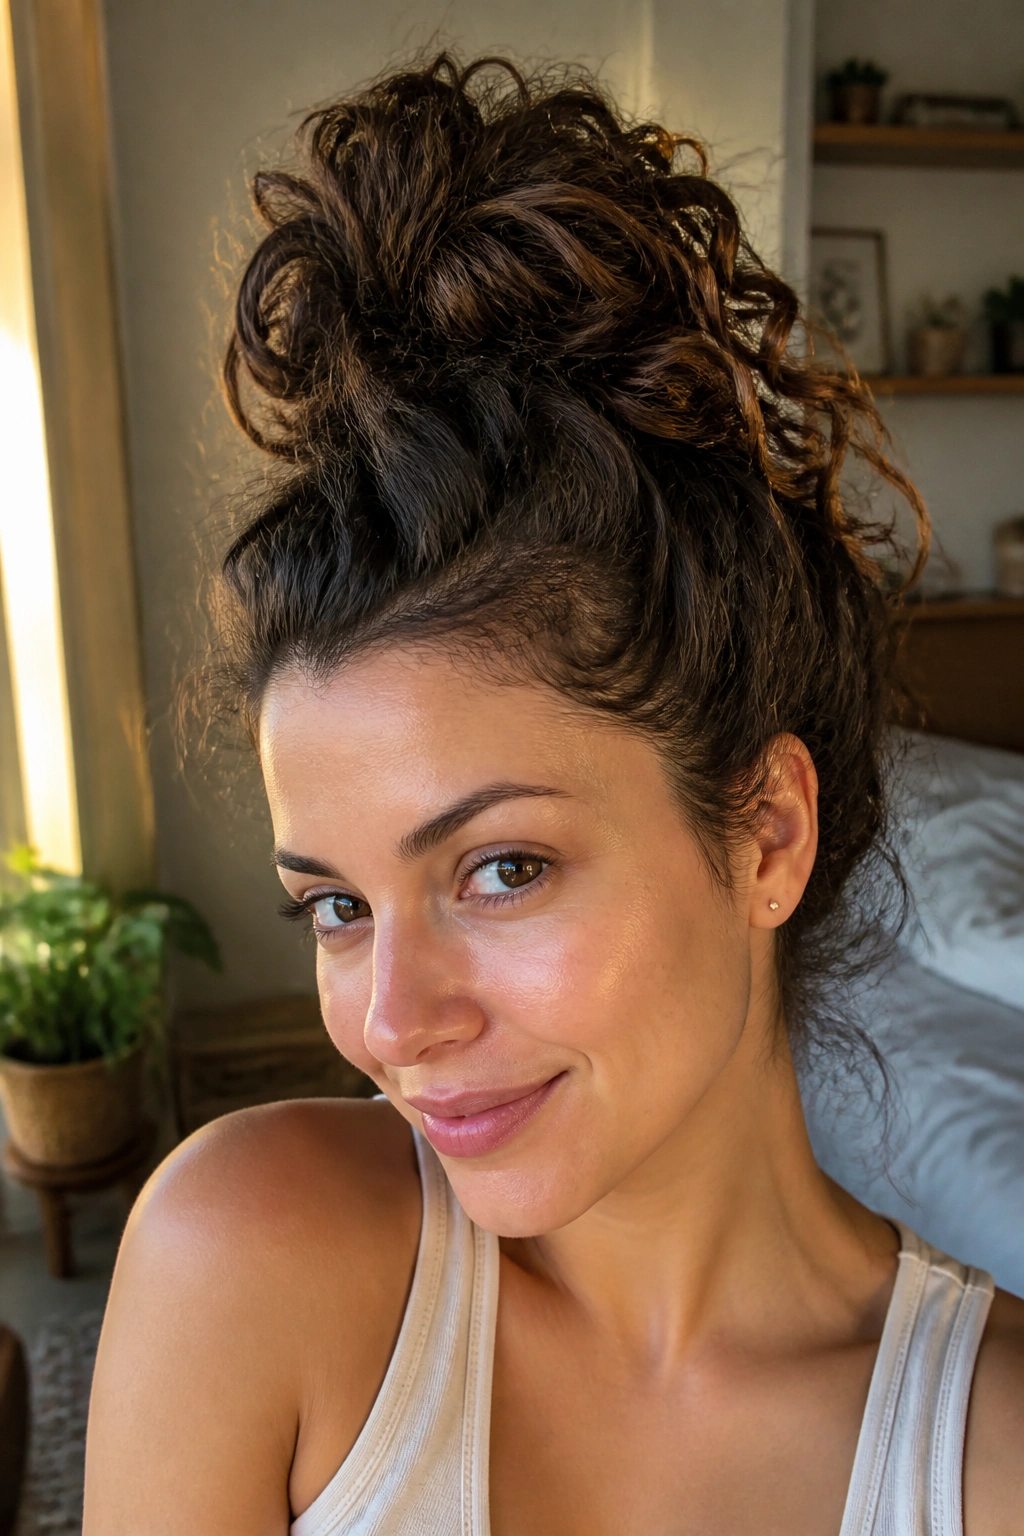
What if the goal is to keep the wave pattern intact, not show it off? Then the pineapple bun is the one that earns its keep.
Gather the hair high on the head, close to the crown, and secure it loosely so the lengths spill downward in a soft loop. The hair underneath stays out of the way, and the waves aren’t crushed at the neck or shoulders. That makes this style especially useful when you want to air dry and then go back in later to wear the hair down again.
The height matters. Too low, and the bun flattens the back of the head. Too high, and it starts looking like a tight topknot. Somewhere near the crown is the sweet spot. If the ends are long, let them fan out a little instead of wrapping them tightly. That keeps tension down.
I like this for active days, but it also works on a lazy afternoon when you want the hair off your neck without pretending you spent time on it.
10. Soft Space Buns With Loose Ends
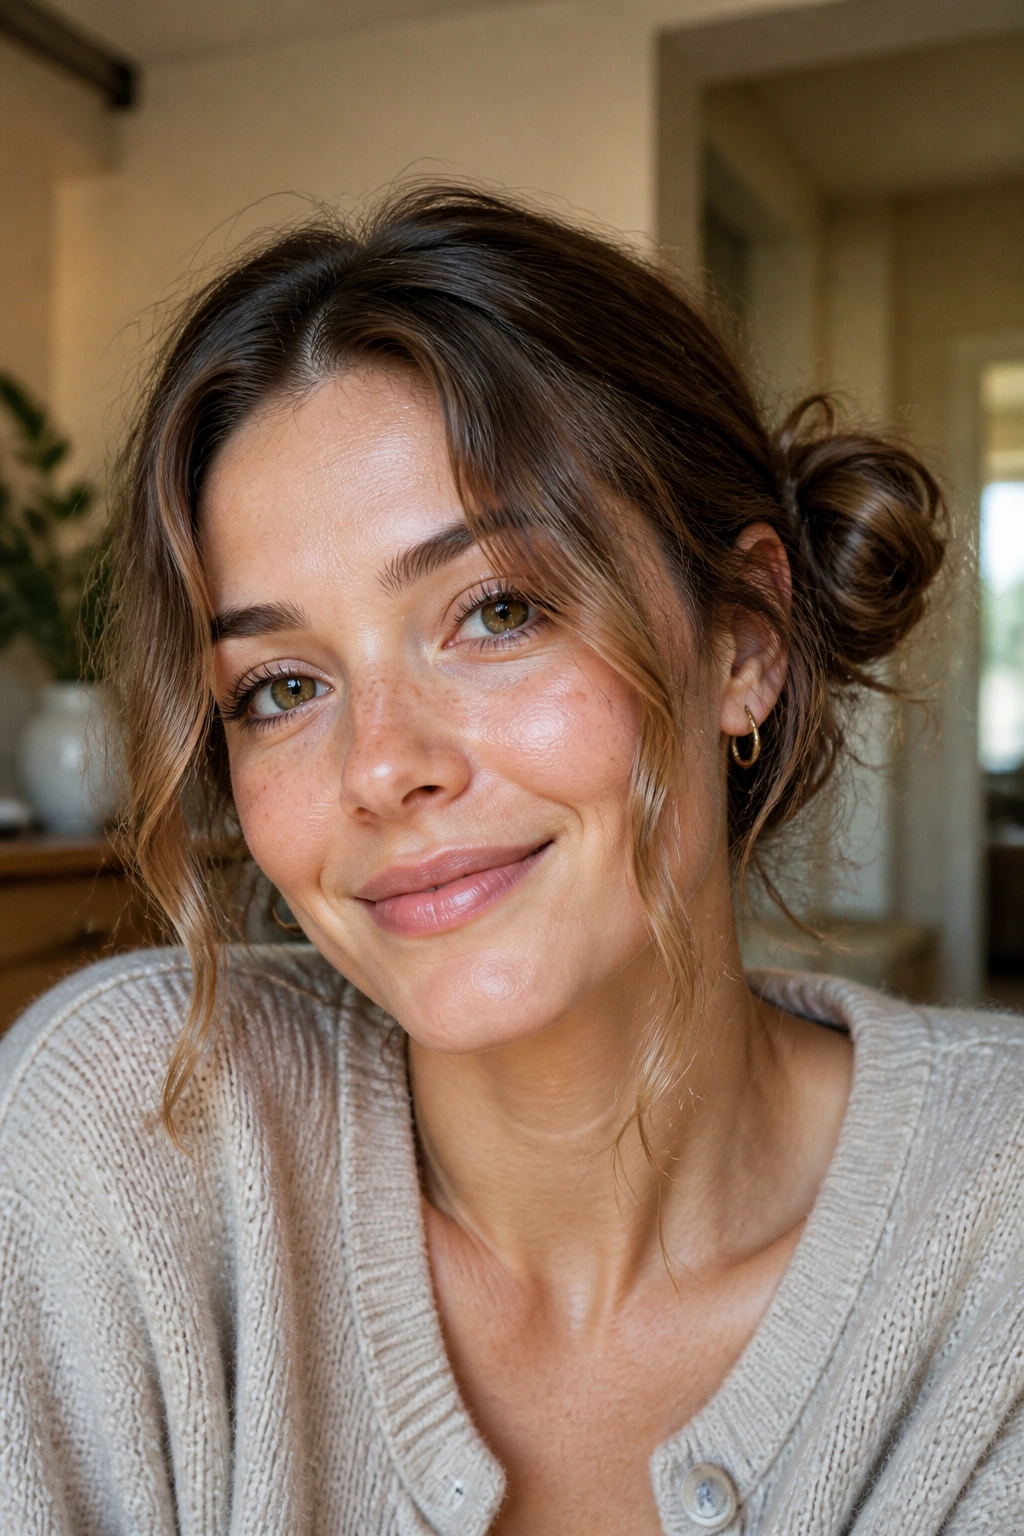
Space buns get a bad reputation because people think of them as loud or overly styled. On wavy hair, though, they can look relaxed and a little playful if you keep them low and soft.
Split the hair down the middle, then twist each side into a small bun above and slightly behind the ears. Leave the ends poking out a little. Do not tuck them too neatly. The loose ends are what keep the style from turning severe. A few face-framing pieces help too, especially if the front tends to puff when it dries.
This style is good for medium-length waves that need control at the crown but still have enough length to show texture. It also works when the hair is not fully clean, which is useful because second-day waves often hold a braid or bun better than freshly washed hair.
A few details that matter
- Place the buns at the same height.
- Use small elastics before pinning.
- Pull the buns apart just a little after they’re secured.
- Keep the twists loose enough that they do not dent the wave.
One note: if your hair is very long, the buns can get heavy. In that case, keep them smaller than you think.
11. The Half-Up Mini Buns That Keep the Length Loose

Half-up mini buns are fun, but they’re also practical. They get the front hair off your face, hold the top section in place while it dries, and leave the bottom waves free to do their thing.
I like this style on hair that sits between shoulder length and mid-back length. The buns stay small, almost like little knots, so they don’t overpower the rest of the shape. If the buns are too bulky, the whole head starts to look top-heavy. Two tiny buns at the crown are enough. That’s usually all it needs.
The bottom half is where the texture gets to show off. The contrast is the appeal here: neat on top, loose underneath. It reads casual without turning sloppy, which is a line a lot of wavy styles struggle to walk.
Wear it while the hair is damp if you want a smoother top, or after it’s mostly dry if you want a softer, puffier finish. Both work. One just feels cleaner.
12. The Side Braid That Pulls Waves Over One Shoulder
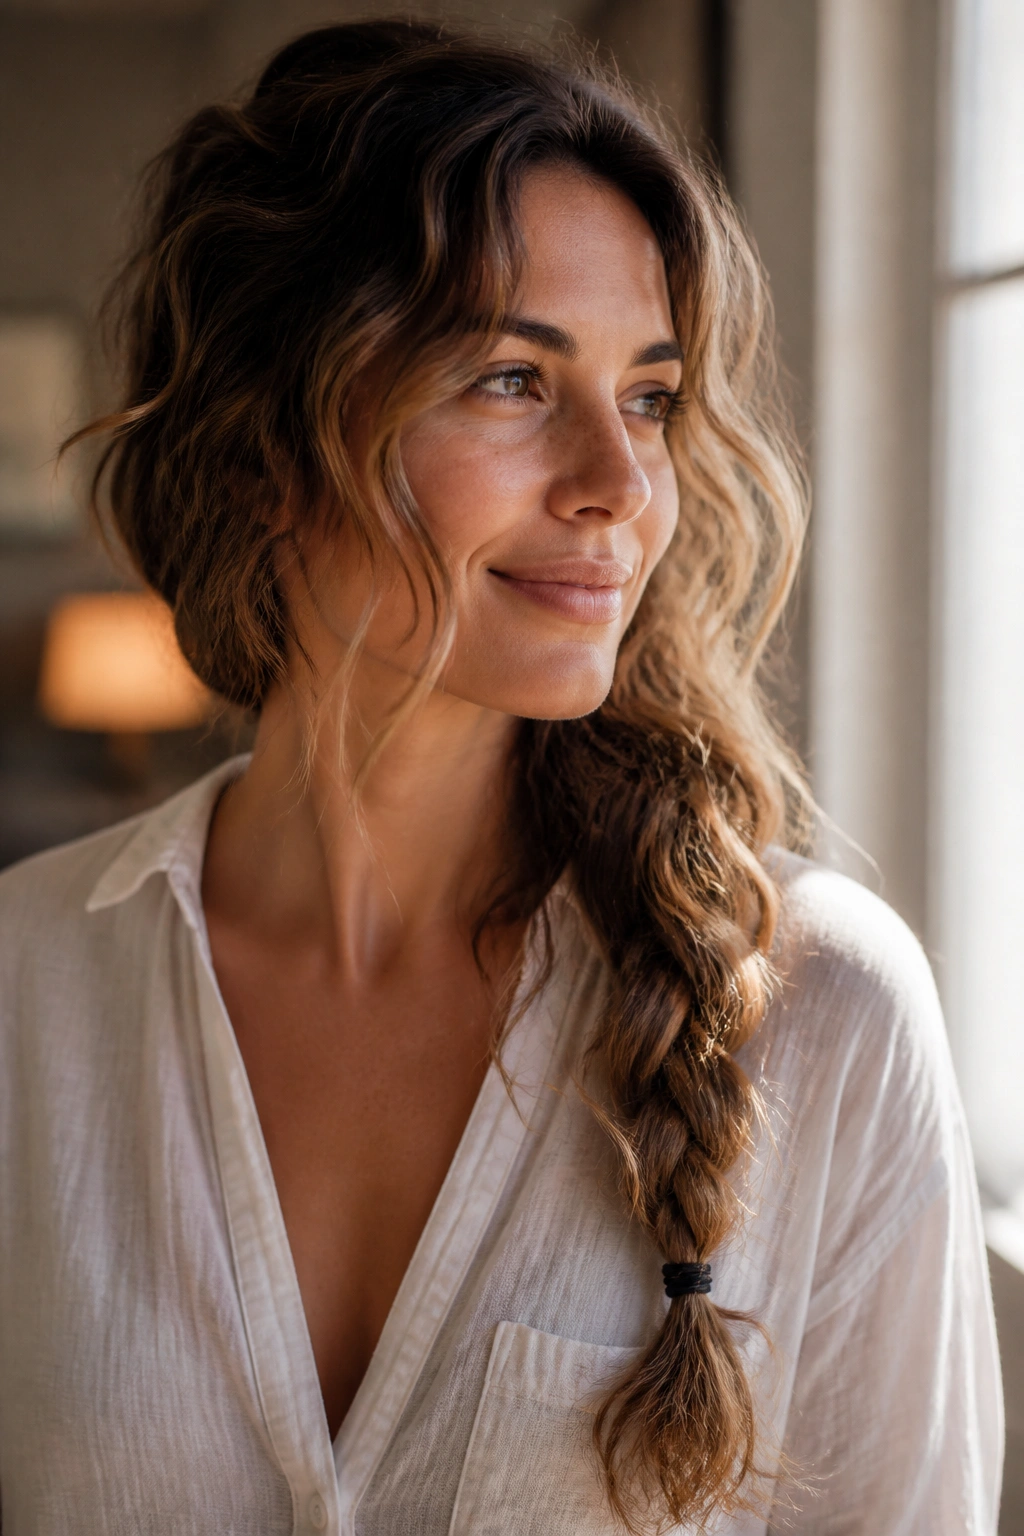
Unlike a braid that falls down the back, a side braid keeps the wave pattern visible where people actually look — near the face and shoulder. It also keeps the underside from puffing out in weird places while the hair dries.
Move all the hair to one side, then braid loosely from just below the ear to the ends. The braid should look soft, not tight and neat like school picture day. If your waves are thick, start the braid a little lower so the top stays lifted. If your hair is fine, a braid that begins too low can make the style feel stringy.
This one is good when you want texture but also want the hair controlled enough to sit under a coat, a scarf, or a seatbelt without turning into a mess. That seems minor until you spend a day in and out of cars. Then it matters.
A side braid also gives you a nice second-day shape when you take it out. The waves get a little more body, not less. That is a useful trade.
13. The Scarf-Tied Ponytail That Makes the Elastic Look Intentional
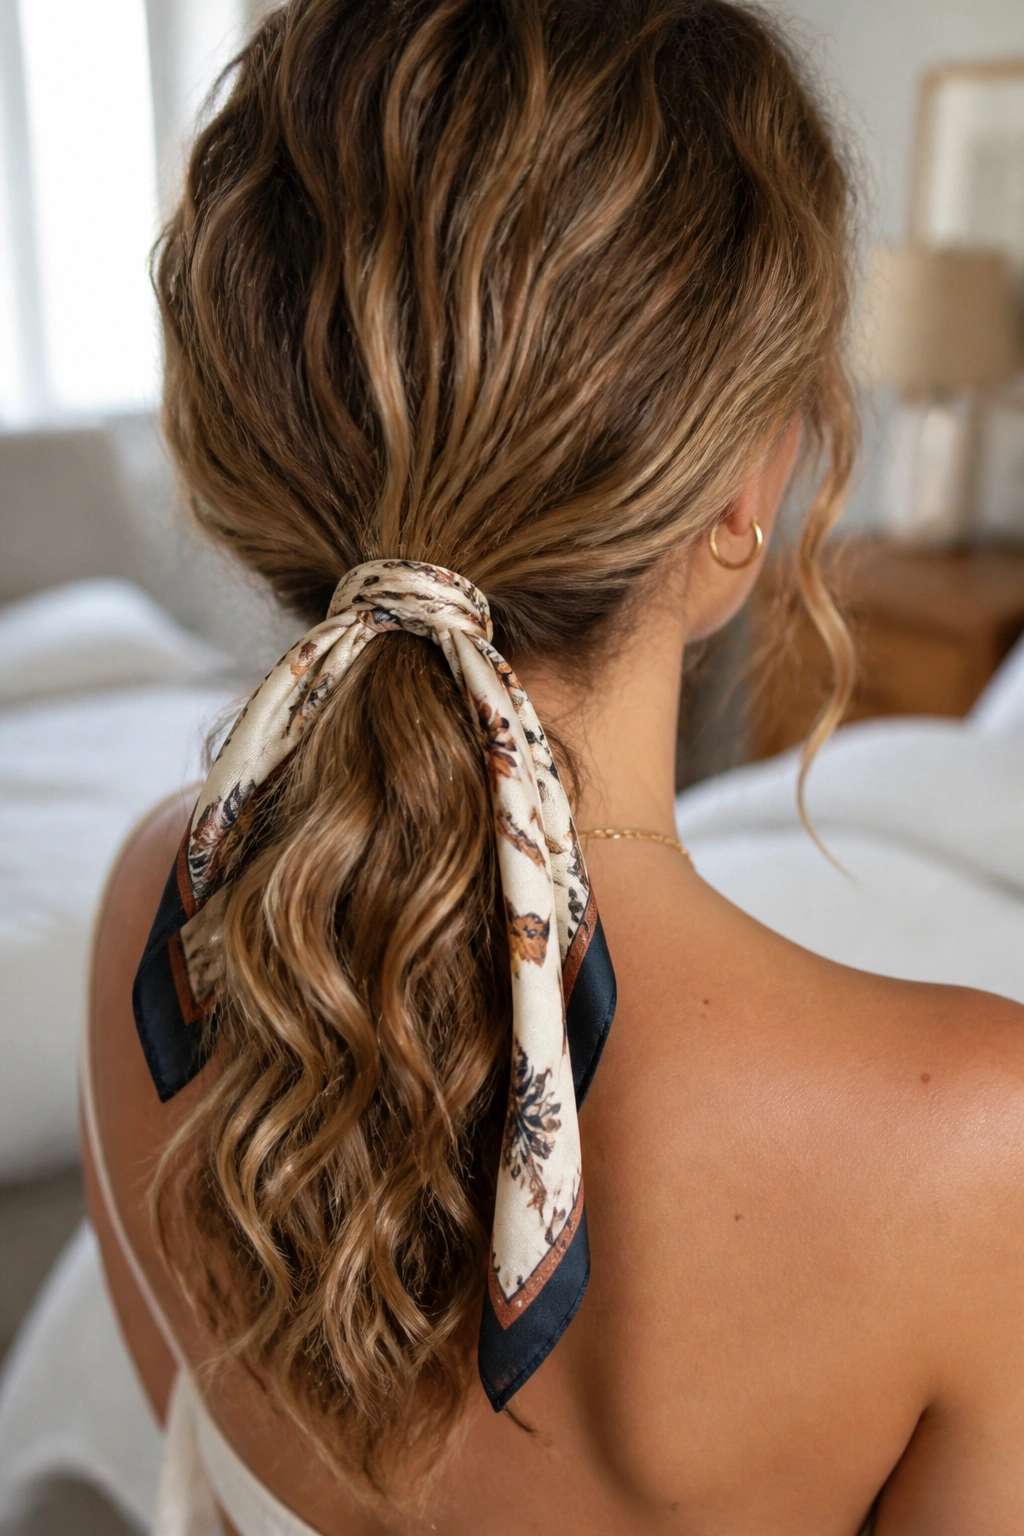
A scarf tied around a low ponytail can change the whole feel of wavy hair. Instead of reading as “I tied my hair back,” it reads as “I had a plan,” which is a nice upgrade for something that takes about two minutes.
How It Changes the Shape
The scarf hides the elastic and adds a visual break between the crown and the ponytail length. That matters because wavy hair can sometimes look too same-y from root to tip. The scarf gives the eye a pause. It also softens the line at the base of the ponytail, which helps if your roots are fluffy or you’re working with day-two texture.
Choose a narrow scarf for a smaller knot or a wider one if you want a more obvious accent. Cotton gives a matte look. Silk or satin slides a bit more, but it feels nicer against hair that tangles easily.
Best Use Cases
- Low ponytail on damp or dry hair.
- Medium waves that need a softer finish.
- Simple outfits that need one small detail.
- Haircuts with layers around the face.
My take: this is one of those styles that looks more expensive than it is, and I mean that in the plainest way possible.
14. The Bubble Ponytail That Makes Fine Waves Look Thicker
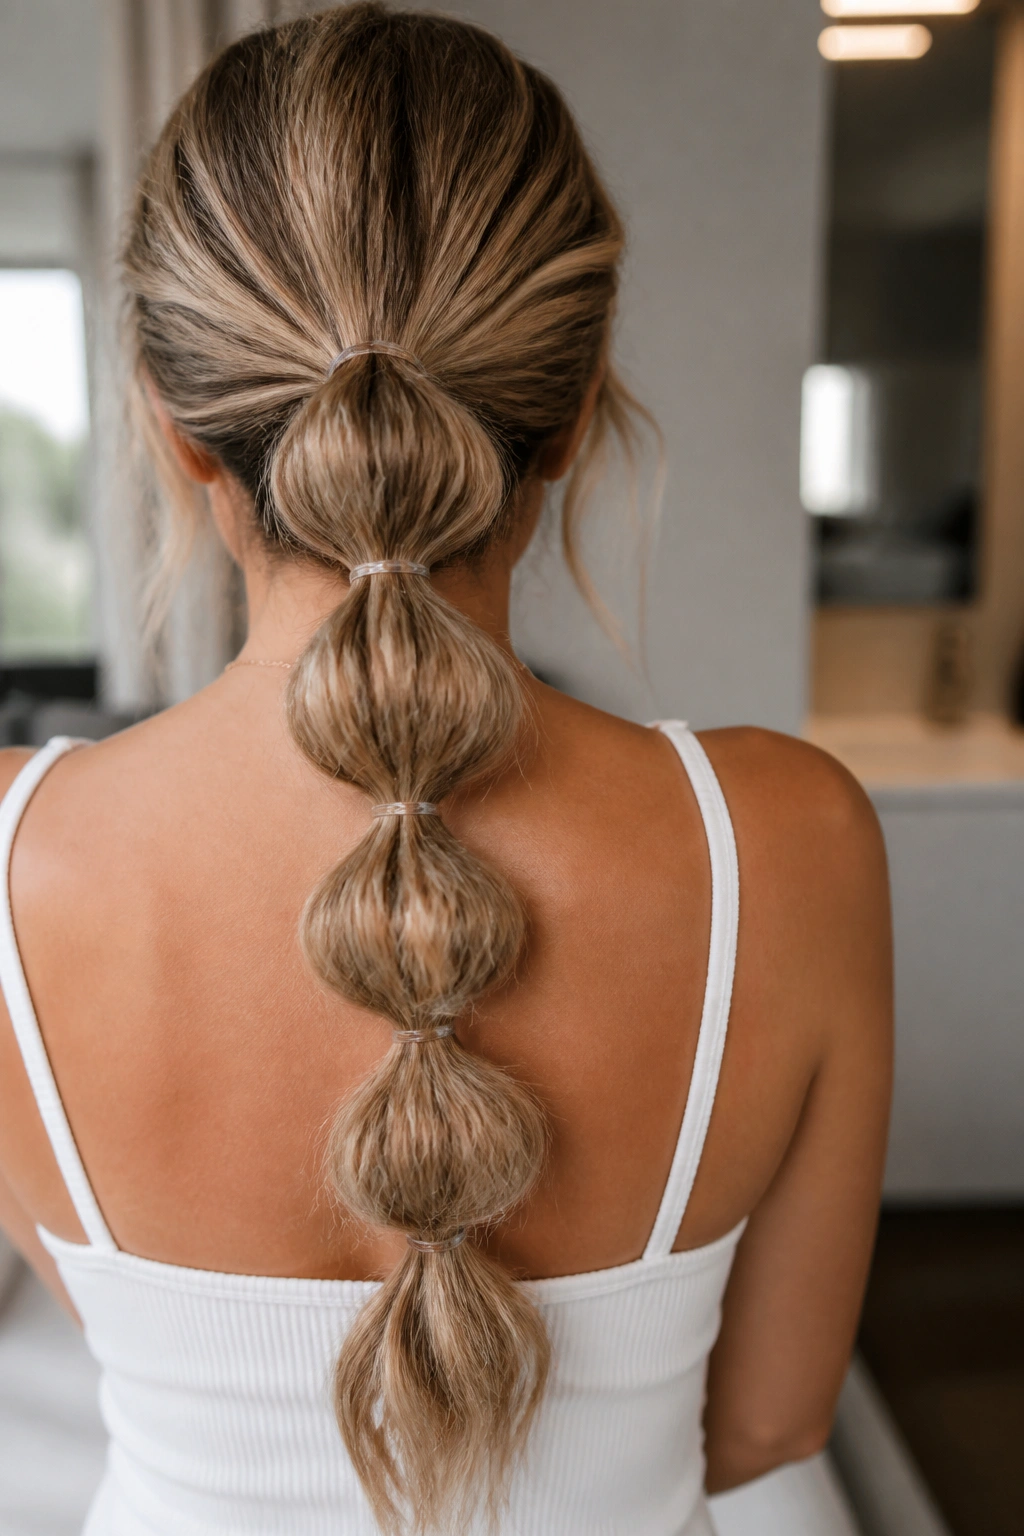
A bubble ponytail is one of the easiest tricks for making wavy hair look fuller without teasing the roots into a knot. The little sections create the illusion of density, and on fine hair, that can be a lifesaver.
Start with a low or mid ponytail, then add small elastics every 2 to 3 inches down the length. Gently tug the hair between each elastic so each section rounds out into a bubble. Don’t pull so hard that the wave pattern disappears. You want shape, not puff. That line matters.
This style works especially well when the ponytail itself feels a little thin. The bubbles break up the length and make the ponytail look more substantial from a distance. It also keeps the hair controlled in humid weather, which is helpful because fine waves can go fuzzy very quickly.
If you want it to look softer, leave a few front pieces loose and stop the bubbles before the very ends. A slightly imperfect finish usually looks better here.
15. Rope-Braid Pigtails That Dry Into Clean Bends

Why do rope braids make wavy hair look sharper than a regular braid? Because they twist the hair around itself instead of weaving it flat, and that changes how the bend dries.
Split the hair into two sections, then twist each section in the same direction before wrapping them around each other in the opposite direction. That is the basic rope-braid move. Keep the tension light if you want soft waves, or tighten it a touch if you want a more structured pattern. Either way, the result tends to hold better than loose hair alone.
How to Get the Bend
- Start on damp hair with a little leave-in.
- Twist each side evenly so the pattern stays balanced.
- Secure the ends with small elastics.
- Let the hair dry fully before loosening.
This style is especially nice for medium-length waves that go a little fluffy at the ends. The rope shape keeps the lengths together while they dry, so you get less halo frizz and more defined separation. It is not flashy. It is just effective.
16. The Crown Braid That Keeps the Front Pieces Under Control
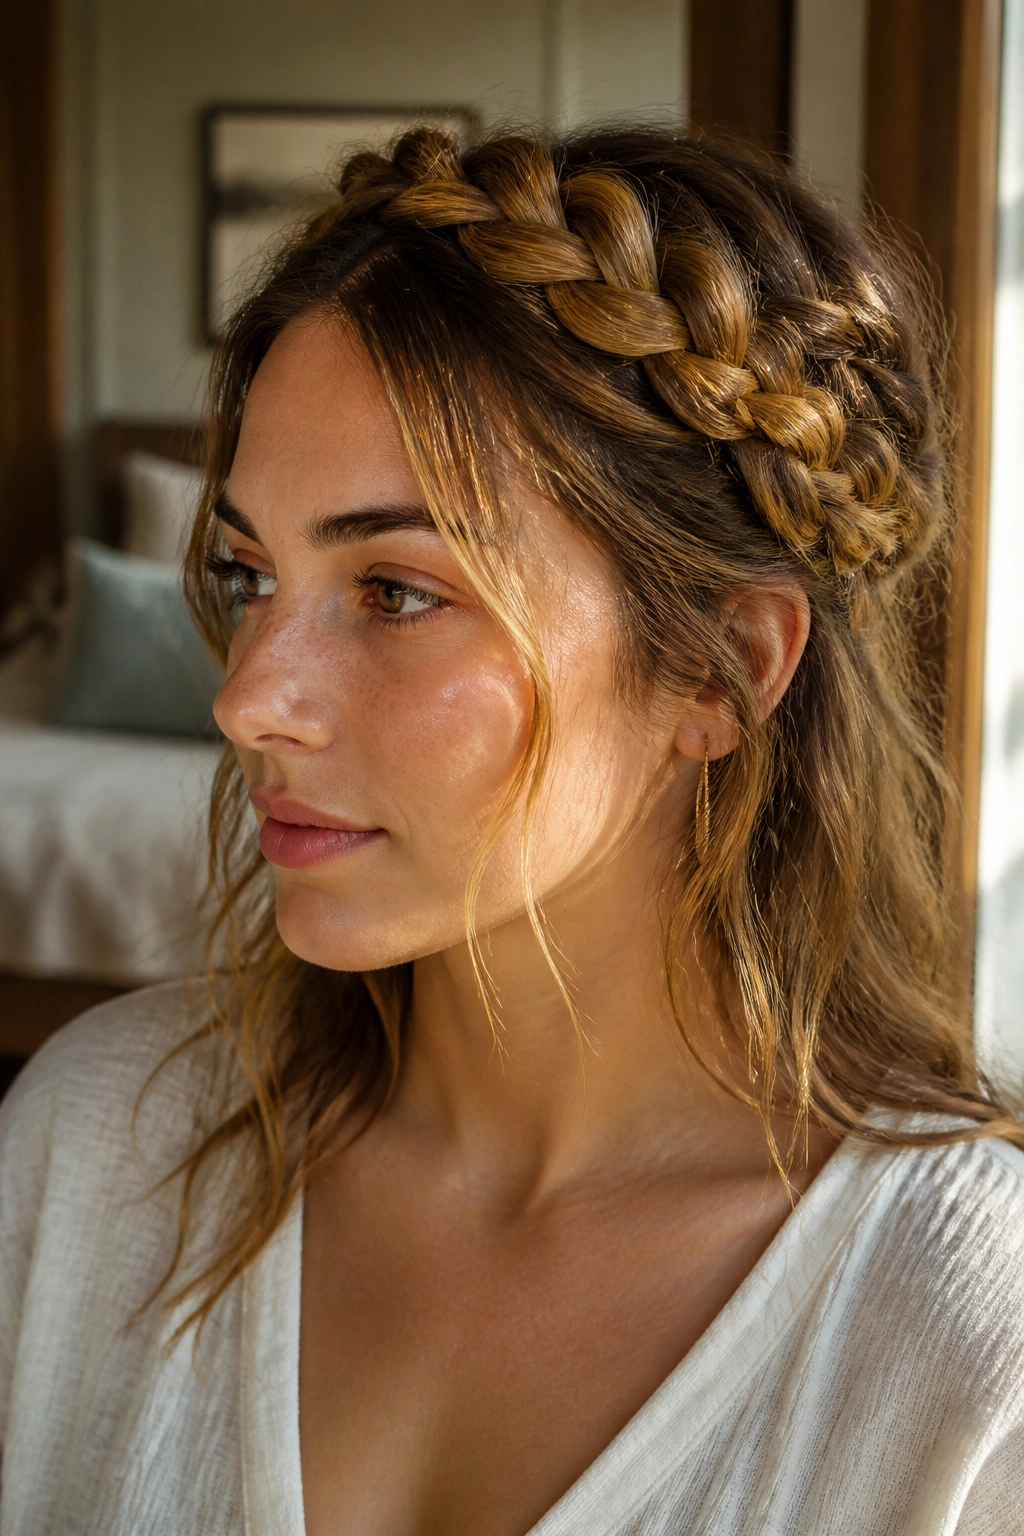
A crown braid looks like the sort of style that takes ages, but the version that works on wavy hair can be looser and more forgiving than people assume. The braid wraps around the head, so the front stays neat while the rest dries with shape.
Begin near one temple and braid along the hairline, working toward the back of the head. Then continue around the other side, pinning as you go. If your hair is layered, a few shorter pieces will slip free. That is fine. In fact, it keeps the style from looking too stiff.
This is the style I’d pick for days when the front of the hair frizzes first. The braid acts like a frame, and the wavy lengths that spill at the back still feel soft. It also handles medium to thick hair well because there is enough bulk for the braid to stay visible.
One caution: a crown braid needs a little grip in the hair. If your strands are too silky, a touch of mousse before braiding helps the sections stay put.
17. Pin Curls for a More Defined Wave Pattern
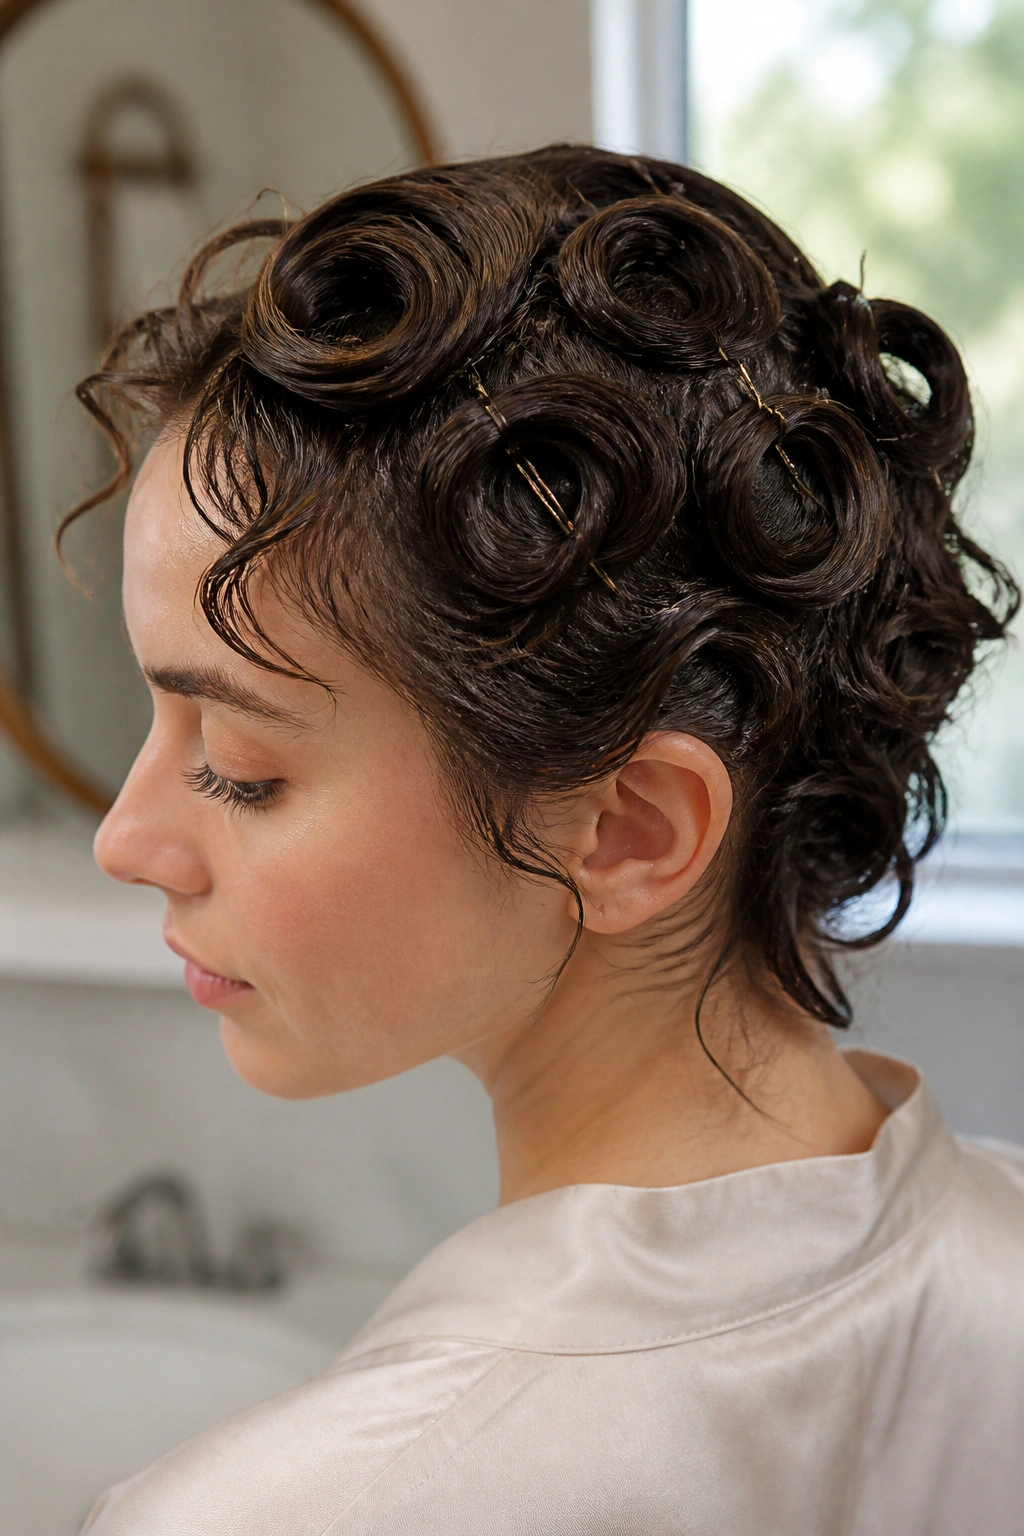
Pin curls are not only for vintage sets and polished waves. On wavy hair, they’re a strong way to guide the bend while the hair air dries, especially if your natural pattern is loose and tends to fall apart.
Take small sections of damp hair, wrap each section around one or two fingers into a flat curl, then pin it close to the scalp. The direction matters a little, but not as much as even tension and consistent section size. Smaller sections give more definition. Bigger sections give softer movement. You can mix them if you want a less uniform finish.
The hair needs to dry all the way before the pins come out. Not almost dry. Fully dry. If you take them down too early, the wave relaxes too much and you lose the shape you built. That is the part people rush, and it is usually the part that backfires.
Pin curls take more time than a braid or bun, but they also give you more control. If your waves refuse to hold a pattern, this is one of the few air-dry methods that can change the outcome in a meaningful way.
18. The Jaw-Clip Chignon That Looks Loose, Not Messy

A jaw-clip chignon sits in the sweet spot between casual and put-together. Compared with a regular low bun, it gives the ends more room to stay wavy instead of being folded into a hard knot.
Twist the hair low at the back of the head, fold it upward, and secure it with a jaw clip so the ends can spill slightly at the bottom. The trick is not to smooth the hair too much before clipping. Wavy hair looks better when the surface has a little life in it. If you flatten it first, the style loses its character.
This one is especially good for thick waves that need to get out of the way but don’t want to be trapped in a tight bun. A medium clip can hold shoulder-length hair well. Longer hair may need a stronger clip with a deeper jaw.
Why It Beats a Tight Bun
- Less tension at the roots.
- Better shape for textured ends.
- Easier to redo during the day.
- More movement around the neck and face.
It is one of the few updos that can look deliberate even when it’s slightly uneven. That’s a real advantage, not a flaw.
19. The Off-Center Top Knot That Keeps Waves at the Ends

A centered top knot can flatten the crown and make wavy hair look oddly severe. Shift it off-center by even an inch or two, and the whole thing softens.
Gather the hair high, but not dead center. Sit the knot slightly to one side of the crown, twist the hair once or twice, and wrap it into a loose knot that still lets the ends show. The off-center placement makes the style feel more relaxed and less like you were aiming for a ballet bun and stopped halfway. It also helps if your head shape or part line tends to pull hair to one side anyway.
I prefer this when I want the wave pattern to stay visible in the lower lengths. The knot keeps the crown out of the way, while the ends still dry with texture. If your hair is layered, a few shorter pieces will frame the face and neck, which is useful. If it is all one length, pull the knot slightly smaller so the finish does not get bulky.
Small adjustment. Big difference.
20. The Tucked-Behind-Ears Finish for Minimal Effort
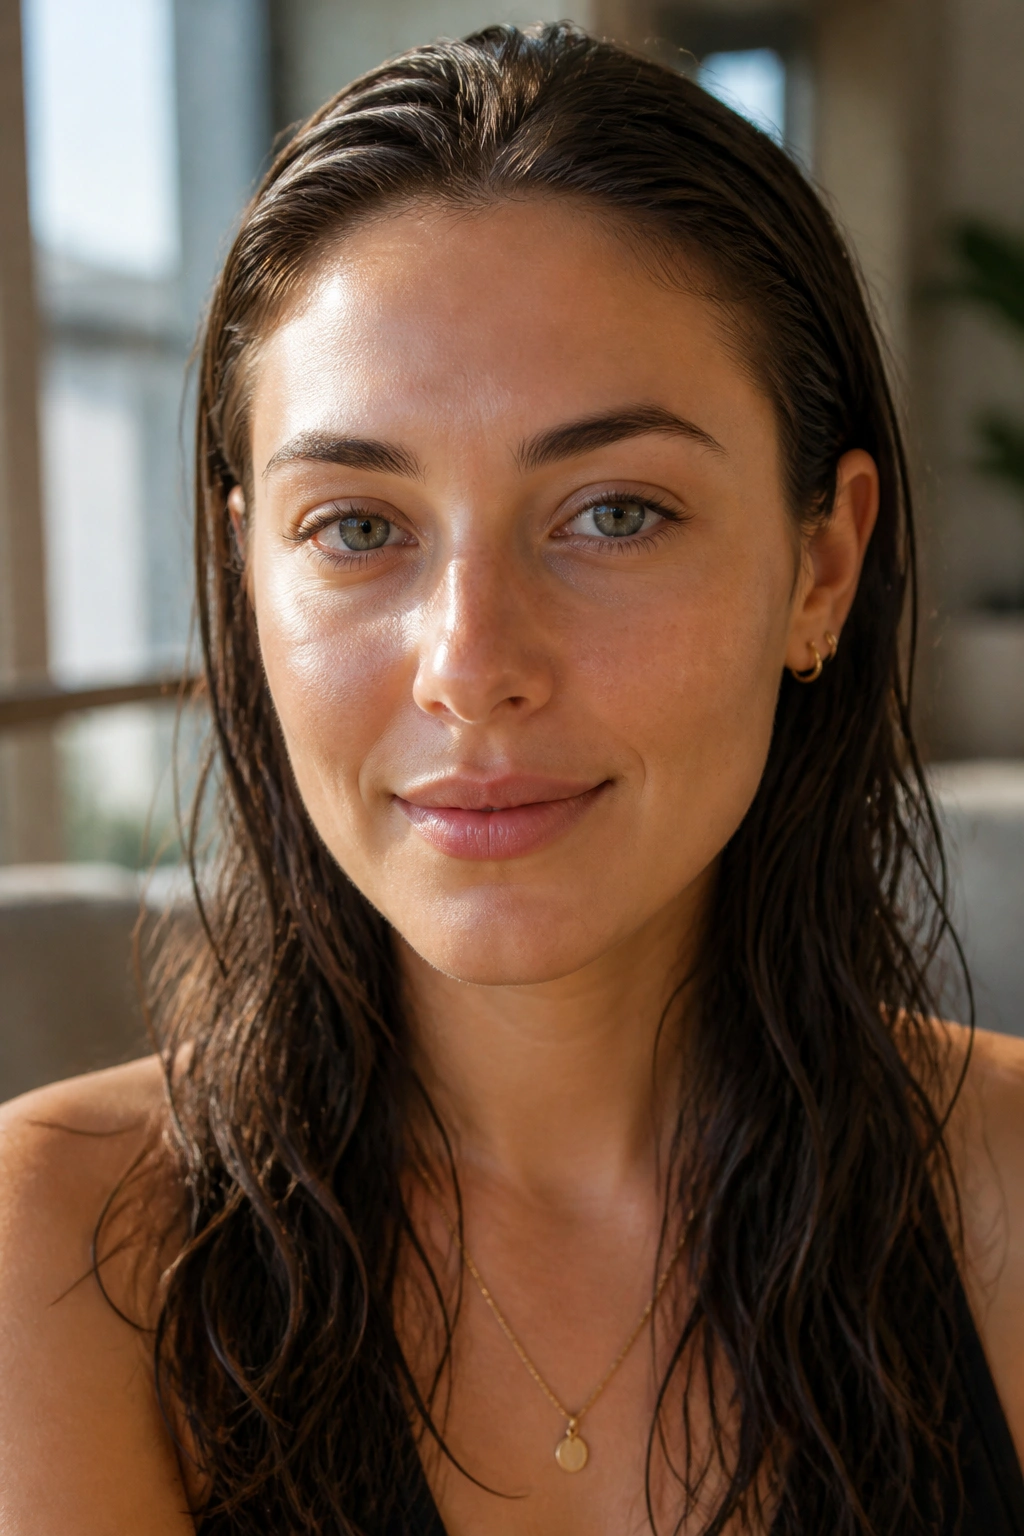
Sometimes the best air-dry hairstyle is almost no hairstyle at all. Wavy hair does not always need a braid, a twist, or a clip to look intentional.
Take damp hair, part it where it naturally wants to sit, and tuck both front sides behind the ears while the rest dries loose. If the hairline needs a little help, smooth just the front inch with a light cream or a drop of gel. Not much. Enough to calm the fuzz, not enough to erase the bend. The tucked sides keep the face open, and the loose length lets the wave pattern settle without interruption.
This is a smart choice for short to medium wavy hair, especially if layers already give you shape. It also works well with glasses, earrings, or a collar that would otherwise fight with bigger styles. No clip needed. No braid needed. No drama.
What I like most is how honest it is. The style says, “This is my hair, and I know what it does.” That kind of confidence looks better than overworking waves into something they were never going to be.
And on the days when the hair is doing exactly what it should, this is the one that lets it speak for itself.
