



A side part does more for a hairstyle than most people give it credit for. Shift the line a little, and suddenly a plain bun looks deliberate, a ponytail looks cleaner, and loose waves stop feeling sleepy.
I keep coming back to side part hairstyles when the goal is polished but not stiff. They’re the styling equivalent of a tailored jacket: simple, sharp, and forgiving when your hair is having an off day.
The trick is placement. A part that lands an inch too far over can flatten the crown or drag the front pieces into your eye; a clean part with a little lift gives shape, balance, and that “I actually thought about this” finish. A rat-tail comb, a bit of root spray, and a steady hand go a long way.
Some of the looks below lean sleek, some softer, some dressy enough for a formal event, but all of them use that side sweep to make the final result feel intentional. Start with the one that matches your texture, not the one that looks hardest.
1. Sleek Side-Part Low Bun
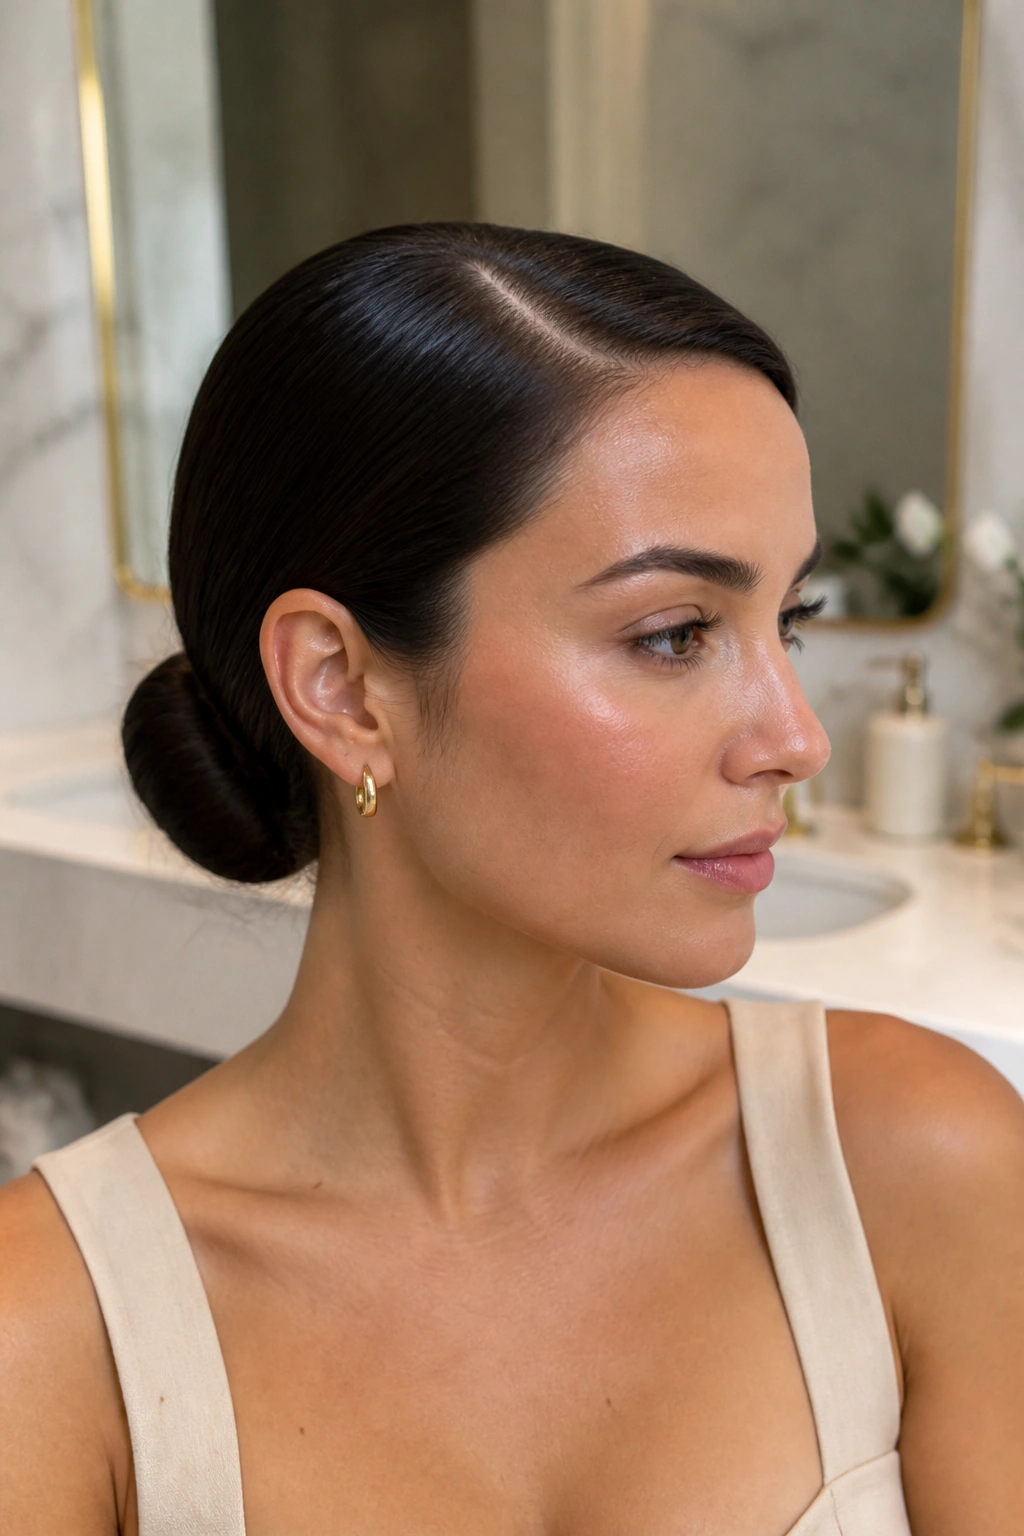
A sleek low bun with a side part is one of those styles that looks expensive even when it takes ten minutes. It works because the part gives the eye a clear starting point, then the smooth sides and tight nape bun keep everything controlled.
The cleanest version starts with damp or freshly blown-out hair. Draw the part with the tail of a comb, mist the roots with a light hold spray, and brush the hair back in the direction of the bun so you do not get those little flyaway bumps near the temples. A dab of styling cream along the hairline helps, but go easy. Too much product makes the front look greasy instead of sleek.
What makes it hold so well
- Keep the bun low, just above the nape, so the weight sits close to the head.
- Use a snag-free elastic first, then wrap a small strand around it for a finished base.
- Pin the bun in a flat circle, not a bulky ball.
- Finish with a soft mist of hairspray, then smooth the edges with a clean toothbrush or spoolie.
Best tip: if your hair slips easily, rough up the inner section of the bun before pinning it. A little texture gives the pins something to grip.
2. Deep Side-Part Hollywood Waves
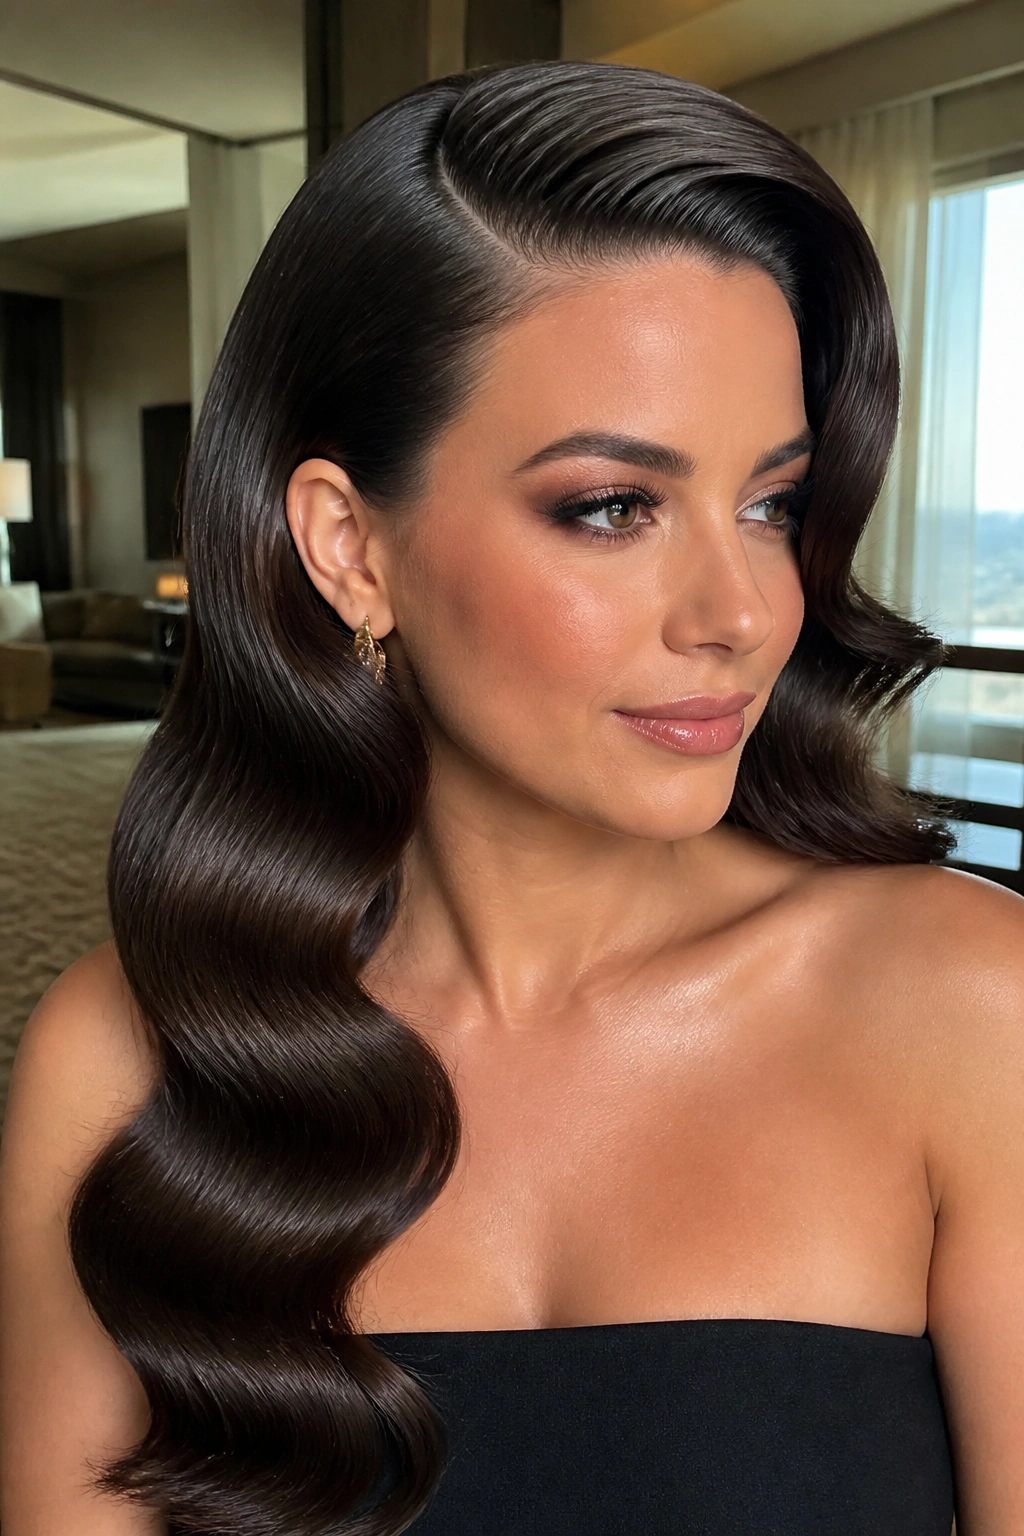
Why does a deep side part make waves look more polished? Because it gives the whole style a shape before the curls even start moving. The heavier side creates that swoop across the forehead, and the rest of the hair falls in a controlled cascade instead of floating everywhere.
I like this look best on medium to long hair with a bit of shine serum worked through the ends. Use a 1 to 1¼-inch curling iron, curl every section away from the face, then pin the curls until they cool. That cooling step matters. Warm curls drop faster, and the wave pattern gets loose in a way that reads sloppy rather than soft.
After releasing the clips, brush the curls out with a paddle brush or wide boar-bristle brush. You want one smooth wave, not a pile of ringlets. Tuck the heavier side behind one ear if you want a little more polish, then mist a flexible spray over the top so the movement stays touchable.
A side part helps this style avoid the flat, middle-heavy look that can happen with long waves. It gives the front of the hair a clean line and a little drama. Not loud. Just enough.
3. Side-Part Chignon with Face-Framing Tendrils
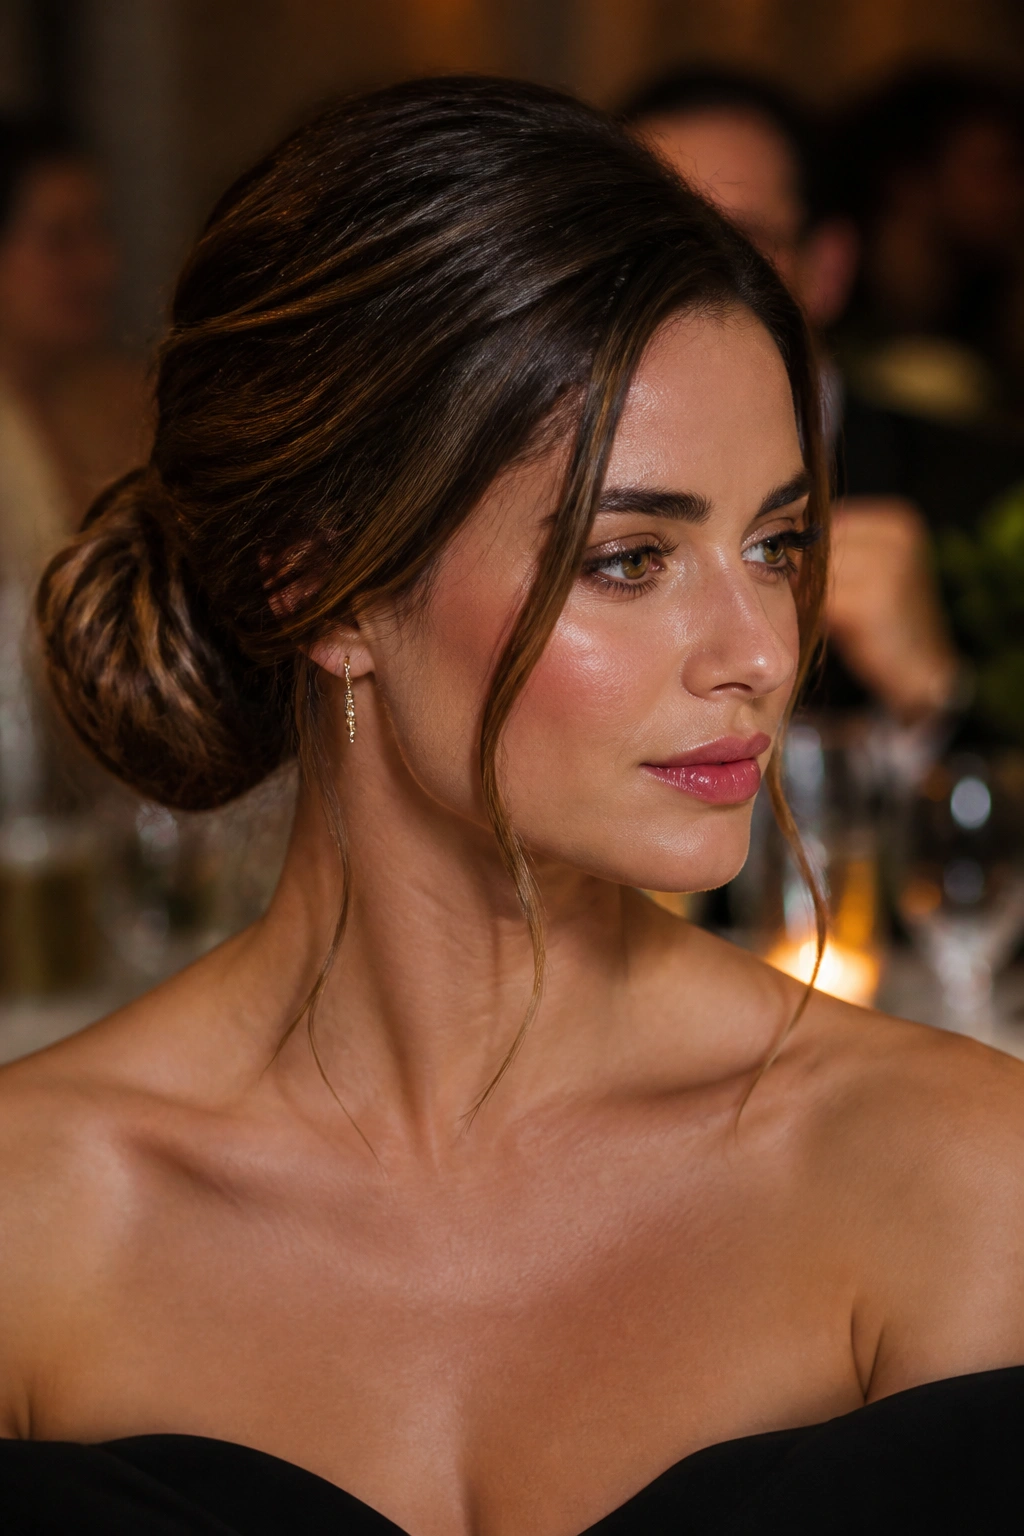
Picture a dinner, a blazer, and earrings that actually deserve to be seen. A side-part chignon fits that mood without looking overworked.
Start by leaving out two slim face-framing pieces, about half an inch wide each, then smooth the rest of the hair into a low chignon. The part should be visible but not exaggerated; think clean line, not runway stripe. Curl the front pieces away from the face with a 1-inch iron so they bend softly instead of hanging straight like curtain cords.
How to keep it polished instead of messy
- Keep the tendrils thin enough to move, but not so thin they disappear.
- Secure the chignon flat against the head with crossed bobby pins.
- Spray the palm of your hand and smooth the crown lightly, rather than spraying directly onto the hairline.
- Let the bun sit slightly off-center if you want the side part to feel connected to the shape.
A chignon is forgiving, which is part of the reason it’s so useful. If the twist isn’t perfect, the part and tendrils do the work of making it look deliberate.
4. Polished Side-Part Low Ponytail
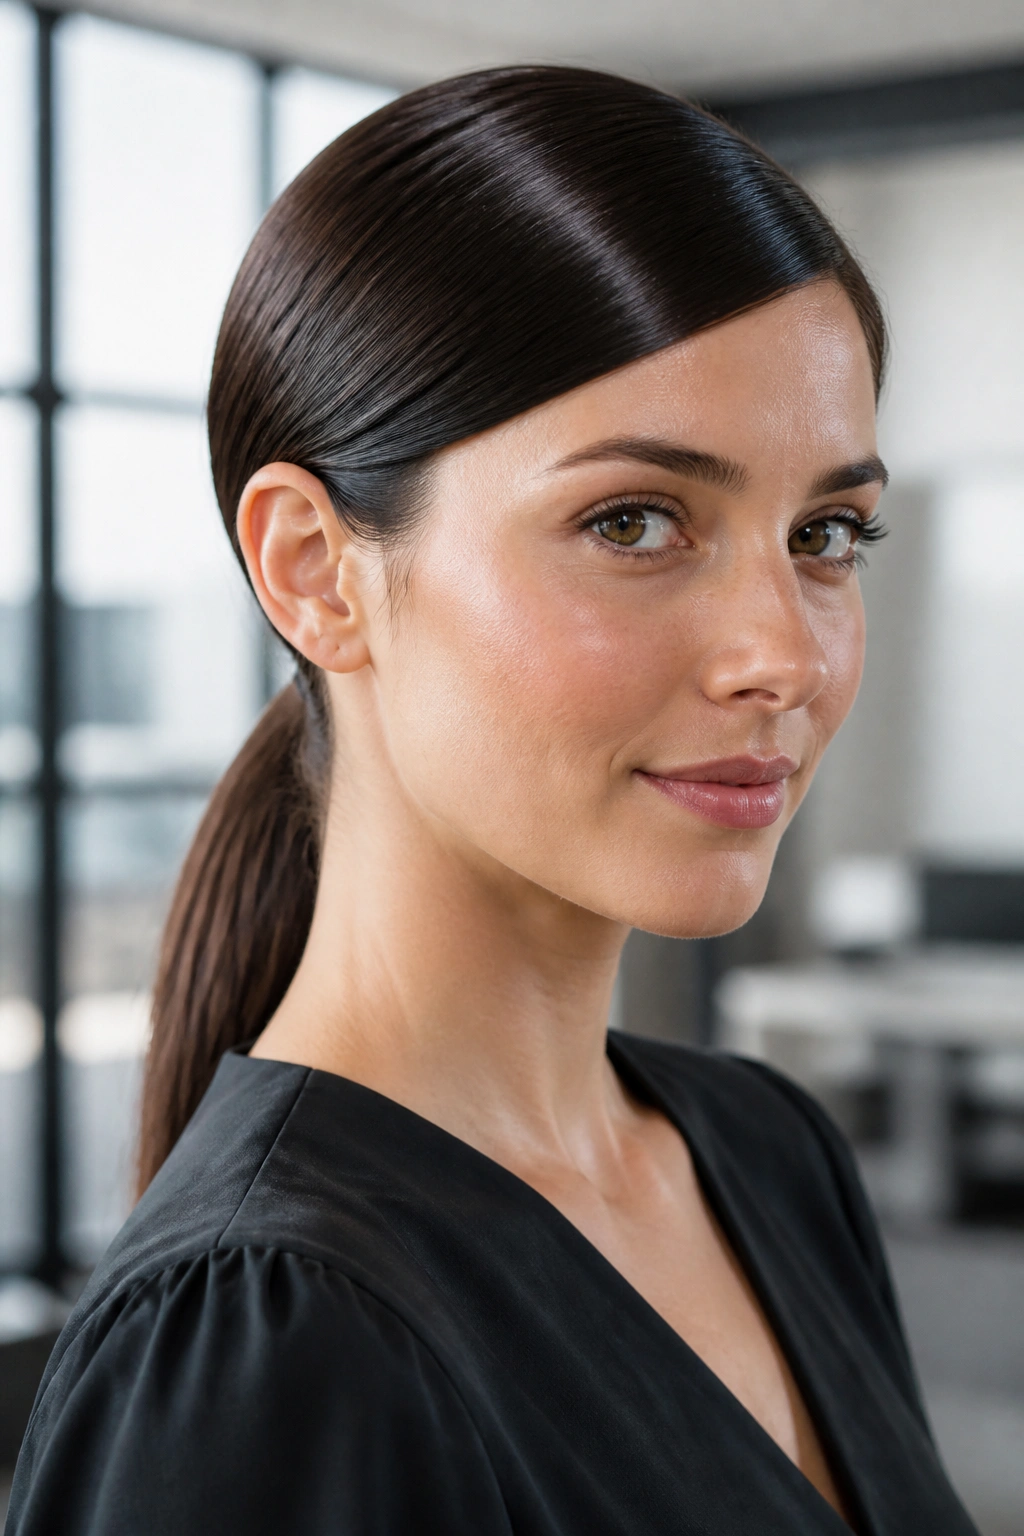
A low ponytail with a side part is the easiest clean style in the group, and honestly, it deserves more respect. Done well, it looks crisp, modern, and a little bit severe in the best way.
The details matter. Brush the hair back low at the nape, but keep the crown smooth rather than pulled tight enough to make your eyes look tired. If you want a touch of lift, tease the roots under the heavier side of the part before you gather the hair. Then wrap a one-inch section around the elastic and pin it underneath so the base disappears.
This style is especially good for straight hair, but it works on wavy hair too if you flatten the top and let the tail keep some texture. A shine spray over the lengths gives it that fresh, finished look. Not greasy. Fresh.
If your ponytail keeps splitting, use two elastics stacked on top of each other. It sounds small, but it keeps the shape from sagging halfway through the day.
5. Side-Part French Twist
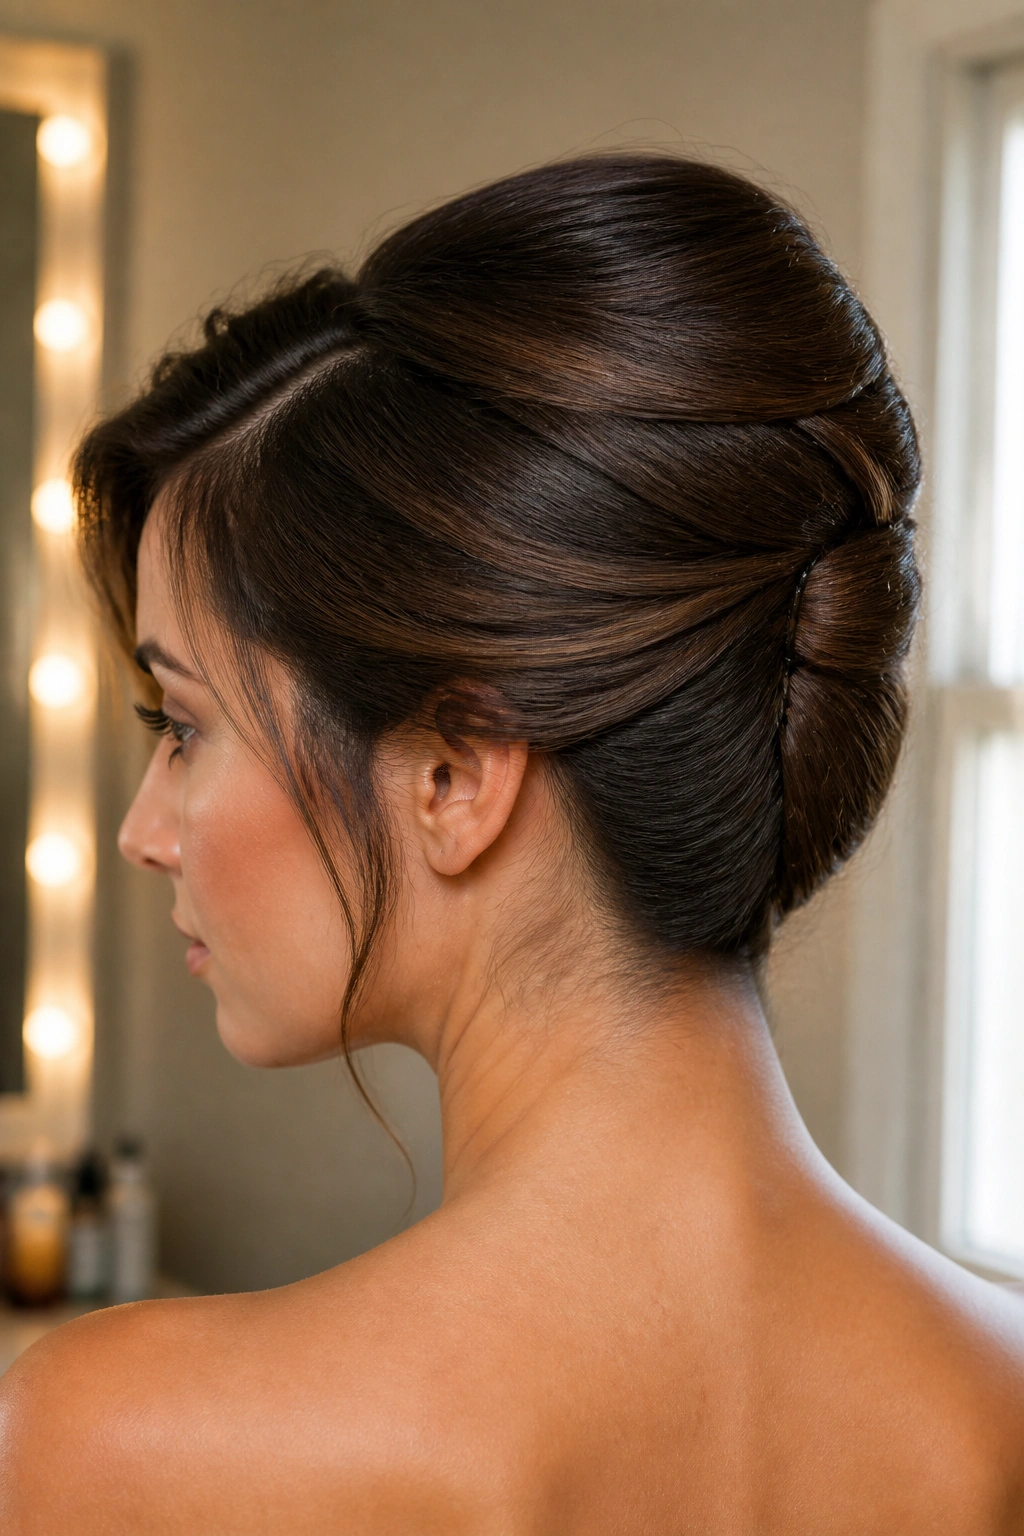
A French twist can look formal in a stiff, old-fashioned way, or it can look sharp and modern. The side part is what tips it toward the second version.
Instead of centering the hair before rolling, build the twist from the lower side of the part so the sweep feels connected to the updo. Keep the roll snug, but not so tight that every line disappears. A little texture near the crown makes the twist look intentional rather than helmet-like.
The best French twists have good pinning, not endless pinning. Use long U-pins to anchor the roll vertically, then tuck a few smaller bobby pins where the shape starts to loosen near the nape. If the hair is silky, mist a texture spray before styling. Smooth hair can slide around fast.
This is one of those styles that rewards patience. The first time you do it, it might look a little too tidy. The second time, you’ll know where to leave a small puff at the crown and where to flatten the sides. That tiny bit of softness makes all the difference.
6. Side-Part Blowout with Soft Flip Ends
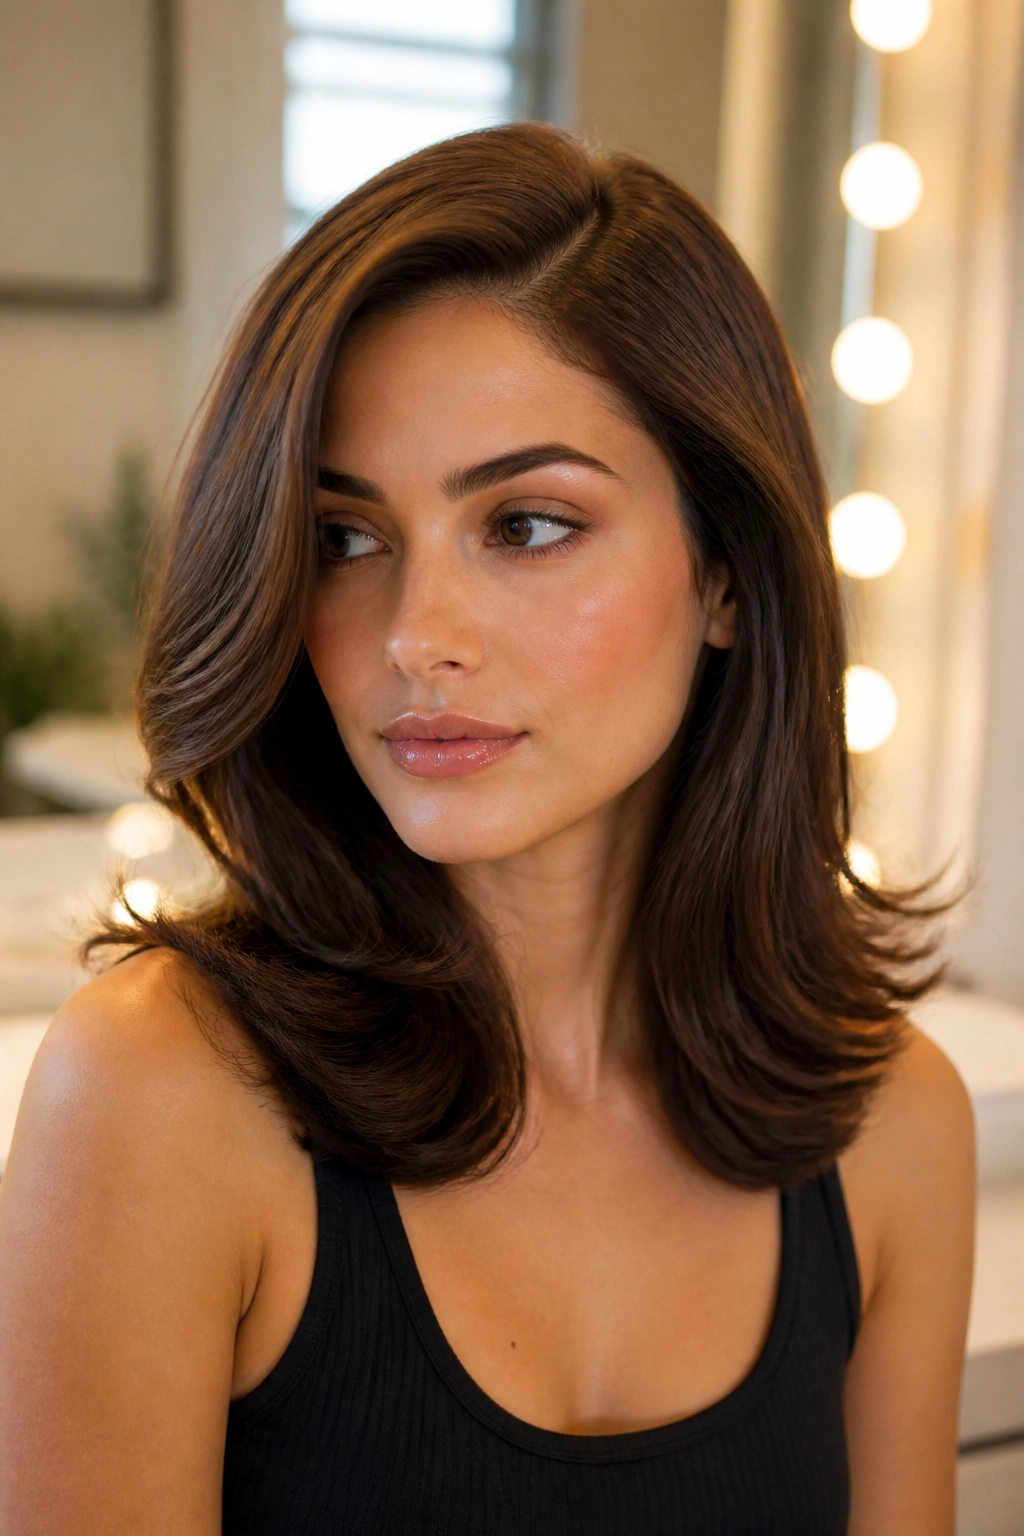
Fresh blowouts have a smug little confidence about them. Add a side part, and the whole thing looks cleaner, richer, more finished.
Start with a volumizing mousse at the roots and blow-dry with a nozzle attachment so the air goes where you want it. Use a round brush, lifting at the roots on the heavier side of the part and turning the ends under or slightly out, depending on your haircut. A 1½-inch brush usually gives the nicest bend on shoulder-length hair.
How to get the bounce
- Blow-dry the part first so it sets the direction.
- Clip the front section away while you work the back.
- Roll the ends under for a classic polished look, or flip them out for a slightly more playful finish.
- Let the hair cool on the brush before moving to the next section.
The polished part here is the shape. Hair that sits flat from roots to ends looks tired. Hair with a lifted crown and a soft swing at the bottom feels cared for, which is really what people notice.
7. Side-Part Braided Low Bun
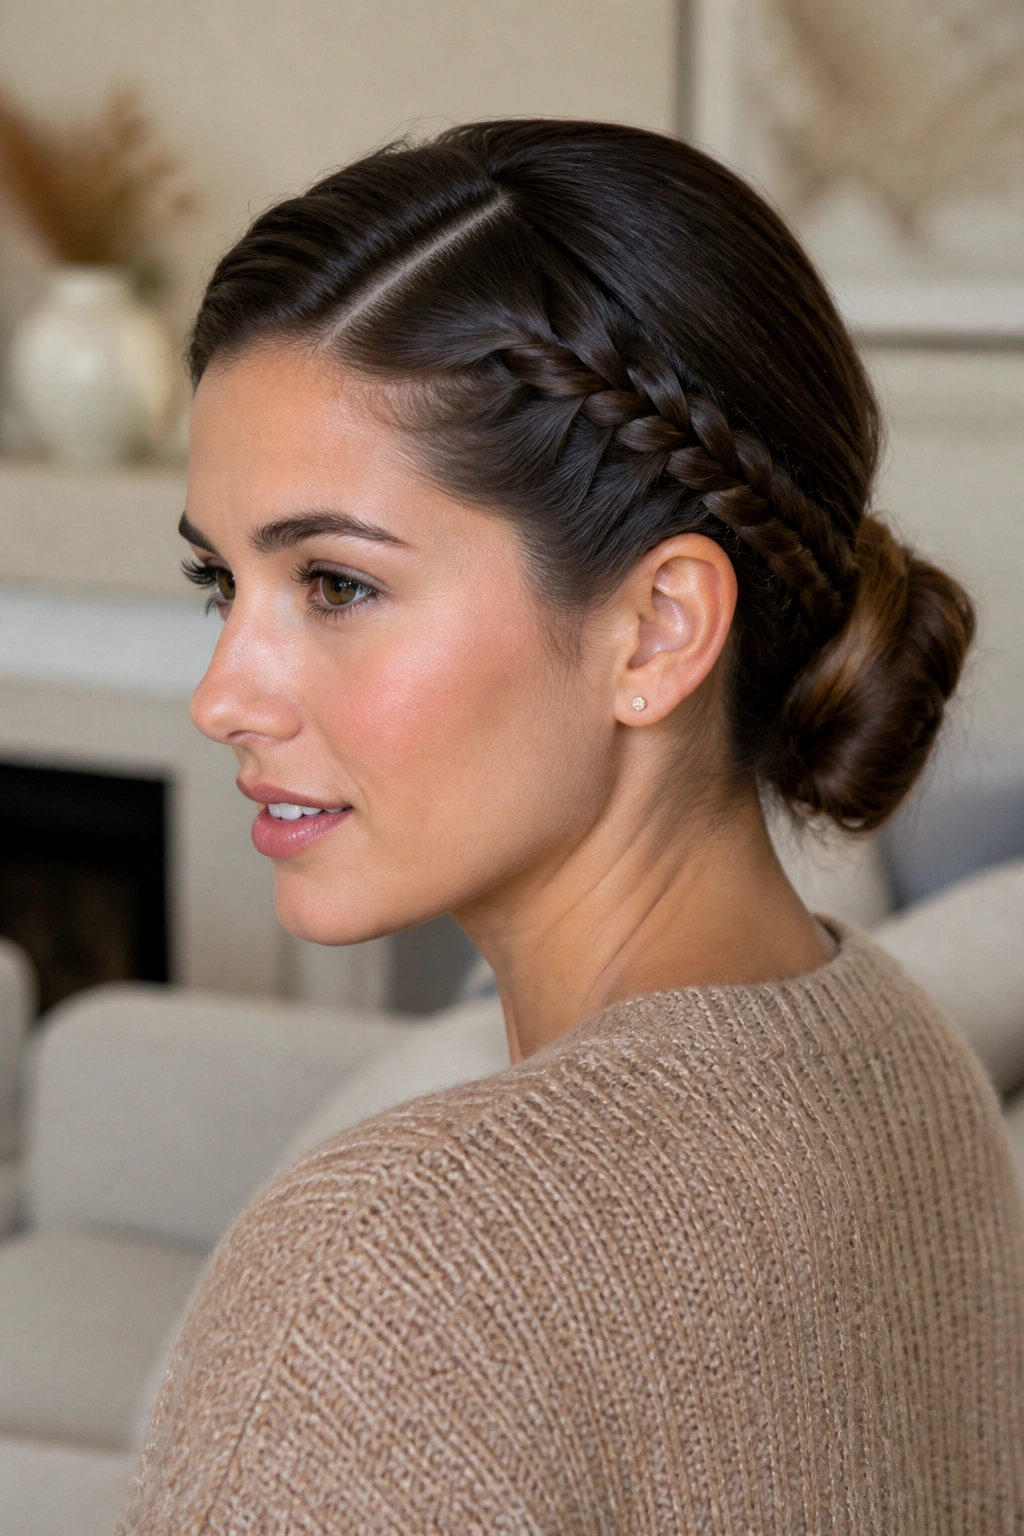
A braided low bun gives you texture without losing control. It’s a smart move when you want the hair pinned up, but not plain.
Begin the braid on the heavier side of the part and work it back toward the nape. A loose Dutch braid or a standard three-strand braid both work; the main thing is keeping the sections even so the braid doesn’t wobble. Then wrap the braid into a low bun and pin it flat.
The braid adds structure, which means the bun can be smaller and still look finished. That’s useful for fine hair, because you get the look of fullness without stuffing in a lot of hair padding. If your hair is thick, braid only the front section and let the rest gather into the bun. Otherwise the whole style can get bulky fast.
Use small pins to lock the braid where it crosses the bun. Big pins tend to lift the shape. Small ones disappear better, and that matters here.
8. Side-Part Wrapped Ponytail
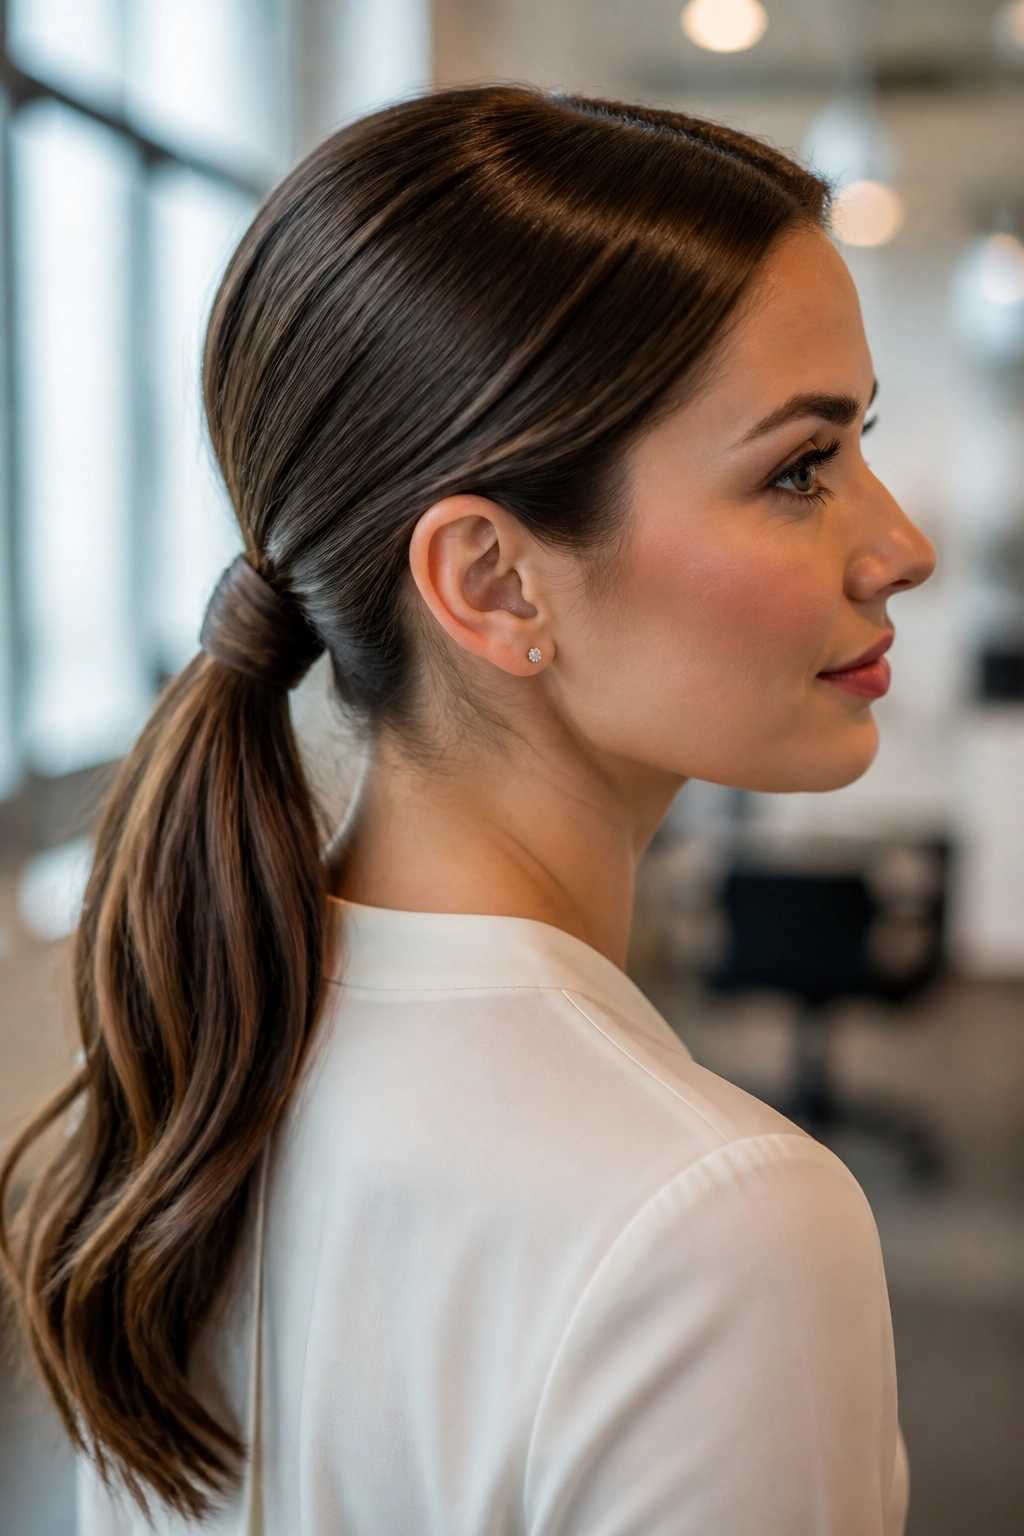
What if you want a ponytail that looks crisp without feeling severe? Wrap the base. That small move changes everything.
A wrapped ponytail with a side part usually sits low or at mid-height, and the part gives it just enough asymmetry to keep it from looking gym-ready. Smooth the crown first, then gather the hair with your hands rather than a brush if you want the tail to keep a little movement. A tighter brush gives a sharper look; hands give a softer one.
Where it shines
- Best with straight, wavy, or lightly curled hair.
- Great for work events, dinners, and clean daytime looks.
- Use a thick elastic if the hair is heavy.
- Wrap a half-inch strand around the base and hide the ends underneath with a pin.
A wrapped base is one of those tiny details that reads immediately as polished. It takes the ponytail from “I needed my hair up” to “I meant to do this.”
9. Side-Part Half-Up Twist
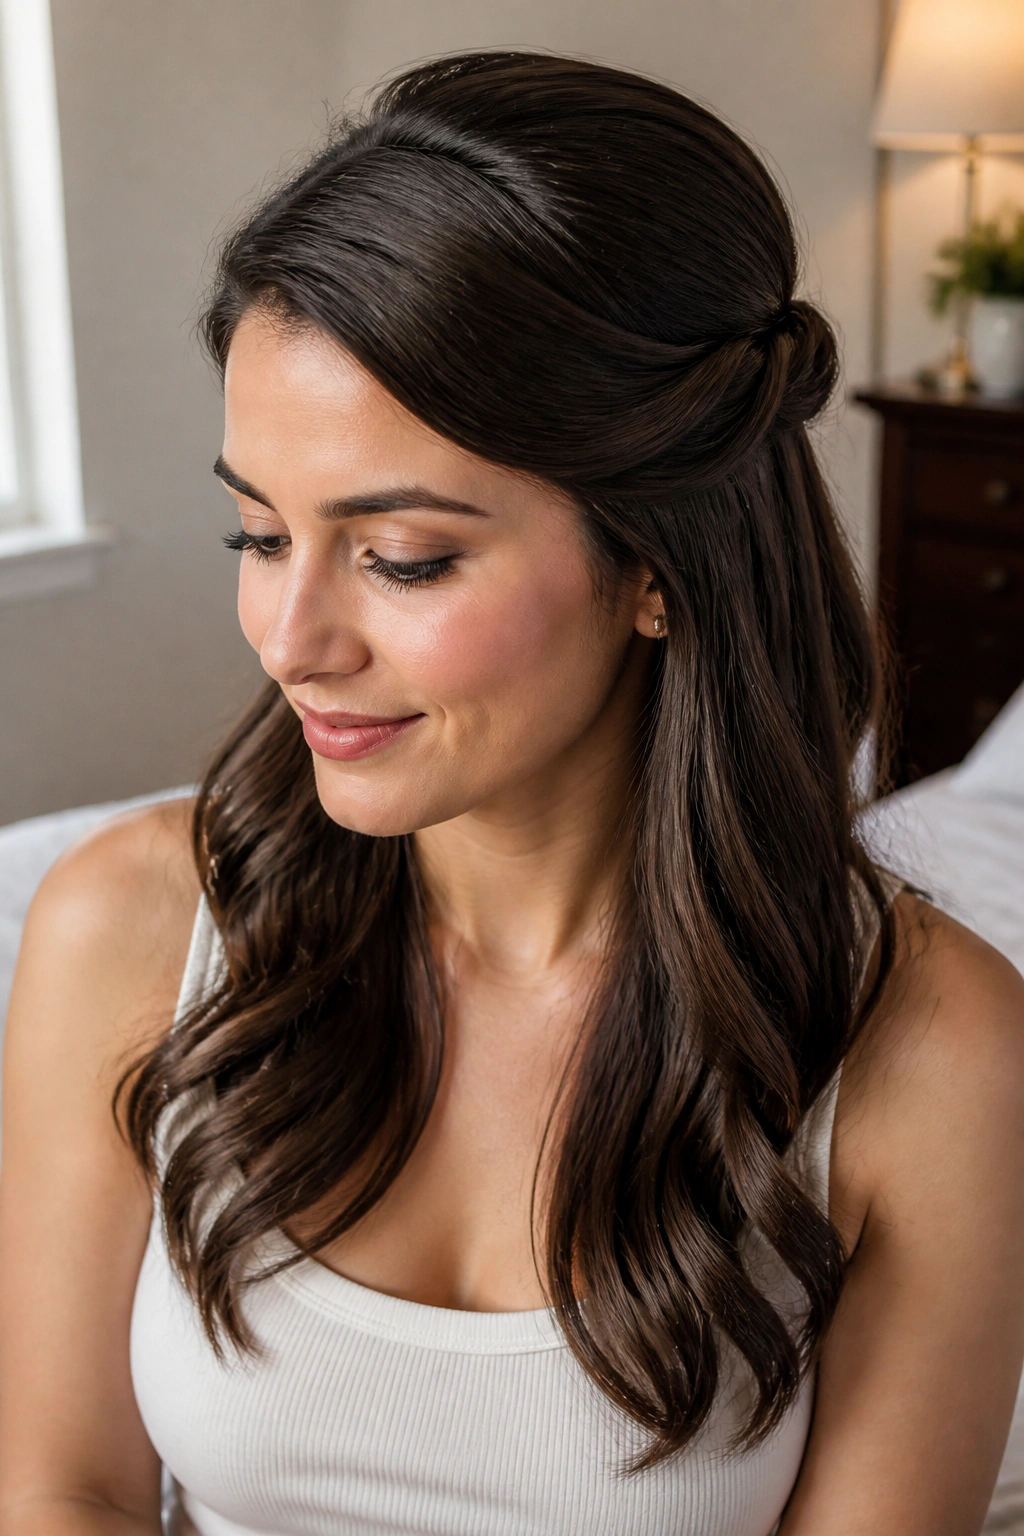
The side-part half-up twist is the style I’d hand to someone who wants polish with the least amount of fuss. It keeps hair off the face, shows off length, and still feels soft enough for everyday wear.
Take a section from the heavier side of the part, twist it back, and secure it behind the head with a pin or two. Repeat on the opposite side if you want more balance, or leave one side looser for a slightly more romantic shape. The ends can hang straight, wave, or curl. The point is the top half looks arranged, while the bottom half stays free.
This style is especially kind to second-day hair. A little texture helps the twist stay in place, and a light mist of dry shampoo at the roots gives the crown some lift. If your hair is very silky, rough up the twist before pinning it. Smooth hair has a habit of escaping.
Keep the twist narrow if you want the part to stay visible. A thick twist can swallow the whole shape, and then you lose the clean line that makes the look work.
10. Side-Part Bubble Ponytail
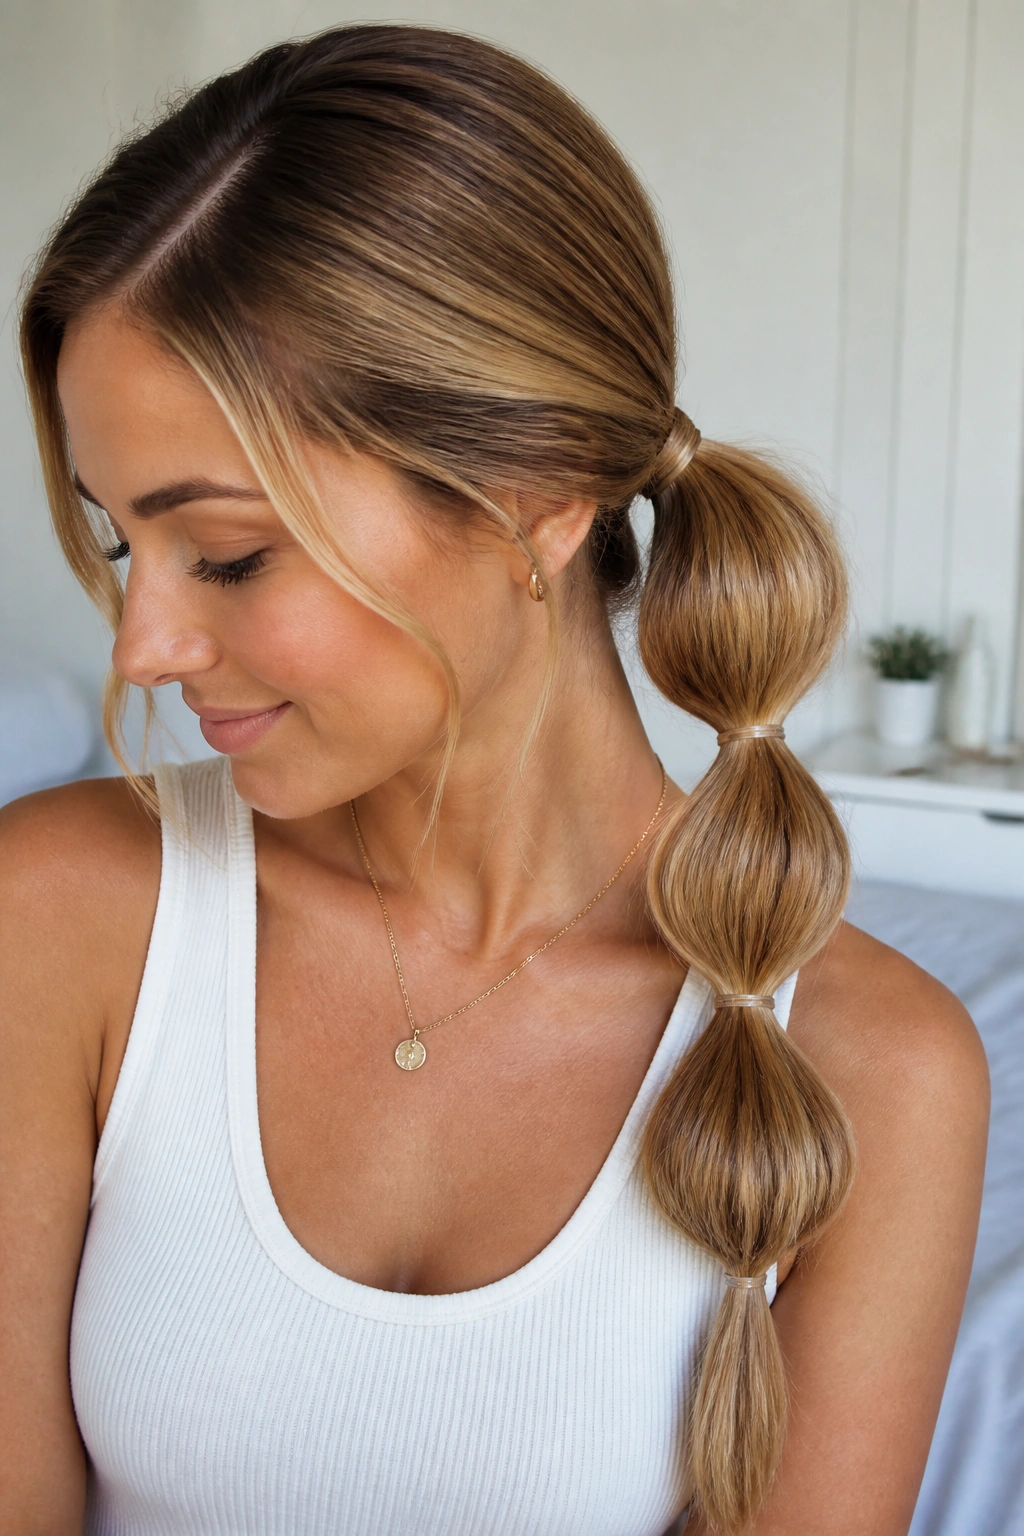
A bubble ponytail sounds playful, but with a side part and clean sections, it can look surprisingly polished. The trick is precision. Loose, uneven bubbles look casual; evenly spaced ones look deliberate.
First, secure a sleek ponytail at the nape or slightly lower. Add clear elastics every 2 to 3 inches down the length, then gently tug each section outward to make a rounded bubble. Use your fingers, not a comb. You want the shape to puff, not fray.
This style works best on medium to long hair. On shorter hair, the bubbles can look cramped. On longer hair, they look elegant if you keep the sections even and the crown smooth. A side part makes the top half feel tailored, which helps the ponytail read as dressed up instead of schoolyard cute.
If the bubbles start collapsing, pinch the center section lightly and mist the outer edges with hairspray. That tiny bit of hold keeps the round shape from deflating.
11. Side-Part Textured Knot at the Nape
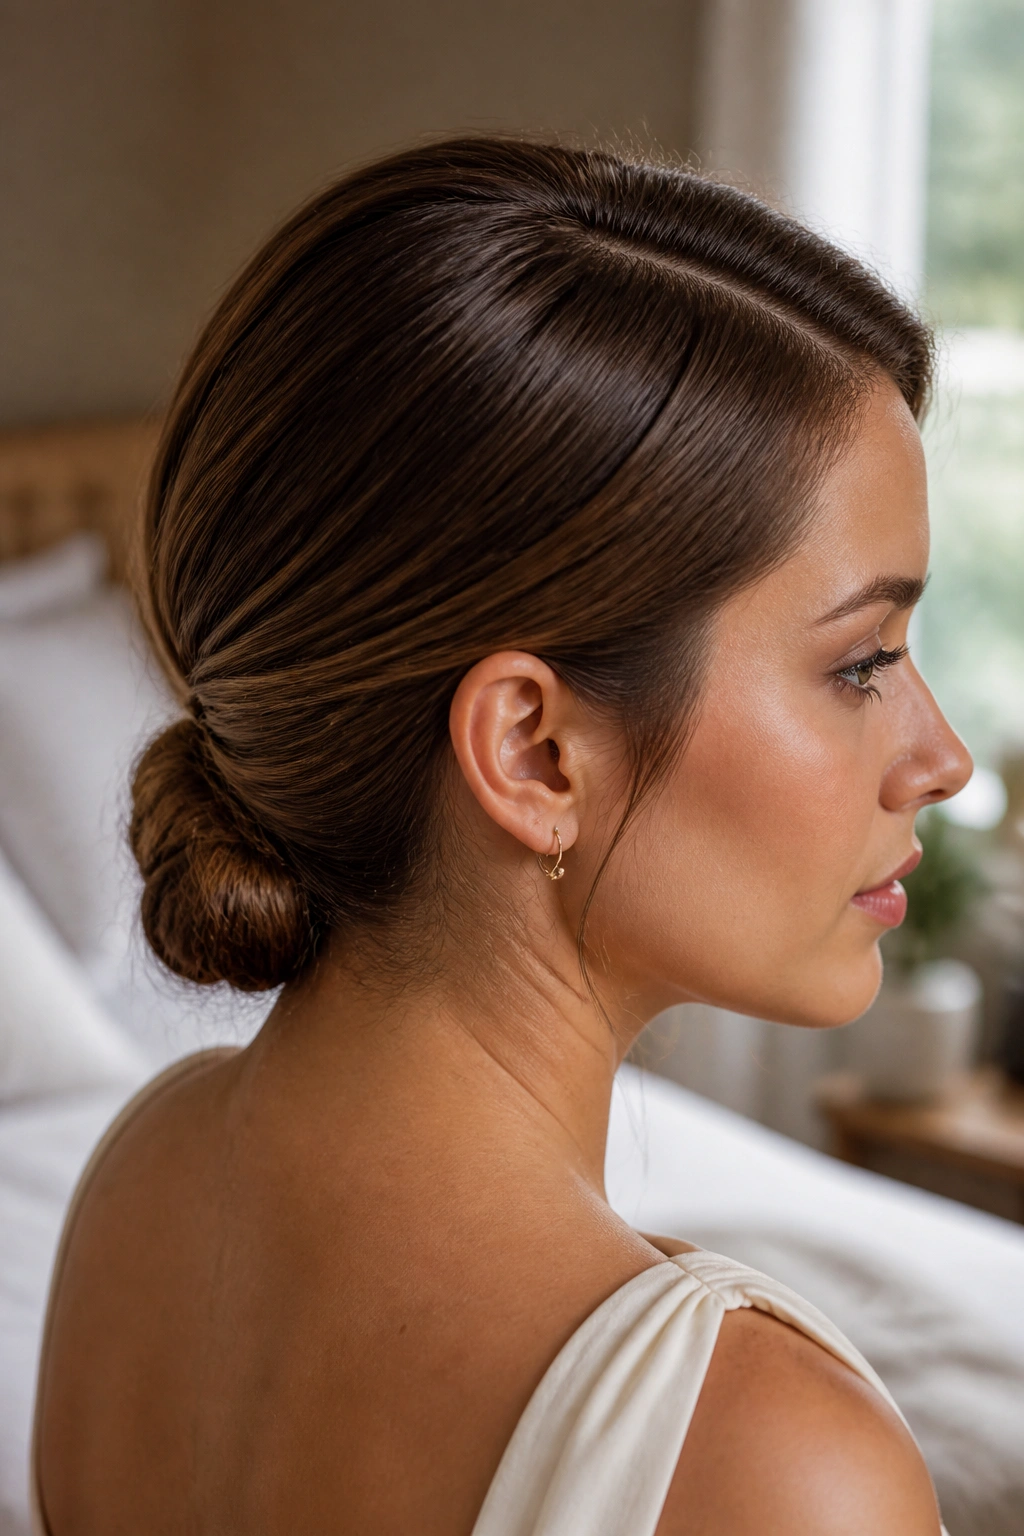
How do you keep a knot from looking like a rushed bun? Start with control, then leave just enough texture to soften it.
A textured nape knot begins with a side part and a low gather. Twist the hair once or twice, then coil it into a compact knot instead of a full bun. The shape should sit close to the neck, where it feels elegant and neat. If you have layers, those shorter pieces can be pinned under the knot rather than sprayed into submission.
What to watch for
- Don’t twist so tightly that the knot turns lumpy.
- Keep the crown smooth, but not pulled flat.
- Tuck shorter pieces under with a pin instead of forcing them into the main coil.
- Use a matte spray if your hair gets slippery during the day.
I like this style for textured hair because it lets the natural movement show through. The side part keeps the front structured, while the knot does not need to be perfect to look good. That’s the charm.
12. Side-Part Sleek Wet-Look Bun
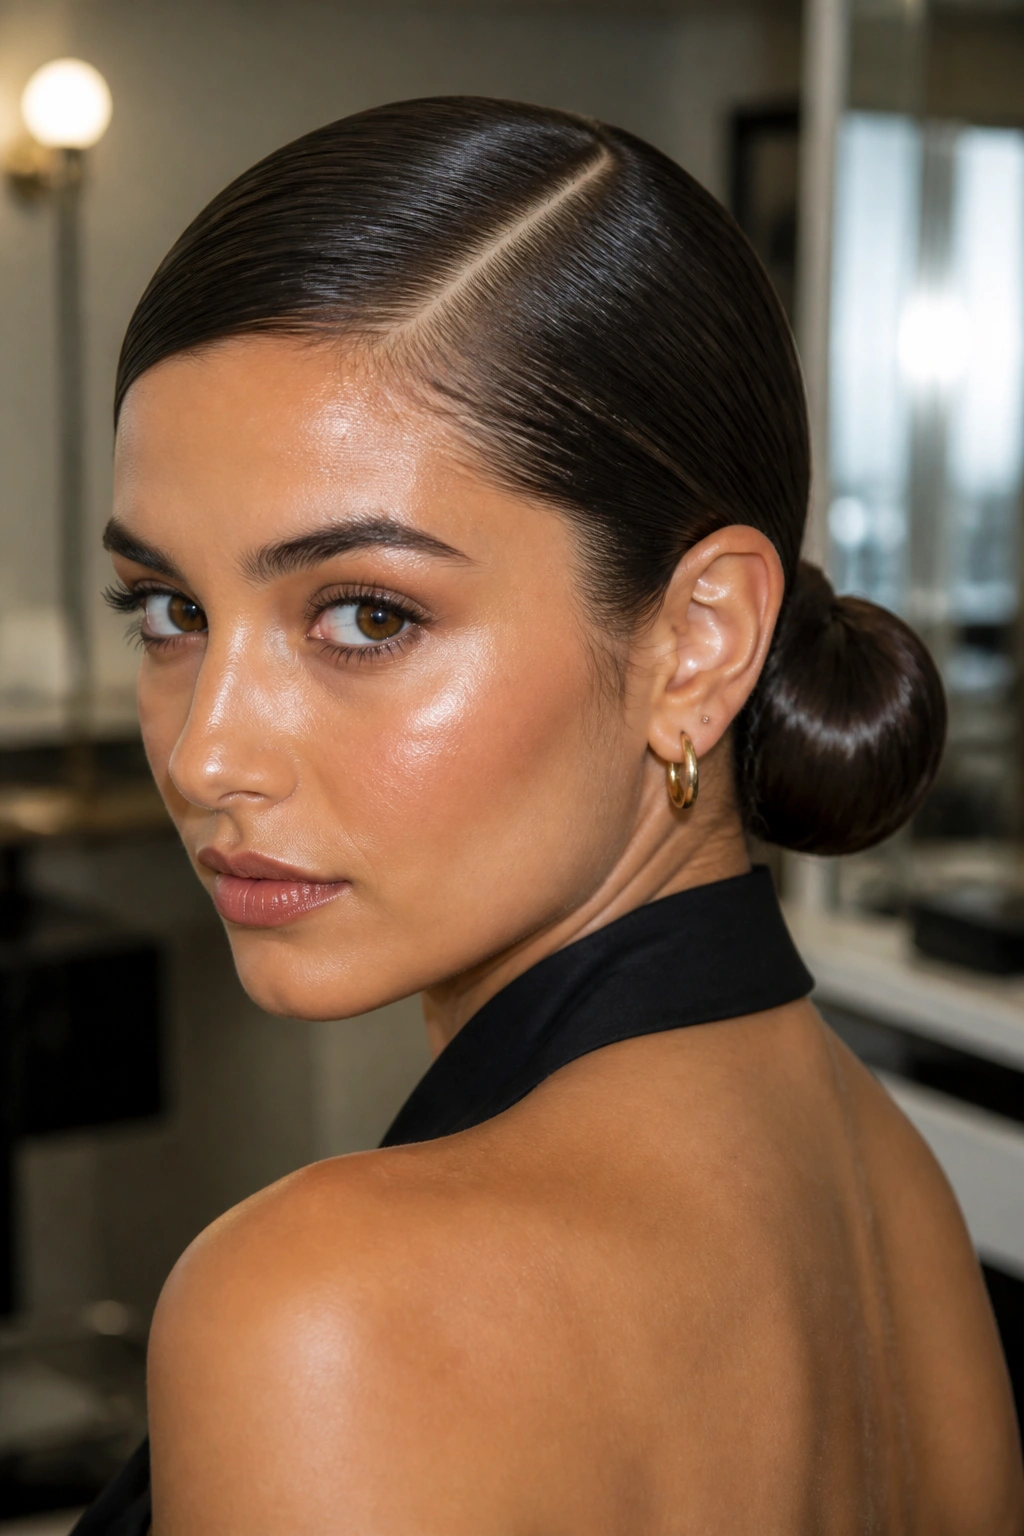
A wet-look bun is not for everyone, and I say that with love. If you like movement and softness, this is not your first pick. If you want sharp, glossy, and controlled, it’s hard to beat.
Start on damp hair or lightly misted dry hair, then work gel through the roots and mid-lengths with a fine-tooth comb. Create a strong side part, smooth the hair back, and gather it into a low bun or tight coil. The shine should look even, not patchy. If some sections look dull and others look coated, the product distribution is off.
The danger with this style is too much product. A heavy hand turns polished into greasy. Use enough to keep the hair flat and glossy, then stop. The hair should still move a little if you touch it.
This look suits short to medium lengths especially well, because the shape stays close and neat. It also pairs nicely with strong makeup or bold earrings, since the hair itself is doing a quiet, sharp job.
13. Side-Part Rope-Braid Ponytail
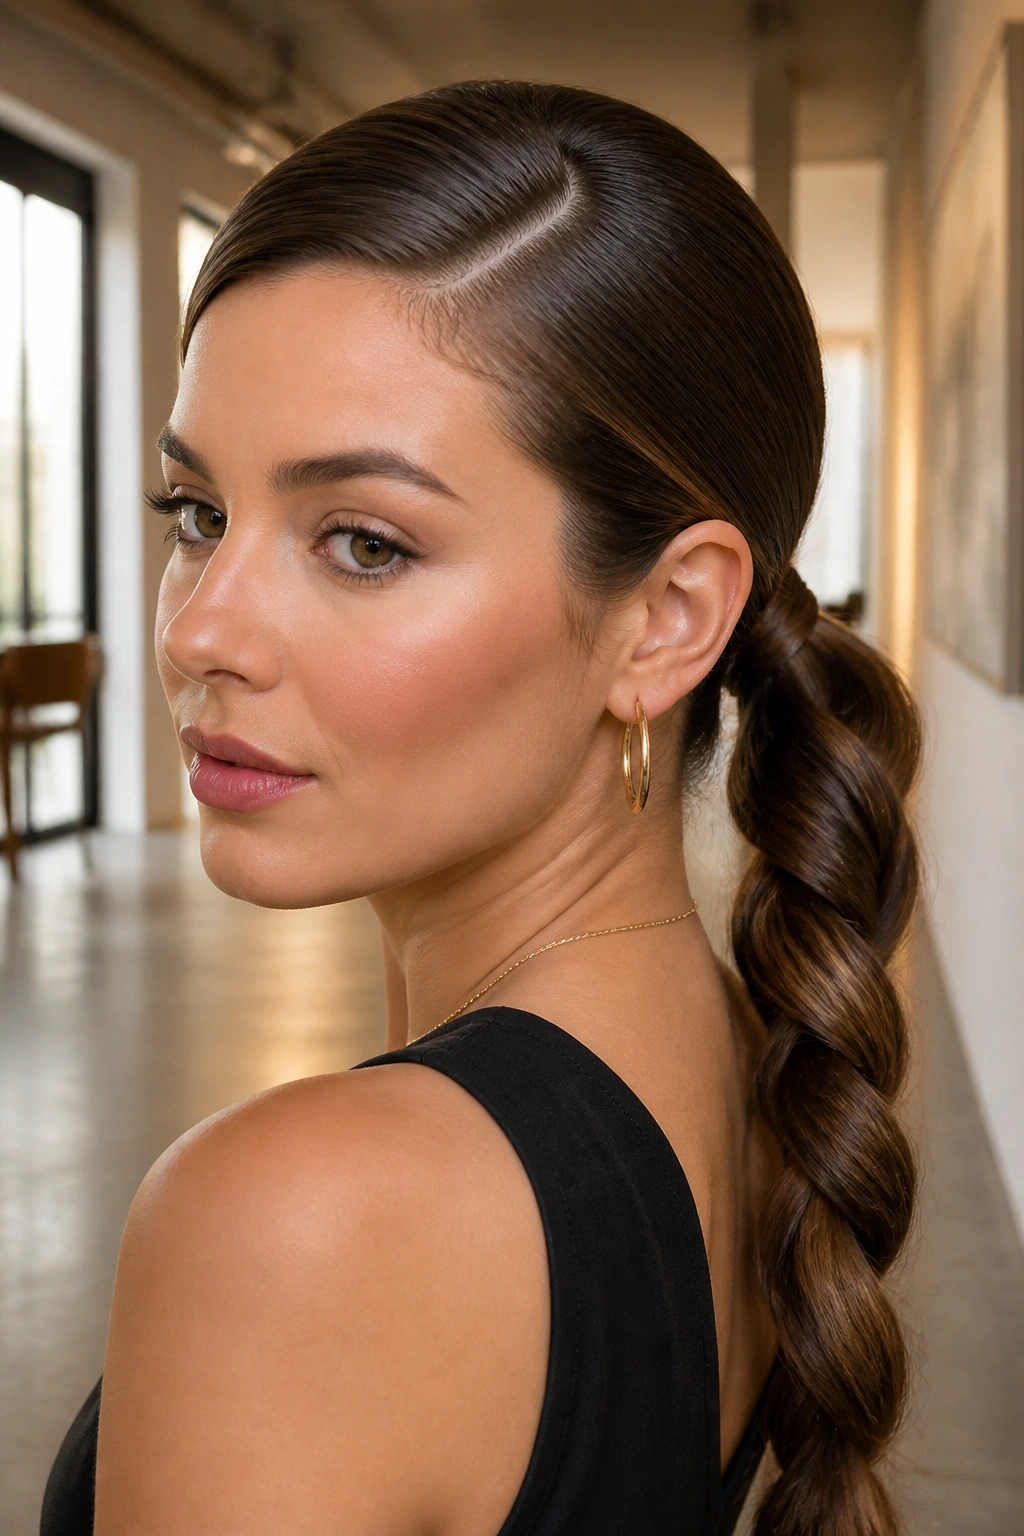
If regular braids fall apart on your hair, a rope braid is easier to control. It also looks cleaner at a glance, which is why I keep recommending it for polished side part hairstyles.
Gather the hair into a low or mid ponytail after creating the side part. Split the tail into two sections, twist each one in the same direction, then wrap them around each other in the opposite direction. Secure the end with a small elastic. The result has a tighter, sleeker feel than a standard braid, and it shows off shine well.
What makes it look different
- The twists should be even and firm from top to bottom.
- A small amount of serum on the tail keeps frizz down.
- If the braid starts unraveling, the sections were twisted in the wrong direction.
- Best on hair with some length, because short layers escape too easily.
A rope braid has a neat, almost architectural quality. The side part gives the front a soft sweep, then the braid keeps the back compact and controlled. That contrast is the whole appeal.
14. Side-Part Rolled Updo
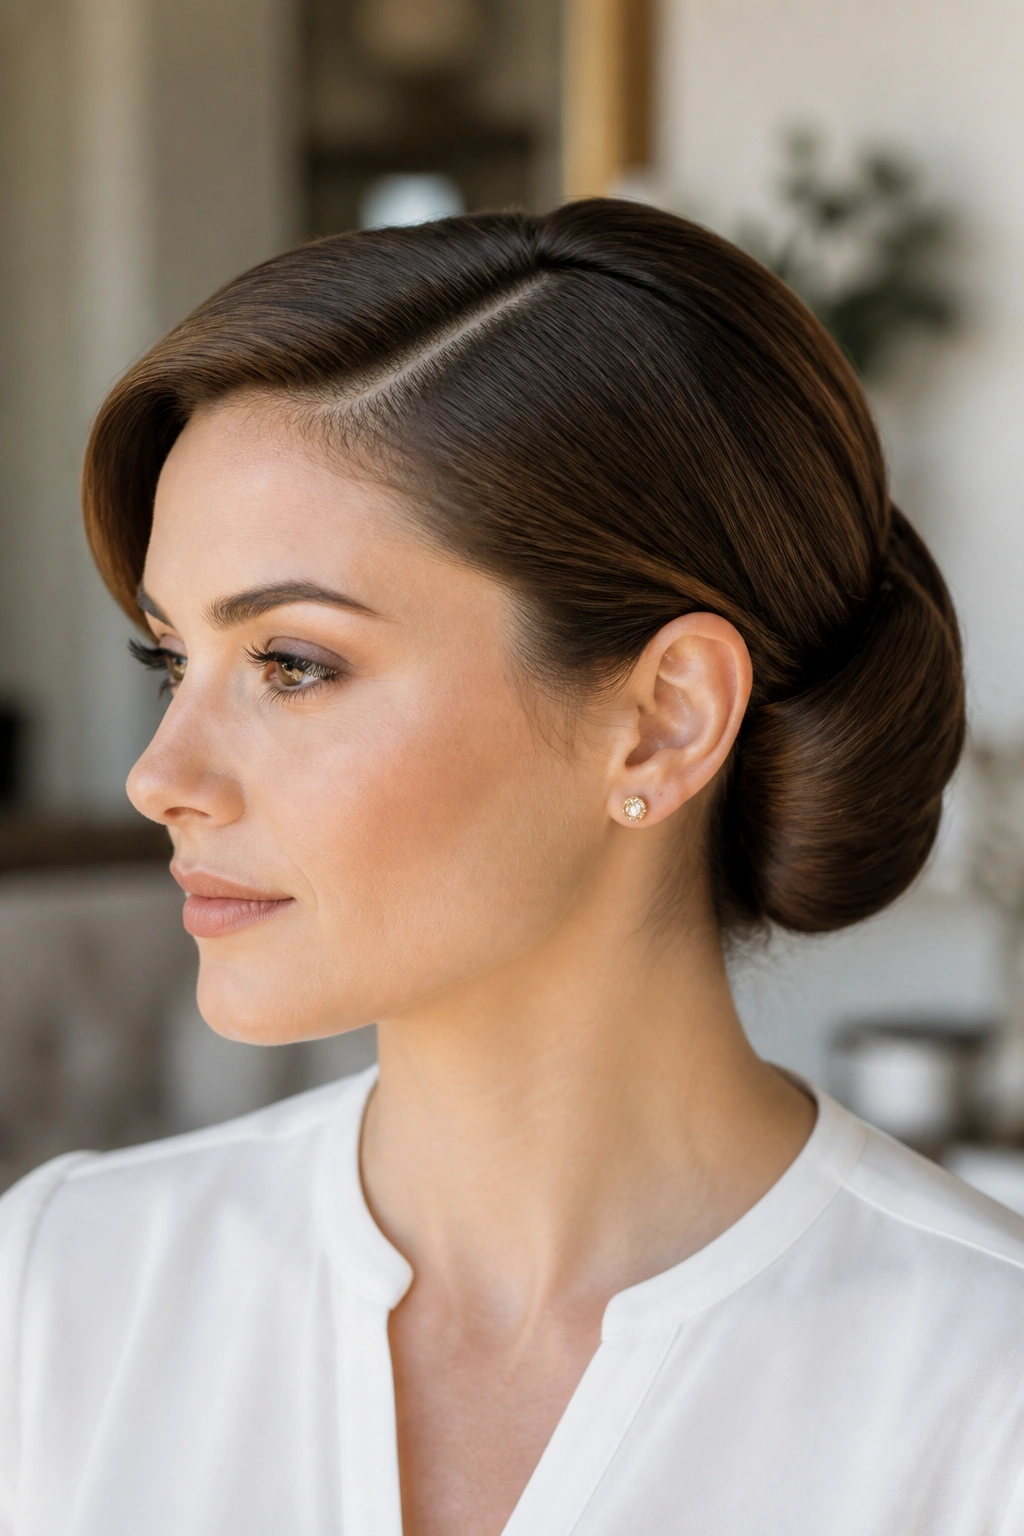
There’s something pleasingly old-school about a rolled updo. Done with a side part, it feels a little vintage without turning costume-y.
Brush the front smooth, follow the side part back, and roll the length inward toward the nape or upward along the back of the head. The roll should look deliberate, not stuffed. If your hair is layered, pin each section as you roll so the shape stays flat. A few hidden pins are better than one heroic pile of them at the end.
The polished version depends on clean edges. Use a small amount of pomade or styling cream at the temples, then smooth with your fingertips. If the hair is too airy, the roll loses its shape fast. If it’s too slick, the style can slide. The sweet spot is controlled but not waxy.
This is a lovely choice for cocktail events, formal dinners, and dresses with open necklines. It keeps the face open and the silhouette sharp.
15. Side-Part Low Pony with Crown Volume
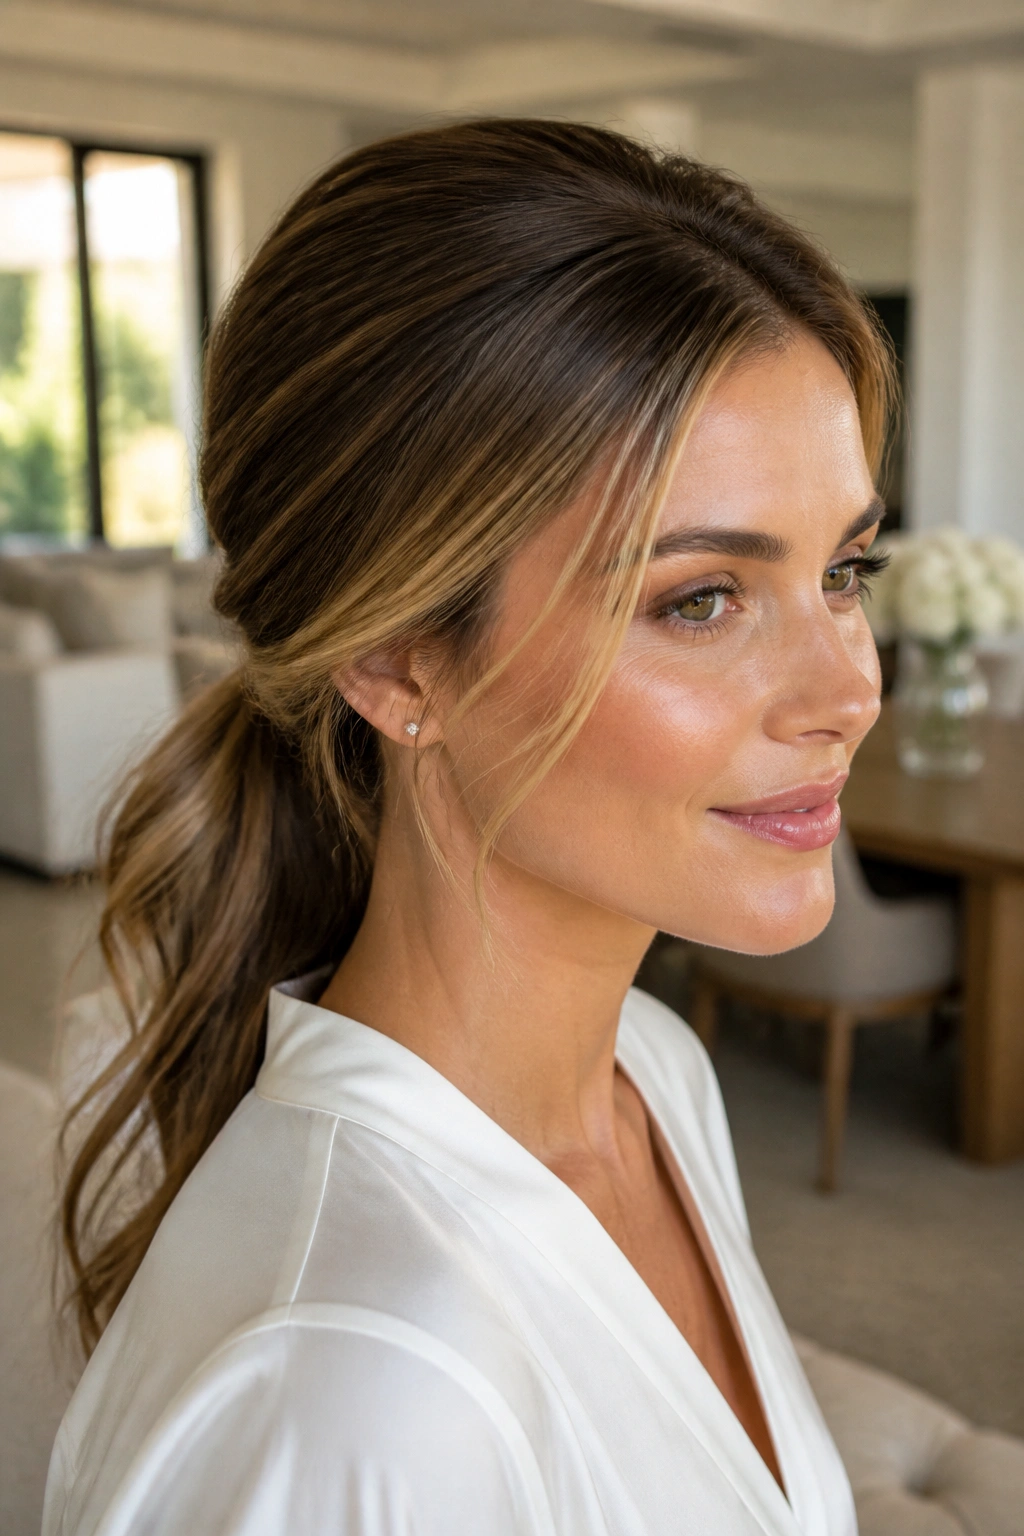
A little lift at the crown changes the whole mood. Without it, a low ponytail can flatten out and feel plain. With it, the style has shape.
Backcomb a small section at the crown, just behind the side part, then smooth the top layer over it so the tease disappears. Gather the ponytail low and keep the sides neat. The trick is to lift only the top one to two inches of hair; too much teasing makes the head look bulky, and that’s not the point.
This works especially well for fine hair because it gives the illusion of thickness where you want it most. The part remains visible, but the crown no longer collapses into the scalp. A soft bend in the ponytail tail helps too. Straight, flat lengths can pull the eye down and undo the lift.
If you want the style to last, mist the teased section before smoothing it over. That helps the volume stay in place without feeling crunchy.
16. Side-Part Crown Braid into a Bun
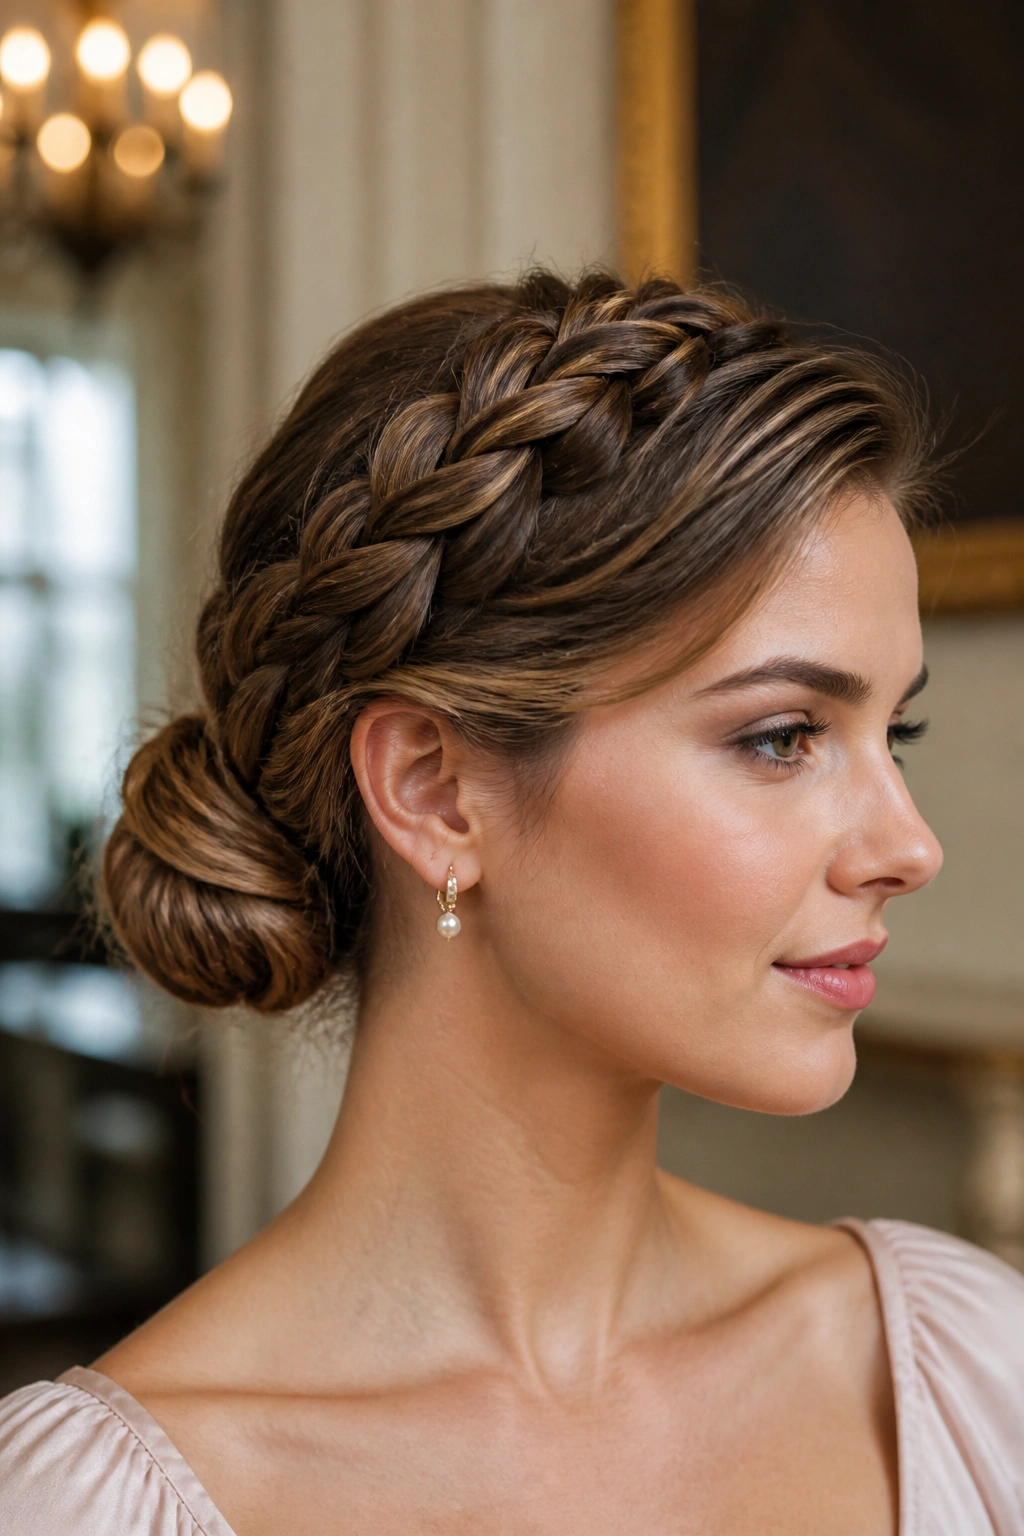
For long hair that needs to stay put, a crown braid into a bun is one of the more satisfying options. It looks detailed, but the side part keeps it from feeling fussy.
Start the braid from the heavier side of the part and follow the hairline back toward the opposite ear. From there, continue the braid around the head or feed it into a bun at the nape. The braid creates a frame, and the bun finishes the shape. It sounds elaborate, but once the first section is secure, the rest falls into place.
Small details that matter
- Keep the braid close to the head so it doesn’t puff out.
- Use bobby pins that match your hair color.
- Tuck the braid end under the bun instead of letting it poke out.
- Smooth the part with a fine-tooth comb before braiding so the line stays clean.
This one is a favorite for thicker hair because the braid helps manage the weight. It also holds up well when you need your style to last through a long evening.
17. Side-Part Polished Curly Ponytail
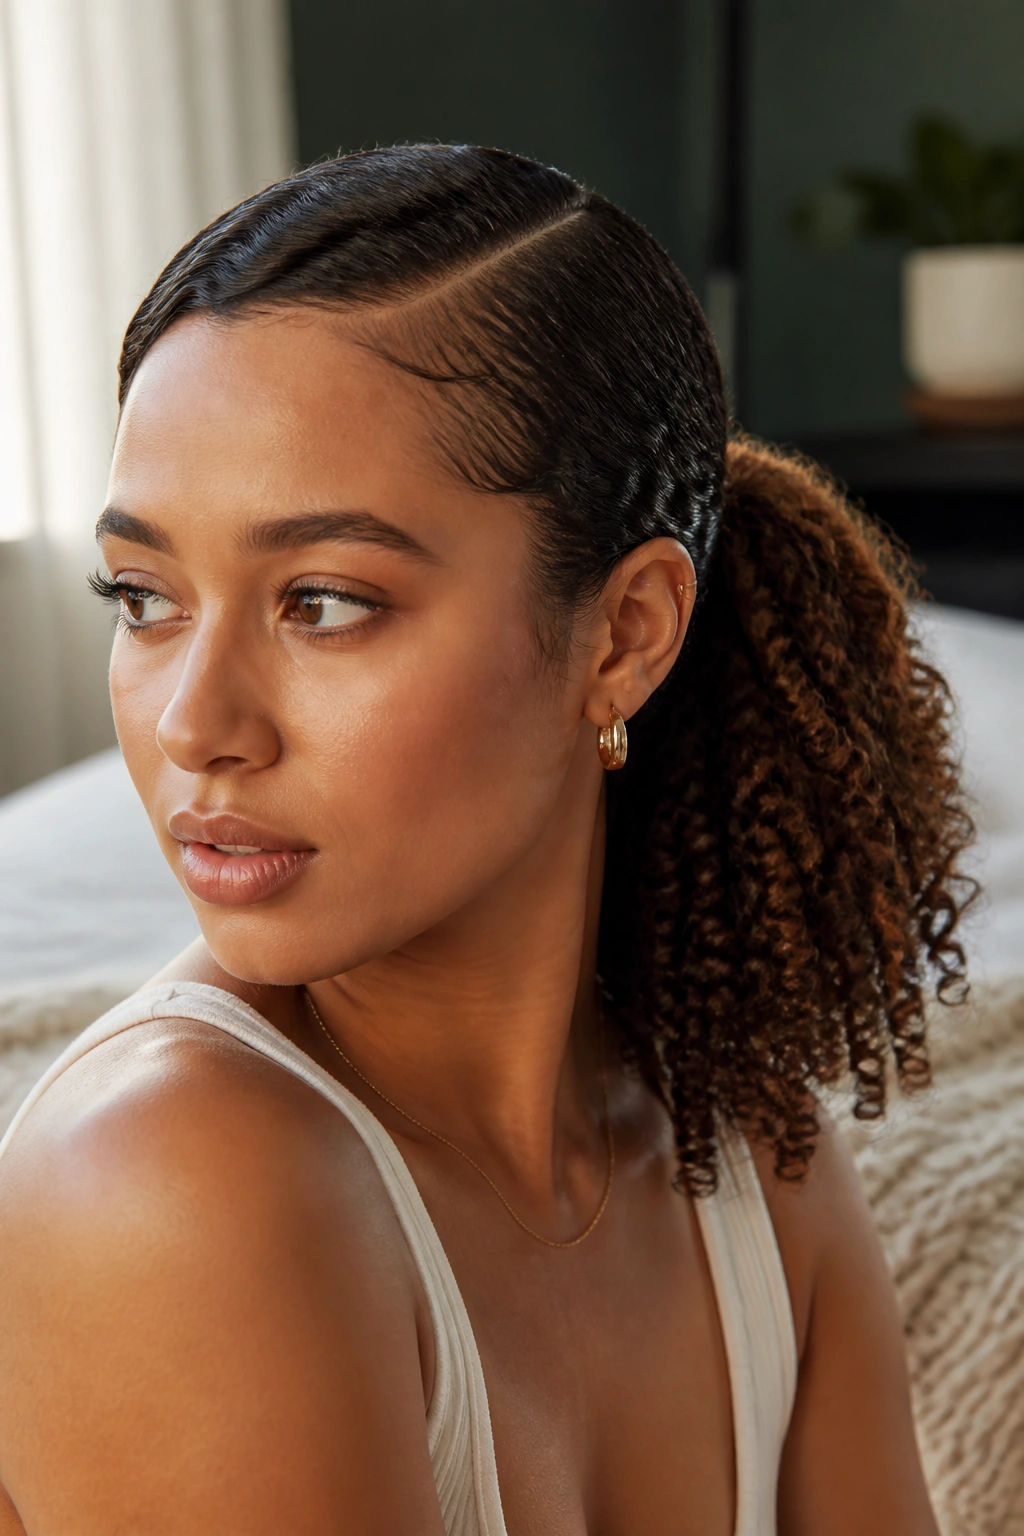
Can curls look polished in a ponytail? Absolutely, if you keep the roots tidy and let the ends do their own thing.
Begin with the side part, then smooth the front and crown with a curl cream or light gel suited to your texture. Gather the hair low or mid-height, but do not brush the curls into submission. You want definition, not puffed-out chaos. The tail should show the curl pattern clearly, while the top stays neat and controlled.
If you have coils or tighter curls, stretch the roots slightly with a brush or your fingers before securing the ponytail. That keeps the base from looking too wide. A wrapped elastic base helps here too, because it gives the style a finished edge and keeps the focus on the texture.
I like this look because it doesn’t fight the hair. It sharpens the front, frames the face with the part, and lets the curls stay themselves. That’s the sweet spot.
18. Side-Part Old-Hollywood Roll and Bun Hybrid
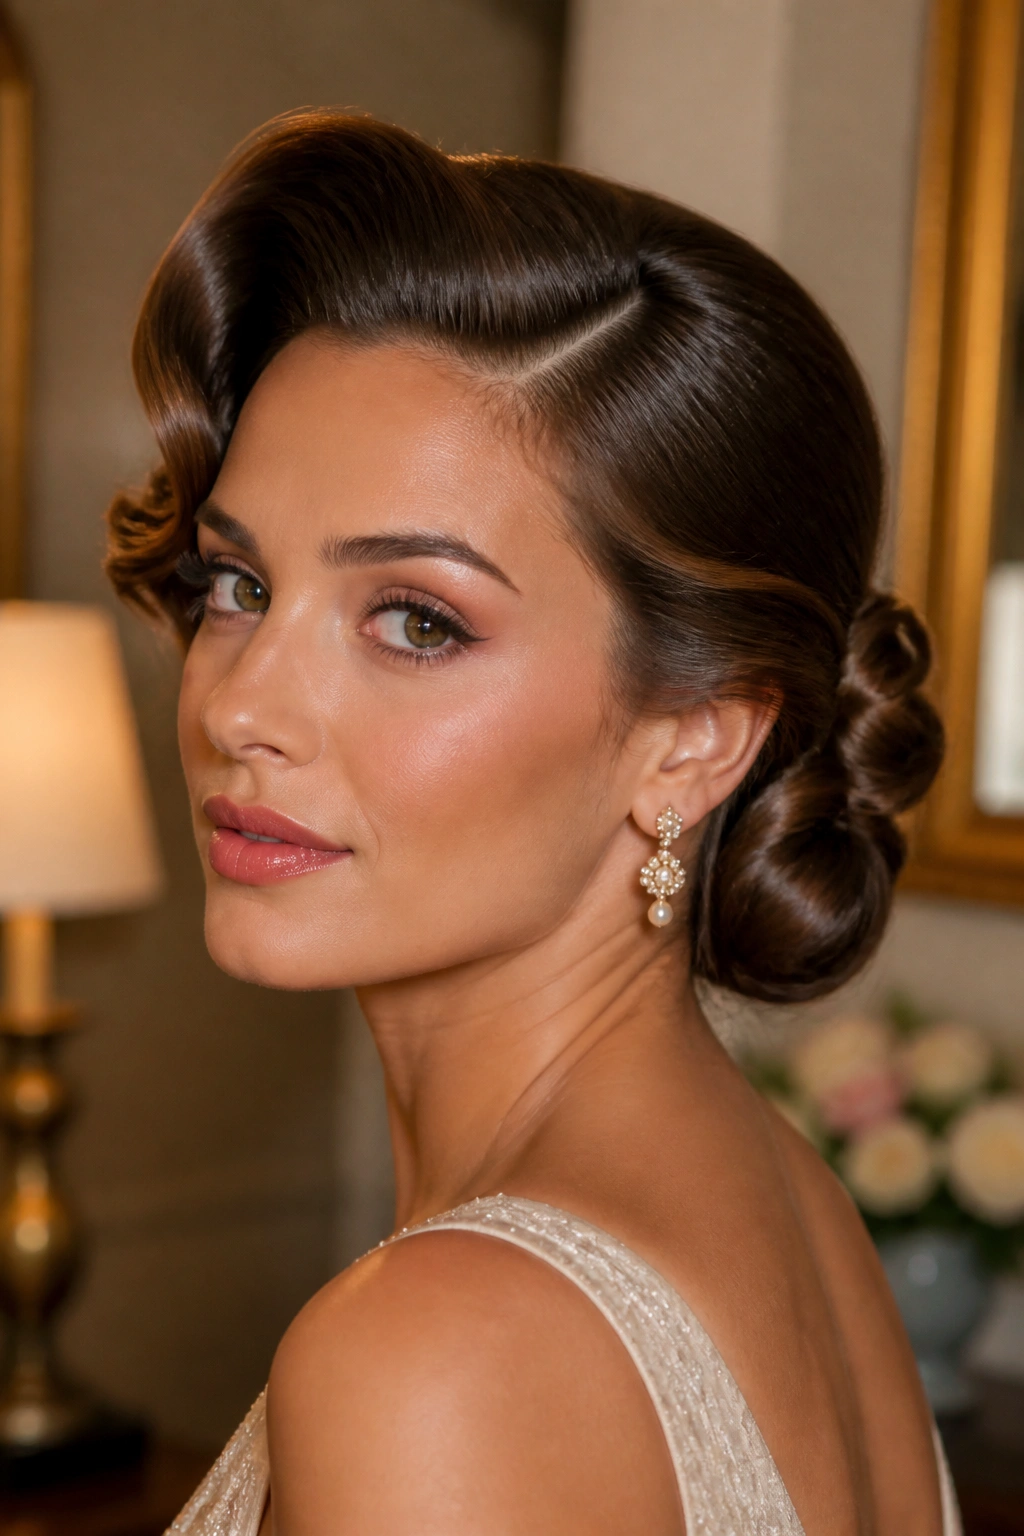
This is the one I pull out when I want hair to look dressed, not merely done. A side-part roll with a tucked bun blends the softness of a wave with the control of an updo, and the result is almost always flattering.
Start by sculpting a smooth side sweep at the front, then roll the longer section back toward the ear or crown. Gather the remaining hair into a low bun and pin the two shapes together so they read as one style. The roll gives you height and curve; the bun keeps the back compact. If your hair has a bit of natural wave, even better. The texture makes the roll easier to shape.
The best version of this style has a polished crown, a visible side part, and one or two soft bends near the face. Too many loose pieces and it stops looking intentional. Too much spray and it turns stiff. You want movement with structure. That balance is the whole point.
If your neckline is clean, your earrings are bold, or your outfit has a strong shoulder line, this hairstyle fits right in. It has enough shape to carry an evening look, but it doesn’t swallow the face. And that’s why it keeps working, year after year, whenever the goal is a side part hairstyle that looks crisp without feeling overdone.
