



The best natural-looking hair color is the kind people notice only after they’ve already complimented your hair. It has movement, depth, and a little bit of shadow at the root, so it looks like sunlight and genetics did the work. That is the whole trick.
A flat color job can be pretty for a week, maybe two. Then the line shows. The root gets loud. The ends start looking like they were painted with one brush and one brush only. Natural-looking hair color techniques solve that by softening the edges, keeping some depth, and letting a few lighter pieces do the talking instead of the whole head shouting at once.
I have a soft spot for color that grows out well. Not because maintenance is glamorous — it isn’t — but because hair looks better when the placement respects the way it actually falls: around the part, at the hairline, through the mid-lengths, underneath the top layer where the light catches late in the day. Those are the spots that matter.
Some techniques are subtle, some are a little more involved, and a few only work if the colorist knows when to stop. That restraint is where the good stuff lives.
1. Soft Balayage Starts Below the Root
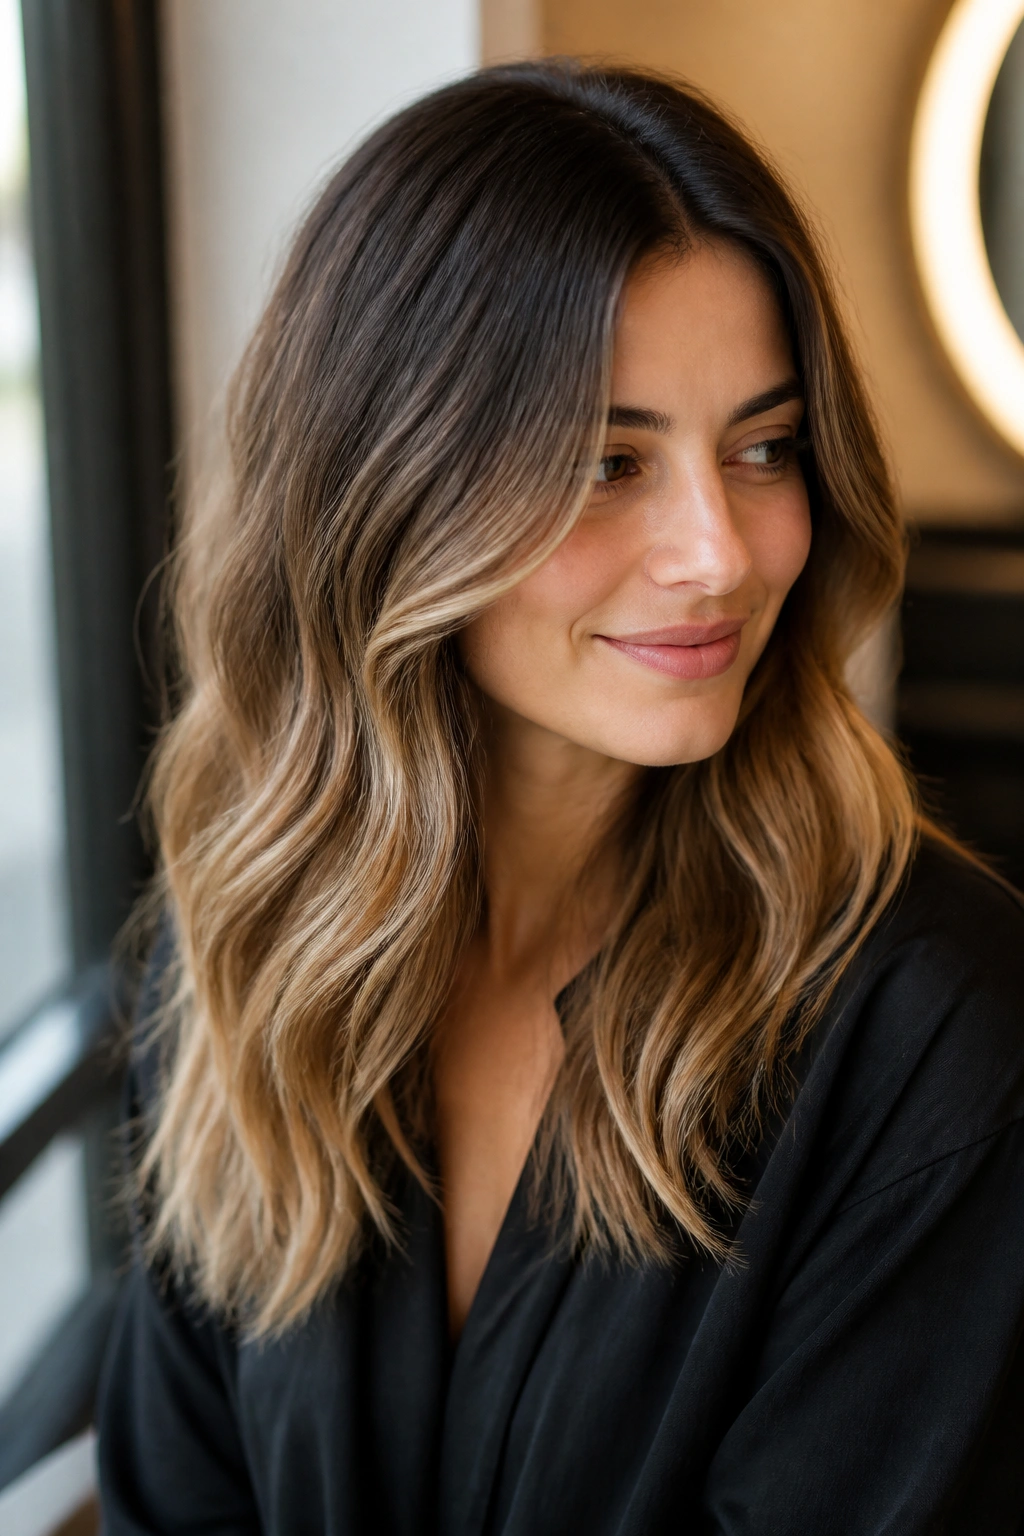
Soft balayage is the classic move for a reason: the lightness starts lower, so the scalp area keeps its depth and the color reads like sun exposure instead of a hard dye line. Painted well, it looks like the front sections got the most attention and the underneath stayed a shade or two deeper. That contrast is what makes it believable.
Why It Looks So Real
The hand-painted placement gives you irregularity, and irregularity is your friend here. Hair in nature does not lift in perfect stripes. It lightens where the sun hits, where the hair bends, and where it moves against your shirt collar. Soft balayage copies that messiness.
A good version usually starts 2 to 4 inches below the root on medium lengths, sometimes even lower on long hair. The ends get the most saturation, but they should not all land at the same level of blonde. Some pieces stay slightly darker. Some get brighter. That unevenness keeps the whole thing from looking canned.
What To Ask For
- Feathered hand-painting rather than chunky ribbons.
- A soft root area with no bleach pressed right up against the scalp.
- A few deeper pieces underneath so the color has shape when the hair moves.
Balayage can go too far if every strand gets light. Then it stops reading as natural and starts reading as a full bleach job in disguise. Keep the root calm, and the whole style relaxes.
2. A Shadow Root Makes Blonding Look Less Loud
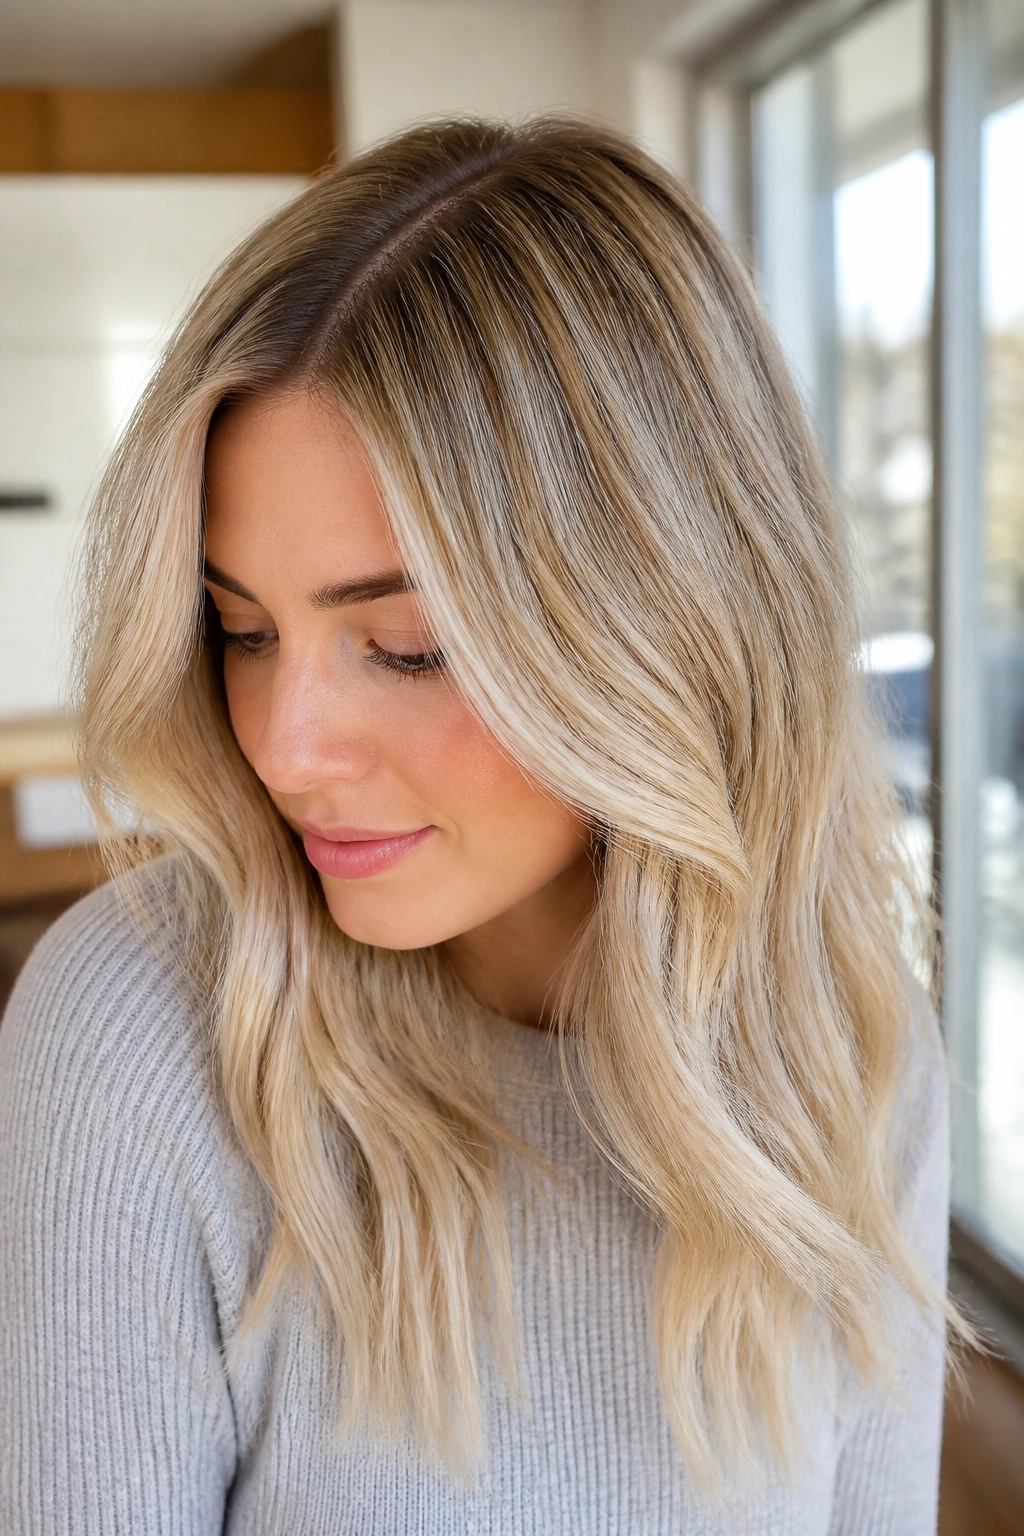
A shadow root is the reason some blondes look expensive instead of freshly lifted. The technique leaves the root area a shade or two deeper than the lightest pieces, then blends that darker color down a little so the transition feels soft. No sharp line. No obvious restart point.
The useful part is simple: the eye sees depth first. When the top stays slightly darker, the blonde below it has somewhere to live. That little bit of shadow also buys you time between appointments because the grow-out is part of the design, not a flaw.
I like shadow roots on blondes that sit anywhere from beige to honey to icy, but they work especially well when the natural base is darker than level 7. The trick is not to make the root muddy. It should look like your own hair, only calmer.
A good colorist will usually blur the root with a demi-permanent formula or a quick toner melt for about 5 to 10 minutes, watching the line disappear without over-darkening the crown. If the root goes too deep, the blonde can look like it was painted on later. You do not want that. You want the root to act like a frame.
3. Babylights Around the Hairline Catch Light Without Shouting
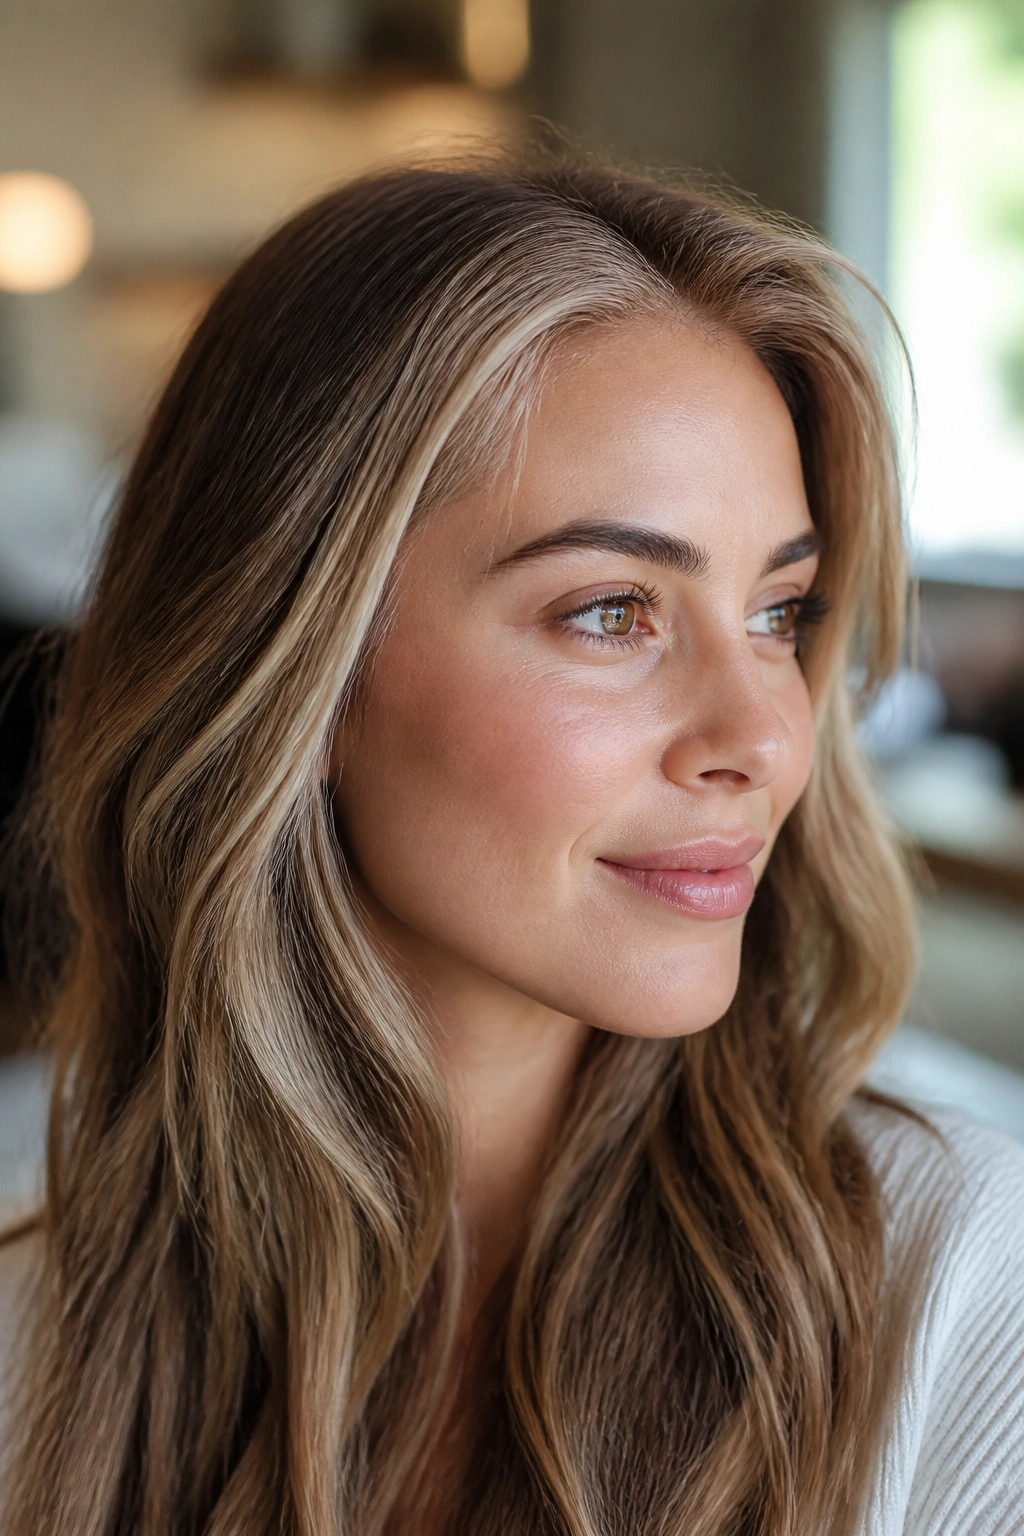
Why do some highlights look soft and others look stripy? Babylights are usually the answer. These are tiny, fine weaves of lightness — the kind you can barely separate from the rest of the hair when the section is laid flat. Because the strands are so small, the finished color feels airy instead of bold.
Where Babylights Matter Most
The hairline, crown, and part are the spots that make or break the effect. If those areas are too thickly highlighted, the color starts looking obvious in daylight and even more obvious in photos. Narrow the sections and the whole head reads smoother.
- Use 1/16- to 1/8-inch slices for the softest result.
- Focus brightness near the part line and temples, where people actually look.
- Leave some untouched hair between foils so the color has room to breathe.
How To Keep Them Believable
Babylights work best when they are tonal, not loud. Think a half-step lighter, maybe one full level if the base is deep enough to carry it. On very dark hair, super-light babylights can look pretty in the chair and harsh by week three. A gentler lift often wears better.
I also prefer babylights on hair with some movement — waves, bends, layers. The tiny pieces disappear into the texture and then flash a little when the hair swings. That’s the good part. That little flicker. It feels earned.
4. Teasylights Blur the Line Before the Lightener Hits
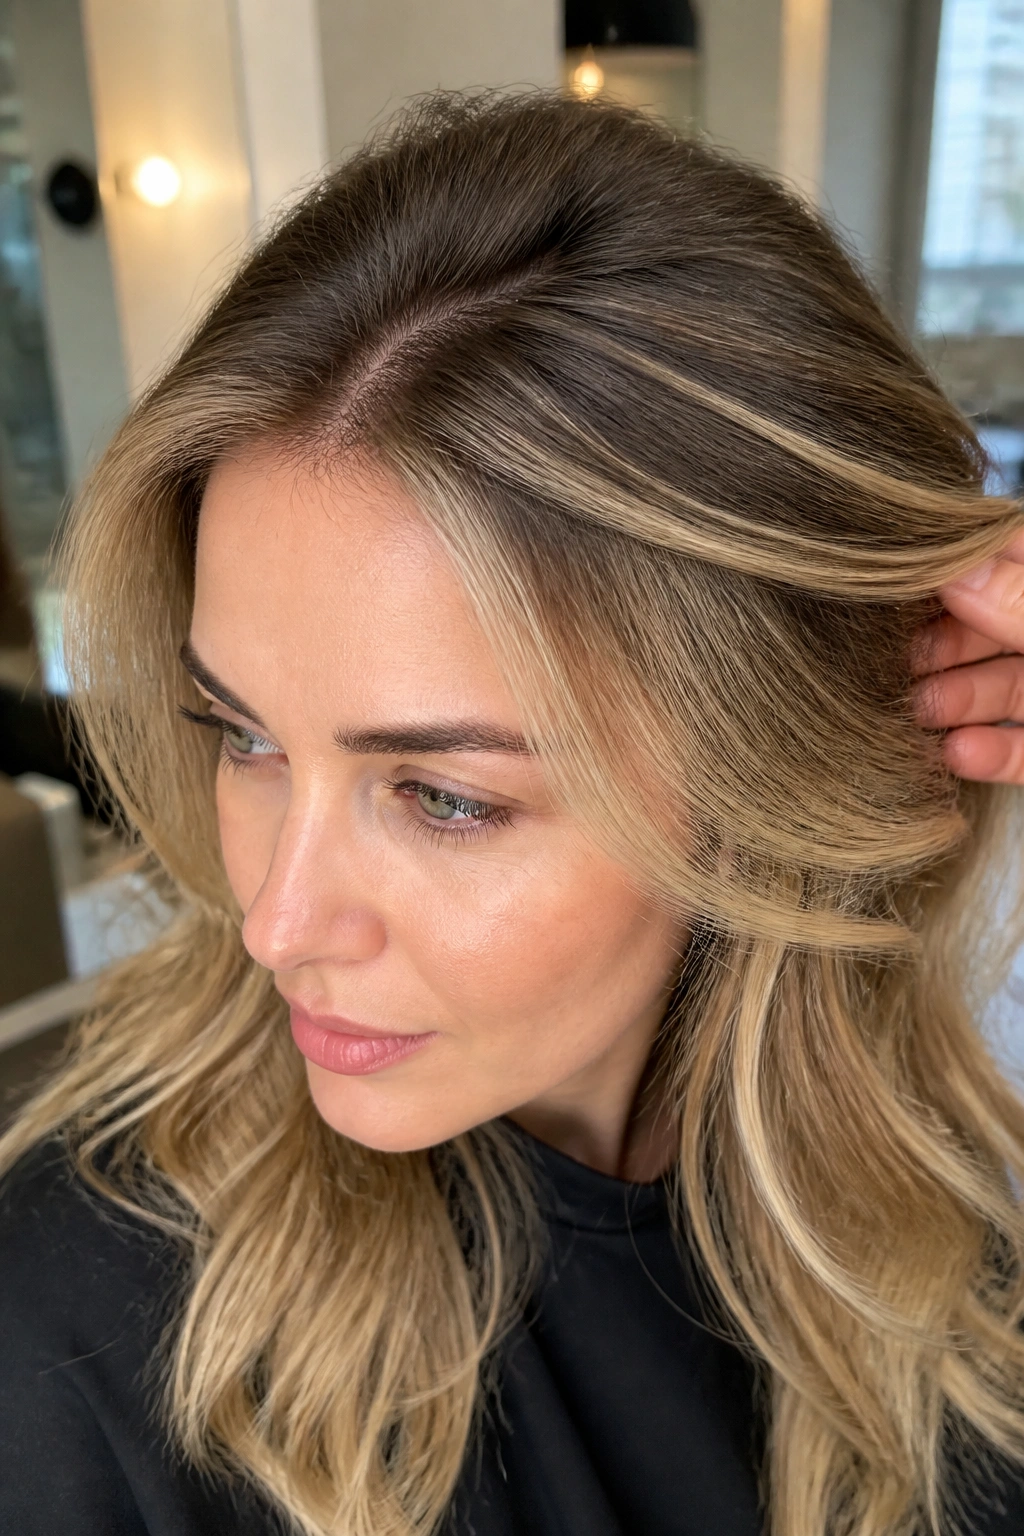
If you have ever seen highlights with a blunt start, you already know why teasylights exist. The stylist backcombs the section before applying lightener, and that teasing creates a soft blur at the root. The result is less line, less stripe, more haze.
It sounds fussy, but it solves a real problem. On dark or medium hair, a clean foil line can look too perfect. Teasing the hair first breaks up the section so the lightener lands unevenly near the scalp and more strongly on the lengths. That makes the grow-out gentler.
Teasylights are especially useful on layered cuts, shoulder-length bobs, and hair that tends to show every little color line. They also help when you want lighter pieces but do not want to commit to all-over brightness. The pieces can still be bright. They just need a softer launch point.
A detail that matters: the teasing should be firm enough to blur the line, not a rat’s nest. If the backcombing is too aggressive, the hair can suffer and the lift can get patchy. Clean out the tease after rinsing, tone it softly, and the finish looks much more expensive than the process sounds.
5. Lowlights Give Blonde Hair Something to Sit Against
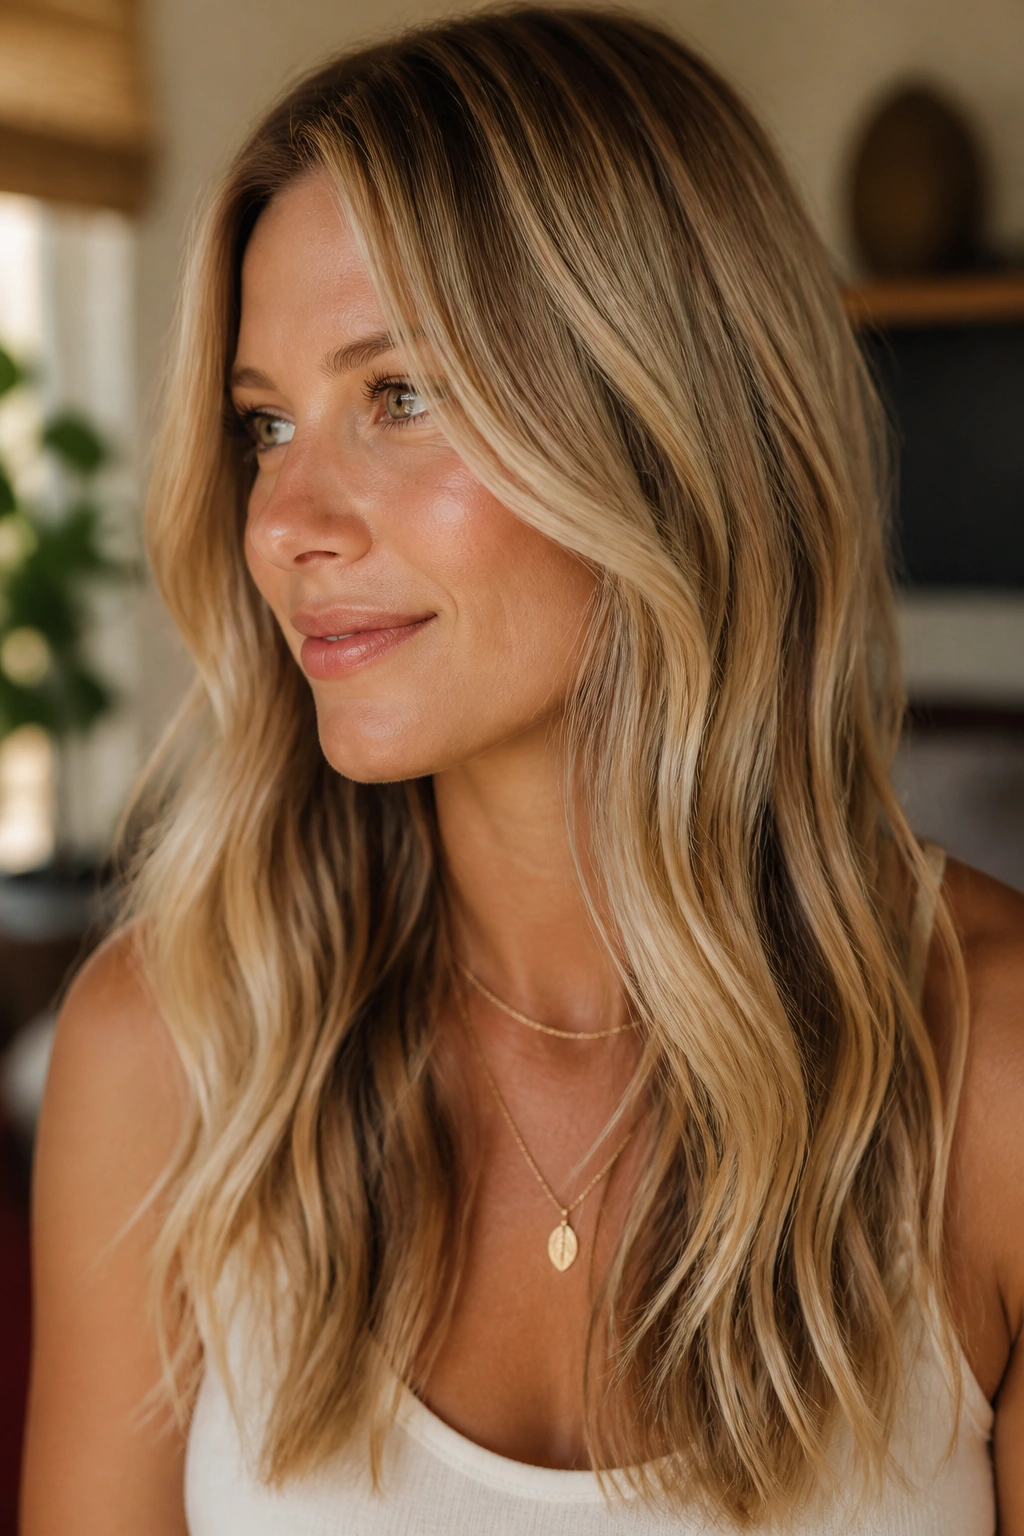
A natural color job needs shadows, not just light. That is why lowlights matter so much. They add deeper strands between brighter pieces, which keeps blonde from turning flat and one-note. Without them, even nice highlights can start to look like a sheet of color instead of real hair.
I reach for lowlights when the blonde is too bright from root to ends, or when a brunette wants more body without going lighter overall. A few level-5 or level-6 pieces tucked under the top layer can do a lot of work. They make the brighter strands look brighter. Strange but true.
The placement should be selective. Put the darker pieces where the hair needs shape: underneath the crown, through the back, around the nape, and in larger panels where a full block of light would otherwise wash everything out. Too many lowlights, though, and the hair starts looking muddy. That is the trap.
A good lowlight formula is usually demi-permanent so it softens the color without leaving a heavy line. It should read as depth, not as a cover-up. There is a difference, and you can see it from across the room.
6. Foilyage Brightens Dark Hair Without Hard Edges
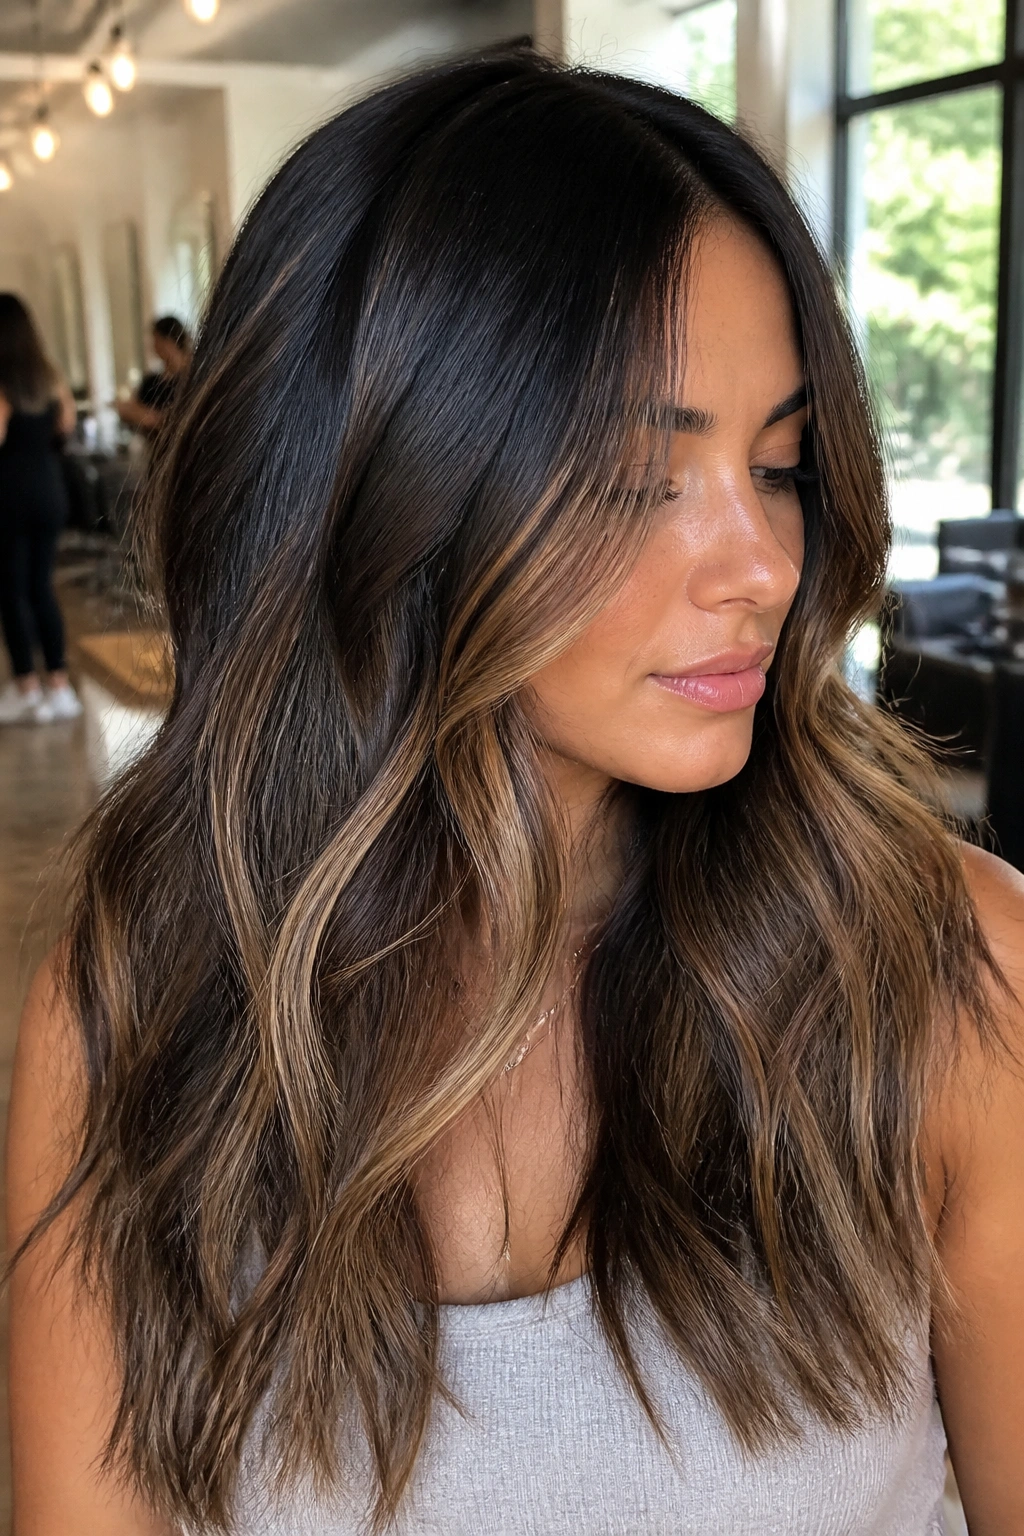
Foilyage sits between balayage and foil highlighting, and that’s exactly why it works so well on deeper bases. The hair is painted first, then wrapped in foil so the lightener gets extra lift. You get the soft placement of balayage with the stronger lift of a foil. Useful. Very useful.
This is the technique I think of when someone wants caramel on dark brown hair, or a lighter brunette result without choppy stripes. Open-air painting alone sometimes stalls on resistant hair. Foils give the color a little heat, which helps the lightener move more evenly and reach a brighter level.
When Foilyage Makes Sense
- Your base is deep brown or black-brown and you want visible brightness.
- Your hair resists lift and tends to stay warm.
- You want painted placement but need a bit more punch than open balayage gives.
The soft part still matters. The color should be feathered where it enters the section and smudged near the root. If the foil starts too high or the lightener is packed too heavily, the result stops looking lived-in and starts looking like a standard highlight set. That is not the goal here.
Foilyage can be gorgeous on long waves. It gives the hair that slow, ribboned look people notice only when it sways.
7. Color Melting Erases the Harsh Line Between Shades
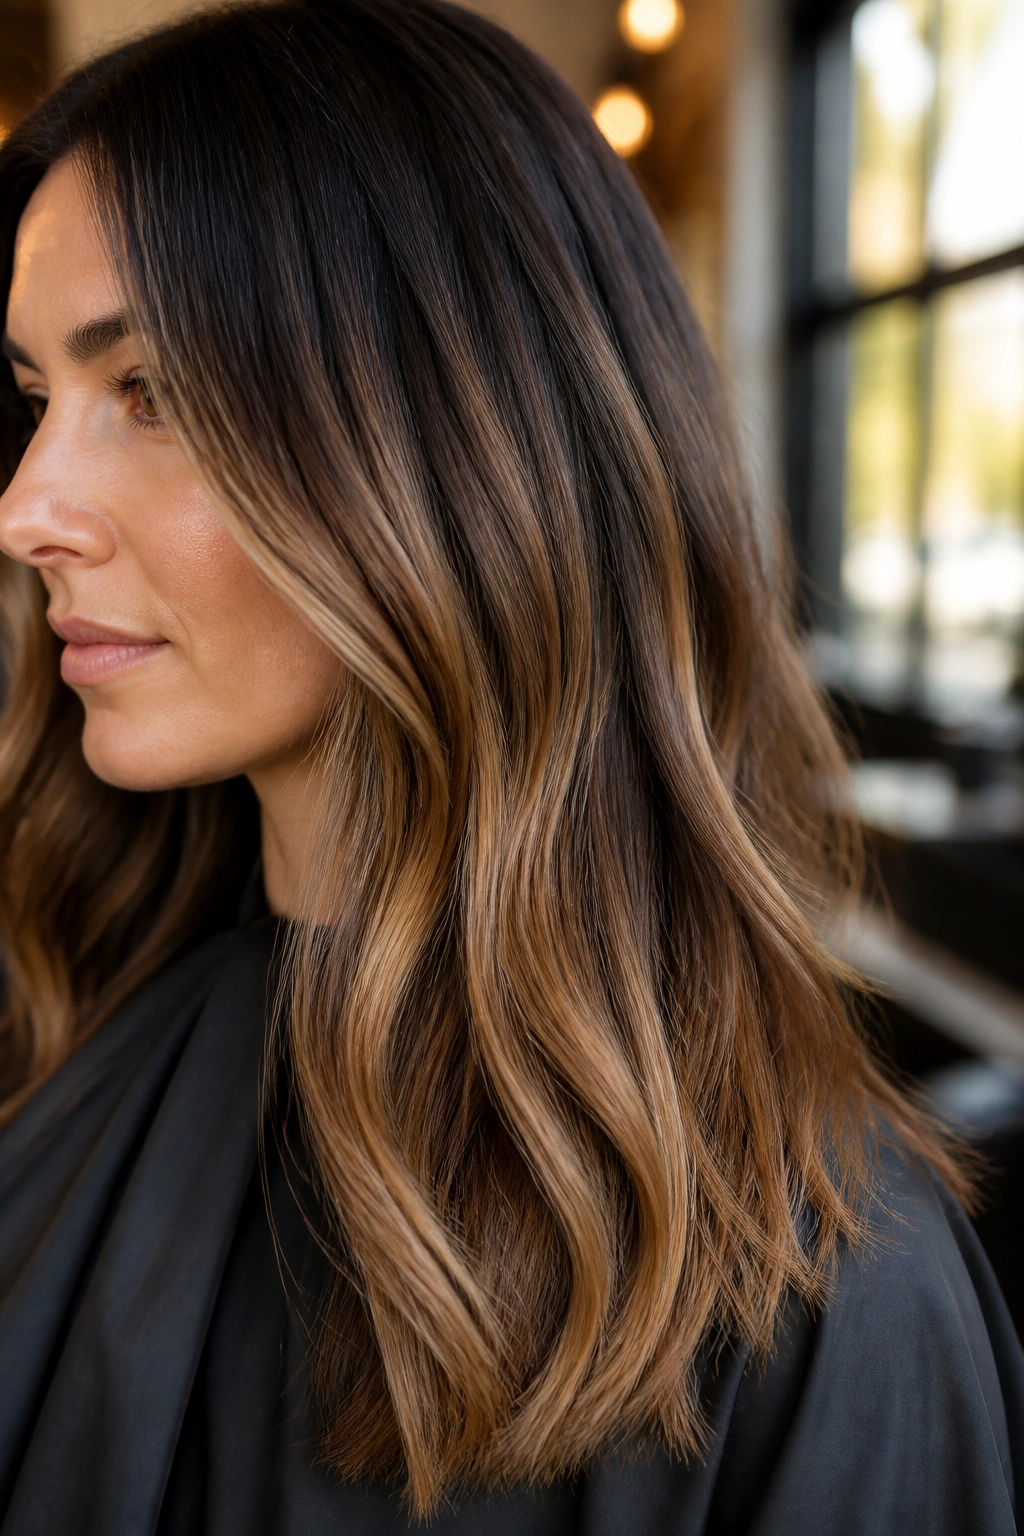
What happens when there is no obvious border between root, mid-lengths, and ends? The color melts. That is the whole appeal. Instead of distinct color blocks, you get tones that bleed into one another in a way that feels smooth and deliberate.
The method usually uses three shades: one close to the base, one for the middle, and one for the lightest areas. The stylist overlaps them while the hair is still damp or freshly toned, so the transitions blur instead of sitting on top of one another like separate layers. Done well, the eye cannot find a hard stop. It just moves.
How To Ask For It
Ask for a root shade, mid-tone, and ends tone that are close enough to blend. If the contrast is too wide, the melt turns into a stripe. If the shades are close, the whole thing reads softer and more natural.
Where It Works Best
Color melting is especially good on hair that has already been lightened and needs the pieces to feel less chopped up. It also helps redheads and brunettes who want subtle dimension without strong contrast. A melt can make even a fairly bold palette feel gentler, which is why salons use it so often after a big color service.
It is a quiet technique. That is the point.
8. Face-Framing Highlights Brighten the Hair You Actually See
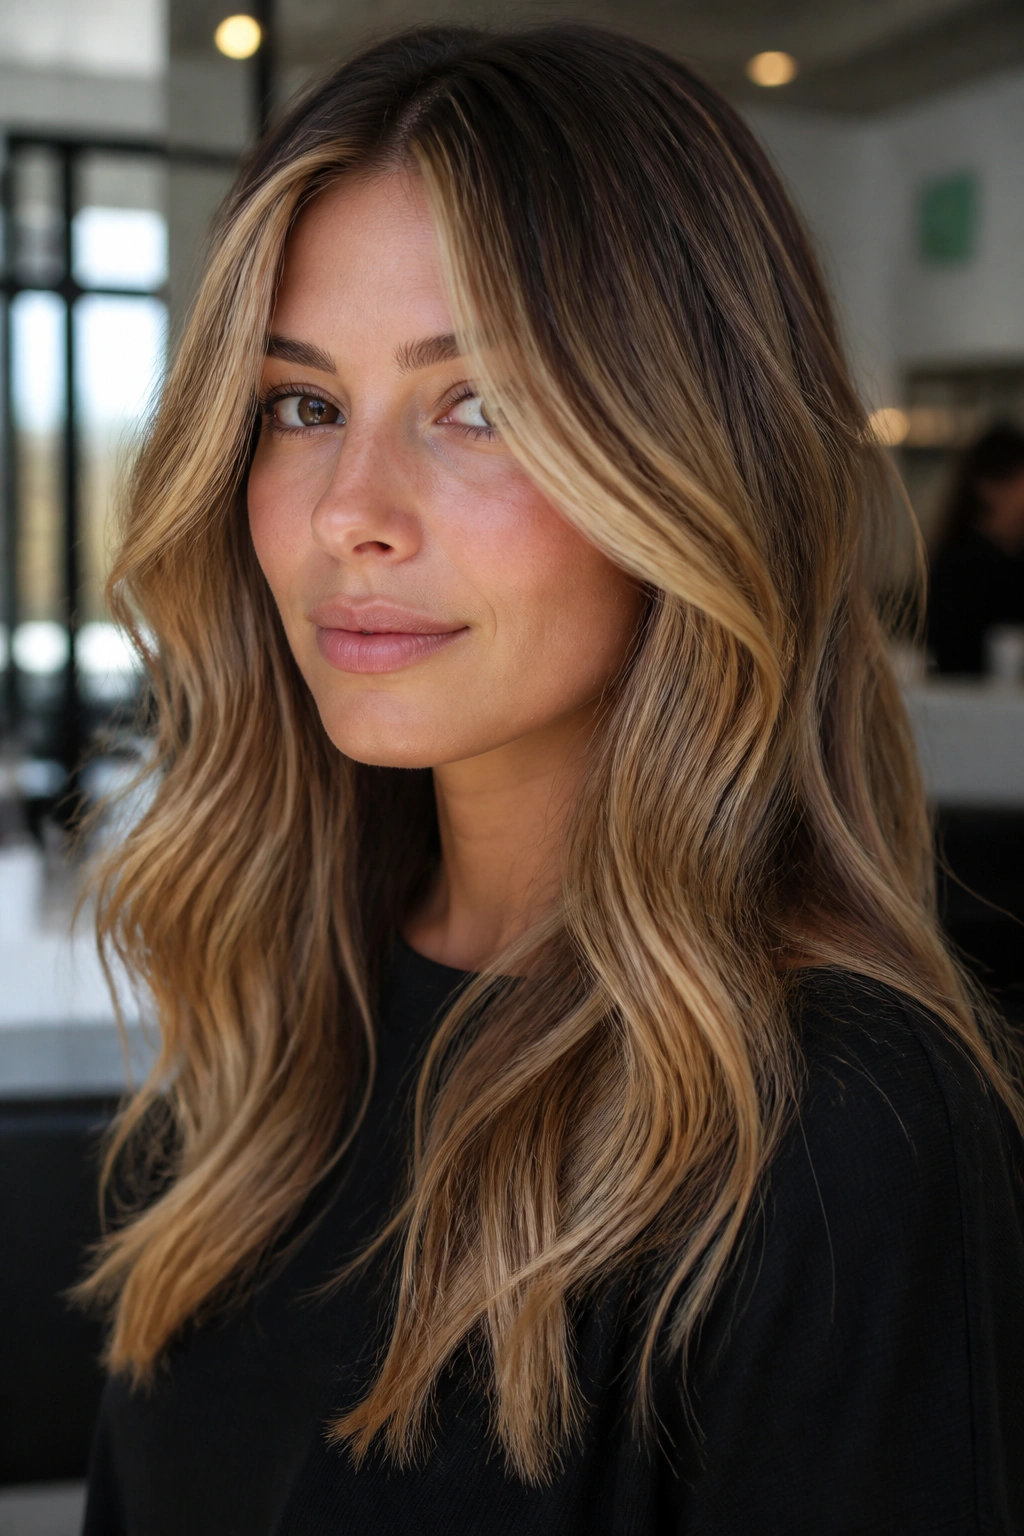
A bright front section can change the whole mood of a haircut. That is why face-framing highlights keep showing up in natural-looking color work. You are not lighting up the entire head. You are just lifting the pieces that sit by the cheekbones, around the part, and near the front edge of the hairline.
A soft version is miles better than a chunky stripe. The highlight should blend back into the sides, not sit there like a spotlight. I like when the brightest section measures about 1 inch wide or less on each side, then fades out before it reaches the back. That keeps the impact high and the upkeep low.
The nice thing about face-framing pieces is that they work on short hair, long hair, curls, straight styles, and everything in between. They pull color toward the face without making the whole head lighter. That can be enough. Sometimes it is more than enough.
If your hair is dark, ask for the front pieces to be lifted only a couple of levels past the base, then toned to a honey or beige finish. Super-light front chunks can look harsh fast. Softer reads better. It always does.
9. Air-Touch Highlighting Leaves the Softest Breakdown
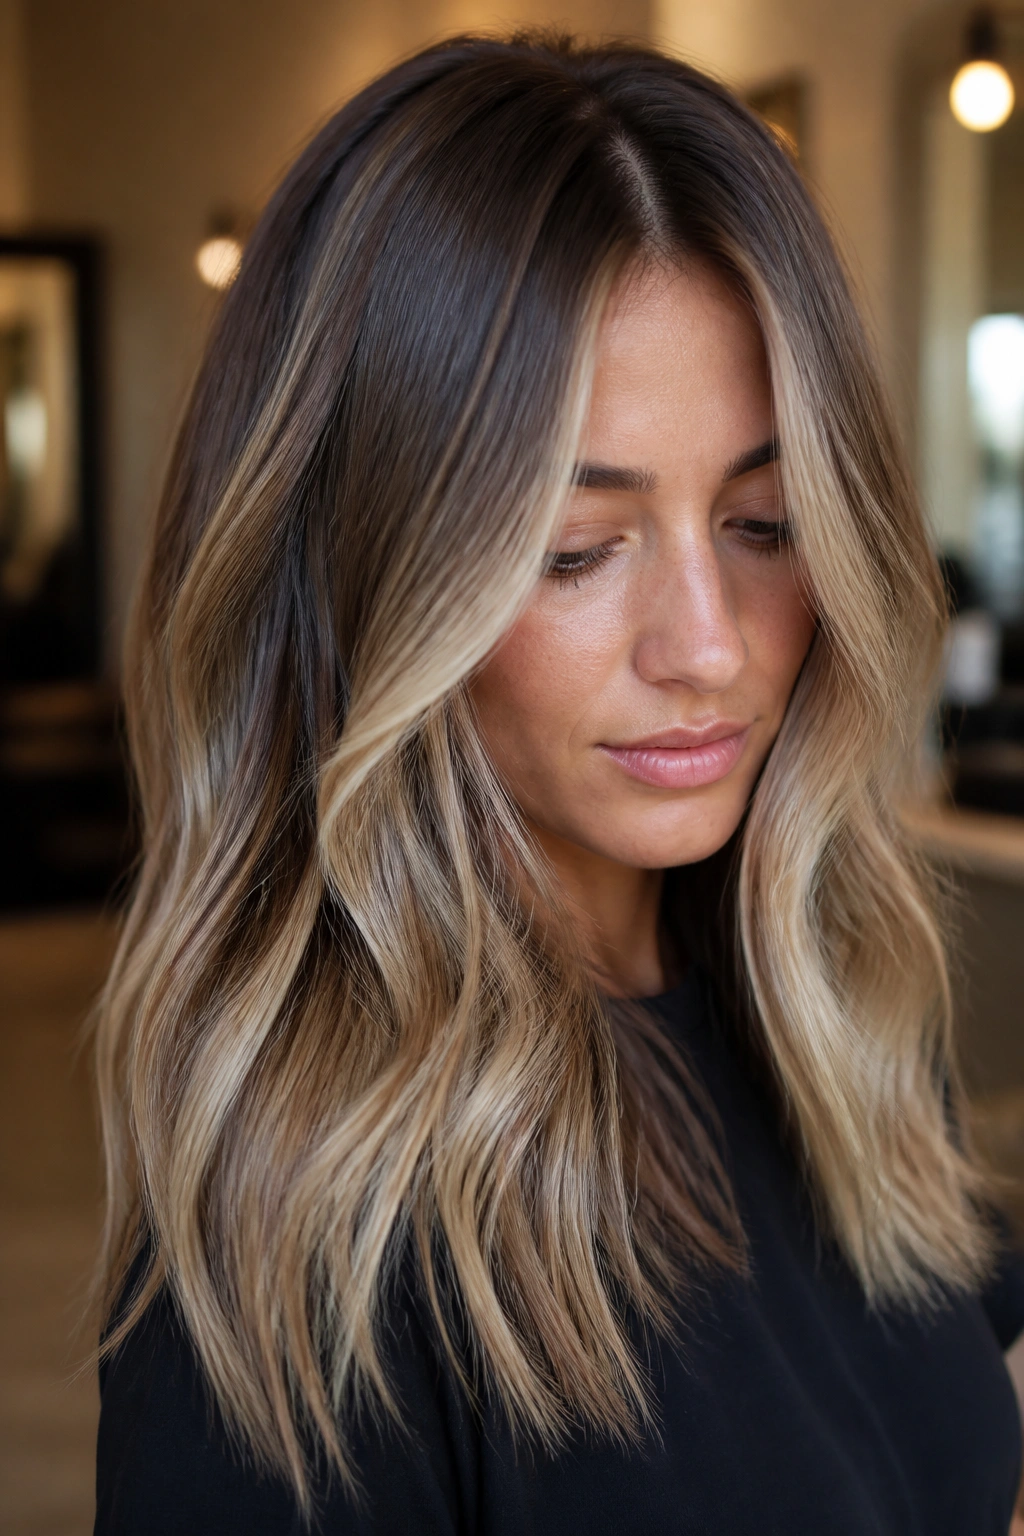
Air-touch is the quietest way to go lighter. The stylist uses a blowdryer to push shorter, finer hairs out of the section before the color is applied, so the lightener goes mostly onto the longer strands that sit deeper in the panel. That creates a very soft fade from root to light piece.
It works because hair never grows in perfectly equal lengths. There are always baby hairs, broken pieces, and shorter strands at the crown and around the face. Air-touch leaves those alone, which makes the highlight line feel blurred right from the start.
This technique takes time. More time than a quick foil service, anyway. But the payoff is a gentle result that looks especially good on fine hair and on people who hate seeing obvious demarcation at the root. The grow-out is calmer because the base stays connected to the light pieces instead of being sliced off from them.
I would not choose air-touch just because it sounds fancy. I would choose it because you want the lightest strands to start softly and you are willing to sit through a longer appointment. That is the honest trade.
10. A Gloss Gives You Tone Without Changing the Whole Head
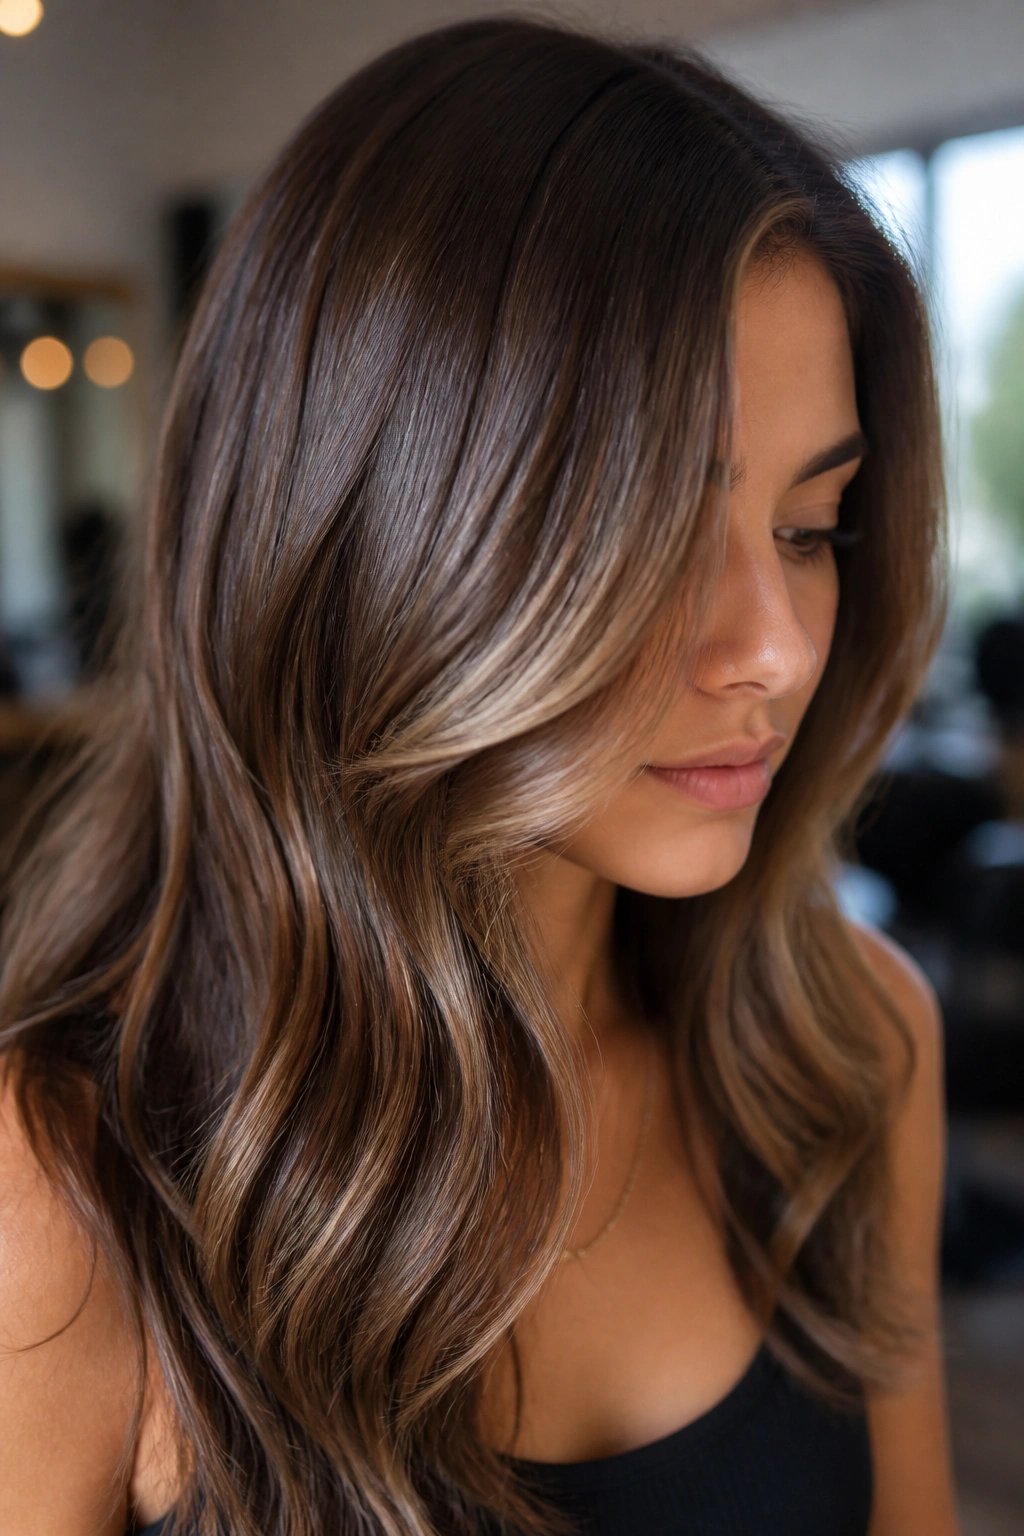
You can have solid color underneath and still get the soft shimmer people read as natural. A gloss does that work. It sits on top or just under the cuticle, adjusts the tone, and leaves the hair looking smoother and shinier without a big color overhaul.
That is why glosses are so useful after highlights, balayage, or even a single-process brunette. Brass starts to show, the ends get thirsty, and the whole head can look dull around the six-week mark. A gloss pulls the color back into line. A clear gloss can add shine without changing the shade much at all.
What A Gloss Can Fix
- Brassy blonde pieces that have gone yellow or too warm.
- Faded brunette lengths that look flat.
- Red tones that have lost their sheen and gone dusty.
A gloss usually stays on the hair for around 10 to 20 minutes, depending on how much tone needs adjusting. The best part is that it does not have to be dramatic. In fact, it should not be. If you can clearly see the gloss job from across the room, it probably went too far.
A good gloss is the polish step. Not the main event.
11. Sombre Keeps the Ends Lighter Without Looking Painted On
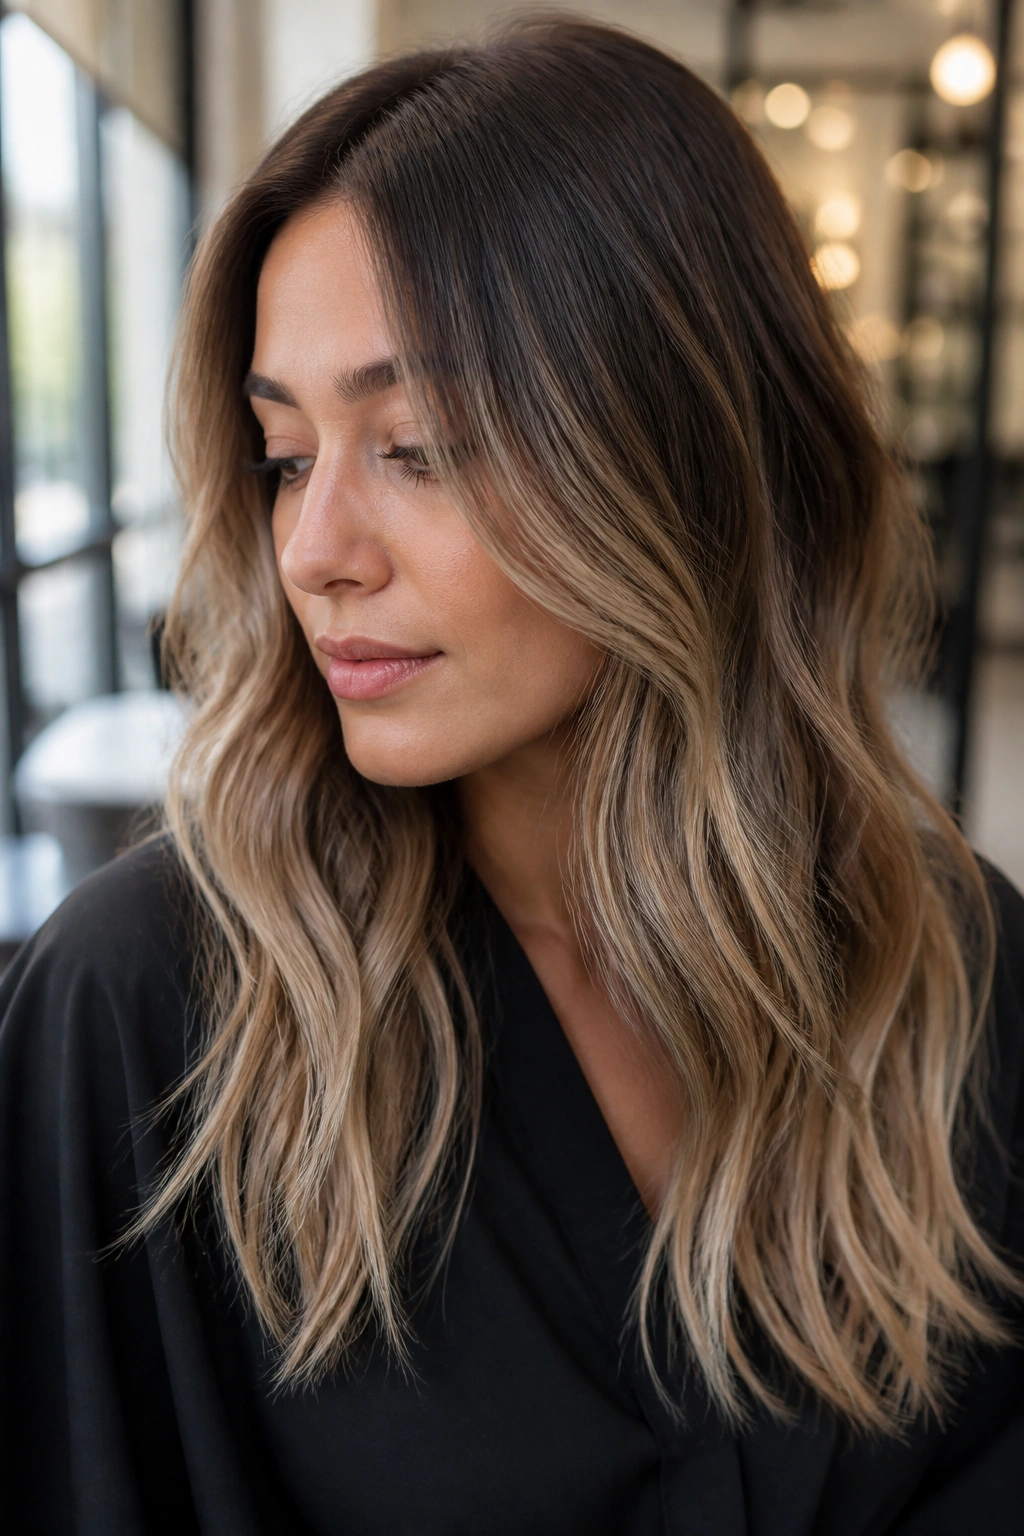
Sombre is ombré after it learned restraint. The root stays darker, the mid-lengths shift gradually, and the ends lighten more slowly than they would in a high-contrast color job. There is no sudden band where one shade stops and another starts. That is the whole point.
It suits people who want visible lightness but do not want the dramatic dip-dye look that used to be everywhere. On longer hair, sombre can be especially pretty because the color has room to stretch. On curls, it can look even softer, since the texture breaks up any slight line that might be left behind.
I like sombre best when the ends are only 1 to 3 levels lighter than the base. More than that and the effect can drift toward obvious ombré. Less than that and the color may disappear in low light. The sweet spot sits in the middle.
The technique also gives you breathing room between salon visits. Since the root stays close to your base, the grow-out happens quietly. That matters if you hate maintenance or if your hair is long enough that full highlighting would be a whole production.
12. Reverse Balayage Puts the Shadow Back Where It Belongs
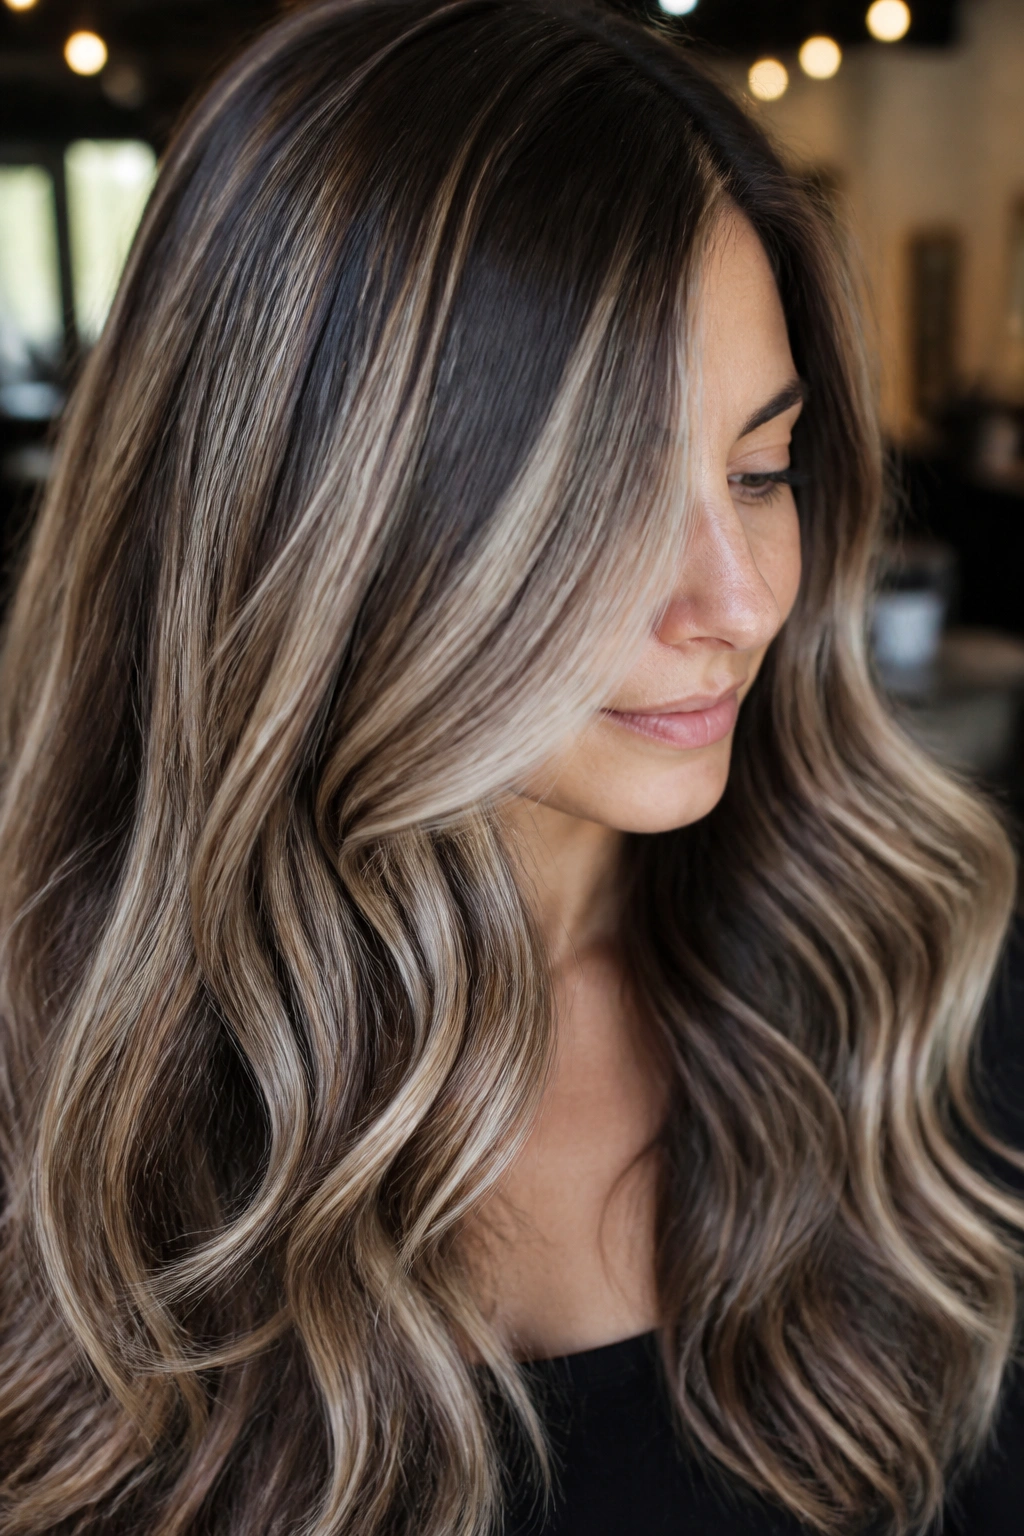
If your hair went too light and now feels stripey, reverse balayage is the fix that makes sense. Instead of adding more blonde, the colorist paints in deeper ribbons to restore depth between the light pieces. It is a clever way to make over-highlighted hair look like it has shape again.
This is not about turning blonde hair dark. It is about giving the bright pieces somewhere to sit. Without those deeper zones, everything can blur into one pale sheet. Nice in theory. Flat in real life. Reverse balayage solves that by reintroducing brown, caramel, or mushroom-toned shadows in strategic places.
The technique is especially good for people who like the idea of blonde but hate the maintenance that comes with it. It also works when old highlights have grown out and started to look dry at the ends. A few deeper panels can make the whole head look healthier without making it heavy.
I prefer reverse balayage when the light pieces are still good and the issue is placement, not damage. If the blonde is fried, the answer is a trim and a calmer color plan. If it is just too bright, this is the one to try.
13. Micro-Highlights Near the Part Line Stay Invisible Until the Light Hits
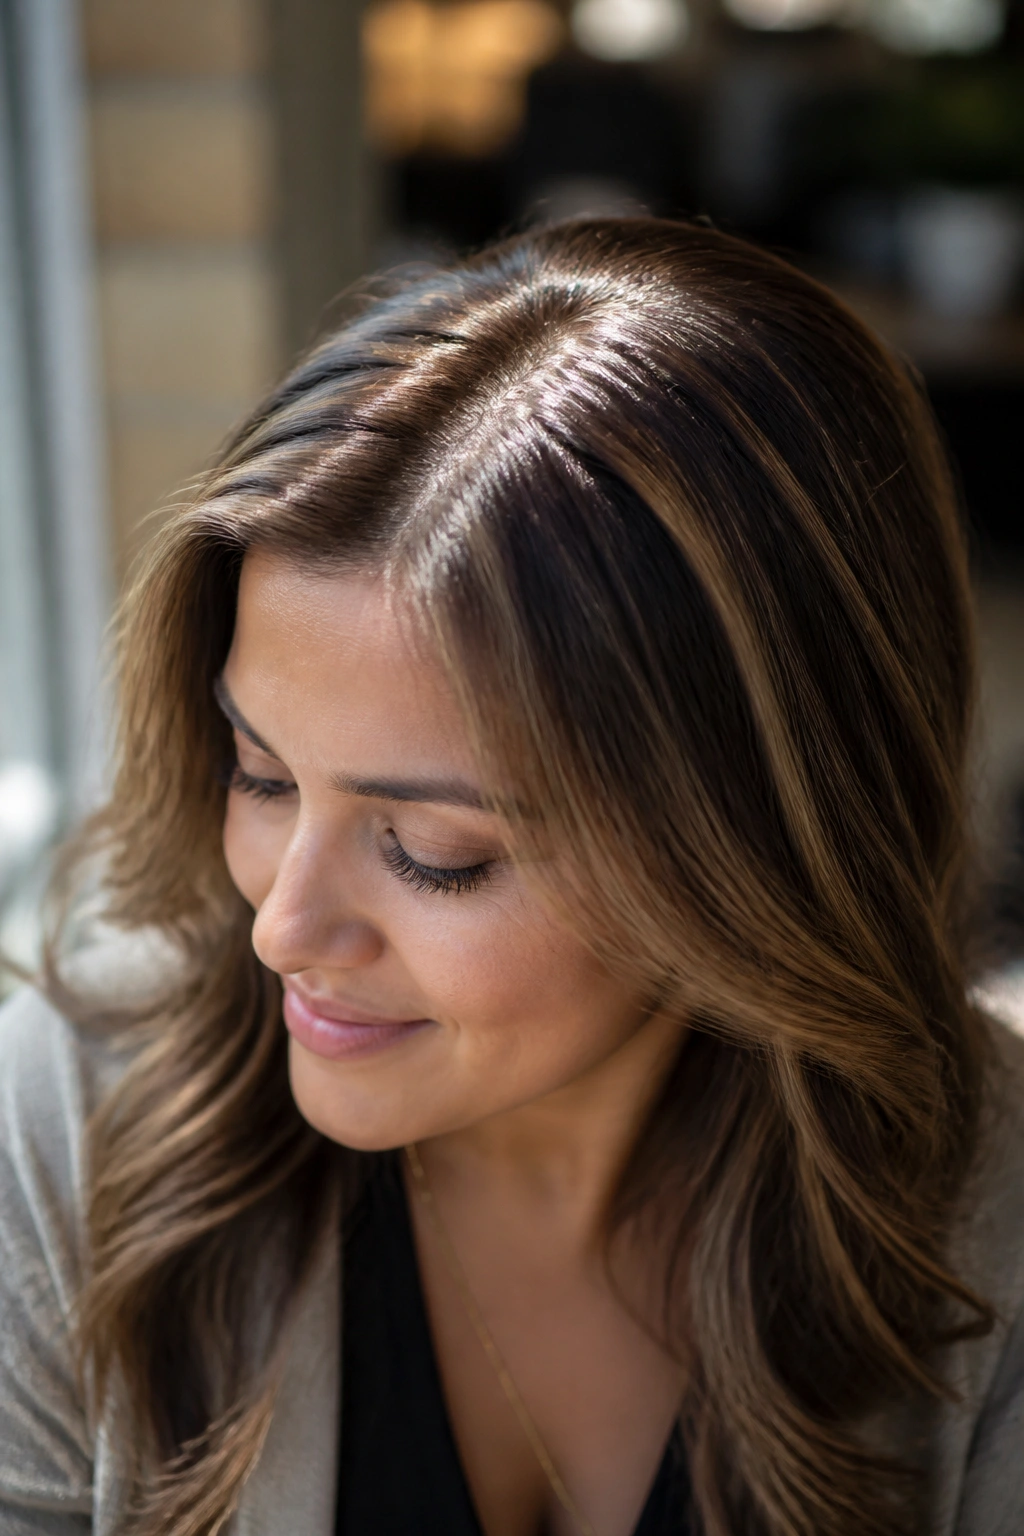
How do you brighten a head of hair without the obvious highlight pattern? Micro-highlights. Tiny slices placed along the part line and top layer can make the hair look lighter in daylight without reading as a full highlight service.
How To Use Them
The best placement is where the eye lands first: the part, the top crown, the front third of the head. Keep the sections narrow, around 1/8 inch if the hair is fine, a touch wider if the hair is coarse. The goal is not to create a stripe. The goal is to sprinkle light where the hair naturally separates.
- Put more of the fine pieces around the part line than underneath.
- Keep the tone close to the base so the lift feels believable.
- Leave the lower sections alone so the hair keeps its body.
Micro-highlights are especially good for shorter cuts, bobs, and people who like a polished look with almost no visible foil pattern. They can also be a smart choice if you want to ease into highlights without a big change. Quiet first, brighter later. That sequence works.
There is a reason stylists use them on clients who want a soft finish. They do not announce themselves. They just make the hair look better.
14. A Demi-Permanent Brunette Formula Adds Shine Without Killing Depth
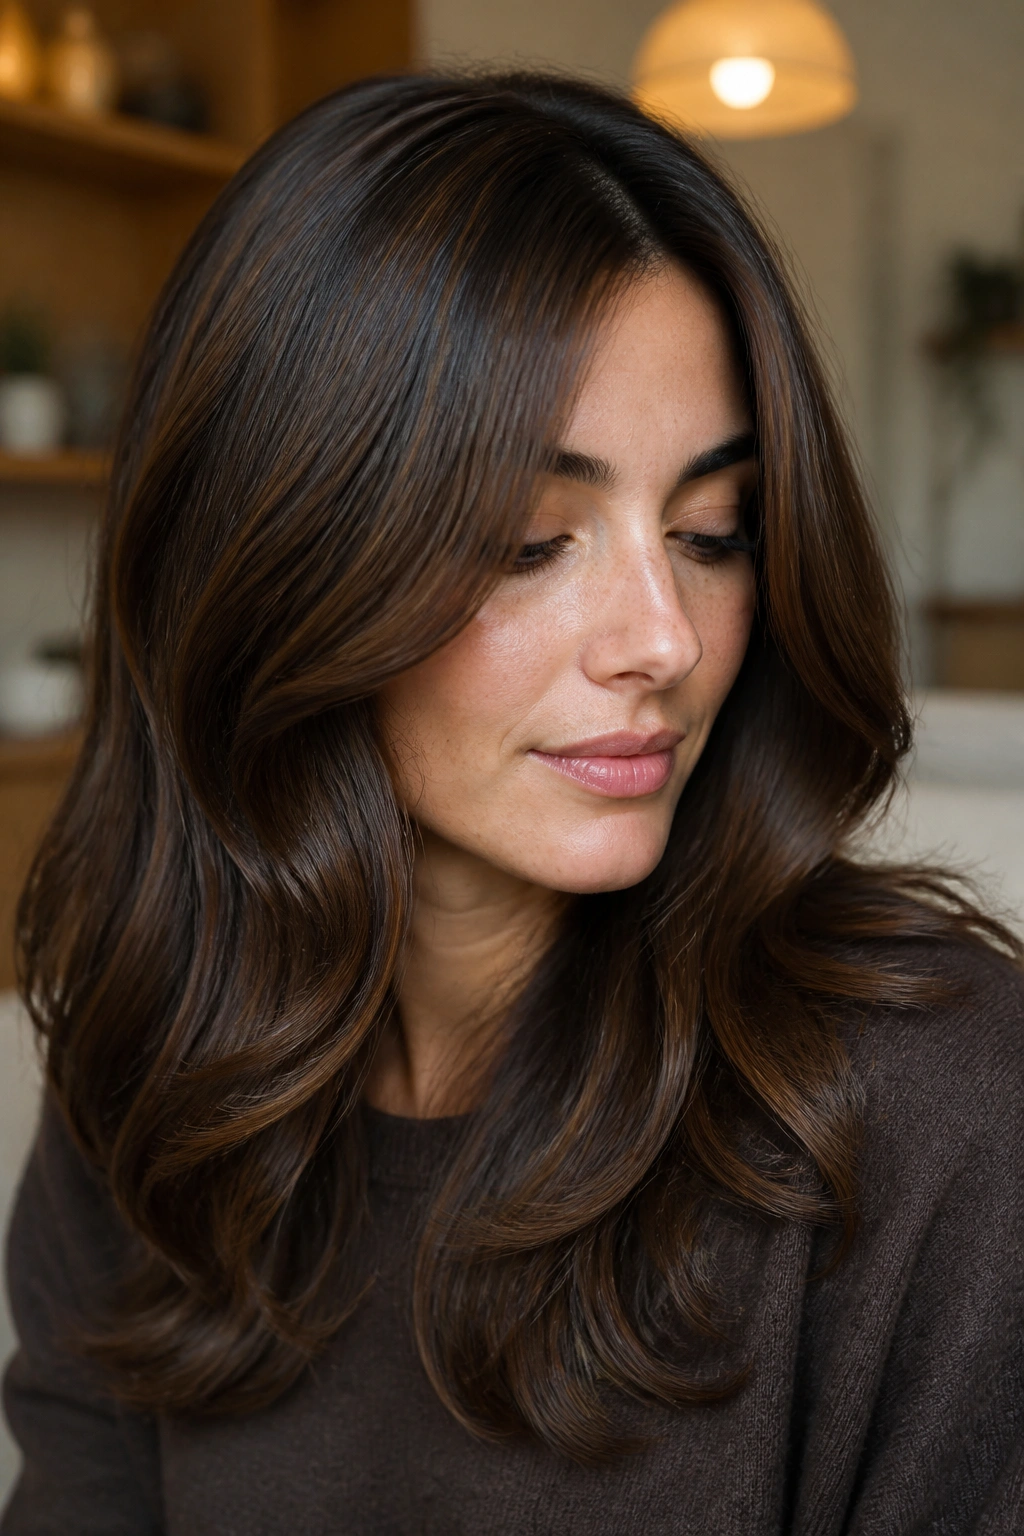
A single rich brunette formula can look natural if the tone stays transparent. That is where demi-permanent color earns its keep. It refreshes the base, adds tone, and gives the hair a soft surface without turning it into one flat block of brown.
The mistake people make with brunette color is going too opaque. A dense, solid brown can look heavy, especially if the skin has warmth or the haircut has layers. A better choice is a chestnut, cocoa, or soft mushroom tone that still lets a little light move through the hair.
Demi-permanent color is also kinder when you only need a tone refresh. It fades more softly than permanent dye, so the grow-out tends to stay less dramatic. That is a big deal for brunettes who hate the obvious line at the root.
I like this approach on hair that already has good shape but needs more life. Sometimes the color does not need to be lighter. It just needs more dimension in the brown family. People forget that. They reach for blonde when what they really need is a better brunette.
15. Gray Blending with Fine Woven Strands Softens Silver Without Full Coverage
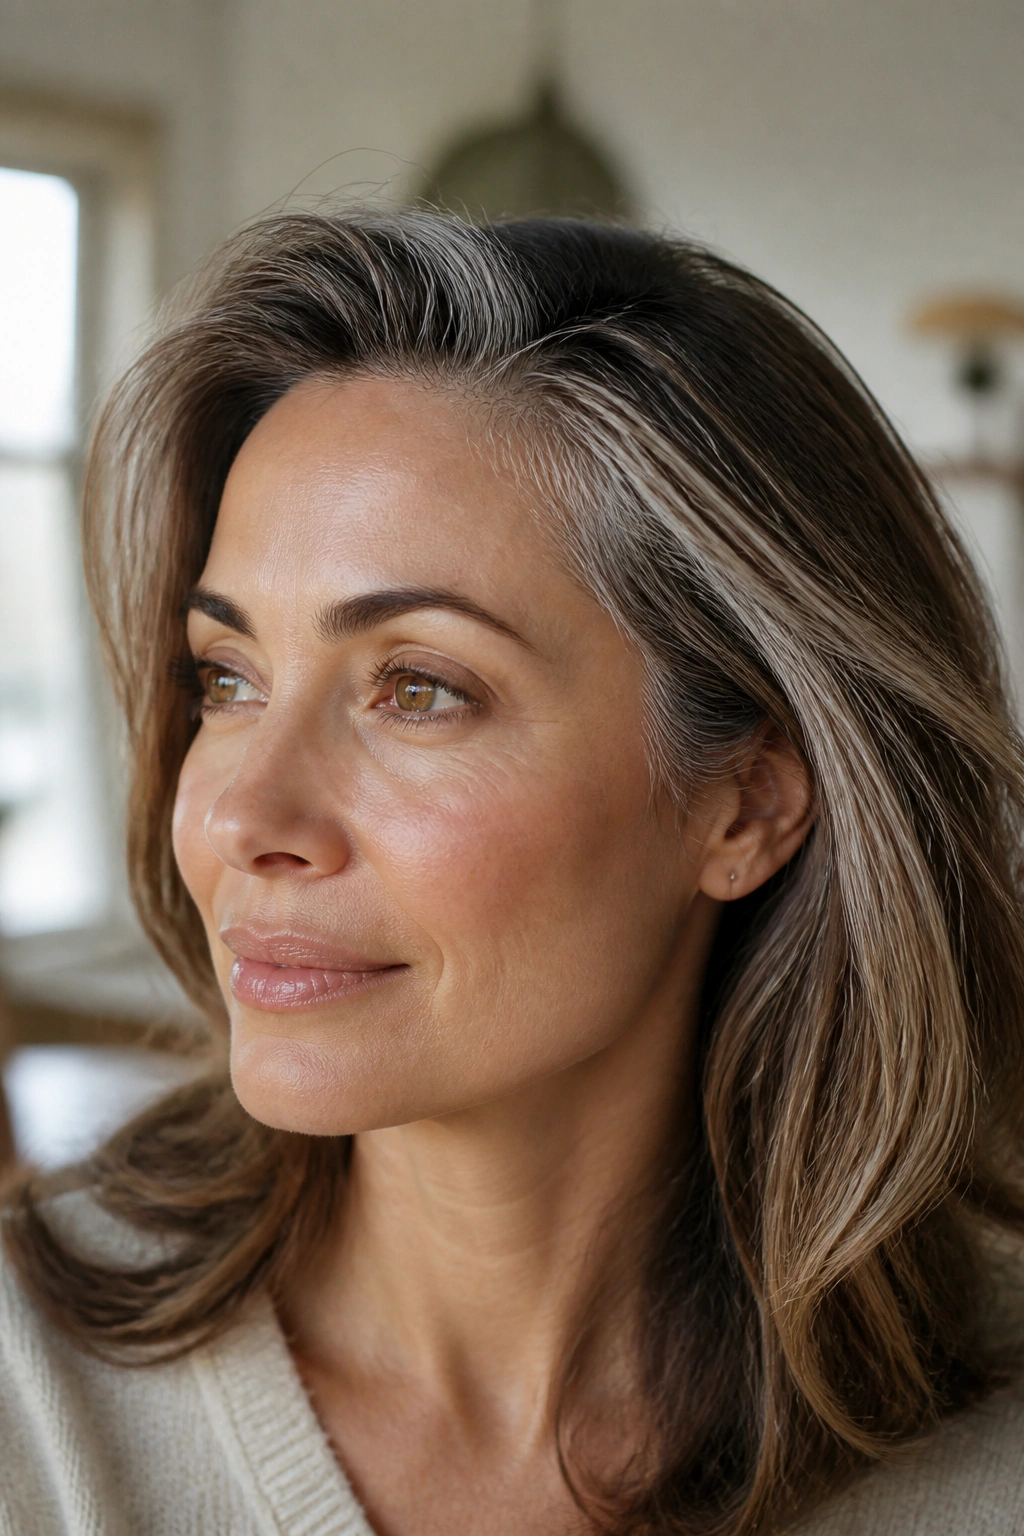
If you are seeing silver threads at the temples or a few bright strands through the part, you do not always need full gray coverage. Fine gray blending uses tiny woven sections of light and dark so the gray sits inside the pattern instead of sitting on top of it. That makes the regrowth far less obvious.
This technique is smart because gray hair reflects light differently. It can look wiry if it is fully covered, and it can look streaky if it is ignored completely. Blending gives it somewhere in the middle. The silver still shows, but it behaves more like dimension than resistance.
What To Request
- Fine weaving rather than broad sections.
- A formula that sits close to your natural level.
- A finish that leaves some silver visible instead of hiding every strand.
Gray blending works best when the goal is softness, not total erase-and-replace coverage. That is a good thing to say out loud at the salon. If you want the gray gone, say so. If you want it softened, say that instead. The difference changes the whole service.
The nicest part is the grow-out. It tends to feel less obvious, which matters when you are covering only a little gray or you do not want a sharp line every few weeks.
16. Soft Copper and Red Toning Looks Natural When the Contrast Stays Low
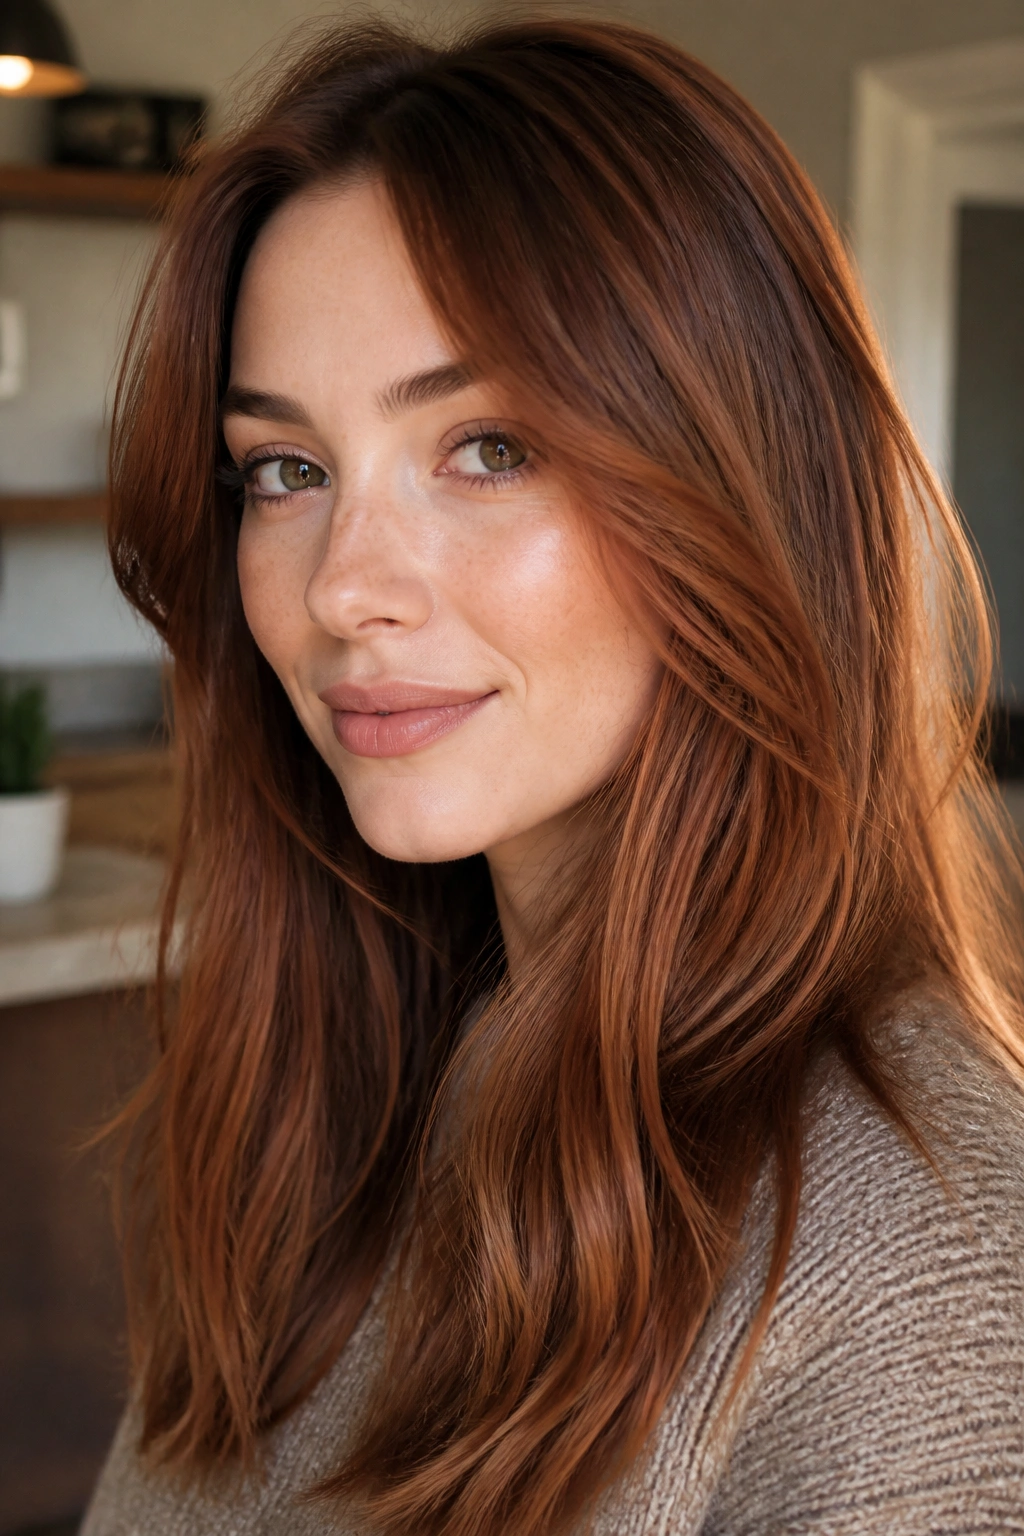
Natural red does not have to be loud. In fact, the prettiest reds are often the quiet ones: strawberry brunette, copper-brown, cinnamon, soft auburn. They glow because the tone is close to what hair can do on its own, not because the color is blazing at full volume.
The mistake is chasing a bright copper that fights the base. That usually looks amazing for about five minutes and then turns high-maintenance fast. A softer red works better when the root stays close to the natural base and the ends are only a few levels lighter. Low contrast keeps the color believable.
I like red toning on hair that already has warmth in it. Natural redheads, warm brunettes, and dark blondes can pull it off without the color looking pasted on. On very cool bases, the tone can still work, but it needs more care and a gentler formula.
There is also a practical side: red pigments fade fast. A gloss or demi-permanent red-beige finish can stay softer as it grows out, which is exactly what you want if the goal is natural color and not a loud seasonal statement. The quieter red wins here.
17. A Soft Money Piece Works When the Edges Are Blurred
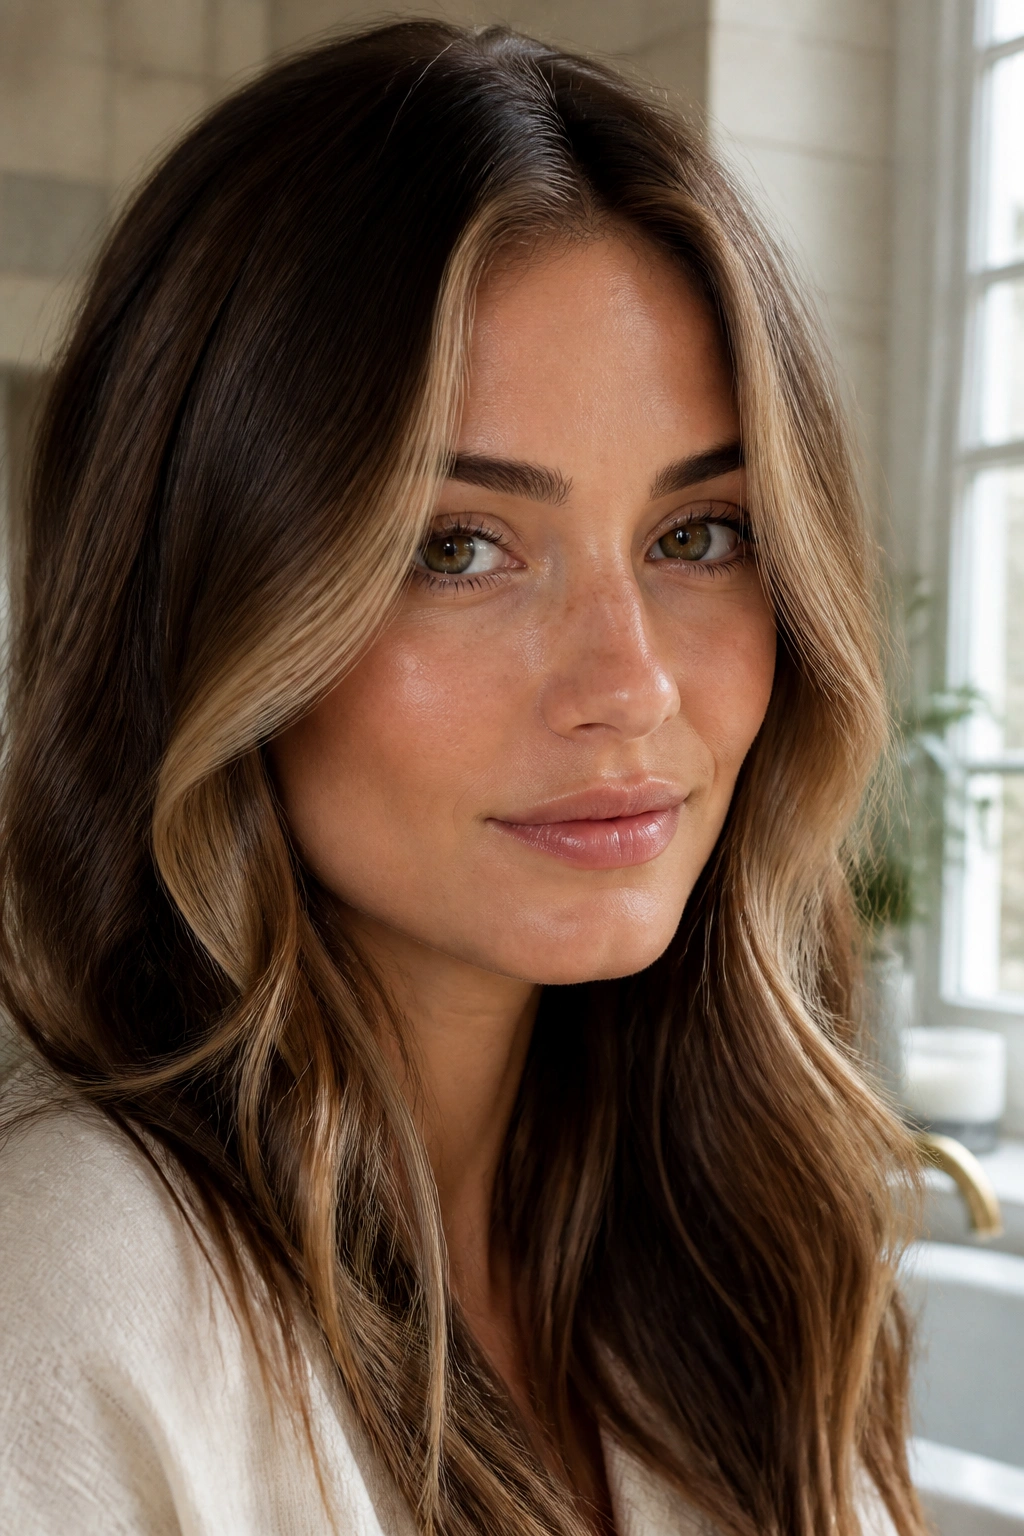
A money piece can look cheap or natural depending on how hard the edges are. The soft version stays close to the face, lifts only a step or two beyond the base, and melts into a shadow root so the front does not look pasted on. It gives brightness where the face needs it without stealing the whole show.
This technique is useful if you want a clear visible change but do not want full highlights. It also works well on wavy and curly hair, where the front pieces move enough to pick up light in different ways. Straight hair can wear it too, but the placement has to be softer or the contrast gets loud fast.
When A Money Piece Works
- Your haircut has a strong face frame or layers.
- You want brightness around the cheeks and eyes only.
- You are fine with a little upkeep around the front.
The piece should be narrow enough to blend into the sides, usually no wider than 1 inch to 1½ inches per side. Wider than that and the effect starts to dominate the haircut. Narrower and it feels more like a bright accent than a stripe.
I like this technique when the client wants a visible difference but still wants the hair to look believable in daylight. That balance is harder than it sounds. When it works, it really works.
18. Soft Gray Blending for Seamless Grow-Out
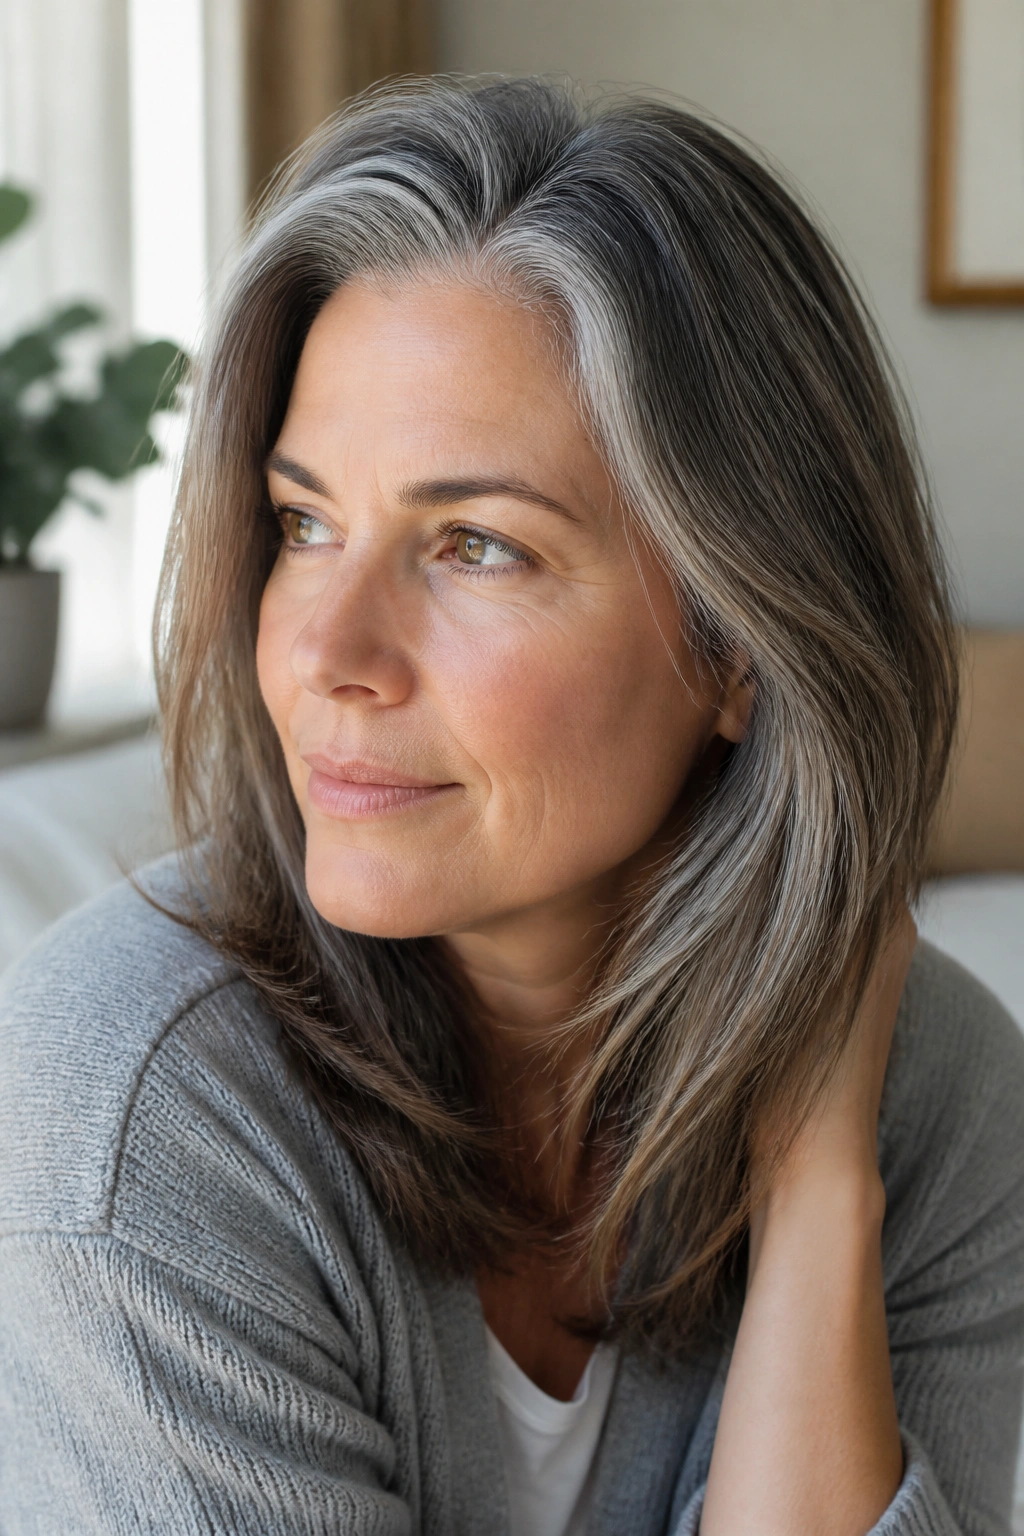
The best natural-looking color usually does one simple thing: it respects the hair you already have. If your base is dark, keep some dark. If your grays are coming in, let them be part of the plan. If your ends are light, make sure the root does not fight them. That calm balance is what makes color look lived-in instead of newly processed.
I always come back to the same rule. The closer the technique stays to your natural depth, the easier it is to wear. That does not mean boring. It means believable. A soft balayage, a careful shadow root, a few babylights around the part, or a gloss that keeps the tone clean can change the whole mood without making the hair look edited.
If you are torn between two techniques, choose the one that keeps the root the least fussy. Roots are where the lie shows first. Keep them soft, and the rest of the hair can do almost anything.
The nicest color jobs are the ones that make people ask what you did, not what you got done. That is a small difference. It matters.
