



A special-day hairstyle has one job: stay put through hugs, flash photos, dancing, and that awkward stretch where you’re suddenly sitting very upright in a chair for speeches. Twisted updo hairstyles do that better than most styles because they can look soft at the front and still hold their shape at the back, which is a rare combination. They also give you room to breathe. No helmet hair. No stiff shell that feels like it was sprayed into place by a machine.
What I like most about a twist is the way it behaves on different hair types. Fine hair gets some shape without needing a full basket of pins. Thick hair gets structure without turning into a heavy knot that drags at the scalp. And if your hair tends to slip out of braids or plain buns, twists usually give you a little more grip to work with.
They suit a lot of moments, too. Wedding guest hair, bridesmaid hair, prom, gala dinners, rehearsal dinners, graduations, black-tie events — all of it. The trick is choosing a twist that matches the neckline, the mood of the outfit, and the amount of time you want to spend in front of a mirror with a comb in your mouth.
The styles below each solve a different problem. Some keep the face open. Some soften a sharp dress. Some hold better on hair that refuses to cooperate. The right one is usually the one that fits the day instead of fighting it.
1. Twisted Updo Hairstyles: The Twist-Wrapped Low Bun
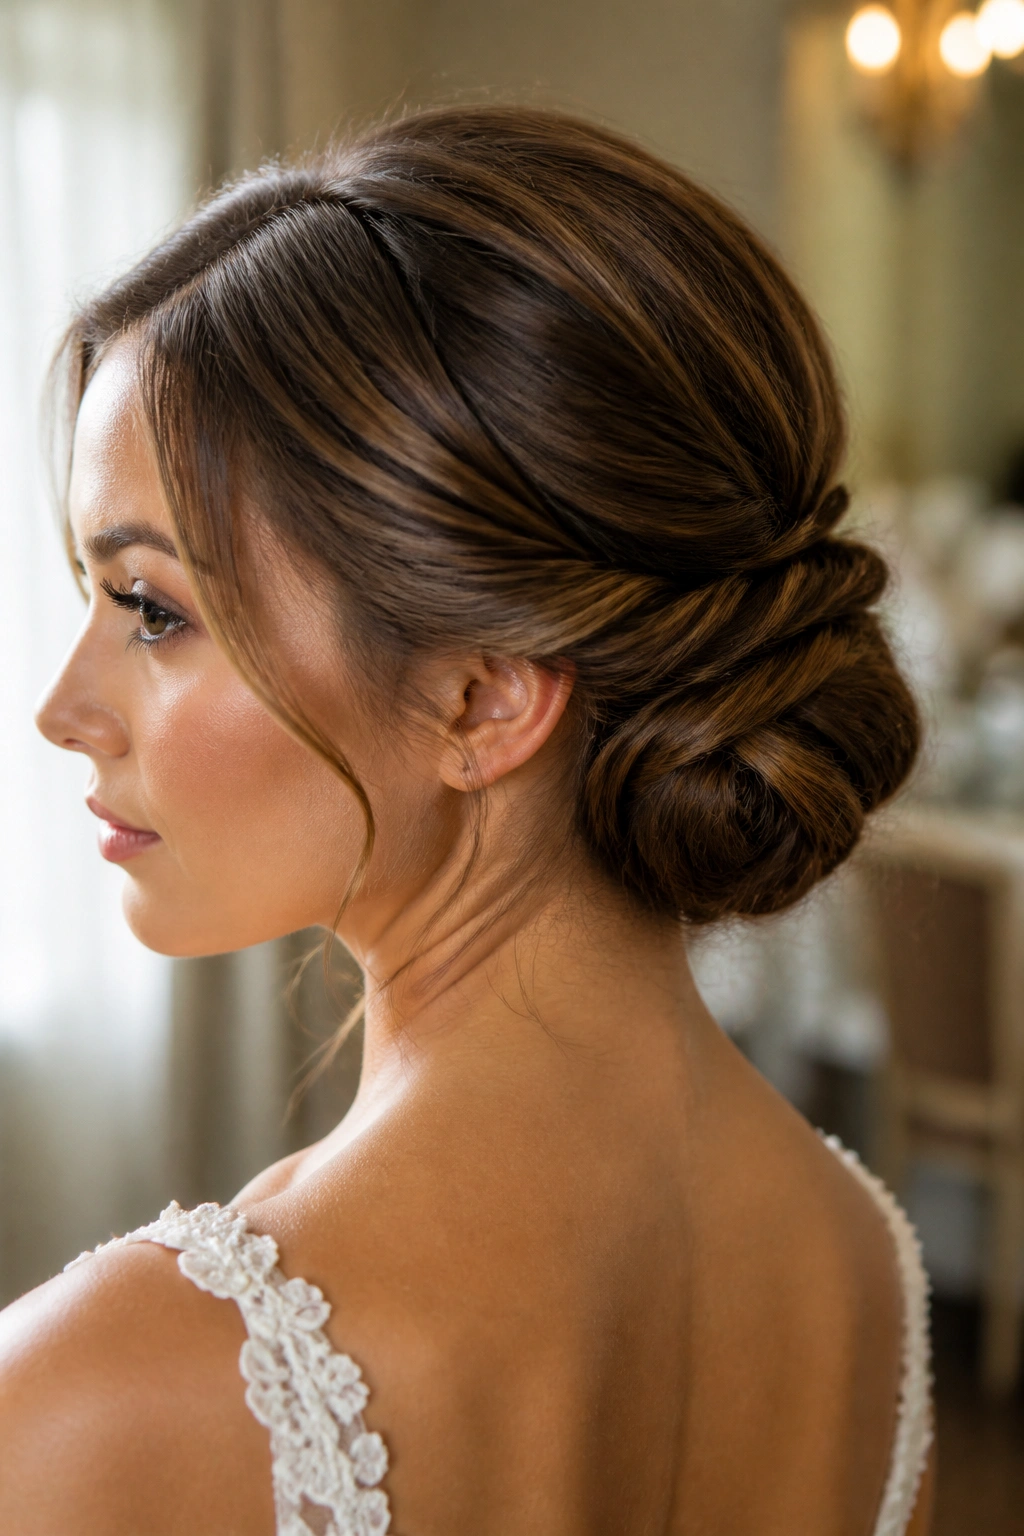
This is the style I’d hand to someone who wants tidy hair without losing softness around the face. The twist-wrapped low bun sits at the nape, which keeps the silhouette calm, and the side twists make the whole thing look a little more thoughtful than a plain bun. It’s one of those special-occasion styles that looks like you spent an hour on it, even when the real work took twenty minutes and a decent handful of pins.
Why It Works
The low placement matters. Hair pinned low doesn’t compete with earrings, veils, or a strong neckline, so the rest of your outfit gets room to show off. That’s useful on formal nights, but it’s also handy if you’re dealing with hair that falls flat when it’s pulled too high. A bun at the nape tends to stay calmer.
It also forgives small mistakes. A twist that isn’t perfectly even can still look good once it’s tucked and pinned. That’s half the charm. If your part shifts slightly or one side has more volume, this style still feels intentional instead of messy in a bad way.
Quick Styling Facts
- Works best on shoulder-length to long hair.
- A texturizing spray or dry shampoo helps slippery hair hold.
- You’ll usually need 6 to 10 bobby pins, depending on thickness.
- Leave one or two small face-framing pieces if you want a softer finish.
- A light-hold hairspray keeps the shape without making the hair crunchy.
Pro tip: If your hair is very clean and silky, rough up the roots with dry shampoo before you twist. Clean hair looks nice. It also slides everywhere.
2. The Crown Twist Into a Low Knot

If you want the front of your hair to matter as much as the back, this is the one to try. The crown twist into a low knot gives you that lifted look around the top of the head, then brings everything back into a neat knot near the base of the neck. It feels balanced. Not fussy. Not flat, either.
The style is especially good when you want to show off a veil or keep the face open for earrings and a strong collarbone line. The crown section gives you a little height without pushing the whole look into high-bun territory, which can feel too severe on some faces. A small lift at the crown is usually enough. More than that, and the style starts to feel like a pageant contestant from the wrong decade.
This one also behaves well with day-two hair. A little bit of lived-in texture at the roots gives the crown something to hold onto, so the twists grip better and the knot has less chance of sliding down. If your hair is layered, keep the twists narrow and pin them as you go instead of waiting until the end. Waiting is where loose pieces start doing their own thing.
A clean center part makes it look sharper. A soft off-center part makes it sweeter. Either way, the key is keeping the knot compact and the crown lifted just enough to matter.
3. The Side-Swept Twisted Chignon

Why does a side-swept twisted chignon look so polished without feeling stiff? Part of it is the asymmetry. Hair that moves to one side naturally softens the face, especially if your jawline is sharp or your dress has a single shoulder, a deep neckline, or an open back that needs a little visual balance.
The chignon itself gives the style its structure, but the side sweep is what makes it interesting. Instead of pulling everything straight back, you let one side carry a bit more hair and texture. That creates a line across the back of the head that feels elegant without being rigid. I like this one for evening weddings because it still looks good after hours of talking, eating, and pretending not to notice the photographer.
How to Style It
Start with a deep side part, then twist the heavier side back in a smooth arc toward the nape. The other side can be twisted tighter and pinned just below the ear. Keep the bun low and slightly off-center so the shape looks deliberate.
- Best for medium to thick hair
- Nice with one-sided earrings
- Works well with sleeveless or asymmetrical dresses
- Use two mirror checks: one from the front, one from the side
A side-swept chignon is one of those styles that gets better when it isn’t overworked. Stop once the shape looks balanced. If you keep fussing, you’ll flatten the volume that makes it special.
4. The Halo Twist Bun
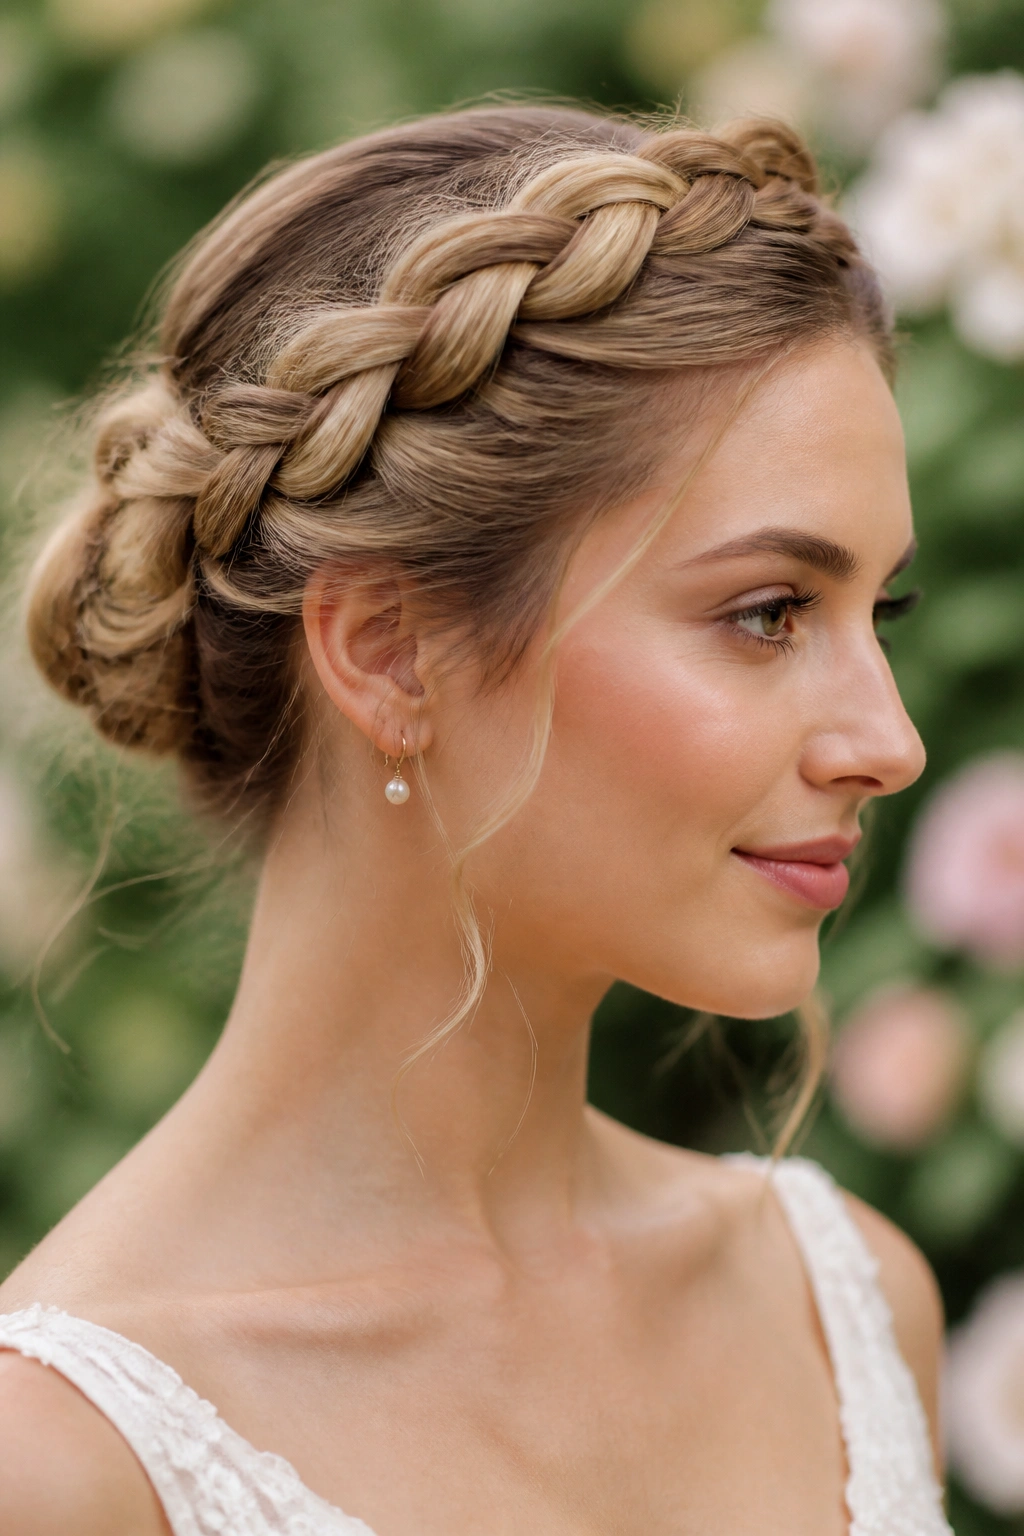
Picture a warm ceremony, a bit of wind, and a dress that leaves your shoulders bare. The halo twist bun makes sense in that setting because it keeps hair anchored around the head while still looking soft at the edges. It has a gentle, wrapped feeling, almost like a crown, but it lands in a bun at the back instead of sitting like a literal halo. Which is good. Literal can get silly fast.
The shape starts with twists that travel around the crown from both sides. They meet at the back and tuck into a bun, usually low or mid-low. What you get is a continuous line around the head, which looks clean from the front and side. There’s enough movement to keep it from feeling severe, but not so much that it turns into loose hair pretending to be up.
It’s a smart option for people who hate hair falling into the face. The front is secured, the temples are covered, and the bun sits out of the way. If you’re planning to wear flowers, tiny pearl pins, or a comb at the back, this style gives those extras a clear place to land.
- Good for medium-density hair
- Works well with freshly curled ends
- A few hidden pins behind the ears make the halo stay put
- Keep the crown slightly lifted so it doesn’t flatten against the head
A halo twist bun looks best when the twists are visible, not smoothed into nothing. Let the texture show. That’s the whole point.
5. The Knotted Mid-Height Updo

A mid-height knot gets overlooked because low buns feel safer and high buns get all the attention. I think that’s a mistake. The knotted mid-height updo sits in the space between them, which gives it a useful job: lift the face a little, but not so high that the whole style starts looking formal in a stiff, old-fashioned way.
The knot placement usually lands around the middle of the back of the head, near the upper part of the occipital area. That spot gives a nice line under a dress neckline. It also helps if your top layer of hair needs a bit of volume to keep the style from collapsing into the neck. With very thick hair, a mid-height knot can look bulky if you shove everything into one section, so I prefer to break the hair into three or four twist panels and let them stack into each other.
What makes this style special is the way it handles shape. A low bun can sometimes disappear against a dark dress. A high bun can feel like the whole hairstyle is shouting. Mid-height sits in the middle and gets the balance right more often than not. It’s especially good for bridesmaids or guests who want something formal but not too precious.
A few face-framing pieces help, but don’t overdo them. One soft piece on each side is usually enough. Too many and the style starts losing the crisp shape that makes the knot interesting in the first place.
6. The Rope-Braid Hybrid Updo
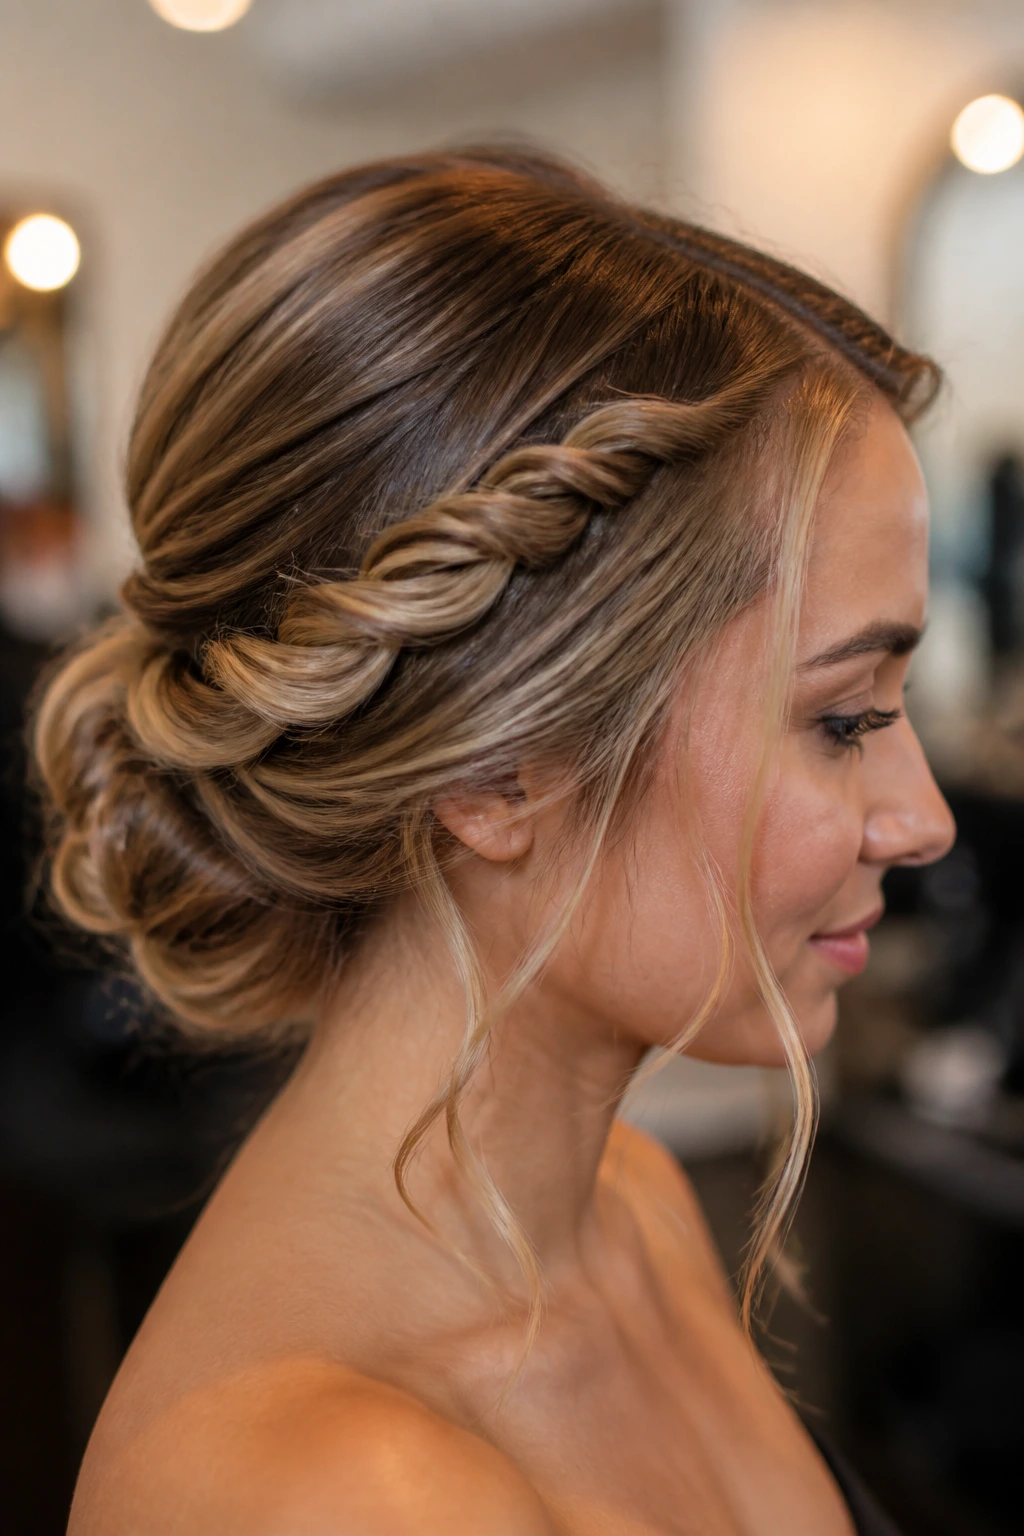
Unlike a full braid crown, a rope-braid hybrid updo moves faster and gives you cleaner lines. That’s because the rope twist only needs two sections per twist instead of three. Less fuss. Less split-end chaos. More control, which matters when you’re trying to get ready and the clock is being rude.
The hybrid part is what makes it useful for special days. You can take a rope twist along the side, then fold it into a low bun or tuck it into a looped knot. The result has the neat texture of a braid without the softer, sometimes too-busy look that a full plait can bring. I reach for this one when hair needs to look textured from a distance. It reads well in a room.
This style works especially well on medium to thick hair, since the rope sections have enough bulk to stay visible. Fine hair can still wear it, but you’ll want a little grit first. Dry shampoo or a light mousse at the roots gives the strands more bite. Otherwise the twist may look too thin and disappear into the bun.
If you want a formal hairstyle that feels a little less expected than a classic chignon, this is a smart pick. It’s neat. It’s fast. And it doesn’t need a perfect finish to look good.
7. The Double-Twist French Roll

I like a double-twist French roll when the dress has structure and the hair needs to stay calm. There’s something satisfying about the vertical line of a French roll, and the double-twist version gives it a little more texture at the sides before everything rises into that clean back shape.
The basic idea is simple. Two side sections are twisted inward toward the center, then the rest of the hair is gathered and rolled up into the shell-like shape at the back. It sounds more complicated than it is. The trick is controlling the direction of each twist so the roll doesn’t puff in the wrong places.
Pin Placement Matters
Where you put the pins decides whether this style lasts the night or starts sagging by dessert. I like to anchor each twist first, then pin the roll itself in layers so the weight spreads out instead of hanging from one spot.
- Place one pin at the base of each twist
- Use crossed bobby pins along the seam of the roll
- Hide the ends inside the center fold
- Spray each section before you tuck it, not after
The French roll looks best when the front is smooth but not too flat. A little bend near the temples keeps it from feeling severe. Leave the back snug. That’s the part that has to do the real work.
8. The Soft Twisted Gibson Tuck
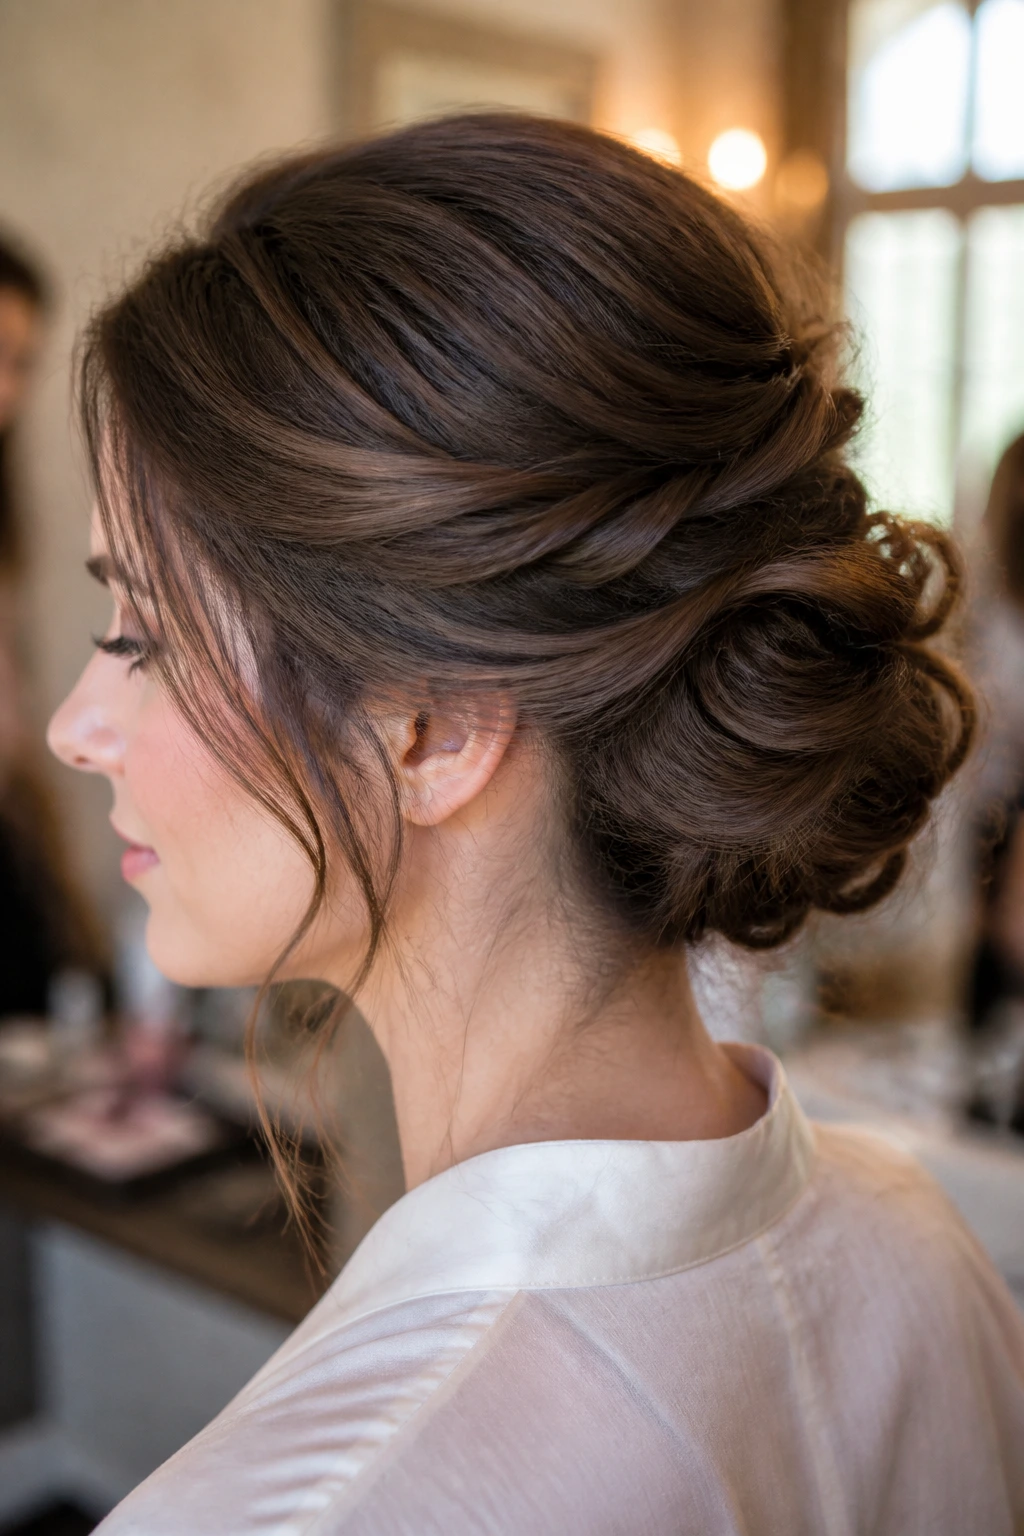
What makes a Gibson tuck feel lighter than a full bun? It’s the way the ends disappear into a pocket instead of wrapping into a dense knot. That keeps the silhouette soft and lets the twist show without adding too much bulk at the back of the head.
A twisted Gibson tuck is especially handy for shoulder-length hair, which can be awkward in formal styles. Hair that’s too short for a big bun often fits this shape better because the ends fold neatly under the twist line. You end up with something tidy, low, and slightly romantic, which is a nice combination for weddings and dressy dinners.
I like this style for people who want their neck open but still want something more interesting than a simple ponytail twist. It works with straight hair, wavy hair, and loose curls that have been brushed into a softer texture. If the hair is too slippery, the tuck can slide down, so start with a little volume at the roots. A small amount of teasing at the crown can help too, though I’d keep it mild. You want lift, not a nest.
How to Keep It from Sagging
A Gibson tuck depends on the hidden fold holding the weight of the rest of the style. That means the inside has to be secure before the outer shape goes in.
- Use 2 to 3 hidden pins inside the tuck
- Keep the fold tight at the base
- Mist with light-hold spray between layers
- Check the back after 5 minutes of wear and adjust before leaving
It’s a quiet style, but a good one. The kind that does its job without demanding attention.
9. The Twisted Ponytail Bun

The twisted ponytail bun is the most underrated style on this list. It doesn’t ask for much, and that is exactly why it’s useful. Pull the hair into a ponytail, twist the length, wrap it around the base, and pin it down. Done right, it looks clean and purposeful. Done lazily, it looks like you ran out of time. That gap matters.
This style works particularly well for thick hair because the ponytail gives you a strong base to build from. You don’t have to fight a dozen loose sections at the nape. The hair starts in one place, then gets folded around itself. That makes it fast. It also makes touch-ups easier if you’re getting ready in a hurry or doing your own hair before an event.
I like adding a small accessory here — a satin ribbon, a single jeweled comb, or a narrow metallic clip tucked above the base. Nothing loud. Just enough to break up the knot and make it feel event-ready. If the dress is simple, the accessory can do a little more. If the dress is busy, keep the bun plain and let the clothing carry the look.
The ponytail bun is not the most dramatic style here. It doesn’t need to be. It’s the practical choice that still looks dressed up, and sometimes that is the smarter move.
10. The Low Infinity Twist Knot
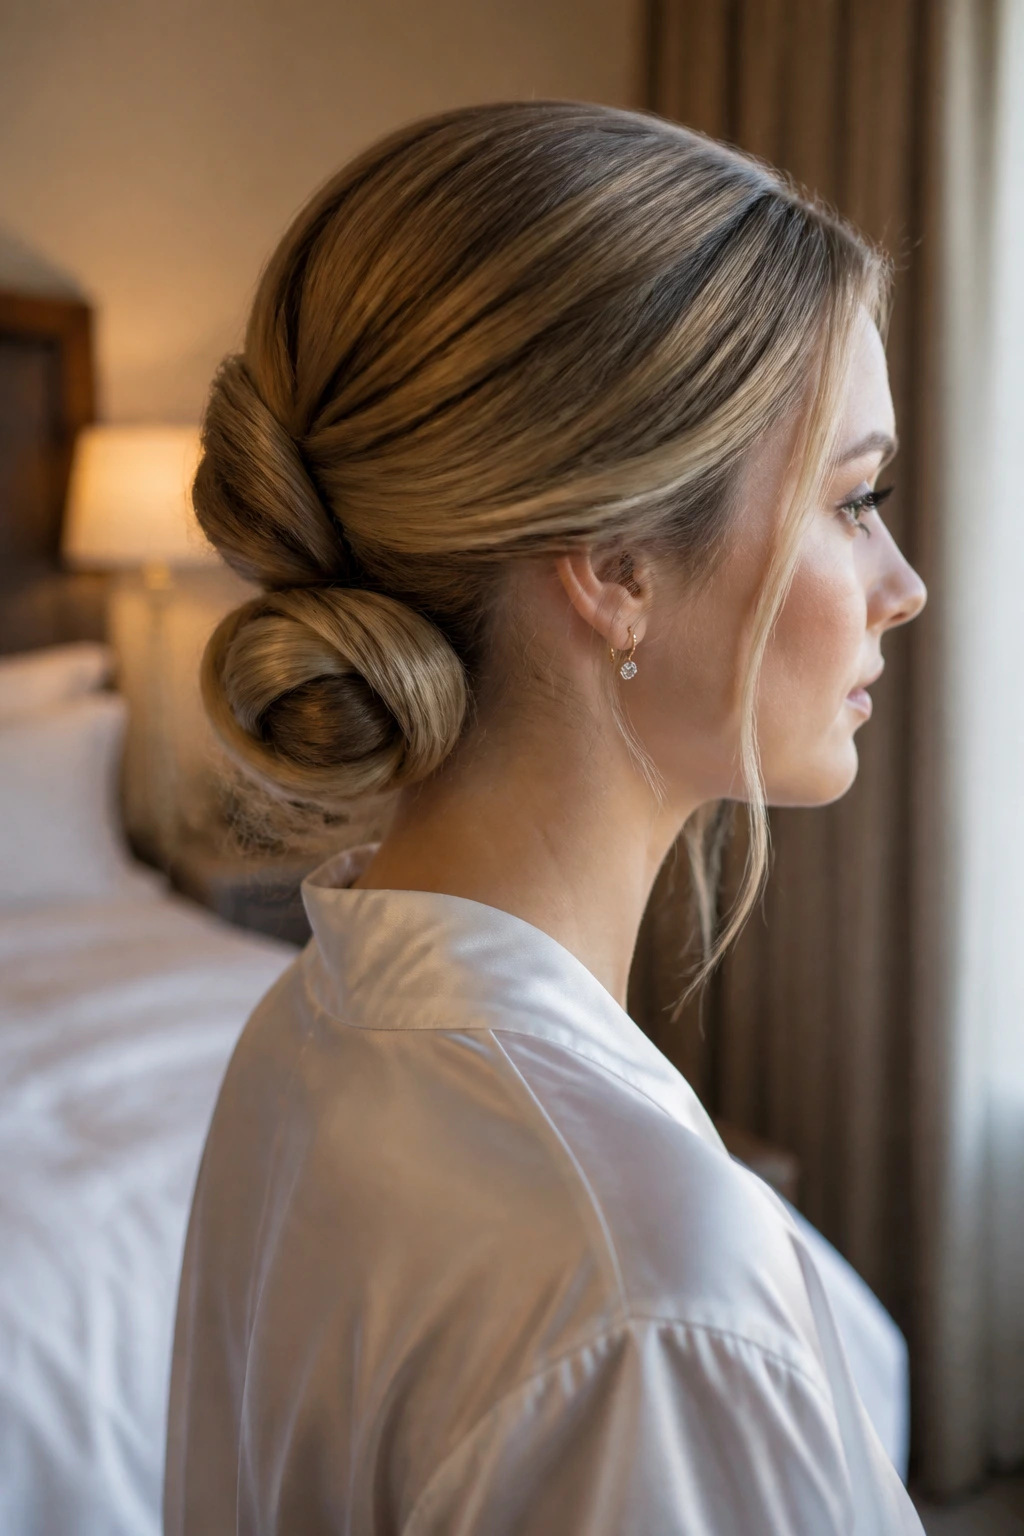
At the end of a long ceremony, this is the style that still looks tidy. The low infinity twist knot uses two sections that loop over and under each other in a figure-eight shape before being pinned at the nape. The line is smooth, a little sculpted, and more interesting than a plain roll.
What I like about it is the shape. A regular knot can feel blunt. The infinity twist has a built-in curve, which gives the back of the head a softer outline. It’s a nice fit for dresses with a simple back or a neckline that needs a clean frame. The style also works well on thick hair, because the looping motion spreads the bulk instead of stacking it in one big lump.
Key Details That Matter
- Make the two sections even in thickness so the knot balances
- Twist each section loosely at first, then tighten near the pin
- Place pins horizontally along the figure-eight loops
- Leave the nape smooth but not flattened
This is not the one to rush. If the loops are sloppy, the knot loses the whole point of the design. Slow hands help. So does a hand mirror. The shape has to read clearly from the side, not just from the back, and that’s where a lot of rushed updos fall apart.
11. The Messy Twisted Bridal Bun

A bridal bun does not have to look pinned down so tight that it feels like it belongs on a mannequin. The messy twisted bridal bun keeps the structure but softens the finish, which is why I think so many people keep coming back to it for weddings. It has movement. It has a little air around it. It does not look sprayed into submission.
The trick is deciding what “messy” should mean. It should not mean random. The twists still need a shape, and the bun still needs a clear center. What you loosen are the edges: a few lifted pieces near the crown, a couple of soft flyaways, maybe one or two pieces around the face that aren’t curled into perfect ringlets. Those tiny imperfections are what make the style feel human.
This one is especially good with veils, floral pins, or pearl accents because the bun has enough texture to hold decoration without swallowing it. If the hair is very smooth, prep with a light wave first. A little bend in the lengths gives the twists something to catch on to, and the bun stays fuller without needing a mountain of product.
I’d use this on brides, yes, but also on guests who want something romantic without looking overdone. It’s one of the few styles that looks better when it relaxes a little over time.
12. The Sleek Center-Part Twist Updo
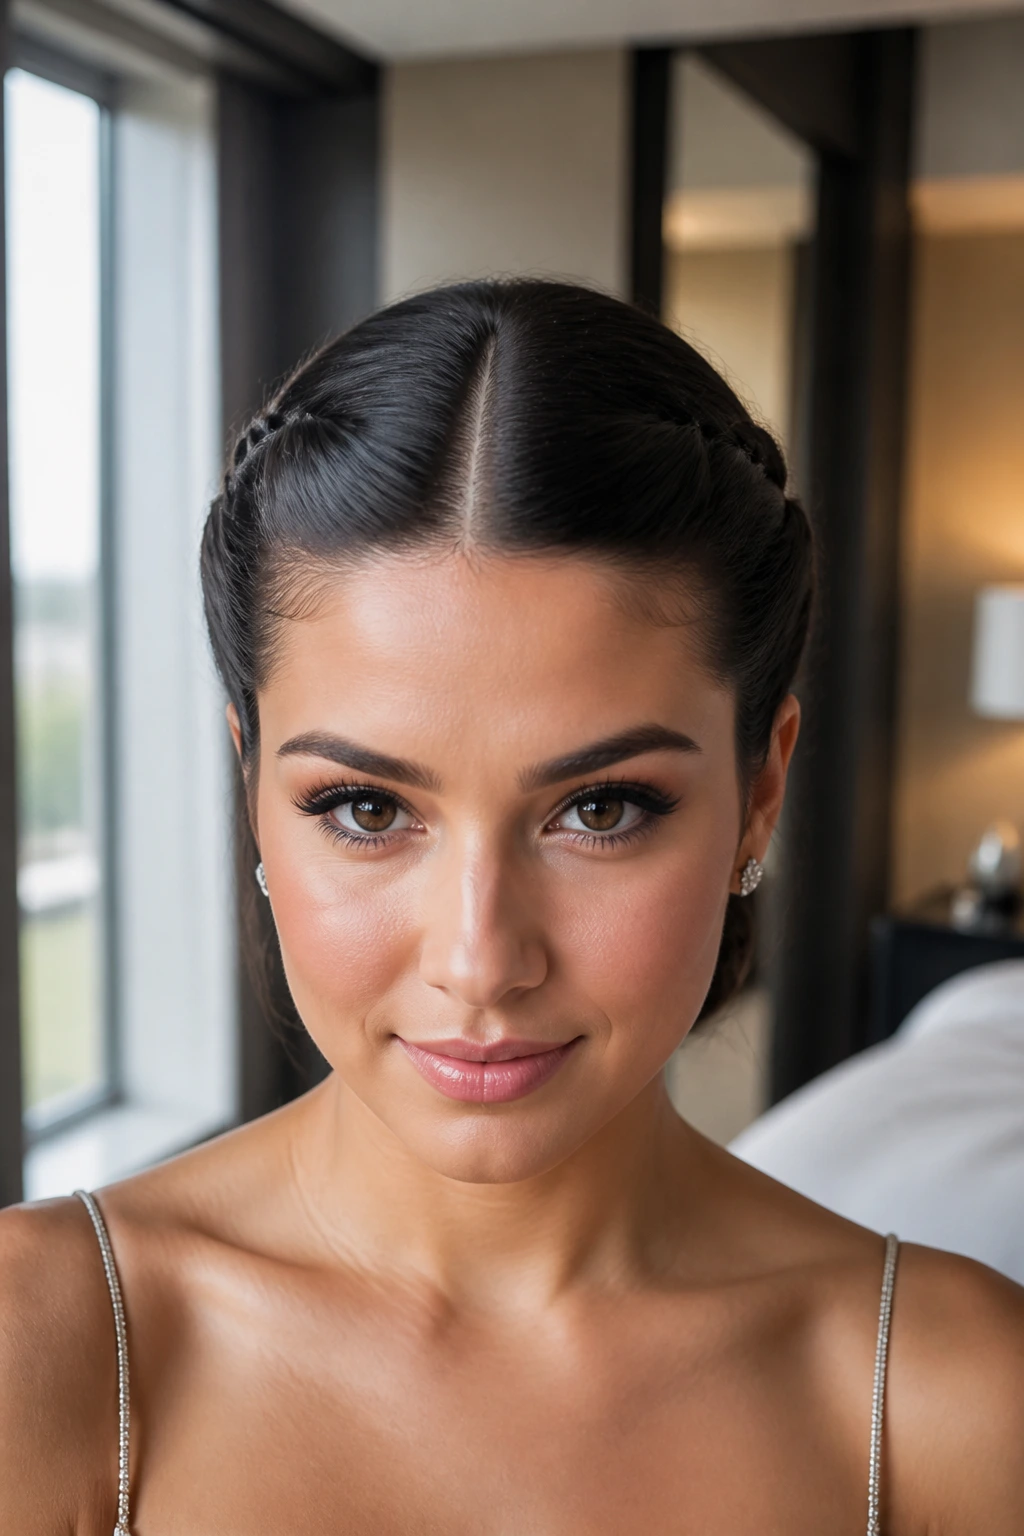
A sleek center-part twist updo is the opposite of the softer, messier versions above. Everything about it leans clean. The middle part draws a straight line down the face, and the twists on either side echo that symmetry before meeting in a low knot or roll. It’s sharp in a good way.
This style makes the most sense when the outfit has structure. A tailored gown, a square neckline, a satin dress with clean seams — all of those pair nicely with hair that’s smooth and deliberate. It also works well if you want the face to look a little longer or more defined. The center part does that nicely without needing extra volume.
I’d use a smoothing cream or light serum before styling, but only a little. Too much product turns the hair oily at the roots and kills the movement you need for the twists. A fine-tooth comb helps keep the part straight. Once the twists are pinned, run the palms lightly over the top layer to settle any stray bits. Don’t press too hard. You want sleek, not pasted.
If your hair is naturally curly or wavy, you may need to stretch the front section first with a blowout or a quick flat-iron pass. The style can still work on texture, but the center line reads best when the front is smooth enough to show it.
13. The Twisted Half-Up Crown Bun

Need your hair partly down but still off your face? The twisted half-up crown bun handles that split beautifully. You get the security of a twist at the top, a little lift around the crown, and the freedom of loose lengths underneath. For someone who likes seeing their hair move, this is a useful middle ground.
The style starts with two sections from the temples or just above them, twisted back and joined near the crown into a small bun or tucked knot. The rest of the hair stays down, which keeps the style from feeling too formal. It’s especially nice with soft waves or brushed-out curls because the loose hair and the twisted top balance each other out. Straight hair can wear it too, though it benefits from a little bend so the contrast doesn’t look flat.
How to Keep It from Sagging
Half-up styles can slip if the top section is too heavy or the pins are too shallow. That’s the part to watch.
- Keep the top sections no wider than 1.5 inches each
- Pin the bun close to the crown, not too far back
- Cross two bobby pins inside the center
- Add a small spray before the final tuck
This one is a nice choice for bridesmaids, rehearsal dinners, or any event where you want a softer shape than a full updo. It keeps the hair out of the face without hiding the length you worked to grow.
14. The Low Twisted Chignon with Tendrils
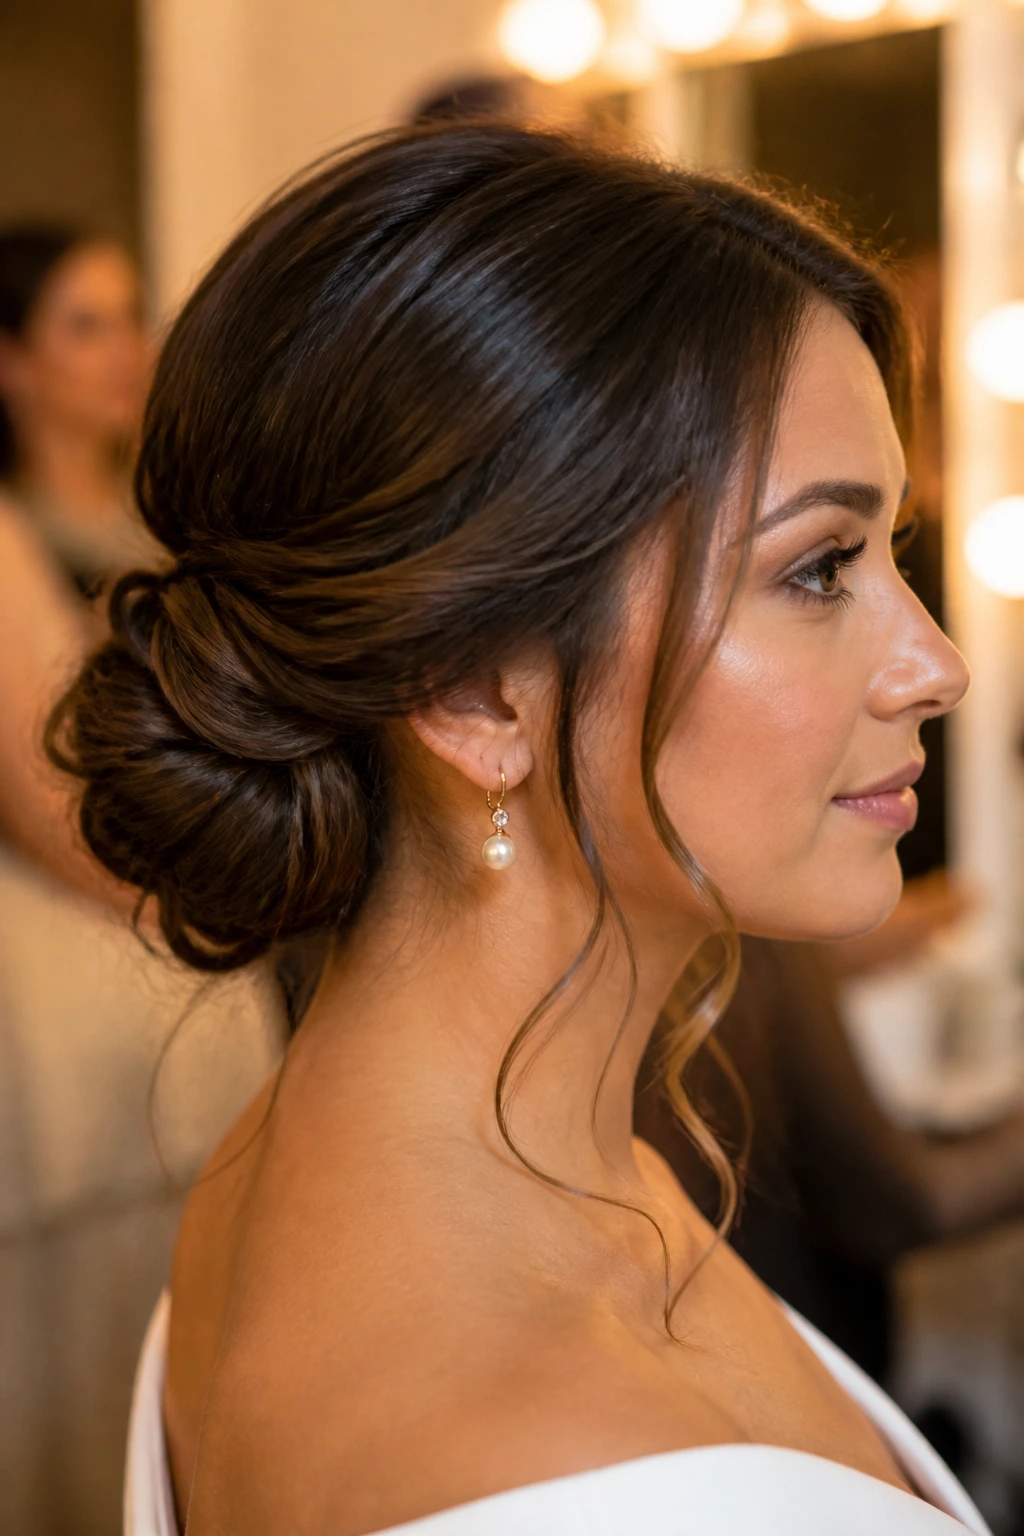
The low twisted chignon with tendrils is what I recommend when someone wants formal without looking severe. It has the clean shape of a chignon at the nape, but the loose pieces at the front stop it from feeling too tight. That matters. A completely smooth updo can look fantastic on the right face, but it can also flatten all the personality out of the look.
The tendrils should be chosen, not accidental. I usually like two front pieces, one on each side, cut or styled to sit softly near the cheekbones. They should frame the face, not cover it. If they’re too thick, the style starts sliding into prom territory. Too thin, and they disappear. A medium section curled away from the face usually lands in the right place.
Why It Flatters
This style gives the eye a few places to rest. The low chignon anchors the back, while the tendrils soften the front. That makes it good for people who want to draw attention to earrings, collarbones, or a dress with detail at the shoulders.
- Best with medium to long hair
- A 1/2-inch curling iron works well for the tendrils
- Keep the chignon compact, not swollen
- Use 2 to 3 pins just on the front pieces if they slip
Small tip: Curl the tendrils away from the face first, then let them cool before touching them. That helps them hold the shape longer and keeps them from turning frizzy by the end of the night.
15. Twisted Updo Hairstyles for Long Hair That Needs to Last
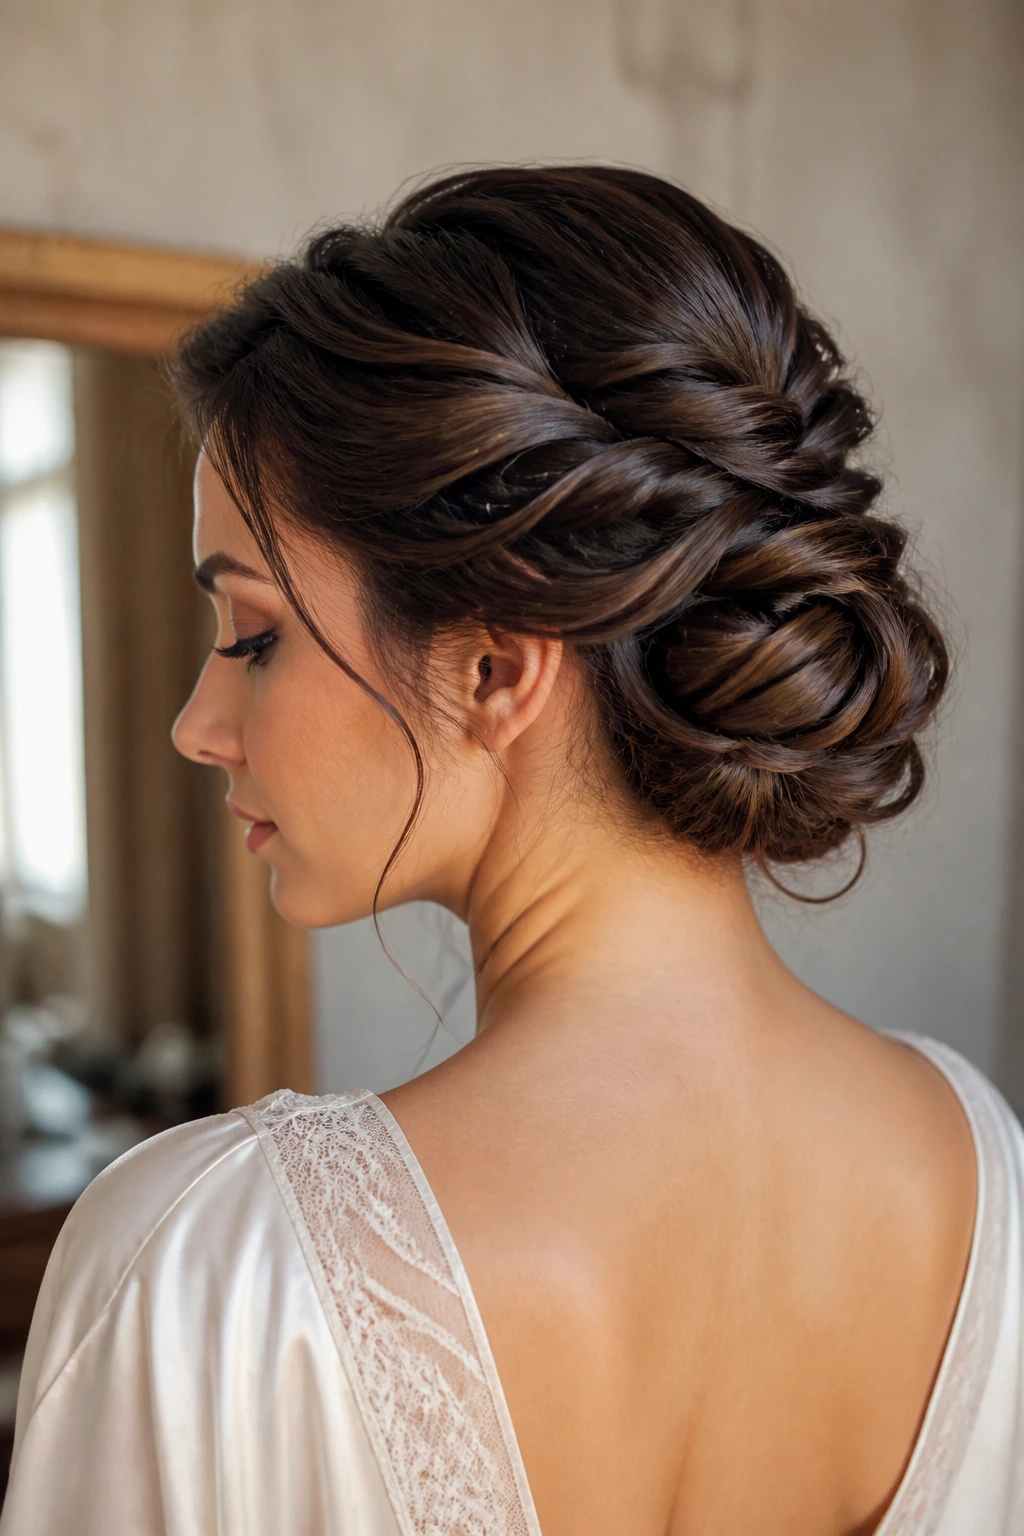
Long hair can be a gift and a nuisance in the same breath. It gives you room to build shape, but it also gets heavy, and heavy hair has opinions. A sculpted twist updo for long hair works because it treats the hair in sections instead of trying to force one giant twist to do everything. That’s the mistake I see most often. One oversized twist looks fine for about ten minutes, then gravity starts sending it south.
The better approach is to build the style in layers. Start with smaller twist panels — usually around 1 inch wide — and anchor them as you go so the weight spreads across the head. If the hair is very long, tuck the ends into hidden pockets or wrap them around a padded base so the shape has somewhere to sit. I like a little internal support for this kind of style, especially when the event involves heat, dancing, or a long gap between getting dressed and walking out the door.
This style can go sleek or soft. A sleek version fits black-tie events and formal gowns with clean lines. A softer version, with gently loosened twists and a few airy pieces around the temples, works better for outdoor ceremonies or romantic dresses with movement. Either way, the structure has to be solid underneath. Pretty on top, firm under the surface. That’s the whole game.
Big hair needs more anchors. Hidden pins, a strong base, and a little patience make a bigger difference here than any fancy accessory ever will. If your hair reaches the middle of your back or beyond, split it into sections instead of forcing it into one pin zone. The style will last longer, look calmer, and feel a lot less like a compromise by the time the night gets going.
