



A lob can be the easiest haircut in the room, or the one that has you redoing the front pieces three times before breakfast.
The best lob styling ideas for easy daily wear do not fight the cut; they use its collarbone length, blunt ends, and built-in movement to make the whole thing look finished in minutes. That’s the sweet spot with a long bob. Too much curl and it shrinks. Too little shape and it goes limp fast.
What I like most about a lob haircut is that it forgives small choices. A different part, one bend at the ends, a clip in the right place, a tiny braid near the temple — those little moves can change the whole read of the hair without turning morning prep into a project. And that matters when you want hair that looks deliberate on a school run, at a desk, or under a coat collar that keeps flattening everything.
The styles below are the ones I’d actually keep in rotation. Fast. Wearable. No drama.
1. Soft S-Bends with a Flat Iron
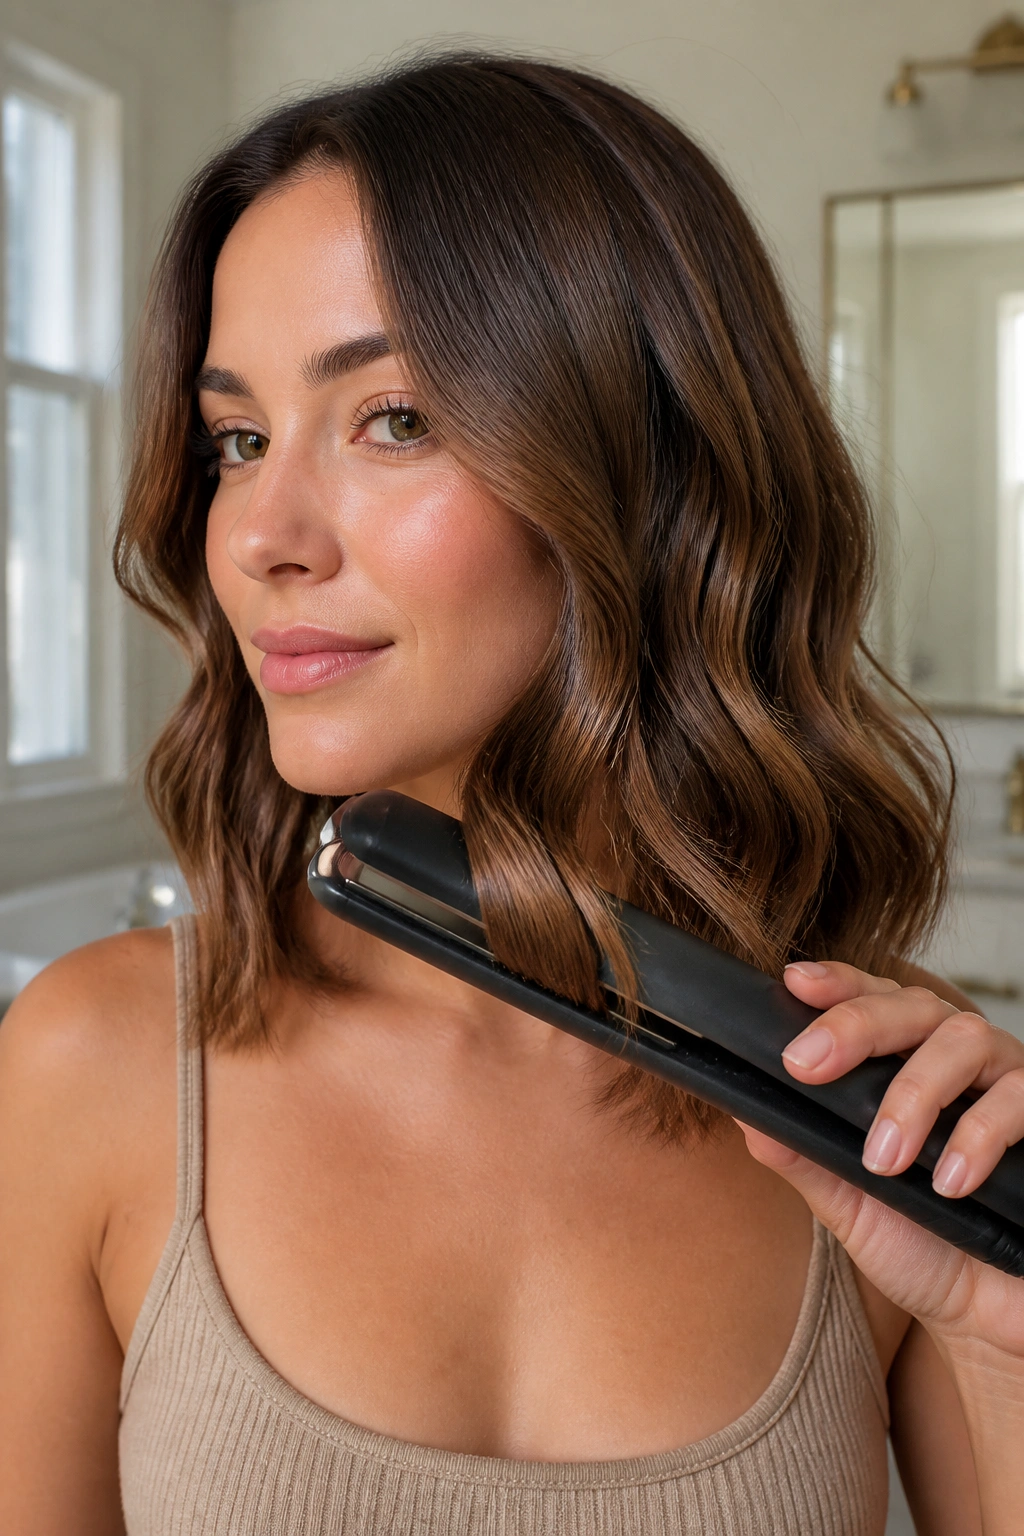
Soft S-bends are the lob’s sweet spot. They give shape without making the haircut look shorter than it is, and they feel far less precious than a full curl set. If your hair falls flat by noon, this is one of the easiest ways to bring it back to life without starting from scratch.
Why It Works on a Lob
The bend follows the line of the cut instead of fighting it. That matters on collarbone-length hair, because the eye still reads the length clearly while the ends get enough movement to look finished. A full curl can look a little too dressed up for daily wear. An S-bend stays easy.
Use a 1-inch flat iron and work in 1.5-inch sections. Turn the iron half a twist away from the face, slide down 2 to 3 inches, then switch direction for the next curve. The trick is keeping the motion loose. If every bend is identical, the style starts looking stiff.
- Keep the iron around 300°F for fine hair and 325–350°F for thicker hair.
- Leave the last 1 inch of the ends straighter so the lob keeps its line.
- Work only on the top layer if you’re short on time.
- Brush through with fingers or a wide-tooth comb once the hair cools.
Best tip: bend fewer sections than you think you need. Three clean waves often look better than ten fussy ones.
2. Air-Dried Texture with Cream and Scrunching

A good air-dried lob often looks more polished than a full blowout. That sounds backward, but it’s true when the haircut already has a nice shape and you just want the hair to land in the right places. This is the style I reach for when the morning is moving fast and I do not want to fight my own texture.
Start with damp hair and work a dime-sized amount of leave-in cream through the mids and ends. If your roots get greasy fast, keep product off the scalp and use a tiny bit of mousse there instead. A little goes far. Too much cream makes a lob collapse into one heavy shape, which is the opposite of what you want.
Scrunch upward with your hands, then twist the front pieces away from your face and clip them back for a few minutes while they dry. That tiny twist gives the front a better bend later. If the hair is stubbornly straight, a quick pass with a diffuser on low heat for 5 minutes can help the crown keep some lift.
No need to keep touching it. That is the part people get wrong. The more you mess with air-dried hair while it’s drying, the flatter and frizzier it gets.
3. Half-Up Twist at the Crown

Why does a half-up twist work so well on a lob? Because it fixes the two things that usually make this haircut feel messy: flat roots and hair falling into your face. You keep the length down, which is the whole point of a lob, but you still get a bit of height where it counts.
A small twist at the crown gives the haircut a lifted, clean shape without making it feel formal. It’s one of those styles that looks like you made an effort, even when the effort was about 90 seconds and one bobby pin got lost in your sink drain.
How to Wear It
Take the top third of the hair from temple to temple, twist it back once or twice, and pin it at the crown with two crossed bobby pins. If you want more softness, tug the twist apart a little with your fingertips so it doesn’t sit too tight against the head. That loosened shape makes the lob feel airy instead of severe.
I like this best on second-day hair, when the roots have a little grip. Freshly washed hair can be too slippery, so a quick mist of texture spray at the crown helps the pins stay put. Keep the twist small. If you pull up too much hair, the whole look starts competing with the cut itself.
4. A Deep Side Part for Instant Lift
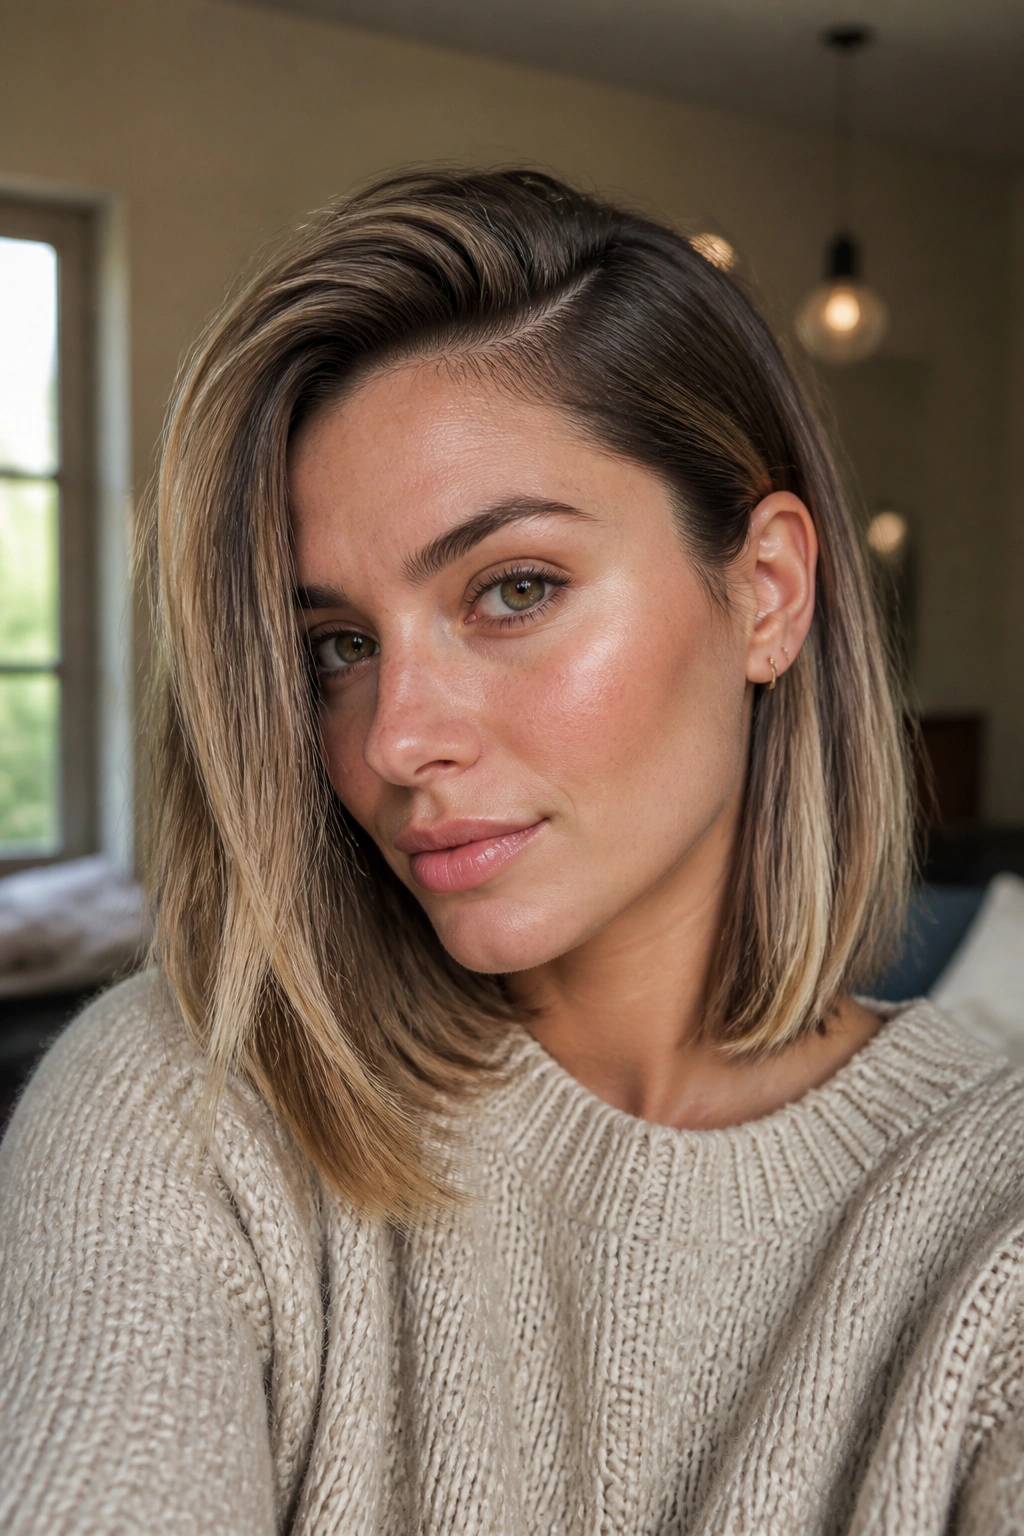
By mid-afternoon, a flat lob can start to look tired even when the haircut is fine. A deep side part fixes that faster than most styling products, and it works because it changes the weight of the hair, not just the surface.
The shift is simple. Move the part 1.5 to 2 inches away from where you normally wear it, then finger-lift the roots on the heavier side. If your hair has been sitting in the same center part for months, the change will feel dramatic. In the mirror, it reads as more volume. In real life, it also helps one side of the lob fall in a cleaner line.
- Use a rat-tail comb to draw the new part straight back.
- Blow-dry the roots for 20 to 30 seconds in the opposite direction before letting them fall.
- Add a small dusting of dry shampoo near the part if the roots are soft.
- Tuck the lighter side behind one ear for an easy finish.
My opinion: a side part is not boring. It’s a shape change, and on a lob, shape is everything.
5. Sleek Tuck Behind the Ears

Sleek hair tucked behind the ears can look severe in a mirror and excellent in real life. That contrast is why I keep coming back to it. On a lob, the tuck opens the face, shows off the neck, and makes the cut look sharper without adding any extra length or volume.
The key is keeping the top smooth and the ends tidy. If the hair is puffy at the temples, the look starts to slip into “I was in a hurry” territory. A light smoothing cream from the temples down to the ends helps a lot. So does a boar-bristle brush, because it presses the hair close to the head in a way a paddle brush often doesn’t.
A tiny bit of flat iron work on the bottom inch makes a big difference. You do not need a bone-straight finish. You need the ends to sit neatly so they don’t kick out in odd places once they’re tucked. One side can stay behind the ear and the other can fall forward. That unevenness keeps the style from looking too rigid.
No volume spray required. No complicated sectioning either.
6. Loose Waves with a 1-Inch Iron
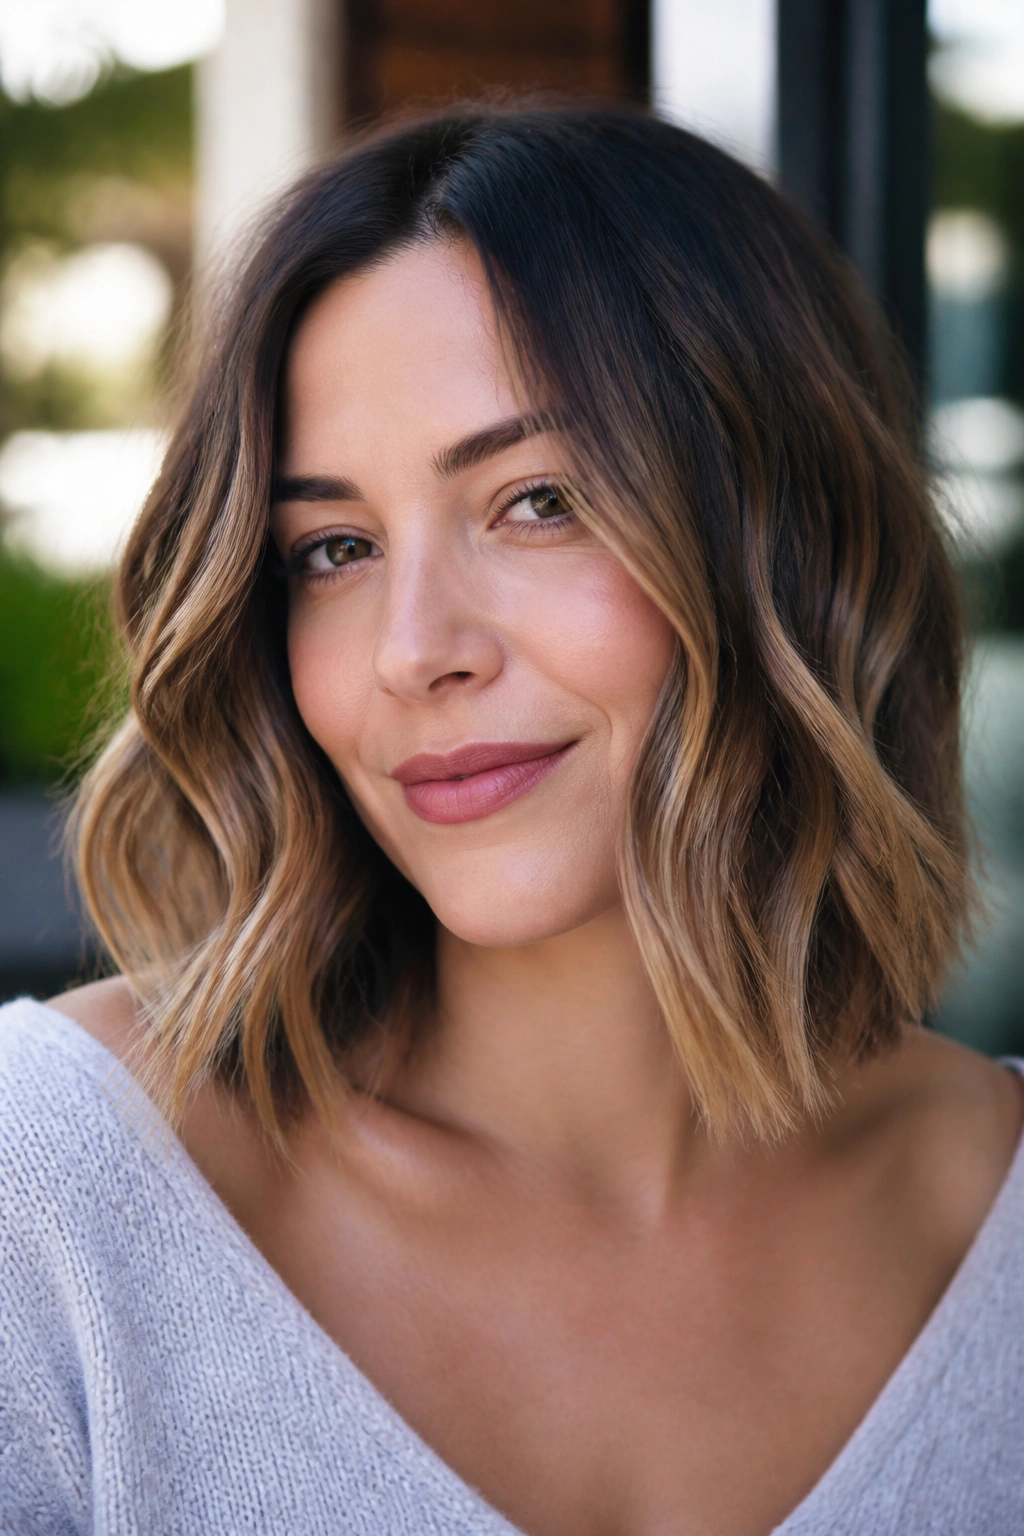
Unlike tight barrel curls, loose waves keep a lob looking like a haircut, not a prom experiment. That distinction matters. The best lob waves feel relaxed and airy, with enough bend to show movement but not so much curl that the length disappears.
The easiest version uses a 1-inch curling iron or wand and a very light hand. Wrap 1-inch sections around the barrel for 5 to 7 seconds, alternating direction as you go. Leave the last inch out on every section so the finish stays modern and the lob still looks like a lob. If you curl the ends all the way under, the shape gets too round and a little dated.
Brush the waves out after they cool. That part changes everything. Fresh curls can look ringlet-like, but a quick pass with fingers or a paddle brush softens the texture into something you can wear to work, to lunch, or anywhere else that does not call for fussy hair.
This style suits medium and thick hair especially well, because the wave has something to hold on to. Fine hair can wear it too, though a light texturizing spray at the roots helps the shape last past the first couple of hours.
7. Claw Clip French Twist for a Lob

A claw clip on a lob is one of those things that looks suspiciously simple and ends up working much better than a full updo. The trick is not forcing all the hair into the clip. Letting a few ends fall loose is what keeps the style from looking too tight or too severe.
Why It Behaves Better Than a Full Updo
Lob-length hair often lands right in the awkward zone for buns. Too short for a full roll, too long to ignore. A claw clip solves that by catching the middle section and leaving the ends to do their own thing, which is exactly why it feels easy.
Use a medium claw clip, around 3.5 to 4 inches, and gather the hair low at the back of the head. Twist upward once, fold the twist down, and clamp the clip over the middle. Let the ends spill out at the top or bottom depending on your length. That loose shape looks better than trying to pin every strand in place.
- Best on second-day hair or hair with a bit of texture.
- Spray the roots with dry shampoo if they’re soft.
- Pull a few face pieces free for softness.
- Choose a clip with strong teeth, not a flimsy one that slips.
Good rule: if the clip feels like it’s holding for dear life, the twist is too tight.
8. Low Half Ponytail with Soft Ends
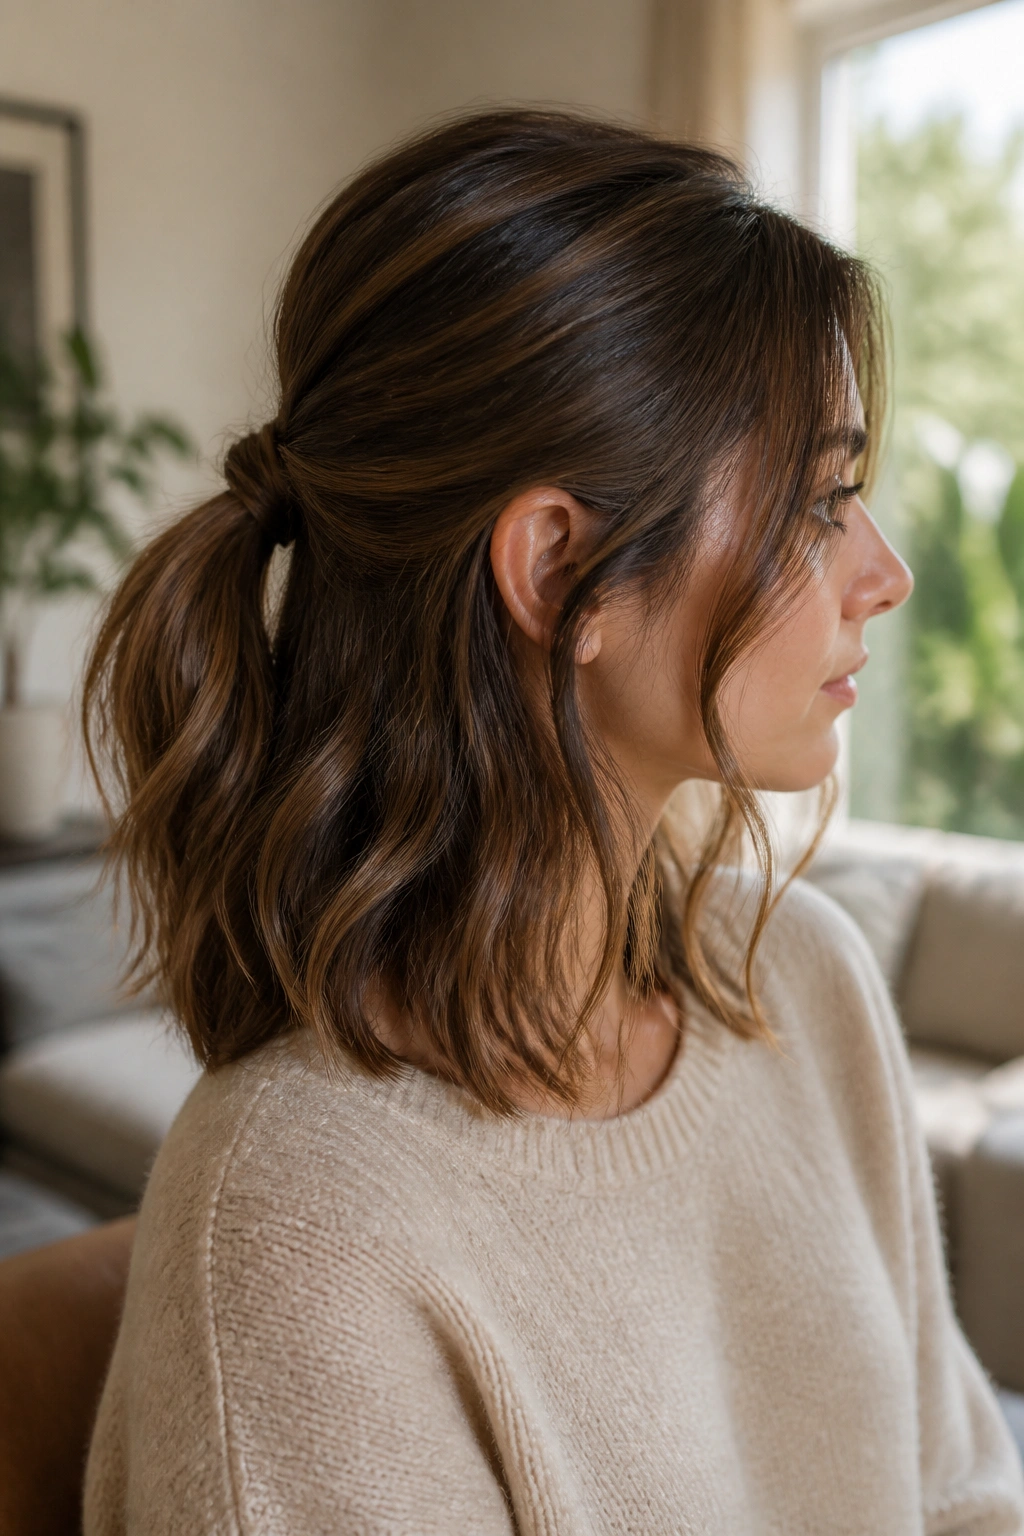
A low half ponytail can read cleaner than a full pony on a lob. That’s the part people miss. Because the haircut sits near the collarbone, a half pony keeps the top controlled while letting the rest of the hair show off its length and movement. It feels casual, but not sloppy.
The placement matters more than the elastic. Gather the top half at the back of the head, around the occipital bone, then secure it with a clear elastic or a narrow satin tie. If you pull it too high, the style starts to look younger than you probably want. Keep it low and the whole thing feels more grown-up.
I like a small amount of bend in the loose hair underneath. Even one soft wave in the bottom layer gives the ponytail a better shape. If the top section is smooth and the bottom section has movement, the contrast makes the style look planned rather than accidental.
Wrap a strand of hair around the elastic if you want a cleaner finish. That single move turns a plain pony into something that looks a little more finished without adding time.
9. Face-Framing Pieces with a Center Part
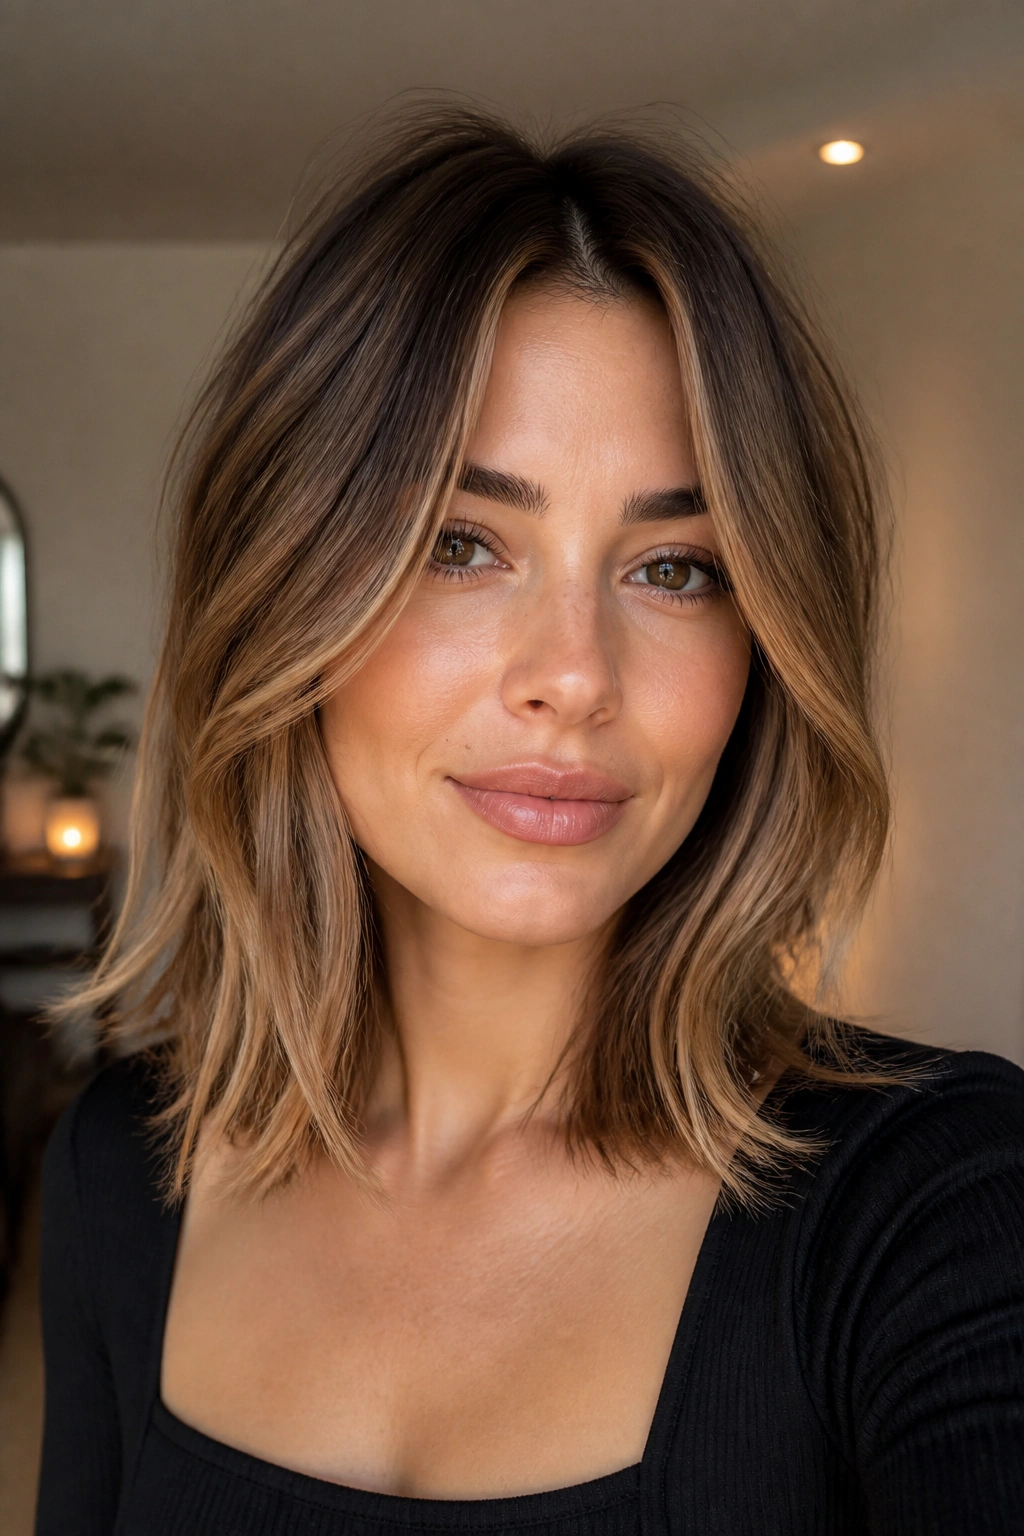
Why do two front pieces change a lob so fast? Because they direct attention right where you want it — the face, not the length that’s hanging behind your shoulders. It’s a small styling move, but on a bob-and-lob haircut, small moves often do the heavy lifting.
A center part makes the framing pieces feel clean and modern. Take the front inch or so on each side, then shape it with a round brush or flat iron so it curves slightly away from the face. The goal is not a big swoop. The goal is a soft line that opens the cheekbones and keeps the front from hanging flat.
How to Style Only the Front Section
If the rest of the hair is behaving, leave it alone. Really. You can style only the first 2 inches near the part and ears, then let the rest fall naturally. That saves time and keeps the hair from looking overworked.
A small round brush is useful here because it lifts at the root and adds a touch of bend. A flat iron works too, especially if your hair flips in odd directions near the face. One pass is enough. If you need a second pass, slow down and lower the heat instead of clamping harder.
This is one of my favorite low-effort fixes for a lob that’s gone a little flat in front. It looks like you spent time on your hair. You did not.
10. A Small Side Braid for Busy Mornings
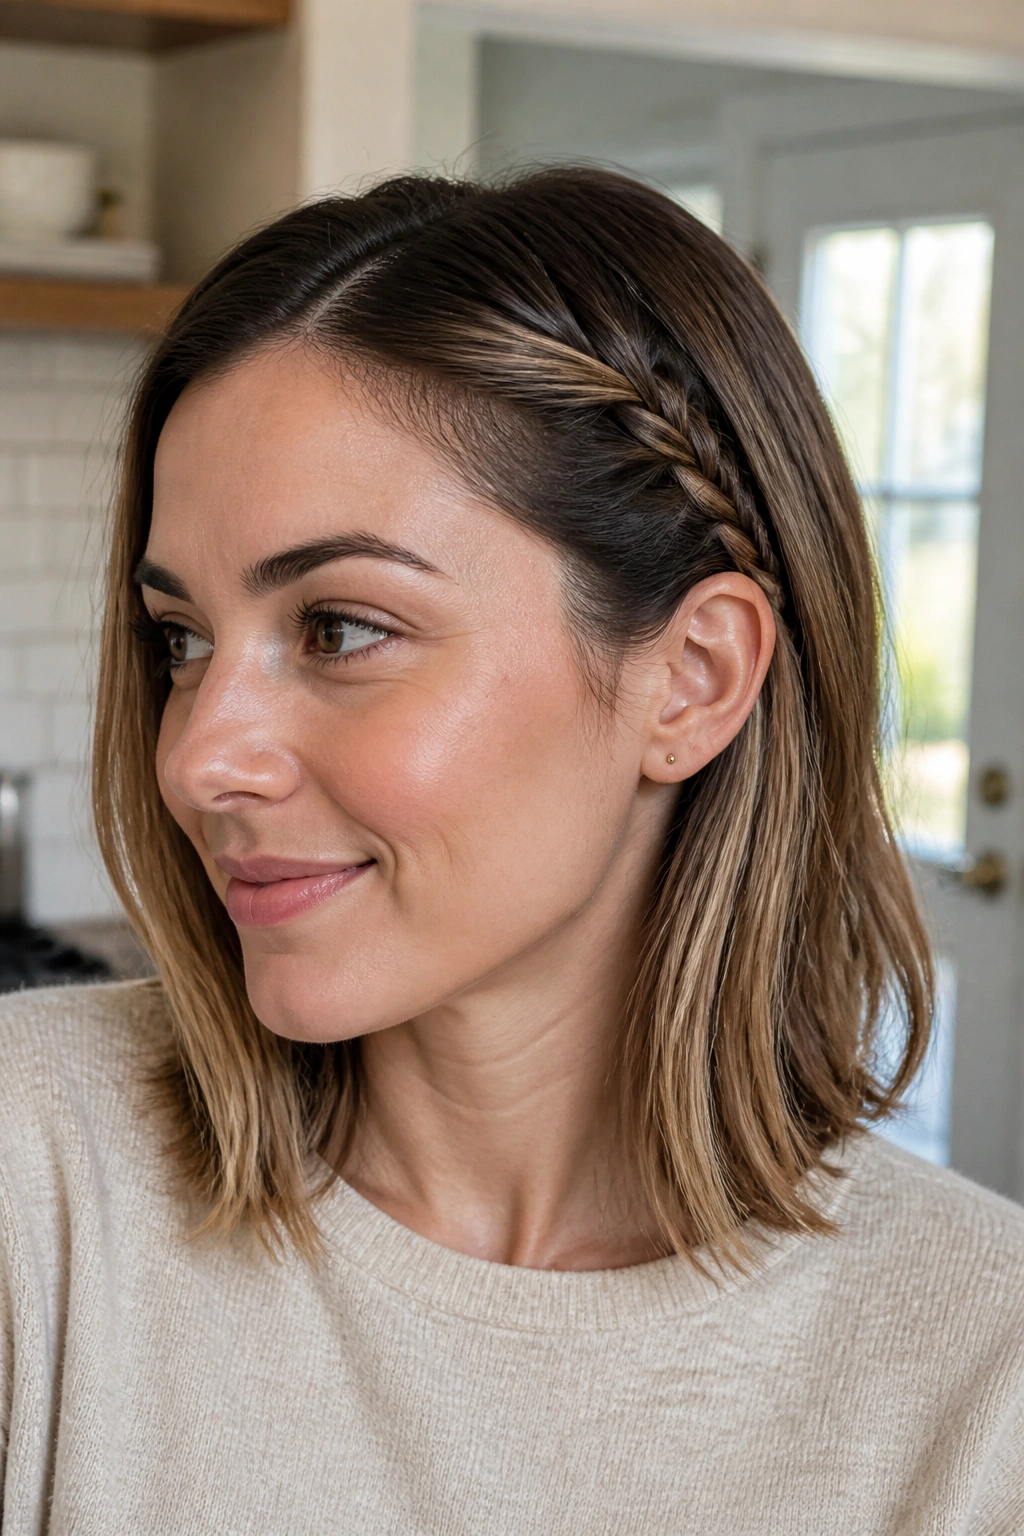
Some mornings the front section is refusing to sit still. That is when a tiny side braid saves the day. I keep this one around for hair that has gone soft at the roots but still has enough shape to look good with a little detail.
The braid gives the lob a point of interest without taking away length. It also keeps shorter layers from slipping into your eyes, which is more useful than people admit. A small braid near one temple can make the whole haircut look styled, even if the back is left loose and a bit imperfect.
- Braid only 1 inch of hair near the hairline.
- Secure the end with a clear elastic or tiny snag-free band.
- Pull the braid outward a little to soften it.
- Pin it behind the ear if you want the shape to stay neat.
I like this on hair that has some natural wave, because the braid blends into the texture instead of looking like it was pasted on. Straight hair can wear it too, though a touch of texture spray keeps the braid from slipping apart by lunchtime.
The nice part is that it never has to look symmetrical. One small braid is enough.
11. Round-Brush Blowout Volume at the Roots
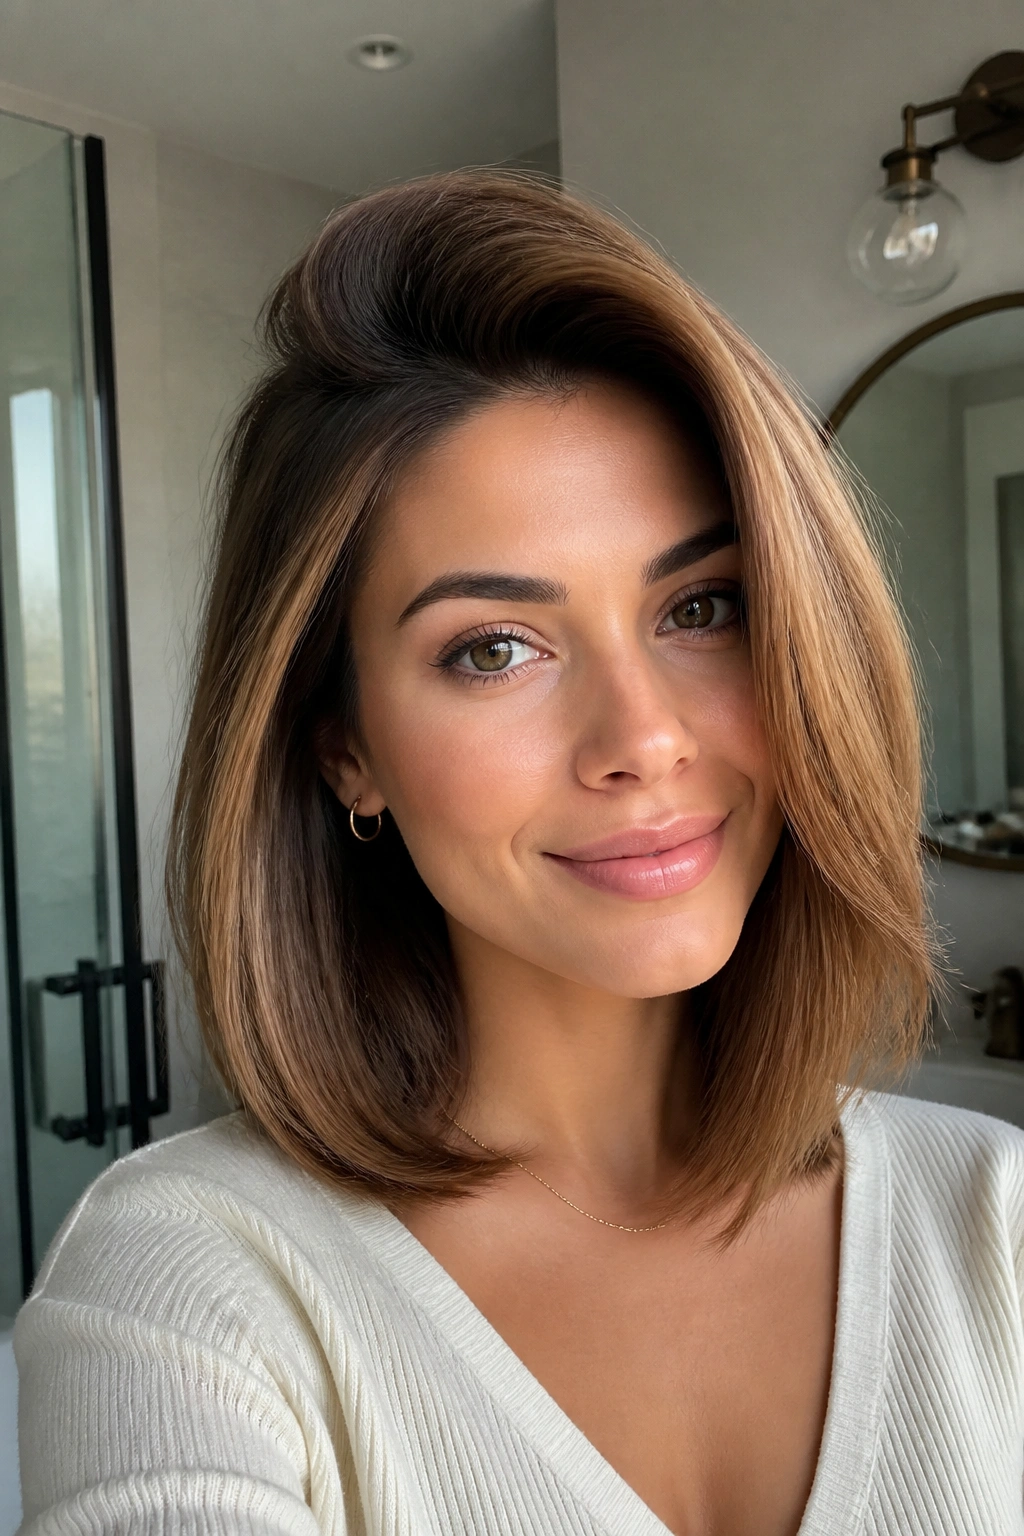
A round-brush blowout is the style I reach for when I want a lob to look crisp without looking stiff. It takes a little more effort than air-drying, but not nearly as much as people assume. Done well, it gives the hair lift at the roots, movement through the mid-lengths, and a smooth edge at the ends.
Start by rough-drying the hair until it’s about 70 to 80 percent dry. That saves time and keeps the brush from dragging through soaking hair. Use a concentrator nozzle on the dryer if you have one. It helps aim the airflow and cuts down on frizz. Then work in sections no wider than the brush itself — a 1.5-inch round brush is a good size for most lobs, while a 2-inch brush works better if the hair is slightly longer and thicker.
Lift each section at the root, roll the brush under, and aim the dryer downward along the shaft before hitting the ends with a quick cool shot. That cool shot matters more than people think. It helps the bend set instead of collapsing two minutes later. If your crown is flat, clip the top section up for a few minutes after drying so it cools with some lift.
No need to over-flip the ends. A smooth root and a neat bend at the bottom will beat a fluffy, overdone blowout almost every time. I’d rather see a lob with clean movement than a brushed-out cloud.
12. Flicked-Out Ends for a Clean Shape
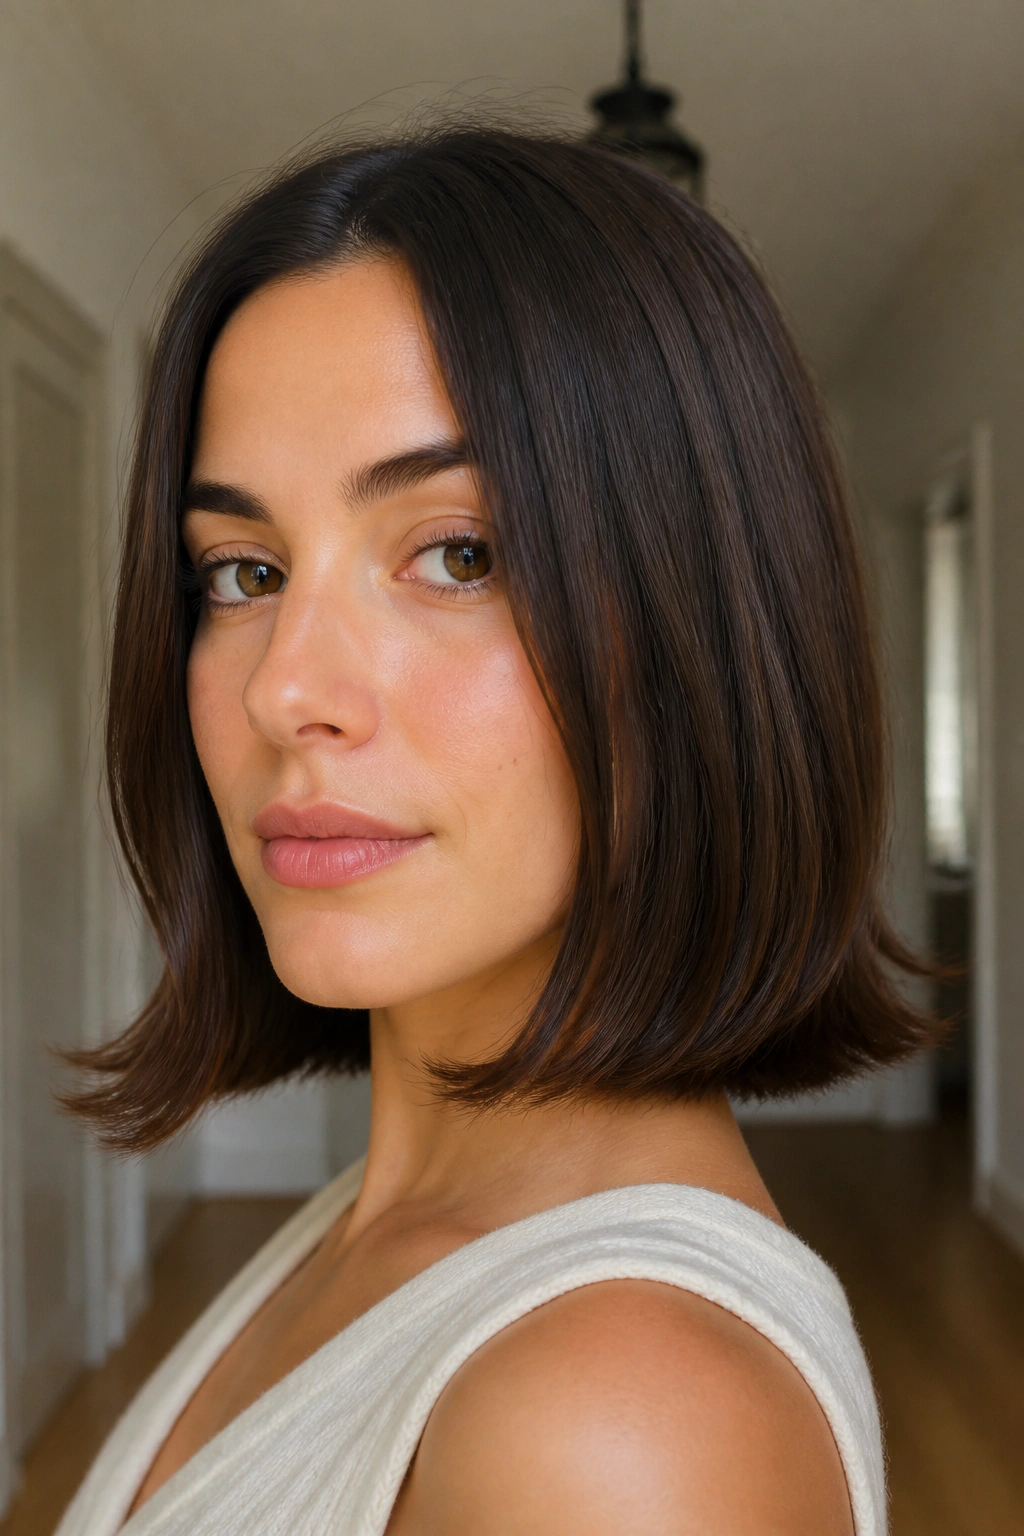
Unlike loose waves, flicked-out ends keep the top half of the lob calm and save the drama for the bottom 2 inches. That makes the style feel sharper. It also helps a blunt cut show off its edges, which is half the point of wearing a lob in the first place.
The easiest way to do it is with a flat iron or a medium round brush. Straighten the mid-lengths, then turn the iron outward only at the very end for a small flick. You are aiming for a subtle kick, not a cartoon curl. If you use a round brush, wrap the last inch around the brush and roll it away from the face for 3 to 5 seconds before releasing.
This style suits fine hair more than people expect, because the flick gives the illusion of a heavier, more deliberate shape. On thick hair, keep the flick small so the ends do not stick out in too many directions at once. That is the trap. Too much flip at the bottom can make a lob look busy in a bad way.
I like this best when the haircut is blunt and clean. It brings attention back to the shape of the cut itself, which is usually where the money is.
13. Silk Scarf Styling for Off-Duty Days
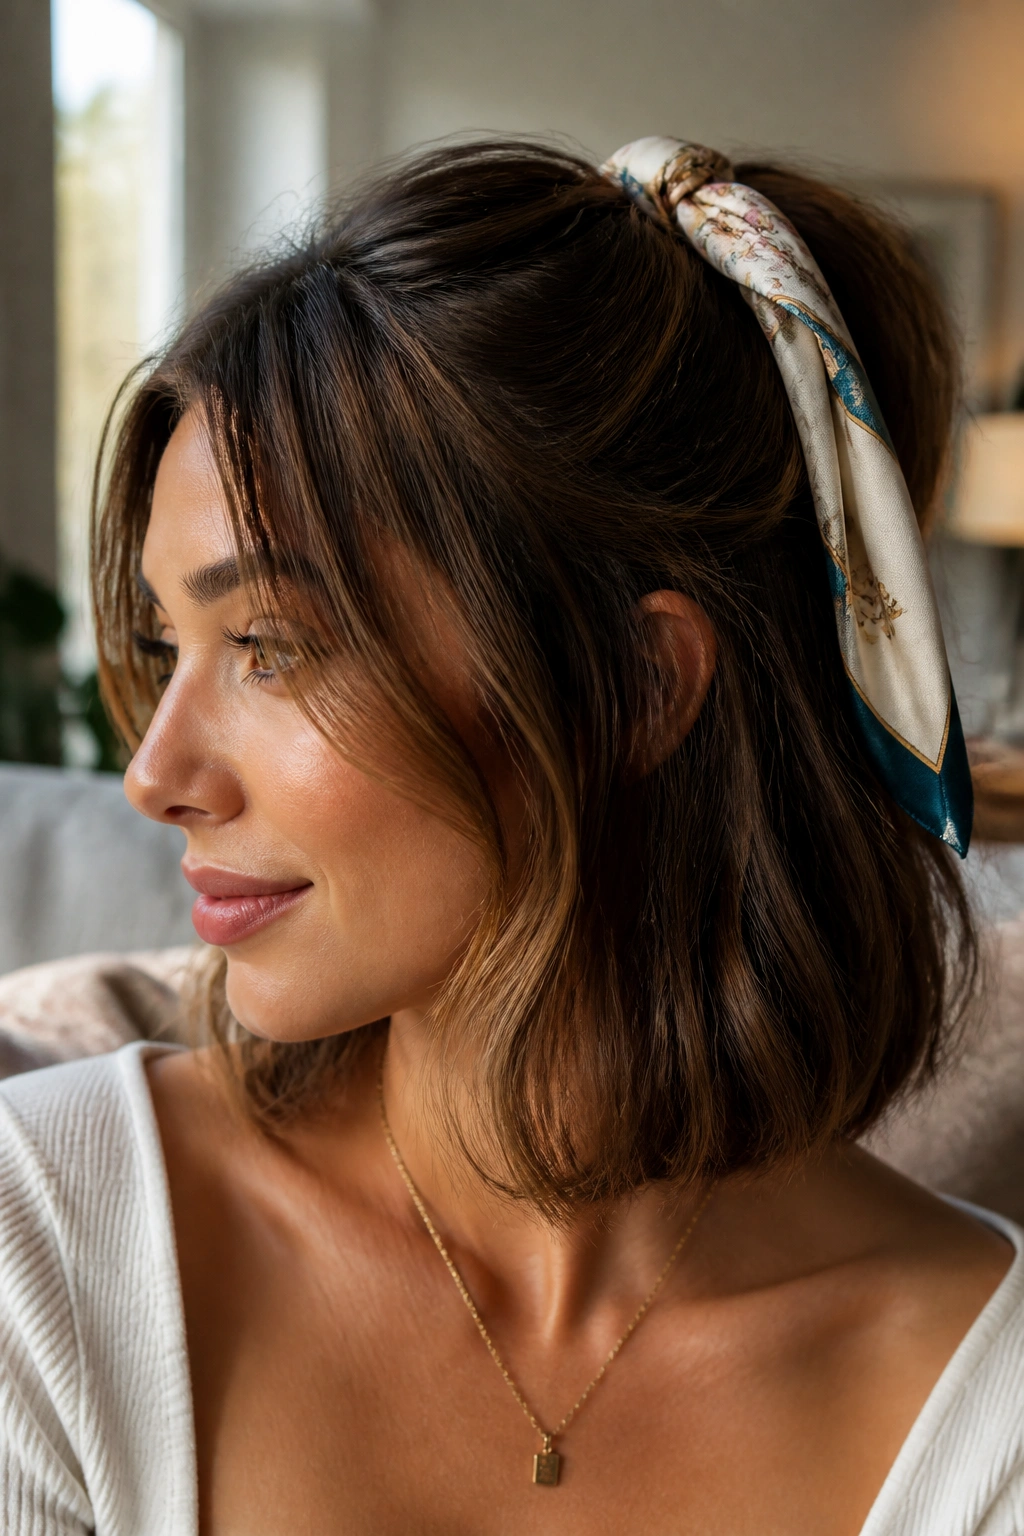
A scarf can rescue a lob on the days when the shape is doing too much work for too little payoff. It adds color, covers a flat root line, and lets you stop thinking about every strand that refuses to cooperate.
Why It Works
A scarf changes the eye line. Instead of staring at a slightly limp part or a section that dried weird, people notice the accessory and the overall shape. That gives the haircut breathing room. It also helps on second- or third-day hair, when the roots need a reset but you do not feel like washing everything again.
A 25-inch square silk scarf is a good size because it folds cleanly and sits flat. Fold it into a 2-inch band and tie it around a half-up ponytail, a low ponytail, or even around the crown like a headband. Keep the knot off to one side if you want the style to feel less rigid.
- Use silk or satin so the scarf glides instead of snagging.
- Place it over slightly textured hair, not freshly smoothed hair.
- Tie the ends under a ponytail or at the nape to keep them from shifting.
- Match the scarf to one color in your outfit, not all of them.
My favorite version: a low ponytail, one soft bend through the ends, and a scarf tied over the elastic. Easy. No fuss.
14. Messy One-Side Pin-Back
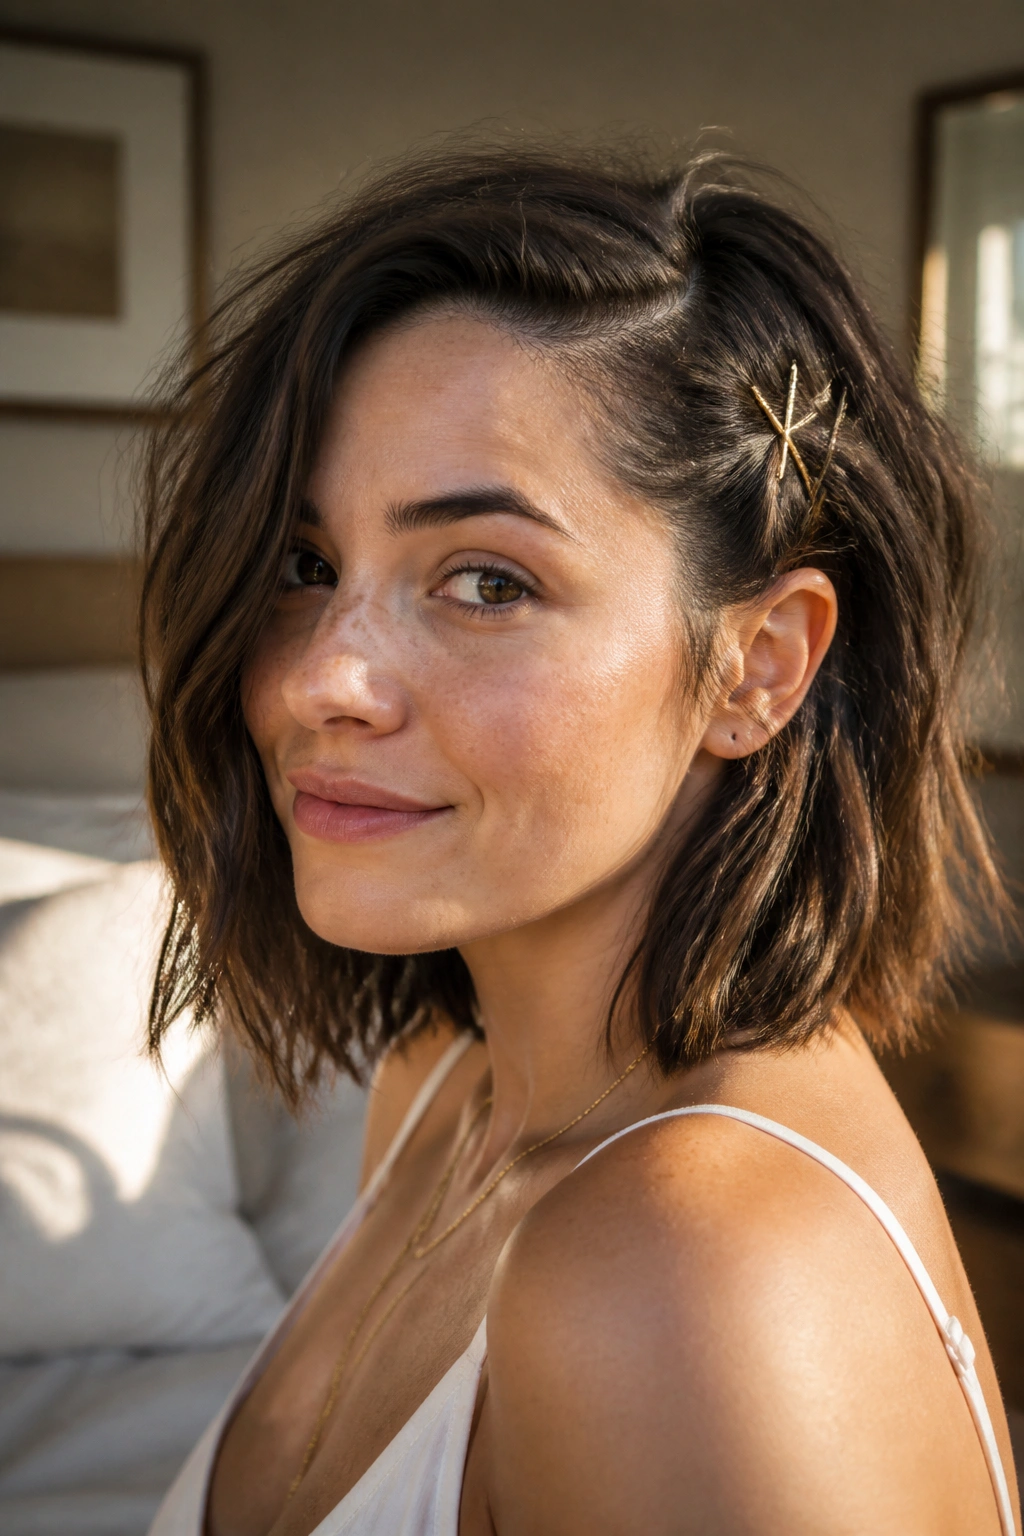
A messy one-side pin-back is the fastest way to make a lob look styled without making it look formal. That is why it works so well on busy days. You keep the hair down, but one side gets a little control, which makes the whole cut feel intentional.
The shape is asymmetrical, and that is the point. Pull back one side from the temple, secure it with two bobby pins crossed in an X, and leave the rest of the hair loose. If the front pieces are too neat, gently pull them apart with your fingertips so the line softens. The result should feel relaxed, not stiff or overdone.
This is a good move for hair that is slightly messy already. A little texture spray at the roots gives the pins something to grip, and second-day hair tends to hold the shape better than clean hair. You can tuck the pinned side low near the ear for a quiet look or a bit higher near the temple if you want more lift.
A small pin-back also works well when you want earrings or a neckline to show. That tiny bit of open space around the face can make a simple lob look sharper with no extra heat styling.
15. The Smooth-Root, Bent-Ends Finish

What do you reach for when you have five minutes and your lob needs to look intentional? I’d go for the smooth-root, bent-ends finish every time. It’s the style that sits between “I tried” and “I’m late,” and honestly, that’s where most daily hair lives.
Start with a little dry shampoo at the roots if they need lift, then smooth the top layer with a brush or flat iron pass at a low setting. Keep the ends soft, with one bend or tiny outward flick so the cut still shows movement. That contrast — smooth up top, loose at the bottom — is what makes the lob look polished without looking stiff.
If your hair is naturally straight, this is the quickest way to stop it from lying there like a sheet. If it’s wavy, it helps the top look calmer while leaving the texture in place. And if you only have time for one thing, focus on the front pieces. Clean front pieces change the whole haircut faster than anything else.
A good lob does not need to be reinvented every morning. It needs a shape that holds up when you’re moving fast, and that is usually a small bend, a smart part, and one detail that keeps the haircut from vanishing into the background.
