



Medium hair is the sweet spot.
It has enough length to twist, tuck, braid, and wave, but not so much that the style collapses under its own weight. That makes fancy medium hairstyles such a gift for special days: they can look polished without needing a mountain of pins or an hour of panic in the mirror.
The trick is choosing shapes that work with your hair’s actual length, not against it. A good formal style for shoulder-length hair should hold the neckline, flatter the face, and stay neat when you lean in for a hug, sit through dinner, or dance for two songs longer than you planned. Slightly lived-in hair often behaves better than freshly washed strands, too. Less slip. Better grip.
What usually fails is overcomplication. People pile on too much curl, too much spray, too many gadgets, and the result looks stiff instead of fancy. The stronger looks are usually cleaner than that — a smart side part, a hidden elastic, a well-placed twist, a few pins crossed in the right spot. That’s where medium length hair really earns its keep.
1. Soft French Twist with Face-Framing Pieces
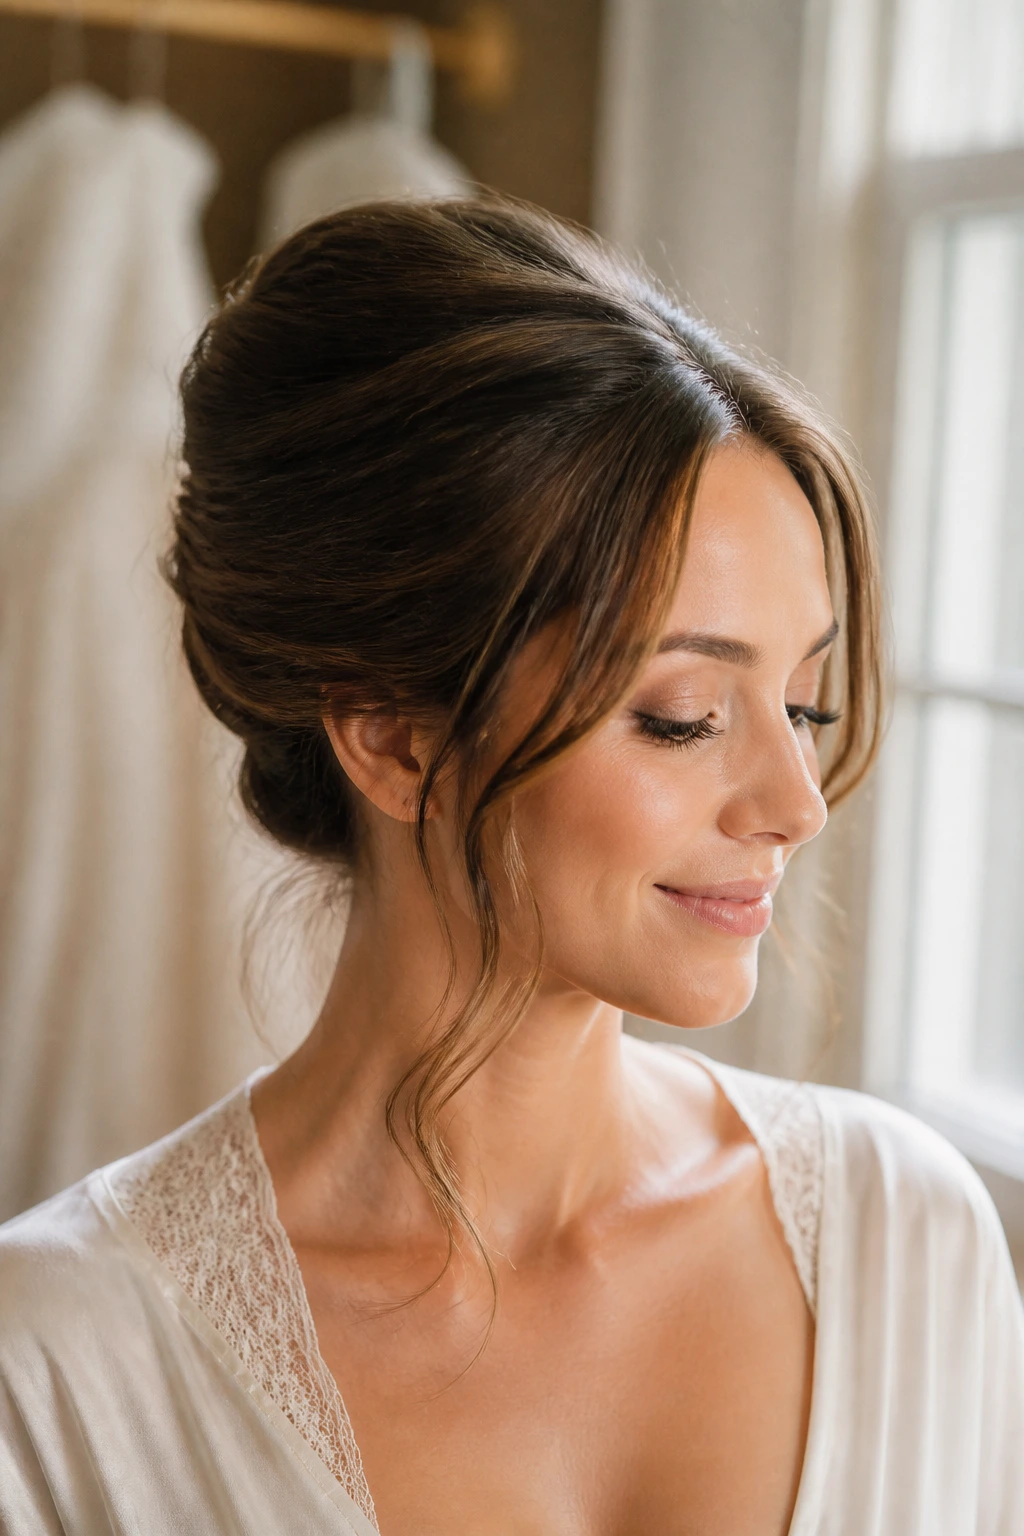
A soft French twist does a lot with very little. It gives medium hair a tall, elegant shape at the back, then keeps the front airy with a couple of loose tendrils around the cheeks. That balance is what makes it work for weddings, formal dinners, and anything that calls for a dressier finish without looking severe.
Why It Works on Medium Hair
Medium length hair has enough body to roll into a twist, but it still stays light enough that the shape doesn’t drag downward by the end of the night. That matters more than people think. A twist on very long hair can turn heavy; on medium hair, it stays crisp.
Start with hair that has a little texture. Day-old hair is fine, and honestly, often easier. Smooth the top with a boar bristle brush, gather the lengths at the nape, and roll upward toward the crown. U-pins are better than a handful of regular bobby pins here because they hold the fold without flattening it too much.
How to Build It
- Mist the roots with light-hold volumizing spray.
- Tease the crown very gently, just enough for lift.
- Roll the hair inward from the nape and pin vertically.
- Leave two slim face-framing pieces free, about the width of a pencil.
- Finish with a satin shine spray, not a heavy lacquer.
The best version looks calm, not shellacked. If the twist feels too perfect, pull one side loose with your fingertips and let the hair breathe a little.
2. Old Hollywood Waves
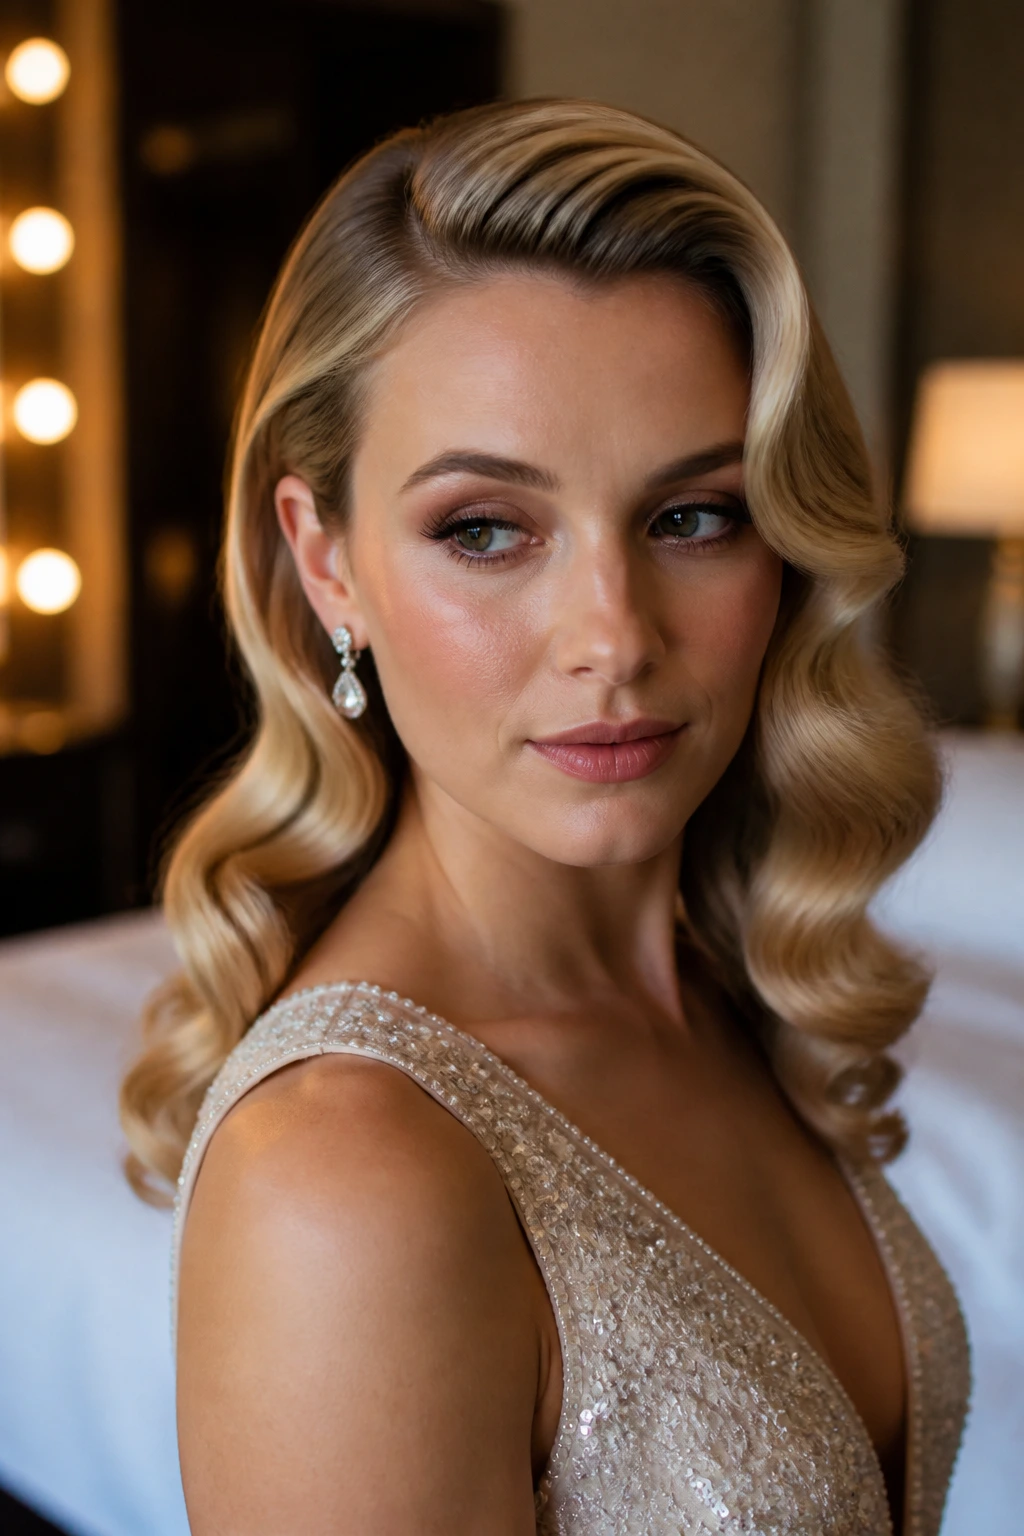
Old Hollywood waves have one job: make medium hair look expensive. They do it fast. The shape is smooth, glossy, and controlled, with a deep side part that creates that unmistakable formal feel without asking for a full updo.
The reason this style wins so often is simple. Waves are forgiving on medium length hair. They add width where you want it, they sit nicely against strapless or one-shoulder necklines, and they don’t rely on extreme length to look finished. A 1.25-inch curling iron usually gives the best bend for this kind of wave, though a 1-inch barrel works if your hair is fine and struggles to hold curl.
Keep the curl direction consistent. Curl every section away from the face on both sides, pin each hot curl flat for a few minutes, then brush through once the hair has cooled. That cooling step matters. Skip it and the wave softens too soon.
A deep side part changes the whole mood. So does a clean finish at the ends. If your tips are frayed, smooth a pea-sized amount of serum only on the lower two inches. Too much product will flatten the wave. Too little, and the ends look fuzzy in bright light.
3. Braided Crown Half-Up
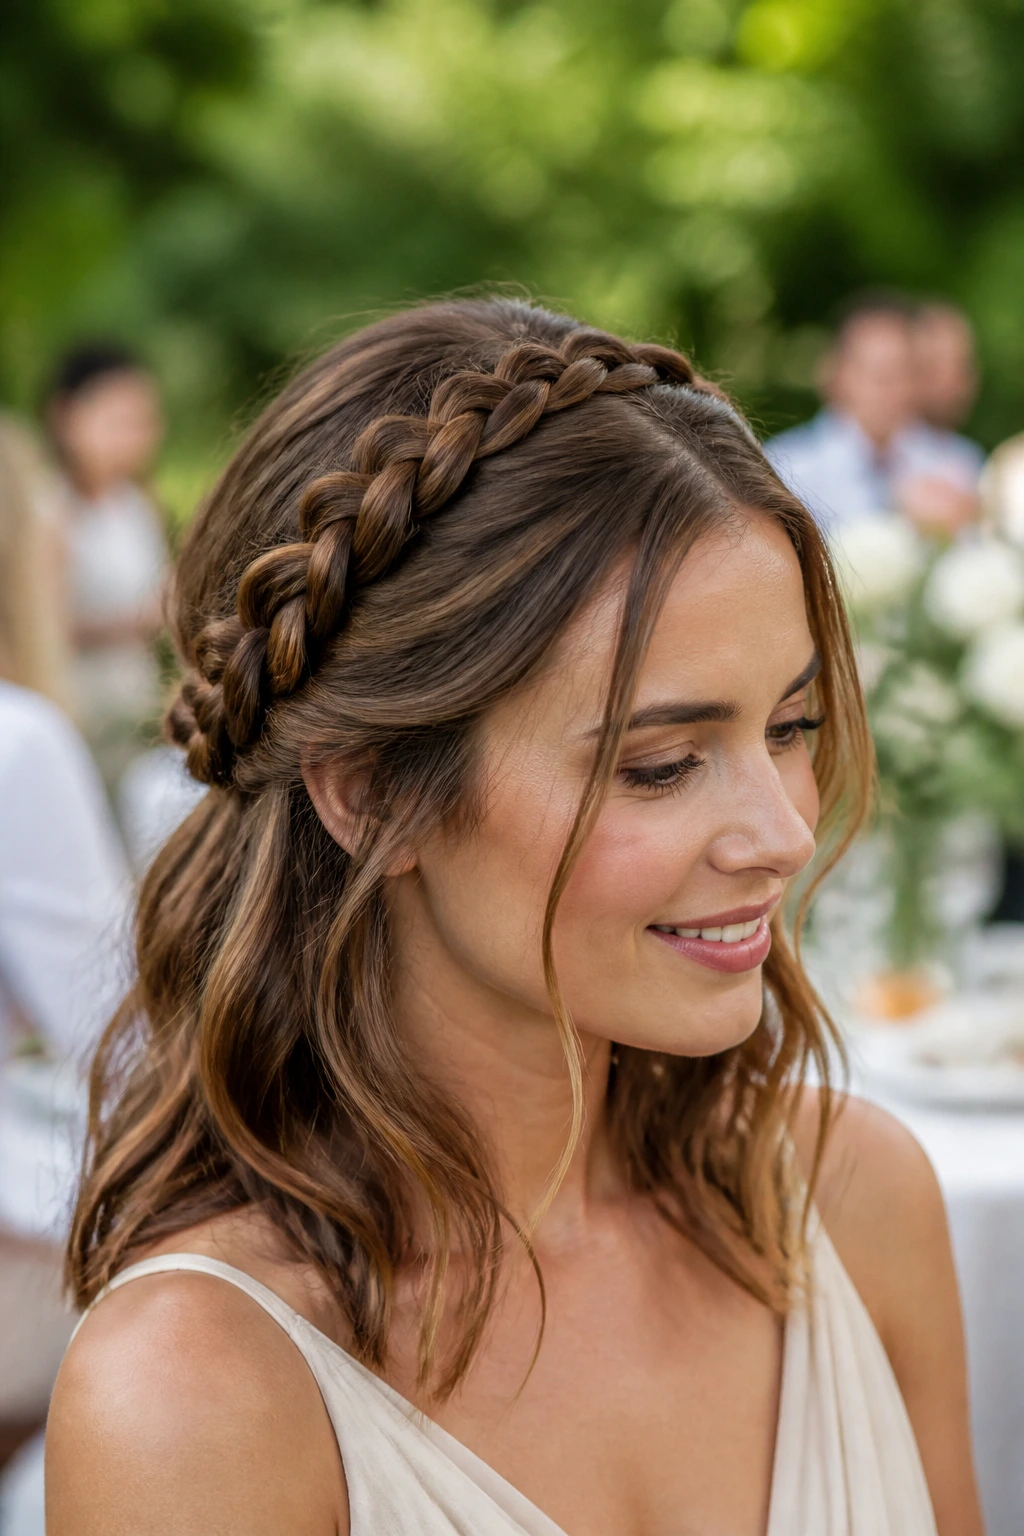
Why does a braided crown look so polished on medium hair? Because it solves two problems at once. It keeps the front pieces in place, and it creates shape without making the whole head look pinned back. For weddings, garden parties, and dressy family events, that combination is hard to beat.
A crown braid can be built from a Dutch braid, a French braid, or a simple three-strand braid if you keep the tension neat. On medium hair, I like a braid that starts near one temple, travels across the back of the head, and ends near the other ear. The loose lengths can stay curled or softly waved for a romantic finish.
What to Watch For
If your hair is layered, braid a little tighter than you think you need. Layers slip. They always do.
A light dusting of texturizing spray at the roots helps the braid hold its shape, and tiny clear elastics at the ends keep the finish clean. If the braid looks too thick on top, pinch out only a few outer loops. Don’t pull the whole thing apart. That turns the style messy in a bad way.
How to Get the Most From It
- Curl the loose hair first if you want a softer result.
- Start the braid just above the ear for balance.
- Hide the braid end under the back section with two crossed pins.
- Add a pearl clip or small comb if the outfit needs extra detail.
4. Sleek Low Chignon with a Deep Side Part

Picture a satin dress, a sharp side part, and a low chignon sitting right at the nape. That’s the kind of look that reads formal from across a room. It’s also one of the easiest fancy medium hairstyles to keep neat once it’s set, because the bun stays low and compact instead of fighting gravity.
The prep matters here more than the bun itself. Smooth the hair with a small amount of cream or gel on damp strands, then blow-dry with a paddle brush until the surface feels flat and clean. A side part that starts above the arch of one eyebrow gives the whole style a little drama. Not too much. Just enough.
Once the hair is dry, gather it into a low ponytail, twist the length around the base, and pin the coil into a tight chignon. Use pins that match your hair color. It sounds obvious, but mismatched pins flash through the bun and ruin the line.
Small Details That Make It Better
- A spritz of shine spray on the crown keeps flyaways under control.
- Two or three hidden pins crossed in an X hold better than one loose pin.
- A narrow hairnet, tucked under the bun, helps if your hair is especially silky.
- This style looks strongest with statement earrings or a high neckline.
5. Voluminous Half-Up Twist

Some styles try too hard to be special. A voluminous half-up twist does not need that help. It has enough lift at the crown to feel dressed up, enough softness through the lengths to stay romantic, and enough movement to avoid that stiff, overdone look that makes people instantly want to let their hair down.
This one works well on medium hair because the length can still drop over the shoulders in a clean curtain. Start by curling the lower half in loose sections, roughly 1 to 1.25 inches wide. Then take the top section from temple to temple, add a touch of backcombing at the crown, and twist both sides back toward the center. Pin them where they meet.
The shape should look slightly lifted from the front, almost like the hair is floating above the head instead of sitting flat. That lift is doing a lot of work. It makes the face look brighter and gives the style a more formal outline.
I like this version for wedding guests who want softness but not fuss. It plays nicely with lace, chiffon, satin, and anything with a detailed neckline. If the top feels too smooth, rub a trace of dry texture spray at the roots and lift with your fingertips. A little unevenness helps.
6. Polished Bubble Ponytail

Unlike a basic ponytail, a bubble ponytail gives you shape in measured sections. It feels playful, yes, but on medium hair it can also look polished and grown-up if the spacing is clean and the bubbles are kept even. That makes it a smart choice for cocktail parties, rehearsal dinners, and dressy events where you want your hair up but not fully pinned away.
Build the base low or mid-height, depending on the neckline. Tie the first elastic snugly, then place more clear elastics every 2 to 3 inches down the tail. Gently tug each section outward to form the bubble, but stop before the shape gets sloppy. The point is roundness, not puff.
A small wrapped piece of hair around the first elastic instantly makes the style feel finished. Pin the end underneath the pony with a small bobby pin. That tiny detail matters more than people admit.
Why It Suits Medium Length Hair
- The length is enough to create 3 to 5 visible bubbles.
- The style stays lighter than a thick braided ponytail.
- It works well with straight, smooth hair or loose waves.
- A few face-framing pieces soften the line near the jaw.
Keep the bubbles equal enough, not identical. Identical can look fake. Equal enough looks deliberate.
7. Side-Swept Glam Curls
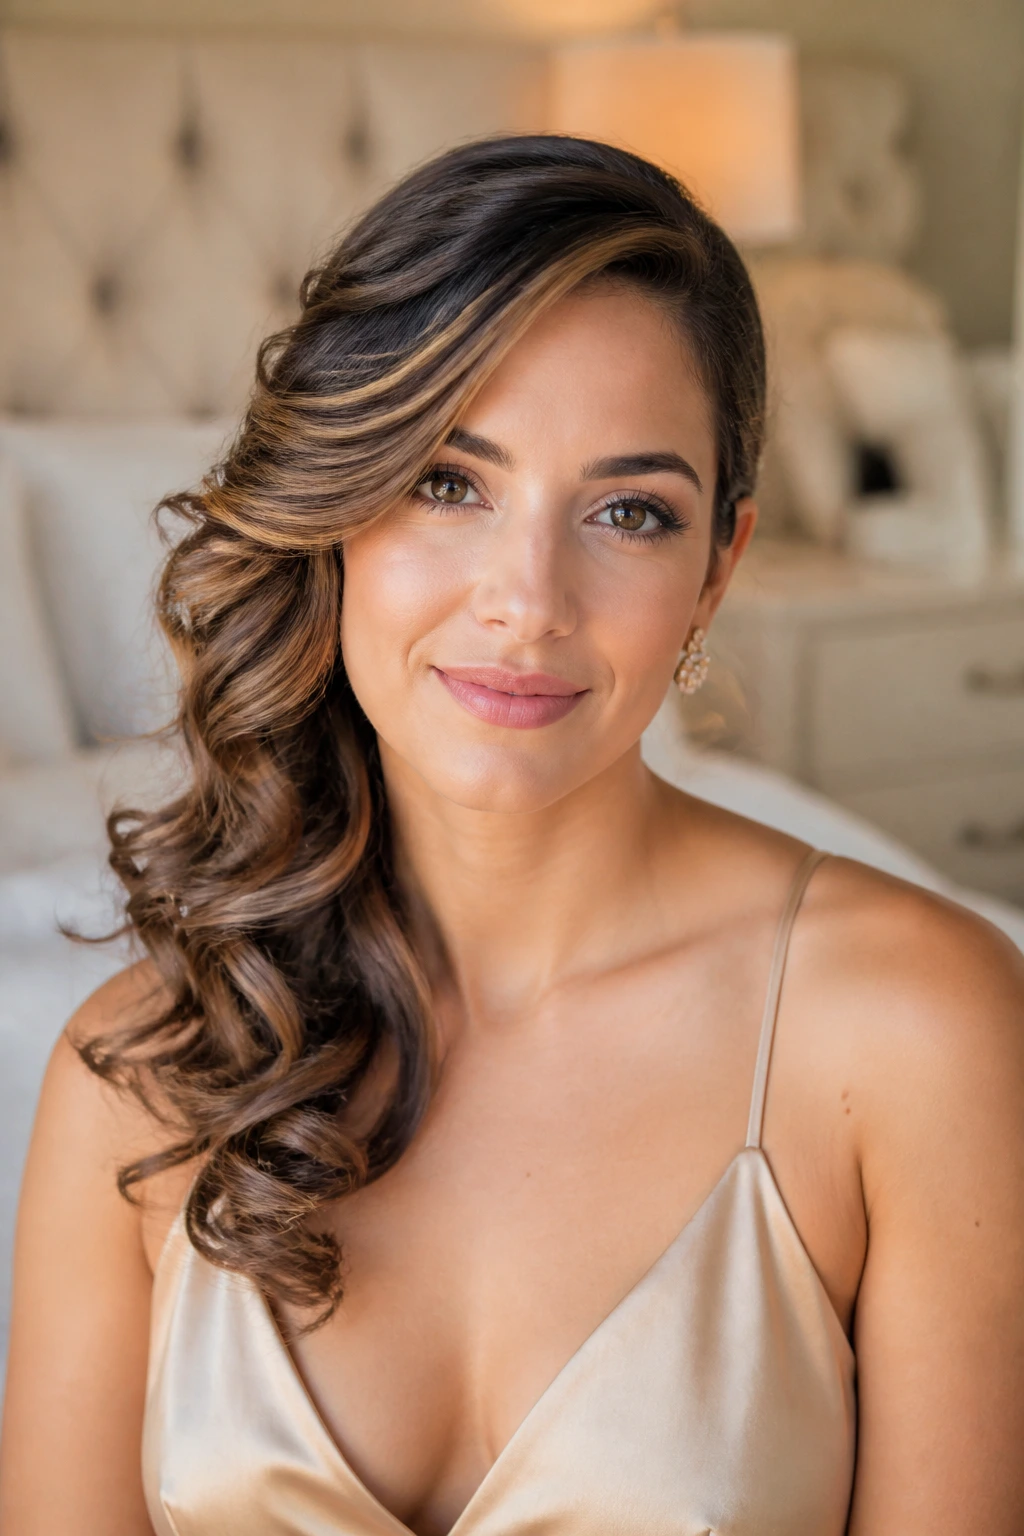
Side-swept curls are one of those styles that look fancy even when the rest of the outfit is simple. One deep side part, one elegant sweep over the shoulder, and the whole thing feels more dressed up. It’s a strong move for medium hair because the length is enough to show off the curl pattern without becoming bulky.
How to Keep the Sweep in Place
Curl the hair in 1-inch sections, all in the same direction, then let the curls cool before touching them. That part is non-negotiable. Warm curls fall fast, and medium hair can lose its shape before you’ve even left the house. Once cool, brush gently into waves and pin the heavier side behind the ear with two discreet bobby pins crossed under the top layer.
If you want the style to look more evening-ready, use a jeweled clip at the temple. Not too large. One small, bright piece is enough.
What Makes It Different
The front stays soft, but the line across the shoulders feels intentional. That’s the whole appeal. It gives you the glamour of a fuller style without needing an updo.
- Use a heat protectant with hold.
- Curl away from the face on the open side.
- Finish with flexible hairspray so the curls move.
- Keep one side tucked tighter than the other for contrast.
8. Wrapped Low Bun with Hidden Pins

A wrapped low bun is the quiet overachiever of special-occasion hair. It looks calm, expensive, and a little old-world, especially when the finish is smooth and the bun sits low against the neck. Medium hair does this style well because there’s enough length to wrap neatly, but not so much that the bun balloons into a giant knot.
Think of this as the better answer for humid evenings, long ceremonies, or dinners where you know you’ll be on your feet. A low bun stays out of the way and still looks complete. Start with a low ponytail, split the tail into two sections, twist each section lightly, then wrap them around the base in opposite directions. The twists give the bun depth without needing extra bulk.
Hidden pins do the real work. Slide them into the twist rather than over it, and aim them toward the elastic underneath. If flyaways bother you, warm a pea-sized dab of styling wax between your fingers and press it lightly over the surface.
The bun should feel secure when you tilt your head. If it shifts, add another pin. If it starts to look too flat, loosen the outer edge with the tip of a comb.
9. Twisted Halo Updo
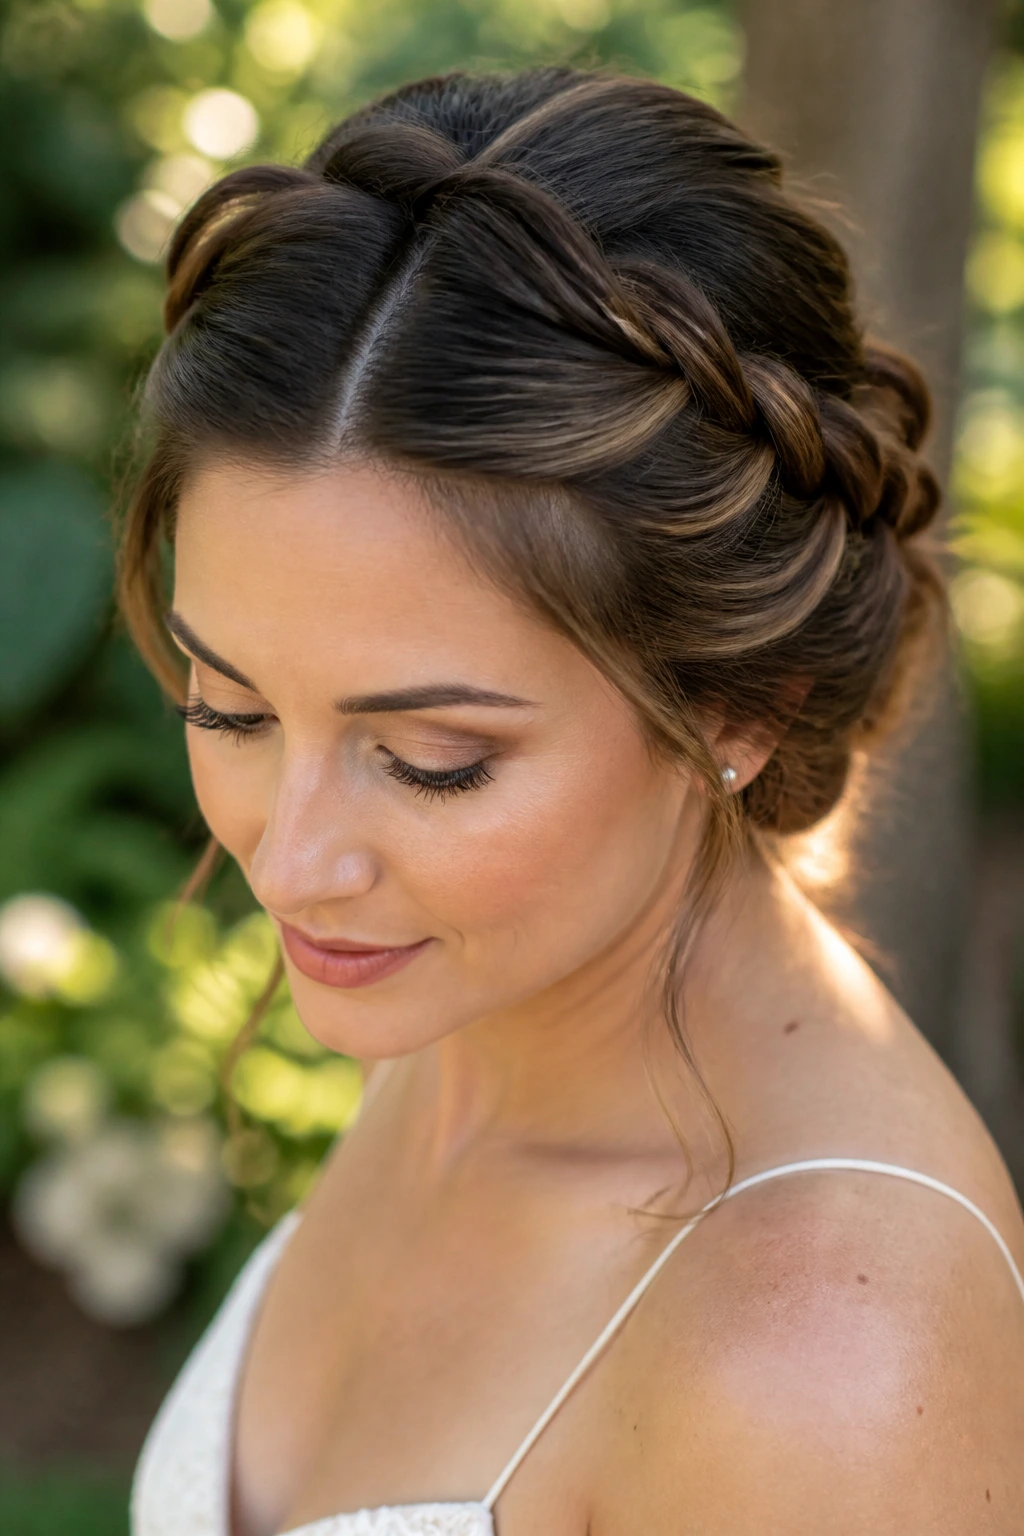
Can medium hair really handle a halo updo without looking thin at the ends? Yes, if you build it with two twisted sections instead of trying to force one long braid across the whole head. That approach gives the style enough width and keeps the finish soft around the hairline.
A halo updo works especially well when the hair has been lightly waved first. The bends create body, which helps the twists look full instead of stringy. Part the hair down the center, twist one side from the temple toward the back, pin it just above the nape, then do the same on the other side. Tuck the ends under the overlap so the seam disappears.
How to Handle Layers
Layers can pop free around the temples. They usually do. A tiny bit of mousse at the roots before styling helps, and so does pinning the twist in two spots rather than one. One pin is rarely enough.
If you want a gentler version, leave a few shorter pieces loose near the ears. That softens the line and keeps the style from feeling too strict.
The Look It Gives
- A crown-like shape without the weight of a full braided bun.
- A neat neckline for high collars and formal dresses.
- Enough softness for outdoor weddings or daytime events.
- Good hold on hair that sits between straight and wavy.
10. Soft Rope-Braid Ponytail
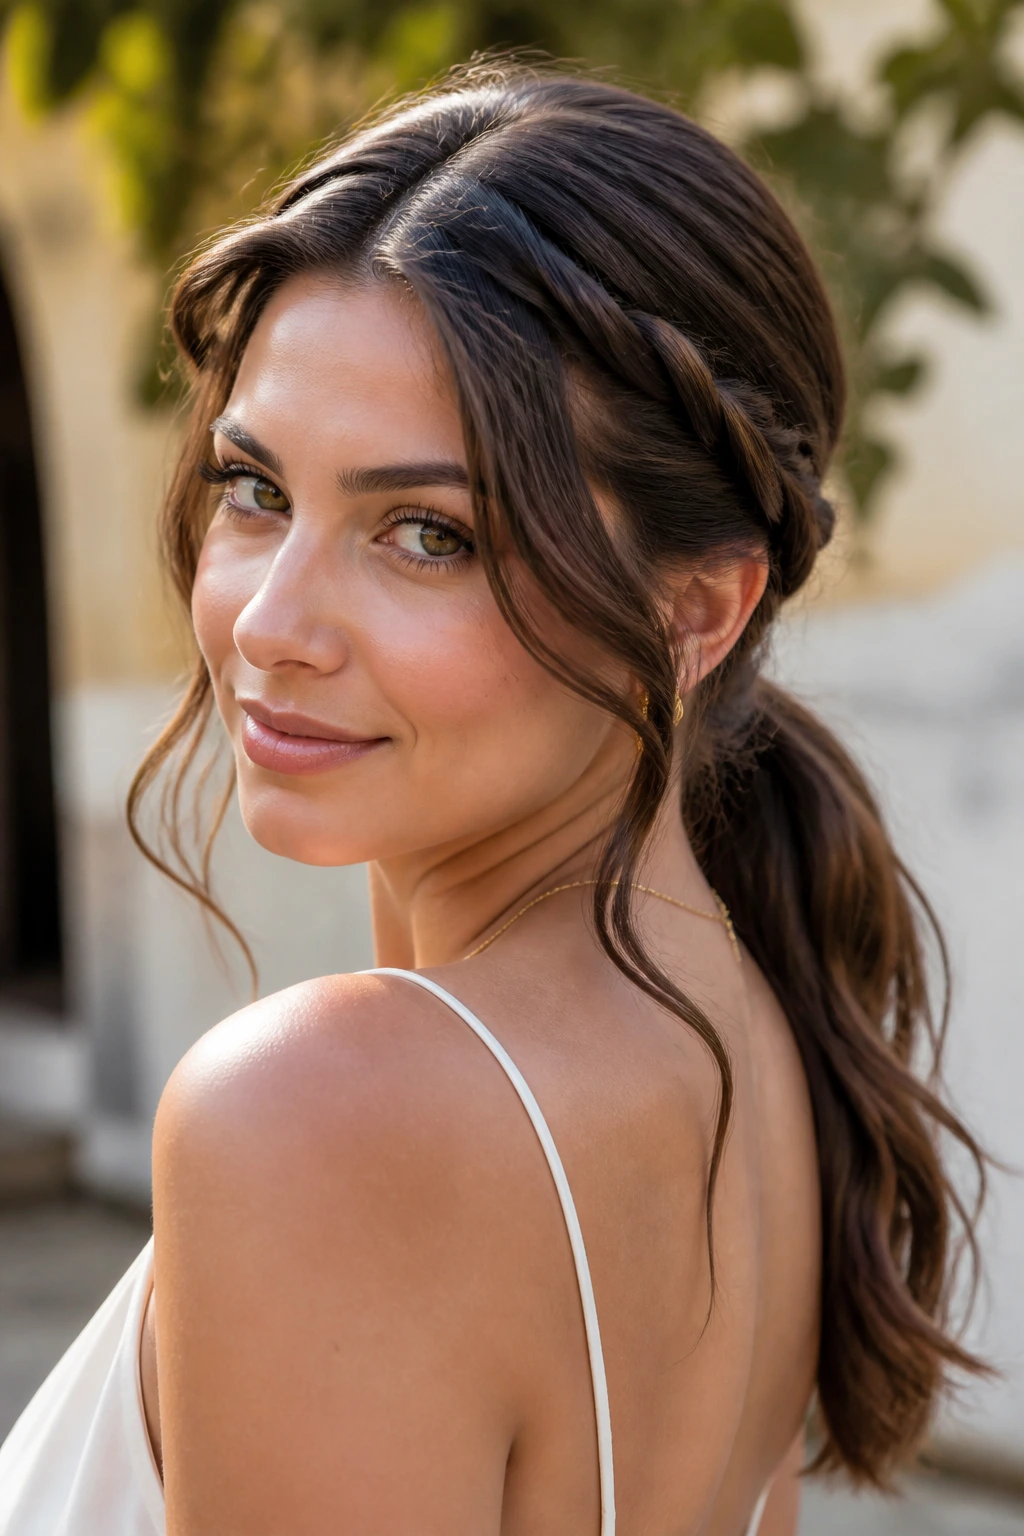
A rope-braid ponytail is a nice answer when you want more interest than a standard ponytail but less fuss than a full updo. It’s structured, neat, and a little modern. On medium hair, the twists show clearly because the length doesn’t get swallowed by the braid.
Start by making two rope twists from the front sections of the hair. Take one section, split it into two strands, twist each strand clockwise, then wrap them around each other counterclockwise. That opposite motion is what keeps the rope braid tight. Do the same on the other side, then gather both into a low ponytail.
What to Use
- A smoothing cream for the front pieces.
- Two clear elastics for the rope sections.
- A strong but flexible hairspray.
- One small strand of hair to wrap the ponytail base.
The style looks especially good with a clean middle part or a slightly off-center part. If your hair is thick, keep the twists looser at the temples so the head doesn’t get too wide. If your hair is fine, gently tug the rope braids apart once they’re secured; that gives the illusion of more fullness without making the ponytail collapse.
This is the kind of style that looks planned from every angle. Not loud. Just sharp.
11. Tucked-Under Roll
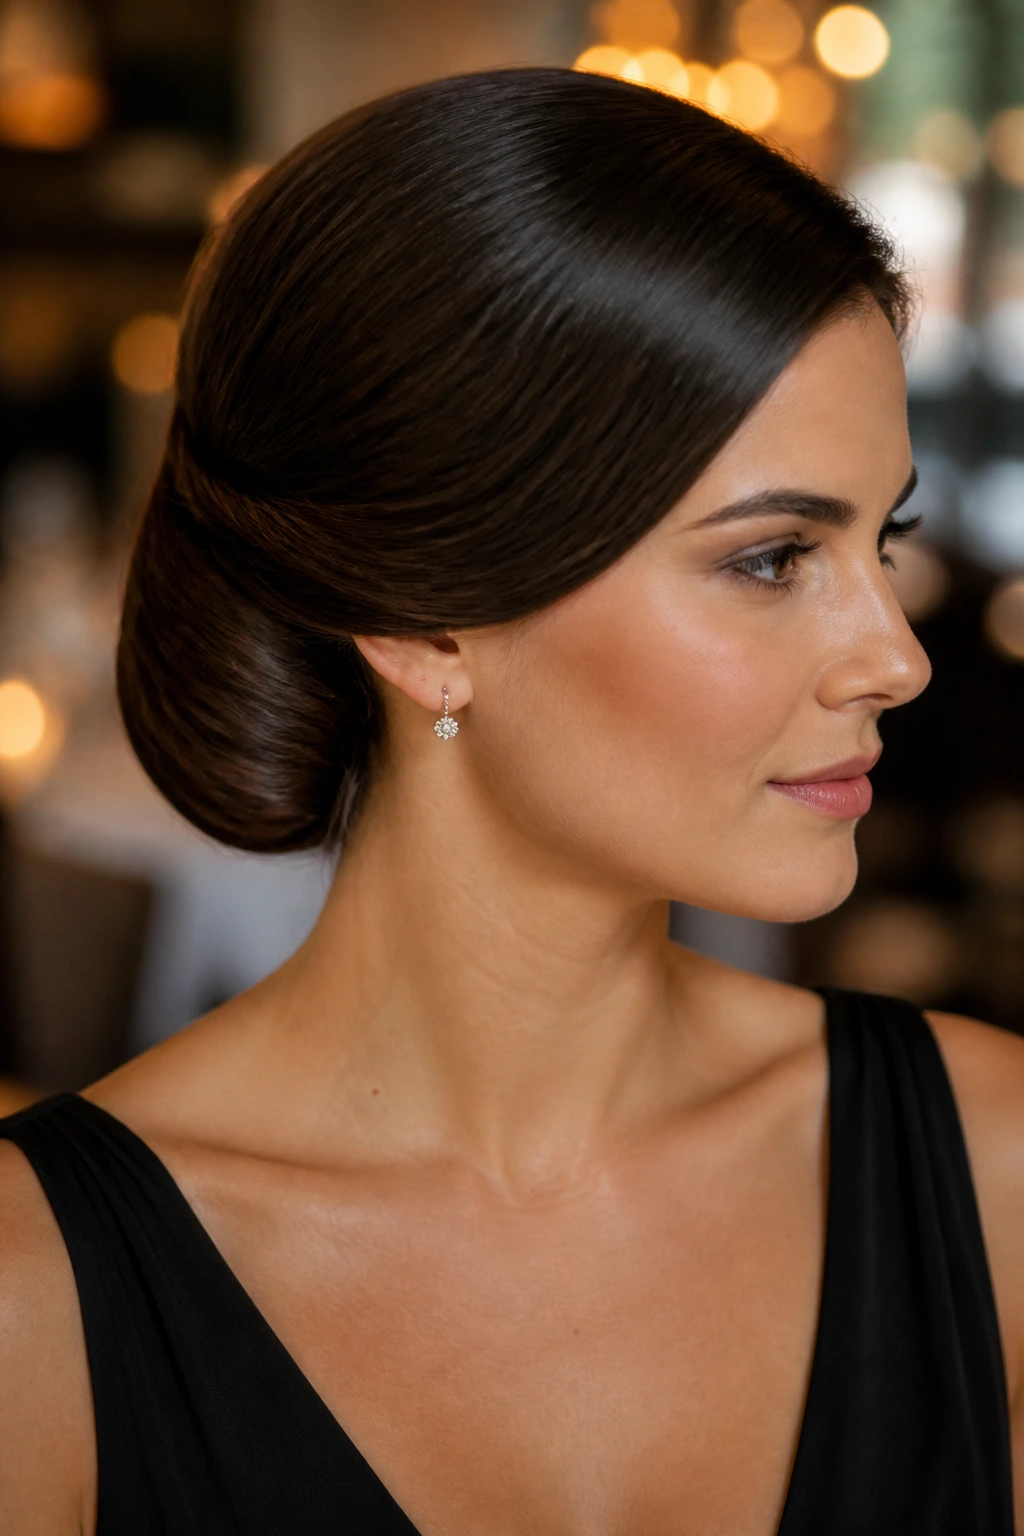
A tucked-under roll has a little vintage energy, which is exactly why it works so well for formal dinners and dressier parties. It’s softer than a French twist and less fussy than a chignon, but still looks like you took the time to do something proper with your hair.
The shape sits close to the head. That makes it flattering on medium hair because the length can tuck neatly under itself instead of hanging loose at the bottom. Blow-dry with a round brush first so the ends curve in slightly; that one step makes the roll easier to build. If your hair is very straight, a quick pass with a flat iron through the lower half helps the tuck stay clean.
Gather the hair low at the back, roll the ends inward, and pin the fold from the inside. The surface should look smooth but not lacquered. A little movement around the temples keeps it from looking severe.
I like this style with drop earrings or a structured dress. It has that nice mix of calm and formal, which is harder to get than it sounds.
12. Loose Curly Half-Up with a Statement Clip
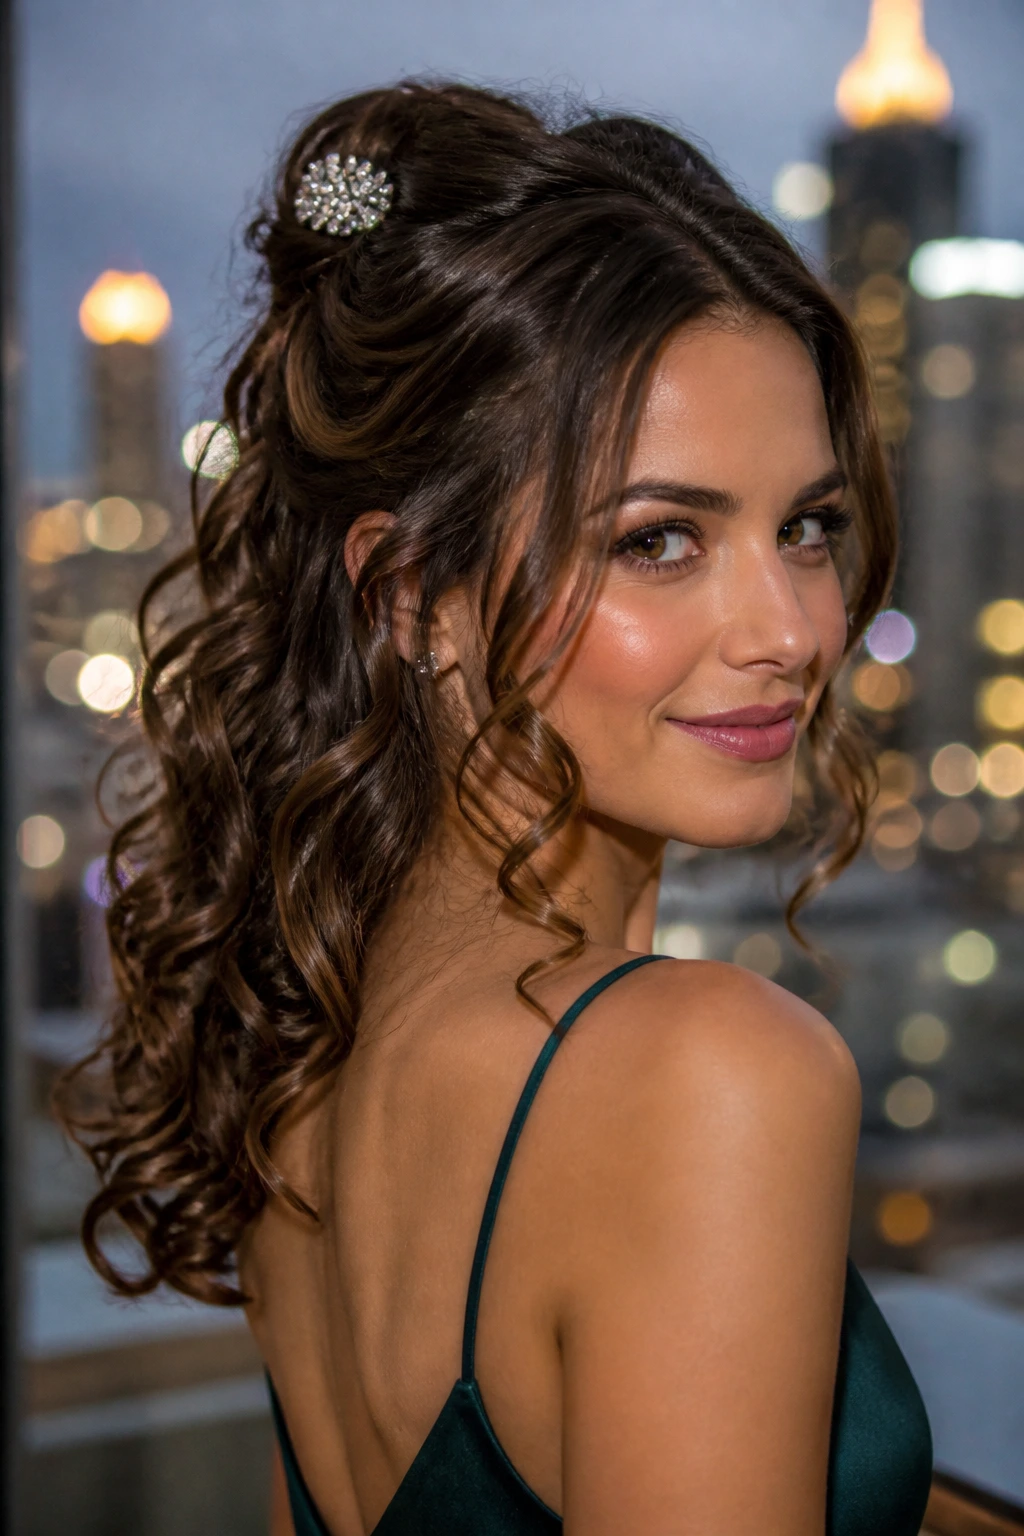
Why do some half-up styles feel more dressed up than full updos? Usually because they keep the softness around the face. A loose curly half-up with a statement clip does exactly that. It leaves enough hair down to feel relaxed, then gives the top section a clear focal point so the style still reads as special occasion hair.
This works beautifully on medium hair with natural wave or with curls added by a curling iron. Gather the top section at the crown, twist it once or twice, and secure it with a clip that has real grip. A decorative clip with teeth holds better than a flat barrette that slides. If the clip is pretty but flimsy, it will slip. That’s just how it goes.
What Makes the Clip Matter
The clip does more than decorate. It sets the whole balance of the style. A pearl clip, a crystal comb, or even a matte metal clasp changes the mood fast. Keep the size proportional to the hair. Too tiny looks lost. Too huge looks like the clip is wearing you.
The loose curls below should stay soft, not separated into perfect ringlets. Run your fingers through them once, then stop. Over-touching turns the ends frizzy.
13. Sleek Wet-Look Lob Tuck

A wet-look lob can be more formal than an intricate braid if the dress is sharp enough. That sounds bold, but it’s true. The shine, the clean line, and the smooth tuck behind the ear give medium hair a modern edge that works especially well for gallery openings, evening receptions, and minimalist outfits.
Start with damp hair and work in a gel or cream-gel combo from roots to mid-lengths. Use a fine-tooth comb to push the hair back from the face. If you want a deep side part, make it while the product is still wet. Trying to change it later usually leaves a dent.
The ends can stay slightly bent under with a flat iron, or you can tuck them neatly behind one ear and pin the other side low at the back. The style should look sleek, not crunchy. If the hair feels stiff, the product layer is too heavy.
A Useful Detail
Medium hair often needs less gel than you think. Start with a nickel-sized amount, smooth it between both hands, then add more only if the top is still poofy. That keeps the style glossy without turning it greasy.
The final result should feel controlled and fresh. A little bold. A little clean. Very good with a strong lip color.
14. Braided Side Bun
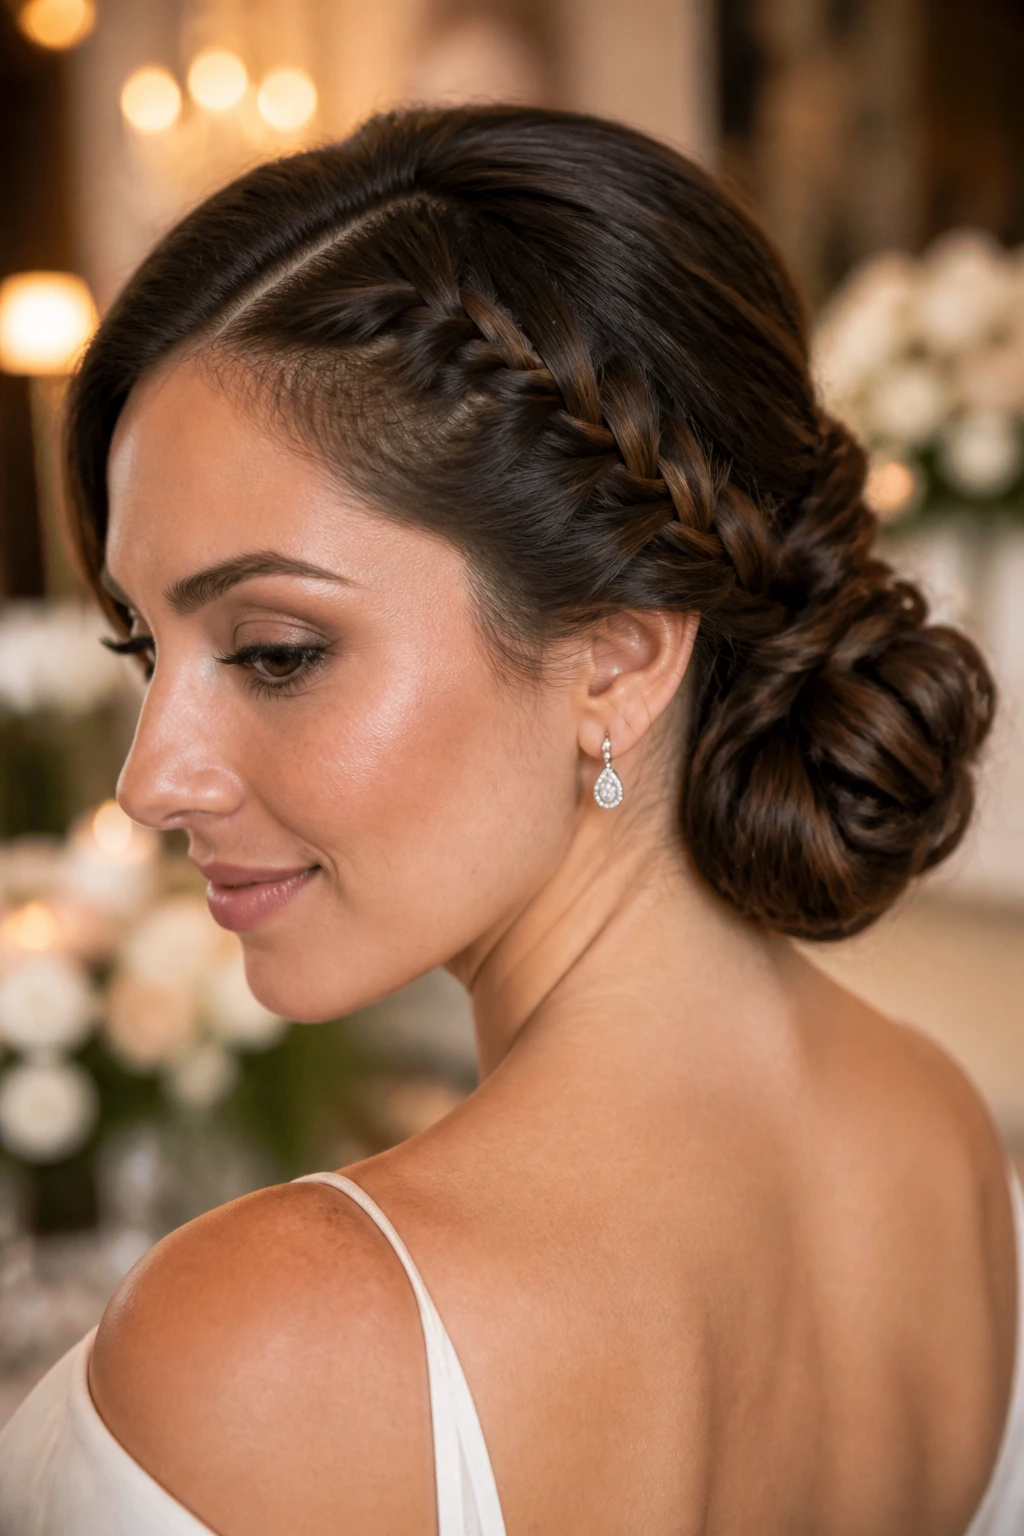
A braided side bun gives you two things at once: the structure of a braid and the softness of a bun. That makes it one of the prettiest fancy medium hairstyles for weddings, rehearsal dinners, and formal evenings where you want texture near the face but a tidy back view.
Begin with a side part. Braid the hair along one side of the head, starting near the temple and moving down toward the nape. You can use a regular braid, a fishtail, or a rope braid, depending on how detailed you want the finish to look. Bring the rest of the hair into a low side ponytail, coil it into a bun, and wrap the braid around the base before pinning it in place.
What to Pay Attention To
- Keep the braid close to the scalp at the start.
- Leave the bun slightly off-center for a softer shape.
- Use pins that cross inside the bun, not just on the surface.
- Pull out a small face-framing piece only if the neckline can handle it.
The side placement is what gives this style its charm. It feels a little more romantic than a straight-back bun and a little less formal than a full crown braid. That middle ground is useful.
15. Pearl-Pinned Low Knot

A pearl-pinned low knot is the kind of style that looks quiet until you notice the details. Then it gets better. Medium hair is perfect for it because the knot can stay compact while still showing enough shape for the pins to matter. It’s a clean choice for bridesmaids, guests, graduation dinners, or any event where you want your hair to look finished without competing with the outfit.
The base should sit low, near the nape, and the knot should be a little soft around the edges. Nothing too tight. Gather the hair into a low ponytail, twist it around itself once, then fold the length under and secure it with pins hidden inside the knot. After that, place three pearl pins in a loose triangle around one side of the bun. Not in a straight line. The triangle gives the eye somewhere to land.
A few fine strands can stay free near the ears. That keeps the style from feeling severe, which is the main risk with any low knot. If your hair is very smooth, rough it up with dry texture spray before you start. If it is already textured, go lighter. Too much product can make the knot feel sticky and hard to shape.
This is a lovely last-resort style when the dress is already doing a lot. It stays graceful. It stays put. And it never looks like you ran out of ideas.
