



Curly bridal hairstyles have one built-in advantage that straight styles have to fake: texture already gives you shape, movement, and a little drama.
The mistake I see most often is trying to smooth that texture into something polite. It works for about ten minutes. Then the crown goes flat, the ends puff out, and every pin starts to feel like it’s negotiating a hostage release.
A good wedding-day style has to do more than sit still for a photo. It has to survive veil placement, hugs, wind, dancing, and the weird little chaos that happens when someone says, “Let me fix one curl” and then makes the whole thing worse. That is why the best bridal looks for curly hair are the ones that respect the curl pattern instead of flattening it.
Some brides want polished. Some want soft and loose. Some want height, some want a veil, some want the neck completely clear. The right answer changes with the dress, the length of the hair, and how much volume you like around your face—so the smartest place to begin is with the style that feels most like you.
1. Soft Curly Bridal Half-Up Crown
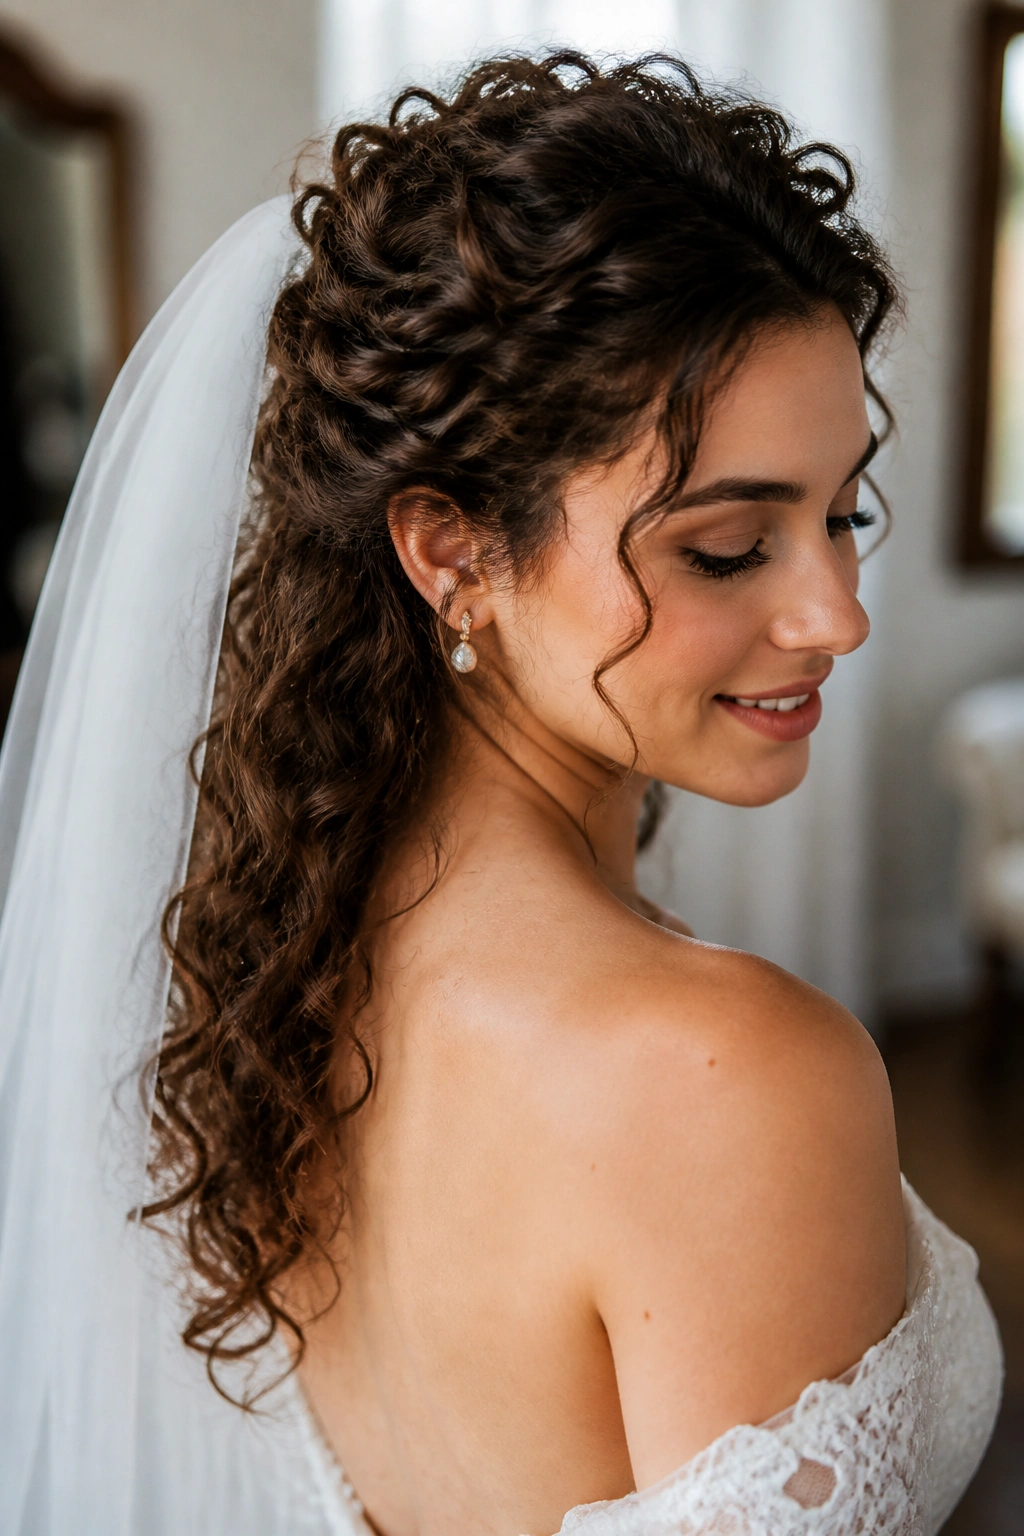
This is the style that gives you lift at the crown without stealing the texture you actually want to show off. A half-up crown keeps curls away from the face, leaves the length visible down the back, and plays nicely with veils and hairpins.
The shape matters. If the pinned section is too tight, the whole look turns stiff fast. If it’s too loose, it slides by the end of the ceremony. That narrow middle ground is where the good versions live.
Why It Works on Curly Hair
Curly hair already has body, so the style only needs a few anchor points—usually 6 to 10 bobby pins crossed in an X. A 1-inch curling iron or diffuser pass can wake up the front pieces if the pattern needs a little definition.
- Keep the top section no wider than about 3 inches across.
- Place the veil comb about 1 inch above the pinned row.
- Leave two curls out at the temples if you want a softer face line.
- Mist the finished shape with flexible-hold spray from 10 inches away.
Tip: Leave the crown a little loose. If it feels perfect in the mirror, it is probably too tight.
2. Curly Bridal Low Knot With Loose Tendrils
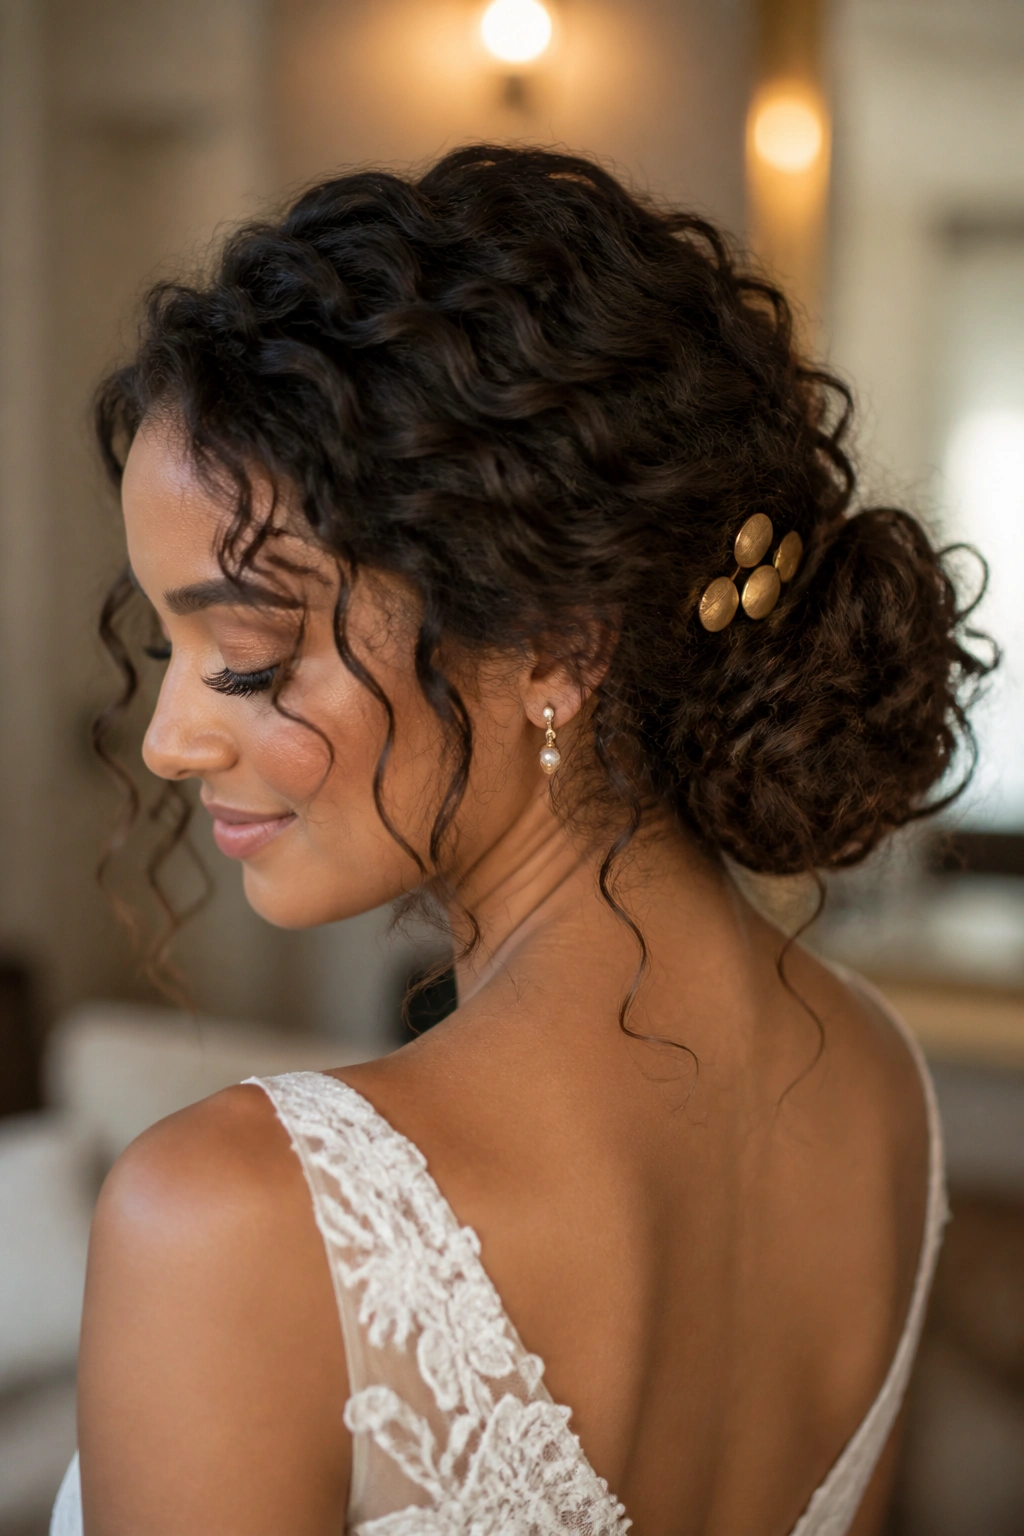
A low knot is the quiet workhorse of wedding hair for curls. It sits at the nape, keeps the neck clear, and lets the dress do more of the talking if the neckline has lace, beading, or a clean cut.
What I like about it is the balance. It feels controlled without looking overworked, which is hard to pull off on curly hair if the pins are showing or the bun is packed too tightly. Let a few tendrils fall in front—short ones around the cheekbones, longer ones near the jaw—and the whole thing softens up fast.
For dense curls, split the bun into two stacked rolls instead of one thick coil. That keeps the shape flatter against the head and makes it easier to hide the ends. Use a matte pin, not a shiny one, because shiny hardware tends to flash in photos in a way nobody wants.
3. Side-Swept Hollywood Curls for Curly Hair
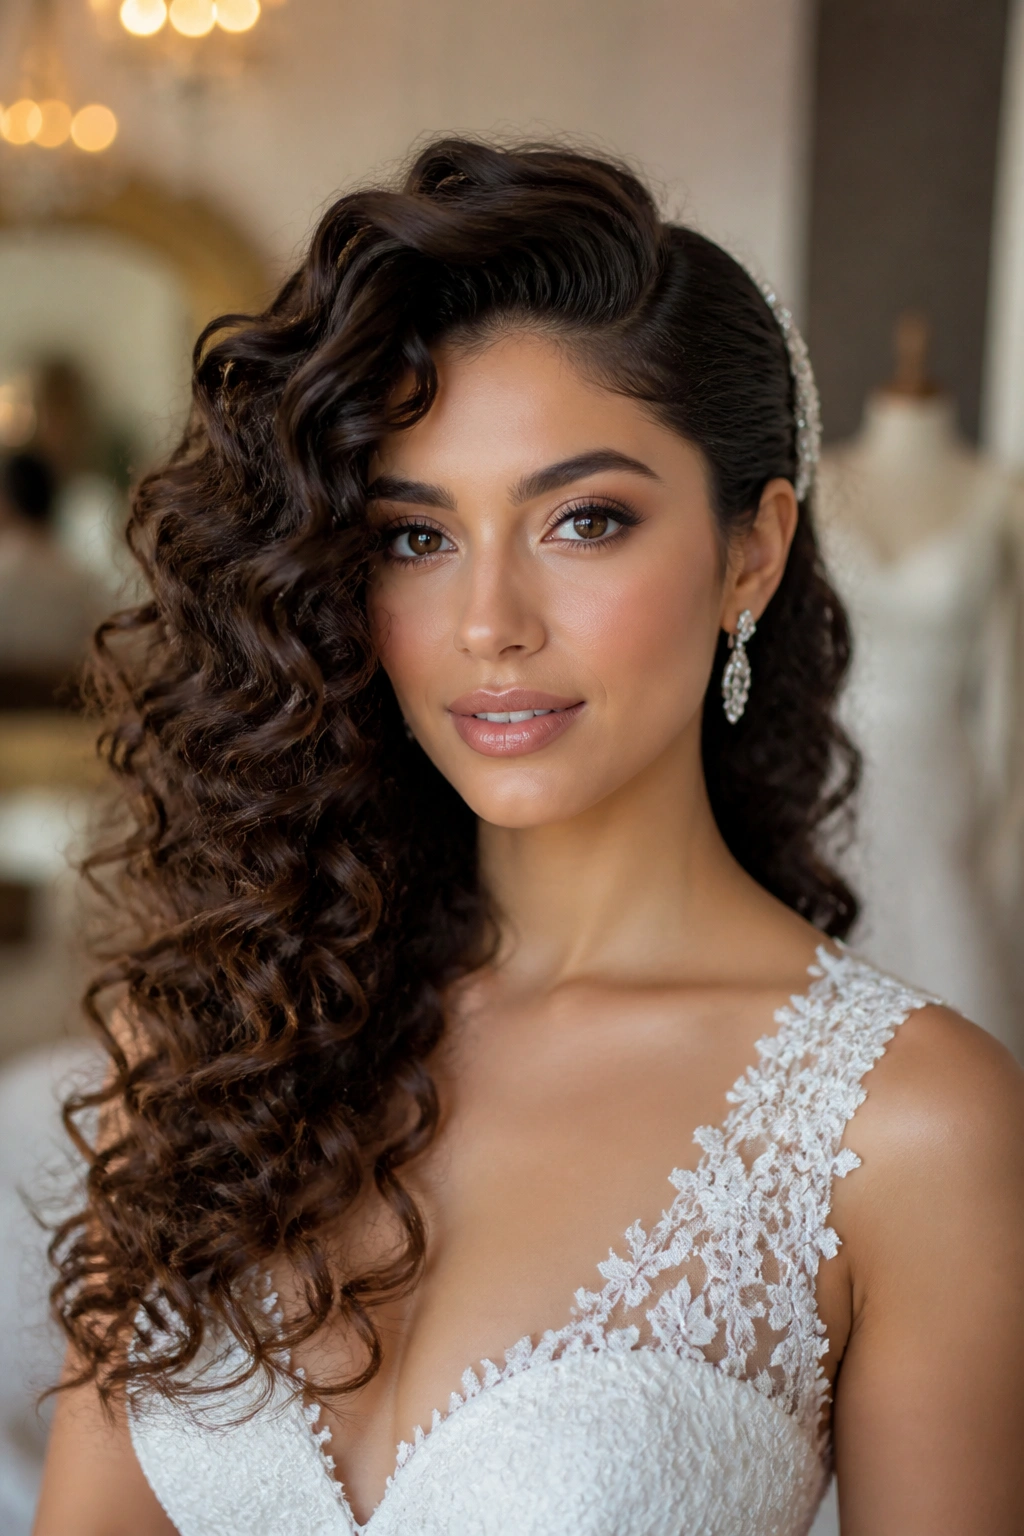
Why do side-swept curls keep showing up in wedding albums? Because they do three jobs at once: they frame the face, they show off length, and they make the whole hairstyle feel intentional without looking hard-edged.
The part does most of the work. A deep side part—usually 3 to 4 inches off center—gives one side enough weight to fall forward while the other side stays tucked behind the ear. That little asymmetry can make a strapless gown feel richer and a high-neck dress feel less severe.
How to Wear It
Set the front with a 1.25-inch iron or refresh the curl pattern with a diffuser until the ends are bouncy and separated. Then pin the heavier side low behind the ear with two crossed pins and a small comb if you want extra grip.
If you love shine, run a pea-sized amount of serum over the outer layer only. Do not coat the roots. That is how the style goes from glossy to greasy in one bad move.
4. Curly High Puff Ponytail With a Wrapped Base
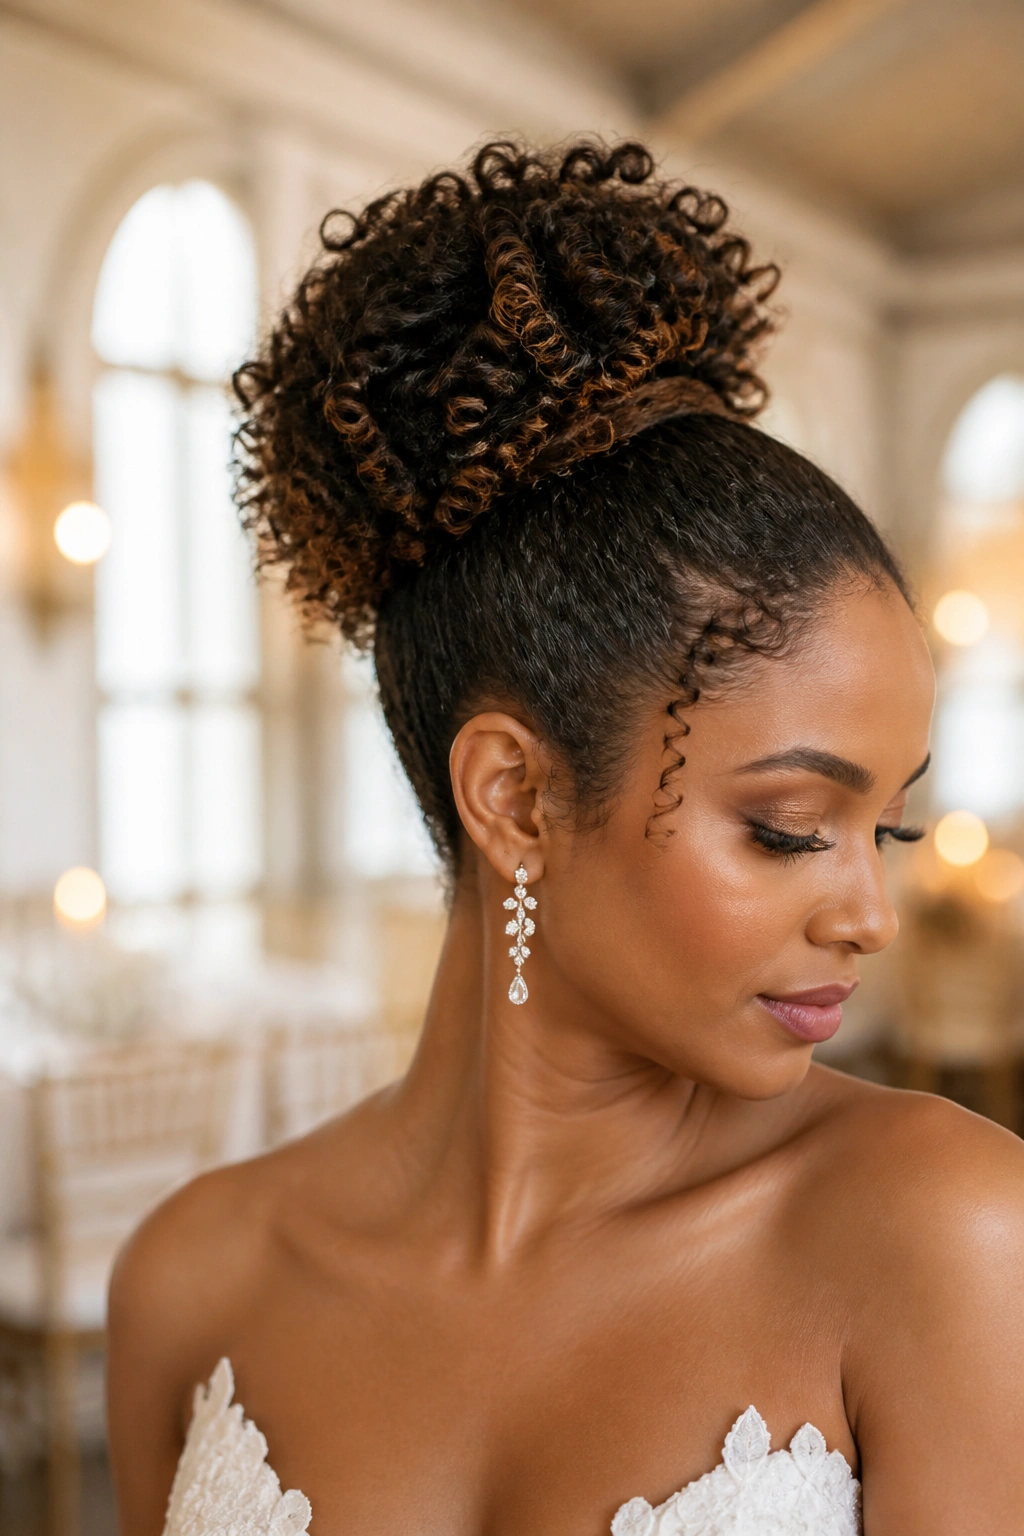
Picture a bride in a clean satin dress, shoulders open, earrings doing a little work of their own. A high puff or ponytail gives that kind of look a lifted shape that feels fresh, not fussy.
The height is the point. When curls sit higher on the head, the neck looks longer and the face opens up. It also keeps the hair off the back of the dress, which matters more than people admit until the ceremony starts and the zipper line keeps catching stray curls.
- Smooth the front with a light edge cream, not a heavy gel.
- Secure the puff with a thick elastic first, then wrap a small curl or braid around the base.
- Add one hidden pin under the wrap so the ponytail does not rotate.
- Fluff the top in layers, not all at once, or the shape turns uneven.
The best version looks full, not stiff. That distinction is everything.
5. Braided Halo With Free Curls
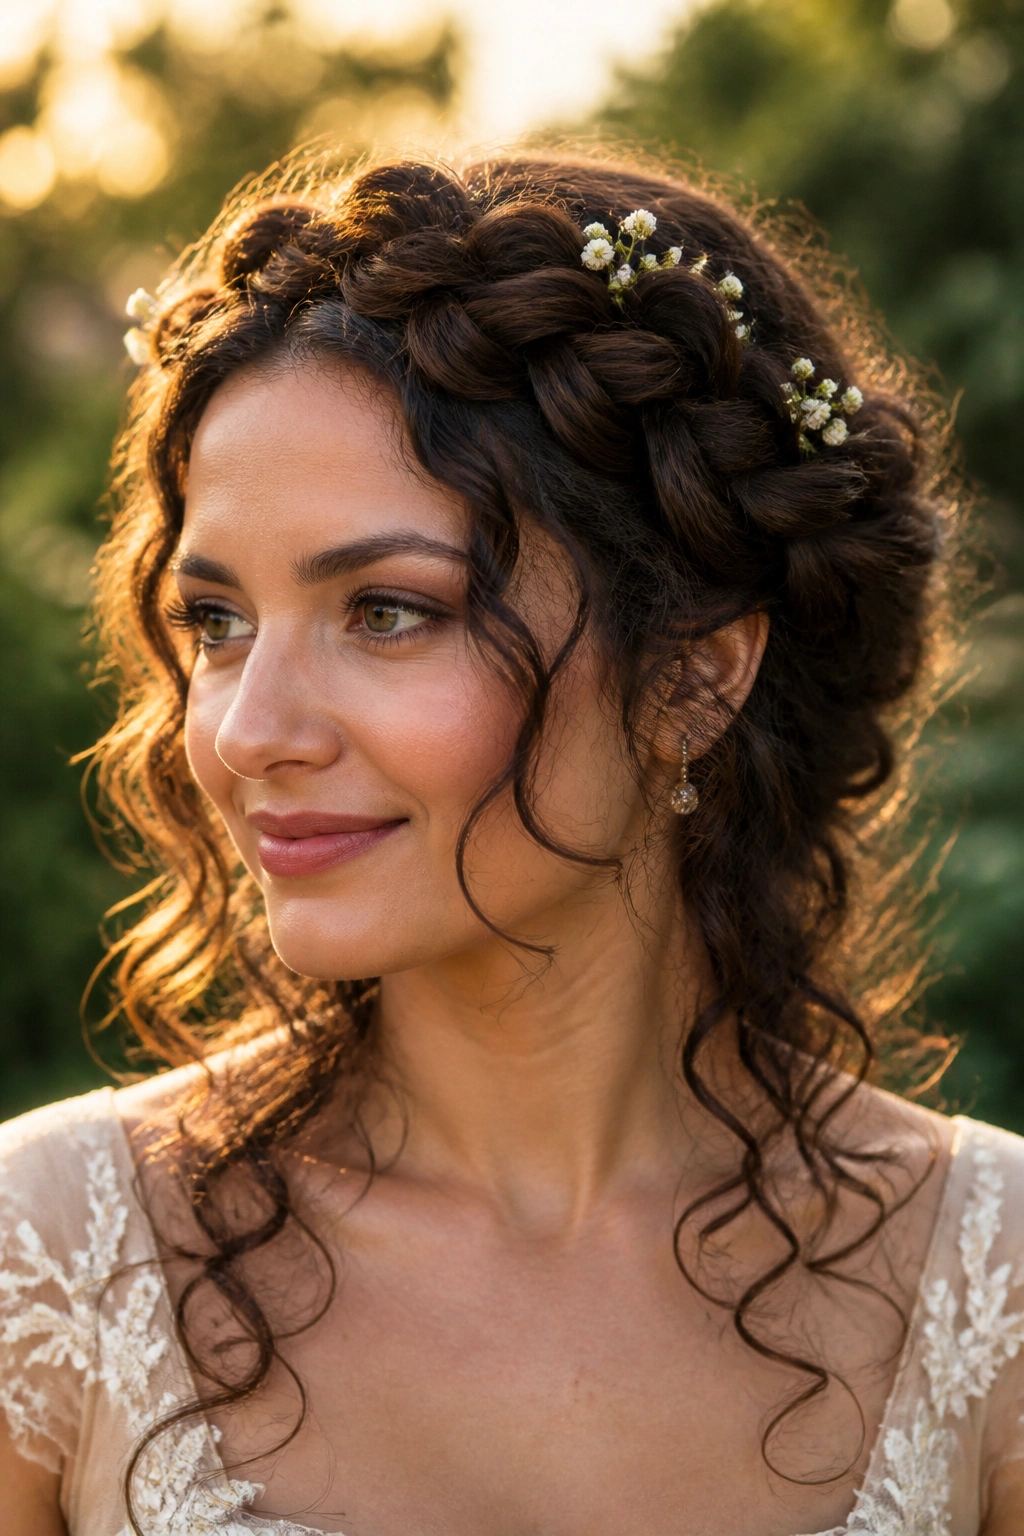
A braided halo is one of those styles that looks delicate from a distance and surprisingly practical up close. It keeps the hairline neat, gives the face a soft frame, and still leaves enough curl visible to make the style feel like it belongs to curly hair instead of fighting it.
The braid should sit like a crown, not a helmet. Too tight looks tense. Too loose falls apart in the first hour. Leave a little softness at the edges of the braid so the hairline can breathe, and use the curls underneath to bring in the movement.
I also like this one for brides who want flowers or tiny pins tucked into the braid without covering the whole head. A few buds or pearl pins spaced along one side are enough. More than that and the look starts to lose its shape.
6. Curly Bridal Low Knot With Textured Ends
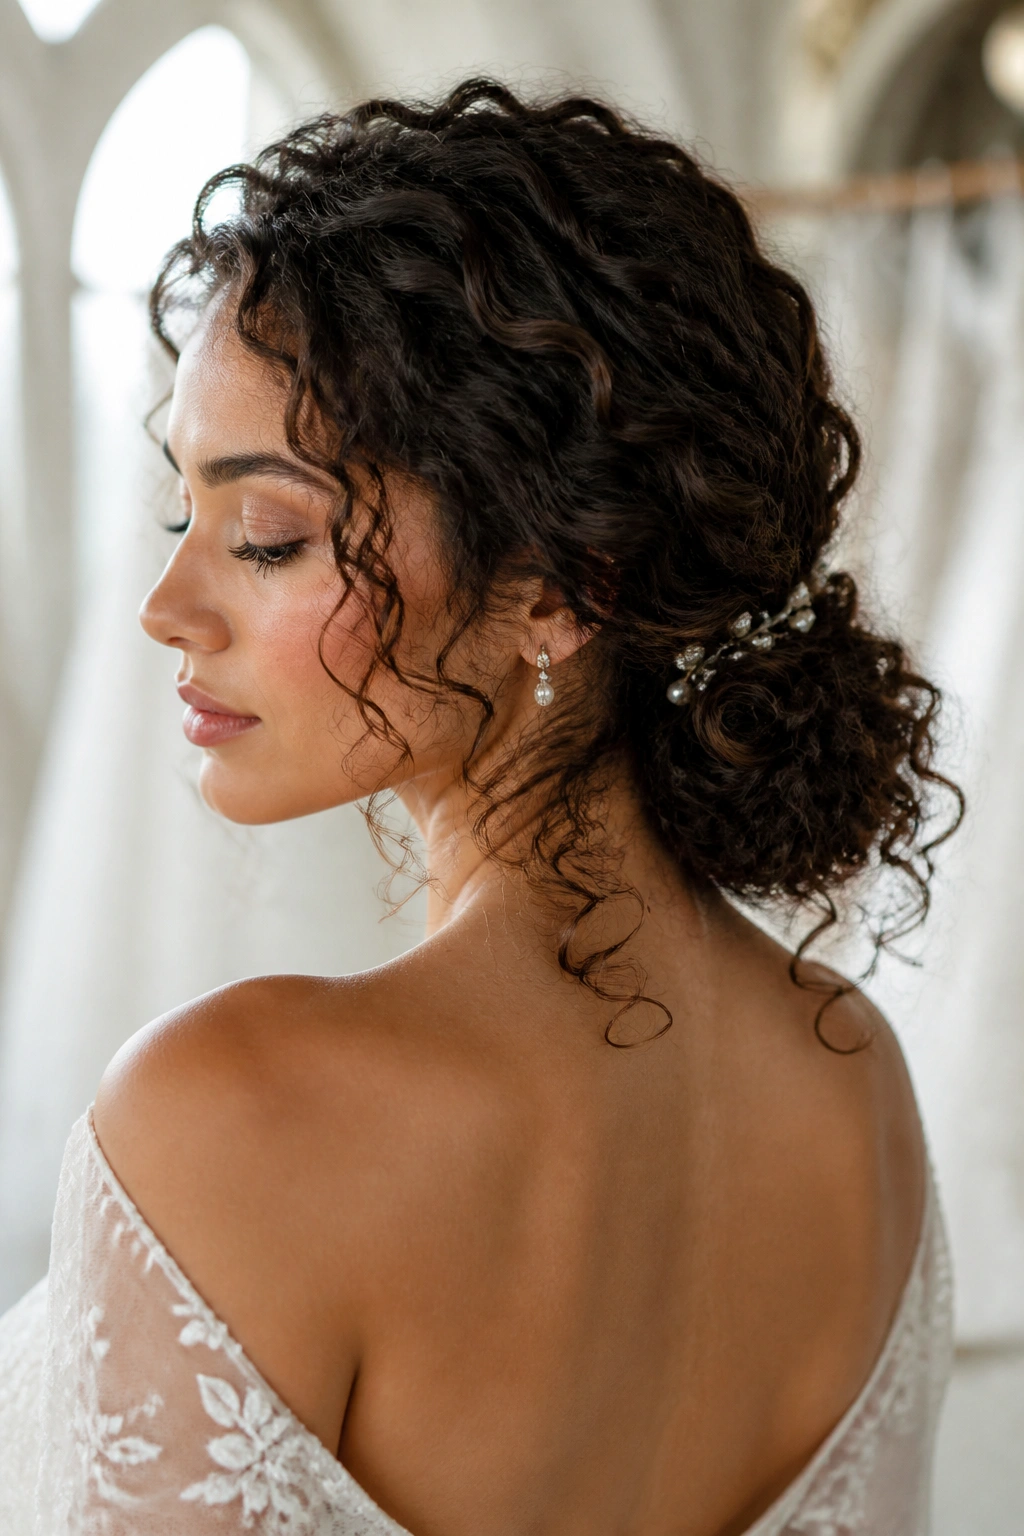
Unlike a smooth bun, a textured low knot leaves a little curl pattern on display, and that is what makes it feel human. You get structure at the nape, but the ends peek out just enough to keep the style from looking severe.
This is a strong choice for a bride who wants order near the face and softness at the back. It also works well with cathedral veils, because the knot sits low enough that the comb does not have to fight for space. If the hair is very thick, split it into two sections before wrapping it. A single twist can bulge out in the wrong place.
Use a matte pin set and a small amount of pomade only around the hairline. Anywhere else, and you will lose the airy texture that makes the knot feel bridal instead of office-ready. I’m picky about that line. Once the texture is gone, the whole thing looks tired.
7. Old-Hollywood Side Part With Glossy Barrel Curls
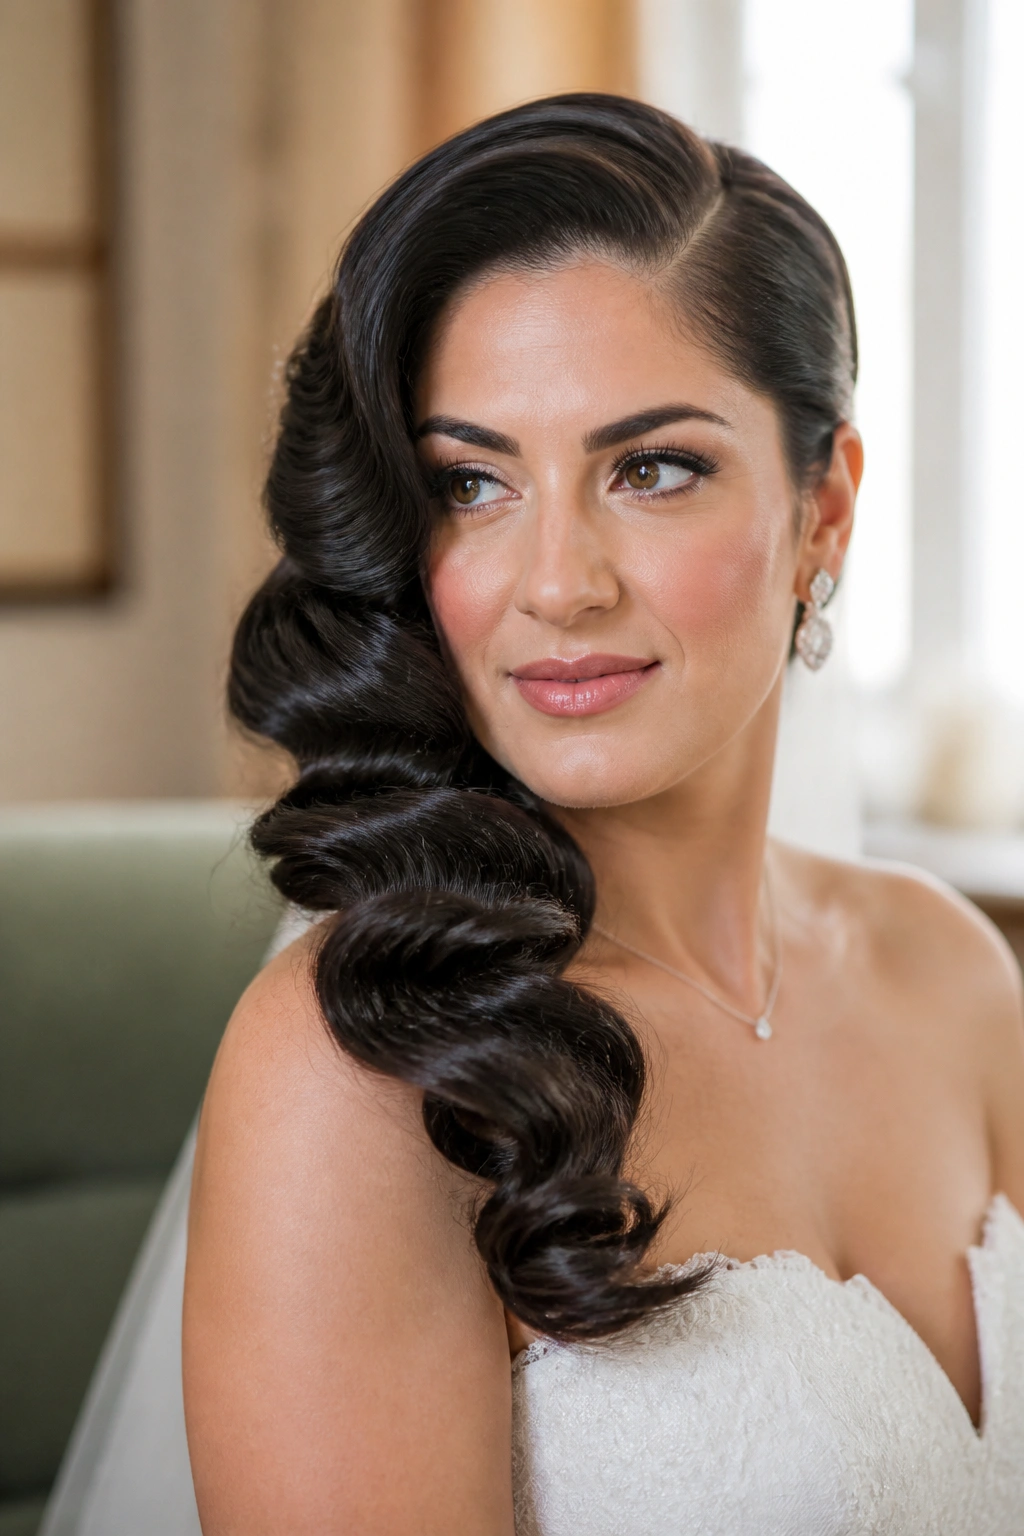
This is the style that says “formal” without shouting. A deep side part, big barrel curls, and a smooth finish give curly hair a sculpted shape that feels especially good with satin, silk, or a gown that already has strong lines.
Why It Works on Curly Hair
The trick is control, not flattening. Set the hair with a 1.25-inch iron or large rollers, let the curls cool all the way, and only then brush the outer layer into those soft, sculpted waves. If you brush too early, the shape collapses into fluff.
- Use mousse at the roots before any heat.
- Pin the front section into place while it cools.
- Tuck one side low with a jeweled comb or two strong pins.
- Finish with a light shine spray, not an oily serum.
Tip: The front should move, but not fly apart. If one piece keeps escaping, pin it under the next curl, not on top of it.
8. Curly French Twist With Soft Lift
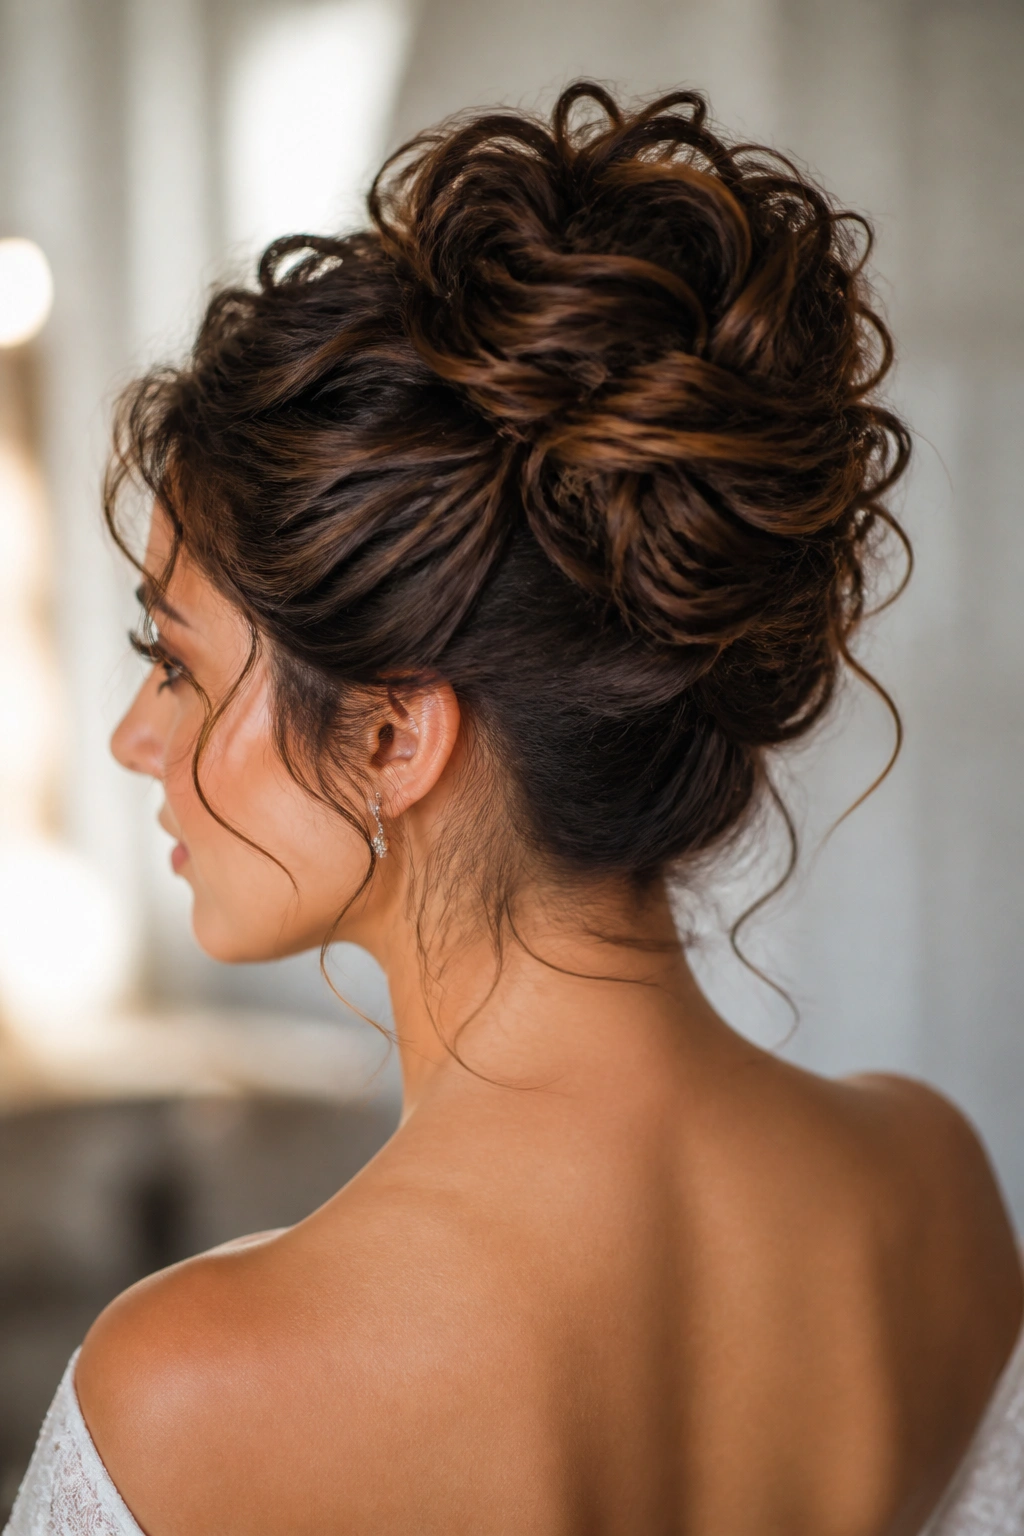
A French twist does something useful that many wedding styles forget to do: it clears the back while keeping the shape elegant and compact. On curly hair, it works best when the curls are treated like texture, not like something to erase.
The version I trust starts with sections, not one giant roll. You gather the curls upward in two or three smaller passes, pin each one into the center, and let a few pieces escape at the top and sides. That small looseness is what keeps it from looking severe.
This is a smart pick for a backless dress or a gown with a detailed neckline. The hair moves up and out of the way, and the dress gets room to breathe. If the curls are dense, a little backcombing at the crown helps the twist sit flat enough to hold. Not much. A few strokes. Any more and the texture starts to fray.
9. Boho Crown Braid on Natural Curls
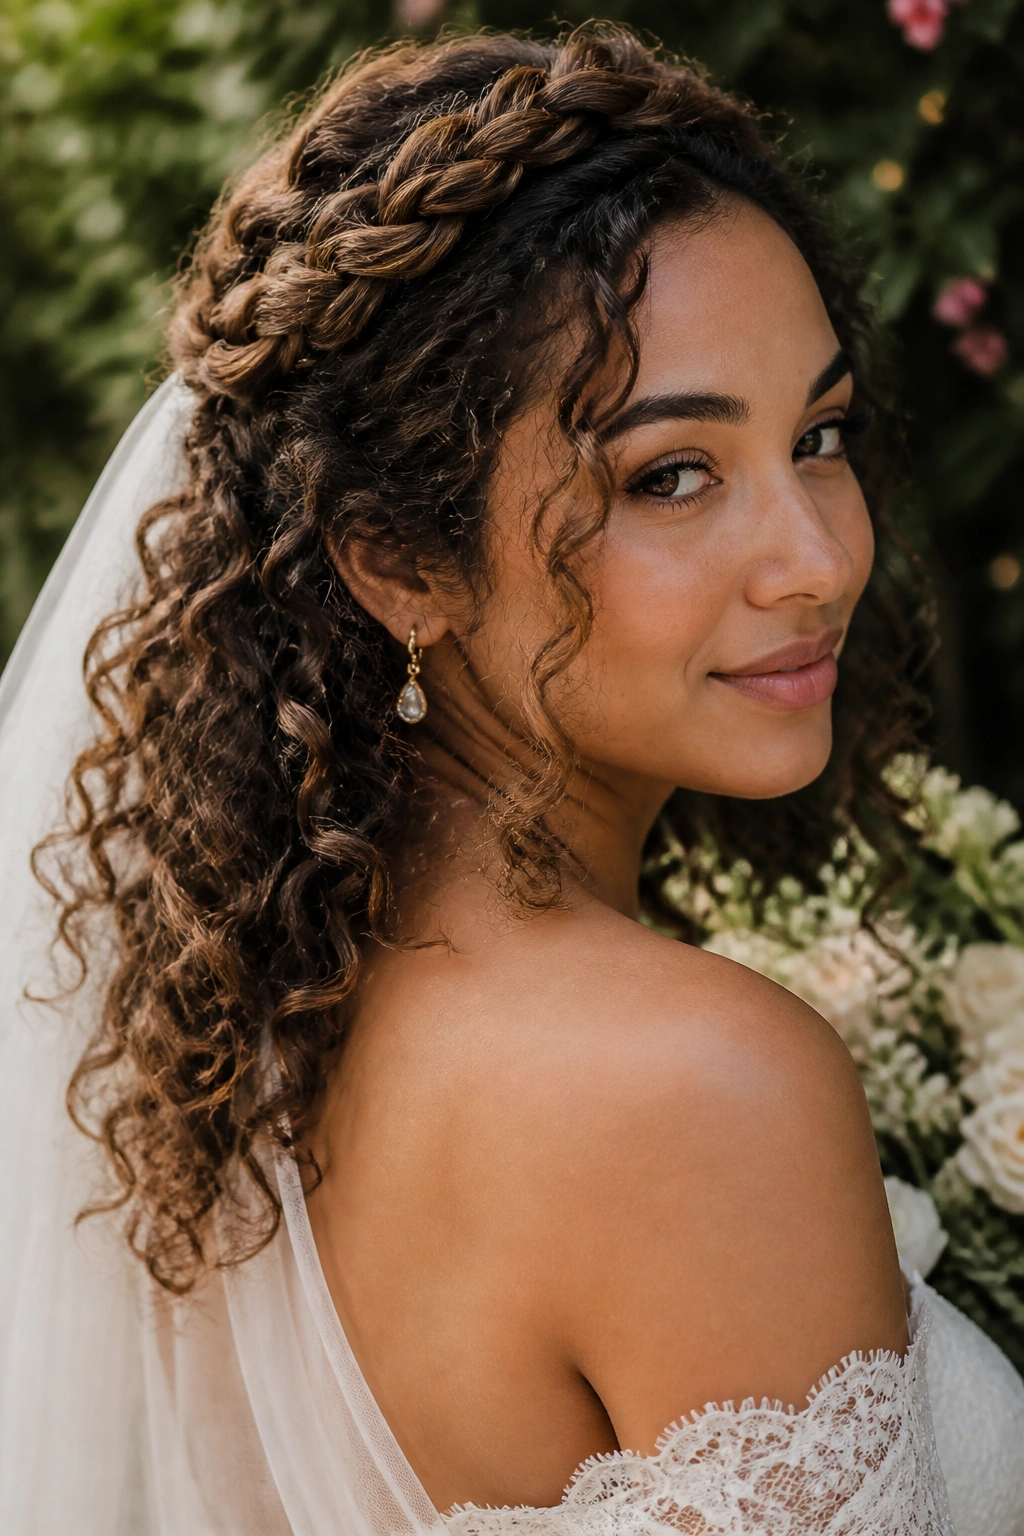
What happens when a braid meets a full head of curls? You get one of the easiest wedding looks to wear all day, because the braid keeps the face open while the rest of the texture still gets its moment.
The braid should travel around the hairline in a loose circle, then stop before it turns too perfect. The curls in the back stay free, which makes the style feel relaxed without slipping into casual. That line is hard to find, and this look finds it nicely.
How to Wear It
Pull the braid about 1 to 1.5 inches back from the hairline so it does not pinch the forehead. Leave the back in defined curls, and if the ends need help, refresh them with a bit of cream and a diffuser.
A veil can sit under the braid or at the back under the curls, depending on how much of the braid you want visible. I’d avoid putting heavy flowers all the way around the head. A few scattered blooms near one temple is enough.
10. Shoulder-Grazing Curly Bob With Sparkle Pins
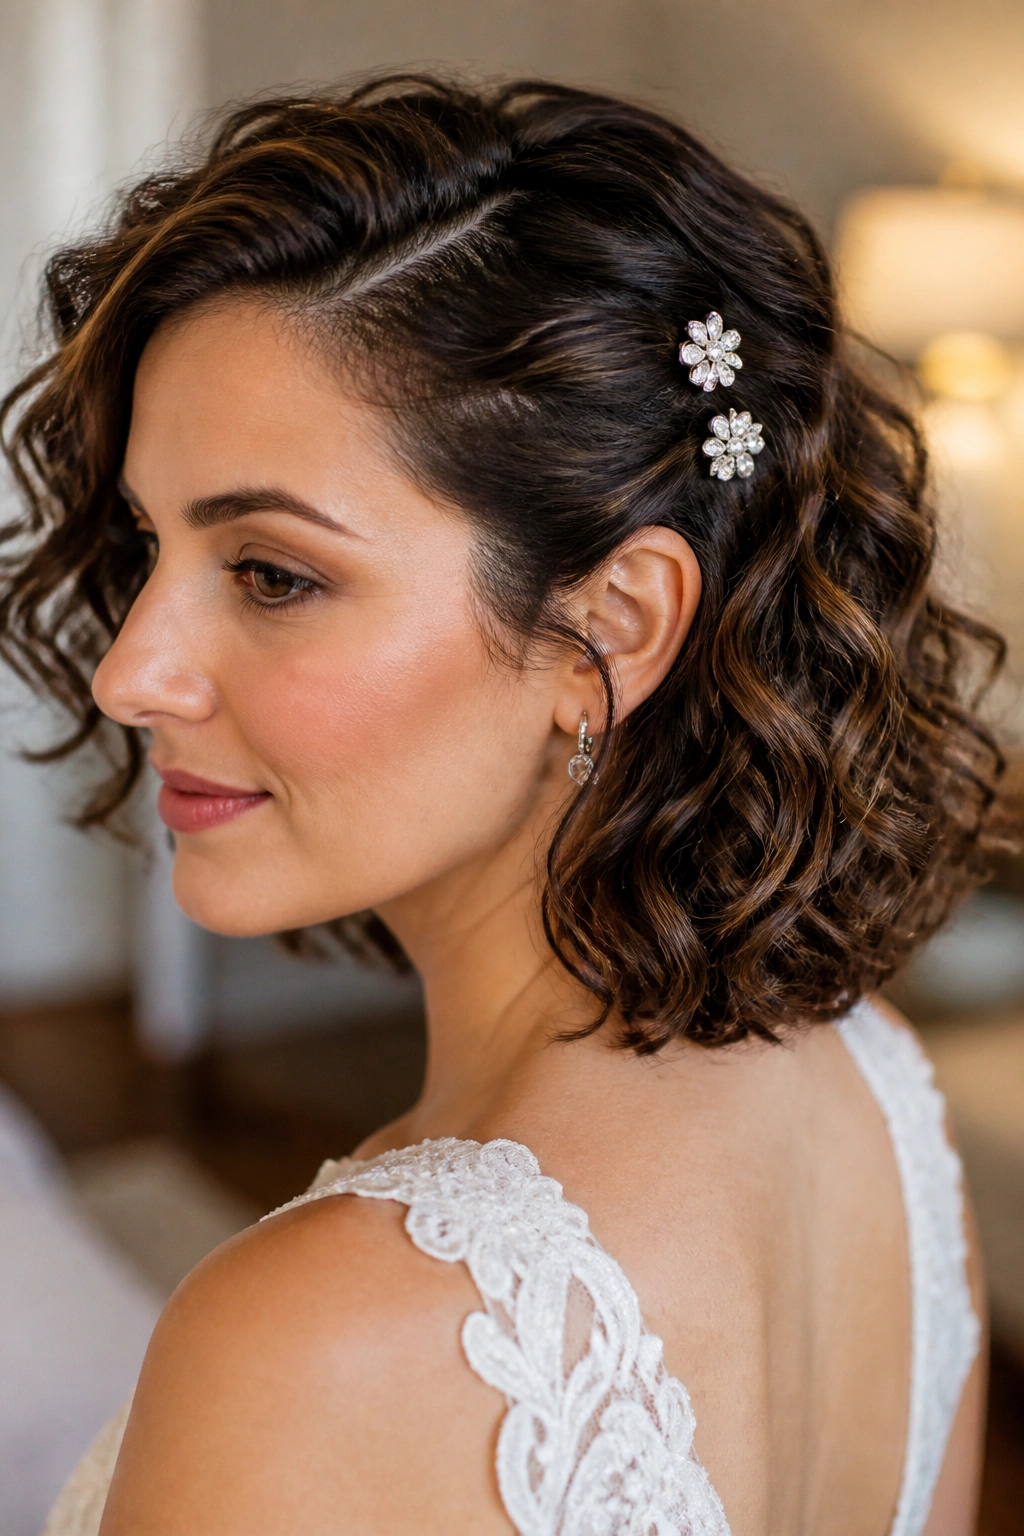
Short curls get ignored too often in bridal hair lists, which is a shame, because a shoulder-grazing bob can look clean, modern, and expensive with almost no fuss. The trick is shape. Not volume for its own sake—shape.
A bob already has strong lines, so the bridal upgrade comes from definition and placement. Curl the ends in the same direction, then tuck one side with two or three sparkle pins that match the dress hardware. That’s usually enough.
- Use a 3/4-inch or 1-inch iron to tighten any loose bends.
- Keep the top smooth and the ends lively.
- Pin one side low, about 1 inch above the ear.
- Choose pins with small stones, not oversized clips.
The best bob looks finished from the front and the back. If the back starts to puff out too much, smooth just the nape with a touch of cream and leave the rest alone.
11. Waterfall Braid Into Loose Curls
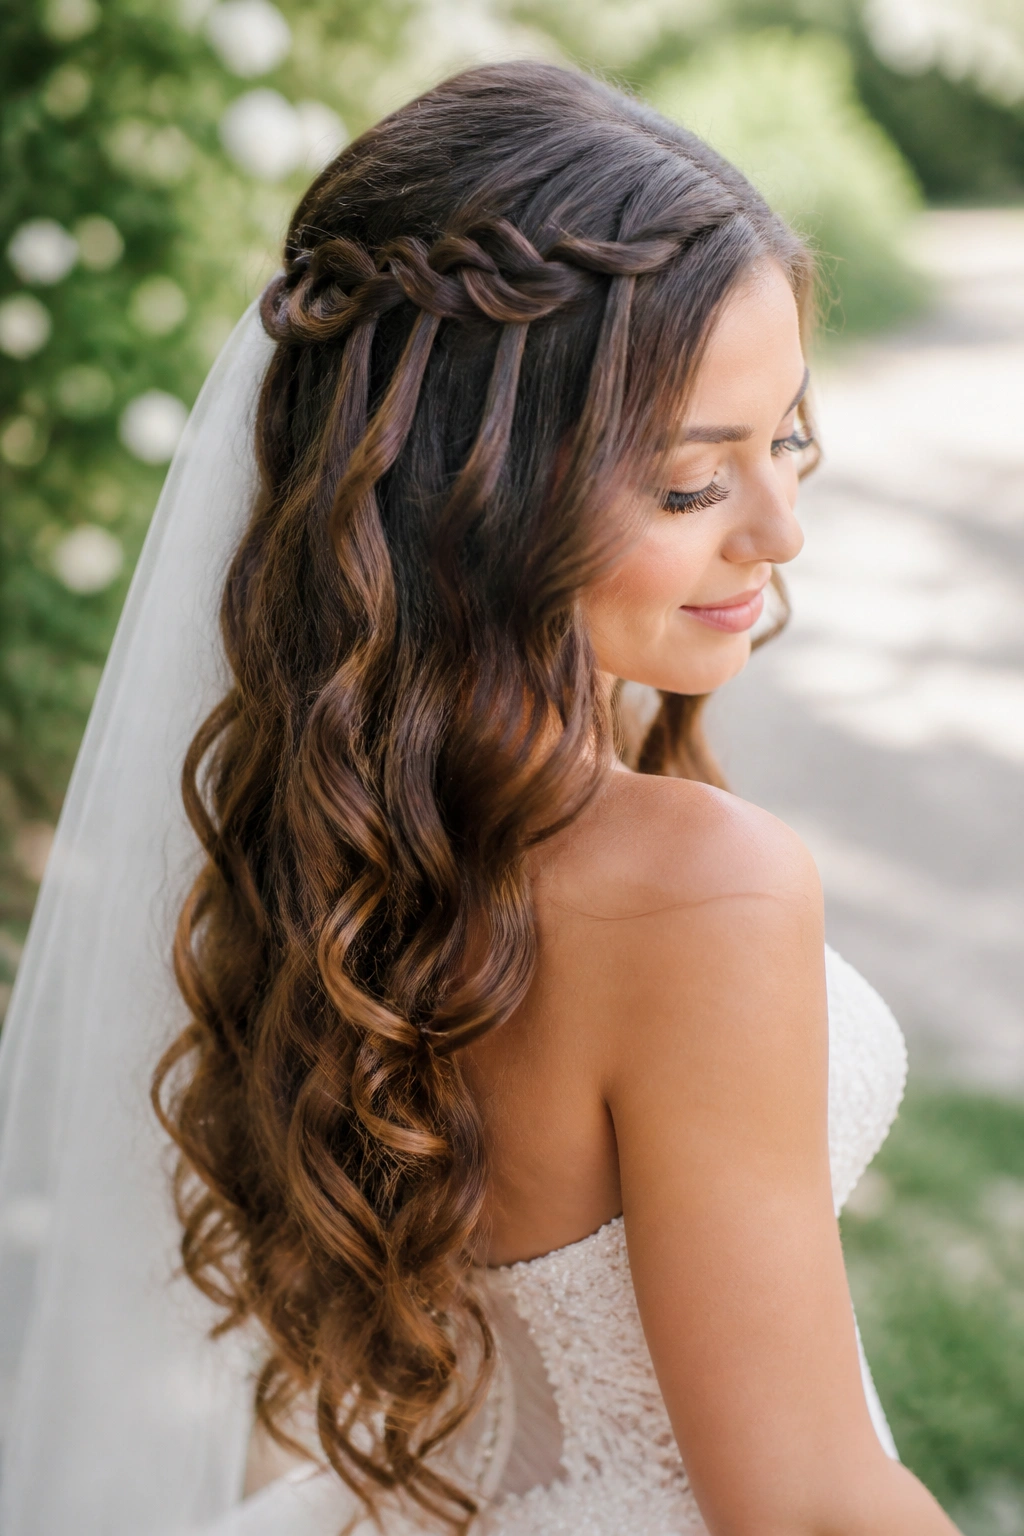
A waterfall braid is one of those styles that gives you detail without stealing the show from the curls. The braid runs across the top layer, then lets sections drop through so the length keeps moving underneath.
That little drop pattern is the whole point. It keeps the front from feeling plain, but it does not lock the hair into a rigid shape. Brides with medium or long curls tend to like this look because it photographs well from the side and still feels soft when the hair swings.
The braid itself should stay loose enough to avoid tiny gaps. I prefer to braid it after the curl pattern is set, not before. If the hair is too slippery, the braid loses its shape; if the curls are too dry, it catches in odd places. A light cream on the top layer usually solves both problems. Keep the ends glossy and the braid slightly airy, and the whole thing reads as graceful instead of busy.
12. Sleek Front, Curly Back Cascade
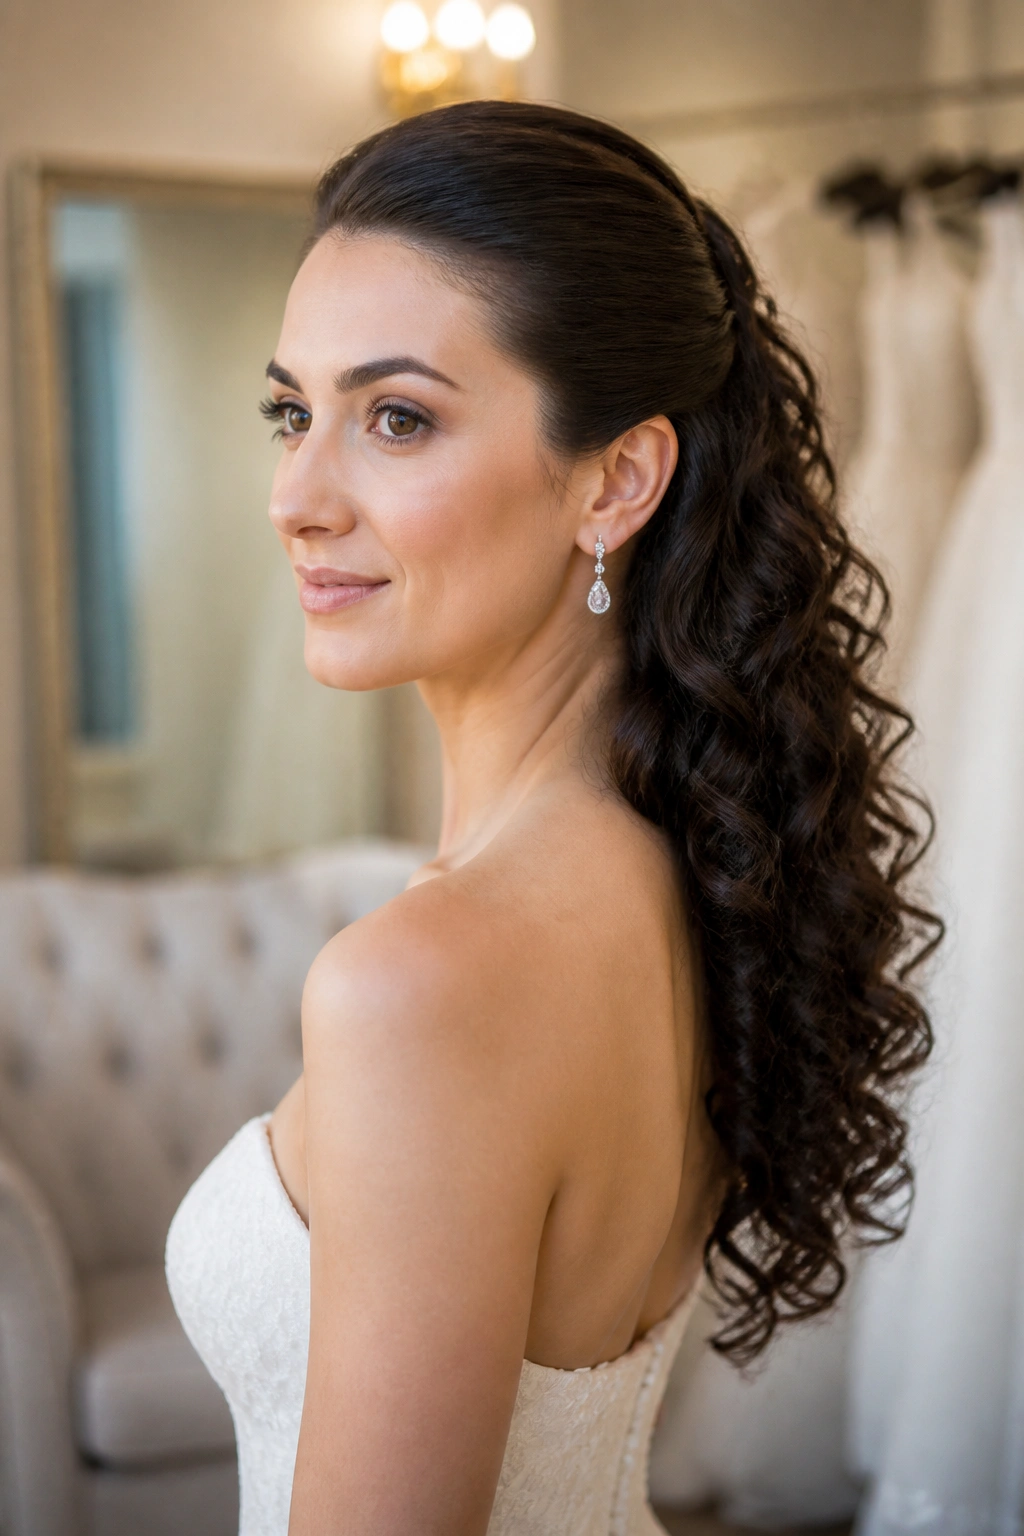
Unlike a fully teased updo, this style keeps the front controlled and lets the curls do their best work in back. It is a good answer for brides who want a clean face line but do not want to give up length.
The front sections are smoothed back with a little gel or pomade, then pinned low behind the ears. The rest of the hair drops into a cascade of curls, usually gathered loosely at the back so the shape stays long and narrow. That contrast is what makes it look deliberate.
It pairs well with minimalist gowns, sharp tailoring, or a dress that already has a lot of detail on the front. If the neckline is busy, the clean front keeps the overall look from becoming crowded. And if the veil is long, this style keeps the top neat so the comb has a clear place to sit.
13. Twisted Half-Up With Pearl Pins
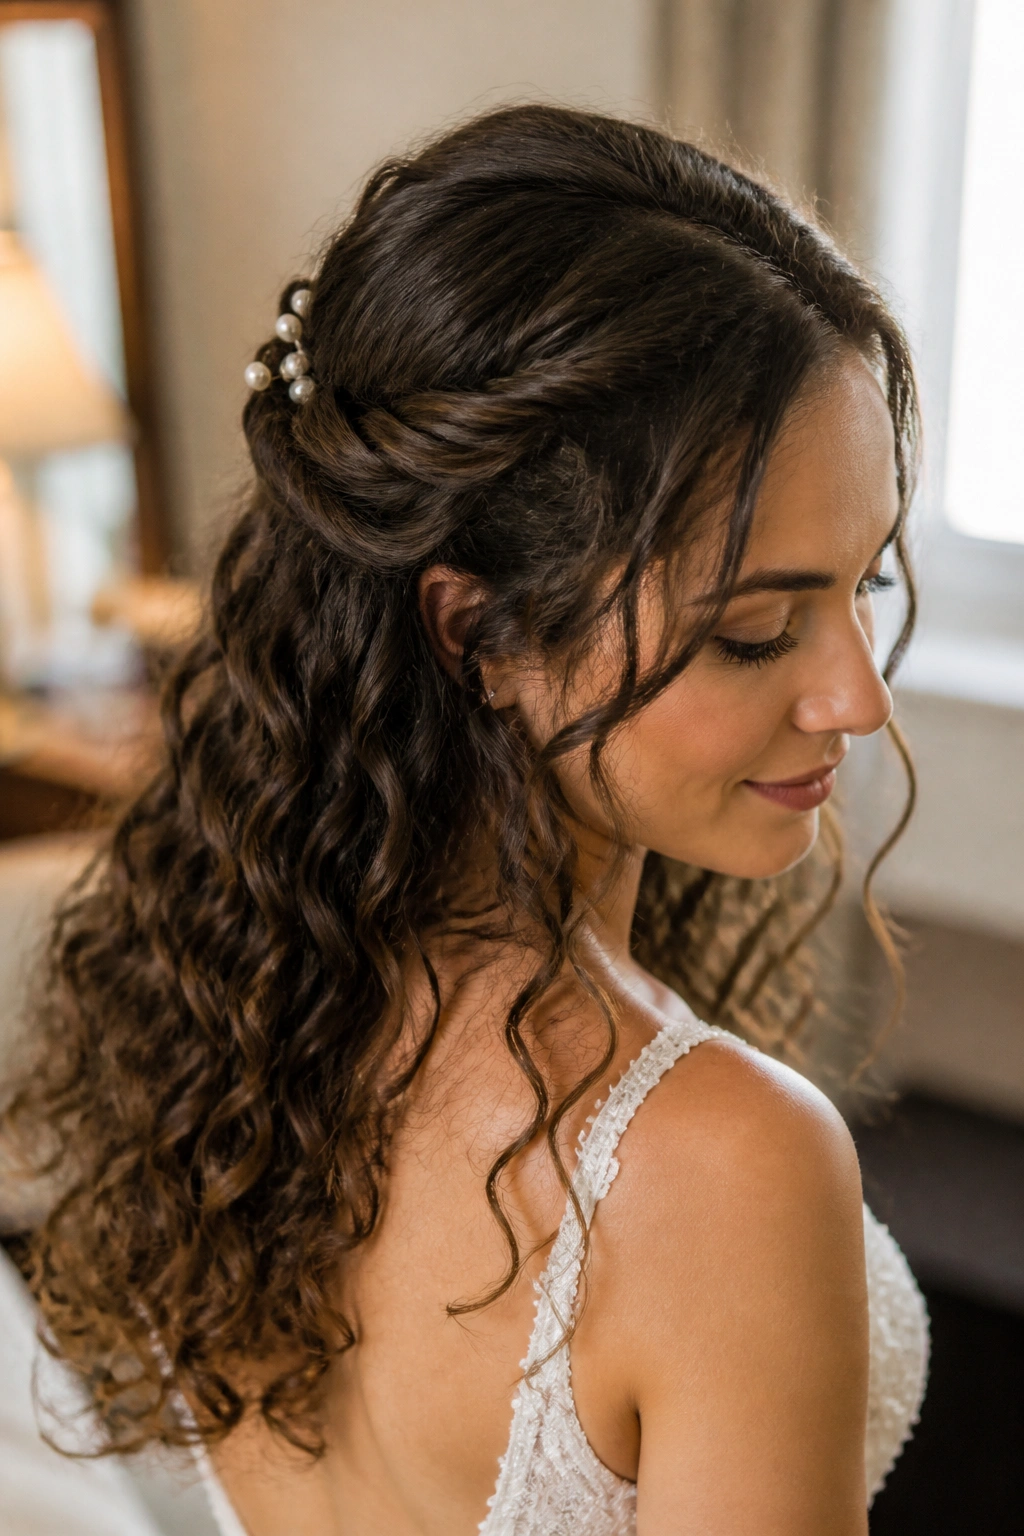
This is the gentler cousin of the half-up crown. Instead of a full pinned sweep, two twisted sections meet near the back and leave the rest of the curls free. It feels softer, a little more airy, and the pearl pins give it enough polish for a formal ceremony.
Why It Works on Curly Hair
Twists hold texture better than a smooth pullback because they follow the curl pattern instead of fighting it. They also let the top stay lifted without forcing the whole crown into one compressed shape.
- Twist two sections from the temples back toward the center.
- Secure each side with 2 or 3 pins, spaced about 1 inch apart.
- Place pearl pins where the twists meet, not all over the head.
- Leave the back curls loose and defined.
Tip: Use fewer pins than you think you need. A cluster of pearls can look expensive; a scatter can look accidental.
14. Voluminous Afro Bridal Shape
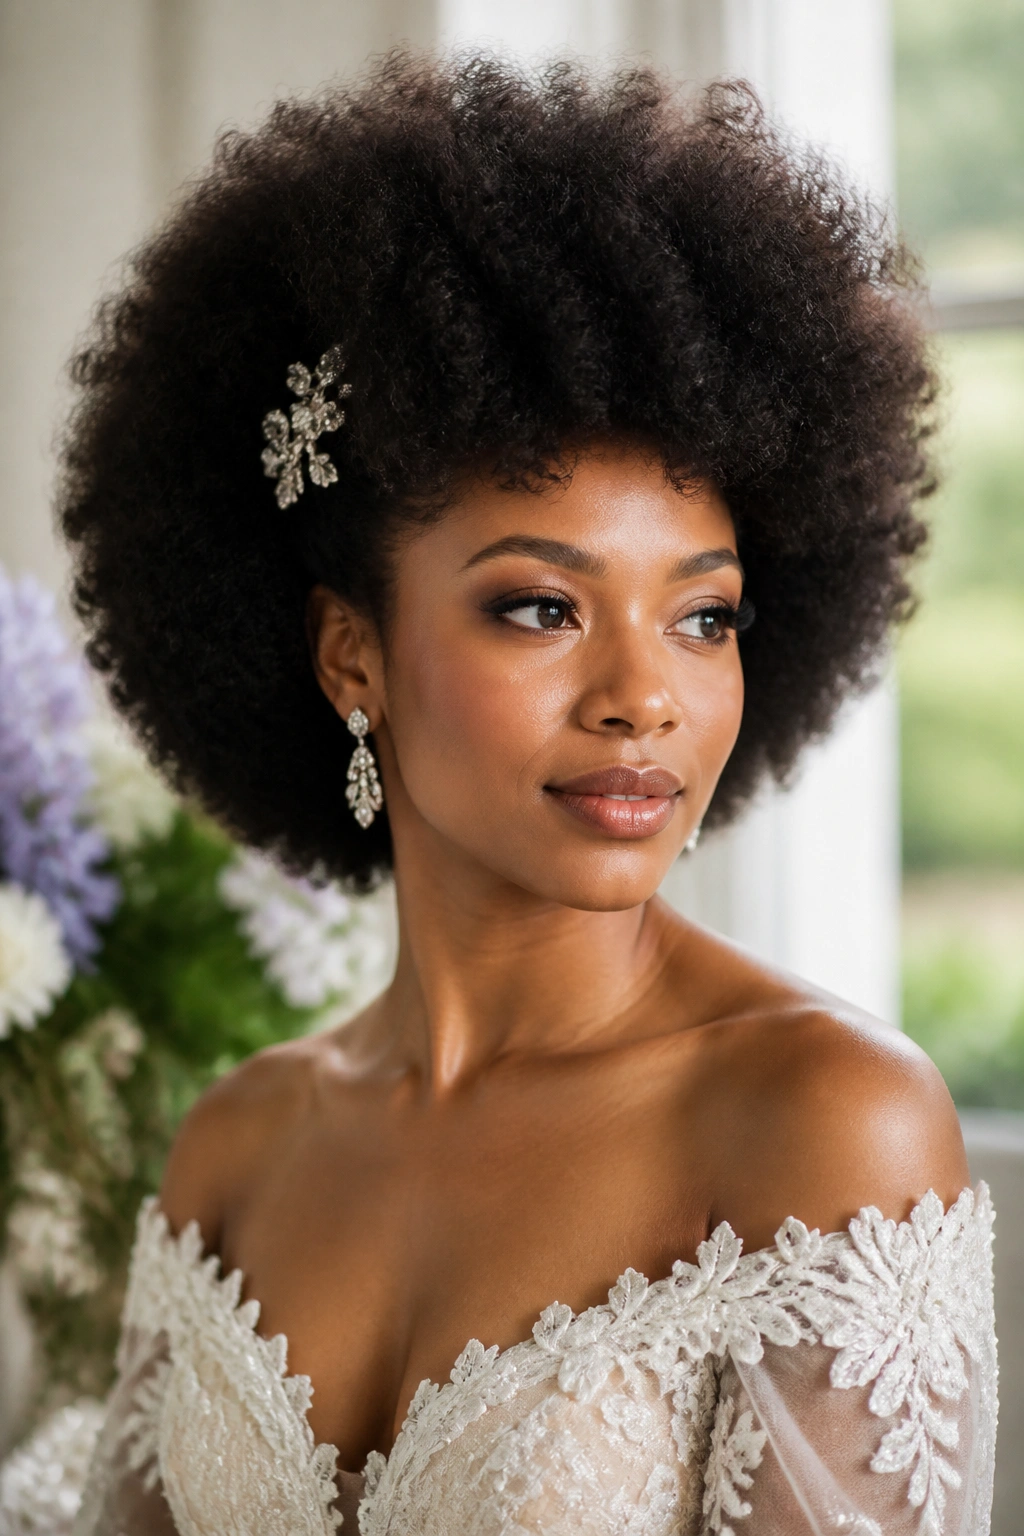
A shaped afro can be the most elegant thing in the room when it’s done with intention. The silhouette carries the whole look, which means the dress, the earrings, and the bouquet all have room to play without competing with the hair.
The key is balance. You want the outline clean enough to feel styled, but not so sculpted that the texture loses its life. A wide-tooth comb, a pick at the roots, and a bit of moisture cream on the perimeter usually do more than a pile of spray ever will.
This style also gives you options. Keep the shape rounded for a soft, classic look, or taper the sides a little tighter if you want the face to stand out more. A comb tucked on one side or a single flower behind the ear is often enough. I would not cover the whole shape. The hair itself is the statement.
15. Low Bubble Ponytail With Curls
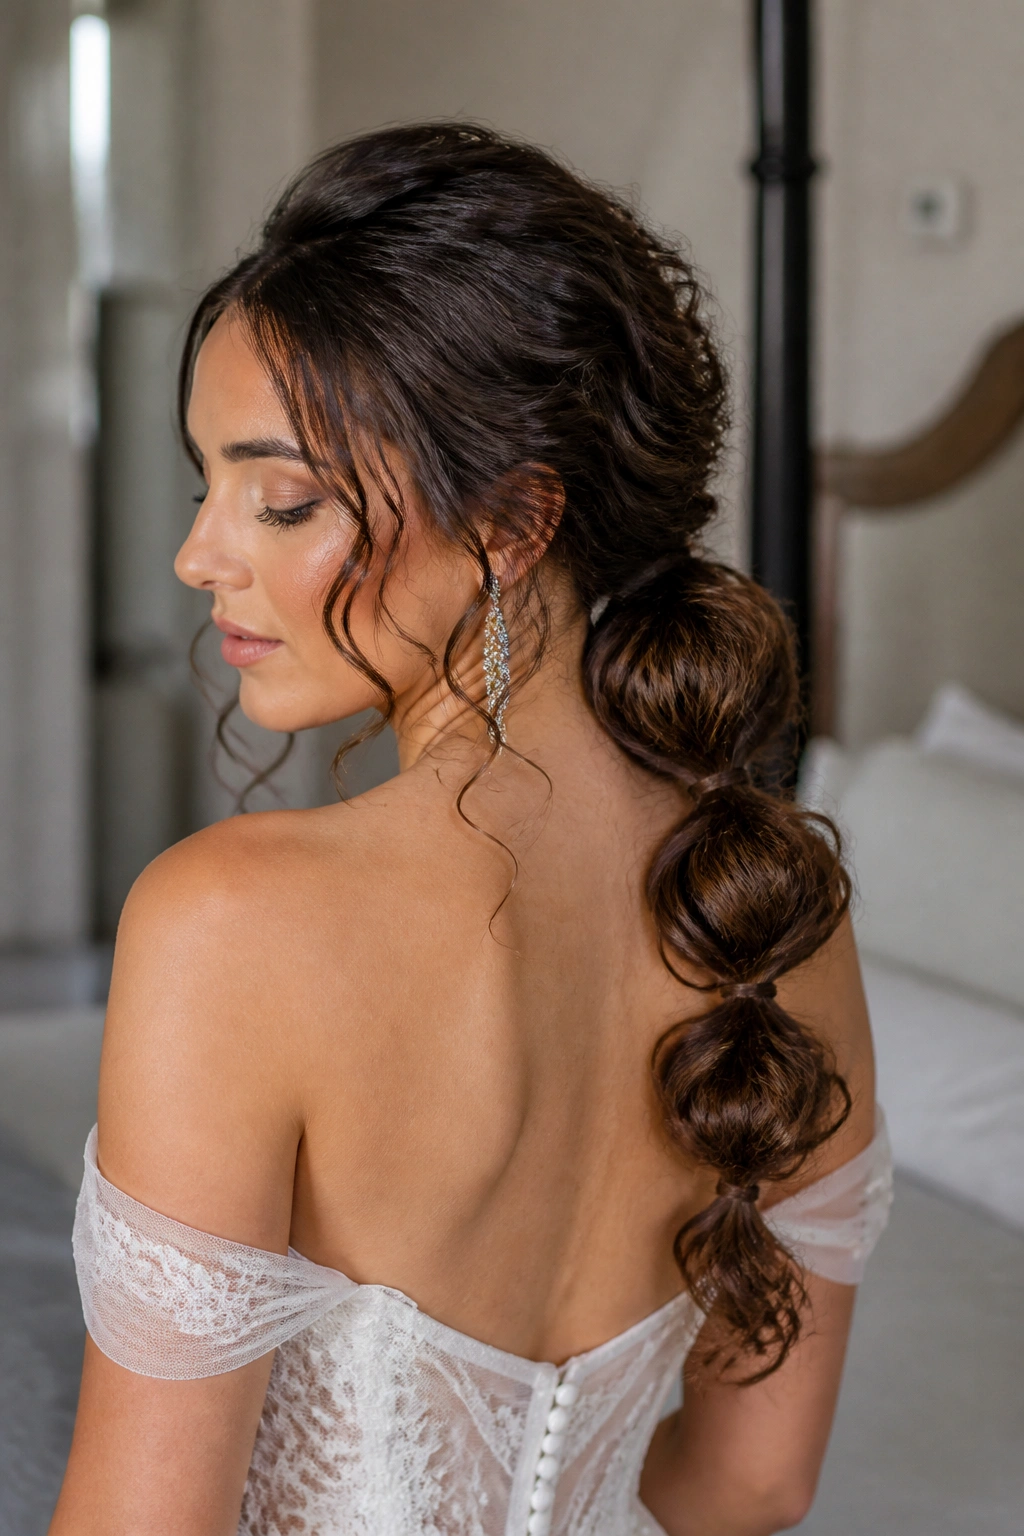
Can a bubble ponytail look bridal? Yes—if the bubbles stay soft and the curls stay defined. The style works because it stretches the hair into sections without hiding the texture inside a tight knot.
The ponytail sits low or mid-low, then gets divided into three or four rounded sections with clear elastics. Each section is gently pulled apart to make a fuller “bubble,” and a curl wrap hides each elastic. That little detail makes the whole style feel cleaner.
How to Wear It
Keep the root area smooth, but not slick. A light cream or gel at the crown will tame flyaways without making the base crunchy. Then let the bubbles get a little uneven. Perfect symmetry looks stiff here, and stiffness is not what this style wants.
If the hair is thick, the bubbles can be spaced 3 to 4 inches apart. If the hair is finer, bring the elastics closer together so the shape does not sag. A few loose curls around the face finish it off nicely.
16. Floral-Threaded Twist-Out Updo
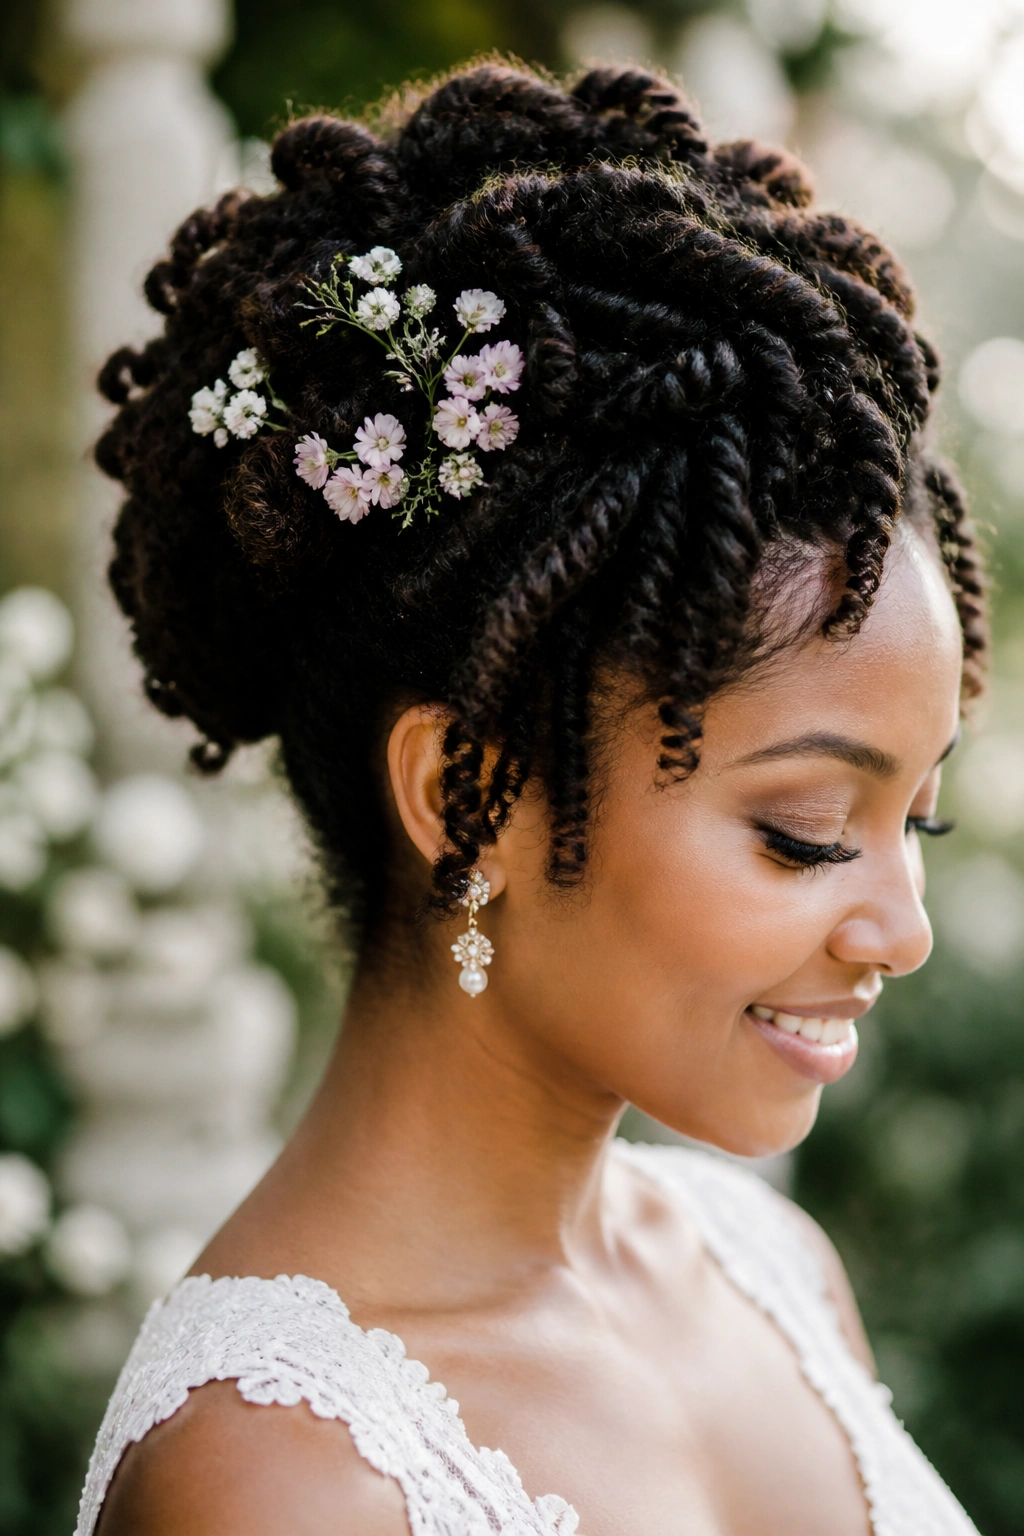
This look has a lot of charm because it keeps the twist-out texture visible while adding little floral details where the eye naturally lands. It feels thoughtful, not overloaded, which is a relief in a category that can go overboard fast.
The updo usually starts with a defined twist-out, then gets pinned upward into a soft shape at the back or crown. Small flowers, vine pins, or floral thread can tuck between the sections without hiding the texture. Fresh blooms work well if they are small and sturdy. Silk can be easier if you do not want to worry about drooping petals.
- Choose flowers with short stems or wire them first.
- Place floral accents near the side or upper back, not all around.
- Keep the twist definition visible at the edges.
- Use pins that match the hair color so the shape stays clean.
The appeal here is simple: the hair still looks like hair. It just has a little ceremony built into it.
17. Curly Faux Hawk for Bold Brides
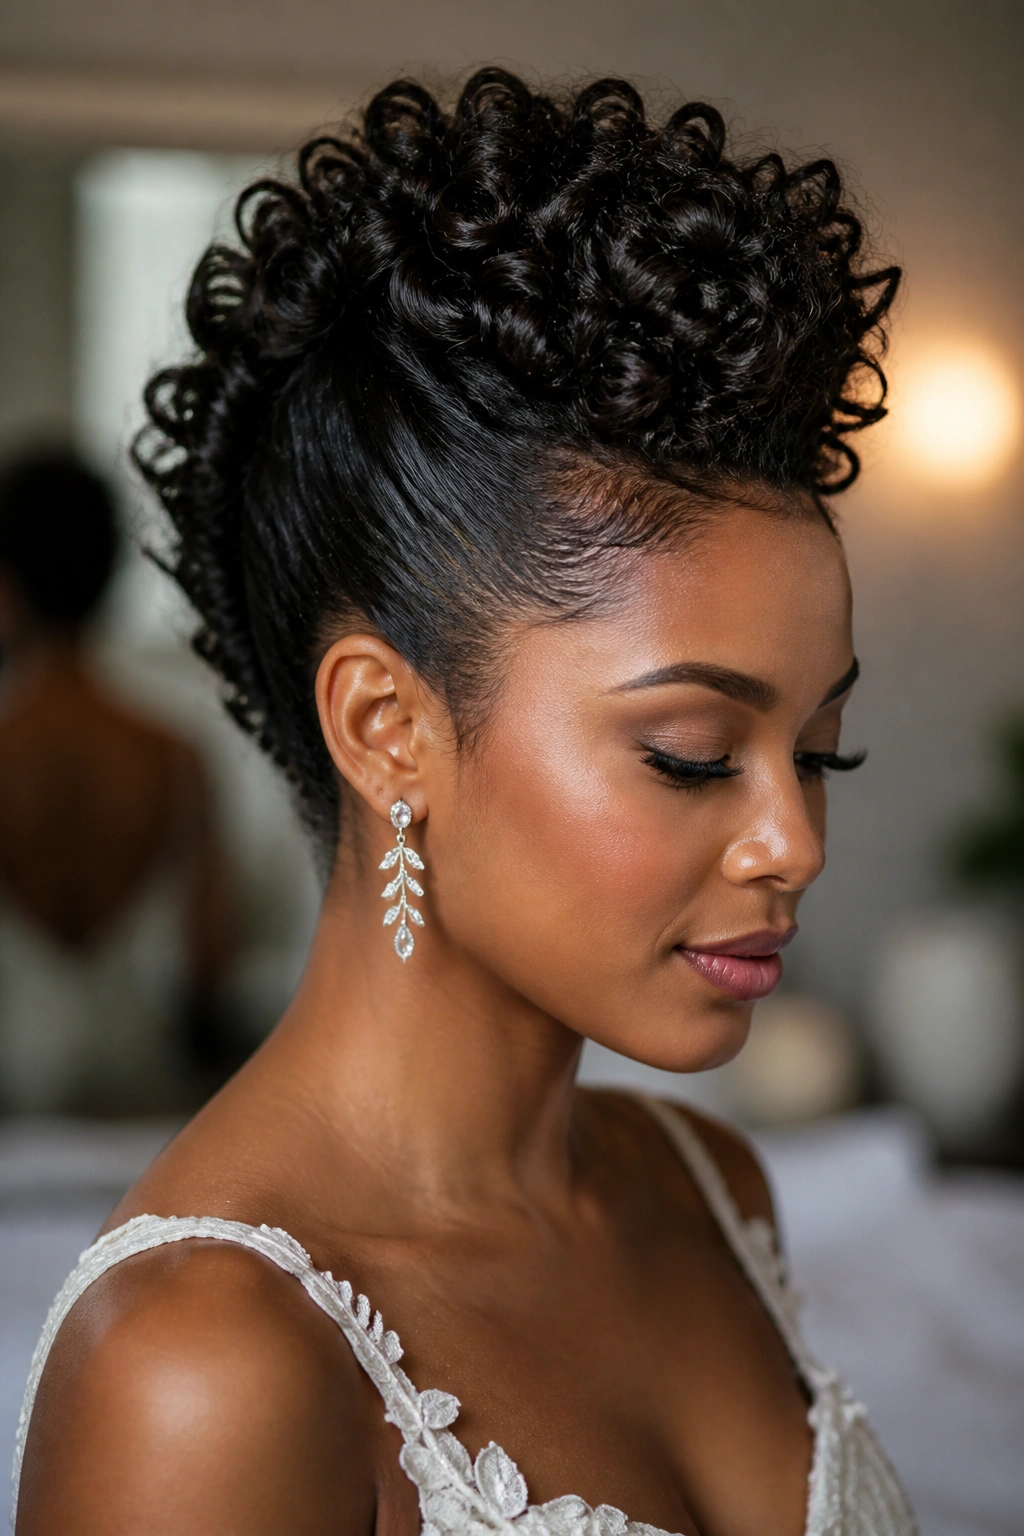
It is not a shy look. That is the charm.
A curly faux hawk clears the sides, stacks the volume through the center, and turns the texture into a vertical line that feels sharp and modern. Brides who hate hair falling onto their cheeks during the day tend to love this one, because the curls stay put while the face gets all the space it needs.
The sides are usually smoothed back with cream or gel and pinned tightly, while the center section gets lifted into a strip of curls from the forehead to the nape. The shape can be high and dramatic or softer and lower, depending on the dress. A jumpsuit, a structured gown, or a sleek slip dress all make sense here.
If you want this style to read as bridal and not nightclub, keep the center curls defined and glossy. A single accessory near the temple is enough. More than that and the whole thing starts to feel crowded.
18. One-Side Braided Bun
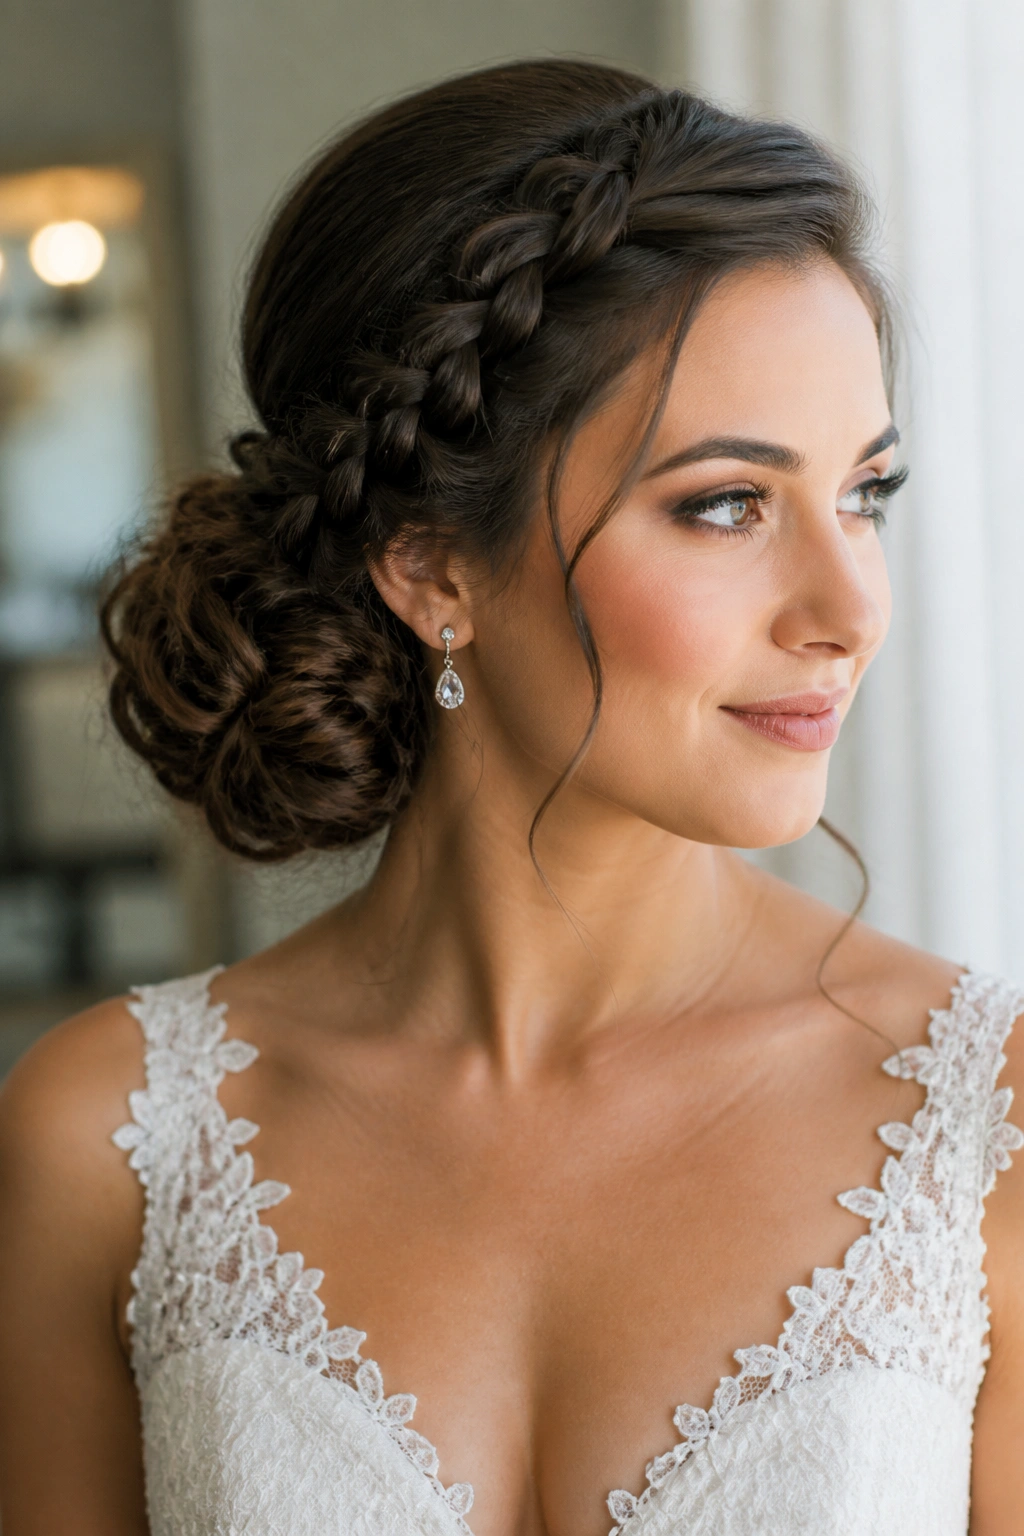
Unlike a halo braid or a centered low knot, this one leans into asymmetry. That’s why it feels fresh. The braid starts on one side—often at the temple or above the ear—then feeds into a bun at the nape or just off to one side.
That shape is useful when the dress has one shoulder, a high slit in the fabric, or a neckline that already pulls the eye in a single direction. The hair can match that energy instead of fighting it. One side looks polished and controlled; the other stays a little fuller, which keeps the style from feeling too severe.
I like this option when statement earrings are part of the plan. The braid opens one side of the face, and the bun gives the earring room to show. Keep the bun low and the braid close enough to the scalp that it does not puff out halfway through the day. That part matters.
19. Curly Bridal Center-Part Curls With a Veil
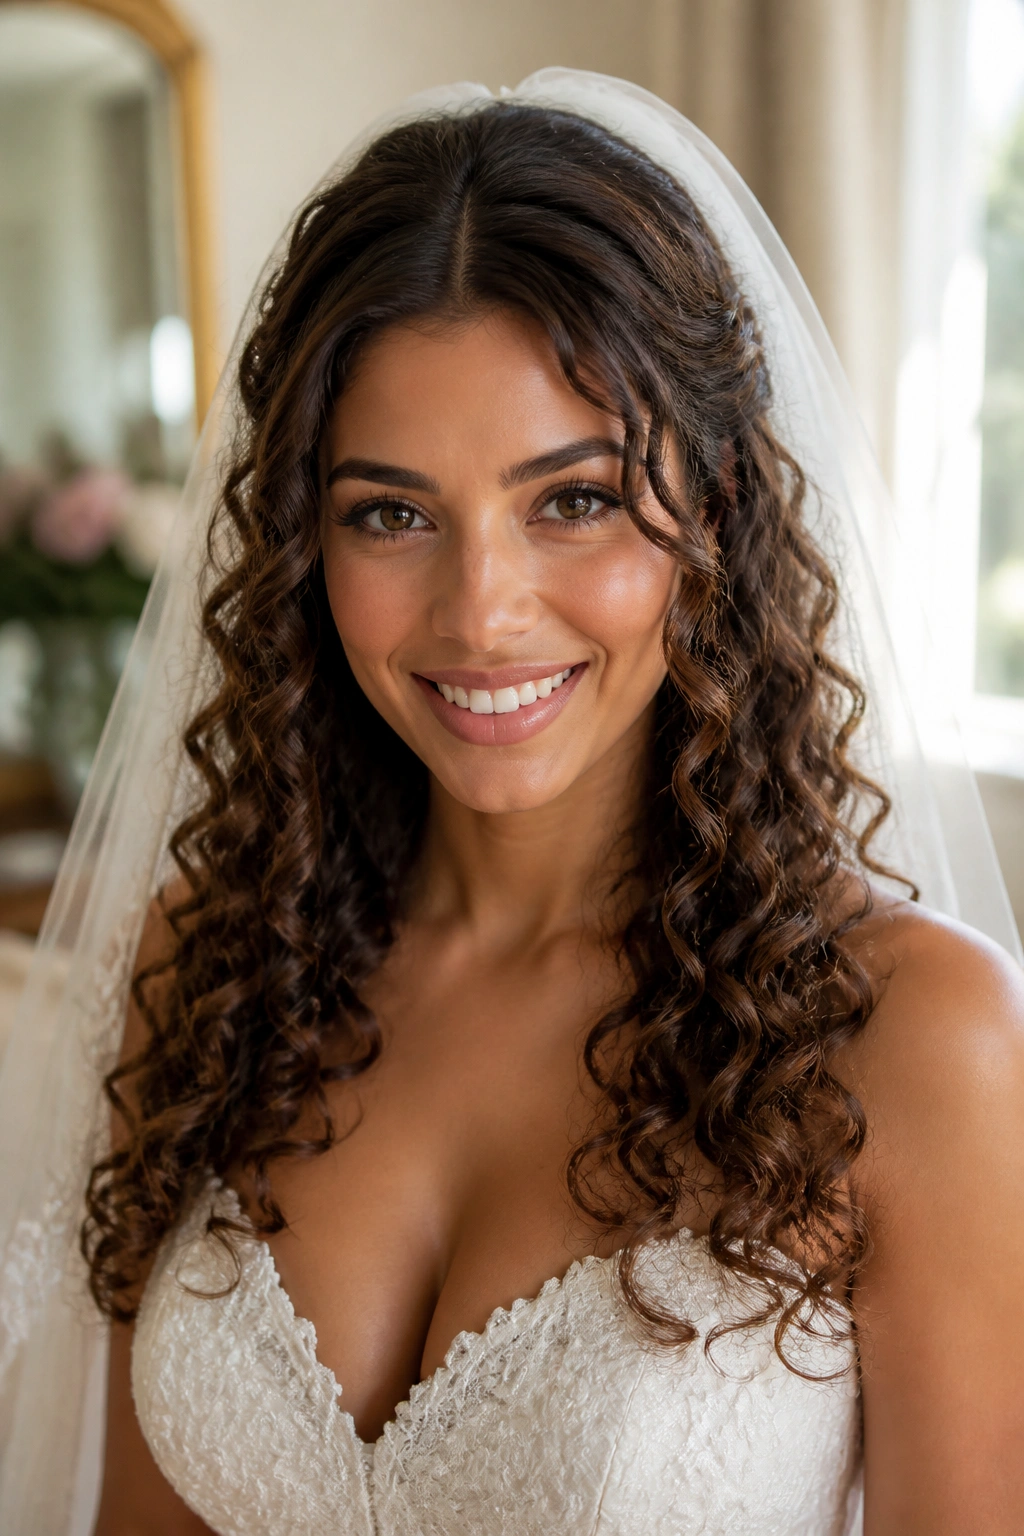
A center part changes the whole mood of bridal curls. It makes the style feel clean and balanced, and it works especially well when the dress already has movement or detail and the hair needs to stay quiet.
The best version keeps the part straight and the roots smooth, then lets the curls fall in even sections on both sides of the face. A veil can sit 1 to 1.5 inches behind the part so the front stays visible instead of buried under fabric. That small distance makes a bigger difference than people expect.
Why It Works
The symmetry gives the curls a frame, and the frame makes the hair look more finished. A center part also works well if you want to tuck one side behind the ear with a comb or a small clip.
- Smooth the roots with a light cream before drying.
- Define the ends so they do not frizz out first.
- Set the veil slightly back from the part.
- Use one small accessory, not three.
Tip: Keep the part crisp. A crooked center part ruins the whole illusion.
20. Messy Curly Bun With Face-Framing Pieces
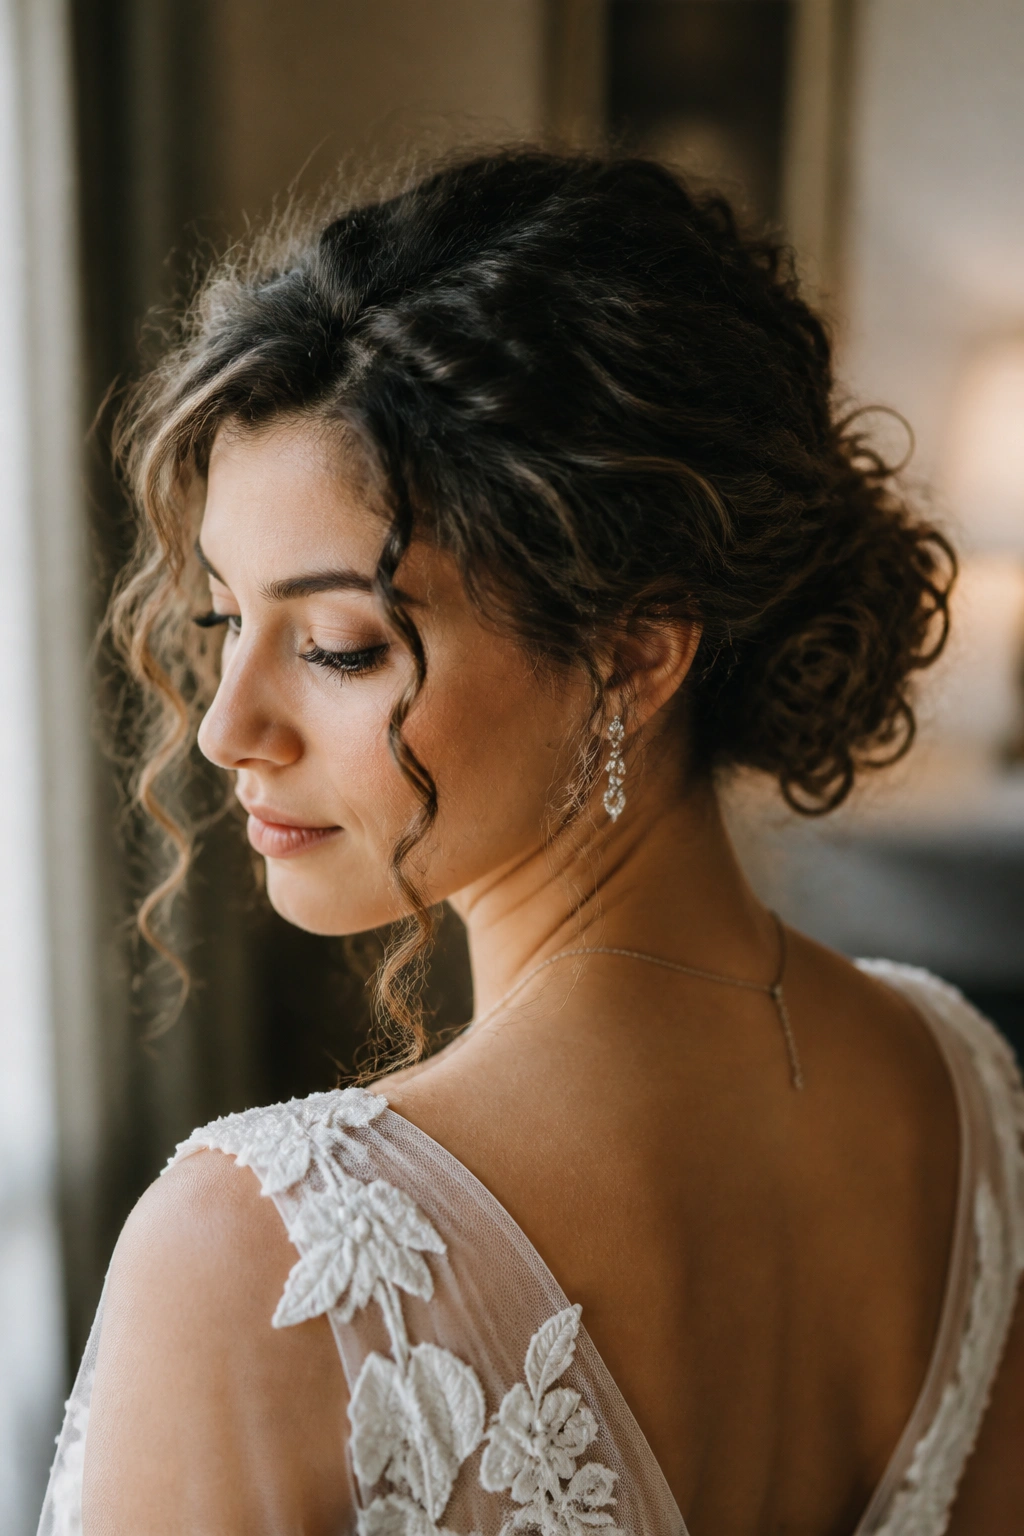
The messy bun gets a bad name because too many people make it look accidental. A good curly bun is not accidental. It is controlled looseness, and that’s a very different thing.
Gather the curls at the nape or a little higher, then pin them into a loose bun that still shows texture at the edges. Leave two face-framing pieces out, one on each side, and soften the crown with your fingertips instead of a brush. You want movement near the top, not a halo of frizz.
This style is especially useful if the hair has second-day texture or if the curls are naturally airy and soft. It also gives you a place to tuck a comb or a few tiny pins without changing the shape. The messy part should stay in the bun itself, not around the hairline. That is the line.
21. Old-Hollywood Glam Waves on Natural Texture
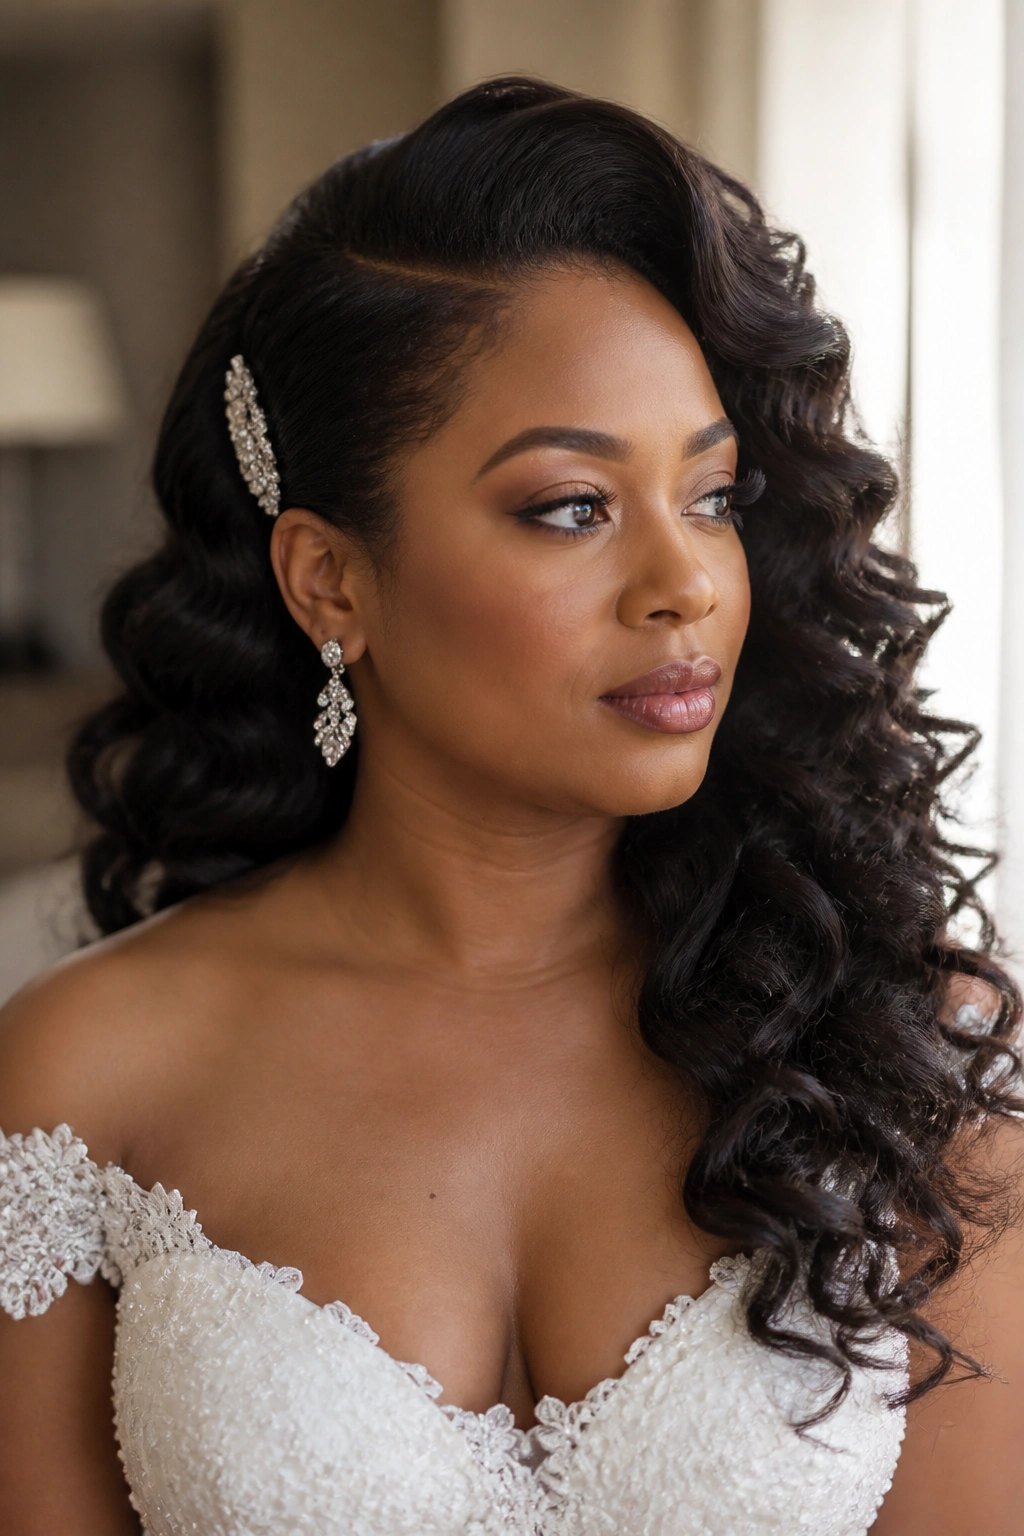
Do glam waves have to flatten curls? Not if you set them with enough shape and let them cool before you touch them. The trick is to treat the curls like the base of the wave, not something to erase.
A side part usually gives the look the right direction. Then the front and outer layers get set in larger sections, brushed into soft waves, and pinned while they cool so the shape holds. On curly hair, the result is usually richer than it is on straight hair, because the texture underneath gives the wave more body.
How to Wear It
Keep one side tucked low with a jeweled clip or comb, and let the other side fall over the shoulder. A shine spray can help, but only at the surface. If you spray the roots, the volume disappears and the whole thing turns limp.
This look is for the bride who wants polish but still wants hair that moves when she turns her head. That small swing matters.
22. Defined Natural Curls With a Jeweled Comb
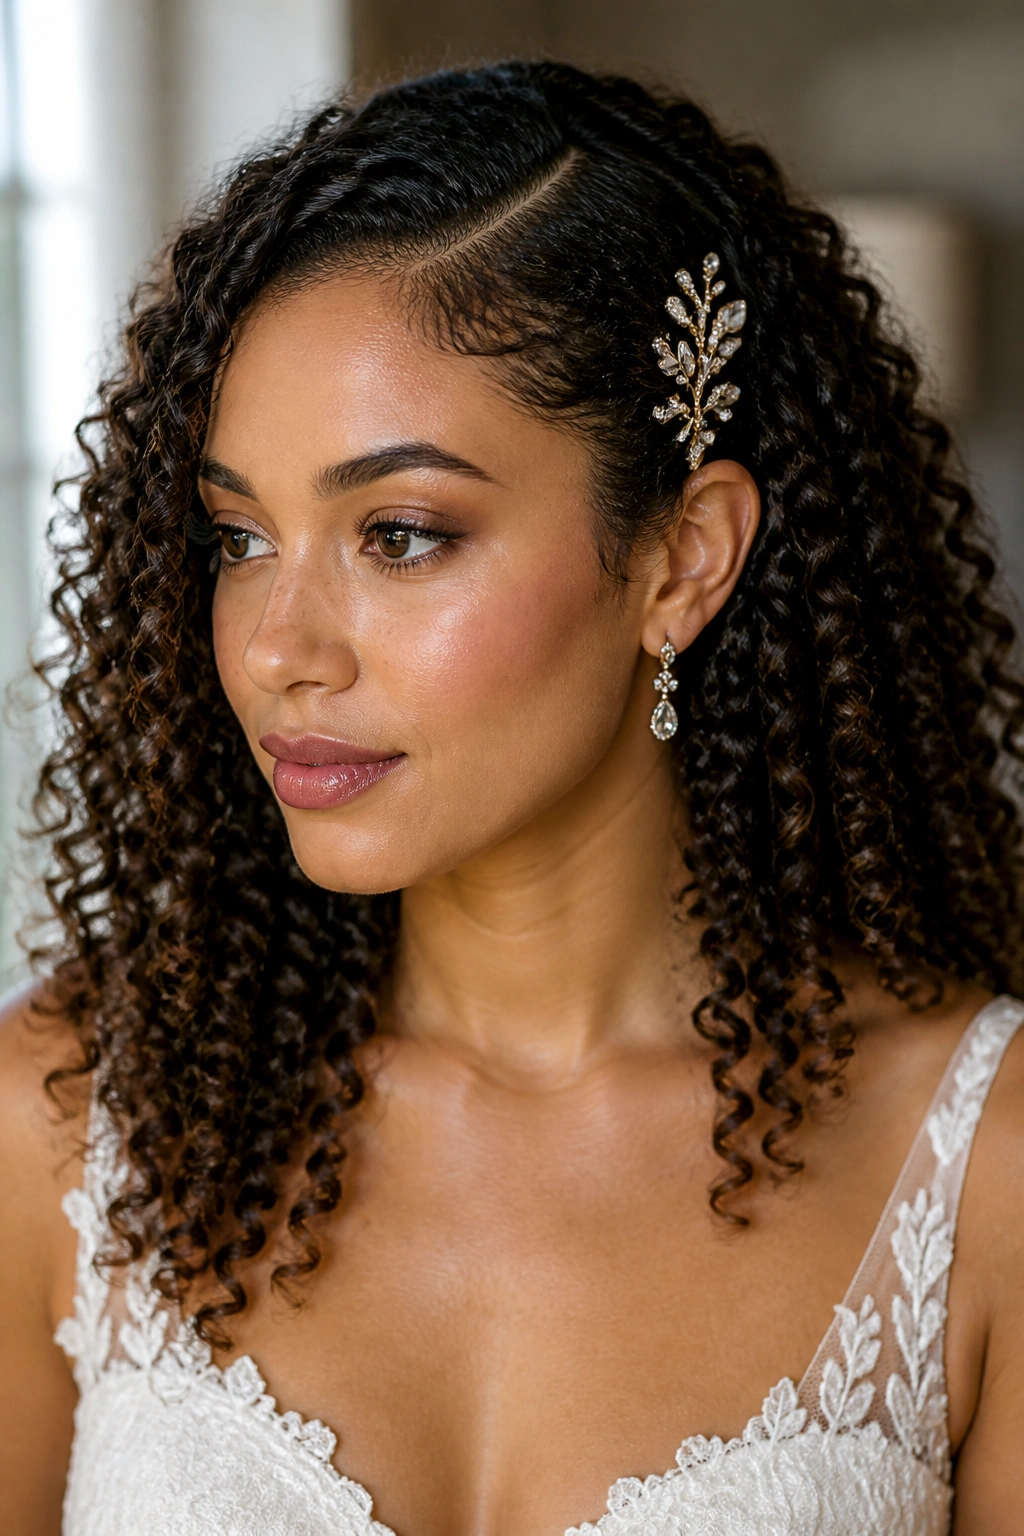
Some brides should not hide the curl pattern at all. When the curls are healthy, defined, and shaped well, wearing them down can be the strongest choice in the room.
The trick is to make the curls look finished, not pushed into a fake shape. A clean part, a good trim, a little curl cream, and a jeweled comb tucked just above one ear can do the work of a much more complicated style. The comb is there to guide the eye, not to cover the hair. That’s the mistake people make. They think the accessory needs to be big. It doesn’t.
If your curls look best after they have settled for a few minutes, that is normal. Let them breathe before you add the accessory, and do one last shape check in natural light. If the hair still feels like you after a hug, a few photos, and a slow dance, you’ve probably chosen well.
