



Brown hair is often treated like a blank canvas that simply needs to be lightened, but there is a persistent challenge that almost everyone with dark hair encounters. As soon as you begin lifting your natural color, it reveals the hidden warmth—the oranges, the reds, the coppers. Neutralizing that warmth is the primary goal when you are aiming for ash tones. An ash highlight isn’t just a color choice; it is a color correction.
When you commit to an ash palette on a brown base, you are essentially cooling the entire spectrum of your hair. This requires a different approach than standard golden or honey highlights. You aren’t just adding brightness; you are actively fighting the natural pigment of your hair fiber. It demands specific techniques, consistent maintenance, and a clear understanding of your hair’s porosity. If you get it right, the result is a sophisticated, lived-in look that feels expensive and intentional.
There is a misconception that ash highlights look the same on everyone. In reality, the spectrum ranges from soft, dusty taupe to sharp, icy charcoal. Whether your natural brown is a deep espresso or a lighter mocha, there is an ash variation that will complement your skin tone without washing you out. Here are fifteen ways to approach this cool-toned transformation, focusing on different placement strategies, contrast levels, and technical applications.
1. Mushroom Brown Balayage
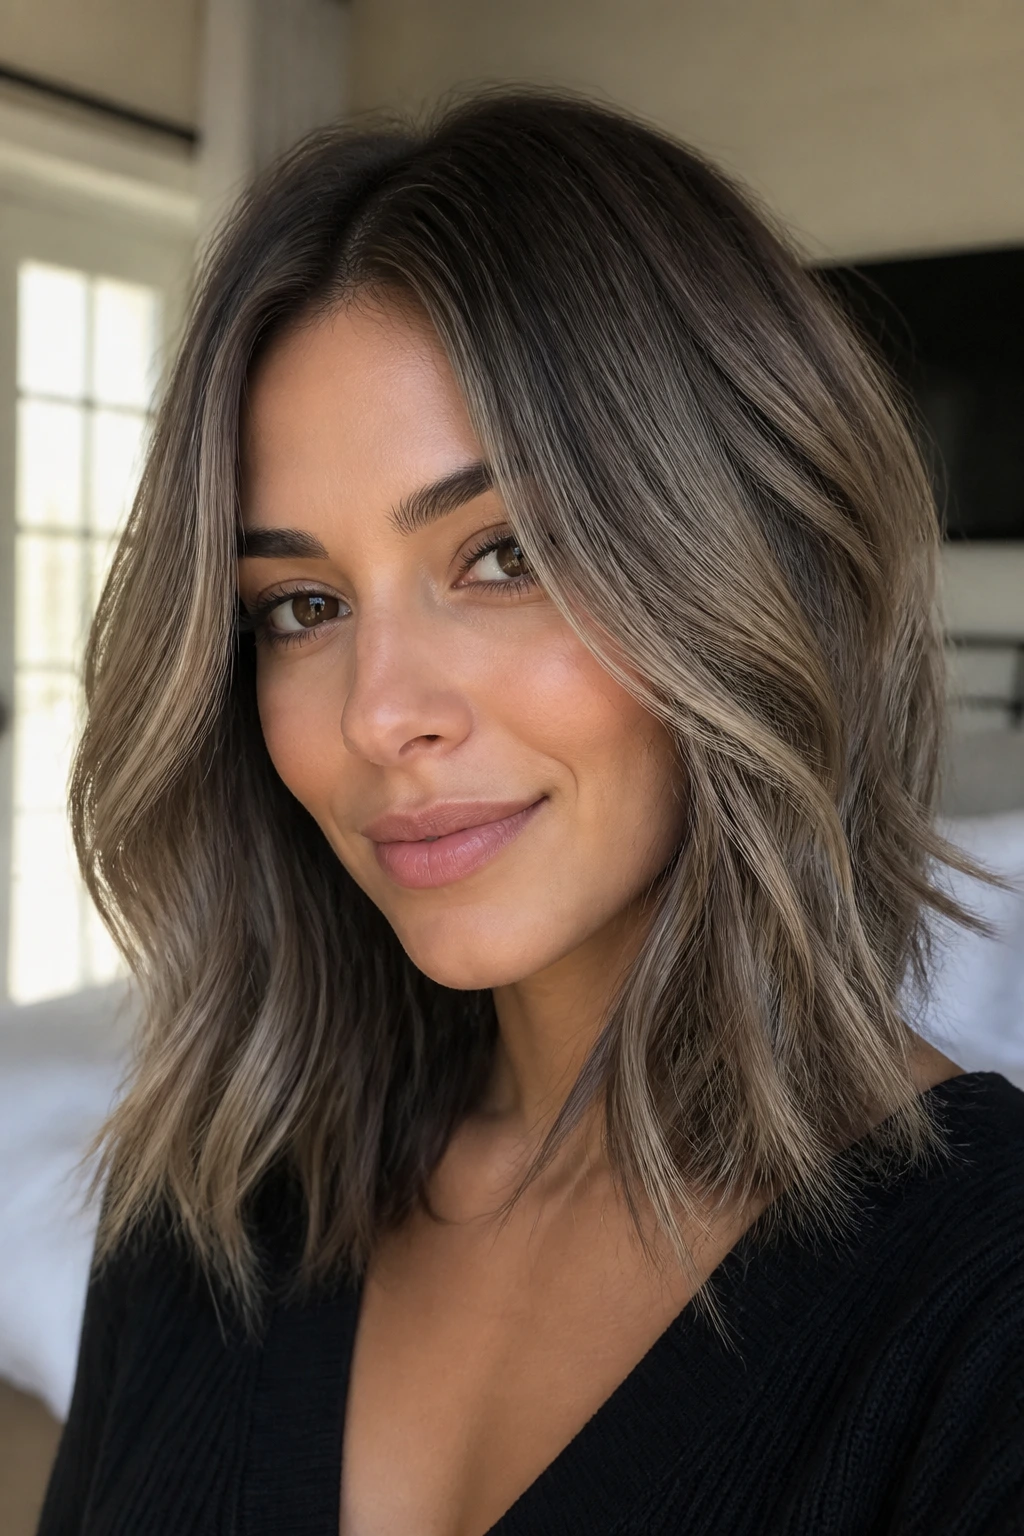
Mushroom brown is essentially a cooler, earthier take on the classic brown highlight. It avoids the yellow or red undertones that typically appear when you lighten dark hair. Instead, it leans into slate, grey, and neutral beige shades. This look is perfect for someone who wants dimension without looking like they have visibly blonde hair.
The key to this look is the blend. You want the highlight to be close to your base color—perhaps only two or three levels lighter. When the colorist paints these onto the hair using a freehand balayage technique, they are aiming for a soft, diffused effect rather than harsh lines. It creates a smoky, multidimensional finish that looks incredibly natural, especially in low light.
Maintenance for this style is surprisingly manageable. Because the contrast between your roots and the ash highlights is minimal, you do not need to worry about a harsh grow-out line. A professional violet-based gloss every six weeks is usually enough to keep the mushroom tones from fading back into warmth.
2. Face-Framing Silver Ribbons
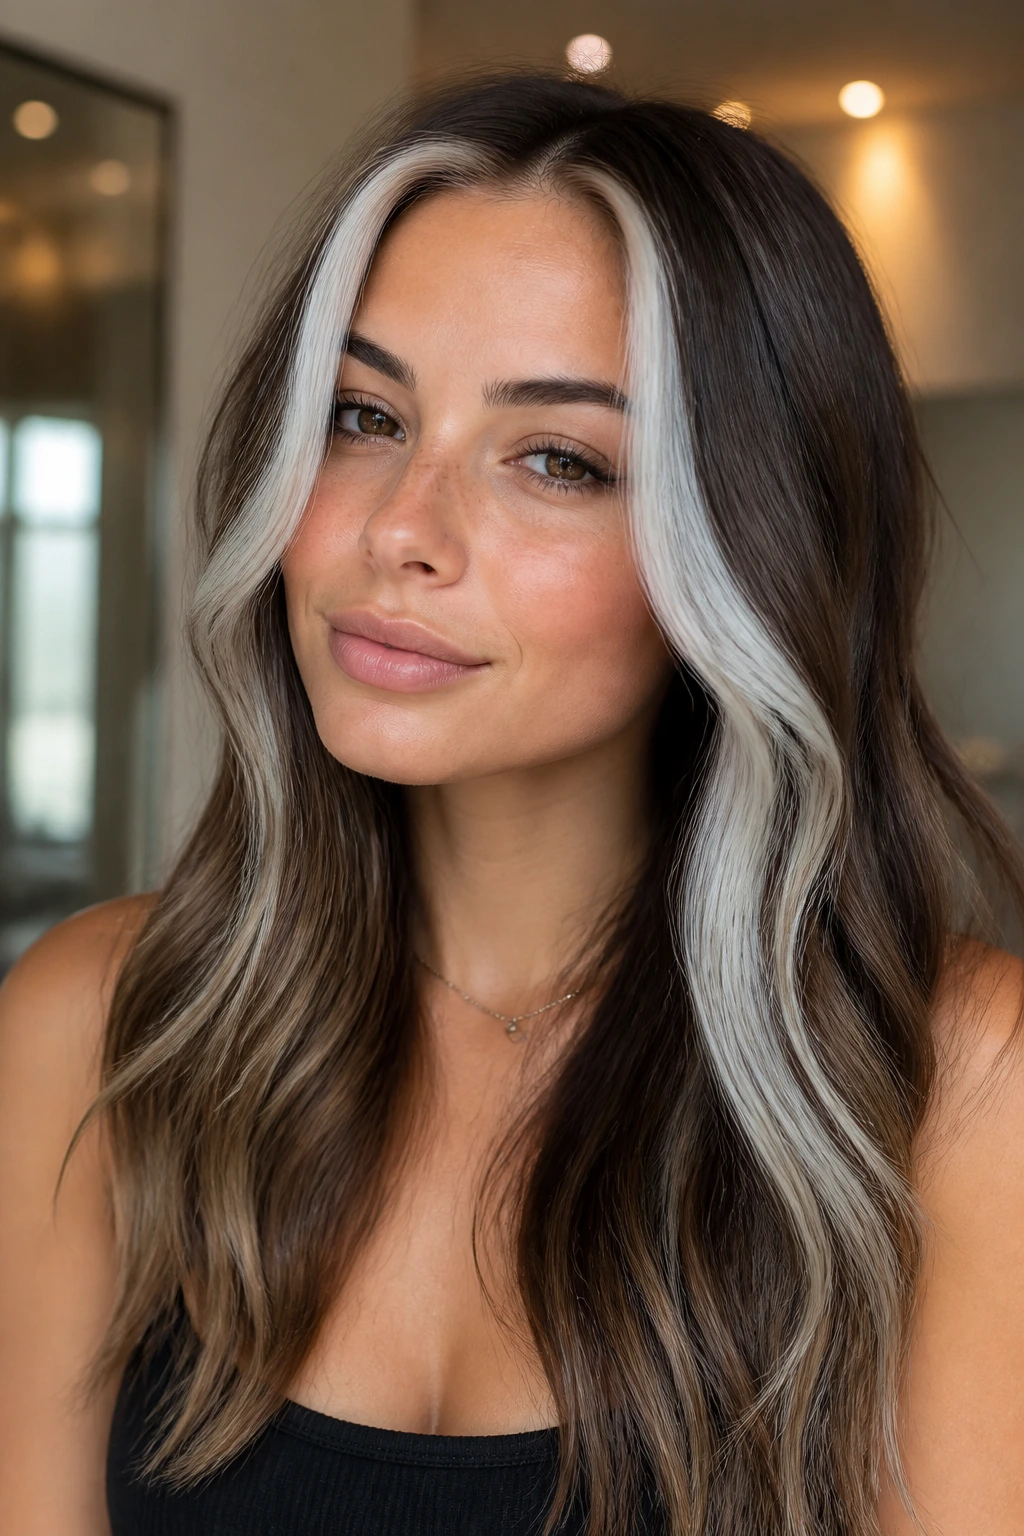
If you want to make a statement, this is the way to do it. Unlike standard balayage that blends throughout the hair, this technique focuses the intensity of the color around the face. The goal is to isolate two thick, ribbon-like sections on either side of your part and bleach them to a very pale, platinum-ash level.
Why This Technique Works
- It draws light directly to the face, which can brighten your complexion.
- The contrast between the dark roots and the near-white ash is stark and modern.
- It requires less total processing time since you are only bleaching specific sections.
You must be prepared for the upkeep. Because these pieces are bleached to a very light level, they are the first to lose their toner. You will need to use a high-quality purple shampoo at least once a week to keep the silver from turning a dull, buttery yellow. If the silver starts to look flat, a quick clear gloss can bring back the shine.
3. Ash-Platinum Babylights
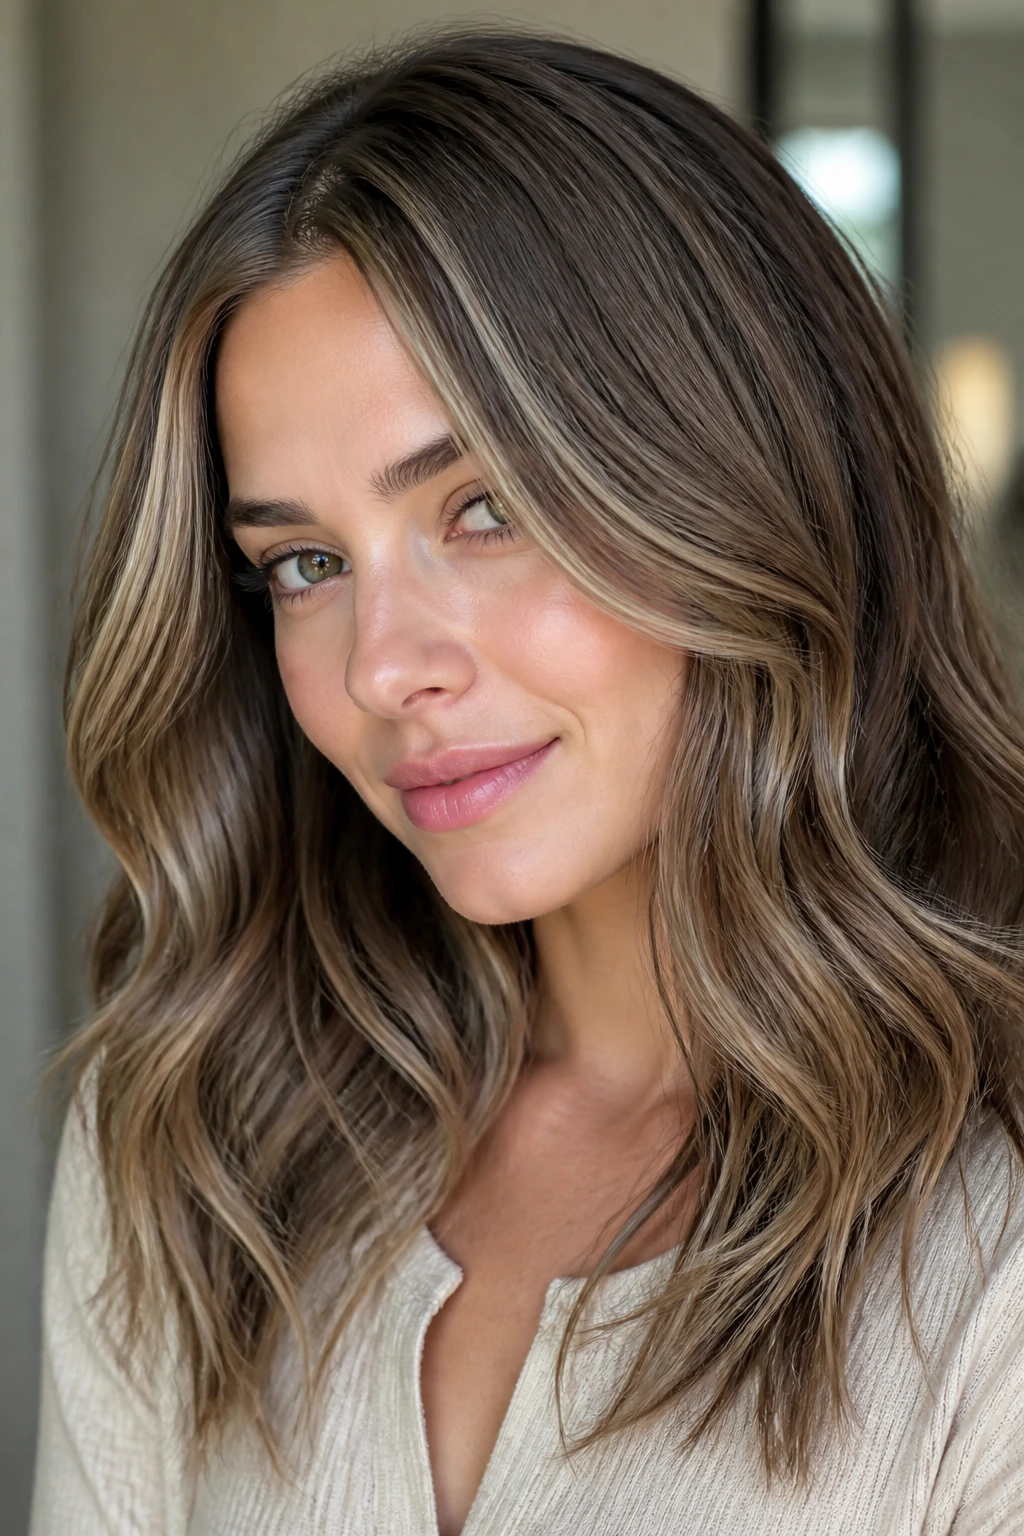
Babylights are fine, delicate highlights that mimic the way hair lightens naturally in the sun. When you execute these using an ash-platinum shade on a brown base, the result is a soft, shimmery veil of light. It breaks up the heaviness of a dark, one-dimensional base without creating thick, chunky stripes.
This is a technical service. Your colorist must use a fine weave and pack the foils closely together near the roots to ensure the blend is seamless. If the sections are too large, the look becomes “zebra-striped,” which is exactly what we are trying to avoid.
The Technical Details
- Density: The foils should be placed very close together, usually leaving only a hair-thin section of natural brown between each packet.
- Toning: This is the most critical step. After lifting the hair to a pale blonde, you must use an ash toner to cancel out remaining yellow.
- Processing Time: Because the sections are so fine, they process quickly. Watch the foils carefully to prevent over-processing the fragile baby hairs.
4. Charcoal Balayage on Deep Espresso
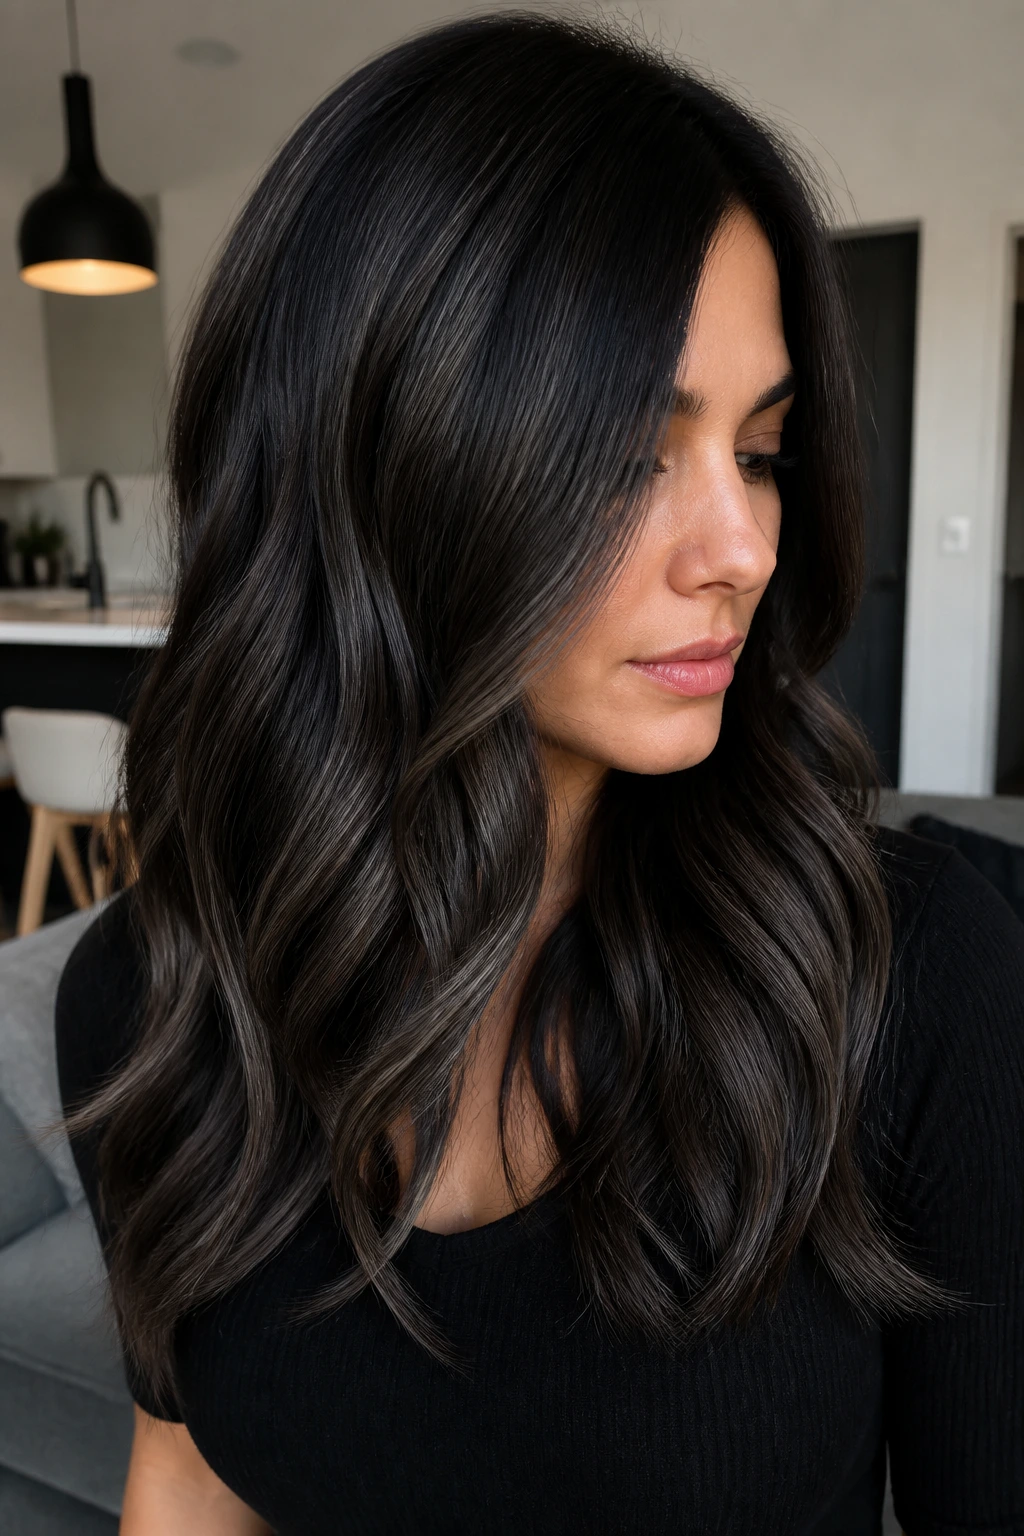
Some people want the drama of high contrast without going fully blonde. A charcoal balayage on a near-black or deep espresso base is the epitome of edge. This is not about lightening the hair to beige; it is about pushing the highlights toward a deep, slate-grey, almost metallic finish.
The appeal of this look lies in its coolness. It’s a “winter” color palette. The charcoal doesn’t fight your dark base; it complements it. When the light hits your hair, you get subtle, moody grey reflections rather than glaringly bright blonde ones.
Technically, this requires a significant lift. You must bleach the hair to a level where the underlying red/orange pigment is almost entirely gone, then deposit a cool, slate-toned demi-permanent color. If you don’t lift enough, you won’t get charcoal—you’ll get a muddy brown. Be prepared for a long appointment and a serious hydration routine afterward, as the lifting process can be drying.
5. Cool-Toned Ribbon Highlights
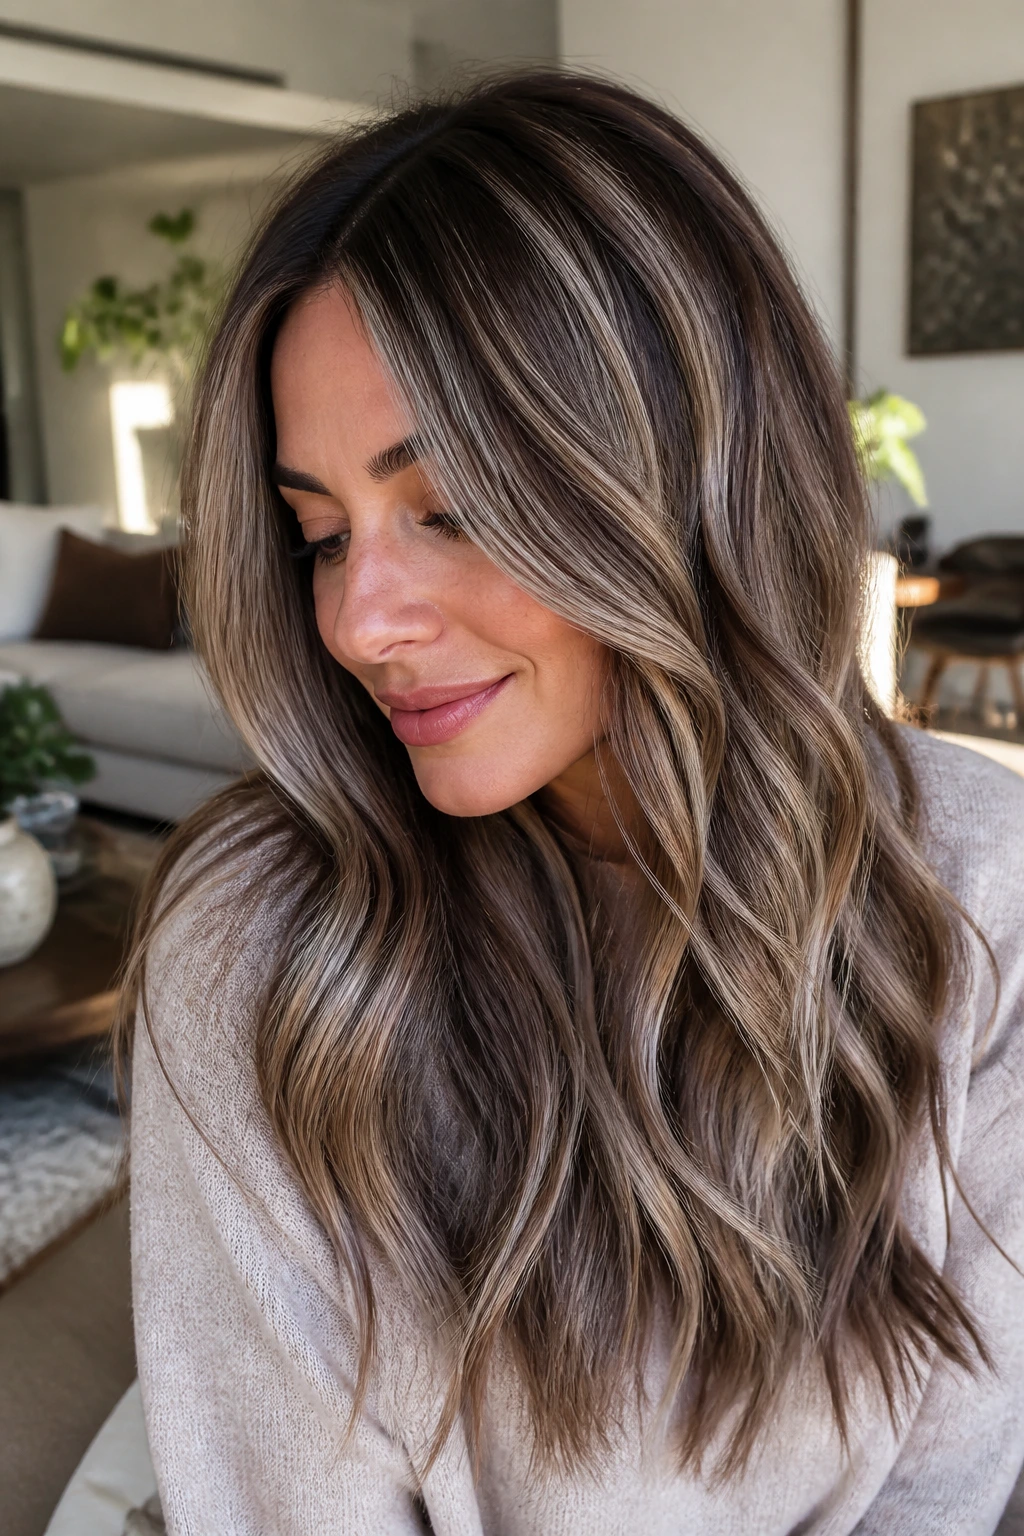
Ribbon highlights are essentially thicker sections of hair that are lightened to provide a more dramatic, visible contrast than traditional balayage. When you select an ash-beige tone for these ribbons, you create a look that feels reminiscent of the 90s, but with a modern, sophisticated color palette.
How to Get the Look
- Ask for “Ribboning”: This is a specific foil technique where the stylist pulls larger sections of hair to create defined light strands.
- Root Smudge: Ensure your stylist does a root smudge after the highlights are applied. This blurs the line where your natural hair meets the highlights, preventing that dreaded “grow-out band.”
- Toner Choice: Request a “cool beige” or “sand ash” toner. Avoid “icy” or “silver” if you want something a bit more approachable and less jarring.
These ribbons look incredible when you curl your hair with a large-barrel iron. The texture allows the light and dark sections to intermingle, creating a complex, swirling effect that looks much more expensive than a simple highlight job.
6. Ash-Taupe Teasy-lights
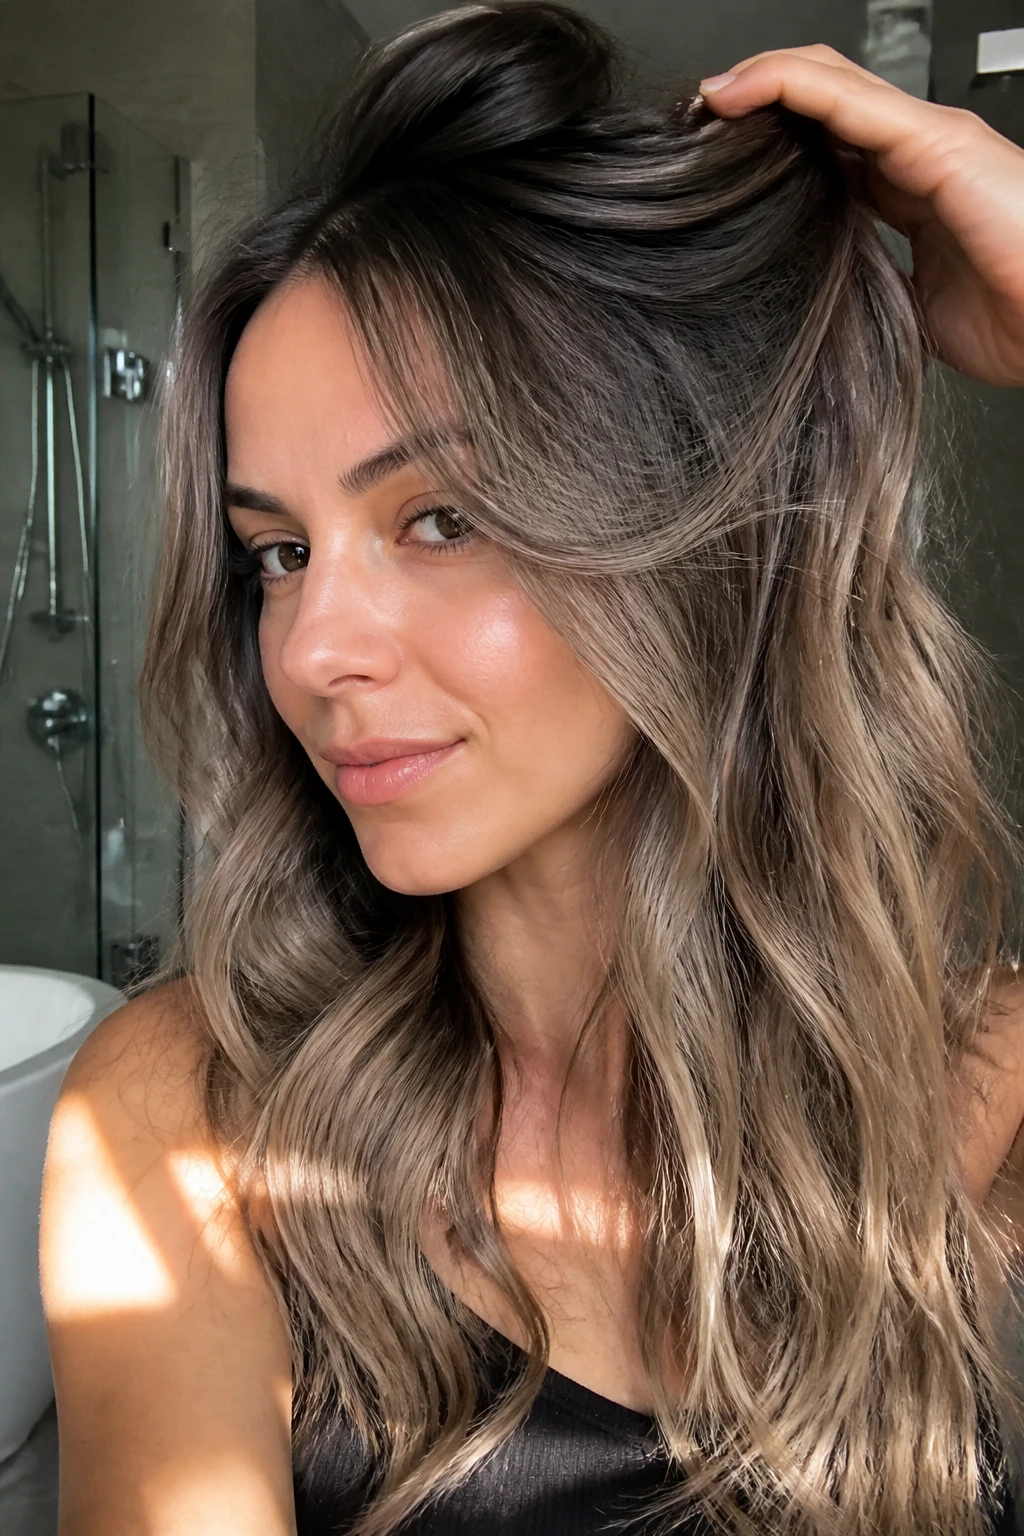
Teasy-lights are a brilliant invention for those who want a lived-in, low-maintenance look. The technique involves backcombing (teasing) the section of hair before applying lightener. This backcombing creates a gradient—the lightener doesn’t reach the root, resulting in a soft, diffused transition rather than a hard line.
When you use an ash-taupe shade for these teasy-lights, you are playing into a very chic, understated aesthetic. Taupe is the bridge between grey and brown. It isn’t as cold as silver, but it’s definitely not warm. It sits perfectly in that neutral, cool-leaning zone.
The beauty of this method is the longevity. Because you haven’t bleached the roots, you can go four to six months between sessions. The highlights grow out naturally, moving down the hair shaft as your hair grows, which means you aren’t tied to the salon chair every eight weeks.
7. Icy Espresso Contrast
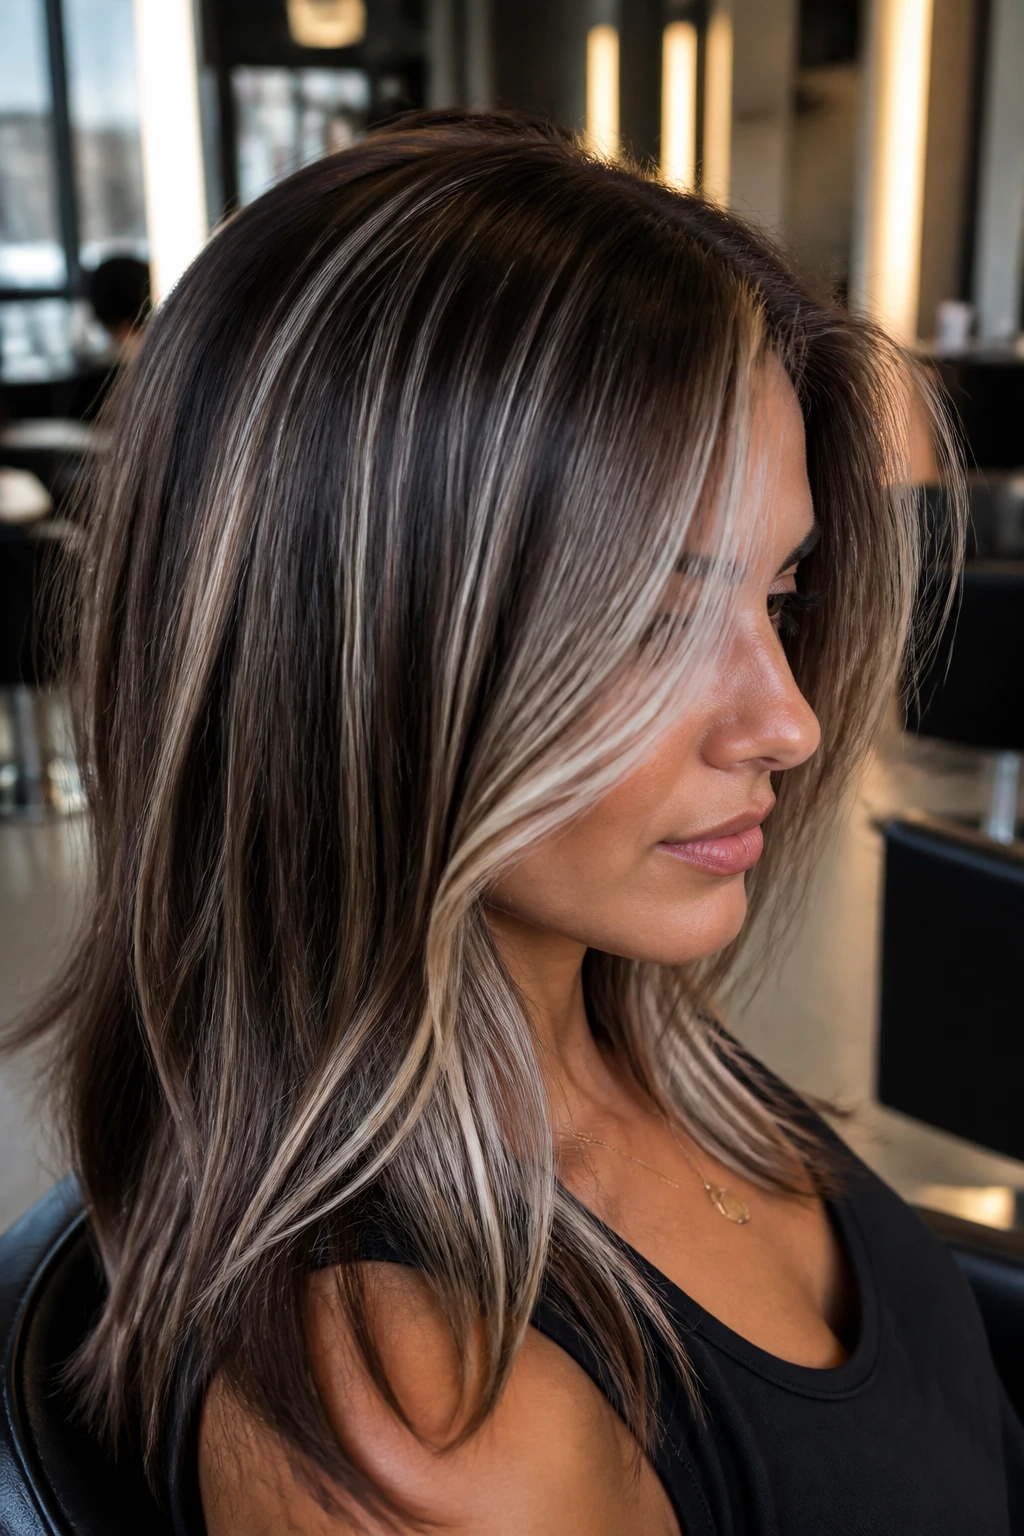
If you have very dark brown hair and you aren’t afraid of contrast, this style is for you. It involves placing very bright, icy-ash blonde highlights against an otherwise untouched, deep brown base. It isn’t about blending; it’s about creating a sharp, intentional clash.
What to Ask For
- High-Contrast Foil Placement: You want the highlights to be noticeable, so the placement shouldn’t be overly feathered.
- Cool-Toned Gloss: The toner must be aggressively cool. Think violet-blue bases to ensure that when the hair fades, it stays in the silver family rather than turning brassy.
This look can be high maintenance. The contrast is the point, and as soon as your roots grow out, the geometry of the style changes. If you are the type of person who likes to be in the salon regularly, this is a great option. If you prefer to stretch your appointments, you might find the grow-out phase frustrating after three months.
8. Subtle Ash-Grey Ombre

Ombre is a gradient style where the hair transitions from dark at the roots to light at the ends. By using an ash-grey palette, you turn a classic style into something moody and ethereal. This works best if you keep the transition point relatively low—think about mid-shaft to ends—to keep the roots dark and natural.
This is a safer option for those who are worried about root maintenance. You are basically keeping your natural color for the top 50% of your head. The bottom 50% is where the ash-grey impact happens.
The biggest mistake people make with this look is not lifting the ends enough. You need to get the ends to a level 9 or 10 (very pale blonde) to achieve a true ash-grey result. If you stop at level 7 or 8, your grey will look like a dull, flat brown. Don’t be afraid to ask your stylist for a bond-builder treatment to keep those ends from snapping during the lightening process.
9. Pearlescent Ash Highlights
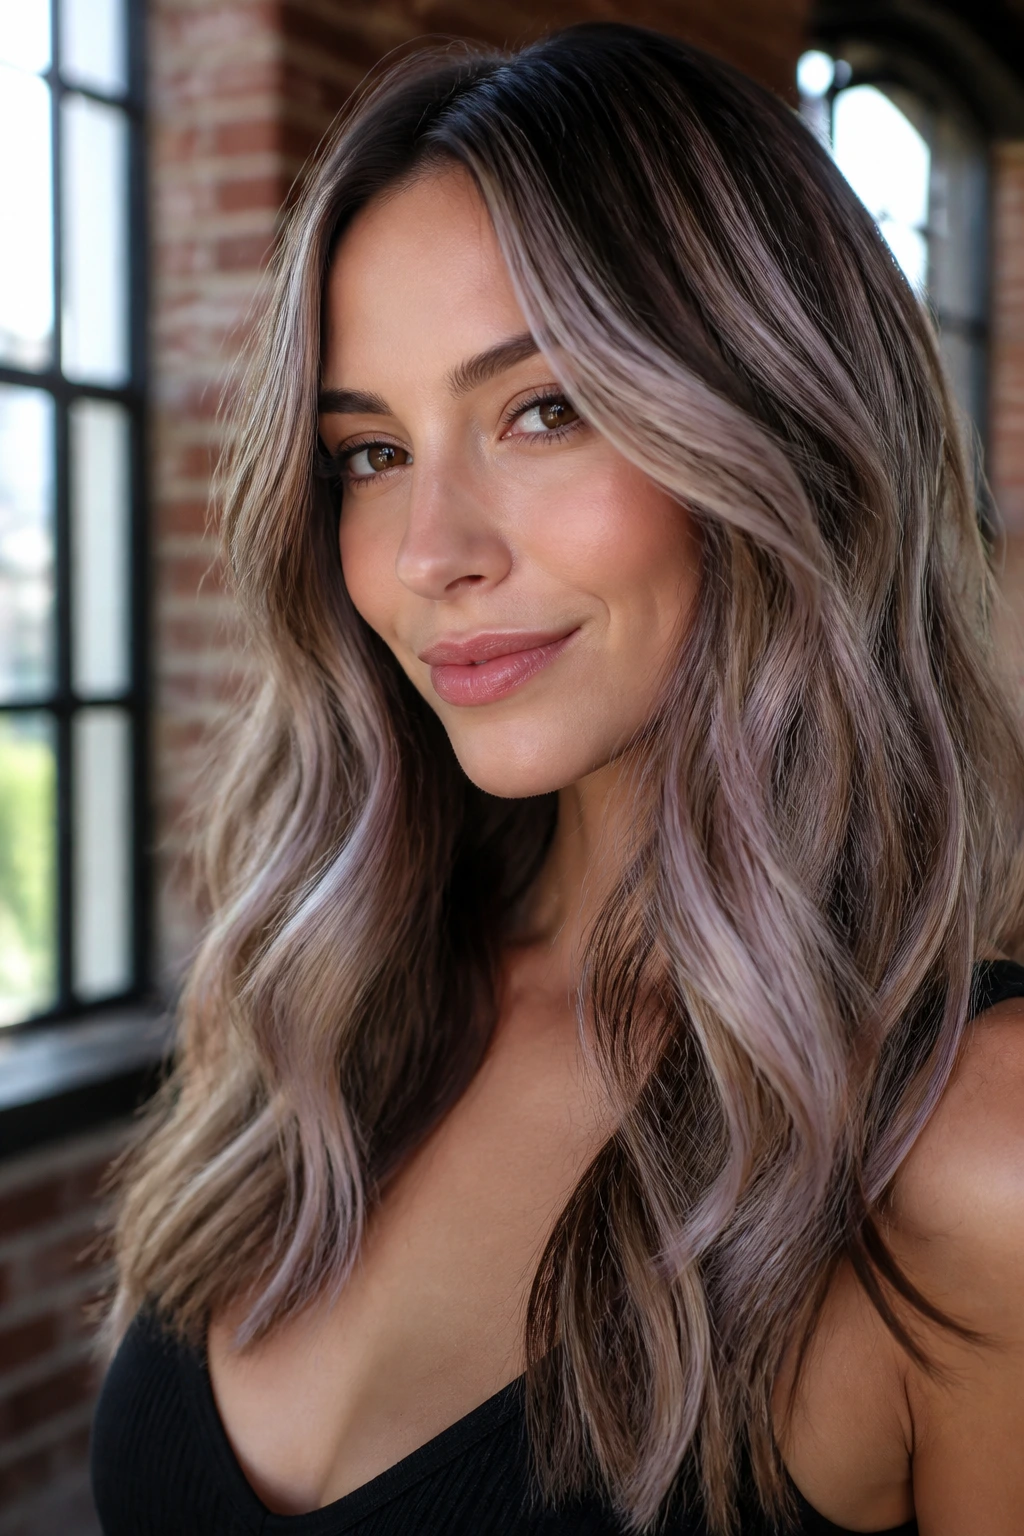
Pearlescent ash is a slightly more editorial take on the cool-toned trend. It involves a mix of ash-blonde highlights with a hint of iridescent, almost lavender-grey sheen. It is multidimensional and captures light in a unique way, looking different in direct sunlight than it does indoors.
This effect is achieved through custom toning. Your stylist will mix an ash toner with a tiny drop of violet or pearl pigment. It’s a delicate balance. Too much pigment and you’re in fashion-color territory; too little and it just looks like regular ash blonde.
This look works best on medium-brown hair that has enough depth to provide a strong background for the “pearl” reflections. It is a fantastic choice if you find standard ash blonde to be a bit too flat or dull for your liking.
10. Ash-Brown Weaves
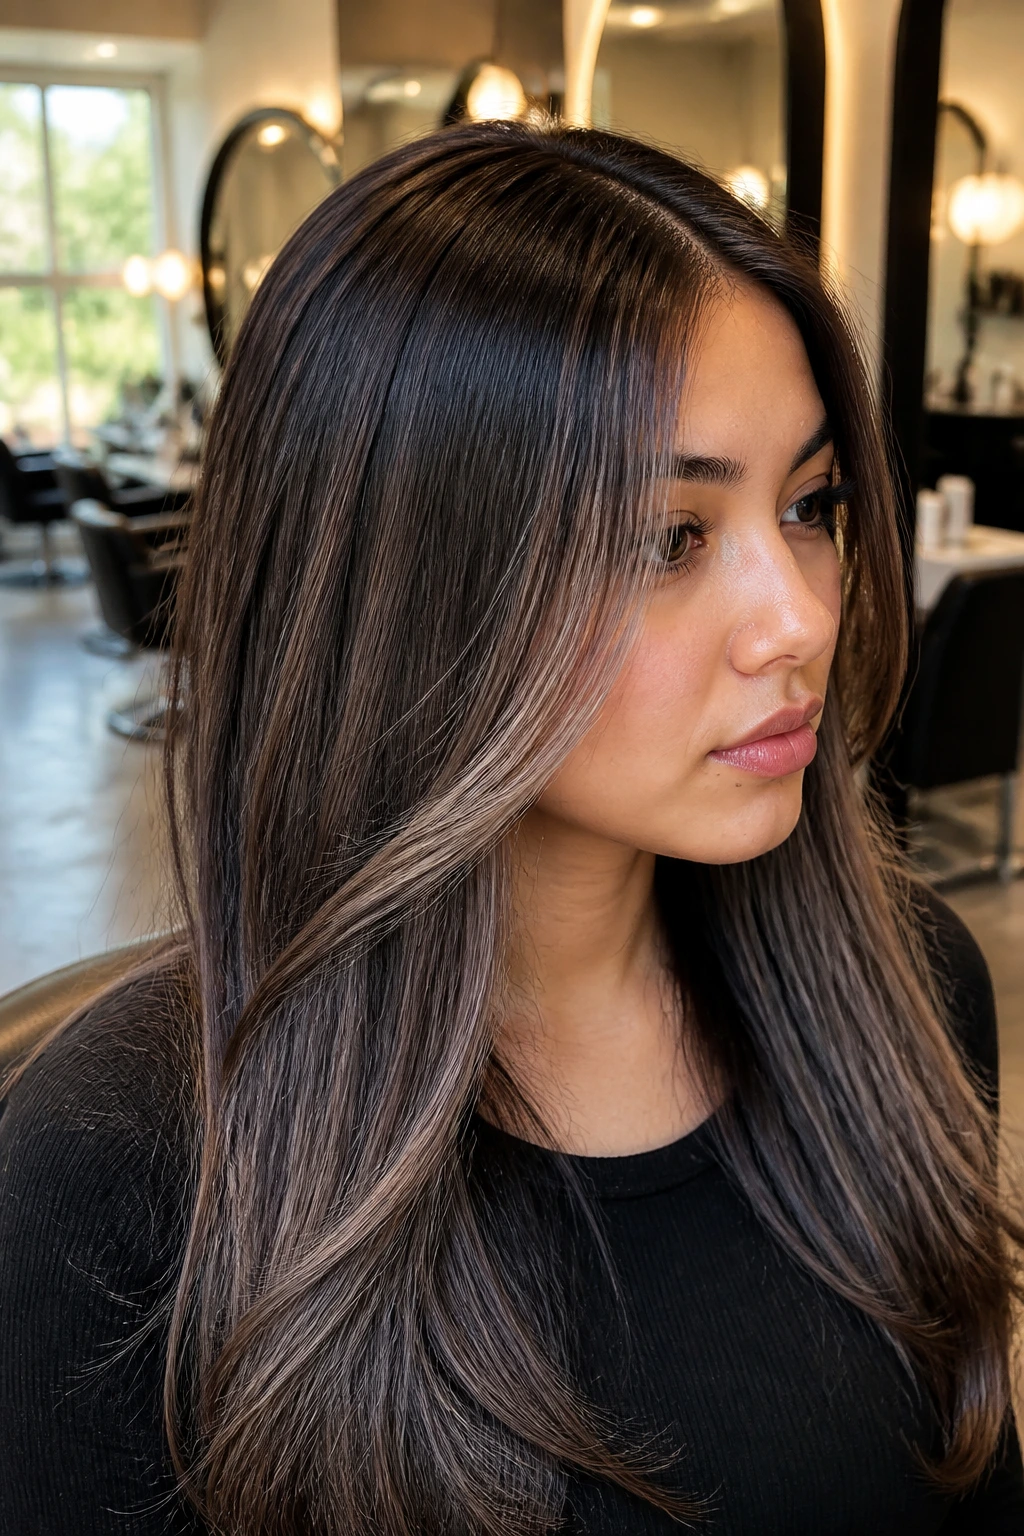
This is a classic technique, updated for modern tastes. “Weaving” is a traditional highlight method where you pull fine, thin sections of hair through a foil. When you weave a cool, ash-brown or dark-blonde shade into a dark brown base, you add incredible depth and volume.
It doesn’t scream “I got highlights.” Instead, it says, “I have naturally thick, multidimensional hair.” Because you are staying within a few levels of your base color, the hair health remains much better than if you were going for platinum.
Maintenance Tips for Weaves
- Glazing: Use a clear or lightly tinted ash glaze every two months to keep the “weave” looking fresh and shiny.
- Volume: Use volumizing shampoos. Because the highlights add slight texture to the hair cuticle, they actually help your hair hold a style better than virgin, slick hair.
11. Money Piece Ash
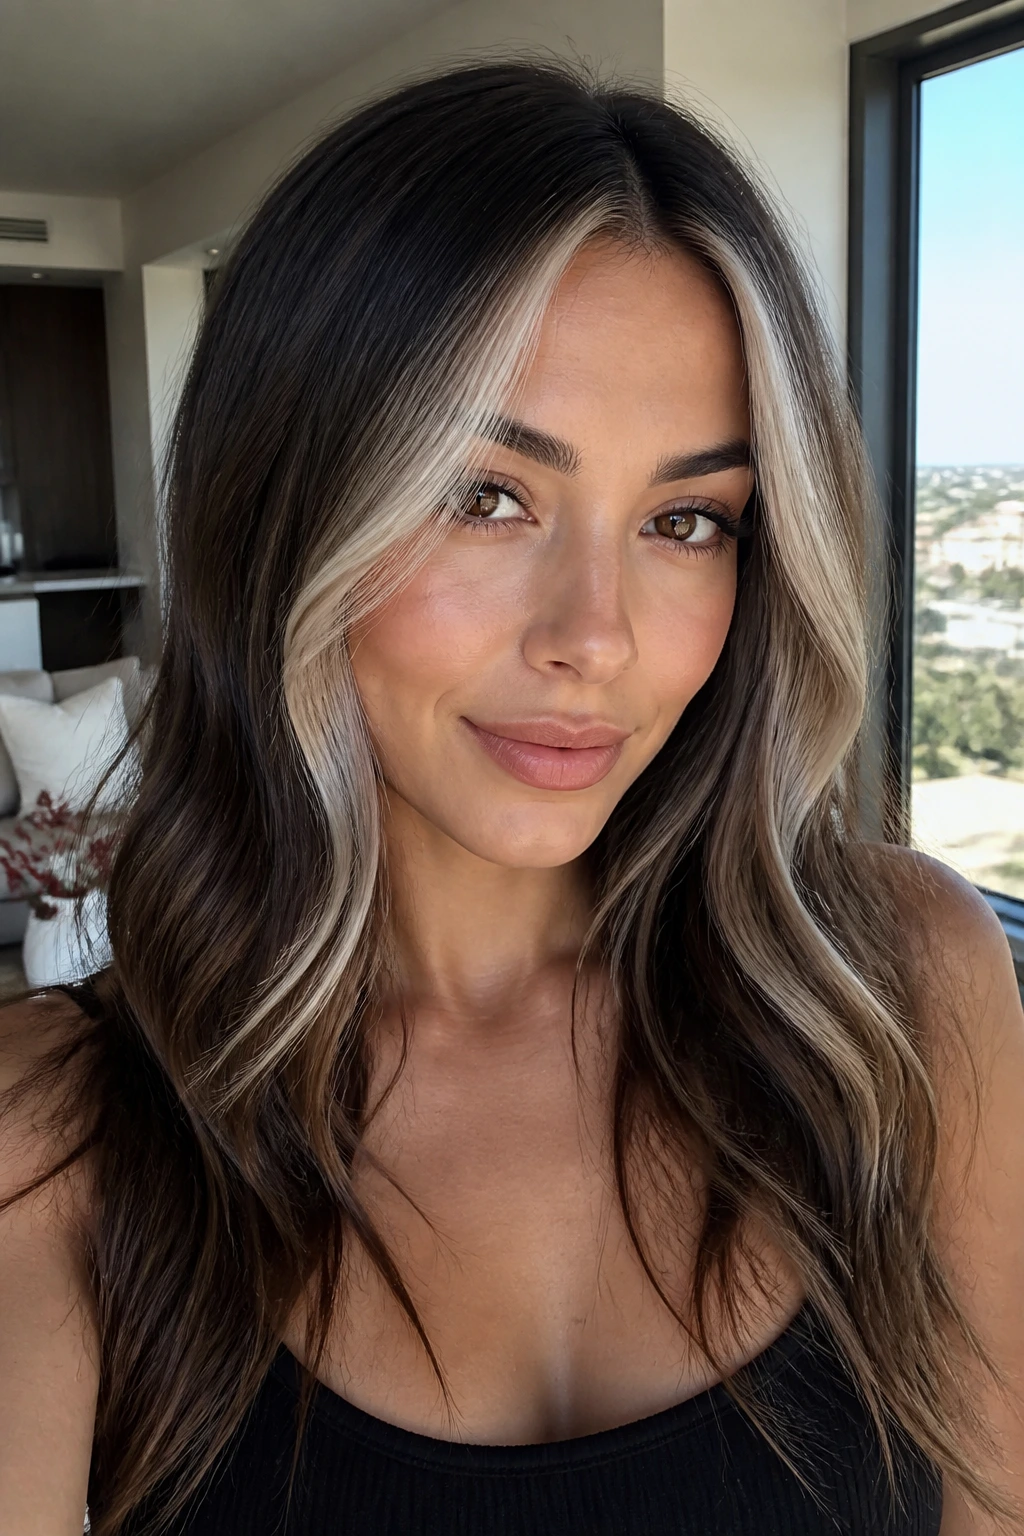
The “money piece”—the trend of focusing bright, high-contrast light around the face—is not going anywhere. When applied with ash tones, it frames the face with a cooling, brightening effect that can make tired skin look vibrant. It is the fastest way to change your look without dyeing your entire head.
You can do this with either a soft ash-beige or a striking, platinum-ash. The soft ash-beige is more “lived-in” and subtle, while the platinum is bold. If you are new to lightening your hair, start with the softer ash-beige money piece.
It requires very little hair to be processed, which means it’s a quick salon visit. Just remember that the hair around your face is often the most fragile. If your hair is already compromised from heat styling, ask your stylist to use a lower volume developer and a bond-builder additive to ensure the integrity of those face-framing strands.
12. Smoky Plum-Ash

This is for the person who loves cool tones but wants a little bit of personality. Adding a hint of plum or violet into your ash highlights creates a “smoky” effect. It is not a bright purple; it is a muted, sophisticated, deep violet-ash that looks incredibly elegant on brunette hair.
The science behind this is color theory. Violet is the direct opposite of yellow on the color wheel. By incorporating a violet-ash, you are automatically neutralizing any brassiness. It’s a self-correcting color in a way. As it fades, it just becomes a beautiful, clean ash-blonde.
It’s an excellent way to transition away from red or copper tones if you’ve had them in the past. If you’ve spent years trying to get rid of red and are struggling, a violet-ash highlight will swallow those warm tones and leave you with a cool, moody finish.
13. Ash-Bronde Slices
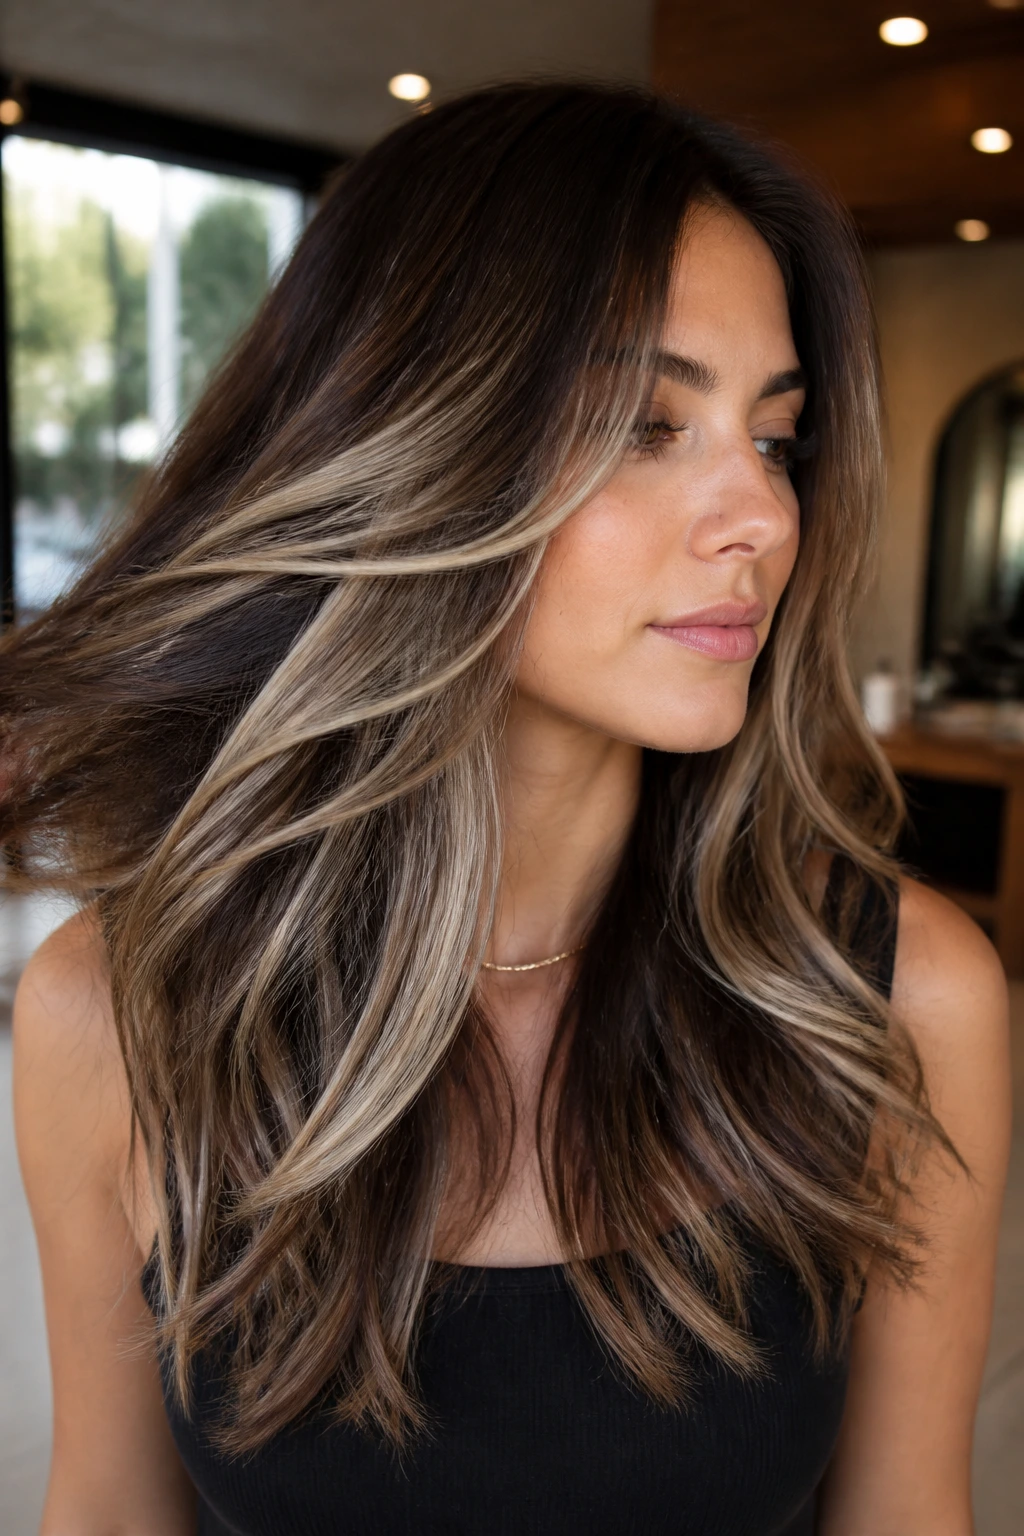
“Bronde”—the marriage of brown and blonde—is a staple for a reason. By making it “ash-bronde,” you avoid the honey and gold tones that often accompany this style. Instead of honey, think of sandy, muted tones.
The “slice” technique involves taking larger, flatter sections of hair to highlight. Unlike the “weave” method which is fine and subtle, the “slice” creates larger blocks of lighter hair. When done correctly, these slices blend beautifully with the darker base, creating a high-contrast look that feels very contemporary.
This style looks particularly good on long, layered hair. The layers interact with the slices, revealing different depths of color as your hair moves. It is a very dynamic style that looks great in movement.
14. Frosted Ends

If you want to try ash highlights but aren’t ready to commit to the maintenance of roots, try “frosted ends.” This is a concentrated, lighter-ash application on the bottom two to three inches of your hair. It’s a modern, sophisticated take on the old-school dip-dye, but with a much softer, more feathered transition.
The secret to making this look modern is the “feathering” or “teasing” at the transition point. You don’t want a horizontal line where your hair color changes. You want the light ash to bleed up into the dark brown in thin, wispy pieces.
This is a low-commitment style. If you decide you don’t like it, you can simply trim the ends off after a few months. It’s a great way to “test drive” how your hair reacts to the lifting process without risking the health of the hair closer to your scalp.
15. Root-Melded Ash
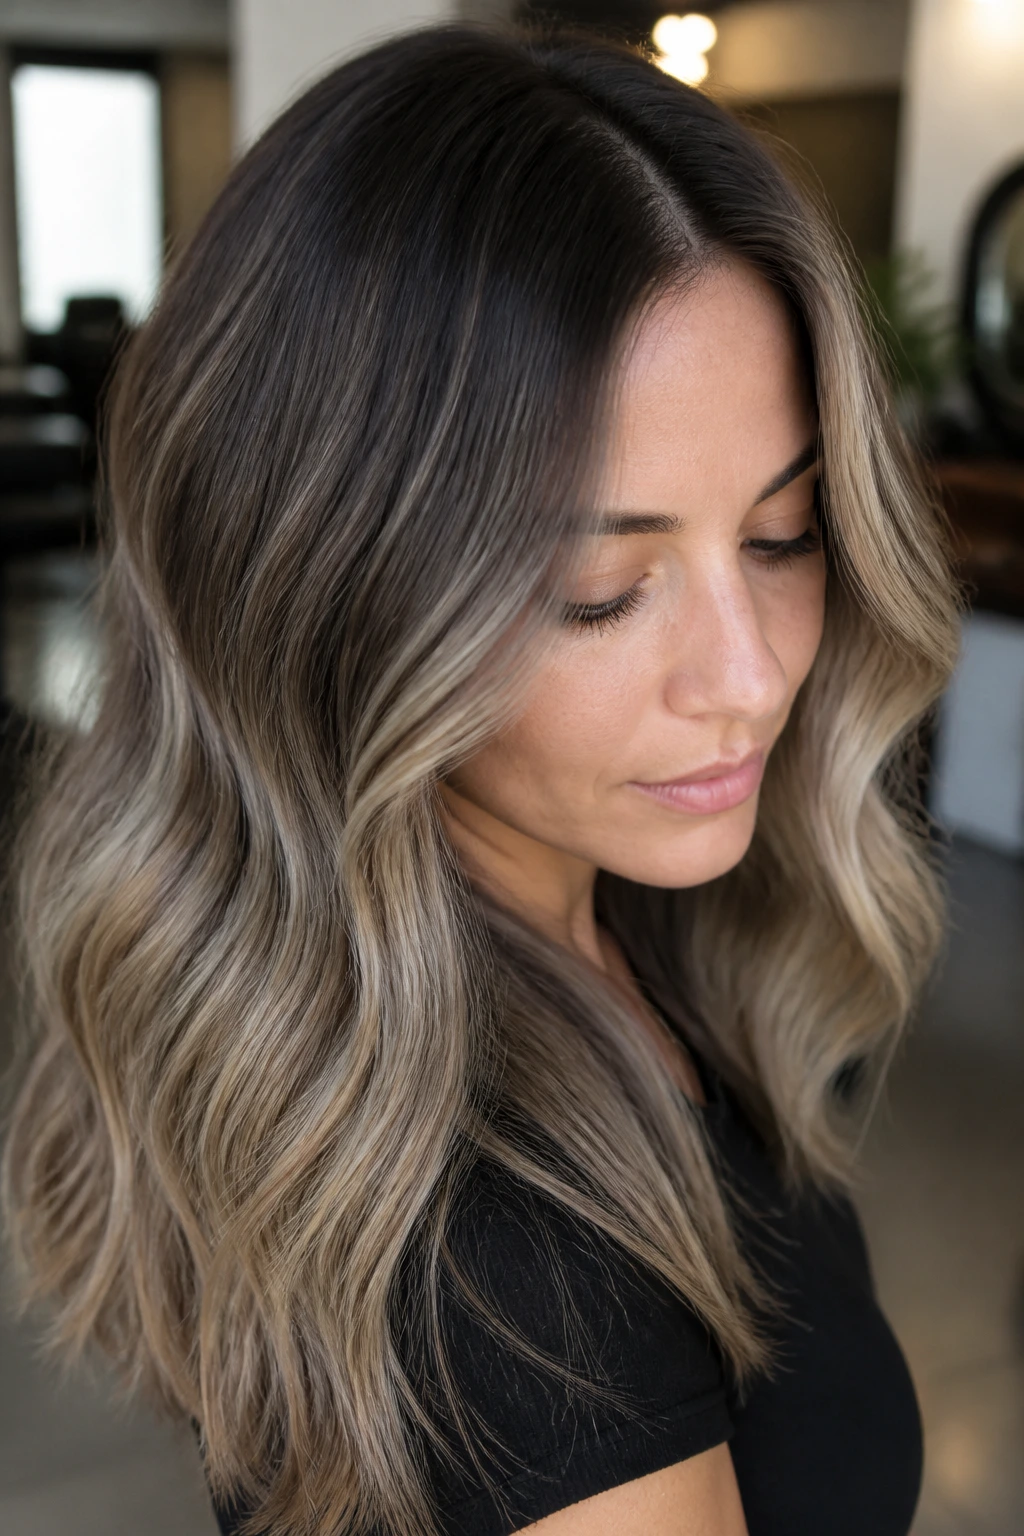
The final approach is the “root melt.” This is the gold standard for high-end, low-maintenance hair color. After you apply your ash highlights throughout the hair, your stylist applies a darker, cool-toned gloss or semi-permanent color to the roots, pulling it down slightly to “melt” into the highlights.
This creates a seamless gradient. You don’t see where the natural hair ends and the highlight begins. It’s perfect for those who want an ash look but are terrified of the roots looking “grown out” or messy.
Why It’s the Ultimate Choice
- It looks natural, even as it grows out, because the root color is custom-matched to your natural base.
- It provides a soft, hazy transition that minimizes the visual evidence of regrowth.
- It allows for a higher contrast in the highlights (brighter ends) without it looking disconnected from your scalp.
Because this relies on a gloss, the gloss will fade over time. You will need to return to the salon for a “glaze” or “toner refresh” every six to eight weeks. Even if the highlights are still bright, that root melt gloss needs to be maintained to keep the whole look feeling cohesive and purposeful.
Final Thoughts
The pursuit of the perfect ash highlight is really a pursuit of balance. You are balancing the natural warmth of your brunette base against the desire for a cooler, more dimensional look. None of these styles are “set it and forget it.” Ash tones are notoriously the first to fade because the molecules responsible for those cool, silvery, or violet reflections are larger than warm molecules, meaning they wash out of the hair shaft more quickly.
If you decide to go down the ash route, you have to accept that your shower routine will change. You must have a professional-grade purple shampoo or a blue-toning shampoo on standby. You should also consider getting a shower filter if your water is “hard” or mineral-heavy, as minerals can build up on the hair and turn those beautiful ash tones into a brassy, dull mess within weeks.
Ultimately, the best ash highlight is the one that suits your lifestyle. If you have the time and budget for regular toners, go for the high-contrast money piece or the ice-blonde babylights. If you prefer to be in the salon twice a year, the root-melted teasy-lights or a subtle mushroom-brown balayage are your best friends. Be honest with your stylist about your maintenance threshold. A great ash look is one you can actually sustain—not just one that looks good for the first ten days after the appointment.
