



The moment you spot that first silver strand against your light brown hair, you usually have one of two reactions: pluck it out and pretend it didn’t happen, or start obsessing over your calendar. Light brown hair is a unique canvas. It is light enough that the contrast between your natural pigment and incoming grey can feel jarring, but it is also dark enough that aggressive, solid-color coverage can leave you with a harsh, unnatural “helmet” effect as your roots inevitably grow out. This is where the philosophy of grey blending—as opposed to total coverage—becomes essential.
Blending is about softening the line of demarcation. It’s about convincing the eye that those grey hairs are actually intentional, multi-dimensional highlights. You aren’t trying to hide the grey; you are trying to frame it so that it feels like a deliberate design choice. Whether you have just a scattering of silver or a significant transition happening around your temples, the goal is low-maintenance elegance. You want to walk out of the salon with hair that looks better with every week that passes, not hair that demands a touch-up the second the first inch of root appears.
1. Dimensional Babylights
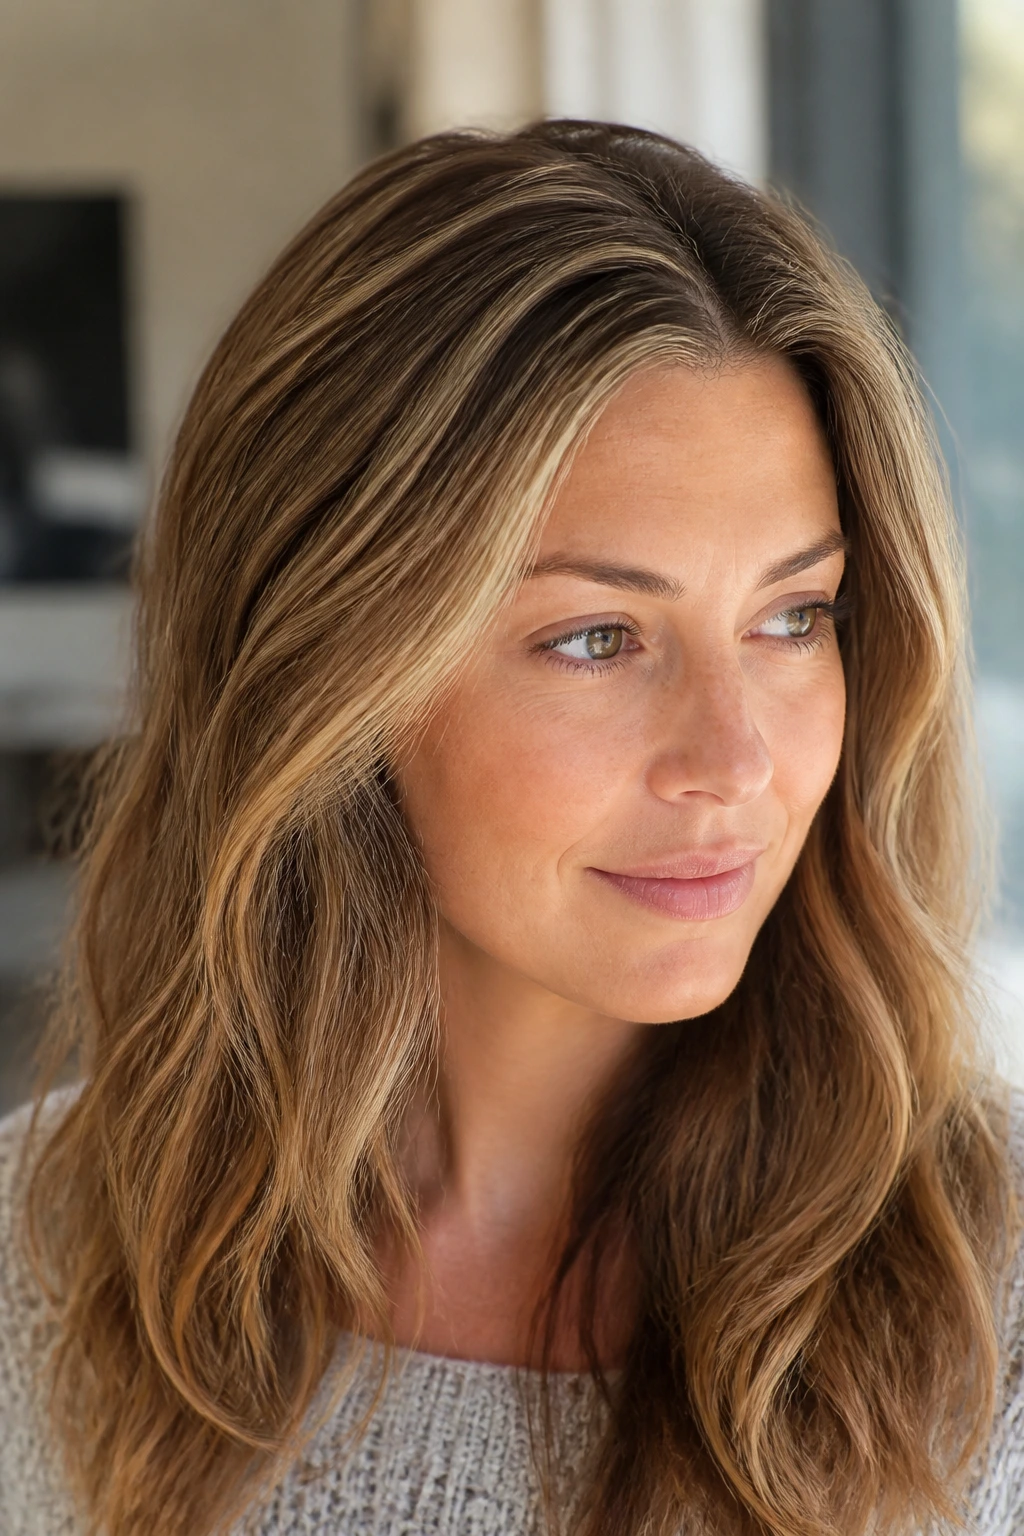
Babylights are the gold standard for those who want to disguise grey hair without a drastic change. The technique involves weaving incredibly fine, thin sections of hair and applying lightener. Because the sections are so small, the resulting highlights mimic the natural, sun-bleached look of childhood hair. When applied to light brown hair, these baby-fine streaks act as a visual camouflage. They break up the solid color of your natural shade, making the transition to grey feel like a gradual evolution rather than a sudden shift.
Why It Works for Grey Blending
The secret is in the weave. By keeping the highlights fine, you avoid the “striped” look that often happens with traditional chunky foils. For grey blending, a stylist will often place these specifically around the hairline and the part, where silver hairs tend to congregate first.
- Maintenance: You can easily stretch this to 10 or 12 weeks.
- The Look: Soft, ethereal, and very natural.
- Pro Tip: Ask for “cool-toned” babylights to ensure the blonde matches the underlying cool tones of your emerging grey, rather than clashing with it.
2. The Mushroom Balayage Technique
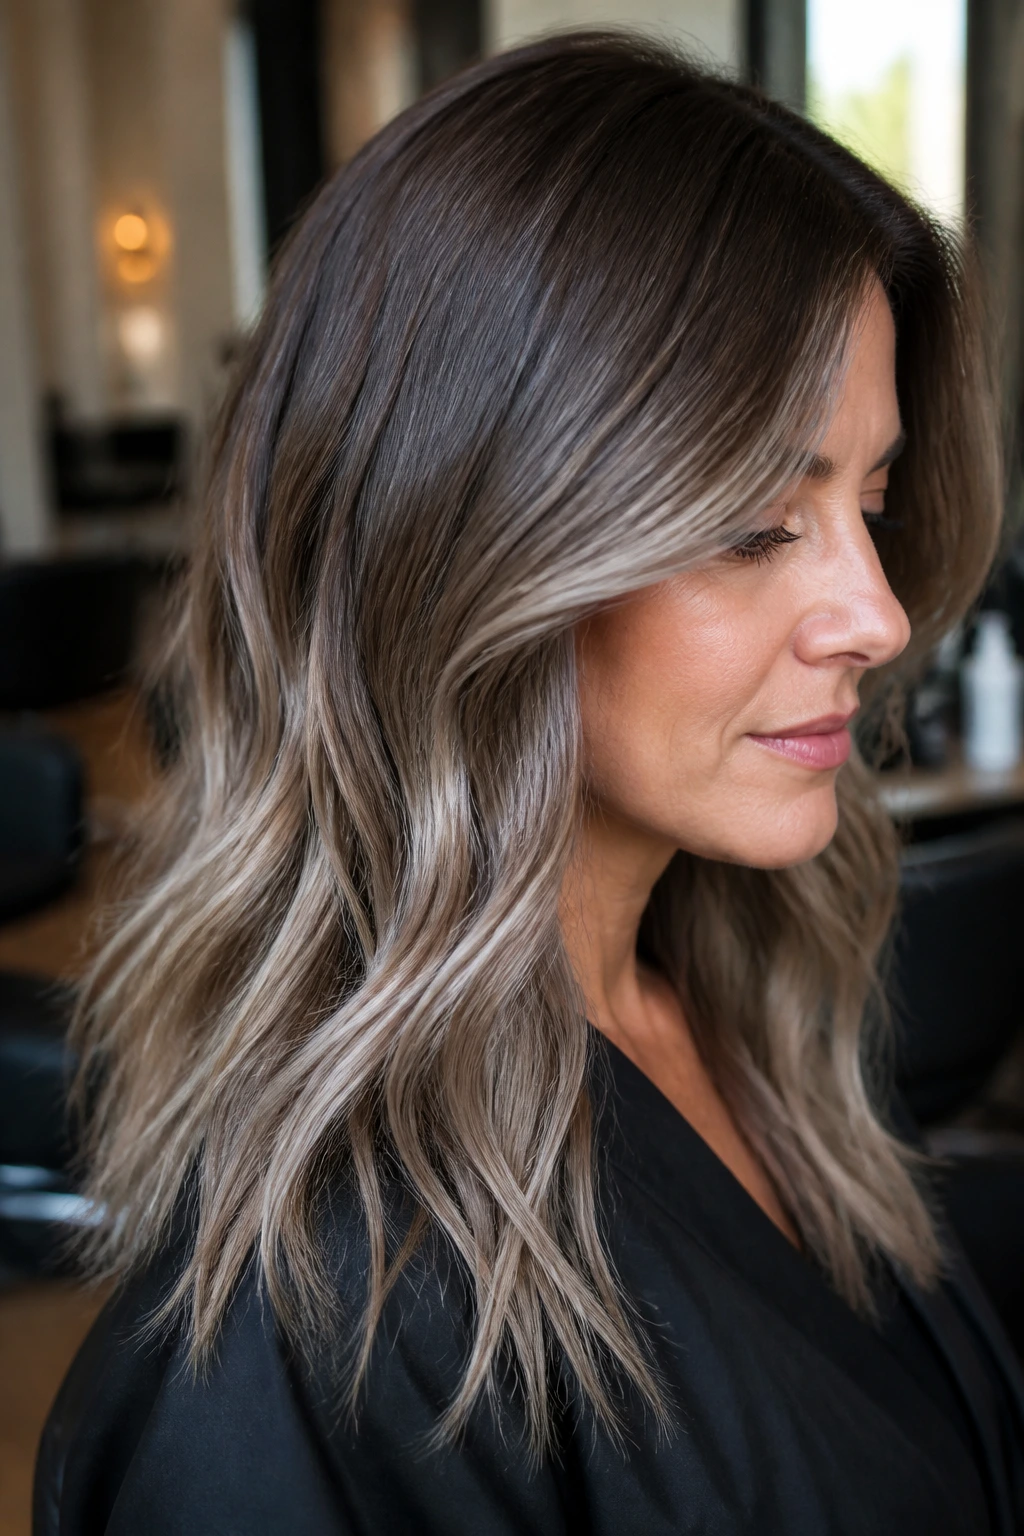
If you are worried about your grey hair clashing with warm, brassy tones, the mushroom balayage is your best friend. This style focuses on cool, earthy, taupe-like tones that sit perfectly between brown and grey. Instead of lifting your hair to a bright, golden blonde, the stylist uses a color palette that mirrors the natural “cool” of emerging grey strands. It essentially creates a bridge between your darker roots and the lighter, silver-infused ends.
This look is particularly effective because it doesn’t fight against the grey. It pulls the grey into the color scheme. When you paint these ash-brown and grey-toned balayage pieces through your mid-lengths and ends, the grey roots simply look like they are part of a larger, intentional gradient. It is the definition of “effortless,” which is exactly what you want when you are tired of monthly salon appointments.
3. Face-Framing Money Piece
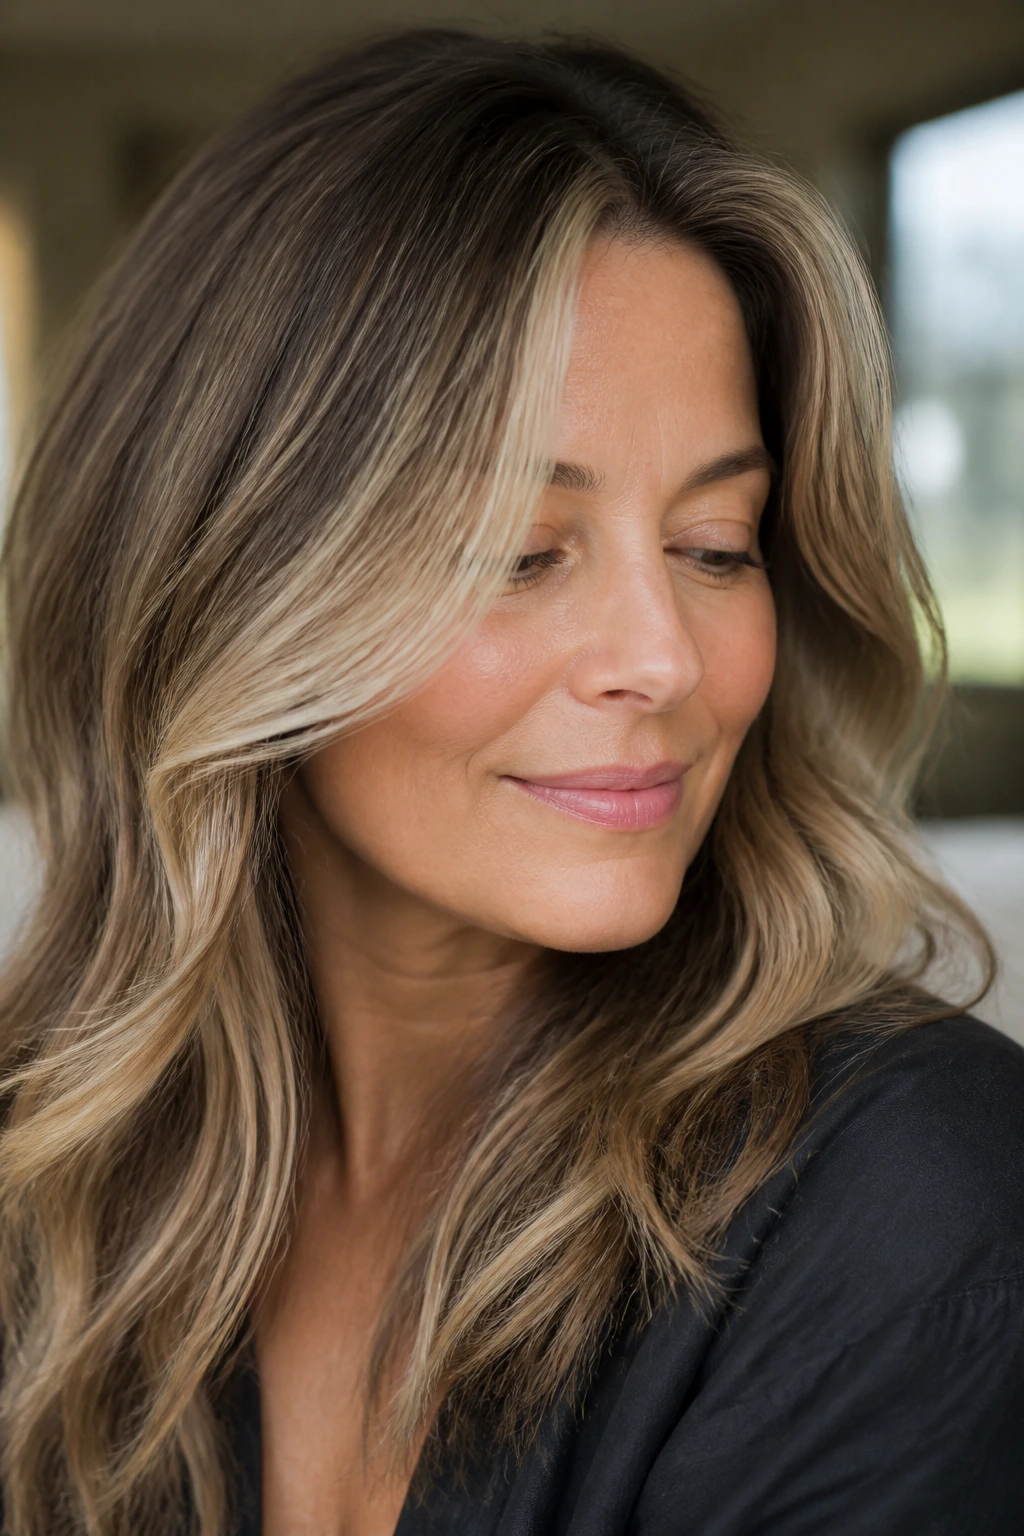
Sometimes, the grey is concentrated almost entirely around your face, which can make you feel older than you actually are. A “money piece” is a classic technique—a slightly lighter, brighter section of hair right at the front—but for grey blending, we adapt it. Instead of a solid blonde stripe, we use a softer, diffused placement. Think of it as a halo of lighter, cooler tones that softens the hairline.
By brightening up the area immediately surrounding your face, you pull focus away from the roots and create a glow that reflects light. This does two things: it makes the skin look brighter, and it masks the starkness of grey hairs that usually sprout at the temples. It’s a surgical approach to color placement, focusing exactly where the eye lands first.
4. Low-Contrast Root Smudge
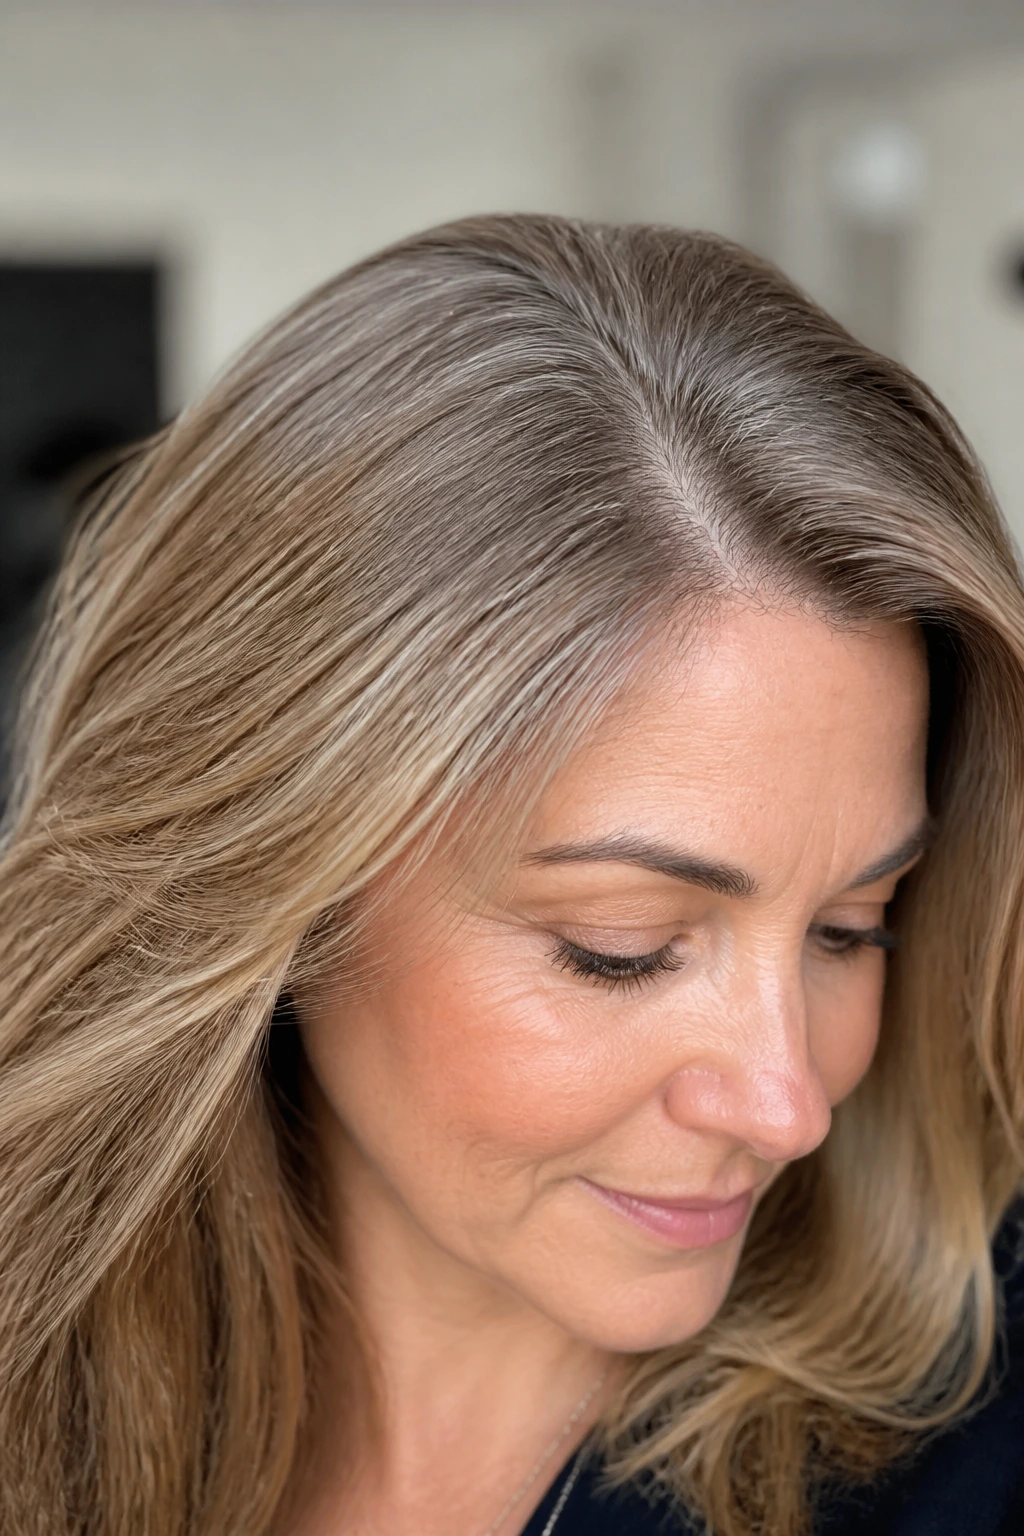
If you hate the look of a stark root line, a root smudge (or “shadow root”) is the technical correction you need. After your stylist applies highlights or balayage, they go back in with a demi-permanent color that matches your natural light brown base and paint it onto the roots, dragging it down just a few inches. This blurs the line where the highlights begin.
Why is this useful for grey? Because it softens the contrast. A root smudge blends the grey, the light brown, and the highlights into one seamless flow. It eliminates that “blocky” feeling. You can get a fresh, highlighted look, but the shadow root keeps it grounded, making the growth phase much less painful. You aren’t running back to the chair every time a quarter-inch of grey pops up.
5. Cool-Toned Ash Highlights
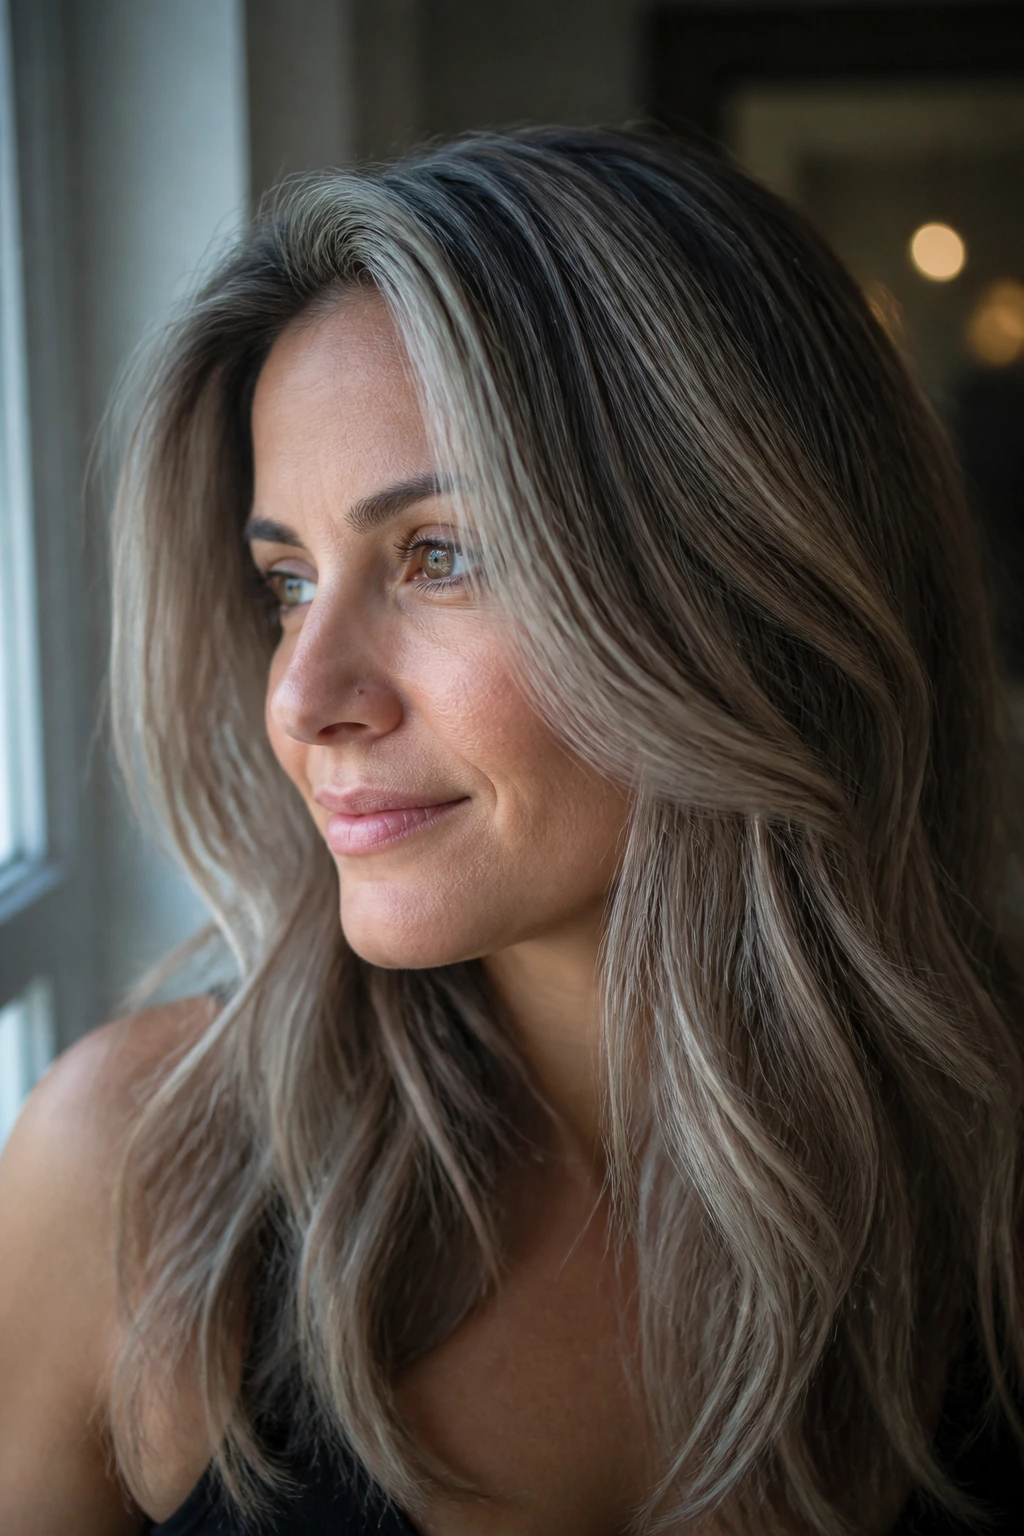
Light brown hair often carries hidden warmth—reds and golds—that can look slightly “off” when grey hair starts showing up. Grey hair is naturally cool; if you put warm, golden-honey highlights over it, the contrast can actually make the grey look dirtier or more yellow. Shifting your highlight tone to a true ash or silver-blonde creates harmony.
What to Ask Your Stylist
Don’t just ask for “highlights.” Be specific about the toner.
- Ask for a “cool ash” or “silver-violet” base.
- These tones neutralize any residual warmth in your light brown hair, aligning it with the cool, icy spectrum of your grey.
- The result is a unified, metallic finish that makes the silver look like a polished choice rather than an accident of aging.
6. The “Grey-Blending” Teasylight
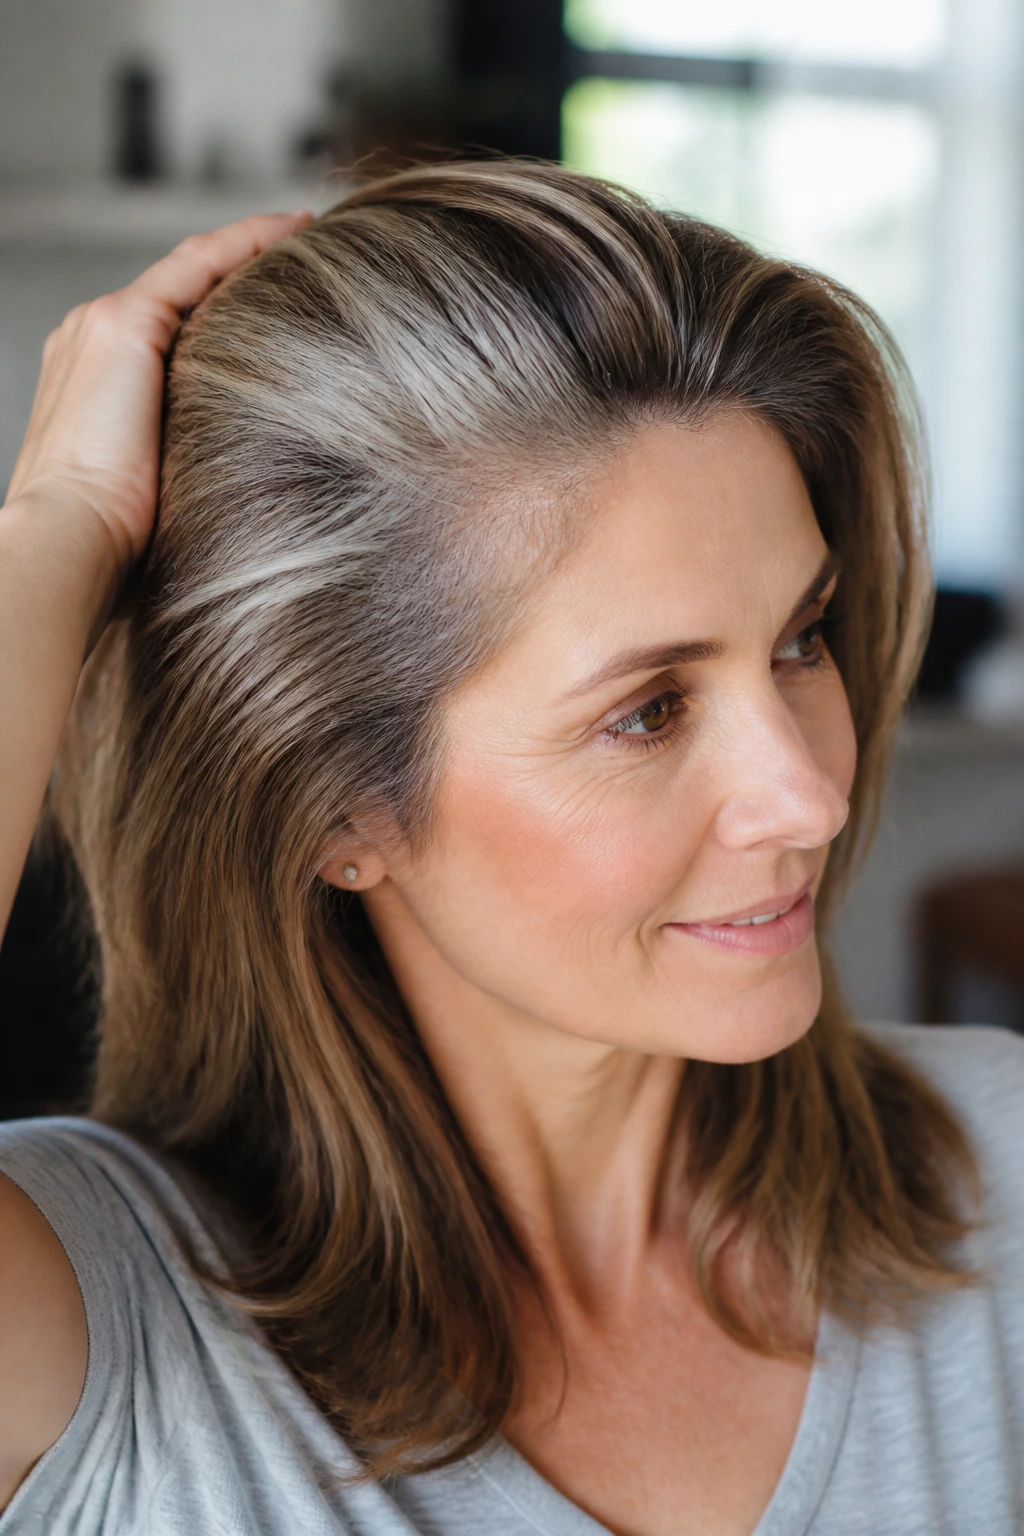
Teasylights are a hybrid technique. The stylist takes a section of hair and backcombs (teases) it before applying the lightener. The backcombing acts as a natural buffer, ensuring that the lightened color doesn’t reach all the way to the root. It creates a soft, diffused transition.
For someone with light brown hair, this is a game-changer. The teased roots ensure that when your hair grows out, there is no hard line—only a soft, hazy gradient. It’s arguably the most forgiving technique on this list. You could theoretically go six months without a touch-up, and it would still look intentionally styled, not neglected.
7. Warm Honey-Caramel Ribbons
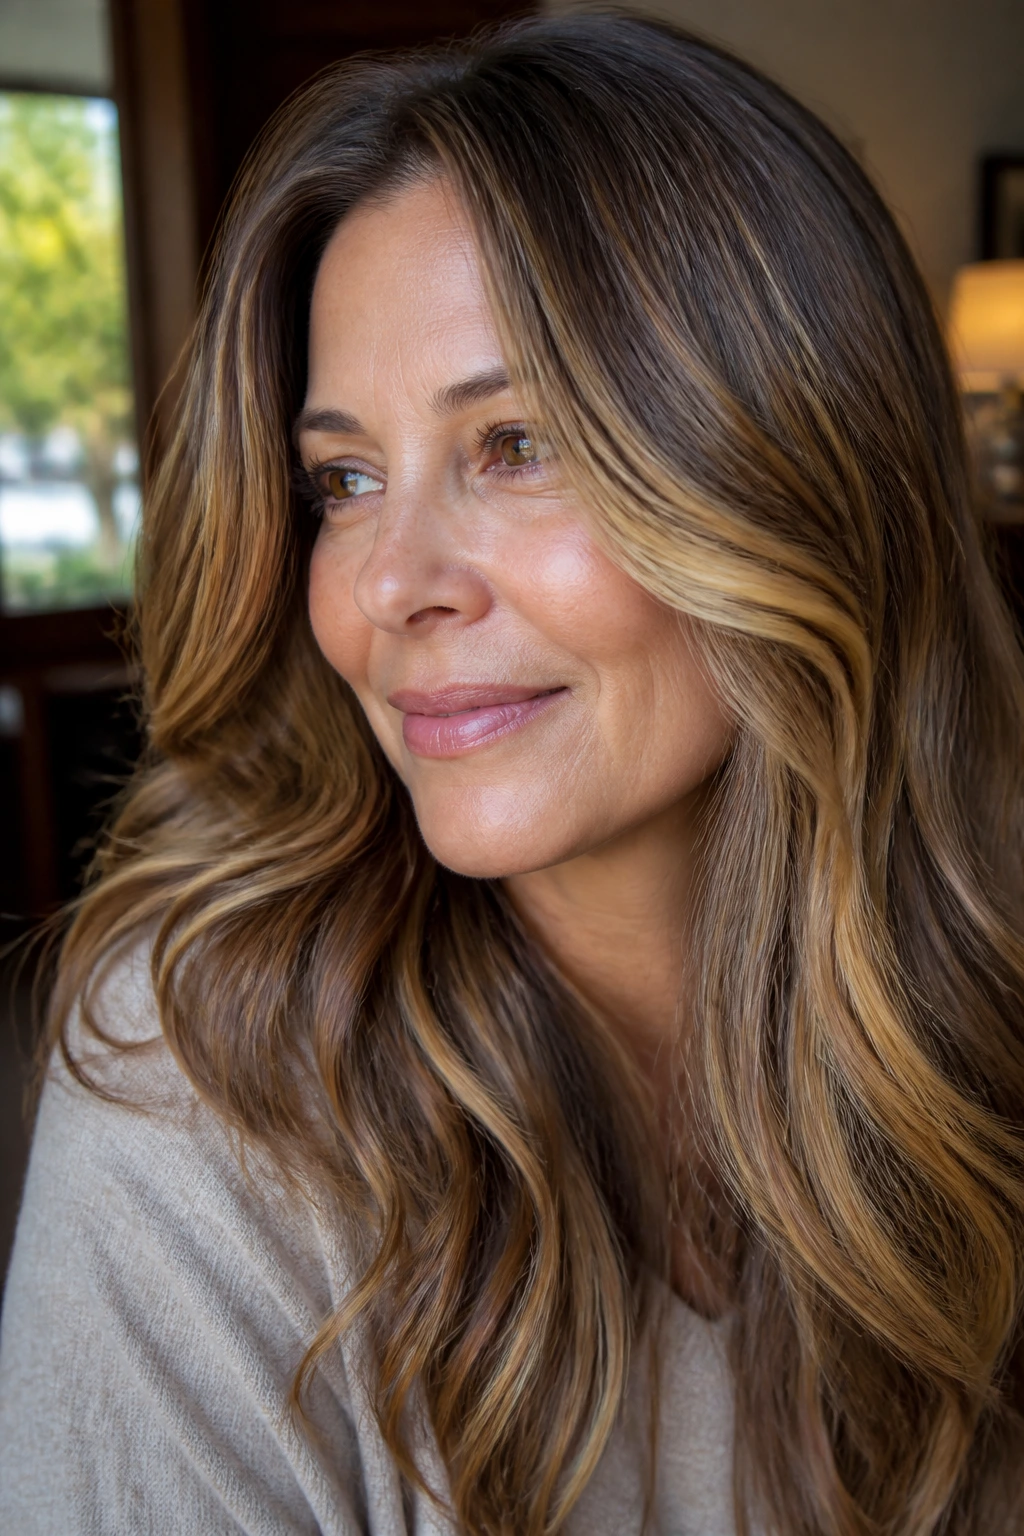
Wait, didn’t I just say warm tones can clash with grey? That is true—unless you are very deliberate about the placement. If your grey is sparse and you are not ready for a full “silver” look, mixing in warm, honey-caramel ribbons can distract from the grey by adding richness and depth to the brown base.
This works best for people with “warm” skin tones. The caramel ribbons make the hair look healthy, glossy, and vibrant. The eye is drawn to the high-shine, rich color, and the grey strands simply get “lost” in the volume and movement of the hair. It doesn’t hide the grey, but it makes it irrelevant because the rest of the hair is so bright and dimensional.
8. Lowlight-Focused Depth
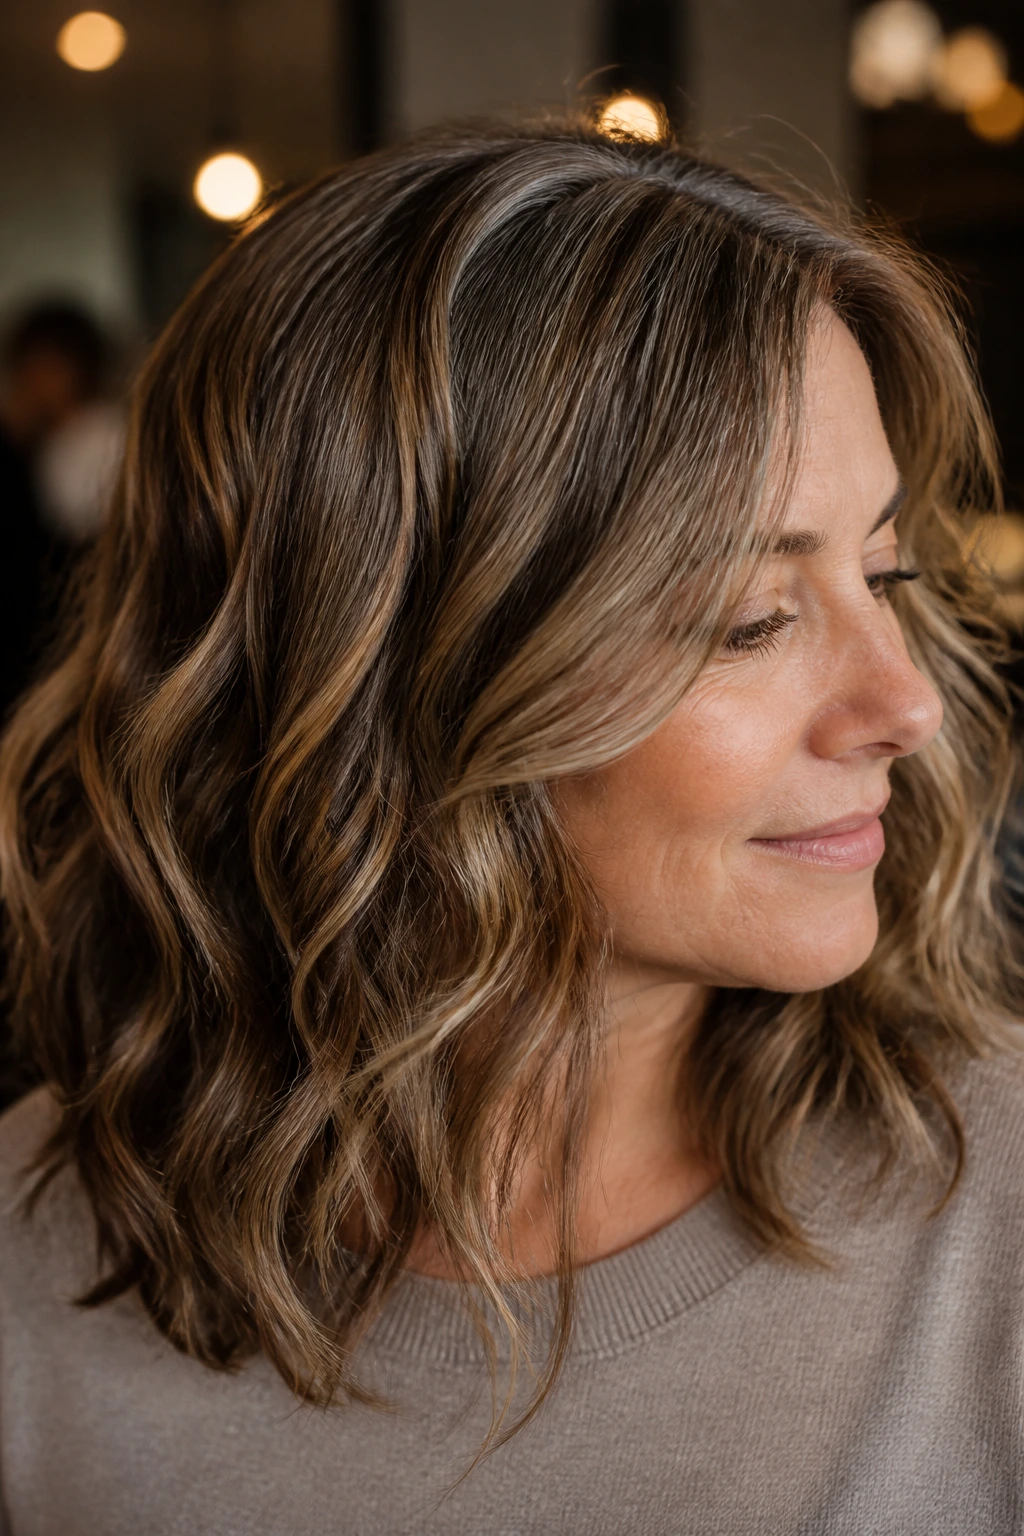
We spend so much time talking about highlights, but lowlights are the unsung hero of the grey-blending world. When grey hair grows in, it can sometimes make hair look wispy or flat because the texture of grey hair is different—often coarser and sometimes thinner. Adding lowlights in a shade or two darker than your natural light brown adds the appearance of density and thickness.
By weaving in dark, rich strands, you create a background that makes the grey hairs look like they are “woven” into the fabric of the hair rather than sitting on top of it. It’s an optical illusion. You are essentially creating a “salt and pepper” look, but you are controlling the distribution so it looks like expensive, professional color work.
9. The “Salt and Pepper” Inversion
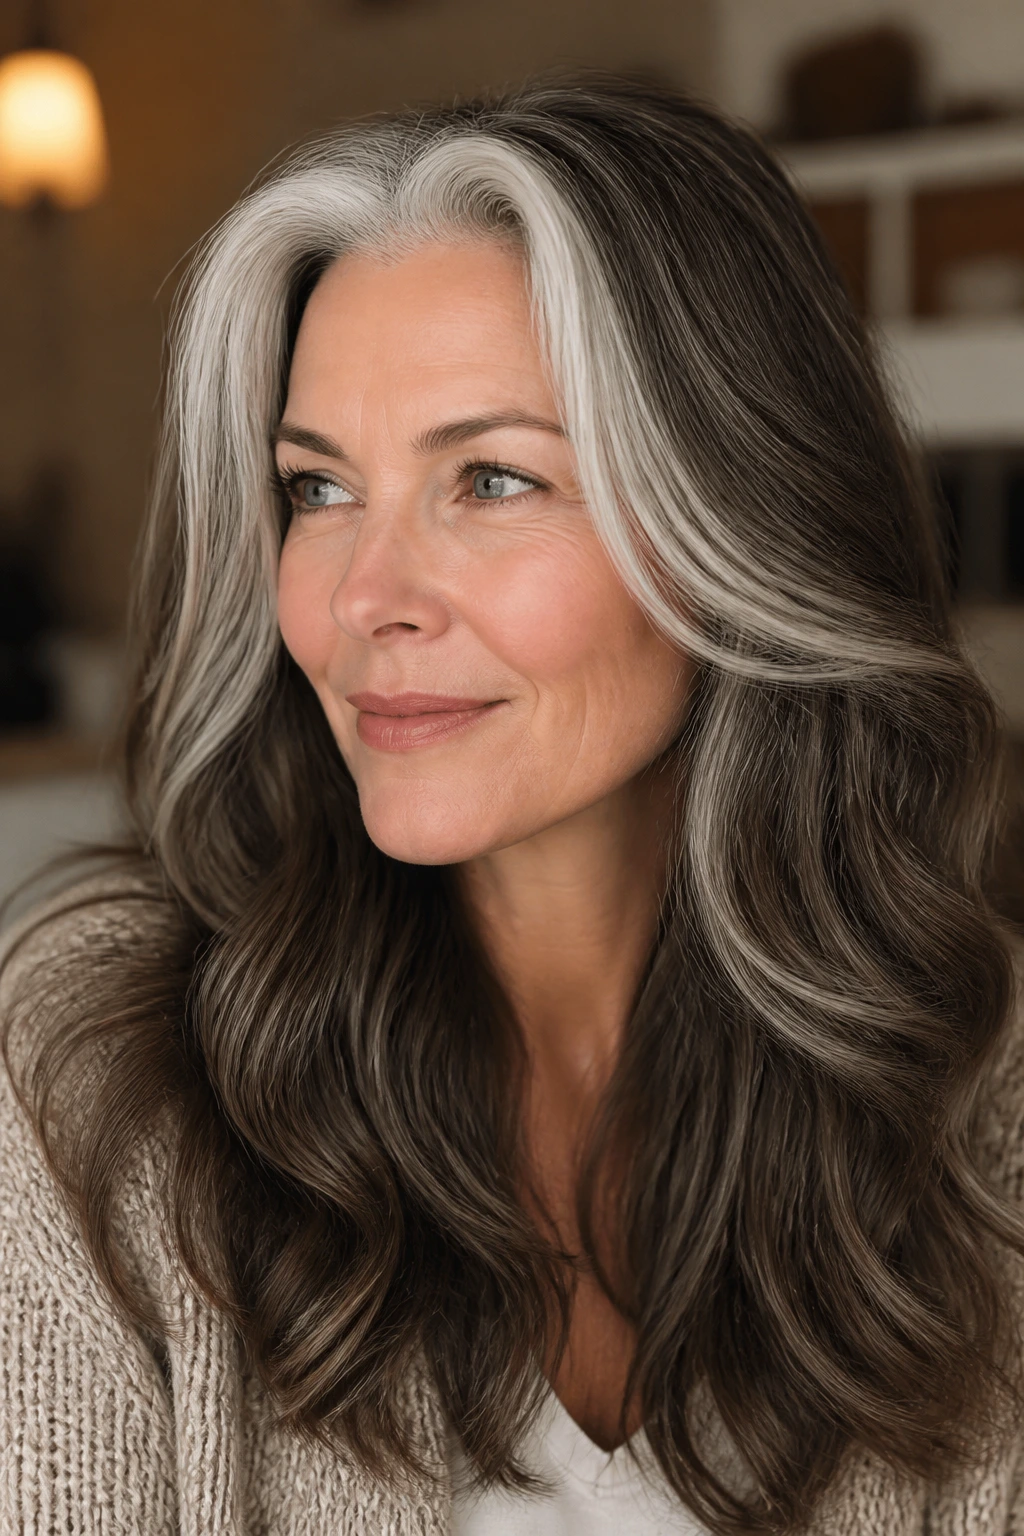
Instead of trying to hide the grey, lean into it. This is for the person who has enough grey that it’s becoming a dominant feature. The “Salt and Pepper” inversion involves strategically adding bright white or silver highlights near the face and crown while keeping the rest of the hair a cool, dark brown.
You are effectively “accelerating” the grey process so it looks even and consistent. By adding more white/silver, you dilute the contrast between your natural brown and your natural grey. It sounds counterintuitive to add more grey, but it is often the most sophisticated way to handle a full transition. It looks purposeful, polished, and very high-fashion.
10. Icy Platinum Accents
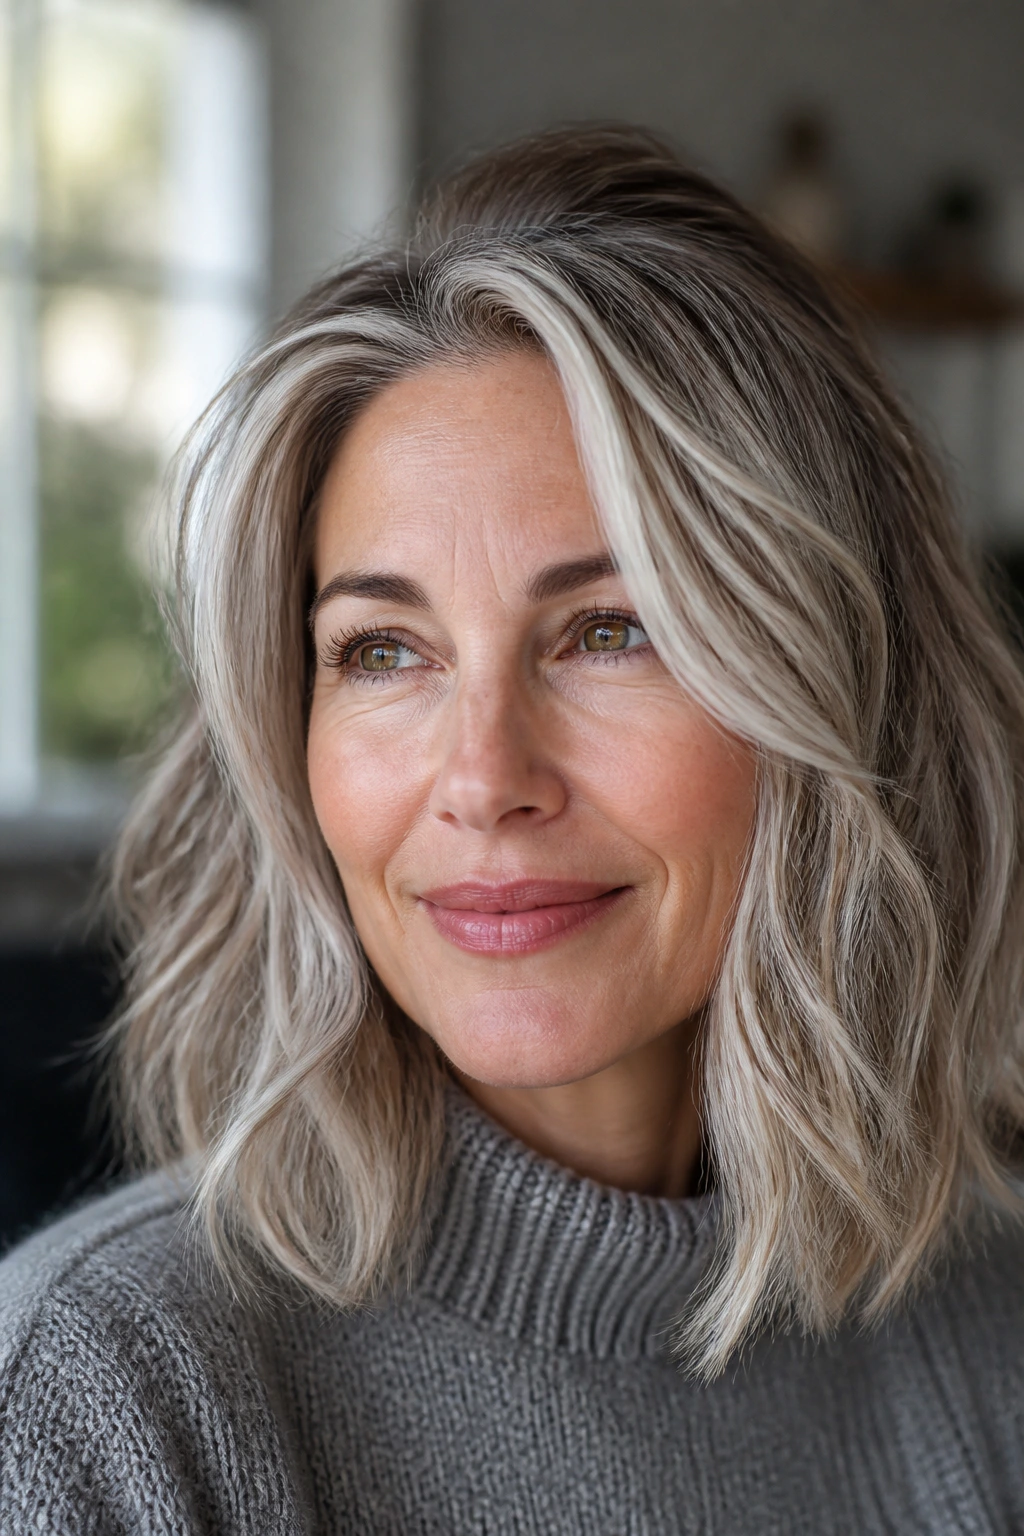
If your light brown hair is cool-toned, you might be the perfect candidate for icy, almost white-platinum accents. These aren’t standard blonde highlights; they are nearly translucent, colorless strips of hair. When placed correctly, they are indistinguishable from your own natural silver or white hairs.
Why This Technique Succeeds
- Blending Power: Because the platinum is devoid of pigment, it visually “absorbs” your actual grey strands.
- High Impact: It brightens the face significantly.
- The Catch: It requires bleaching, which is damaging. Keep this for the top layer only, and treat your hair with deep conditioners or bond-builders to maintain the integrity of those lightened strands.
11. Soft Ribboning Technique
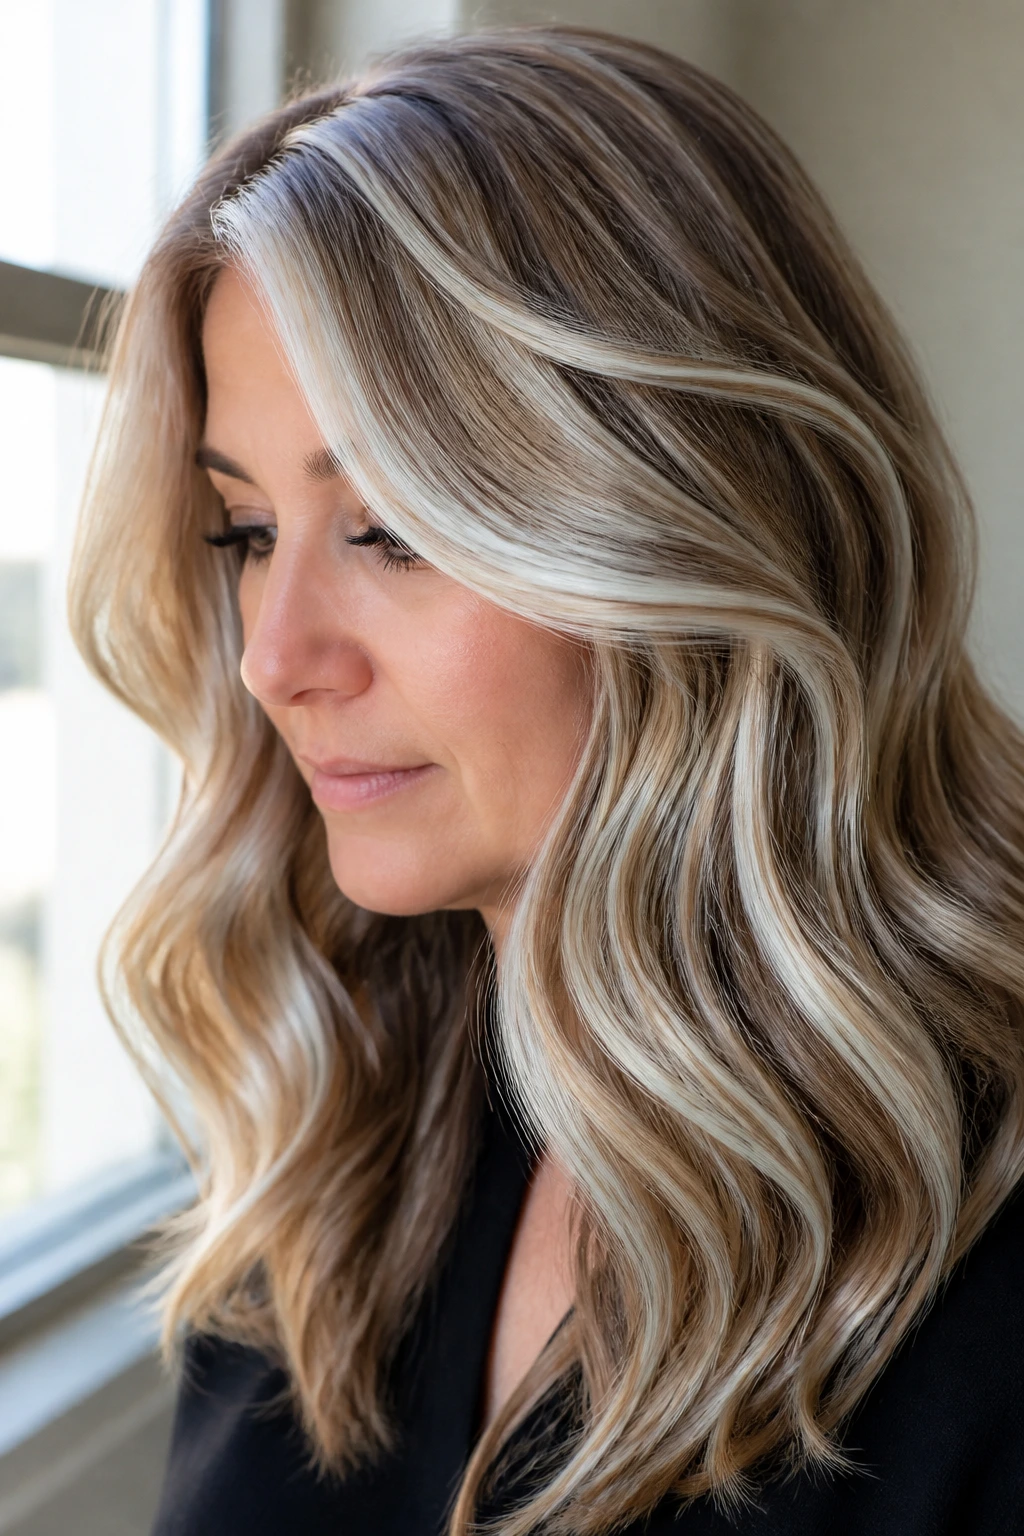
Ribboning is a technique where the stylist takes slightly wider sections of hair and paints them to create visible, flowing strands of color. Unlike babylights which are microscopic, ribbons are bold. For light brown hair with grey, this creates a “ribbon” of silver/blonde that weaves through the hair.
It creates a very cohesive look. When the light hits your hair, the ribbons shine and catch the eye, while the grey hairs hide in the shadows created by the darker base. It’s perfect if you have hair with a bit of a wave or texture, as the ribboning will follow the movement of your hair, highlighting the shape of your cut.
12. Natural-Looking Grey “Roots” (The Shadow Root)
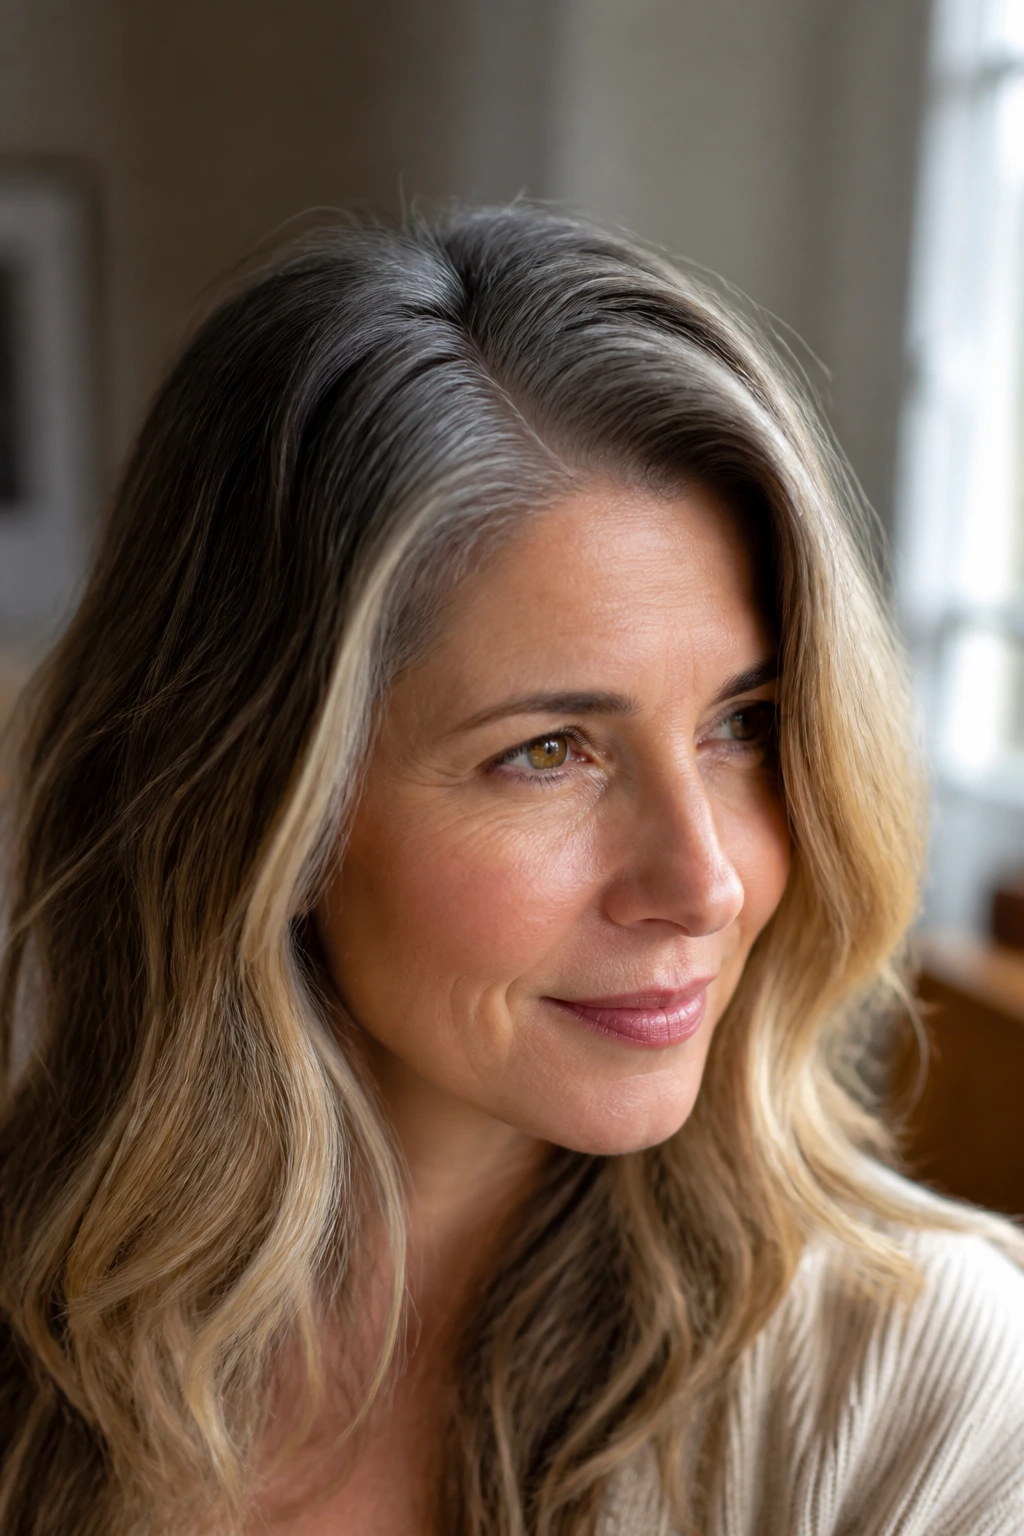
This is a trend that is becoming widely adopted, and for good reason. It involves intentionally dyeing your roots a darker, ashier color that matches your incoming grey, and then keeping the ends lighter. It effectively “pre-ages” the roots.
It sounds strange to pay to make your roots look like grey, but it removes the stress of maintenance. When your actual grey grows in, it just blends into the “faux” grey shadow root. You are essentially training your hair to transition to its natural state. It is the ultimate low-maintenance hack.
13. Soft Caramel Balayage
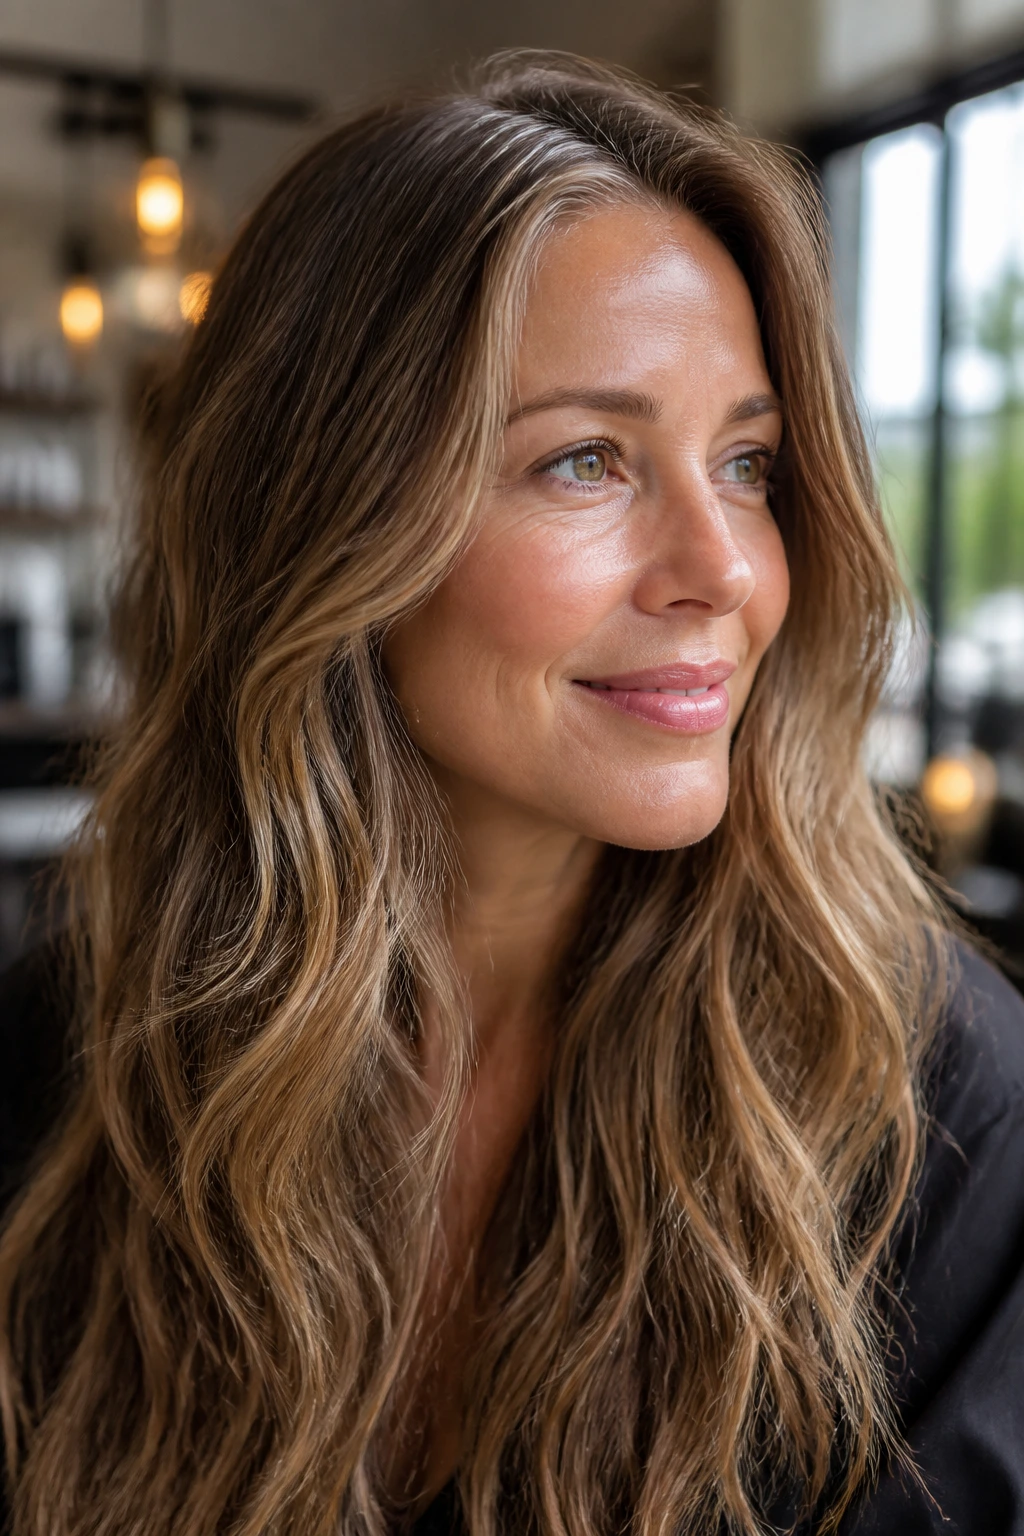
Caramel is a classic for light brown hair, and it remains one of the most effective ways to blend grey. The caramel tones act as a buffer. They aren’t as bright as platinum, which means the contrast between the caramel and your brown hair is softer.
This is an excellent option for those with long hair who want a “lived-in” look. Because balayage is hand-painted, it follows the natural fall of your hair. You can ask your stylist to “spot treat” areas where you have clusters of grey. Instead of a uniform application, they paint the caramel balayage primarily where the silver is most prominent, turning those spots into intentional highlights.
14. Champagne Blonde Toning
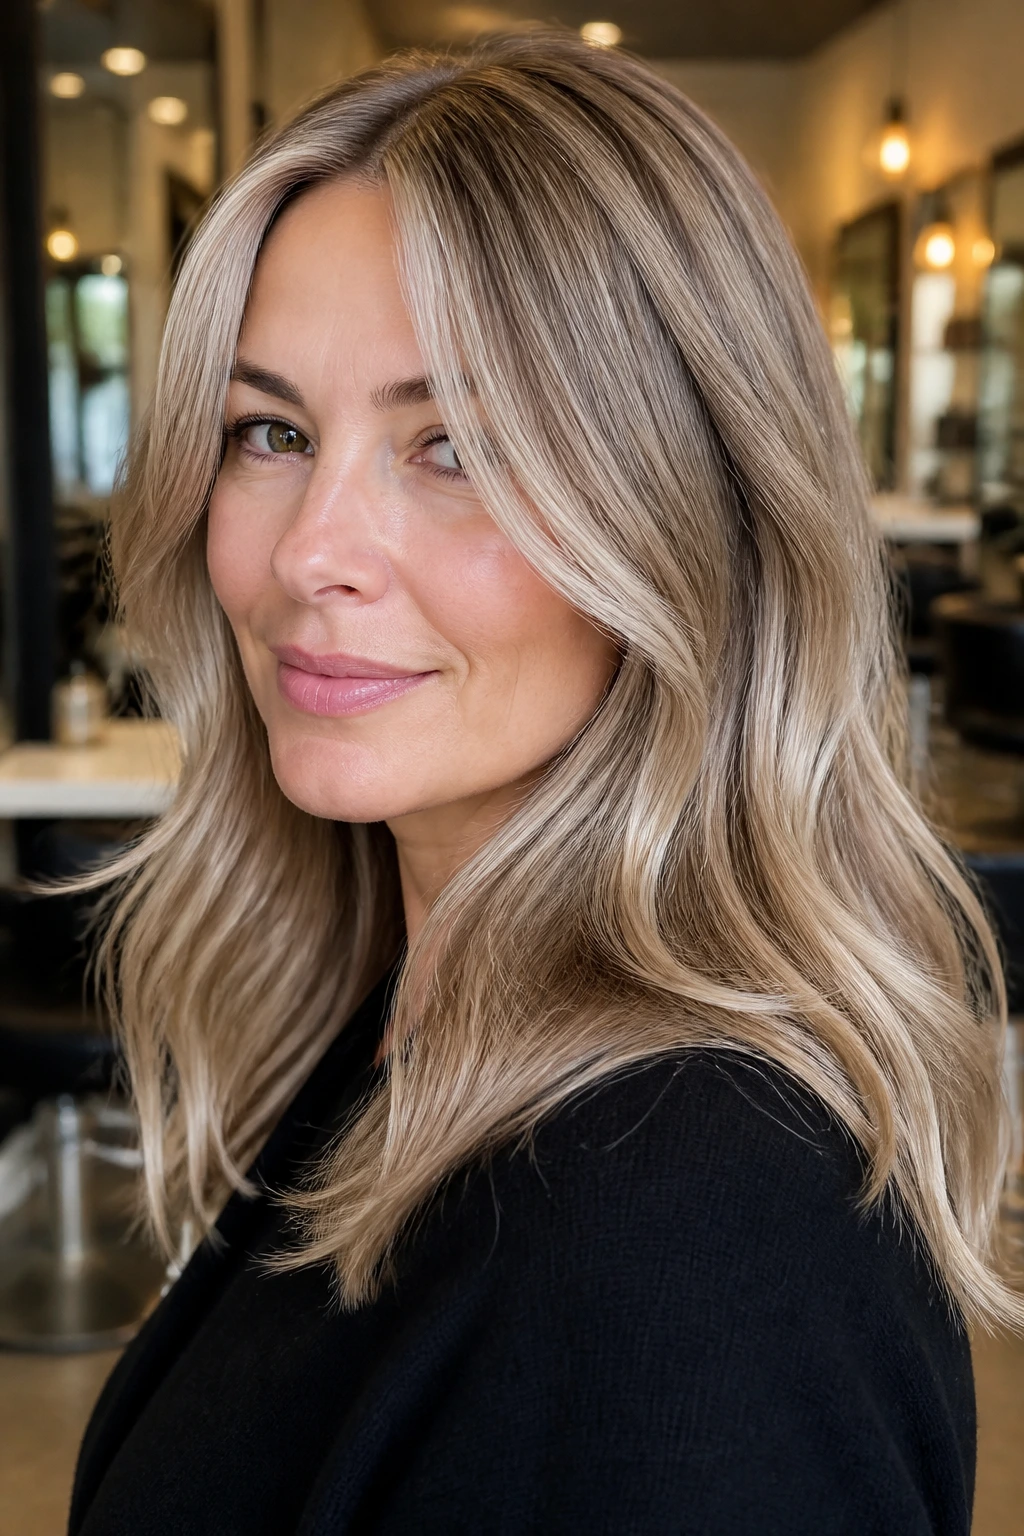
Champagne is a specific tone—it’s not yellow, it’s not ash, it’s a shimmering, pearlescent beige. It is incredibly flattering for light brown hair and does an amazing job at muting the “starkness” of grey. It adds a slight shimmer that makes the hair look expensive and healthy.
If you find that your grey hairs look wiry or dull, a champagne toner can help. It deposits just enough pigment to smooth down the cuticle and add reflection. It won’t hide the grey, but it will make it sparkle in the light. It’s a subtle change, but one that makes a massive difference in how the hair feels to the touch.
15. Chunky Highlights (The Modernized 90s Way)
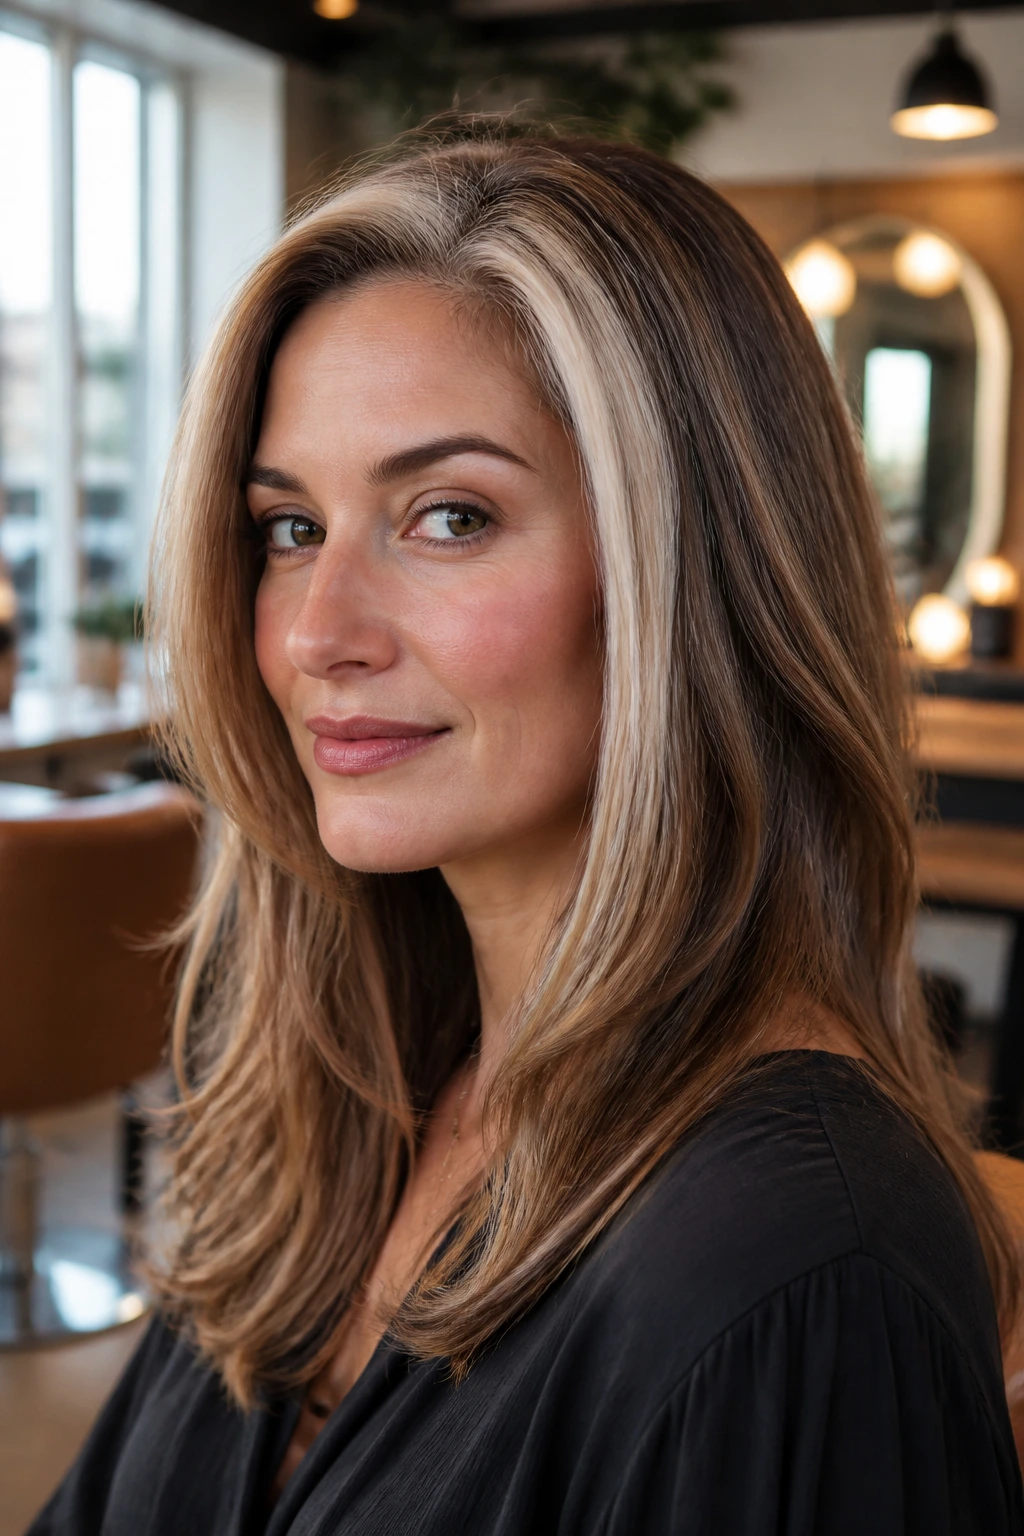
Hear me out: chunky highlights were a trend everyone wanted to forget, but they have returned in a refined, “money-piece-adjacent” form. For grey blending, chunky highlights can be useful because they allow you to “chunk” out the grey.
If you have a persistent patch of grey near your temple (a common spot), thin highlights might not be enough to disguise it. A slightly wider, chunky highlight right over that patch can “claim” that space, turning a cluster of grey into a bold, stylized streak of light. It’s a statement look that works well for those with a bit of a rebellious edge.
16. The “Scattered” Highlight Placement
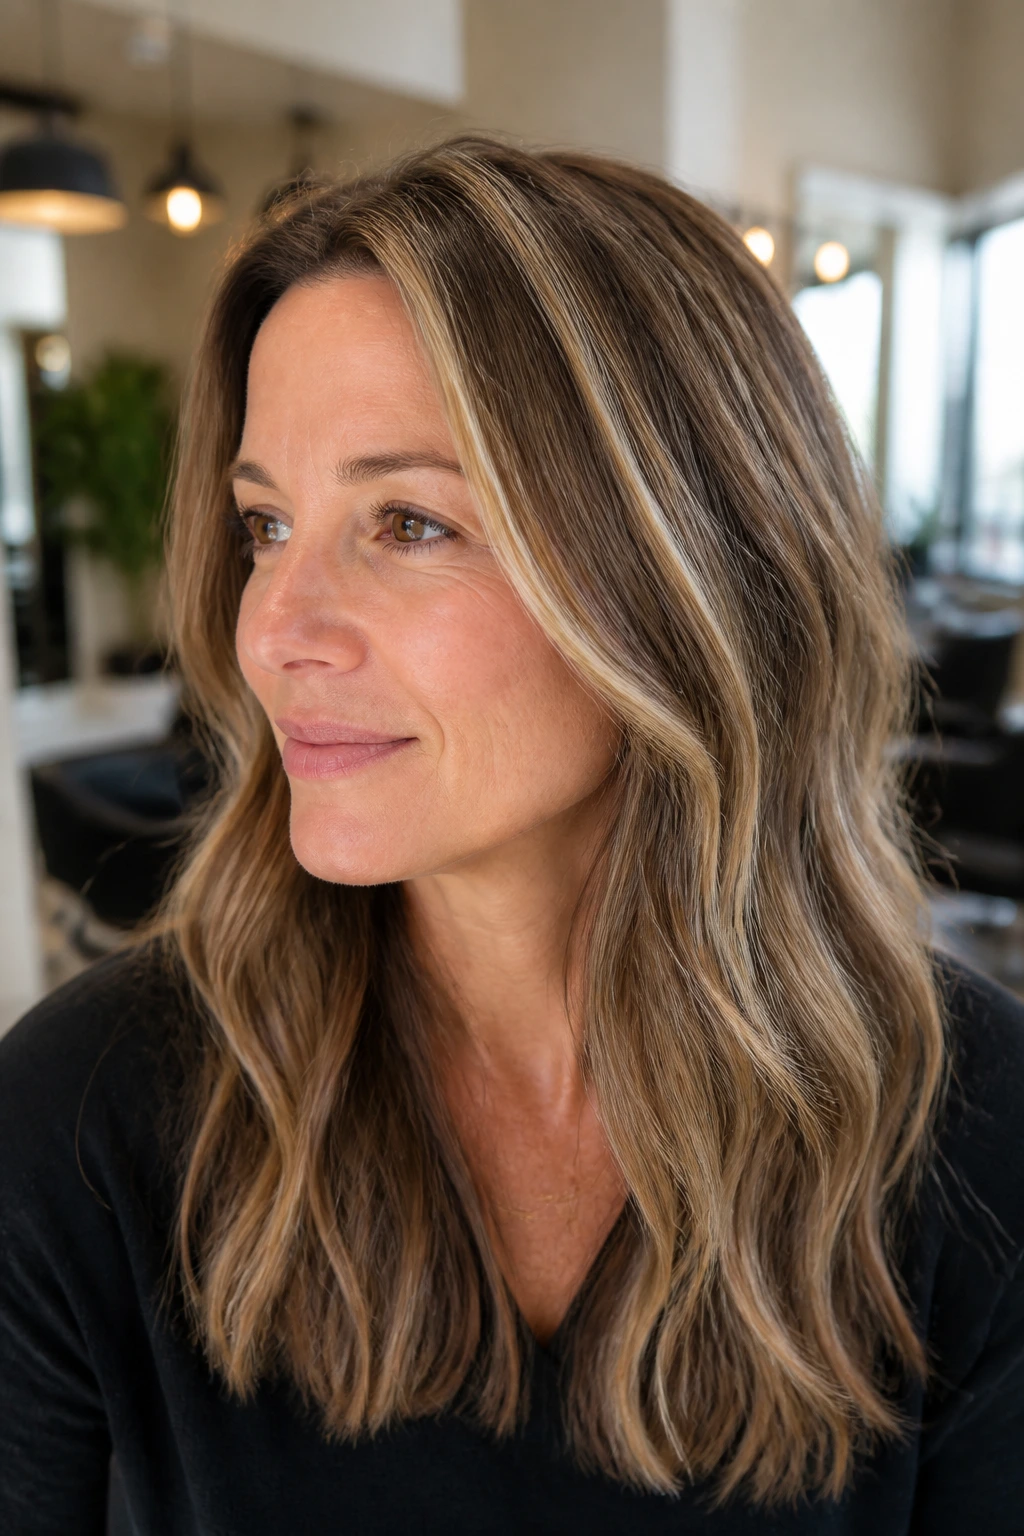
This is a technique for someone who has grey hair scattered randomly throughout their head, not just at the roots. Your stylist will use a freehand technique (or foil placement) to “scatter” highlights. They aren’t looking for a pattern; they are looking for the grey hairs.
They will foil the specific strands that are silver, turning them into bright blonde. This is precise work. It takes longer than a standard highlight service, but the result is invisible blending. Because you are highlighting the grey strands themselves, the grey hair disappears into the blonde, and the rest of your brown hair stays largely untouched.
17. Silver/Smokey Lowlights
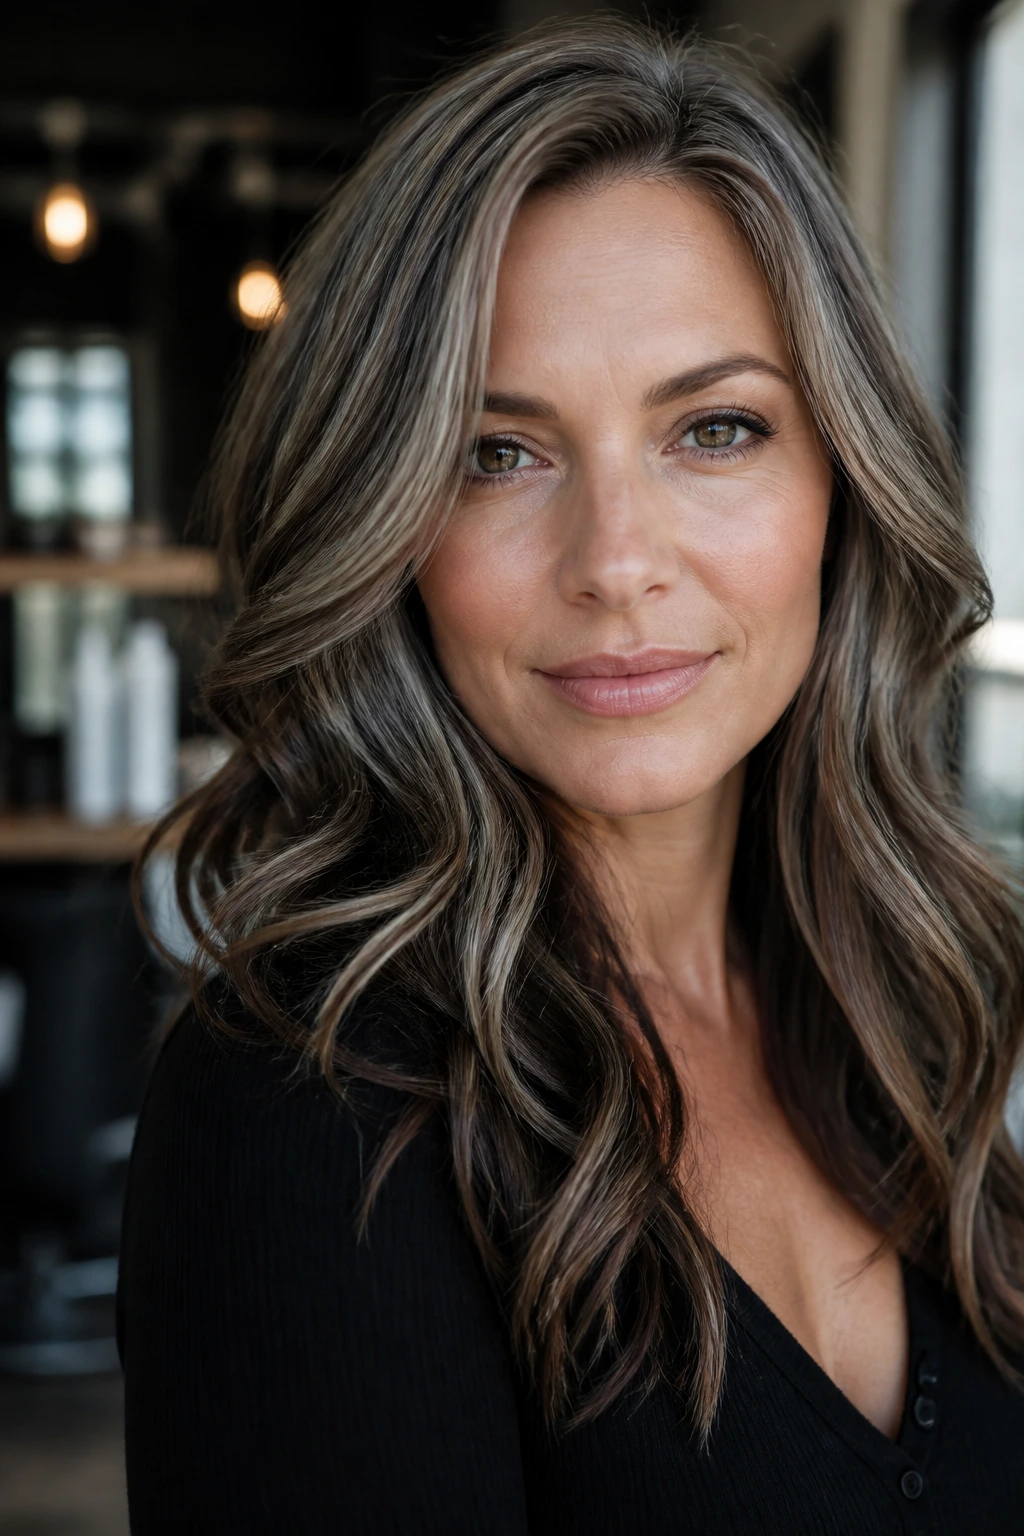
If you have successfully transitioned to a lighter color but feel like you’ve lost the depth of your original brown, try smokey lowlights. These are darker, cooler tones—think charcoal, slate, or cool brown—that mimic the depth of natural hair but in a monochromatic, greyscale palette.
This adds a “gothic” or “editorial” vibe to the hair. It’s incredibly stylish and does a fantastic job of giving the hair volume. It also prevents the “washed out” look that can sometimes happen when someone with light brown hair goes too light trying to hide their grey. It keeps the hair grounded and substantial.
18. The “Growing Out” Method (The Transition Service)
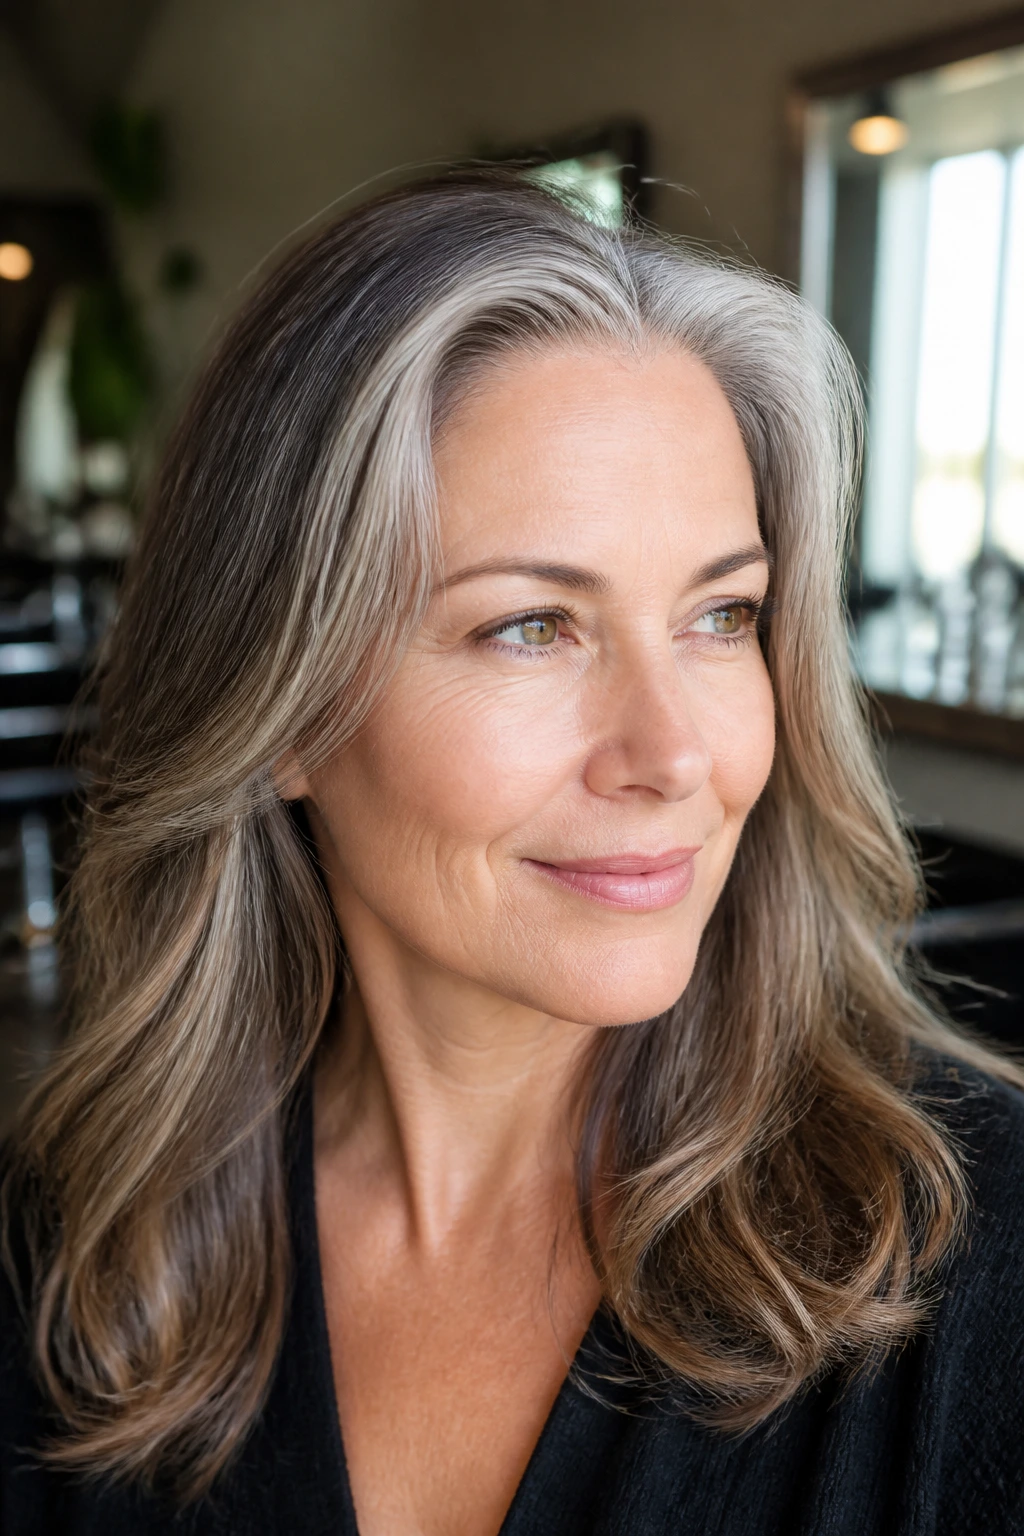
Sometimes, the best grey blending idea is to stop fighting and help the process along. This is what we call a “grey transition service.” Your stylist will take your hair and strip out the old dark dyes (if you have been coloring it) and apply a “grey-matching” toner.
They aren’t trying to make you blonde; they are trying to make your entire head of hair look like your natural grey. It is a one-time intensive service to strip away the color history, followed by regular toning sessions to keep the color even. It is the fastest way to get to your natural, grey-blended self. It requires a commitment to a shorter cut, as stripping long hair is difficult, but the freedom it offers is unmatched.
Final Thoughts
Grey blending on light brown hair is as much about psychological comfort as it is about aesthetics. You are moving from a mindset of maintenance—trying to hold back the clock—to a mindset of enhancement, where you are working with the texture and color your hair is choosing to adopt.
Light brown hair is uniquely positioned for this. It has enough pigment to allow for beautiful, multi-dimensional color, but enough lightness that you aren’t fighting an uphill battle against deep, dark, resistant roots. Don’t feel pressured to pick one of these techniques and stick to it forever. Your hair—and your grey pattern—will shift over time.
Start with something subtle, like babylights or a soft balayage, and see how you feel as the weeks pass. If you love the ease of it, you can push further into the lighter, more “grey-forward” techniques. If you find you miss your darker roots, a simple root smudge can pull you back to reality. The most important tool you have is communication with your stylist. Bring photos of the texture and tone you like, but trust their expertise in choosing the placement. A good colorist can see the “map” of your grey and know exactly where to drop the light to make it look like a masterpiece, not a maintenance chore.
