



Long hair and vintage styles get along in a way short hair sometimes can’t quite match. There’s room to roll, twist, pin, curl, and build shape without running out of length halfway through the styling process, which is half the fun. The trick is not trying to force your hair into one giant costume-piece shape. The best vintage hairstyles for long hair usually look polished first and retro second.
That’s why these looks keep showing up again and again in salons, weddings, dance halls, and old movie stills. They have structure, but they also have movement. A strong side part, a neat roll, a brushed-out wave, or a well-placed scarf can do more than a mountain of accessories ever will. And if your hair is thick, heavy, or a little slippery, a setting spray, a teasing comb, and a box of bobby pins become your best friends fast.
I’ve always thought long hair is at its best when it looks controlled without looking frozen. A style can be tidy and still feel soft. It can be formal and still move when you turn your head. That balance matters here, because vintage hair lives or dies on shape, and shape lives or dies on prep.
1. Side-Parted Hollywood Waves
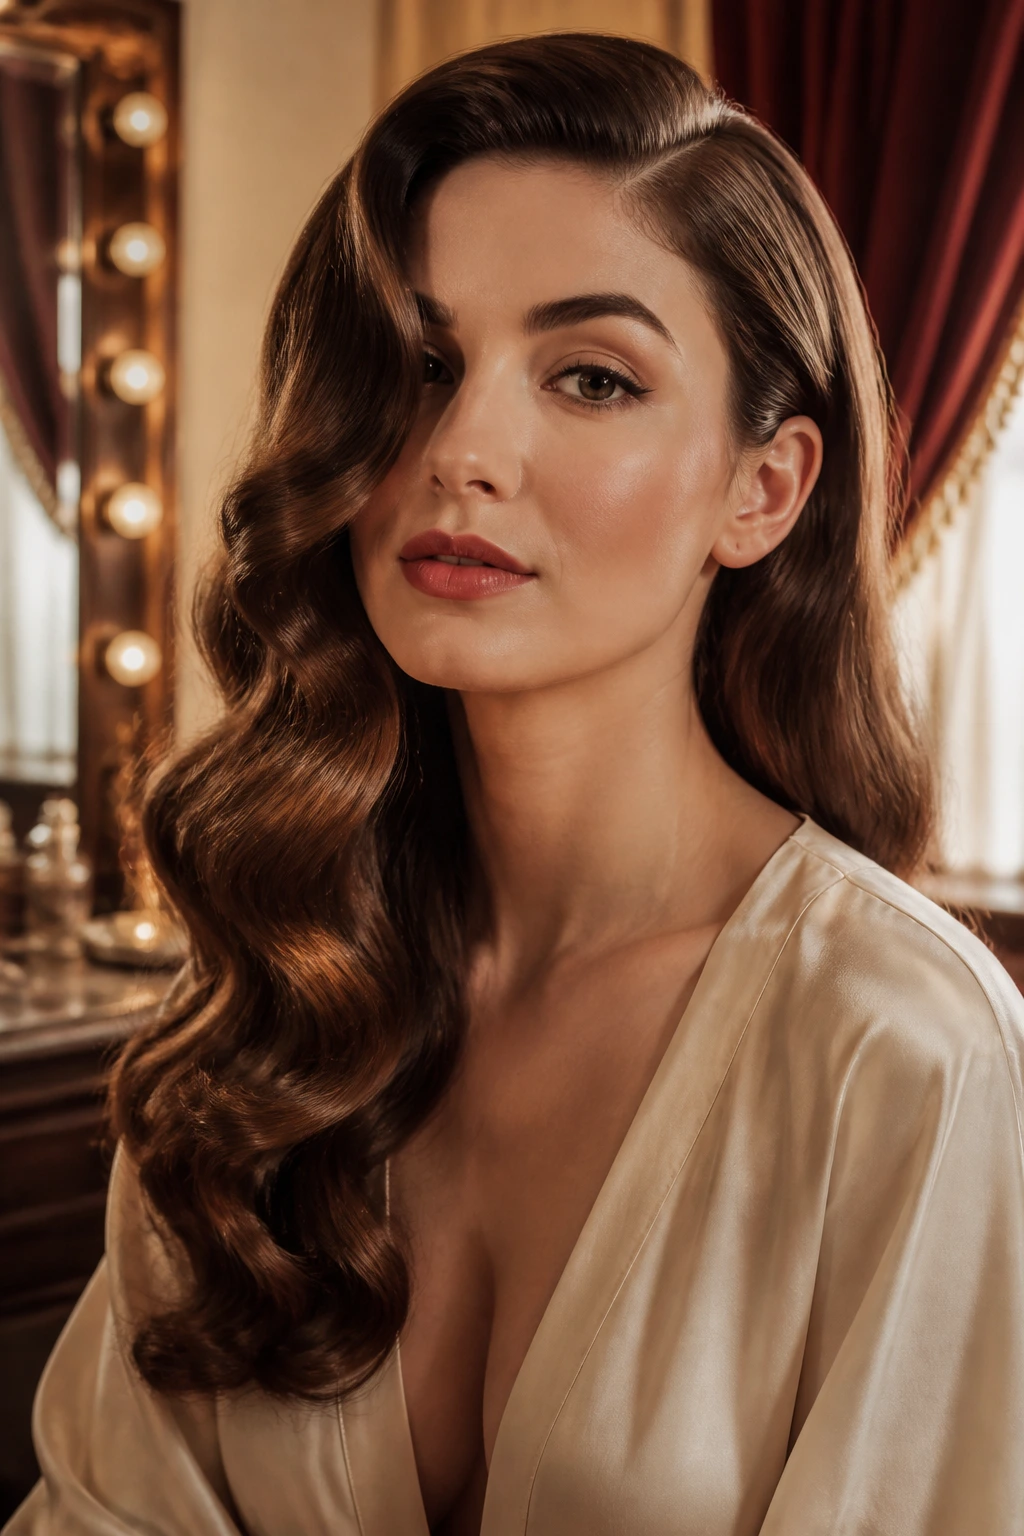
A deep side part does a lot of the work before you even pick up a curling iron. On long hair, those sweeping waves have room to fall in a clean line, which is exactly why this look stays so flattering.
Why it works on long hair
The length gives the wave weight, so it settles into that screen-siren curve instead of puffing out. I like this style because it feels dressed up without getting fussy, and it’s one of the easiest vintage looks to adapt for everyday wear.
A 1¼-inch or 1½-inch curling iron is the sweet spot here. Curl sections away from the face, pin each curl flat while it cools, then brush everything out with a boar-bristle brush once the hair is fully set.
- Use a side part about 2 to 3 inches off center.
- Clip the curls while they cool so they keep their bend.
- Finish with a light shine spray, not a heavy oil.
- Keep the front wave a little lower on one side for that old-Hollywood shape.
Best tip: curl the bottom sections a touch tighter than the top. Long hair loosens as it drops, and this keeps the wave from falling flat by the time you leave the house.
2. Classic Victory Rolls
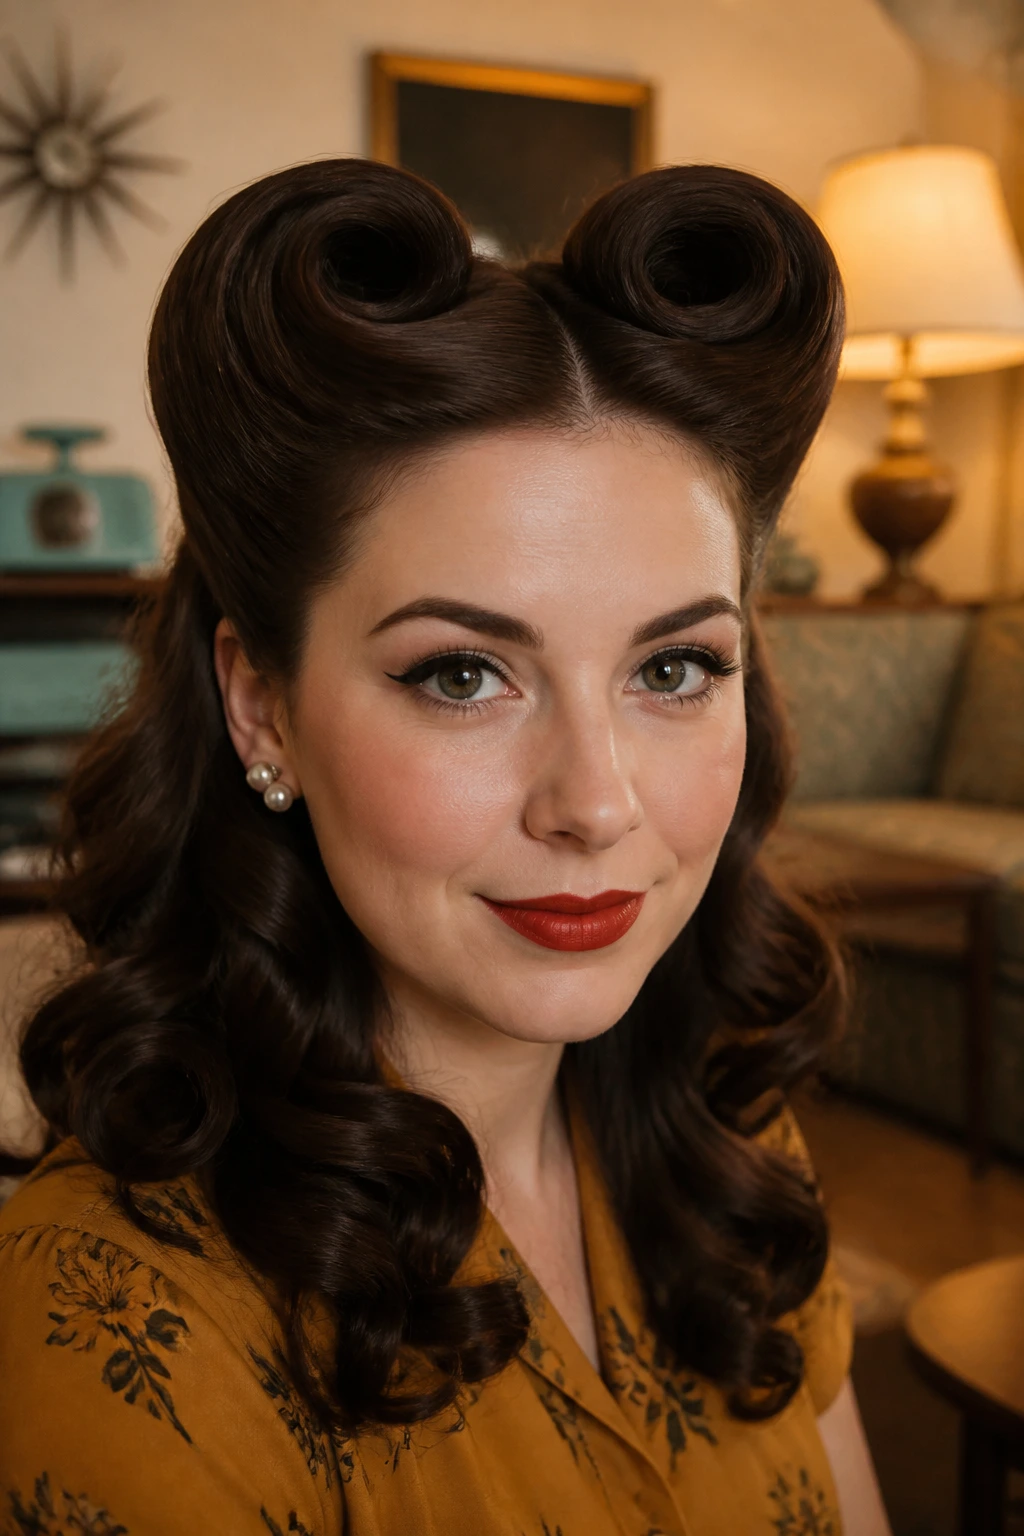
Victory rolls are not subtle. That’s the point.
They bring height, curve, and a little swagger to long hair, which can otherwise drag a style down if the crown is too flat. The rolls also give you a nice excuse to leave the rest of the hair loose, waved, or tucked into a low finish so the whole look feels balanced rather than heavy.
What I like most is the contrast. The front is sculpted and precise, while the length behind it can stay soft. That mix keeps the style from reading as a full costume unless you really lean into it with makeup and accessories.
For long hair, make the rolls from medium sections rather than huge chunks. Too much hair in one roll turns floppy fast, and floppy is not what you want here. A little backcombing at the base helps, but don’t overdo it or the roll gets lumpy.
If you want the style to hold, mist each section with setting spray before rolling and secure the underside with crossed bobby pins. Hidden pins matter. Visible ones do not.
3. Soft Pin Curls
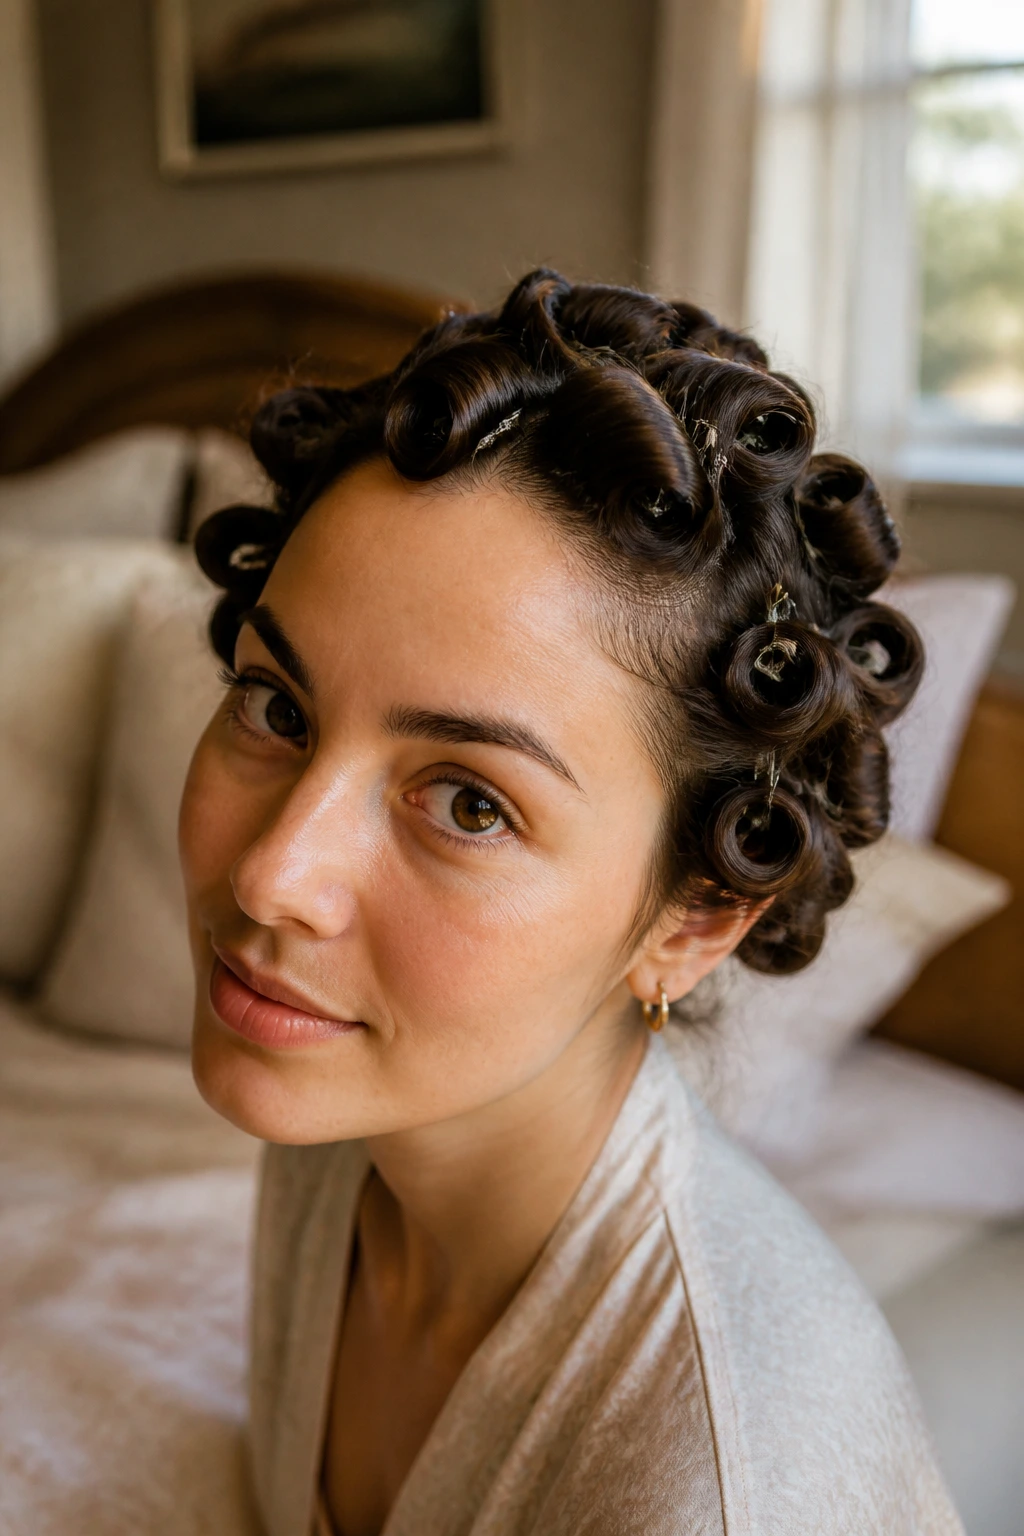
If you set pin curls while the hair is still slightly damp, the whole style wakes up with more shape in the morning. That’s the magic of it. Pin curls are one of those old methods that still earns its place because they can make long hair act like it has memory.
The look can be tight and sculpted, or brushed out into something softer. Either way, the curls start with tiny wound sections pinned flat against the head so they dry in a controlled coil. Long hair needs more sectioning than shorter hair, but that’s actually useful—you can control exactly where the volume lands.
What you’ll want
- Setting lotion or a light mousse on damp hair.
- Duckbill clips or flat clips to hold each curl.
- A silk scarf or hair net if you’re sleeping in the set.
- Patience. A little.
When the curls are completely dry, brush them gently into shape or leave them as is for a more defined retro finish. Do not rush the drying stage. If the center of the curl is still wet, the style collapses, and long hair makes that collapse more obvious.
4. Finger Waves with Long Length
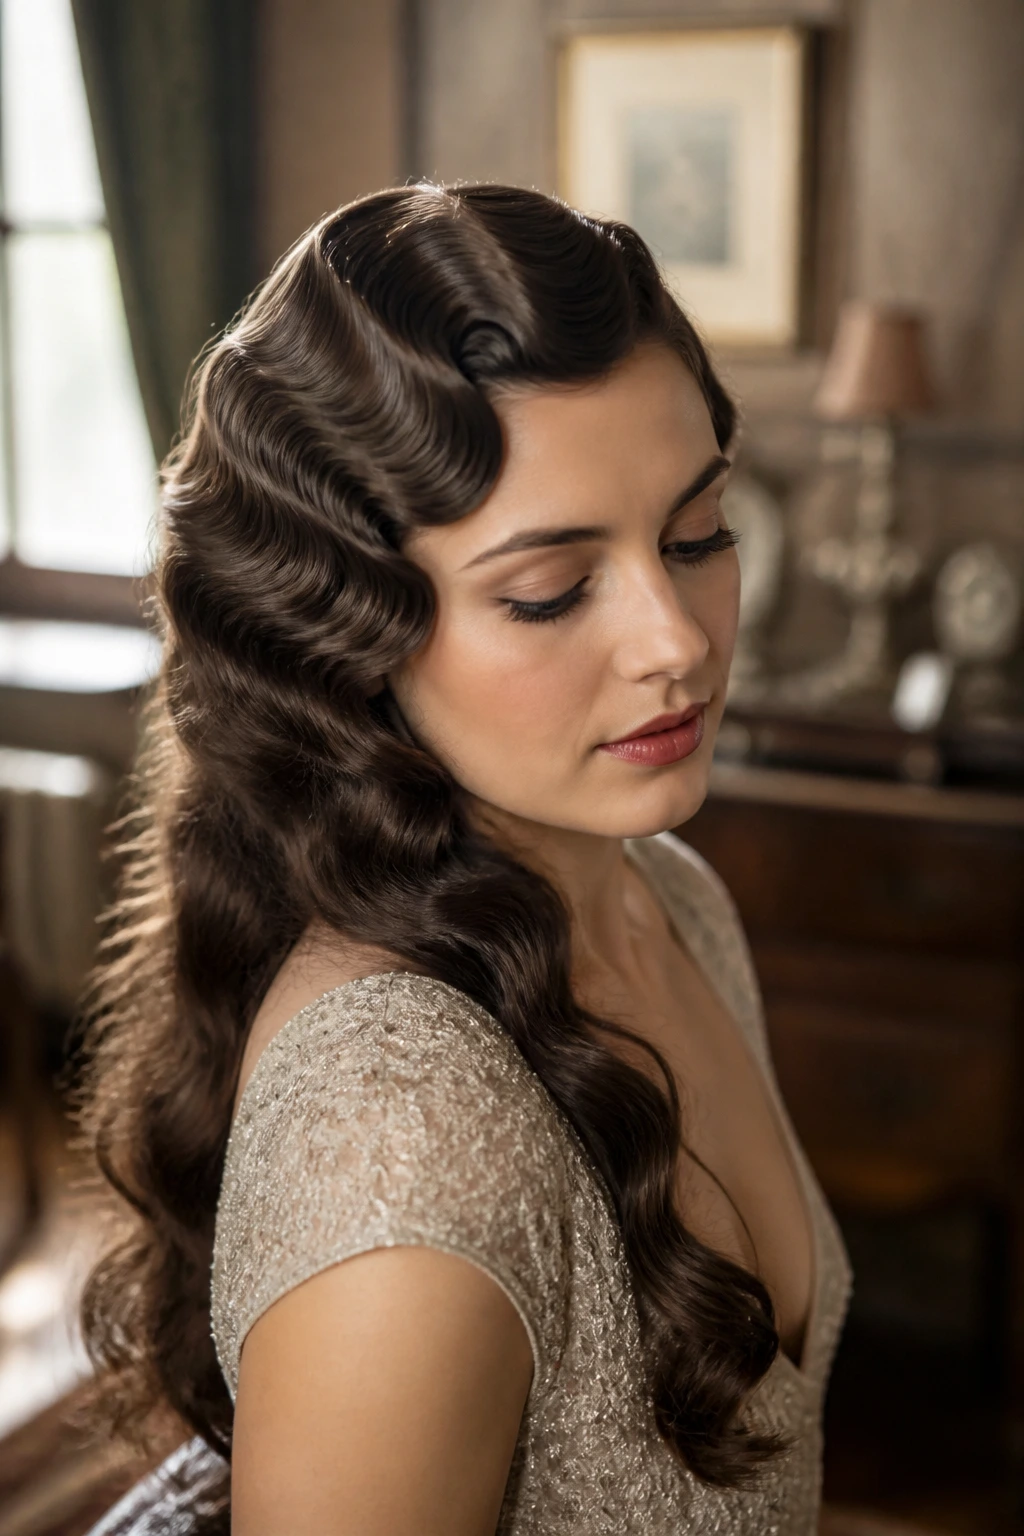
Finger waves are crisp before they are pretty. That sounds harsh, but it’s true, and it’s exactly why they work so well when you want vintage hair with real structure.
The technique shines on long hair because you do not need to sculpt the entire head this way. A front section, a side panel, or the top few inches can carry the whole mood while the rest of the length stays soft or pinned back. That keeps the style from becoming stiff or too time-consuming.
The key is the gel-to-comb ratio. Too little product and the wave falls apart. Too much and the hair looks wet for hours in a bad way. You want the hair to feel slick and controlled, not drenched. Use a fine-tooth comb and press the waves into place with your fingers as you go.
I like finger waves best when the finish is a little imperfect. A tiny gap here, a softer curve there. Those small irregularities keep the look from feeling pasted on.
Long hair benefits from this style because it gives you a fancy front without asking every inch of hair to behave.
5. Marcel Waves
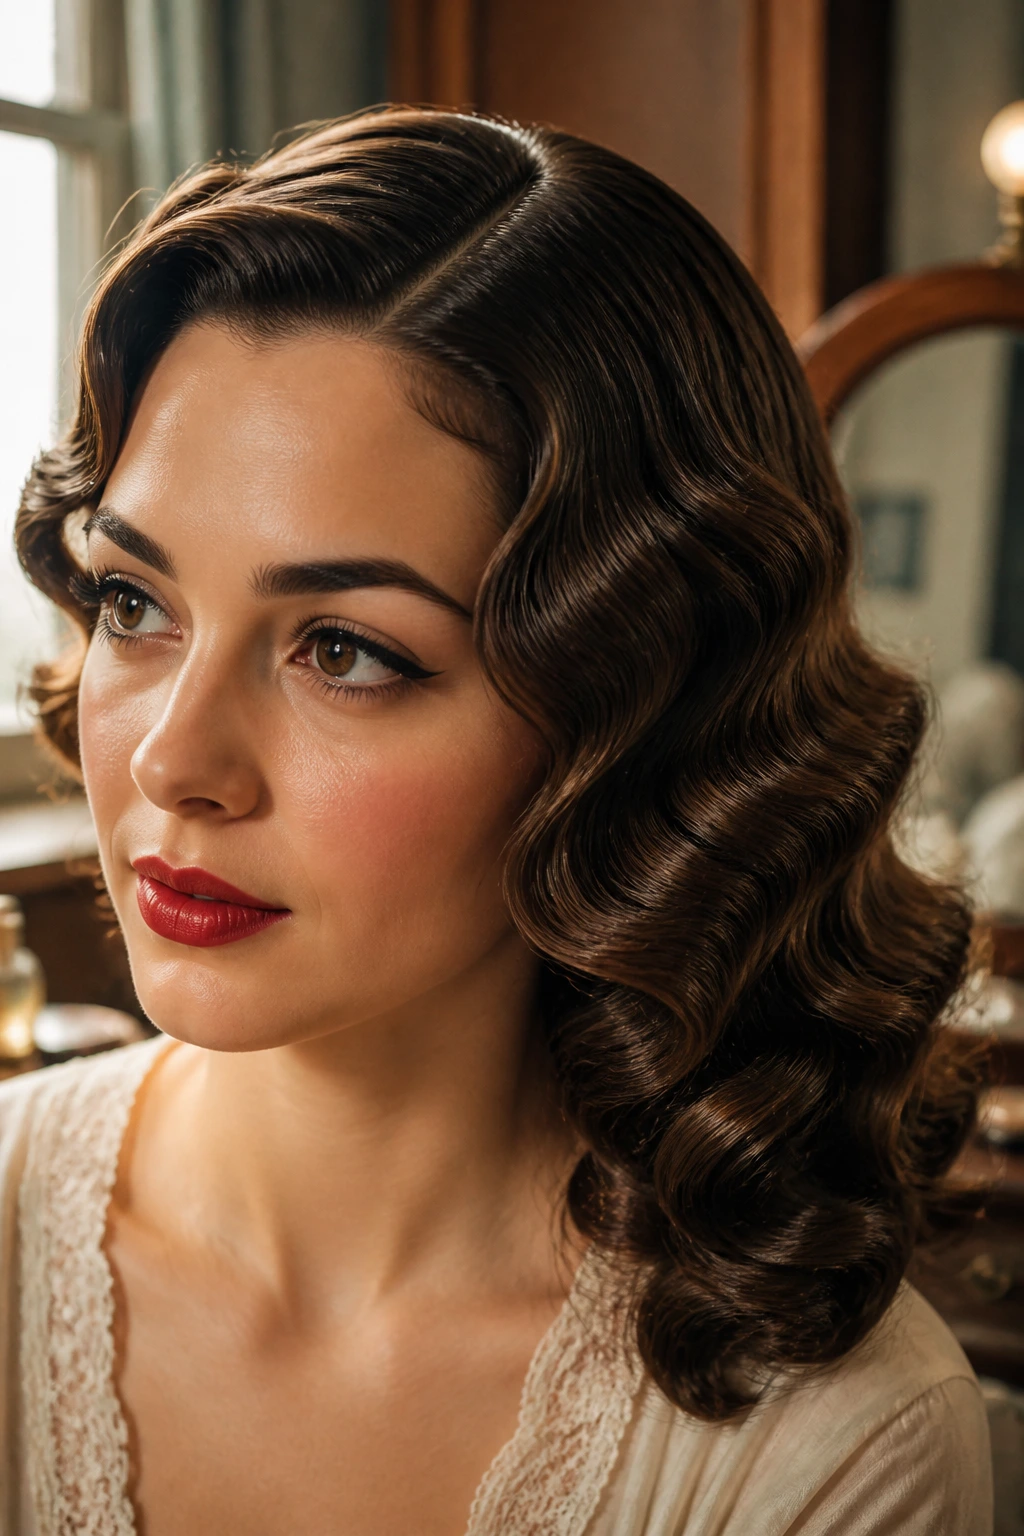
Why do Marcel waves still look so polished on long hair? Because the shape comes from heat, not just product, and that gives the wave a cleaner, smoother line.
They’re different from finger waves in a way you can see right away. Finger waves are sculpted with fingers and gel. Marcel waves are built with a heated iron and a careful clamp-and-turn motion, which leaves a softer, more uniform S-curve. On long hair, that smoothness looks expensive without needing a lot of extra decoration.
How to wear it
Use a 1-inch or 1¼-inch iron and work in horizontal sections from the nape upward. Clamp, twist slightly, and release in a rhythm that keeps the wave even. If you’ve got very thick hair, smaller sections will save you from ending up with one side tighter than the other.
A side part suits this style better than a center part, especially if your hair is long and dense. The wave needs a place to fall. Otherwise it can spread out too much and lose the sharp vintage line.
I’d wear this with a simple neckline and maybe one pair of earrings. Let the hair do the heavy lifting. It does enough.
6. Half-Up Bouffant
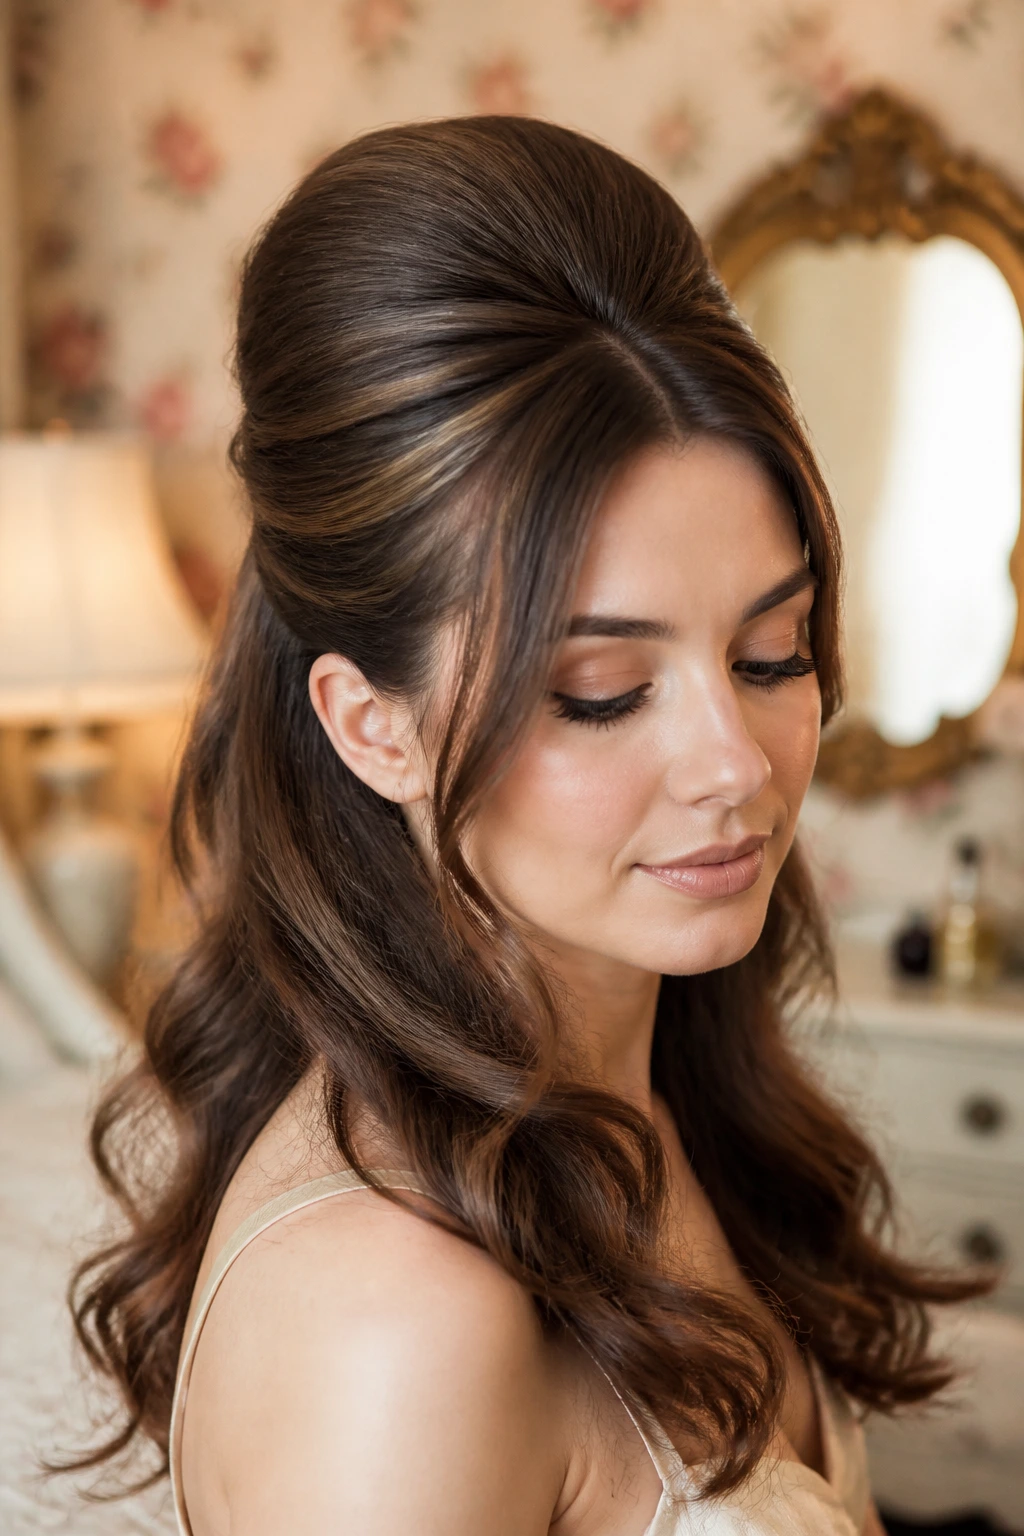
Half-up bouffants beat flat hair every time. There, I said it.
Long hair can handle a little height at the crown without looking cartoonish, and that’s what makes this style such a solid option. The lifted top section keeps the face open, while the remaining length stays loose enough to show off curl, wave, or even a straight blowout.
This is one of those styles that feels more glamorous than it is difficult. Tease the crown in small layers, smooth the top layer over the backcombing, then pin the sides back so the volume sits centered instead of drifting backward. That’s the part people rush, and it shows.
If your hair is silky or fine, spray each section lightly before teasing. A dry teasing comb helps too. If your hair is thick, you may need fewer backcombed layers than you think—too much teasing can make the shape bulky in the wrong way.
The result should look airy at the top and full below. Not stiff. Never stiff.
7. Gibson Tuck
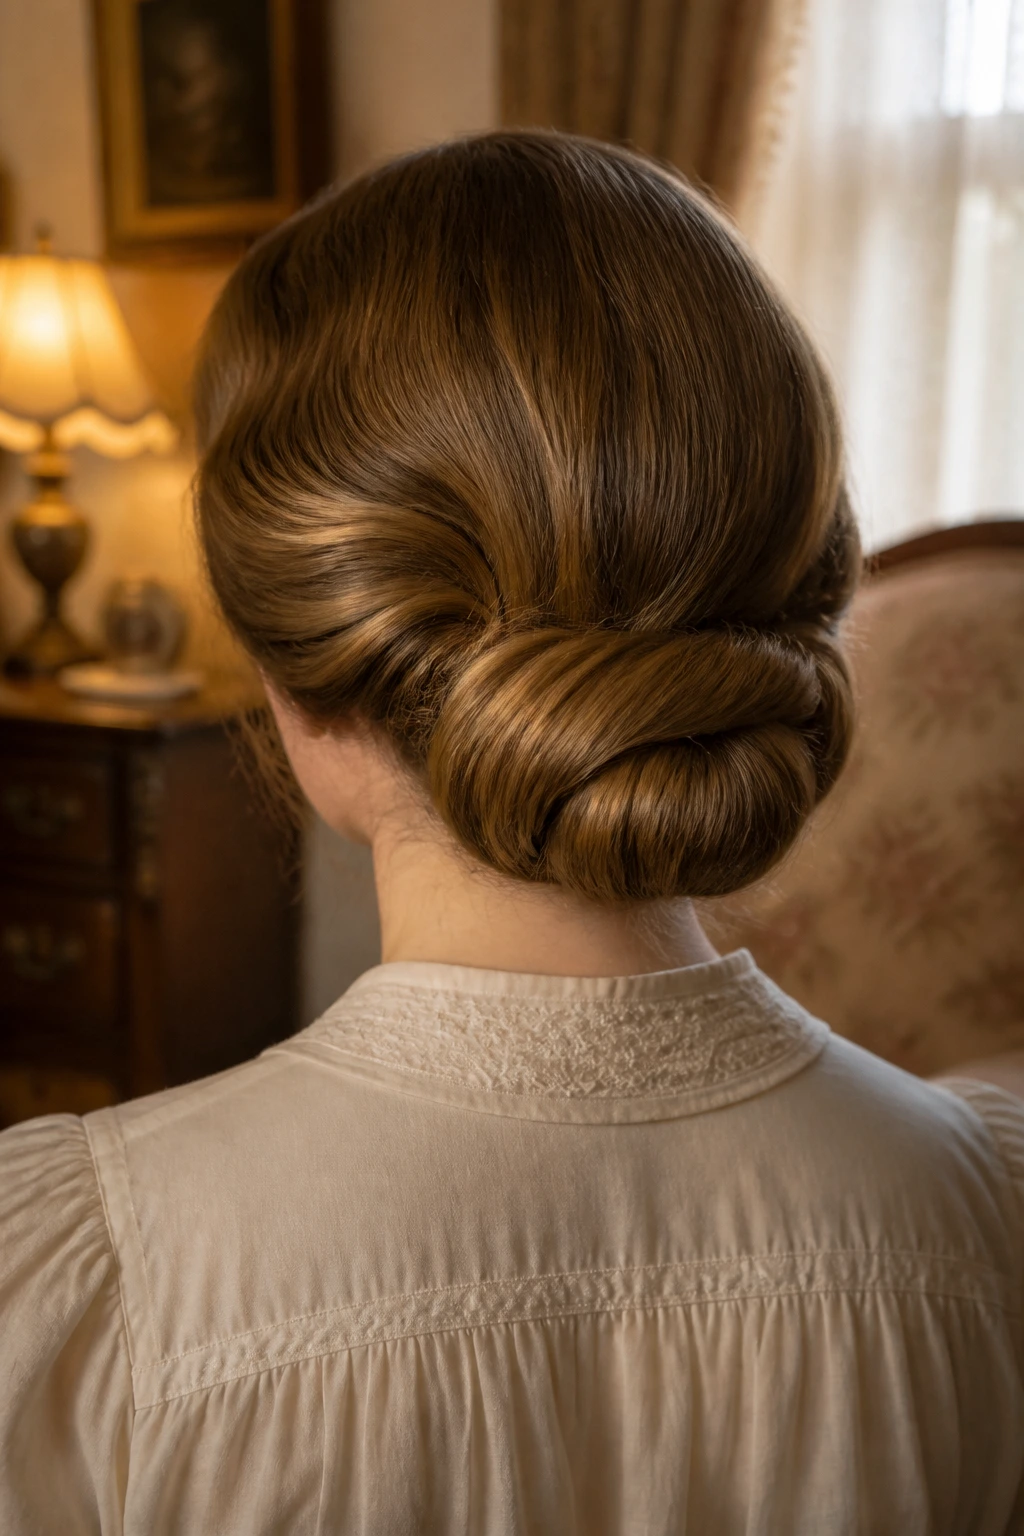
A Gibson tuck is basically long hair behaving like it has a shorter, cleaner cut. The ends disappear into a low roll, but the style still keeps enough softness around the head to avoid looking severe.
It’s one of my favorite vintage options for long hair because it solves a real problem: what do you do when your hair is too long for a simple tucked style but you don’t want a full updo? You fold it inward, pin it low, and let the shape do the work.
This style looks best when the hair has a little bend in it already. A light wave gives the tuck something to hold onto, and a side part adds a softer line near the forehead. If your hair is pin-straight, the tuck can still work, but the finished shape may need a few extra pins under the fold.
The bottom edge should be smooth but not tight. If you pull too hard, the whole thing loses the old-fashioned charm and starts looking severe. I like a little softness at the ears. It feels more human that way.
8. Rolled Chignon
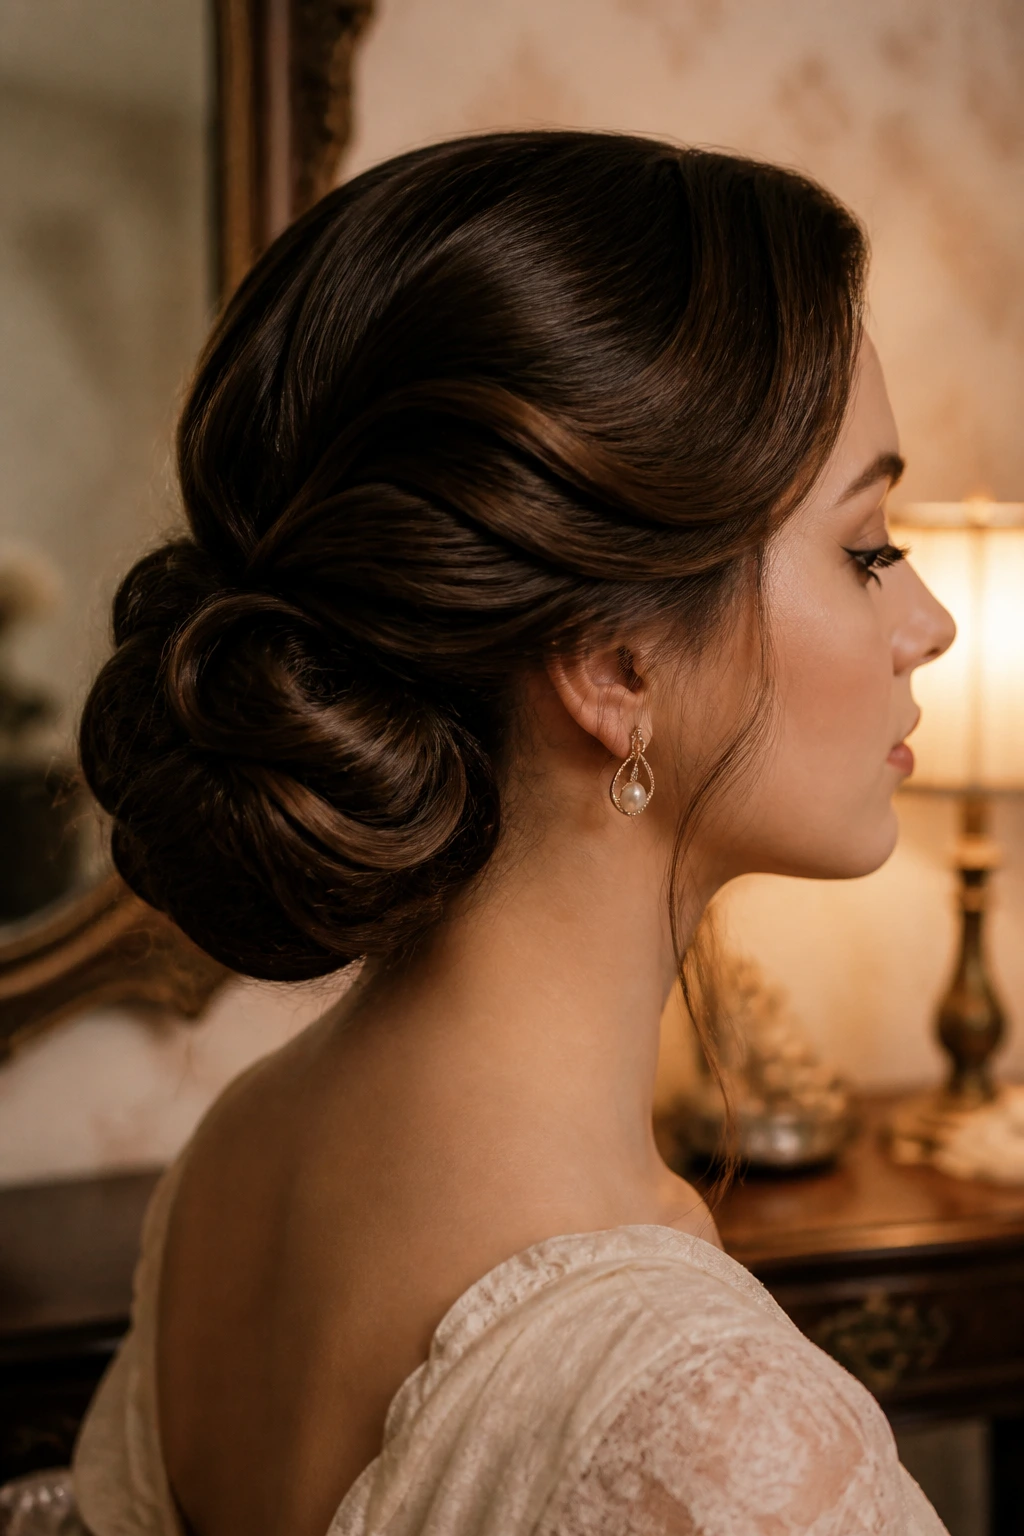
Rolled chignons are the kind of style that makes long hair look controlled without looking stiff. That’s a hard balance to hit, and this one does it nicely.
The basic idea is simple: gather the hair low, roll or fold the length inward, and pin it so the shape sits close to the nape. On long hair, that folded bulk creates a fuller chignon than you’d get from a shorter cut, which is exactly what gives it that vintage evening feel.
Where to place the roll
A centered chignon looks formal. A slightly off-center one looks softer and more lived-in. If your hair is very thick, build the style over a low ponytail first. That gives the roll a base and keeps the pins from fighting you.
Use U-pins for the bulk and regular bobby pins for the little loose edges. The U-pins hold shape better in heavy hair, which matters more than people think.
Best tip: twist the lengths once before you roll them under. That small bit of tension helps the chignon sit cleanly instead of puffing at the sides.
9. Braided Crown with Soft Ends
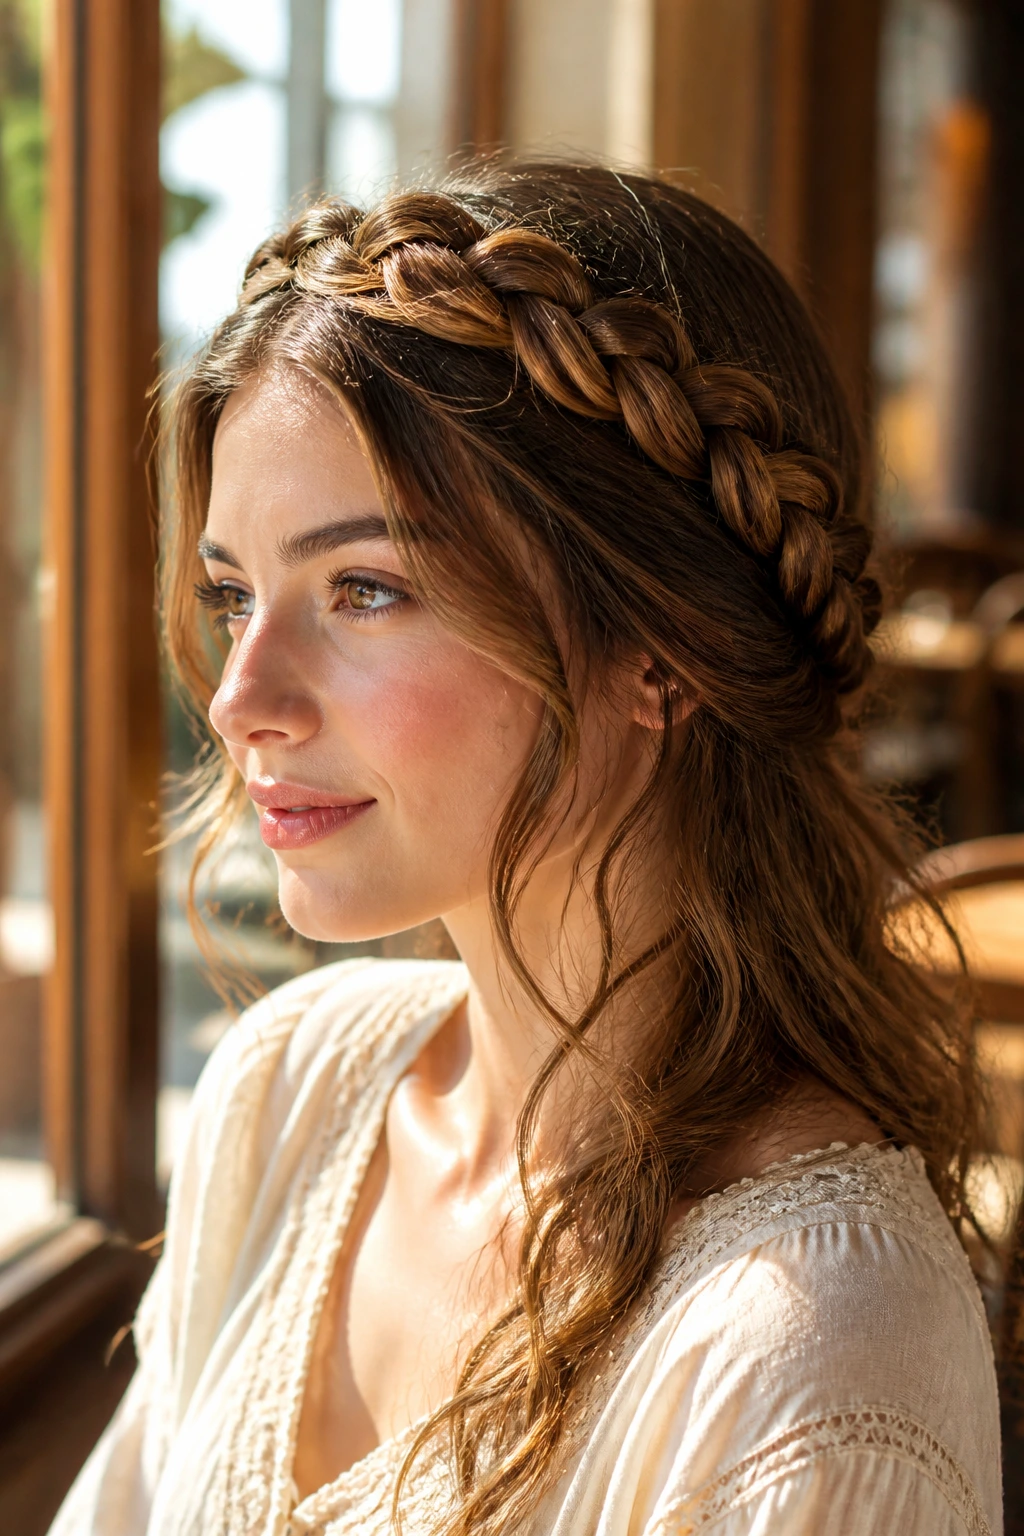
The braid crown earns its keep because it gives you both structure and softness. Long hair is ideal for it, since the braid itself can be thick enough to hold shape while the rest of the length stays loose.
I reach for this style when I want something romantic but not sugary. You braid from the temples or along the hairline, wrap the braid around the crown, and leave the remaining hair curled or waved down the back. The braid keeps the front under control, which is useful if you’ve got layers that love to escape.
A loose braid reads more vintage than a tight, shiny one. You want the weave to have a bit of width, so gently pull the outer edges after braiding. Not so much that it falls apart, but enough to create a fuller line across the top.
If your hair is very long, you can tuck the ends of the braid into the back of the length instead of pinning them openly. That keeps the crown neat and lets the loose hair stay the focus.
10. Silk-Scarf Ponytail
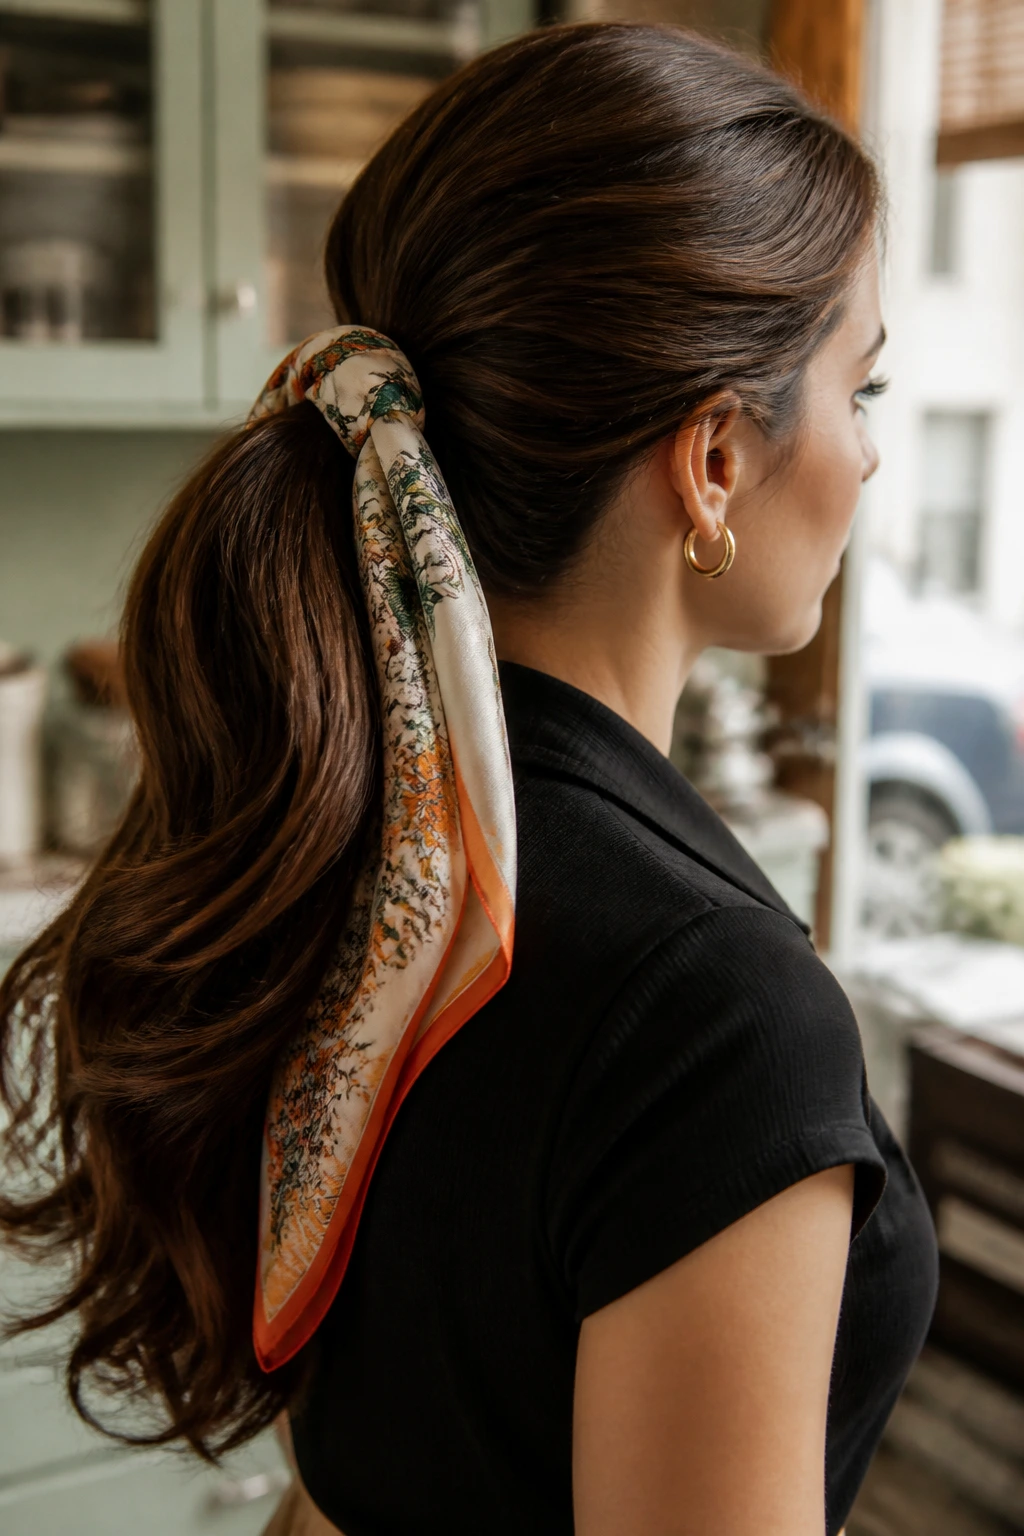
A silk scarf turns an ordinary ponytail into something with history. That’s the whole appeal.
On long hair, a low or mid ponytail already has enough weight to hang beautifully, and the scarf adds color, movement, and a little bit of pin-up energy. Choose a scarf that isn’t too thick or it will fight the elastic and sit lumpy around the base.
How to tie it
Start with a smooth ponytail and wrap the scarf around the elastic once or twice. Tie it in a knot or a small bow, then let the tails fall beside the hair. If the ponytail feels too plain, curl the ends with a large-barrel iron so the finish has shape instead of just length.
This style is especially useful when your hair is clean but not freshly washed. A little grip helps the ponytail stay put, and the scarf disguises the practical part of the style.
I like this look because it doesn’t pretend to be complicated. It’s casual, but it still nods to old movie styling and mid-century street wear. That mix is what makes it work.
11. Teased High Ponytail
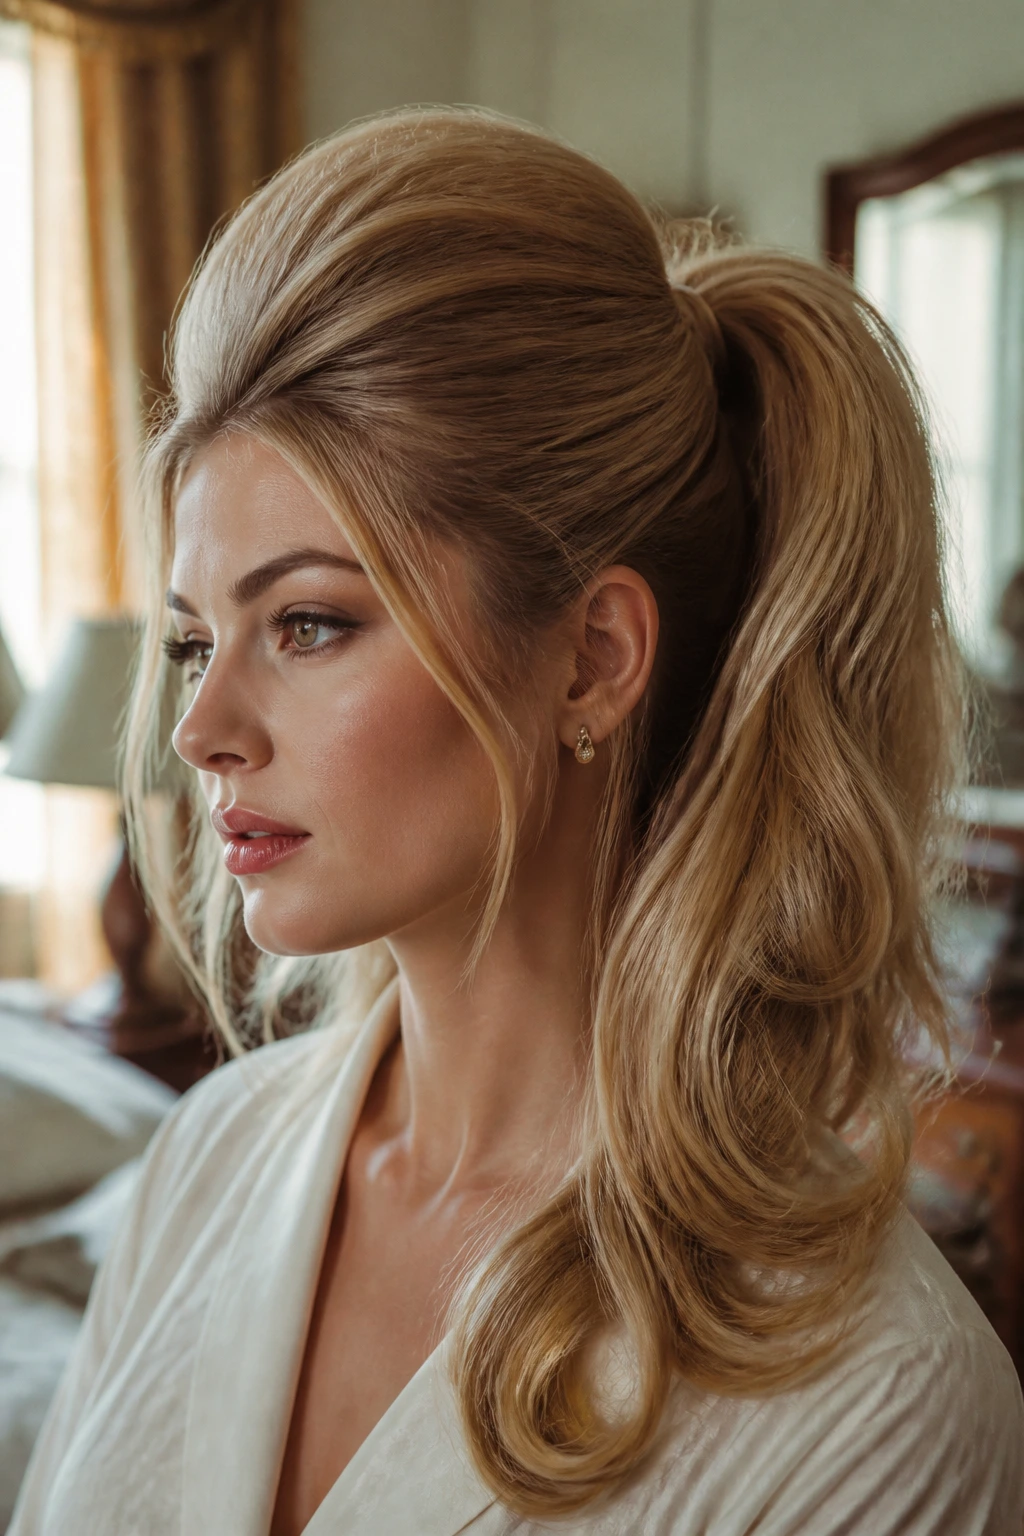
A teased high ponytail is the closest thing vintage hair has to a grin. It’s cheerful, lifted, and a little cheeky.
Compared with a sleek modern ponytail, this one wants crown height and soft ends. The base sits high enough to create lift at the face, then the ponytail itself gets curled, waved, or brushed into a rounder shape. Long hair gives the style more swing, which is part of the fun. You feel it move when you walk.
Tease the crown in small sections and smooth only the outer layer. If you flatten the top too much, the whole thing loses the retro personality. Wrap a strand of hair around the elastic for a cleaner finish, then pin it underneath.
This is a good style when you want volume without a full updo. It also survives an ordinary day better than a more delicate set, which matters if you’re not trying to babysit your hair all afternoon.
A strong side bang or a rolled front section makes this even better. Without some shaping at the front, it can drift into generic ponytail territory.
12. Half-Up Beehive
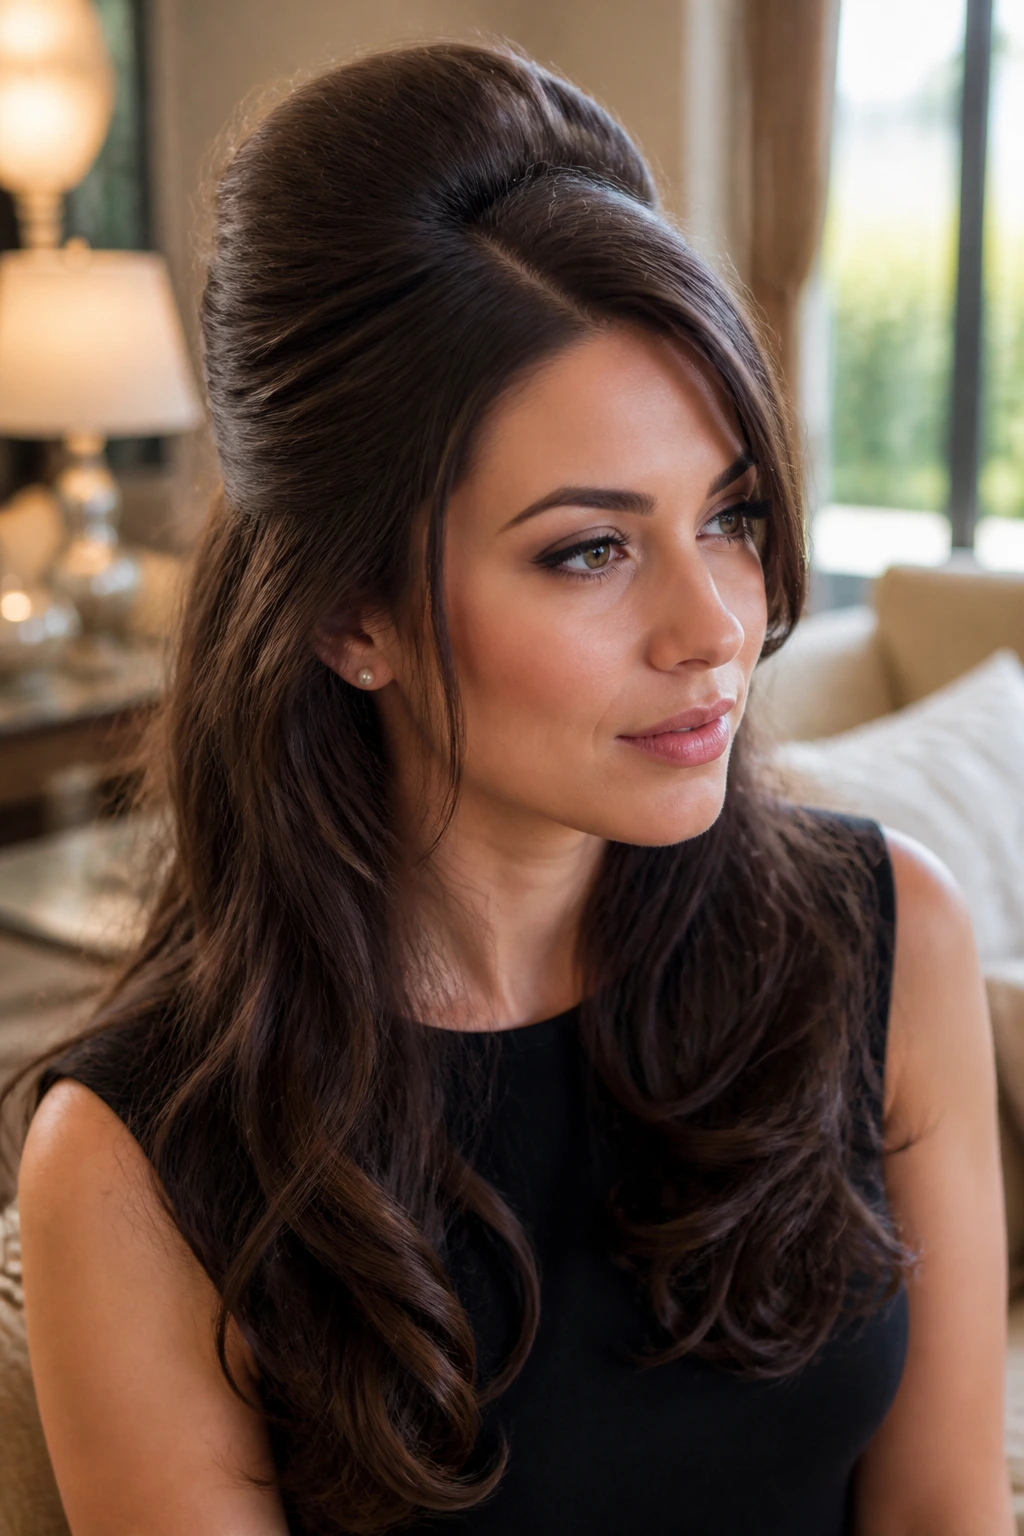
When a beehive is worn half-up, it stops looking costume-y and starts looking chic. The lower length keeps the style from getting too tall, which is exactly why this version works so well on long hair.
The crown section gets backcombed, smoothed on top, and pinned into a rounded lift. The rest of the hair stays down, usually in curls or brushed-out waves. That contrast matters. A full beehive can feel heavy on long hair, but a half-up version gives you the height without the bulk.
Keep it from collapsing
- Backcomb in small layers, not giant chunks.
- Smooth the top with a soft brush rather than pressing it flat.
- Secure the shape with crossed bobby pins at the base.
- Finish with firm-hold hairspray only after the shape is set.
I’m picky about this style because it can go wrong fast. Too much teasing makes it look puffy, and too little makes it disappear. The sweet spot is a soft dome that still shows the hair underneath.
Wear it with curled ends, and it suddenly feels much more graceful. Plain straight lengths underneath can look unfinished.
13. Faux Bob
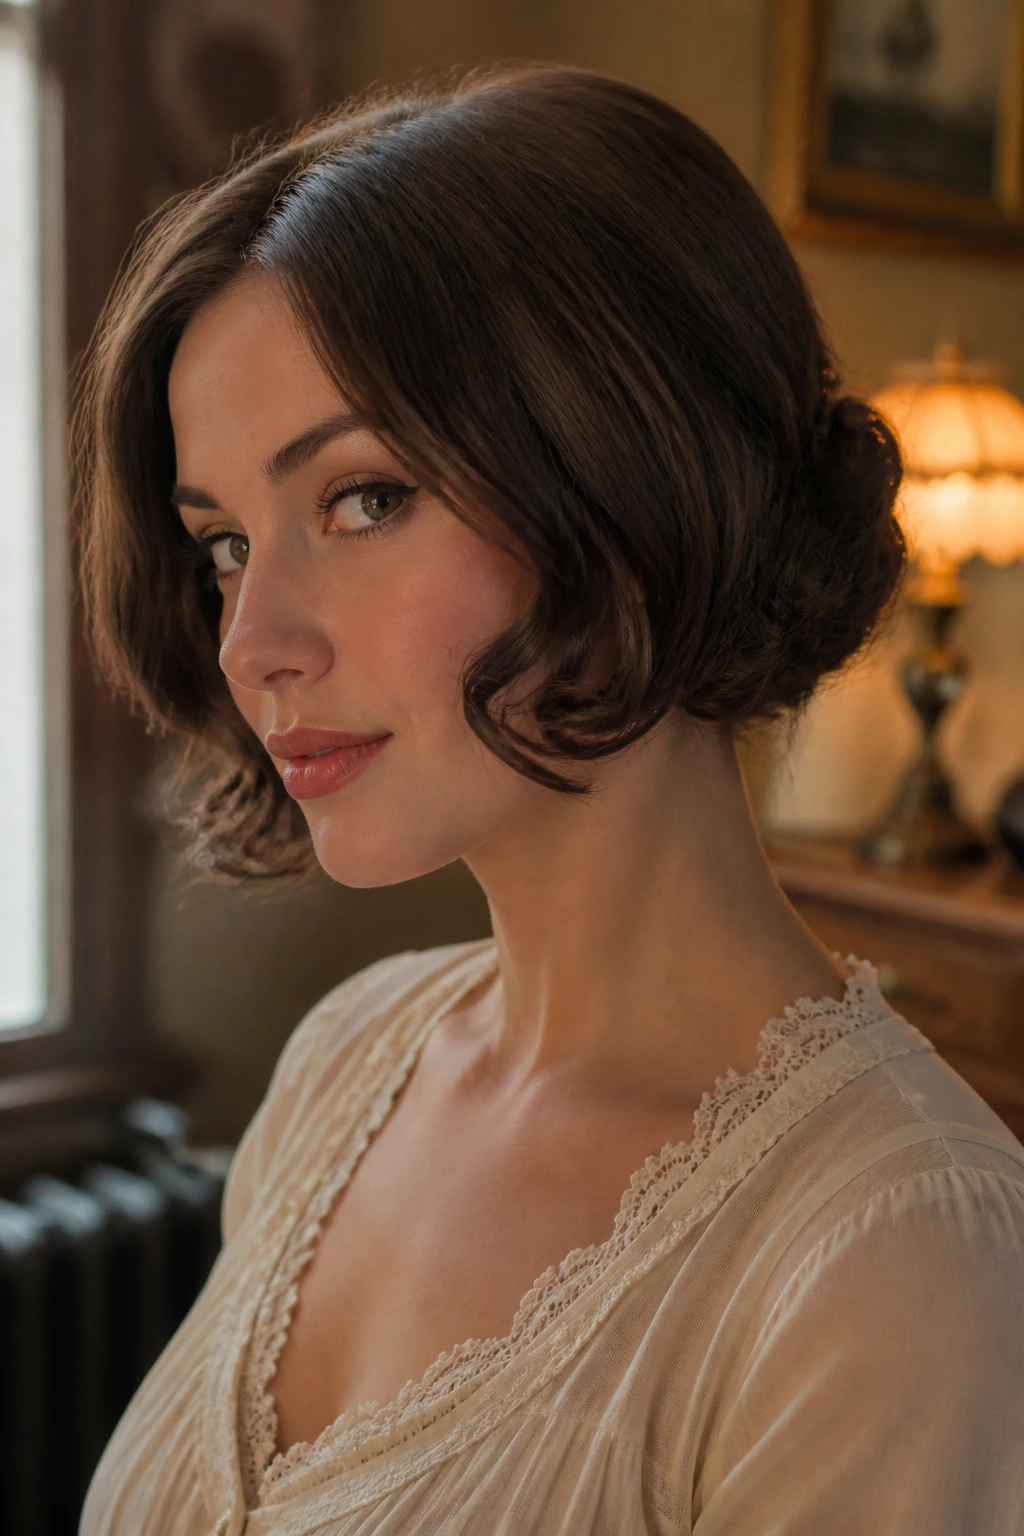
The faux bob is a small magic trick.
Long hair gets tucked, folded, and pinned so it looks like a much shorter cut from the outside. The reward is instant vintage drama without scissors, and that alone makes the style worth knowing. It’s especially good if you love 1920s-inspired looks but don’t want to commit to a real haircut.
The best faux bobs hide the ends in layers. You create a low shape, roll the bottom inward, and pin the hair up under itself so the visible line sits around the jaw or just below it. Leave a few face-framing pieces loose and the illusion gets better, not worse.
The part matters here. A side part gives the style a softer line and helps disguise where the hair is tucked. If your hair is very long, start with a loose curl in the lengths so the tucked ends don’t feel bulky under the fold.
This style is one of those rare tricks that looks more difficult than it is. The pins are doing most of the work. You just need to hide them well.
14. Barrel-Curl Blowout
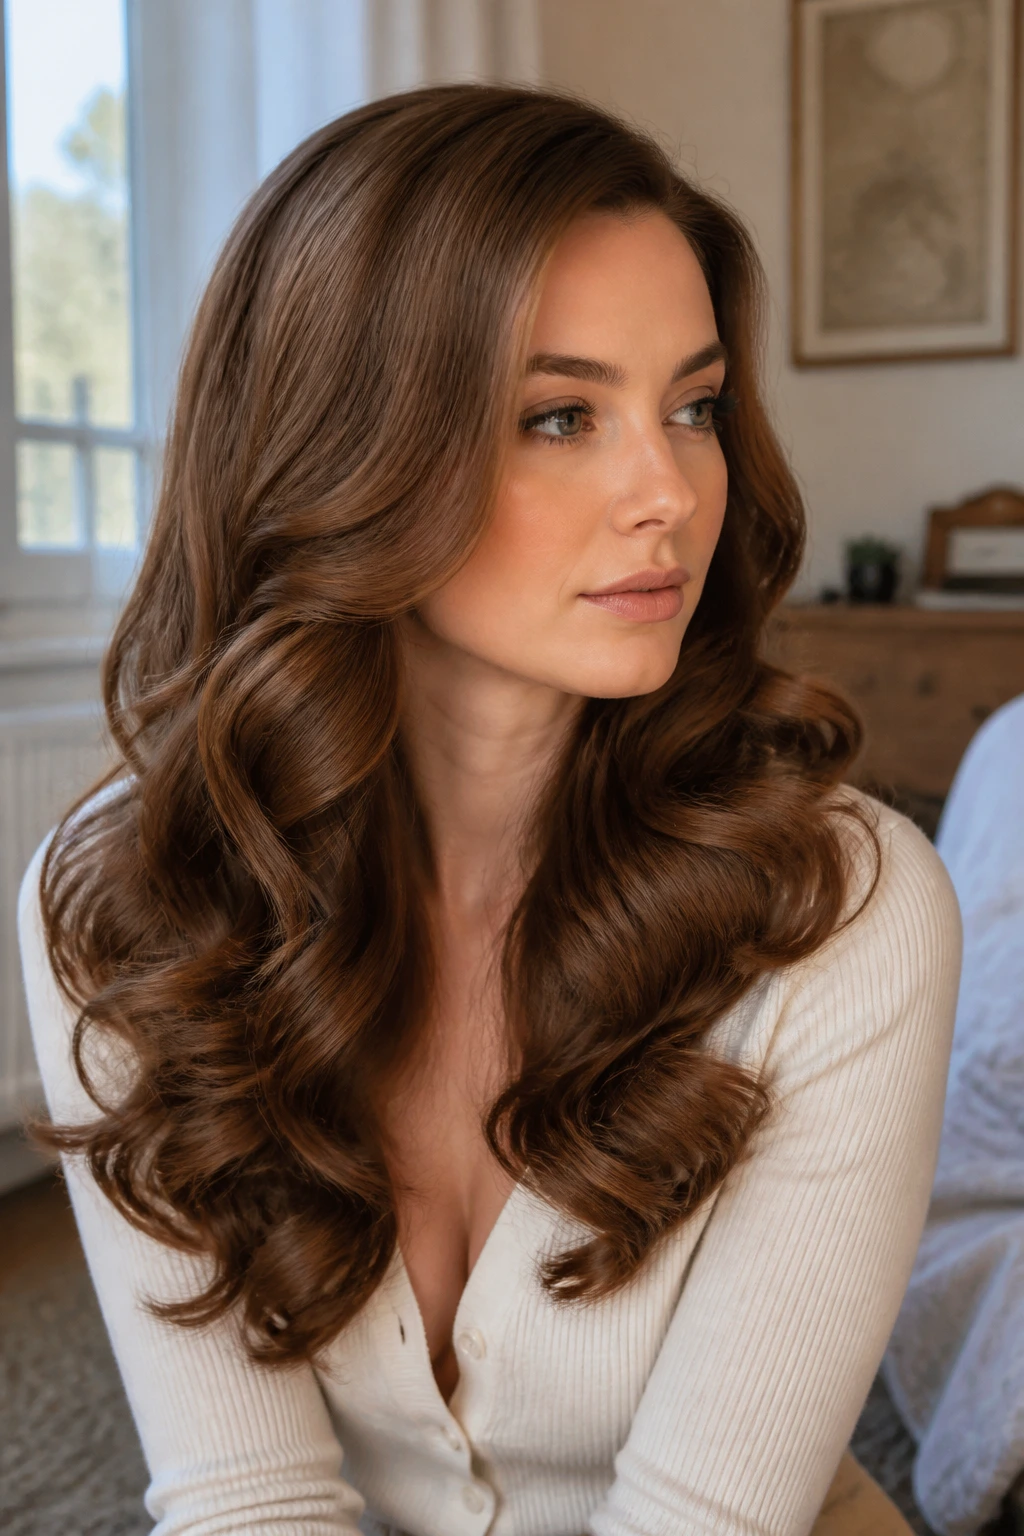
Barrel curls are all about weight and release. That’s why long hair wears them so well.
Unlike tighter curls, barrel curls create a smooth, broad curve that brushes out into soft movement instead of little ringlets. The effect feels glamorous in a calmer way, which makes it a strong choice if you want a vintage shape without looking overly dressed up.
Use a large-barrel curling iron or hot rollers and let each section cool before brushing. If you brush too soon, the curl collapses into frizz. If you leave it untouched, the look can turn stiff. The sweet spot is a full cool-down followed by a gentle brush-through from mid-length to ends.
Signs you’ve got it right
- The ends fold softly rather than flipping sharply.
- The wave sits in a smooth arc.
- The crown stays flat enough to keep the shape elegant.
- The finish has movement when you turn your head.
I think this style looks best with a side part and a clean neckline. It also pairs well with a hair accessory, but it doesn’t need one. The curls are the point.
15. Victory-Roll Half-Up
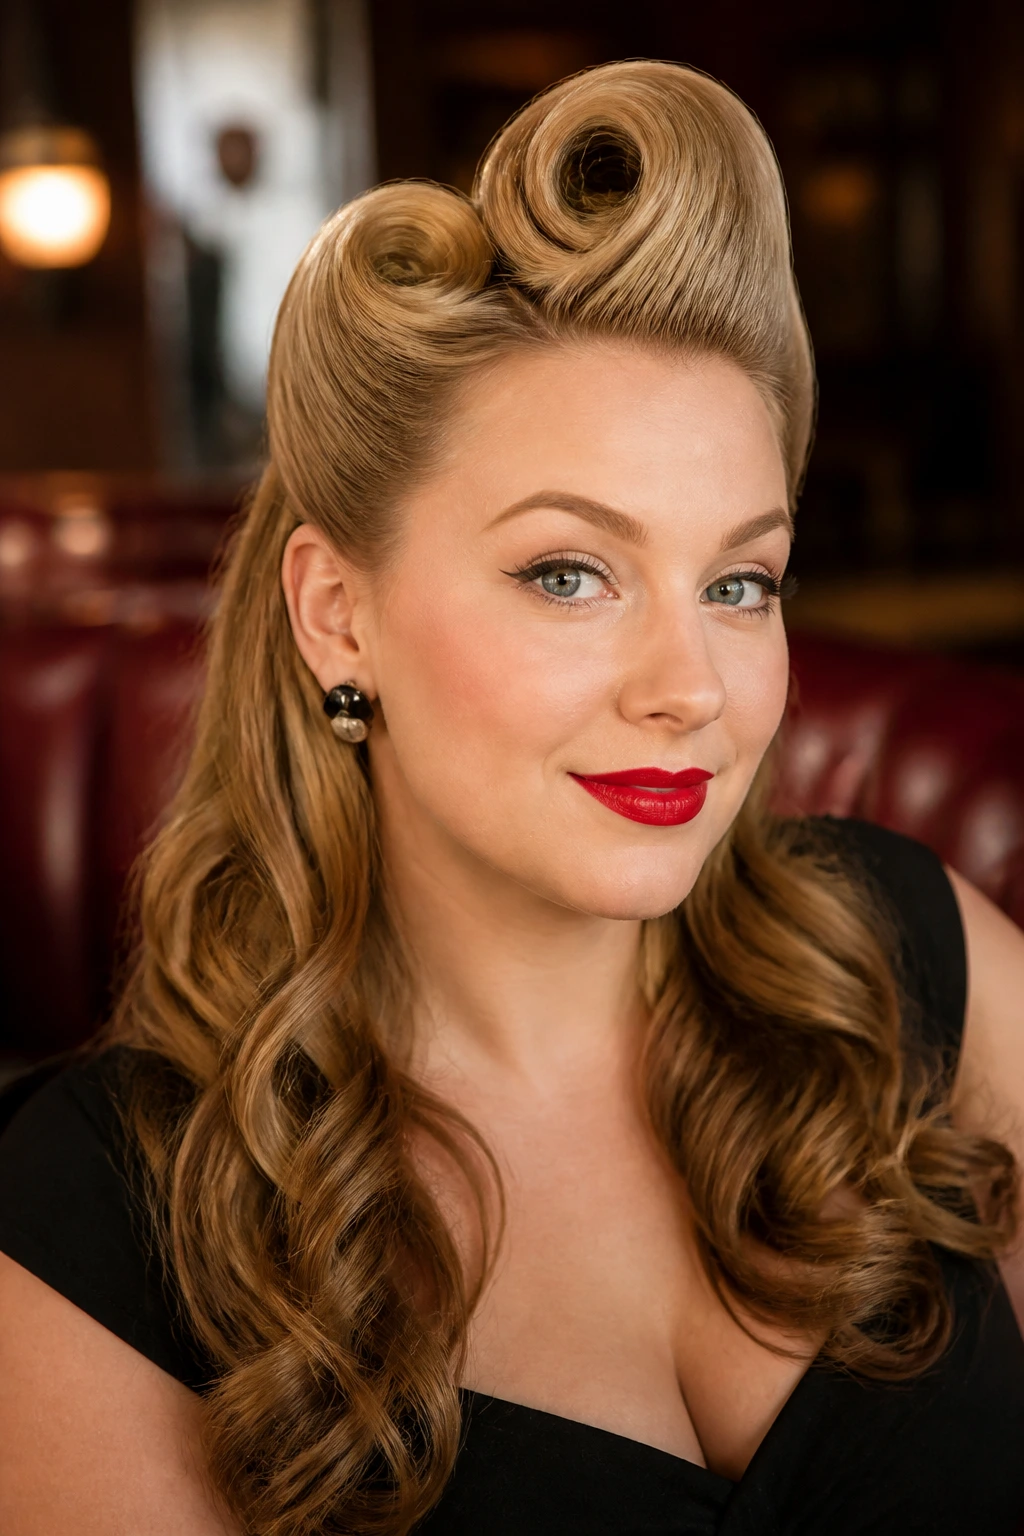
Victory rolls get easier when you stop trying to make them twins. One roll can sit a little higher than the other and still look right.
That matters for long hair because the length below the rolls creates enough visual weight on its own. You don’t need the top to be perfectly symmetrical to make the style work. In fact, a touch of asymmetry can make it look less rigid and more wearable.
The half-up version is especially nice if you want the pin-up look without stacking the whole head into rolls. You take the front sections, roll them inward or backward, pin them securely, and leave the rest down in waves or curls. If your hair is layered, a little extra smoothing at the sides helps keep shorter pieces from sliding out.
I’d wear this with a strong side part or a soft curl at the ends. Straight lengths can feel a little abrupt under the rolls, while waves soften the transition. The style is bold, but it isn’t fussy when done well. That’s the charm.
16. Ribbon-Tied Low Knot
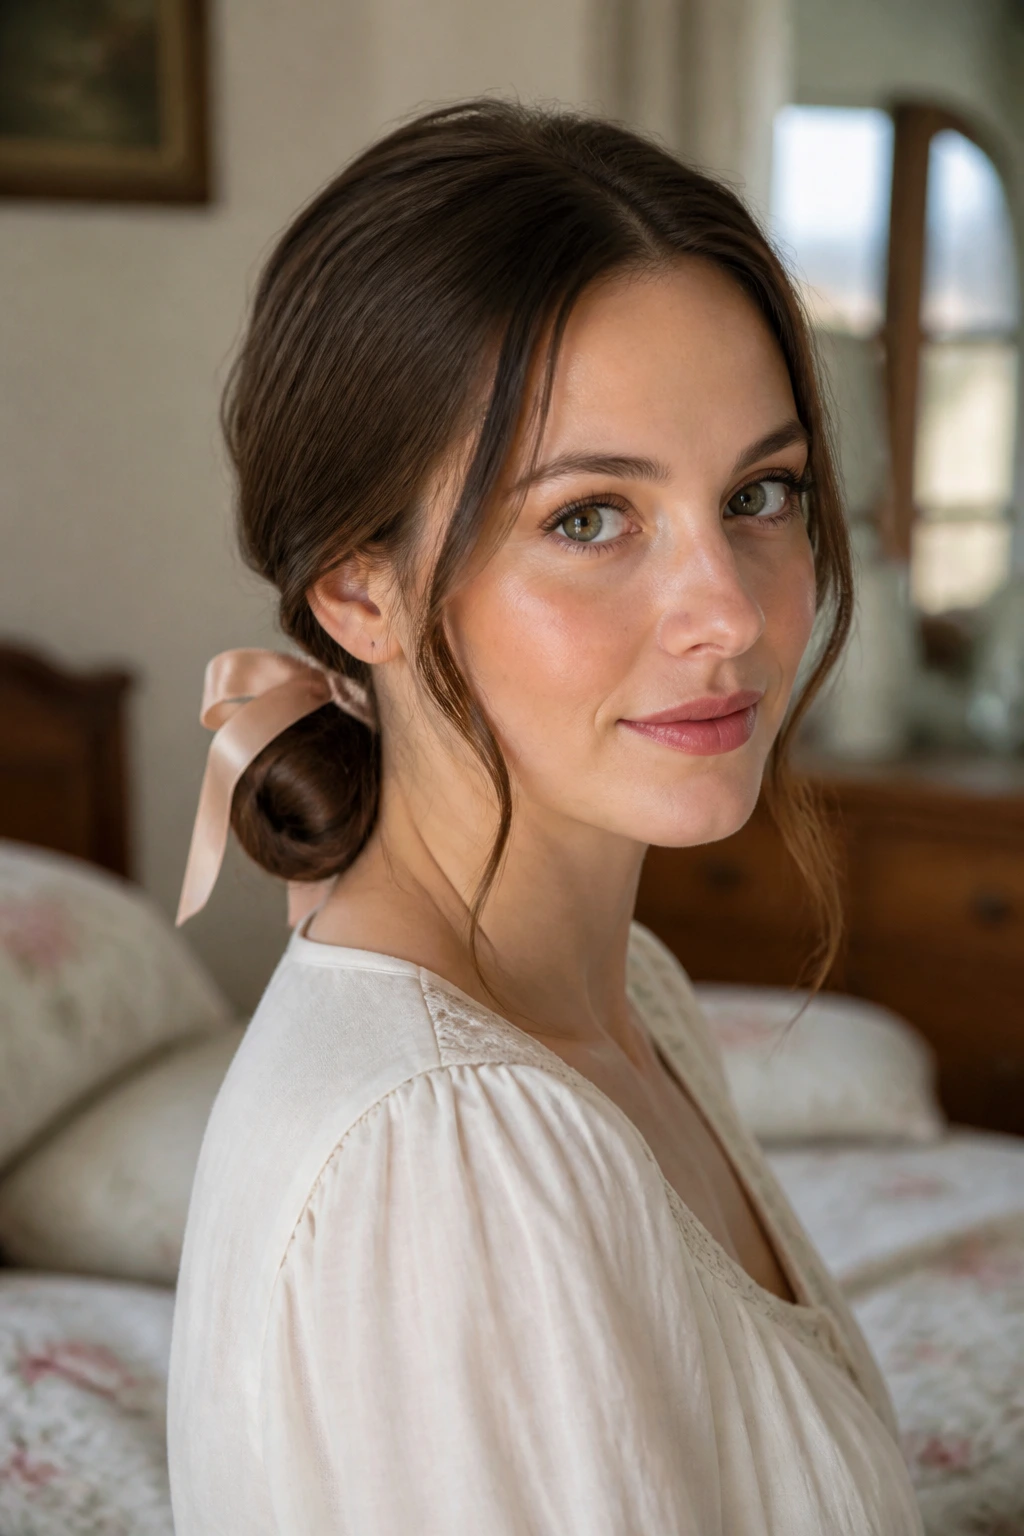
What a ribbon-tied low knot does best is soften a severe outfit. It takes long hair, folds it low, and gives the whole shape a gentle, old-fashioned finish.
This is one of the easier vintage hairstyles for long hair, but easy doesn’t mean boring. The ribbon adds color and texture, and it also hides the practical part of the style, which is often just a smooth knot or loop at the nape. Satin works especially well because it slides less than silk and stays tied more cleanly.
What to use instead of a plain elastic
- A 1-inch satin ribbon for a neat bow.
- A smaller velvet ribbon if you want a wintery feel.
- A hair-friendly tie underneath, so the ribbon is only decorative.
You can leave the knot polished or pull out a few softer pieces around the face. I like the latter better. It keeps the look from becoming too severe and gives the ribbon something to frame.
This style is good for thick long hair because the knot has enough bulk to look intentional. Fine hair can wear it too, but the ribbon matters more there since it provides some of the visual weight.
17. Milkmaid Braid
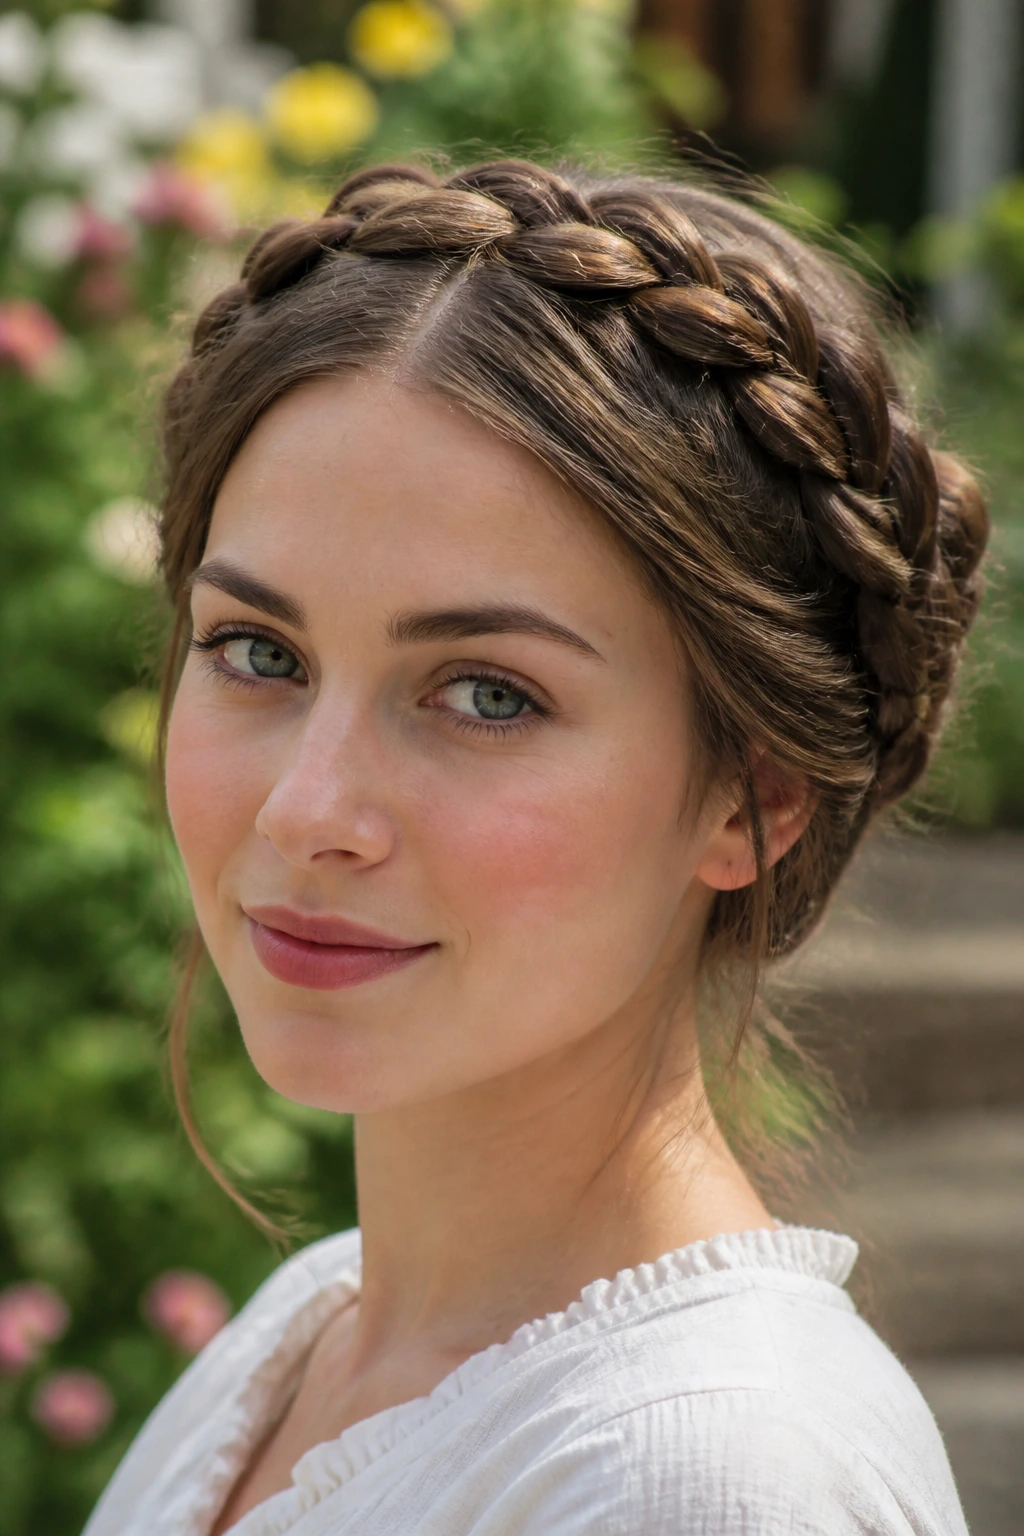
Milkmaid braids are not just for fairytale photos.
On long hair, they become a practical vintage style with a smooth, tidy line around the head and enough thickness to look substantial. The two braids wrap across the crown and get pinned in place, which makes the look feel neat without losing softness.
Compared with a crown braid, the milkmaid version sits lower and feels a little more casual. That makes it a good pick for daytime events, garden settings, or any situation where you want your hair up and off your neck but still styled. If your hair is very long, the braid sections will be fuller, and that gives the style more presence.
Pull the braids apart gently after braiding so they look wide and lived-in. Then pin them with the braid tails tucked underneath. A few wispy pieces near the ears can soften the effect, but don’t overdo the mess. Too many flyaways and it stops looking vintage.
I’d call this one quietly dependable. It holds up, it photographs well in person, and it does not fall apart the second the weather turns damp.
18. Pompadour Half-Up
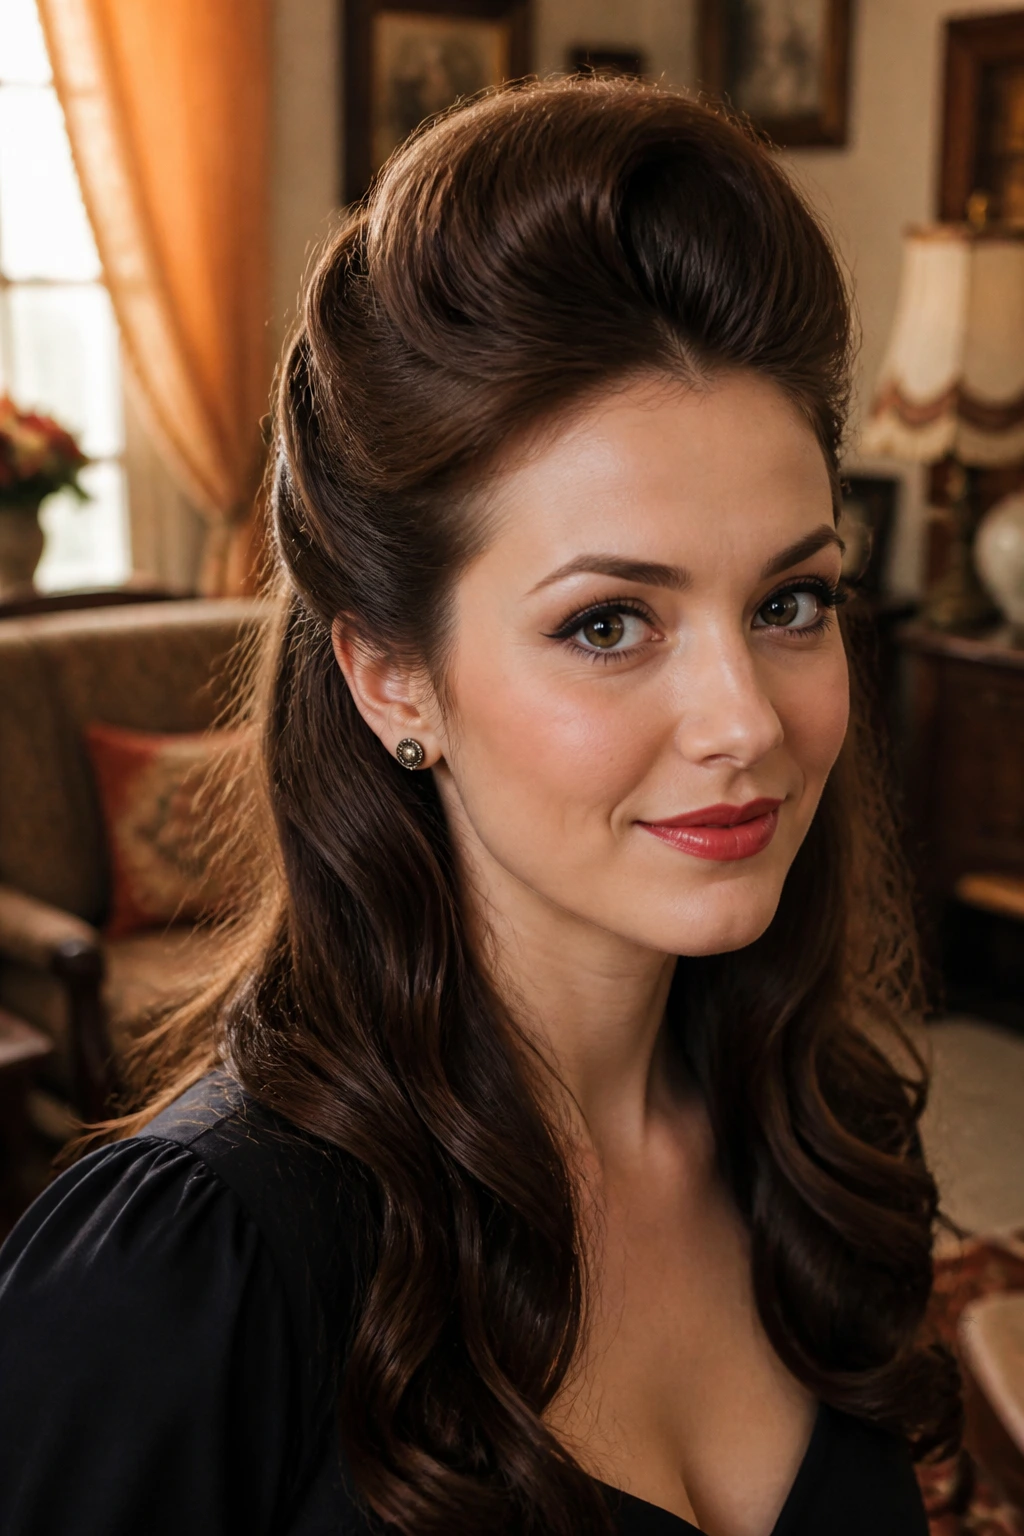
A pompadour half-up keeps the crown high and the rest calm. That’s the whole formula.
The lifted front section gives you the vintage shape, while the remaining length stays loose so the style doesn’t feel overbuilt. On long hair, this works beautifully because the length below balances the height above. Without that balance, a pompadour can feel top-heavy. Here, it just feels intentional.
Tease the front section lightly, smooth the top layer over it, then pin the lifted shape backward. You’re aiming for a rounded front, not a hard wall of hair. A small side sweep near the forehead can soften the line even more, especially if your face shape benefits from asymmetry.
This style likes curls or waves below the crown. Straight hair can work, but the contrast is less interesting. A few large pin curls or barrel curls make the lifted front feel like part of a finished look rather than a random bump.
It’s one of those styles I reach for when I want a little drama without making the whole head compete for attention.
19. Low Roll with Side Sweep
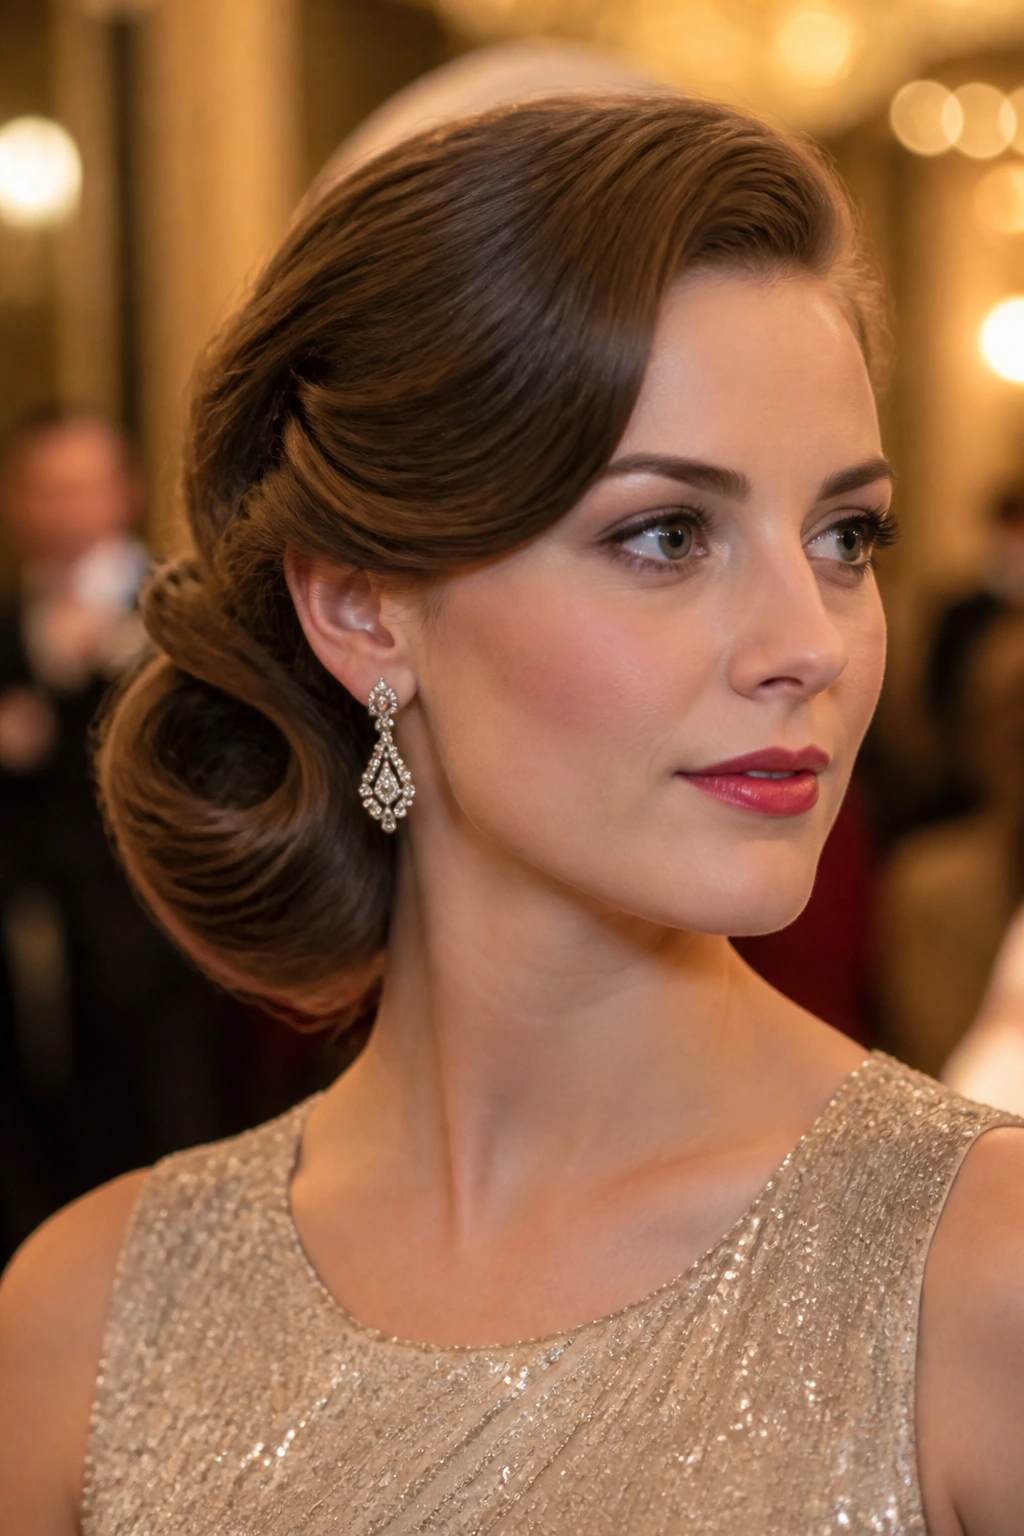
A low roll with a side sweep has old-screen-star energy without the hard edges.
Picture long hair drawn to one side, then folded or rolled low across the back of the head and secured at the nape. The side sweep gives it movement, and the roll keeps it from becoming too loose. That combination is the whole reason the style works.
A quick way to think about it
The front is soft. The back is controlled. The contrast is the point.
You can start with a deep side part and brush the hair toward the opposite shoulder before rolling the lengths inward. If your hair is very long, create the roll in two layers so the pins don’t have to hold one giant mass all at once. Smaller folds sit flatter and stay put better.
A low roll like this is particularly nice for formal wear because it frames earrings and keeps the neckline visible. It also survives long events better than many updos, since the shape is compact and the weight sits low on the head.
I’d skip a tight finish unless you really want that severe, polished look. A little softness around the ears makes this style feel richer.
20. Curled Side Ponytail
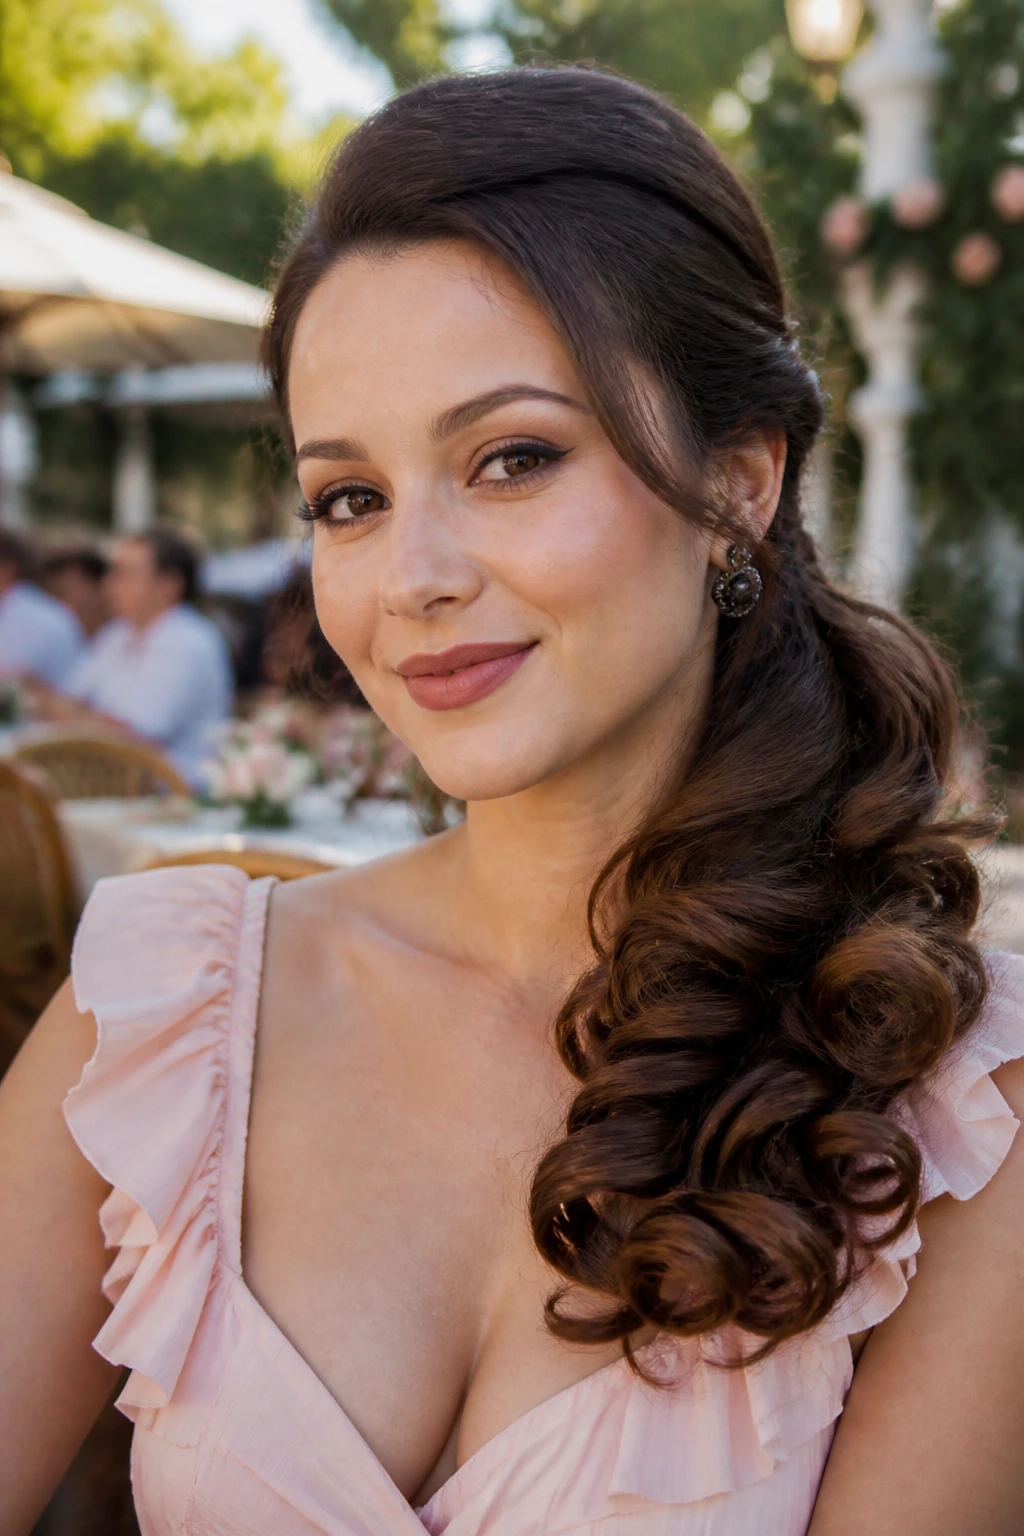
A curled side ponytail looks simple until you watch how much body it can hold. Long hair makes the shape fall in one dramatic line, and that side placement keeps the style from feeling too casual.
This is a good middle ground between loose hair and a full updo. You sweep everything to one side, secure it low, then curl the ponytail in large sections so the lengths stack rather than hang limp. The result is soft, full, and very wearable.
The trick is to give the crown a little lift before you gather the ponytail. A flat crown kills the look. A bit of root volume, even if it’s just a soft backcomb and a brush-over, keeps the style in vintage territory instead of gym-hair territory.
If you want to make it more old-school, wrap a strand of hair around the elastic and pin it underneath. A ribbon or scarf works too, but the hair wrap keeps the finish cleaner.
It’s a forgiving style, which is rare enough to be worth celebrating.
21. Snood Updo
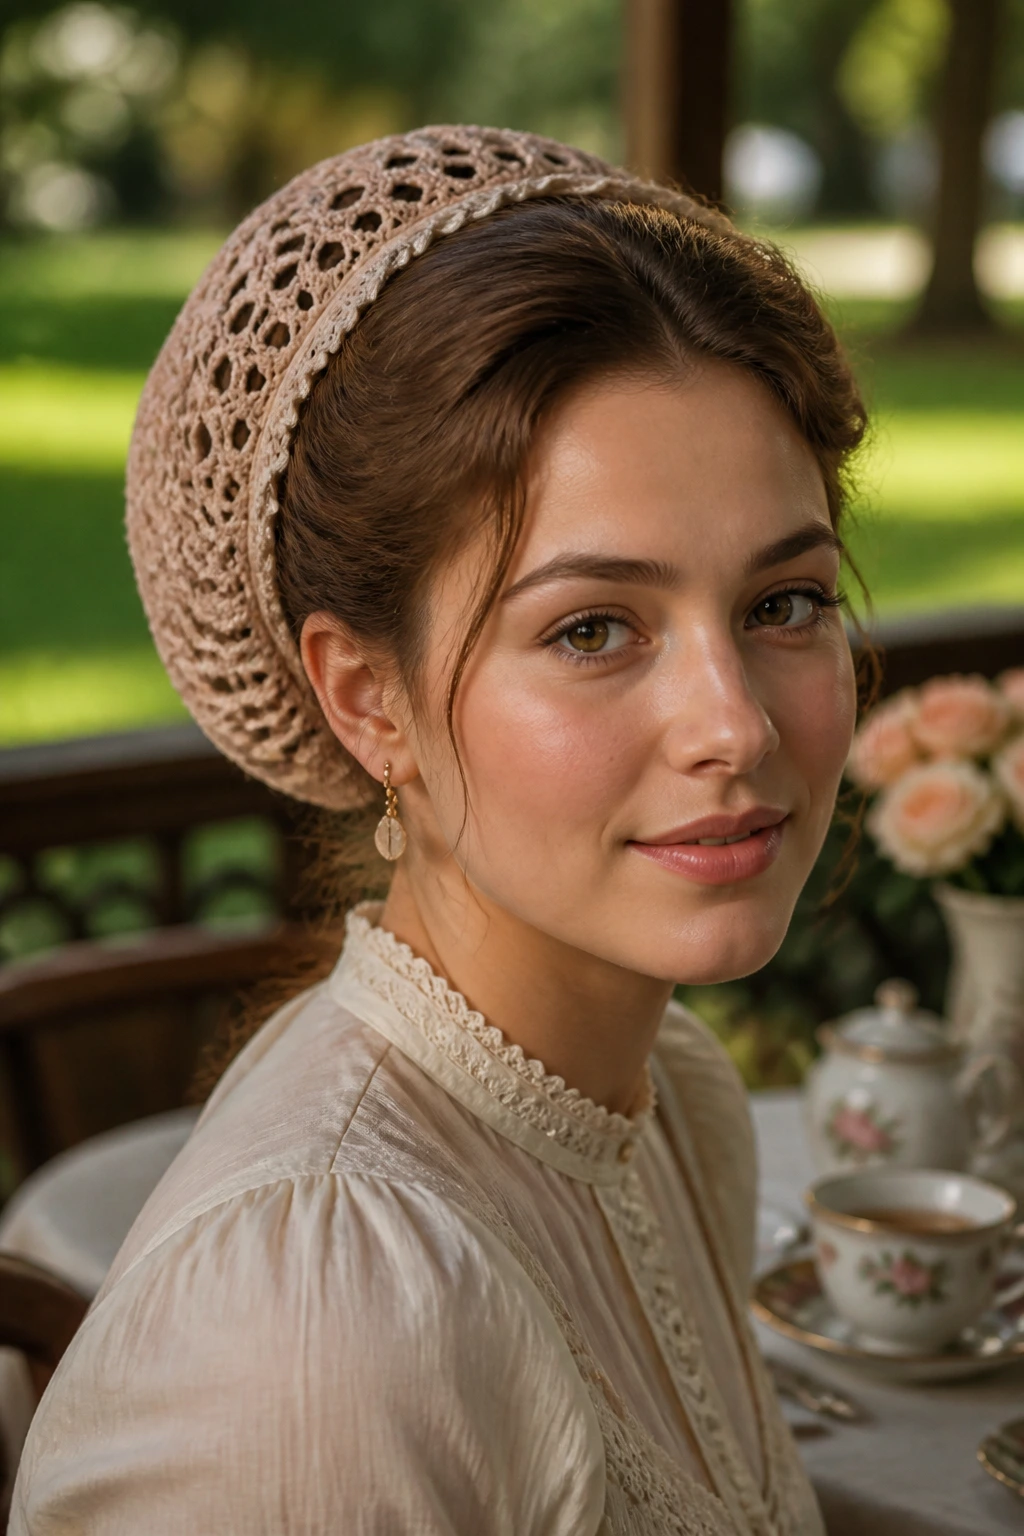
A snood is practical in the best possible way.
It catches long hair, keeps it contained, and still lets the style feel decorative instead of plain. Historically, that practicality mattered a great deal. For modern wear, it means you get an easy vintage silhouette that can handle thick lengths, windy weather, or a long day on your feet.
Why it works
The snood gives the hairstyle an outer shape, so your own hair doesn’t have to do all the visual work. That’s useful if your lengths are heavy or layered. You can braid, twist, or loosely pin the hair underneath, then let the snood hold the outline.
A decorative net looks nicest when the hair beneath it is smooth enough to sit evenly. If the base is too bulky, the net stretches in odd places and the whole thing looks strained. That’s one of those tiny details that separates a cute vintage idea from a messy one.
I like snoods with simple dresses, strong lipstick, and not much else. The accessory is already doing a lot. Give it room.
22. Flower-Accent Braided Bun
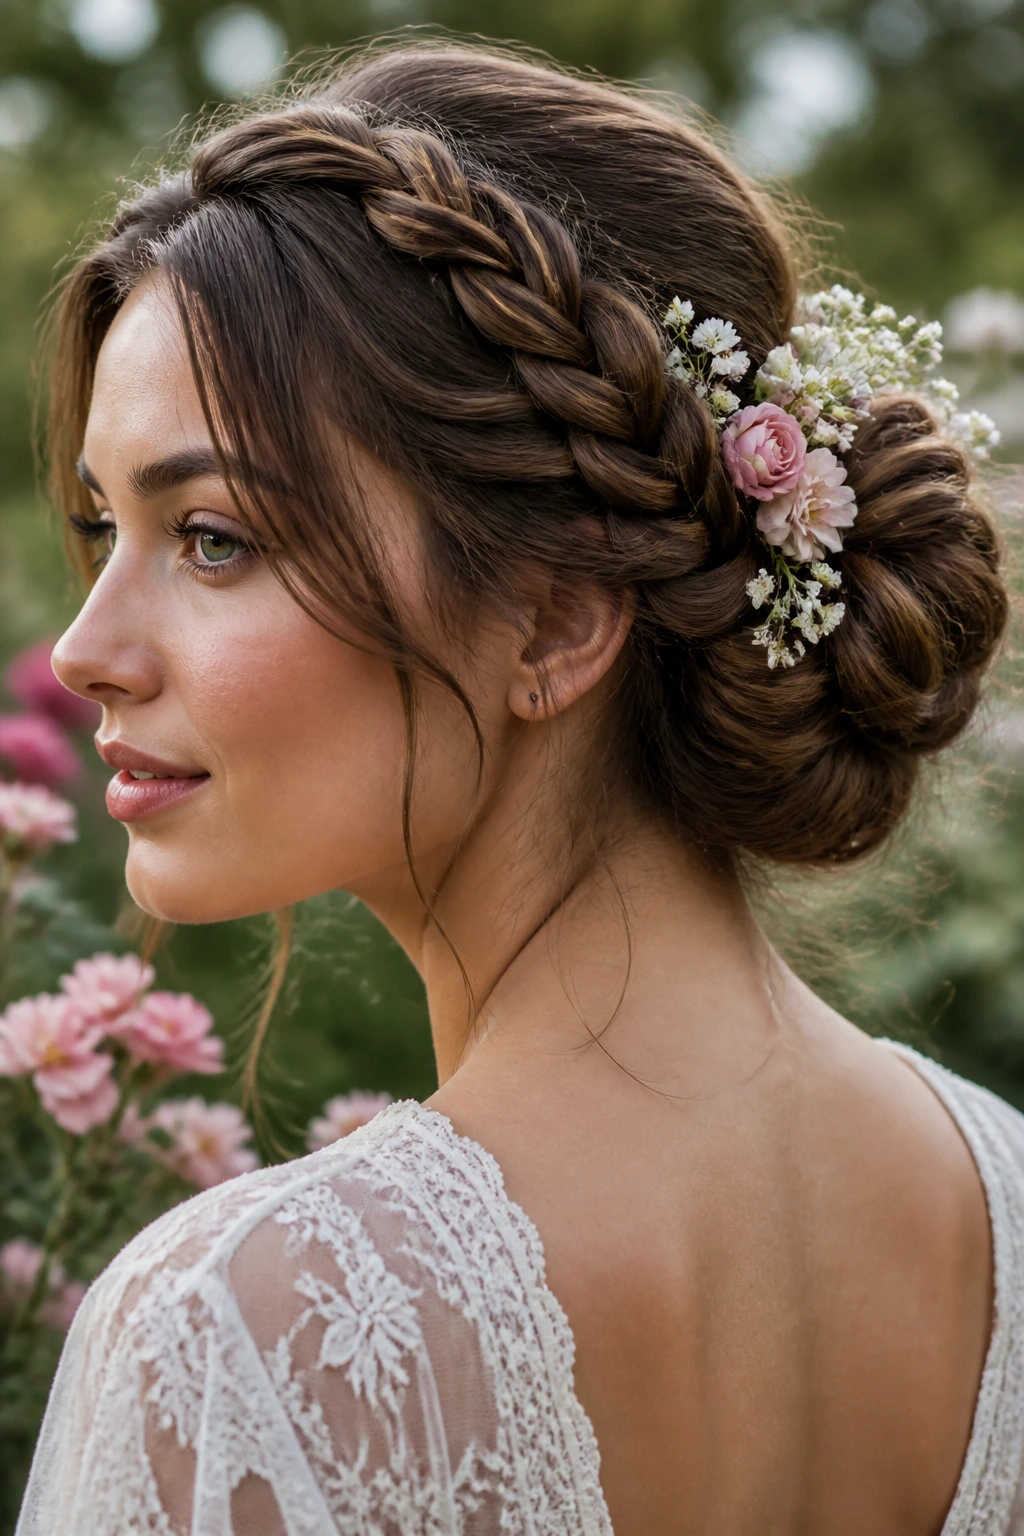
Flowers can make a braided bun look softer, but only if the braid itself has shape.
This style works best when the bun sits low or mid-height and the braid feeding into it has enough width to show texture. Long hair helps here, because the braid can be thick, and thick braids hold flowers better than thin ones. The blooms or floral pins should feel like part of the style, not stuck on as an afterthought.
Use small flowers or a few clipped blooms rather than a crowded cluster. Too many, and the bun loses its line. I prefer one side of the bun to stay cleaner so the flowers have somewhere to rest visually. If everything is covered, nothing stands out.
This look is especially nice for daytime events, wedding guests, or any setting where you want a touch of romance without going full bridal. The braid keeps it vintage. The flowers keep it soft.
The bun itself can be simple. It should be. The braid and flowers are carrying enough of the mood already.
23. Bumper Bangs with Long Waves
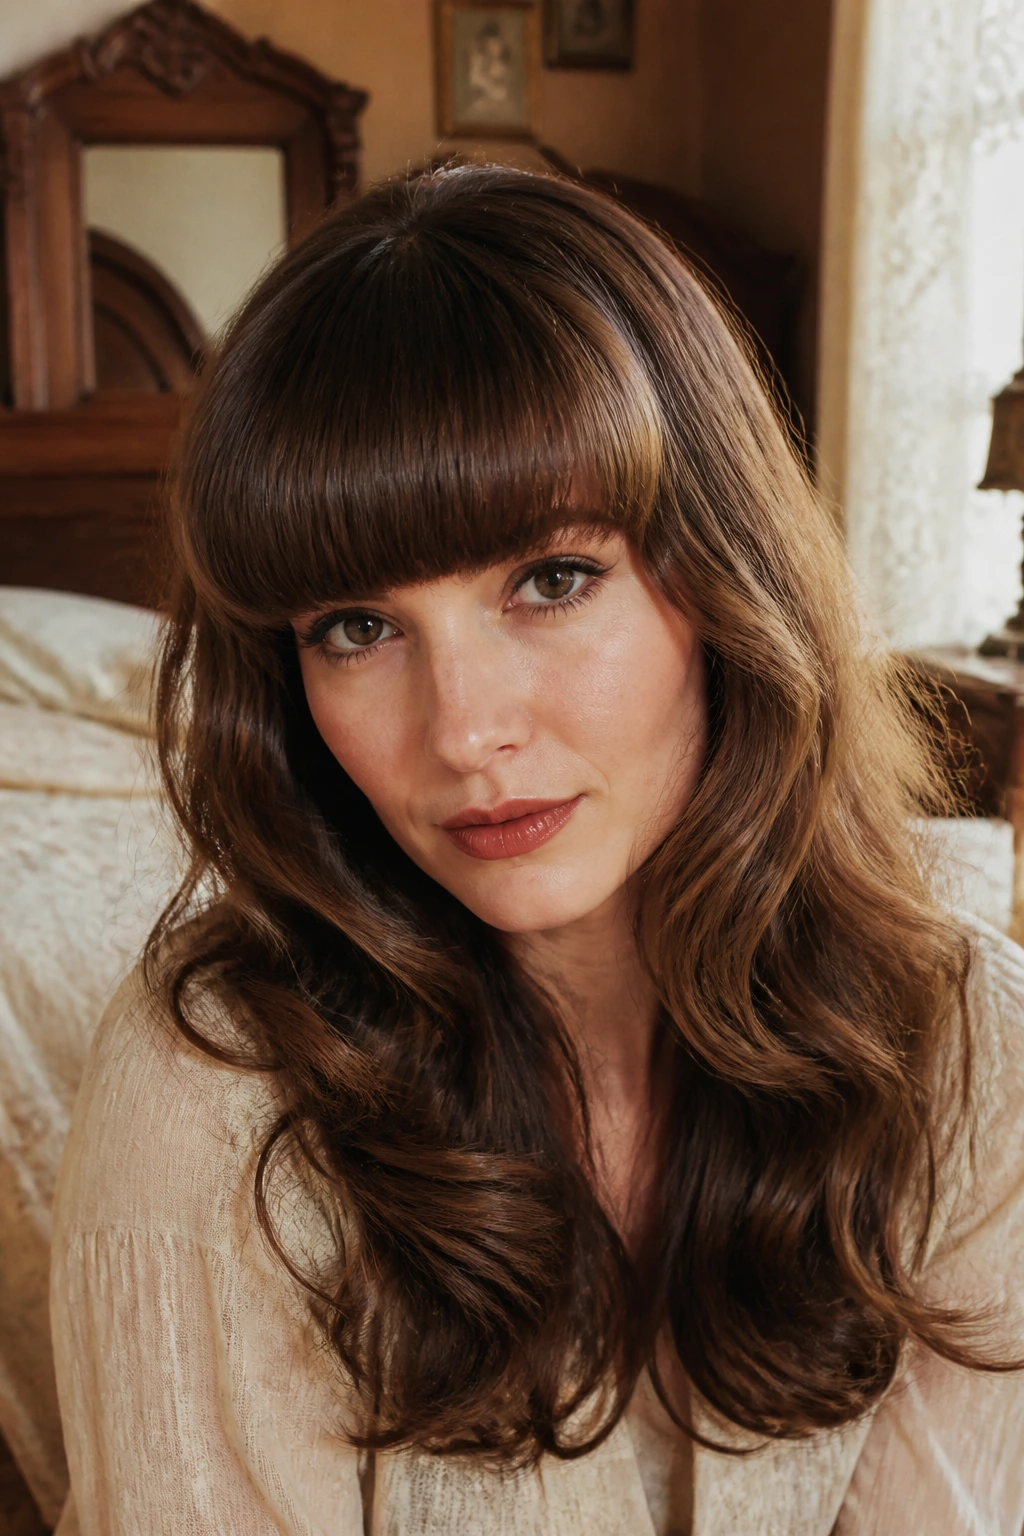
Bumper bangs are a little dramatic, and that is the whole point.
On long hair, they let you create a strong front shape without needing a full victory-roll set. You build a rounded front section, pin it securely, and let the rest of the hair fall in waves or curls. That keeps the look grounded and stops the bangs from looking disconnected from the length.
Why it flatters long hair
Long lengths give the front roll something to balance against. If the rest of the hair were short, the bangs could dominate the whole style. With long waves underneath, the eye moves through the shape instead of stopping at the forehead.
You can make bumper bangs from real fringe, or borrow hair from the front if your bangs are shorter. Either way, use a fine comb and work in a smooth, controlled curve. This is one of those styles where the silhouette matters more than the detail in the pinning.
- Keep the roll centered or slightly off center.
- Pair it with large brushed-out waves below.
- Hide pins under the curve, not at the top.
- Let the ends stay soft.
It’s a bold look, but not a difficult one once the front section is shaped well.
24. Twisted Roll Updo
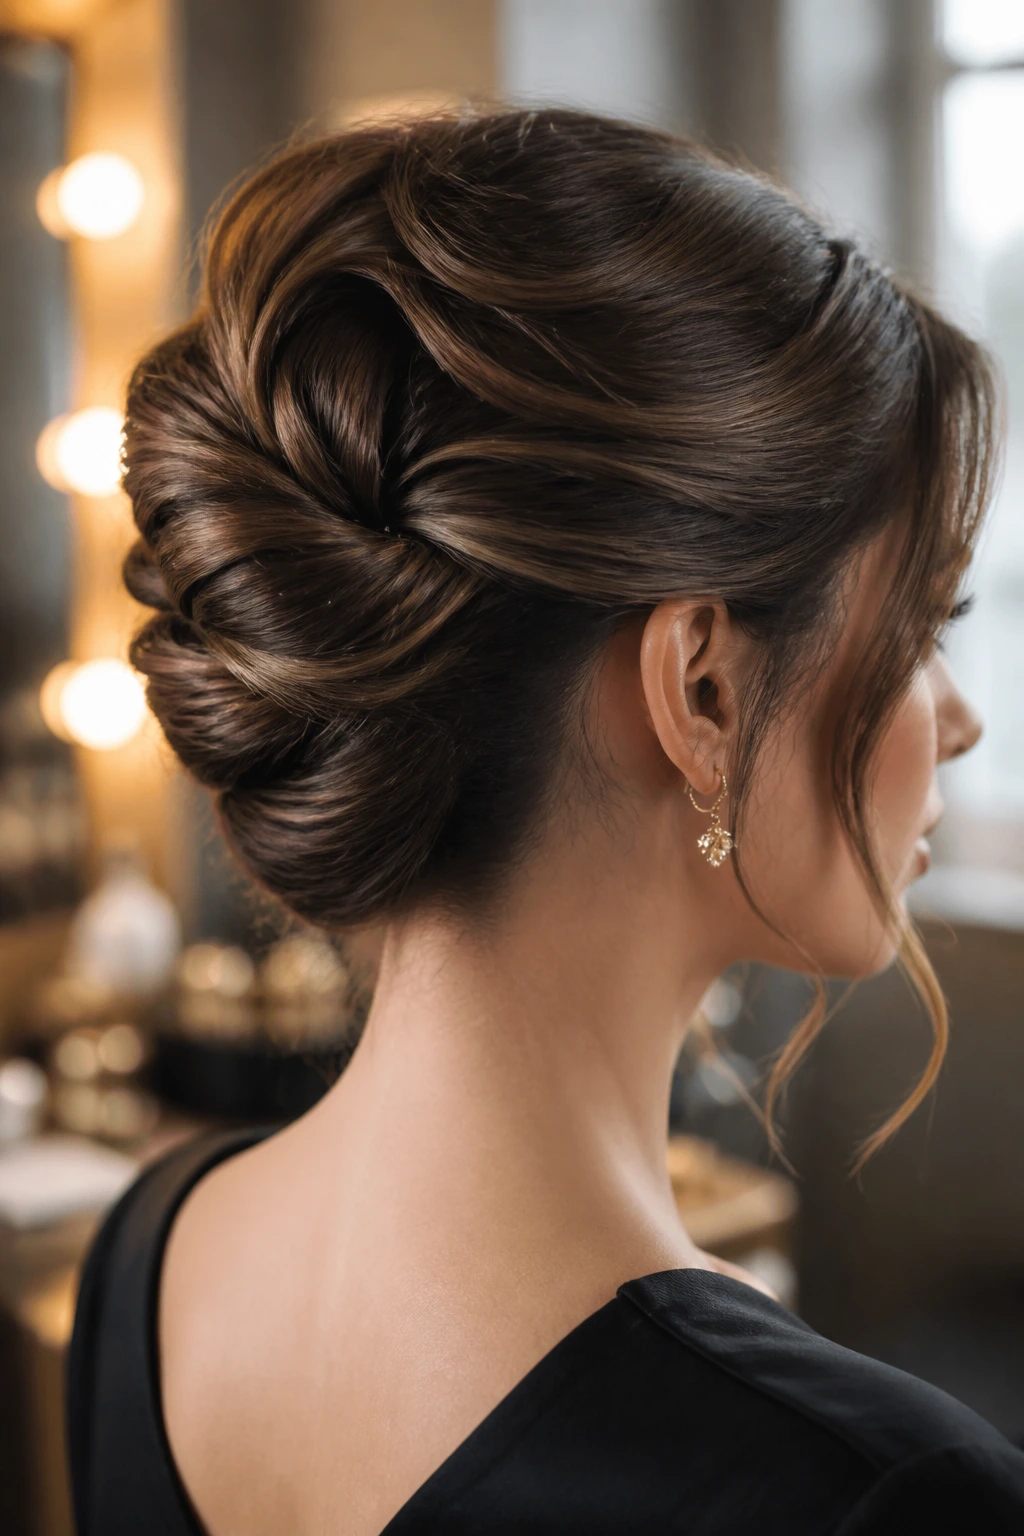
A twisted roll updo is what I reach for when I want polish and don’t want to fuss with a dozen pins.
It sits somewhere between a French twist and a low roll, which is why it feels so useful for long hair. The length gets twisted upward in sections, then folded into a vertical or diagonal shape at the back. The result is neat, but not severe, and the texture from the twist keeps it from looking flat.
What makes it different
Unlike a smooth chignon, this style shows the movement of the hair. Unlike a full French twist, it tends to leave a softer outline at the top and sides. That gives it a gentler vintage feel, especially if you keep a few face-framing pieces loose.
For best results, prep the hair with a little mousse before styling. The extra grip helps the twist hold. Thick hair may need a few more U-pins than you expect, especially near the bottom where the roll carries the most weight.
This is a strong choice for formal dinners, weddings, or any outfit that needs a cleaner neckline. It also photographs well in person because the twist creates shadow and shape without turning stiff.
25. Banana Roll Updo
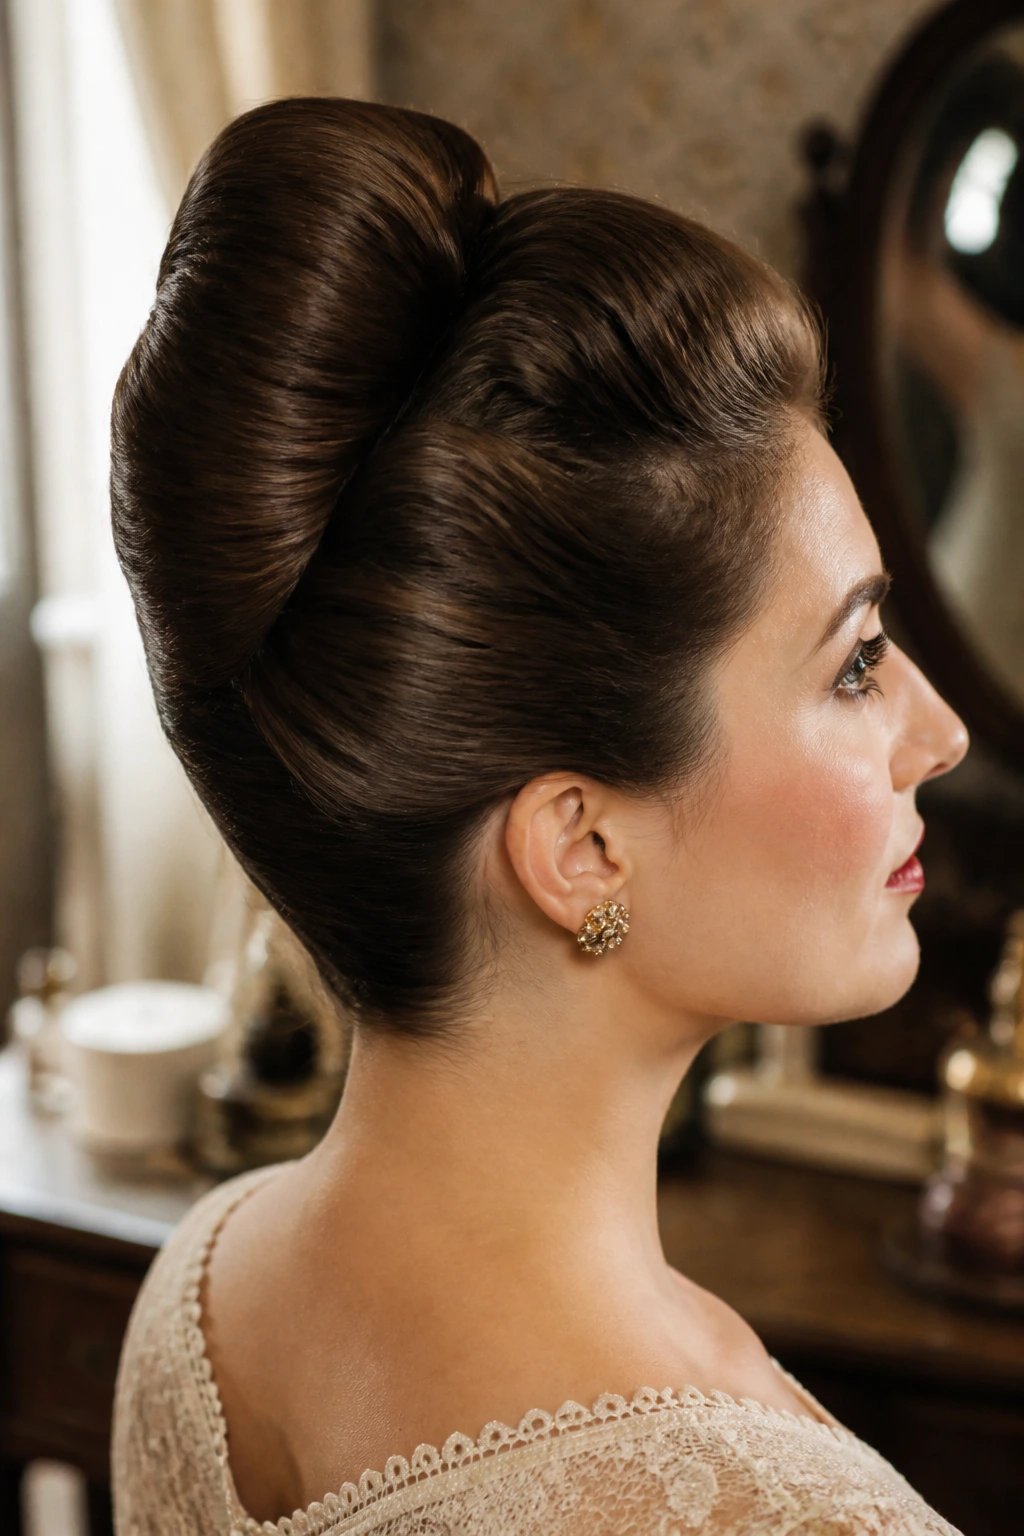
The banana roll is one of those styles that looks elaborate and, in practice, is mostly a matter of folding long hair into the right shape.
Hair is swept upward or across, then rolled into a long, sleek vertical form that sits close to the head. On long hair, that shape has enough material to feel full instead of thin, which is exactly why it holds up so well for vintage-inspired dressing. It looks elegant from the side and tidy from the back.
I like this style for hair that needs control. A lot of control. It keeps the ends hidden, the shape compact, and the overall look refined without asking for a heavy amount of decoration. A decorative comb or a few hidden pins can finish it off, but the roll itself should stay the star.
If your hair is especially long, build the roll in stages instead of trying to fold everything at once. Smaller sections are easier to smooth and pin, and they sit flatter against the head. The finished shape should feel secure when you tilt your head. If it shifts, add pins before you leave the mirror.
That last one is the sleeper hit: it tames heavy hair, holds its shape, and still leaves you room for a red lip or a pair of earrings.
