



Some knot ponytail styles for daily wear look polished for about ten minutes, then start slipping, puffing out, or tugging at your scalp in the worst spots. The ones worth keeping in rotation are the ones that stay neat without asking for a full salon setup, a dozen pins, or a prayer.
A knot ponytail works because it gives you the easy lift of a ponytail with a little structure at the base. That structure can sit low, high, side-swept, braided, twisted, or half-up, and each version changes the mood of the whole hairstyle.
The tiny details matter more than people think. Where the knot sits, how tight you pull the hair, whether you wrap a strand around the elastic, and how much texture you leave at the crown can turn the same basic style into something clean, soft, sporty, or a bit dressy.
I keep coming back to knot ponytails because they solve a real morning problem. You want your hair off your neck, but you still want shape, movement, and something that works with a T-shirt, a button-down, or a gym set. Start with the low wrapped version; it’s the easiest one to trust.
1. Low Wrapped Knot Ponytail
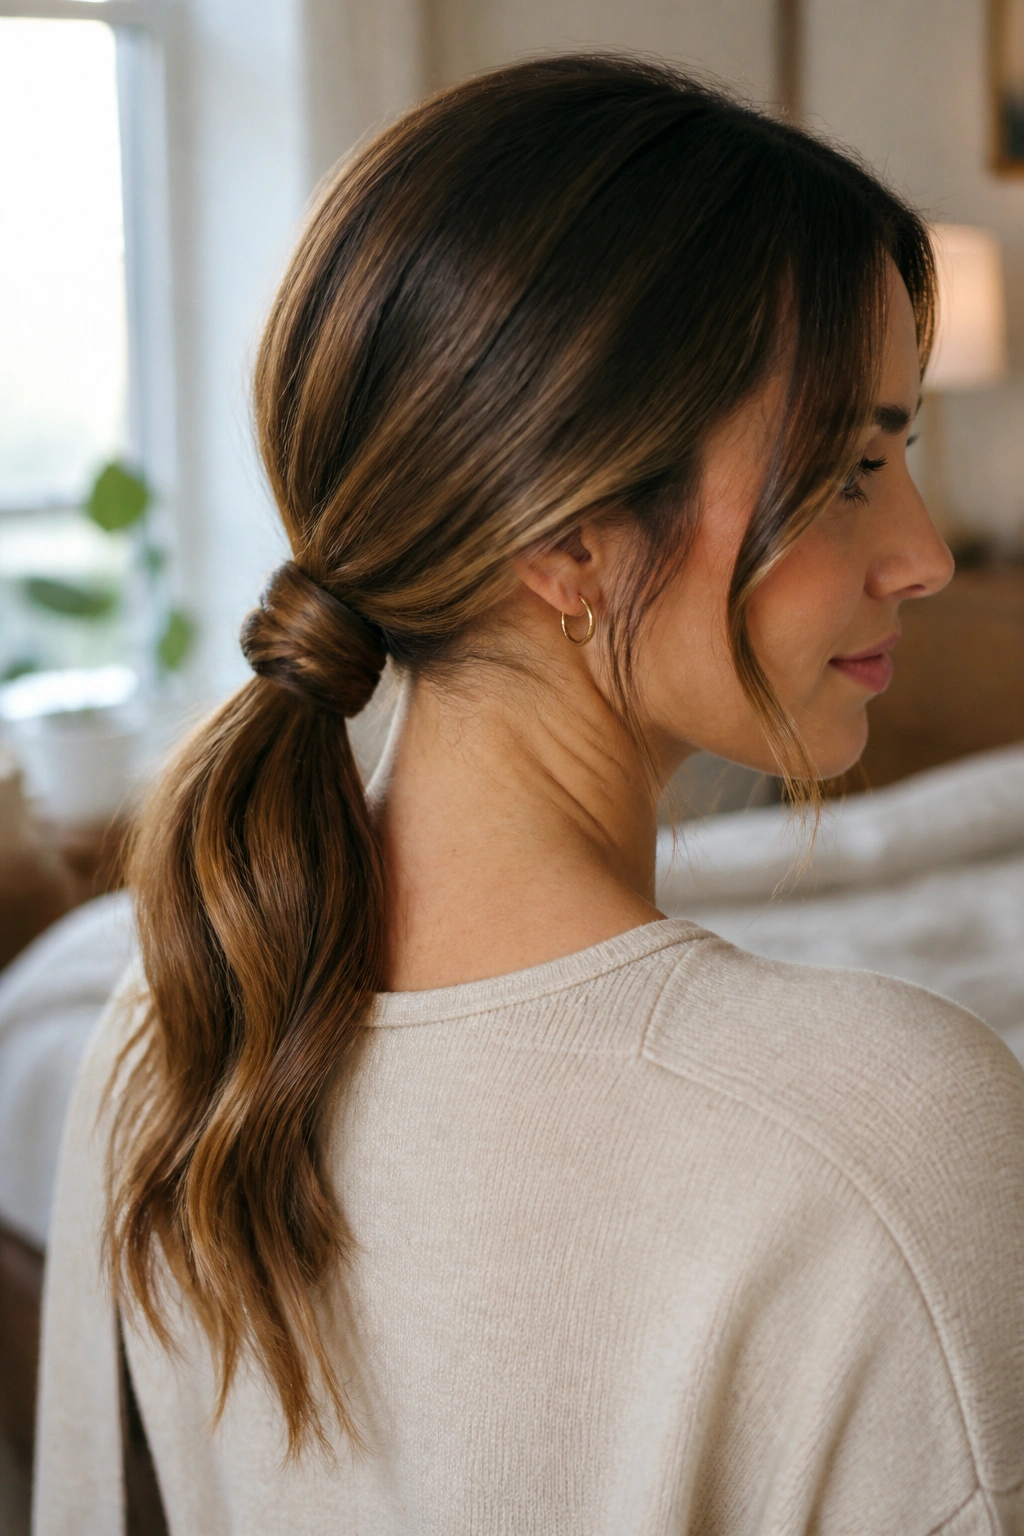
This is the one I’d hand to anyone who wants a knot ponytail that behaves. The low wrapped knot ponytail sits at the nape, which keeps the look calm and unfussy, and the wrapped base hides the elastic in a way that never feels fussy. It works especially well when your hair is on the second day, because a little natural grip helps the knot stay snug.
Why It Stays Put
The trick is simple: gather the hair low, tie it once, then split the tail and form a soft knot over the base. If you have medium or long hair, leave about 1 inch of slack before you cinch it down. Too tight and the whole thing looks stiff. Too loose and the knot starts to sag by lunch.
- Best for straight, wavy, or lightly curly hair.
- Use a 1/2-inch clear elastic at the base.
- Add a light mist of dry shampoo first if your roots are slippery.
- Finish with one wrapped strand or a tiny bobby pin hidden under the knot.
Pro tip: press the knot flat with your palms for 2 seconds before pinning it. That little pause helps the shape settle instead of puffing out.
2. Mid-Height Double Knot Ponytail
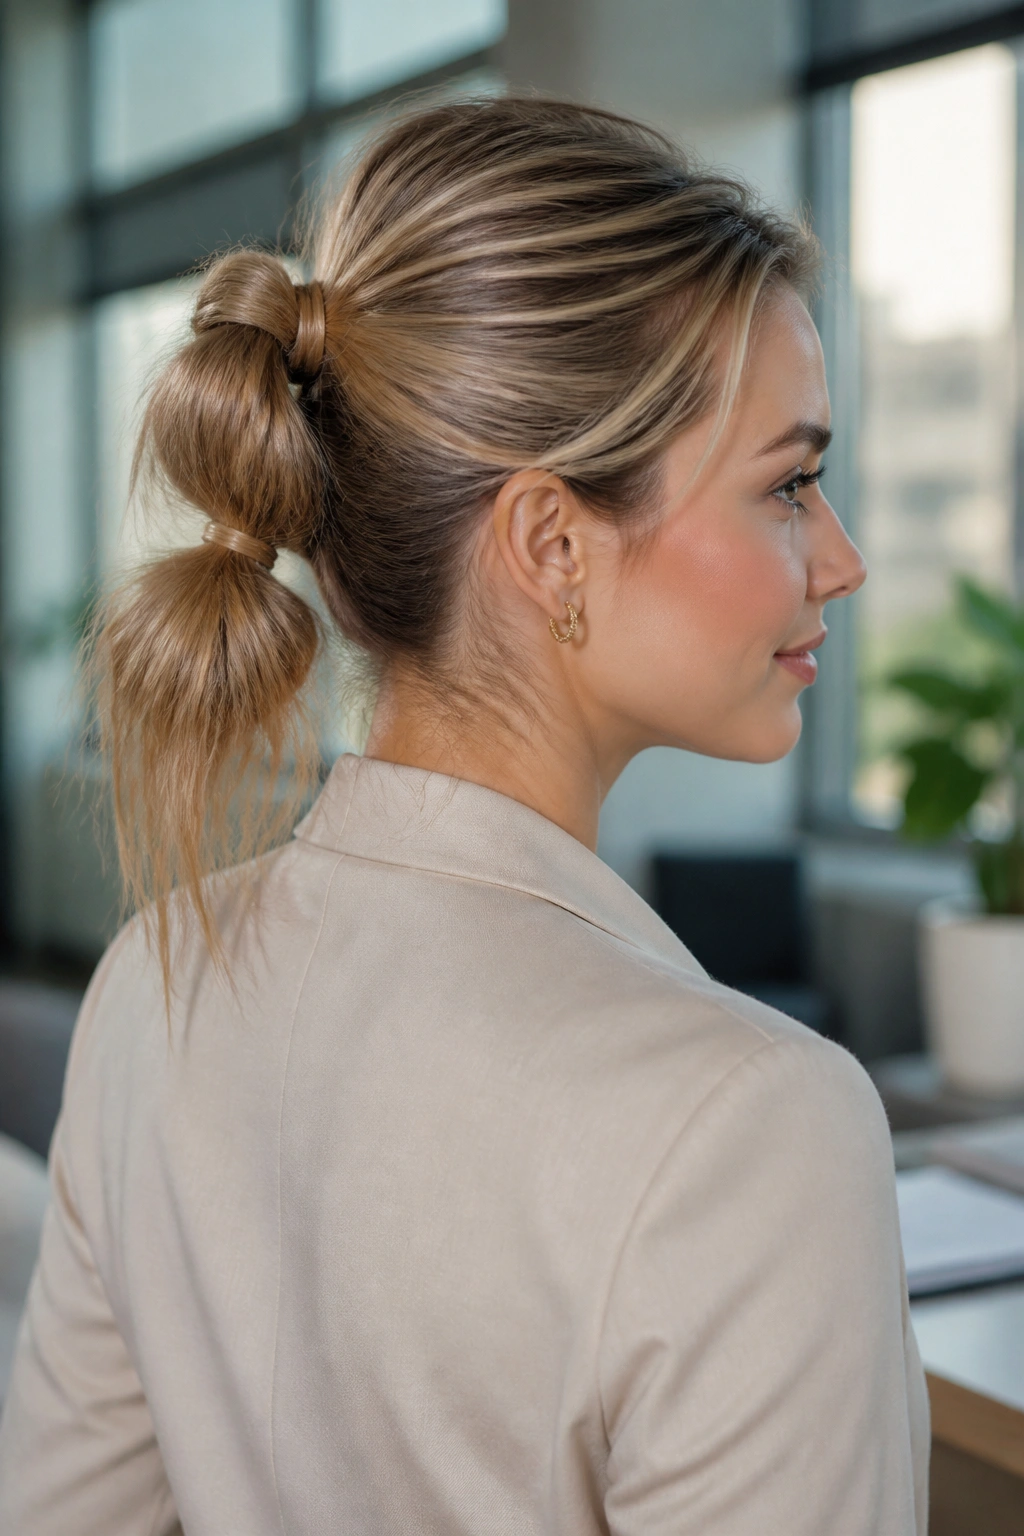
Two knots beat one when you want extra shape without going full formal. A mid-height double knot ponytail sits between the crown and the nape, so it gives you a little lift without the high, tight feel that can wear on your scalp. The double knot makes the style look fuller too, which is handy if your hair tends to collapse into a skinny tail by noon.
The first knot should be soft and loose. The second one sits right below it, using the remaining length to build a thicker-looking base. It sounds fussy on paper. It isn’t. Once you do it twice, your hands remember the motion fast enough that it becomes one of those styles you can do while half-awake.
I like this version for workdays when I want hair off my face but still want a bit of personality. It looks more deliberate than a plain ponytail, but it does not read as “I spent 40 minutes on this.” That’s the sweet spot.
Use a medium-hold mist before you start, then pinch a few strands near the ears after the knot is tied. Those loose pieces stop the style from looking too buttoned-up.
3. Sleek High Knot Ponytail
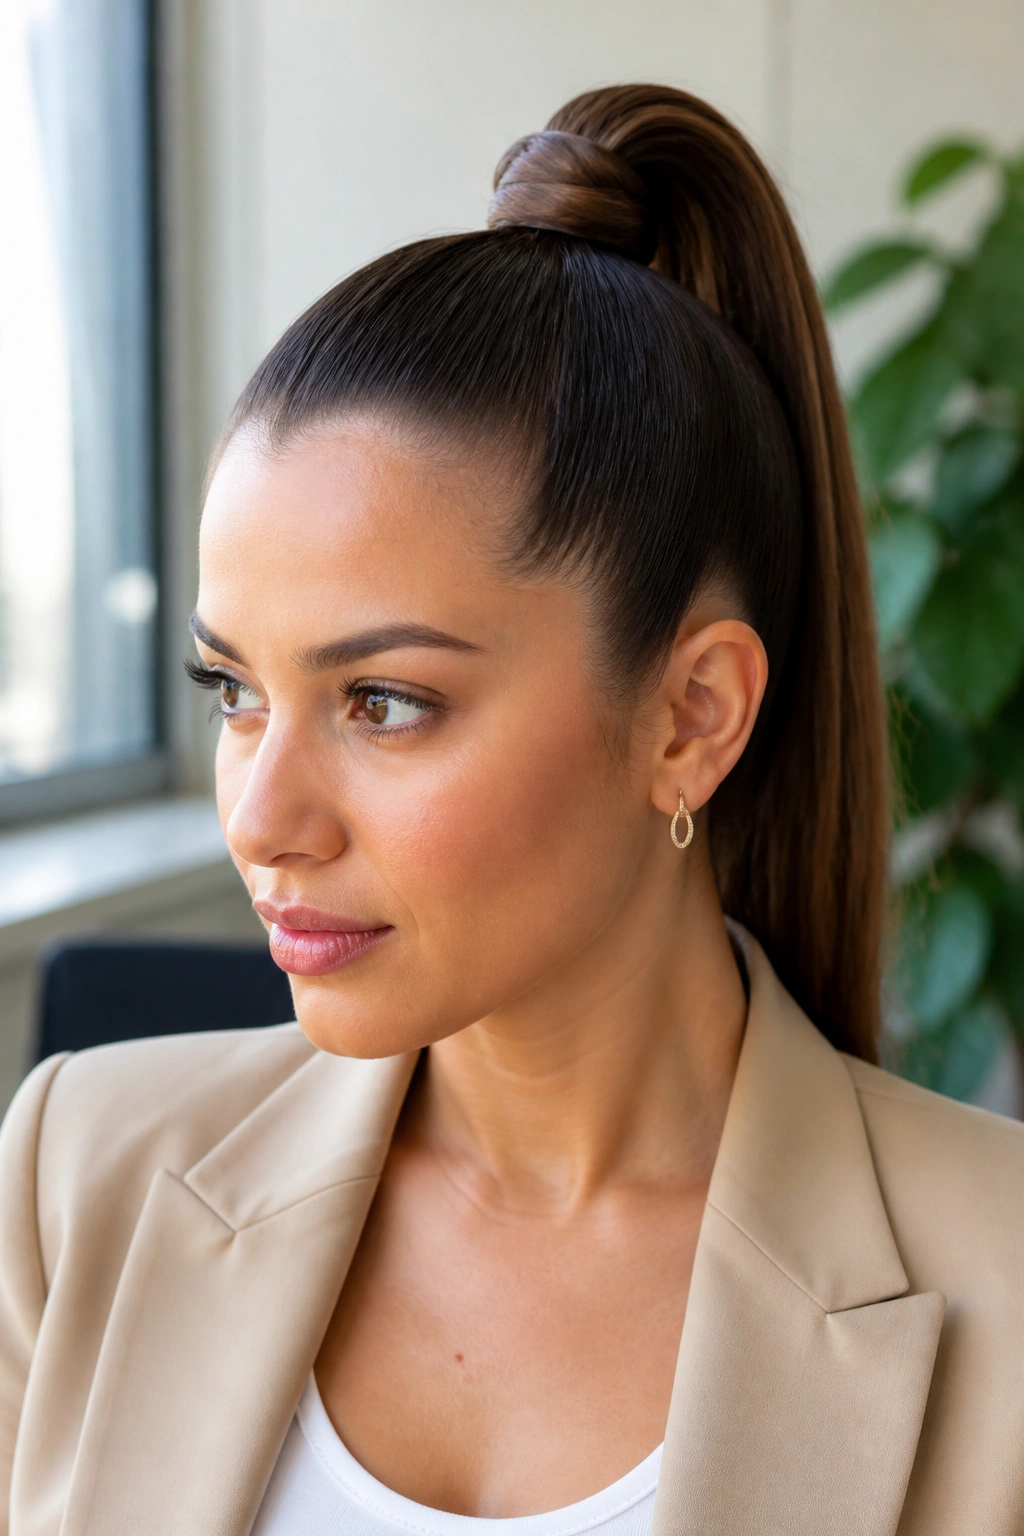
Want something clean enough for the office and sharp enough for dinner later? A sleek high knot ponytail does both without acting precious. The high placement lifts the face a little, and the knot keeps the tail from looking too plain, which is usually the problem with a high ponytail on its own.
The key is the crown. Brush the hair up in one direction, smooth it with a boar bristle brush or a dense paddle brush, and use a small amount of gel or cream at the hairline. Do not drown the roots. A pea-sized amount is enough for most hair, maybe a touch more if your hair is thick or frizzy.
How to Keep the Crown Smooth
Take your time on the first pass. That matters more than the knot itself.
- Start with dry hair and a clean part, or no part at all.
- Tighten the elastic in two stages instead of one hard yank.
- Wrap a thin strand around the base for a cleaner finish.
- Tap flyaways down with a little serum on your fingertips, not your whole palm.
If your scalp gets sore fast, slide the base down by half an inch. It keeps the style sleek without turning it into a helmet.
4. Textured Knot Ponytail with Face-Framing Pieces
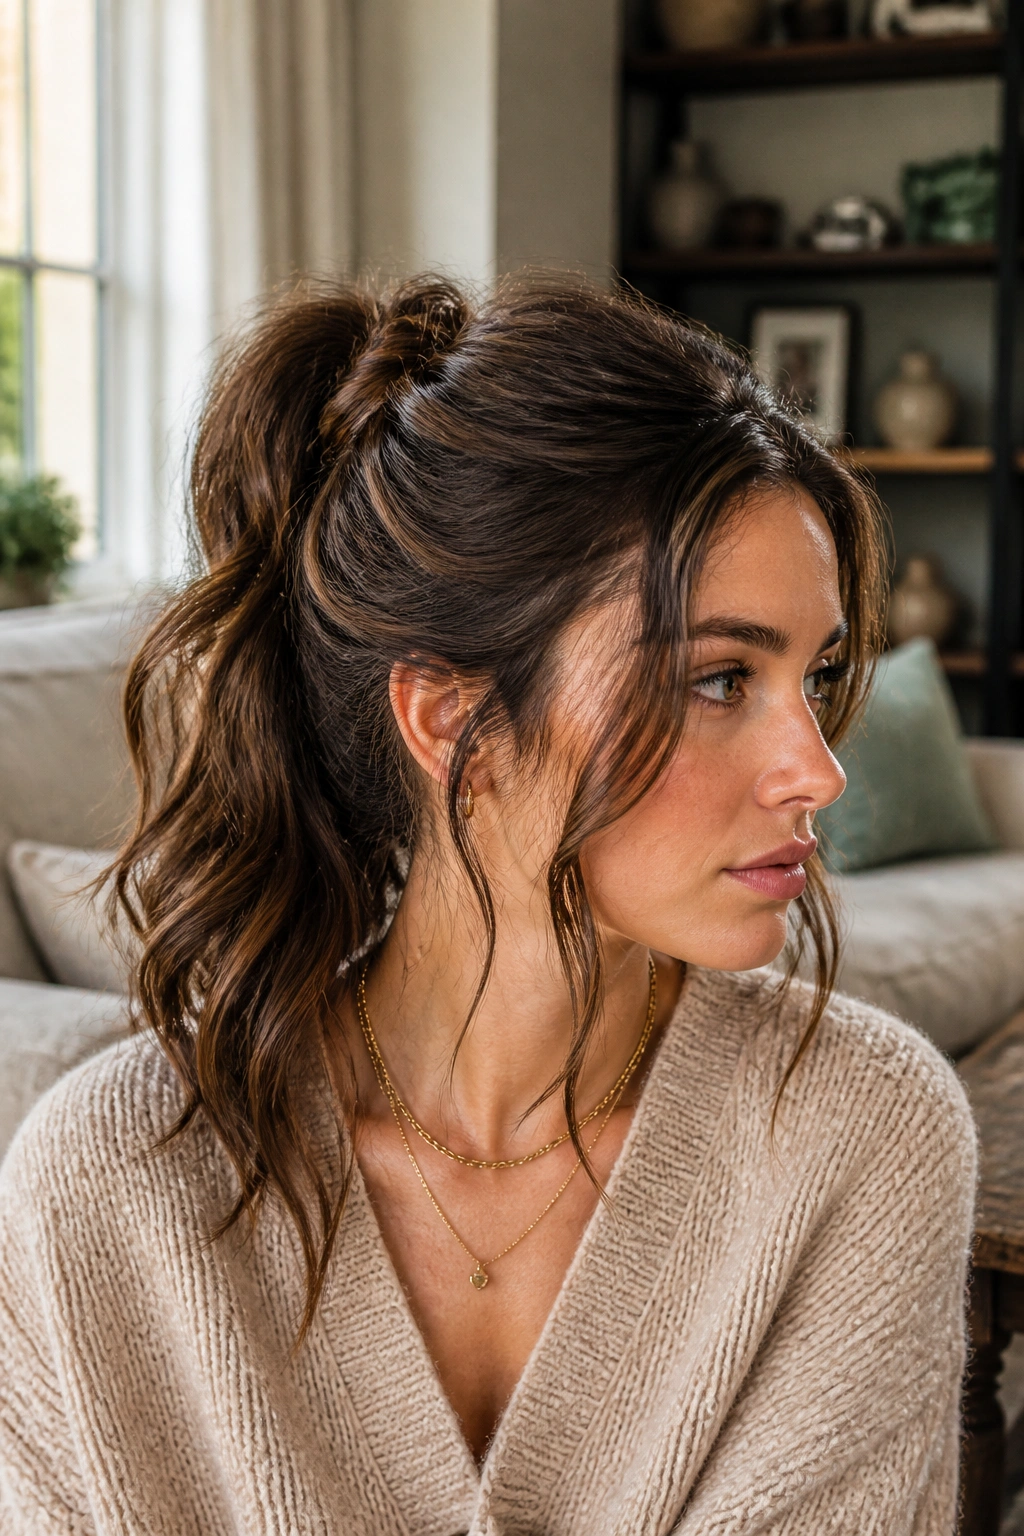
This is the style I reach for when I want hair to look lived-in rather than locked down. A textured knot ponytail with face-framing pieces works because the knot gives the shape, while the loose strands around the front keep it from feeling too controlled. It has that easy, pulled-together look people like, but it still moves when you walk.
A little texture spray at the mid-lengths makes a big difference. So does rough-drying the roots instead of blasting them perfectly smooth. If your hair is naturally straight, bend a few sections with a flat iron on low heat first. You do not need curls here. You need a bit of roughness so the knot has something to hold onto.
- Leave the front pieces out before you tie the ponytail.
- Tug the knot gently after it’s secured so it feels soft, not rigid.
- Use two bobby pins crossed under the knot if the length is heavy.
- Curl the face-framing pieces away from the face for a softer line.
The style can get sloppy if you overdo the texture. One light spray and a few bends is enough. More than that, and it starts looking like you got caught in the rain.
5. Side-Swept Knot Ponytail
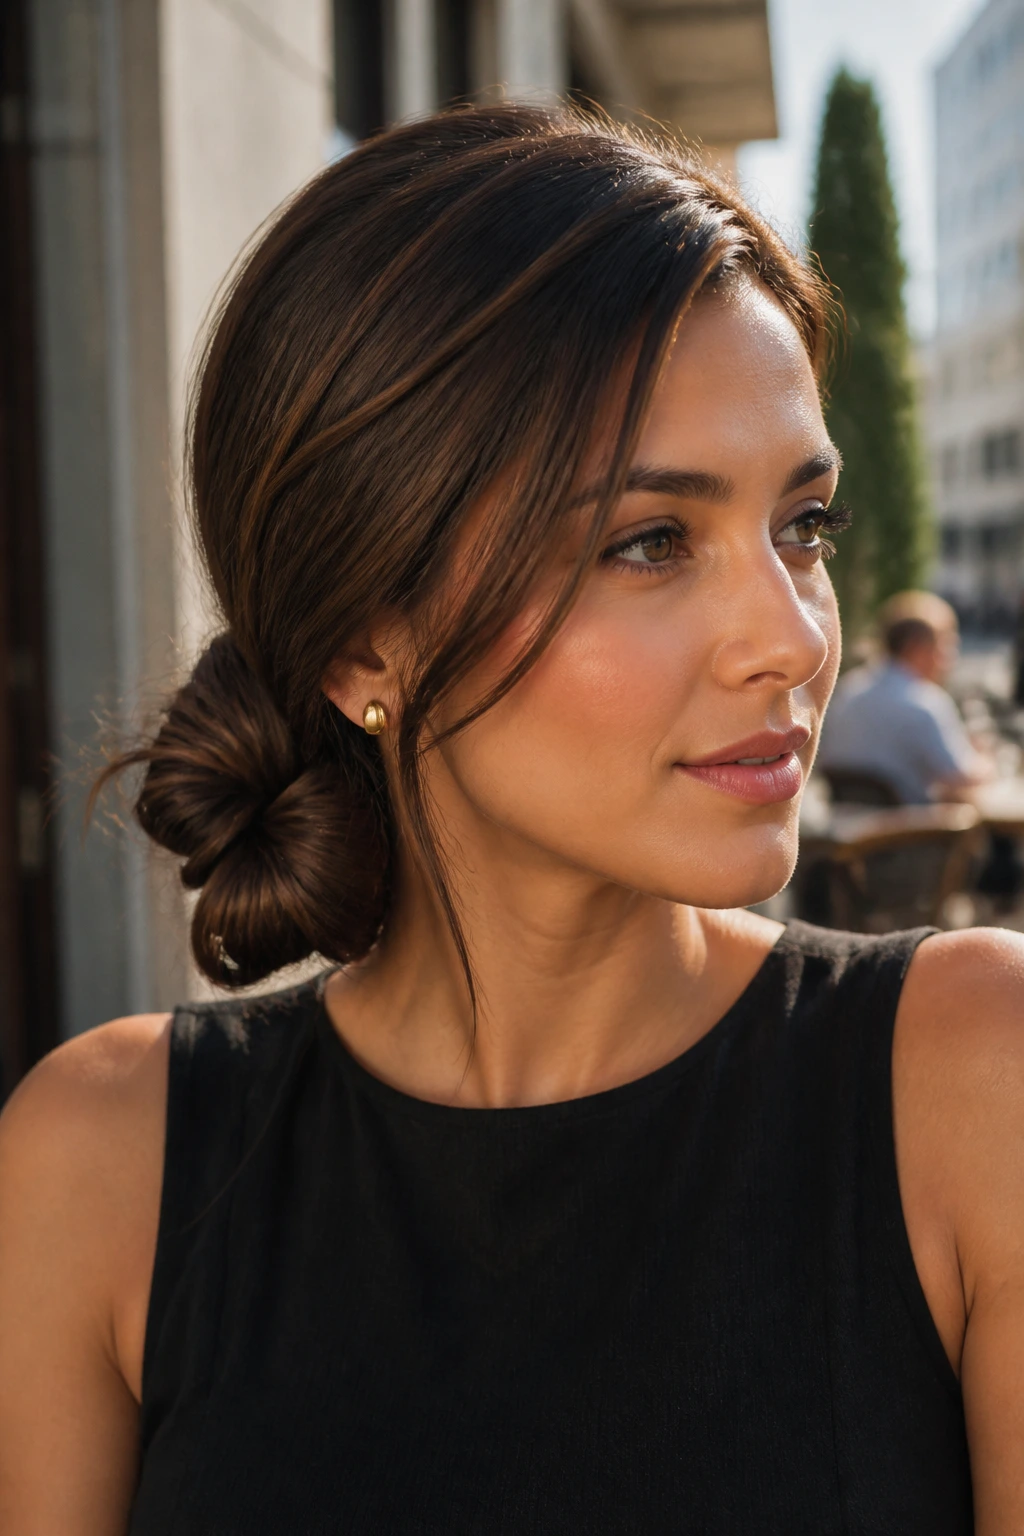
A knot does not have to sit dead center to work. A side-swept knot ponytail shifts the whole style a little off the middle, and that small move changes the mood more than you’d expect. It feels softer, especially if you have a side part already, and it flatters hair that likes to fall to one side anyway.
I like this version for days when a centered ponytail feels too severe. The knot lands just behind one ear or a little lower on one side, which gives the style movement without making it messy. If your hair is layered, this is one of the easiest styles to make look intentional because the shorter pieces naturally follow the sweep.
One-sentence truth: this style is kind to awkward layers.
Keep the elastic slightly lower than you would for a standard side ponytail. Then gather the tail, twist once, and knot it loosely before pinning the tucked end underneath. A satin scrunchie works better than a hard elastic here because it lets the hair shift a little without leaving a hard dent.
If you want the style to last through a long day, pin the heavy side first. That little order change matters.
6. Bubble Knot Ponytail
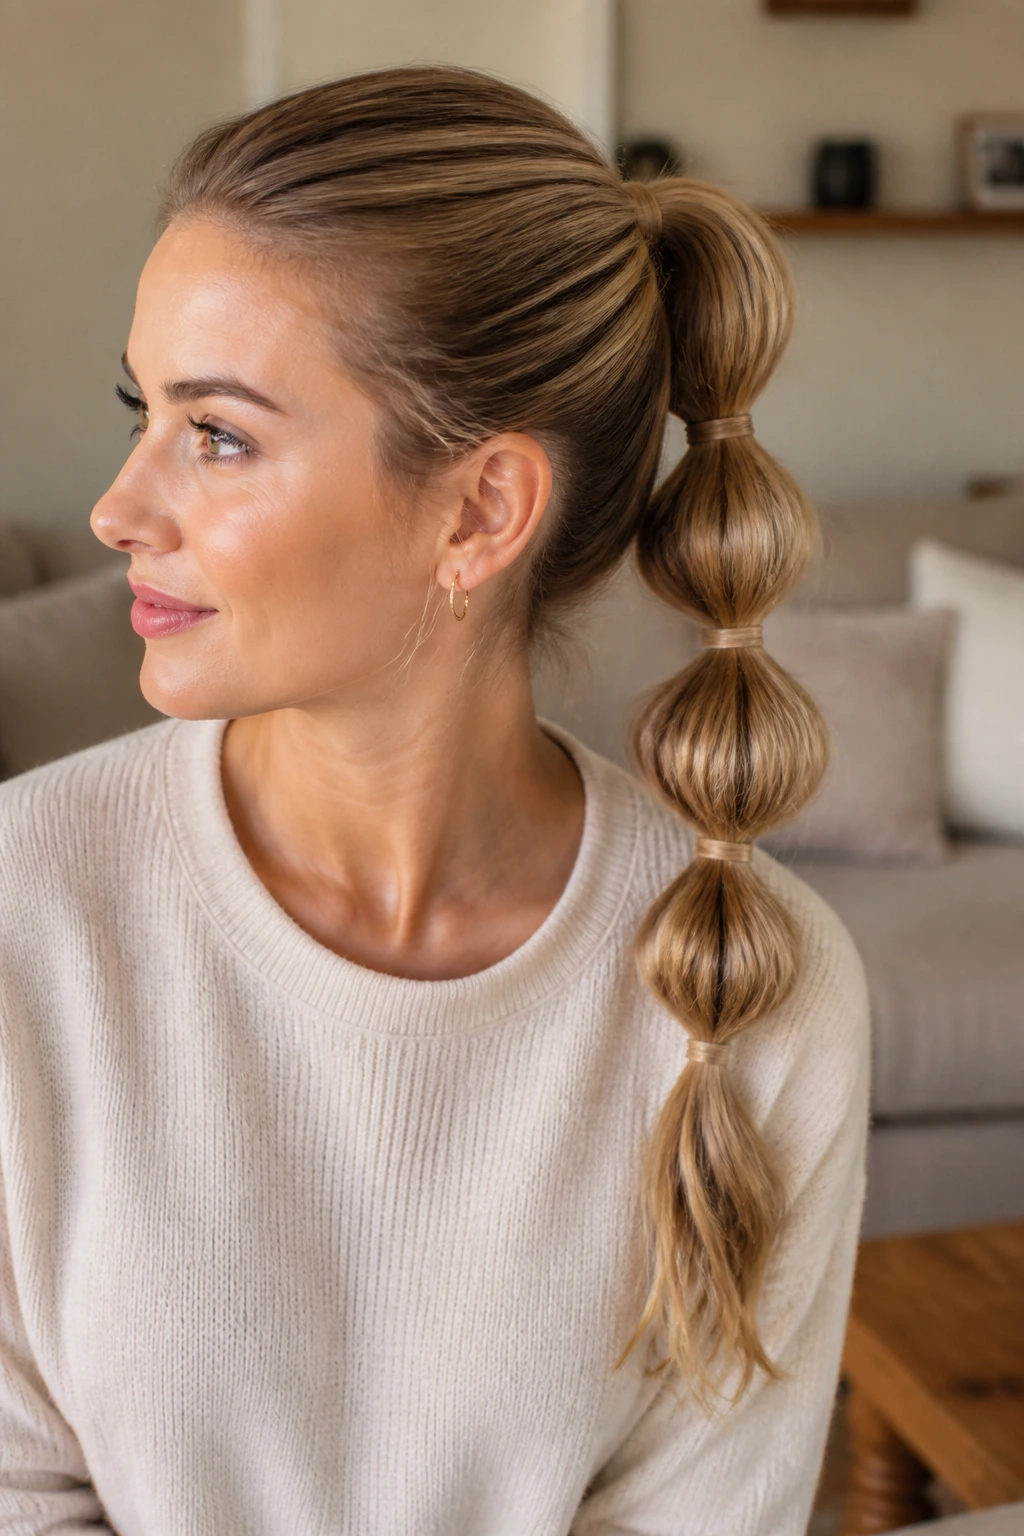
Unlike a standard bubble ponytail, this version gives each segment a little knot-like shape instead of just a puffed-out round section. That matters if you want the style to read a little more polished and a little less playful. It’s still easy, though, which is why it belongs in a daily-wear lineup instead of hiding in the special-occasion pile.
The structure is simple: start with a ponytail, place clear elastics every 2 to 3 inches, then gently pull each section outward so it forms a knotted bubble. You’re not trying to create perfect spheres. You want small, even loops that hold their shape without sticking out like balloons.
This works best on longer hair, because the extra length gives the sections enough room to puff. On shorter hair, the bubbles can look crowded. On very layered hair, the ends may poke out unless you smooth them with a tiny bit of cream first.
If you want it to last, tug each bubble from both sides instead of from the middle. That keeps the shape balanced and stops the sections from twisting into odd lumps.
7. Braided-Into-Knot Ponytail
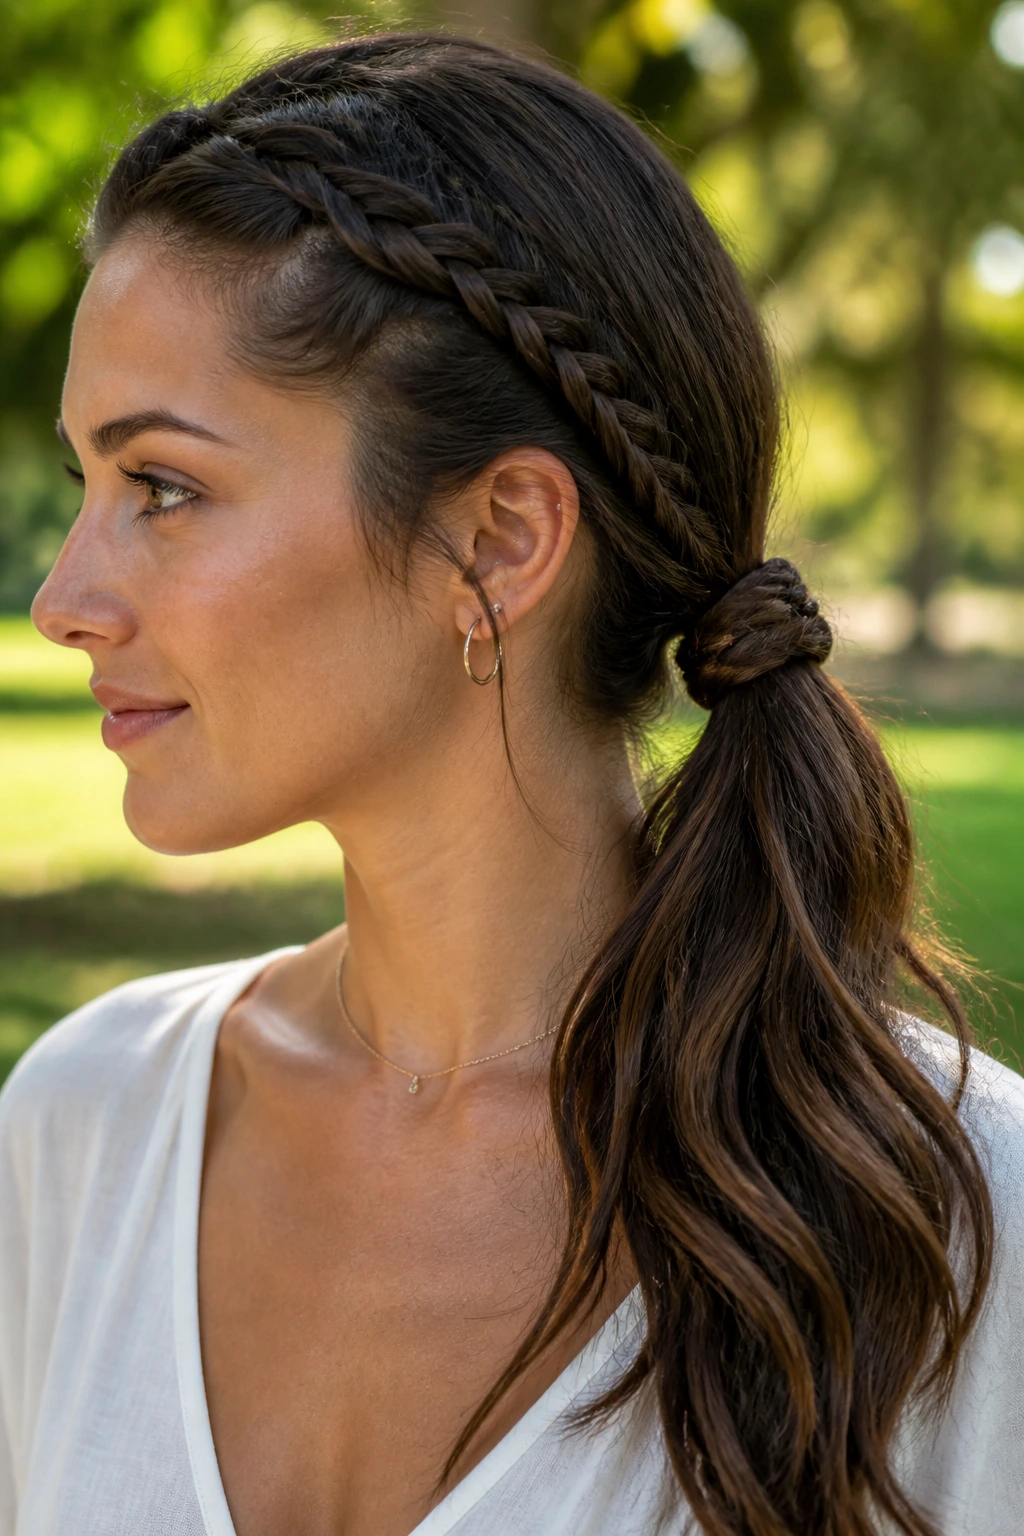
A braid gives this style its backbone. A braided-into-knot ponytail is one of those knot ponytail styles that looks more complicated than it is, mostly because the braid does half the work before the knot even shows up. That makes it a smart choice for days when your hair is slippery or freshly washed and not eager to stay put.
The Braid Does the Heavy Lifting
Start with a small braid along the crown, temple, or one side of the head, depending on where you want the visual interest. Feed the braid into the ponytail, then tie the tail into a knot around the elastic. The braid helps anchor the front, which means you do not have to pull the whole style tight.
- A small three-strand braid is enough.
- A fishtail braid works if you want a finer texture.
- Keep the braid flat so it doesn’t compete with the knot.
- Pin the end under the base so it disappears cleanly.
This style is good when you want structure without looking too neat. It also handles layers better than a plain knot because the braid keeps the shorter pieces under control. If you wear glasses, this one sits nicely behind the temples and doesn’t fight the frames.
8. Half-Up Knot Ponytail
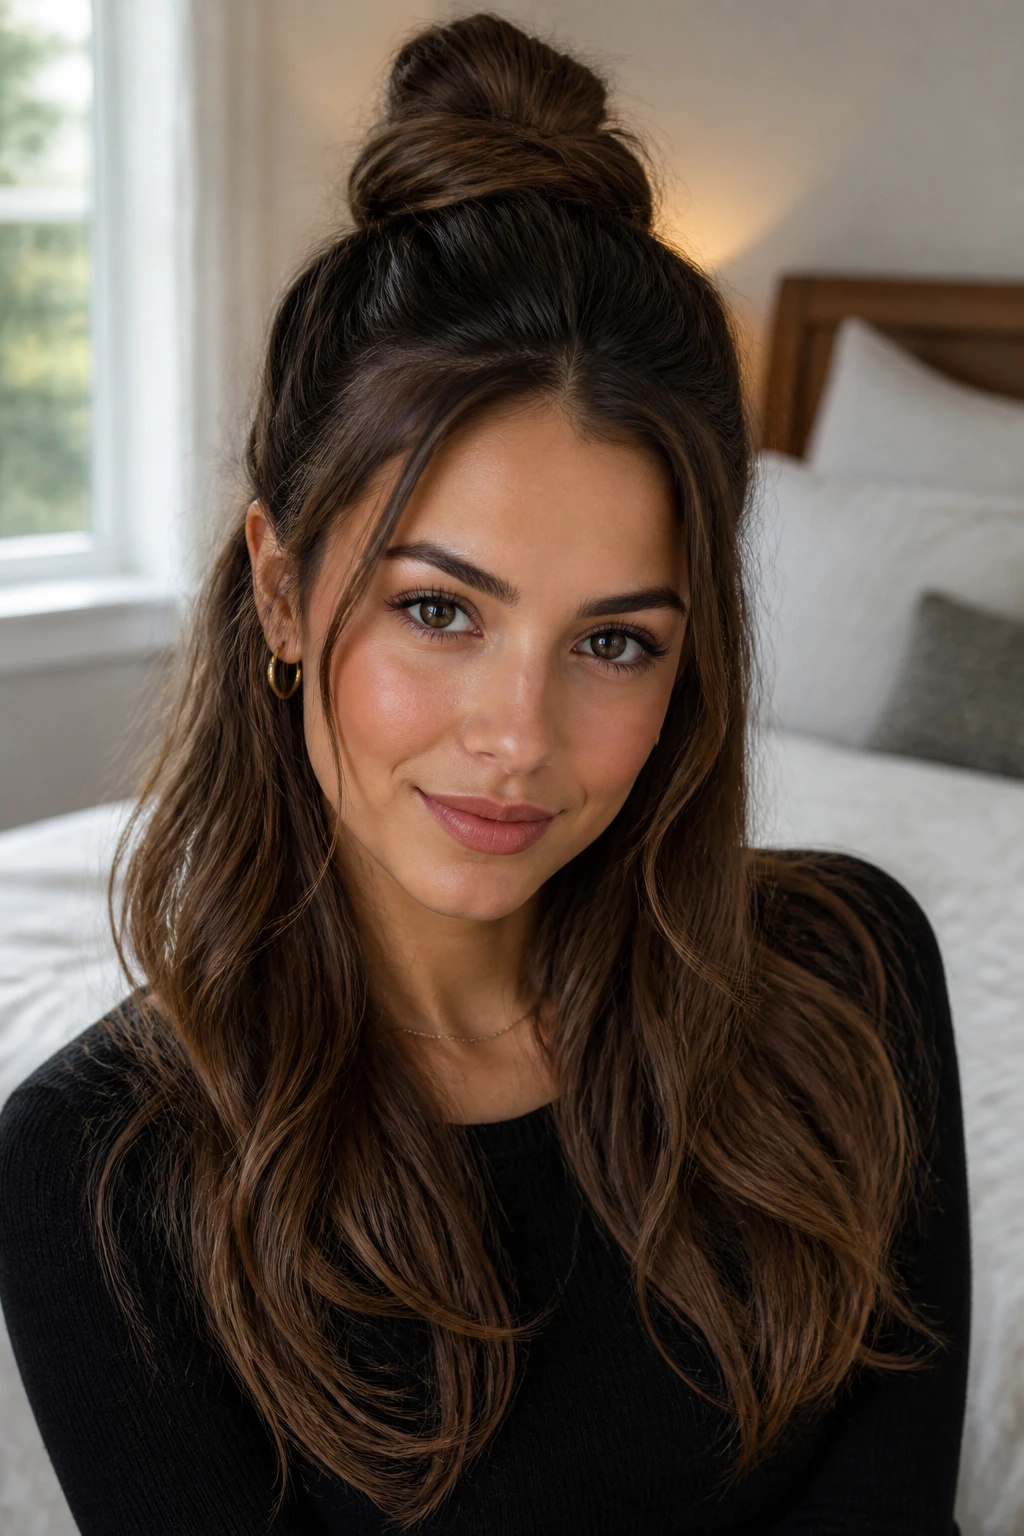
Half-up knot ponytails are the answer when you want your hair partly off your face but don’t want the weight of a full ponytail pulling at your scalp. The knot sits on the top section, while the rest of the hair stays loose, which keeps the style softer and easier to wear all day.
The biggest mistake is making the top section too small. You need enough hair to show the knot clearly, or it disappears into the rest of the style. About a third of your hair is a good starting point, though thick hair may need a little less to avoid a bulky bump at the crown.
How to Keep the Bottom Section Soft
Leave the lower hair brushed through, not overdone. If the ends are dry, a drop of light oil on the tips helps them lie flat without making them greasy.
The half-up knot is especially good with waves, because the loose length adds movement below the knot. Straight hair works too, but you may want to bend the ends slightly so the style does not feel too sharp. A small claw clip can hold the top section in place before you knot it if your hair is slippery.
It’s a relaxed style. That’s the charm.
9. Rope-Twist Knot Ponytail
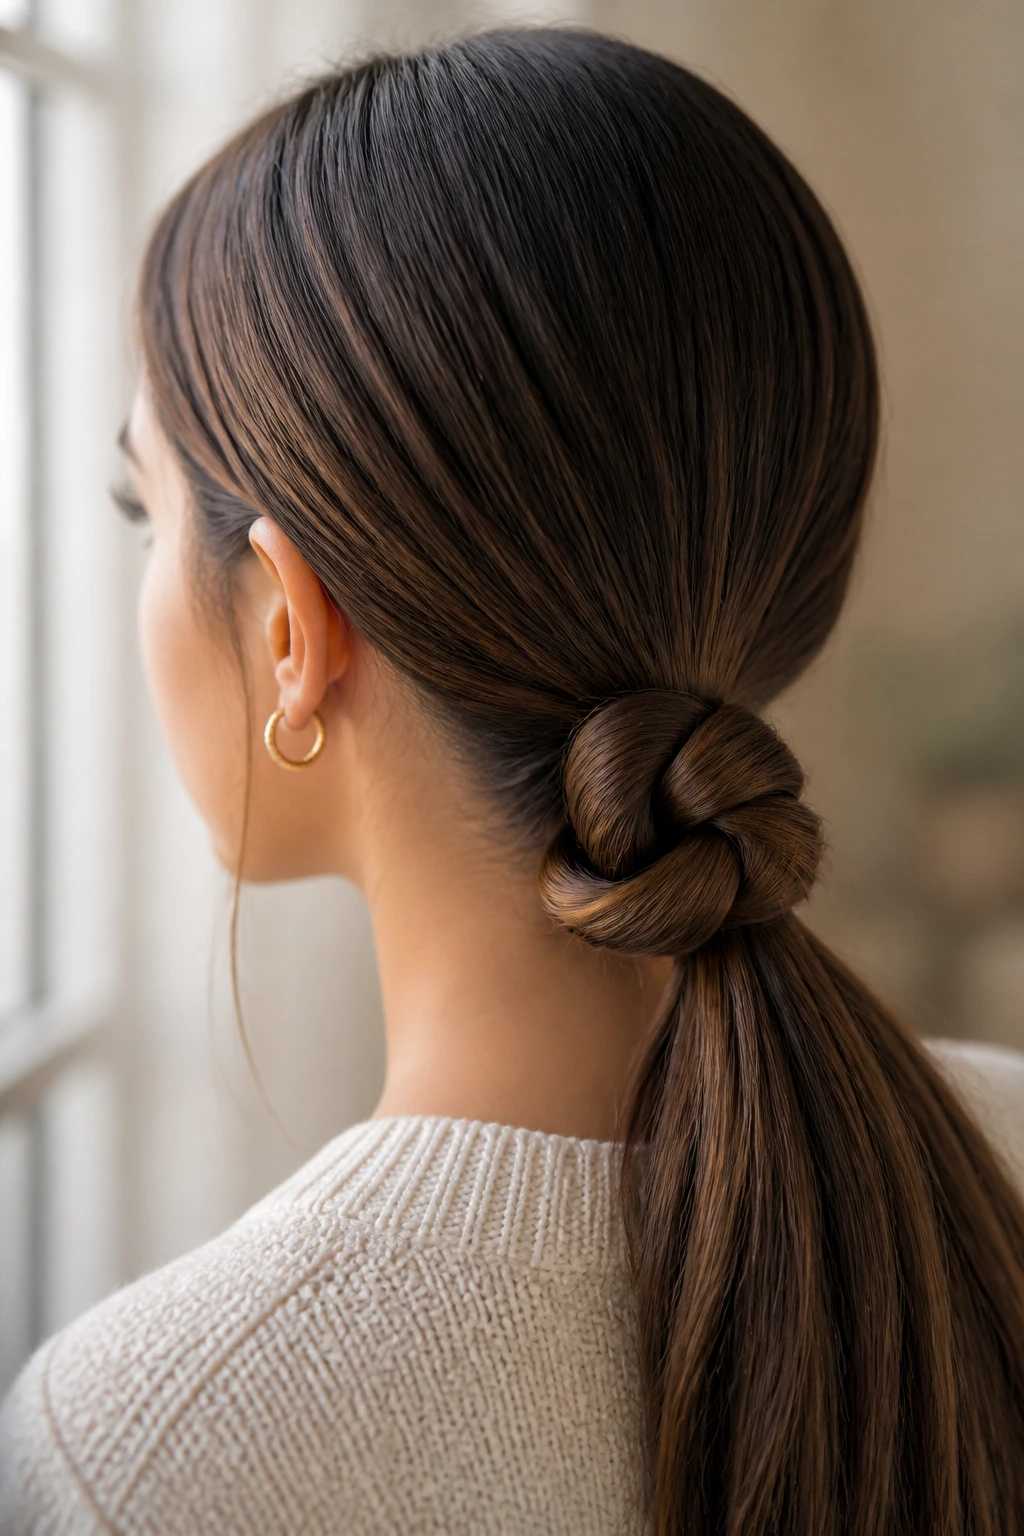
A rope-twist knot ponytail has a more structured look than a loose knot, but it still feels easy enough for daily wear. The twist gives the hair direction, and that direction makes the knot sit cleanly instead of fanning out. It’s a solid pick for humid mornings, because twisted hair tends to hold its shape better than hair that’s been handled too much.
Here’s the part I like: the style looks tidy without looking flat. You divide the ponytail into two sections, twist each section in the same direction, then twist them around each other in the opposite direction. That rope pattern creates a tight, springy base that behaves well once secured.
- Use medium-hold mousse before blow-drying if your hair is fine.
- Twist the sections until they begin to coil on themselves.
- Keep the knot low if your hair is shoulder length.
- Secure with two pins crossed under the rope.
If the rope twist starts to unravel, your sections probably weren’t twisted enough to begin with. Tighten them one more turn, and the shape usually settles right down. It’s one of those styles that rewards a steady hand more than a fast one.
10. Knotted Ribbon Ponytail
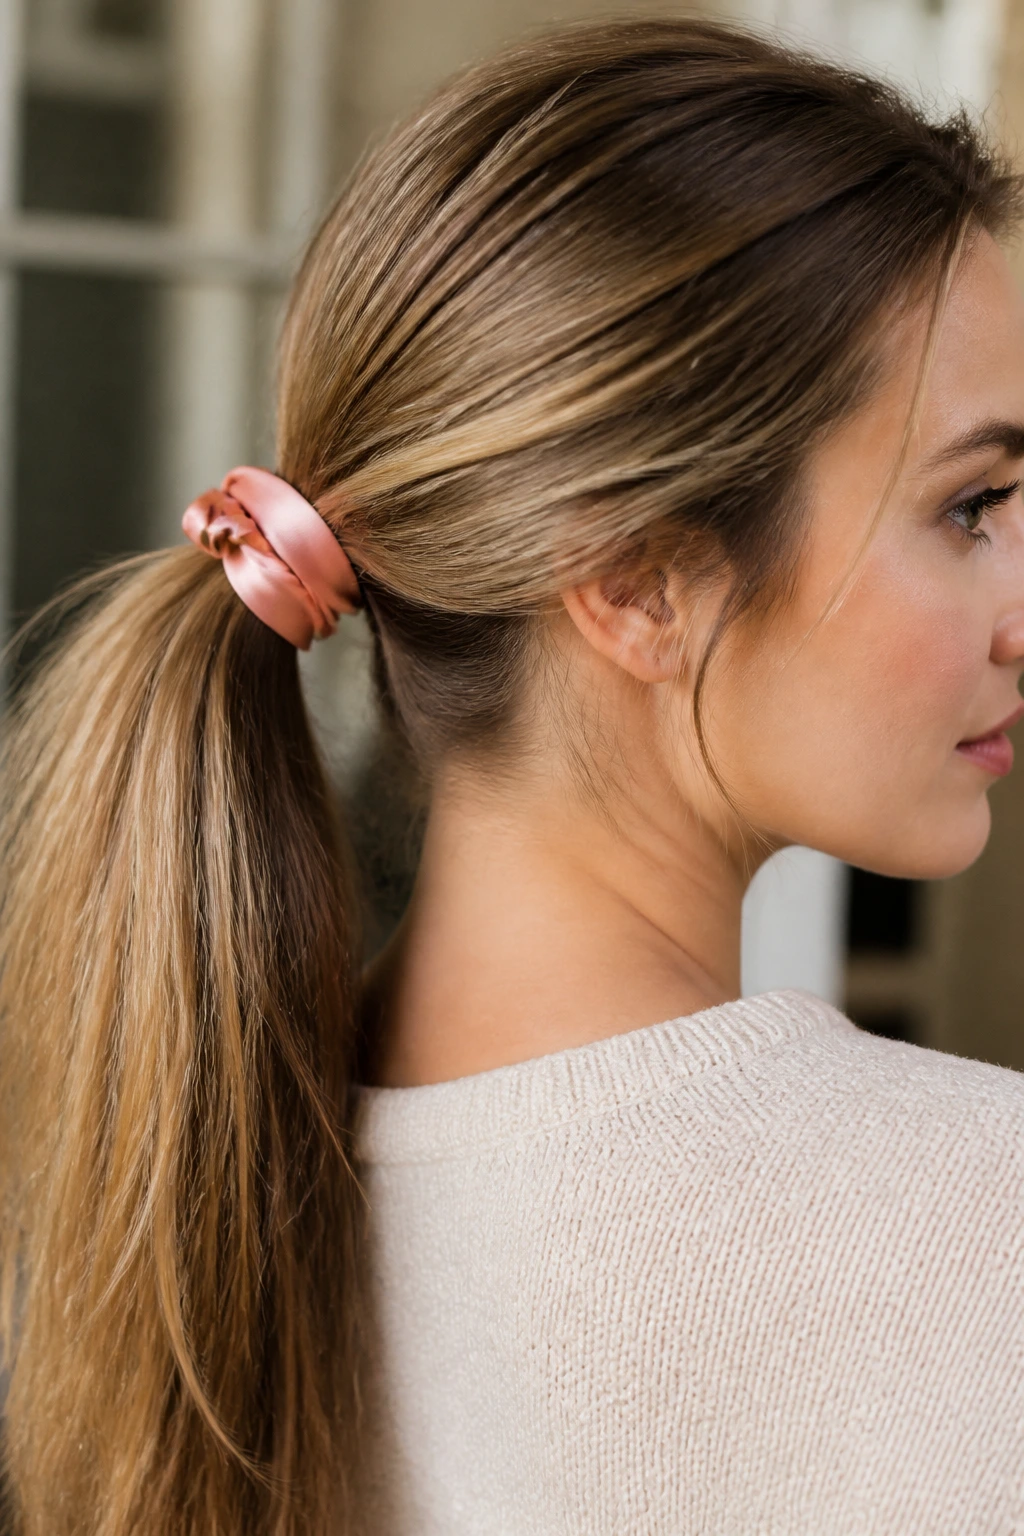
A ribbon changes the whole mood of a knot ponytail. The knot still does the structural work, but the ribbon softens the base and gives the style a little color or shine without making it feel dressed up. I like this one when plain elastics feel too plain and metal clips feel too hard.
Silk and satin ribbons work best because they glide over the hair instead of snagging it. A ribbon about 1 to 1.5 inches wide gives enough visual shape without turning the ponytail into a craft project. Tie the ponytail first, then wrap the ribbon into the knot itself or secure it over the elastic so the ends disappear under the hair.
The key is restraint. One ribbon is enough. A shiny print, a deep neutral, or a soft pattern can change the whole look. If you choose something loud, keep the rest of the style simple and let the hair stay smooth.
I’d use this one for errands, brunch, or a casual office day. It has polish, but the easy kind.
11. Messy Knot Ponytail
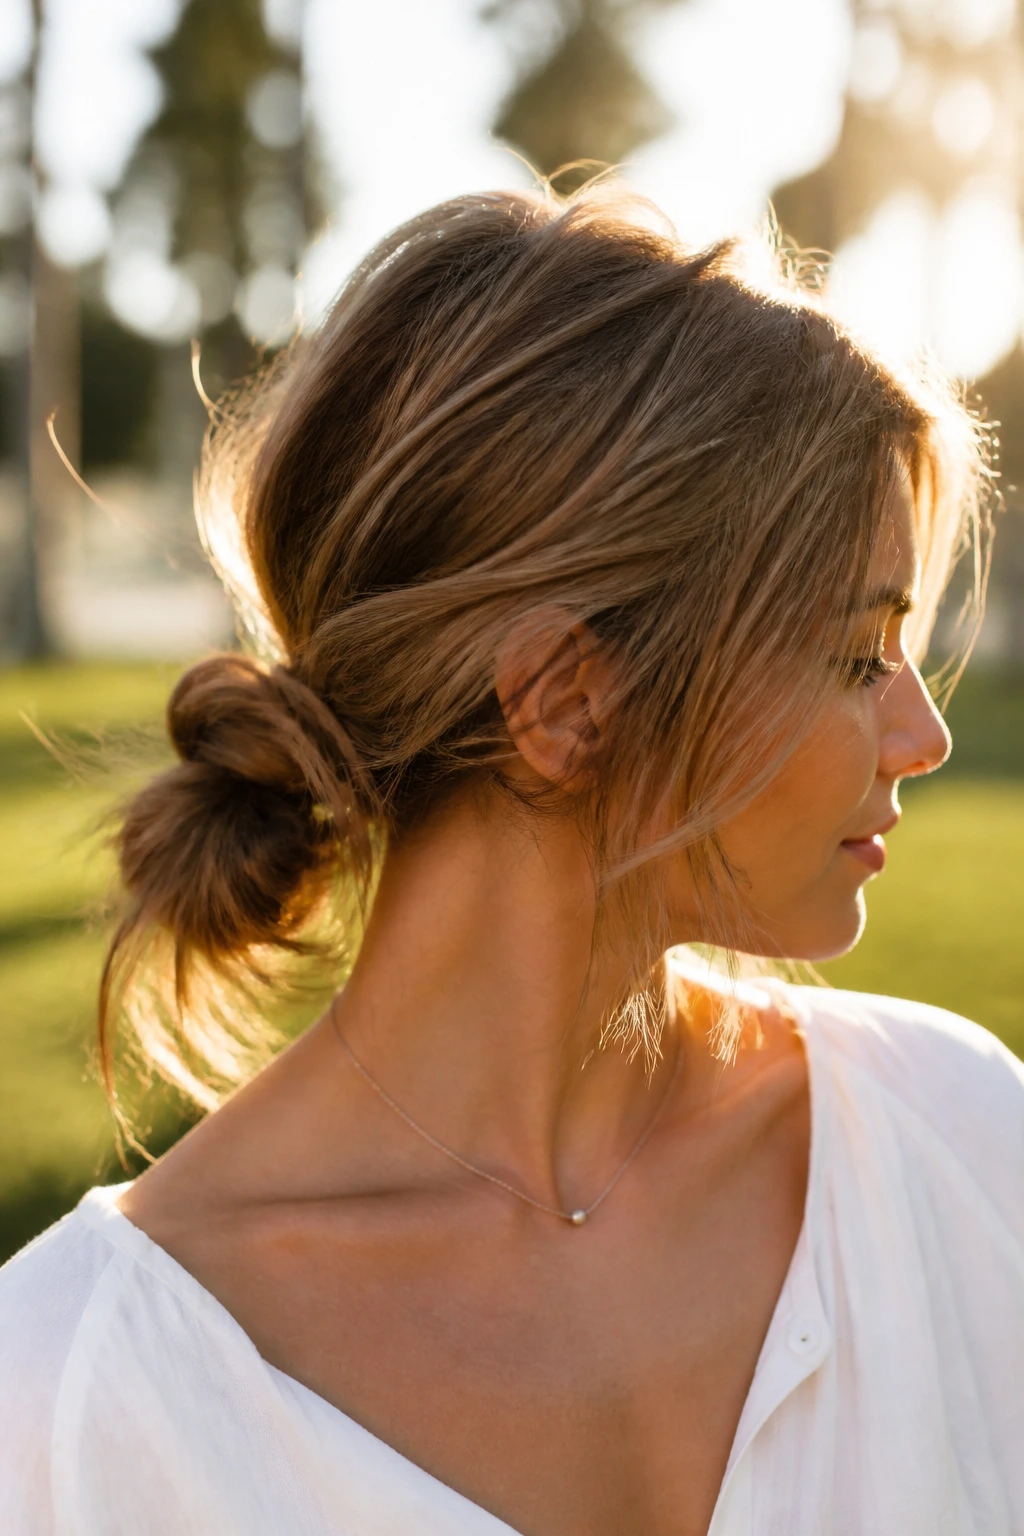
A messy knot ponytail can look better when it isn’t perfect. That is not lazy advice. It’s the whole point. The looseness gives the knot air, and air is what keeps the style from turning into a stiff little lump at the back of your head.
The sweet spot is controlled mess. Pull the ponytail loosely, then knot it with just enough slack that the loops can puff a little. Tug a few pieces at the temples, maybe one strand near the crown, and stop before the whole thing collapses. If you keep tugging, you go from relaxed to accidental in about ten seconds.
This is a good choice for second-day hair, especially if the roots need a little dry shampoo. It also works well when you do not want to fight your own hair texture. Wavy hair usually looks best here, but straight hair can do it too if you rough up the lengths first with texture spray.
The main downside is obvious: if the base is too low or too loose, it can look unfinished. Pin the knot from underneath, not on top, and the style holds its shape much better.
12. Tucked-End Knot Ponytail
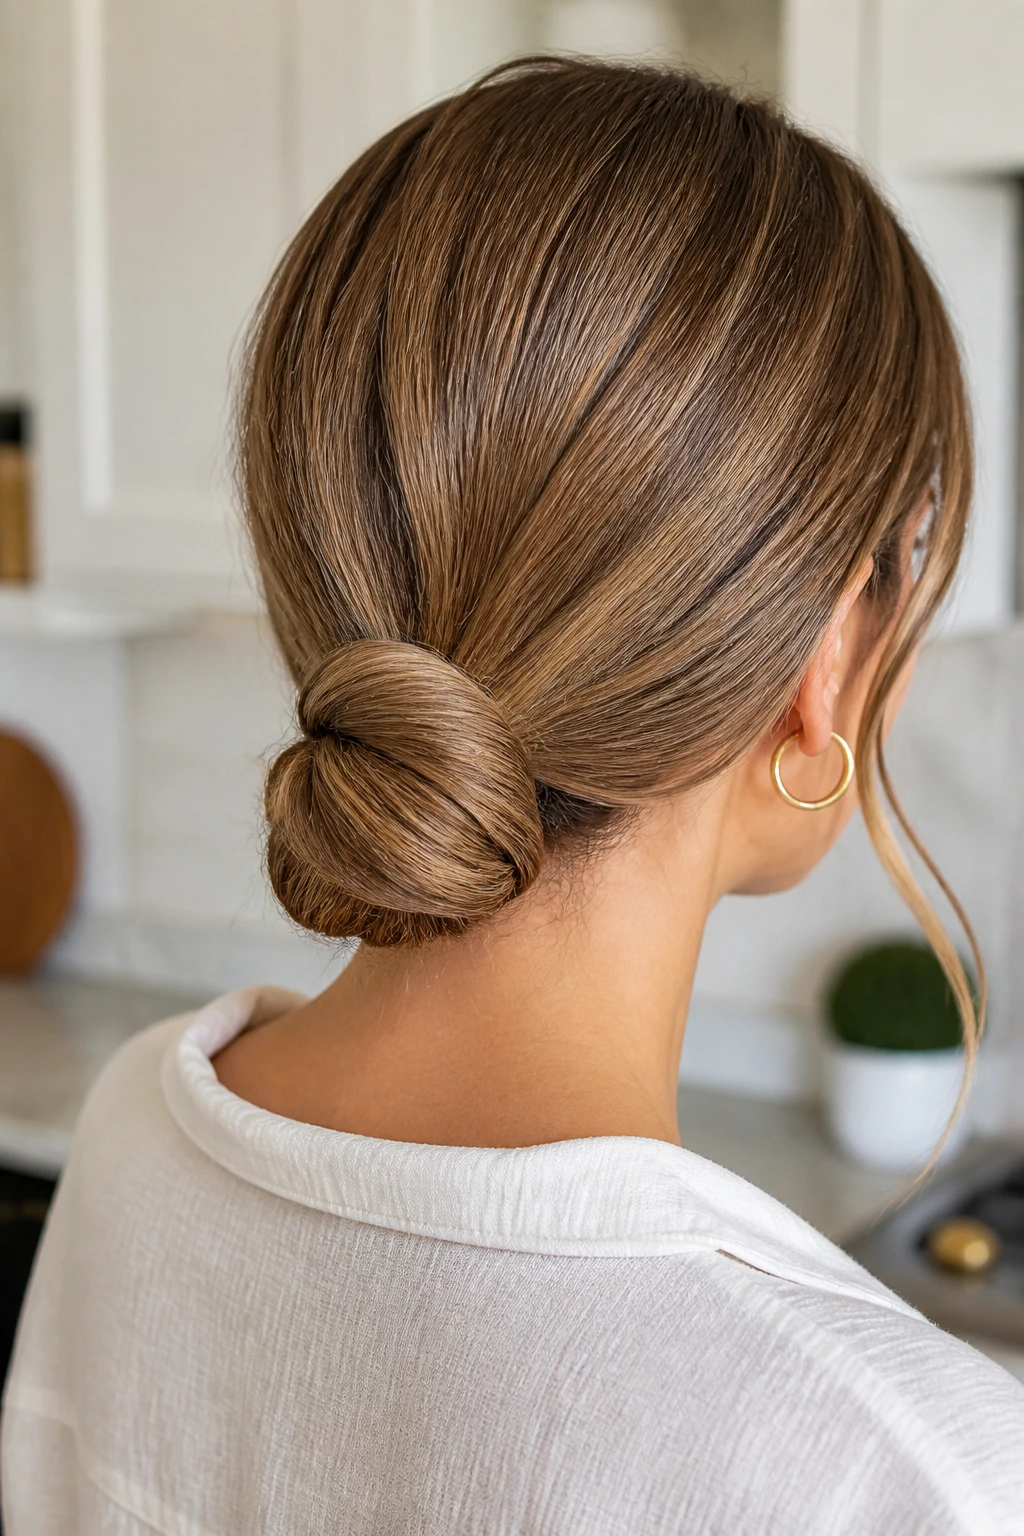
A tucked-end knot ponytail hides the ends inside the knot instead of letting them hang out. That gives the style a cleaner outline, and it makes the whole thing feel more compact. If you’ve ever liked a ponytail but hated the way the tail flops around while you work, this version fixes that fast.
Compared with a standard knot ponytail, this one feels neater and a little more deliberate. It’s also useful for hair that’s dry on the ends, because the tucked finish keeps the weakest part of the hair from rubbing against your clothes all day. I think it looks best when the knot sits low or mid-low, where the tucked shape reads clearly.
A few U-pins help here. Push them in from the sides of the knot and angle them inward so the tucked ends don’t slide out. If your hair is thick, split the tail in two before tucking it; one big fold tends to bulk up too much.
This is the style I’d pick when I want clean lines without the hardness of a bun.
13. Curly Hair Knot Ponytail
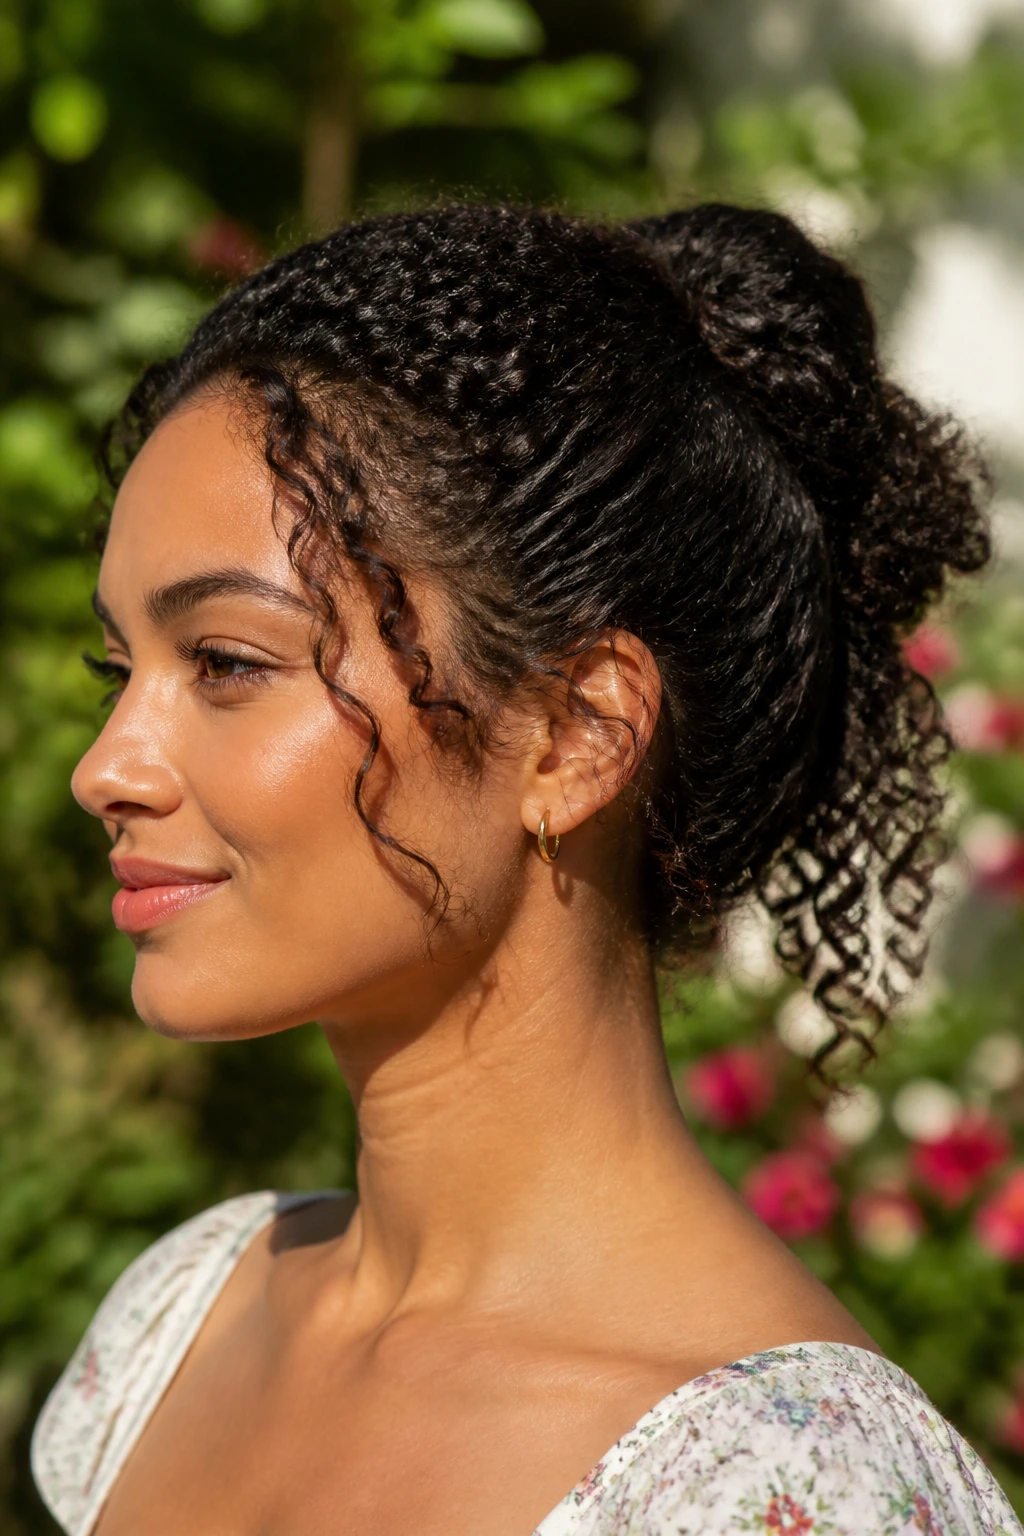
Can curly hair do knot ponytails without turning into a puffed-out knot cloud? Absolutely. The trick is to work with the curl pattern instead of trying to flatten it first. A curly hair knot ponytail keeps the shape of the curls intact, which makes the knot look fuller and more interesting than it would on straight hair.
Start by refreshing the roots with water or curl mist, then smooth only the top section enough to gather it. Leave the lengths alone unless you need to detangle a specific section. If you brush curls dry, the style gets frizzy fast. Better to use your fingers or a wide-tooth comb while the hair still has a little slip.
What to Change for Curls
- Use a coil-friendly elastic that won’t snap the curl pattern.
- Leave the knot a little looser than you would on straight hair.
- Tuck the ends only halfway if you want the curl shape to show.
- Smooth the hairline with a light cream, not heavy gel.
I like this style because it respects the texture you already have. It does not fight it. That’s a relief, honestly.
14. Fine-Hair Teased Knot Ponytail
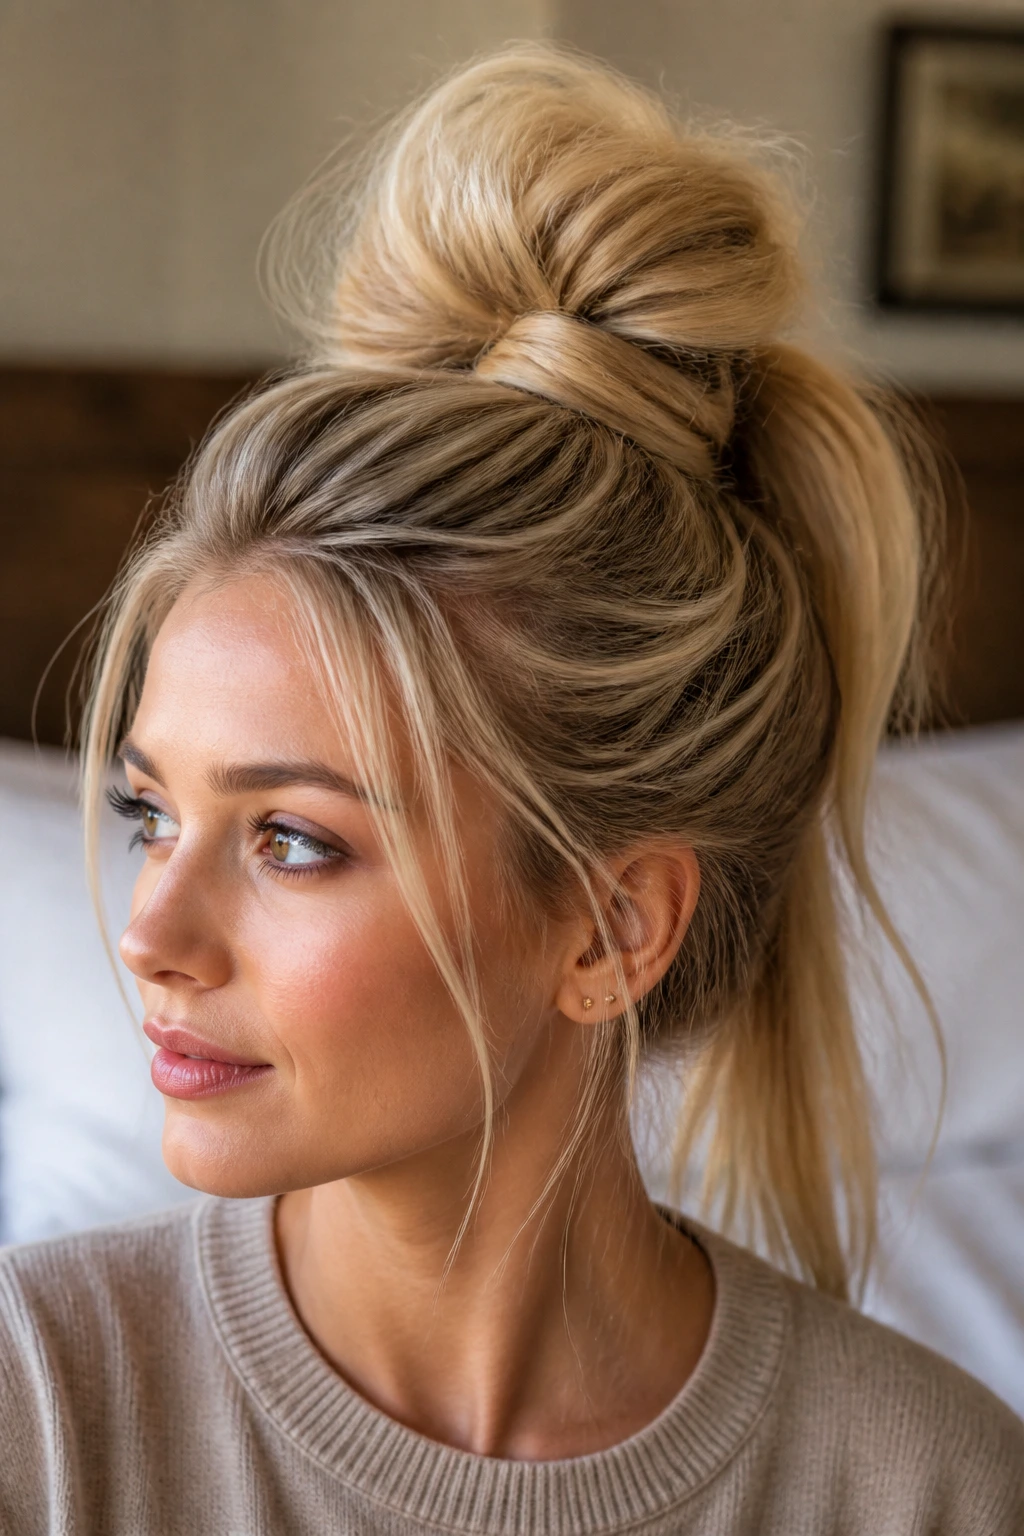
Fine hair needs a little help if you want the knot to look like something on purpose instead of a thin twist hanging off the back of your head. Teasing the crown gives the ponytail a base to sit on, and that small bit of volume makes a huge difference in the finished shape.
The best version is soft teasing, not a rat’s nest. Lift the top layer, backcomb the roots with 3 or 4 gentle strokes, then smooth the surface so it still looks clean. A little powder at the roots helps too, especially if your hair slips out of elastics by lunch.
- Tease only the crown and upper sides.
- Use a small elastic so the knot doesn’t disappear.
- Wrap a thin strand around the tie for a thicker visual base.
- Finish with a light mist of flexible hairspray.
If your hair is very fine, avoid a heavy oil near the roots. It flattens the style faster than anything else. A matte texture product works better because it gives the knot a bit of grip without making it crunchy.
This style can look tiny on its own, so make the knot sit high enough to show.
15. Office-Ready Knot Ponytail
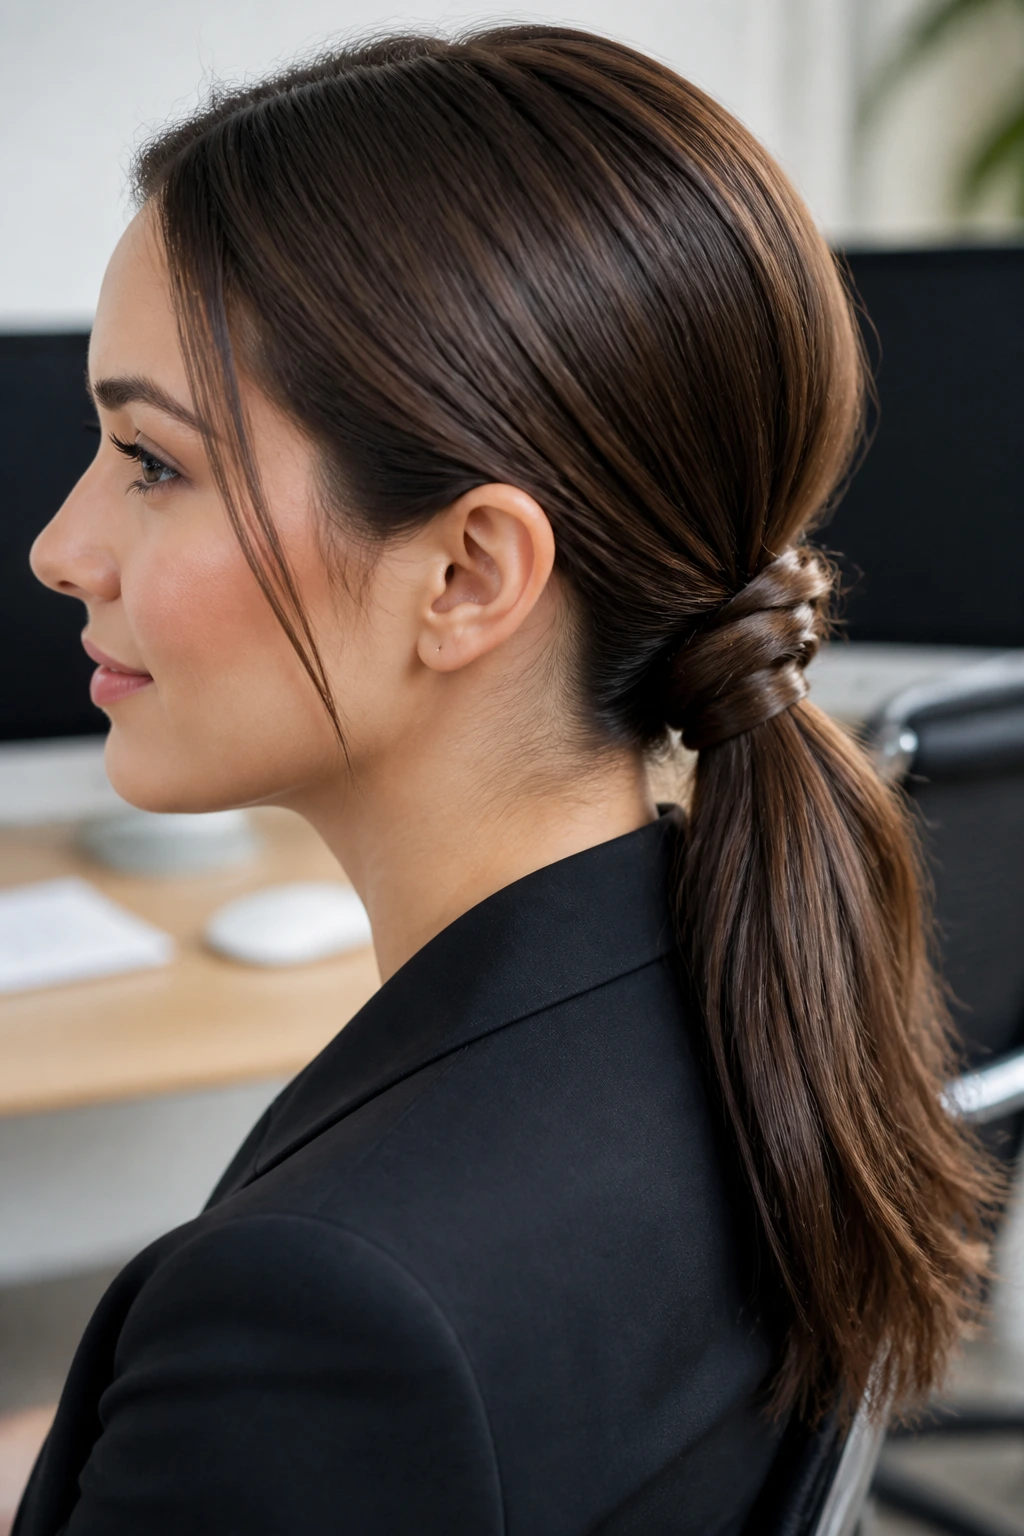
A good office-ready knot ponytail should look calm, not severe. I like a mid-low placement here, because it keeps the style neat while avoiding the hard pull that a very high ponytail can create. Add a clean side part or a center part, and the whole thing feels finished without turning formal.
The base should be smooth, but not slick. That matters. Hair that’s been plastered flat with too much product can look stiff under overhead lighting, and no one needs that. A touch of cream at the hairline, a wrapped elastic, and one hidden pin under the knot are usually enough.
This is a style that works with a blazer, a knit sweater, or a plain tee. It does not care. That’s the appeal. It gives you order without stealing the rest of your outfit’s attention.
If you want it to last through a long day, use a little mist of flexible spray after you’ve shaped the knot. Let it dry for 30 seconds before you touch it again. Rushing that part tends to flatten the hairline.
16. Sporty Knot Ponytail
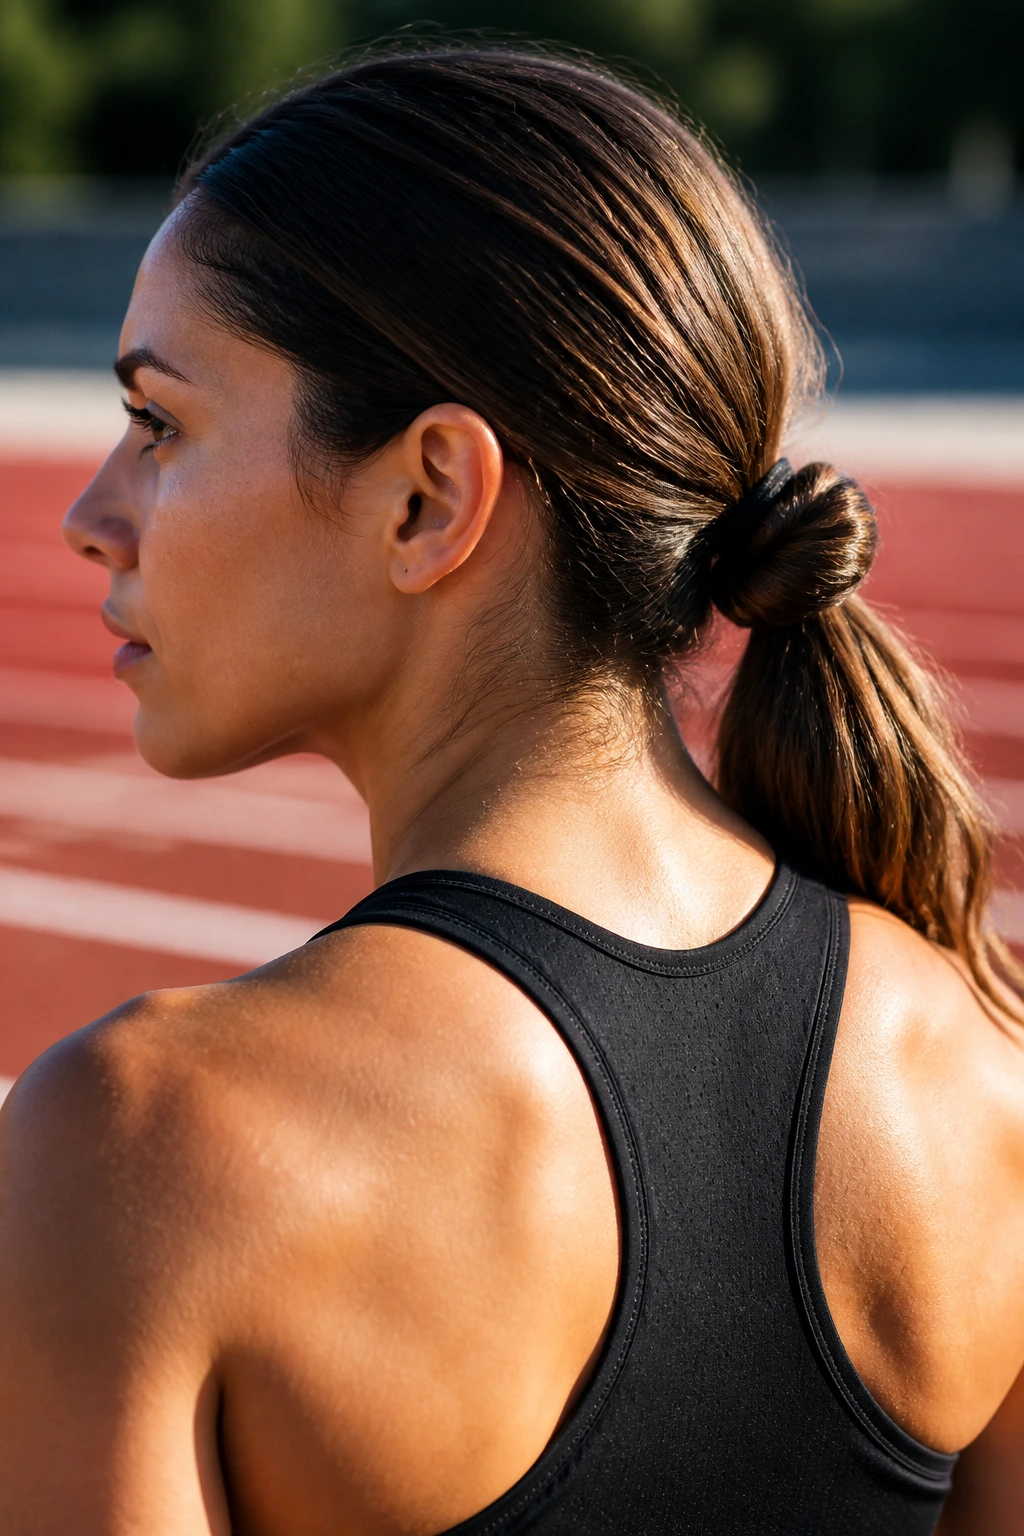
The sporty knot ponytail is all about staying secure without feeling locked in. You want a style that can handle movement, sweat, and a hat if needed, but you do not want it so tight that your temples ache halfway through the day. A lower knot with a firm elastic usually does the job better than a sky-high version here.
The best setup starts with grippy hair. Second-day roots are ideal, and if your hair is freshly washed, a bit of dry shampoo at the base helps. Pull the ponytail back, twist the tail once, knot it close to the elastic, and pin the tail under the knot so it stays out of the way.
A snug base matters more than a glossy finish. If you’re heading to a workout, skip heavy creams and go for a light spray or nothing at all. Too much product can make sweat show up faster and turn the style slippery.
This one is practical, not precious. That’s why I like it.
17. Scarf-Wrapped Knot Ponytail
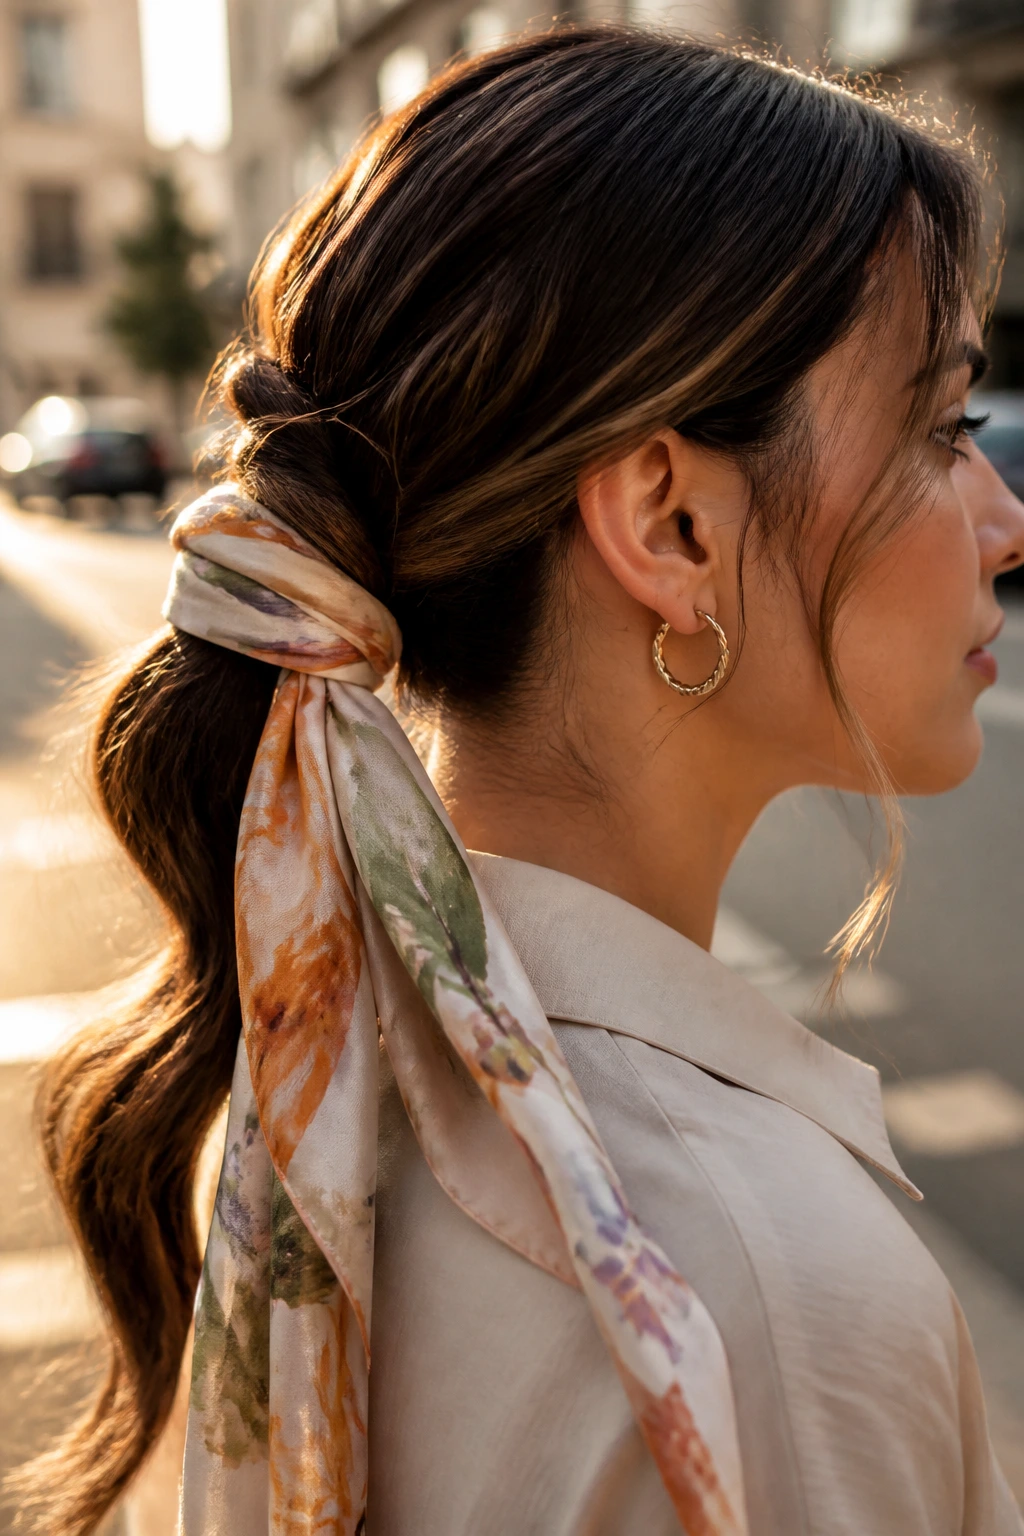
A scarf-wrapped knot ponytail does more than add color. It changes the scale of the style, which is useful when you want the knot to feel fuller or when you want to cover a hair tie that won’t stay hidden. Compared with a ribbon, a scarf has more body, so it sits with a little more presence around the base.
Lightweight silk or satin works best because thick cotton can bulk up the knot and pull on fine hair. A scarf about 20 to 25 inches long is usually enough for most ponytails. Fold it into a strip, wrap it around the base, and tie it into the knot itself or let the ends trail a little for a softer finish.
This style is handy on days when your hair is doing something annoying and you want to distract the eye in a smart way. Frizz at the roots? The scarf covers it. A slightly uneven knot? The scarf makes it feel intentional.
If the print is busy, keep the hair simple. If the hair is textured or curly, a plain scarf usually looks better.
18. Asymmetric Knot Ponytail
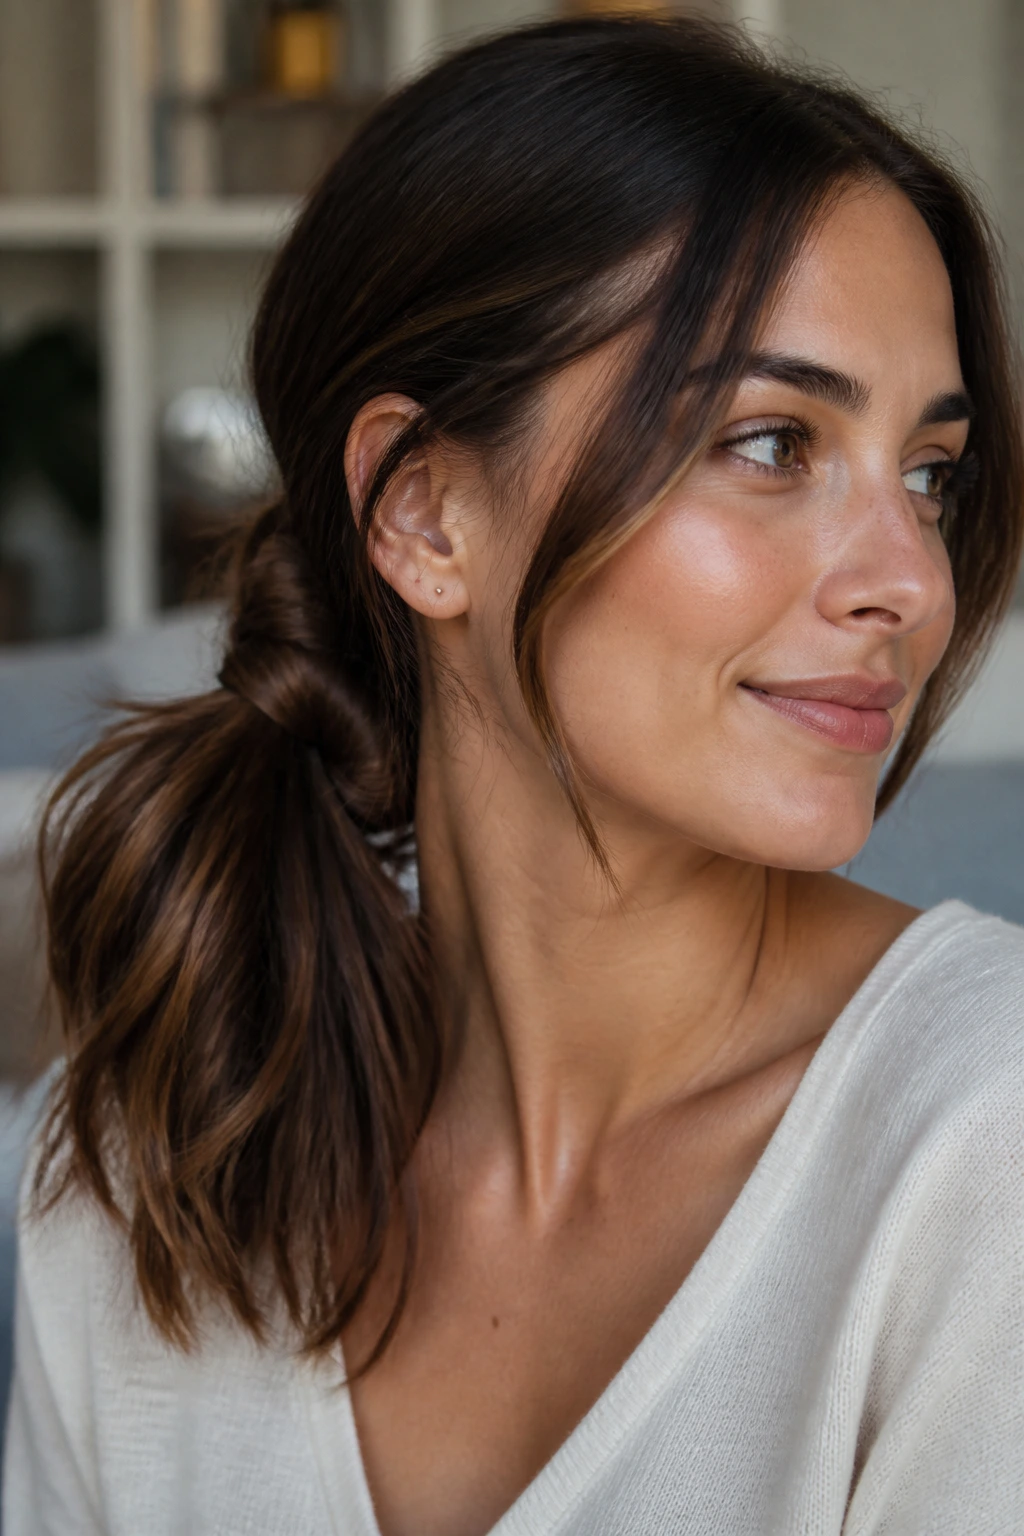
Do you want a knot ponytail that breaks the symmetry just enough to feel interesting? An asymmetric knot ponytail does exactly that. The knot sits off-center, usually behind one ear or a touch lower on one side, which gives the style a natural swing when you move.
The off-balance placement can be subtle. It does not have to look dramatic. In fact, the best version usually looks almost accidental, like the hair just fell that way and you decided to keep it. That’s the charm. You get shape without the stiffness of a dead-center knot.
How to Place It
Brush the hair toward the heavier side first, then gather the ponytail a little off the middle line. Knot the tail loosely, secure it from underneath, and let one side stay slightly fuller than the other. If you have a side part, lean into it instead of fighting it.
This style works especially well with layered cuts. The uneven lengths help the asymmetry look natural, not forced. If you want a little more drama, tuck one side behind the ear and leave the other side soft.
19. Double-Wrap Knot Ponytail
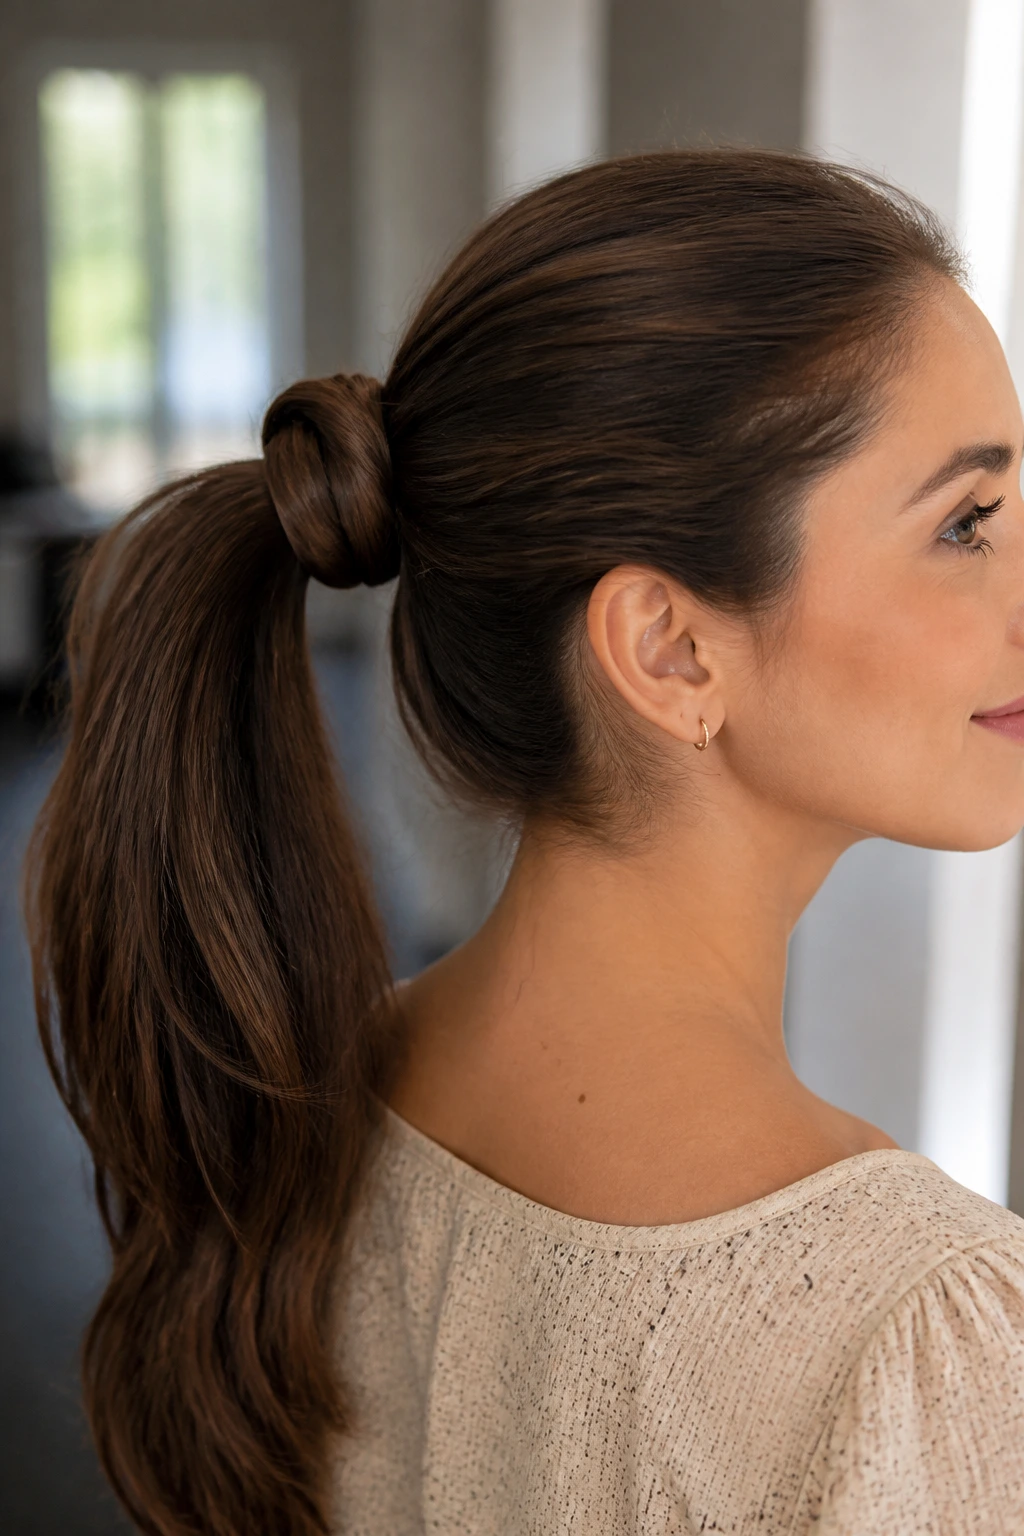
A double-wrap knot ponytail gives you that wrapped, sculpted base that makes even ordinary hair look more intentional. The “double wrap” part means you use two passes of hair or ribbon around the elastic, so the knot looks thicker and a little more finished. It’s a smart move for medium-density hair that needs visual weight.
I like this version when the ponytail itself is fine but I still want the base to look substantial. One wrap can look thin. Two wraps make the knot read more clearly from across the room, which sounds minor until you see the difference in the mirror. It’s real.
- Start with a firm base elastic.
- Divide the tail into two equal sections.
- Wrap each section around the base in opposite directions.
- Pin each end under the knot so the shape stays balanced.
If the knot feels bulky, the sections were too thick. Thin the strands a little and try again. The style should look layered, not stuffed. That distinction matters more than people think.
It’s a nice one for days when you want hair that looks finished with minimal fuss.
20. Everyday Low Knot Ponytail with Soft Ends
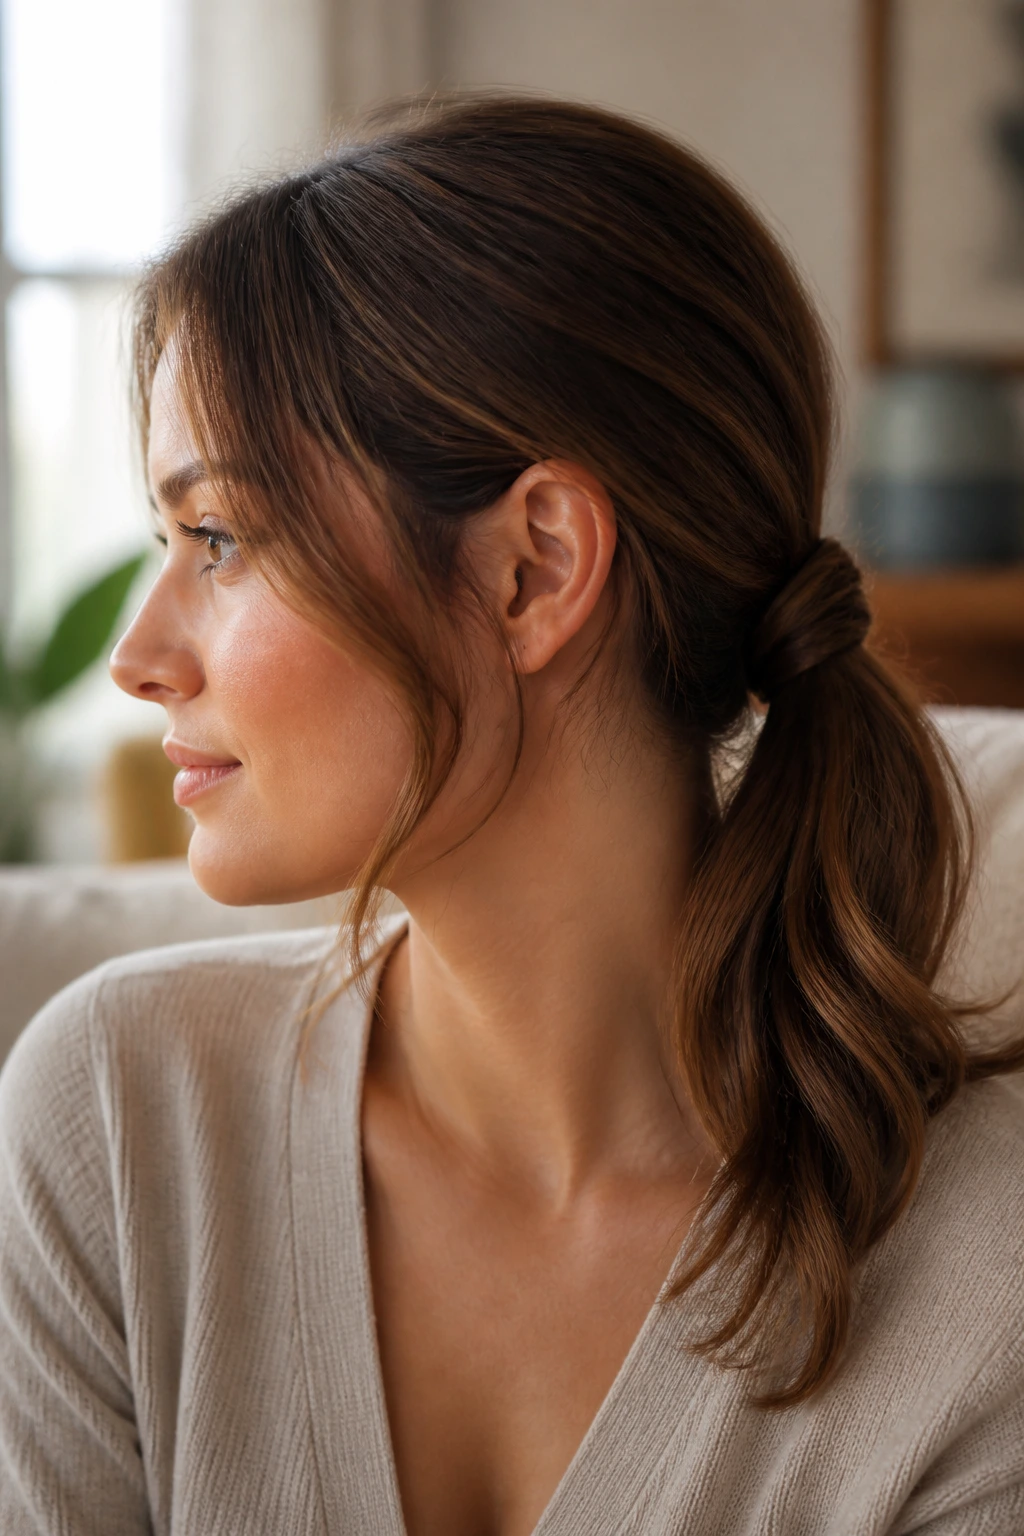
If you only wear one knot ponytail on repeat, make it this one. The everyday low knot ponytail with soft ends is easy to build, easy to fix, and easy to wear for hours without feeling overdone. It sits low enough to feel relaxed, but the knot still gives it shape, which keeps it from sliding into “plain ponytail” territory.
The soft ends are the part I like most. Instead of tucking everything in or pulling the tail too tight, leave the ends brushed and natural, maybe with a light bend if your hair likes that. The result feels casual in a good way. Not sloppy. Just human.
This style is the one I’d choose for school runs, desk work, dinner plans, and those days when you want to look like you made an effort without actually making a scene about it. It works on straight, wavy, and curly hair, and it does not ask much from the rest of your routine.
A low knot like this also ages well through the day. If it loosens a little, it usually looks better, not worse. That’s rare. And useful.
