



Standing in front of the mirror with an hour to get ready for a formal event is a specific kind of stress. You have the dress, the shoes, and the jewelry, but your hair feels like a massive, unruly curtain that refuses to cooperate. Long hair is a beautiful asset, but it is heavy and, frankly, it can be overwhelming when you are trying to make it look intentional rather than just “left down.” You do not need a professional stylist or an arsenal of expensive tools to achieve a look that feels polished, secure, and sophisticated. The secret usually lies in the prep work rather than the final styling phase.
Most people skip the texture phase because they want to get to the styling part immediately. This is the biggest mistake. If your hair is freshly washed and slippery, it will not hold a curl, a braid, or a pin. Using a texturizing spray or a light dry shampoo adds the grit necessary for bobby pins to actually grip the hair instead of sliding out the second you turn your head. This one habit changes everything. Once you have that foundation, the rest is just about understanding how to manipulate the weight of your hair to keep it looking voluminous without causing a headache by the end of the night.
1. Classic Low Chignon
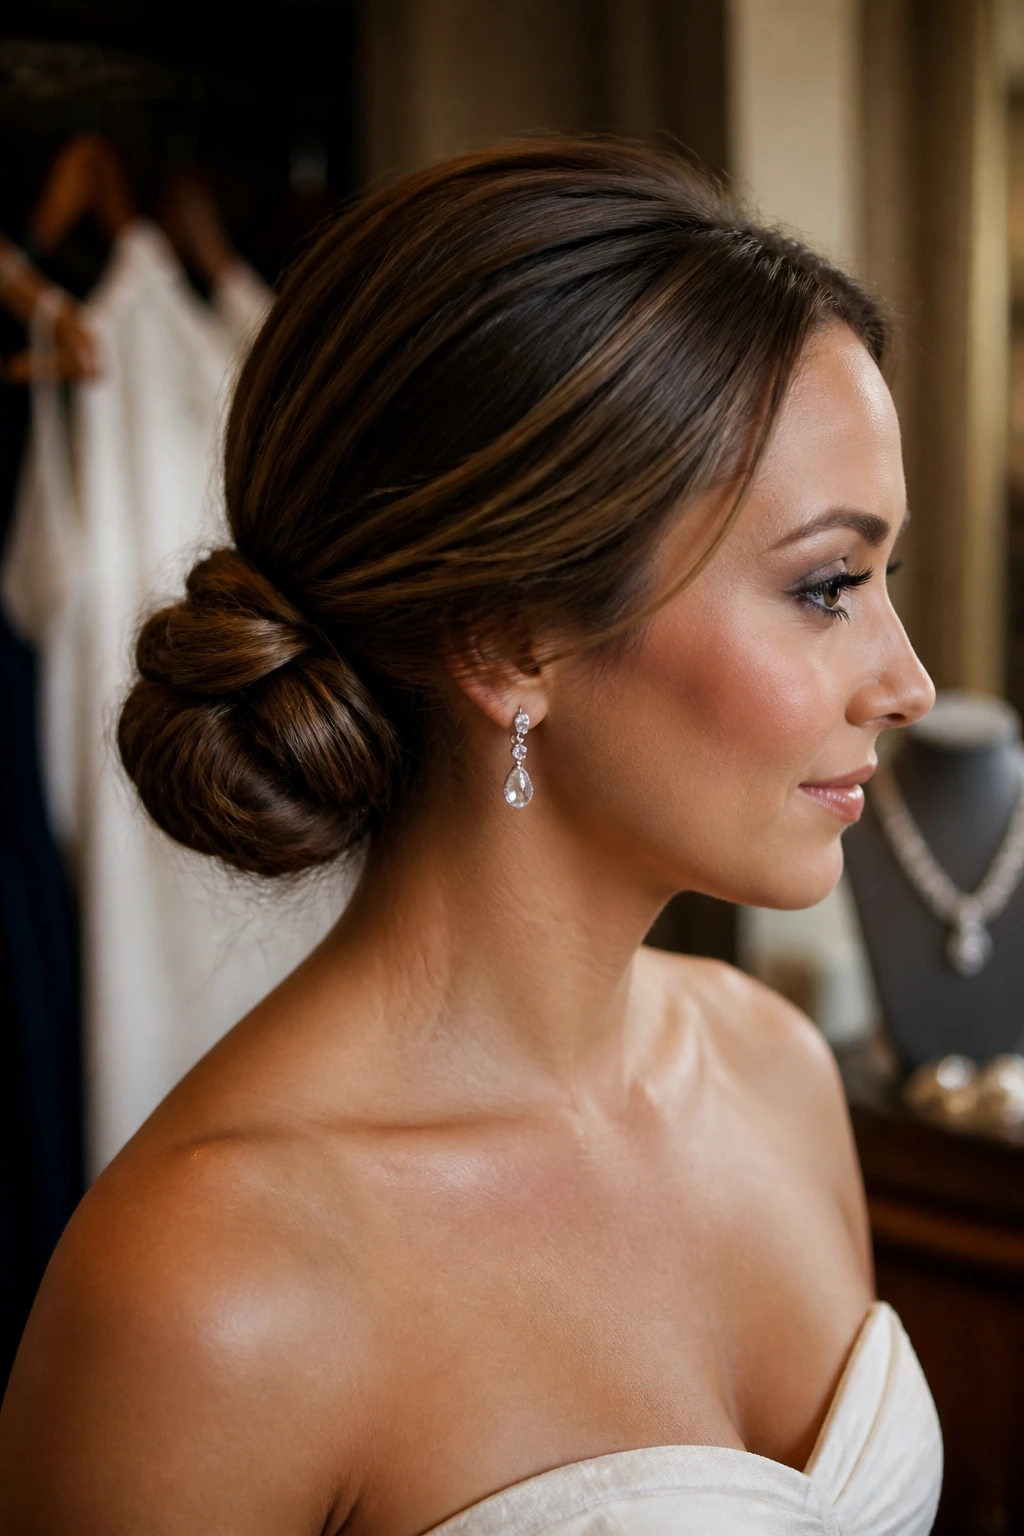
The low chignon is the undisputed king of formal hair because it manages to look expensive while actually being quite simple to construct. It sits at the nape of the neck, keeping the hair off your shoulders and allowing you to show off the back of your dress or your jewelry. The beauty here is that it does not need to be perfect. A slightly messy or soft chignon often looks more natural and approachable than one slicked back with a mountain of hairspray.
Why It Works for Formal Events
This style creates a clean line from the profile, which works exceptionally well with high necklines or statement earrings. It is essentially a rolled bun held together by the hair itself and a few strategic pins.
Key Technique for Success
- Start by gathering your hair into a low, loose ponytail at the nape of your neck, but do not pull the ends all the way through on the final loop. This creates a loop or a “bun” shape.
- Take the remaining tail of hair and wrap it around the base of the ponytail to hide the elastic.
- Secure the wrap with a bobby pin pushed upward into the center of the bun.
- Use your fingers to gently tug at the hair around your crown to create volume.
Pro tip: If your hair is very silky, spray the bobby pins with dry shampoo before inserting them; this provides the friction needed to lock the hair in place all night long.
2. Sleek High Ponytail
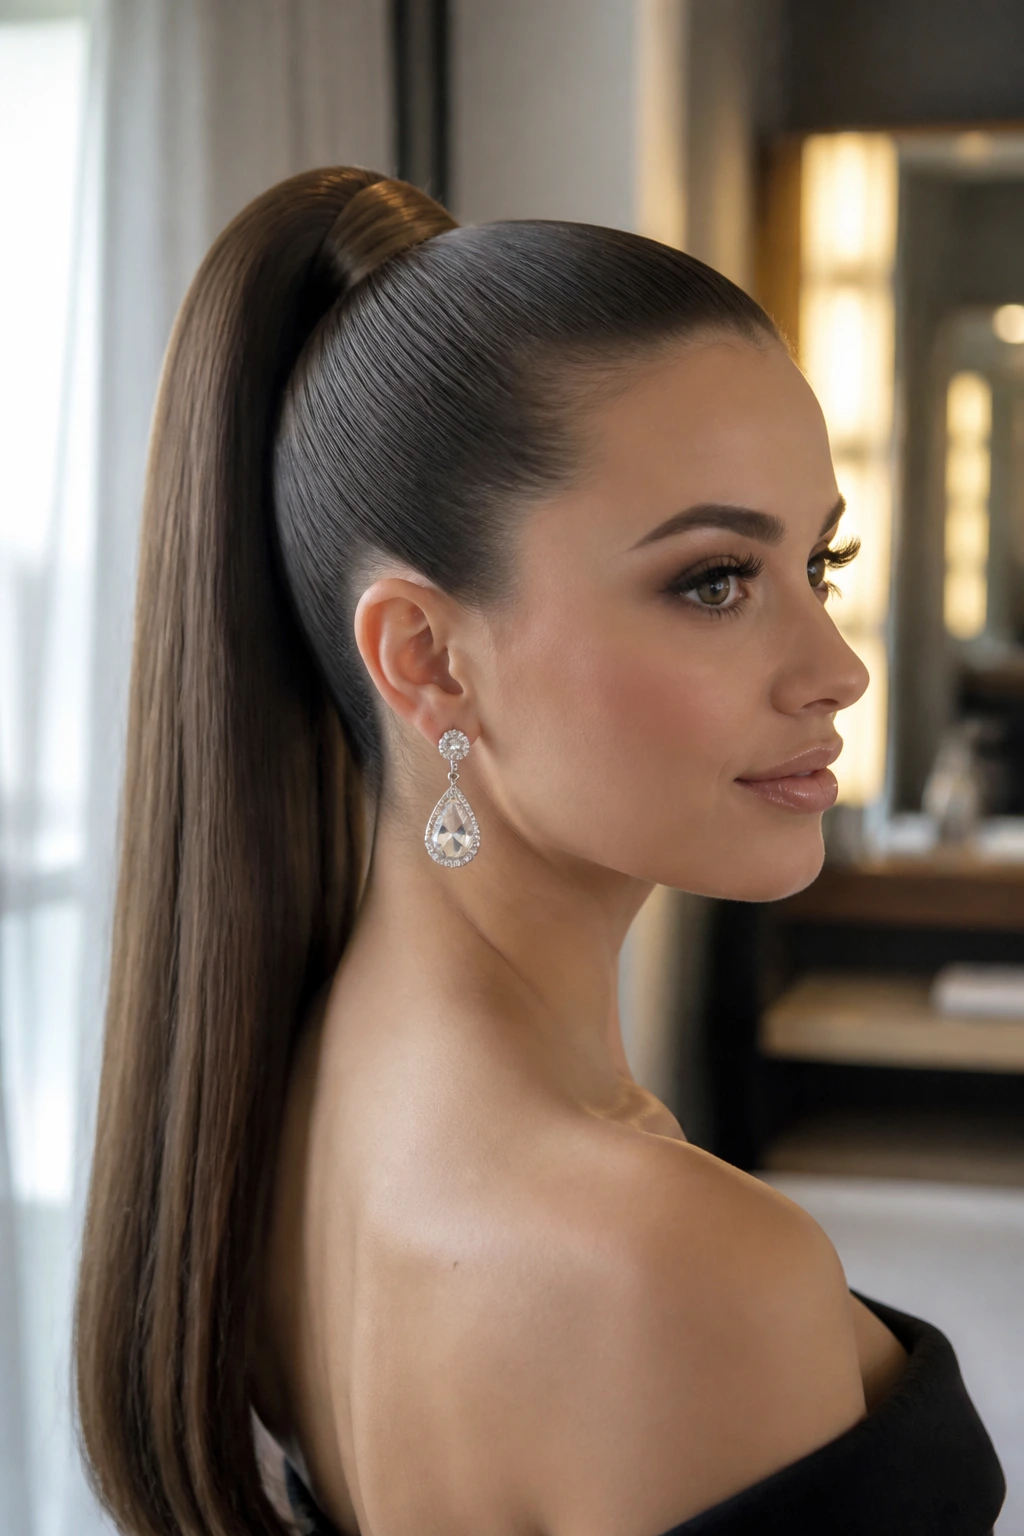
There is something undeniably powerful about a high, polished ponytail. It lifts the face, mimics a subtle facelift, and works perfectly with gowns that feature complicated necklines or halter tops. The trick to making this look formal rather than gym-ready is all in the finish of the hair and the concealment of the hair tie. You want it to look intentional, not like you were running late.
To achieve this, you need a high-quality boar bristle brush. Start by pulling your hair up while your head is tilted back; this ensures the ponytail stays tight against your scalp without sagging. Use a dime-sized amount of smoothing cream or a light-hold pomade to tame any flyaways along the hairline. Once the ponytail is secured with a snag-free elastic, take a small, thin section of hair from the underside of the ponytail and wrap it tightly around the base. Secure this tail with a tiny bobby pin tucked underneath. This small detail elevates a standard pony into a high-fashion statement.
3. Romantic Half-Up Twist
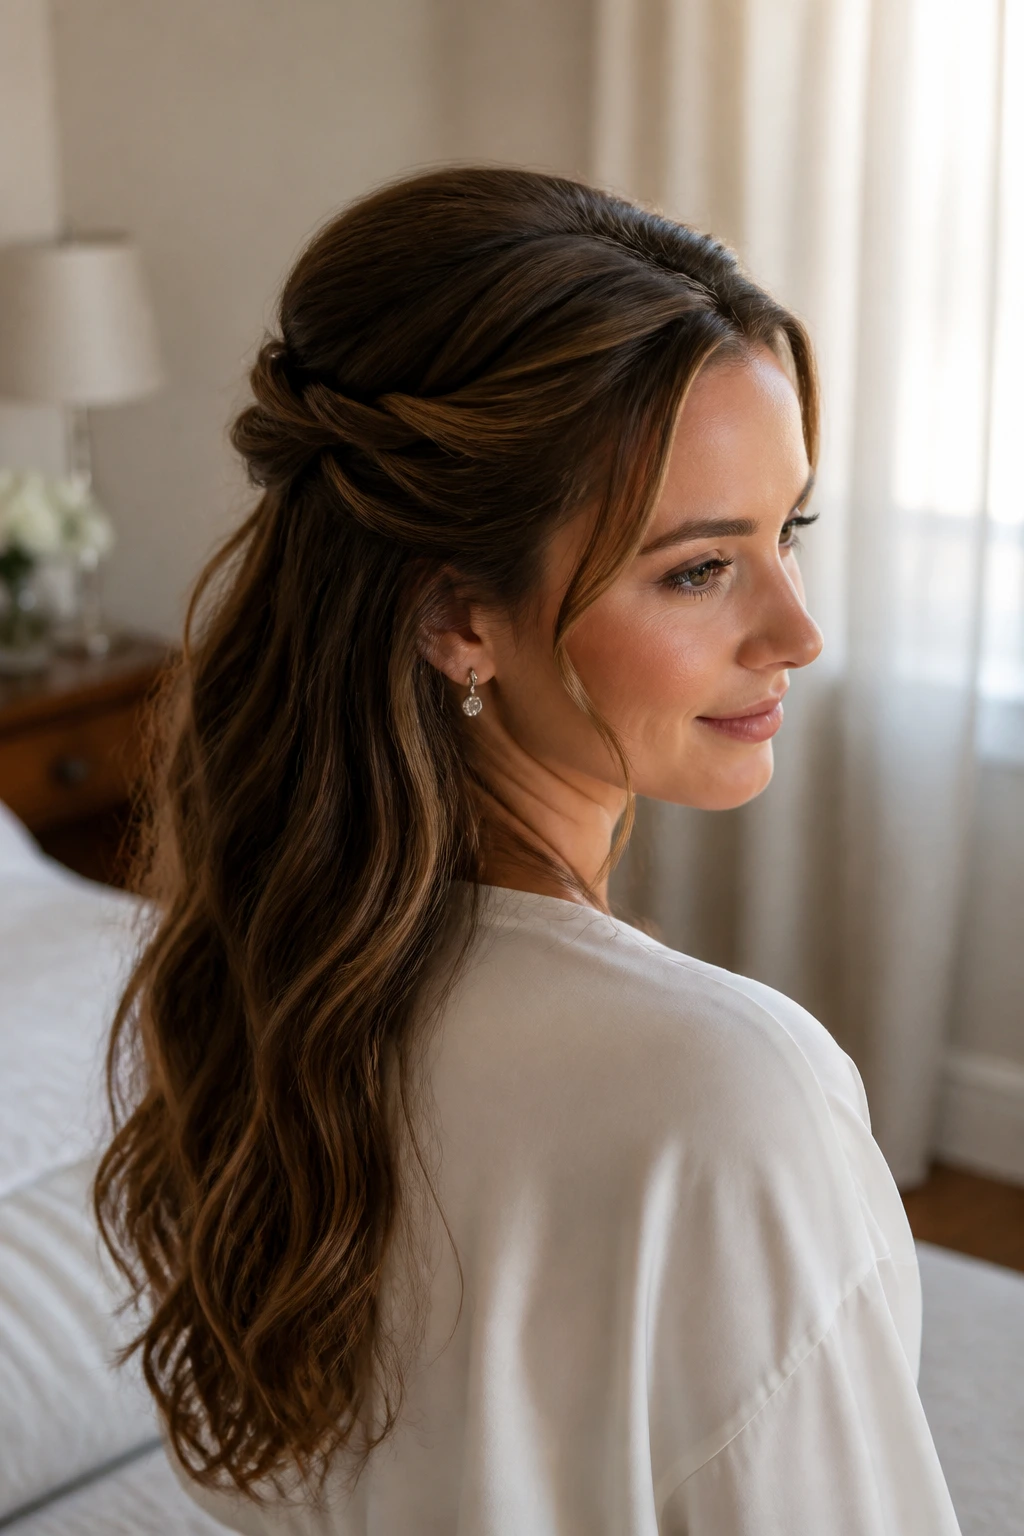
When you want to keep your length but need your hair out of your face for an event, the twisted half-up style is the perfect compromise. It feels soft and feminine, and it is significantly easier to execute than complex braids. It works best on hair that has a little bit of wave or texture already in it. If your hair is poker straight, run a large-barrel curling iron through it first to give it some movement.
How to Create the Twist
- Take a one-inch section of hair from near your temple on the left side.
- Twist this section away from your face, moving toward the back of your head.
- Repeat on the right side.
- Bring both twisted sections to the center of your head, overlapping them slightly, and secure them with a clear elastic or a decorative barrette.
- You can leave the rest of your hair loose or add a few curls for a more formal aesthetic.
This style is excellent because it is incredibly forgiving. If the twists are a little loose or the parting isn’t perfect, it just adds to the “undone” charm of the look. It is an ideal choice for someone who wants to look refined without appearing too stiff or formal.
4. Braided Side Sweep
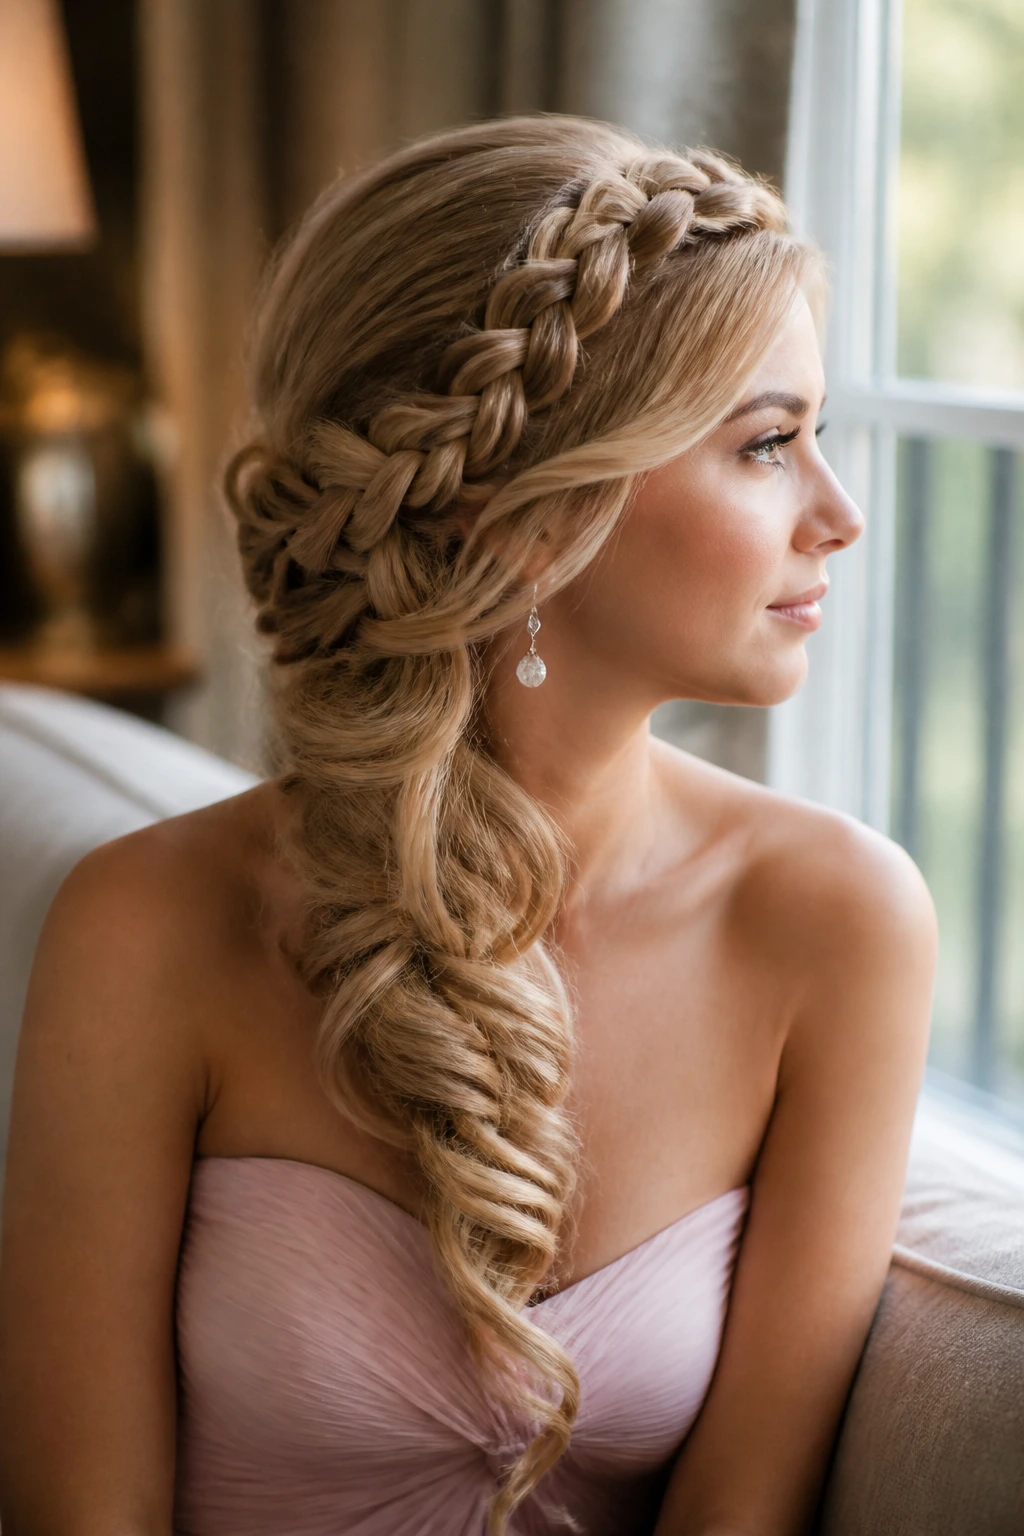
The side-swept braid is a functional masterpiece. By pulling all your hair to one side and weaving it into a loose braid, you create a look that feels incredibly intentional and romantic. It is particularly striking if you have balayage or highlights, as the weaving process mixes the colors together, adding depth to the overall style.
Start by parting your hair to your preferred side. Begin a Dutch braid—where you cross the strands under rather than over—starting from the part and working down toward the nape of your neck. As you move toward the shoulder where you want the braid to sit, incorporate the rest of your hair into the braid. Once you reach the end, secure it with a clear elastic. The most important step here is “pancaking,” which involves gently tugging at the loops of the braid to make them look wider and fuller. Never skip this step; it transforms a basic braid into a voluminous, formal-ready style that looks like it took hours of work.
5. Soft Hollywood Waves
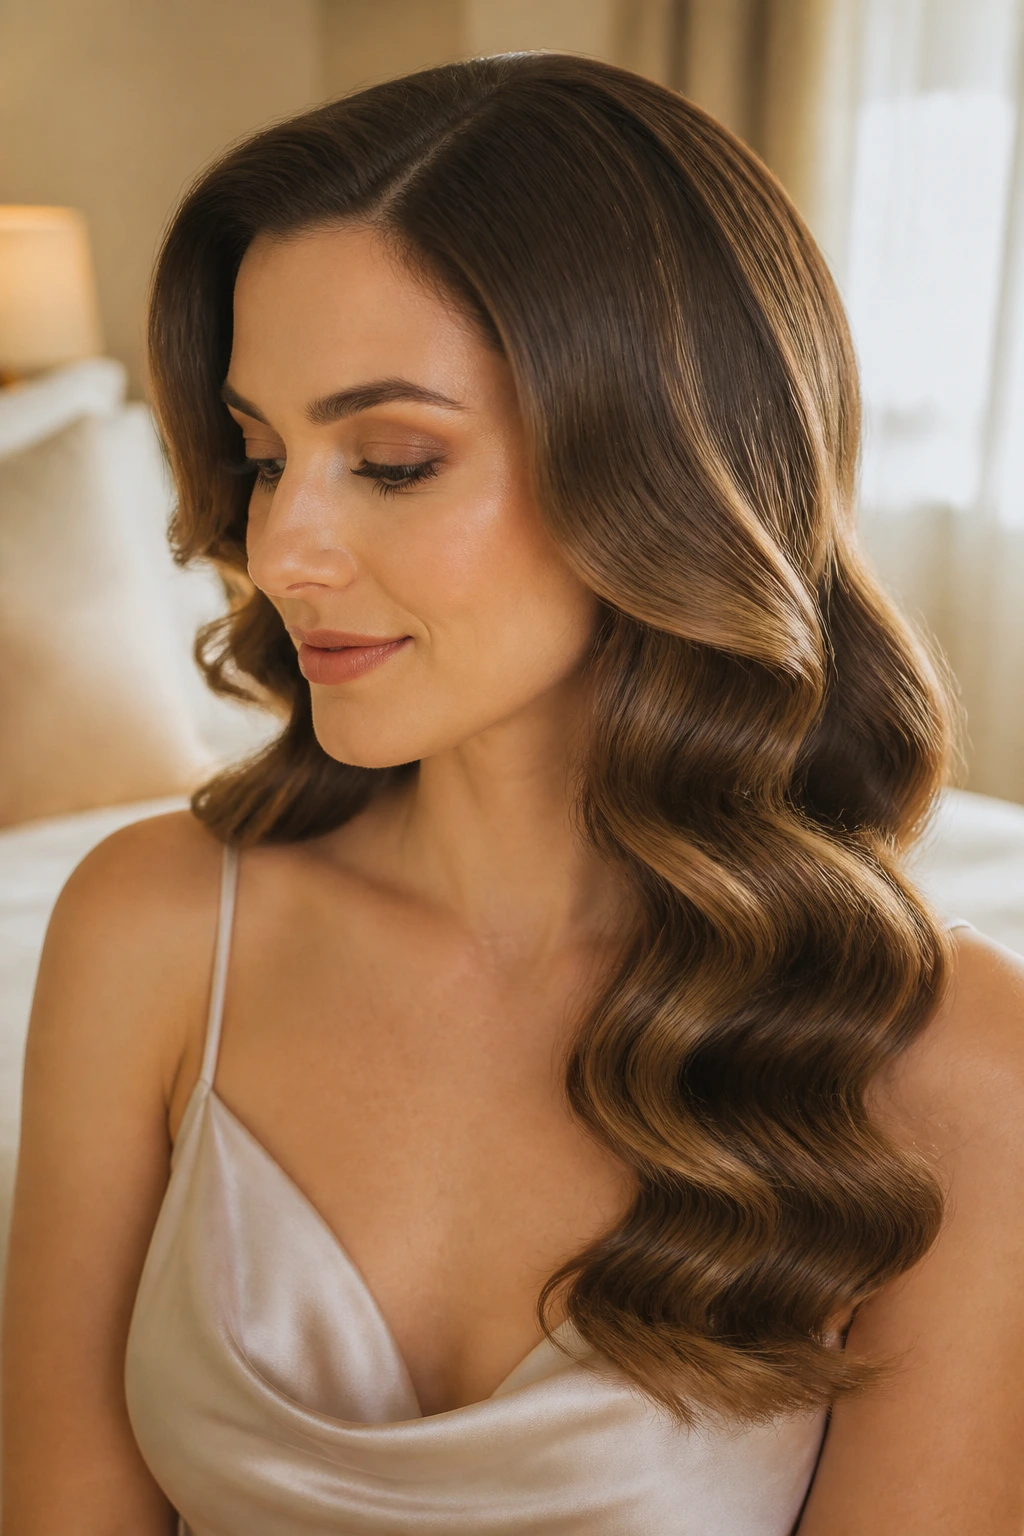
Hollywood waves represent the classic, vintage aesthetic that never goes out of style. While they look intimidating, the technique is actually quite repetitive and manageable. You are looking for a uniform wave pattern that sits close to the head without looking frizzy. The key is in the cooling phase; do not brush the curls out until they have cooled completely, or you will lose the shape.
You will need a one-inch curling wand and a generous amount of flexible-hold hairspray. Curl all your hair in the same direction, away from the face, in relatively small sections. Once you have finished the entire head and the hair is cool, use a wide-tooth comb or a soft bristle brush to gently work through the curls. They will start to merge into those signature, undulating waves. If you find one section is too straight, just hit it again with the iron for three seconds. This style demands patience, but the result is a red-carpet look that feels genuinely luxurious.
6. Messy Bohemian Bun
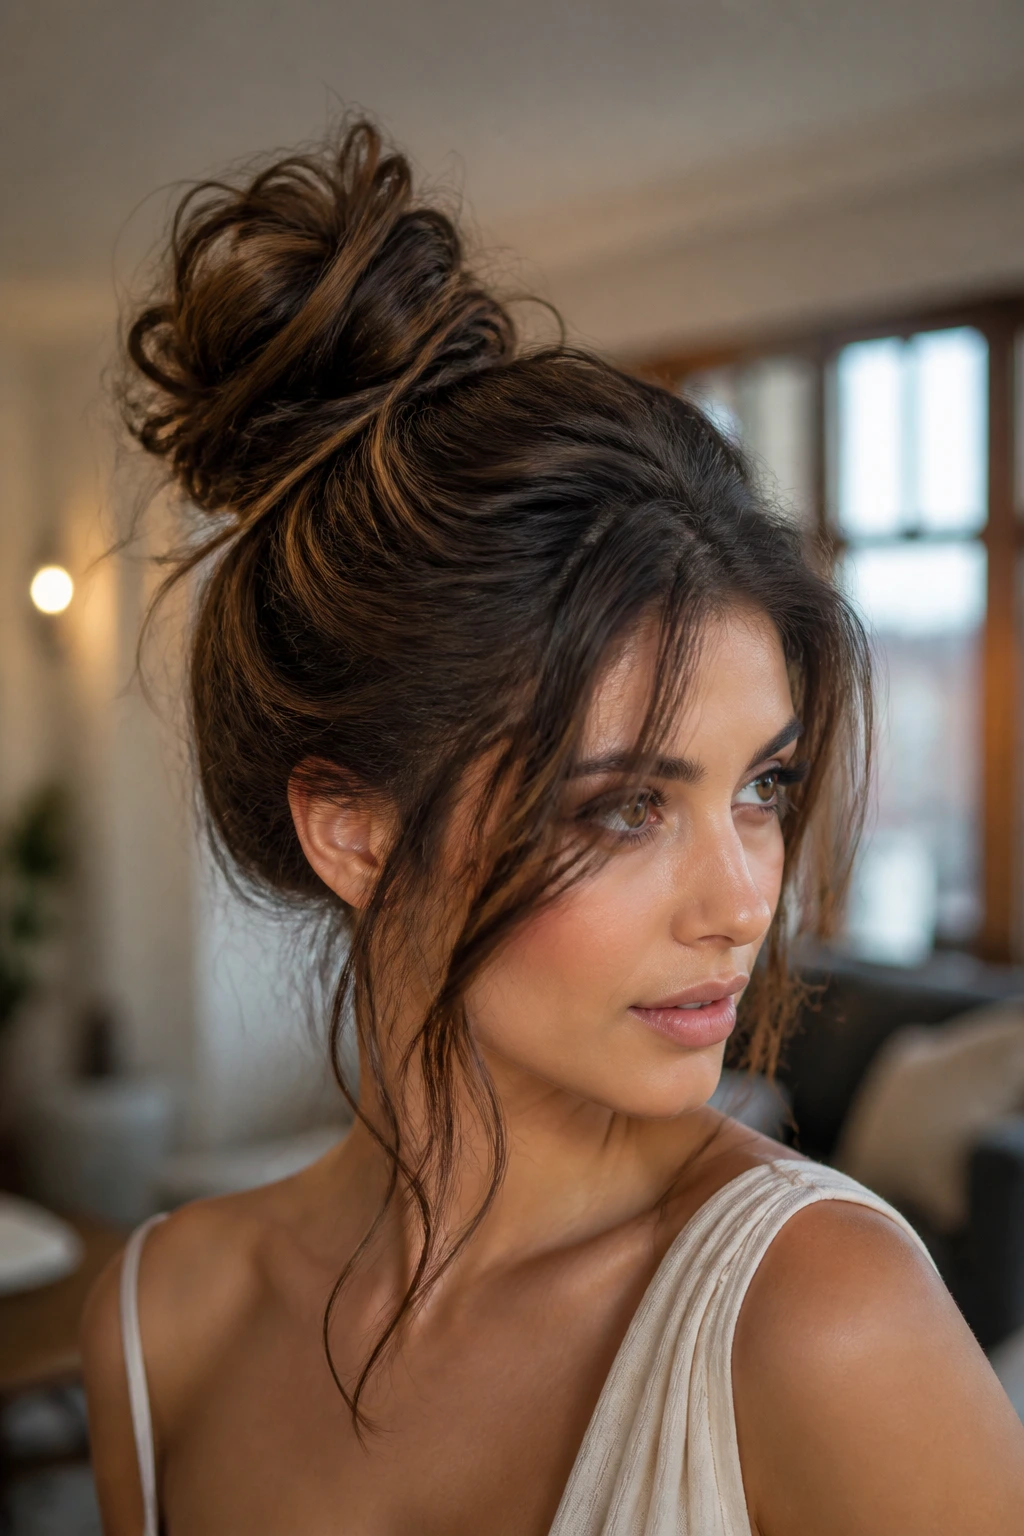
Sometimes the most formal setting calls for a look that feels relaxed and effortless. The messy bun, when executed with clean hair and strategic pins, is a staple for formal events where you want to look comfortable. It works perfectly with high-neck dresses or outfits with a lot of detail, as it prevents the hair from competing with the clothing.
Why This Style Succeeds
It relies on texture rather than precision. If a few strands fall out around the face, it frames the cheekbones rather than looking like a mistake. It is the ultimate “I woke up like this” look that actually requires careful pinning.
Construction Steps
- Gather your hair into a high ponytail, but on the final loop, pull the hair only halfway through to create a large, messy loop.
- Separate the remaining tail into two sections.
- Wrap these sections around the base of the bun in opposite directions to secure the loop.
- Use U-pins—not bobby pins, if possible—to anchor the bun to the head. U-pins hold more hair and are easier to hide.
- Pull out a few face-framing pieces and curl them lightly to soften the look.
7. Waterfall Braid Accent
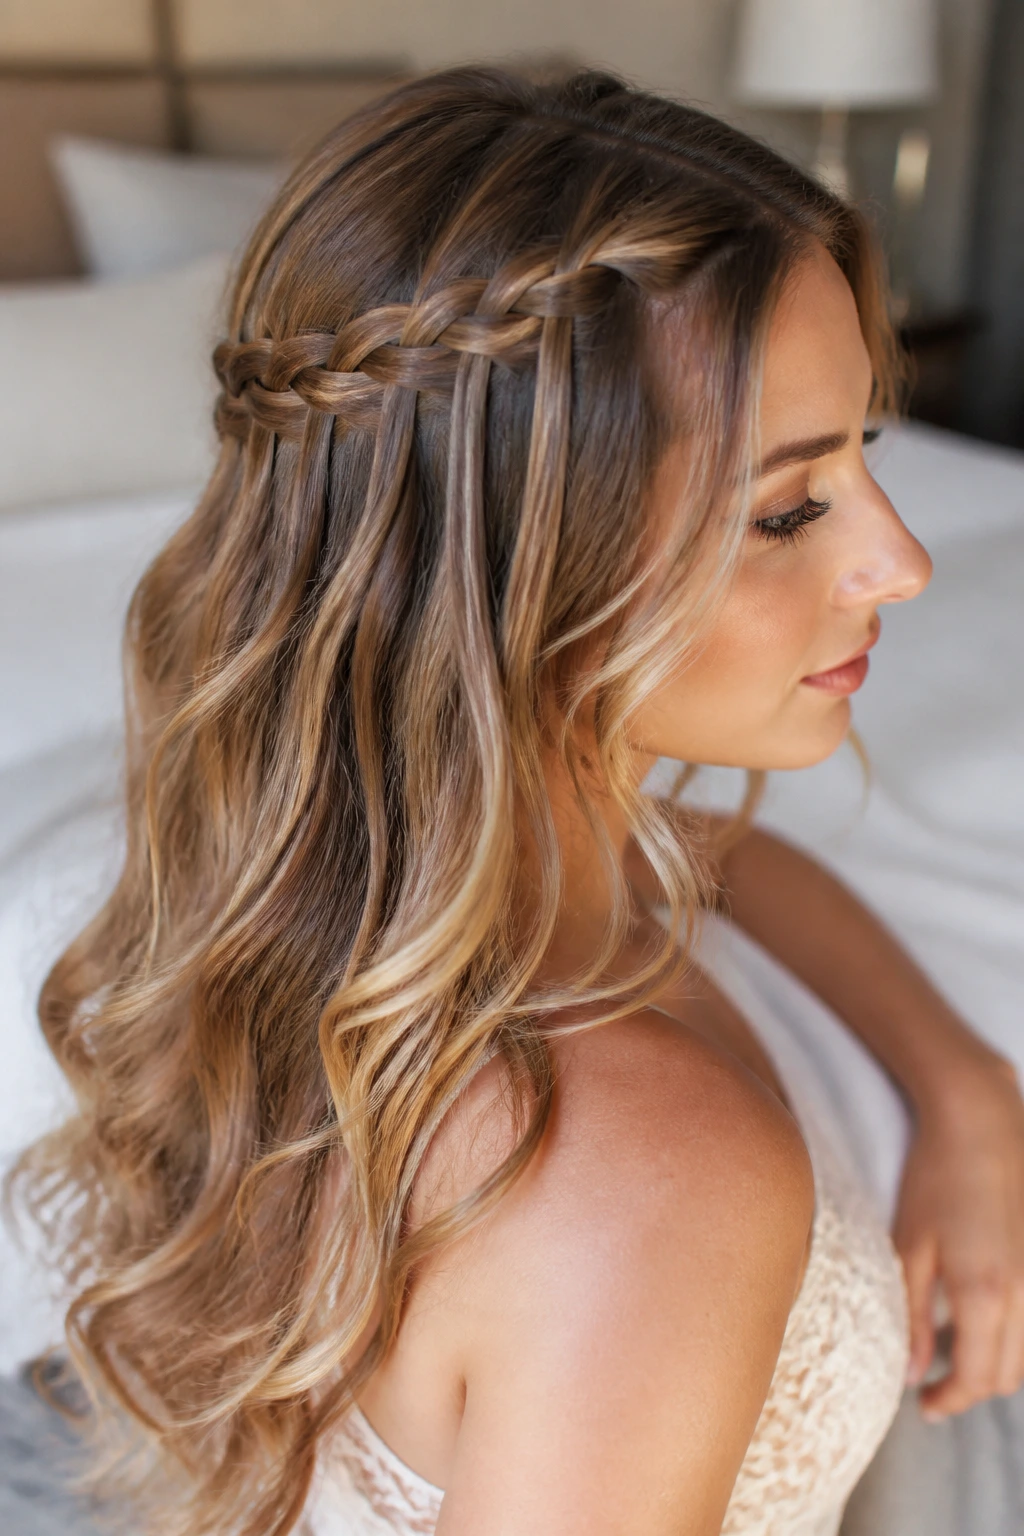
A waterfall braid is essentially a half-up style where the strands from the braid are “dropped” to fall through, creating that cascading effect. It is a fantastic way to keep your hair down while ensuring the front section does not fall into your eyes. It looks complicated, but once you understand the pattern of dropping the back strand and picking up a new one, it becomes muscle memory.
This style is perfect for those who want a touch of intricacy without committing to a full updo. Because the hair is left loose, you have the option to curl the ends or leave them natural. If you have very fine hair, this style is especially useful because the braiding process creates a natural anchor that adds visual bulk to the crown area. It is a subtle, feminine detail that elevates an otherwise simple hairstyle.
8. Modern French Twist
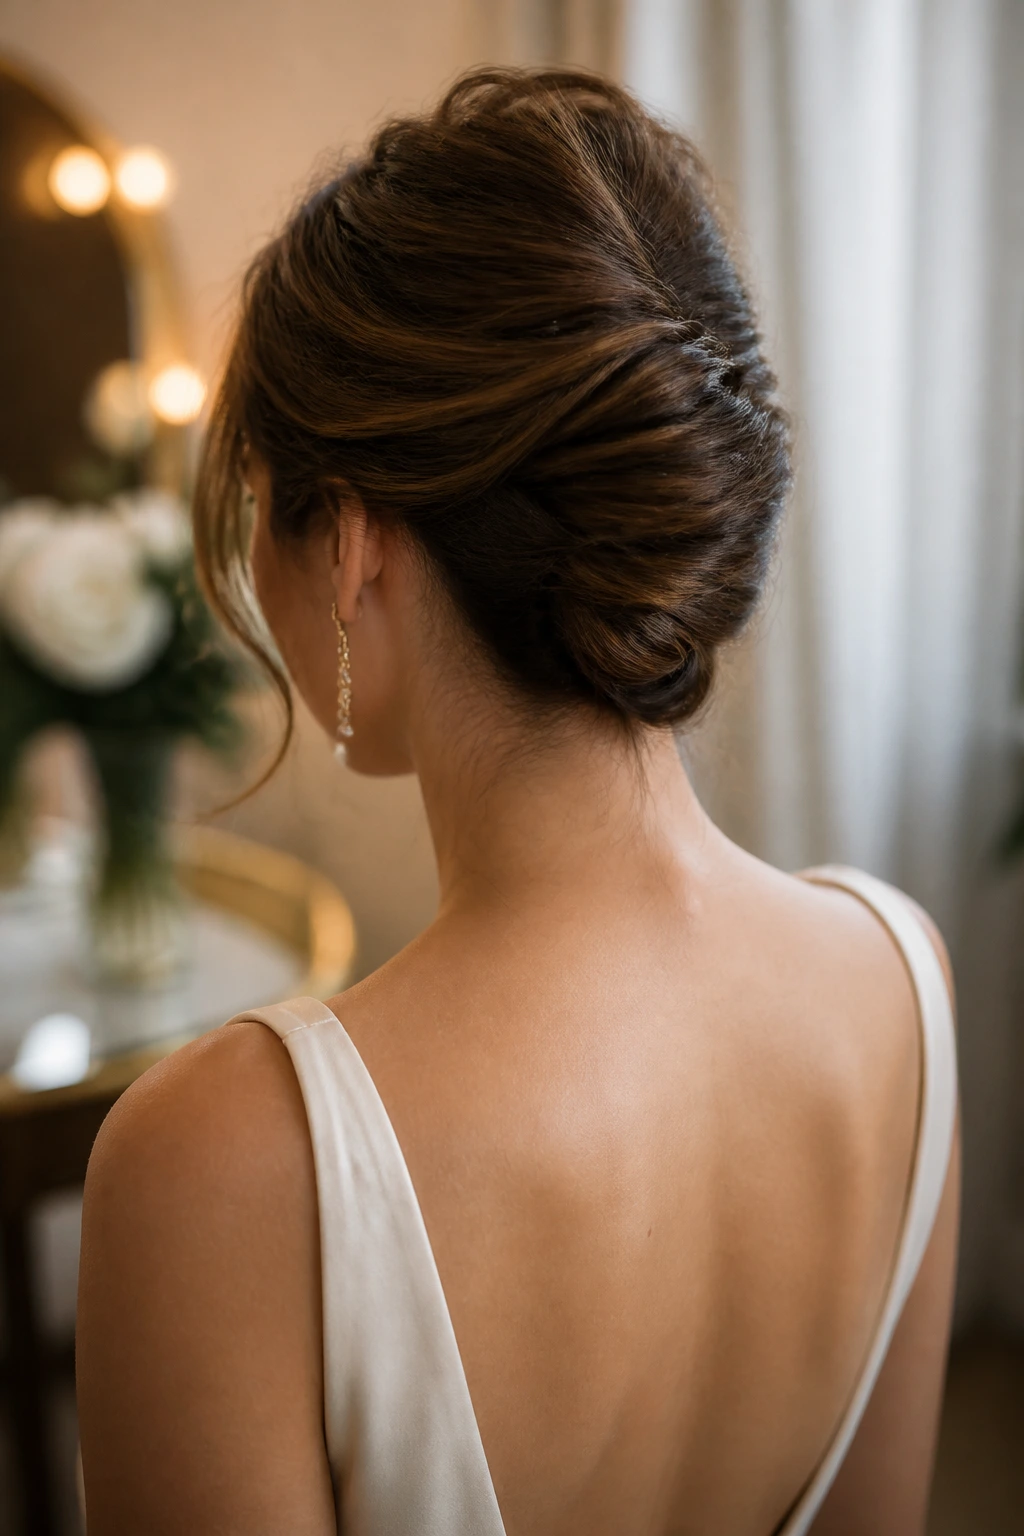
The French twist is often associated with traditional, stiff hairstyles, but the modern version is softer, looser, and much more versatile. Instead of pulling the hair tight and using a mountain of hairspray, modern techniques favor a “loose” twist that sits slightly lower on the head. It is a sophisticated look that pairs exceptionally well with backless dresses or anything with a plunging neckline.
Start by gathering your hair at the nape of the neck as if you are going to make a low ponytail. Twist the hair upward, keeping it close to the head. As you twist, use bobby pins that match your hair color to secure the hair along the seam of the twist. Instead of tucking all the ends inside, leave a few wisps at the top to give it a more relaxed, modern feel. The goal is to look like you put effort into your appearance without looking like you spent three hours in a salon chair.
9. Polished Low Ponytail
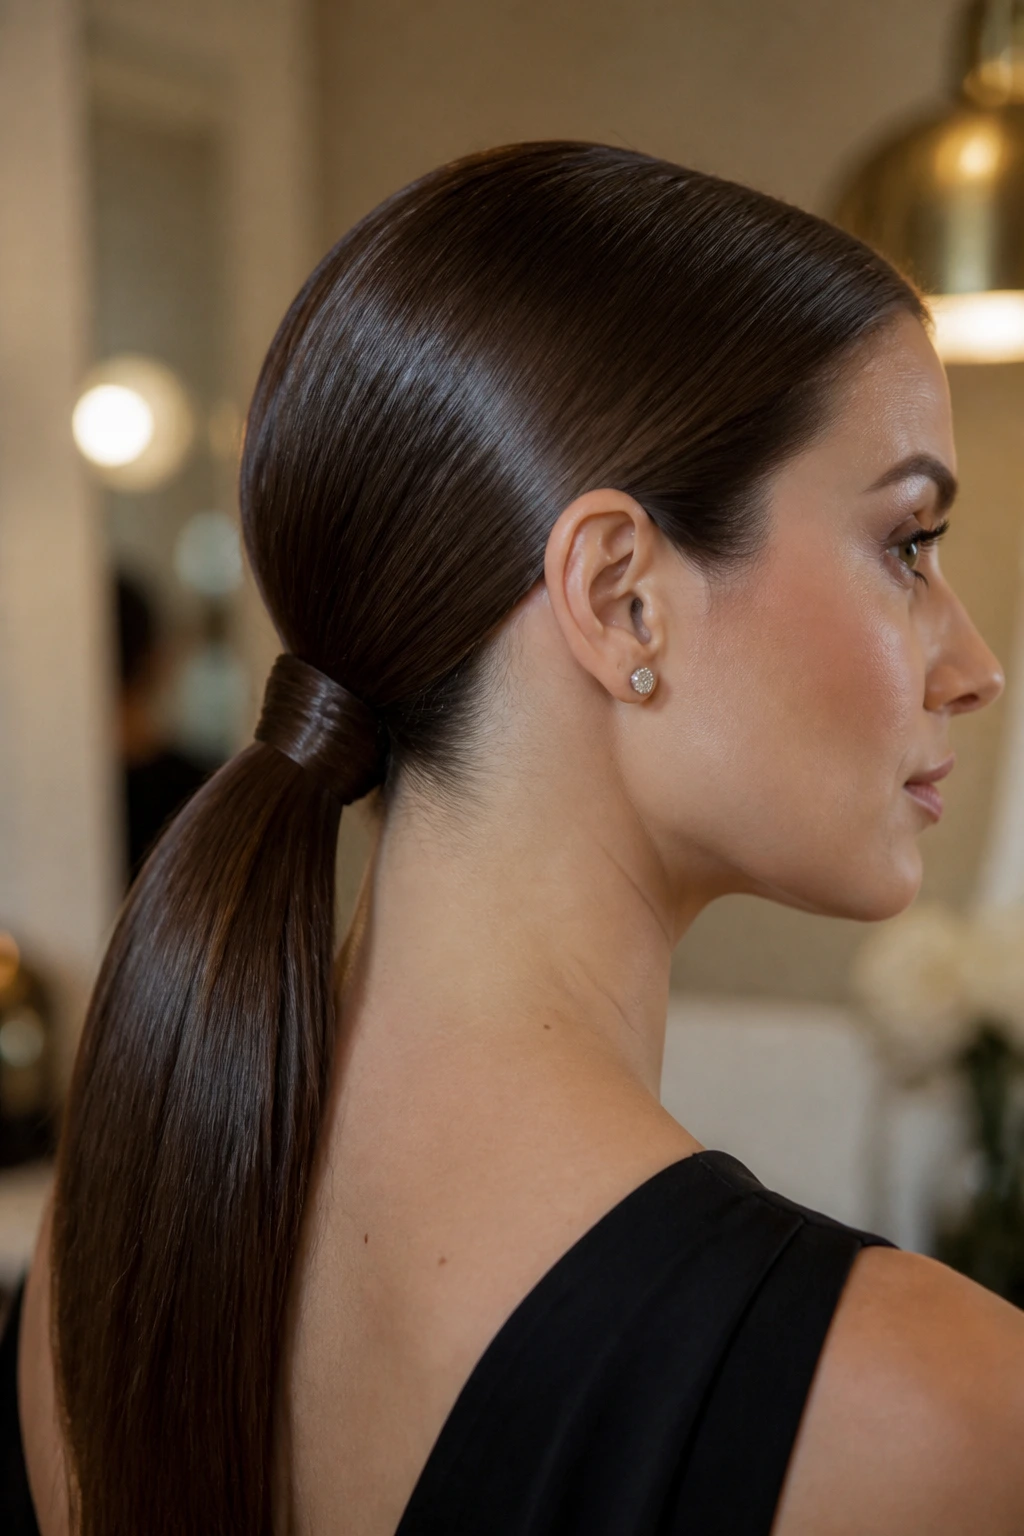
A low ponytail can easily look casual, so the difference between “running errands” and “attending a gala” is all in the details. A polished low ponytail should be sleek, centered, and perfectly smooth. This is a great choice if you are wearing a dress with a high, embellished collar, as it keeps the hair completely out of the way.
Start by parting your hair down the middle or in a sharp side part, depending on what flatters your face shape. Brush the hair back toward the nape of the neck, ensuring there are no bumps or loose strands. Use a bit of hair oil to smooth the top sections. Secure the ponytail with an elastic that matches your hair color. To take it to the next level, take a small section of hair from the underside of the pony, wrap it around the elastic, and pin it underneath. For a final touch, use a flat iron on the length of the ponytail to make it poker-straight and sleek.
10. Fishtail Half-Up
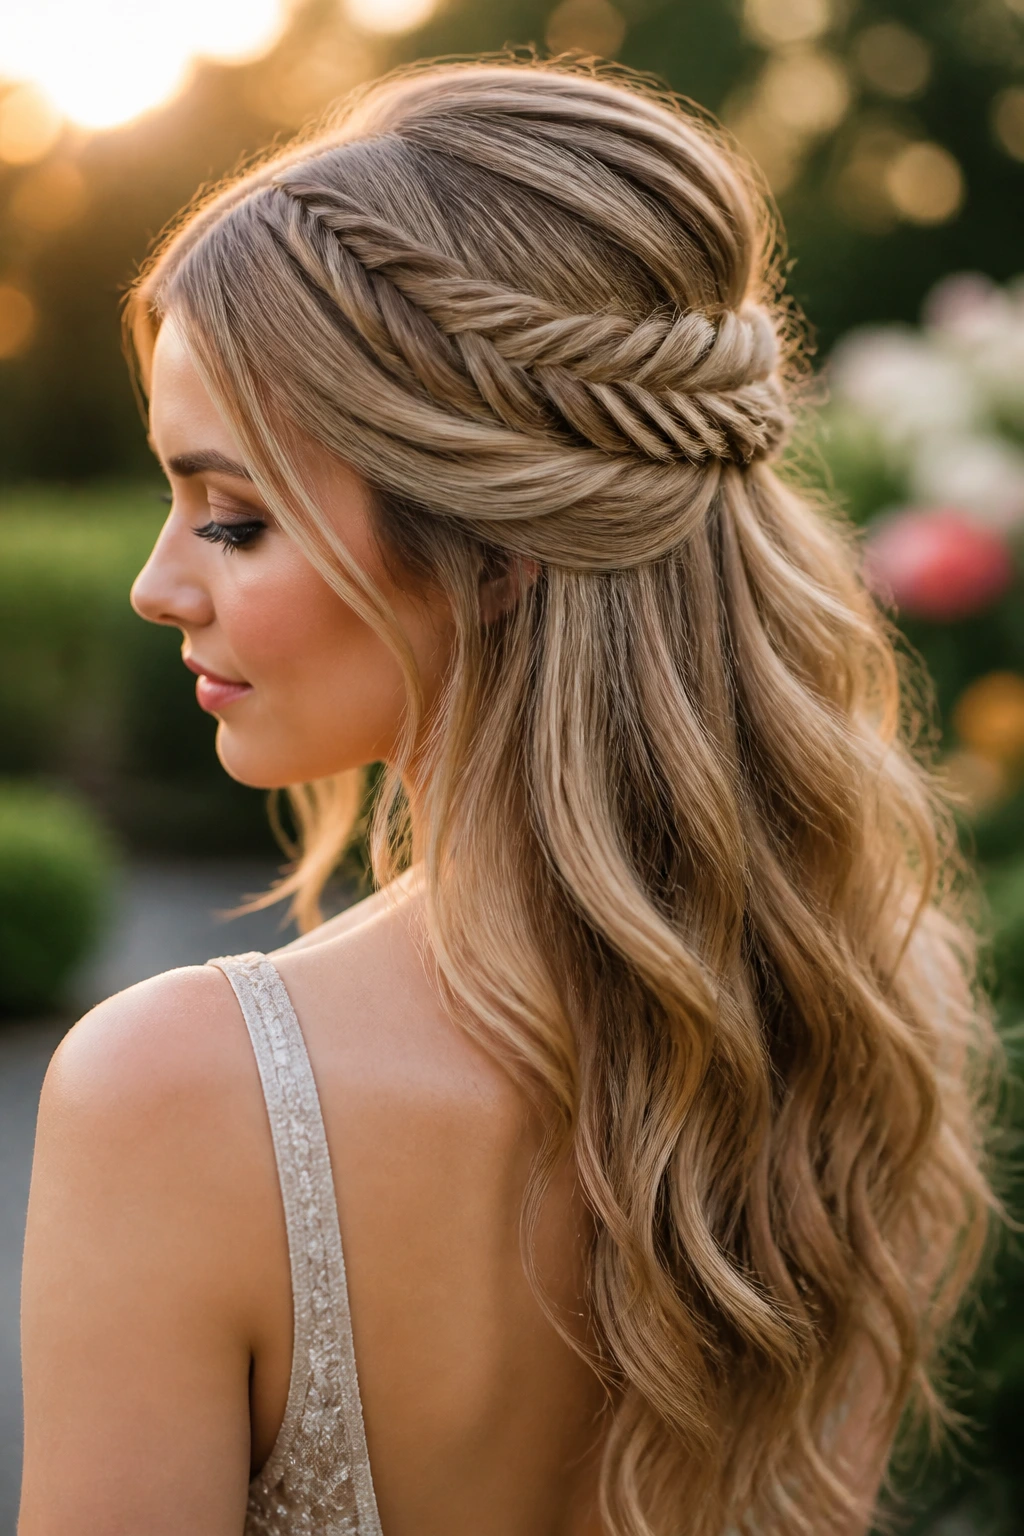
The fishtail braid is deceptively simple once you get the hang of the weave. It creates a tighter, more intricate braid than a standard three-strand plait. Doing this as a half-up style is a great way to showcase the beauty of the braid without having to do it for your entire head of long, heavy hair.
Take two sections of hair from near your temples and bring them to the back of your head. Secure them with a small elastic first—this makes the process much easier—and then begin your fishtail braid on the tail of that half-up section. Divide the tail into two halves, take a thin strand from the outside of the left half, and cross it over to the inside of the right half. Repeat on the other side. Continue this down the length of the tail. When finished, gently pull the braid apart to expand it. The result is a intricate, boho-chic look that holds its shape all night.
11. Bubble Braid Updo
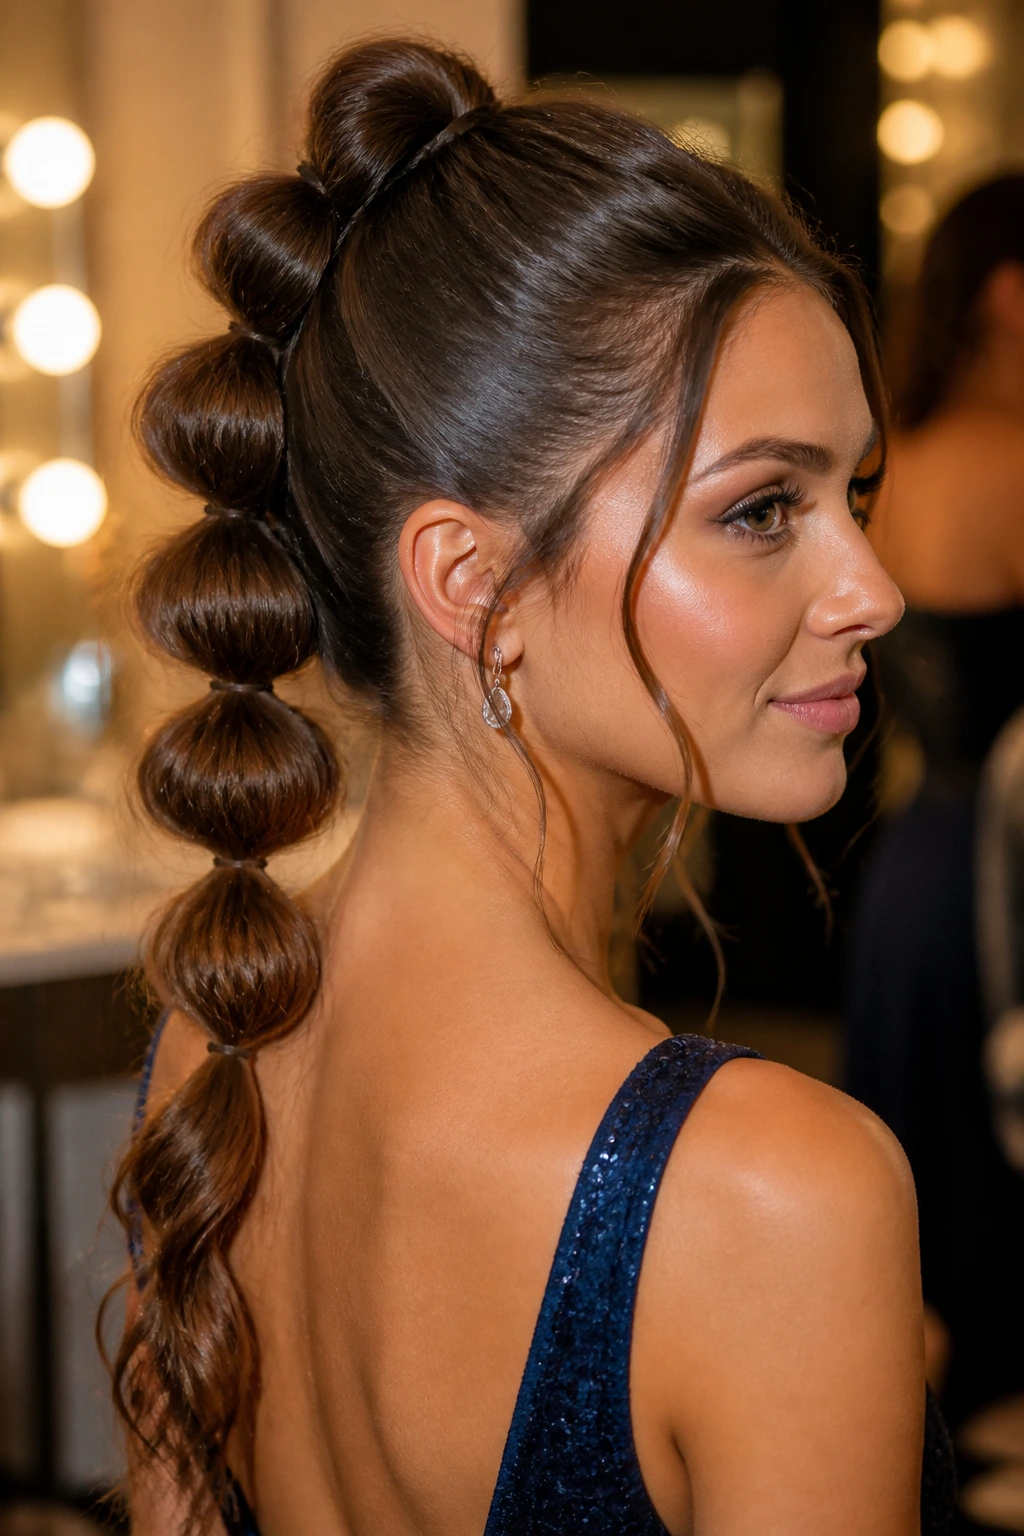
The bubble braid has become a favorite for those who want a high-impact look that requires zero complex braiding skills. It is essentially a series of tied-off sections that are puffed out to look like bubbles. For a formal event, you can incorporate this into a ponytail or even pull it all up into a faux-mohawk style.
Start by creating a high ponytail. Secure it, and then place another elastic about two inches down the length of the ponytail. Gently tug at the hair between the two elastics to create the “bubble” shape. Repeat this process until you reach the ends of your hair. You can add small decorative pins or pearls at each elastic for an instant formal touch. It is playful, modern, and keeps your hair perfectly contained for the duration of the event.
12. Retro Victory Rolls
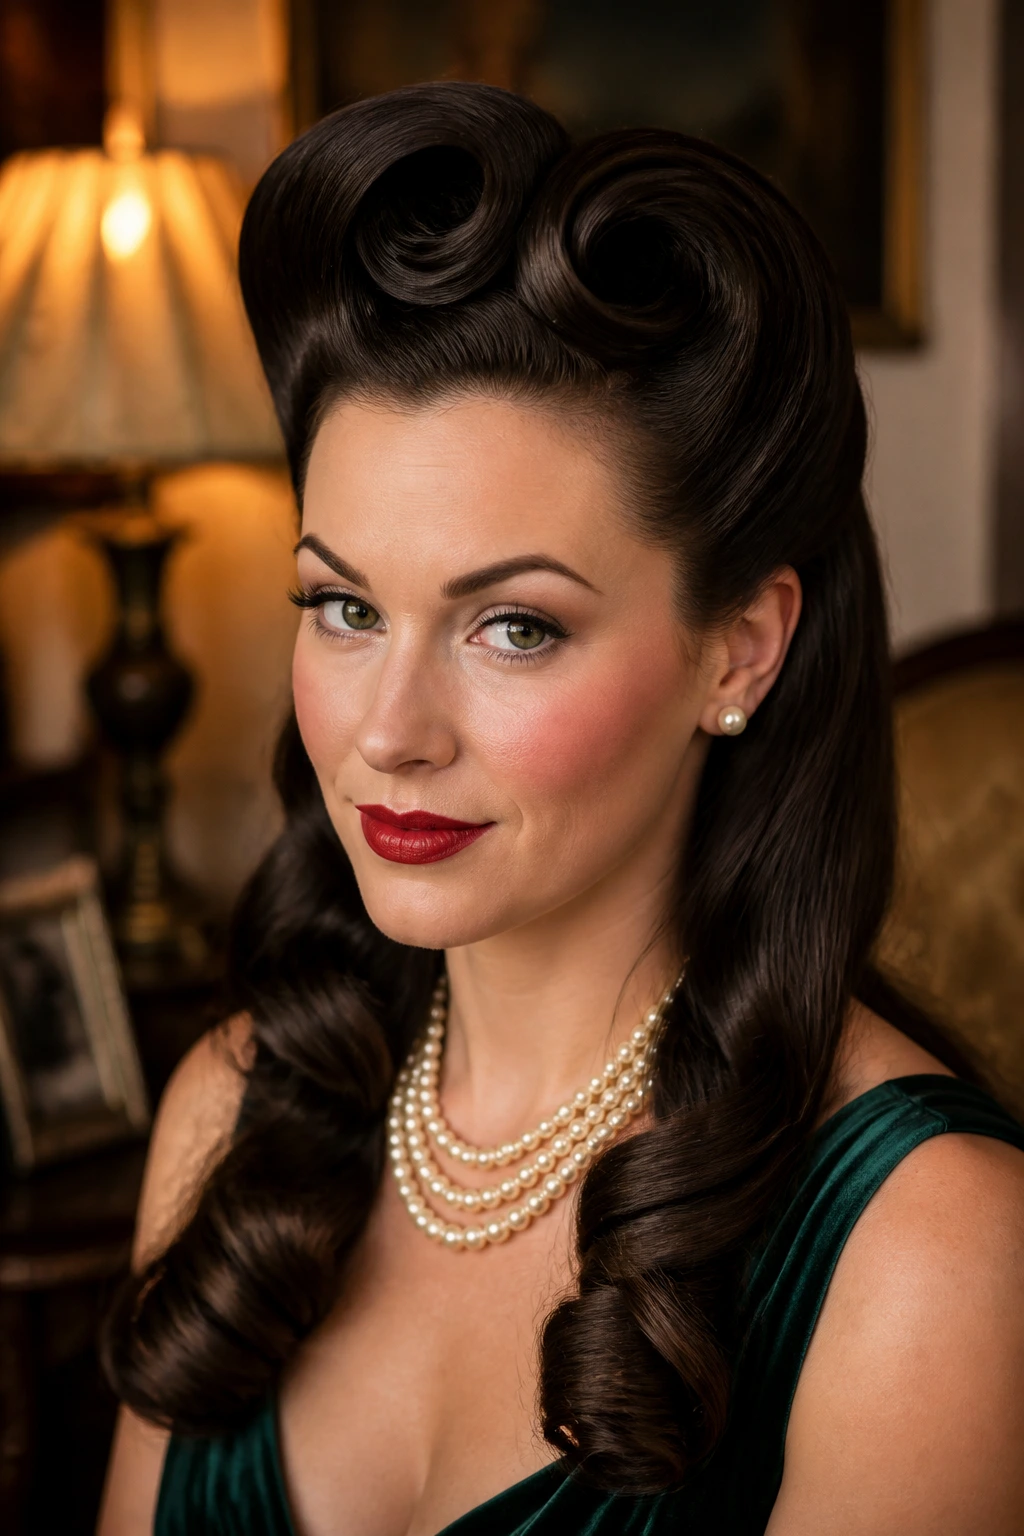
If you are attending a themed event or just love the glamour of the 1940s, victory rolls are the way to go. These are large, tubular rolls of hair, usually placed at the crown or the sides of the head. While they look like they require a professional, you can achieve them with a curling iron and some well-placed bobby pins.
Section off the front part of your hair—the “bangs” or front layers. Take the section and curl it toward your face with a curling iron to get the hair hot and pliable. Once it cools for a second, roll the hair around two fingers and tuck the ends into the roll. Pin the roll firmly against your head. You might need to use a tail comb to smooth out any flyaways on the roll itself. Pair this with a low, sleek bun in the back, and you have a stunning vintage look that feels incredibly put-together.
13. Bohemian Crown Braid
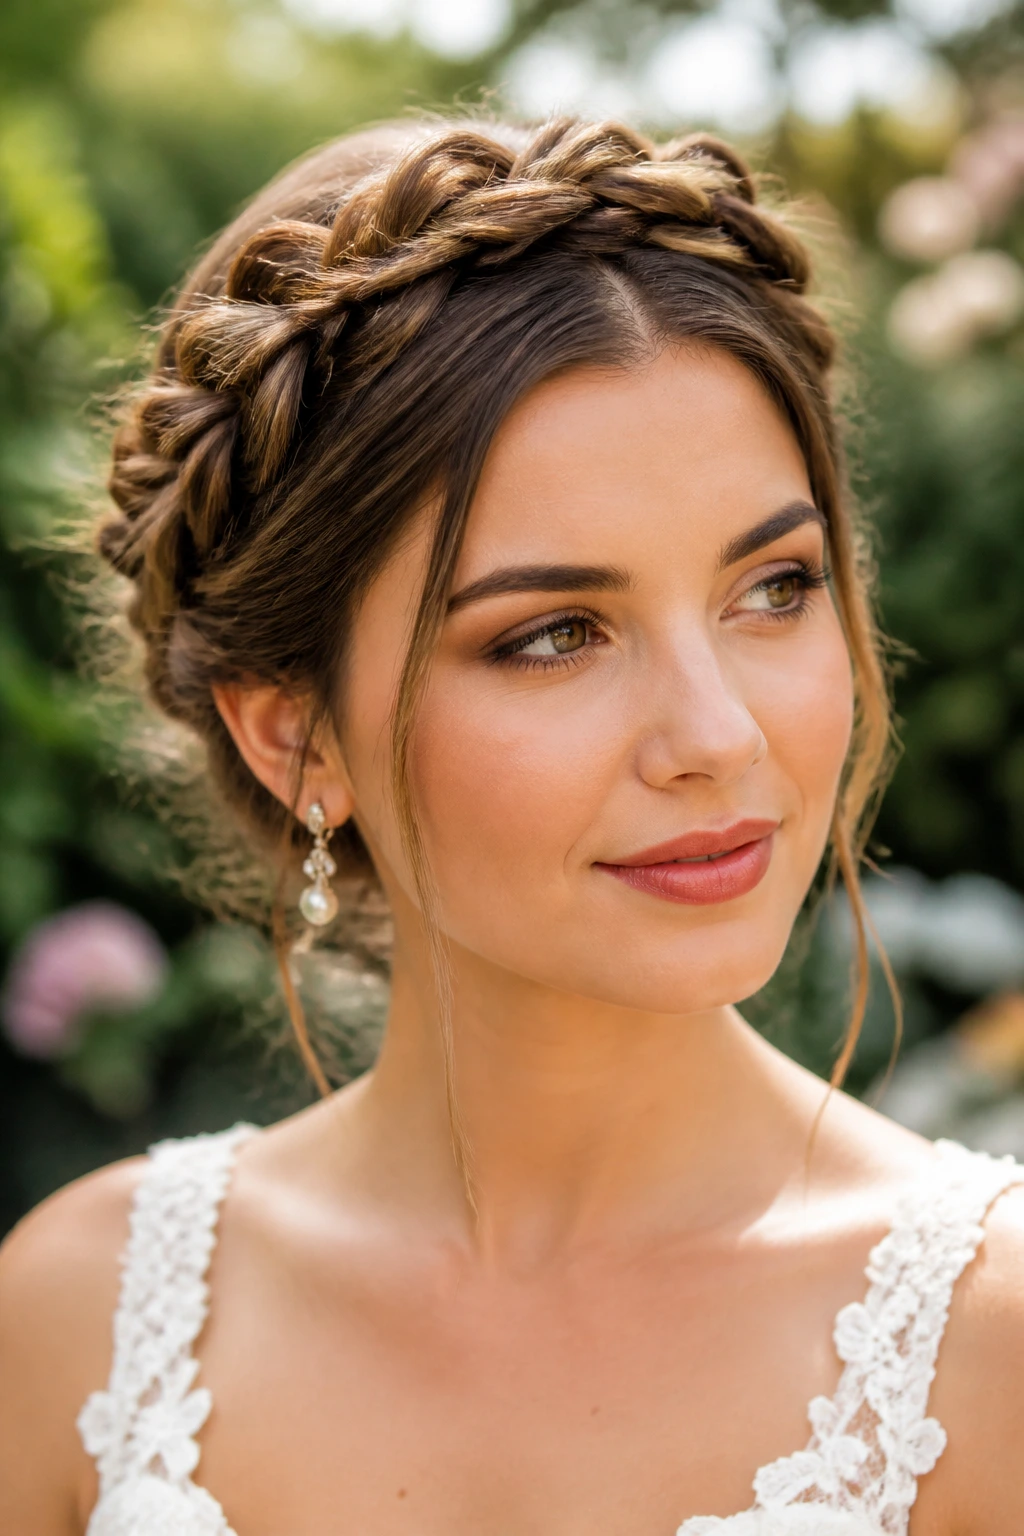
A crown braid looks like a masterpiece, but it is effectively just two braids wrapped around your head. It is the perfect style for an outdoor wedding or a garden party, as it keeps your hair completely off your face and neck. It feels regal and slightly whimsical at the same time.
Part your hair down the middle and divide it into two sections. Create a simple three-strand braid on each side, starting behind your ears. Once you reach the ends, secure them with elastics. Take the left braid and pull it over the top of your head to the right side, pinning it down securely behind your right ear. Do the same with the right braid, tucking the ends under the left braid. The key is to hide the ends so that it looks like one continuous, seamless circle of hair. It is a bold look that really stands out in photos.
14. Wrapped Side Knot
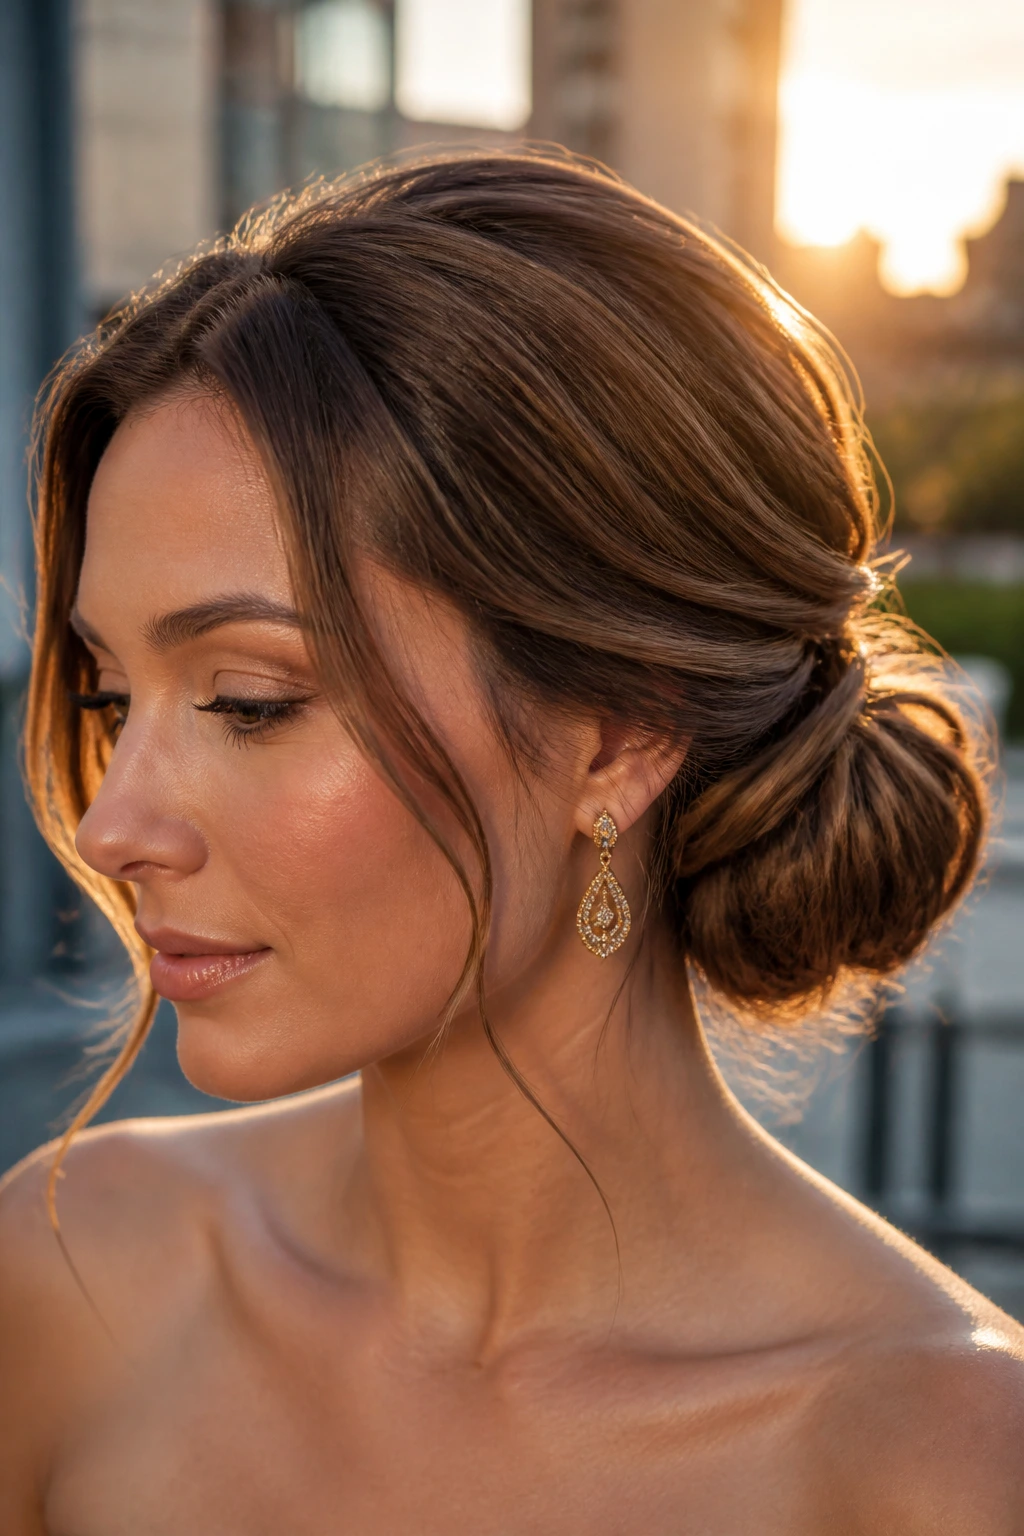
The side knot is a variation of the chignon but positioned asymmetrically. It adds a touch of sophistication that is often lacking in standard buns. It works best with a deep side part. Start by sweeping all your hair to one side. You can leave a few pieces out in the front to frame your face.
Gather the hair into a low ponytail behind the ear on your preferred side. Twist the ponytail and wrap it around the base to form a bun. Secure it with a heavy-duty hair tie or several bobby pins. This style is excellent for showing off one-sided earrings, as the hair is pulled away from one ear entirely. It is elegant, understated, and manages to look both polished and slightly romantic at the same time.
15. Minimalist Center Part
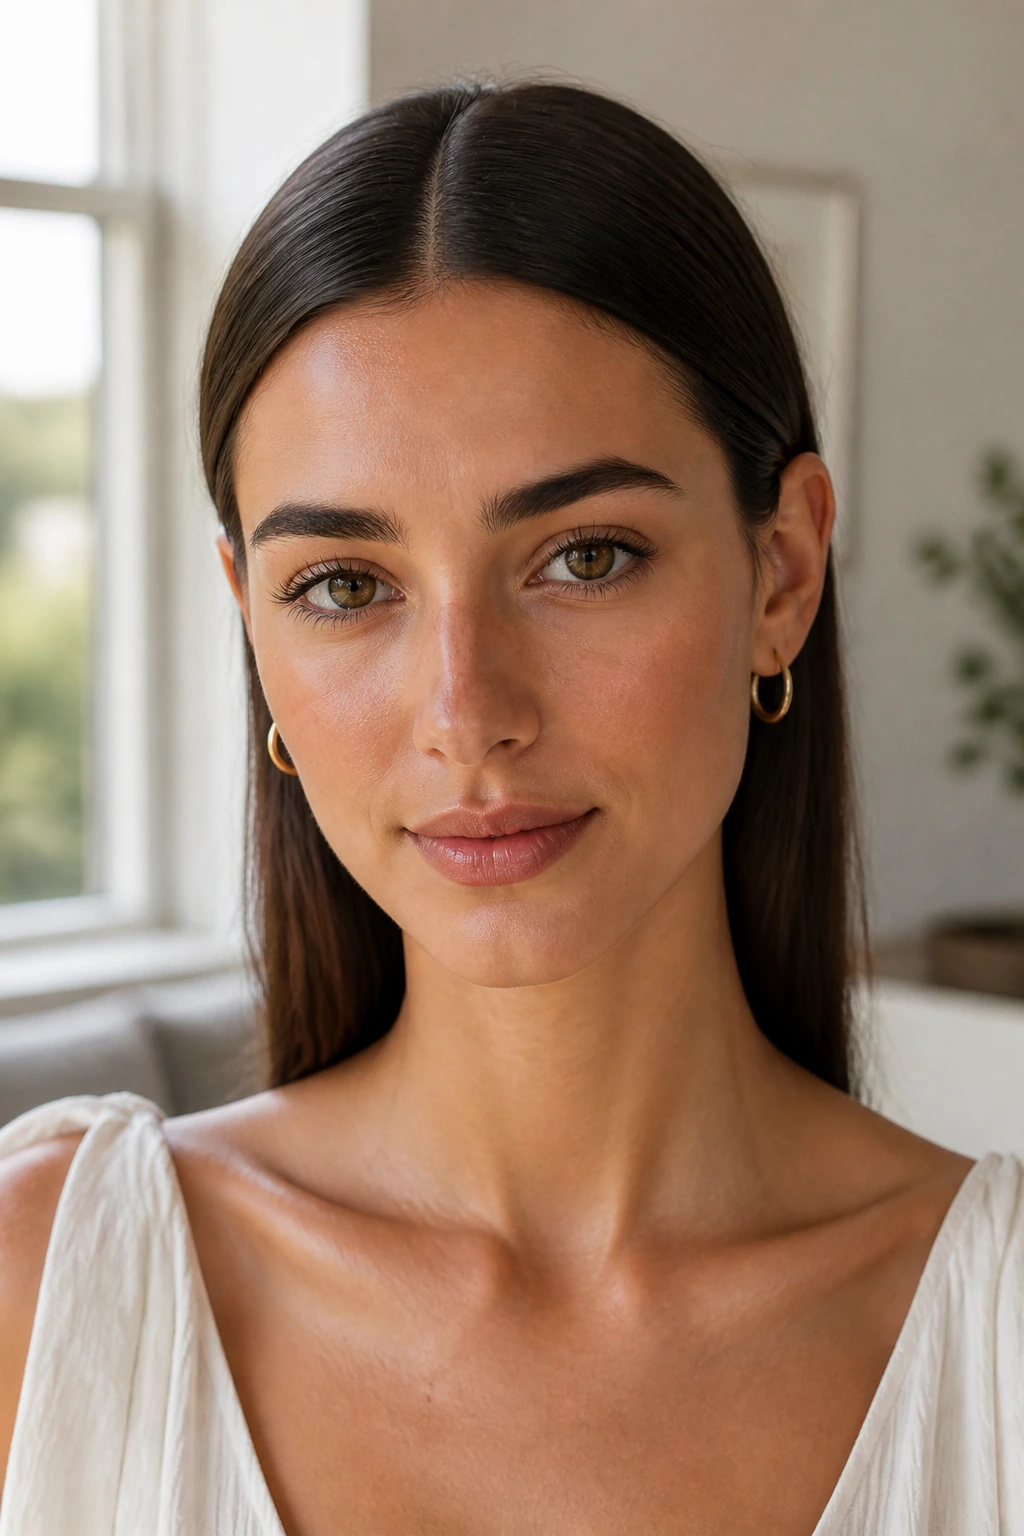
Sometimes, less is truly more. If your outfit is incredibly ornate, has a complicated neckline, or is heavily beaded, you do not want your hair to compete with it. A sharp, sleek center part with the hair tucked behind the ears is the epitome of modern sophistication.
Use a rat-tail comb to get a perfectly straight part down the middle. Use a flat iron on small sections of your hair, starting from the roots and pulling straight down to the ends. Apply a tiny amount of smoothing serum to your palms and run it over the top of your head to eliminate any baby hairs. Tuck both sides behind your ears and use a tiny bit of clear hair glue or strong-hold hairspray to keep them behind your ears. It is sharp, clean, and highlights your facial features without any distraction.
16. Twisted Headband Look
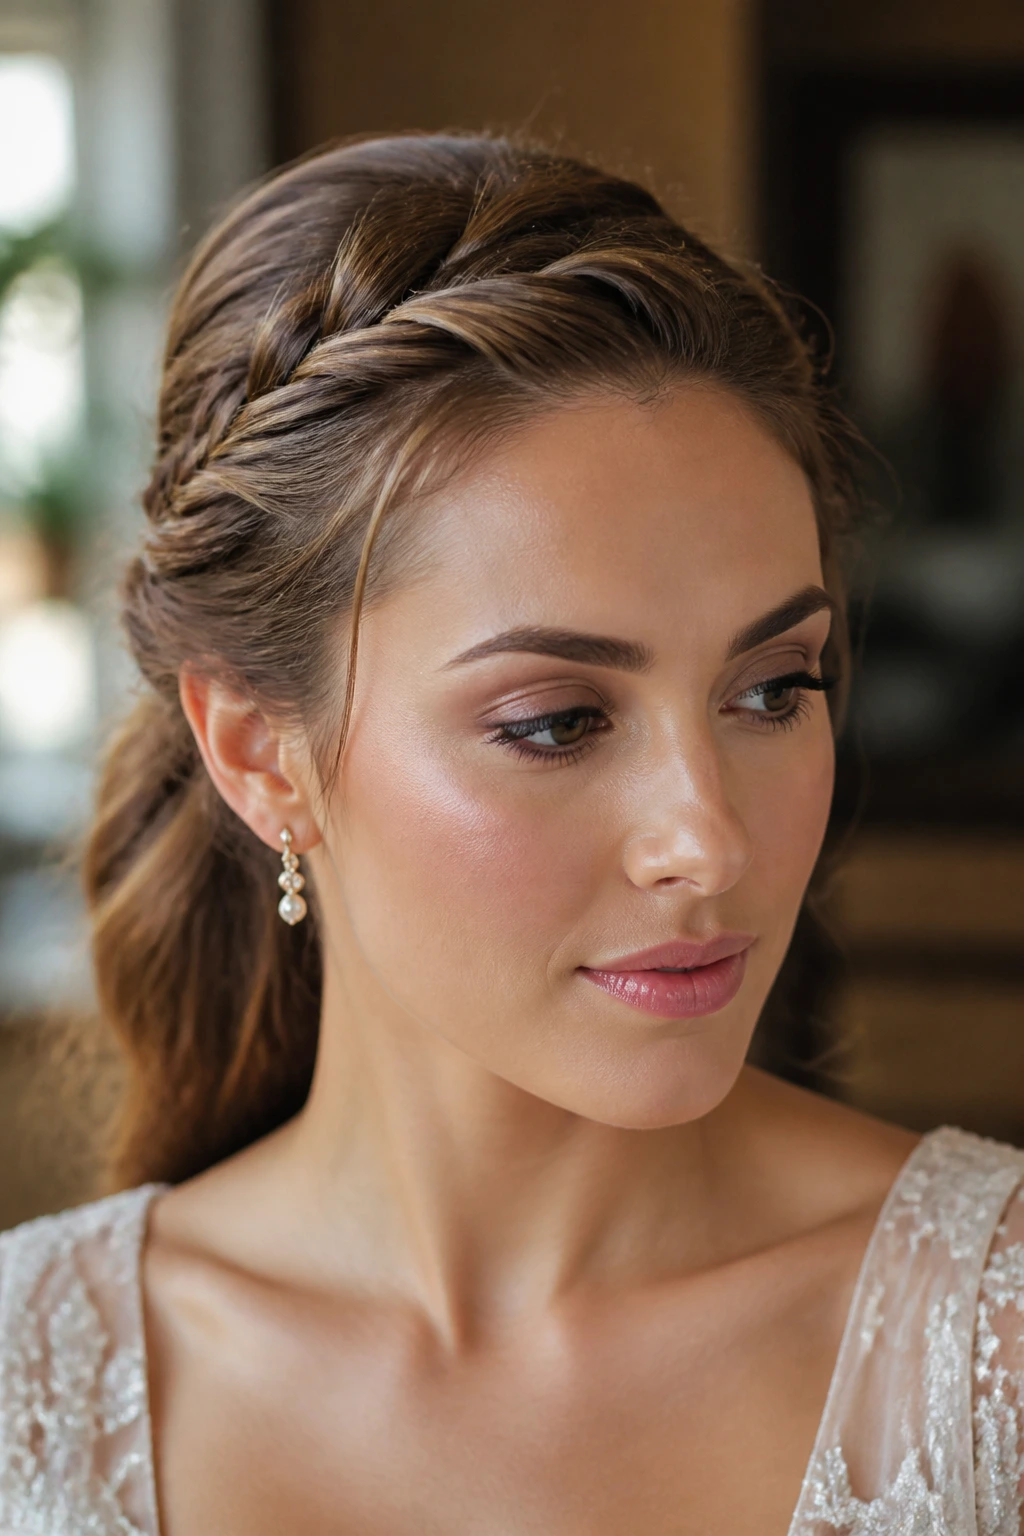
You can create the illusion of a headband using your own hair. This is a great way to pull your hair back while keeping some volume and interest at the front. It involves twisting sections of hair along the hairline and pinning them back toward the crown.
Start by sectioning off a one-inch strip of hair along your hairline, from ear to ear. Divide this into smaller sections. Take the first section, twist it back, and secure it with a bobby pin near the crown. Take the next section, twist it, and incorporate it with the first. Continue until you have a “headband” of twisted hair across your head. Gather the remaining hair at the back into a low ponytail or bun. This style keeps your hair securely out of your face and adds a delicate, intricate detail that looks far more difficult than it actually is.
17. Voluminous Half-Up
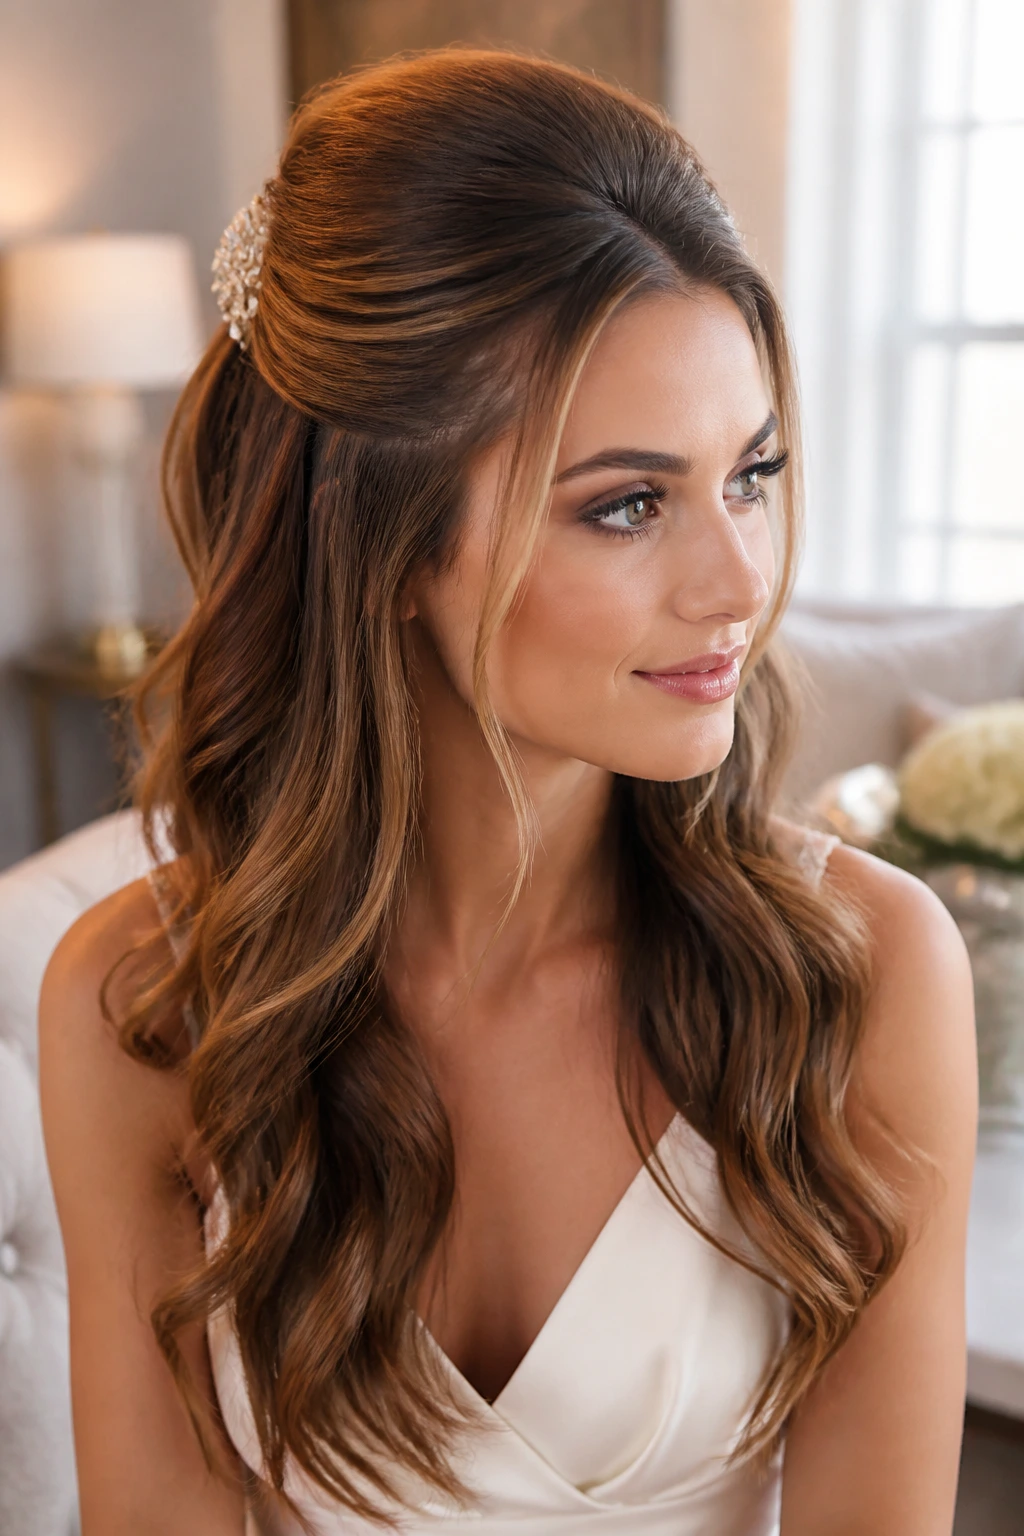
The half-up, half-down style is a classic for a reason, but it can often look flat if you just pull back two sections. To make it formal, you need volume. Start by teasing the hair at the crown of your head. This provides the lift you need to make the style look purposeful.
Once you have teased the crown, smooth the top layer over the teased section. Take the side sections, pull them back, and secure them with a decorative clip or a barrette. The key here is not to pull the hair back too tightly; you want that rounded, voluminous shape on top. Leave the remaining length in soft waves or curls. This style is universally flattering, as it elongates the face and adds lift exactly where you want it. It is a reliable go-to for almost any semi-formal or formal event.
18. Sleek Low Bun with Accessory
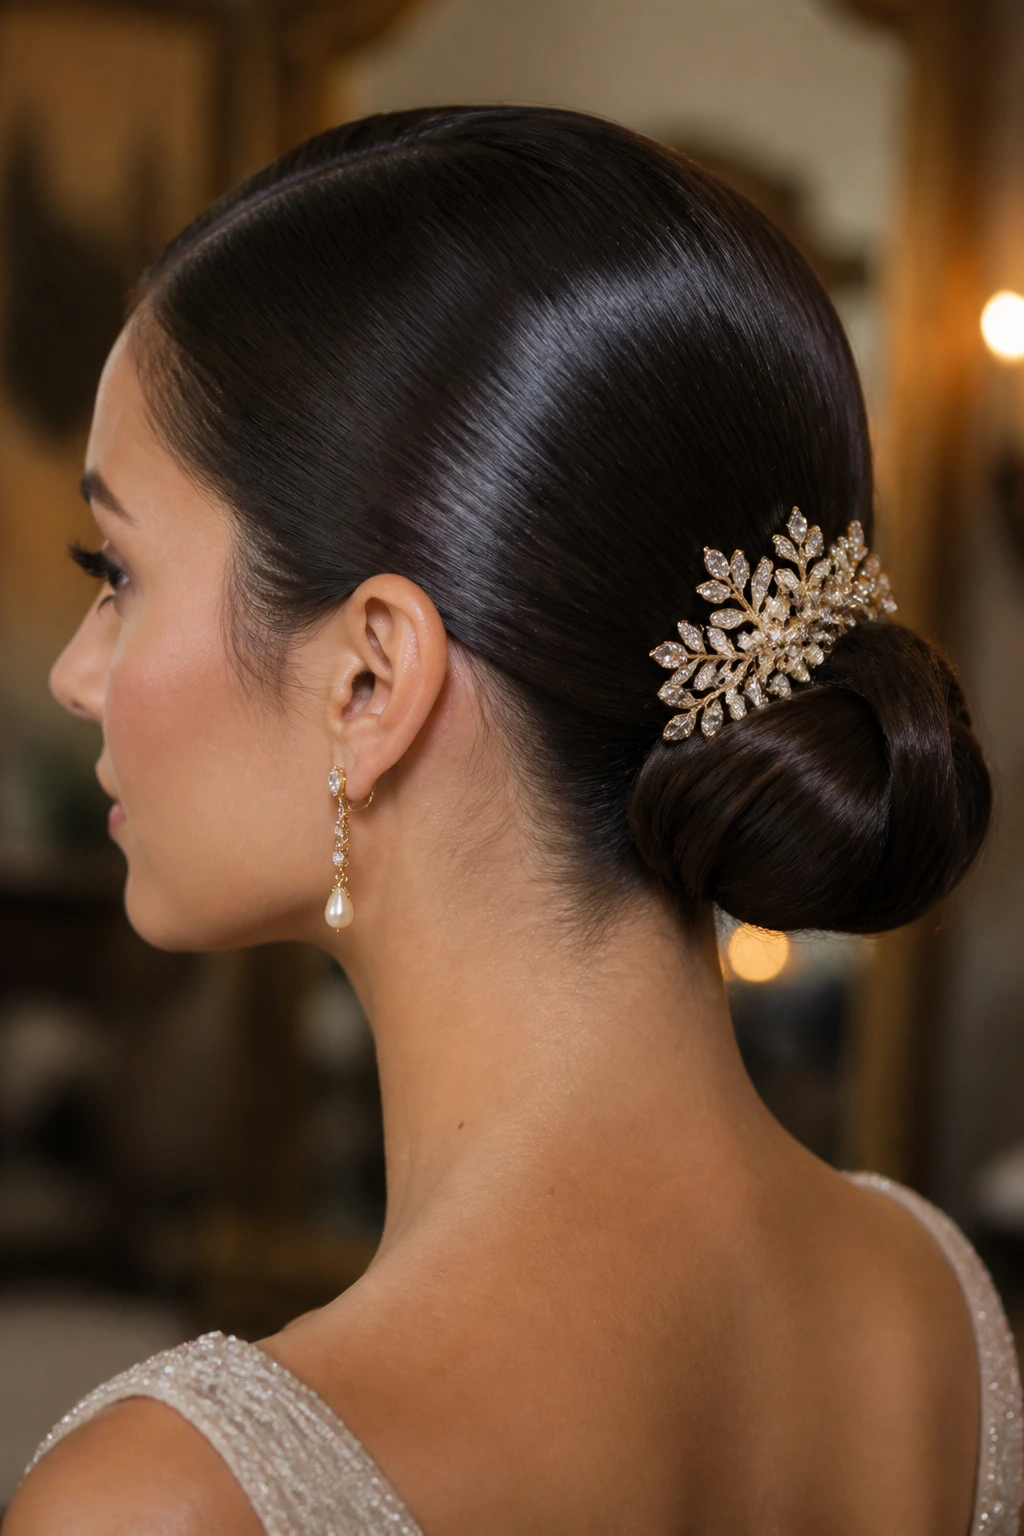
If you are running short on time and need something that looks expensive, the answer is always a minimalist bun paired with a statement accessory. A simple low bun can be transformed into a formal style instantly by adding a gold pin, a pearl clip, or a ribbon.
Create a tight, low bun. You can either braid your hair first and then roll it into a bun for texture, or keep it sleek. Once the bun is pinned securely, insert a large decorative hairpin or a set of smaller clips into the top of the bun. The accessory does all the heavy lifting. It draws the eye to the style and makes it look like you put significant effort into the process, even if the bun itself took all of thirty seconds to secure.
19. Messy Side Braid
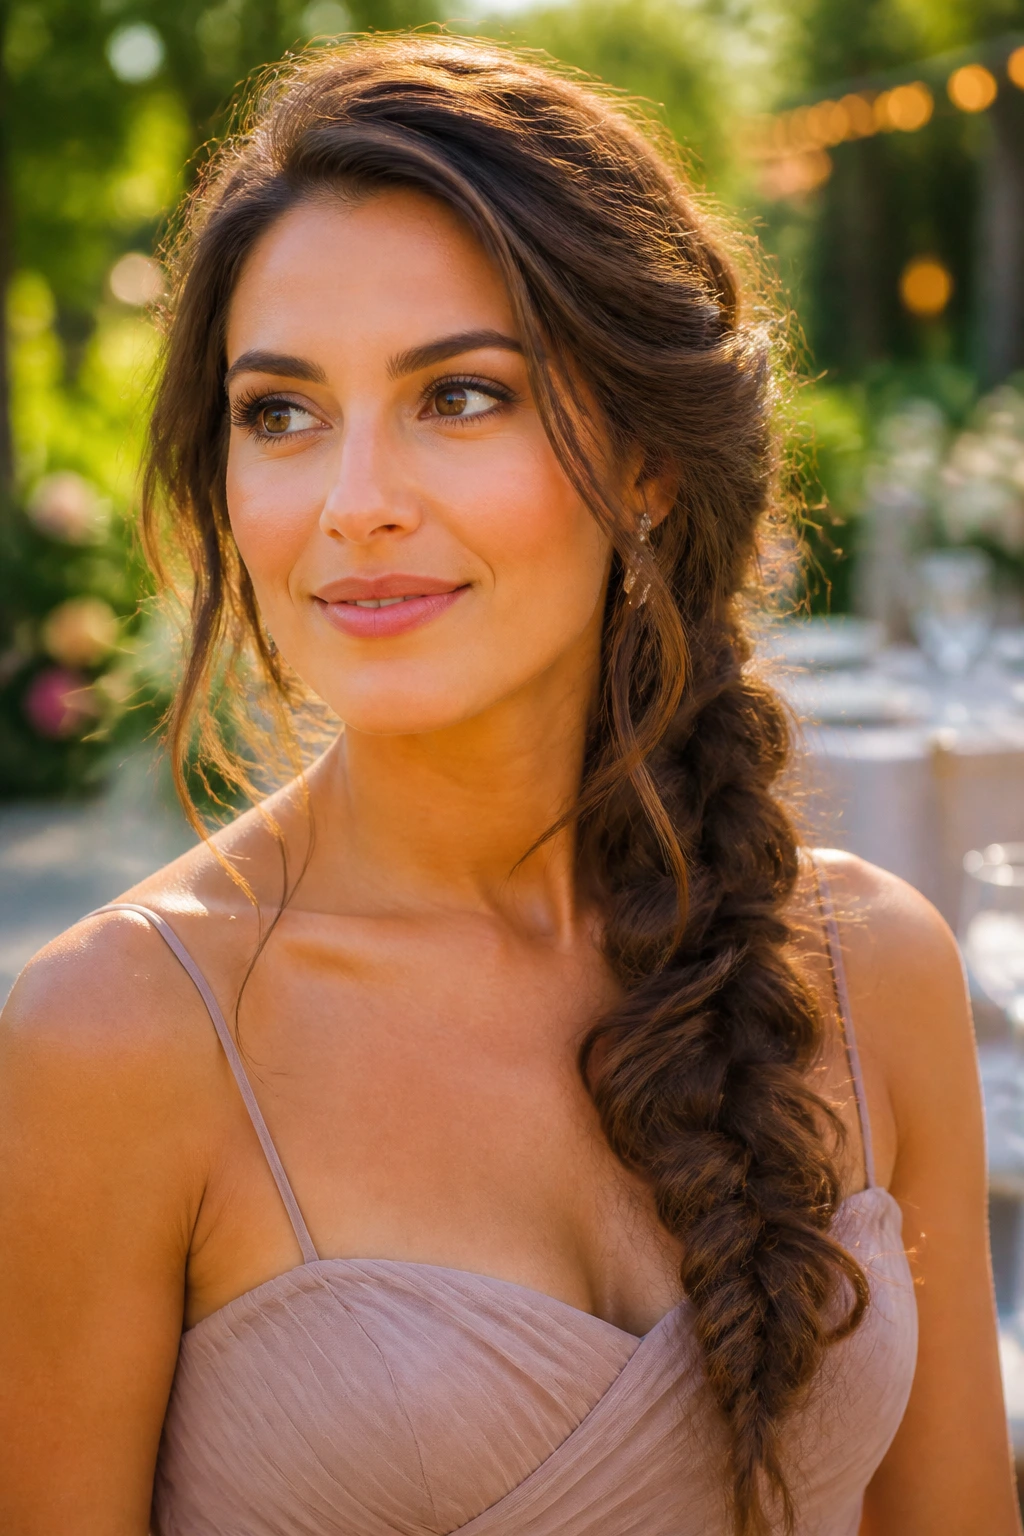
A messy side braid is the perfect style for events that are formal but have a relaxed, bohemian vibe, such as outdoor weddings or garden parties. The messier it looks, the better, but there is a technique to “controlled” messiness. If you just let your hair fall out of the braid, it looks unkempt. If you specifically pull at the loops to create volume, it looks intentional.
Start by curling your hair first to give it the necessary texture and volume. Bring all your hair to one side and do a standard three-strand braid. Once you reach the end, secure it with an elastic. Then, go back through the entire braid and tug at the edges of every loop to make them as big and messy as possible. Pull out a few pieces around your ears and forehead to soften the look. The result is a thick, voluminous braid that looks like it belongs on a runway, despite being incredibly easy to do.
20. Elegant Updo with Pins
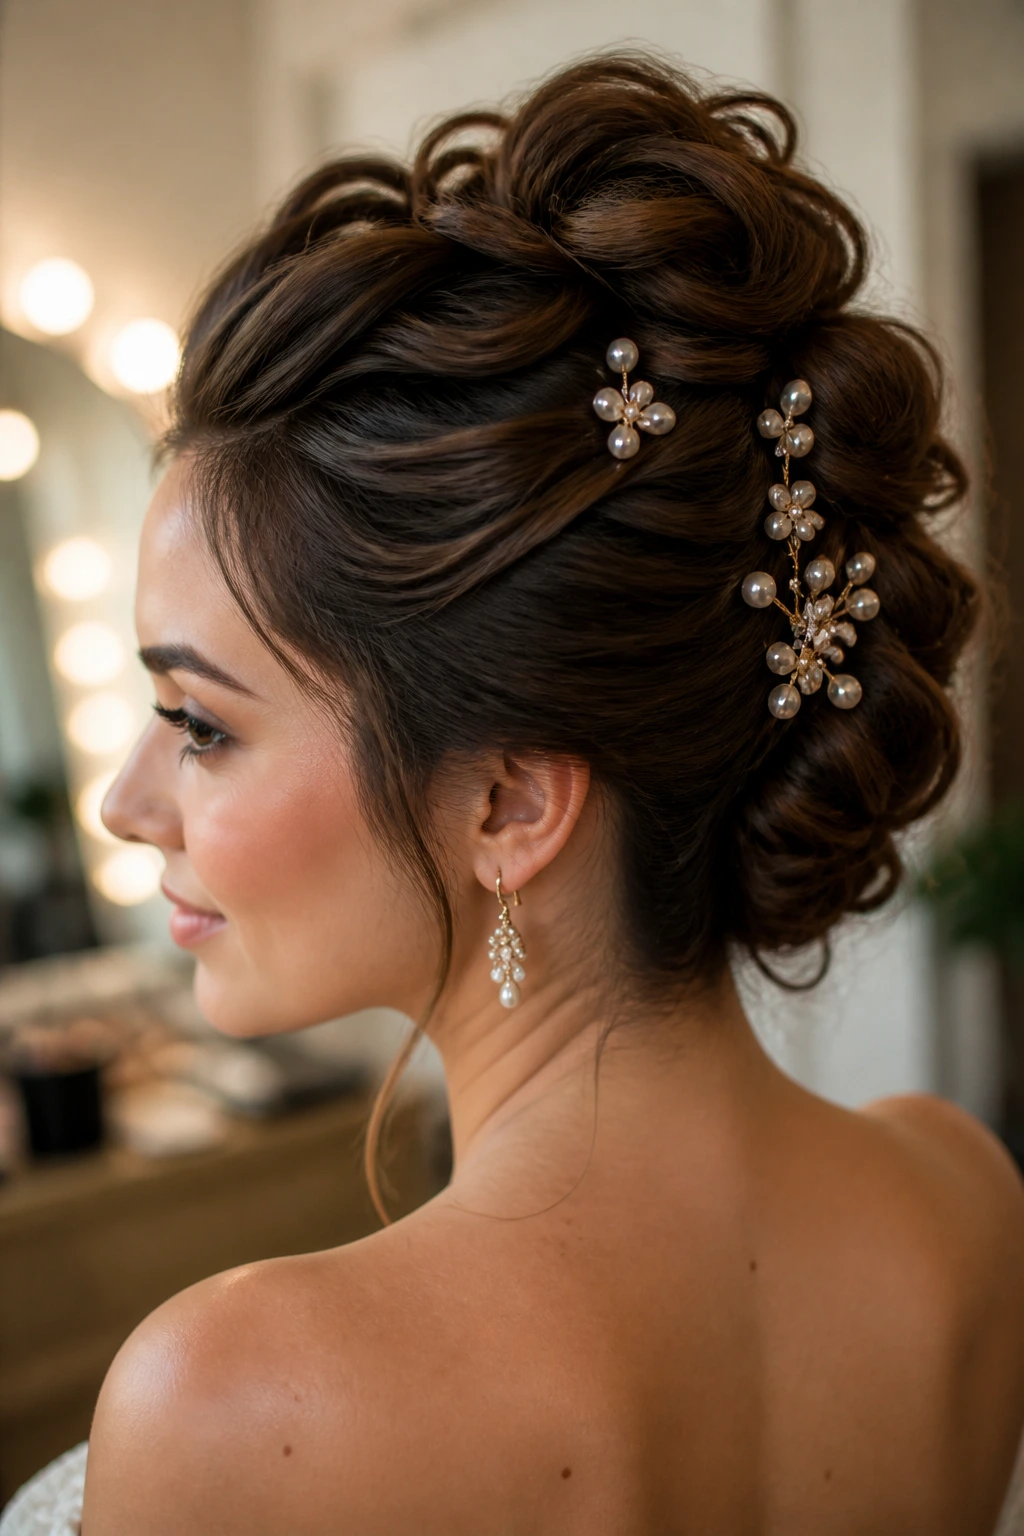
If you have a collection of decorative bobby pins or pearl-encrusted slides, use them to create your own unique updo. This style is about placement rather than intricate braiding or twisting. Simply pull your hair back in sections—twisting and pinning them against the head one by one—and secure each section with a decorative pin.
You are essentially building the updo layer by layer. Start at the bottom and work your way up, pinning sections of hair to the back of your head until all your hair is contained. This is fantastic because you can customize it based on how much hair you have. If you have extra-long hair, just keep twisting and pinning smaller sections until it is all secure. By using decorative pins, you turn a functional necessity into the main feature of the hairstyle. It is a completely custom look that will ensure no one else at the event has the same hair as you.
Final Thoughts
Formal hairstyles do not have to be a source of stress. Whether you choose a sleek, minimalist look or an intricate, braided updo, the most important factor is the preparation. Start with texture, use the right tools like U-pins and boar bristle brushes, and do not be afraid to let a few strands fall loose. Perfection is rarely the goal; the goal is a style that feels secure enough to last through the evening and polished enough to match the occasion.
Once you find two or three styles from this list that work with your specific hair length and texture, practice them once or twice before your next event. The more comfortable you are with the technique, the faster it will go when you are actually in a time crunch. Remember that hair accessories—from gold barrettes to simple ribbons—are often the easiest way to bridge the gap between “everyday hair” and “formal hair.” Keep things simple, focus on the details that keep the style secure, and enjoy your event without worrying about your hair falling flat.
