



Bob length hair is sneaky. It looks short enough to feel limited, then turns around and gives you more room than you expected for pins, twists, braids, clips, and all the small styling tricks that make hair look finished without a lot of fuss.
The catch is that bob length hair can go flat fast. One wrong part, one heavy cream, one overdone curl, and the whole shape starts to look tired. That’s why the cutest styles on a bob usually work with the cut’s own structure instead of fighting it. They lean into the jawline, the cheekbones, and that clean little edge at the ends.
I’ve always thought bobs do their best work when they look a touch imperfect. A soft bend, a tucked side, a tiny braid near the temple — those details matter more on shorter hair because there isn’t a lot of length to hide behind. You see every choice. Which is honestly the fun part.
Some of these styles are fast enough for a school run or a coffee dash. Others make a bob look dressed up enough for dinner, a wedding, or any day you want people to assume you spent longer on your hair than you did. The good ones start with the same idea: give the bob shape, then let the shape do the rest.
1. Deep Side Part With Tucked Ends for Bob Length Hair
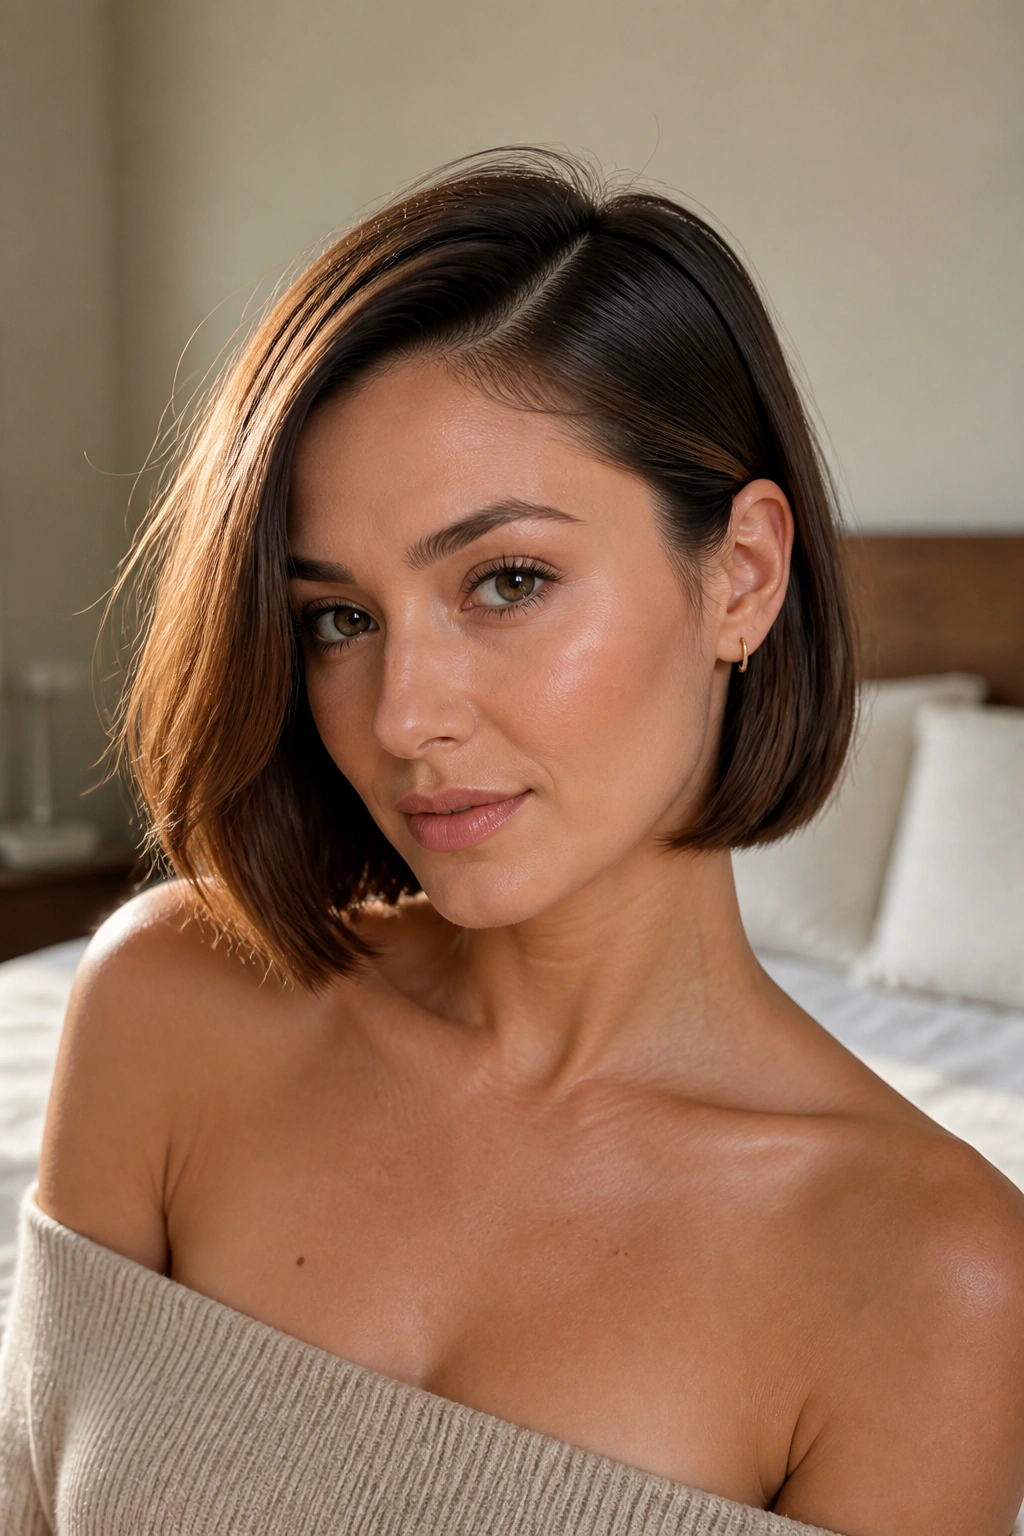
A deep side part can change a bob in about ten seconds. It shifts the weight, opens one side of the face, and makes the cut look sharper without adding a single extra tool to the mix. On bob length hair, that small move often does more than a complicated updo.
Why it flatters a bob
The trick is balance. A side part creates a little height at the crown and lets the ends fall into a softer line, which keeps the style from looking boxy. If your bob sits at the jaw or skims the neck, tucking one side behind the ear gives the whole shape a cleaner finish.
Keep the tucked side loose, not slicked flat. A single bobby pin hidden under the hair is enough for most people. If the hair is fine, a pea-size amount of lightweight mousse at the roots helps the part stay where you put it.
What to use
- A rat-tail comb for a clean part
- 1 bobby pin, or 2 if your hair slips easily
- A small dab of smoothing cream on the ends
- Light hairspray, sprayed from 10 inches away
Tiny detail, big payoff: push the part back by about 1 inch from where you usually wear it. That little shift makes the style look intentional instead of accidental.
2. Soft Bend Waves
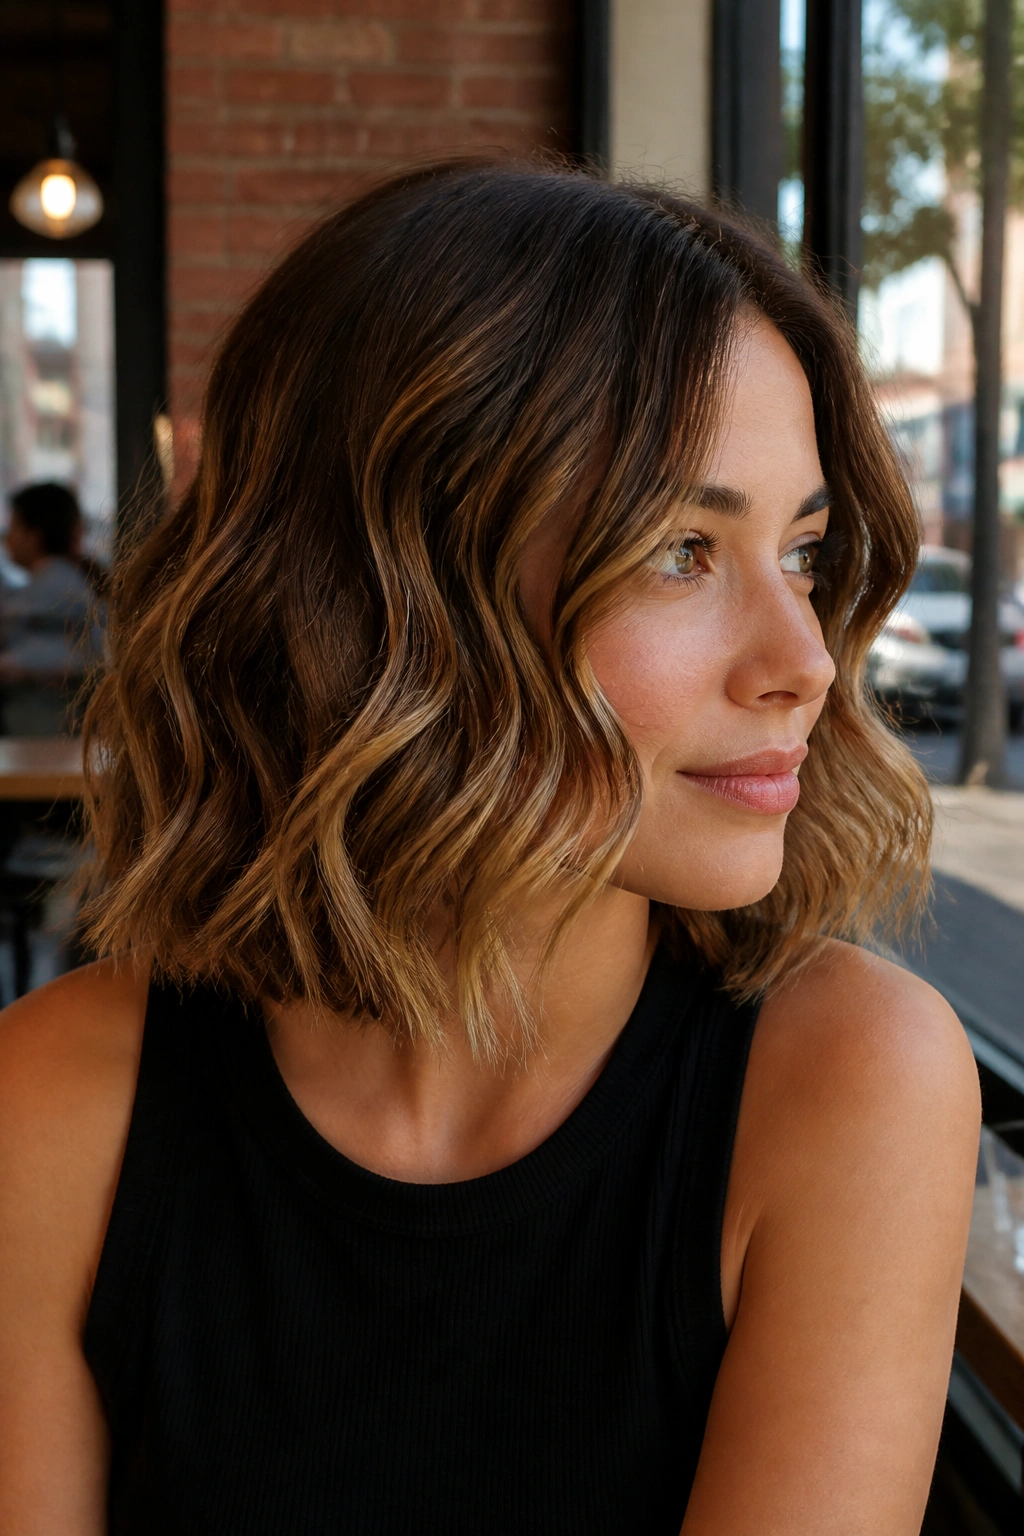
Soft bend waves are not curls. That’s the whole point. On bob length hair, a loose wave looks cleaner and more modern than a tight ringlet, and it lets the cut keep its shape instead of ballooning outward.
A 1-inch curling iron works well for chin-length and jaw-length bobs, but a 3/4-inch iron can be easier if your hair is very straight or slips out of a bigger barrel. Wrap each section for only 5 to 7 seconds, leave the last inch or so out, then brush the waves lightly once they cool. That last part matters. Brush too soon and you lose the bend; brush too hard and the style turns poofy.
I like this style on hair that has a blunt edge. The waves soften it without hiding the line. If your bob has layers, alternate the curl direction from section to section so the ends don’t all kick the same way.
What makes it hold
Use a light texture spray before curling, not after everything is done. Hair that has a bit of grip keeps the bend longer and looks less shiny in a stiff, helmet-like way. And if your hair is fine, skip heavy oil near the mids and ends. It weighs the whole thing down in minutes.
3. Half-Up Mini Knot
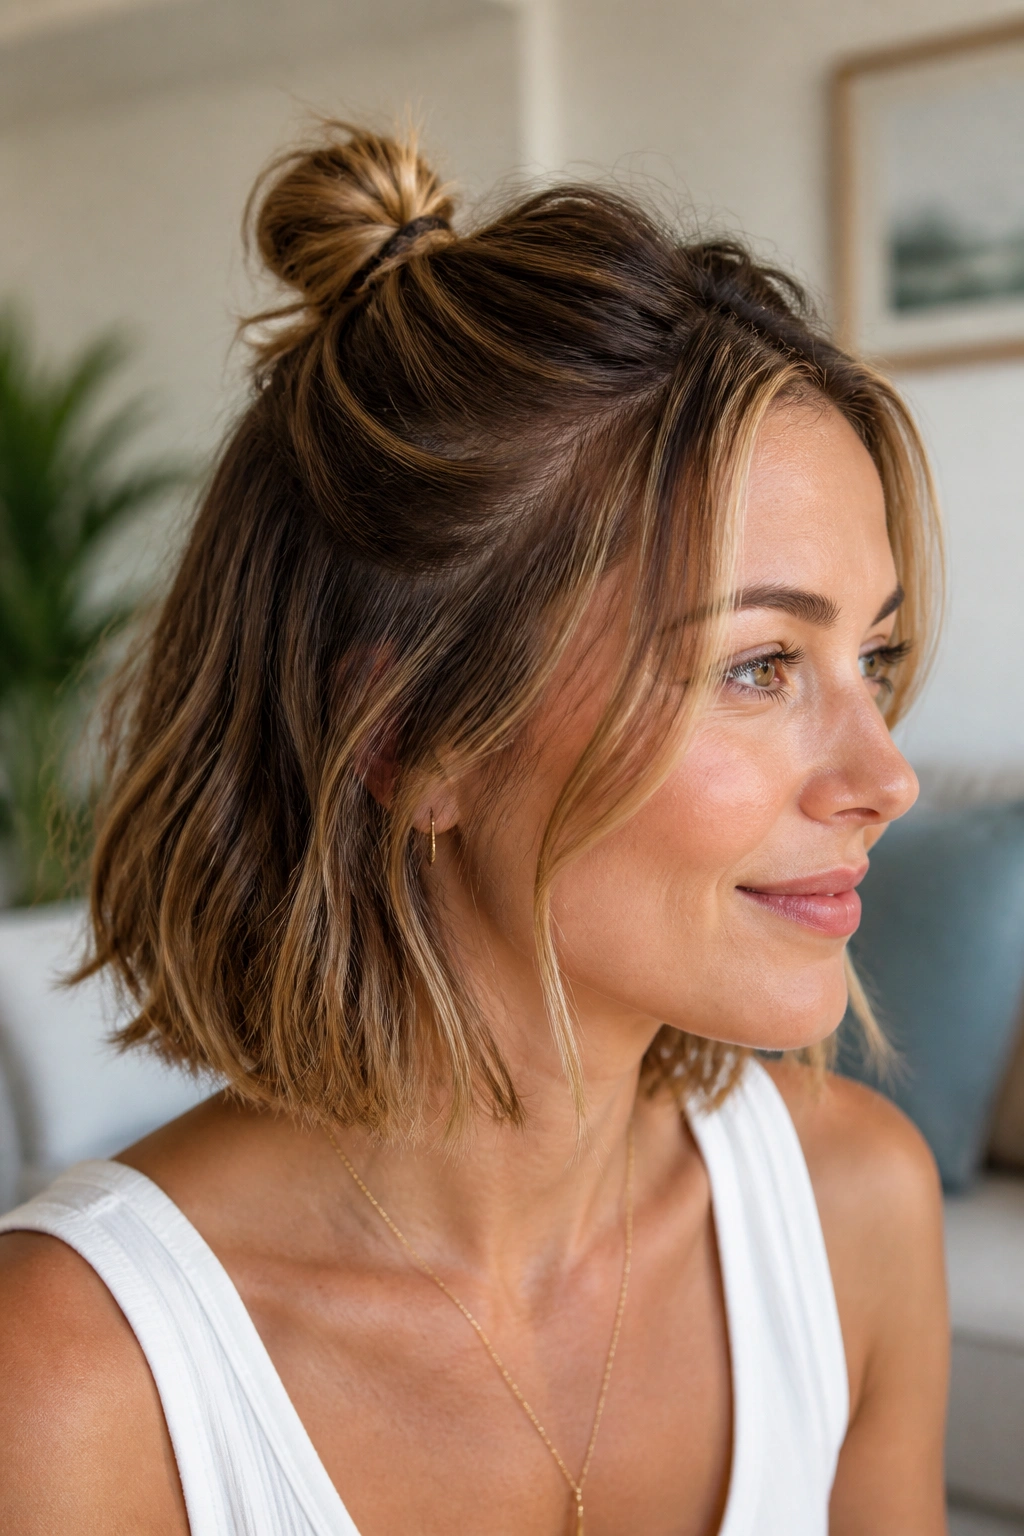
Can a bob really do a half-up knot? Yes, and that’s exactly why this style is so useful. You only need the top third of the hair, so the shorter layers at the bottom can still swing freely and keep the style from feeling cramped.
Start by taking hair from above the temples and gathering it into a small knot at the crown or slightly back from it. Twist once, maybe twice if the length allows, and secure it with a tiny elastic underneath. The knot should look small on purpose. If it gets too bulky, it starts to fight the bob shape.
How to keep it from shrinking the bob
Backcomb the crown lightly before you gather the section. Just two or three quick strokes at the roots is enough. That tiny bit of lift stops the knot from pulling the whole style too tight. I also like to leave the face-framing pieces out on both sides, especially if the cut has layers around the cheekbones.
A half-up knot looks best when the ends are still a little messy. Clean, yes. Stiff, no.
4. Claw Clip French Twist
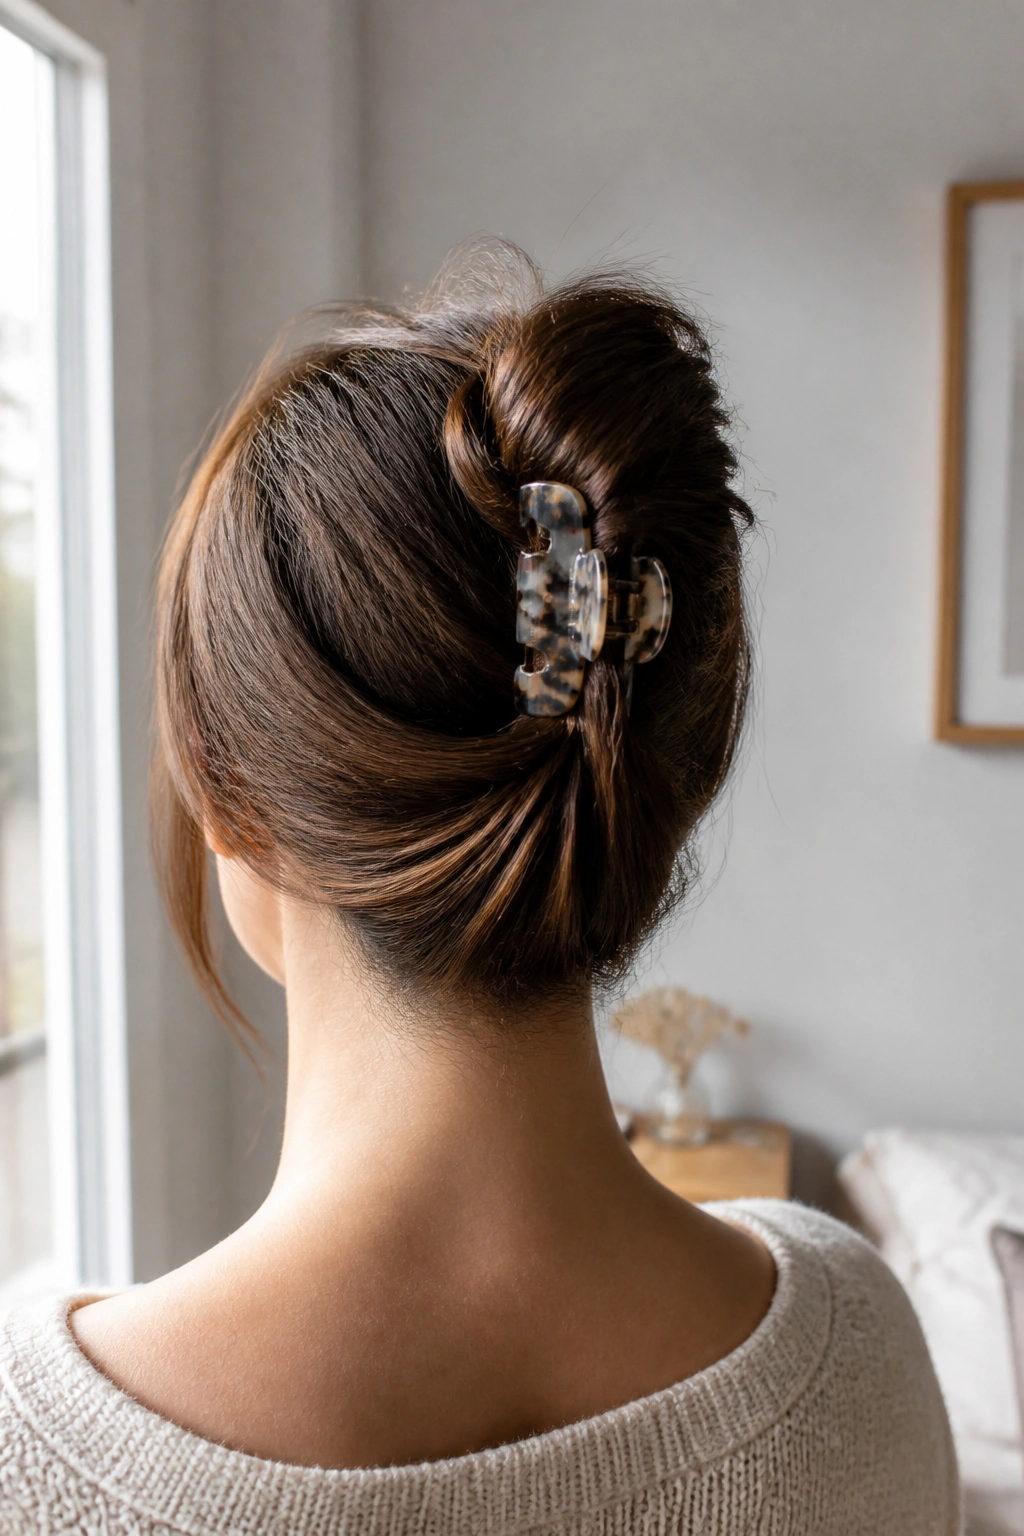
A claw clip and a bob are a better pair than people expect. The shorter length keeps the twist compact, which means the clip sits closer to the head instead of wobbling around like it does on long hair. That makes the whole thing feel neater.
Here’s the move: twist the hair upward from the nape, fold the ends under, and let the clip catch the twist near the center back of the head. For bob length hair, the ends often peek out a little, and that is fine. Actually, it looks better that way. Too much tuck can make the style look forced.
A few things that help
- Use a claw clip that’s about 2.5 to 3 inches wide
- Twist the hair before clipping, not after
- Let the ends stay loose if the bob is too short to fully fold
- Spray the nape first if the hair slips
One sentence, and it matters: this is the style for mornings when you want hair off your neck without looking like you gave up.
5. Braided Headband
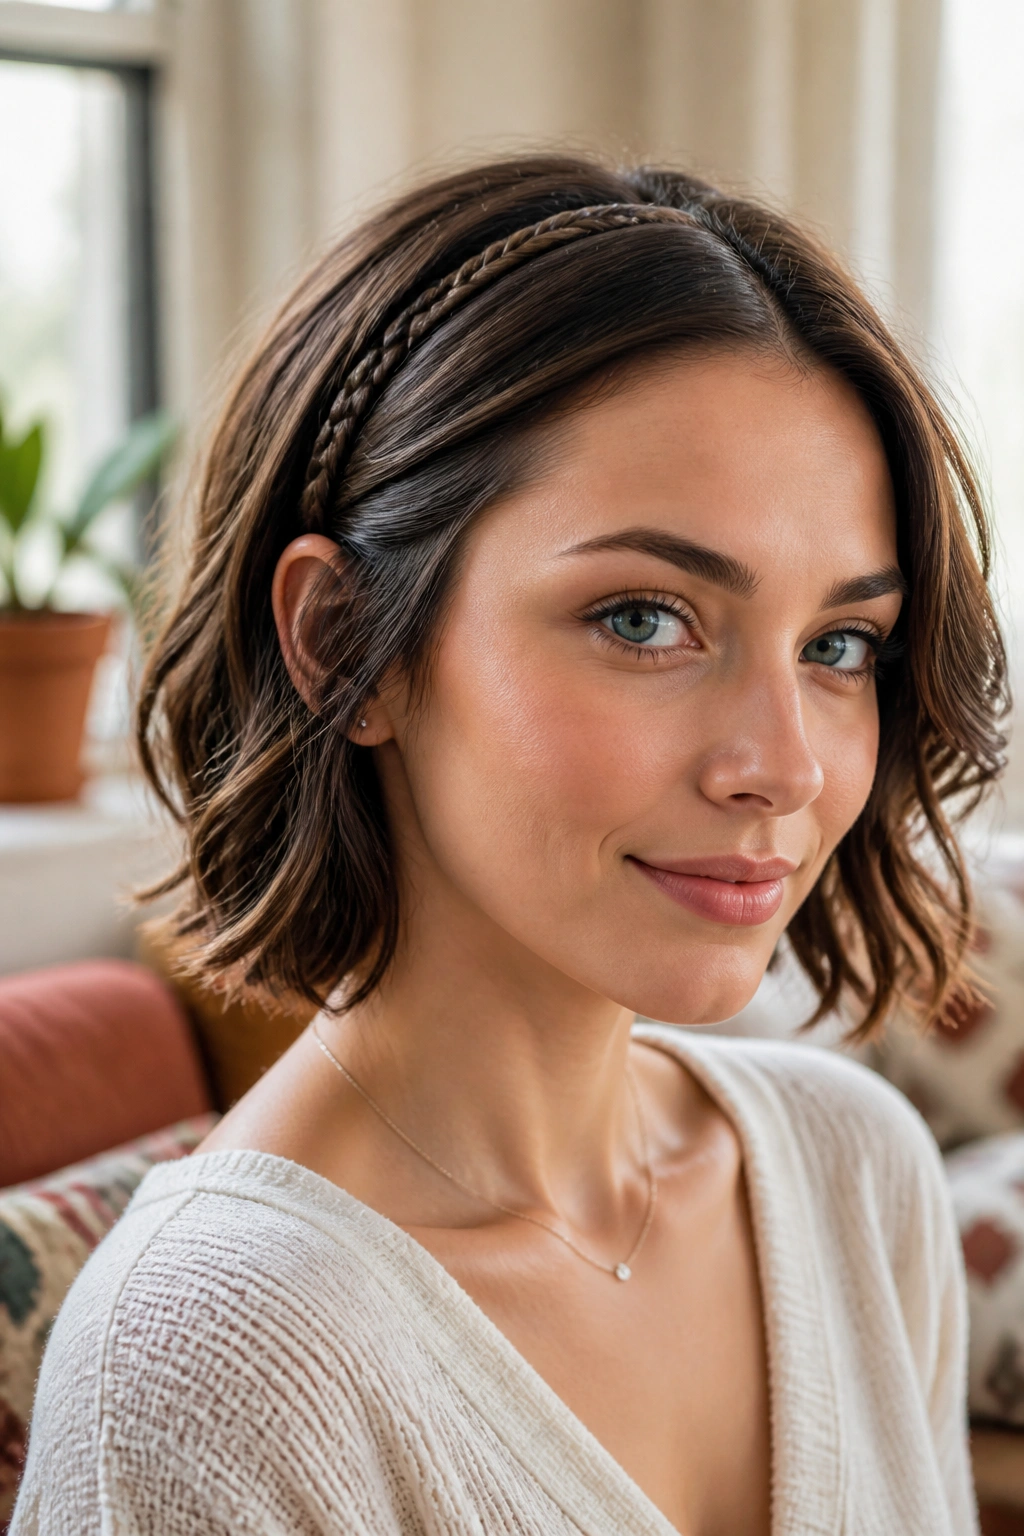
A braided headband is one of those small styles that makes bob length hair look cared for in a way people notice. It also solves a very real problem: grown-out bangs, face pieces that refuse to stay put, and roots that need a little camouflage on day two or three.
Start a braid behind one ear, take a narrow strip along the front hairline, and work it across toward the other side. Pin it behind the opposite ear with two crossed bobby pins. If the braid feels too chunky, take a smaller section than you think you need. On a bob, thin is often better. Thick can overwhelm the cut.
What makes it work
The braid should sit just inside the hairline, not an inch back from it. That placement frames the face instead of hiding it. If your hair is silky, mist the section with dry shampoo before you braid. It gives the strands enough grip to stay put.
Leave the rest of the bob straight or lightly waved. The contrast is the charm here.
6. Flipped-Out Ends

Flipped-out ends have a little retro energy, and bob length hair wears them well. The line at the bottom of a bob already wants to be noticed, so flicking the ends outward gives it a playful finish without making the style busy.
A flat iron makes this easier than a round brush if you already know how to work it. Clamp the last half-inch of the hair and turn your wrist outward just enough to create a soft flip. Don’t over-curve it. The goal is a slight kick, not a full-pageant turn.
Why it suits blunt cuts
A blunt bob can look too severe when it’s left perfectly straight. A flipped edge breaks that line and adds movement right where the eye lands. It works especially well on hair that’s straight, slightly wavy, or heat-styled in a hurry.
If your hair has layers, keep the flips subtle. Too much bend in every section can make the ends look frayed. One or two passes with a heat protectant spray, then a light mist of flexible hairspray, is enough. No crunch. No stiff ends.
7. Bubble Half Pony
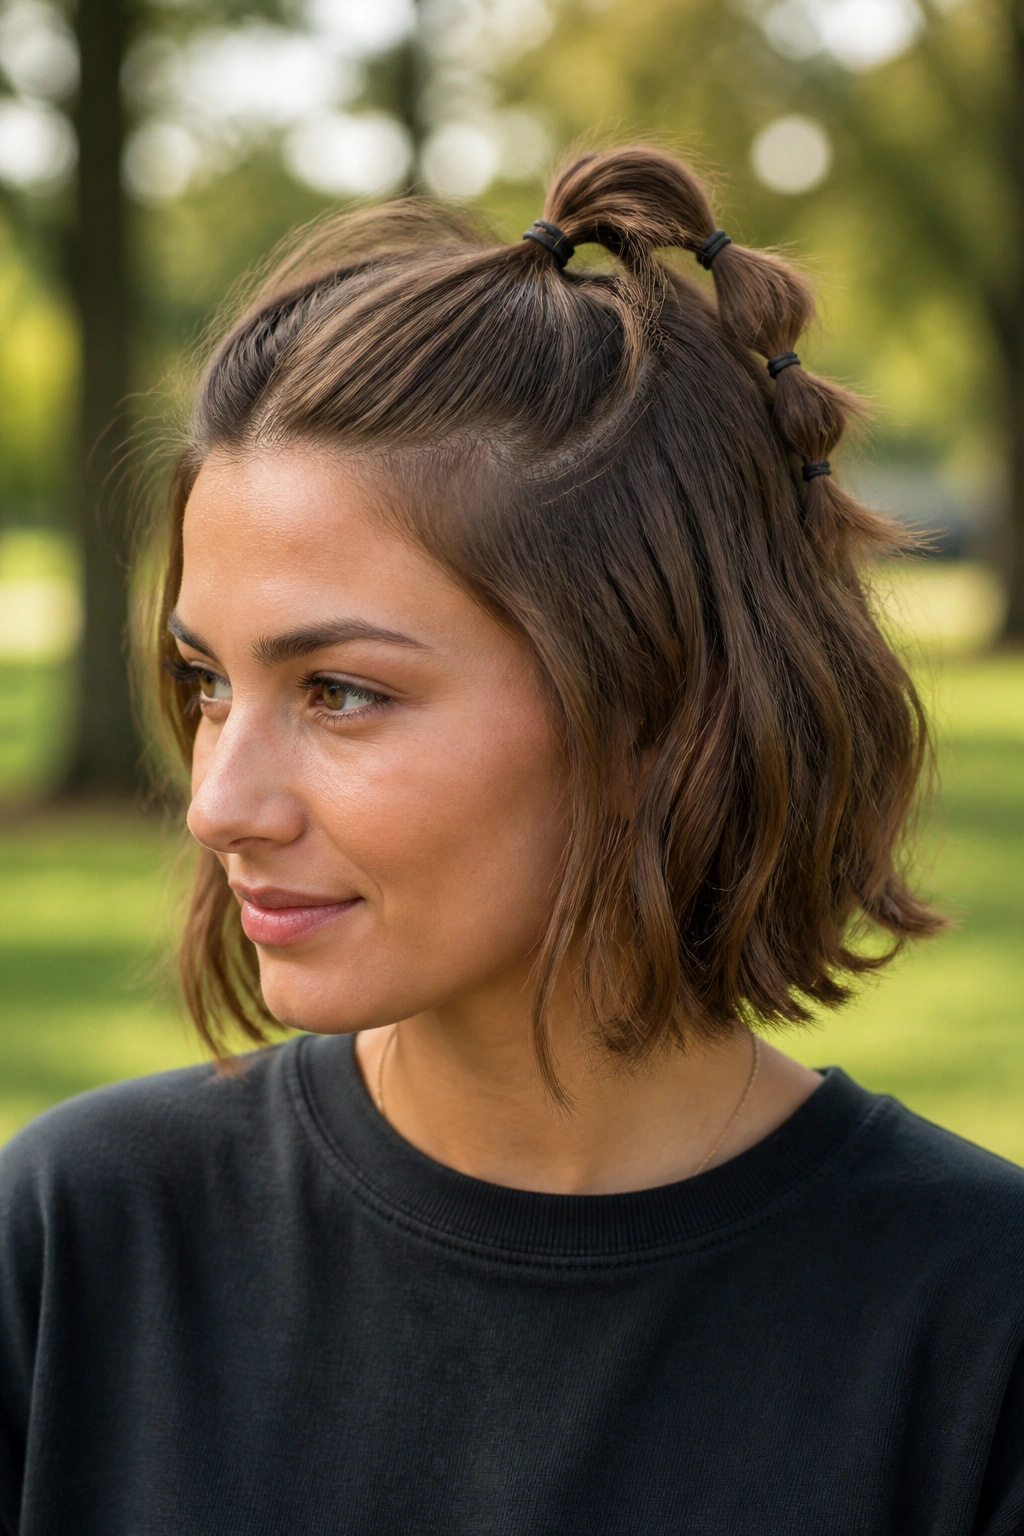
A bubble half pony gives a bob a little personality without needing much length. It’s also a smart choice if the top layers are long enough to gather but the bottom layers are too short for a true ponytail.
How to shape the bubbles
Gather the top half of the hair and secure it with a small elastic. Then add 1 or 2 more tiny elastics down the tail, spacing them about 1.5 to 2 inches apart. Gently pull at each section between the elastics to puff it into a rounded shape. That’s the bubble.
- Keep the bubbles small on a bob
- Use clear elastics if you want the shape to stand out
- Tug from the sides, not the center
- Finish with a little texture spray for grip
The best version of this style is slightly imperfect. If every bubble is the same size, it can look stiff. Uneven spacing feels softer and more human, which sounds odd, but it really matters here.
8. Slicked-Back Wet Look
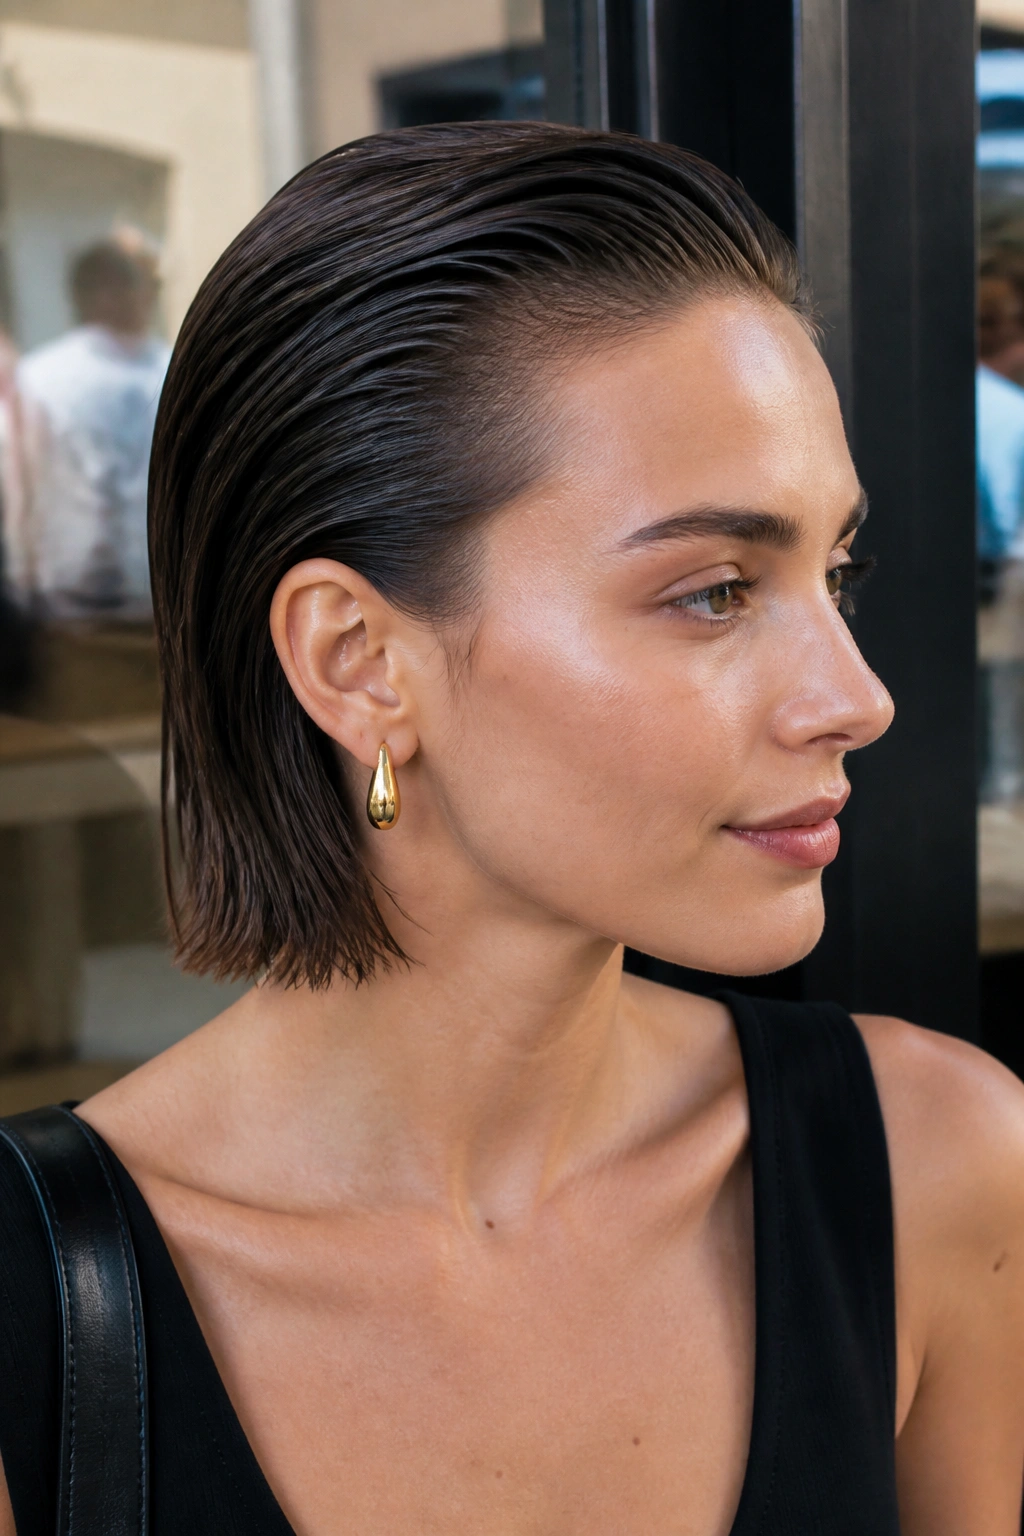
Slicked-back hair on a bob can look severe in photos and oddly flattering in real life. The reason is simple: the shorter length keeps the style close to the head, so the wet finish reads as polished instead of greasy.
Use gel at the roots and through the top layers, then comb the hair straight back or slightly off-center. The ends can stay smoother and drier if you want contrast. That keeps the style from turning into a helmet. A tiny amount of shine cream on the ends is enough. More than that and the hair starts to look heavy.
This one is good when the weather fights your blowout or when you want earrings, makeup, or a strong neckline to do more of the visual work. It’s also one of the fastest ways to make a bob look deliberate after a long day.
Skip the fluffy brush. Use a fine-tooth comb and your hands. The finish should look sleek, not frozen.
9. Ribbon-Tied Half Pony for Bob Length Hair
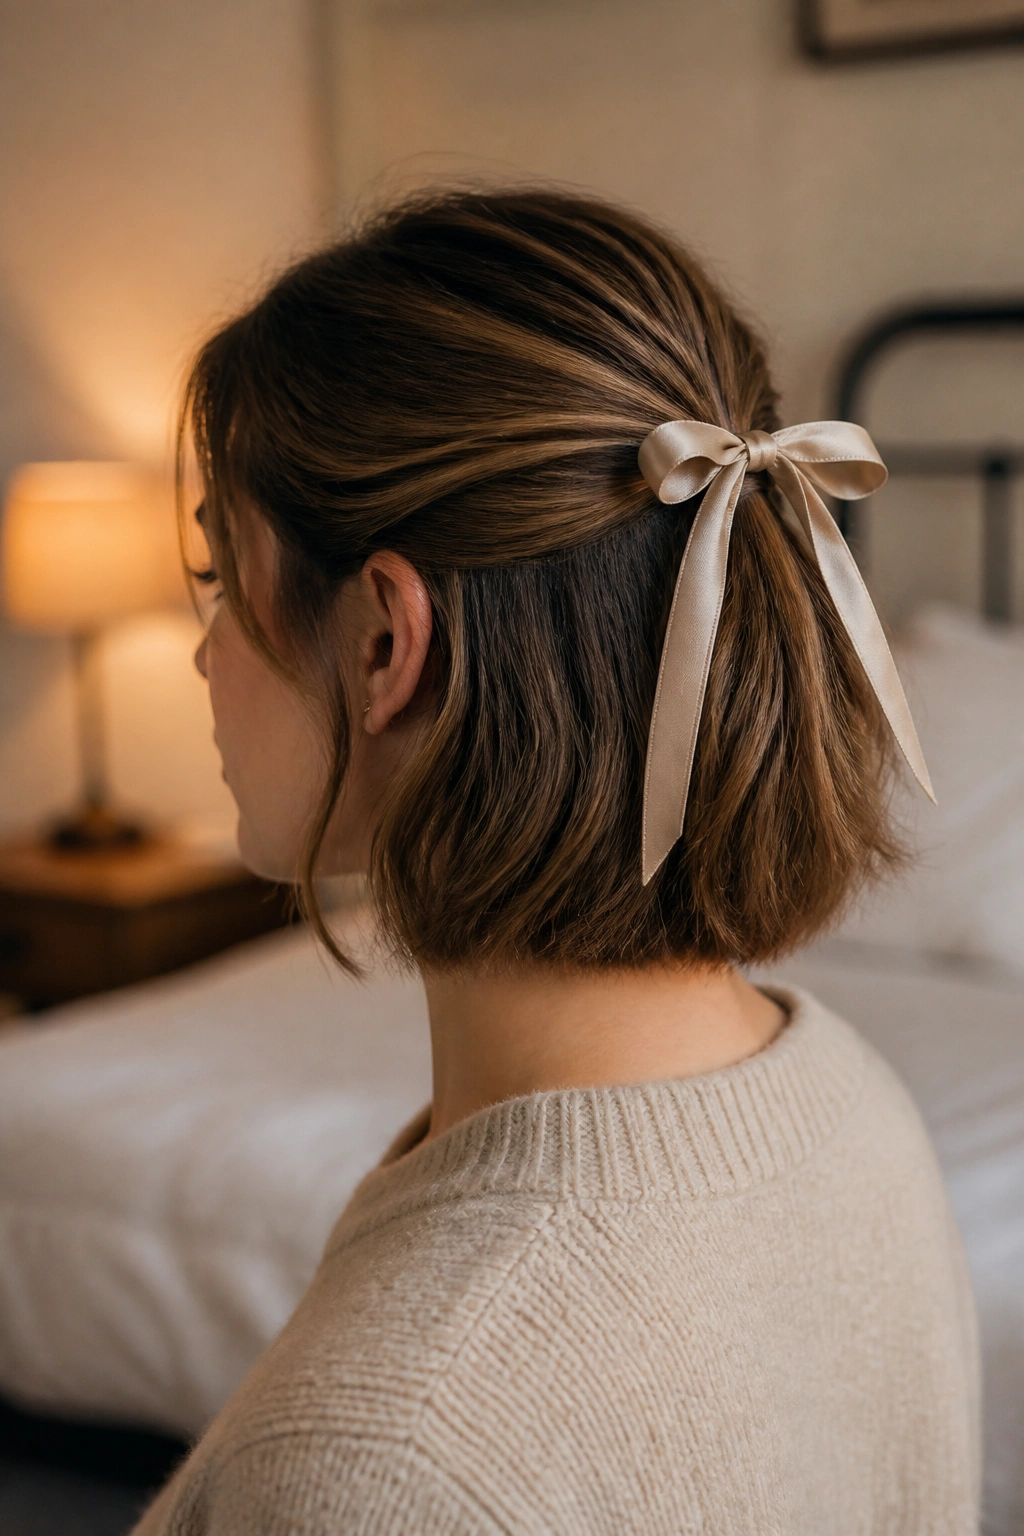
A ribbon changes a half pony from ordinary to charming in a very low-effort way. On bob length hair, that matters because there isn’t much length to build a big style, so the accessory has to carry some of the weight.
Pull the top section into a small half pony at the back of the head and secure it with a clear elastic. Then wrap a ribbon around the elastic and tie it in a neat bow or a simple knot with long tails. Satin gives a softer look, while grosgrain holds its shape better. I tend to like grosgrain more because it stays put.
How to keep the ribbon from sliding
Tie the ribbon over the elastic, not around the loose hair alone. That hidden elastic is doing the actual work. If your hair is silky, rough up the section with a little dry texture spray before tying it. The ribbon grabs better, and the whole style lasts longer.
This is sweet without being fussy. And that’s a nice place to land.
10. Low Nape Twist for Bob Length Hair
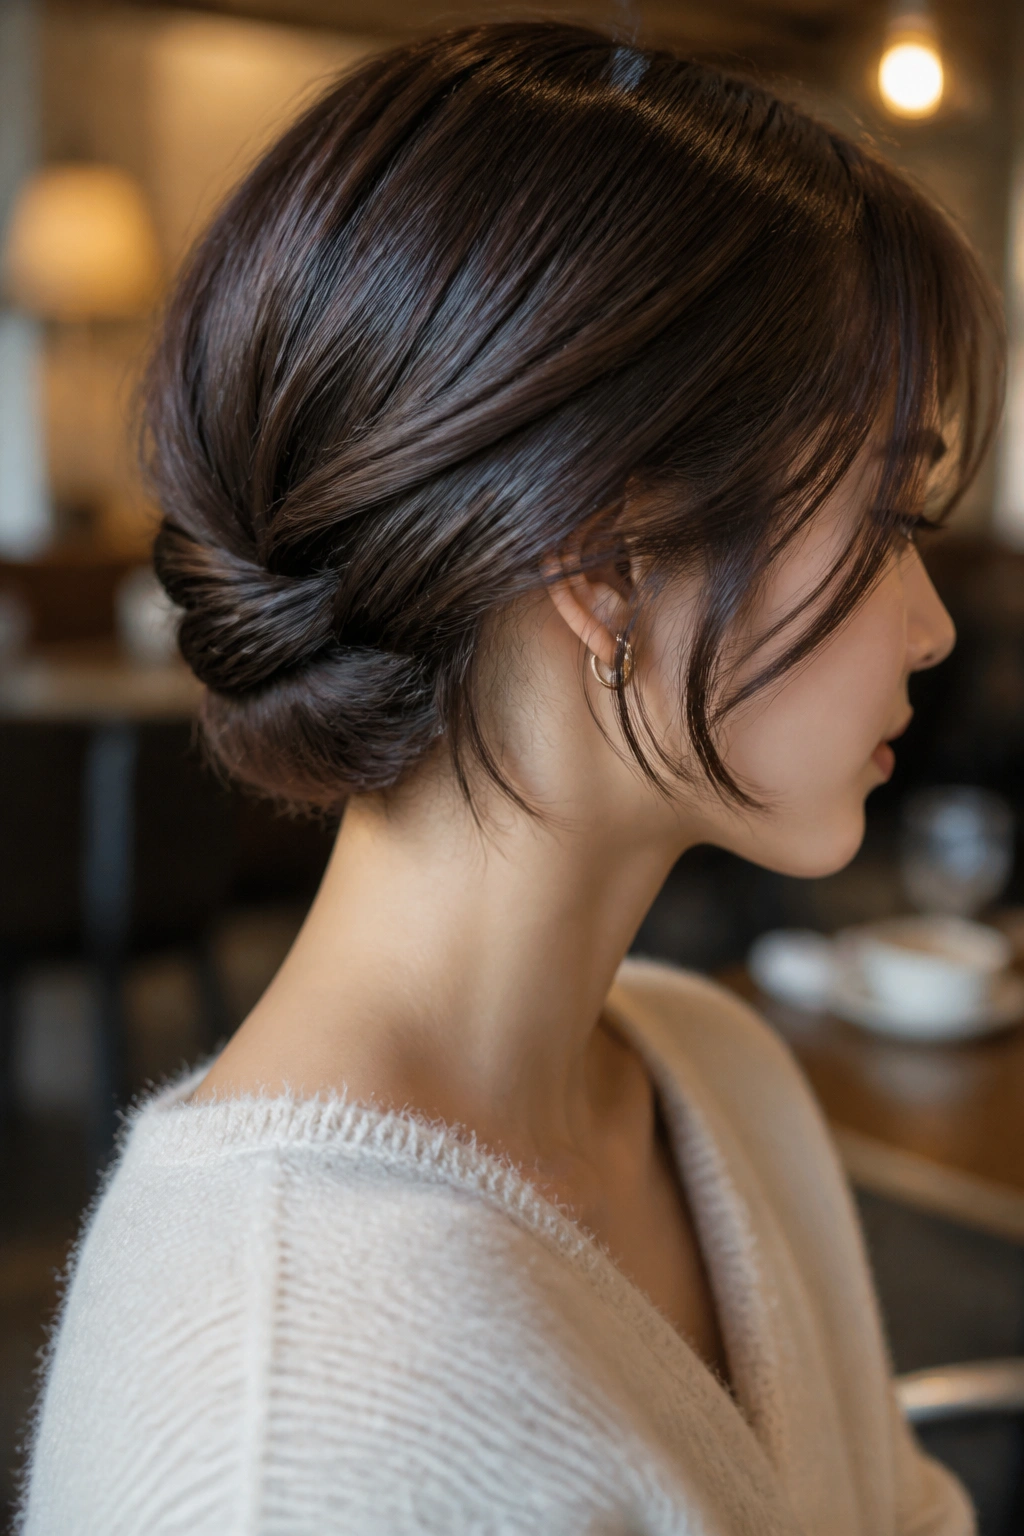
If your bob is too short for a real bun, a low nape twist is the next best thing. It hugs the head, keeps the ends tucked in, and looks more finished than people expect from a style that takes only a few minutes.
Start by parting the hair how you like it. Then take the two sides back toward the nape, twist them inward, and pin where they meet. The shape should sit low and close to the neck. With a chin-length bob, a few ends may stick out. Fine. Hide them under the twist or let them peek out a little if the style feels too tight.
The small details that matter
- Use 2 crossed bobby pins for each side if the hair is slippery
- Keep the twist low, near the base of the skull
- Leave a few face pieces loose for softness
- Mist the nape before pinning if the hair slips out
This style works because it respects the length instead of pretending it’s longer.
11. Double Mini Braids
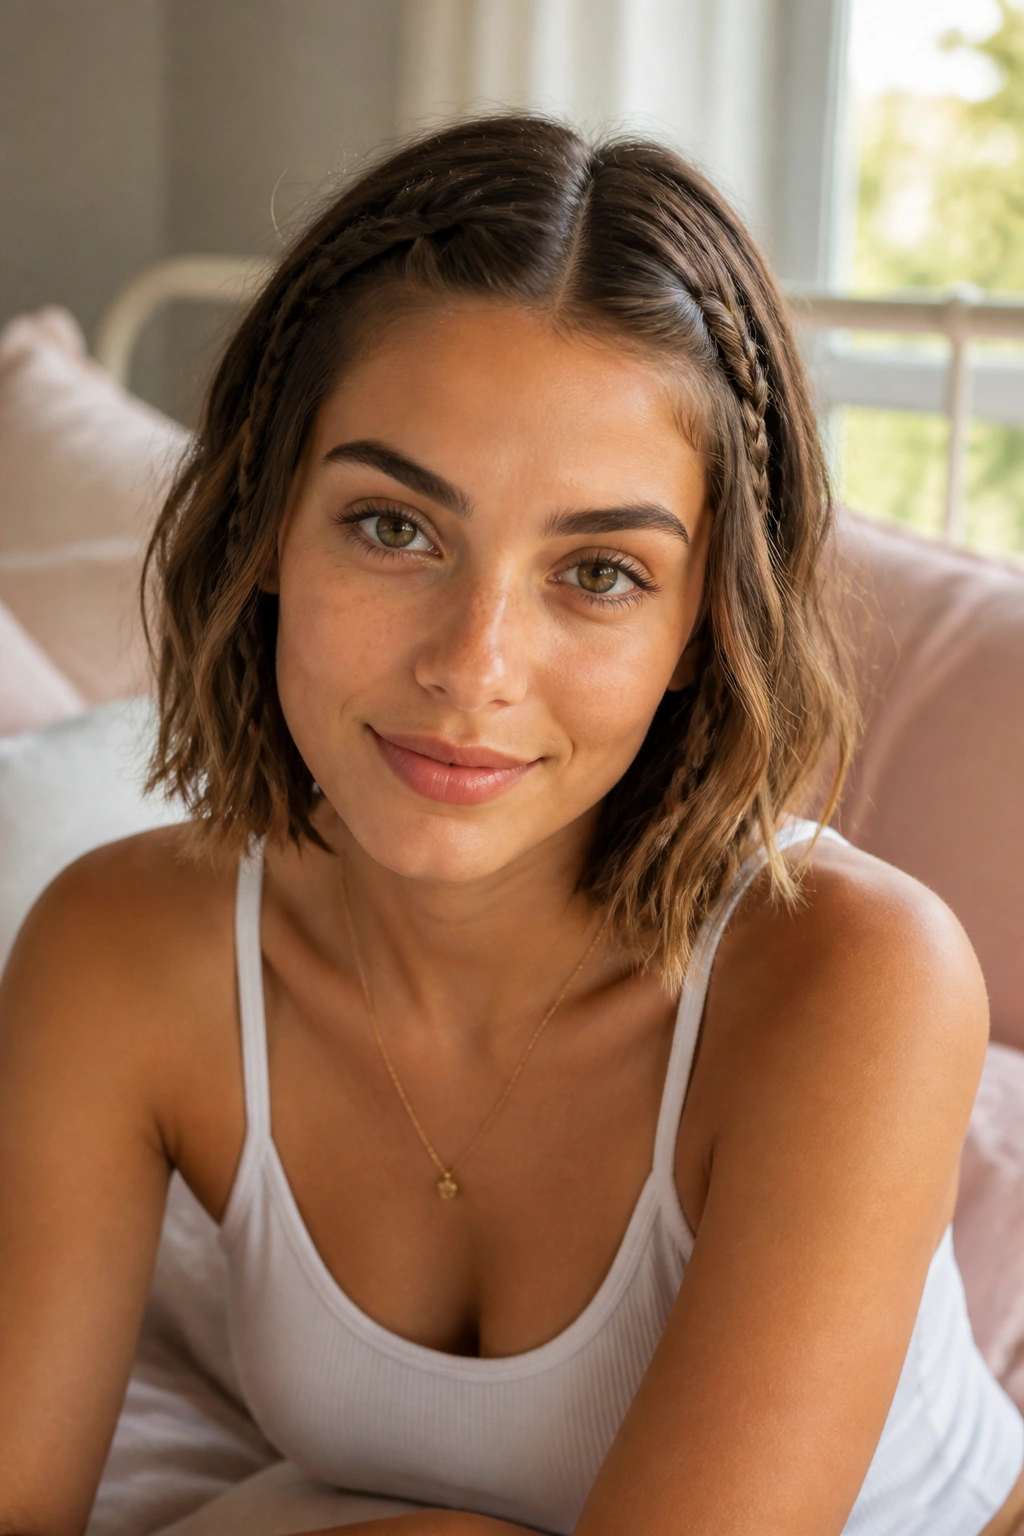
Two tiny braids near the temples can change the mood of a bob fast. They add texture around the face, break up a plain cut, and look cute in a way that doesn’t tip into childlike if you keep them narrow.
I like this most on bobs with layers or grown-out fringe. A braid on each side pulls the shorter pieces forward and gives the cut a bit of shape. Leave the rest of the hair loose and a little piecey. If everything else is too polished, the braids can look pinned on.
A small dab of matte paste or styling cream helps the braids hold without puffing up. Braid them tightly enough to stay neat, but not so tight that they flatten the sides of your head. That’s an easy mistake. Once the braid gets too flat, the style loses the charm.
It’s a quick style, but it still needs a bit of intention.
12. Scarf-Wrapped Bob
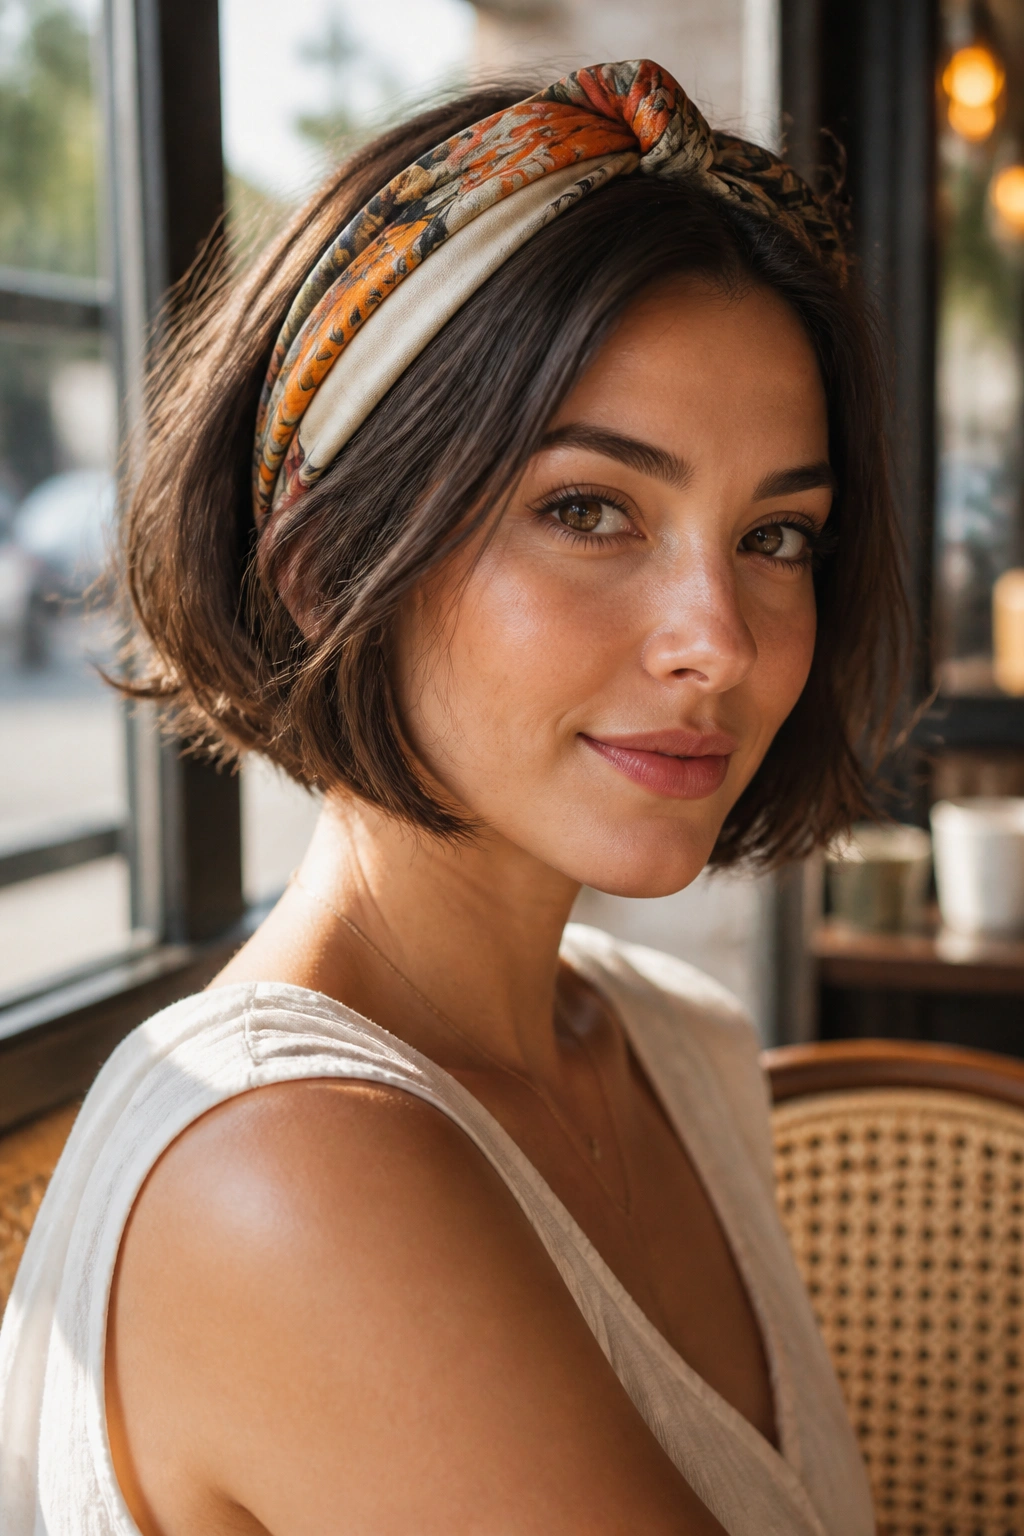
A scarf wrapped around a bob does a lot of jobs at once. It adds color, controls flyaways, and makes a simple cut look styled even when the hair underneath is a little tired.
The big difference between a scarf and a headband is scale. A scarf gives you more fabric to play with, so the look feels softer and more personal. Fold a silk or cotton scarf into a strip about 2 to 3 inches wide, wrap it over the crown or around the hairline, and tie it underneath the hair if you want the knot hidden.
Why I like it more than a plain band
A scarf is kinder to bob length hair because it doesn’t fight the silhouette. It frames the cut instead of squeezing it. If the bob is blunt, the fabric softens the line. If the bob is wavy, the scarf gives the style a little shape without stealing attention from the texture.
Use it on a day when the roots need help or when you want the haircut to look more styled than it actually is. That’s the whole appeal, really.
13. Side Sweep With Statement Pins
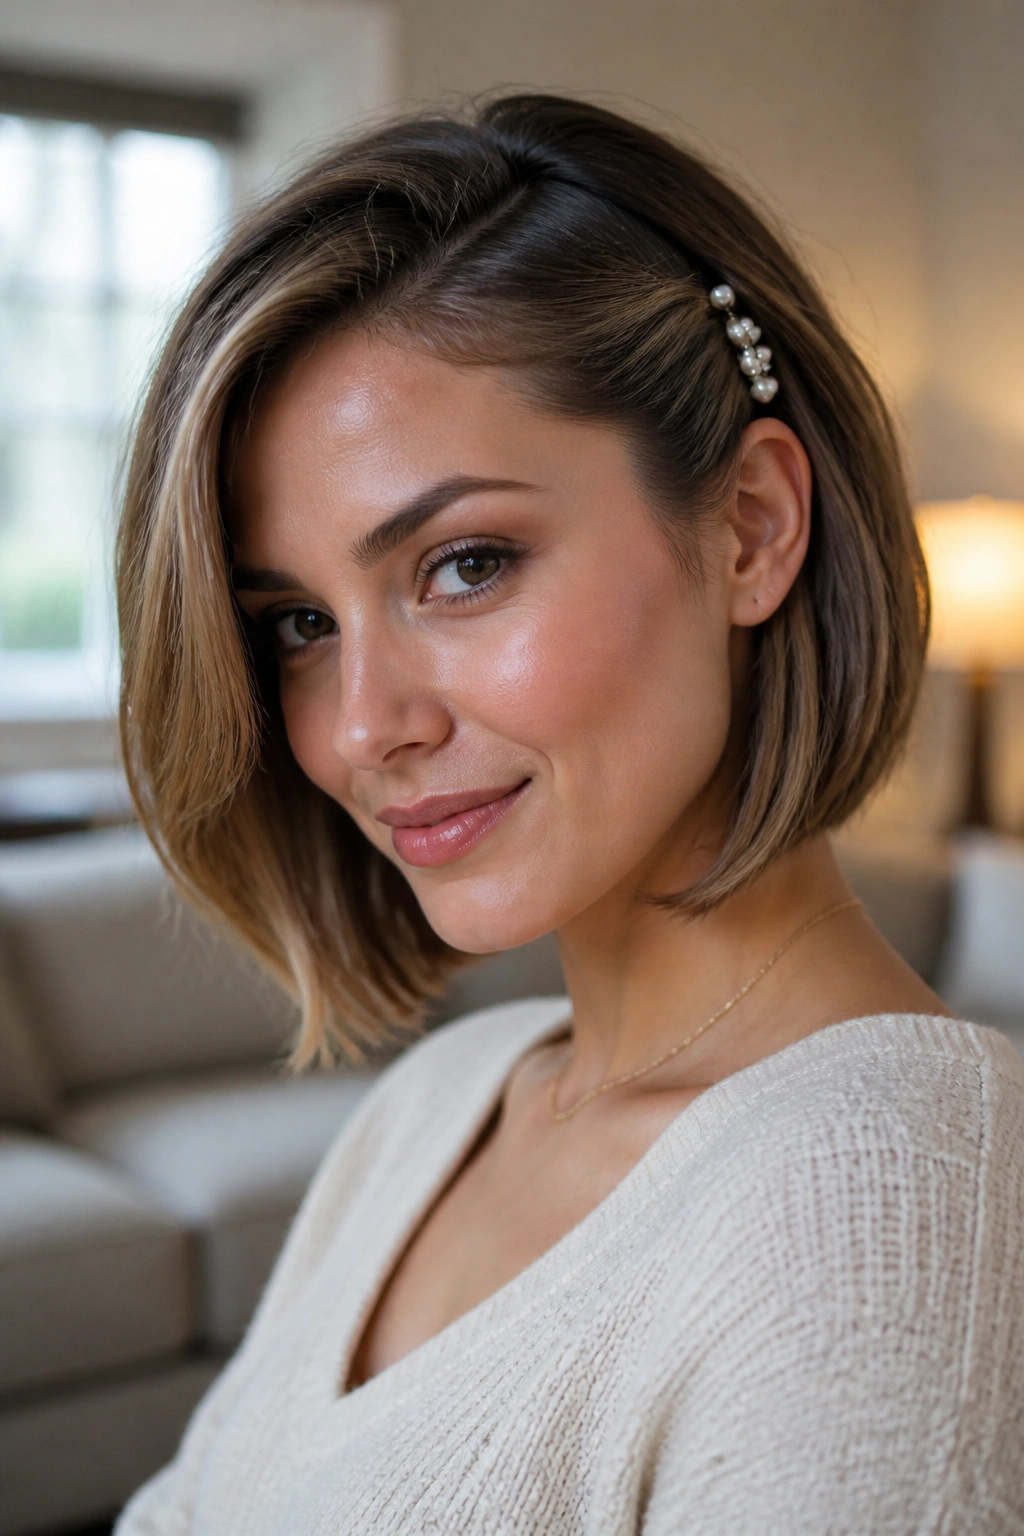
A side sweep can make a bob feel dressed up in the easiest possible way. You move the hair away from one side, pin it with something pretty or bold, and suddenly the cut looks a little more designed.
Pin placement matters
The pins should sit just above the ear or slightly behind it. Too high, and the shape gets awkward. Too low, and the whole section falls out. I prefer using 2 or 3 pins instead of one heavy barrette because smaller pins spread the hold out and feel lighter on short hair.
- Try three pearl pins in a row for a soft look
- Use a single metal barrette for a cleaner finish
- Stack two snap clips if you want a playful edge
- Backcomb the roots once before pinning for extra lift
This style is especially good for side bangs or layers that refuse to stay put. It also works on day-two hair when the front has a little natural bend. That bend helps the sweep stay in place.
14. Retro Pin Curls
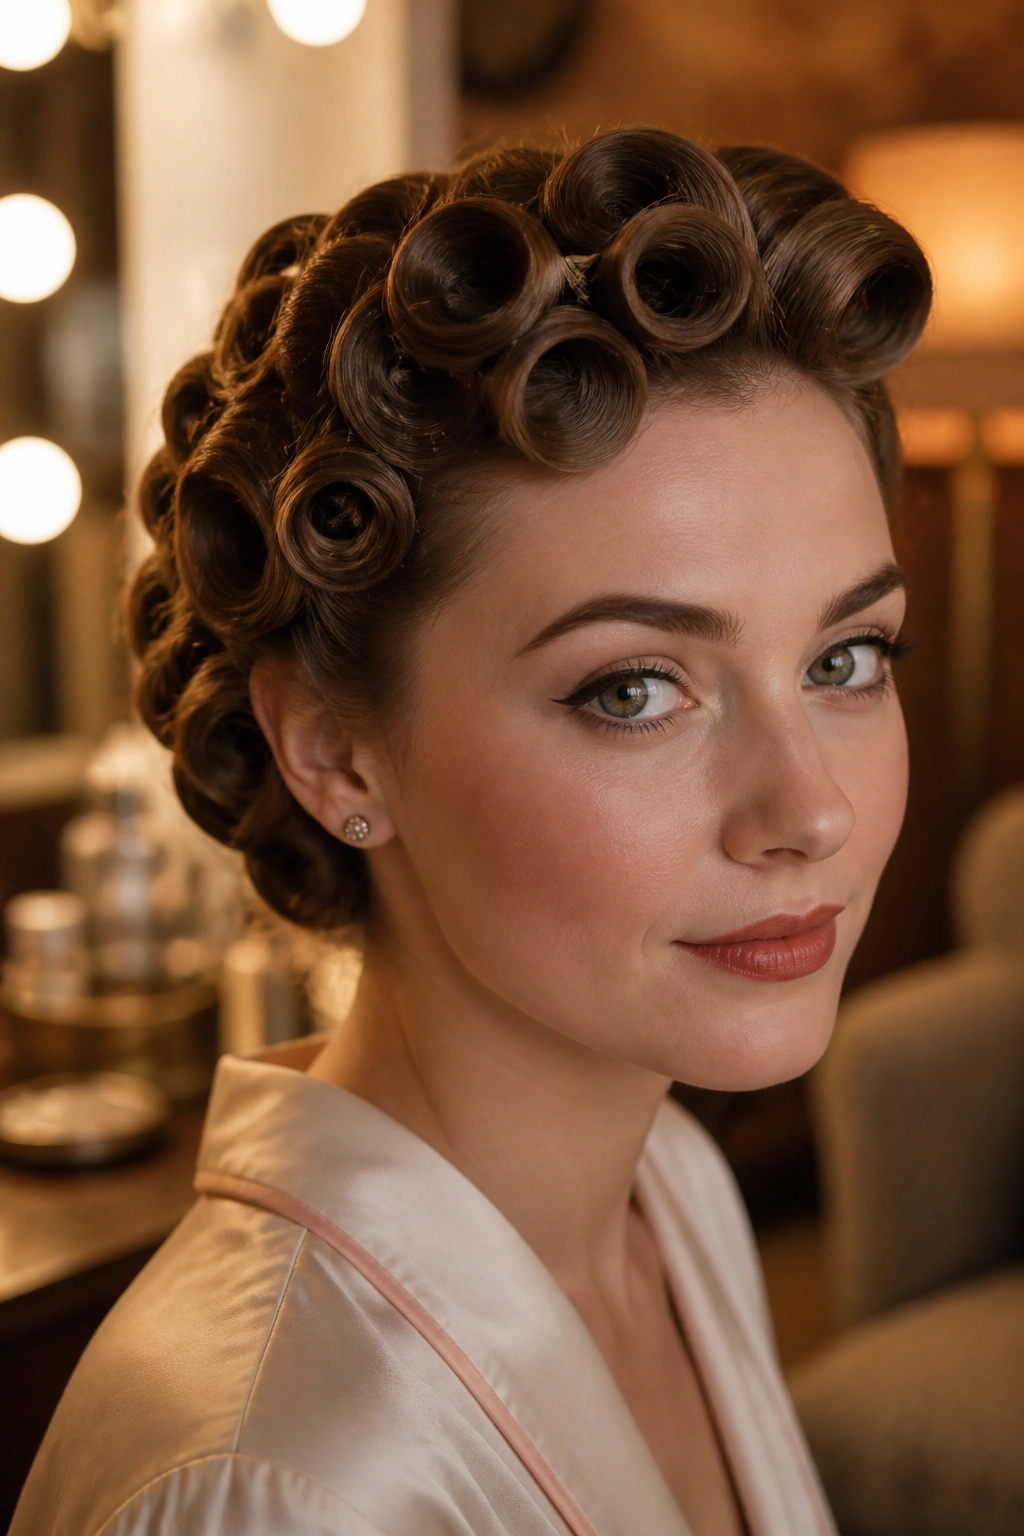
Pin curls give bob length hair a polished, vintage look that feels more special than a standard wave. They also work with shorter hair better than people think, because the curl doesn’t need much length to set.
Take 1-inch sections, curl each one with a small iron, then roll it back into a flat loop against the scalp and pin it while it cools. Leave them pinned for 15 to 20 minutes, longer if the hair is thick or stubborn. After you remove the pins, brush the curls into a soft wave and tuck one side behind the ear if you want a cleaner face frame.
What to watch for
- Don’t use sections that are too wide; the curl won’t set well
- Let the hair cool fully before brushing
- Use a lightweight spray, not a stiff shell of hairspray
- Leave two face pieces out if the bob is heavily layered
This style can look fancy without being fussy, which is rare.
15. Textured Piecey Bob
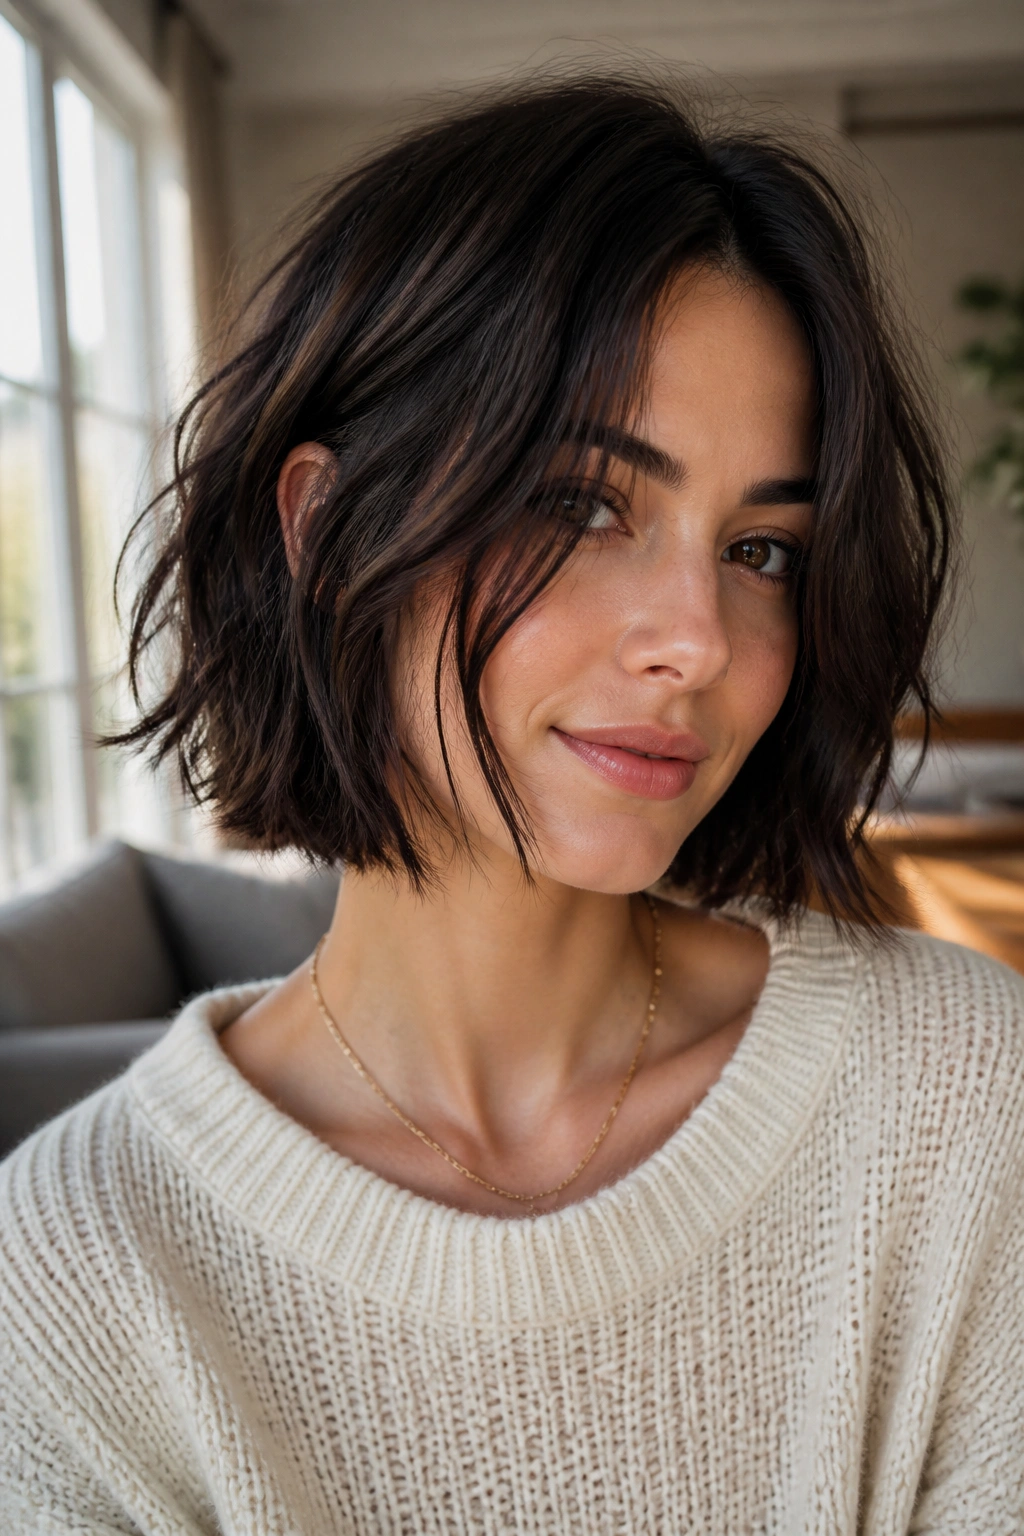
A piecey bob is what you reach for when you want the haircut to look a little undone in a good way. It’s casual, but not lazy. That difference matters more than people admit.
How to keep it piecey, not crunchy
Start with a root-lifting mousse or a small amount of salt spray on damp hair. Scrunch with your hands, then rough-dry or air-dry until the hair is about 80 percent dry. Finish by rubbing a tiny bit of matte paste between your fingertips and touching the ends, one section at a time. The goal is separation, not stiffness.
A piecey bob works especially well with natural waves and layers, because those shapes already want to move. If the hair is dead straight, add a few bends with a flat iron instead of blasting the whole head with curl. One or two bends near the front can do enough.
This is the style I reach for when I want hair to look like hair, not a project.
16. Half-Up Braid Crown
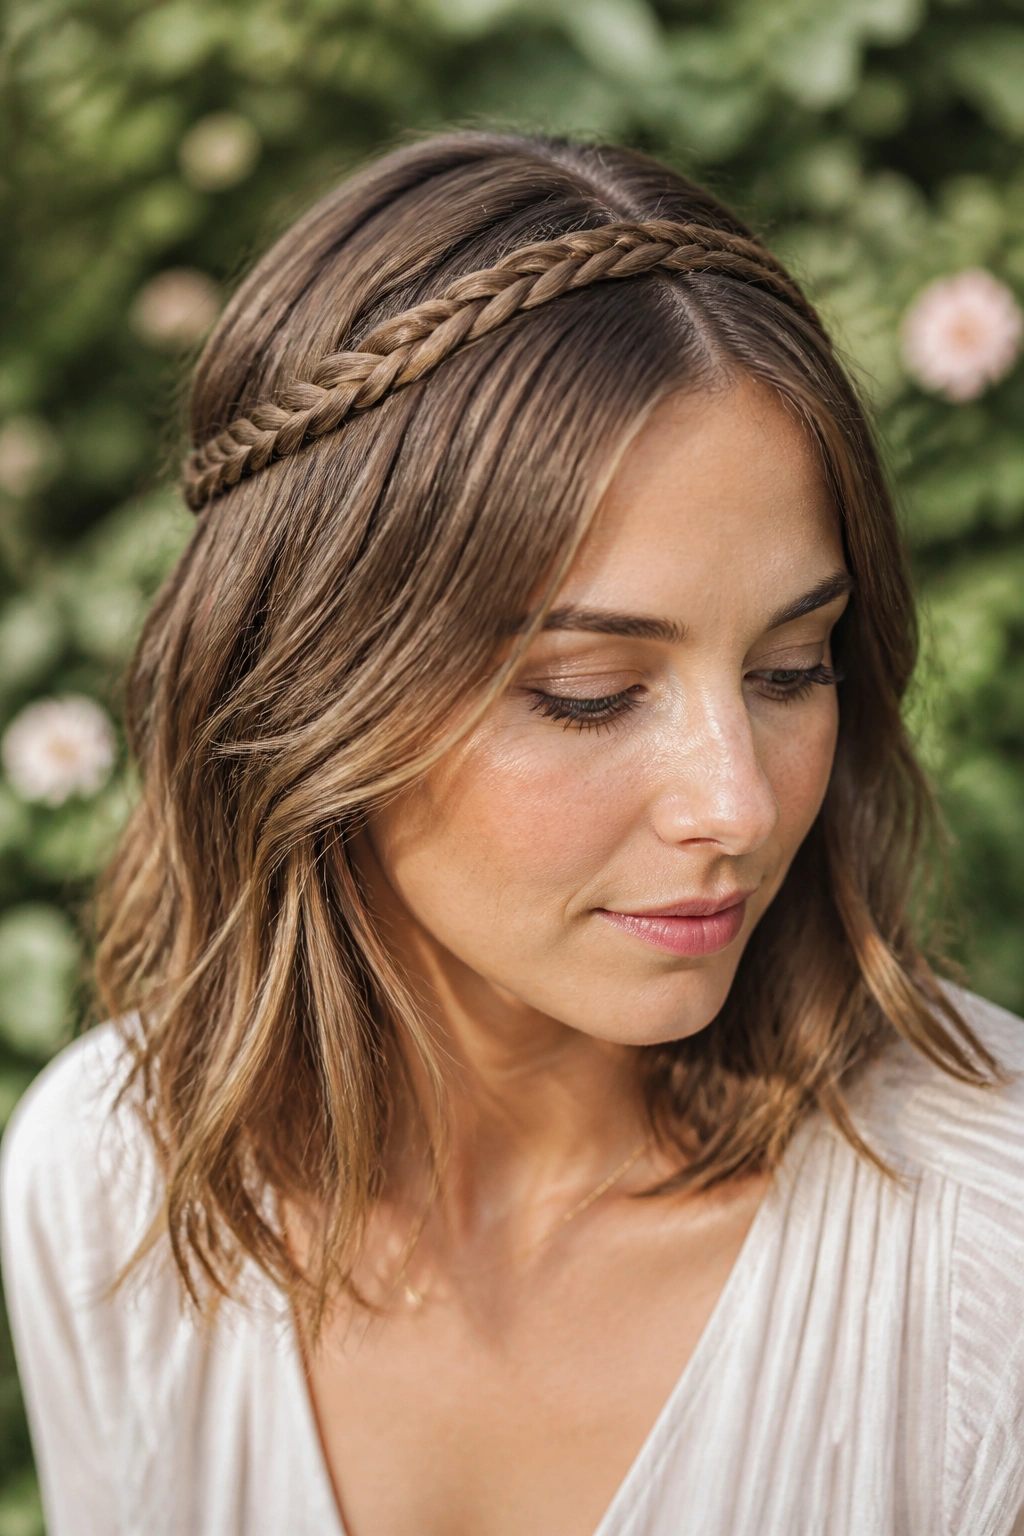
A half-up braid crown gives bob length hair a little more shape around the top without requiring enough length for a full crown braid. It’s one of those styles that looks harder than it is, which is useful on mornings when time is not generous.
Take two sections from near the temples, braid each one back toward the center, and pin them together behind the crown. The rest of the hair stays loose. That loose bottom keeps the bob looking like a bob, which is the point. If you braid too much of the head, the style starts to swallow the haircut.
Quick details that help
- Keep each braid narrow, about 1 inch wide
- Use small clear elastics at the ends if needed
- Hide the braid ends under the pinned section
- Pull a few strands free around the face for softness
This style is especially nice for growing-out bangs. The braids tuck those shorter pieces away without making them disappear.
17. Mini Space Buns
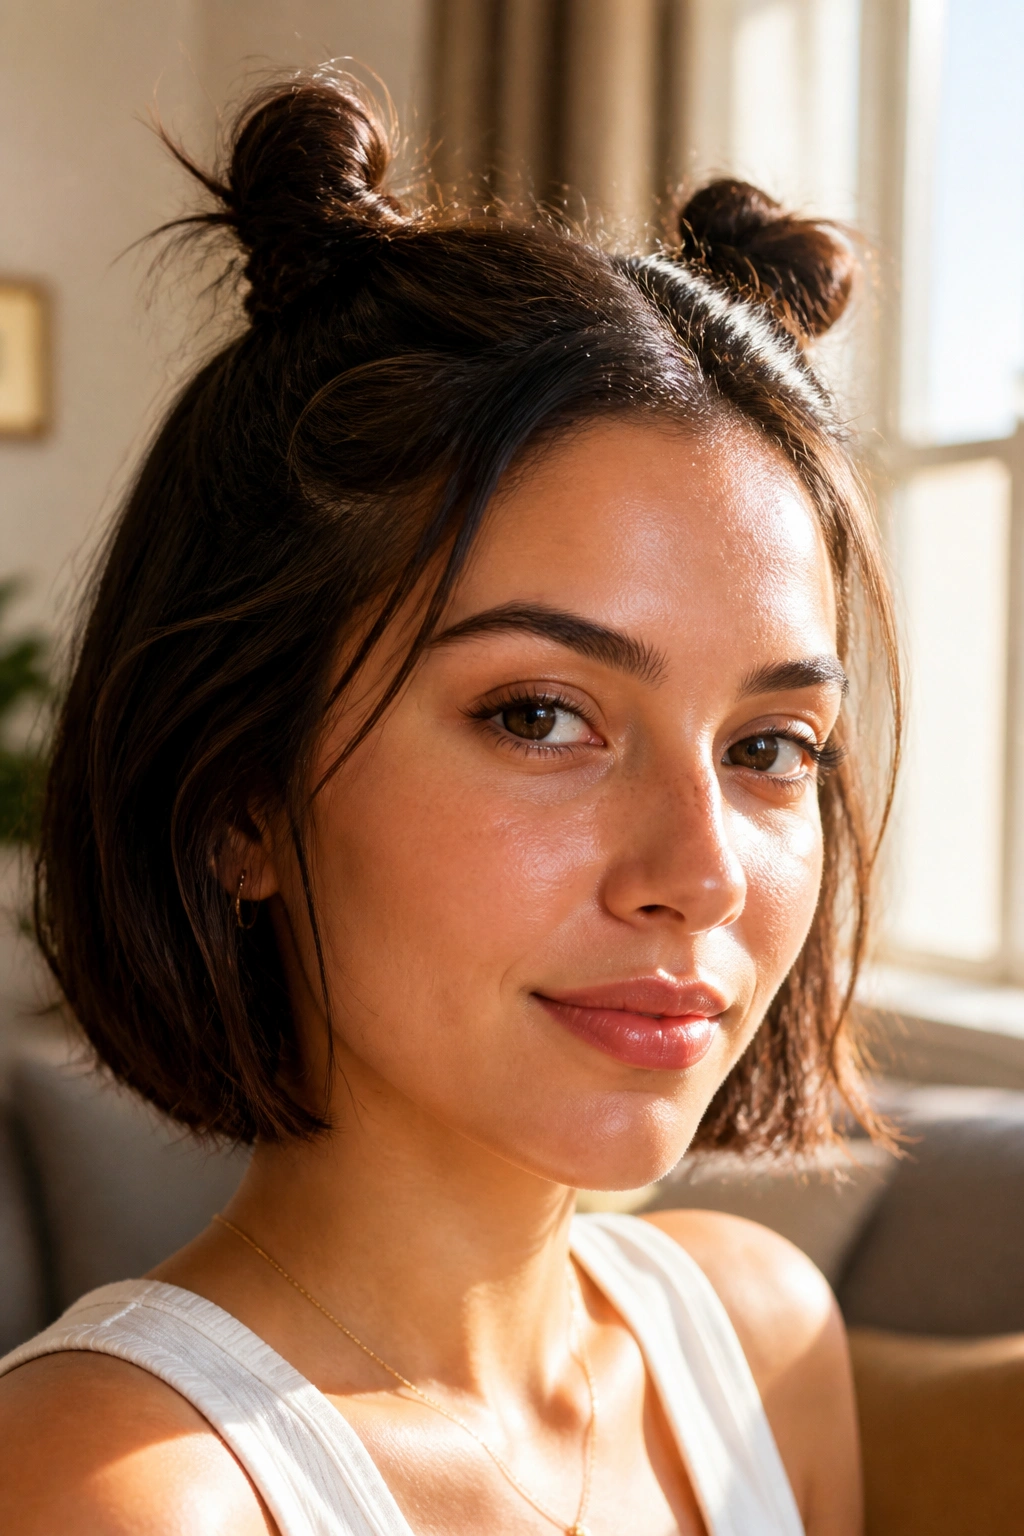
Mini space buns on a bob are playful without feeling like a costume, as long as the buns stay small. That’s the trick. With shorter hair, bigger buns can look stretched and awkward, while tiny buns sit close to the head and feel balanced.
Divide the top half of the hair into two sections, one on each side of the part. Twist each section into a small bun and pin or elastic it in place. Leave the bottom hair down and a little textured. That contrast is what makes the style cute instead of severe.
A little mess is welcome here. Pulling a few pieces loose around the hairline softens the look and keeps it from feeling too young or too neat. If your bob is thick, make the buns flatter and wider. If it’s fine, a bit of teasing at the base gives them enough body to hold.
This one has personality. Use it when you want the haircut to look a little mischievous.
18. Inside-Out Twist Crown
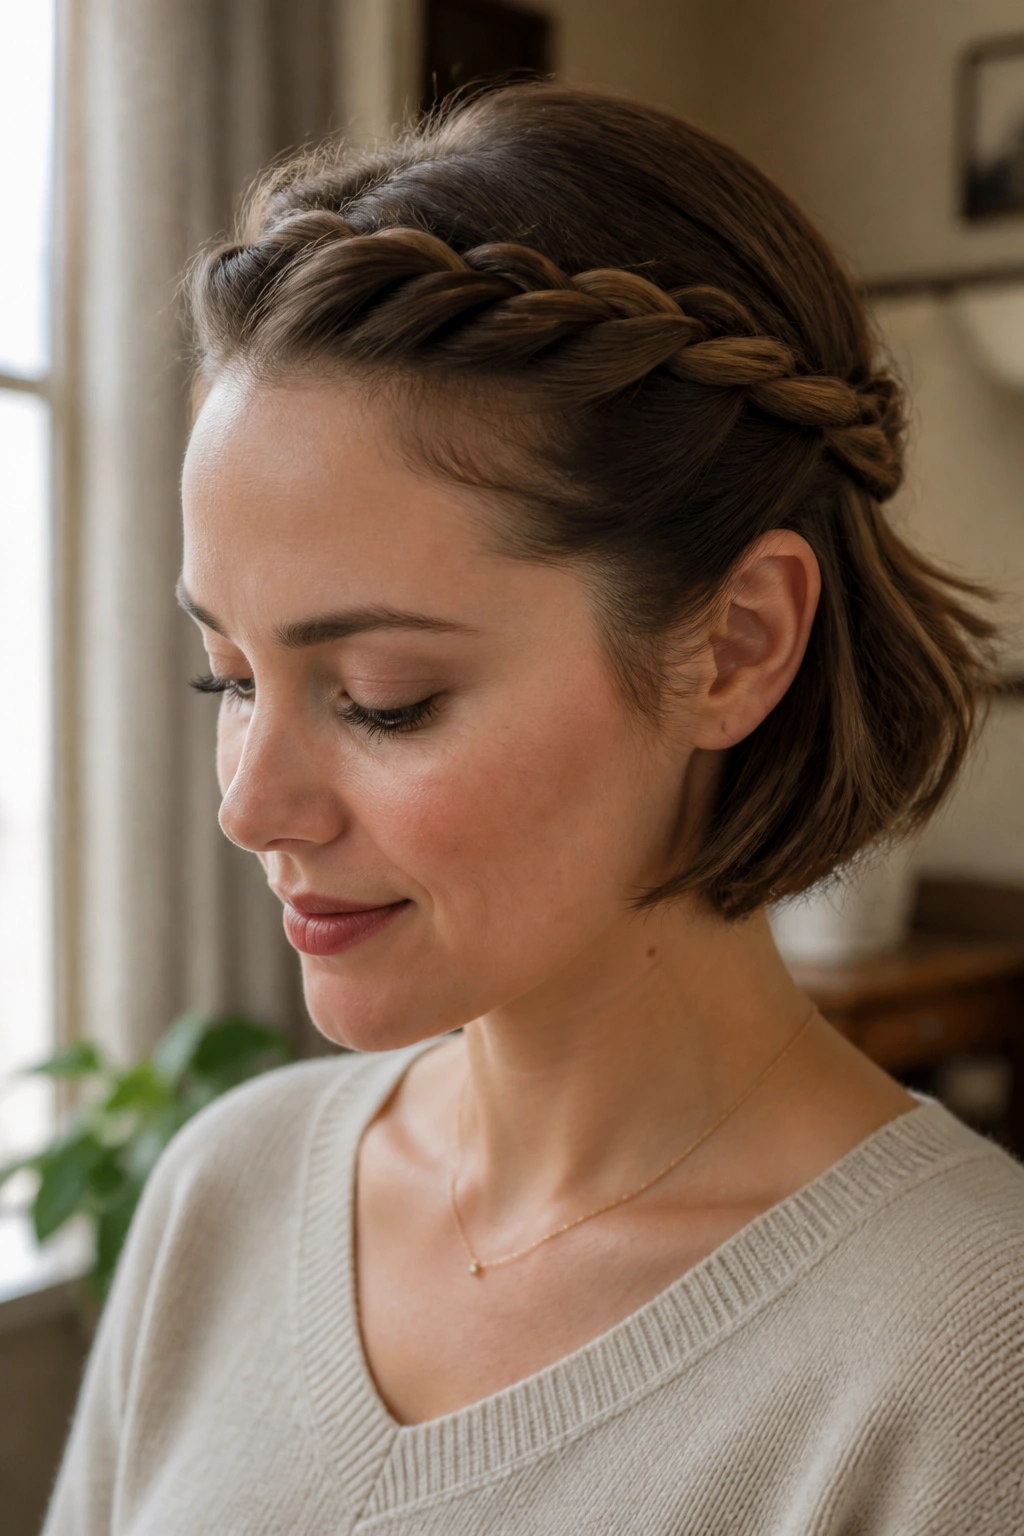
Twists are the answer for anyone who loves the idea of a braid crown but does not want to spend the time braiding. On bob length hair, they’re flatter, faster, and often easier to hide into the rest of the cut.
Take a 2-inch section from one side of the hairline, split it in two, and twist the strands backward over each other as you move toward the opposite side. Pin it behind the ear or at the back of the head. Repeat on the other side if you want a full crown effect. The result looks tidy without being fussy.
Best if you hate braiding
This style is ideal for fine hair, because the twist lies close to the scalp and does not need a lot of volume to make sense. It also works on hair that’s a little dirty, which is a bonus on day two. A light mist of texture spray before twisting gives the strands enough hold to keep the shape.
It’s not showy. That’s what makes it useful.
19. Curved Under Ends for Bob Length Hair
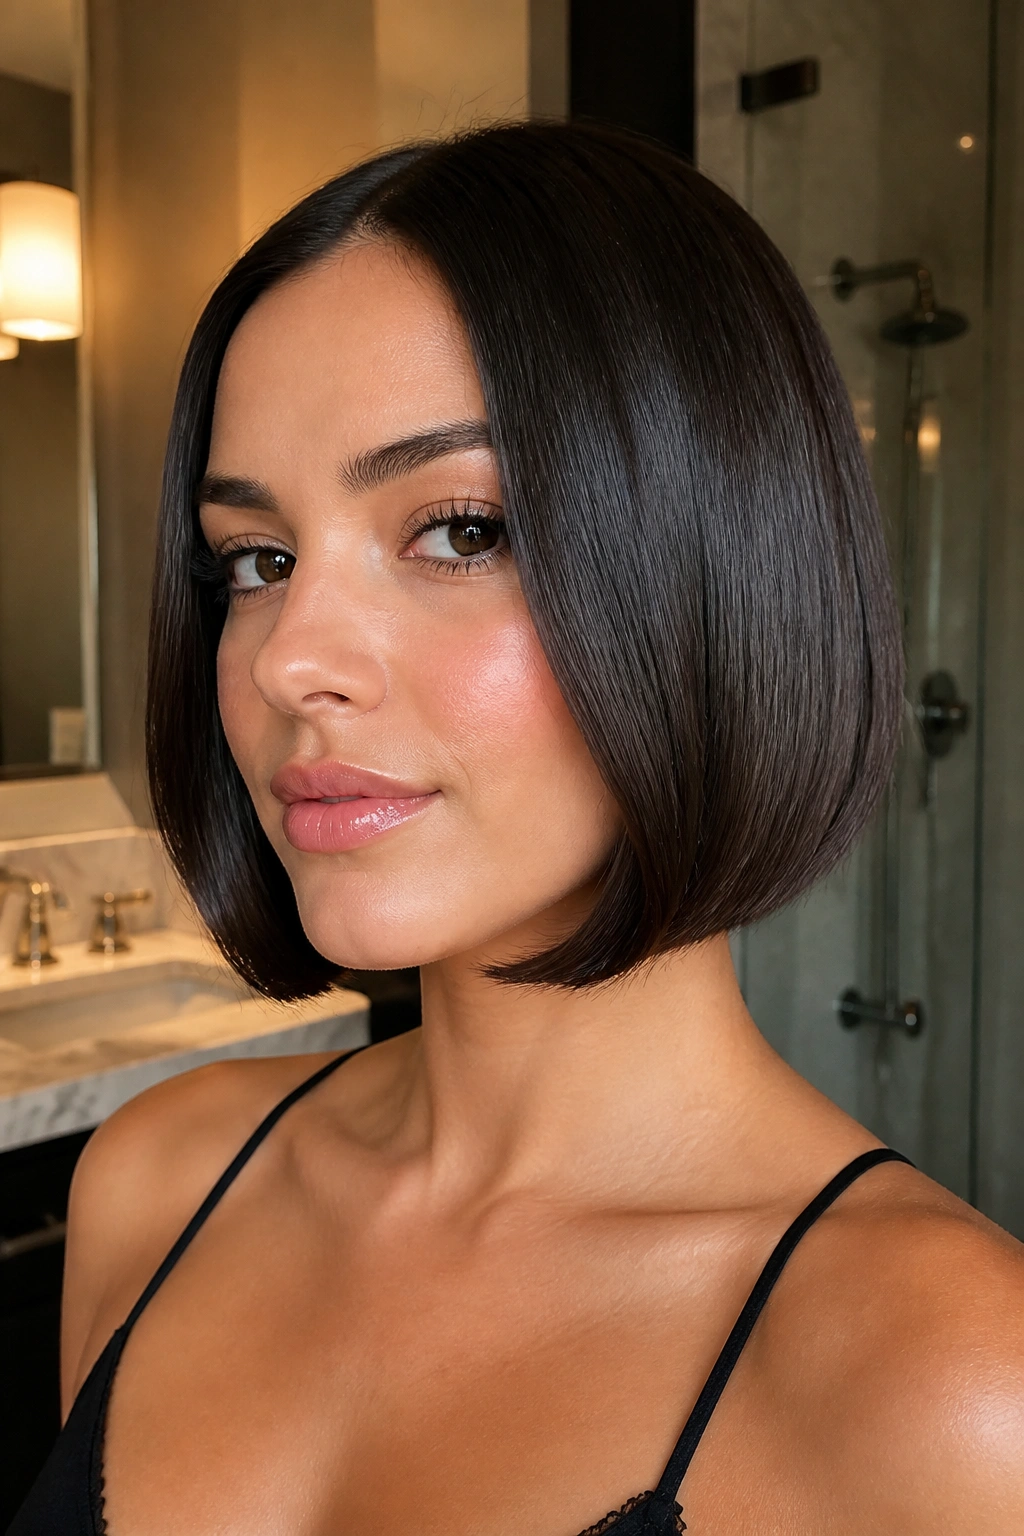
Curved-under ends are the polished version of a bob, and they never really go out of style because they make the haircut look deliberate. If your bob tends to kick out in odd places, this styling choice reins it back in.
Use a round brush while blow-drying or bend the ends under with a flat iron in small sections. The movement should follow the jawline, not flare away from it. That subtle inward curve gives the whole cut a cleaner silhouette and makes the neck look longer, which is a nice side effect.
How to get the curve
- Blow-dry the roots first for lift
- Smooth the mids with the brush
- Turn the ends inward at the last inch only
- Cool the hair in that position before letting go
This style works especially well for blunt bobs and collarbone-length lobs that need a more finished edge. It can also rescue a blowout that went a little too puffy. A flat brush and a touch of heat protectant usually do the job.
20. Pinned-Back Side Roll for Bob Length Hair
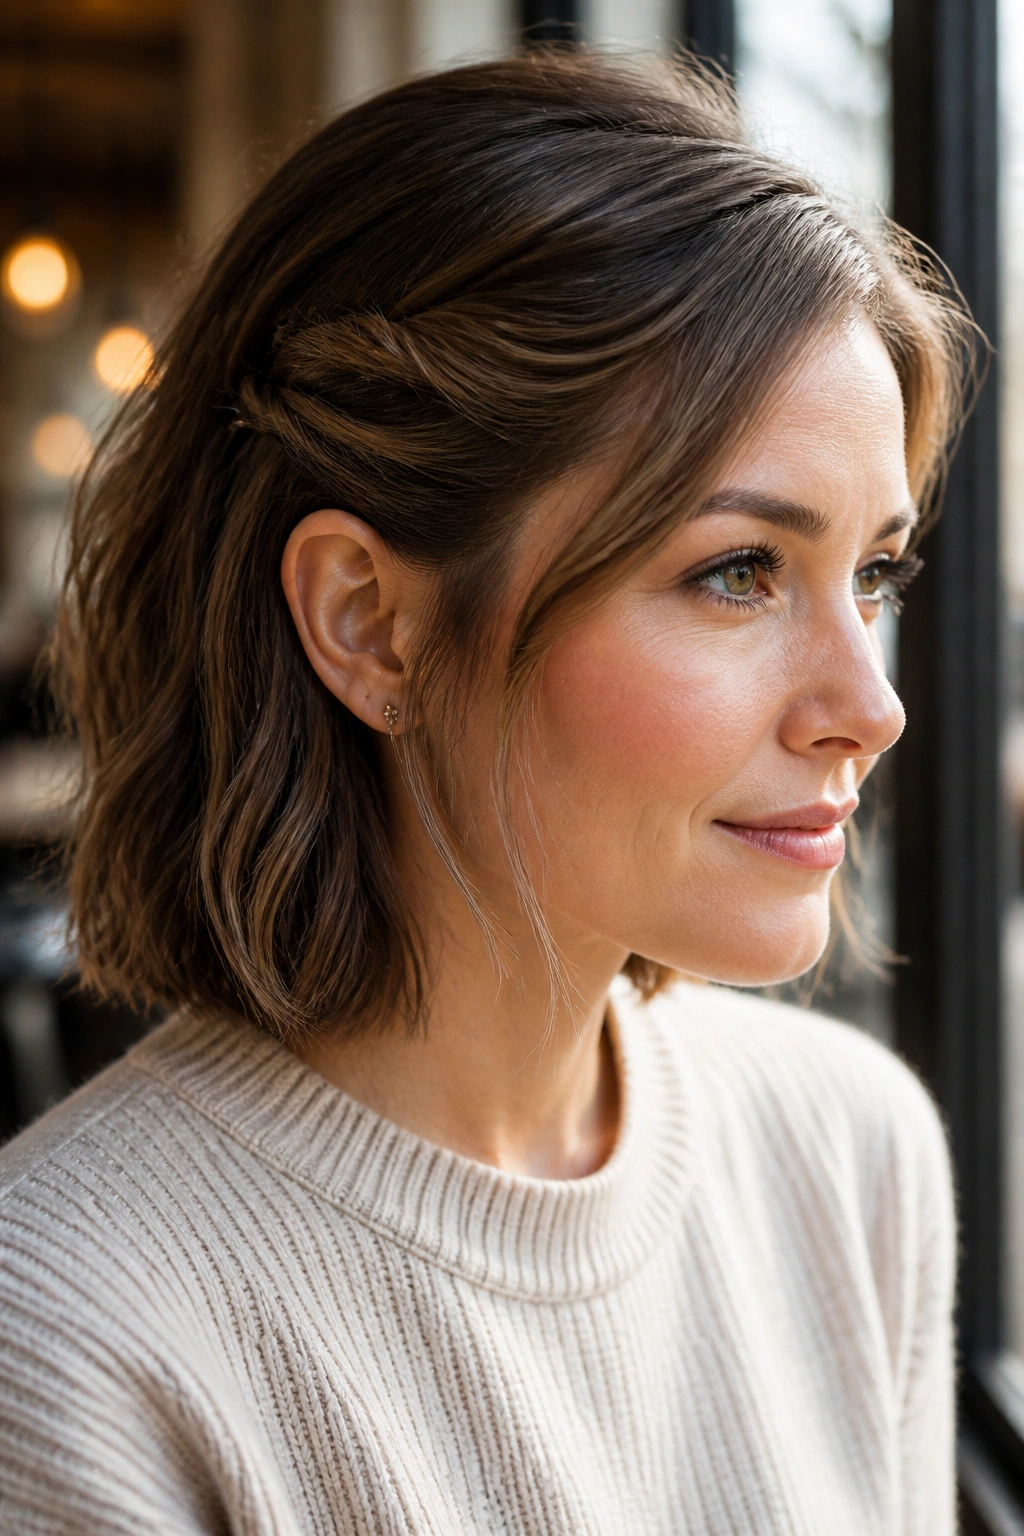
A side roll is the sort of style that quietly fixes a bad hair day. You take one side, roll it back toward the ear, pin it securely, and leave the rest of the bob smooth or lightly textured. Simple. Useful. A little old-school, in a good way.
The roll should sit close to the head, not puff out like a puffed-up wave from another decade. Two bobby pins crossed under the fold usually hold better than one. If the front layer is short, let it fall loose around the face and pin only the longer section behind it. That keeps the shape soft instead of rigid.
This style is one of my favorites for bob length hair because it works with almost any outfit and almost any texture. Straight hair looks neat, waved hair looks softer, and a layered bob gets a little movement where it needs it most.
A good bob doesn’t need much help. A little pin here, a little bend there, and it’s done.
