



Moon goddess hair looks have a sweet spot I keep coming back to: they feel soft enough for a field ceremony, but they still hold their shape once the dancing starts and the veil comes off. That is harder to pull off than people think. The styles that do it well usually lean on texture, a real part line, and one small piece of hardware — a comb, a pin, a ribbon — that gives the whole thing a point of focus.
Texture matters.
Boho brides usually do best with hair that looks touched, not sprayed into submission. A little grit at the roots, a few loose pieces around the temples, and curls that are brushed out after they cool can make the difference between hair that just looks nice and hair that feels deliberate. If you have ever watched a braid sag by cocktail hour, you already know why the base has to be pinned better than it looks from the chair.
The looks below stay romantic without drifting into costume territory. Some are braided, some are vintage, and a couple are neat enough for brides who want calmer lines with their lace or satin. The first one starts with the easiest kind of magic: waves, a center part, and one crescent comb placed where the eye naturally lands.
1. Moon Goddess Waves with a Crescent Comb
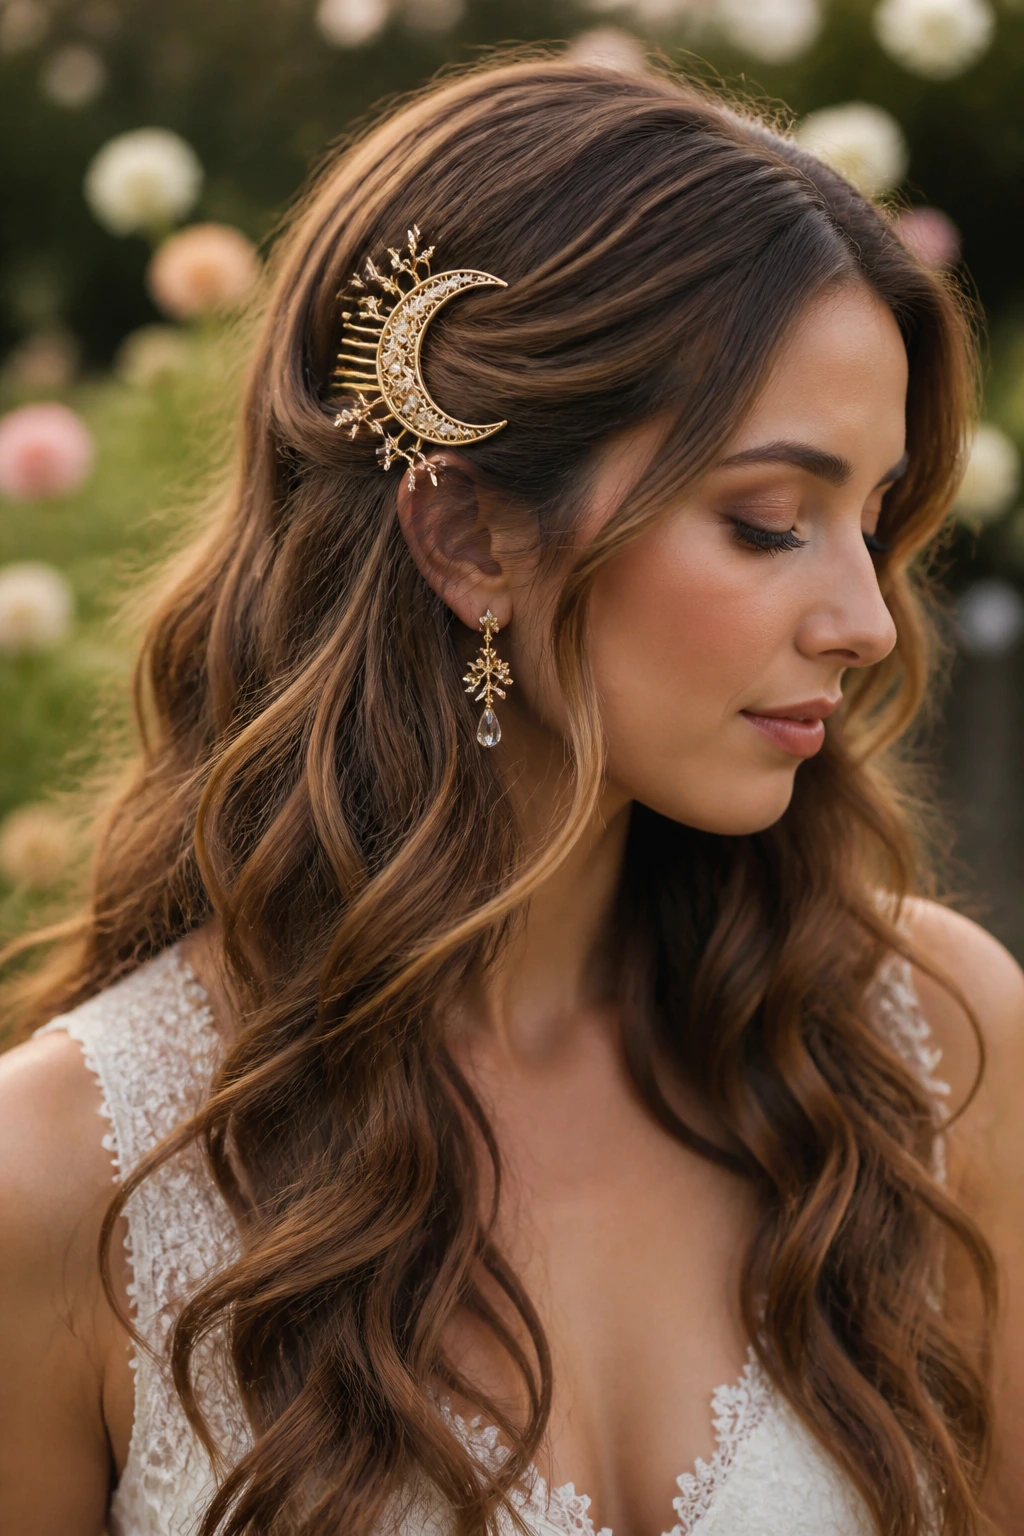
These are the moon goddess hair looks I reach for when a bride wants her hair down but not loose in the lazy sense. Soft, brushed-out waves give movement through the lengths, and the crescent comb turns the whole style into a finished shape instead of “I curled it and hoped for the best.”
Why it feels celestial
The comb does the heavy lifting here. Set it slightly off-center or just above one temple, and it frames the face without stealing the whole show. A wave pattern with a loose bend — not tight spirals — keeps the style feeling airy and not pageanty.
- Best on shoulder-length hair or longer, though a collarbone cut can work with smaller sections.
- A 1.25-inch curling iron gives a wave that still looks soft after brushing.
- Place the comb 1 to 2 inches above the ear line so it sits in the visual center of the hair.
- If your hair is fine, prep the roots with a light mousse and a quick blast of dry shampoo for grip.
Tip: Put the comb in after the hairspray has set for about 60 seconds. If you insert it too early, it slides; if you wait until the hair is stiff, it leaves a dent.
2. Braided Crown with Loose Ends
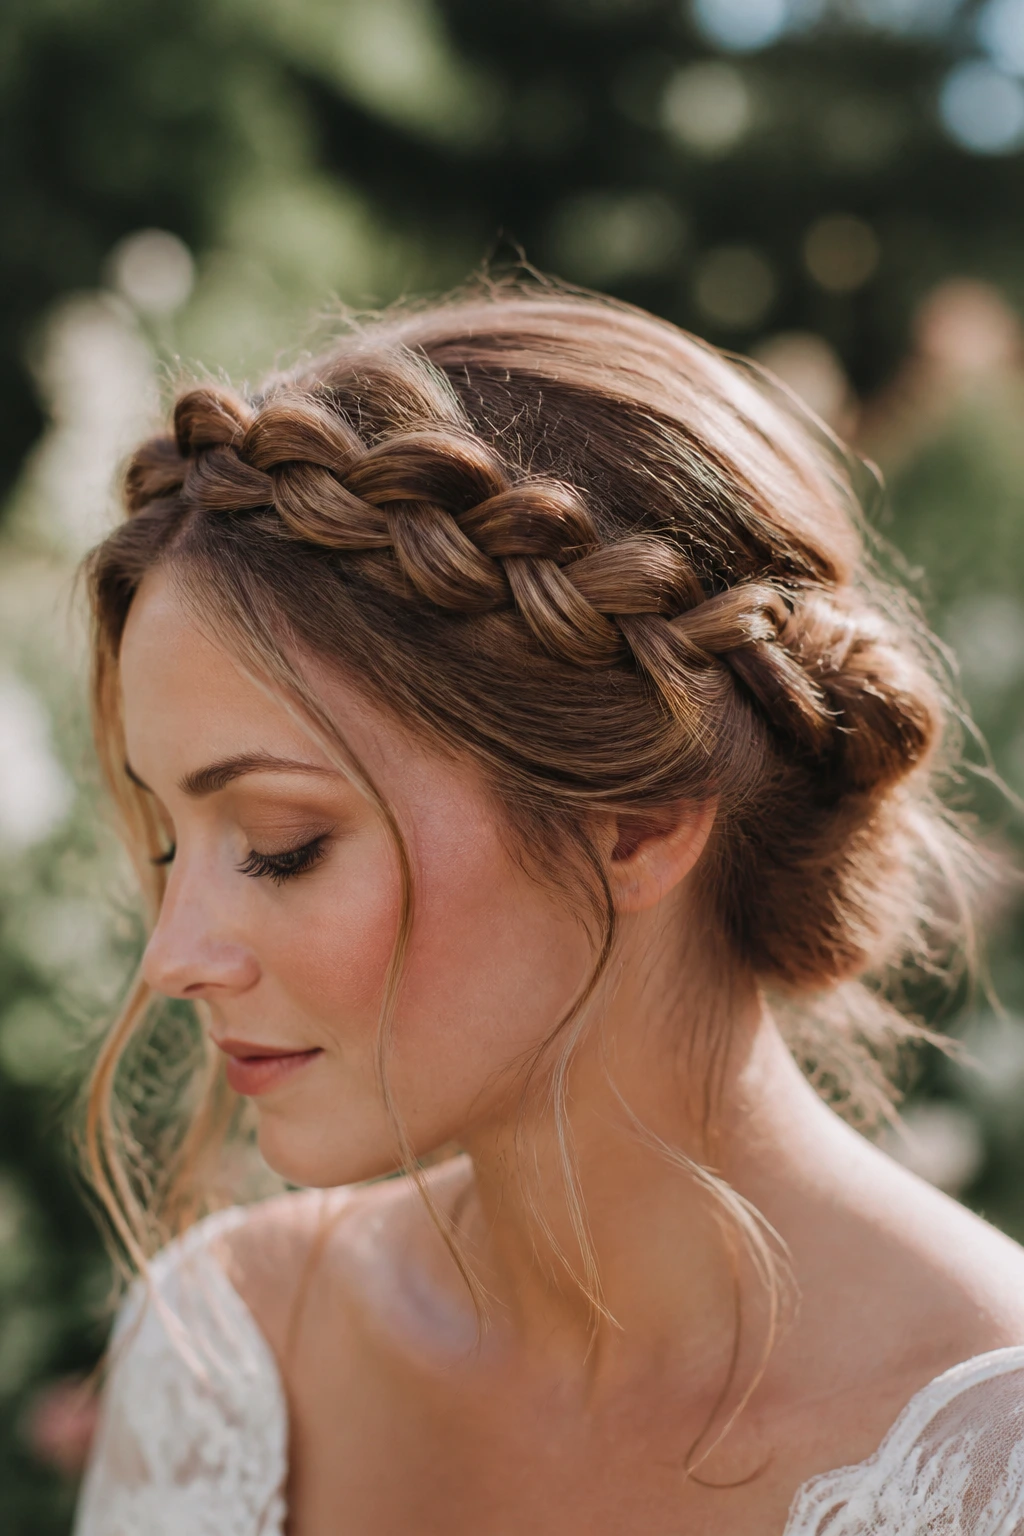
If you want one look that stays put from vows to last dance, this is it. A braided crown wraps the head in a way that feels grounded and calm, which is a nice counterpoint to a floaty dress or a very soft veil.
The braid itself should not be pulled so tight that it turns formal. Leave the weave a little airy, tuck the ends under at the nape, and let a few small pieces fall around the ears. That tiny bit of looseness keeps the look from reading like a stage costume.
I like this especially for brides with medium to thick hair, because the braid has enough hair to look full even after you pinch it wider with your fingers. If your hair is finer, braid from behind the ears rather than starting too high on the head. It gives the crown more weight where you need it.
It is not a fussy style. It just looks like it took care.
3. Half-Up Rope Twist with Pearl Pins
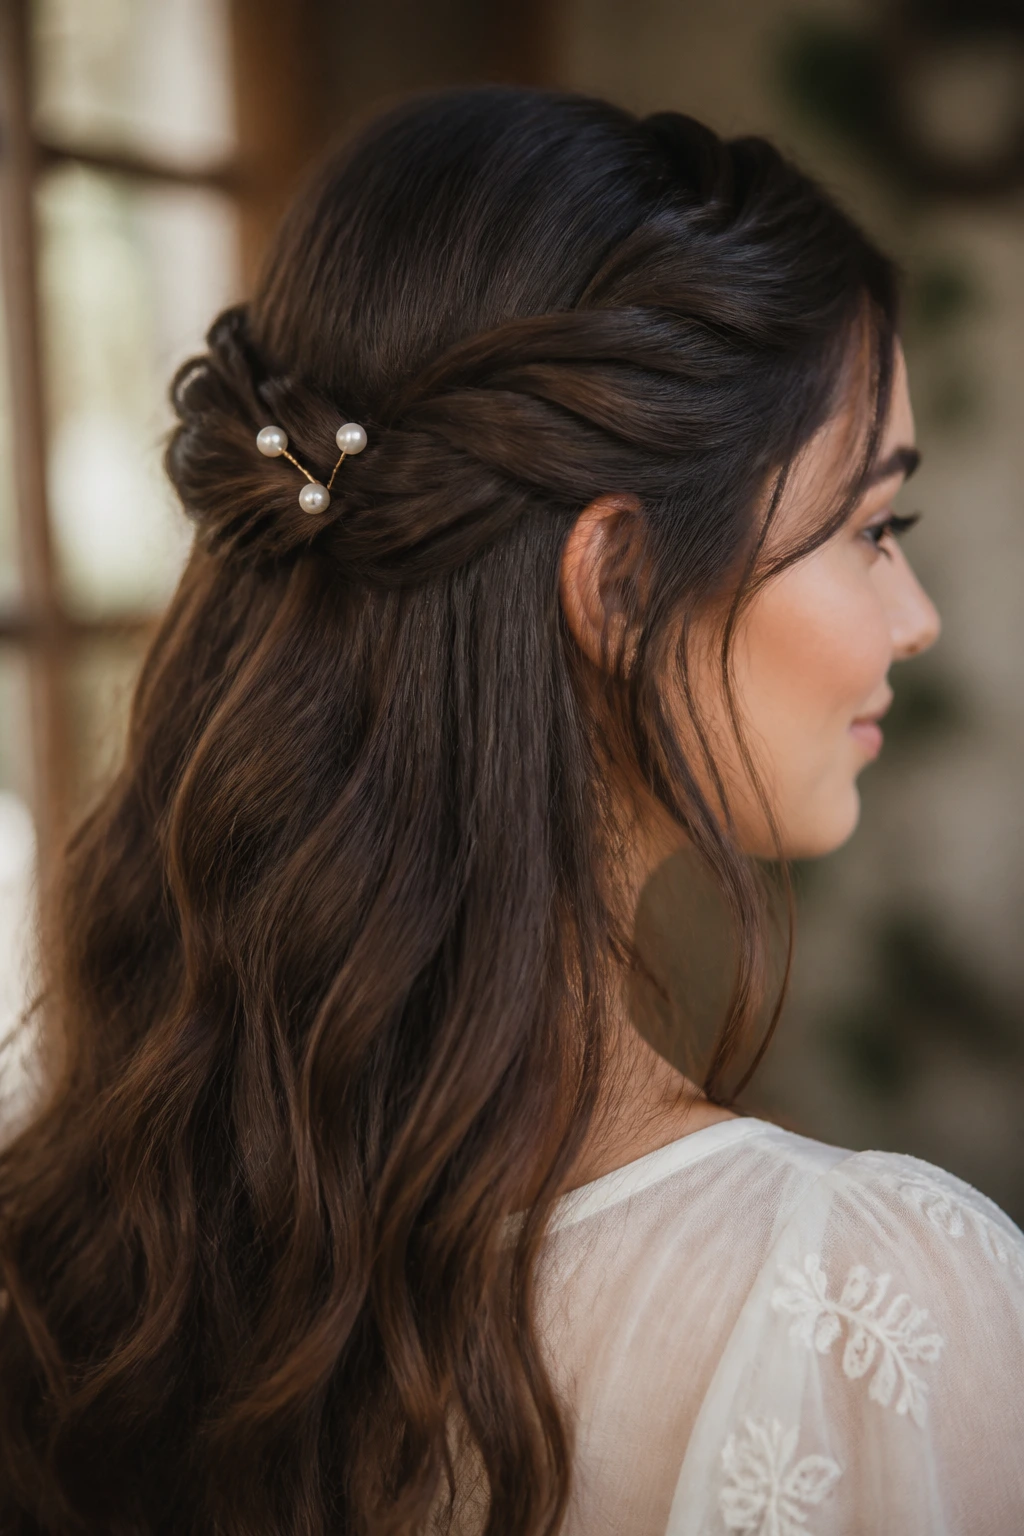
Why does a rope twist feel so right on a boho bride? Because it gives you lift at the crown without locking the whole style into place. The ends stay free, the face stays open, and the twist itself has a natural curve that pairs well with lace, gauze, and anything with a little movement.
How to wear it
Work with two 1-inch sections from each side, twist them away from the face, then cross them at the back and anchor them with two pearl pins in a shallow V. That V shape matters more than people expect. It makes the pin cluster look intentional, not accidental.
This style is especially good if your hair is straight and tends to collapse when fully down. The rope twist gives the crown some shape, while the rest of the hair can still fall in soft bends. If you have a long face, keep the twist low and let the front pieces skim the cheekbones.
A light mist of flexible hairspray is enough. Heavy spray makes the twist look hard, and that kills the charm fast.
4. Low Twisted Chignon with Face-Framing Tendrils
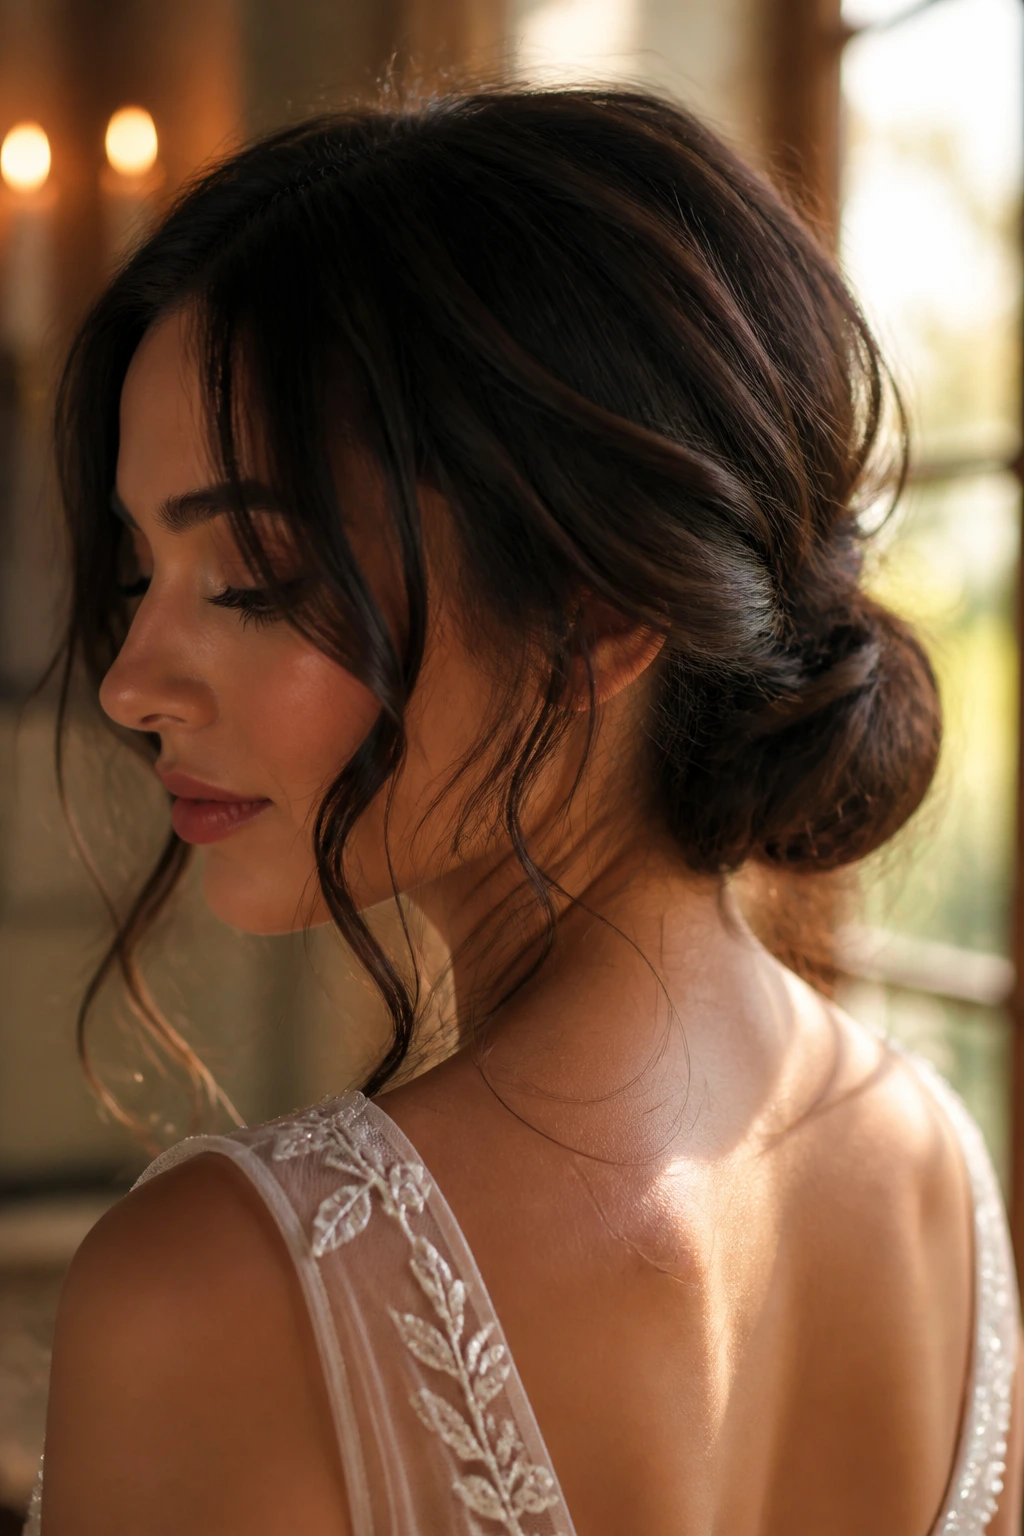
Picture a ceremony that starts in late afternoon and slides into candlelight. The low twisted chignon fits that whole mood without needing a single dramatic move. It sits at the nape, stays neat through hugs, and still leaves room for those little face-framing strands that make a bridal style feel lived in.
The shape works best when the twist is gathered low and slightly off-center, then pinned into a soft knot rather than a perfect ball. A couple of U-pins — the forked kind — hold the knot better than a wall of bobby pins, which can start to feel pokey after a few hours. Curl the tendrils with a 3/4-inch iron so they bend, not bounce.
- Keep the knot at the nape, not mid-head.
- Leave two tendrils on each side if your dress has a square or sweetheart neckline.
- Smooth the crown with a boar bristle brush before pinning.
- Use a tiny opal comb if you want the moon-goddess note without adding height.
That last part matters. A lot.
5. Side-Swept Fishtail Braid
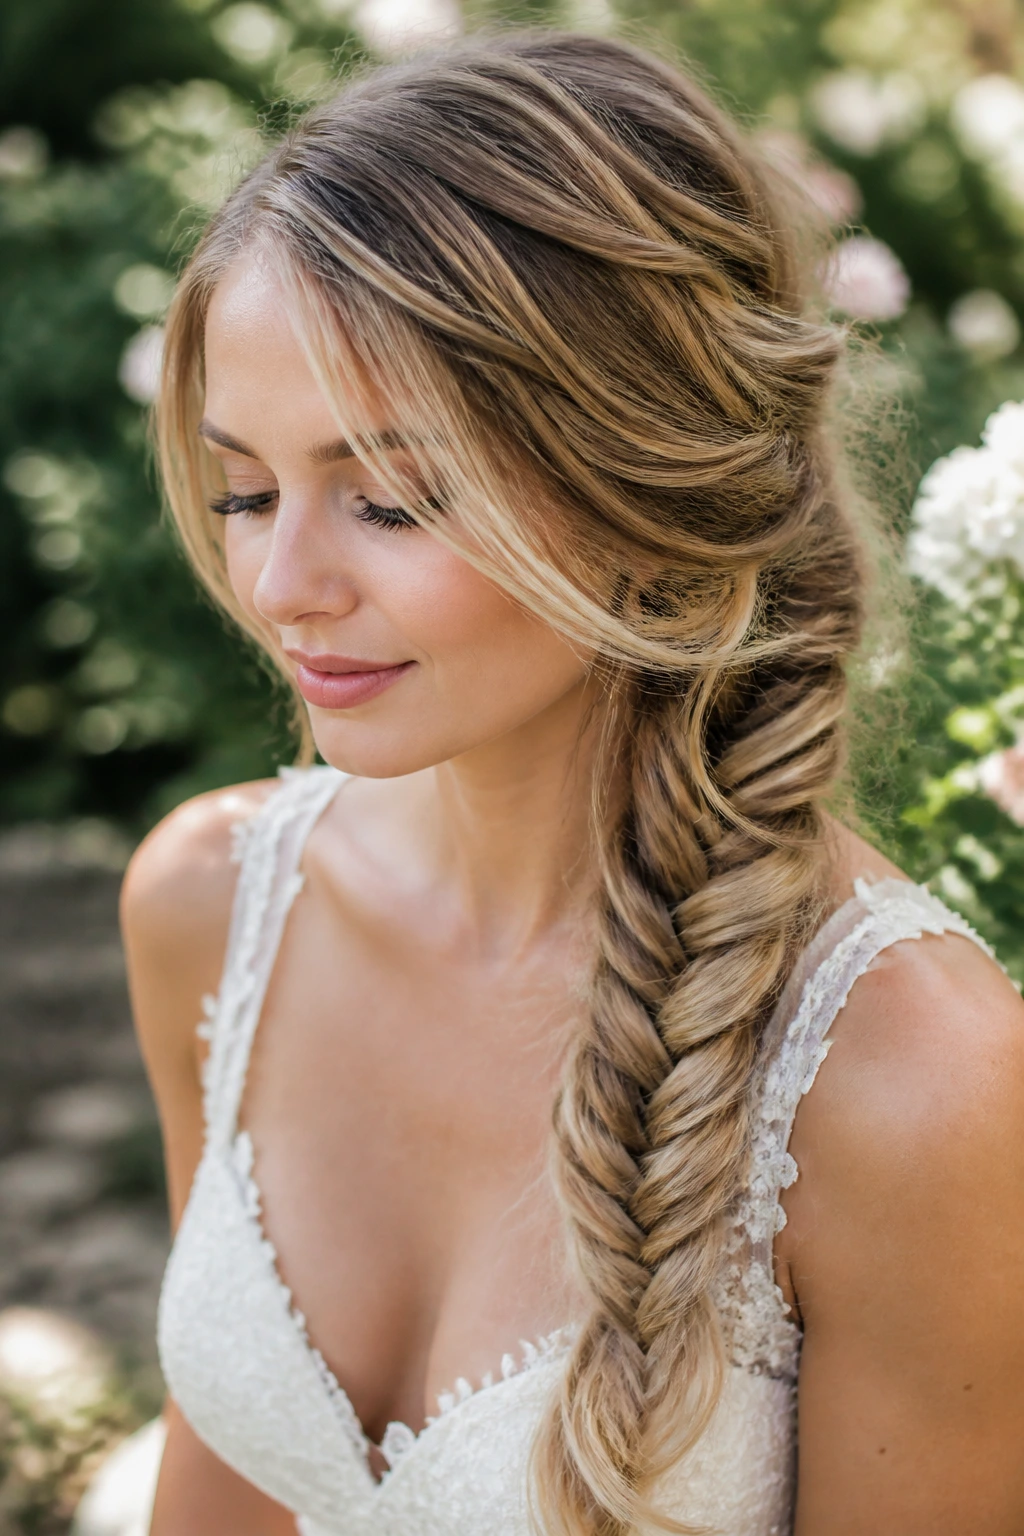
Side-swept braids can look precious if you pull them too tight. This one doesn’t.
A loose fishtail gathered over one shoulder has enough texture to feel boho, and enough structure to avoid looking sloppy. Start with a soft side part, gather the hair low behind one ear, and braid the tail in a fishtail pattern all the way down. Then pinch the braid wider, one inch at a time, so it gets that full, woven look instead of a skinny rope.
What I love here is the shape around the neckline. It shows off drop earrings, especially if the braid drapes over one shoulder and leaves the other side open. That asymmetry feels less expected than a center style, and it works well when the dress has detail on one side or a low back with a lot going on.
A few small pieces pulled free around the temple stop the braid from feeling too tidy. That little messiness is the point. Without it, the braid can look too school-dance, and nobody wants that on a wedding day.
6. Milkmaid Braid with Soft Fringe
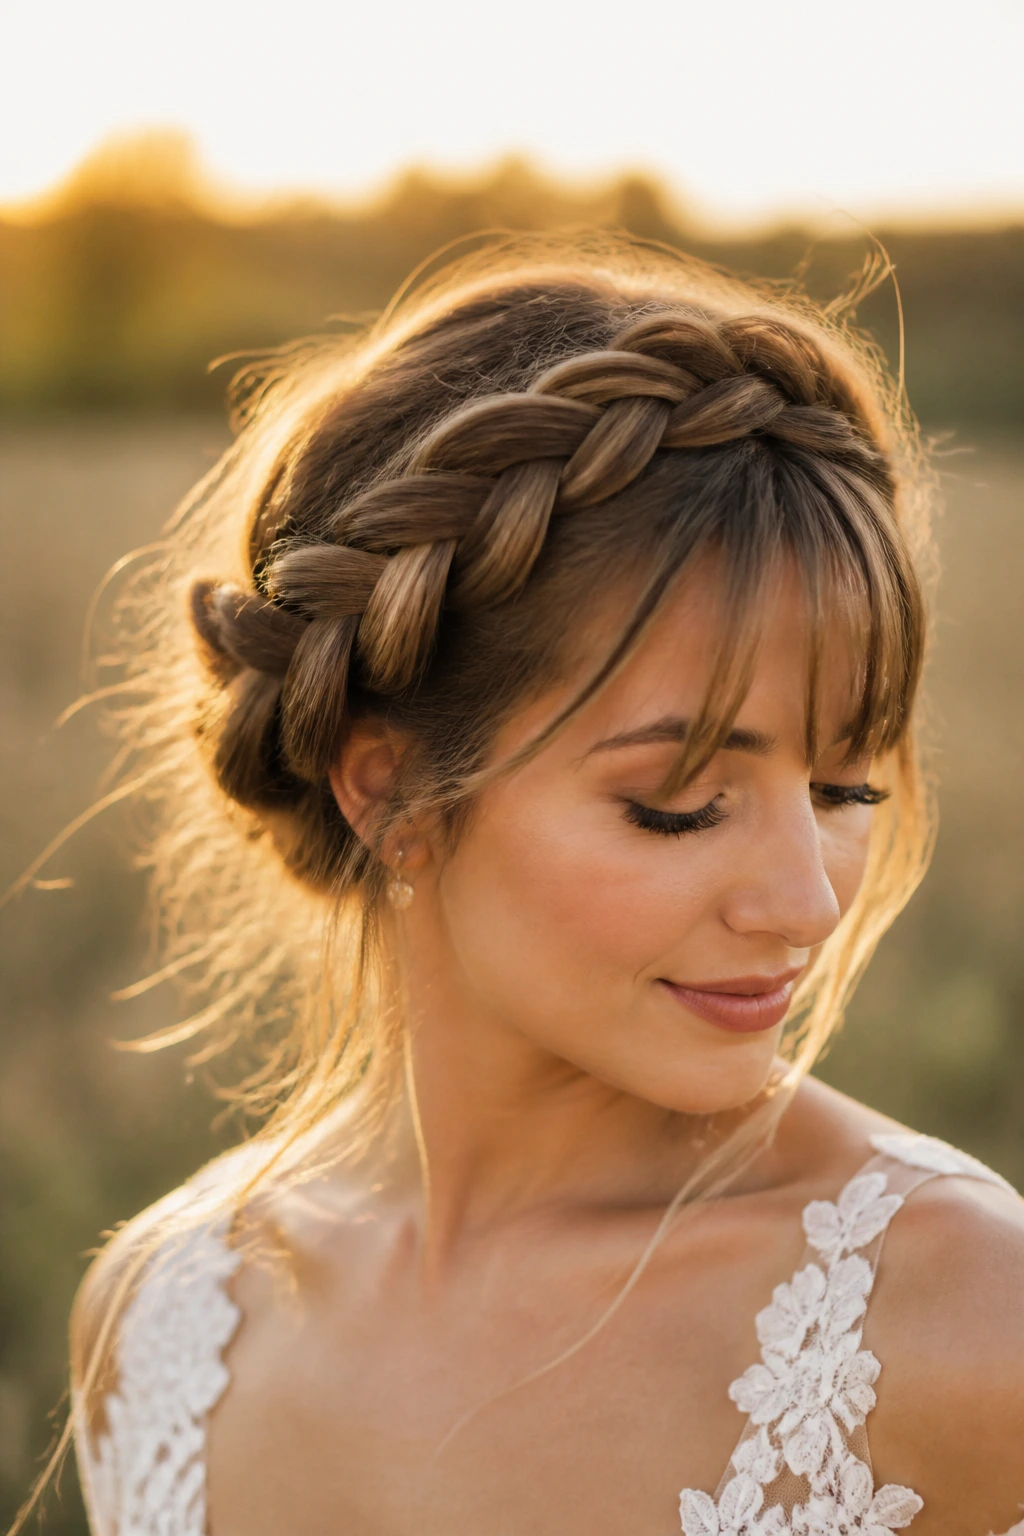
Unlike a tight milkmaid braid, this version sits lower and leaves room around the temples. That space matters. It keeps the style from feeling costume-like and lets a soft fringe or curtain bangs do some work around the face.
This is one of the best boho bride hairstyles if you want a vintage nod without going full retro. The braid wraps around the head, but it should look a little relaxed, almost as if it settled there on its own. If your hair is layered, braid a touch lower behind the ears so the shorter pieces can blend instead of poking out.
A soft fringe changes the whole mood. It takes the braid from “classic village bride” to something more romantic and a little undone. If you do not have bangs, two thin face pieces clipped away from the face and curled at the ends can do the same thing.
I’d pick this look for an outdoor ceremony, especially if you know the wind is going to have opinions.
7. Braided Low Ponytail with Ribbon
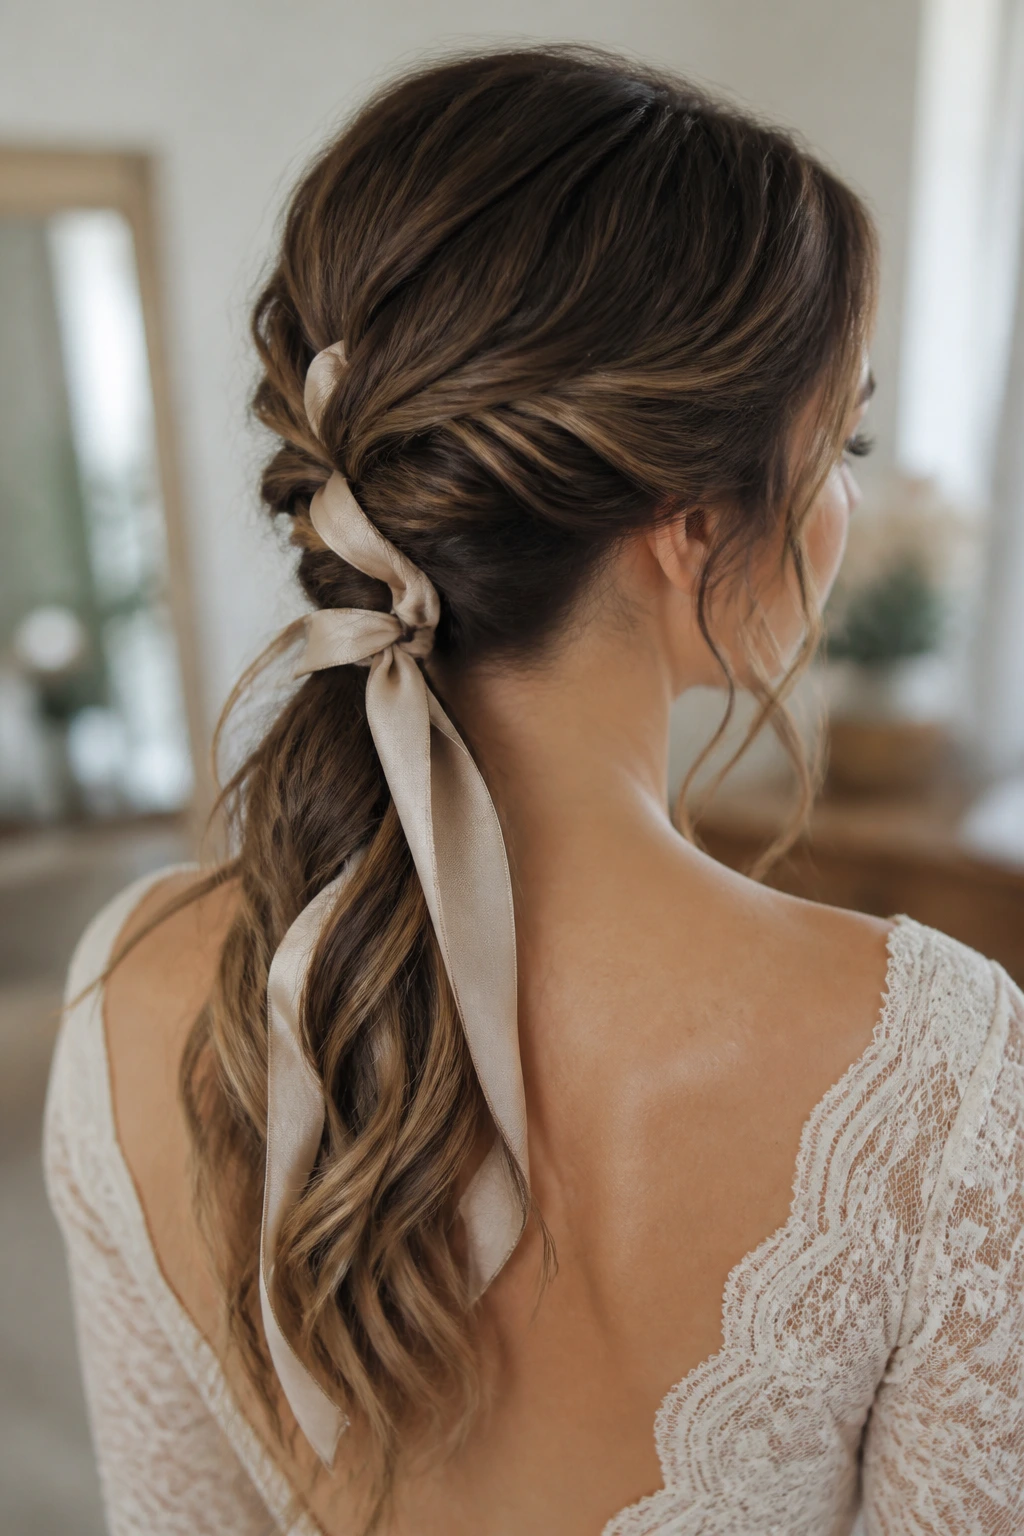
A braided low ponytail sounds simple. It is, but that is also why it works.
What the ribbon changes
The ribbon is not filler. It changes the entire read of the style. A 3/4-inch to 1-inch ribbon in silk or velvet softens the ponytail, and it gives the braid a bridal finish without adding a lot of bulk. Ivory is safe, but muted rose, sand, or a dusty gold can look richer against warm hair colors.
- Tie the ponytail at the nape, not in the middle of the head.
- Braid the tail loosely so the rope has a little softness.
- Use ribbon that is at least 18 inches long so you have enough to tie and tuck.
- Hide the elastic under a wrapped section of hair before adding the ribbon.
Tip: Let the ends of the ponytail keep a bend or wave. A pin-straight tail can look severe, and this style needs a little movement.
This one is especially good for brides who want something easy to carry from the ceremony into the reception. It stays neat enough for photos, but it never feels stiff.
8. Messy Top Knot with Moonlit Tendrils
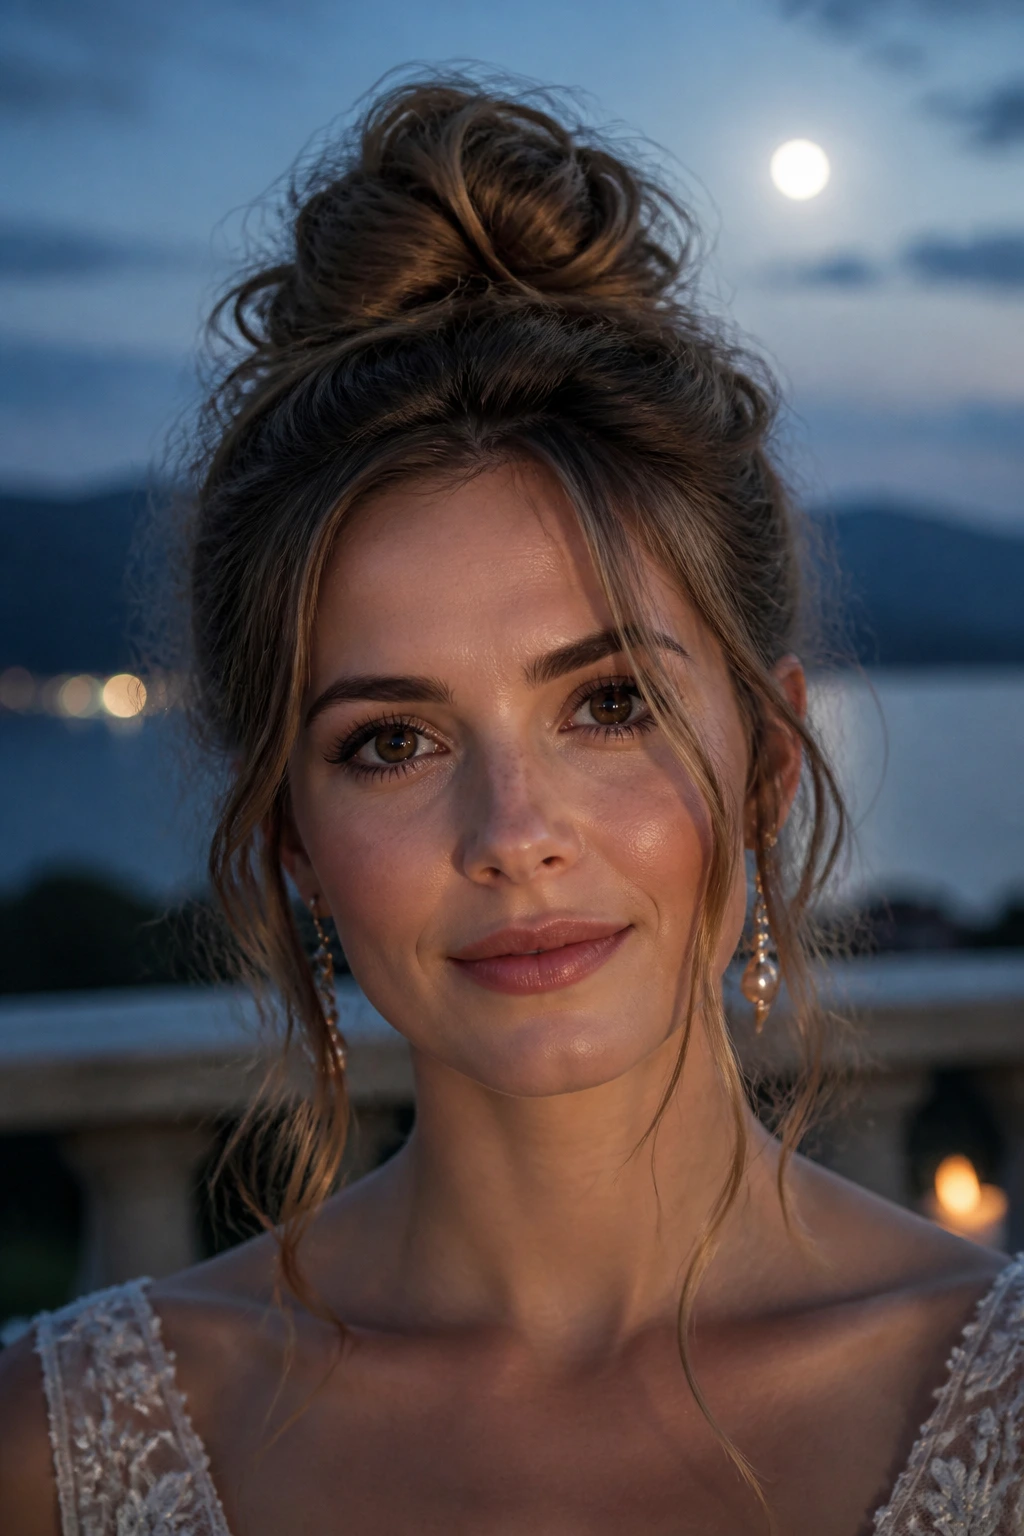
A messy top knot can look lazy. Or it can look intentional, which is a different thing entirely.
The difference comes down to how the base is built. Gather the hair high, twist it once or twice, and pin it with four to six bobby pins that lock into the twist from different angles. Then loosen the outer edges with your fingers until the knot looks soft instead of sculpted. The tendrils around the face should be thin, not chunky, and they should fall just past the cheekbone or jaw.
This is the look I like for brides with shorter hair, brides in warmer weather, or brides who want the second half of the day to feel lighter than the first. It also works beautifully with moon-shaped clips tucked into one side of the knot. The accessory gives it the themed note, while the knot keeps it grounded.
The danger here is over-teasing. Too much height and the style starts to look like a prom updo. Keep it touchable.
9. Waterfall Braid with Loose Waves
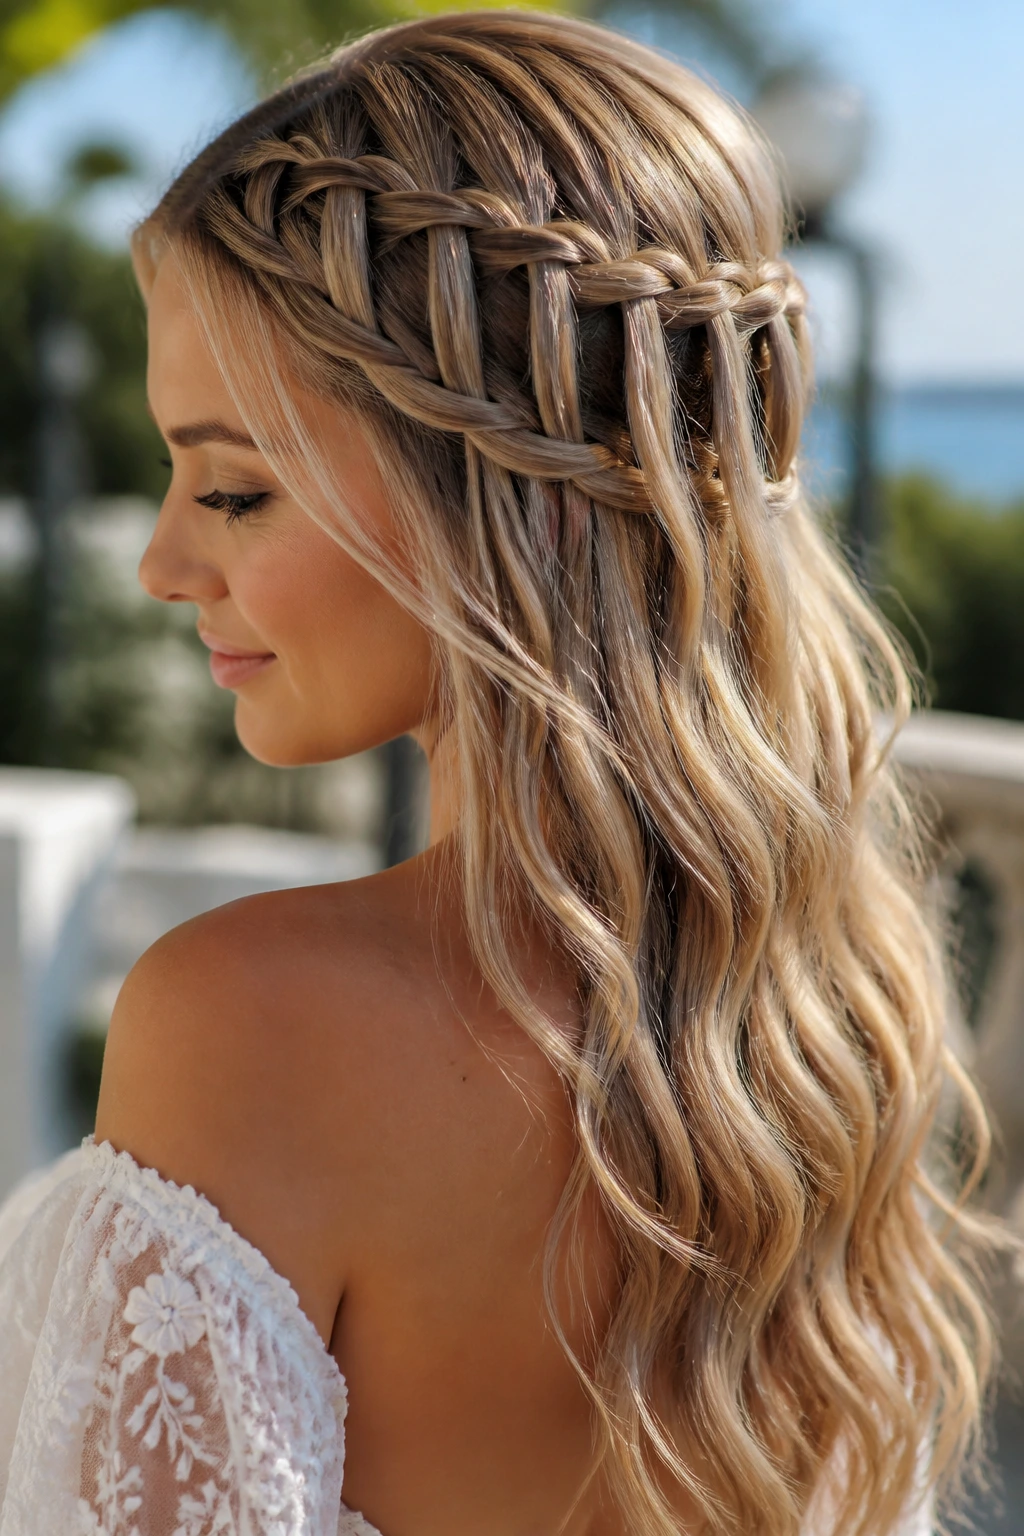
What makes a waterfall braid feel softer than a regular half-up braid? The dropped sections. They break the line of the braid and let the rest of the hair keep moving, which is exactly what a boho bride usually wants.
The braid itself should sit along the crown or upper temple, then release small pieces as it moves across the head. Those released strands blend into loose waves underneath, so the braid reads almost like jewelry woven into the hair. On highlighted hair, the pattern shows up even better because the light catches the folded pieces.
How to keep the drops visible
Start with hair that has a little texture already. A flat, freshly washed base makes the braid harder to hold, and the little cascade pieces can slip out before you finish. Curl the loose lengths first, then braid through them so the drops sit on top of the wave instead of disappearing into it.
A tiny clear elastic at the end keeps the braid from loosening near the temple. After that, a couple of silver pins or a crescent barrette give the whole thing its moon-goddess edge. It is delicate. Not fragile.
10. Double Braids into a Low Bun
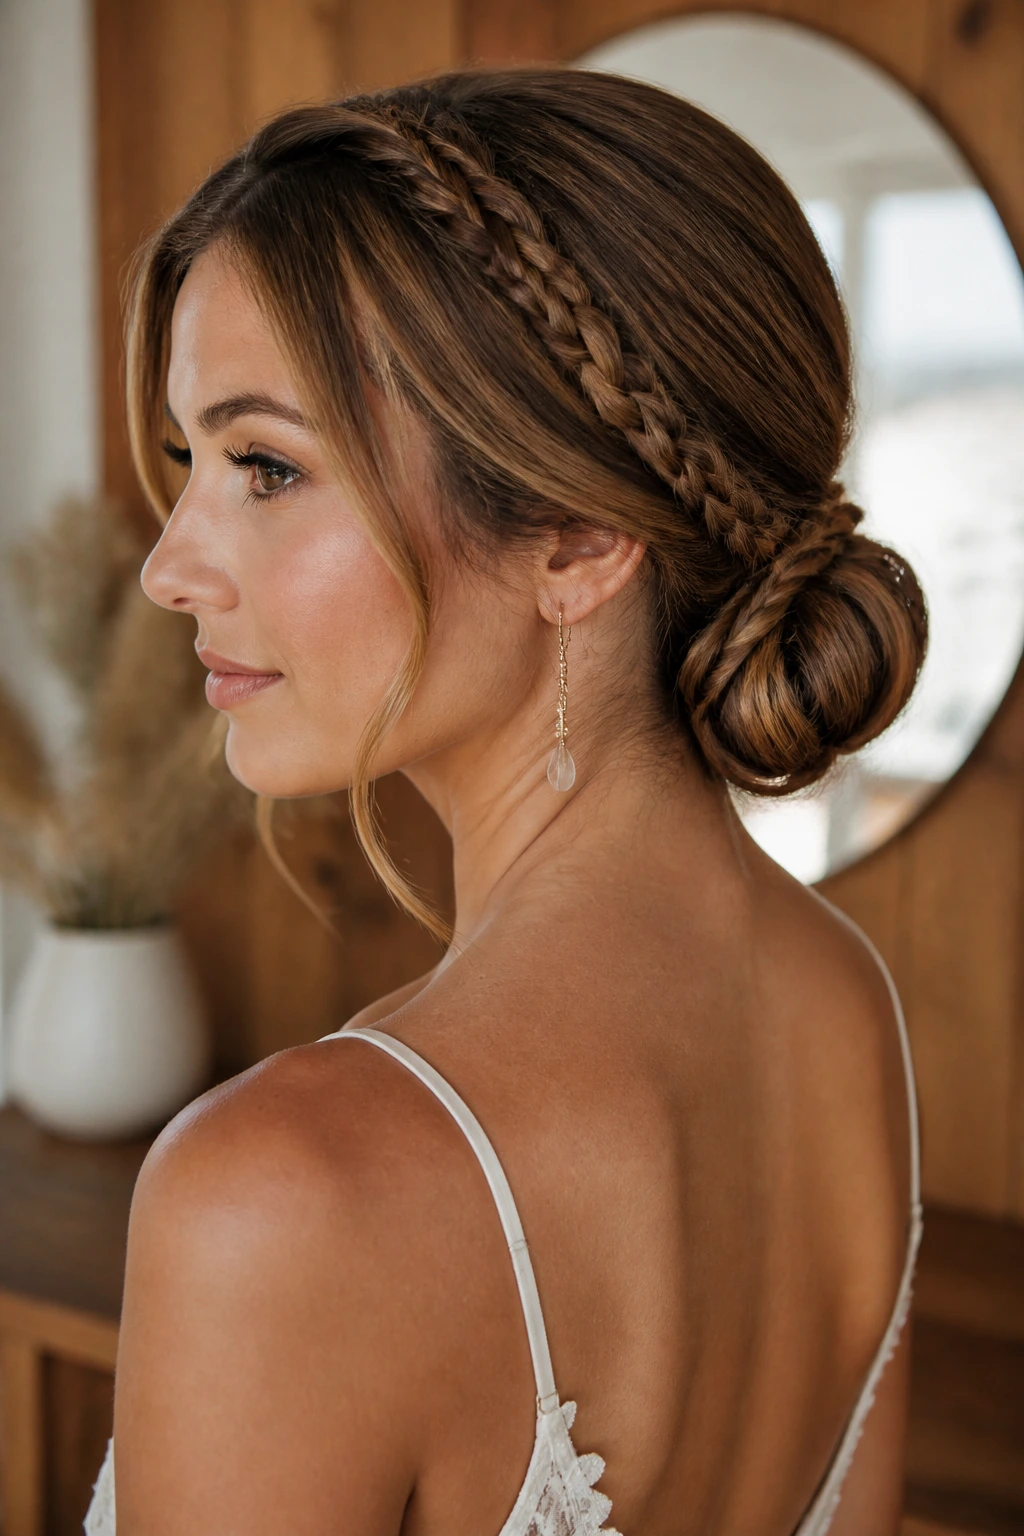
A bride with waist-length hair and a cathedral veil usually needs more control than romance. This style gives both.
Two slim braids, one from each side of the head, feed into a low bun at the nape. The front stays tidy, the back gets texture, and the bun itself can be pinned flatter or fuller depending on the dress. I like this look on thick hair because the braids keep the length from feeling bulky. On finer hair, a bit of padding under the bun can help it hold its shape.
- Part the hair down the center for a balanced finish.
- Braid each side to just behind the ears before gathering the rest.
- Twist the ends into a knot instead of coiling them into a ball.
- Secure with 8 to 10 bobby pins if the hair is heavy or layered.
A few dried flowers tucked near one braid can push it into boho territory fast, but keep the cluster small. Too many blooms, and the bun starts to look like a flower market.
11. Vintage Finger Waves with a Side Clip
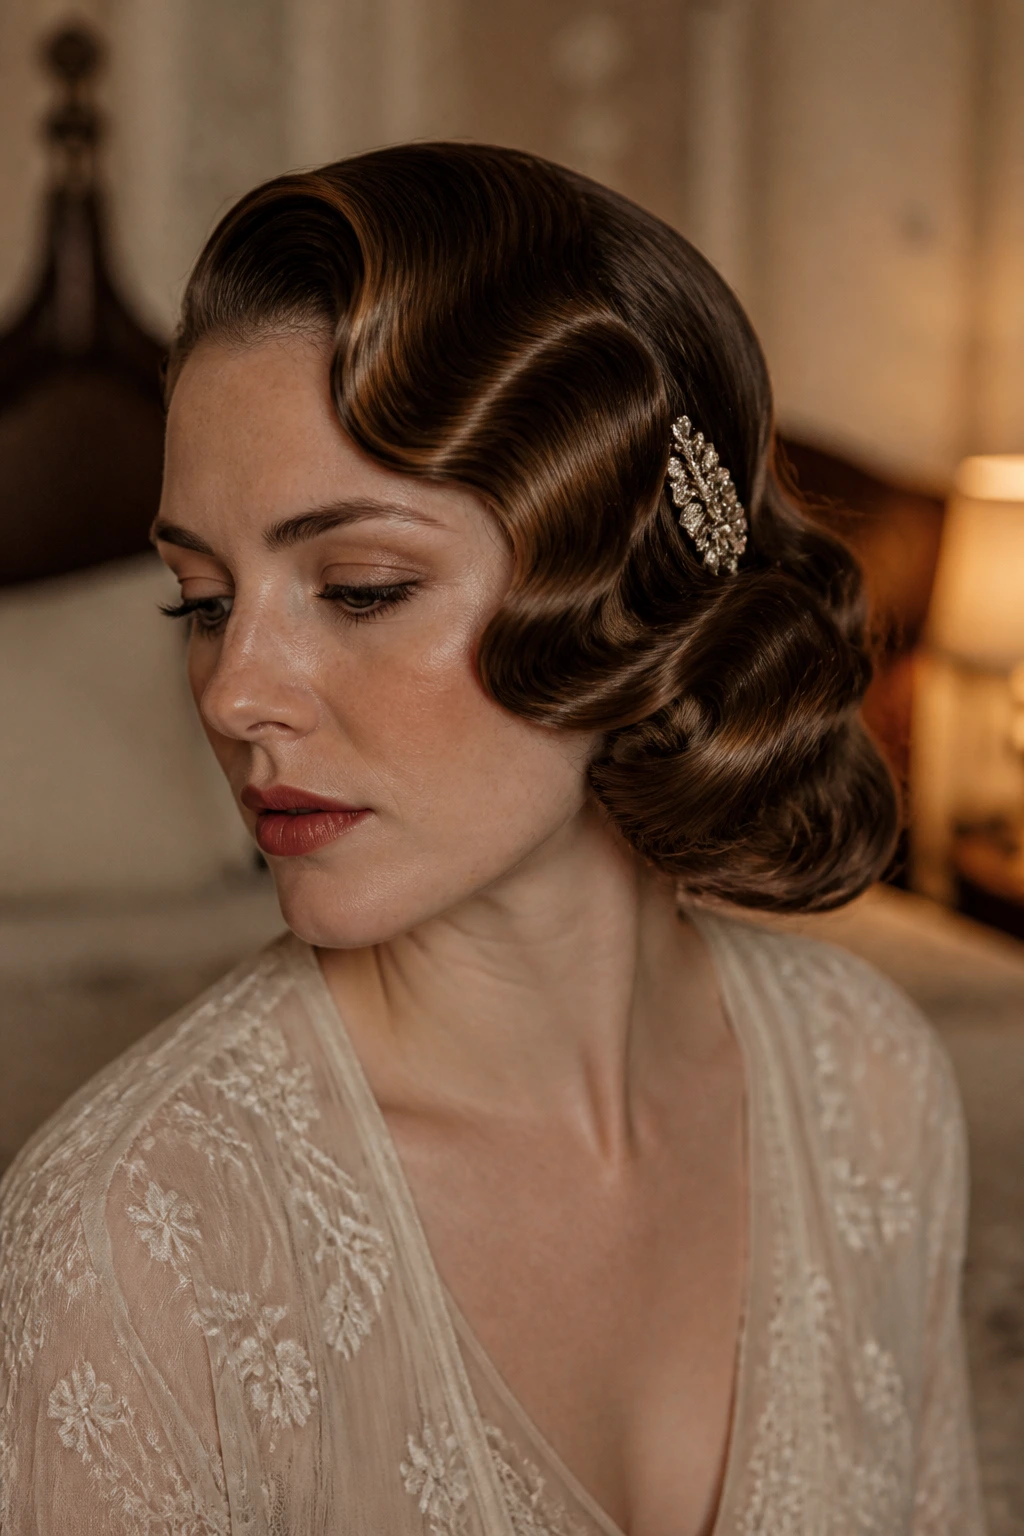
Finger waves change the whole mood. One slim wave pressed across the front of the head can make a boho dress feel sharper, which is useful when the fabric already has soft drape and you need a little contrast.
This is the most vintage-leaning look in the group, and I like that it does not try to hide it. A side clip with a moonstone, pearl, or brushed silver finish can carry the celestial theme without forcing the rest of the hair to compete. If you have short hair, the waves can be the whole style. If your hair is longer, finger waves across the front with a low knot or loose back length is the cleaner move.
The setup matters. Use setting lotion or a strong styling cream on damp hair, shape the waves with a fine comb, and clip each ridge until it dries. That part takes patience. There is no way around it. But when the ridges dry cleanly, the hair has that polished, sculpted look that photographs well from every angle.
It is a bolder choice than loose curls, and that is exactly why it works.
12. Twisted Half-Crown with Baby’s Breath
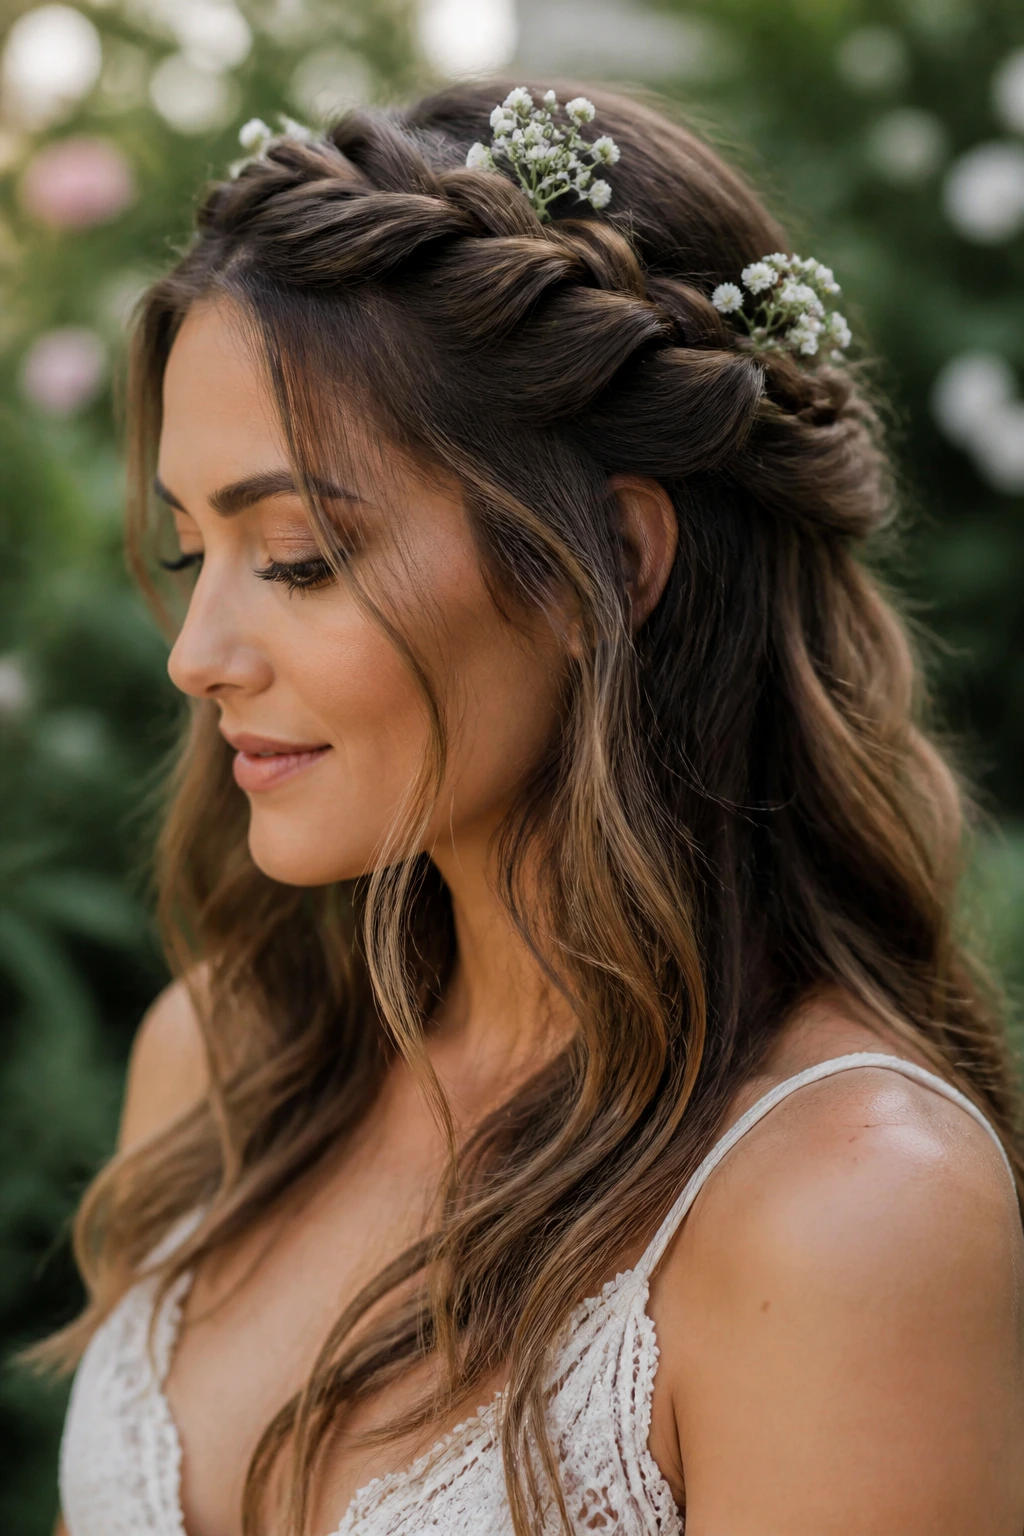
Compared with a full crown braid, this style leaves more air around the face. That extra space is what makes it feel softer and more wearable for a bride who wants flowers in her hair but does not want the flowers to take over.
The twists begin at each temple, fold back toward the crown, and meet near the back of the head. From there, the lengths stay down in waves or a soft blowout. Baby’s breath works best here when it is used sparingly — one or two tiny clusters pinned close to the twists, not dotted everywhere. Too much and the hair starts to look like a bouquet wearing a braid.
I tend to suggest this look to brides who like romantic details but still want their face to stay open. It suits rounder faces especially well because the twisted line lifts the eye upward without adding a hard edge. If your dress has sheer sleeves or a soft neckline, the whole shape feels easy and light.
A small moon comb tucked under one twist can give it the celestial note without changing the silhouette.
13. Bubble Ponytail with Celestial Pins
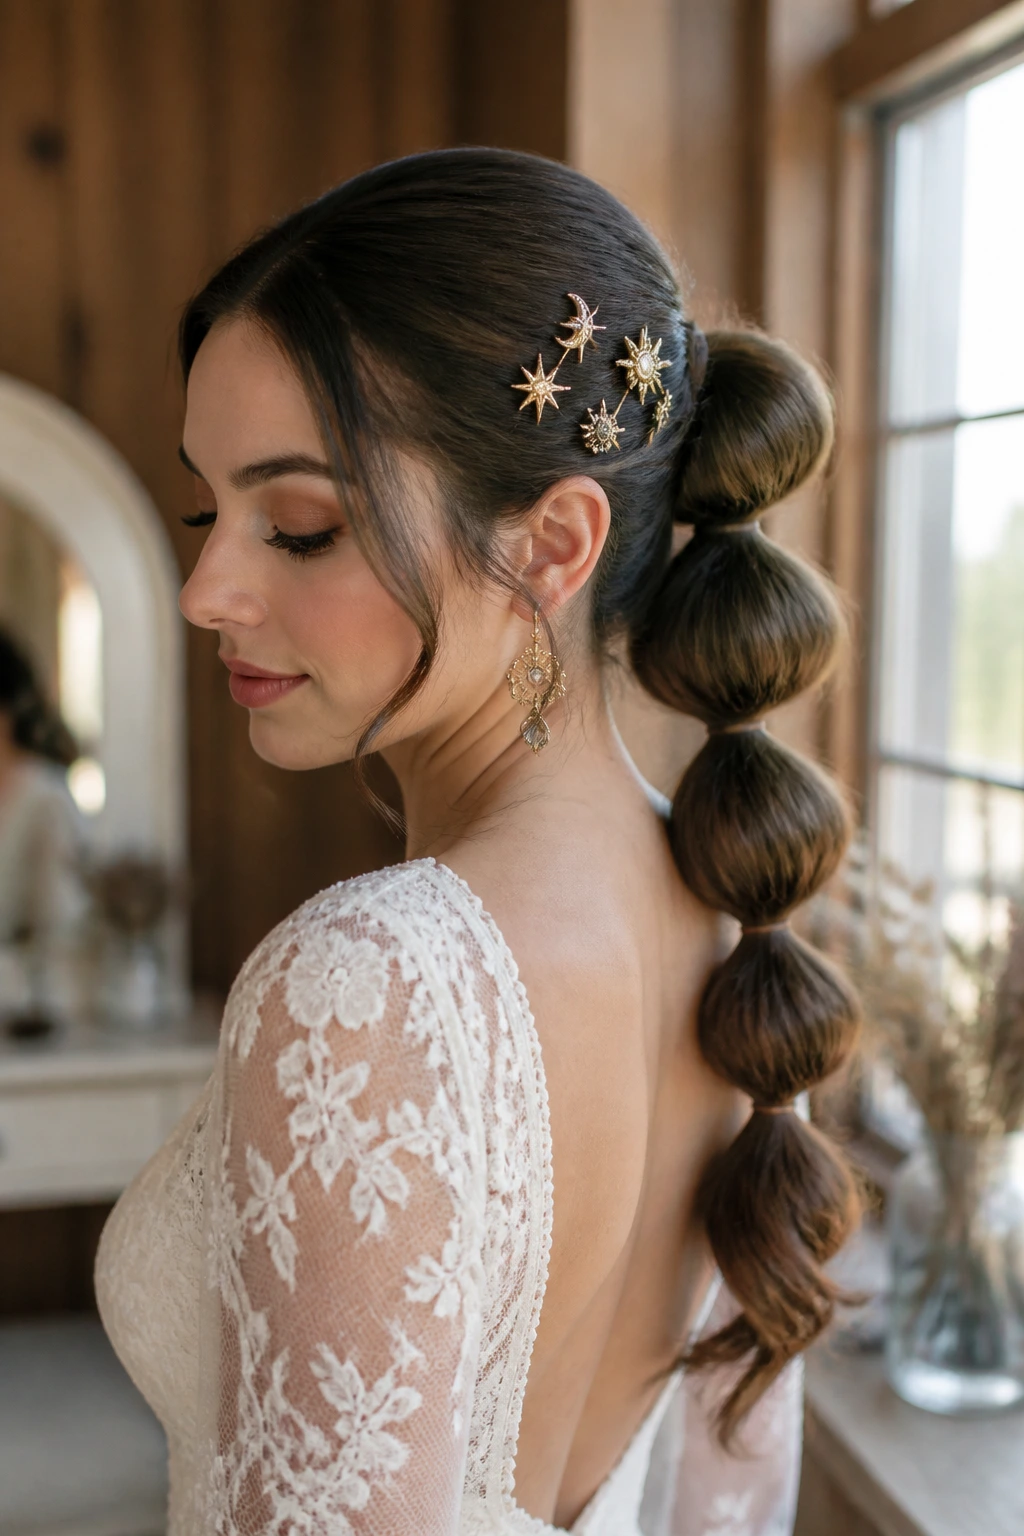
A bubble ponytail sounds playful, and it is. The trick is keeping it polished enough that it still belongs in a wedding album.
Why it feels playful, not childish
The bubbles create shape at regular intervals, which gives the ponytail a kind of rhythm. That rhythm looks good with long hair, especially if you want movement but not a full cascade of curls. The style gets its bridal feel from the finish: smooth at the crown, neat elastic spacing, and a few small celestial pins scattered along one side.
- Place small elastics every 2 to 3 inches down the ponytail.
- Tug each bubble outward with your fingers until it looks rounded but not puffy.
- Wrap a thin strand of hair around each elastic to hide the band.
- Add 3 to 5 star or crescent pins along one side, not all around.
This one is a good choice for brides who like a slightly modern shape but still want to stay in boho territory. It also survives humidity better than a loosely curled ponytail, which is a practical bonus nobody complains about later.
Tip: Keep the crown smooth before you start the bubbles. If the top is frizzy, the whole ponytail looks unfinished.
14. Soft French Twist with a Textured Finish
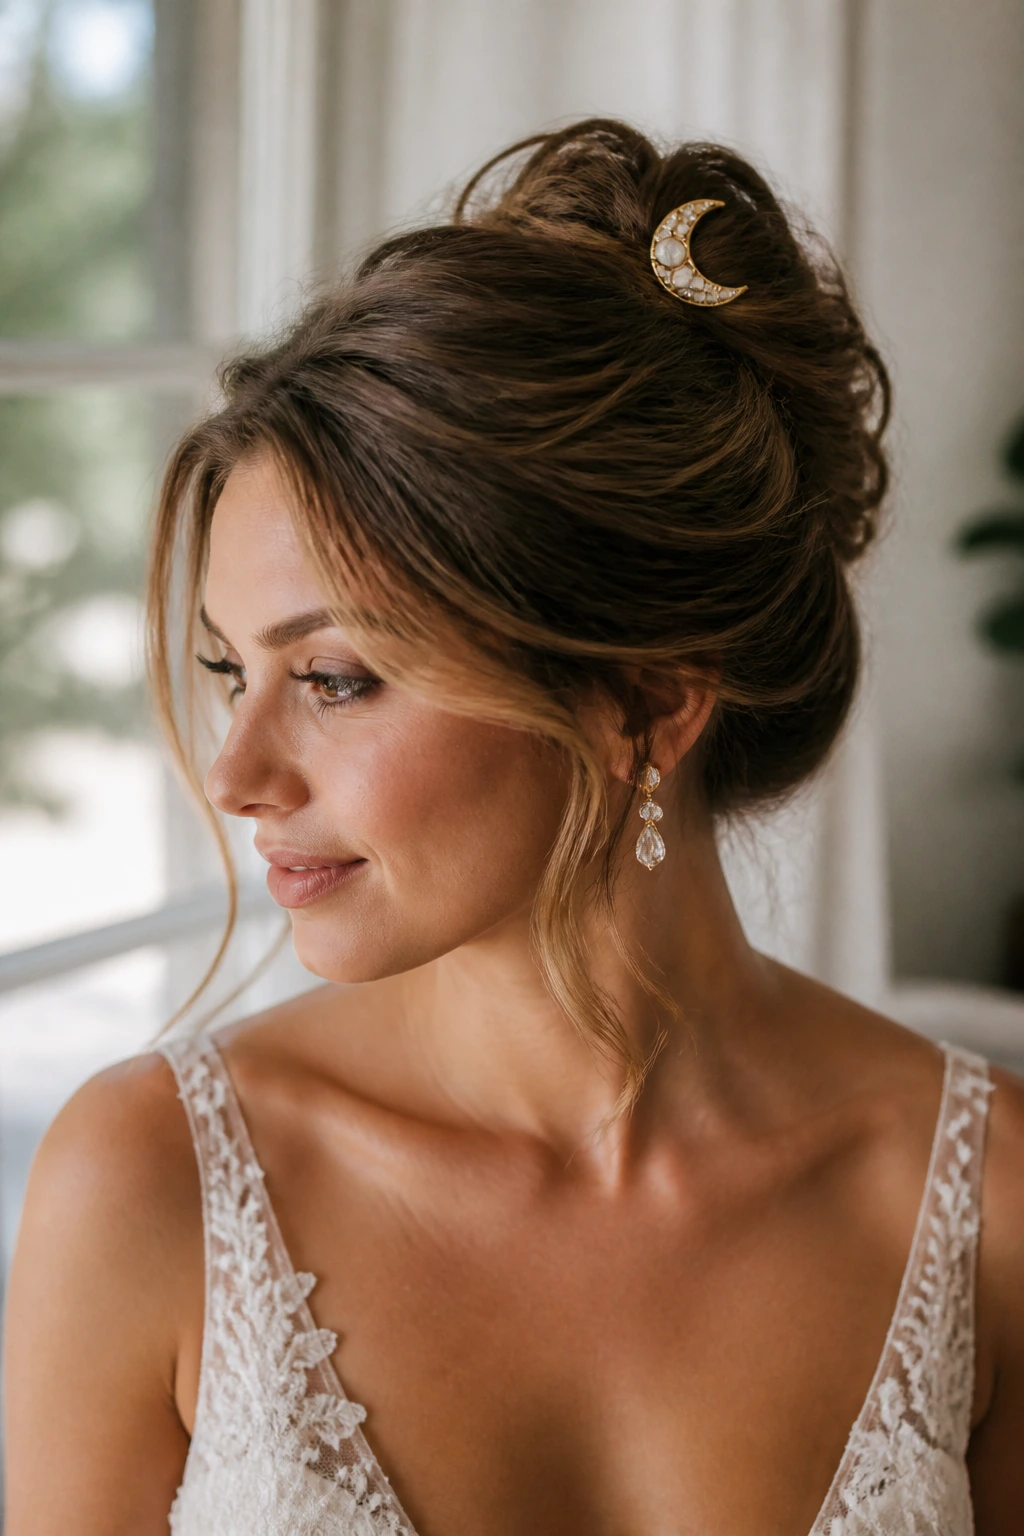
A French twist does not have to feel severe. Give it a little texture, pull out a soft front piece, and it turns into a wedding style with real presence instead of office-lunch energy.
The shape is simple: hair gathered low, rolled upward, and pinned into a vertical shell. The boho version loosens that shell on purpose. You want a bit of width through the twist, not a tight seam running up the back of the head. A brushed-out wave at the front or a narrow side piece left free can soften the line, which helps if your dress has strong shoulders or a cleaner neckline.
This is one of the best moon goddess hair looks for brides who want structure but do not want their hair to disappear. A brushed silver comb, a moon-shaped pin, or even a narrow vine accessory can sit at the top edge of the twist and keep the whole thing feeling themed without getting costume-heavy.
Fine hair may need a bit of padding inside the roll. Thick hair usually needs fewer pins than people think, but they have to go in deep. Shallow pins slide.
15. Loose Low Knot with a Veil-Friendly Base
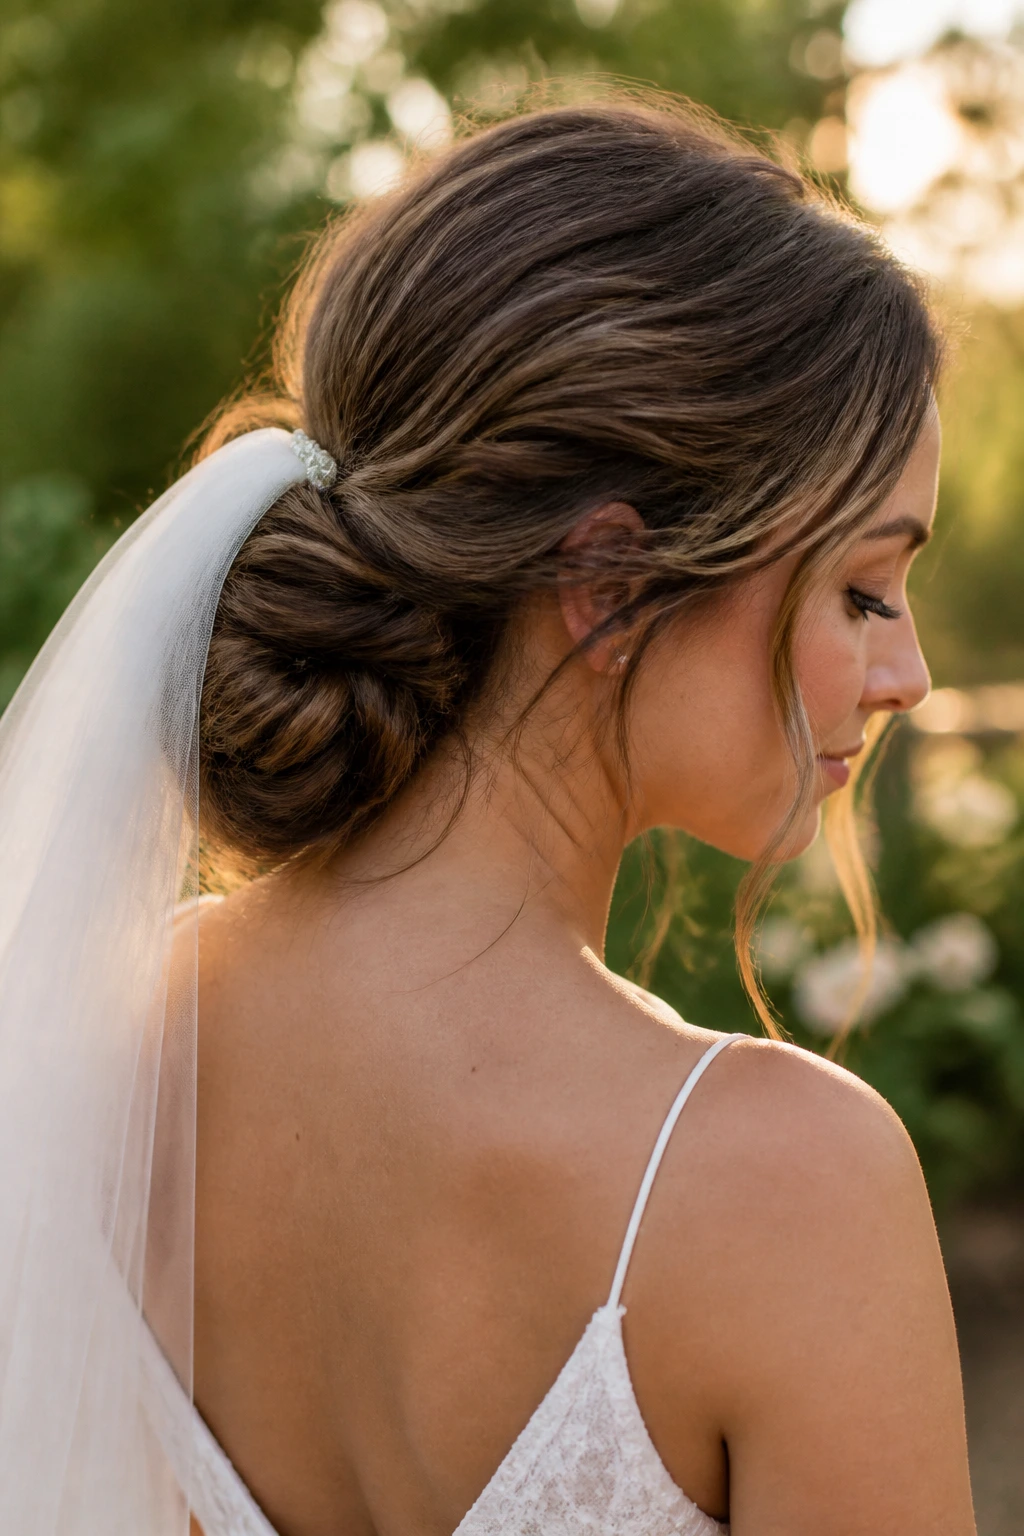
A loose low knot is the one I reach for when the veil needs somewhere to live. It sits low enough to support a comb, soft enough to stay boho, and simple enough that it does not fight with lace, beading, or a dramatic back on the dress.
The knot should start with textured hair — not crunchy, not wet, just hair with enough grip to hold a twist. Gather it at the nape, twist it once or twice, then pin it into a loose knot that keeps a little shape on the sides. Leave a few pieces near the ears if you want the style to feel softer; leave them out of the way if you want the neckline to stay clean. Either way, the base should be flat and secure so the veil comb can sit above it without wobbling.
This look is a good choice for brides who plan to wear the veil for the ceremony and remove it later. The hair keeps its shape after the veil comes off, which sounds basic, but it is one of those little details that saves a lot of fuss before photos. A tiny crescent pin tucked into the knot can add the moon note without changing the silhouette at all.
It ends up looking calm in photos and easy in motion. That is a rare combination.
