



Medium length hair is often described as the “goldilocks” zone, but anyone living with it knows that’s a polite way of saying it’s the most frustrating length to manage. It is long enough to get in your face and cause tangles, but rarely long enough to hold the weight of complex, intricate updos without a dozen pins and a prayer. The solution, however, isn’t to force your hair into a ponytail that pulls at your temples or to cut it all off in a fit of pique. The secret is the tuck.
The tuck is an undervalued styling technique. It is less about force and more about architecture. Instead of fighting your hair to make it do something it doesn’t want to—like bending into a tight bun that’s too heavy for your hair’s density—you work with the natural fall of your layers. Tucking is about rolling, pinning, and securing the ends into a shape that looks deliberate, romantic, and effortlessly finished.
Mastering these styles requires a shift in how you think about hair tools. If you are still relying on twenty cheap, wavy bobby pins to hold an entire style, you are the problem, not your hair. You need a few high-quality U-shaped hair forks, a bottle of texturizing spray, and the willingness to let a few strands fall loose. These fifteen styles are designed specifically for the unique weight and texture profile of medium-length hair.
1. The Classic French Nape Tuck
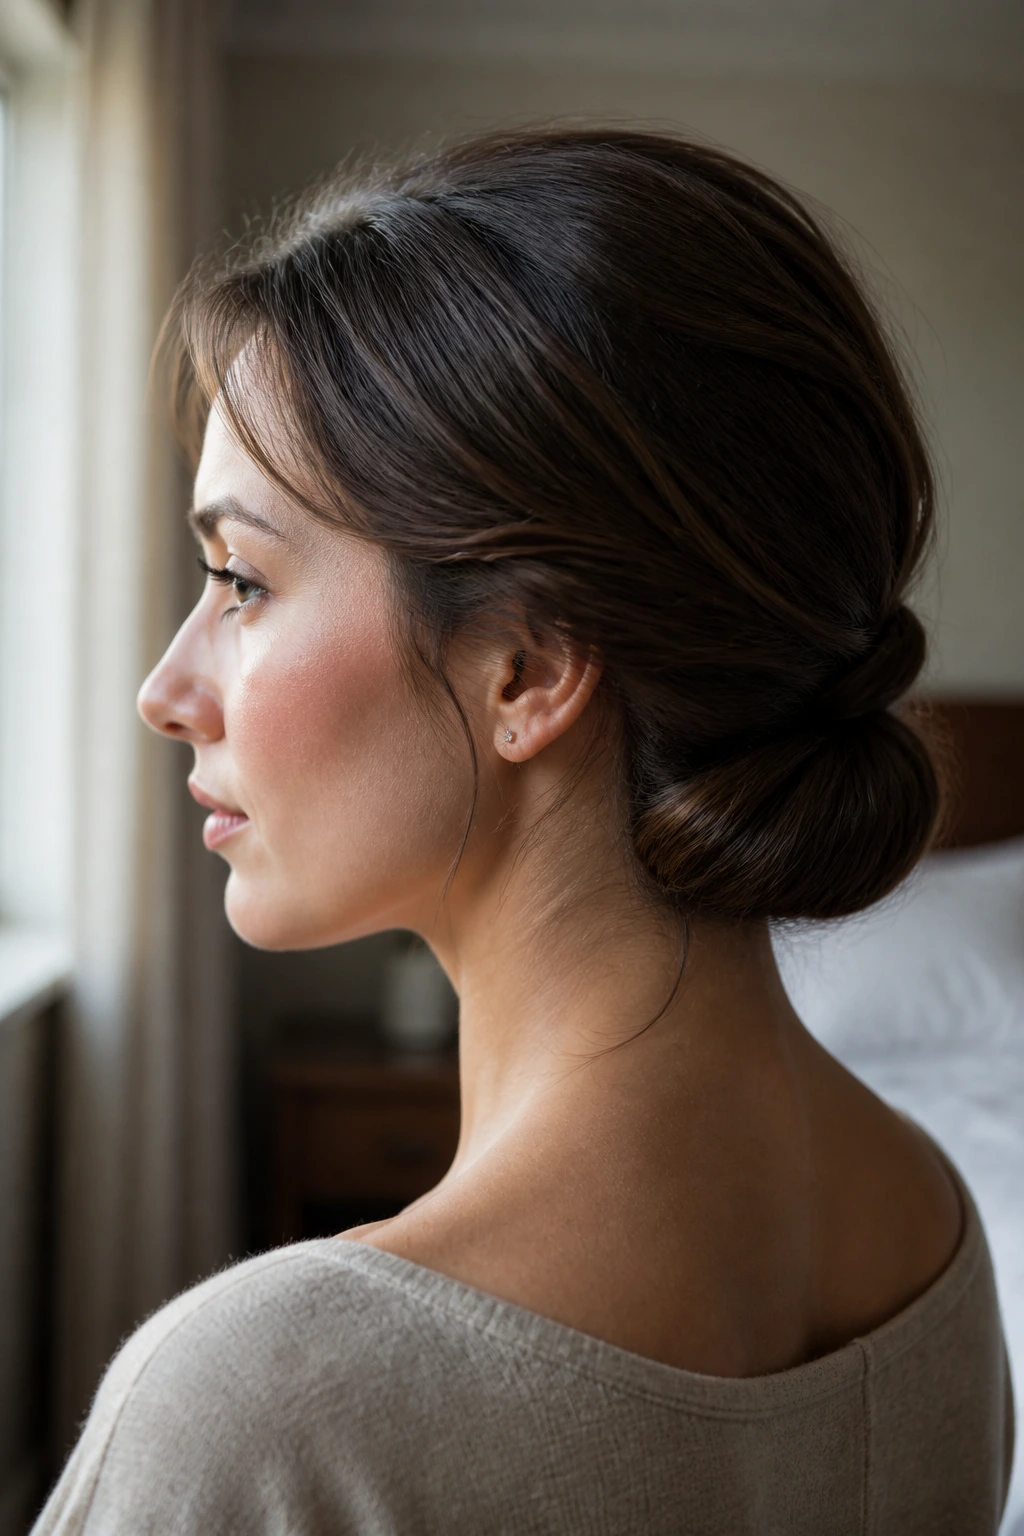
The French tuck is the cornerstone of every elegant, “I threw this together in five minutes” look. It’s perfect for medium-length hair because it utilizes the ends rather than hiding them. The key is to start with a base that has some grit; if your hair is freshly washed and slippery, it will simply unspool within ten minutes. Spray a bit of texturizing dry shampoo throughout the lengths before you begin.
Creating the Foundation
Begin by pulling your hair back into a low, loose ponytail, but do not secure it with a hair tie. Instead, hold the base of the pony with one hand while you begin to roll the length inward toward your nape with the other. You want to create a smooth, rounded tube of hair against your neck. Once you have the shape, you do not use a standard pin.
The Secret to Longevity
You need a U-shaped pin—also known as a hair fork. Take your hair fork and insert it downward through the top of the roll, catching the hair against the scalp and then flipping it to push it back up through the center of the roll. This “locking” motion keeps the weight of the hair secure without causing the pulling sensation that traditional pins create. If you have layers, leave a few face-framing pieces out to keep the look soft.
2. The Messy Side-Swept Tuck

Sometimes you want a style that looks like it came from a French boutique, not a locker room. The side-swept tuck is fantastic for medium hair because it creates the illusion of more volume than you actually have. The goal is to bring all your hair to one side and secure it, which hides the lack of length that might be obvious in a center-aligned style.
Achieving the Shape
Sweep all your hair over to your left or right shoulder. Divide the hair into three loose sections. You are going to take the middle section and tuck it underneath the other two, pinning as you go. It sounds more complex than it is. Simply twist the hair in small, horizontal segments and pin them against the nape of your neck, working toward the side you’ve chosen.
Why It Works
This style is forgiving. Because you are creating a “messy” aesthetic, if a piece falls out, it just looks intentional. Use a light-hold styling paste on your fingertips when you are twisting the segments; this adds definition to the ends and prevents them from looking frizzy or dry. When you reach the side, tuck the final tail into the roll you’ve already pinned.
3. The Double-Twist Bohemian Tuck
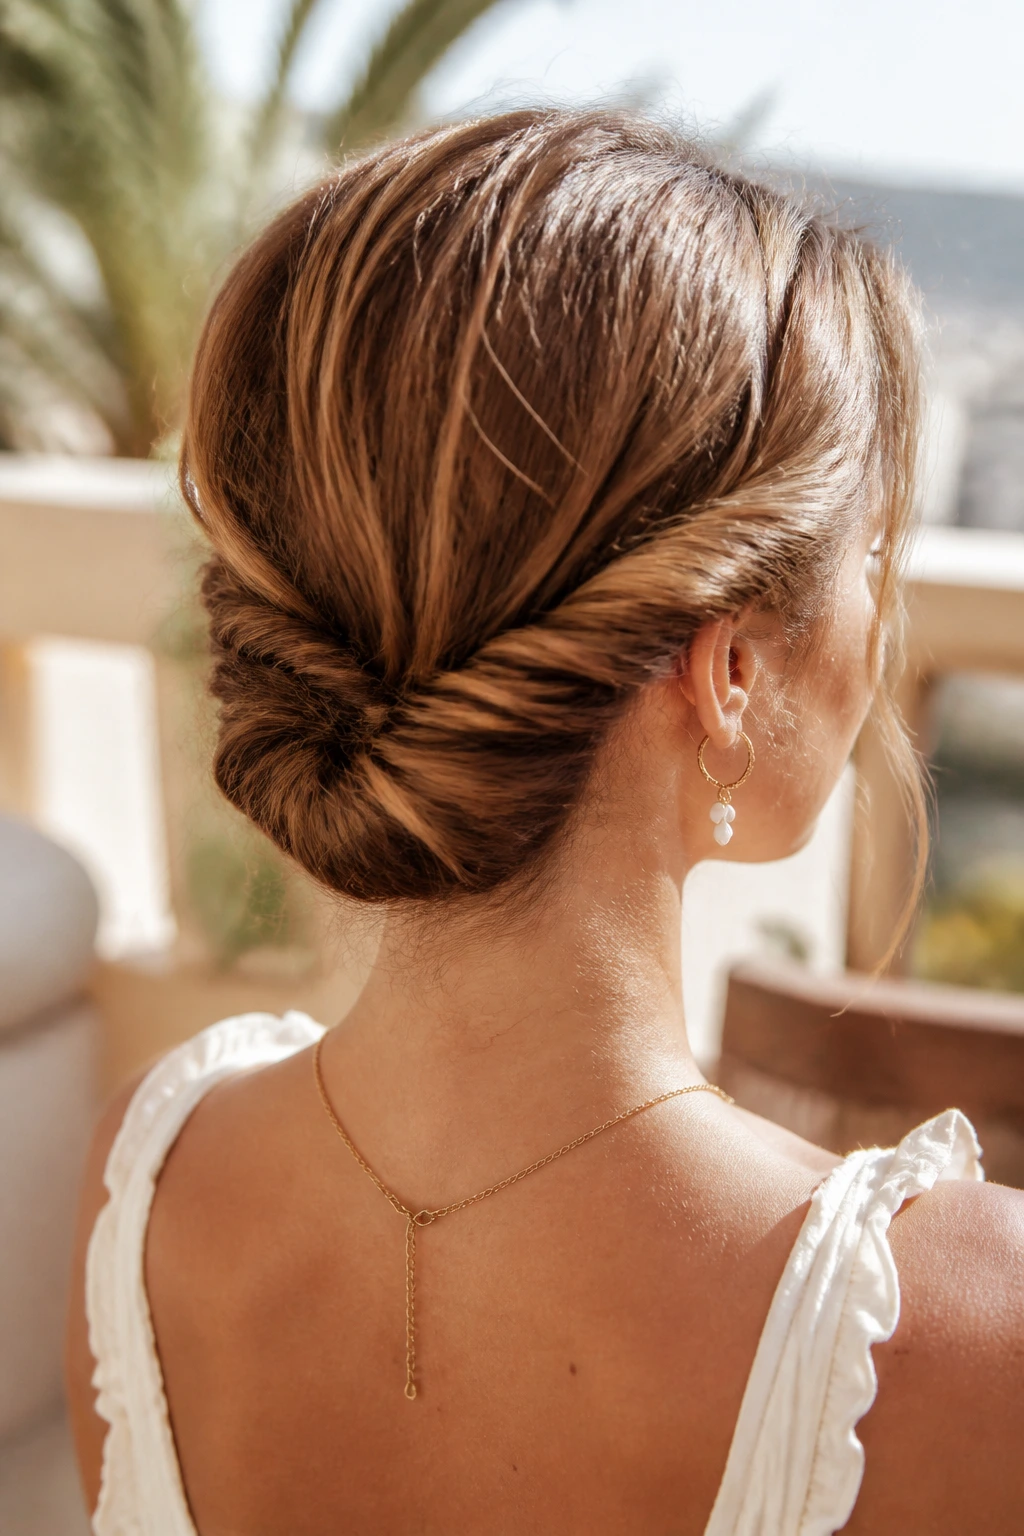
This style is a favorite for warmer months or when you are wearing a dress that has a higher neckline. It takes the “tuck” concept and adds a bit of texture by creating two separate twists that meet in the middle. It’s remarkably sturdy, which makes it a great choice for a full day of activity where you can’t be bothered to fix your hair.
The Setup
Part your hair down the middle or in a deep side part. Take a one-inch section from the front on the left side and twist it away from your face. As you move back toward the nape of your neck, keep adding small pieces of hair to the twist, French-braid style, but keep the motion as a simple twist. Pin this twist temporarily at the nape.
The Final Tuck
Repeat the process on the right side. Once both twists are pinned at the nape, you will have a collection of loose ends hanging at the back. Take these ends, gather them together, roll them upward into a small, tight nest, and secure the whole thing with two large U-pins. The result is a secure, intricate-looking updo that feels incredibly light.
4. The Scarf-Wrapped Hidden Tuck
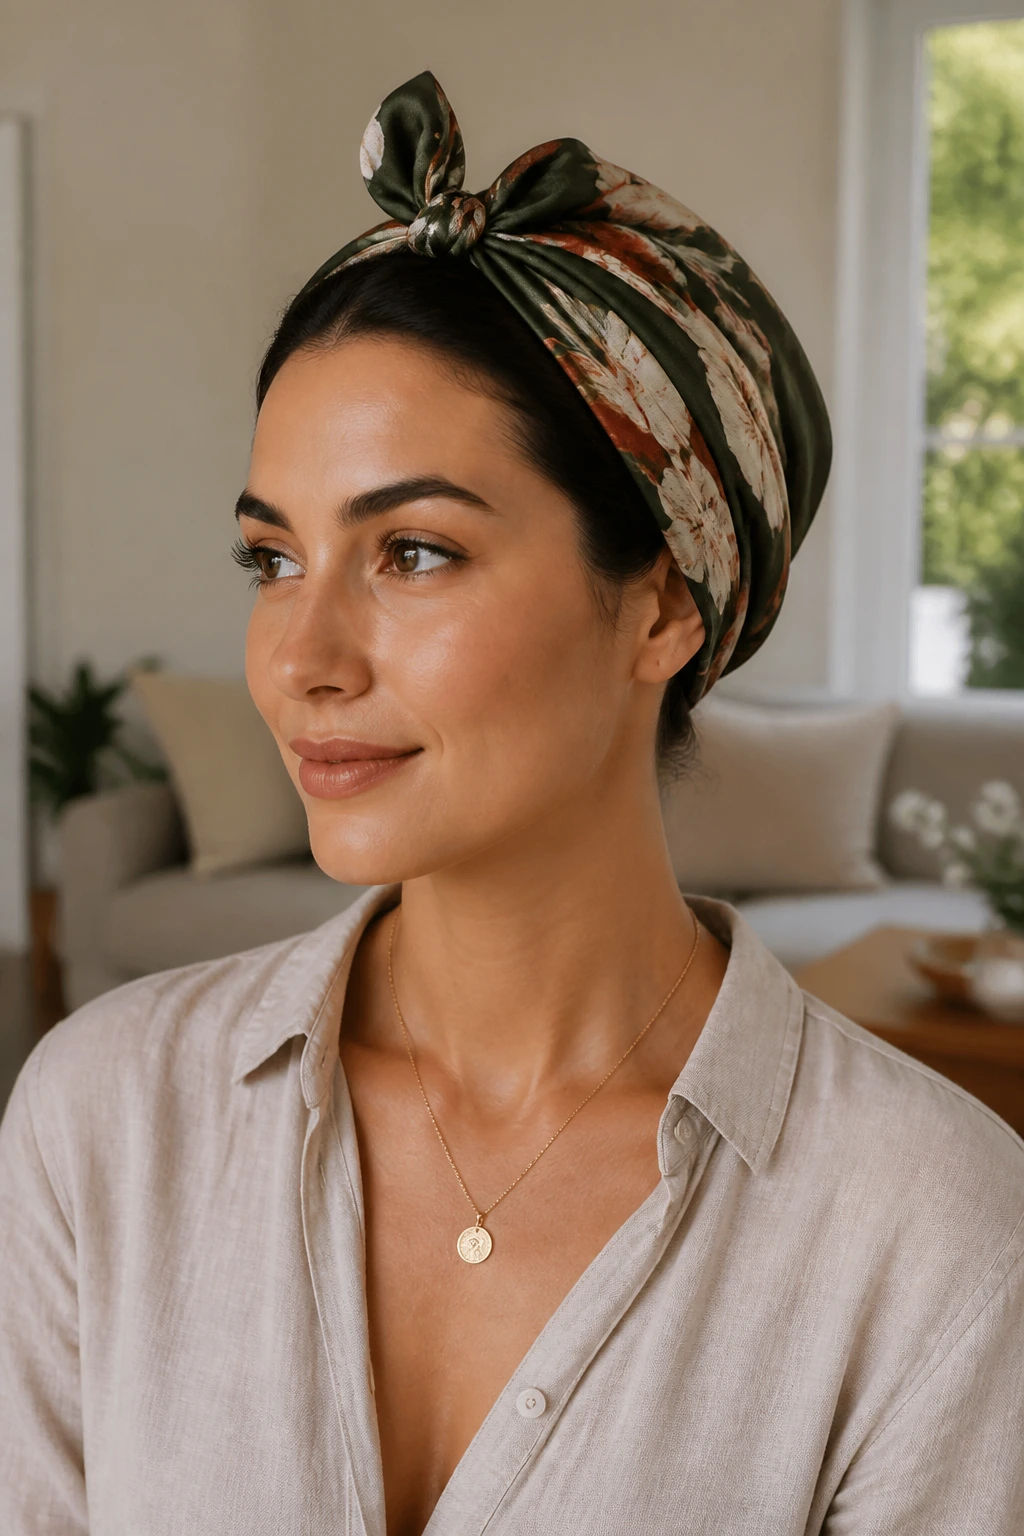
When you are having a “bad hair day” or your ends are feeling particularly dry, a scarf is your best friend. This style is not about showcasing your hair’s length, but rather its volume. You are essentially using the fabric to hold the hair in place, which means you can be much less precise with your pinning.
Preparing the Scarf
Choose a silk or satin scarf that isn’t too thick—cotton can be bulky and hard to tie securely. Fold the scarf into a long, flat band. Lean your head forward and place the center of the scarf at the nape of your neck, bringing the ends up toward your forehead.
The Tuck and Tie
Now, gather your hair into a low, loose bunch. Tuck the ends of your hair up and into the band of the scarf, rolling the hair around the fabric. Once the hair is tucked, tie the scarf securely at the crown of your head or slightly to the side. The scarf does all the heavy lifting, holding the tuck in place without a single bobby pin touching your scalp.
5. The Sleek Low-Bun Tuck
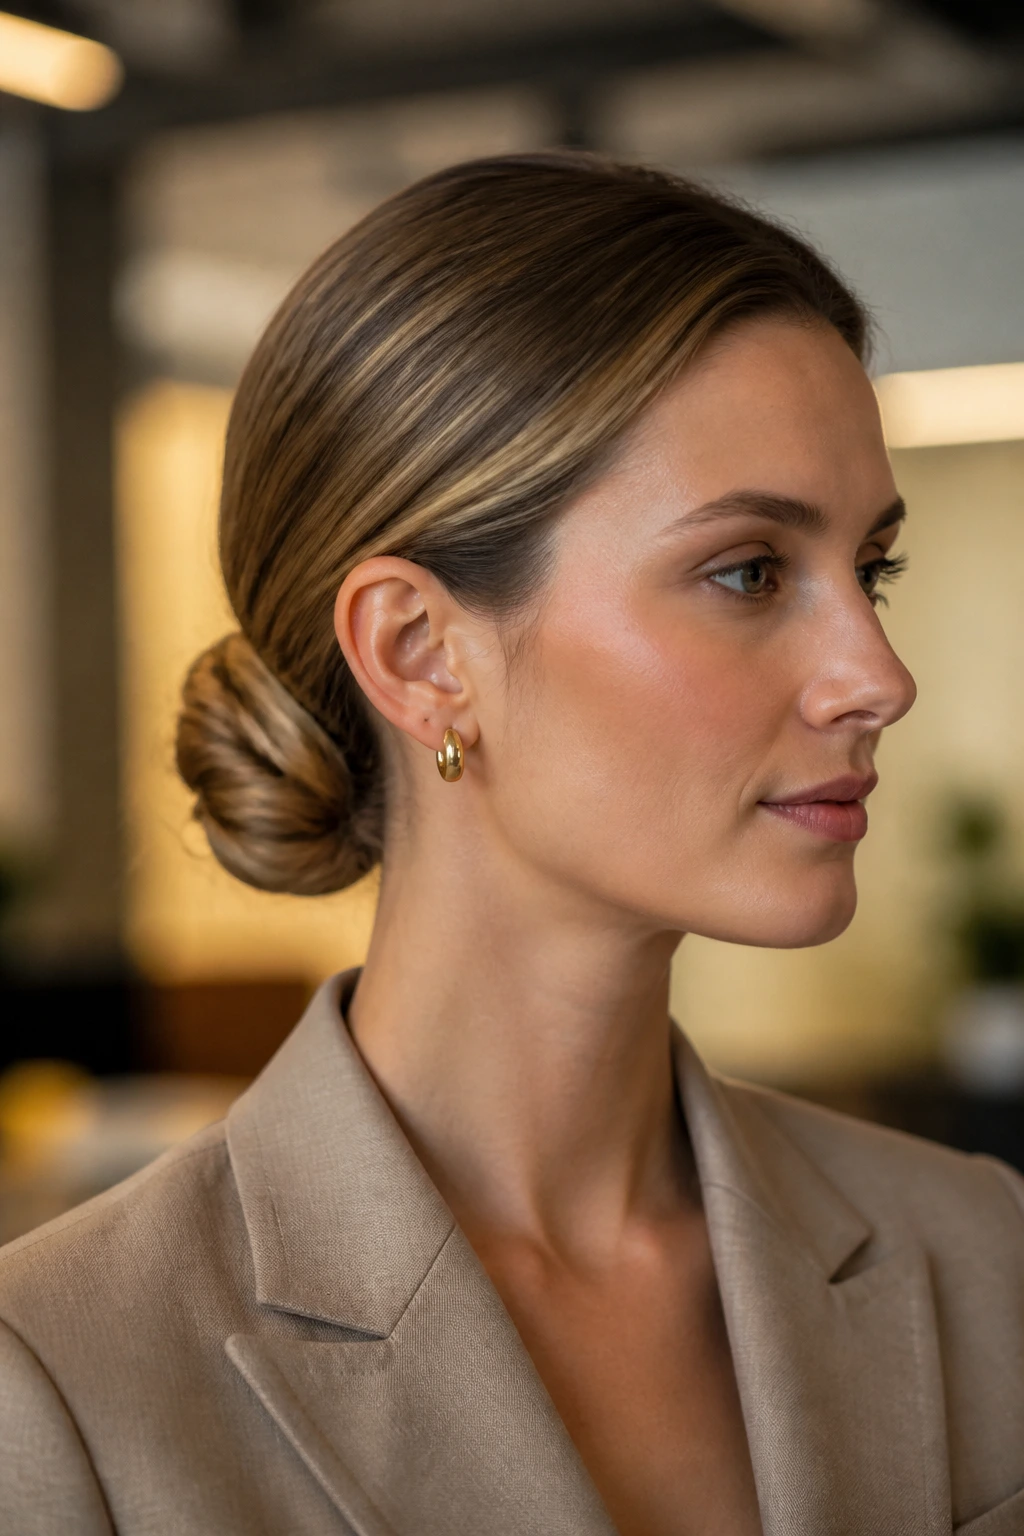
If you have a professional event or just prefer a polished aesthetic, the sleek low-bun tuck is a classic for a reason. It is clean, minimalist, and very easy to achieve with medium-length hair because you don’t have to worry about the sheer volume of hair that people with longer locks face.
Smoothing the Texture
Start by applying a small amount of smoothing serum or light oil from mid-lengths to ends. You want to eliminate flyaways before you start tucking. Pull your hair back into a low ponytail. Here is the trick: pull the ponytail halfway through the elastic on the last loop, creating a small loop or “bun” at the nape, leaving the ends loose.
The Finishing Move
Take the loose ends and wrap them around the base of the elastic to hide it. Use a single, high-quality bobby pin to secure the tail of the wrap. You aren’t trying to create a massive bun; you are creating a neat, small knot at the base of your neck. It’s elegant, understated, and never looks like you tried too hard.
6. The Braided Crown Tuck
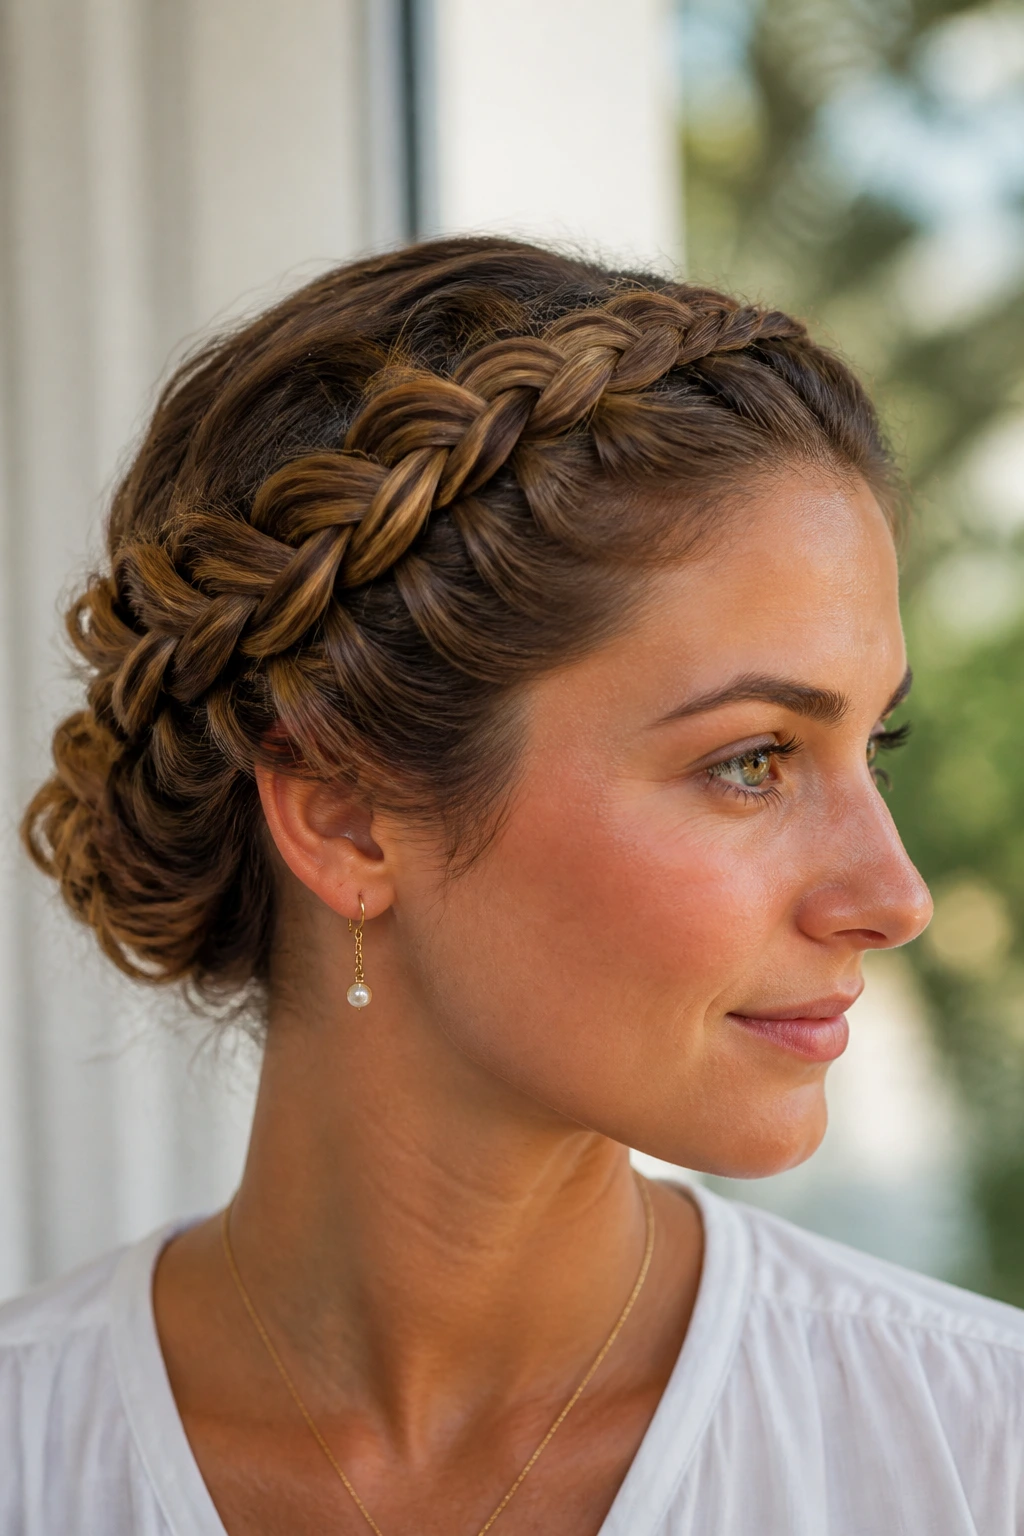
Adding a braid to your tuck provides structure and keeps those stubborn shorter layers in check. This is an excellent style for medium-length hair that has a lot of layers, as the braid physically secures the hair that would otherwise poke out of a simple roll.
The Braid
Start by creating a Dutch braid (underhand braid) along your hairline, starting near one ear and moving across to the other. You don’t need to braid all the way to the ends of your hair; just braid until you reach the back of your head on the opposite side. Secure this end with a clear, snag-free elastic.
The Tuck
Gather the rest of your hair at the nape of the neck. You are going to take the unbraided length and the braid itself and roll them together into an upward-facing tuck. Pin this firmly to the base of your skull. The braid acts as a decorative element across the back of the tuck, masking the transition between the scalp and the pinned hair.
7. The Half-Up Top Tuck
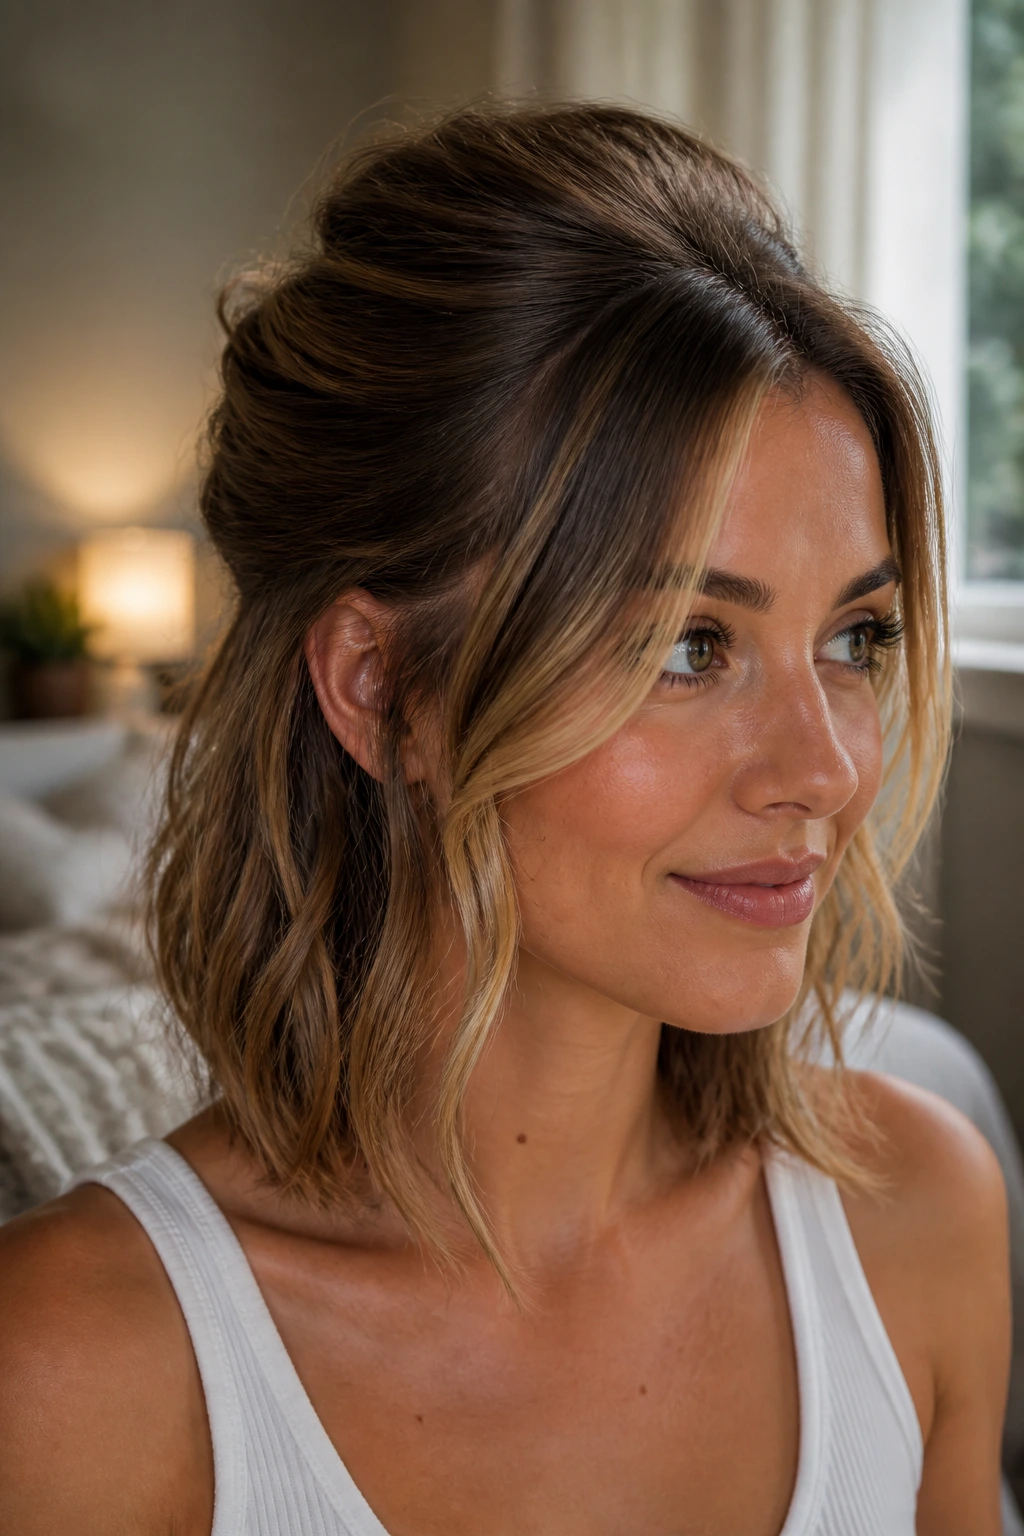
Sometimes the best tuck is not a full updo. The half-up top tuck is youthful and adds height to the crown, which is flattering for almost every face shape. It’s a great way to manage the hair around your face while still enjoying the length of your hair down your back.
Creating the Section
Section off the top half of your hair, from the temples to the crown. Do not worry about a precise line; a slightly messy, zigzag part often looks more natural. Gather this top section and twist it loosely at the back of your head.
The Tuck
Instead of letting the twist lay flat, push it slightly upward to create a small “poof” or volume at the crown before pinning it down. Take the ends of this twisted section and tuck them underneath the twist itself, securing with a pin. You are creating a soft, tucked “bump” that blends seamlessly into the hair left down.
8. The Bobby-Pin Minimalist Tuck
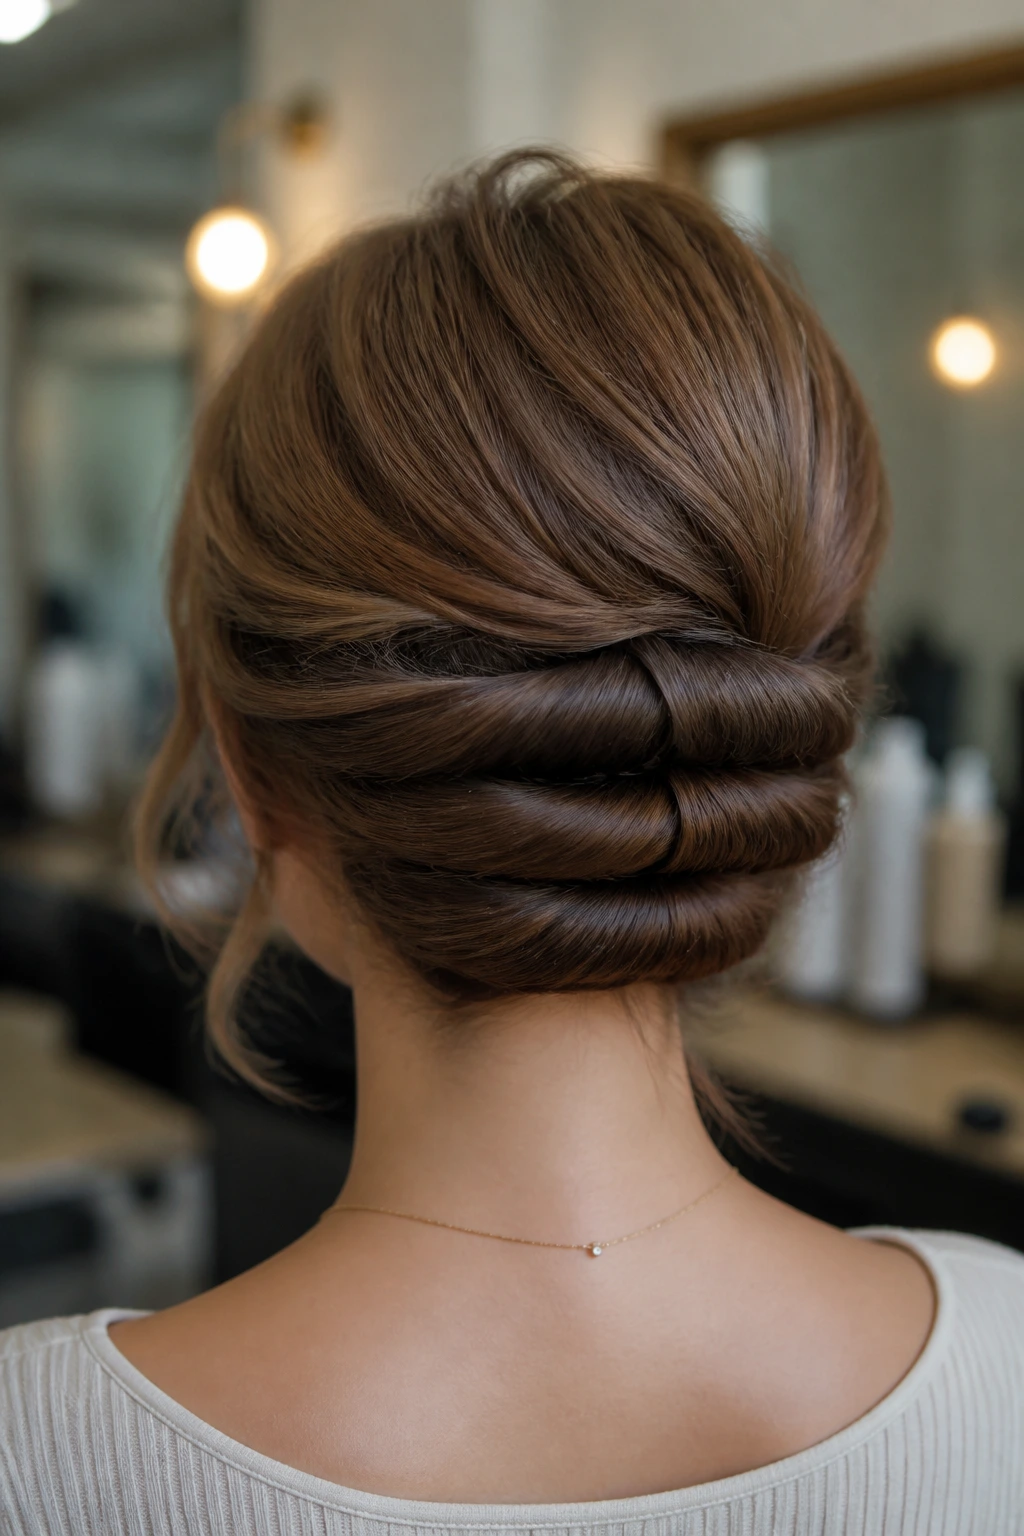
If you are a fan of the modern, minimalist aesthetic, this style is for you. It’s essentially a “faux-bob” look, where you tuck the length of your hair to make it appear shorter. It’s perfect for switching up your look for an evening without actually visiting a stylist.
The Sectioning
Split your hair into four distinct horizontal sections, moving from the nape up to the crown. Take the lowest section at the nape, roll it under toward the neck, and pin it securely with flat, non-slip bobby pins. These should be placed horizontally to act as a hidden shelf.
Building the Shape
Move to the next section and tuck it under the first. By the time you reach the top, you are effectively rolling your hair into a series of stacked, tucked layers. This creates a very rounded, bob-like shape. Don’t pull too tightly; the goal is a loose, airy shape, not a stiff helmet.
9. The Chignon-Style Internal Tuck
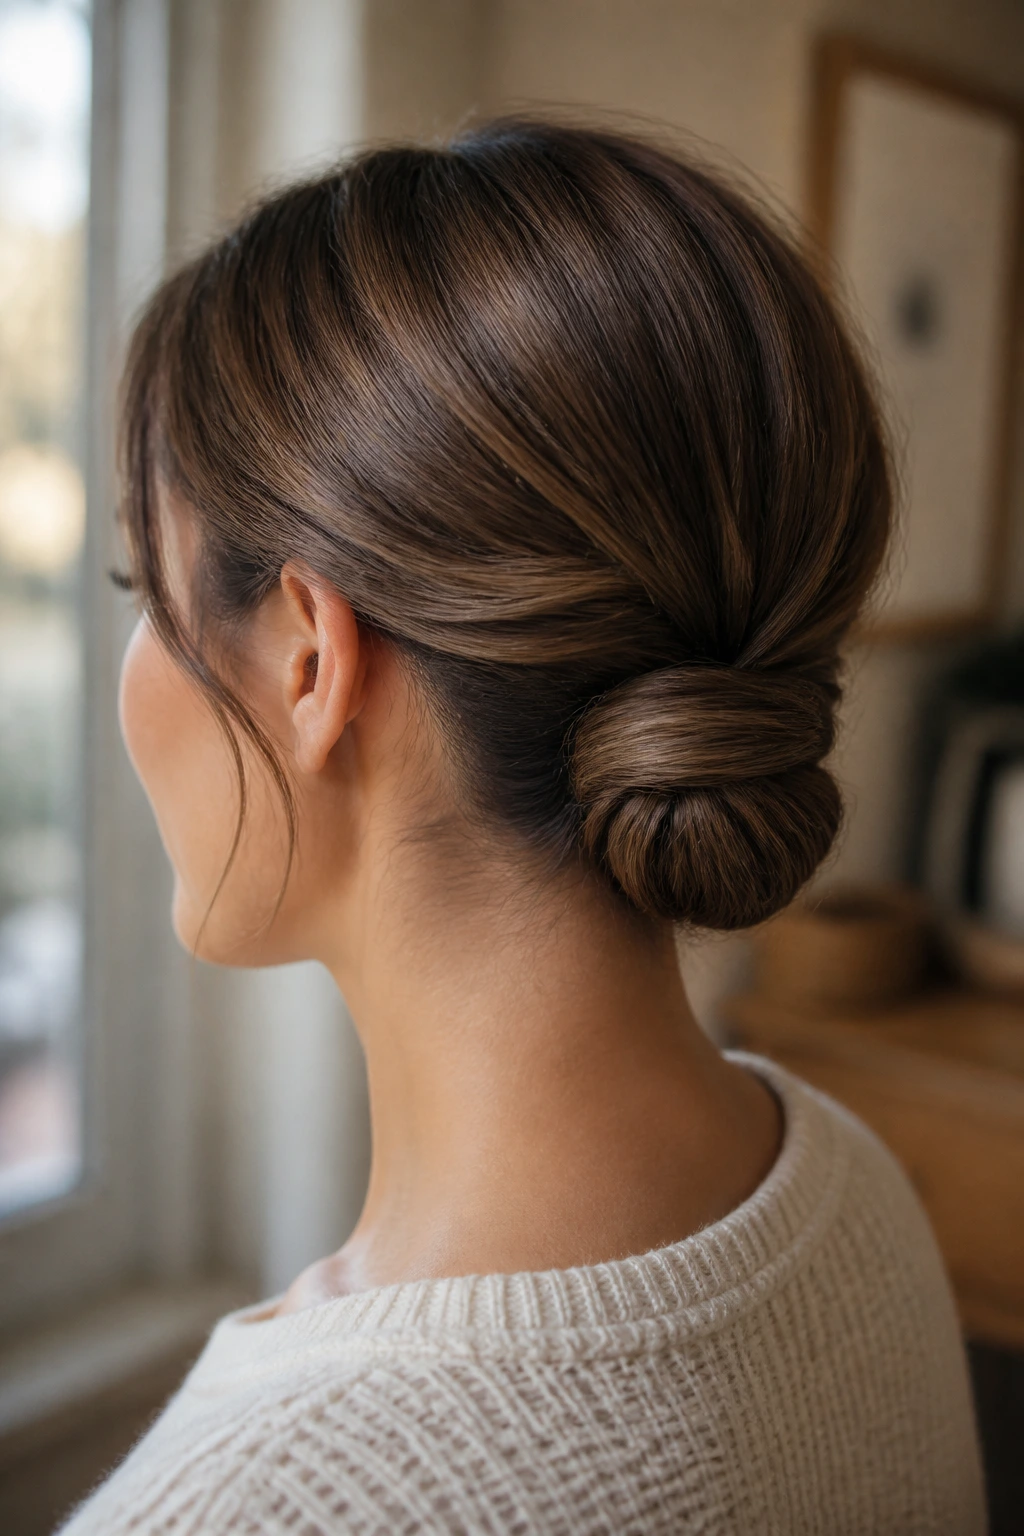
A chignon is typically seen as a formal, complicated style, but it doesn’t have to be. For medium-length hair, the chignon is actually easier to execute than on long hair because there is less bulk to manage. This is about creating a singular, cohesive knot at the nape.
The Loop
Pull your hair into a very low, loose ponytail. Before you tighten it, make a small hole in the hair above the elastic, as if you were going to do a “topsytail” flip. Instead of pulling the whole tail through, just tuck the ends of your hair into that hole, rolling them inward until the hair fills the space entirely.
Securing the Shape
Use U-pins to anchor the sides of this loop to the hair at your nape. If you have fine hair, you might want to backcomb the ponytail slightly before tucking it—this provides the necessary surface area for the pins to grab onto, ensuring the chignon doesn’t slide down throughout the day.
10. The Waterfall Tuck
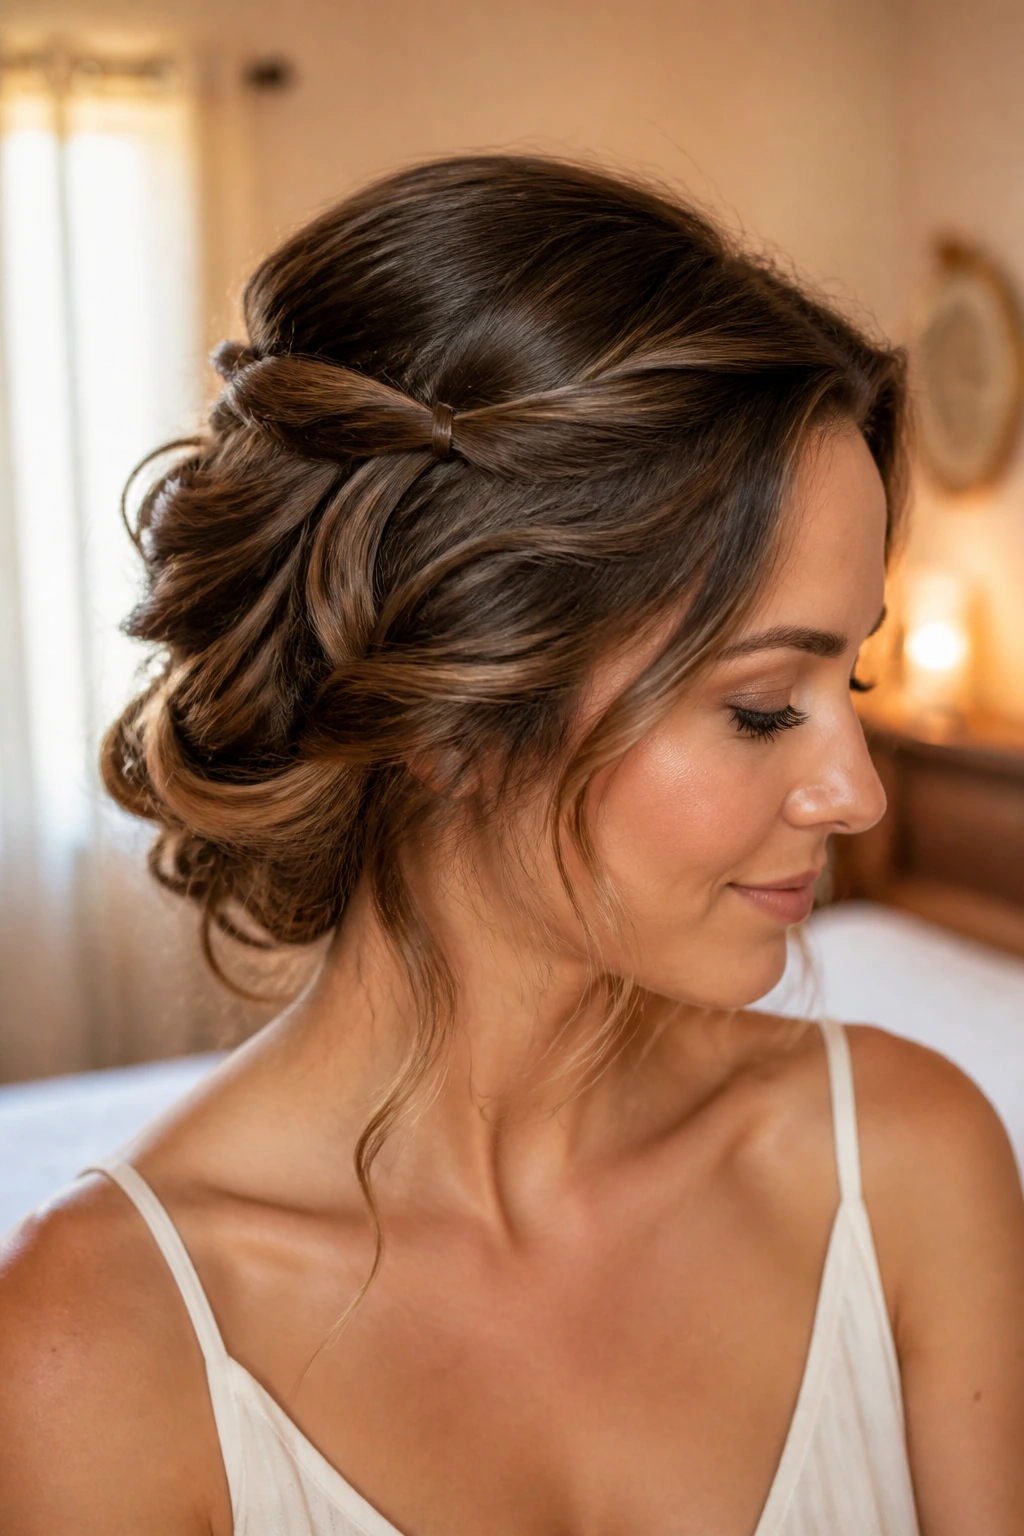
This style is romantic, soft, and feels somewhat ethereal. It’s all about the illusion of length and volume. It works best if you have some wave or curl in your hair. If your hair is poker-straight, give it a quick pass with a curling iron before starting to help the tuck hold its shape.
The Twist
Start by taking two small sections of hair from near your temples. Twist them back toward the center of the back of your head. Secure these twists together with a small, clear elastic. You now have a mini half-up style.
The tuck
Take the remaining length of hair—the hair that is loose underneath—and roll it up toward the elastic you just created. Tuck the ends under the twist and pin them securely. This creates a cascading effect where the top twist frames the “tucked” portion, making it look like a cascading, romantic updo.
11. The Twisted Turban-Band Tuck
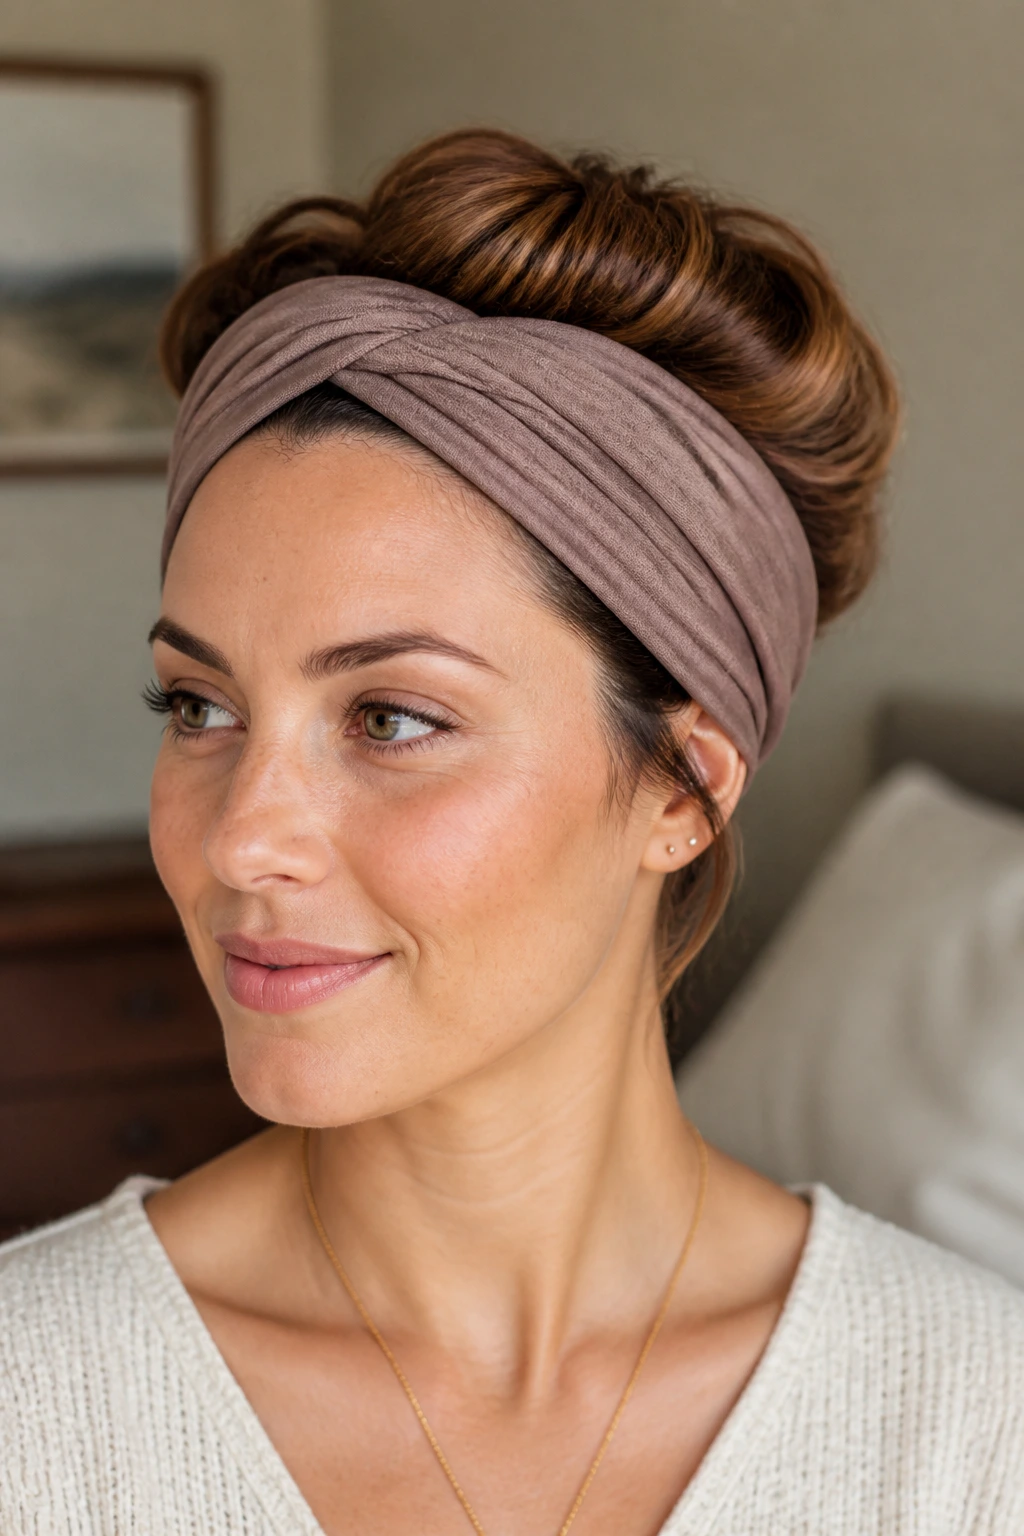
Hair accessories are not just for decoration; they are structural tools. A wide, fabric turban-style headband can actually be the foundation of a great tuck. This style is incredibly easy because the band hides any messy pinning or imperfections at the hairline.
Positioning the Band
Place your headband over your hair so it sits across your forehead and around the back of your head. Now, take the hair in sections—starting from the back—and loop it up and over the band, tucking the ends back down under the band itself.
The Full Tuck
Continue doing this until all your hair is tucked into the fabric. The result is a smooth, voluminous roll that circles your entire head. It looks like a complex, vintage-inspired updo, but it’s actually just a series of loops over an accessory. If you have shorter layers, the band will hold them in place better than any pin could.
12. The Multi-Section Pinned Tuck
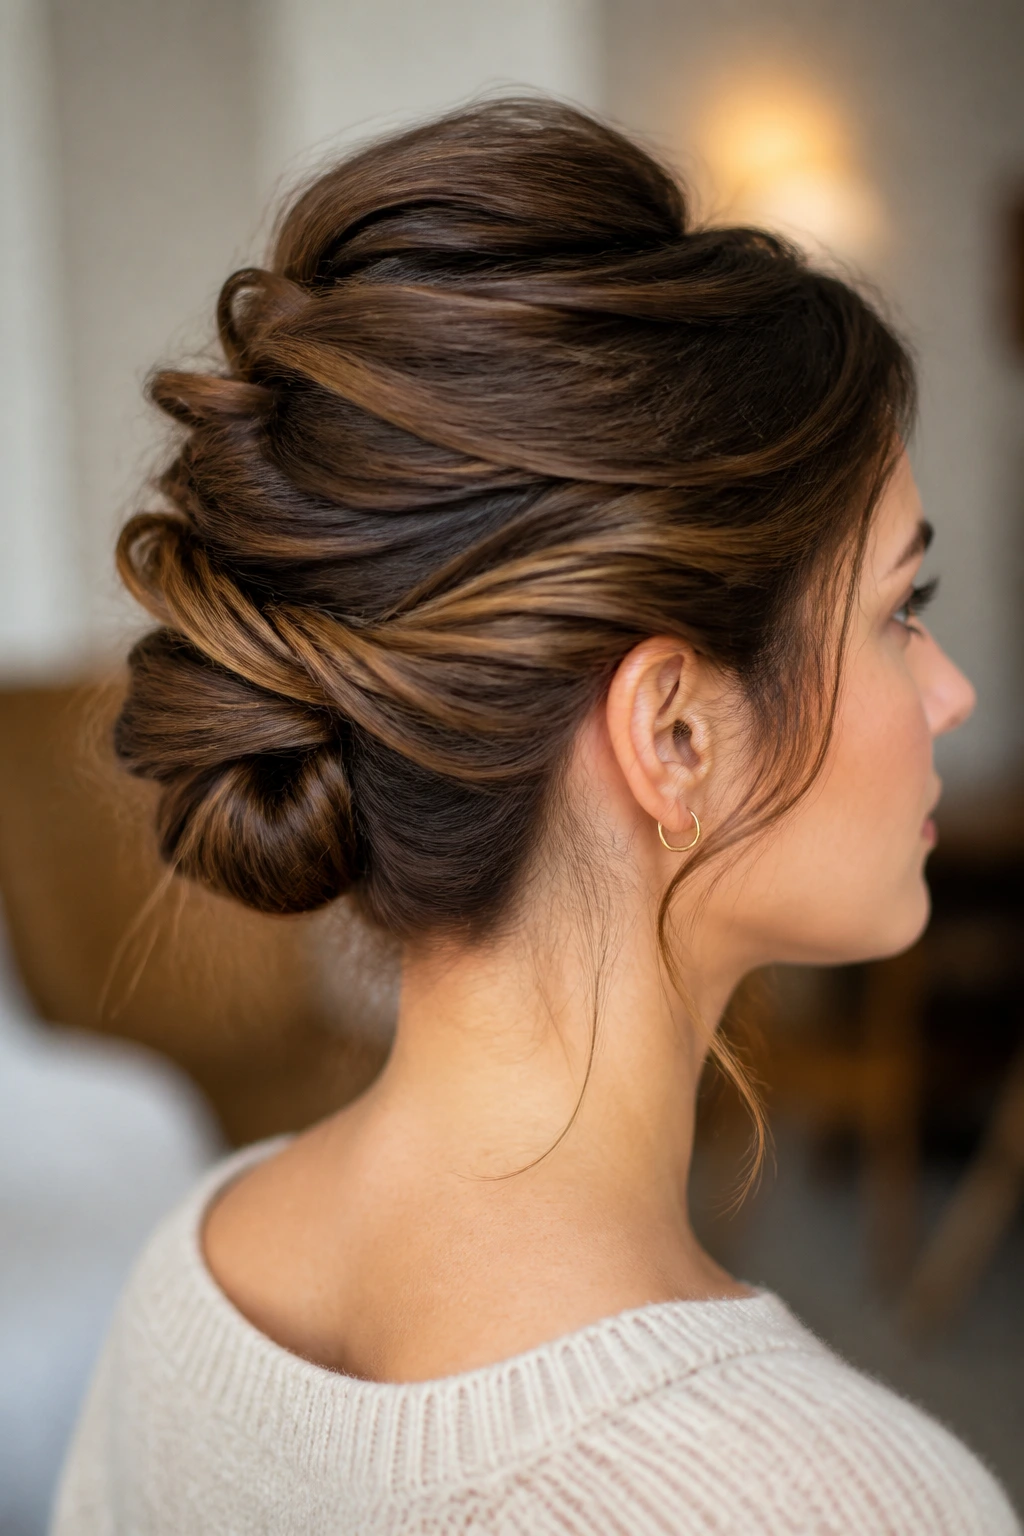
Medium-length hair can sometimes look thin if it’s all pulled into one lump. The solution is to break the hair into smaller, manageable sections and tuck them individually. This creates a layered, “Pinterest-worthy” look that is actually quite simple to construct.
Break it Down
Divide your hair into three horizontal sections: a nape section, a middle section, and a crown section. Start with the nape section, rolling it into a small, tight bun and pinning it to the scalp. This acts as your anchor.
Build and Tuck
Take the middle section, twist it, and drape it over your anchor bun, pinning it in place. Finally, take the crown section, give it a slight backcomb at the roots for volume, and tuck the ends into the rest of the style. By layering the tucks, you get a much more substantial, textured updo than you would by trying to tuck everything at once.
13. The Retro-Roll Tuck
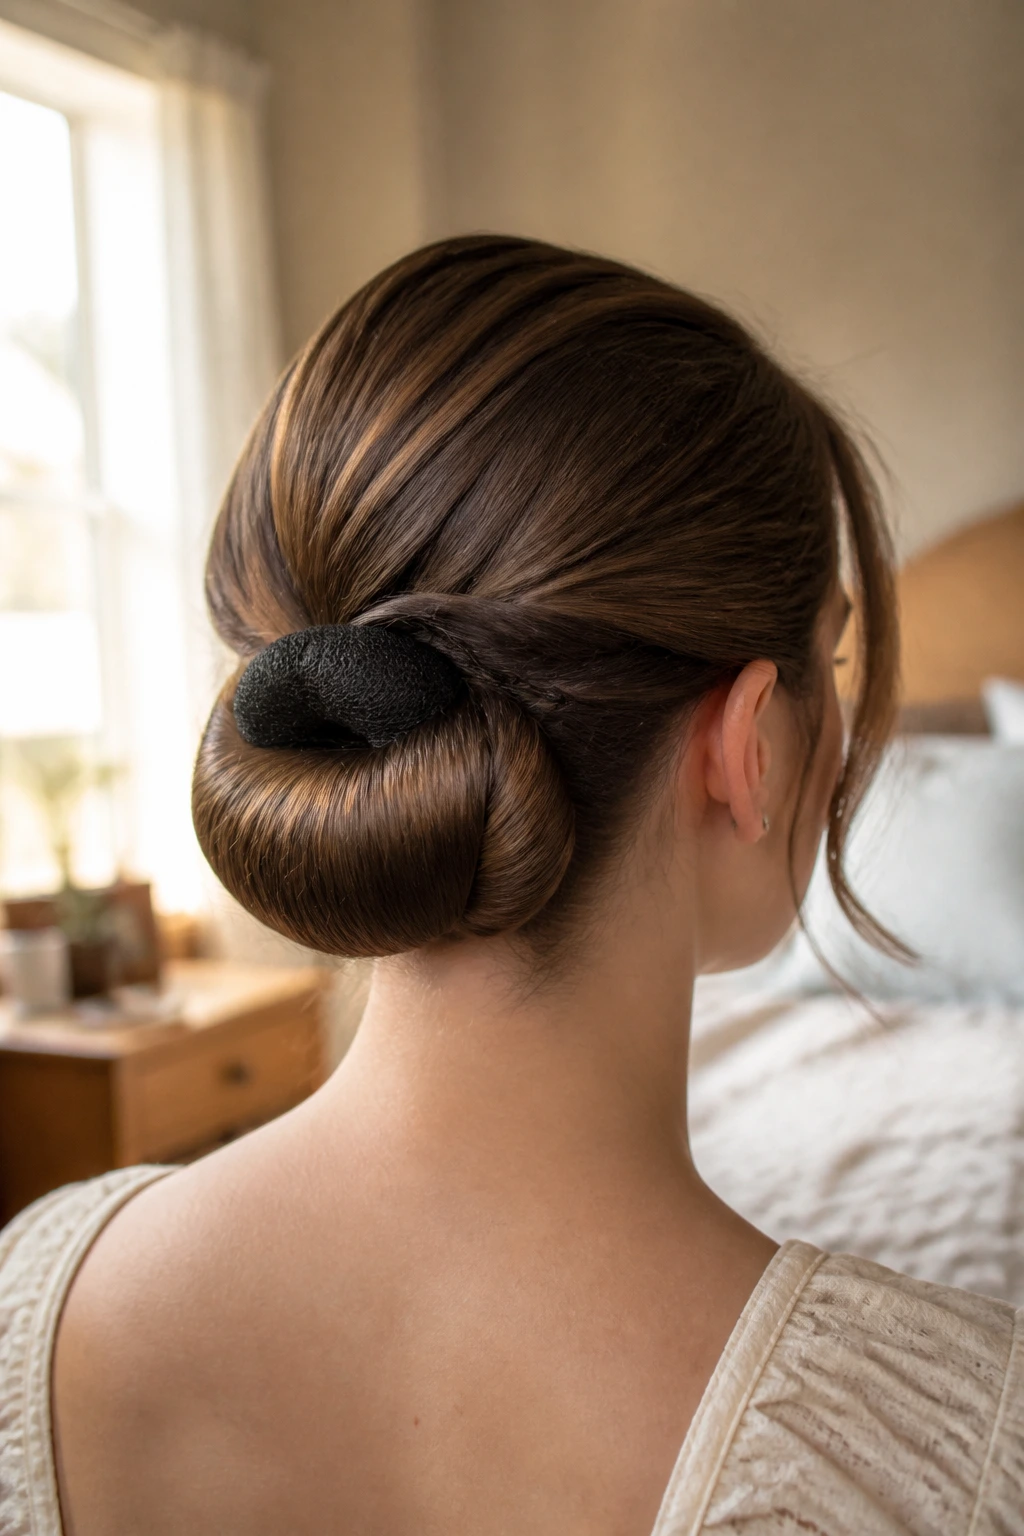
If you enjoy a bit of vintage flair, the retro-roll is a fun way to style medium-length hair. It plays on the classic victory rolls of the 1940s but adapts them for the back of the head. It’s an eye-catching style that looks much more difficult than it actually is.
Creating the Roll
Bring all your hair to the back into a low ponytail. Use a foam “donut” or a small, round hair rat—a tool made of synthetic hair or mesh—and place it at the ends of your ponytail. Roll your hair up around the form, moving toward your neck.
Pinning the Victory
Once the roll is at the nape of your neck, pin it firmly on both sides. The form gives the tuck a perfect, rounded shape that doesn’t sag or droop. This is one of the most secure styles you can wear, as the form acts as a literal internal structure for the hair.
14. The Spiked-Ends Tuck
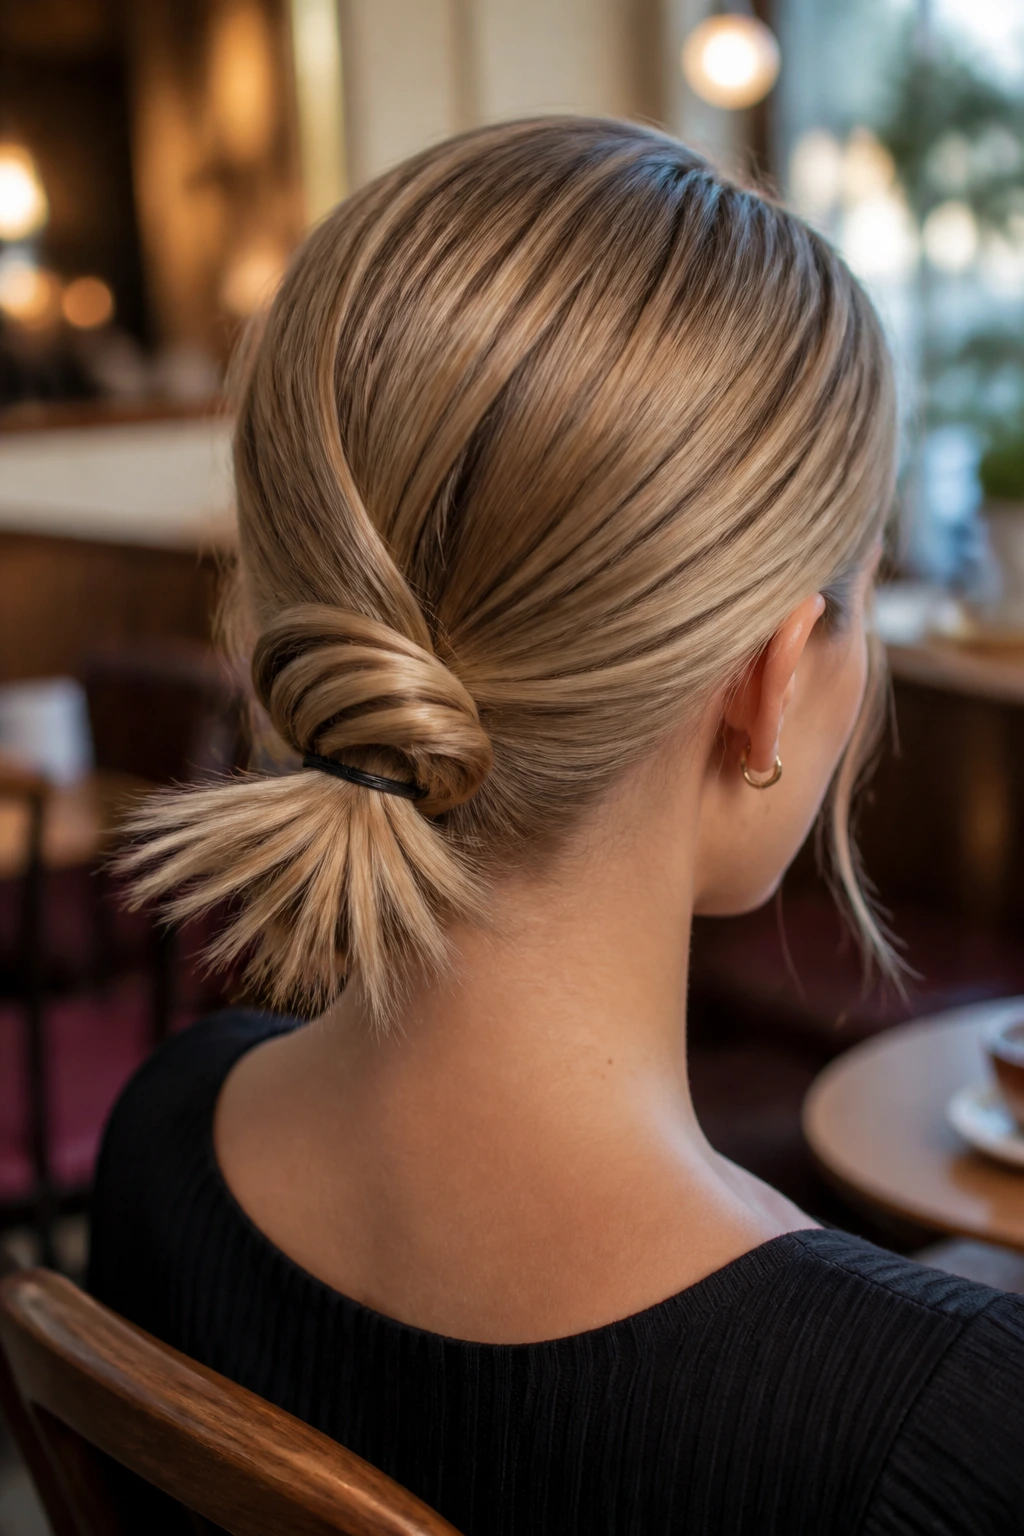
Not every tuck needs to be perfectly smooth and rounded. If you have a blunt cut or your hair is layered, playing up the ends can be a modern, edgy choice. This style is about pinning the hair in a way that allows the tips to peek out, creating a textured, “lived-in” finish.
The Technique
Pull your hair back and fold it in half toward the nape, but stop halfway. You aren’t creating a tight roll; you are creating a loose, folded loop. Secure the middle of the loop with a hair tie. Now, take the ends that are sticking out and use a pomade or wax to spike them slightly outward.
Pinning for Effect
Pin the base of the loop to your head so it stays in place, but leave the “spiked” ends loose. This adds an element of geometry to the style, moving away from the traditional soft-and-pretty look toward something more architectural and modern.
15. The Claw-Clip Secured Tuck
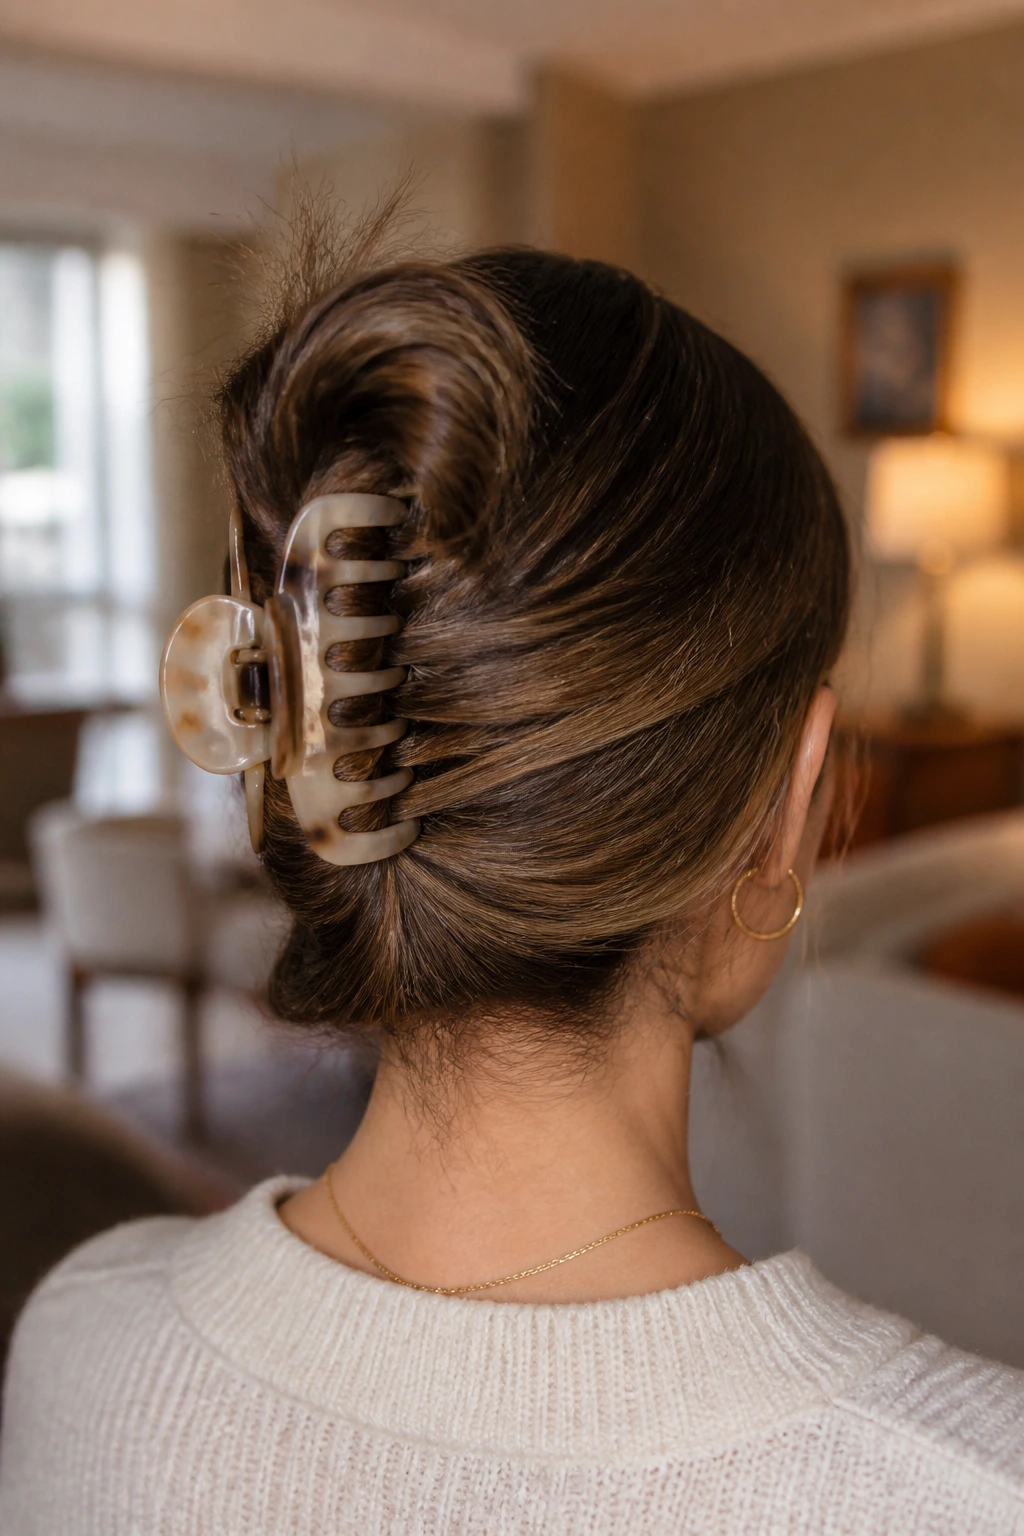
Claw clips have made a massive comeback, and they are essentially tailor-made for the medium-length hair tuck. They are strong, they hold a lot of hair, and they require zero skill to use. The trick with a claw clip is not to just “clip it in,” but to use it as part of the tucking architecture.
The French Twist Method
Gather your hair as if you are going to put it in a low ponytail. Twist the entire length of your hair upward against the back of your head. Do not twist it into a tight rope; keep it loose.
The Clip
Once the hair is twisted upward, take the ends and tuck them down into the twist. Now, take your claw clip and clamp it over the entire vertical twist, catching both the twist itself and the hair against the scalp. The clip provides instant, rock-solid security. If you have a few stray ends poking out, you can leave them for a messy-chic vibe or pin them under the clip.
Final Thoughts
The beauty of styling medium-length hair lies in experimentation. Because your hair isn’t weighed down by extreme length, you have the freedom to play with gravity in ways that long-haired people simply cannot. Do not let the “middle-of-the-road” label fool you; this is the most versatile length for updos, provided you have the right tools.
Always keep a set of U-pins and a good texture spray on hand. They are the difference between a style that slides out by lunch and one that lasts until you decide to take it down. If a style feels too stiff, shake your head, pull a few pieces out around your ears, and embrace the imperfection. The best tucks—the ones that look truly effortless—are usually the ones that are just a little bit messy. Practice these techniques when you have nowhere to be, and you will find that on the days when you are rushing, the tuck becomes second nature.
