



A faux bob is one of the few hair tricks that can make long hair look sharply cut, on purpose, and a little bit clever without a single snip. That’s the appeal. You get the shape, the jawline, the bounce at the ends, and the tiny shock of seeing yourself with shorter hair — all while your actual length stays right where it is.
People usually reach for a fake bob when they’re bored with their usual ponytail, getting dressed for a wedding, or growing out a haircut that’s starting to feel messy. But there’s another reason it keeps hanging around: a good faux bob changes the whole feel of your face. It can make heavy hair look lighter, soften sharp features, or make a simple outfit look more finished.
The part most people miss is the neckline. A convincing faux bob is rarely about the front. It’s about the back of the head, the tuck at the nape, and whether the ends disappear cleanly or sit there like a little paper clip. That’s the difference between “cute experiment” and “wait, did you cut your hair?”
One trick. One head of hair. Fifteen ways to make it work.
1. The Tucked-Under Faux Bob
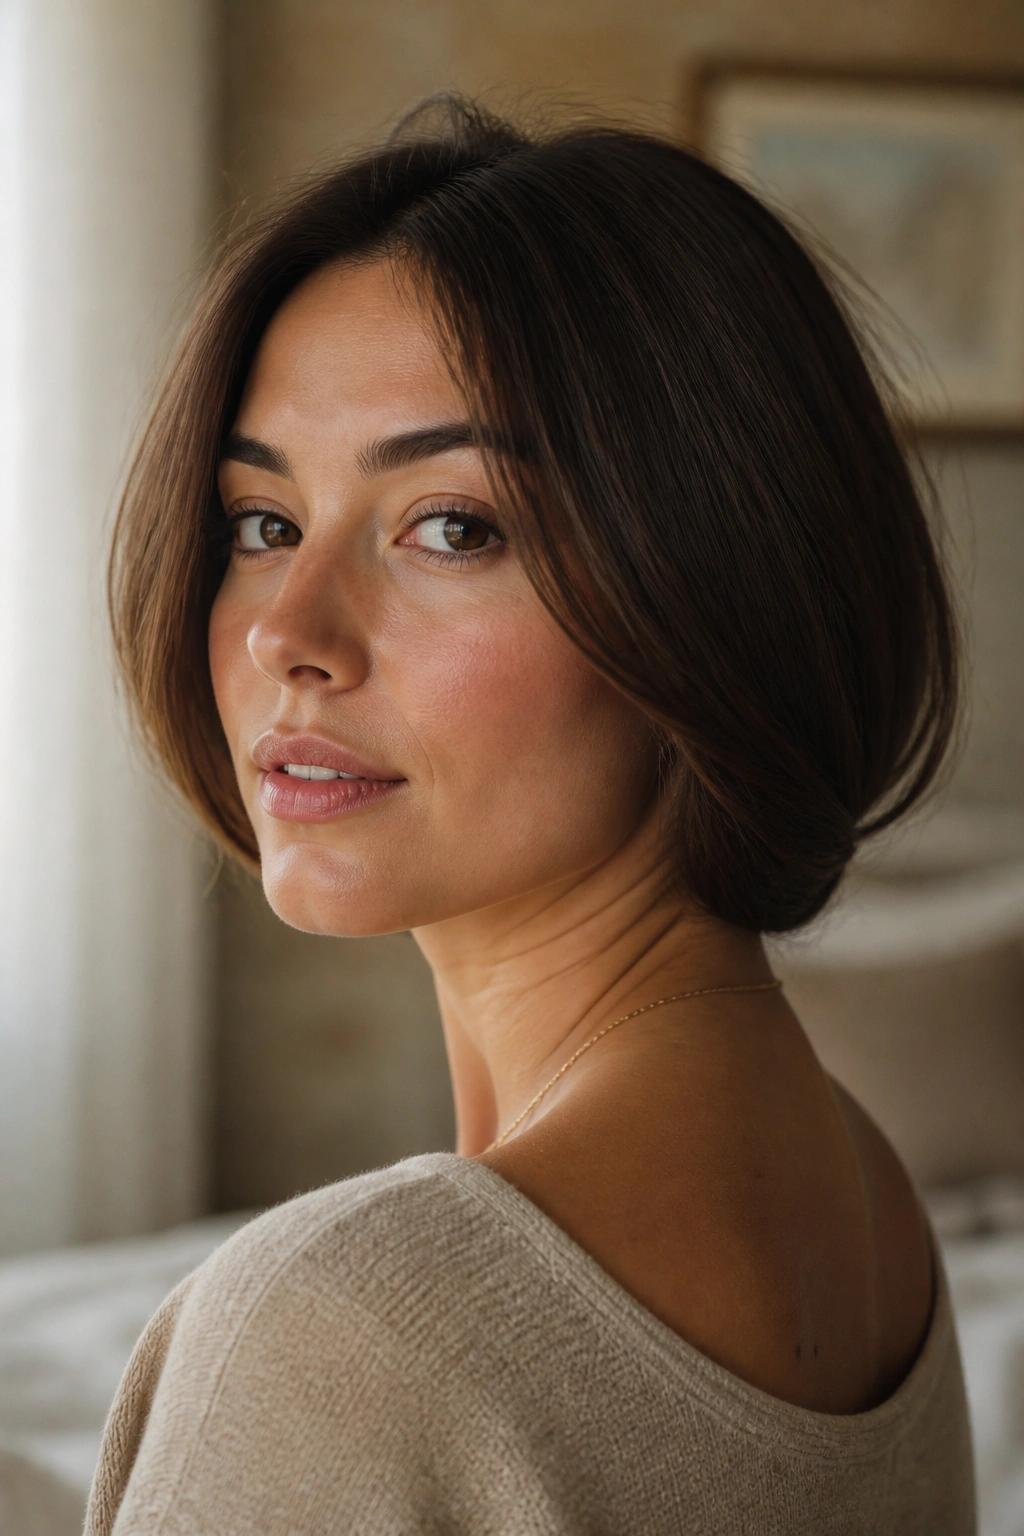
This is the style I reach for when I want the hair to look short without looking fussy. You gather the length low, fold the ends upward at the nape, and pin them flat so the outside shape lands around the chin or jawline. Done right, it reads like a blunt bob that happens to have better styling.
Why It Reads as a Real Bob
The eye believes the outline before it studies the details. If the lower edge lands cleanly and the back stays smooth, the brain fills in the rest. That’s why this version works on straight hair, lightly wavy hair, and hair that’s been blown out with a round brush.
The trick is not making the tuck too high. If the fold sits halfway up the head, it starts to look like an updo. Keep the bend tucked at the nape, then let the rest of the hair fall over it in a shallow curve. A light mist of texture spray at the roots helps the pins grip instead of sliding around.
What You’ll Need
- 6 to 10 bobby pins, depending on thickness
- A medium-hold hairspray
- A tail comb
- Optional: a 1-inch curling iron for shaping the ends
Pro tip: leave one thin face-framing piece on each side. It softens the whole thing and keeps the style from feeling too stiff.
2. The Rope-Braid Faux Bob
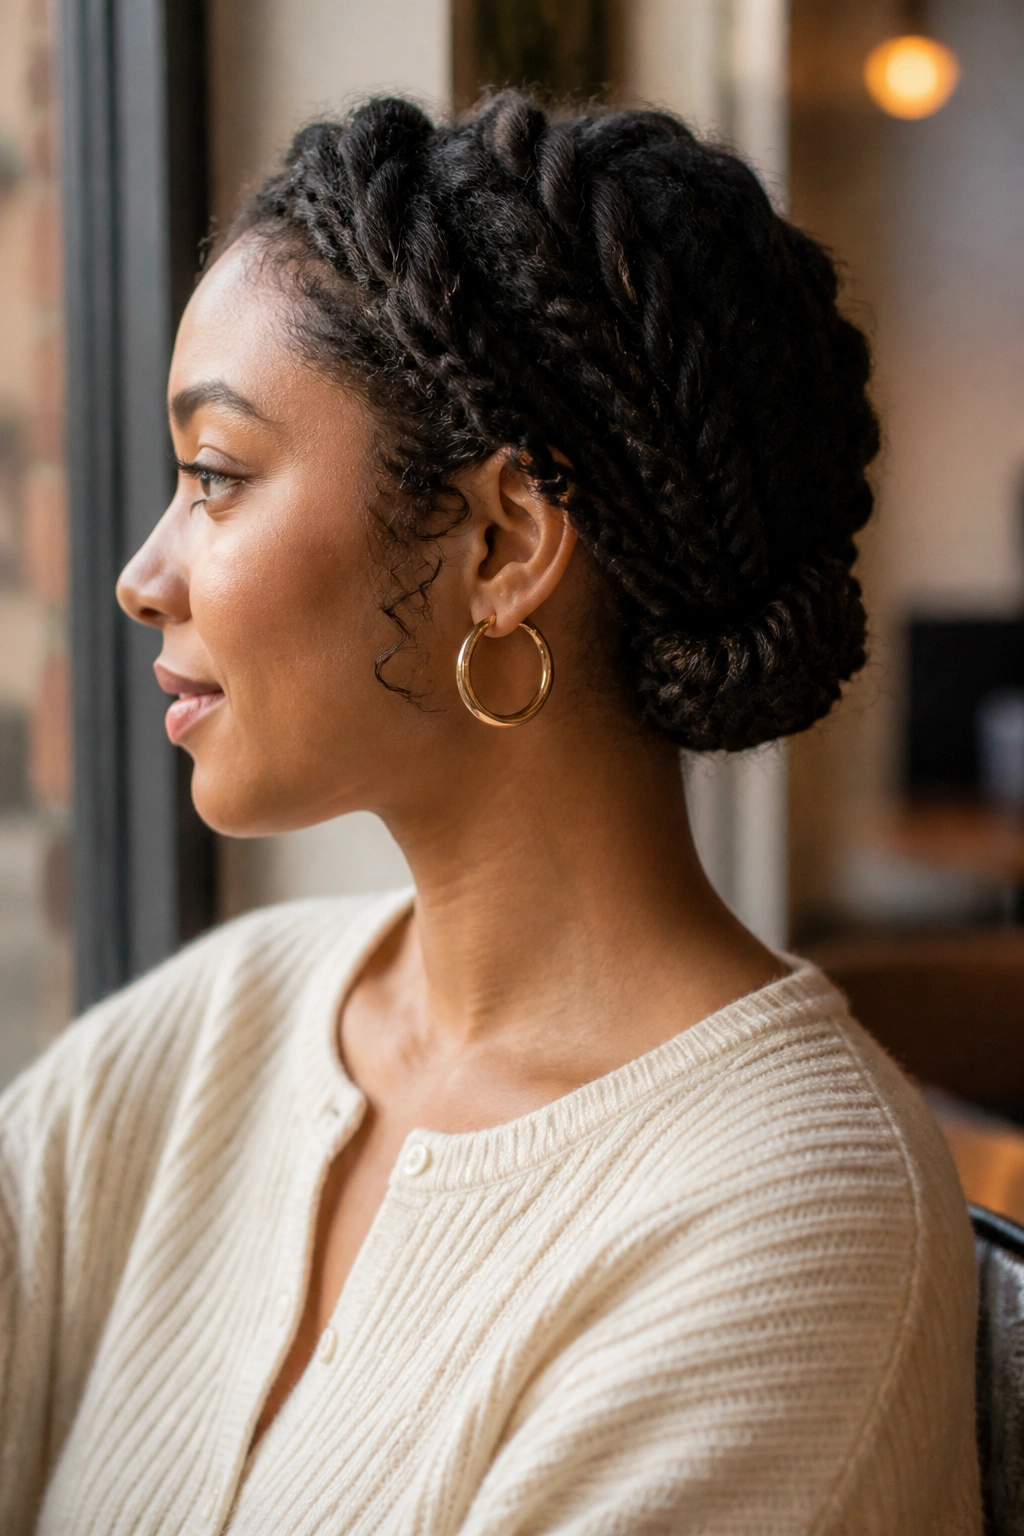
If your hair slips out of everything, this is the safest fake bob to try. Rope twists hold better than loose tucks because the two strands lock into each other, and that structure gives the style some grip before you even touch a pin.
Start with a center or side part, then divide the hair into two low sections behind the ears. Twist each section in the same direction, wrap them around each other in the opposite direction, and secure the rope braid low at the nape. From there, fold the tail upward and pin it so the outside edge sits at bob length.
It looks a little neater than a regular braid, which is why I like it for fine or silky hair. Regular braids can puff up and read more casual. Rope twists stay compact, which helps the faux bob look intentional instead of improvised.
This one is especially good if your hair is layered. The shorter pieces disappear into the twist more easily, and the longer lengths stay tucked instead of poking out at odd angles. The downside? Very slippery hair can unwind if you don’t use a little dry shampoo or styling cream first. So don’t skip the grip.
3. The Low Chignon Faux Bob
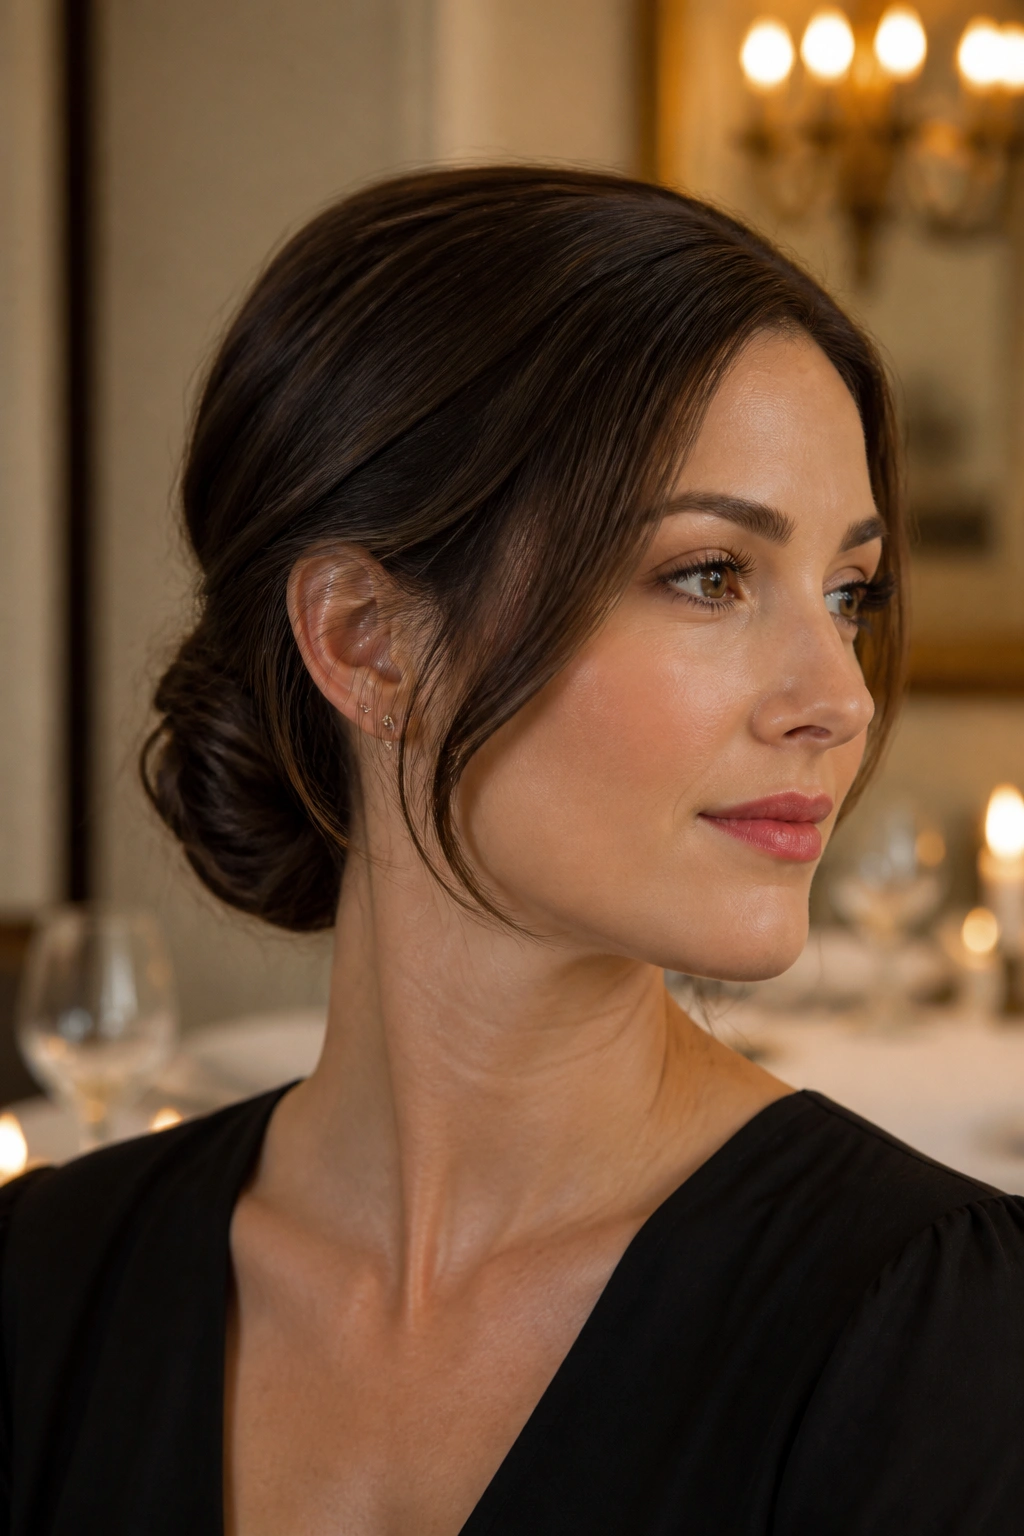
Why does a low chignon read as a bob instead of a bun? Because the knot sits under the visual line of the jaw, not above it. The shape feels like a cut, not an updo, when you keep the bulk tiny and flatten the perimeter around it.
A proper faux bob chignon works best when the twist is tight but not bulky. Gather the hair at the nape, twist it upward into a small loop, and anchor the edges with pins that cross each other in an X. Then loosen the top layer just enough to let the hair fall over the top of the knot. You want the surface to look smooth, not puffed.
How to Keep It From Looking Like a Bun
The biggest mistake is making the knot too round. A round knot says “bun” immediately. A flattened knot, tucked into the natural curve of the neck, says “short hair.”
That’s why this style looks good with a slightly off-center part or a few pieces tucked behind one ear. The asymmetry keeps it from feeling too formal. If you want a cleaner finish, run a tiny bit of pomade over the top and the sides — about a pea-sized amount, warmed between your palms first.
This is the faux bob I’d pick for a dinner where you want to look polished but not overdone. It has enough shape to feel dressed up, and it stays put better than a loose tucked style.
4. The Soft S-Wave Faux Bob
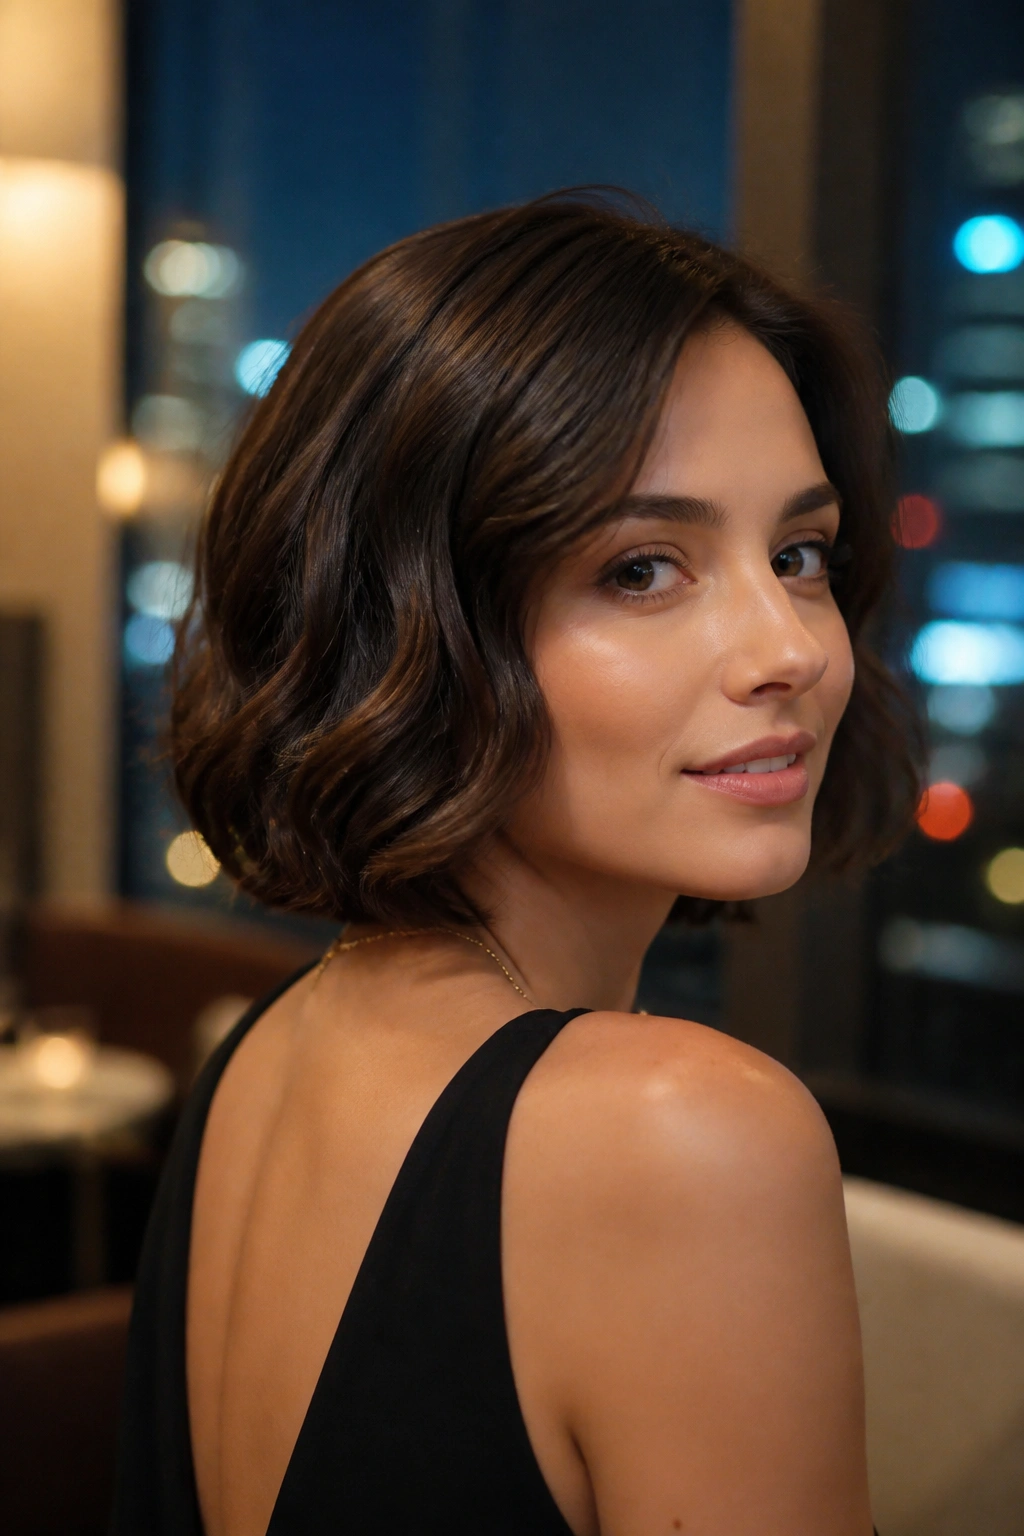
I keep coming back to this one for dressier nights because it has a little movement without losing the bob shape. The hair isn’t flattened, and it isn’t curled into stiff ringlets. It falls in soft S-waves, then folds under at the bottom like a salon blowout that got cropped just at the shoulders.
Begin by curling 1-inch sections away from the face with a curling iron or a flat iron bend. Alternate directions on the back sections so the waves don’t all sit in the same groove. Once the hair cools, brush it lightly with a soft paddle brush until the curls melt into smooth waves, then tuck the last 2 to 3 inches under at the nape and pin them low.
- Use a 1-inch barrel for a clean wave pattern.
- Keep the curls loose; tight curls make the style look too springy.
- Pin from underneath so the clips disappear into the shadow of the neck.
- Finish with a light mist of flexible hairspray, not a crunchy one.
The whole thing depends on movement. If the waves are too stiff, it stops looking like a bob and starts looking like styled long hair. Softness is the point.
5. The Sleek Pin-Curled Faux Bob
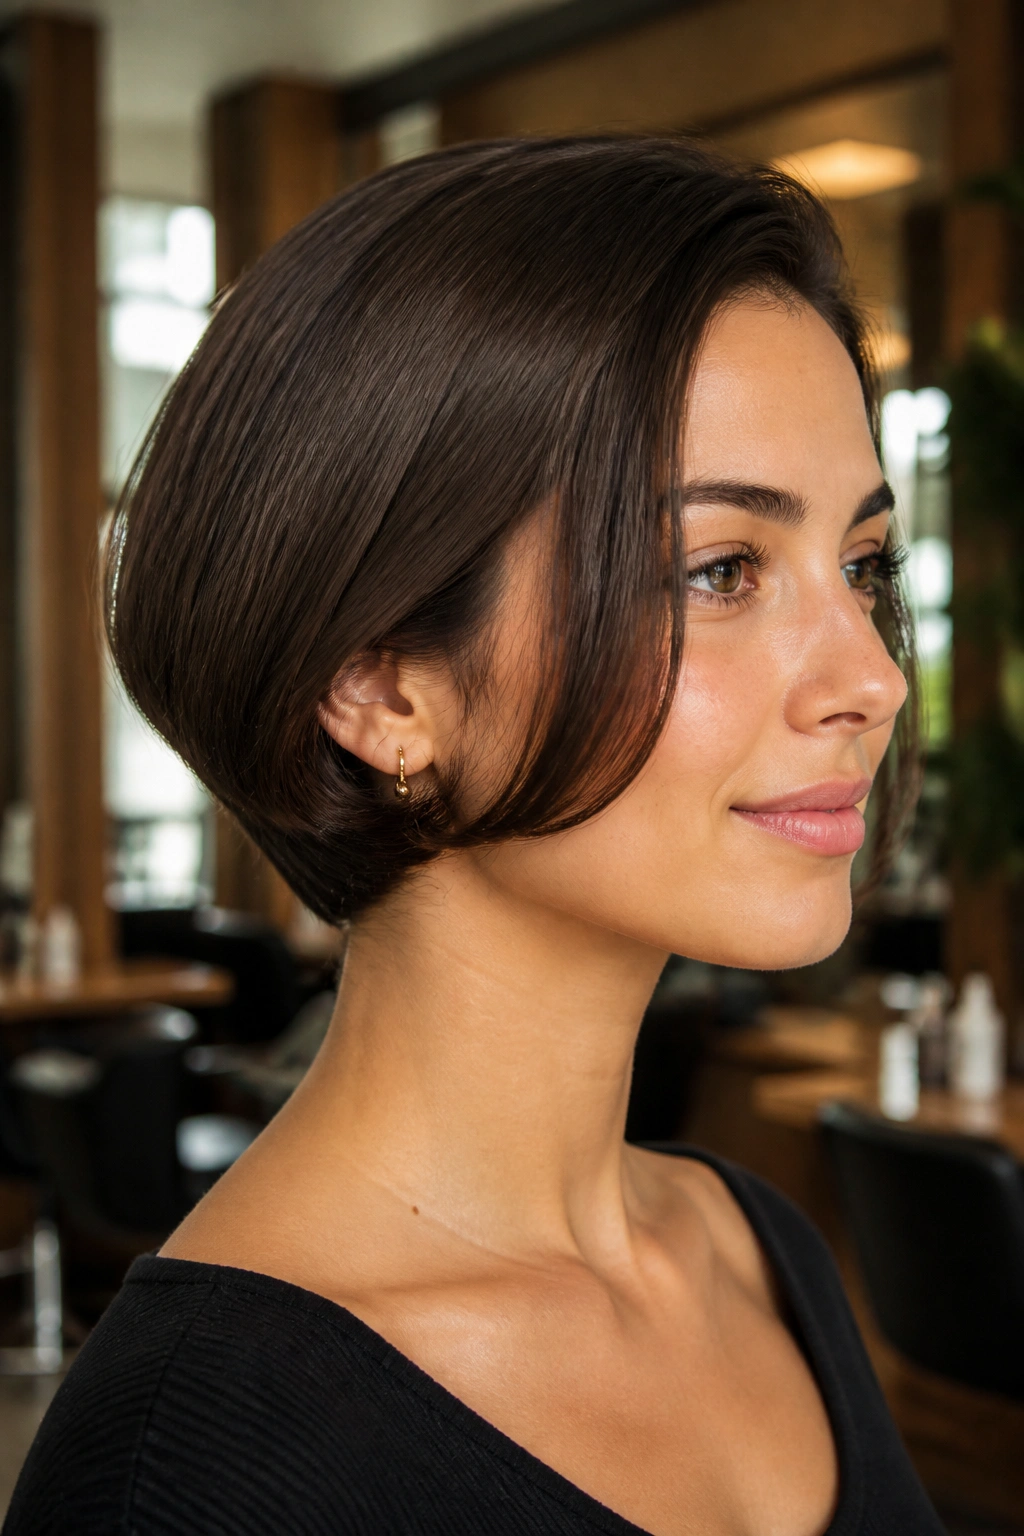
Straight hair can look almost too honest in a faux bob, which is why the sleek pin-curled version works so well. It gives you that crisp, controlled line around the face, then hides the length with a bend that feels deliberate rather than tucked in a hurry.
The process starts with a smooth blow-dry. Then you use a small curling iron — 3/4 inch to 1 inch is the sweet spot — to make tight, controlled curls through the mid-lengths and ends. Let them cool fully. That cooling step matters more than people think. Warm curls collapse fast, and a faux bob needs structure if it’s going to hold its shape for more than an hour.
Once the curls are cool, brush them out gently and roll the lower lengths upward at the nape. The result should feel sleek near the head and slightly cushioned where the ends disappear. If your hair is very fine, a touch of setting lotion before styling helps more than heavy spray. Heavy spray tends to sit on the surface and make the whole thing look dusty.
Cool curls. Clean lines. No heroics.
This version is lovely when you want the hair to look expensive without looking stiff. It works especially well with strong makeup or a structured neckline, because the hair stays quiet and lets the rest of the outfit speak.
6. The Braided-Crown Faux Bob
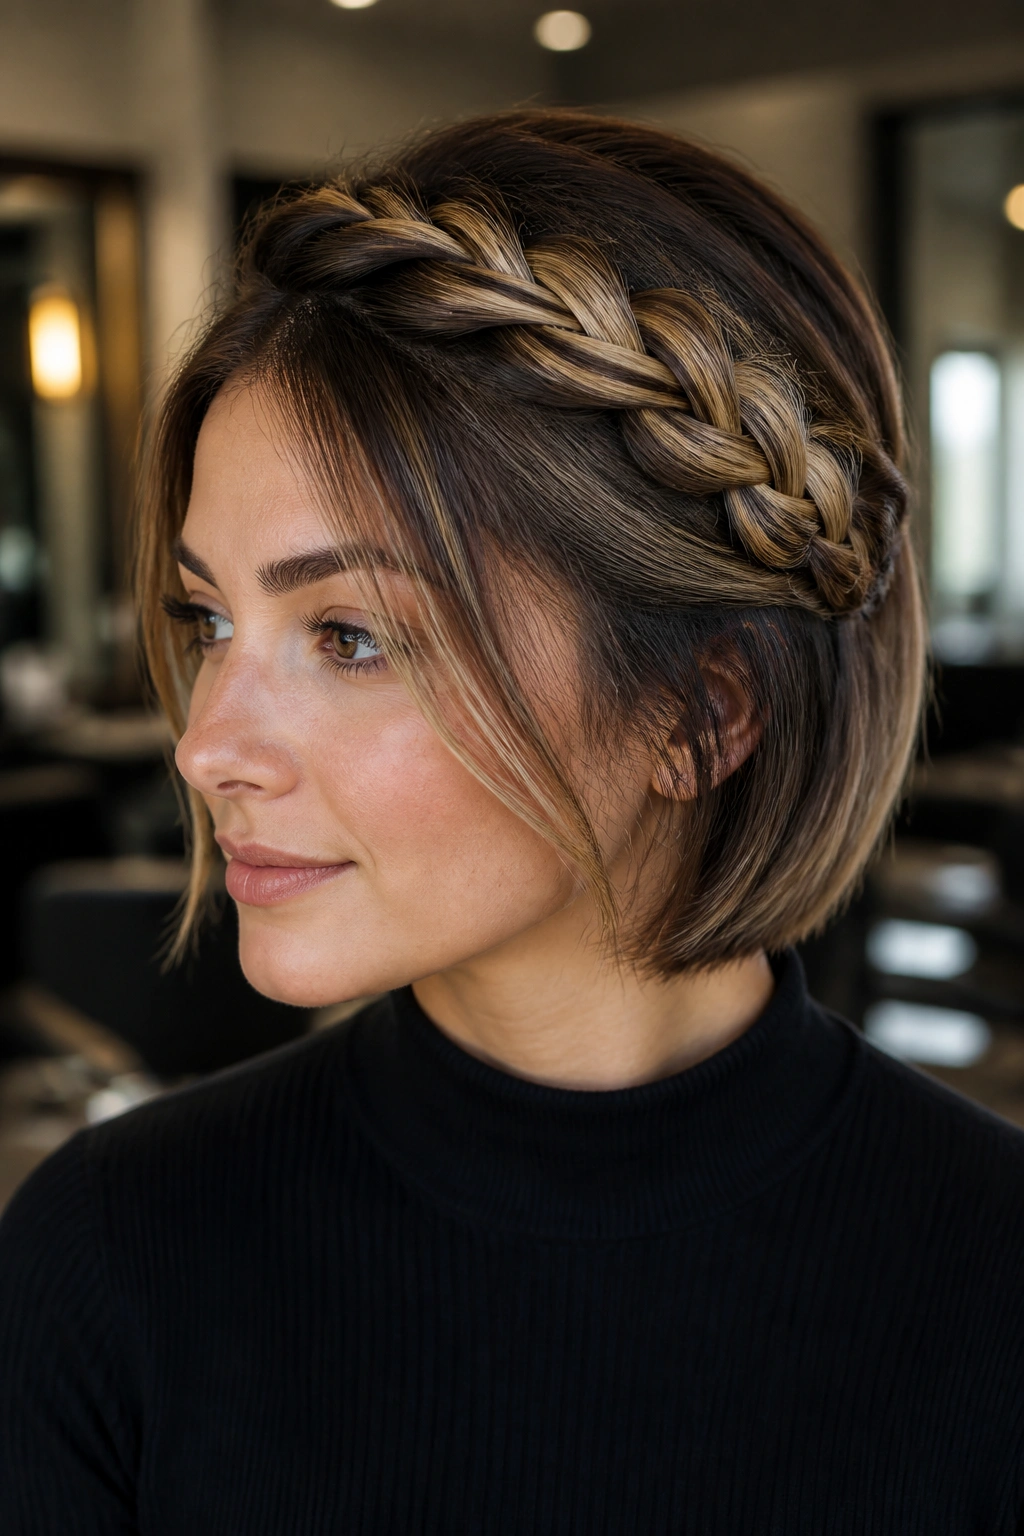
A full crown braid can get heavy fast. This version is lighter, shorter, and a lot more believable as a bob because the braid stops doing the obvious “updo” thing before it reaches the nape.
Start a braid at one temple, travel across the crown, and stop once you reach the opposite ear. Then tuck the remaining lengths under the braid line and pin them flat into the back of the head. The visible part becomes a curved crown, while the lower section reads like a collar-length cut.
Compared with a classic halo braid, this looks less bohemian and more tailored. That’s the difference. A halo braid wraps all the way around and announces itself. The crown version leaves the bottom hidden, which gives you room to shape the ends like a bob instead of a braid tail.
This is best for medium to thick hair, because the braid needs enough body to sit on top of the tucked section. Very fine hair can still work, but it may need a little root powder first so the braid doesn’t lie flat and lose the shape. If you want a romantic faux bob that still feels neat by the end of the evening, this is a smart place to start.
7. The Half-Up Faux Bob with Hidden Ends
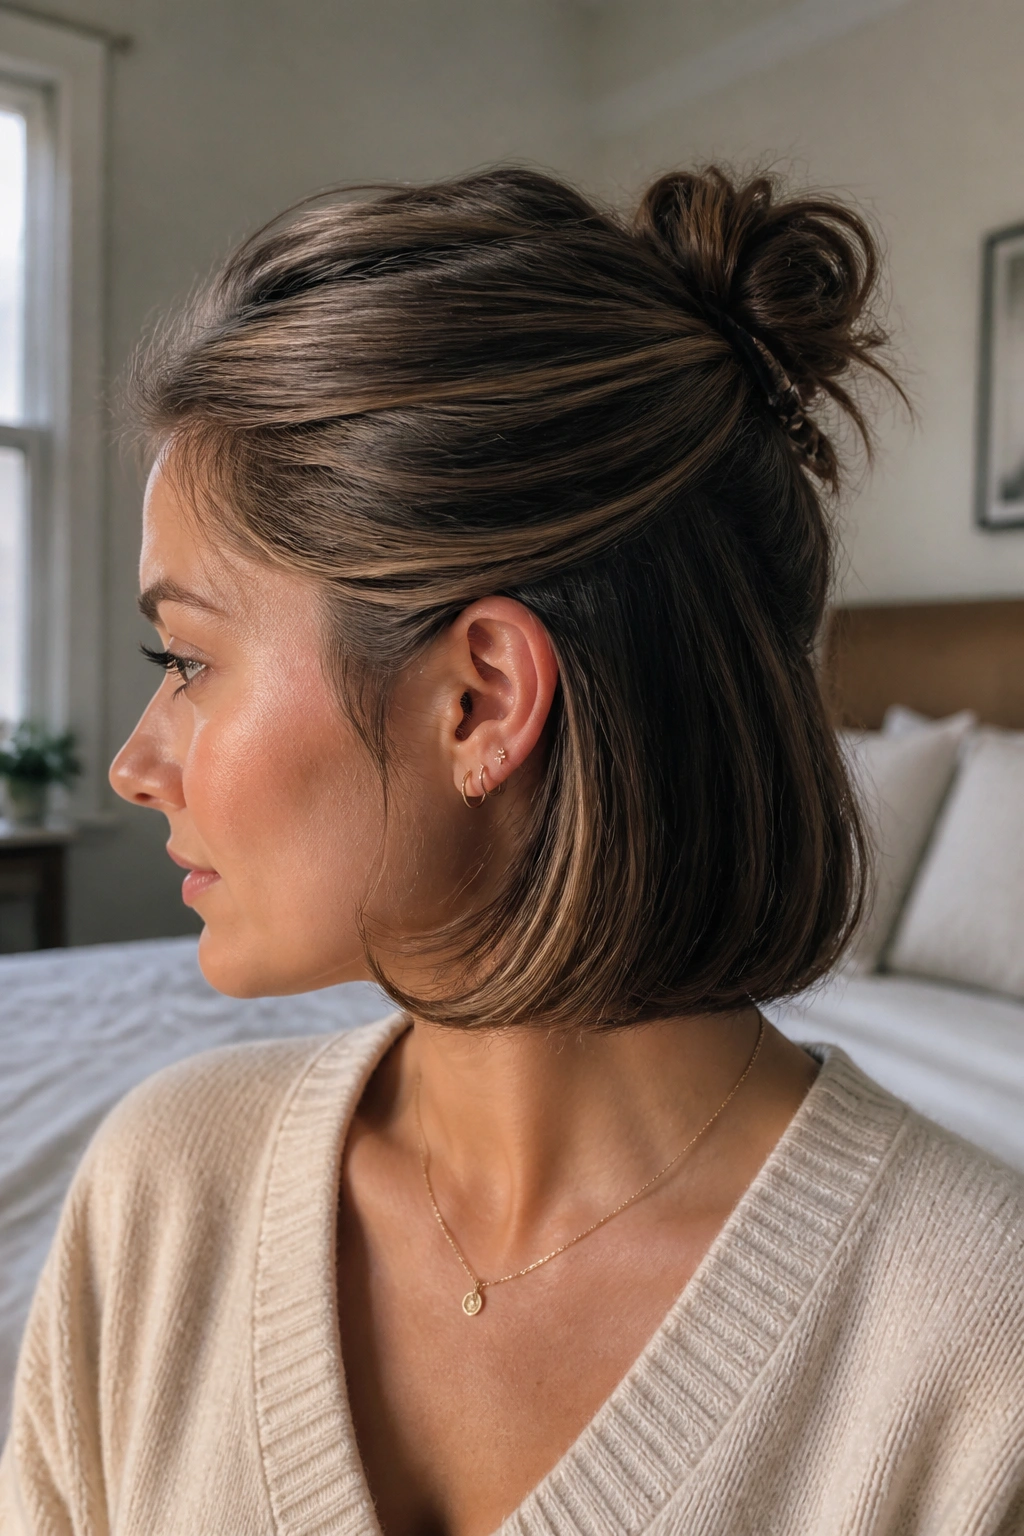
This one sounds odd until you see it from the side. The top half stays loose enough to sell the haircut, while the lower lengths get folded under and hidden inside the shape. That hidden base is what makes the style look shorter than it is.
The Part People Never See
Take the top section from temple to temple and clip it away first. Then gather the lower hair at the nape, fold the ends upward in a shallow curve, and pin them in place so the fold sits below the top section. Once the top layer comes down, it covers the whole trick.
You can keep this soft or make it neat. Soft works better for layered hair and soft waves; neat works better if the hair has been blow-dried smooth. A clear elastic can help keep the lower section from shifting while you pin, but don’t leave it visible unless you want the style to look more casual.
- Best on shoulder-length hair or longer
- Works with straight, wavy, or lightly curled textures
- Needs about 8 bobby pins for most hair types
- Looks best when the crown has a little lift
Tiny warning: if the top section is too thick, it can hide the bob shape entirely. Keep it clean and not overly heavy.
8. The Scarf-Wrapped Faux Bob
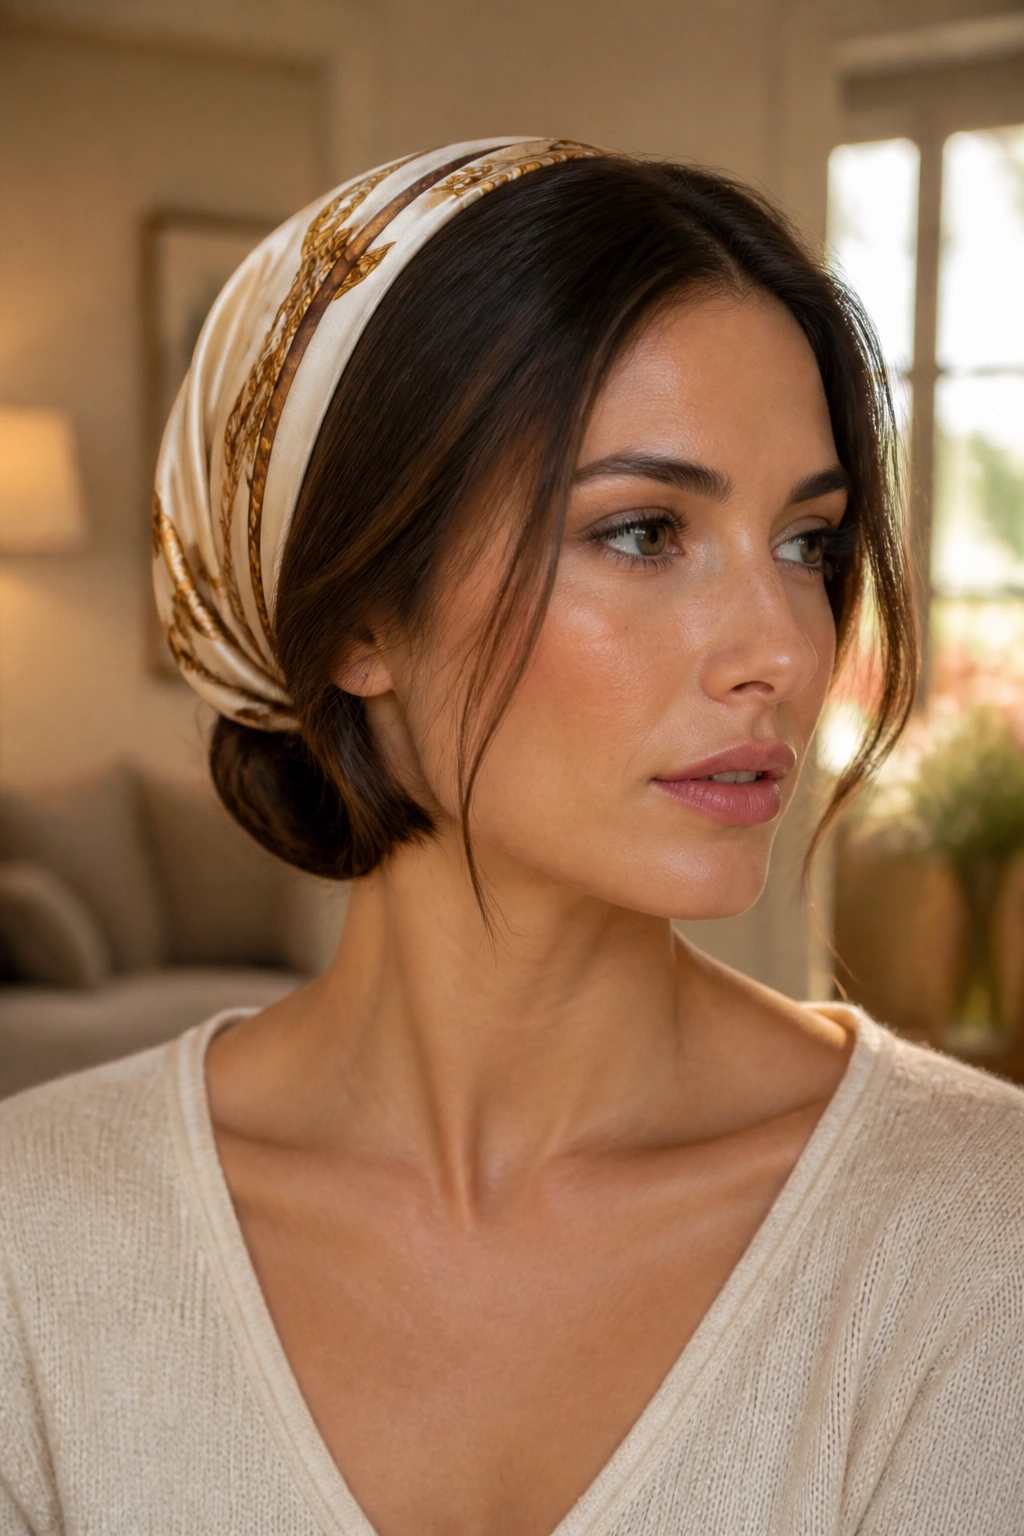
A silk scarf can do more for a faux bob than half the styling products in your drawer. It hides pins, controls flyaways, and gives the whole look a finished edge without forcing the hair to behave like a helmet.
Fold a square scarf into a band about 2 to 3 inches wide. Place it low at the nape, then wrap your hair under and up into the scarf so the ends disappear inside the fold. Tie the scarf off to one side or directly at the back, depending on how neat you want it to look. A 21-inch square scarf gives enough fabric to anchor the hair without making the knot bulky.
This style is a lifesaver when the weather is humid or the hair is freshly washed and too slippery to cooperate. The scarf acts like a brace. It also lets you keep the look soft around the face while the back stays put, which is hard to do with pins alone.
Silk is nicer than cotton here. Cotton grabs too hard and can flatten the hair in odd places. Silk slides a bit, which helps the hair sit naturally. If your hair is very smooth, a touch of texture spray at the roots will keep the scarf from creeping upward during the day.
9. The Voluminous Retro Faux Bob
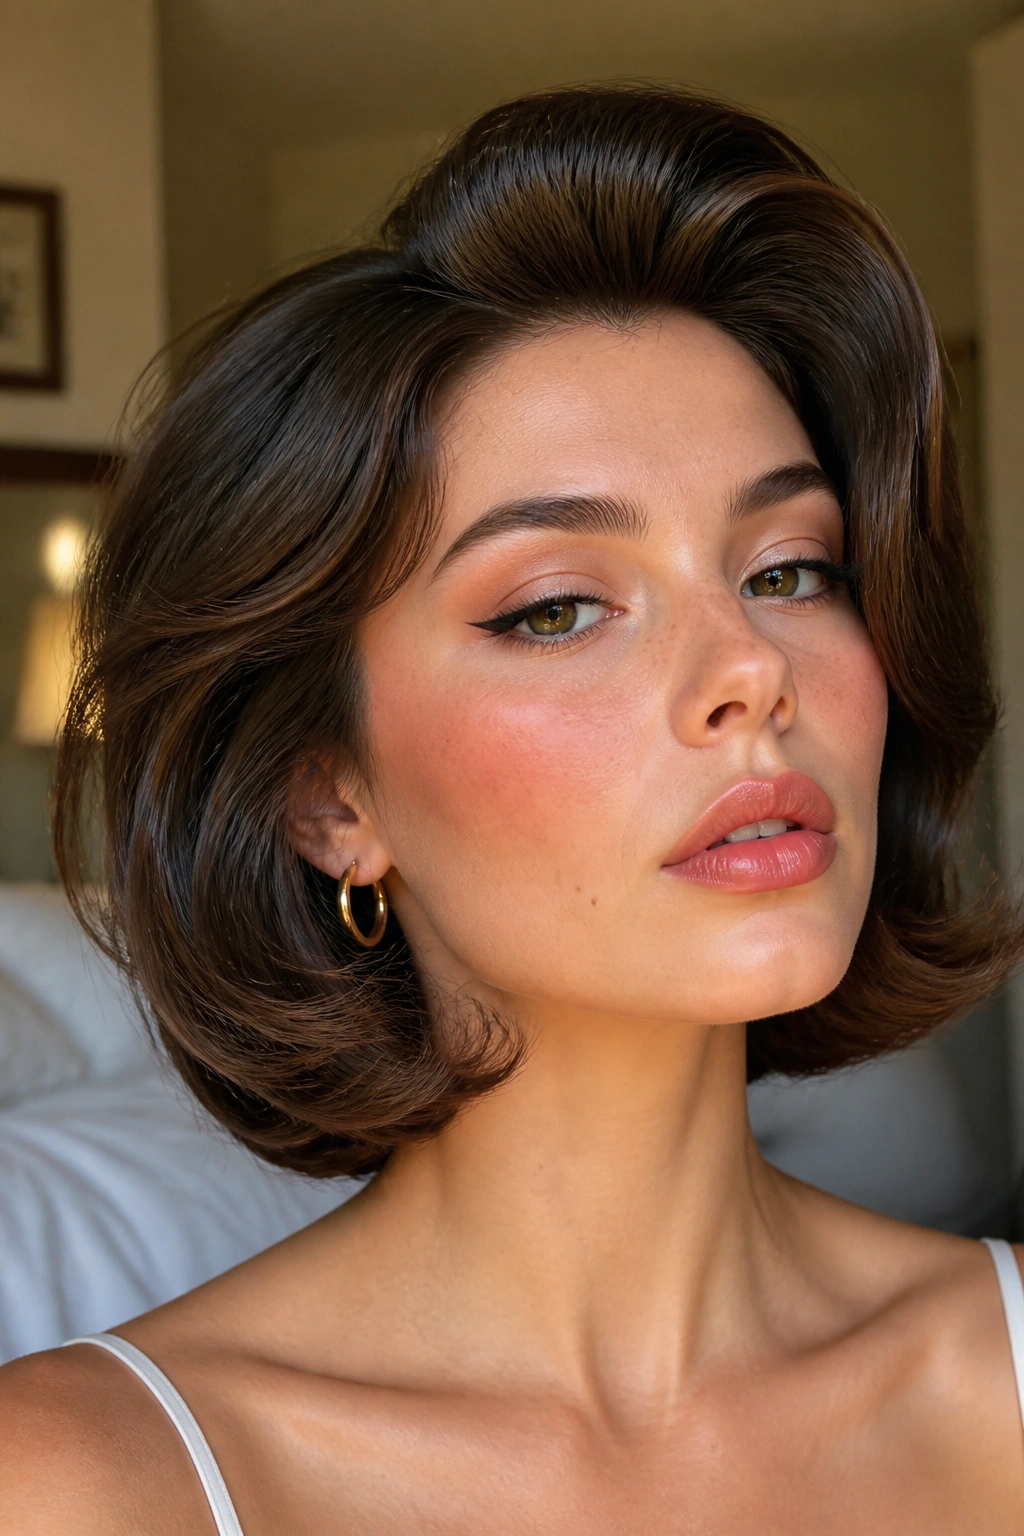
What if you want the ends to flip under like a salon set from an old movie? Then this is the version to try. It borrows from vintage blowouts: lift at the crown, curve at the ends, and enough volume to make the haircut look intentional from every angle.
Set the hair on medium rollers or use a 1.25-inch curling iron to create a soft bend through the mid-lengths. Concentrate the volume at the crown and around the cheekbones, not all over the head. That’s where the shape starts to read as a bob. Too much fullness at the sides can make the head look wide. A little lift at the top, though, gives the illusion of shorter hair with better tailoring.
Where the Volume Should Live
At the roots. Not the ends.
The ends need to turn inward and stay tidy, but the top should have enough lift to keep the style from collapsing into a flat tuck. Tease only the top layer if your hair is fine, and keep the back smooth so the silhouette stays clean.
This is the faux bob for events where you want hair that looks styled, not accidental. It pairs nicely with lipstick, earrings, or a structured dress, because it has that same old-school shape. And unlike some trendier textured versions, it photographs in a very straightforward way from the side.
10. The Messy Texture Faux Bob

The version I reach for when I’m in a hurry is the messy one. It doesn’t need a perfect blow-dry, and it doesn’t punish you for having a little frizz. In fact, a little roughness makes it look fuller, which is helpful when the hair is fine or freshly flattened from a hat.
Start with day-two hair if you can. A light spritz of dry shampoo at the roots gives the hair grip, and a sea-salt or texture spray through the mids helps the ends hold their shape. Twist the lower lengths loosely under at the nape, pin them in place, then pull out two thin face-framing strands — no thicker than a pencil. Those pieces stop the style from looking too staged.
- Mist dry shampoo at the roots and crown.
- Leave the waves a little broken; don’t brush them smooth.
- Use 4 to 6 pins, hidden under the roughest fold.
- Tug the crown up slightly for height.
- Keep the bottom edge uneven by a few millimeters.
That last bit matters more than people admit. A perfectly straight hemline can make a messy faux bob look fake in a bad way. A slightly irregular edge makes it look like hair that happened to fall naturally around the jaw.
11. The Twisted-Nape Faux Bob
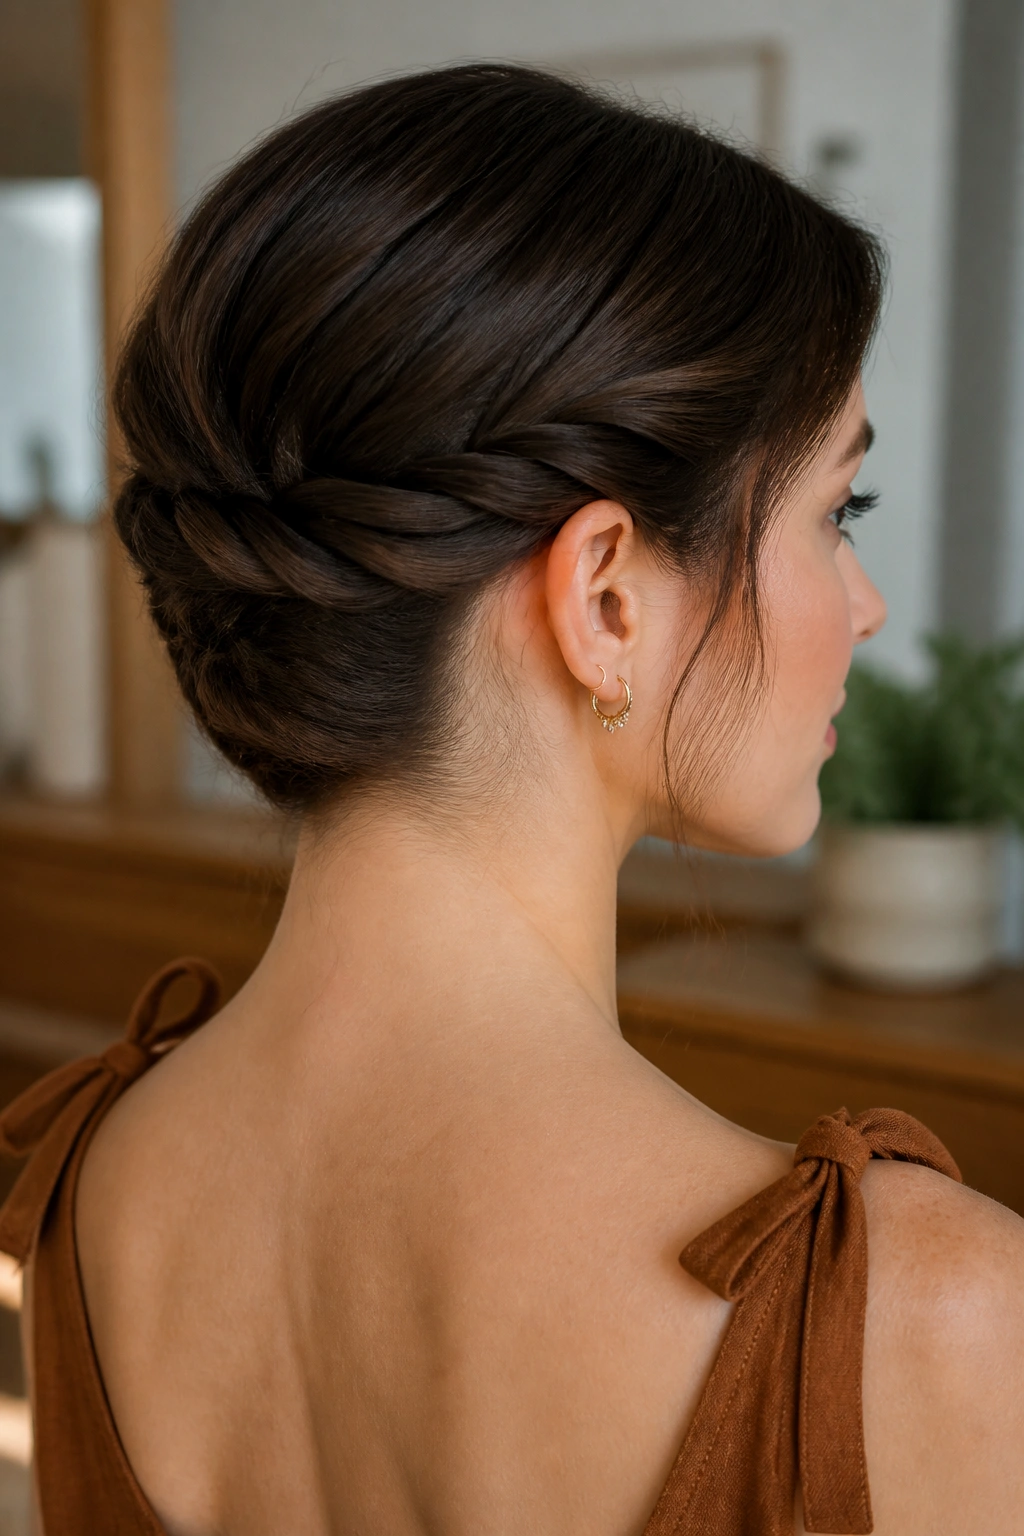
Unlike a braid, this version keeps the sides soft and the center line clean. You twist, not weave, which means the hairstyle stays lighter and a little less formal. I like that. It doesn’t try too hard.
Divide the hair into two sections behind the ears, then twist each one backward toward the nape. Cross the twists low, pin them flat, and fold the tail upward into the hidden center. The visible shape should be smooth around the sides and compact at the back, with the ends concealed just under the twist line.
This works especially well on fine to medium hair, because flat twists create the illusion of thickness without needing much product. Thick hair can use it too, but you may need a second row of pins to hold the weight. If your hair tends to puff at the crown, smooth the top with a tiny dab of cream before twisting. Tiny. Too much product and the style gets greasy fast.
The best thing about this faux bob is how little hardware it needs. You can usually get away with 4 to 8 bobby pins and a light spray. No elaborate setting. No complicated sectioning. Just a clean fold and a shape that sits neatly against the neck.
12. The Deep-Side-Part Faux Bob

A deep side part does more heavy lifting than people give it credit for. It changes the balance of the face, shortens one side visually, and makes the tucked length feel like part of the haircut instead of a trick.
Begin with a part almost over the arch of one eyebrow. Blow-dry the roots in the opposite direction first, then bring them back over so they hold the lift. On the fuller side, create a soft curve under the jaw with a curling iron or brush. On the slimmer side, tuck the hair behind the ear and pin it so the line stays sharp.
Why the Asymmetry Sells It
Bob haircuts often have a side that feels heavier or longer. That’s what this style borrows. The deep part creates that same imbalance, which is why the eye accepts the shape so quickly.
It’s a good choice if you want your faux bob to feel a little more modern and less costume-y. It also works well when your outfit has a strong neckline, because the asymmetry keeps the hair from fighting with the clothes. If you wear glasses, even better. The sharp part and the tucked side frame the face without crowding it.
This one is also kind to round or heart-shaped faces. The diagonal line gives the illusion of length, and the tucked side keeps everything clean around the jaw.
13. The Curly Faux Bob for Natural Texture
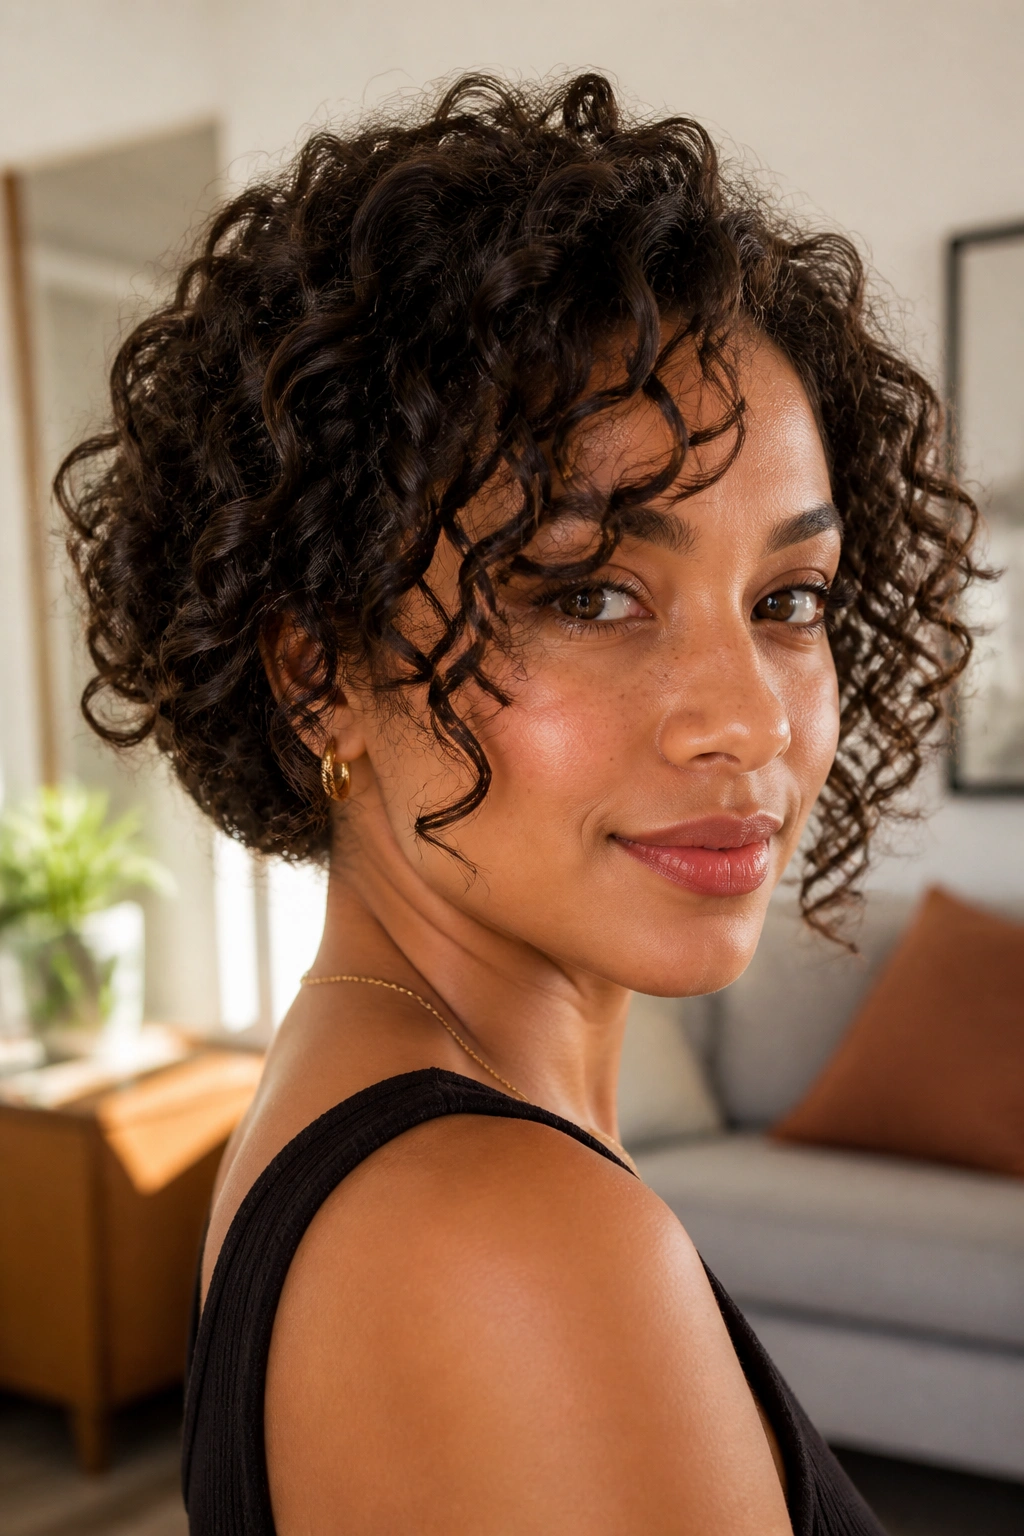
Curly hair does not need to be forced into a flat shell to pull off a faux bob. In fact, that usually backfires. A better version lets the curl pattern stay alive while the length gets tucked and shaped at the neckline.
Start with hydrated curls, not dry ones. Work in curl cream or gel, then diffuse until the hair is about 80 percent dry. If the curls are long, tuck the lower layers upward in sections rather than trying to hide everything at once. The goal is to keep the curl clumps intact while folding the bulk under the nape. A few pins placed inside the curl mass will do more than a whole row of visible clips.
Keeping the Curl Pattern Intact
- Pin one curl group at a time.
- Use small U-pins or flat pins that disappear into the coil.
- Leave the crown airy so the style doesn’t shrink too high.
- Pull one curl forward on each side to frame the face.
Curly hair often shortens once it’s shaped, so leave the ends a little lower than you think you need. If you pin them too high, the whole style can pop up into a puff. And that is not the look.
This version is one of the prettiest for natural texture because it respects the curl pattern instead of fighting it. The result feels softer, fuller, and much more believable.
14. The Sleep-In Faux Bob

This is the lazy-person’s winner, and I mean that as a compliment. You do the shaping at night, sleep on it, then wake up with hair that already wants to live in bob form.
Prep damp hair with a light leave-in conditioner or foam, then divide it into two or three low twists or loose braids. The sections should be smooth but not tight. Let them dry fully overnight under a satin bonnet or scarf, then release them in the morning and shape the ends upward at the nape with a few pins. If the hair is only slightly damp by bedtime, the inside will stay wet too long and flatten the style, so let it air-dry partway first.
This is the least fussy version for people who hate hot tools. The texture you get depends on how you set it. Two twists give you a looser bend; three smaller braids give you a neater, more controlled shape. Either way, the sleeping time does the work for you.
The catch is that the hair needs a little discipline the next day. Don’t brush it out into a cloud. Separate the sections with your fingers, tuck the ends where they belong, and stop before it gets poofy. A faux bob should look shaped, not exploded.
15. The Glass-Hair Faux Bob
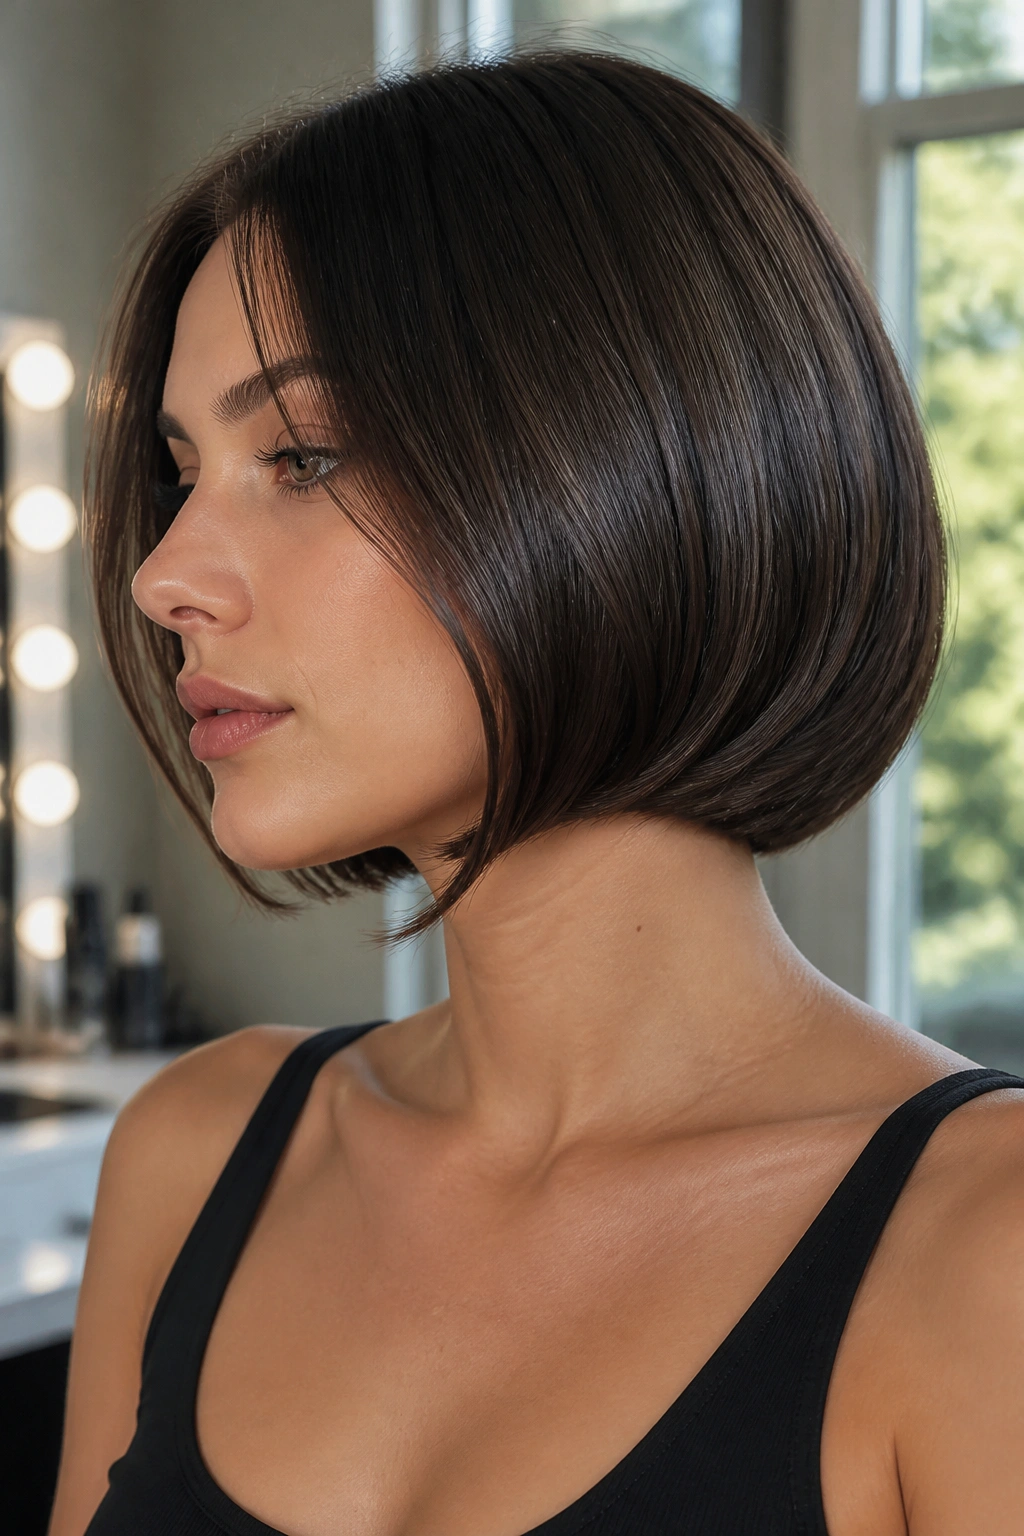
When you want the faux bob to look like a real cut, not a styling trick, smoothness matters more than volume. This is the sleekest version of the bunch, and it works best when every line looks deliberate.
Blow-dry the hair with a paddle brush, then go over the mids and ends with a flat iron in small 1-inch sections. Keep the iron moving so the hair stays straight but not pin-straight; a tiny inward bend at the ends looks more natural than a ruler-straight edge. After that, tuck the length under at the nape and pin it so the outside surface looks glossy and flat. One drop of serum rubbed over the top layer is enough. More than that and the hair starts looking greasy under indoor light.
Where This Version Wins
It’s the best choice for sharp outfits, strong makeup, or any event where you want the hair to behave like part of the architecture. A clean middle part or a precise side part helps. So does a neckline that gives the hair somewhere to sit.
This style can be unforgiving, though. Frizz shows faster here than in any textured faux bob, and the pins need to be hidden almost obsessively. If you’re the type who likes a finished look and doesn’t mind standing in front of a mirror for 10 extra minutes, this one pays off.
It has a particular kind of authority. Quiet, but not boring.
Final Thoughts
The best faux bob isn’t the one that looks most complicated. It’s the one that suits your hair’s natural behavior and doesn’t fight it every five minutes. Thick hair usually needs flatter tucks and more pins. Fine hair usually needs grip, volume at the crown, and a shape that doesn’t ask too much of the ends.
A good test is simple. Turn your head side to side and check the neckline in a mirror, then check it again from the back with your phone camera. The back tells the truth faster than the front ever will.
And if one style feels close but not quite right, tweak the part, not the whole plan. A deeper part, a lower fold, or one more pin can change the whole read. That’s the part people forget — a fake bob is rarely about doing more. It’s usually about moving one thing by an inch.
